This will be a T-50 light tank. Scratch built in 1/16 scale of steel and brass with a view towards future motorization.
I built a Maresal some time ago and struggled a bit with the angled armor. This time I have a new plan.
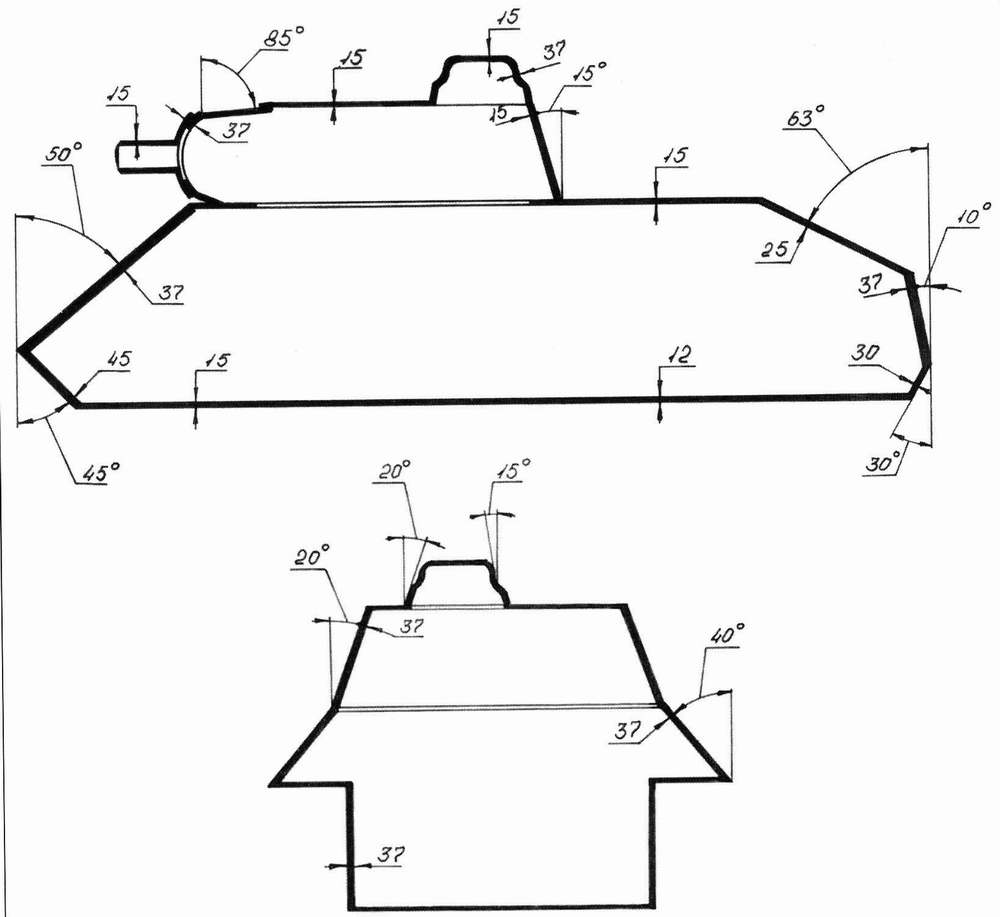
These are the angles of relevance:
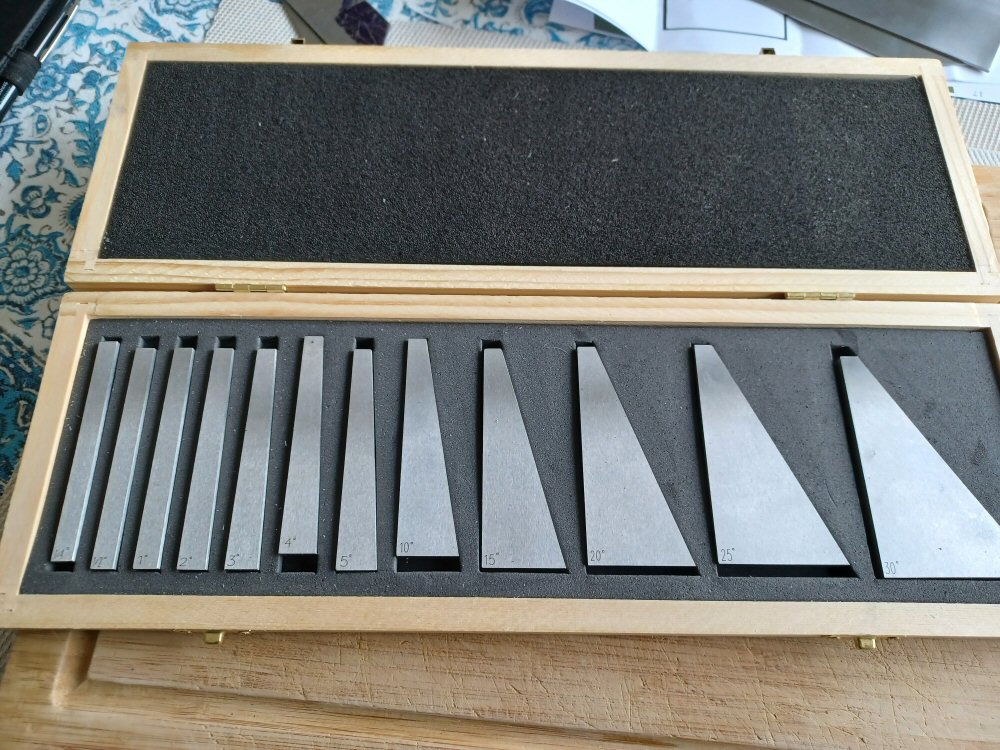
I have bought some of these:
and will be using them to get the correct positions of the plates.
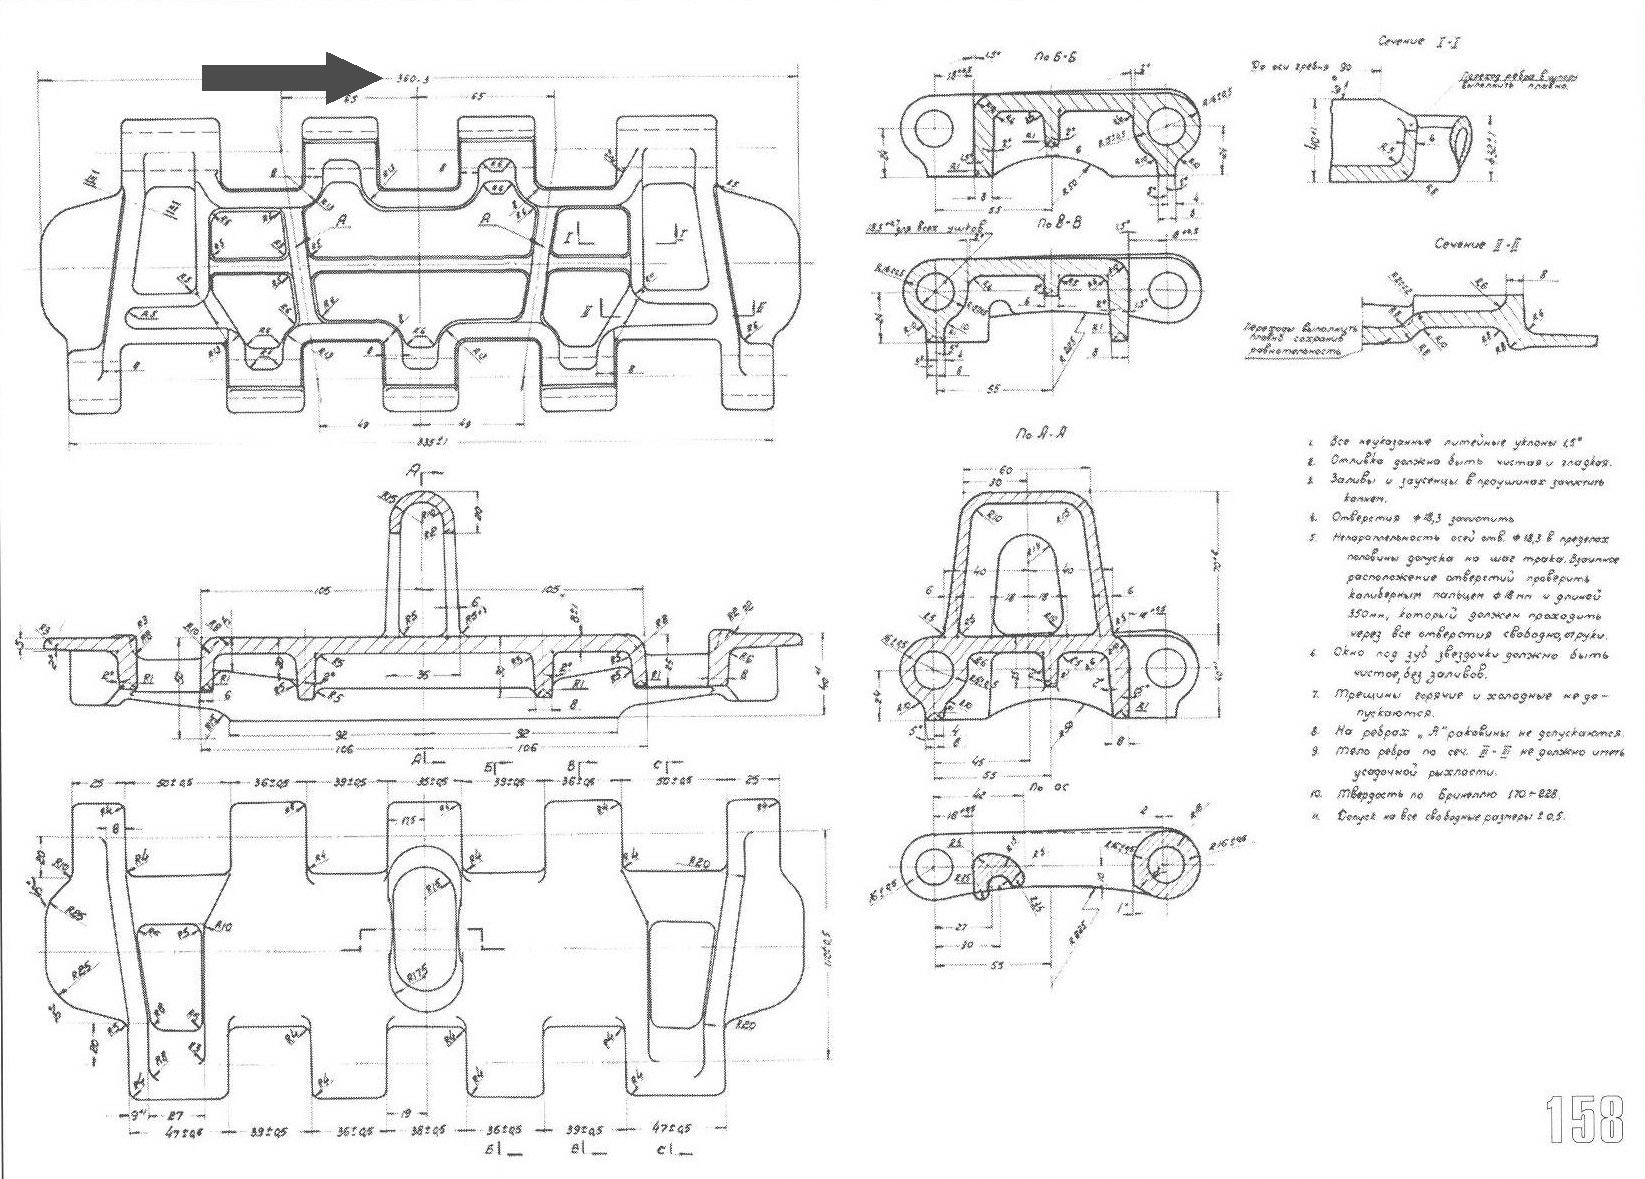
The tracks will be Stug tracks as according to this:
The sizes are similar and they have the correct single tooth.
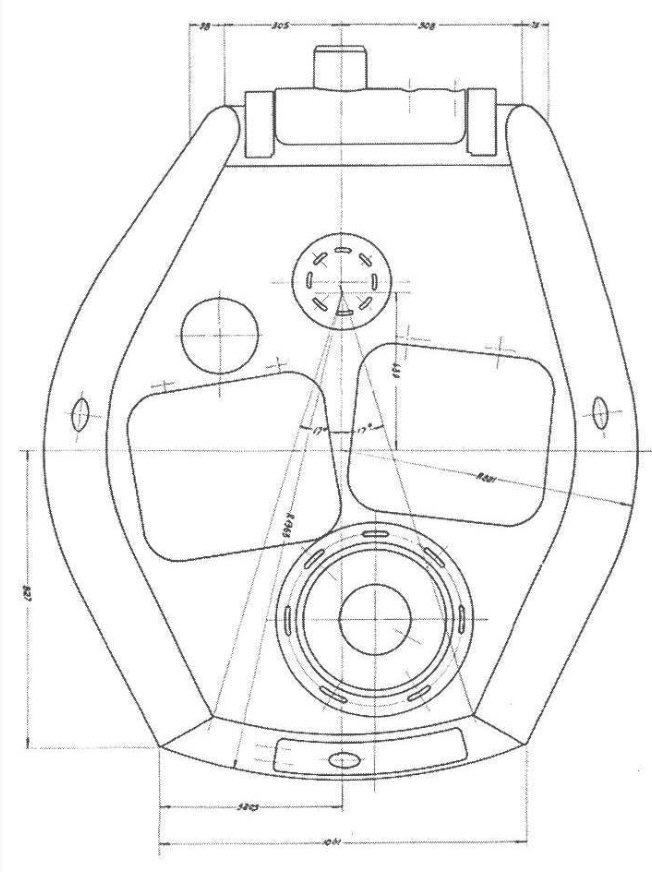
The turret will be an issue as it has no symmetry what so ever:
But we will see.
P
1 Like
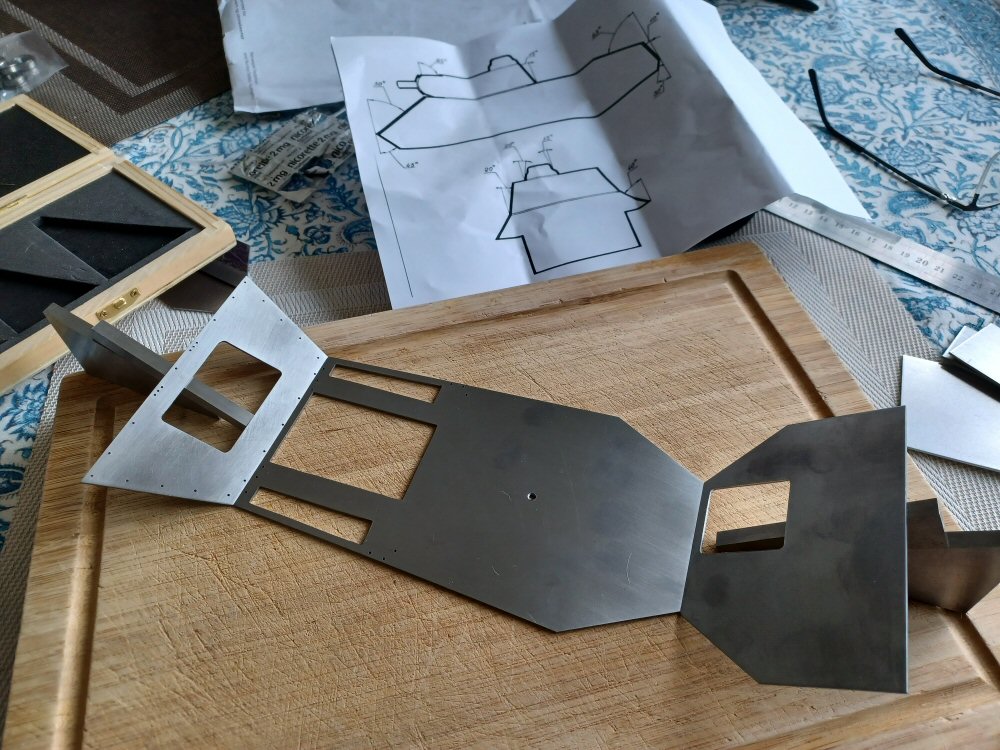
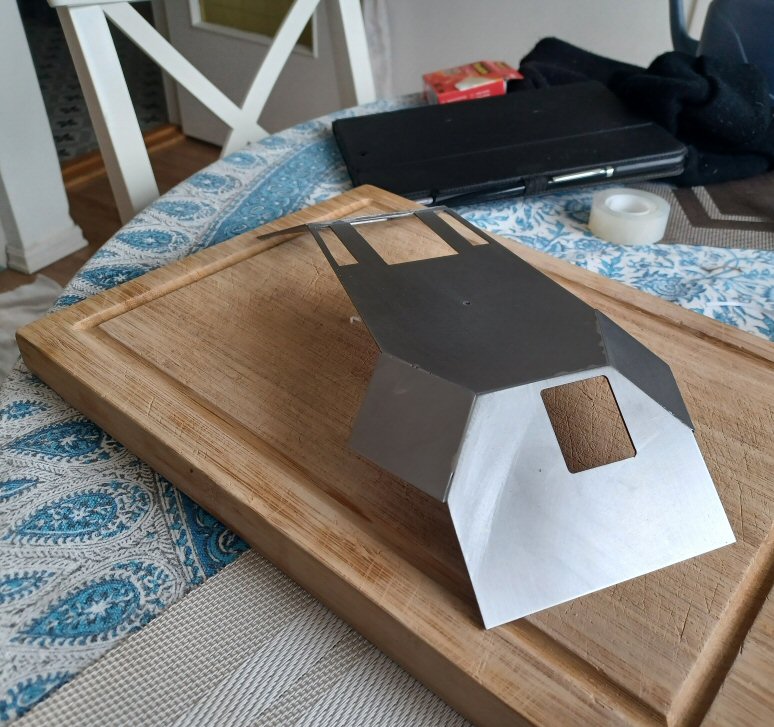
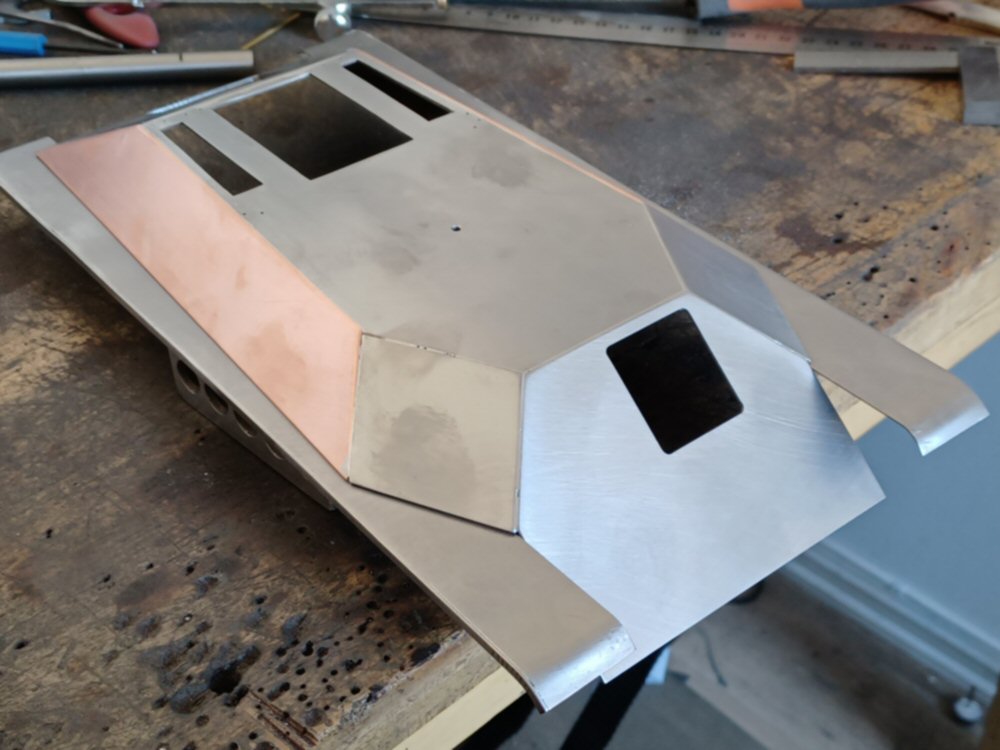
I started with the upper hull using the angles bars as shown below. All steel is 1.2mm mild steel plate.
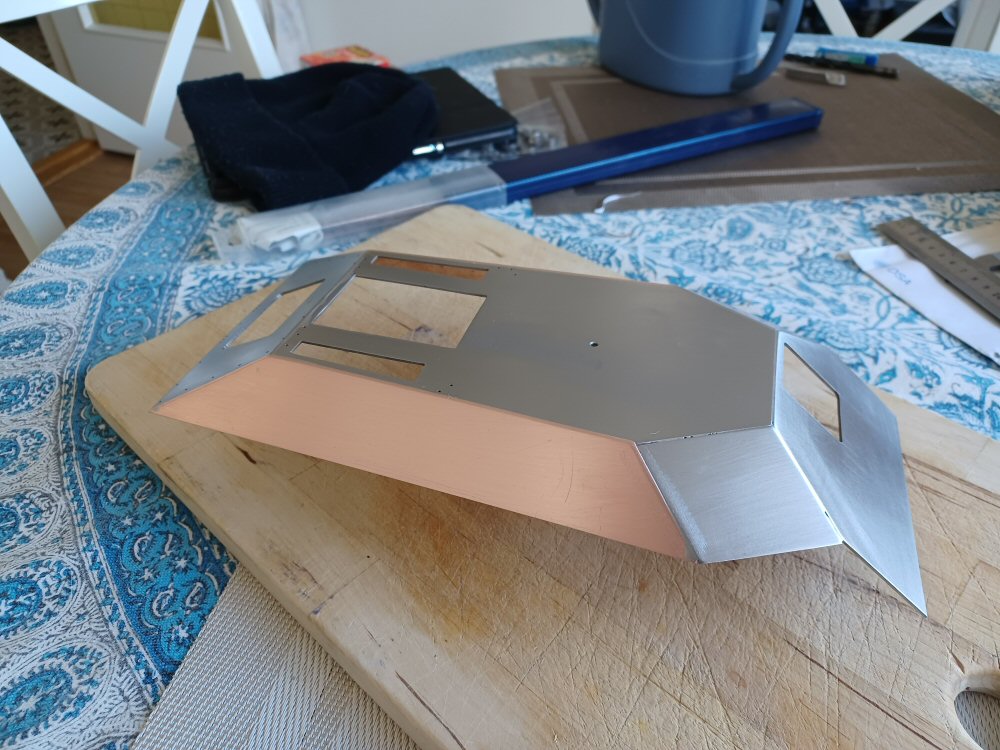
Then I had to deal with the side plates so I used copper plate as it was easier to file to shape.
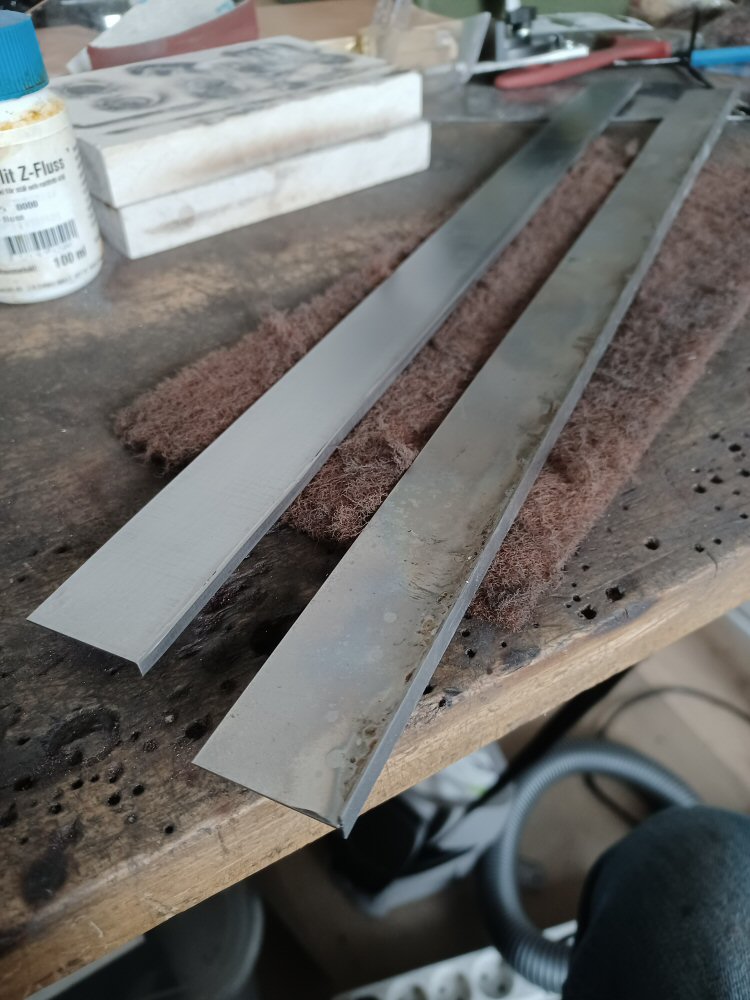
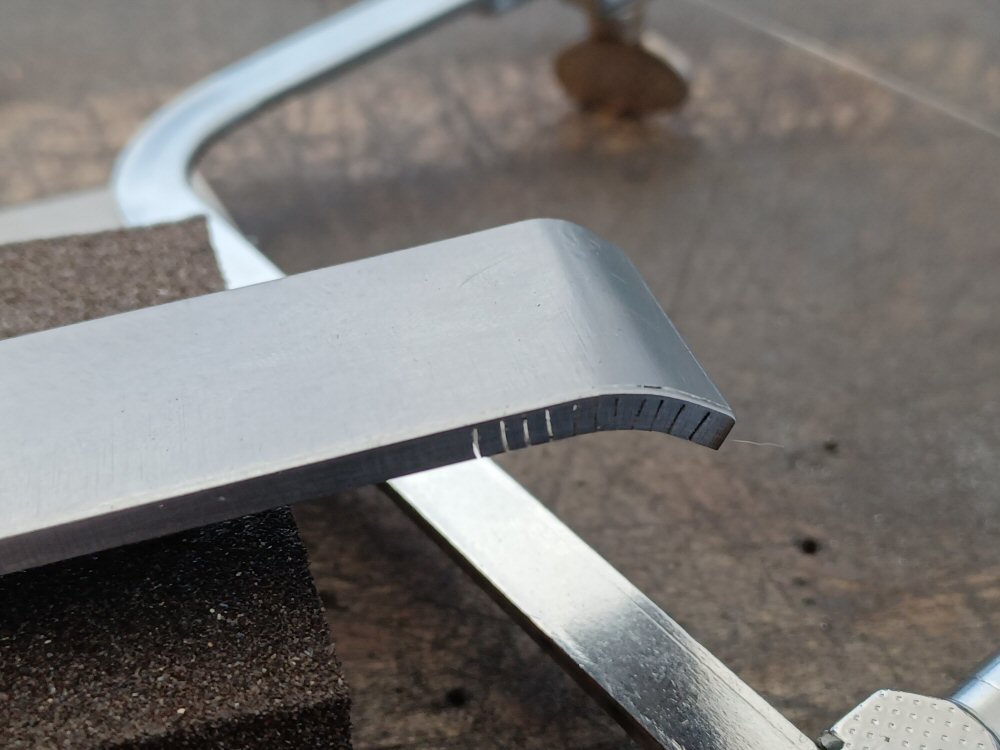
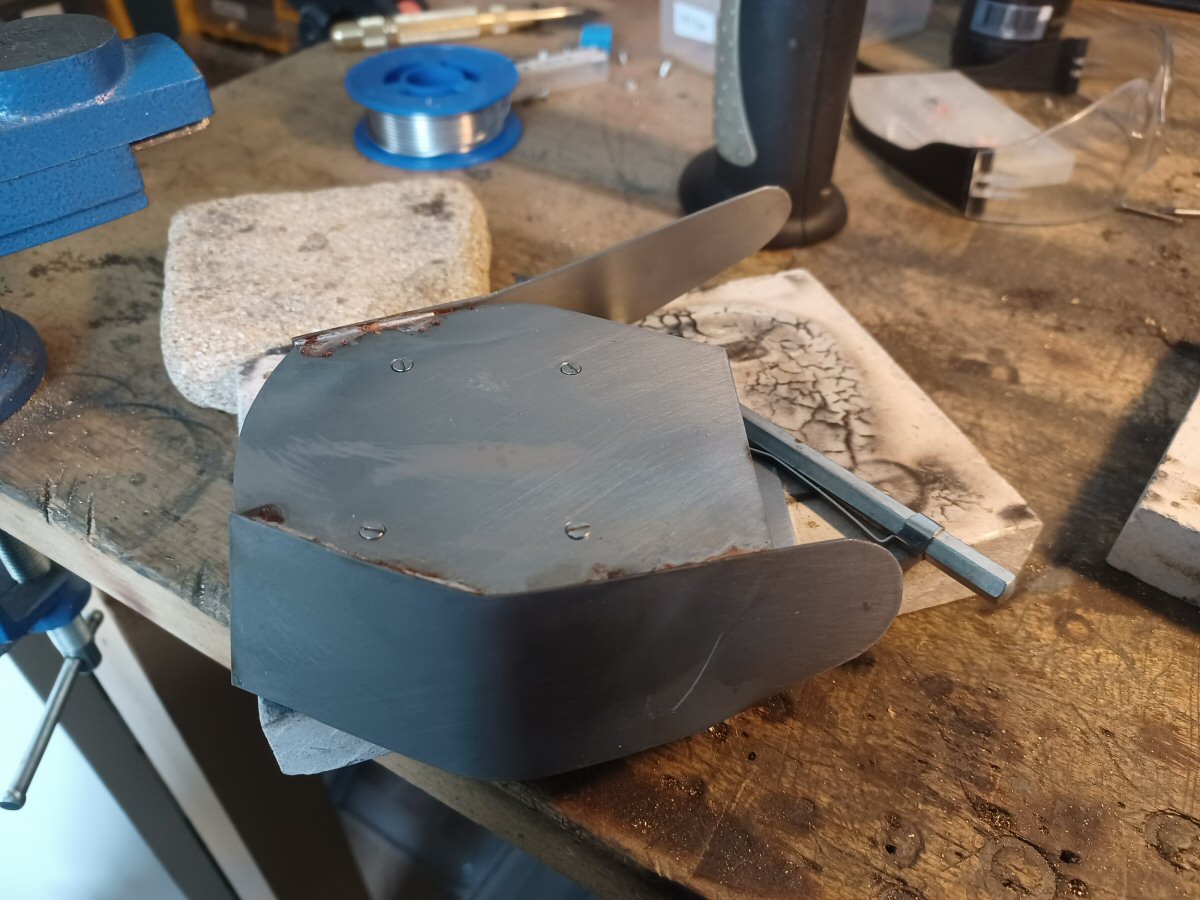
Next bit was the mudguards. These were made from long strips soldered to each other at right angles and then trimmed and sanded to the correct shape.
They have a lip along the length. Normally I would use brass angle soldered on but there is a curve and previous experience shows that method does not handle curves well.
So I cut some slots with a jewellers saw and then bent around a steel bar, closing the slots along the curve. I will fill in the gaps later.
Here they are in position with the upper hull.
p
5 Likes
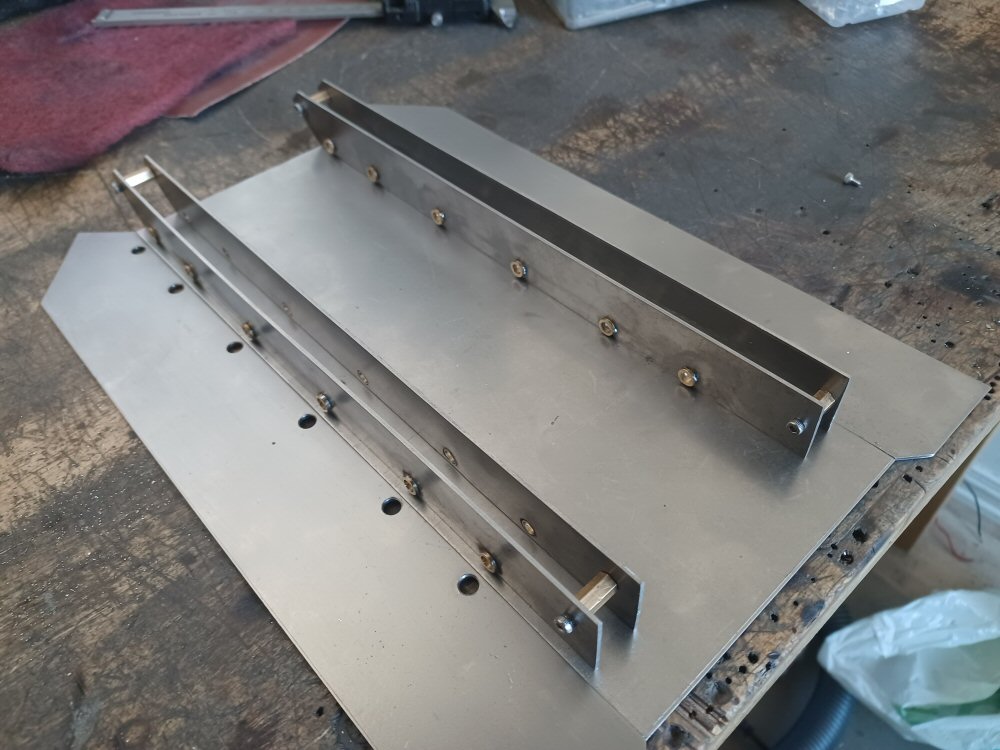
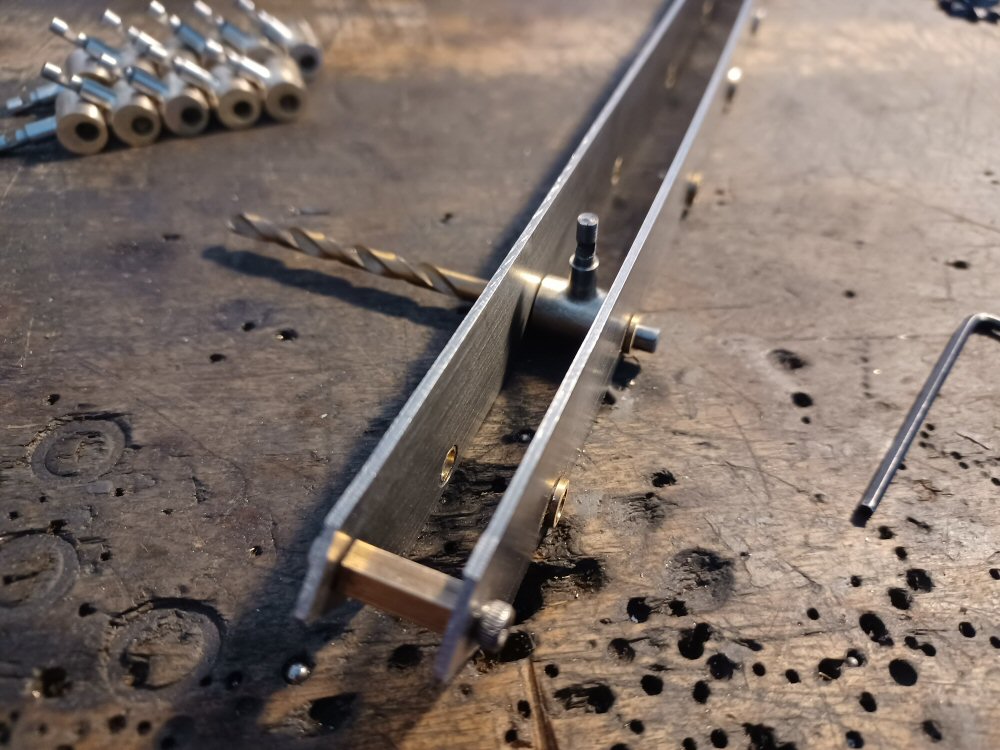
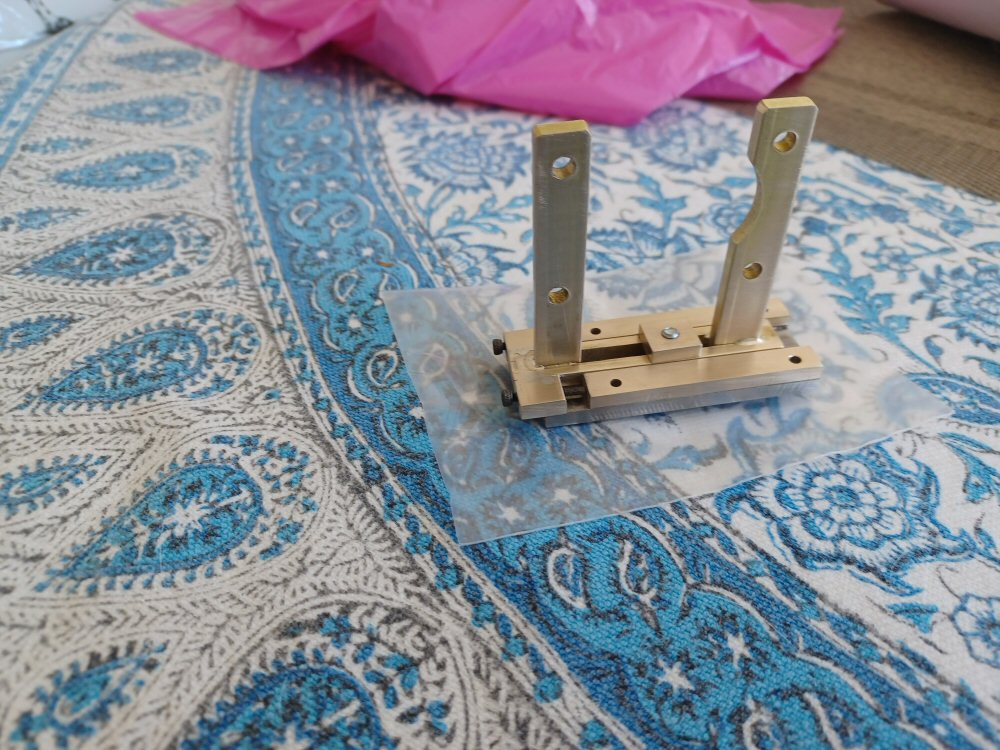
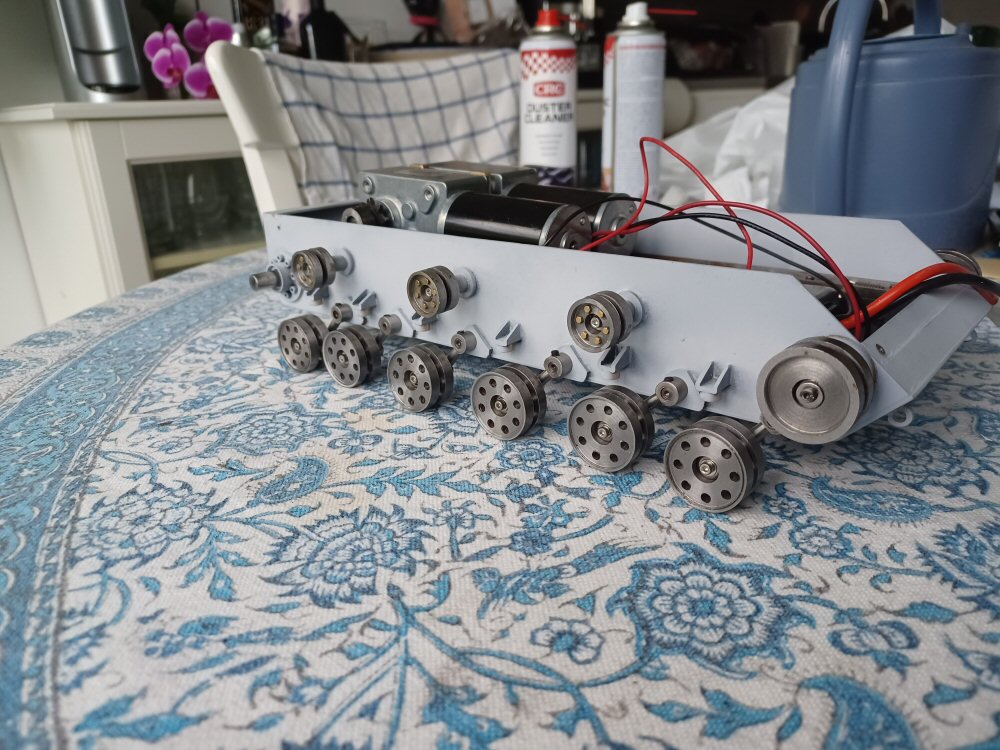
The next thing to do was to make a suspension system. This was based on two racks which would run along the hull length and house the springs. The road wheel axles would connect to a lever which is connected to a spring.
First I made the racks.
The axles run in brass bushings.
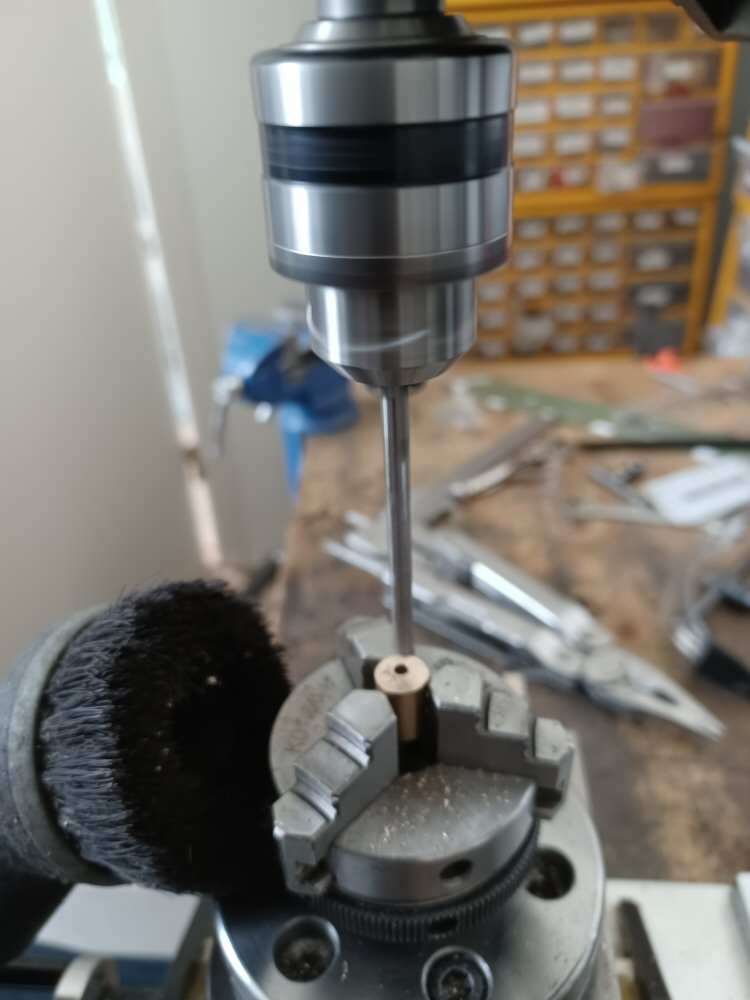
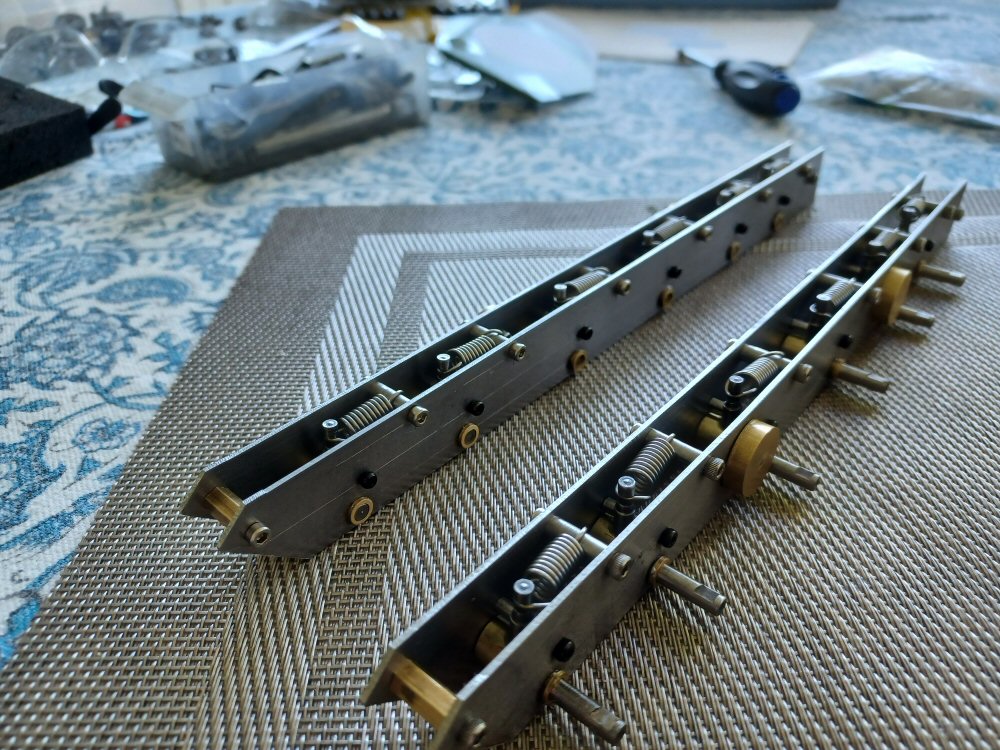
Then I needed to make the rotation bits for the base of the lever. I used some brass bar with an off centre hole through which the axles are soldered. The brass is then cross drilled to hold one end of the lever.
I needed some slots on the levers to engage the springs so simply filed them into the lever.
Then I silver soldered them into the brass rotator.
Then gave them a polish.
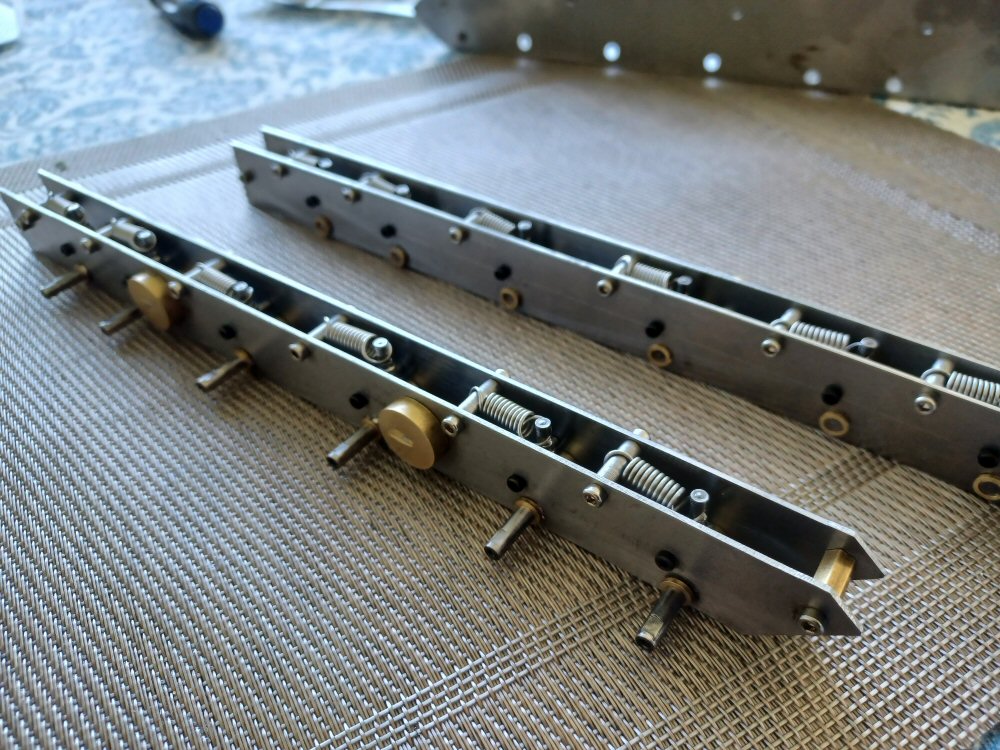
They fit in the rack like this:
Then they fit in the lower hull like this:
And here they are with the springs fitted:
p
2 Likes
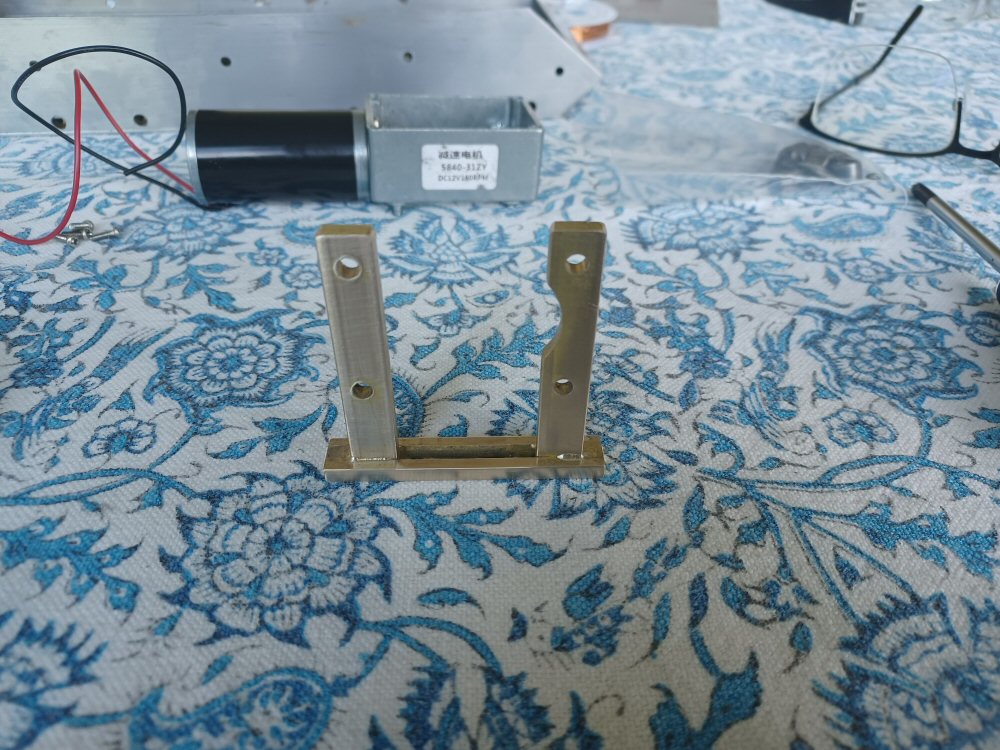
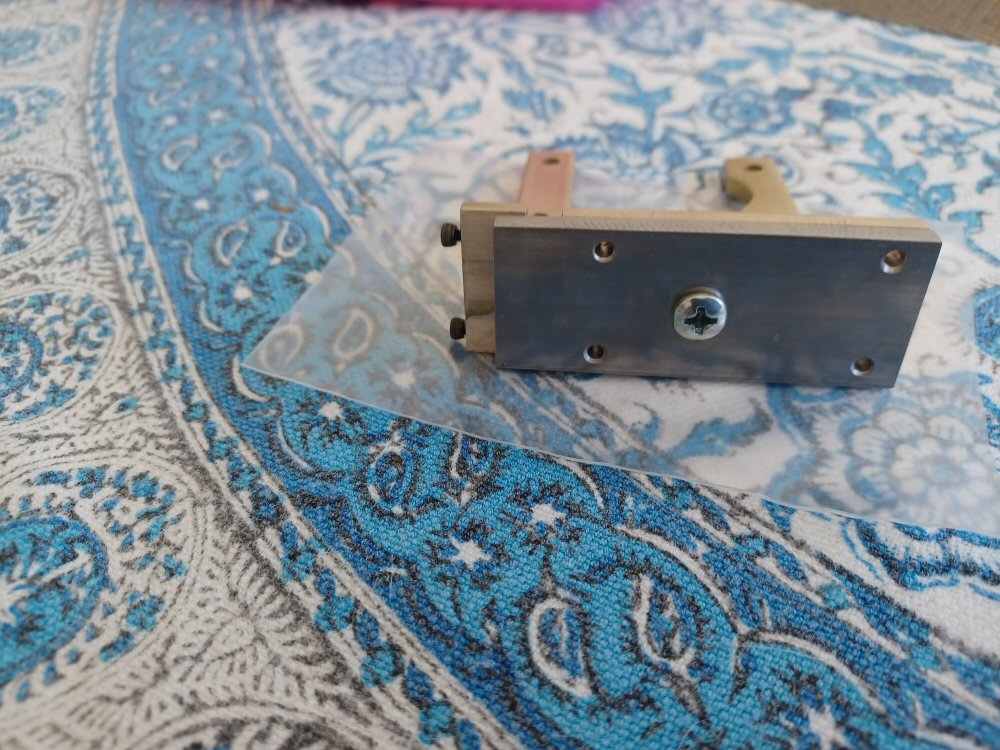
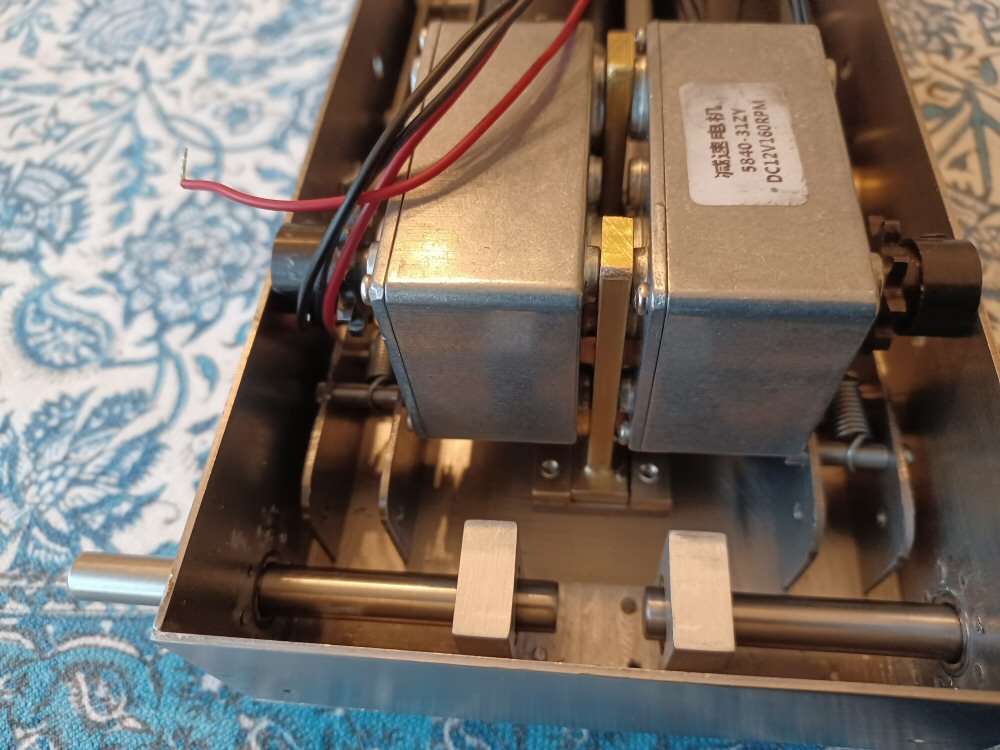
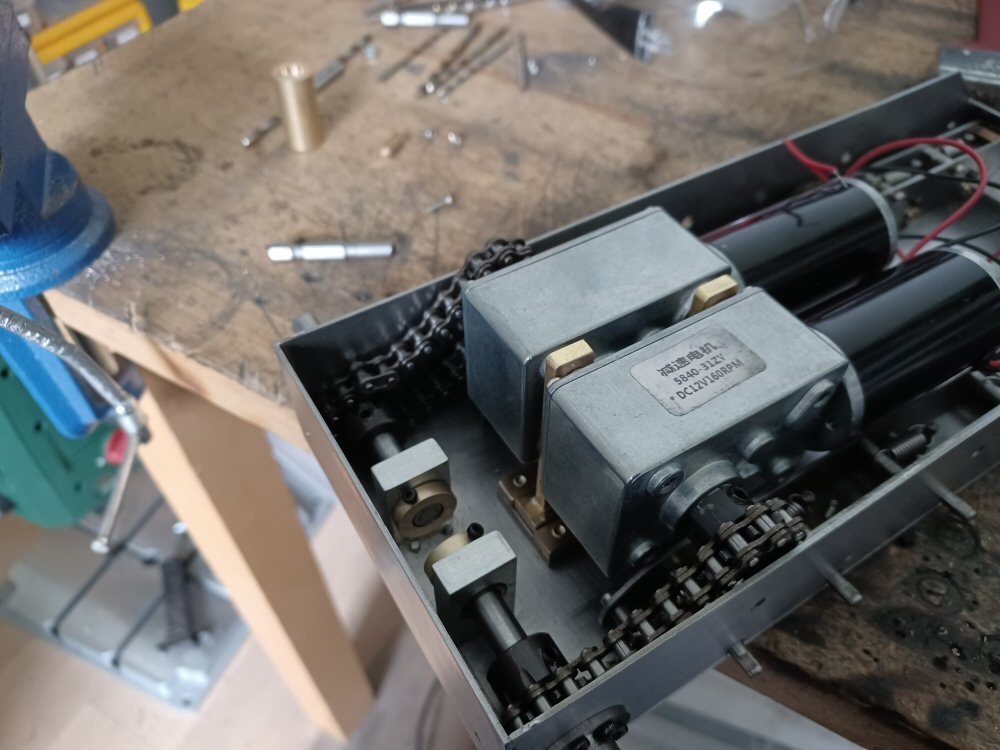
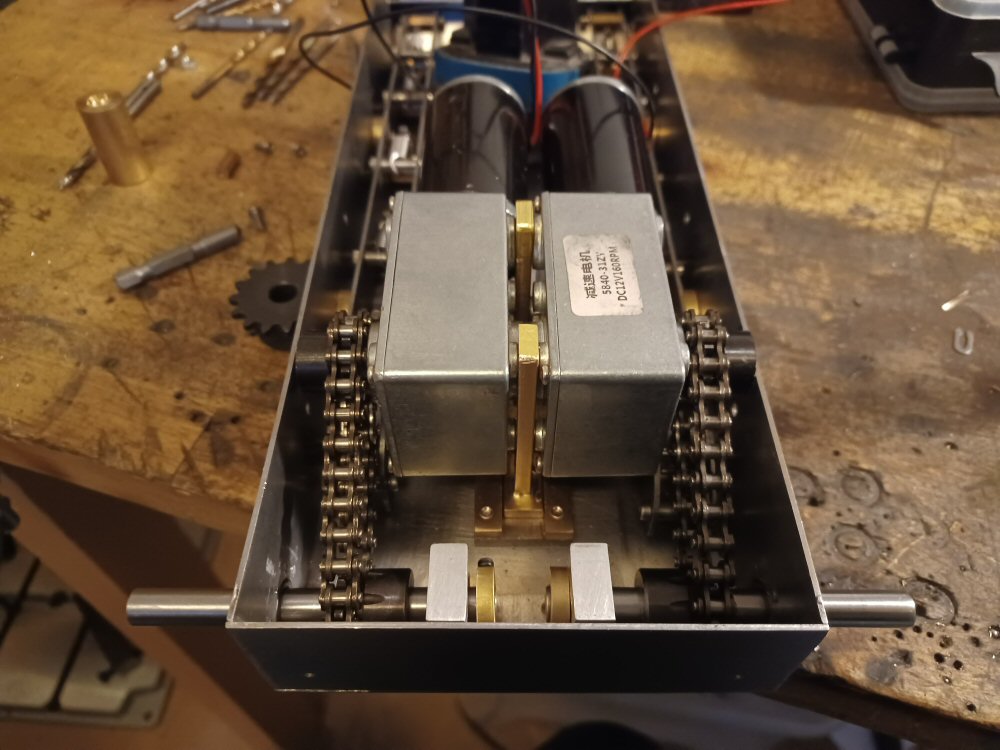
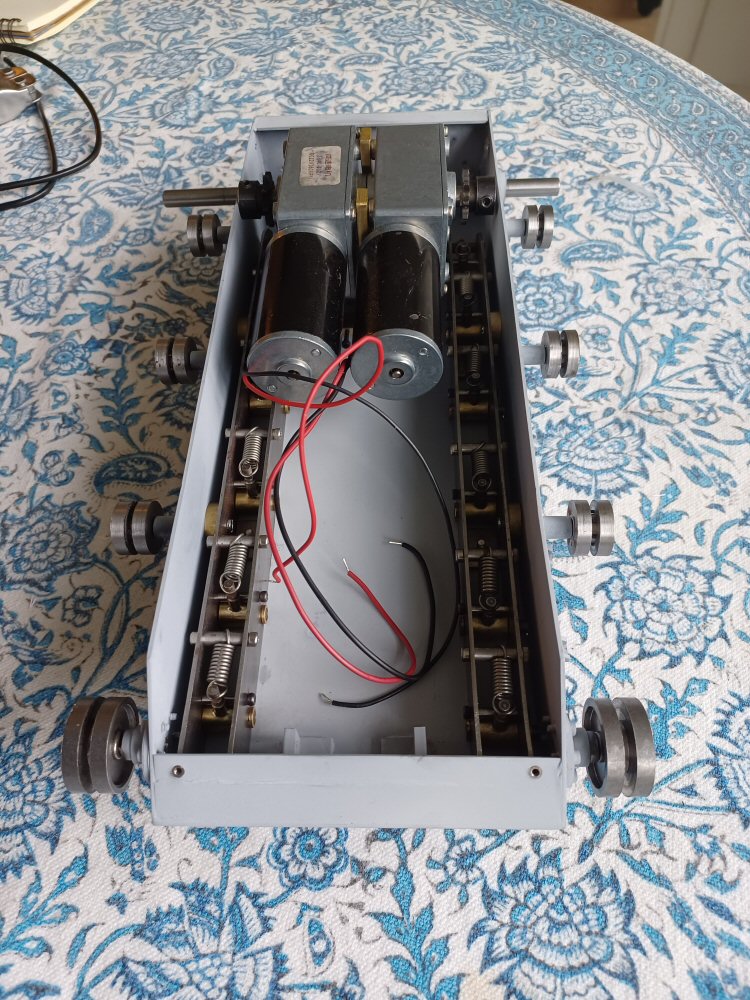
Before I could proceed I needed to fit possibility for motors otherwise it would hinder progress. I am using two 200 rpm 12 volt geared motors from the net. I needed to make a bracket to hold them above the suspension racks so I made one from brass bar stock.
They will use a chain to drive the shafts so I needed t make a tensioner. Its a simple base plate along which th ebracket can slide and be fixed in position using two long M2 bolts. A t-nut accessible from under the tank locks the bracket in the slide to allow tensioning of the chains.
The drive shafts are 8mm silver steel and one end is held in a hub on the hull exterior and the other end is held in a simple aluminium block on the interior. Both hub and internal block are fitted with needle bearings to smooth the ride.
Here are the chains in position, noth slack and taught.
I had to move the sprockets to the inside as they were fouling with the hull sides.
p
3 Likes
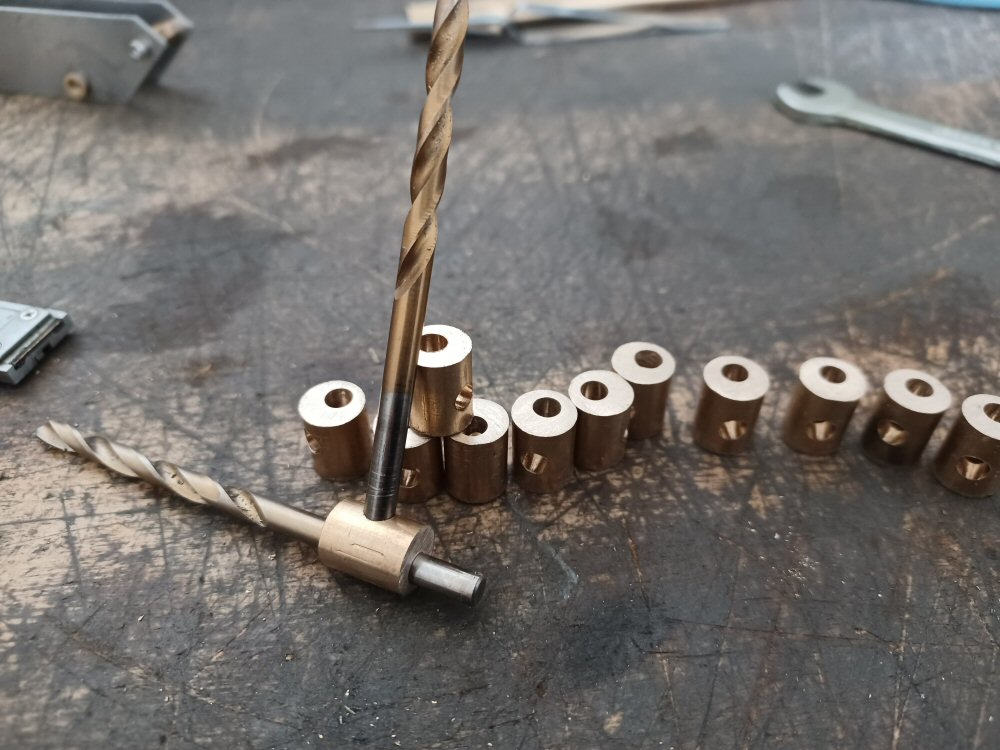
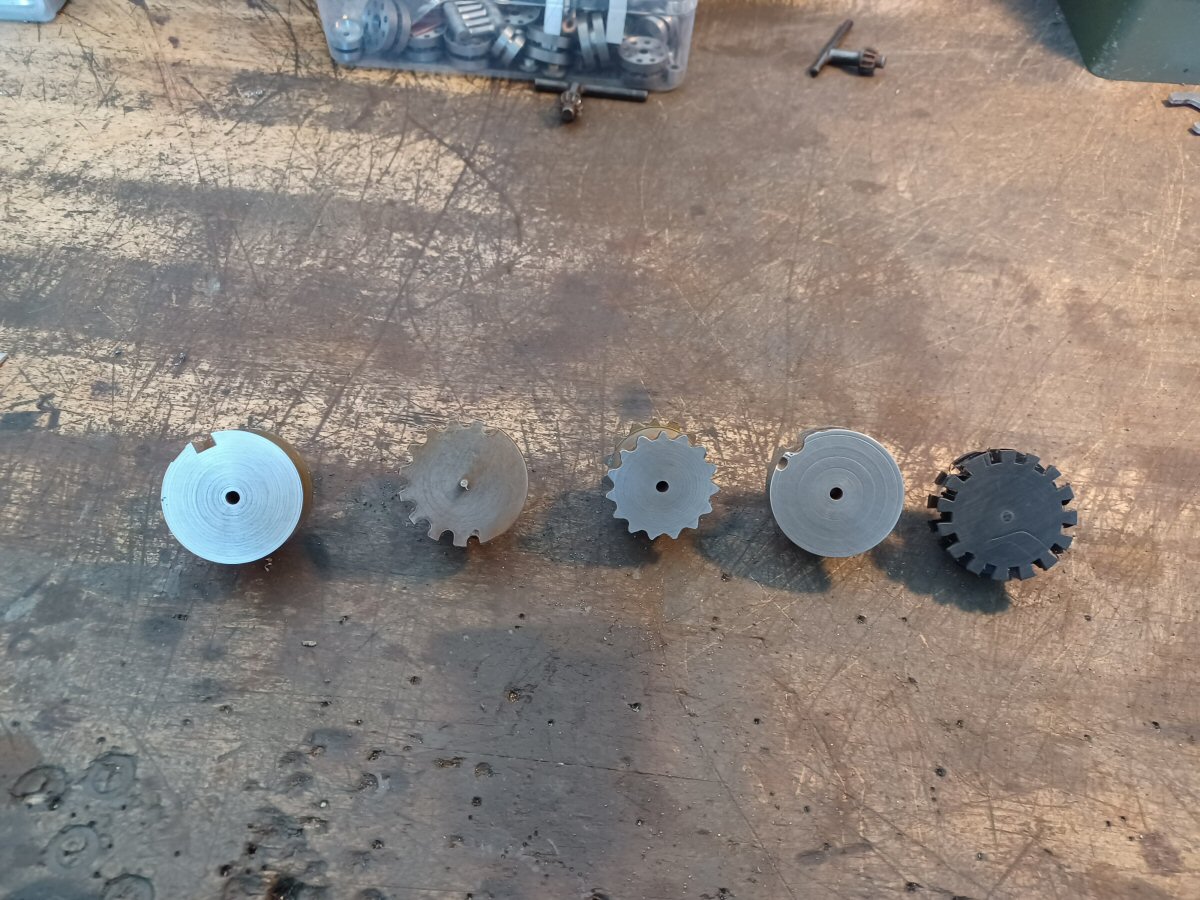
The sprocket for the tracks was an issue. There i snot a right sized one available.
I measured the pitch of the tracks from the pin distance and then calculated the tooth number needed for a sprocket of the right diameter.
I then tried cutting the teeth with a file and a Dremel but that was not working at all.
I changed tack and drilled a series of 4 mm holes around the pitch diameter and then opened them out with a carbide burr in a small proxxon drill. This worked well enough. Needed a flap disk to get them smoothed out.
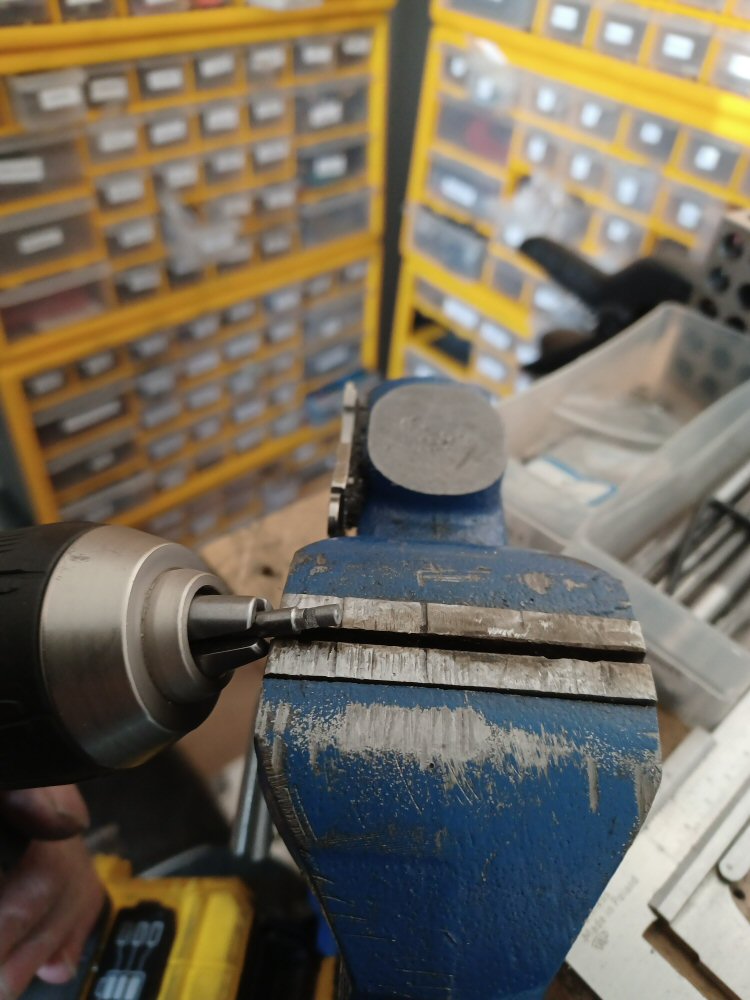
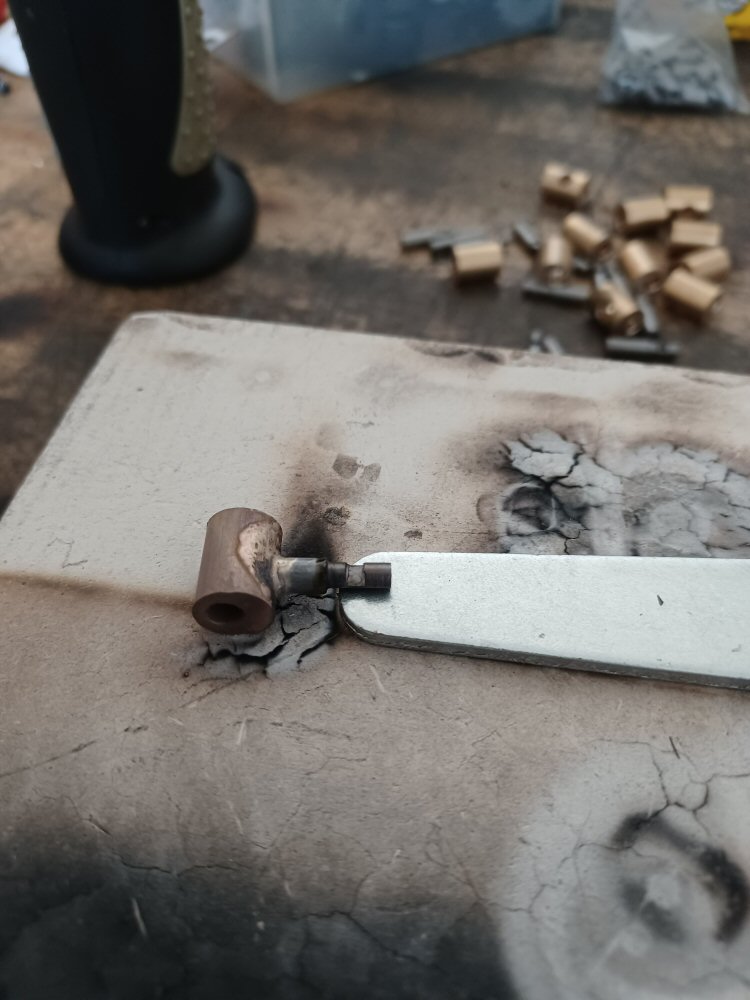
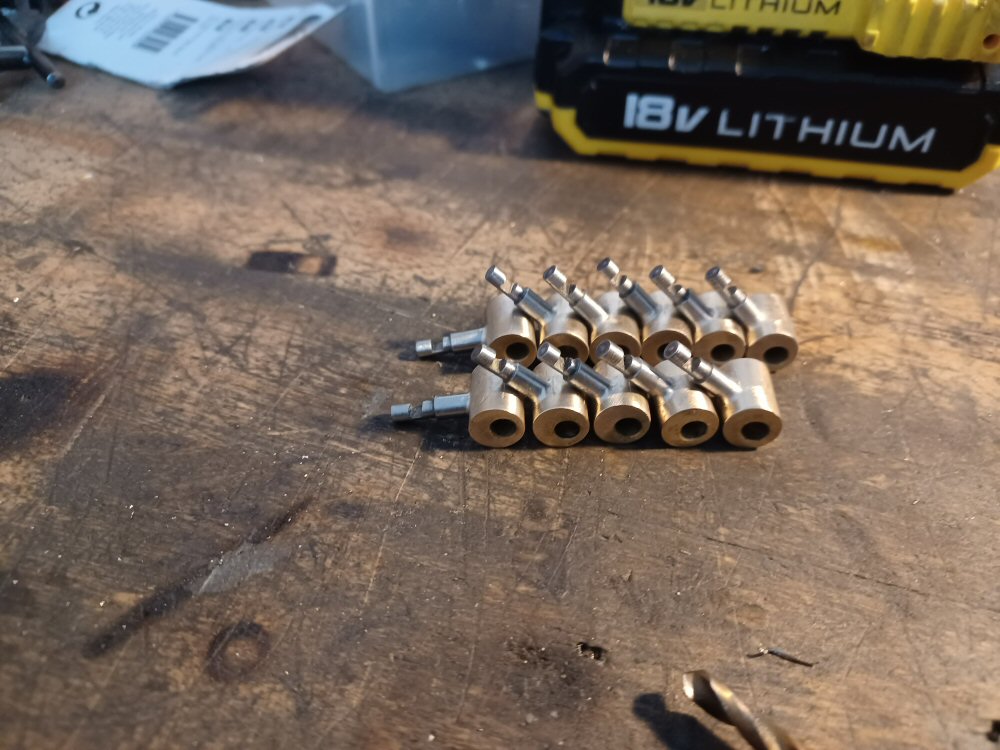
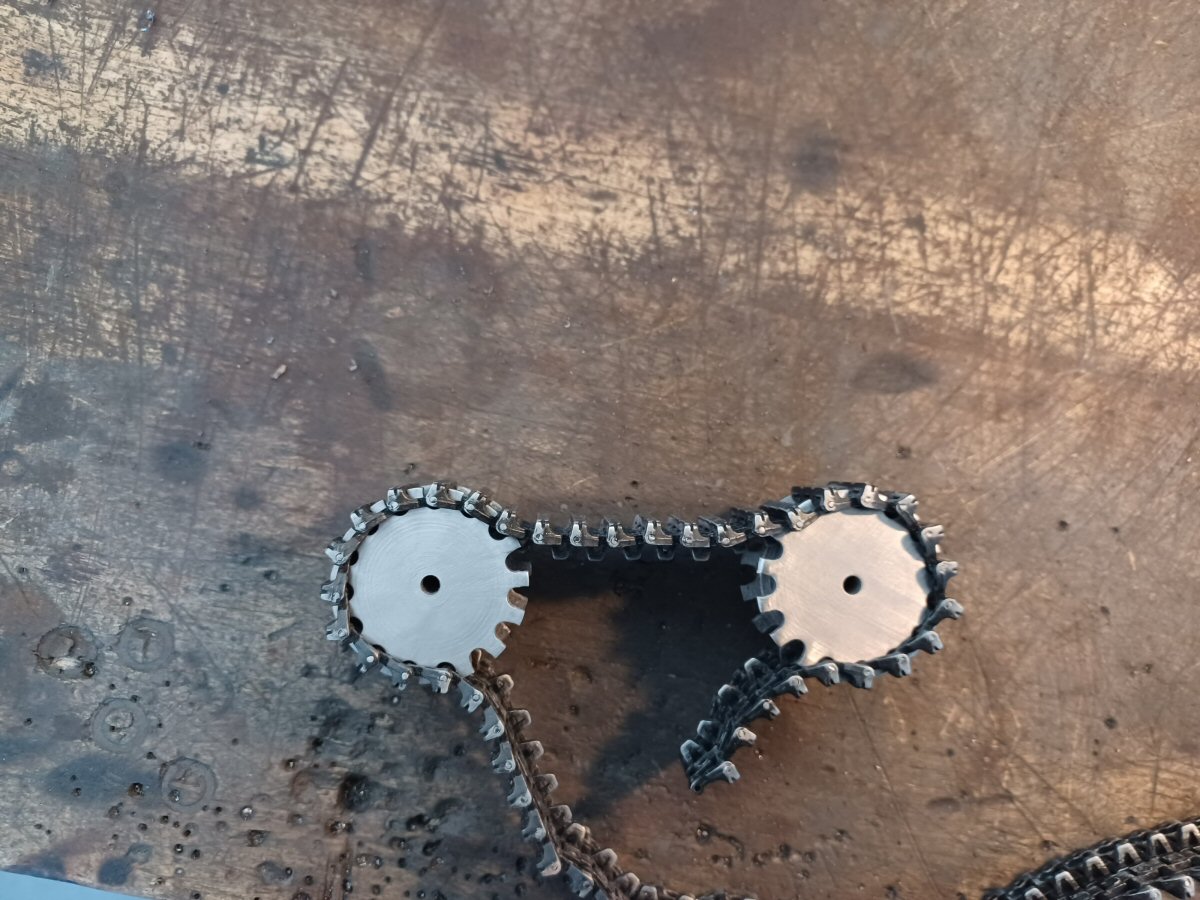
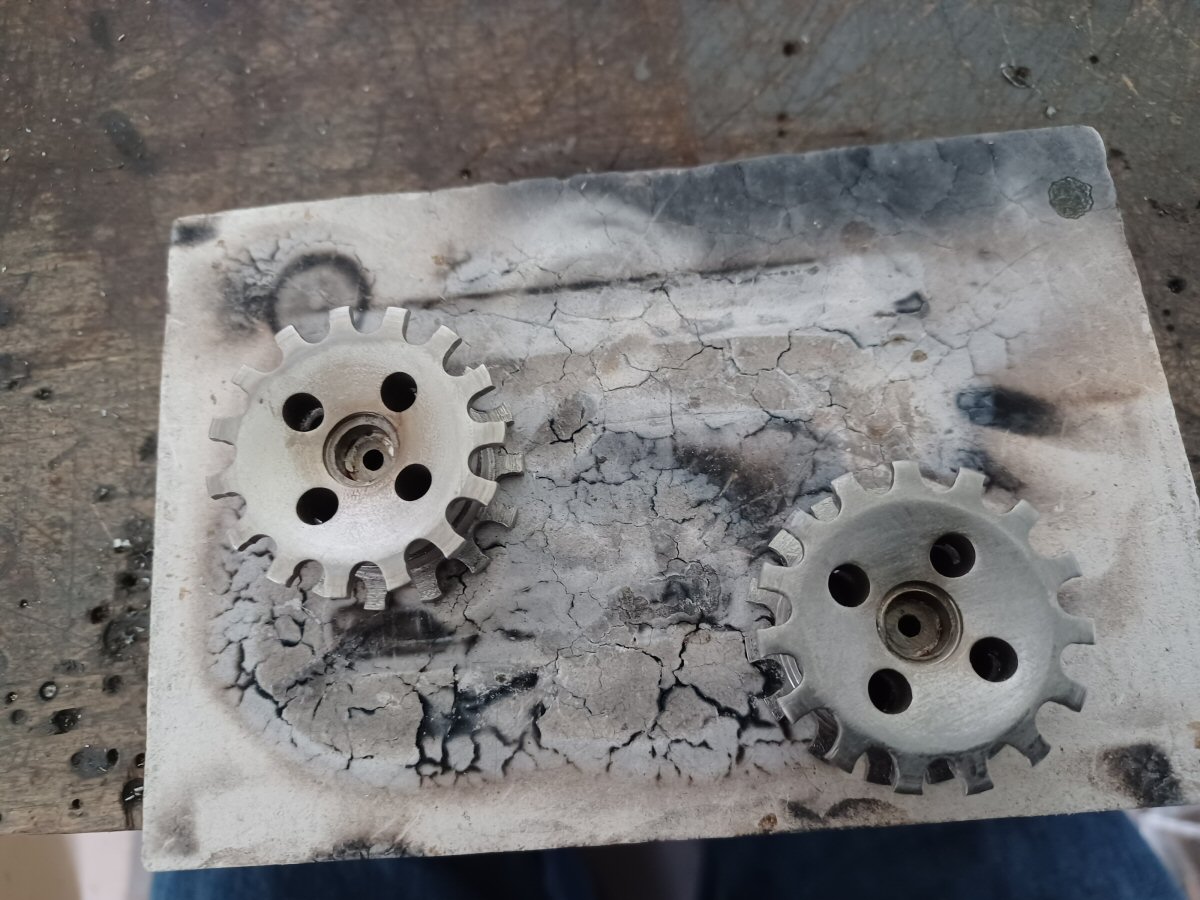
These sprockets have no way of engaging the drive shafts so I needed something. A d-shaped hole imn the sprocket and a flat on the drive shaft is the usual way but I cannot drill d-shape holes.
So I made these inserts:
Then soldered them into the sprocket. This gives a d hole on the back and a through hole to allow a securing screw to hold the sprocket to the shaft.
These actually worked quite well.
p
3 Likes
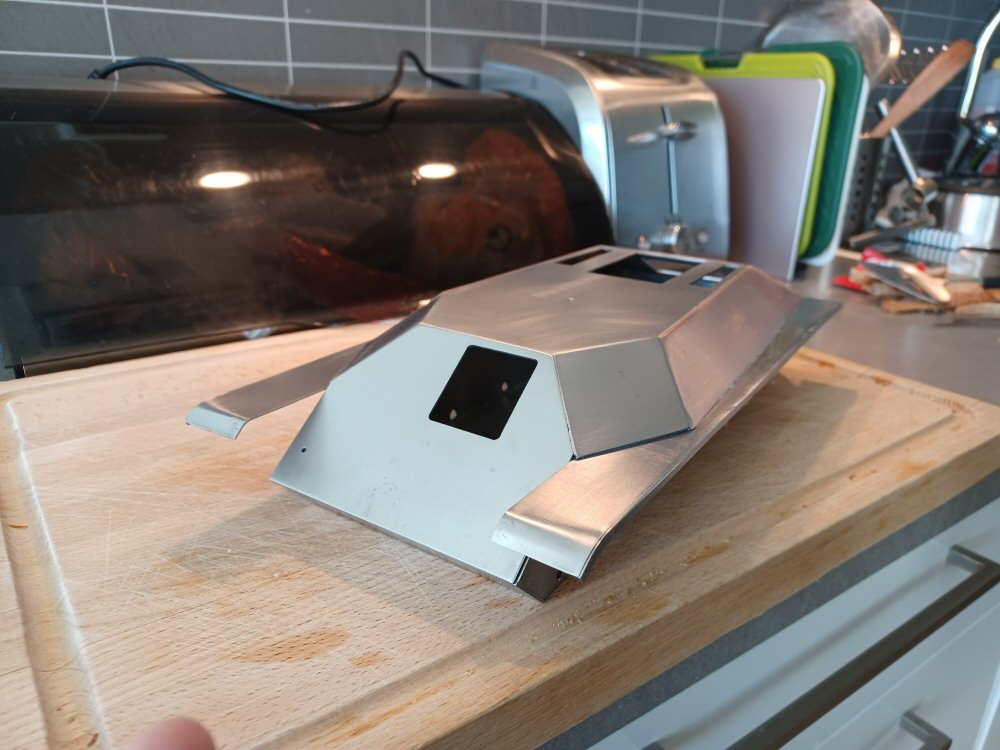
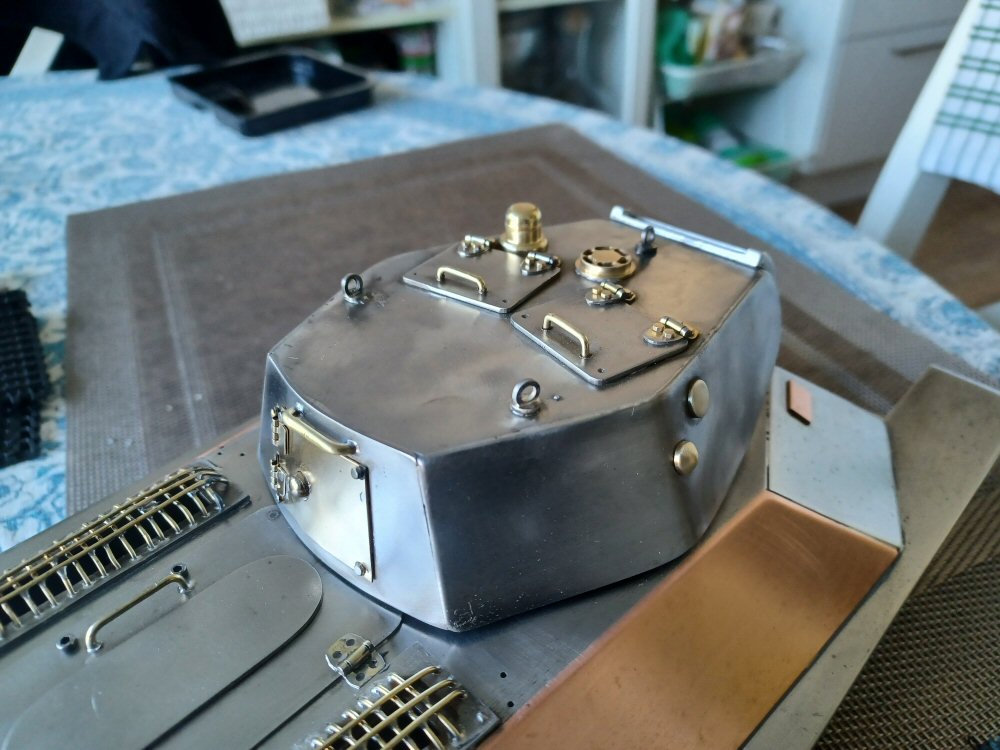
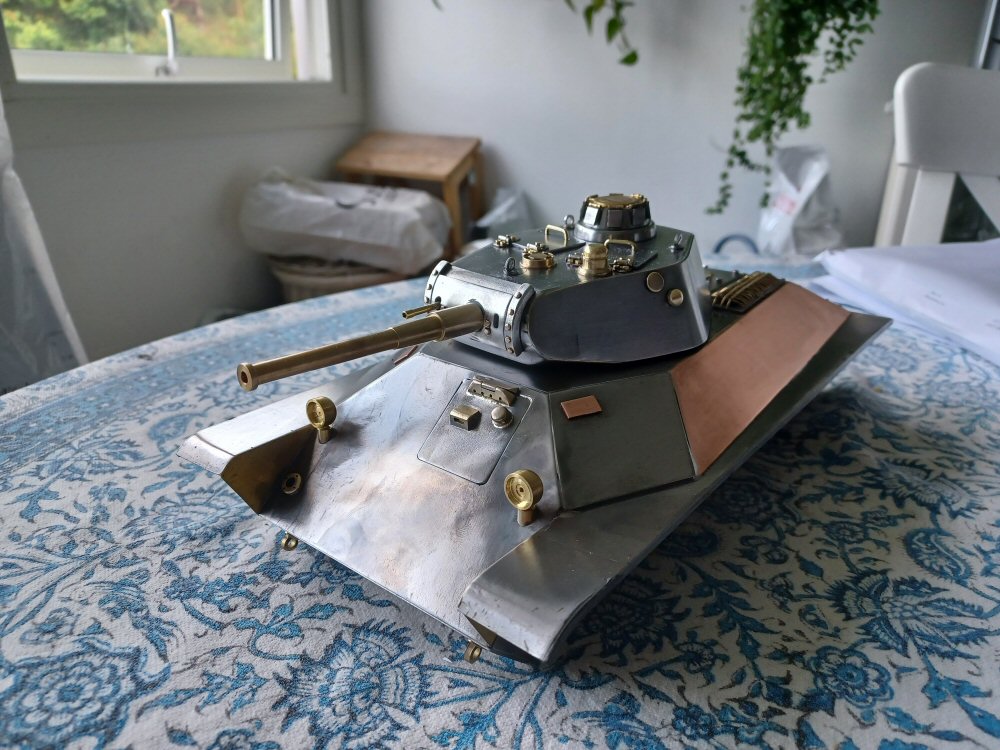
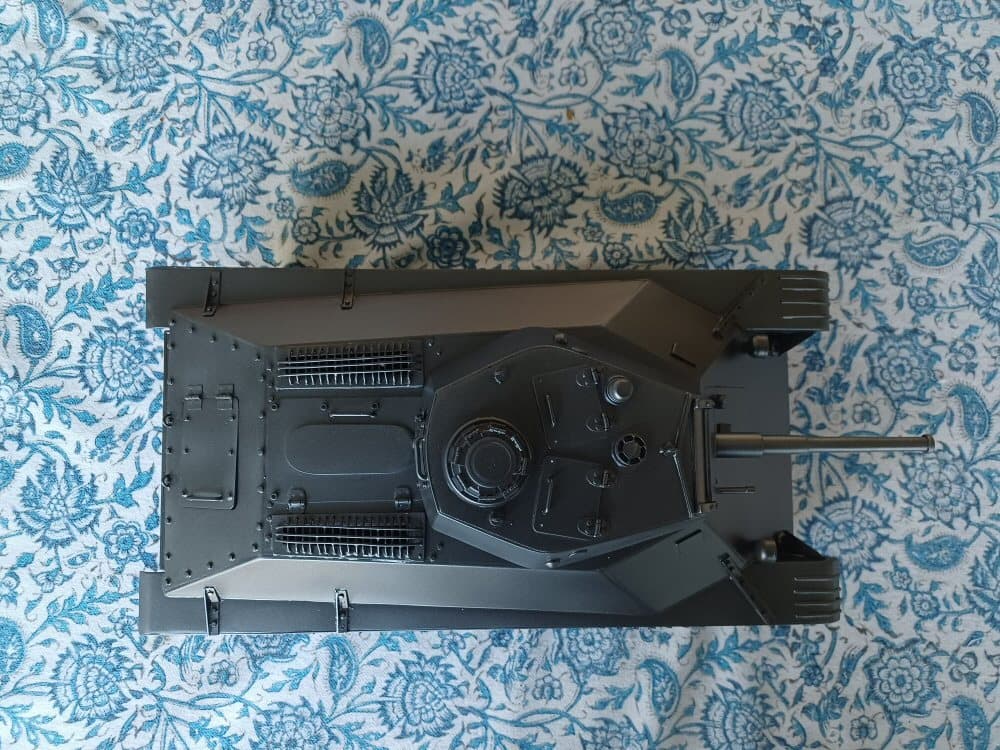
The turret needed addressing. I made a sketch of top and bottom and cut som eplates to th eshape I needed. These were held in the correct orientation using some studding. Then I simply wrapped some steel around it and soldered it on . Somme extra plates helped to cover up some crews and things.
I tidied it up a bit and checked to see if the asymmetry was preserved.
And it was! Happy days!
P
3 Likes
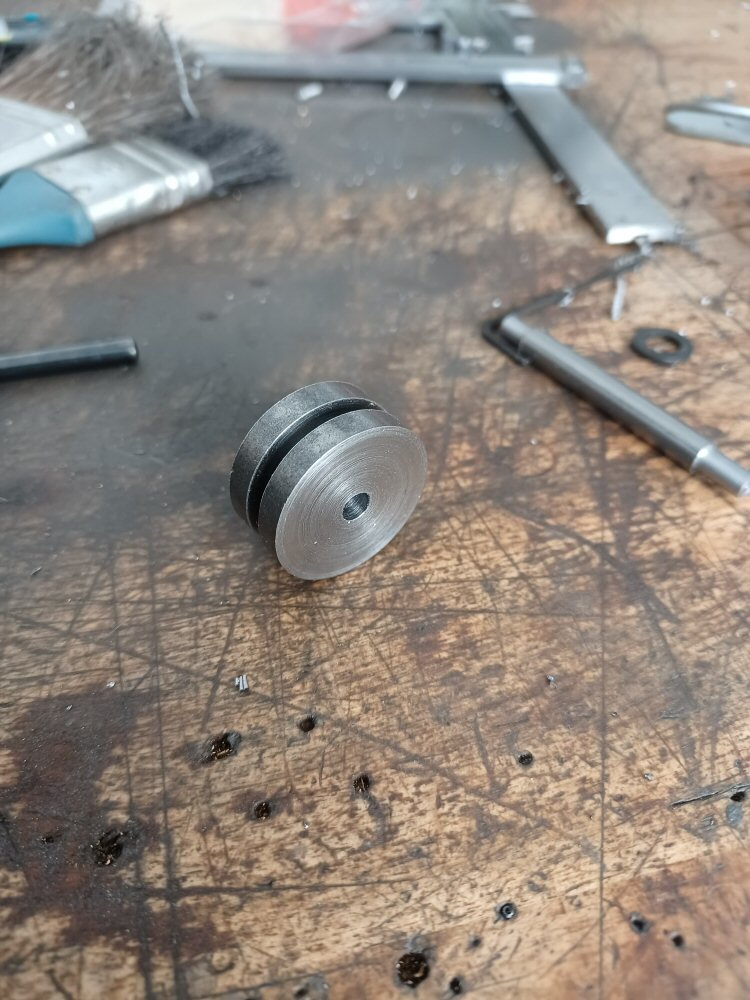
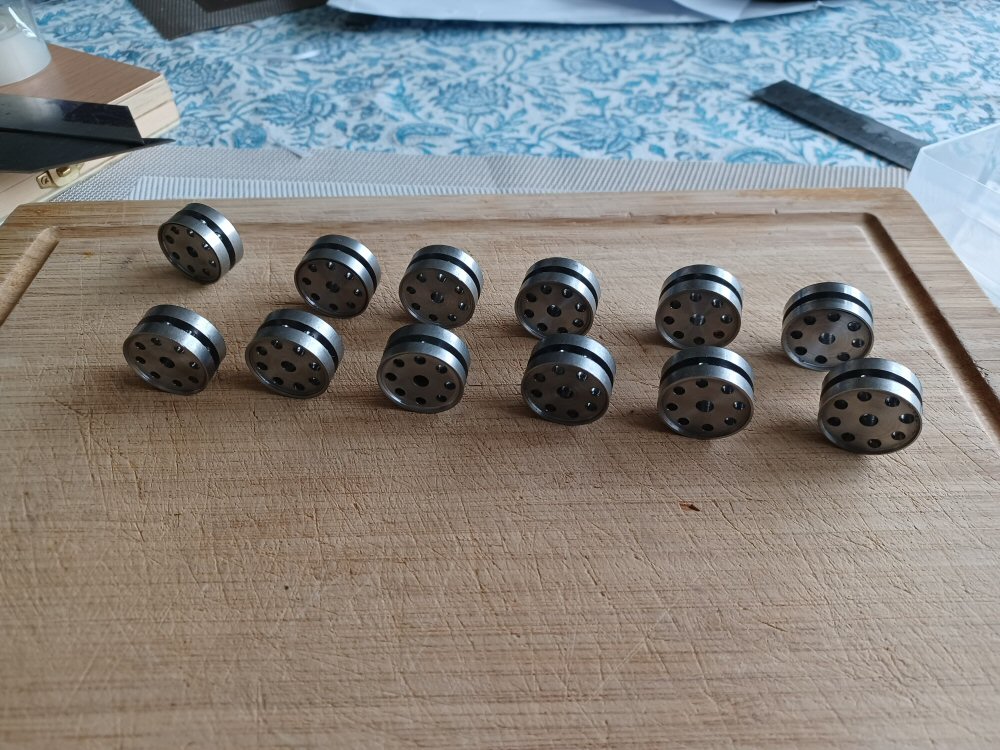
Road wheels were made from these blanks that I had from a 1:10 Panther build I had to abandon.
I beat the daylights out of my proxxon drilling the holes around the rim.
And then I was left with these:
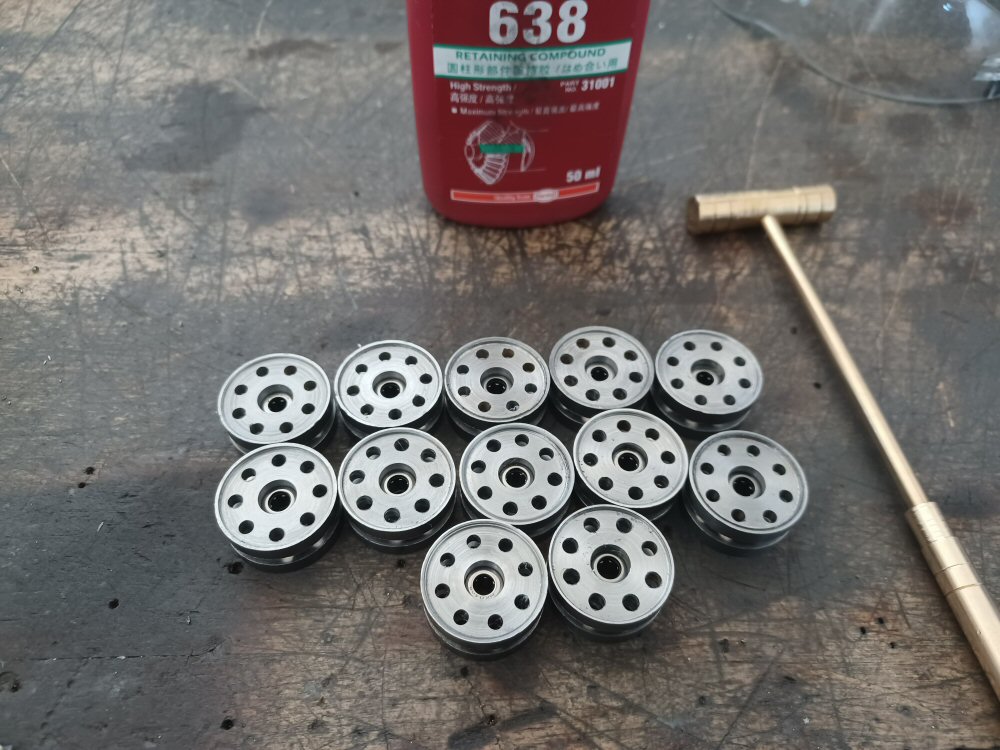
I need these to run smooth so I drilled them out to a wobbly 7.9 mm and pressed some 4 mm ID needle bearings into them.
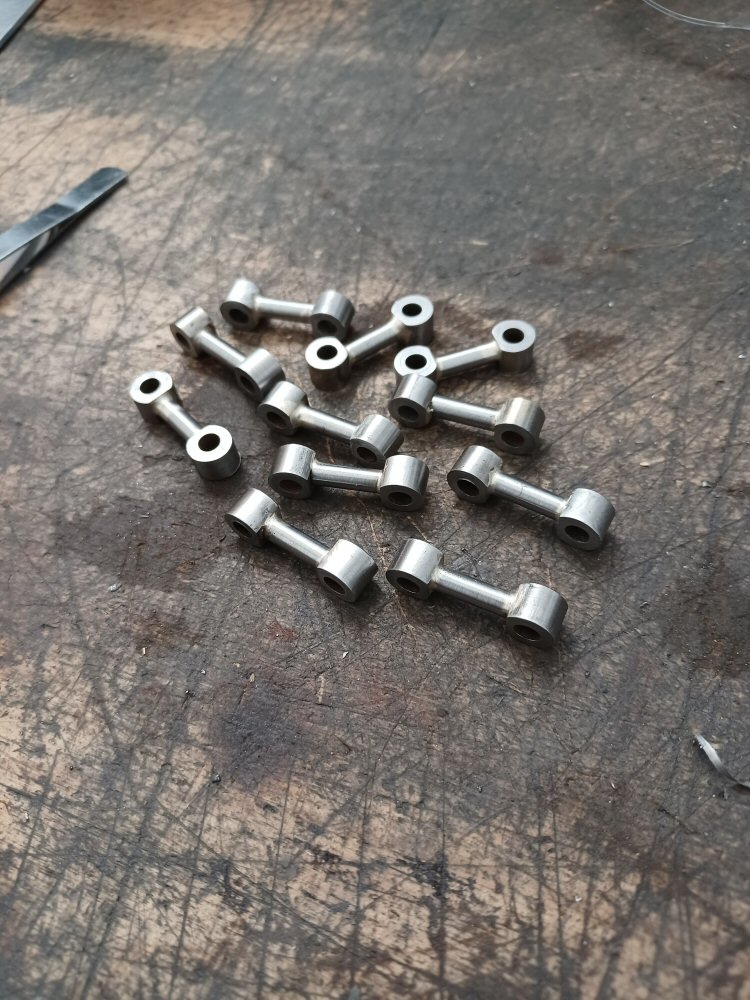
The swing arms were made from centre drilled silver steel rod cut into slices and then filed with a flat. These were silver soldered to some steel rod to form the arms.
The idlers and return rollers were fashioned using a similar process as for the wheels and all fitted with bearings.
P
4 Likes
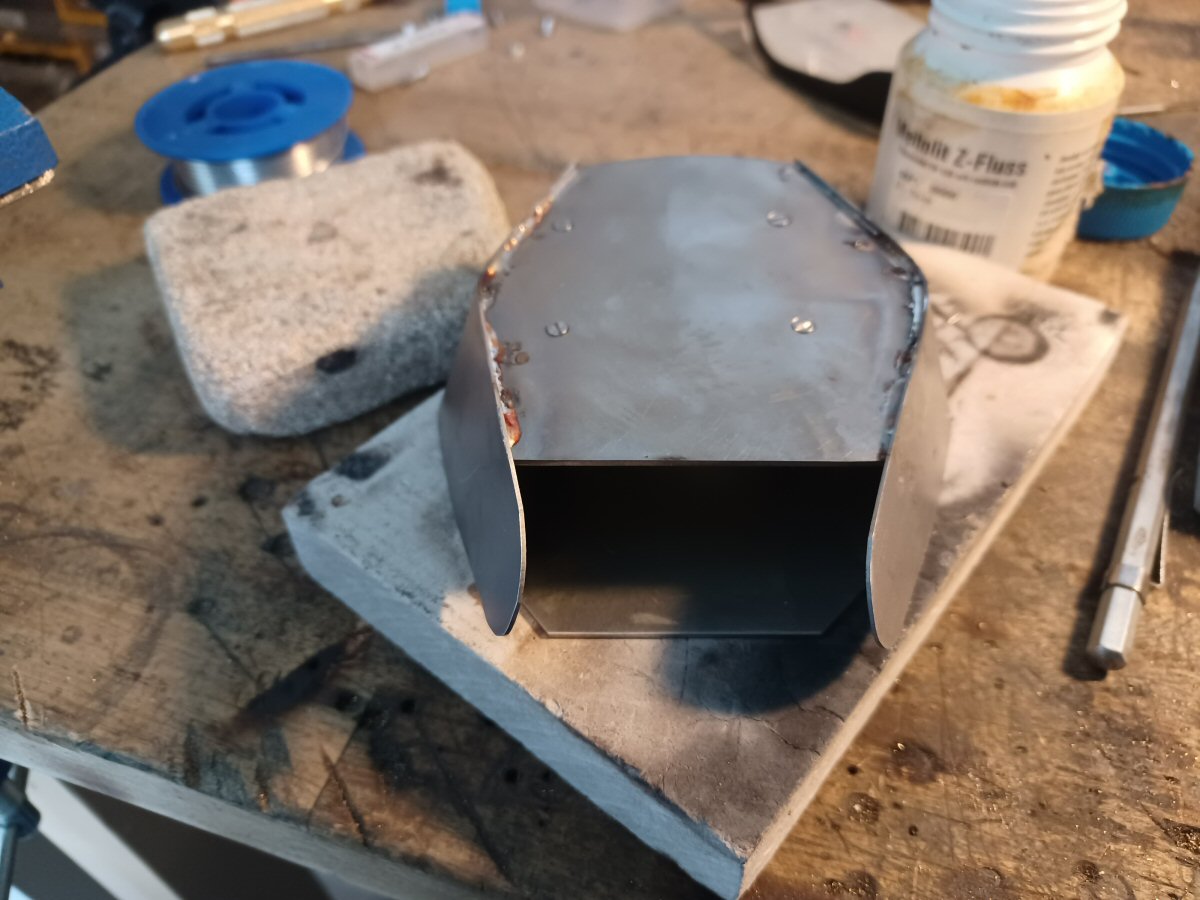
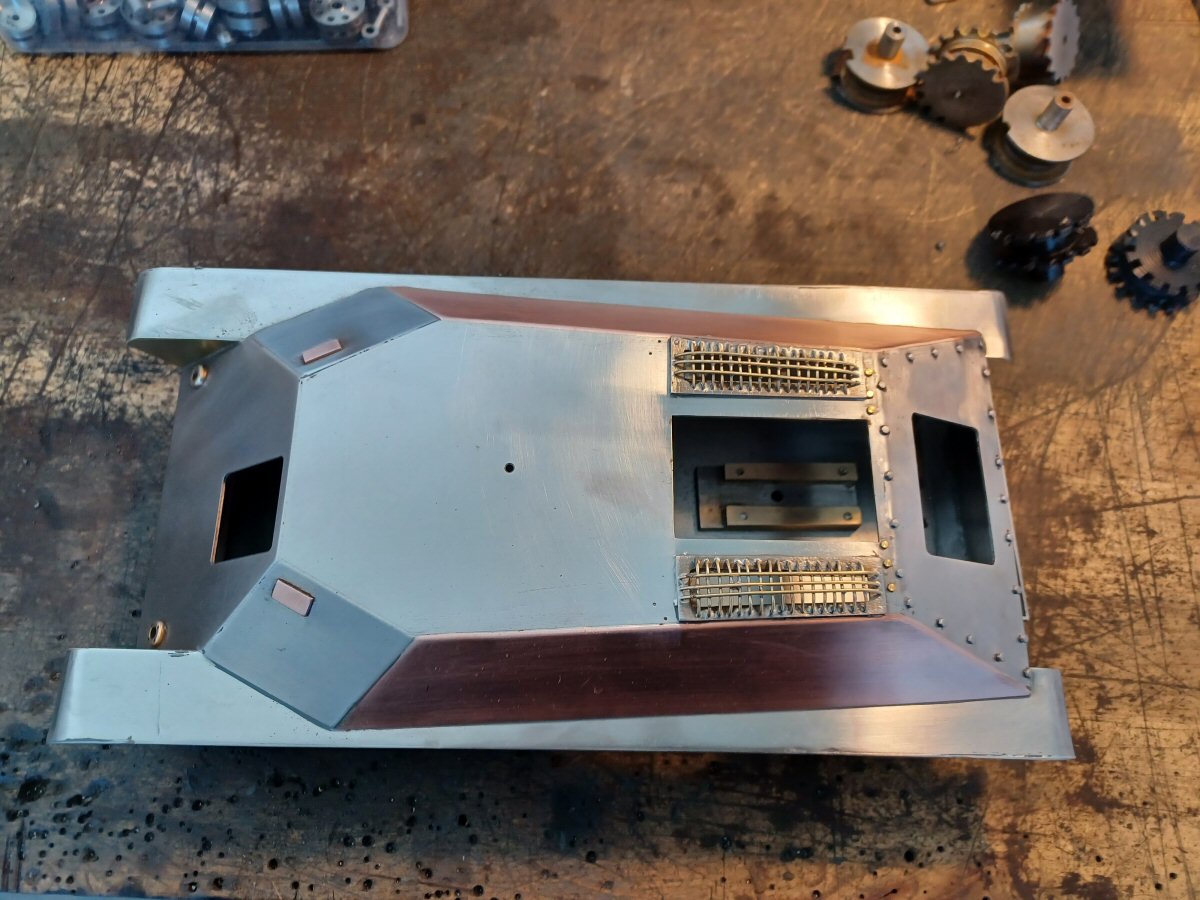
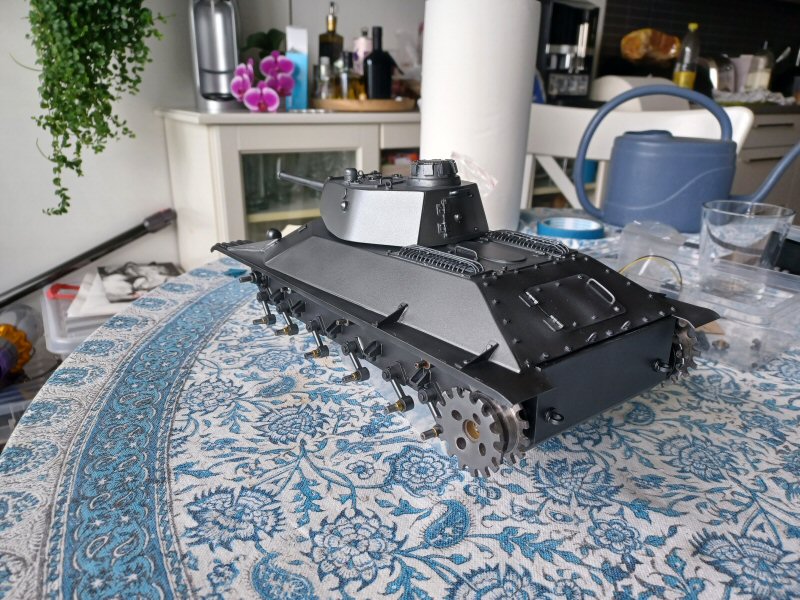
I then checked the fit of the two hull halves.
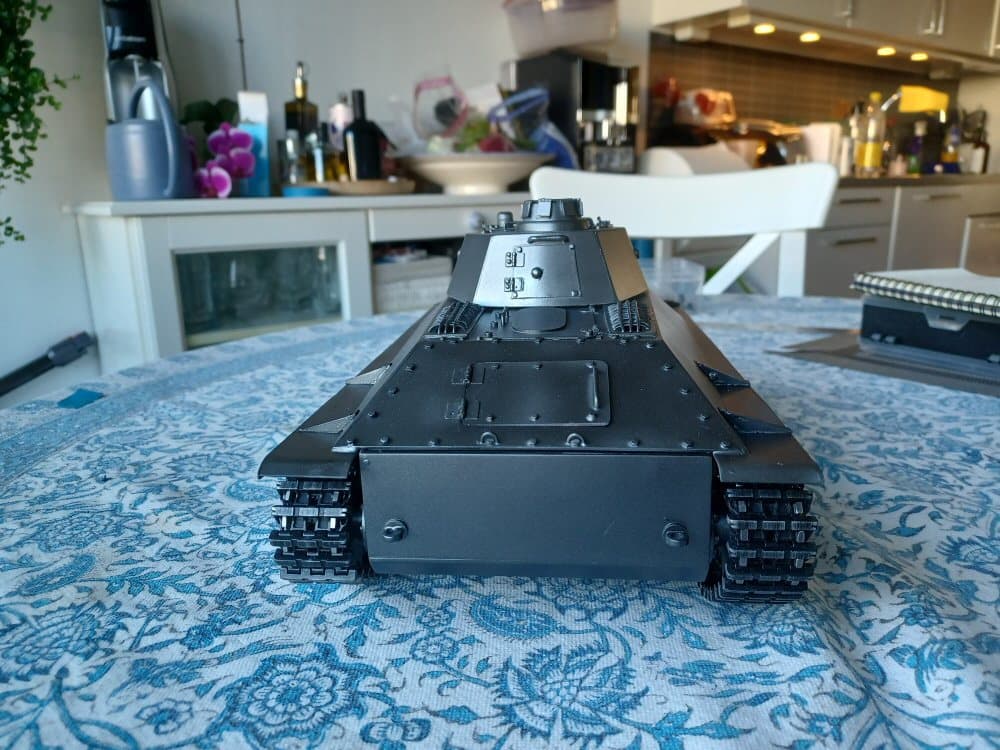
That gap along the back is actually present in the real thing:
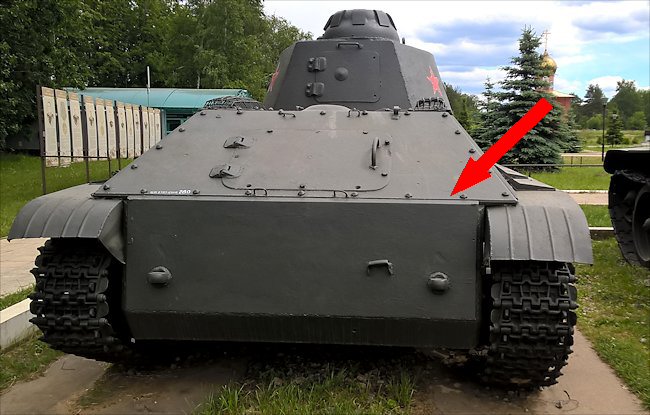
So I will just use a shelf along the inside of the lower hull to fill it in.
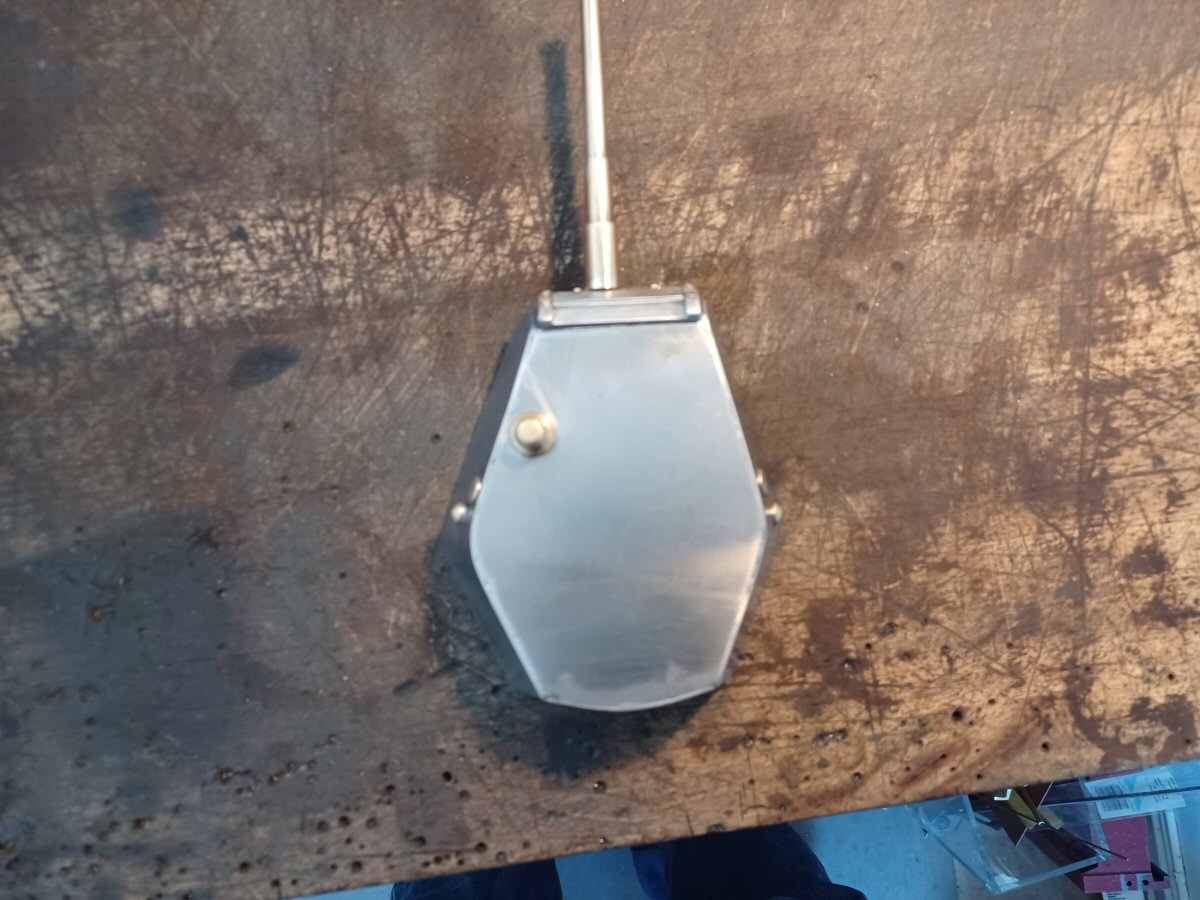
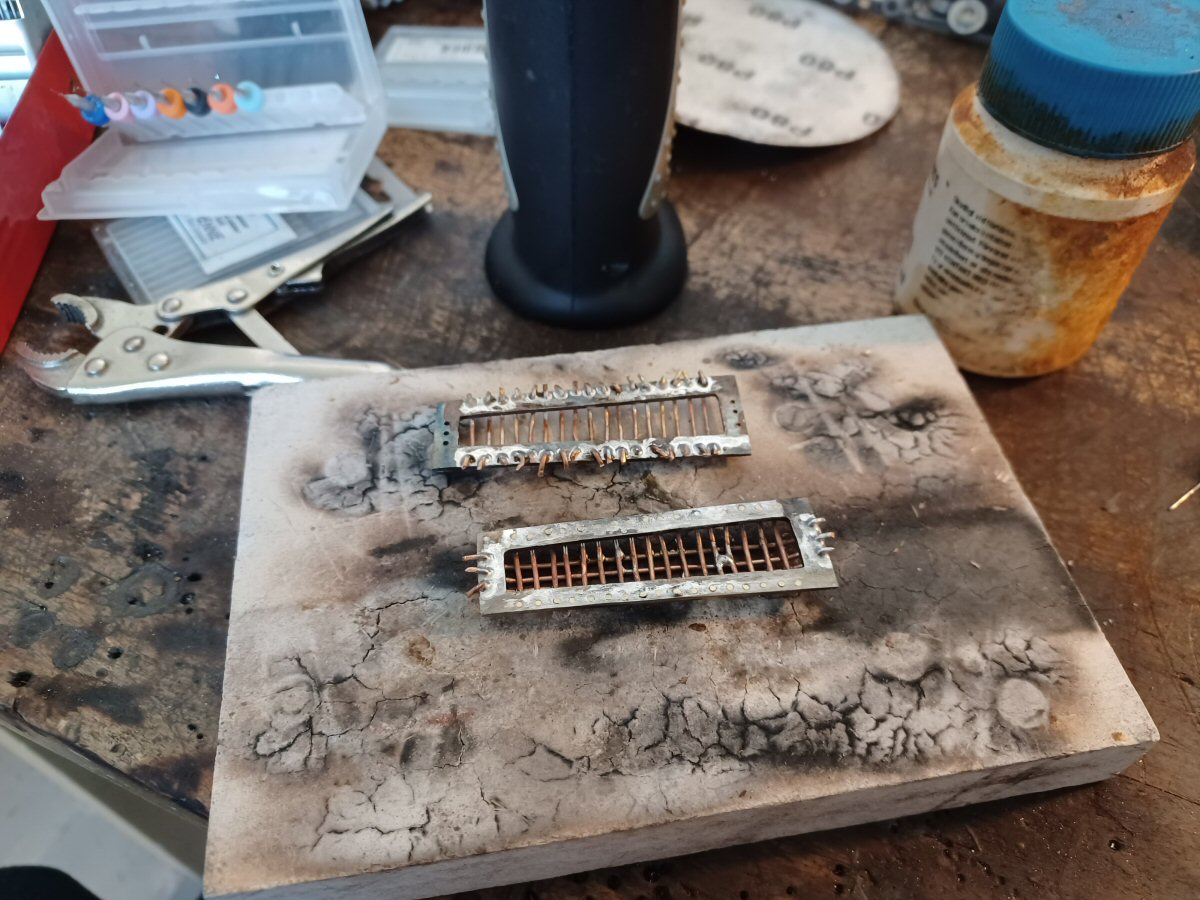
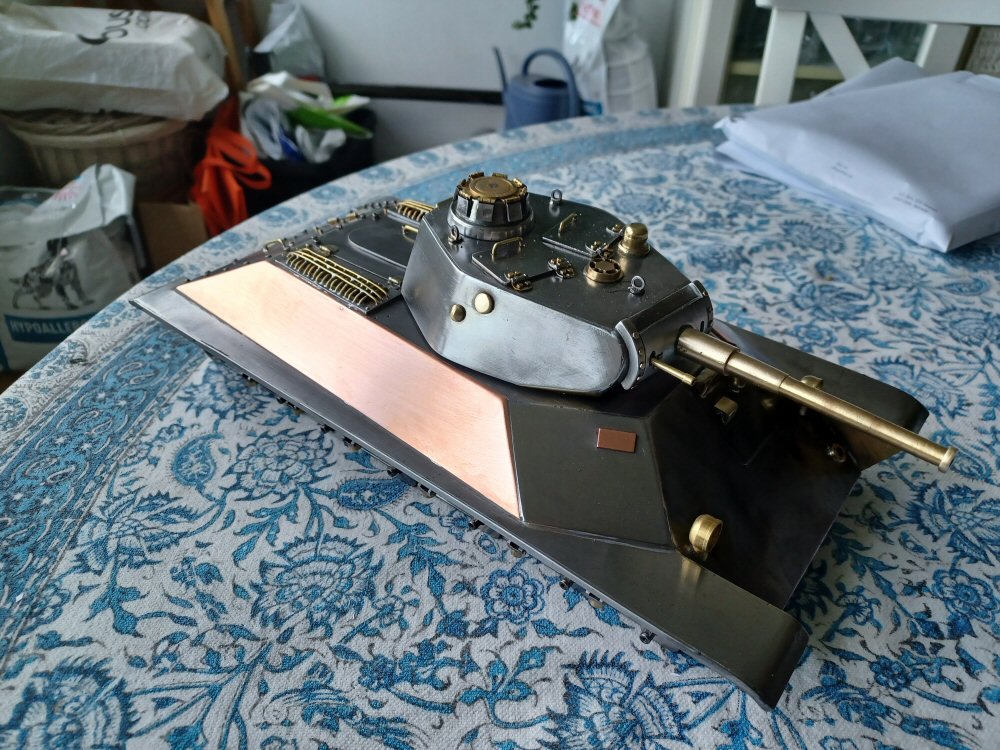
Then vent covers vary between chicken wire and thick bars depending on the photo. I deceided to go fo rthe thick bar look so I fabricated them using solder and steel and a lot of cursing.
And then added some doodahs to the upper hull along the way.
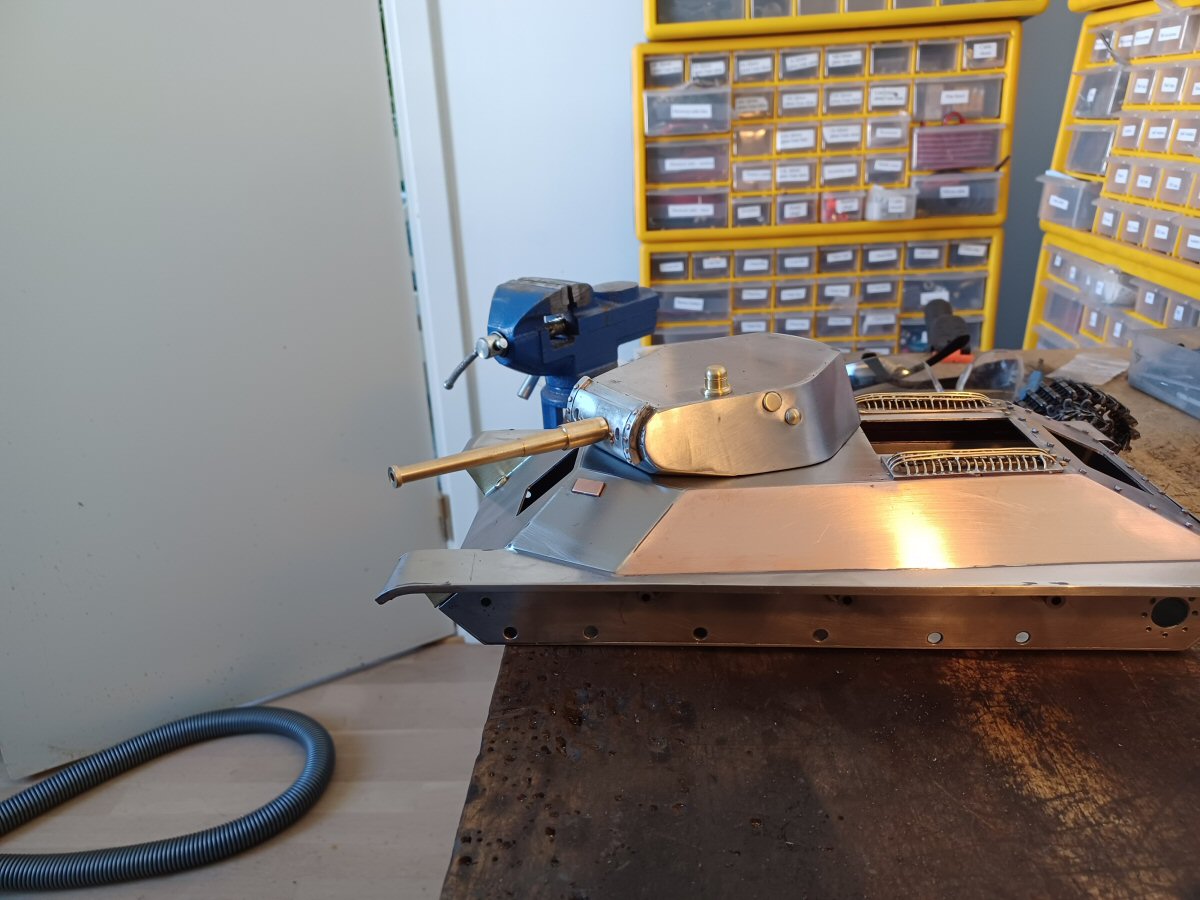
At this point I needed to consider final assembly. I hate doing that and then having to dissamble for paint so I threw a coat of acid on the lower hull to allow for test fitting some biys.
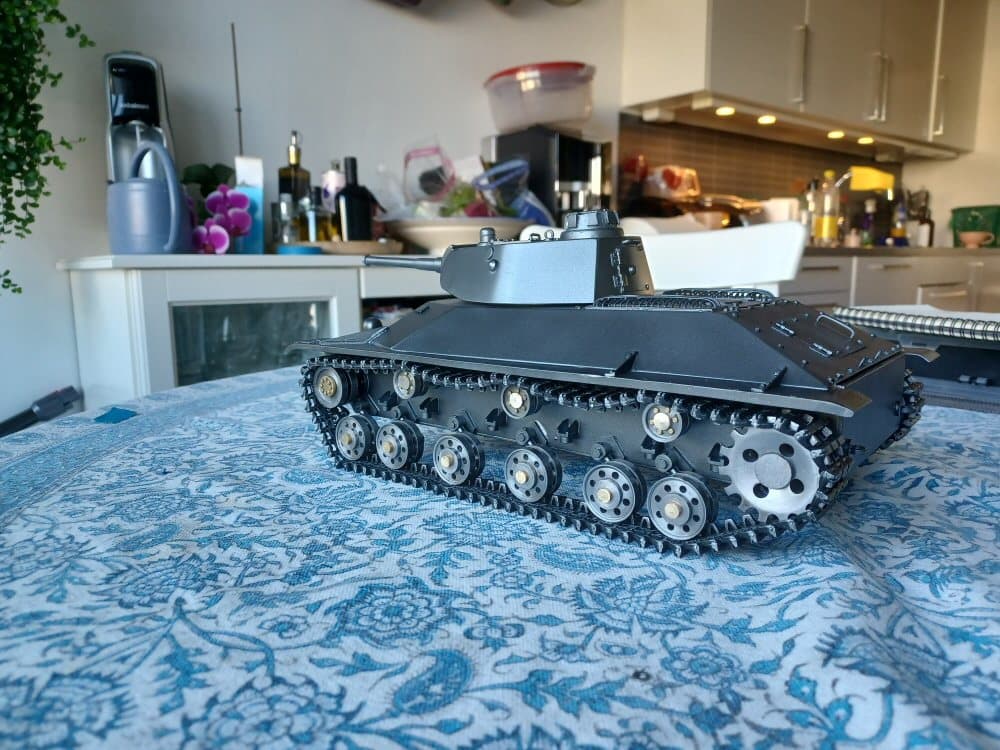
Then I tried on the tracks for fit and they worked very nicely indeed.
And thats where it stands.
next will be to finish the upper hull, make a switch box and charging ports under the rear hatch, prime the whole thing and then start seeing where it goes from there.
Im not really into painting so I will just paint it steel grey to match the other tanks on the shelf.
P
10 Likes
I always enjoy seeing these builds on here. Interesting subjects, large scales, scratchbuilding, machining and great results, all makes for a good combo
That’s scratch building at whole different level then most. 
That is awesome work, thanks for sharing!
~ Eddy 
If you are into fine art tank painting you need to leave this thread about now!!
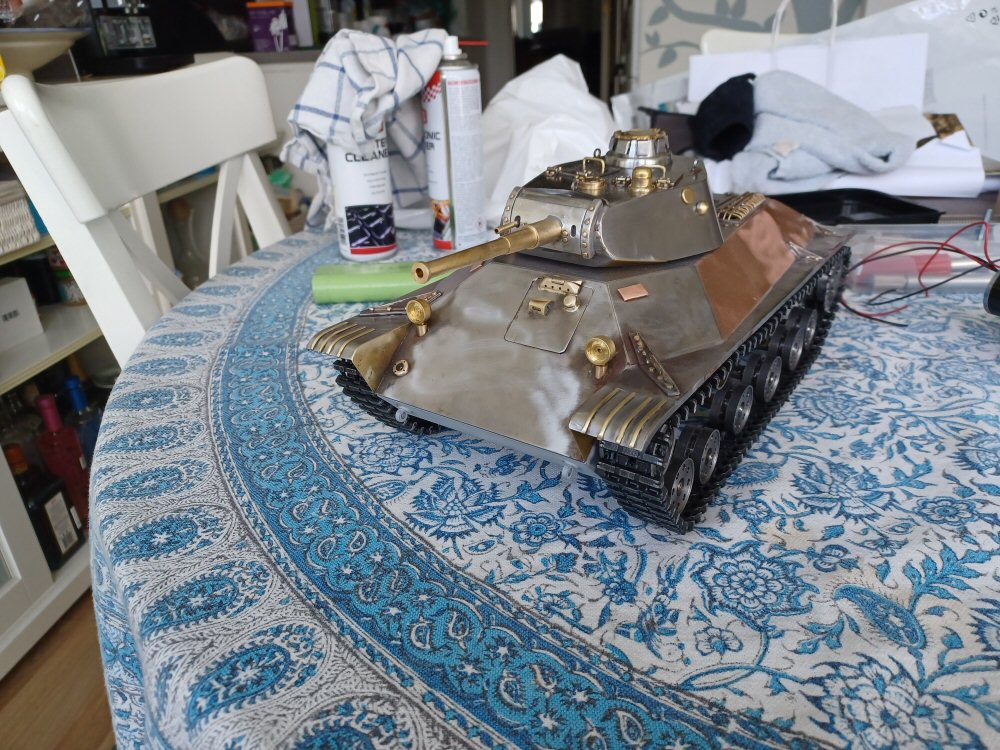
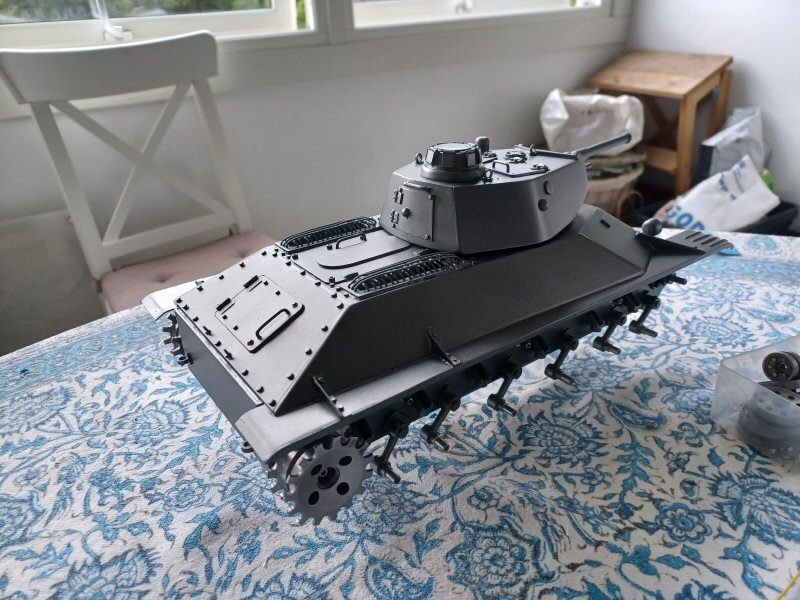
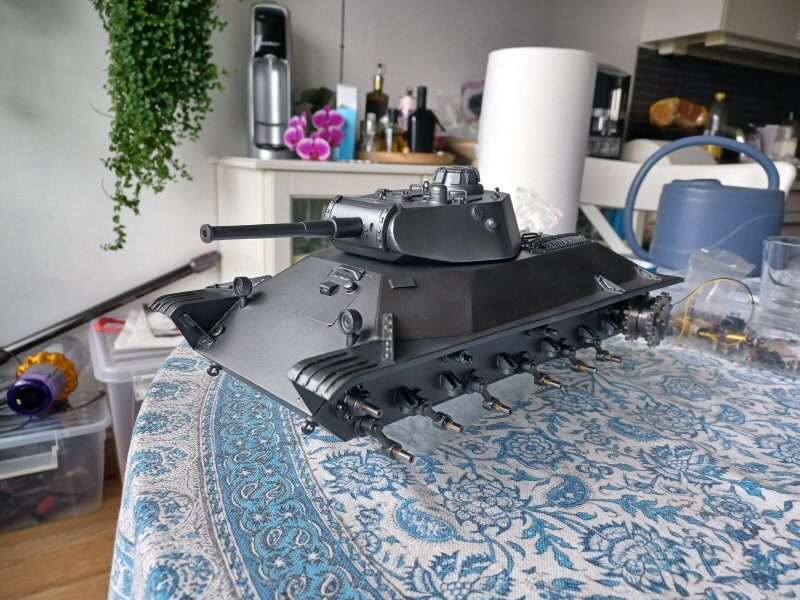
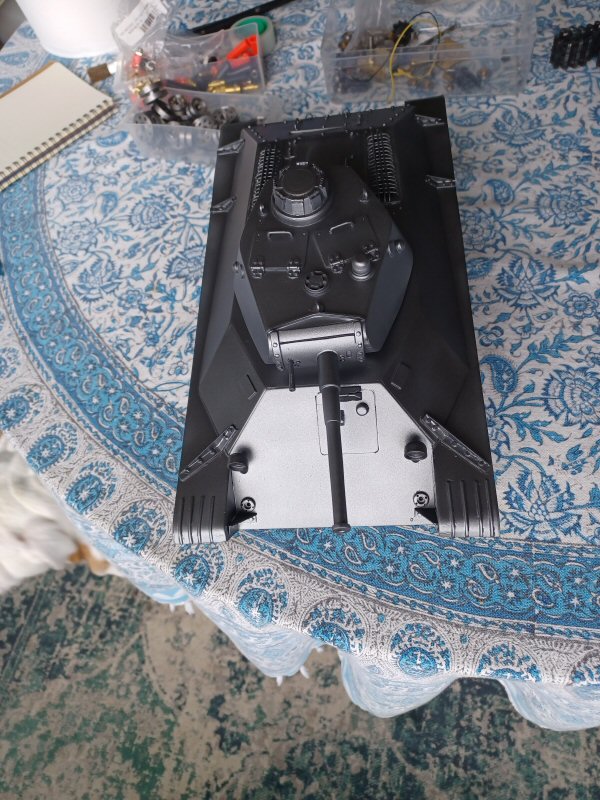
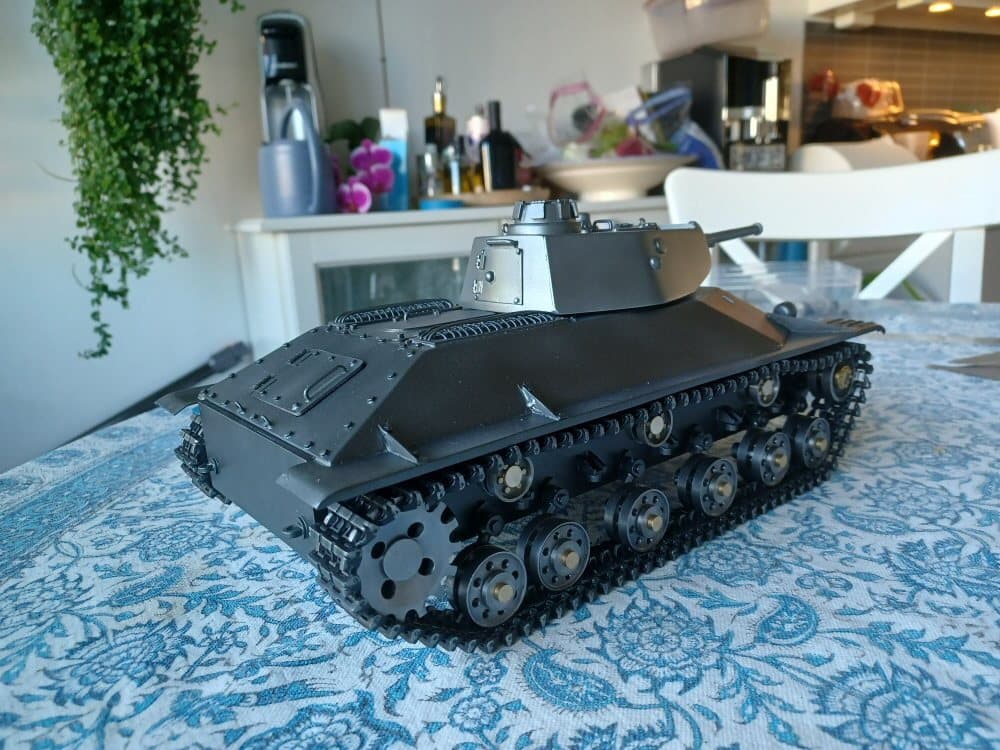
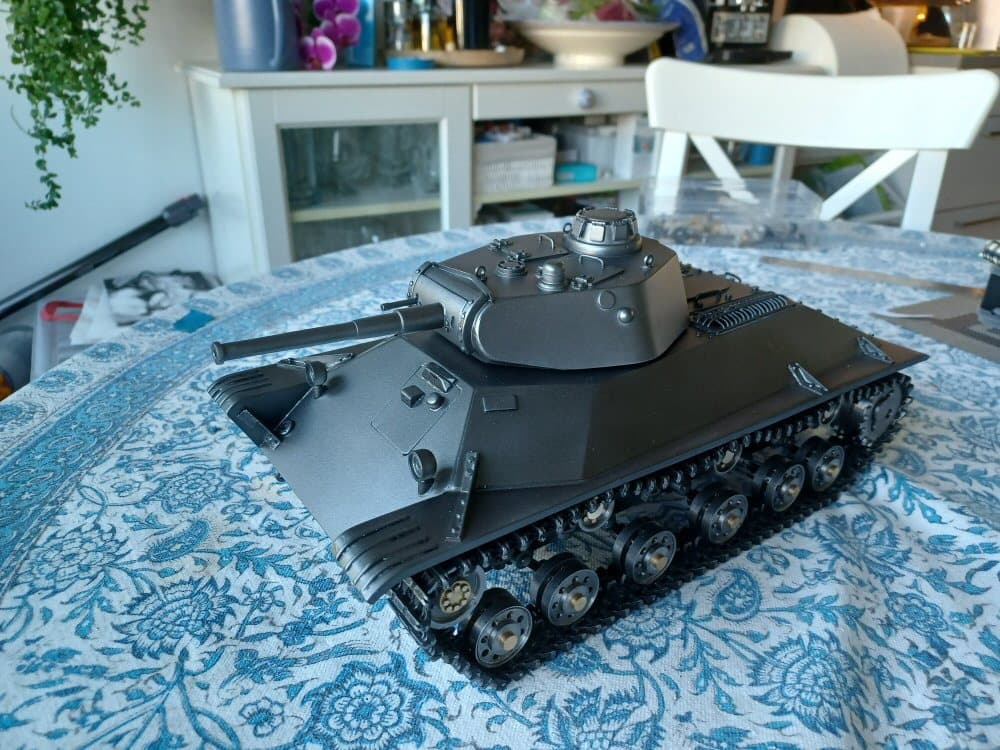
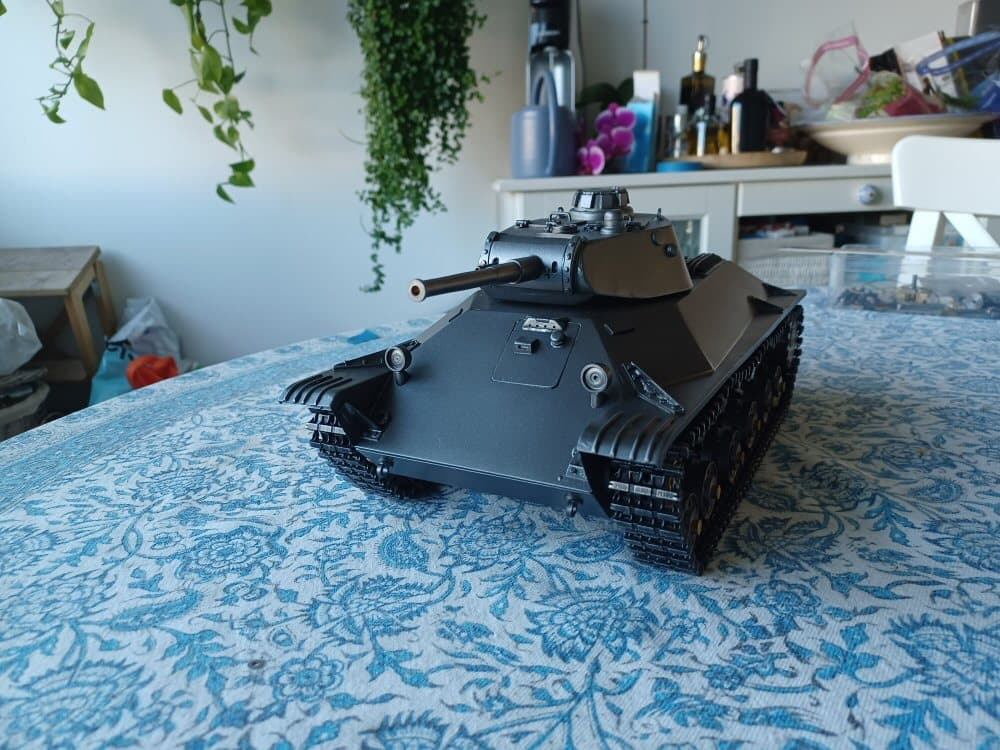
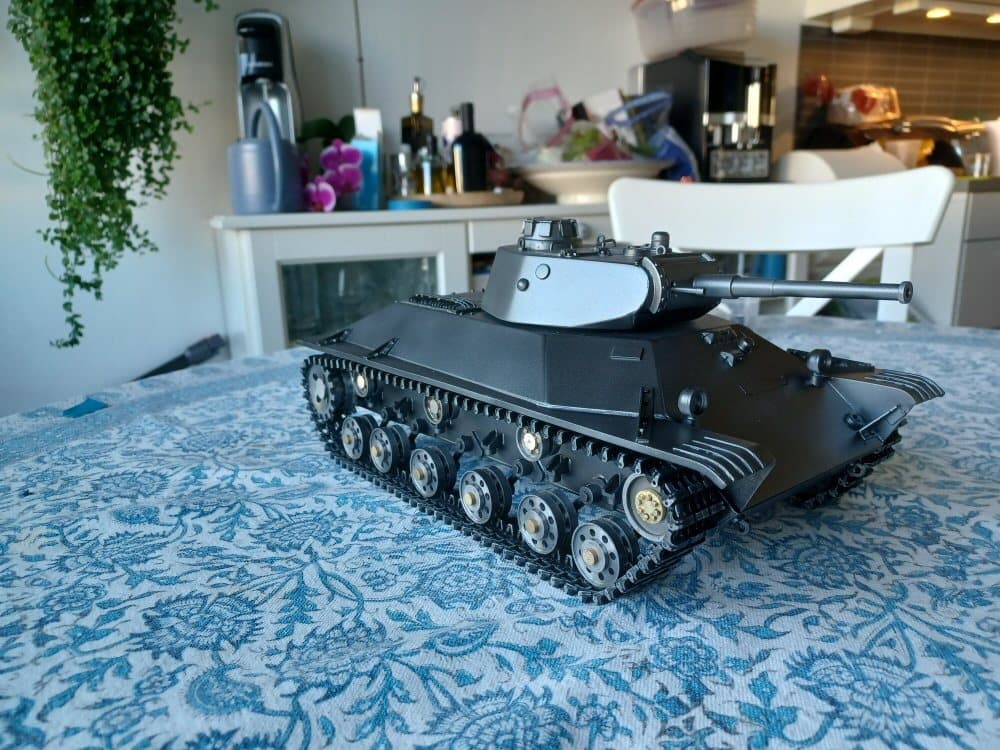
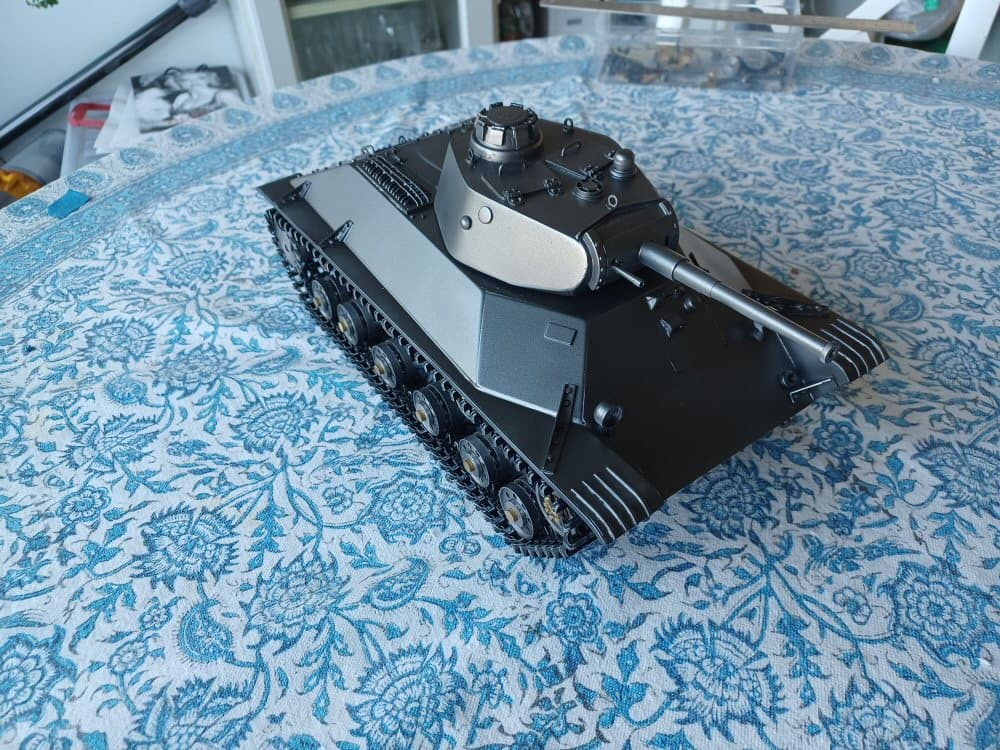
I moved onto final assembly and primed the three main parts of the tank with acid etch.
Then slathered it in gun metal paint from a cheap airbrush so it matches my other tanks.
Then a layer of clear coat.
Then assembly. Motors and drive axles went together fine and I greased up all the bearings as I went.
I noticed a few errors and omissions (accidental mostly) underway but this boat has sailed and I dont care anymore.
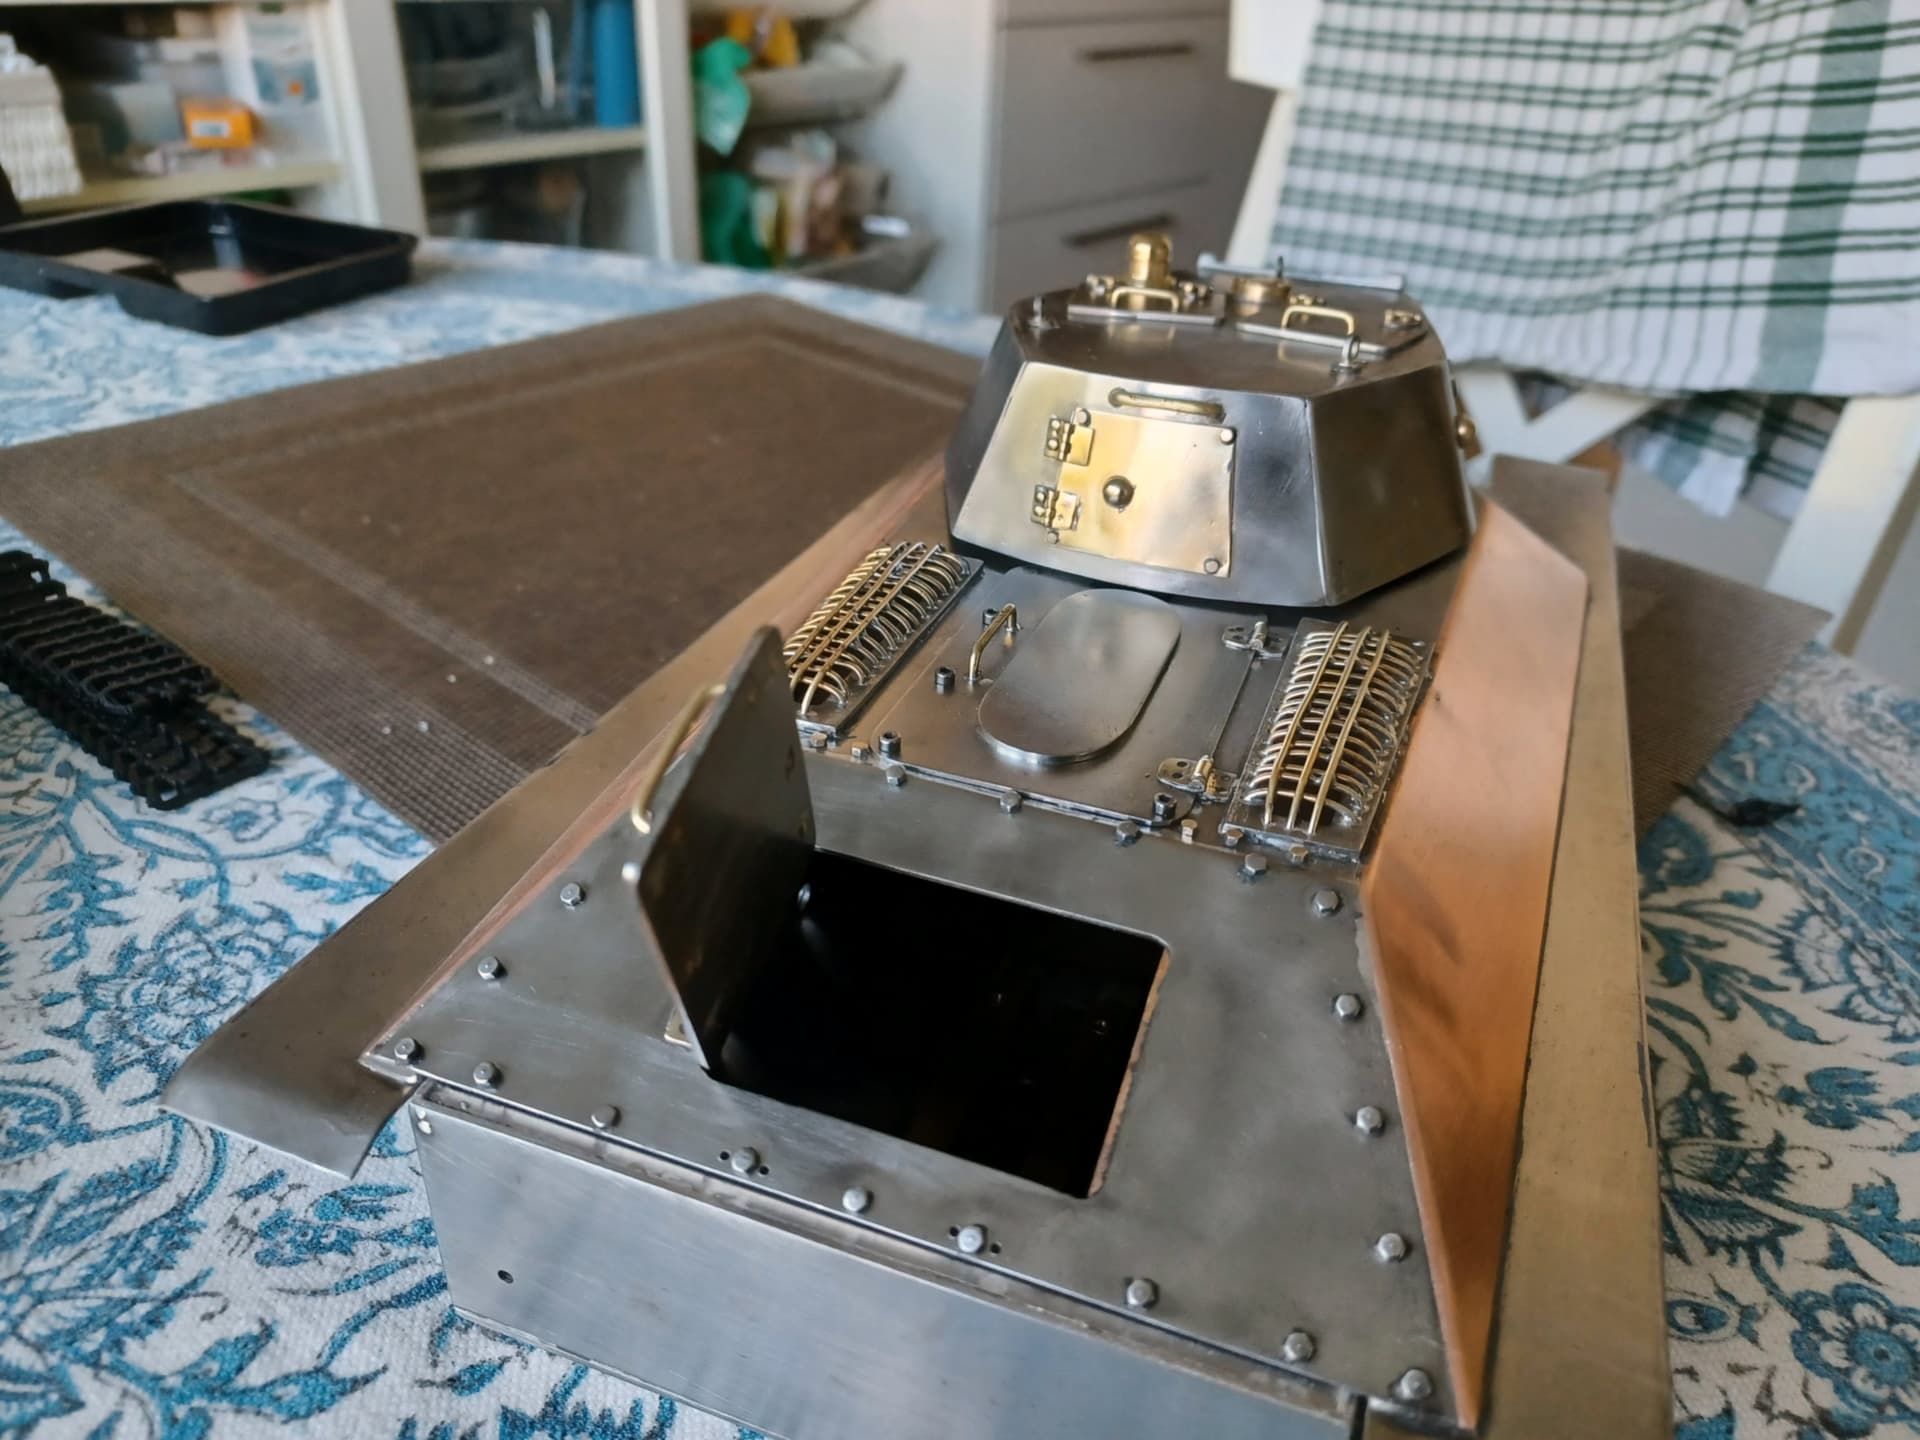
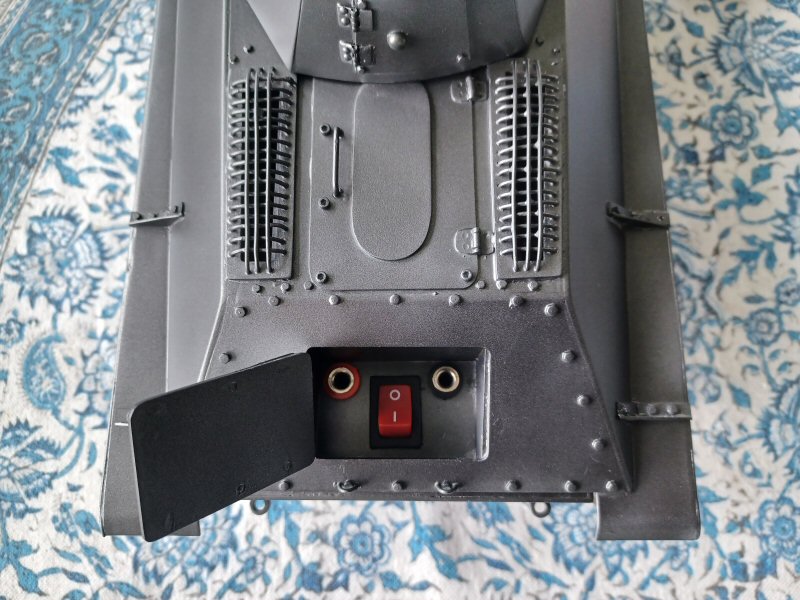
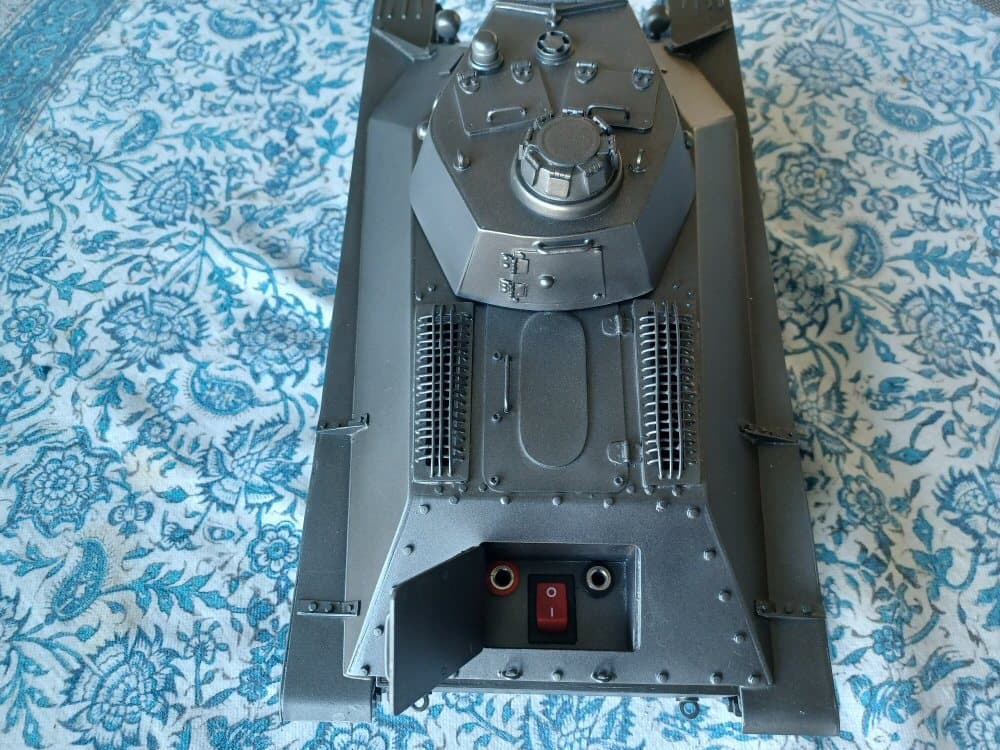
I hate opening tanks to charge them so I mounted a recessed box under the rear hatch and therefore had access to a switch and a set of charging ports. I will wire them in when I get to that stage.
I still have not tackled the hubcaps. I have been dodging it but it needs to be done now.
3 Likes
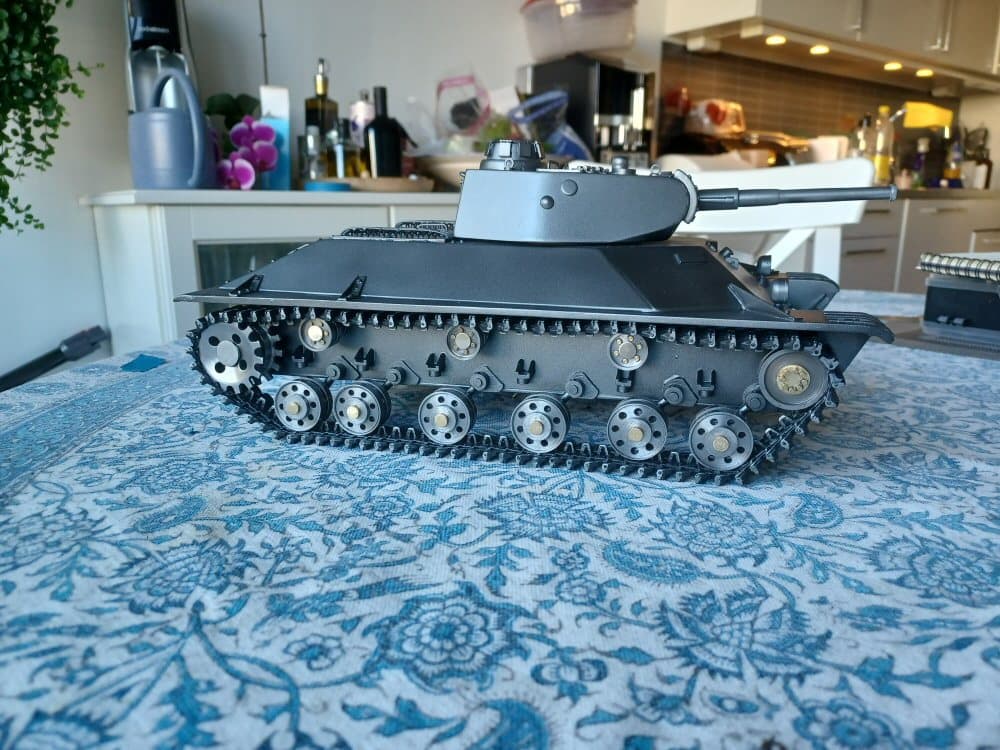
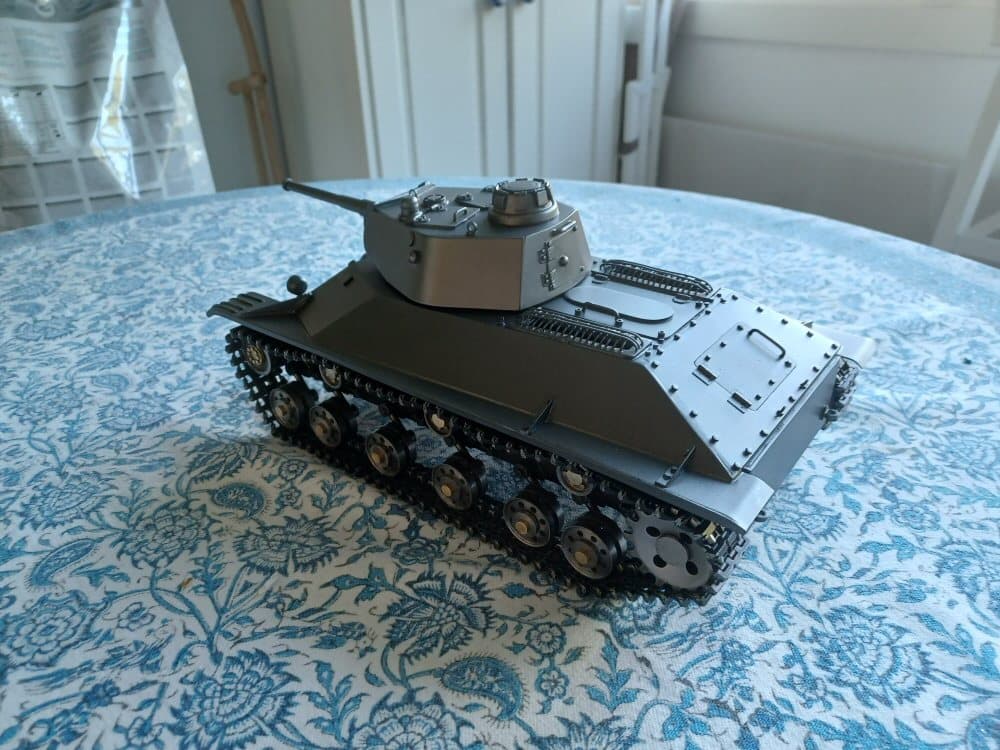
Finally wrapped up construction. All thats left is a headlight lens but I have no plastic to make one.
I take my holidays next week so will attend to electrics and so on after I get back.
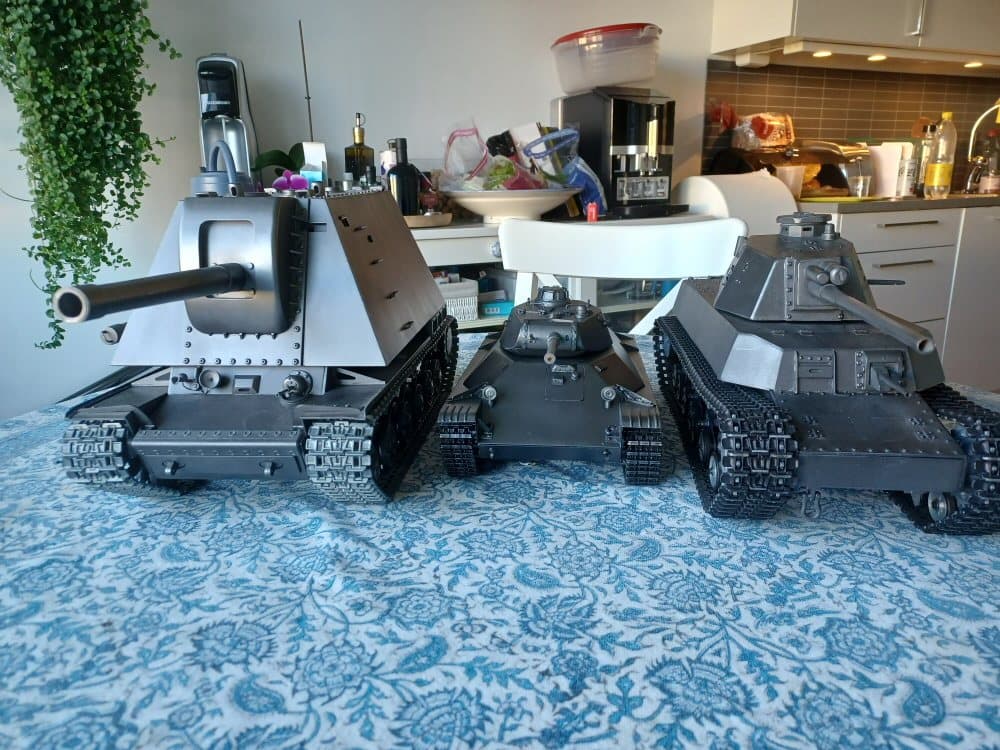
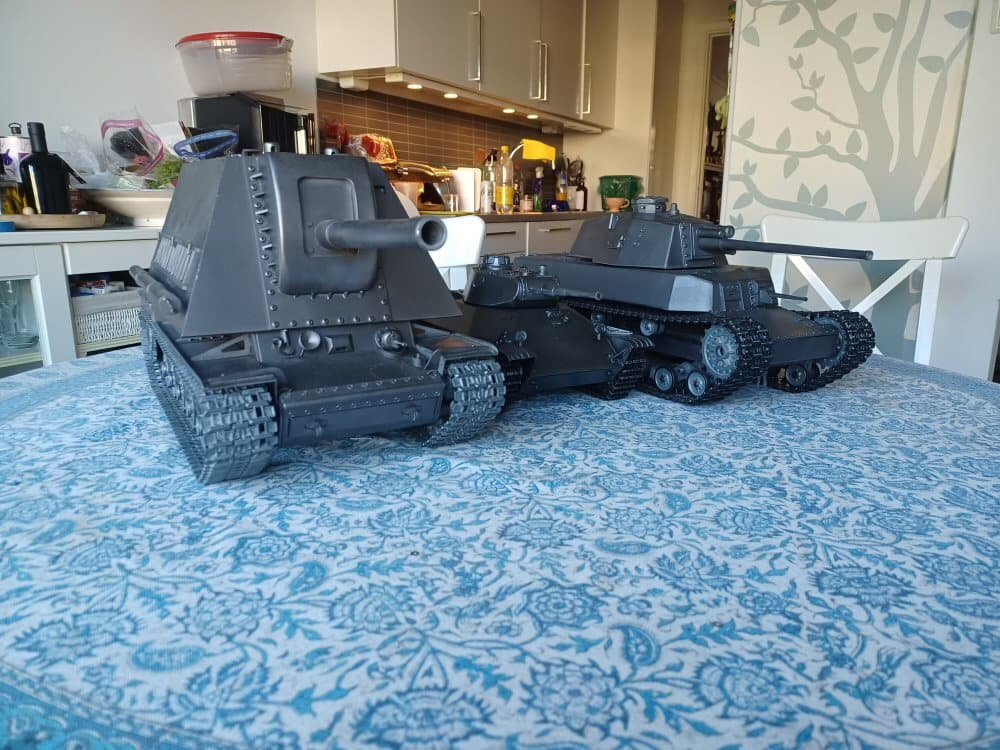
Really glad this one is done. It was a real tiny tank and they are a pain.
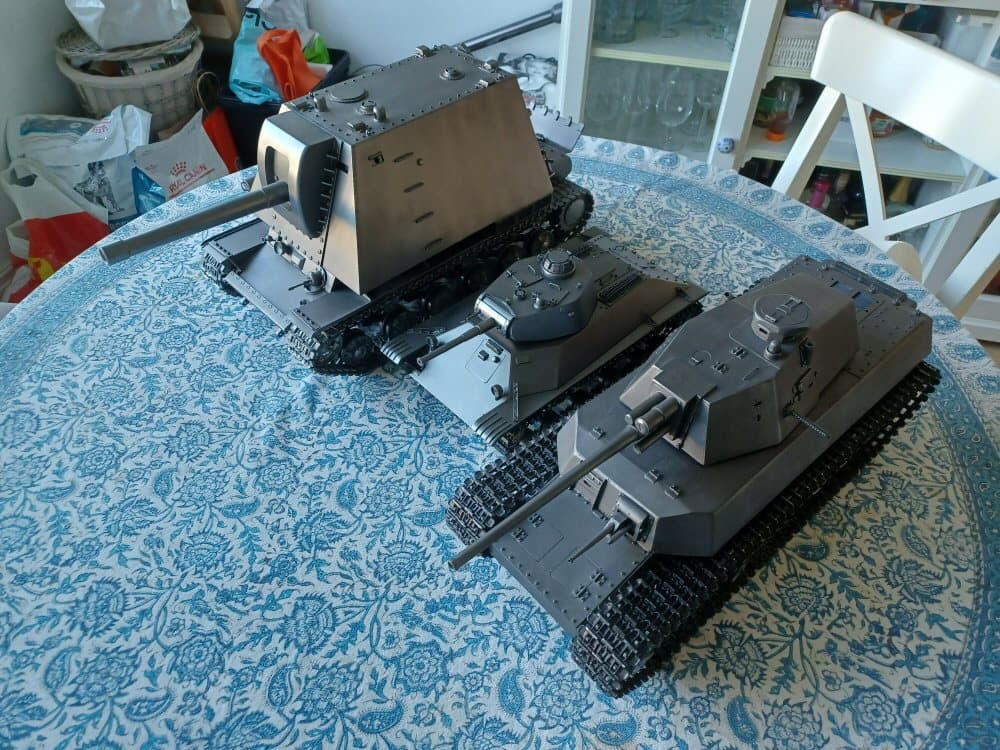
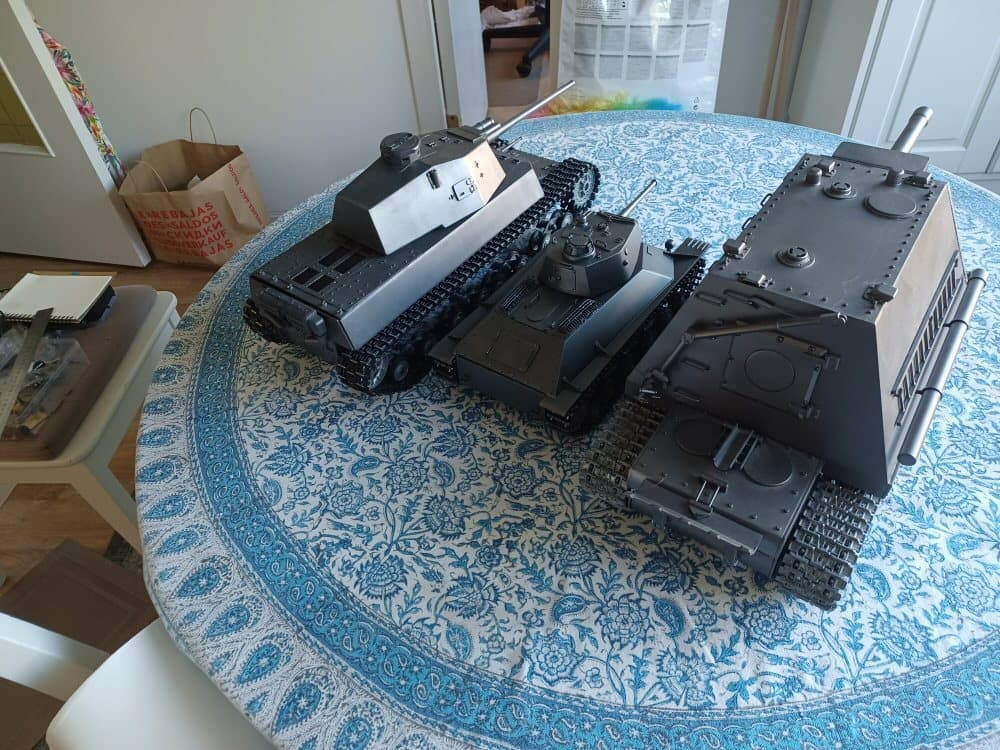
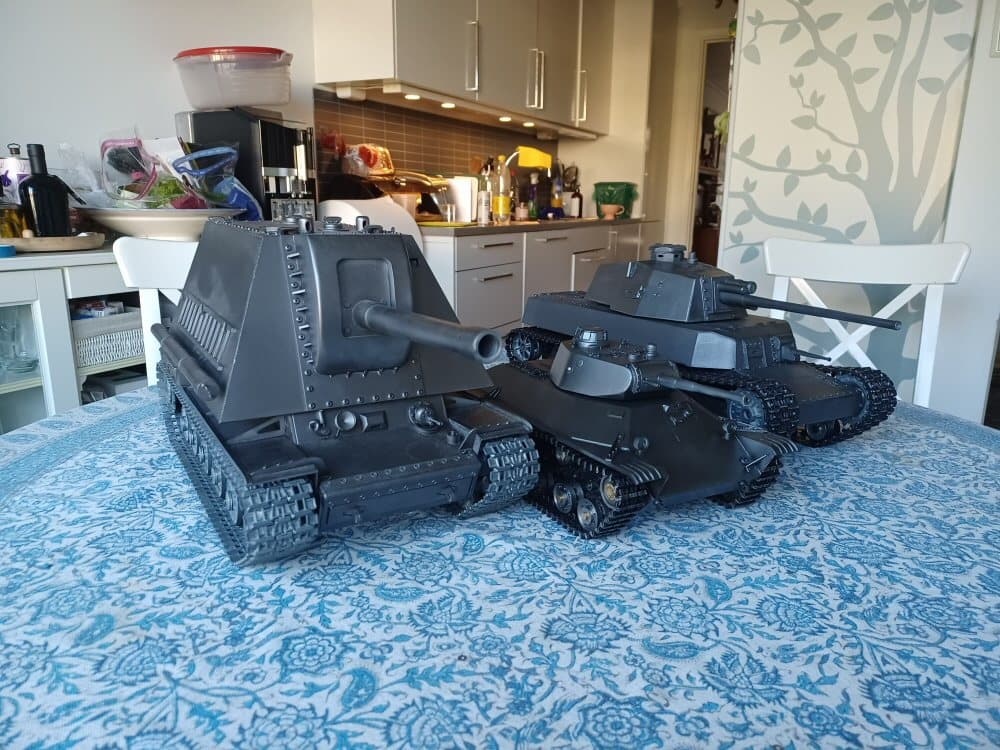
And to put its petite size in perspective…here it is beside a Soviet U-19 and a Japanese Type 5.
P
2 Likes
Thanks Lars, awesome build again. And thanks for the U19, never knew about it 
Model-making in its purest form, brilliant result bravo Lars! Can we see the T-50 moving anywhere? Are the others also motorised? 
1 Like
Lars, one more question, I noticed in one of your pictures in another build a stug III/IV, do you have a buildthread of that too somewhere?
Pretty much speechless … That is real model making in the truest form, made from the tracks up by design, hand and tool. Engineering at the highest level. Do you paint these eventually or keep them bare metal ?