Tamed Panther: “Cuckoo”

With the models I want to finish before starting something new mostly done, I think I can safely start a thread about my next model :slight_smile:

This will be a Panzerkampfwagen Panther Ausführung G of 6 Guards Tank Brigade — the specific tank better known as Cuckoo. Yes, a British Panther :slight_smile: Here’s a column of Churchills:

At the very back is an odd tank for a unit equipped with Churchills. Here it is as it came nearer the photographer:

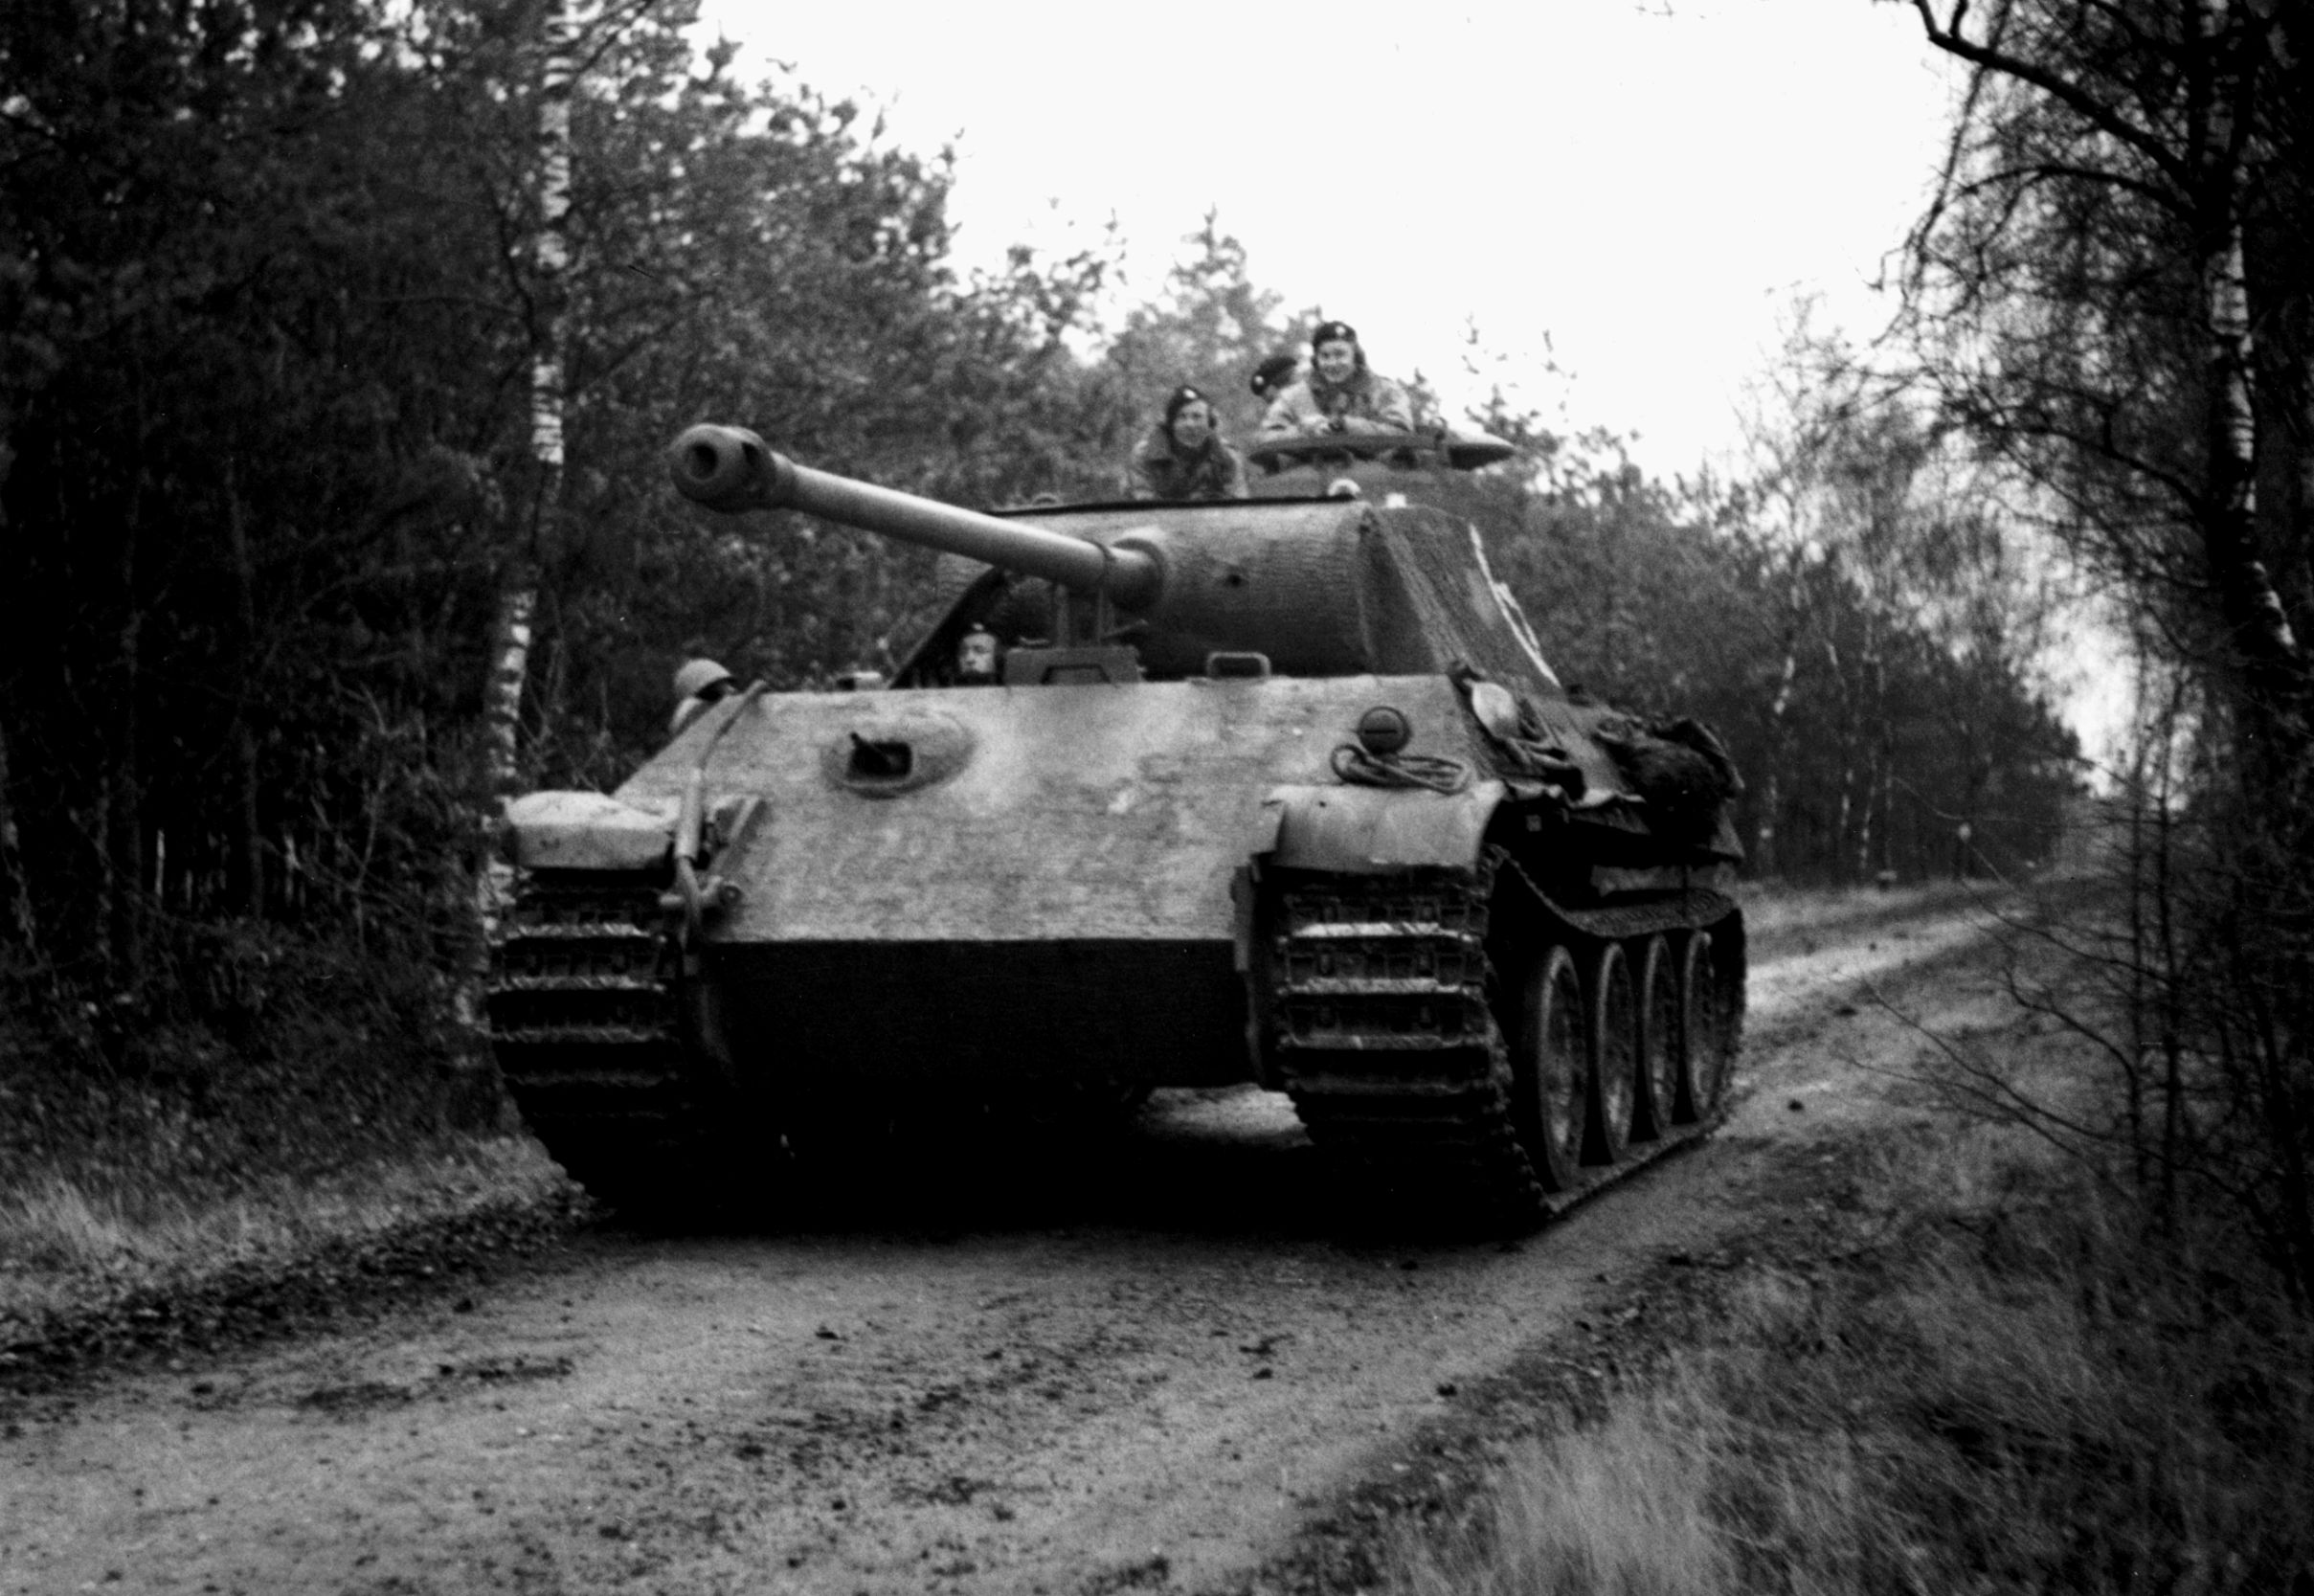
Obviously a Panther Ausf. G with Zimmerit, and clearly not in German colours, with Allied stars and British tankers crewing it.

The history of this tank is pretty interesting. Using captured enemy equipment is not an extraordinary thing in war, but the Allies generally had little need to use German armoured vehicles because they usually had plenty of their own. In early October of 1944, 6 Guards Tank Brigade was in the southeast of the Netherlands, and during the fighting around the village of Overloon (where there is now a large museum), discovered an abandoned Panther that belonged to Abteilung 2107 of Panzerbrigade 107. Because it was in running order, it was incorporated into the brigade staff. Going by photos, it was repainted in (presumably) British SCC 15 olive drab, with large Allied stars on it and the name Cuckoo painted on the turret sides. This name probably refers to it being a vehicle in the wrong nest, so to speak, but also fits with the naming of HQ vehicles in 6 Guards Tank Brigade, which all had bird names.

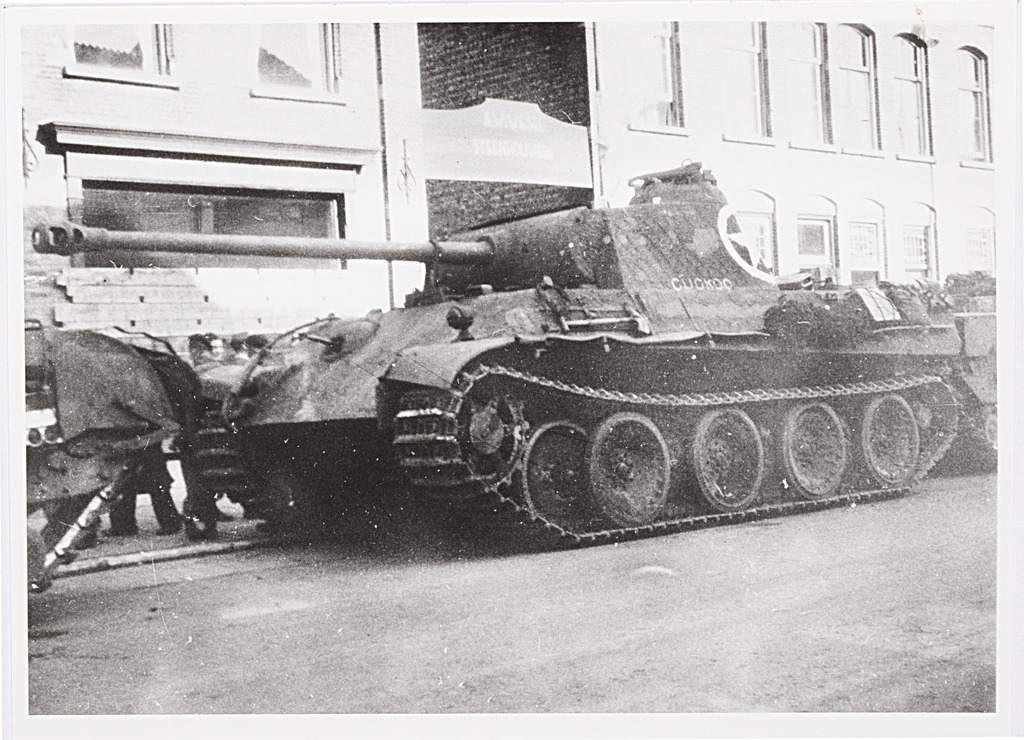
This photo was taken in the Dutch city of Tilburg (at approximately the marked location on this map, though the street pattern changed drastically since the war), which is not too far from where the tank was found, and nicely shows the name. It also shows a good deal of damage to the side skirt mounting rail. The other side was a bit more intact:

Cuckoo was first deployed in an attack on Geijsteren Castle, near where it was captured:

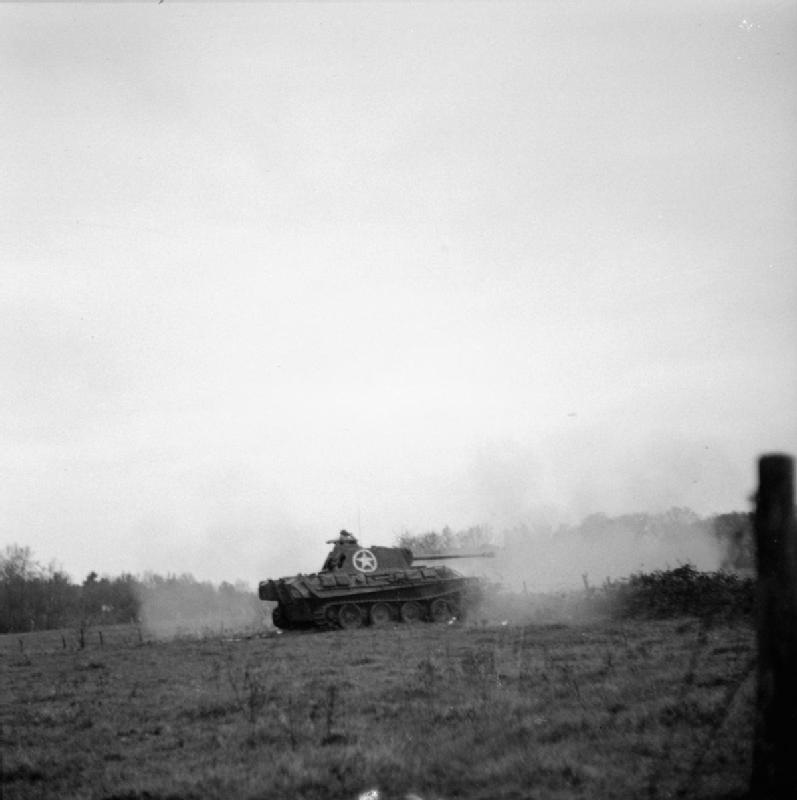
Apparently, it was valued highly by its new owners because its 75 mm gun proved much more accurate than the 95 mm howitzers of the Churchills that also took part in shelling the castle.

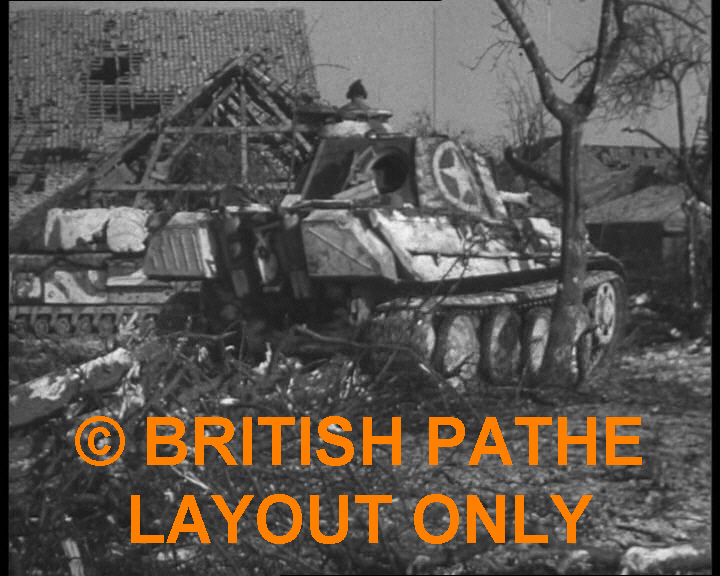
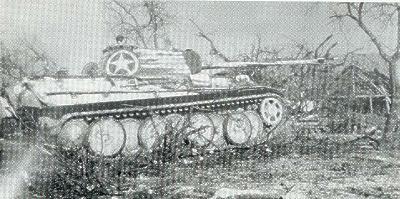
Cuckoo remained in use until the Battle of the Reichswald in February 1945, when the fuel pump failed somewhere east of Kleve, and because no spares were available, the tank had to be abandoned once more. This picture was taken in the town itself:

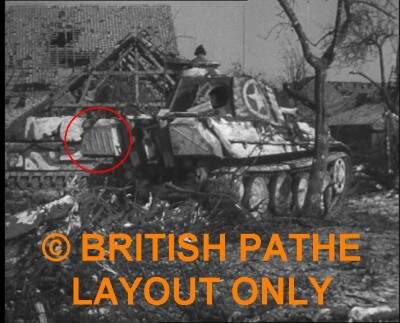
And here is film shot of the tank, in winter camouflage, which dates it to January of 1945 because it’s known the tank was painted this way for Operation Blackcock in that month:

12 Likes

Great story to portray!
I have started the same build. Pay attention that front zimmerit is damaged and that one rear box had vertical stripes rather than “X” shaped ones.
Good luck!
Marko

6 Likes

Thanks for the heads-up, though I had already noticed those details as well :slight_smile: I’ll be (and have been) looking closely at the photos and videos available to work out what details I need to add and/or remove from the kit, because with projects like these I want to build a model as close as I can make it to the real thing :slight_smile:

5 Likes

To build the model, I bought this Dragon kit:

Cuckoo was an early Ausf. G, so this kit looked like a good choice. The box is well-filled with sprues and stuff:

It’s the latest incarnation of this particular kit, and comes with fairly extensive etched brass, a turned aluminium gun barrel, twisted copper wire for tow cables and some 3D-printed parts.

The tank was apparently produced by MNH, which those more knowledgeable about the Panther than I am, can tell by the Zimmerit pattern. Normally, I would just make Zimmerit myself from putty, but because of the details of the pattern are important to building an individual tank, I also bought an ATAK set intended for Dragon kit No. 6268 (mine is 6622, but I highly doubt any major parts are different):

The ATAK set includes a paper-thin resin sheet with Zimmerit “panels” you have to cut out, as well as a bag with some more three-dimensional parts like a gun mantlet and stowage bins with Zimmerit on them.

Also in the photo is an Ultracast British tanker figure who will likely end up in the commander’s cupola :slight_smile:

The instructions would have you start by fitting the suspension arms, but because there are Zimmerit parts for the lower hull sides, that is what I actually started with:

I attached plastic part A20 (the panel that pushes track pins back in), then cut out the Zimmerit for the hull side. I had to enlarge all three holes in it (for A20 and the two round things poking through) a little, but otherwise this was pretty painless. Another good thing about starting with these, I realised as I was cutting them out, is that if you mess up, it will all be safely hidden behind the wheels later :slight_smile:

7 Likes


Have you seen any of these? The others in the collage appear to be a US operated Panther

7 Likes

Hi Jakko, thanks, re. new US pics, useful top view of turret too.
I wonder if Hobby Boss, Tamiya, Airfix or other do a suitable G with Zimm.?
I have a Tamiya one but still needs Zimm.

N.B. The writing of name CUCKOO appears to be in yellow.
Cheers, Andrew T

2 Likes

The top two photos are stills from the video I posted, and I agree that the others are all of a Panther in American service.

[quote=“ANDREWTOMLINSON, post:6, topic:48032”]
I wonder if Hobby Boss, Tamiya, Airfix or other do a suitable G with Zimm.?[/quote]
Don’t ask me, Panthers are not my special subject :slight_smile:

I do know Tamiya make paper Zimmerit you cut out and paste on, and apparently it looks quite good.

That’s my thought as well, because it generally looks darker in photos than the stars on the turret do.

1 Like


I have this Kagero publication that also offers decals for those vehicles in 1/35, 1/48 and 1/72.
Their interpretation is that Cuckoo is written in light blue, as a diamond symbol on the turret rear

5 Likes

Tamiya requires zimmerit and PE and suitable tracks, as vinyl aren’t good for sag (Panther, T55…).
I started with Dragon late G, and backdated it to early G, added Atak zimmerit. I have zimmerited Panther G, but i guess zimmerit pattern isn’t appropriate (that one will be French Dauphine)

2 Likes

I haven’t noticed a diamond on the turret at all in the pictures I’ve seen of Cuckoo. I will have to look more closely … I know it had the armo of service number 153 on the right rear hull at one point but not later on. As I will probably paint it in winter camouflage (though I’ve not quite decided yet), I would not need to add that, anyway.

As for my model, Dragon is known for instructions that aren’t always as clear as they could be, and though I’m usually not overly troubled by that, I do think that in this kit, far too much is shown simply in place with only a part number pointing to it, which makes it very easy to miss the fact that you have to glue parts on at all. For instance, I didn’t notice that the sponson floors are separate parts (C48 and C49) that must be glued to the lower hull. Those parts explain why, in my first picture of the kit under construction, the Zimmerit doesn’t reach the sponson floor: that’s because that isn’t the sponson floor. Due to this, I had to cut away a sliver of the Zimmerit on both sides to make room for the floors. Had I noticed them earlier, I would have installed them before fitting the Zimmerit.

But they’re on, as are the suspension arms. I cut the torsion bars off those because I don’t see the point of working suspension at all (as an aside, the instructions don’t even tell you that you could build the suspension as working if you want to …) and those lengths of plastic rod will come in handy some day :slight_smile: I glued the Zimmerit to the rear plate before installing that in the lower hull, which proved to be a good choice. It took a lot of dry-fitting and fettling before the Zimmerit went on as it should.

However, something gives me the impression that the upper hull fit exactly as it should, but I can’t quite put my finger on it …

:wink:

4 Likes

Forgive me sticking my nose in, but to me it’s inconceivable that they would have left the tank in yellow; their very survivability on the battlefield would depend on not being mistaken for a Panther from its rightful owners. They simply must have repainted it I’m sure.

2 Likes

Andrew was referring to the name CUCKOO painted on the turret sides. In several pictures it’s clearly not as bright white as the turret stars, so it was probably painted a different colour. My thoughts were also that it was yellow, but following Marko’s message above with the Kagero book, I’m wondering what the tactical markings colour for 6 Guards Tank Brigade’s HQ was — if that was blue, then the name probably was as well.

The tank itself was almost certainly overpainted in SCC 15 olive drab, this being the standard British vehicle colour at the time. It’s far too dark and too close in shade to the Churchills to be in German dark yellow. Not to mention the tank is much darker than the crews’ tank oversuits, which were a medium tan in colour and so would have appeared a similar shade to dark yellow in black-and-white photos:

5 Likes

Ah - mea culpa.

3 Likes

I’ve edited my post to read better.
I’ve never seen a decent rear pic with the diamond on it.

Andrew T

2 Likes

As I say - mea culpa - which is Latin for “Duh”!

1 Like

Great pics

1 Like

I hope that kit comes with the different stowage boxes. You can see on one of the images posted, that “Cuckoo” sports two separate styles of stowage boxes, both early and late production.

1 Like

Glad to see that you are posting here.

2 Likes

It doesn’t, but I had noticed that detail, too :slight_smile: I figure it’ll be easy enough to file off the crossed ribs to replace them with some vertical ones from plastic strip.

That’s a great album. Though probably more for my generation than yours :wink:


3 Likes

If you go on eBay and find the G Paers Tree for RFM’s Panther G (RM-5112); it has both versions.

4 Likes