Thanks, but that’s more trouble and expense than just modifying the part myself ![]()
Also: Cuckoo did indeed have a diamond painted on the back of the turret! What do you know.
Thanks, but that’s more trouble and expense than just modifying the part myself ![]()
Also: Cuckoo did indeed have a diamond painted on the back of the turret! What do you know.
Chaps,
You might be barking up the wrong tree a bit here. Just to recap first - and I appreciate you may well have a grasp on this - but others might not; a Brigade is a formation in Brit Army parlance, and a formation is composed of units. A unit is a regiment or a battalion. Two or more units , in a tactical grouping make a formation, in this case a Brigade. Just for info, two or more Brigades forming a tactical grouping make a Division.
If I’m teaching you to suck eggs as the saying goes, then my apologies but I am aware that British Army organisation, leavened as it is with historical and traditional form and precedence can be difficult to grasp.
In this case, 6 Guards Tank Brigade – formed incidentally from 3 battalions of Foot Guards (Infantry) converted to armour, consisted of
4th Tank Battalion Grenadier Guards
4th Tank Battalion Coldstream Guards
3rd Tank Battalion Scots Guards
The Arm of Service numbers allocated in the same order above were:
152
153
154
A brigade needs a command and control staff (with a supporting Signals Squadron) and that is a Brigade HQ. The AOS number for 6 Guards Tank Brigade was 151. The Brigade staff component would be quite small and consist – vehicle-wise – probably 3-4 Dorchester ACVs, Bedford QL office trucks and signals wagons, scout cars and possibly a couple of tanks to enable the Brigade Commander to get forward to the battle should he so wish. I can’t quite remember but they may even have been Shermans.
These numbers were painted white on a green square. There was a horizontal white bar at the bottom of the squares which indicated that the Brigade was under the direct control of 2nd Army, not as one might expect, a Division. It does mean of course that the Army Commander could allocate them wherever he so wished, so they could indeed be fighting alongside a Div for a particular operation, or anywhere else for that matter, which was the whole idea of the independent Tank Brigades.
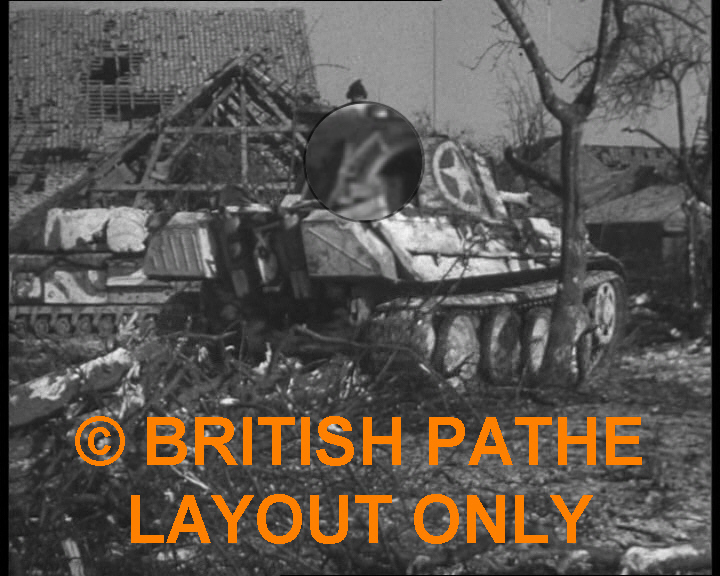
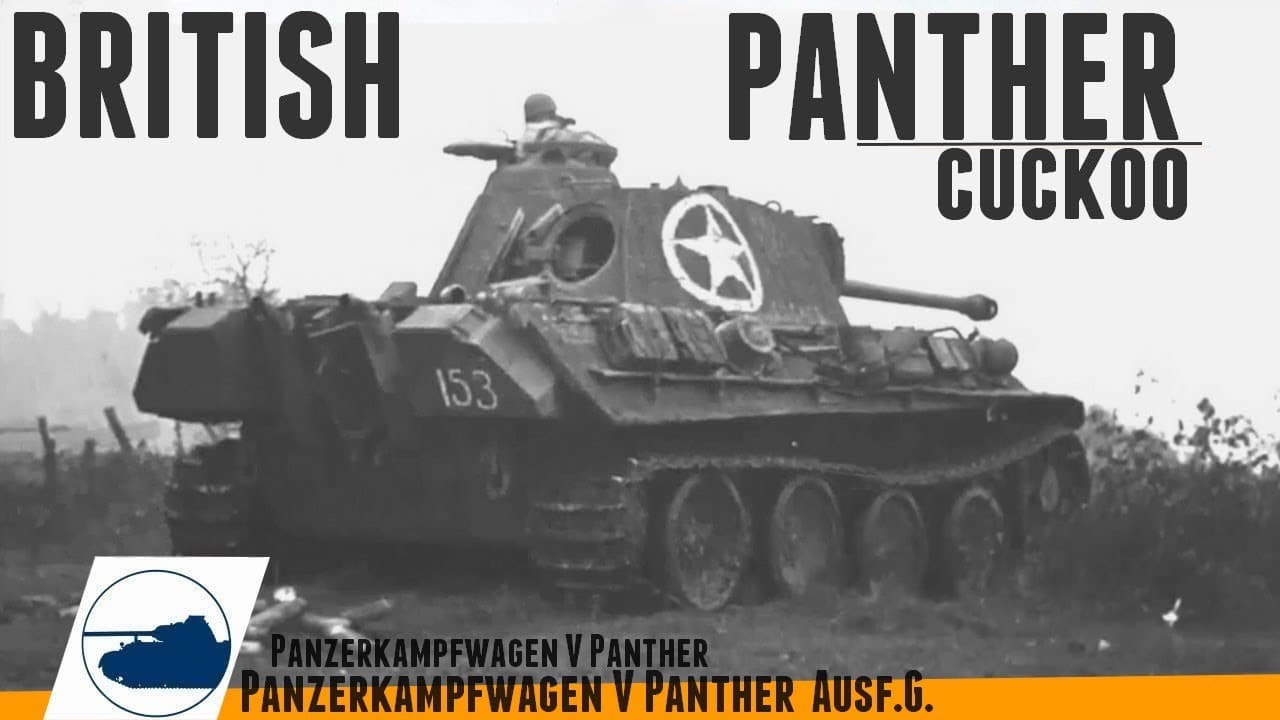
If Cuckoo sported 153 then it belonged to the Coldstreams; if it had a diamond on its turret or anywhere else come to that, then it belonged to the HQ Squadron of that particular Tank Battalion. This would makes sense as such a beast was obviously an anomaly, but it had to go on the books somewhere.
In accordance with the seniority colours allocated to the respective tank battalions, the Coldstreams’ tank names’ colour would have been yellow.
I’ve borrowed this from the Flames of War site; I’m sure they won’t mind.
So from all this, I think that “Cuckoo” would be painted in yellow as first posited. The diamond is unlikely therefore to be blue.
Just remember that the Foot Guards were highly disciplined, almost rigidly so, and any deviance form the regulations would be most unlikely.
Further to my last: I forgot to mention there is some hint that post-Normandy, the Tank brigades were told to change their AOS numbers to that of the Armoured Divisions, viz 50 (Brigade HQ), then 51,52 and 53, all in white on a red square.
However, as at today, I can find no evidence but I am still looking(!)
Definitely 4th Bn Coldstreams then; I imagine painting the full square with bar was not appropriate at the time (they were probably busy!). The diamond indicates HQ Squadron as mentioned, and is probably in yellow as is the tank’s name.
Good pic.
Thanks for the explanation. Anything above about battalion level is generally out of my area of interest, and in fact I often find myself largely disinterested in which units did what — making typical war histories hard to read for me because I just can’t keep all the units straight ![]()
What you explained helped a lot in confirming the colour of the diamond on Cuckoo, and therefore almost certainly also the name.
The number was for some reason removed later, as it’s not visible in photos of the tank in its later career. I get the impression it was removed together with the whitewash, perhaps.
'Glad to help out; it’s only taken me 45-odd years to get my head around most of what and how the British Army is organised. This is actually as a result of my working primarily in Formation HQs so one simply had to understand the organisation, both upwards and downwards as it were.
Anyway, if I’ve helped de-mystify some of the variables, then I might go and have a gin to celebrate(!)
It also means that Kagero appear to have confused themselves, but that’s not surprising perhaps.
on behalf of the “soon to model Panther Cuckoo”, thanks for clarification!
I didn’t quite express myself properly here; what I meant was that the squadron identifiers - ie the geometric shapes would have been yellow, in accordance with the small pic from flames of War.
Tank names, serial numbers etc would/could have been in white, however, as assessed earlier the tank name looks a bit darker than the star so was probably in yellow.
Just for interest, other avian tank names within the Battalion HQ were Seagull, Eagle, Cygnet, Ostrich; there was also a Recce Troop with Stuarts named Snipe, Peregrine, Hawk, Kite, Falcon, Osprey, Flycatcher and Merlin.
As an addendum, and I know there’s no image of Cuckoo, but here’s a selection of great Churchill pics, including extensive coverage of 6 Guards Tank Brigade from Normandy to Germany:
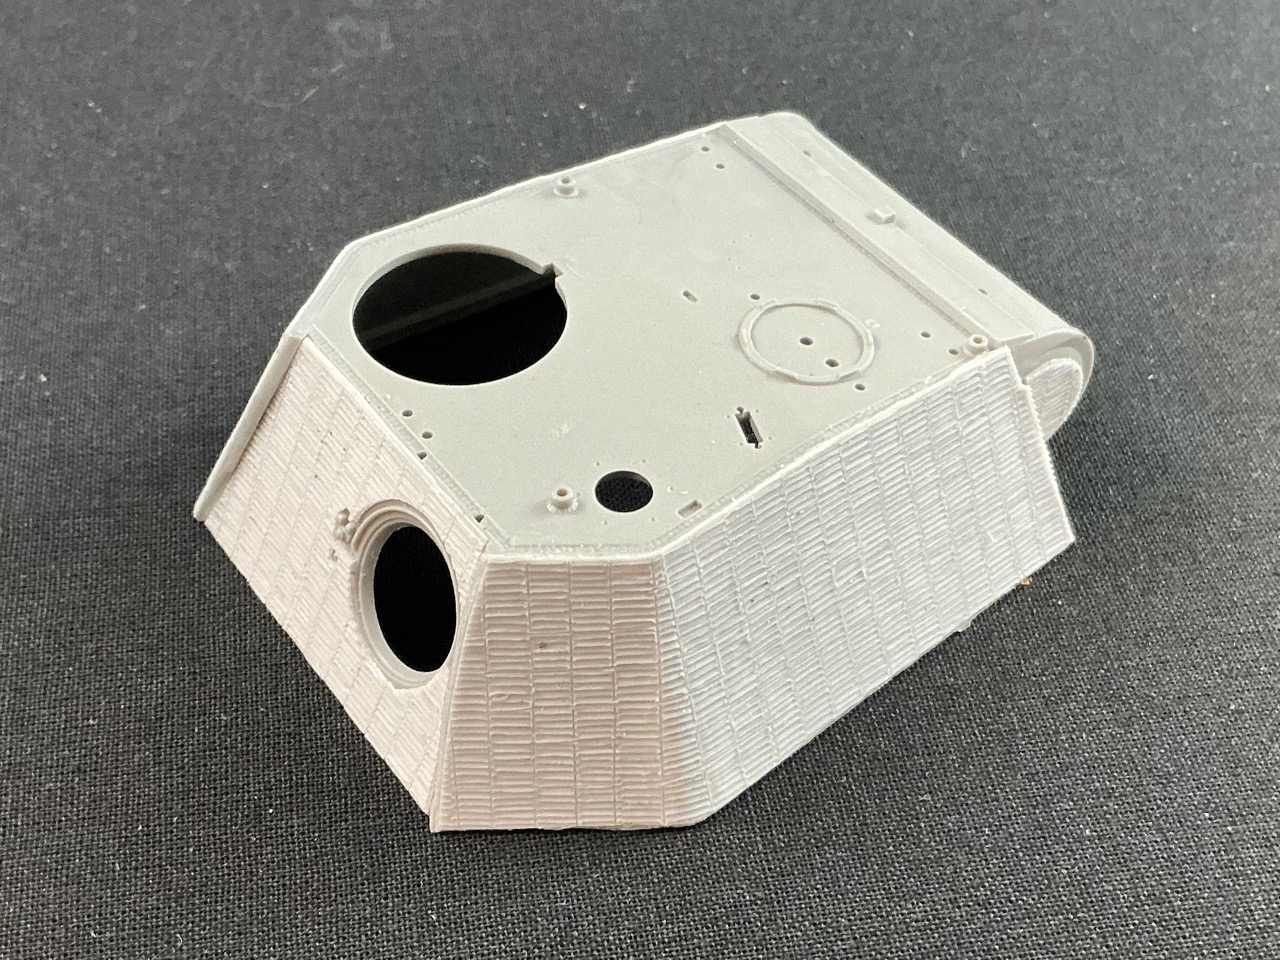
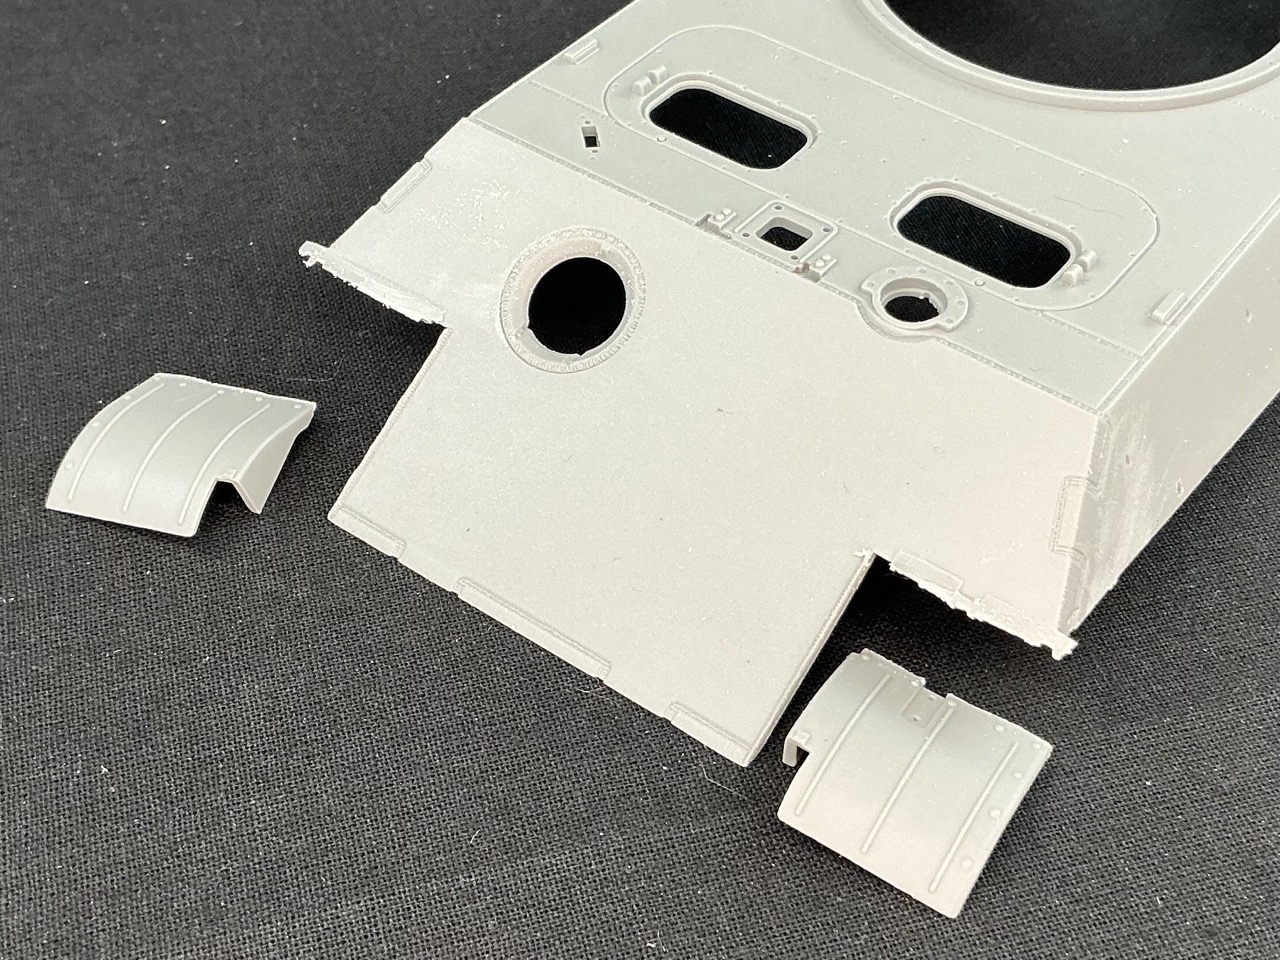
The Zimmerit is now also attached to the turret:
That was not as straightforward as it looks. The piece for the back required a lot of dry-fitting and fettling again, because I had glued the back wall into the turret first. With hindsight, it would probably have been easier to glue the Zimmerit to the back wall first, so that I could have trimmed it to match the chamfer on the back wall part once the glue had dried.
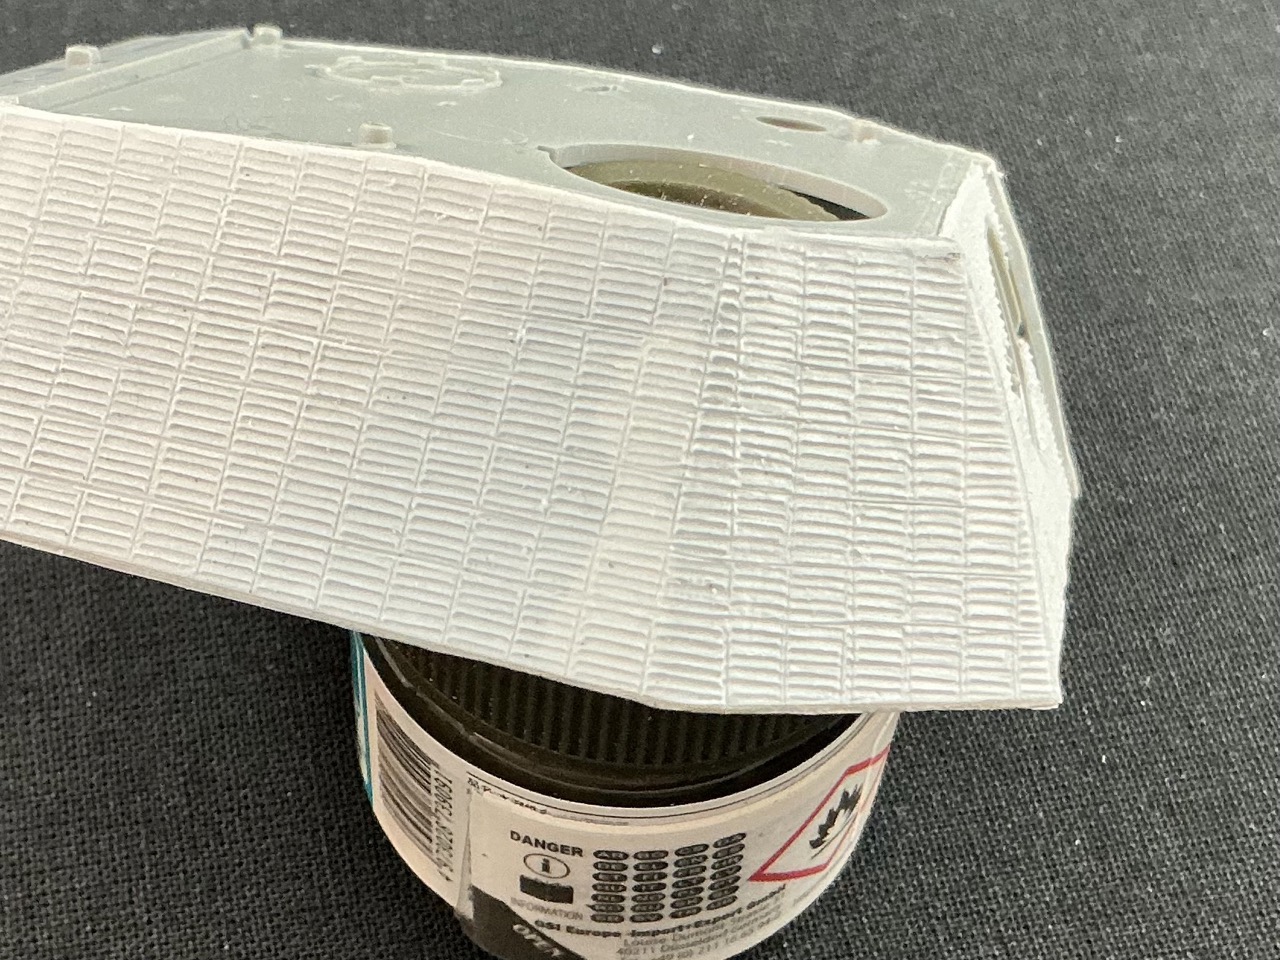
On the sides, I first glued the forward section, before the bend in the armour plate, and the rear part only once the glue on that had set. To get the rear section to fit neatly, I had to use a glue clamp, with a steel ruler between the Zimmerit and the clamp to spread the pressure more evenly.
BTW, you can see where there is no glue behind the Zimmerit:
The lighter spot in the middle, near the bend, is where no glue crept behind the resin.
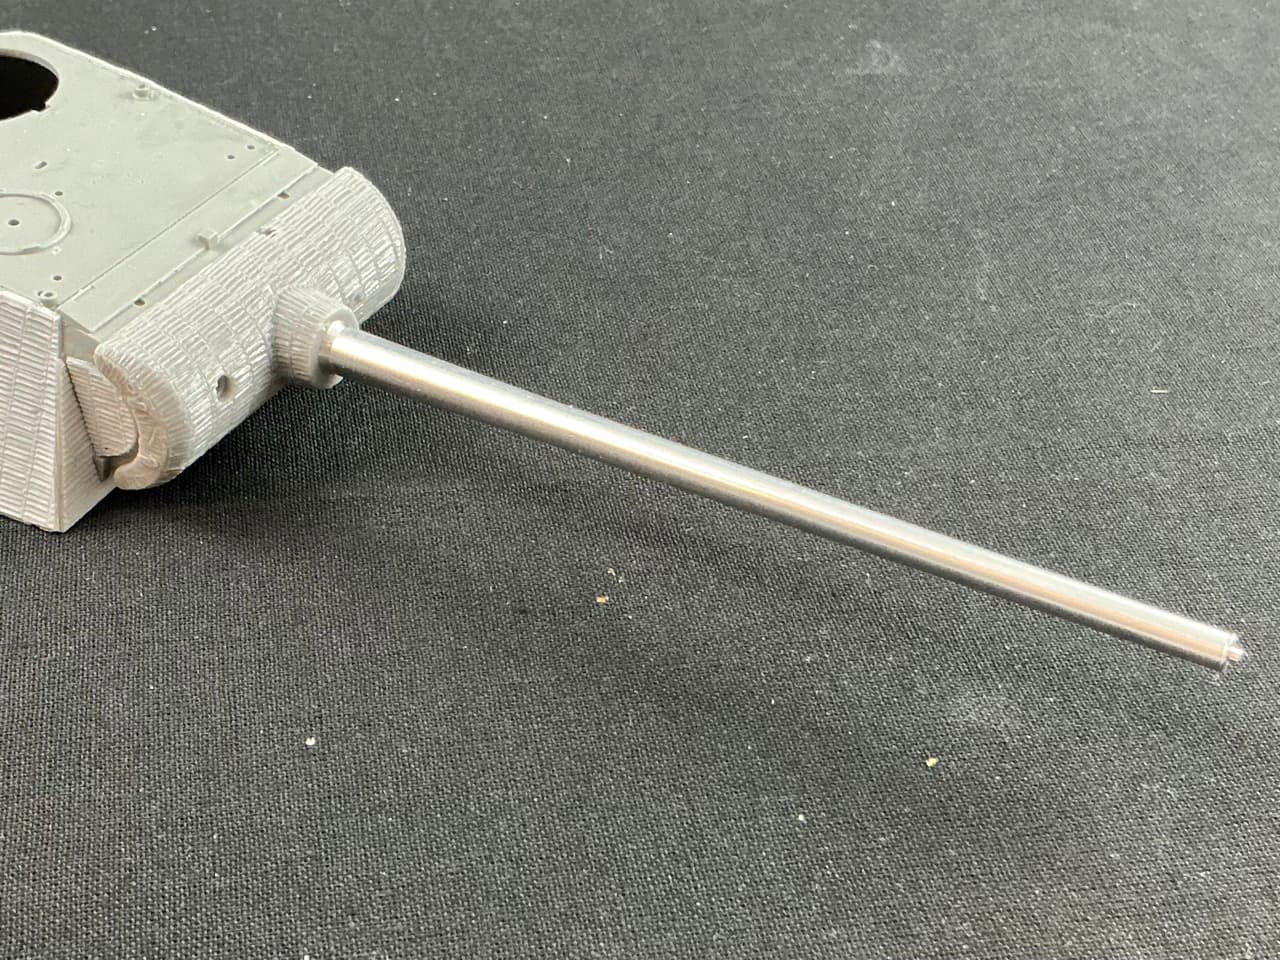
I also built the gun:
That isn’t entirely straightforward. The barrel fits into the innards reasonably well, though with a bit of play, but to get the inner parts into the turret requires filing down the hinge blocks A31 and A32 a little, else they’re very difficult to get into the turret at all. Also very odd is that there is a locating lug with a flat side on it on the front end of the gun, so that the muzzle brake will only fit one way. Yet the barrel rotates freely in the breech …
The gun shield is still loose, I’ll only glue it on later. In the shield is an air bubble at the top edge, but that will be hidden by a rain shield that goes over the gun shield anyway, so I’m not worried about it.
Looks nice and neat!
Incidentally, the Coldstream had form in acquiring Panthers; in August 44 they had scoured the remnants of the Falaise Gap to try and assemble enough Panthers to form a troop - 3 x tanks - but it ultimately came to naught. Obviously, the attributes of the heavier tank (than their Churchills) were more than apparent, and attractive.
That explains why they were so eager to repair this one, I’d say. I found that kind of odd for a unit that, as you said, likes to do things by the book. But if they already felt that some Panthers might be worth having a few months earlier, they probably wouldn’t pass up the chance to get one if they could.
I suspect that they considered the tactical value and even edge, worth the hassle and a potential spares nightmare. But one can almost imagine the havoc a well-handled Troop of Panthers could wreak on the enemy, possibly capitalising on deception.
I feel for the poor fitters though, they had enough on their plate with 58-odd Churchills, scout cars, ACVs, trucks etc; but I further suspect that the higher chain of command would have frowned on any such use, even if successful. Inevitable comparisons with our own AFVs would surely become well known (they were well known in any case - Tommy Atkins isn’t stupid - well, not too much) but it would have drawn attention to the quality/performance gap that’s for sure.
Anyway, an interesting snippet I thought (!)
One for the wargamers, really: field a platoon of Panthers in a British force fighting the Germans in Normandy ![]()
I had to take the mudguards off, because Cuckoo’s are both bent and dented, which is hard to replicate with the plastic ones.
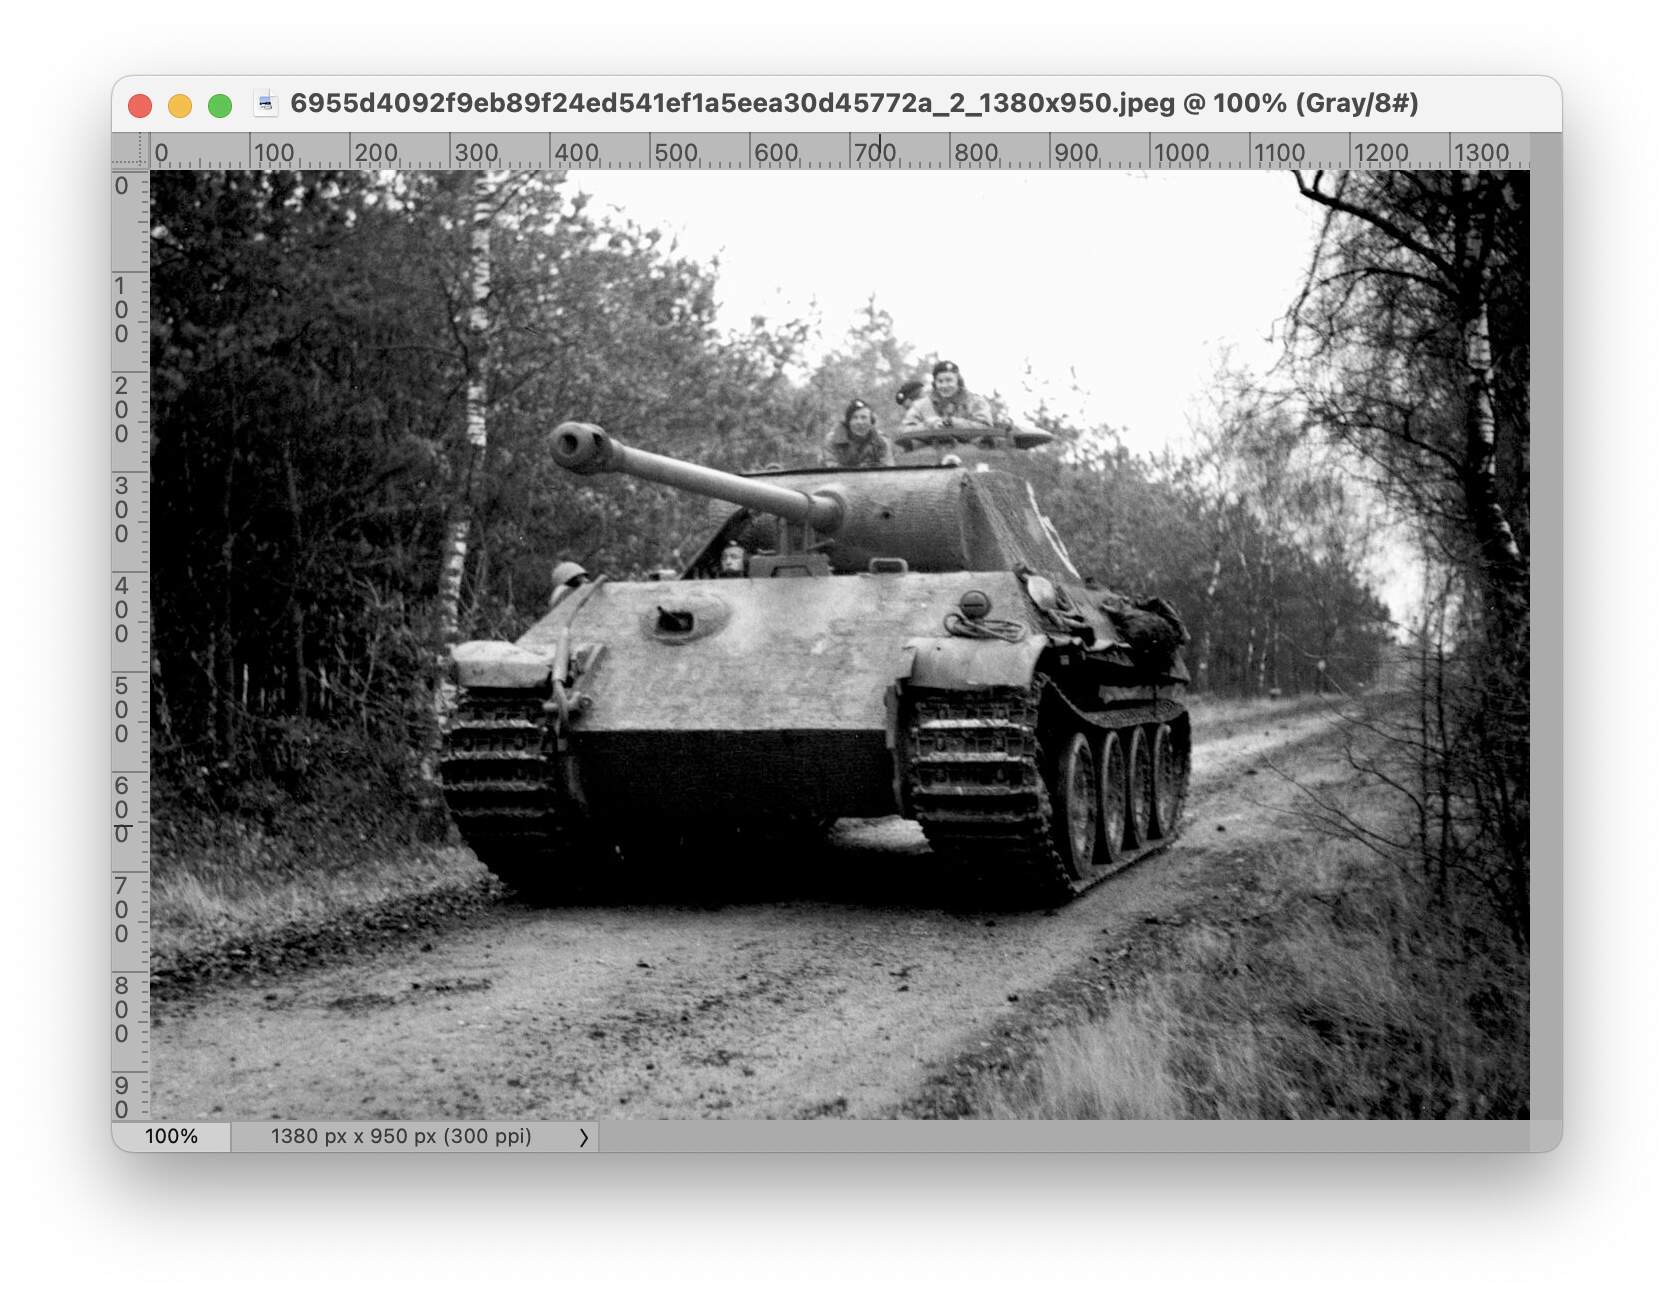
After I then glued the upper hull to the lower, I turned to the Zimmerit on the glacis. Pictures show that it was damaged towards the top, so I opened the well-known photo of the tank driving down a forest road in Photoshop, so that I could use the perspective crop tool to cut out the glacis and have a “straight-on” view of it. This let me stretch it to the correct dimensions horizontally and vertically, then trace over it in Illustrator. That way, I got a template that can be used to draw the extent of the damage on the ATAK Zimmerit (or on the glacis itself, of course). That template appears below as a PNG file:
The ATAK Zimmerit is translucent enough that I could just trace over the template with a pencil:
All that remained was to cut it out, make the edge a bit rougher and put it onto the model to take a photo:
It’s not stuck down here yet, as I still had to cut out the opening for the bow machine gun, but once I did that I glued it on, and the rest as well:
That is pretty cool how you can manipulate that in photoshop. Way above my comprehension.
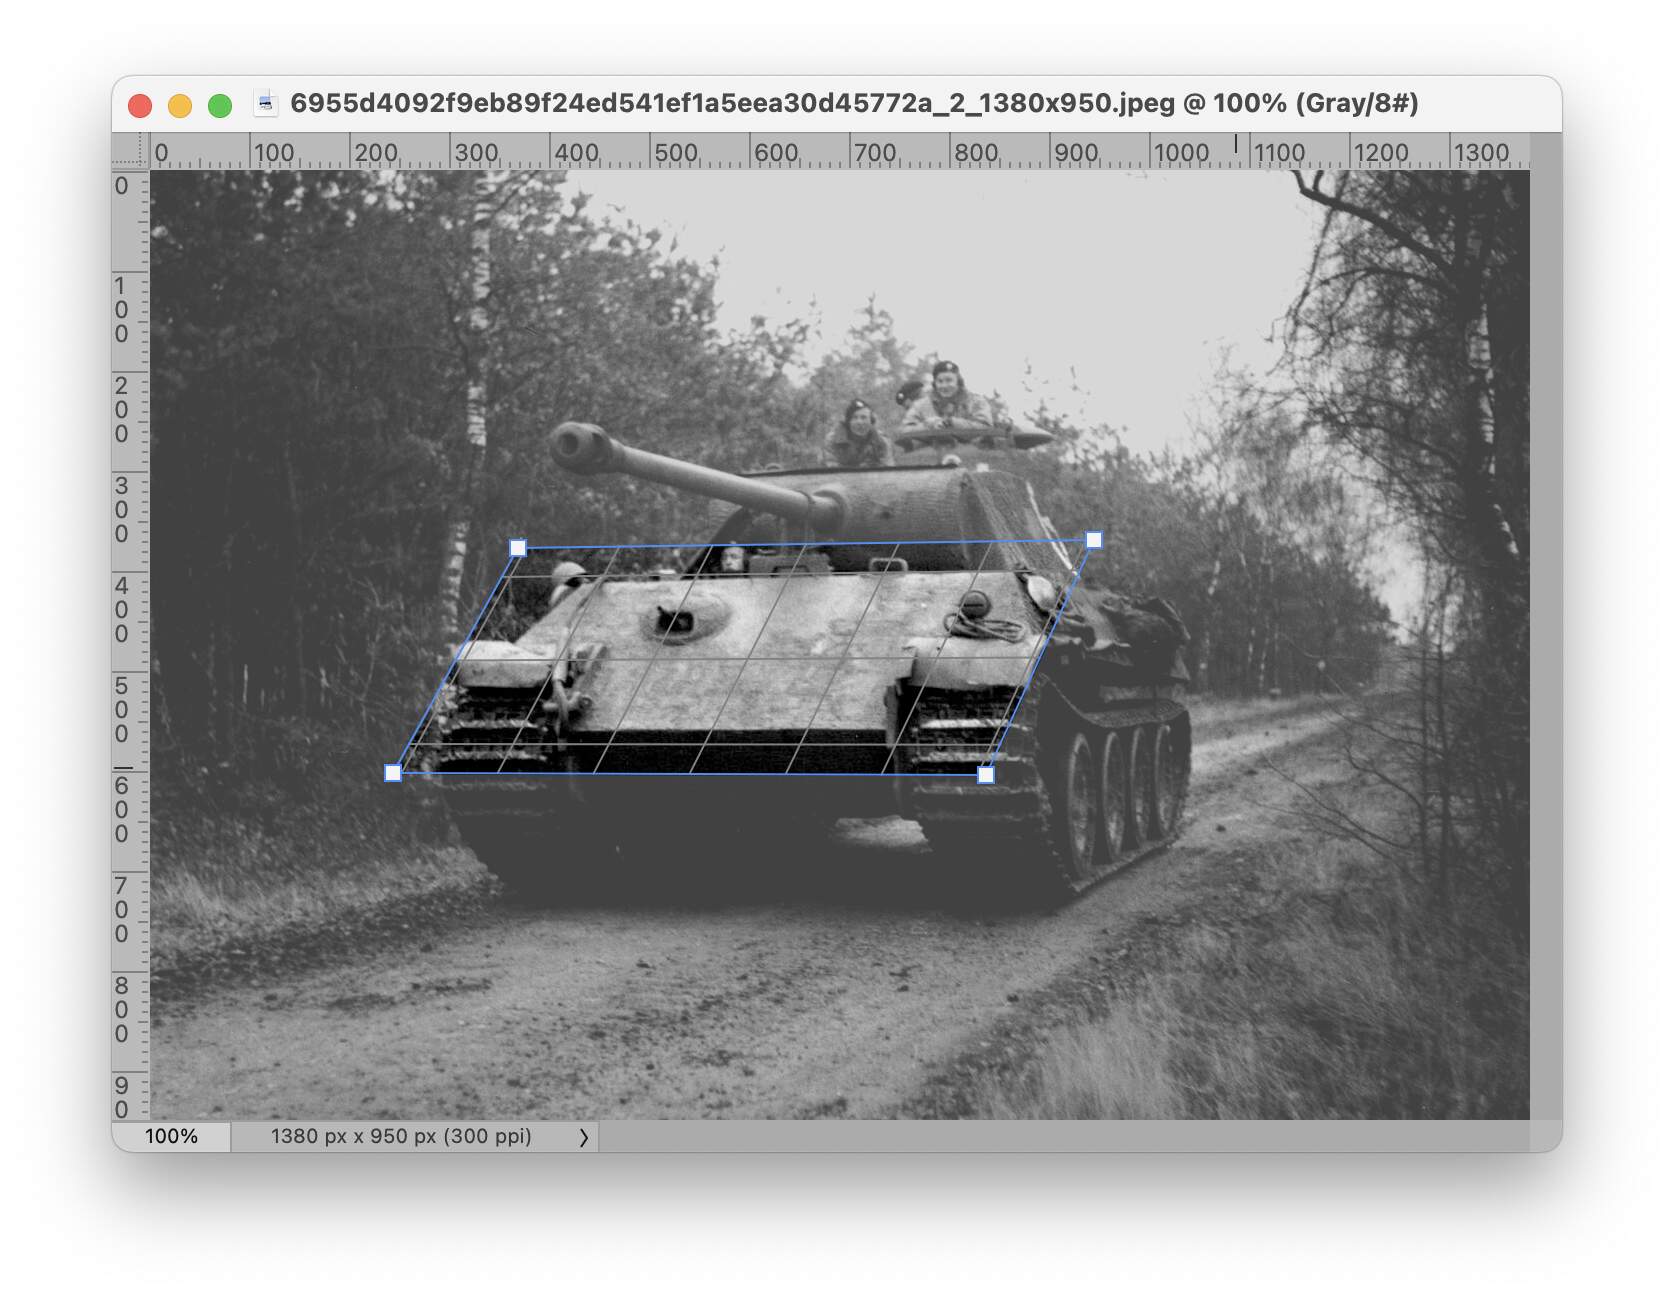
It’s actually really easy once you know the tools exist ![]() Wait, I’ll illustrate … Here’s the photo of Cuckoo on the forest road, opened in Adobe Photoshop:
Wait, I’ll illustrate … Here’s the photo of Cuckoo on the forest road, opened in Adobe Photoshop:
Like I mentioned earlier, Photoshop has a perspective crop tool. “Cropping” is to cut away the bits of a photo that you don’t want; this tool lets you do that and at the same time, correct the perspective in the photo so that you look straight at the part of the photo you have left.
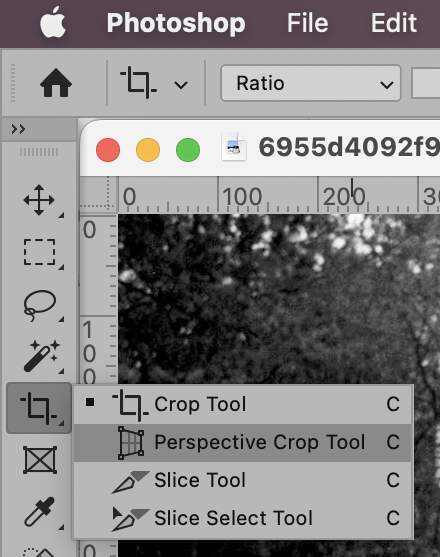
You get to this tool by keeping your mouse button down on the Crop tool in Photohop’s toolbar, so that this menu pops out:
Just click on “Perspective Crop Tool” and that becomes active. Then all you do is click in four places in the photo, which will draw a grid over it:
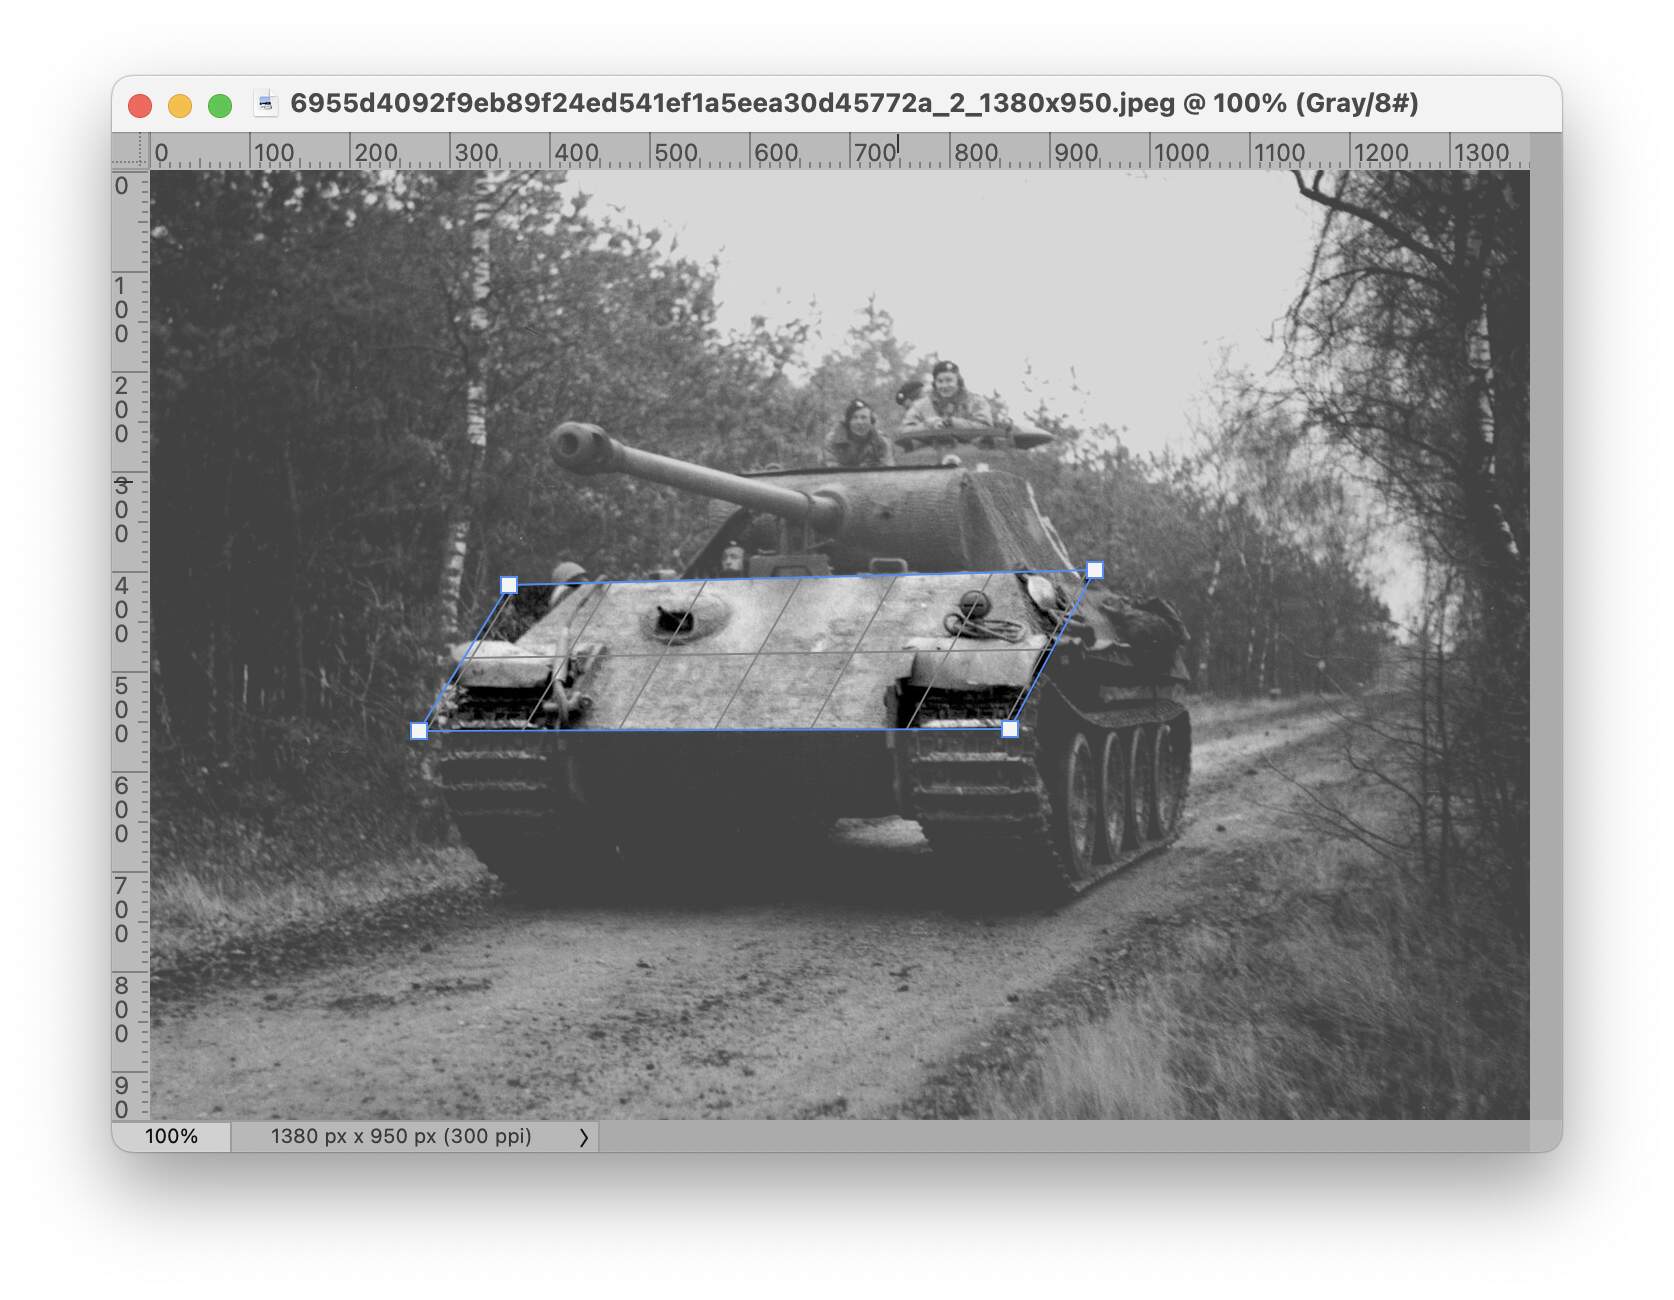
After that, you can click-and-drag with the corners and/or the edges so you align the grid with the part you want to keep — in this case, the glacis. It’s fairly simple to get the top and bottom of the grid on the upper and lower edges of the glacis:
(Don‘t forget you can zoom in by pressing ⌘+ on a Mac, or Ctrl++ on Windows, and go back to actual size with ⌘1 or Ctrl+1.)
Getting the sides correct is a bit trickier because of course the upper sides of the Panther’s glacis slope inward, but the trick is to look at the other grid lines: move the corners until the grid lines look like they’re parallel to any vertical lines there may be on the glacis:
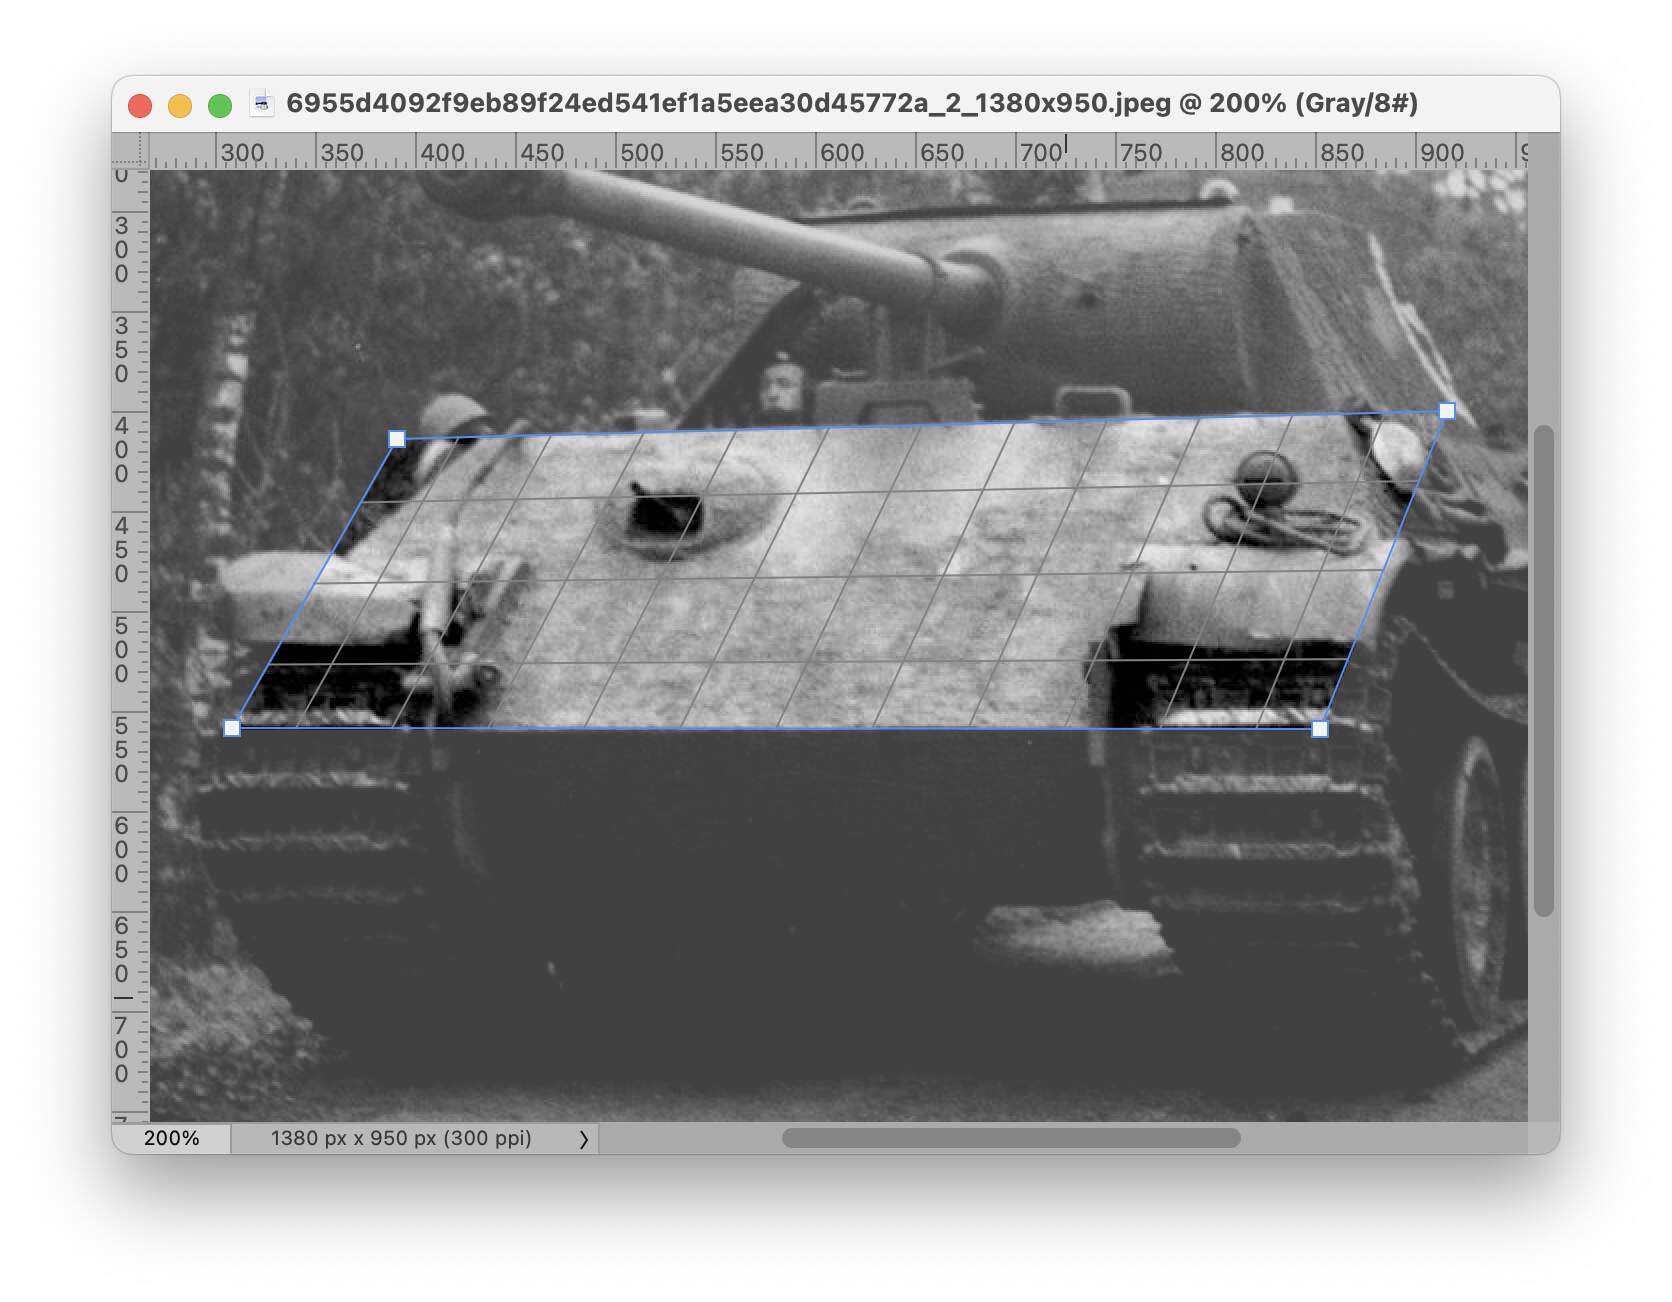
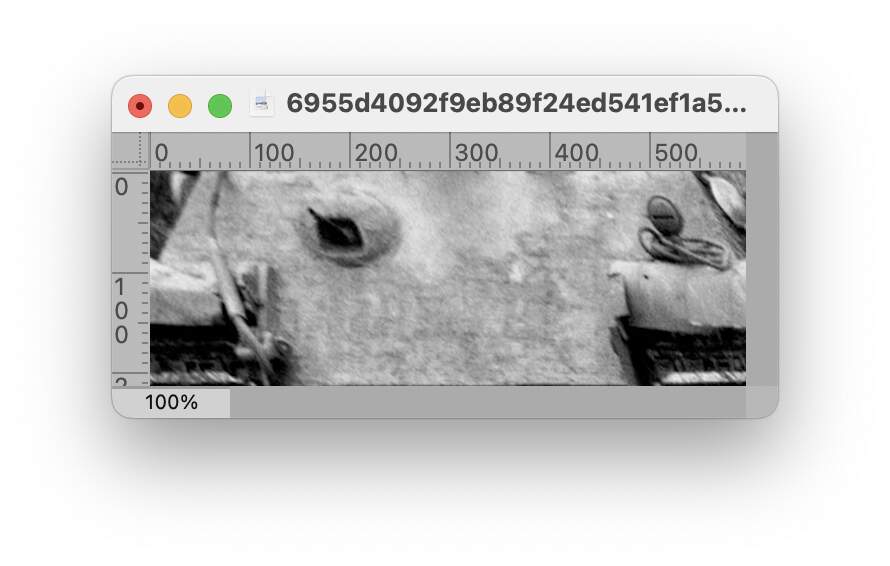
This looks good to me, so then all you do is click the ✓ button in Photoshop’s button bar at the top, and you get:
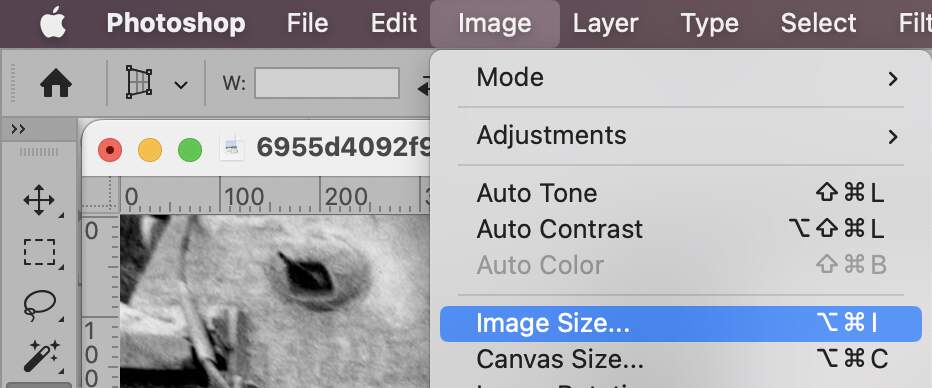
There’s the glacis as if you’re looking straight at it. The only thing to do now is adjust it to the right size, which is a matter of measuring up your model, then in Photoshop clicking the Image menu and choosing “Image Size”:
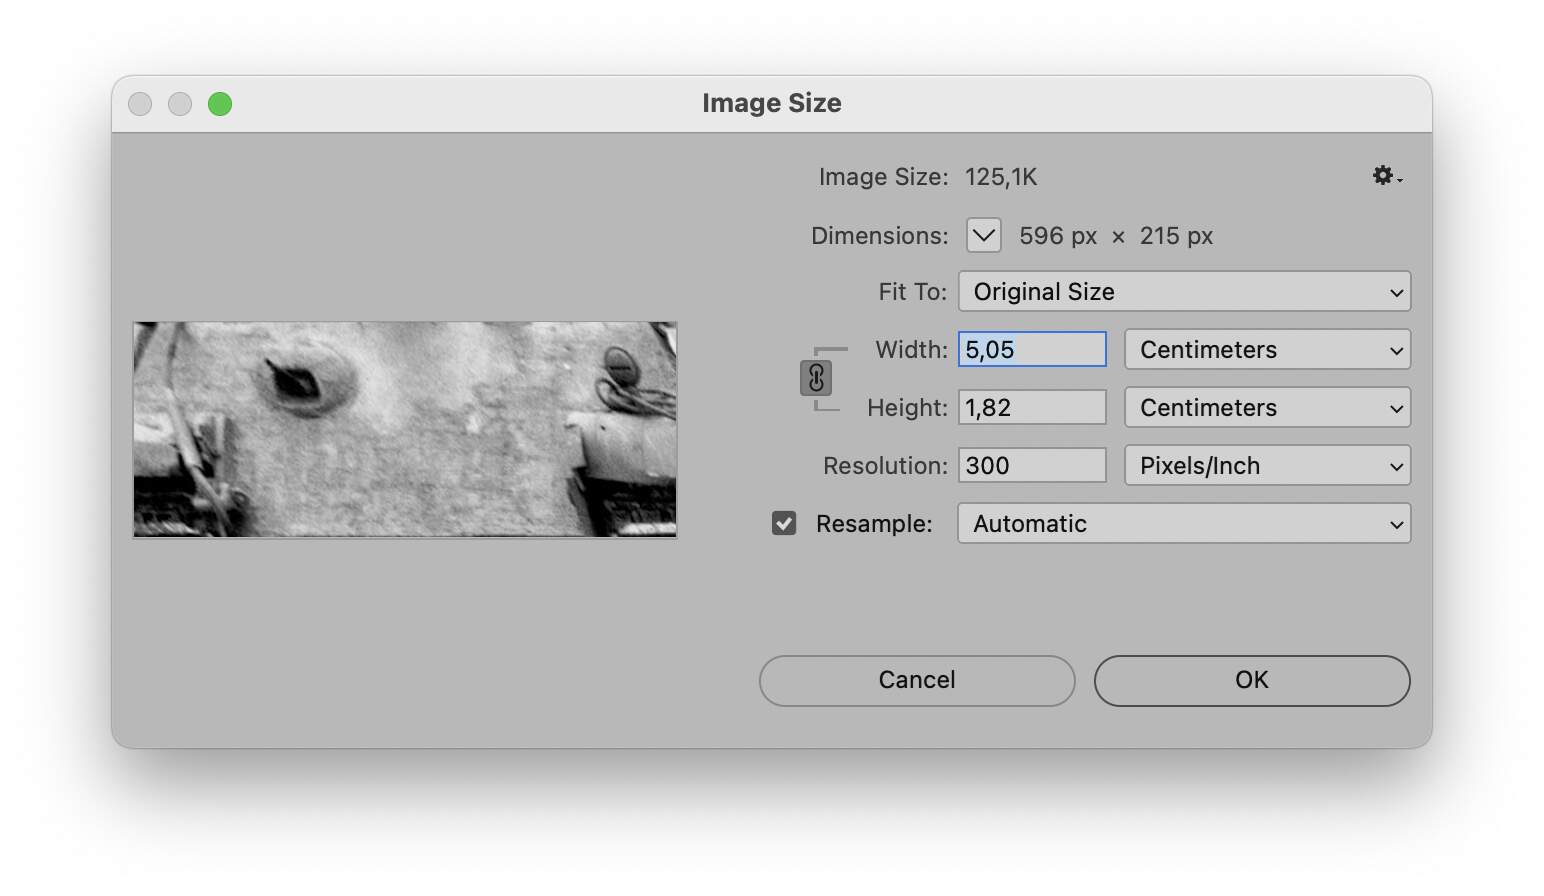
A new window opens, like this:
Click the “chain” icon to the left of Width and Height to uncouple them — if you don’t, changing one of the two will also adjust the other proportionally. Also be sure that the units for width and height are set to centimetres, millimetres, or if you really must, inches — but not to pixels, points, etc.
Then enter the width and height of the kit glacis as you measured it on your model:
(Note that these values may not be 100% correct, as they’re from memory.) After clicking OK, Photoshop will resize the image to correspond to those dimensions, and you have a picture that will match your kit part — at least fairly well — if you print it out.
Thanks for that tutorial. Photoshop is such a powerful tool if you know how to use it. The last time I used Photoshop was in 2009 and only very basic knowledge.
I have encountered a few times I wish I knew the scale of something on a picture and this does it! But, I can’t justify a $30 per month subscription for the occasional use.
Do you know if Lightroom has the same feature? My wife could use Lightroom and therefore a bit more justifiable.