That’s pretty much what I had in mind when I wrote my last message, yep ![]() Will see about adding those later today …
Will see about adding those later today …
3 Likes
Sorry Jakko, not nagging!
1 Like
Don’t worry, I’m Dutch ![]() Tell me what I missed or got wrong, and I’ll probably look at it and say, “You’re right” or “I don’t think I did, and here’s why”
Tell me what I missed or got wrong, and I’ll probably look at it and say, “You’re right” or “I don’t think I did, and here’s why” ![]()
4 Likes
You’ve inspired me to attempt to make some that I can stuff in an open bin on my 251.
4 Likes
Well Steve, clearly my work here is done!
Just a reminder of my methodology for this type of net: for a stowed net I normally use a lump of Milliput or similar, wrapped around with a couple of turns of gauze bandage, soaked in diluted PVA glue. I say soaked, but you can apply it with, say, a brush once it’s in position. The trick is perhaps, to interleave or intersperse lengths of Tamiya masking tape amongst the layers of gauze, finishing up with some on the surface as though tied to the netting, which is what happened in real life. Brit nets were made using Hessian that came in rolls of a brown and a green; there may have been a third colour but I can’t remember. Sometime plain Hessian material (eg sandbags) was torn into strips of the appropriate lengths and width and tied on to the net.
What the Germans used I have no real idea save that during any conflict, enemy kit will be scrounged and utilised if there’s a need, so I imagine any net would suit your 251’s purposes.
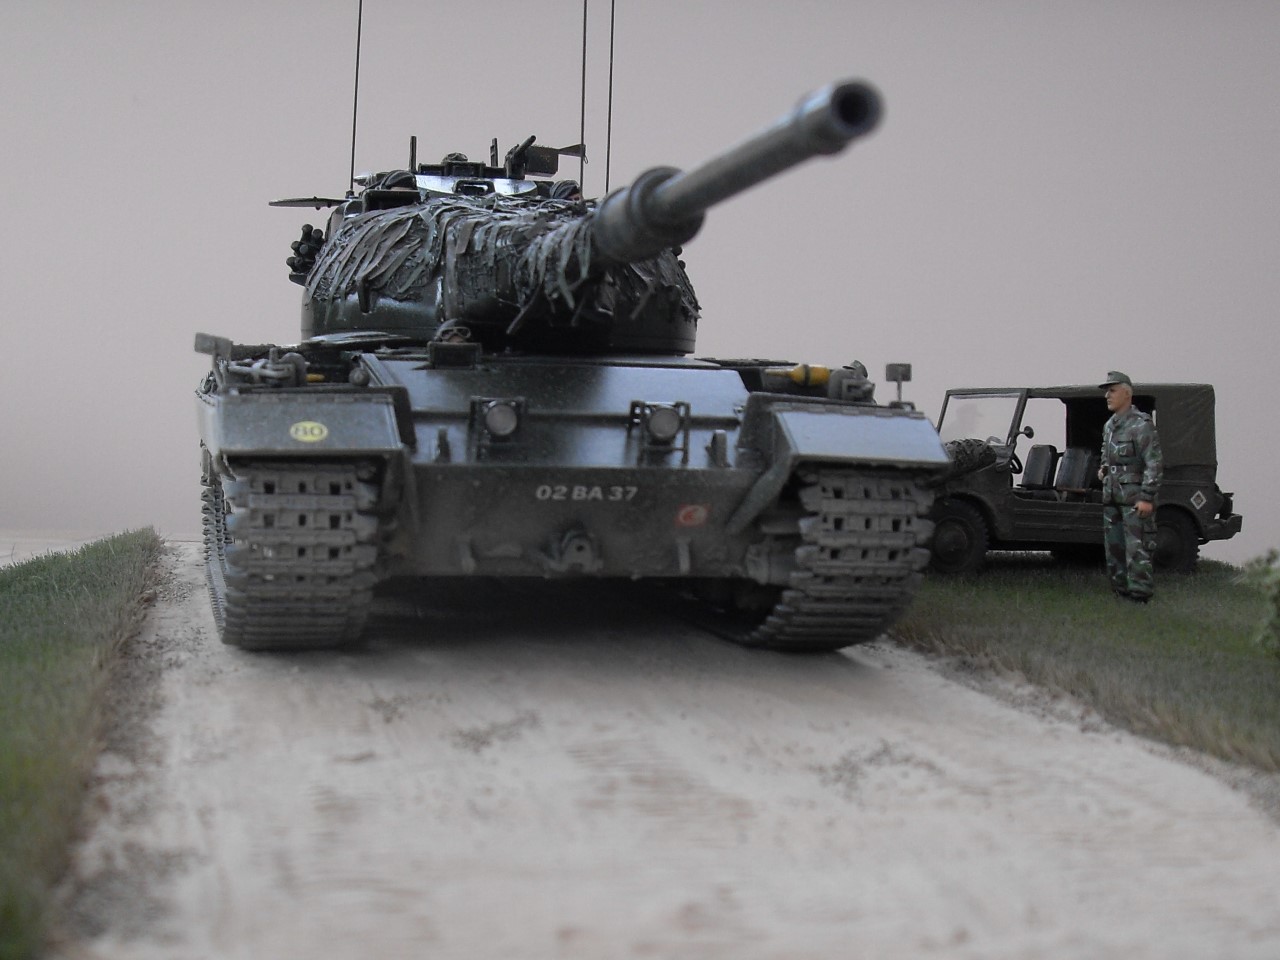
Draped cam (ie festooned on the vehicle itself) is another story, and I haven’t quite got there; the Conqueror below shows an attempt, which gets an effect but probably not quite as it should be. Part of the problem may be the density of colour and subsequent matting down - I’ll have to have another go some time. Anyway, I hope this all helps:
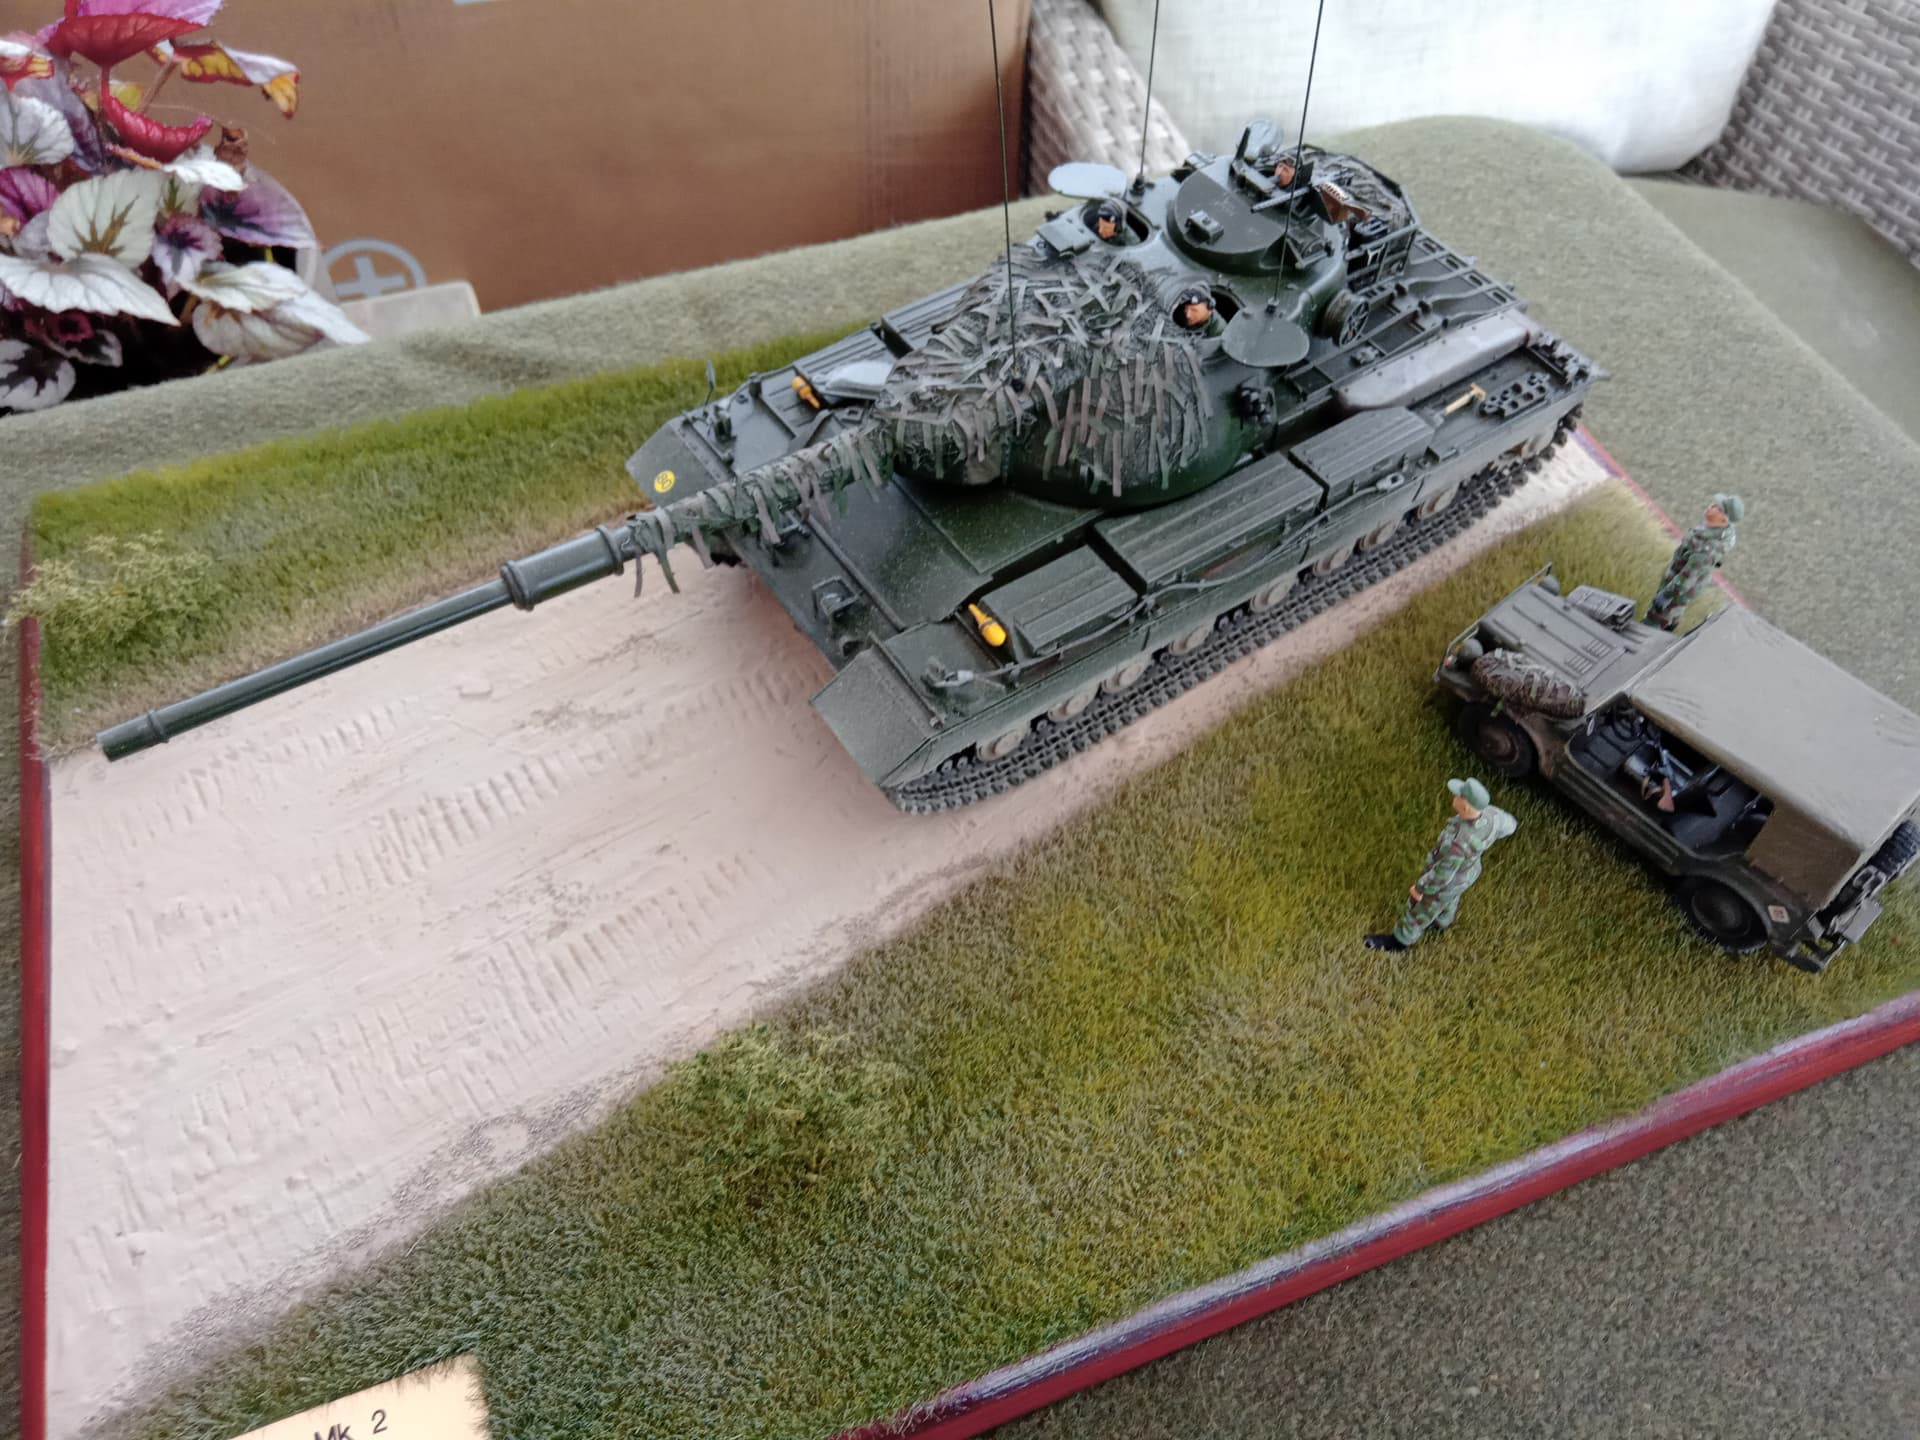
It looks a little better here - arguably(!)
Good luck with the 251.
7 Likes
I’ve just realised - sorry Jakko - accidental hijack! A result of my usual misplaced enthusiasm.
No worries — I expect topic drift and don’t mind it at all ![]()
Anyway, I took your advice and added some hessian strips to the net on my model:
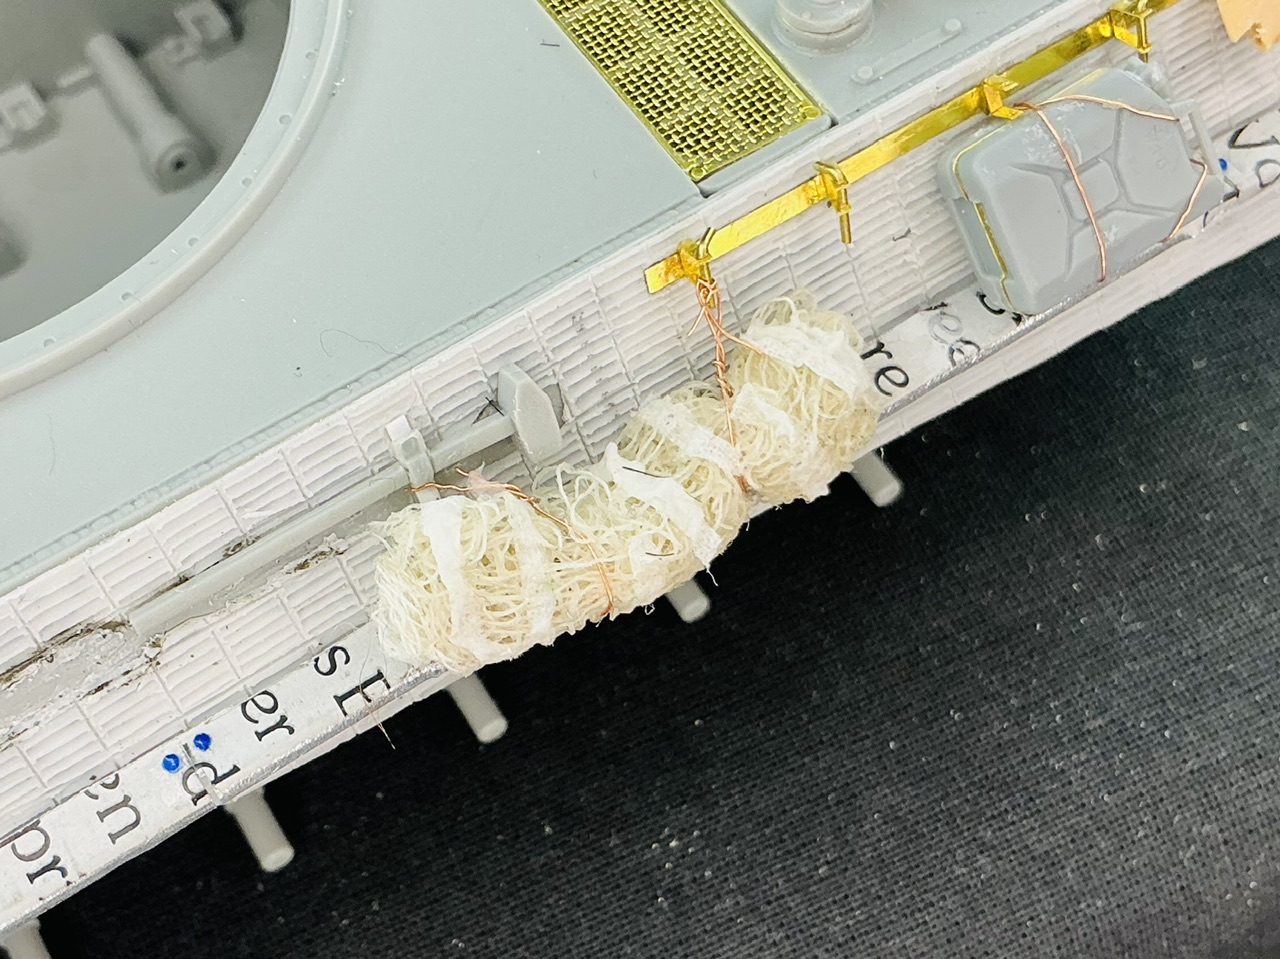
I just cut a strip, maybe 2 mm wide, from a paper handkerchief, peeled the layers apart and then cut one of those into different lengths. I then put each piece into some thin PVA glue, placed it on the net and pressed it in place with a stiff brush. Roughly three minutes’ work, I guess ![]()
6 Likes
Tonight I had to quickly add the last thing I had forgotten:
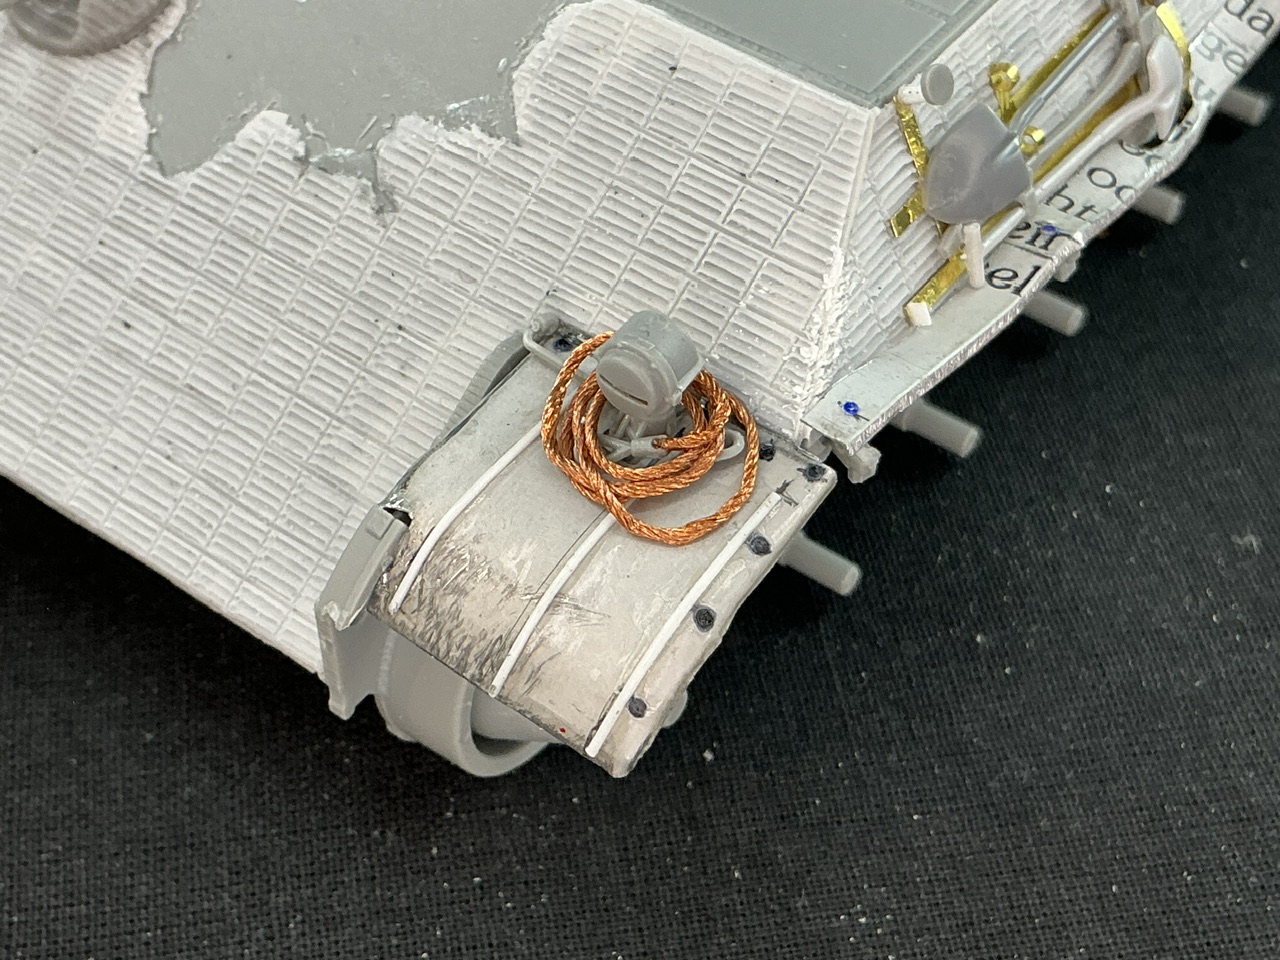
This is the cable that should be fitted on the right-hand side, wound around the round brackets that I put the oil can in/against. In the picture of Cuckoo on the forest road there’s a similar cable wound around the headlight, and this one seems to fit the bill quite nicely.
5 Likes
Everything faded to grey before my eyes …

That is to say, I sprayed a couple of coats of grey primer over the whole model ![]() Nothing fancy, but “Spectrum” brand primer from an Action discount store, and that cost me all of, IIRC, €2.99 for a 400 ml aerosol can. But it covers well, and dries quickly and hard. However, when spraying it I realised I should have gone for white instead, as the grey was almost the same colour as the plastic so it was hard to see whether I had missed some spots.
Nothing fancy, but “Spectrum” brand primer from an Action discount store, and that cost me all of, IIRC, €2.99 for a 400 ml aerosol can. But it covers well, and dries quickly and hard. However, when spraying it I realised I should have gone for white instead, as the grey was almost the same colour as the plastic so it was hard to see whether I had missed some spots.
8 Likes
You’ve done an excellent job on the build Jakko! Extraordinary research and attention to detail. Wonderful and highly skilled construction. It looks fantastic in primer. It’s going to look outstanding in paint. You’ve really got an incredible project going here.
3 Likes
Thanks ![]() As I said before, I’m just trying to replicate what I see in photos of the real thing — and as usual, it’s taken me a lot longer than I expected it to
As I said before, I’m just trying to replicate what I see in photos of the real thing — and as usual, it’s taken me a lot longer than I expected it to ![]()
2 Likes
Can’t wait to see the lusterless Olive Drab go on. This build has been wonderful from the start.
2 Likes
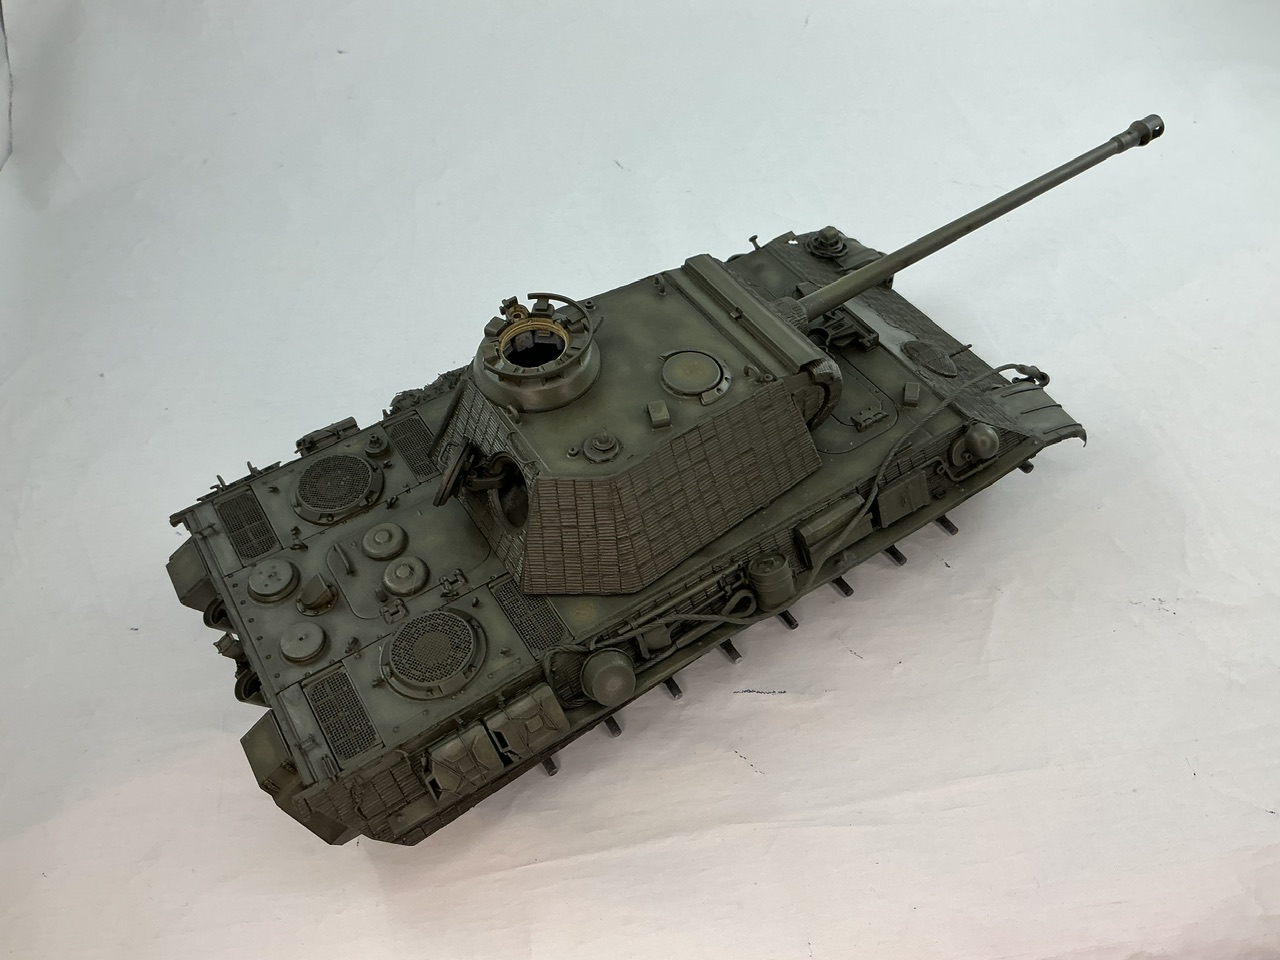
Your wish has been granted! ![]() I sprayed most of the tank with SCC 15 British olive drab from AK 3rd Gen:
I sprayed most of the tank with SCC 15 British olive drab from AK 3rd Gen:

This is why I got out the white background again, because with the black one I doubt the colours would be very good in the pictures. That Zimmerit, incidentally, doesn’t make spraying any easier. You have to do it all from at least two sides to make sure there’s paint everywhere. Before I sprayed the tank, I painted parts of the commander’s hatch in Tamiya Dark Yellow 2, so that the bits that would be covered by the closed hatch would keep that colour. I don’t know if the real tank was like that or if they touched it up after spraying it, but the model is more interesting this way.
The bottom of the hull got a coat of black, after I got advice from a fellow modeller with a background in soil types about the colours of the soil in the area of the Netherlands in which Cuckoo operated. Some of the soil there is very dark, black-brown, and since photos of Cuckoo show its undercarriage to be darker than the upper parts, I figure it was probably covered in thin mud of that sort of colour. Thus, I sprayed it black:
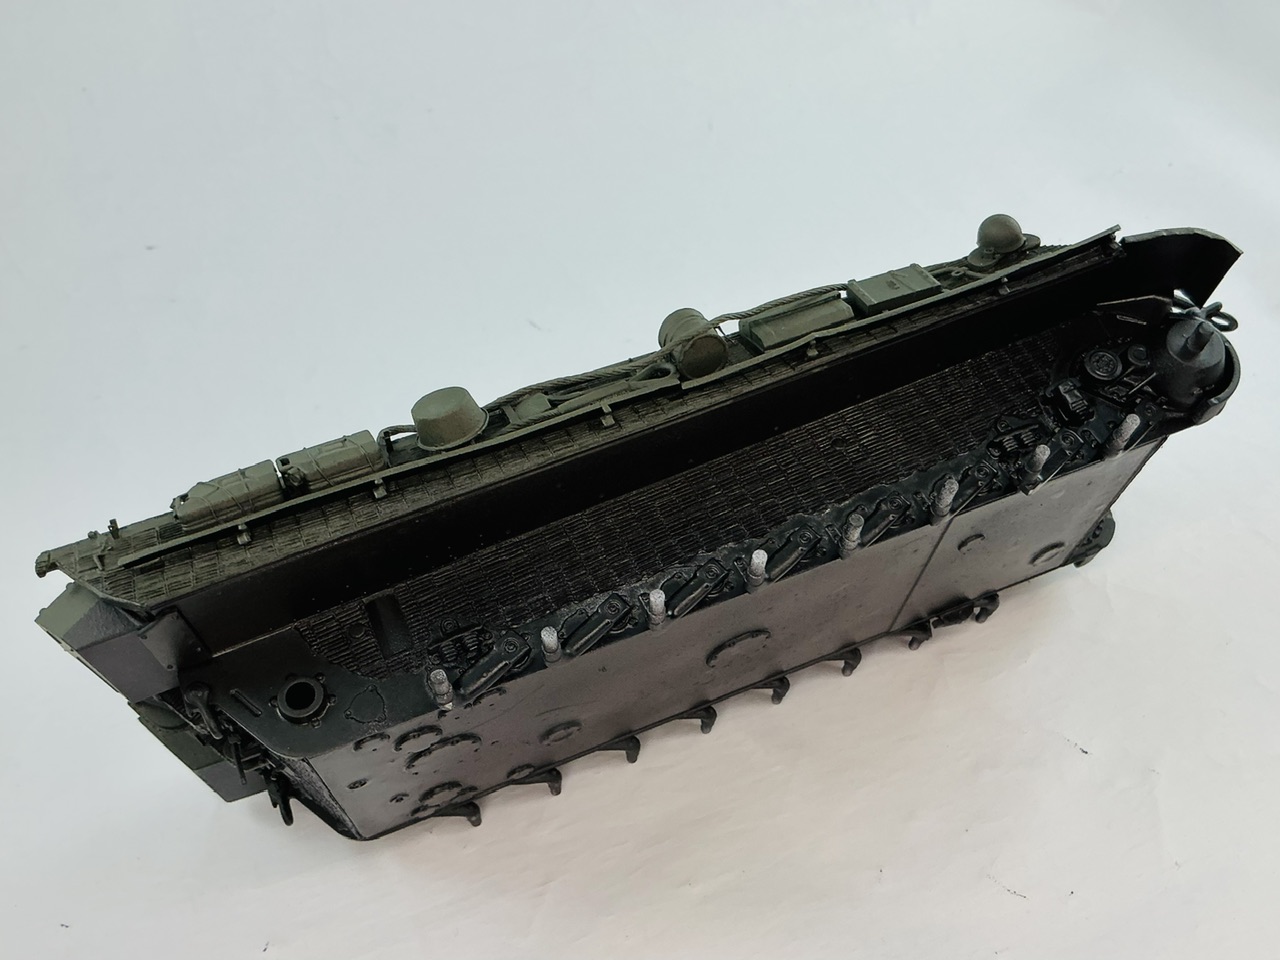
Though slightly more involved than that ![]() The parts that will be behind the wheels are simply black airbrush-ready paint from AMMO, while the bits higher up and more in the light, I sprayed with that same paint with Field Drab from Vallejo Model Air mixed in. The proportions were more or less random as I did this by eye, but probably around 1:1, though it obviously varied every time I had to refill the paint cup.
The parts that will be behind the wheels are simply black airbrush-ready paint from AMMO, while the bits higher up and more in the light, I sprayed with that same paint with Field Drab from Vallejo Model Air mixed in. The proportions were more or less random as I did this by eye, but probably around 1:1, though it obviously varied every time I had to refill the paint cup.
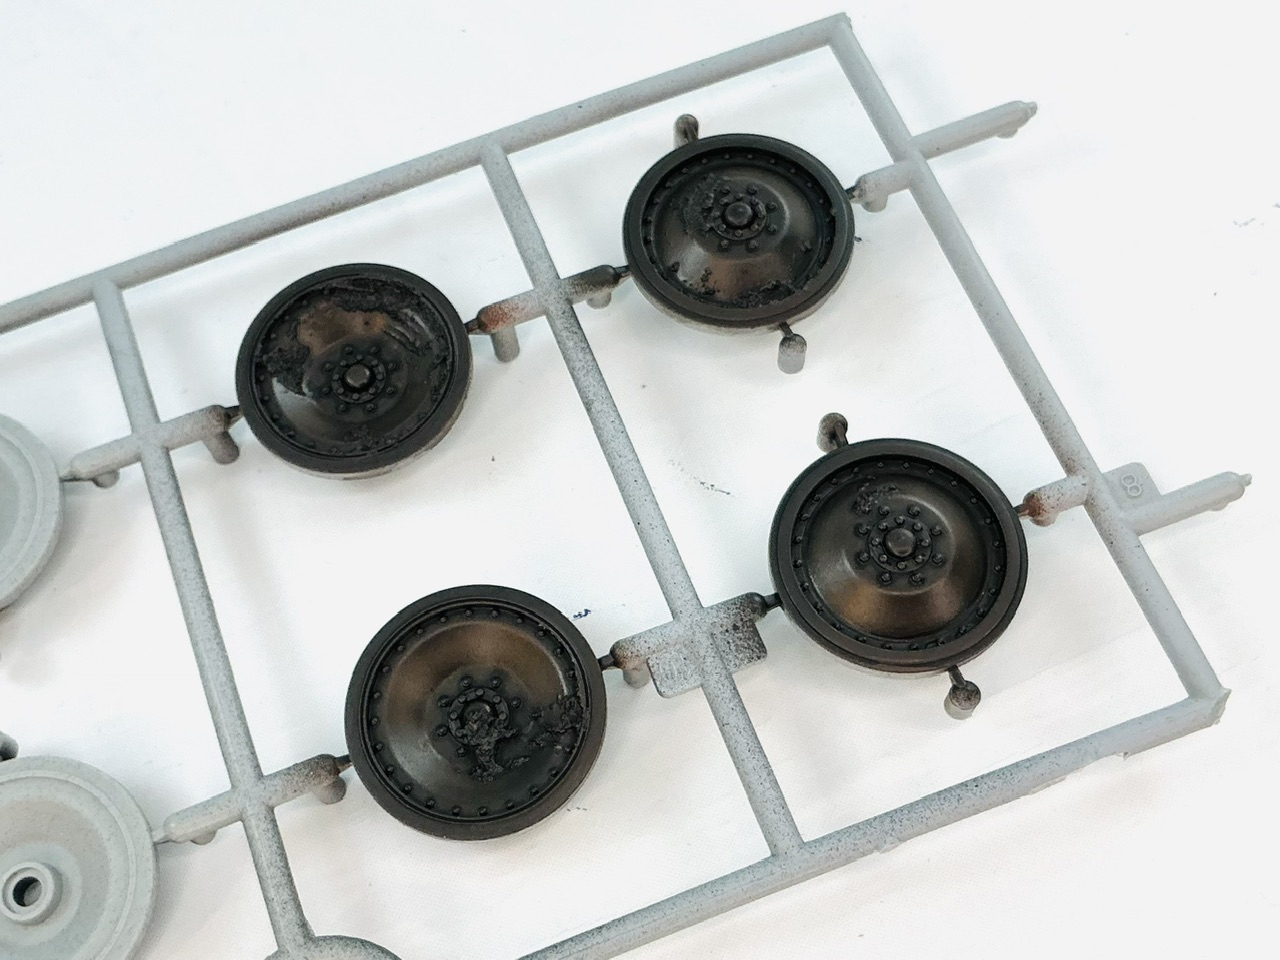
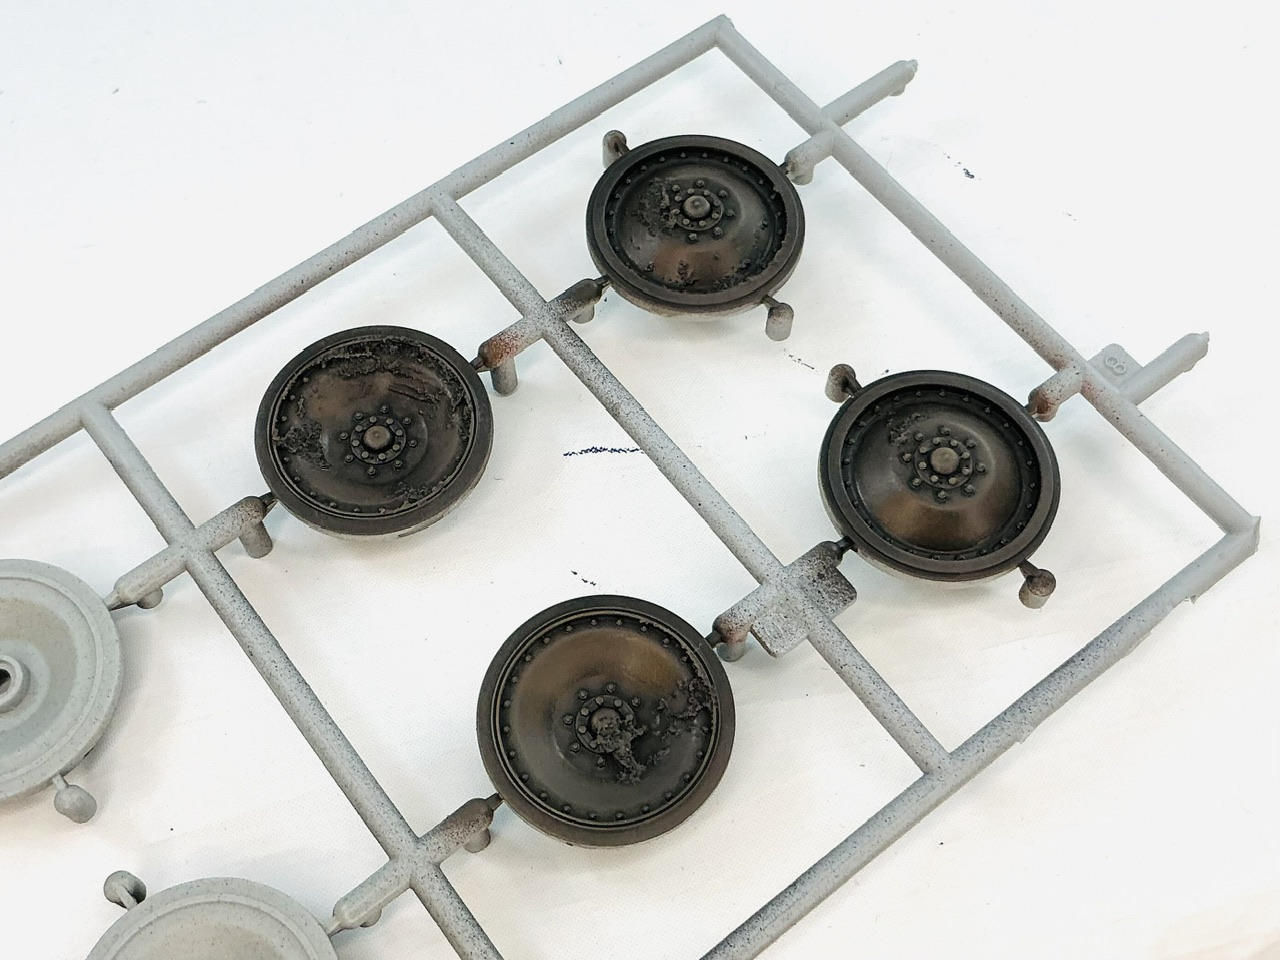
The difference is very hard to see in the photo above, but I painted the wheels the same way, and it’s clearer there by holding them side-by-side:

The inner two rows of roadwheels are simply black, while the outer two and the drive sprockets and idler wheels are the lighter mixture.
7 Likes
Nicely done, @jakko. I have to find me some SCC 15 OD for my RFM Firefly.
2 Likes
Don’t get the Mig one, it’s more like grass green. The AK one is a bit darker than I expected, but maybe that’s because the previous tank I painted like this, I did with SCC 15 I mixed to Mike Starmer’s recipe from Tamiya paints, but I think I made it too light.
3 Likes
I think i have that recipe at home… I did make a bottle of it. Will see how my recipe comes out once I start work on the Firefly.
3 Likes
The next step was to spray lighter patches onto as many surfaces as possible:

I used Mig IDF Green for this on the olive drab parts. On the wheels that were already lighter in colour, I did the same with Vallejo Armour Brown, but after looking at the result, then sprayed them entirely with that, as well as putting it in some areas on the lower hull, before adding lighter bits from the same colour mixed with Field Drab. This way, the wheels are still dark brown, but not as dark as before.
4 Likes
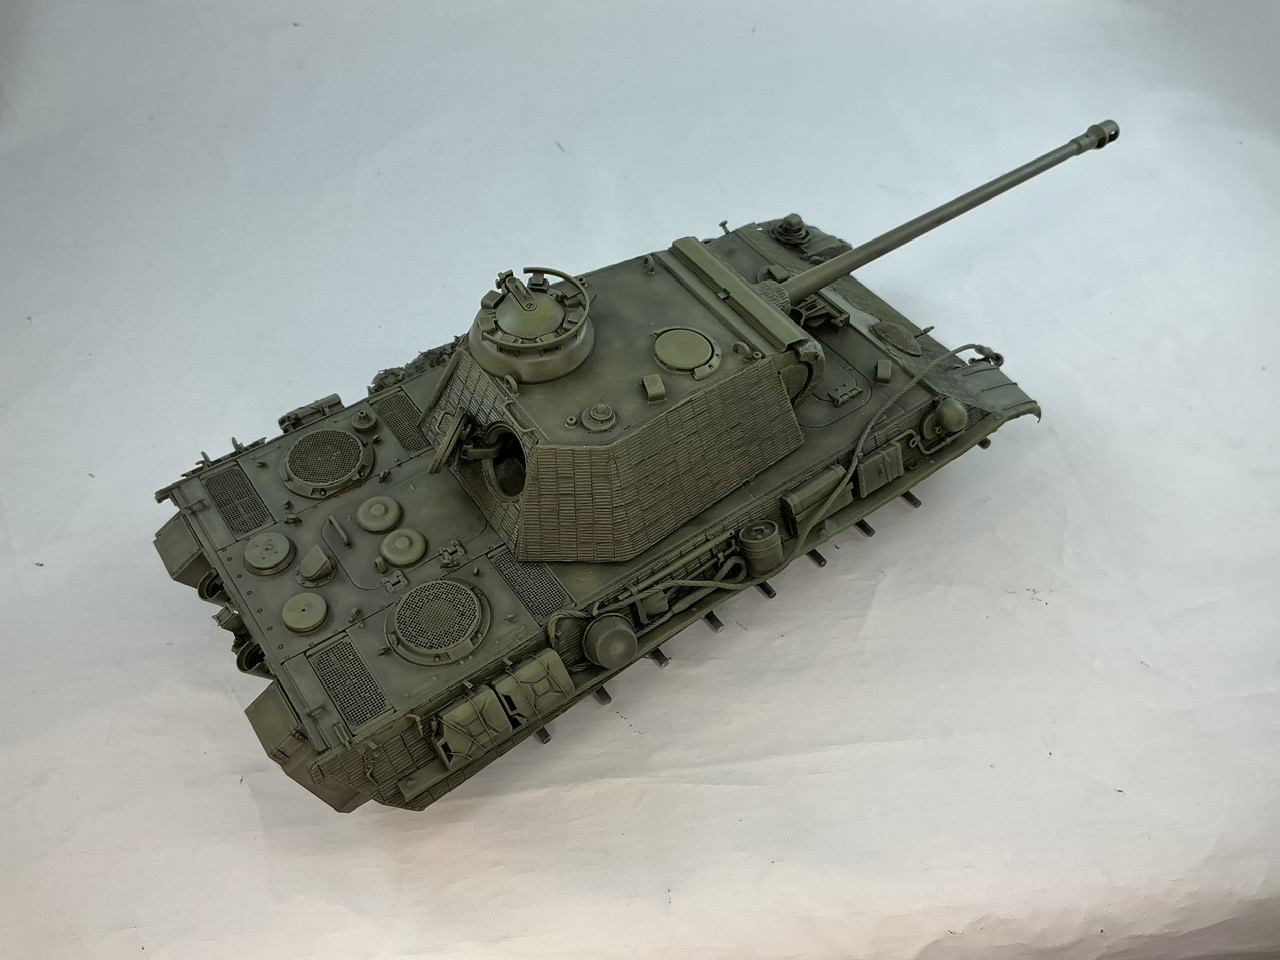
I seem to be on a roll with this one ![]() After the lighter sprayed patches were dry, I put some washes over the model. First Army Painter Strong Tone (a translucent dark grey, like Tamiya Smoke but not glossy) over the olive drab, and before that had dried, their Dark Tone (translucent very dark grey) over the mud. Both of these I thinned roughly 1:1 with water, because they’re usually too strong if used straight from the bottle:
After the lighter sprayed patches were dry, I put some washes over the model. First Army Painter Strong Tone (a translucent dark grey, like Tamiya Smoke but not glossy) over the olive drab, and before that had dried, their Dark Tone (translucent very dark grey) over the mud. Both of these I thinned roughly 1:1 with water, because they’re usually too strong if used straight from the bottle:
It’s not really that apparent in the photo, but the whole model is now darker and there is shading around details and inside grooves etc., like all of the Zimmerit. The next step was to highlight it:
All of the OD was drybrushed with Humbrol 86 Olive Green first, followed by a lighter pass with 159 Khaki Drab. The undersides, on the other hand, got a coat of 98 Chocolate first and then very lightly with HB2 Dark Earth. Yes, HB2, not 29 — the 159 is a Super Enamel tin from maybr 25 years ago, all of the others are older still, if not a lot older ![]()
Here the wheels. I first put on a coat of Army Painter Dark Tone, but unthinned because it proved to be too light when I did a few wheels with the thinned version first:
And then I drybrushed them just like the mud on the hull:
6 Likes
Working on the markings for Cuckoo now, I just came across the following video. Watch and weep/LOL:

The information in the video seems to be pretty accurate, but the pictures in it are an excellent example of why you should not use “AI” for these sorts of things …
2 Likes
That is looking great.