Tamiya 1/12 Ferrari 312T F1

TAMIYA 1/12 FERRARI 312T

1975 NIKKI LAUDA

World Champion and Construction Champion

KIT MOLDED IN 1976

(BACK TO THE PRESENT)

Our contractors have resumed work and that means any chance of painting my GT40 body with a gloss finish is on hold until the renovation is completed – way too much dust from cutting wood, painting and construction. I’m guessing but it easily looks as if three weeks mores or maybe four will be needed before they are finished and I can resume work on the GT40. In the meantime, I thought I would get a jump start on my next build project: Tamiya 1/12 F1 312T Ferrari.

I purchased an original production kit from 1976, now a good 46 years old on ebay and I was hooked. The kit was the state of the art back in 1976 and if memory serves me correctly, light years ahead of most model companies. The kit with shipping was costly and no PE or resin at all. There are a number of incredible AM upgrade sets still available but the cost for all, would bring the total close to a MFH kit! Tamiya has been upgrading and releasing it’s 1/12th scale F1 kits but when I purchased my Ferrari, I didn’t realize the 312T was available as part of the upgrade series of kits. I have since purchase the 1/12 Brabham BT44B, which comes with PE and Cartograf decals and I do have my eye on a few more the upgrade kits.

The way I see it, there are a few ways I can go about building the kit:

  1. Go all out, buy the AM detail sets …not a chance.

  2. Build it OOB and see what I can do

  3. Purchase a new set of decals from Indycals.

I’m going down the path of number 2 and 3 as my favorite part of any build being painting and decaling. So that’s the plan, an OOB build with the best presentation as my goal. Since I’m still a newbie to automotive modeling, I’ll be following Tamiya’s instructions closely and seeing how I do.

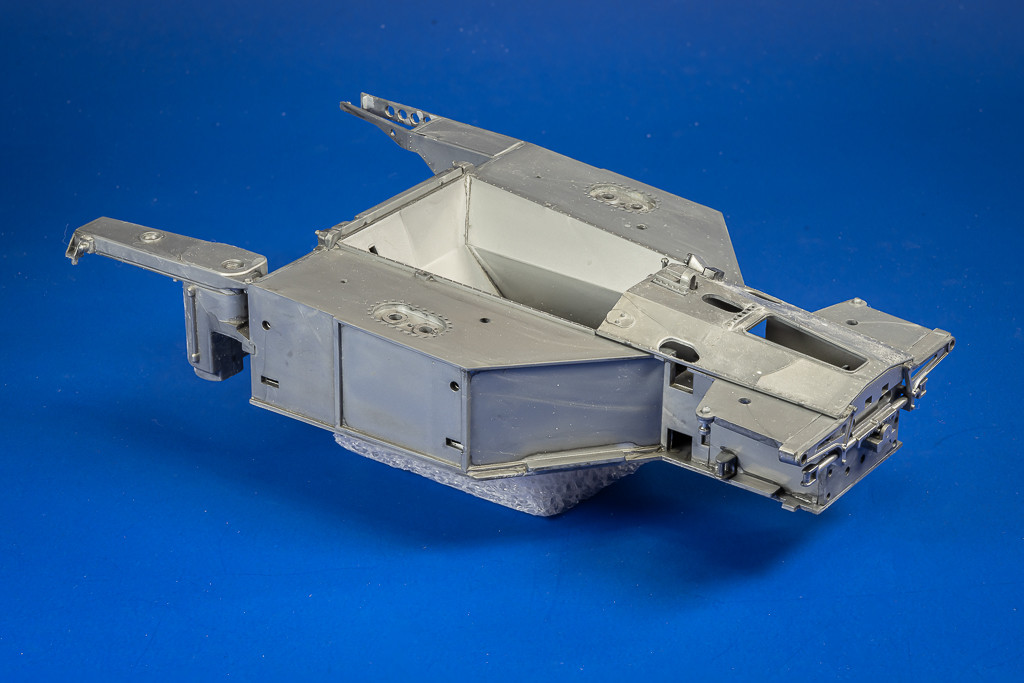
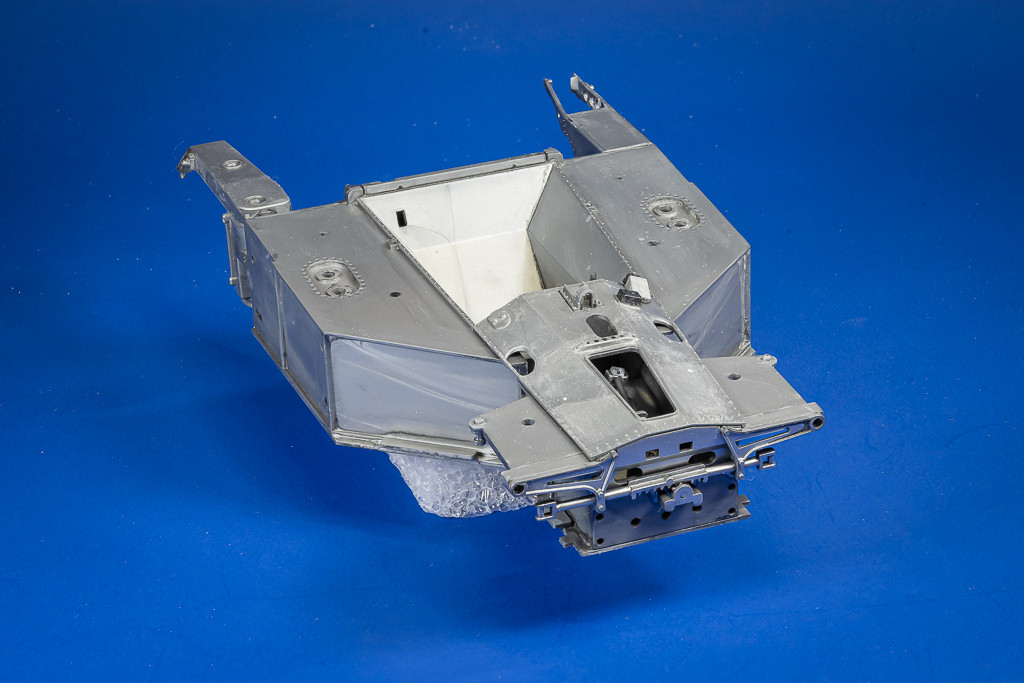
Where else would Tamiya start: the main body tub and front office. Molding is crisp, nearly 100% flash free, most parts have faint molding lines that need to be removed and there are a number of injector pin marks that need to be dealt with. Part fit is good, not perfect and a few parts even have their alignment pins keyed; Tamiya was on the right path. While the instructions are thorough and well laid out, nowhere as comprehensive as we have today and to my eye a bit confusing, especially for a newbie struggling a bit to understand the orientation of some of the components.

I made a note to go easy on following the color callouts as Alclad, Gravity Paints (Spain), Tamiya Lacquers and Model Air didn’t exist in 1976, as it was the world of enamel paints. Geez, there wasn’t even Extra Thin, just good old tube glue and liquid cement. Sanding sticks and sponges – not a chance.

Since I’m restricted on what I can and cannot paint during this period of our home renovation, I’m hoping I can still prime and maybe attempt a NMF on the chassis and if not, then just keep going forward, completing sub-assemblies.

OFF TO THE RACES

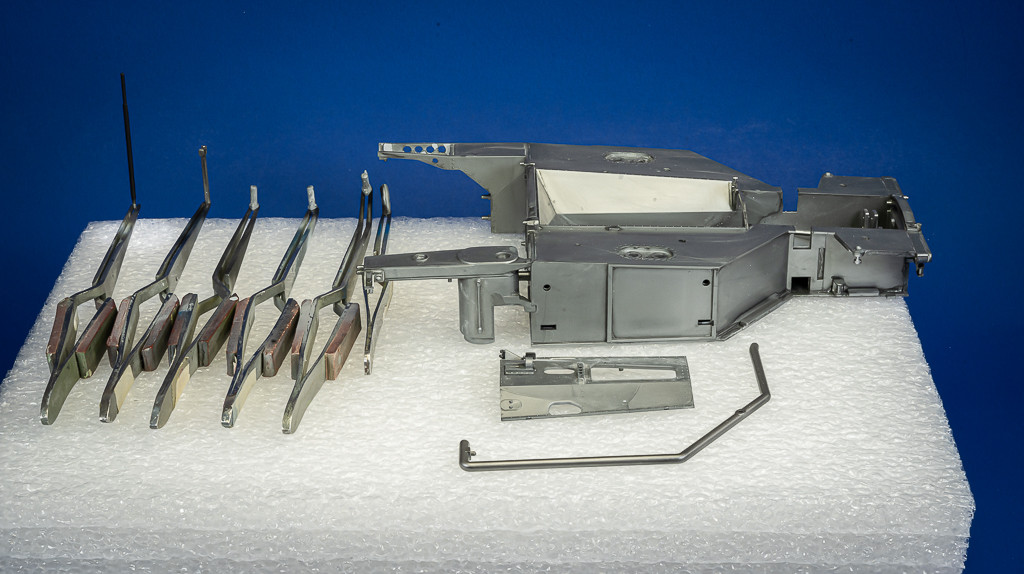
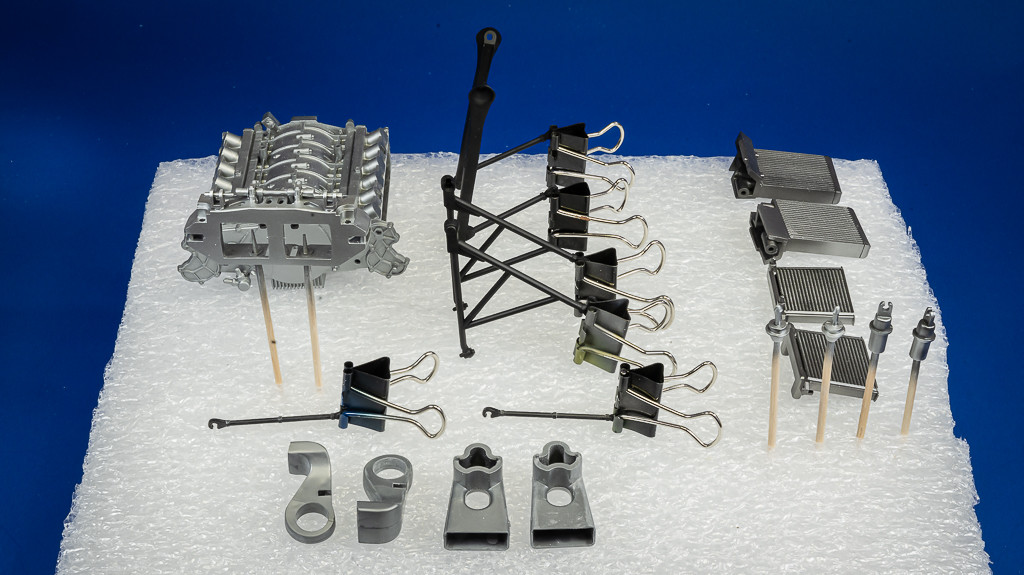
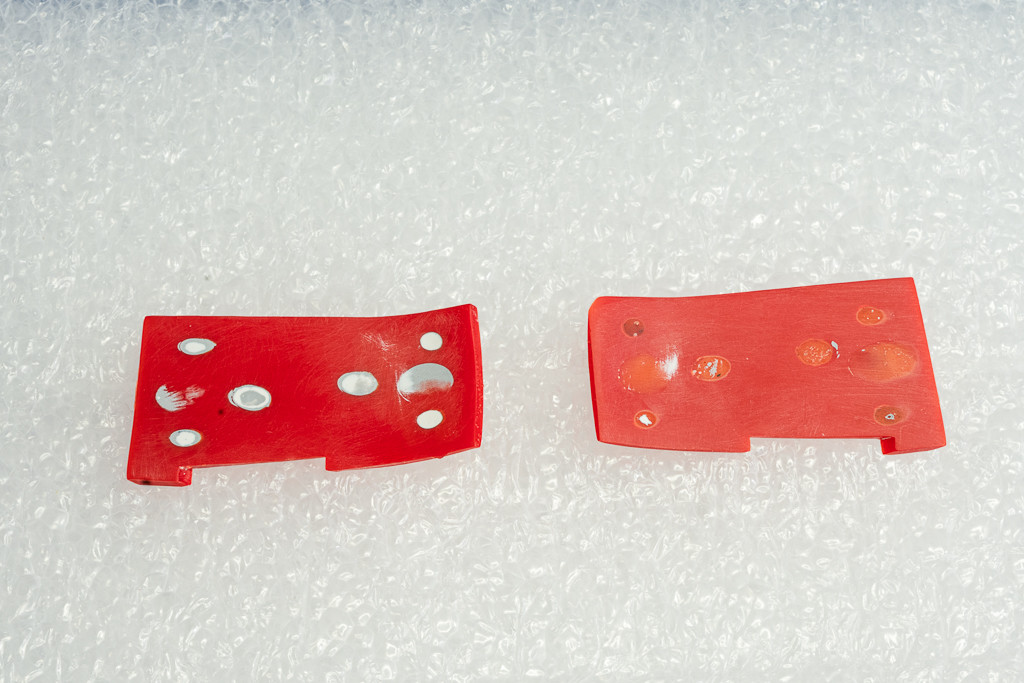
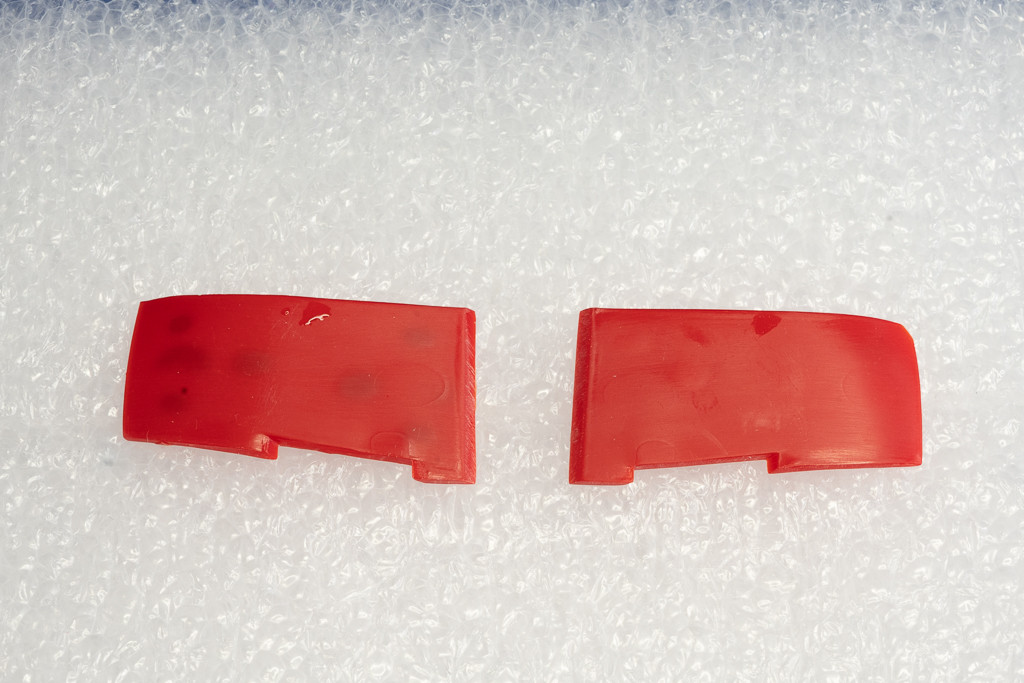
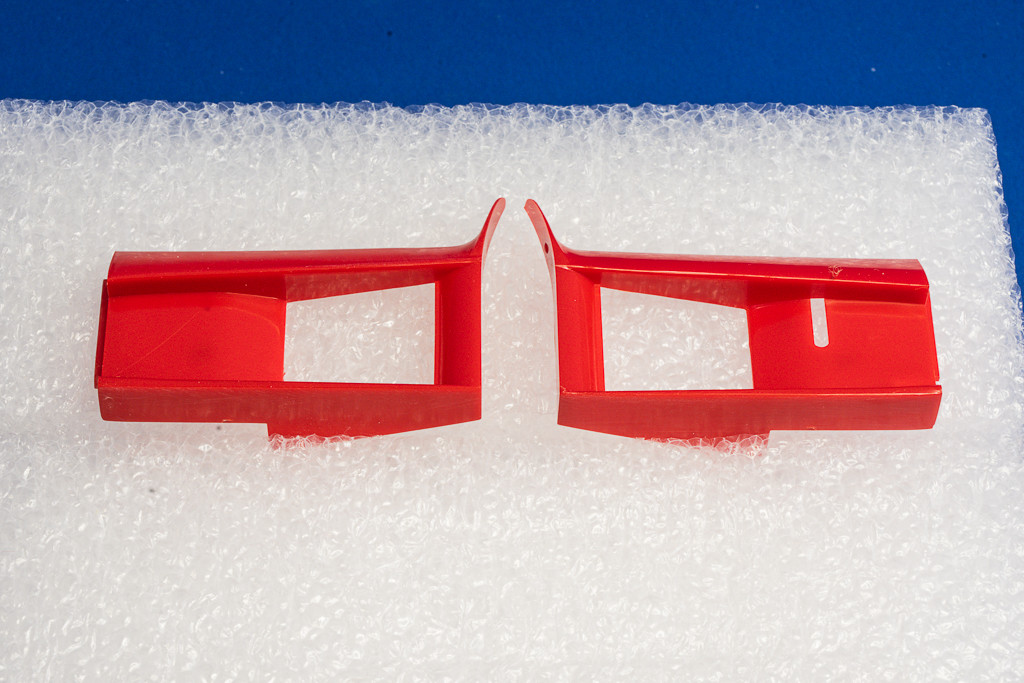
Starting with the aluminum interior chassis, all the parts had the mold lines carefully removed, concentrating on part fit and squareness. The firewall had six large injector pin marks that needed to be filled in with CCA and removed. The rear fuel tank and oil cooler thanks assemblies had seams that needed to be dealt with that’s about all the issues encountered at this stage. At the front bulkhead, the rack and pinion steering was a bit fussy, since this is a working assembly and ultra-care needs to be taken on part orientation and what is glued and what isn’t. Once I figured out how the parts should fit, all went well. The two oil coolers and two radiators were tackled next, no issues at all and I got carried away with myself and as they were primed black, base coated and finished with Alclad Dark Aluminum. Pin washes and some detail painting is still needed to bring out the details. If I would have purchased some of the optional PE detail sets, the radiator screens would have been replaced, but that’s not the plan.

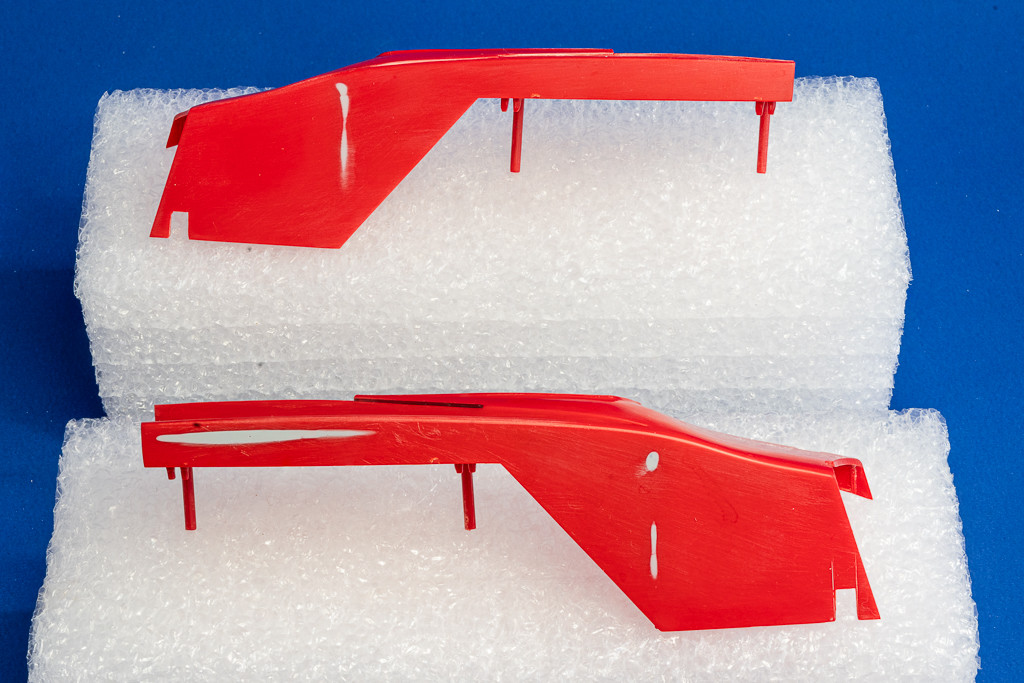
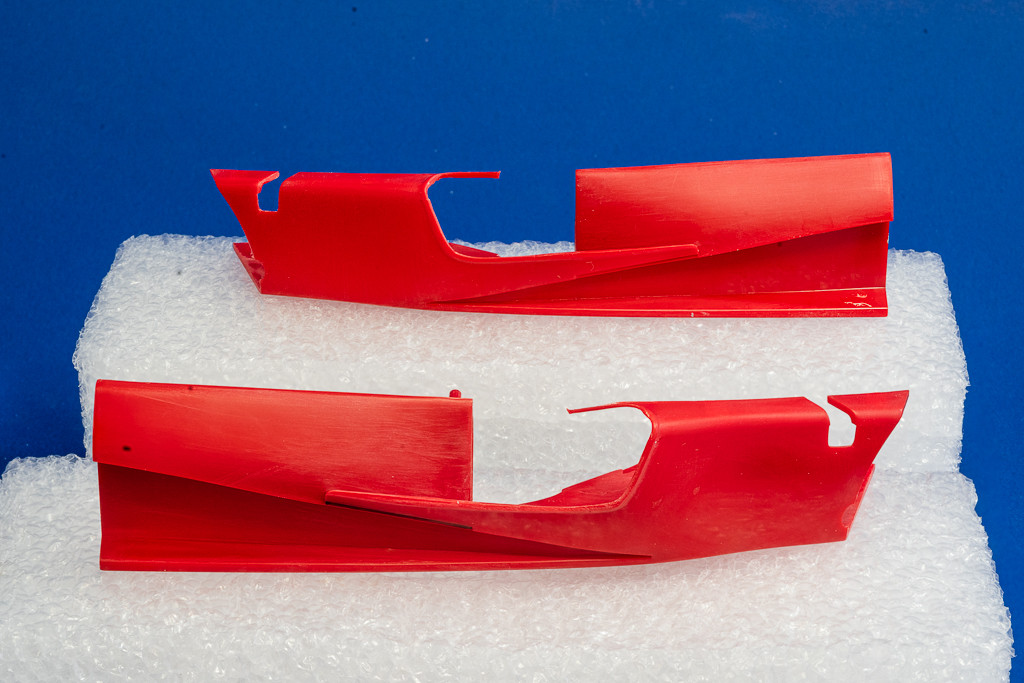
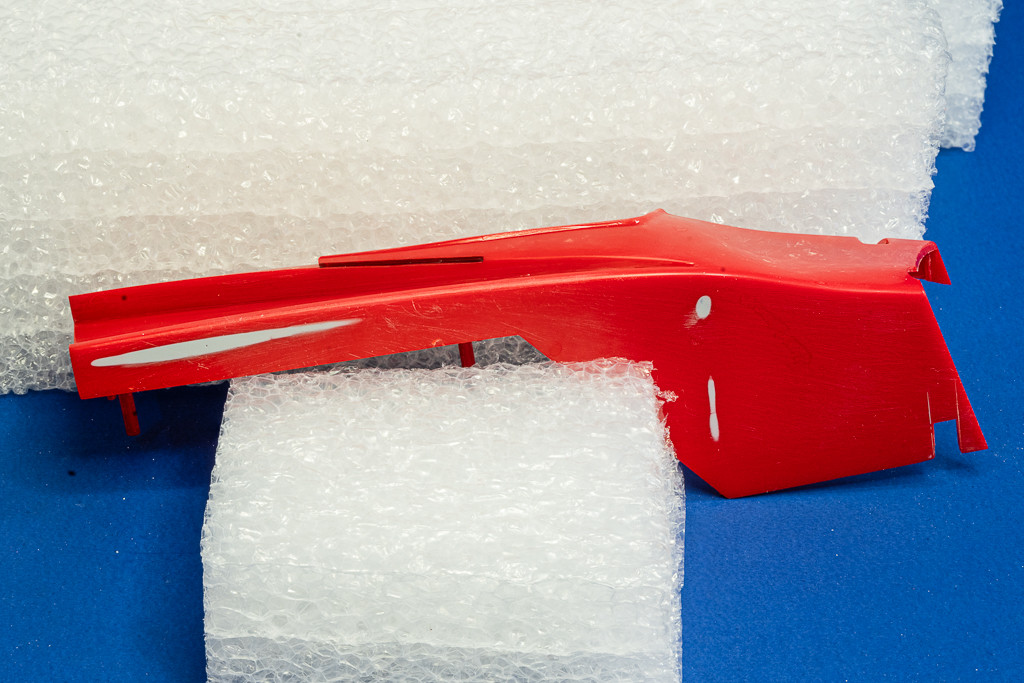
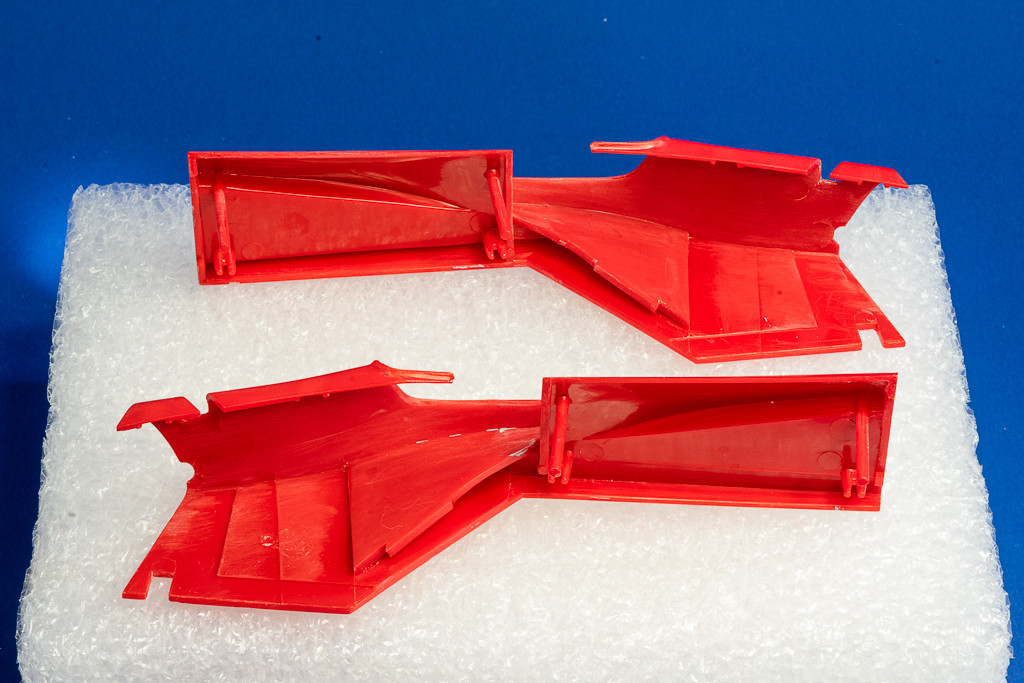
Right at the start, the builder should decide how the Ferrari will be displayed as it effects how the numerous exterior body panels will be utilized with the following three options:

  1. Is the Ferrari going to be finished leaving all the body panels off the chassis and displayed next to the finished model?

  2. Are all or a portion of the exterior body panels going to be glued in place, helping to insure the best possible fit?

  3. Will the body panels be removable, offering unlimited display options?

My choice is to build the Ferrari with the body panels off and displayed next to the model in the display case. Fit is good but dealing with 46 year old plastic, I worry about the plastic cracking with all the handling and being snapped into place each time a panel is added or removed.

I’ve reached step 8 in the instructions and the interior body, front suspension and cockpit are now ready for priming.

Thanks for checking in

Peter

4 Likes

Hi Peter - I’ll be following along for sure . I recently built Tamiya’s ancient Lotus 49 kit - blog posted here somewhere- and it was a struggle.
Be aware that the Indycals decals may not fit . It seems they are all the same for a given car/race and just enlarged or reduced for the different scales . The decals for my Lotus 49 were too short here and there and the nose wrap didn’t fit . I should have done the stripe in paint .
Cheers- Richard

Bro,
As we’ve been discussing, you really don’t have a choice but to start the 312T and work one step at a time till your renovations are finally done.
As all those parts really do look quite good in Alcad 2 especially the water and oil radiators in Dark Aluminum. From what I can tell, the pin wash did it’s job just fine. Just remember that the engine block is cast and has a dead Matt finish.

I followed Richard’s Tamiya Lotus 49 build every single step of the way, and I can tell you that most of us, including me would have binned it, but Richard stayed the course, and the final results truly speak for themselves. It’s way more then what I believe Tamiya ever envisioned for that motorized kit, which was their very 1st 1/12 scale kit.

As for the decal issues that Richard brought up concerning Indy Cals just up scaling the decal sheet, they do at times do that and visa versa. But in this case there are sheets for several 312s, all are slightly different as the cars changed from one variant to another. Just be sure that you order the 1975 312 T.

Bro #1

Outstanding! More big scale, more open-wheelers, more Willstein detailed build log content. No downside to this one!

Great opening post Peter and really nice work to get to this stage, I’m really looking forward to this one.

Cheers, D

D,
Well said my friend. Very well said.
joel

Thanks Richard and glad you are along for the ‘ride’. I’ll be extra careful with the decals keeping your warnings in mind but it’s way down the road as all the construction going on now, severely limits limits my modeling time.
Peter

JA
Still moving along at a snails pace as the renovation crew makes working very difficult. Only Alclad right now is on the radiators, as I wasn’t happy how the chassis looked and stripped it down to bare plastic. Haven’t had an opportunity to go through the NMF procedure again as just too much just in the air. Of course, you know I’ll be emailing and calling a zillion times once I reach the decal stage down the road.
Bro

Thanks D, much appreciated.
Going as fast as I can and trying to work around the renovation crew. Dust and what ever else, just slows me down and unfortunately, there are some other issues as well.
Peter

JA
:ok_hand:
Bro

Great to see this classic on the bench Peter. Having built a couple of these, Tamiya of the 1970’s is not the same as they’re today. I think fit can be a problem especially with the body panels.

cheers
Michael

Thanks Michael for the heads up and information.
I read you post the other night and apologize for not responding right away, as my head sometimes is just out of sink with needs to be done these days - just to much going on with our home renovation and my health issues. You were so right about the fit issues and I decided to jump right on it and see what I can do.
Do you have a link to your 312T builds I can read and learn from?
Much appreciated
Peter

A Change of Heart

The Side Panels

Building and still doing research to learn as I go, it became quickly apparent that my initial thoughts of displaying the chassis and all the body panels separately, was no longer the way for me to go. Think more and more about the end display, the model wouldn’t look or have the feel of this iconic F1 Championship race car, with all the body panels displayed separately and some need to be on the car so anyone looking at the model would know it is a Ferrari. I now dug into studying a good deal of display model photos and realized there was going to be a numerous fit issues it (yup, I saw the panel fit issues) and decided I needed do some serious testing before moving on and a new display plan as well.

I removed all the exterior body panels from their frets, cleaned up the gate nibs and started attaching them to the chassis by the locating pins and nearly fell off my chair at the fit issues. There were gigantic injector pin marks on the back side of panels that would/could be seen and of course, some caused fit issues as well. I decided to remove them all which turned into a mega headache as they were in hard to reach places. The small exhaust radiator body panel has compound curves, some of the deepest and most numerous injector pin marks on a small part I had ever seen. I’m guessing that they were needed as Tamiya couldn’t get them to release from the mold any other way.

Of course, there were lots of tricky mold lines to remove and I was lucky that a good number of injection pin marks, I was able to sand out and no filler was needed.

Each of the side body panels are comprised of three parts, replicating the actual side panel makeup. There are fit issues, especially the small exhaust radiator panel – it doesn’t fit well at all. At this stage, job number one is to create a single side panel, no gaps and insure it will attach to the side of the chassis with no issues. There were large exterior sink marks that needed some TLC.

Back to the display thoughts as it stands now: the chassis sides would have the body shell panels permanently installed, the top portion of the chassis would be displayed in bare aluminum and all the remaining body panels including the large intake assembly that is so distinctive on the 312T.

Nothing ever goes according to plan and of course, my brother has been invaluable with his knowledge of race cars and modeling them, as I’ve always been a large scale aircraft modeler, with little automotive modeling to fall back on.

Peter

This is where I’m heading at the rear side panel shows the body panel fit needs work.

Some mighty nice sink marks - filled in with CCA, Mr Surfacer and Tamiya Filler.

I highlighted grooved area just seem to be wrong. I didn’t see any mention of it in the instructions or a part that should be glued in. Hoping someoen knows if it should be there or not.

The record

1 Like

Bro,
Excellent job on on those ejection pin marks.

You’ve got me really confused once again as to what your display goals are as those side panels have part of the top panels as well. Is this your goal:

Bro #1

JA
I was born confused - right now I’m really down to just two options:
display my 312T as the pic above or just use the side panels. You have me thinking. Looking at the photo, I think I can see the groove/slot in the side panel I was asking about … any ideas?
Bro

Bro,
Are you talking about the hot air exhausts with that run right under the front suspension?
Bro#1

JA
Nope, I marked it out on the photo: it’s the black line. I have no idea what it is or what I should do with it.

Bro

1 Like

Hi Peter, I have not built the Ferrari though I do have it somewhere in the pile. What I found was on similar vintage Tamiya models - A Tyrell 003 and a McLaren M23 both had sufficient fit issues that they remain uncompleted on the shelf for a time when I am more patient.
Oddly, or maybe not, my lack of patience is inversely proportional to price I paid for the kit - which means I try not to buy cheap kits anymore.

cheers
Michael

3 Likes

Michael,
Well said. I too have gone the route of cheap bargain kits only to eventually be donated to the recycle bin where the plastic can be put to better use.

For the amount of time and effort I put into each of my builds, the cost isn’t nearly as important as the quality and accuracy of the kit.

joel

3 Likes

That’s true, but subject matter comes into it as well. Why isn’t Mr Tamiya releasing a 1/12 ‘57 Bel Air or 1/24 Nomad just for me?

Great progress Peter, every little bit of work you do on cleaning up the parts is a step forward and heading to a better finish.

Cheers, D

1 Like

D,
I took subject matter for granted as I’m not inclined to build anything I have no interest in the subject matter.

joel

1 Like