I have TT 100’s on my Commando - love them .A little short lived mileage wise on the rear but otherwise fine . Choices for modern rubber are are limited as I still use 19” rims.

2 Likes
Richard,
I’ve never been a biker as my parents wouldn’t even consider the idea of me having a bike, even when I was in college but living home. But your Commando does stir those very old feelings once again. she’s a classic for sure.
joel
I have 19"s front and rear on my '71 Fastback. I use Avon Roadriders (also on my other British bikes). There’s nothing wrong with Dunlops, it’s just a personal thing. But then I’ve never done any racing on the track.
@Joel_W - Maybe no real bikes for you but I hope you will cave in and build a model !
@Hohenstaufen - here is a comparison of of the KR 73 racing cross section
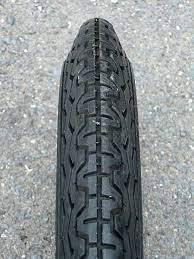
and the TT100 on my Commando - keep in mind that the KR 73 photo is of an unmounted and uninflated tire (tyre ) and so it’s somewhat conical section is exaggerated.

1 Like
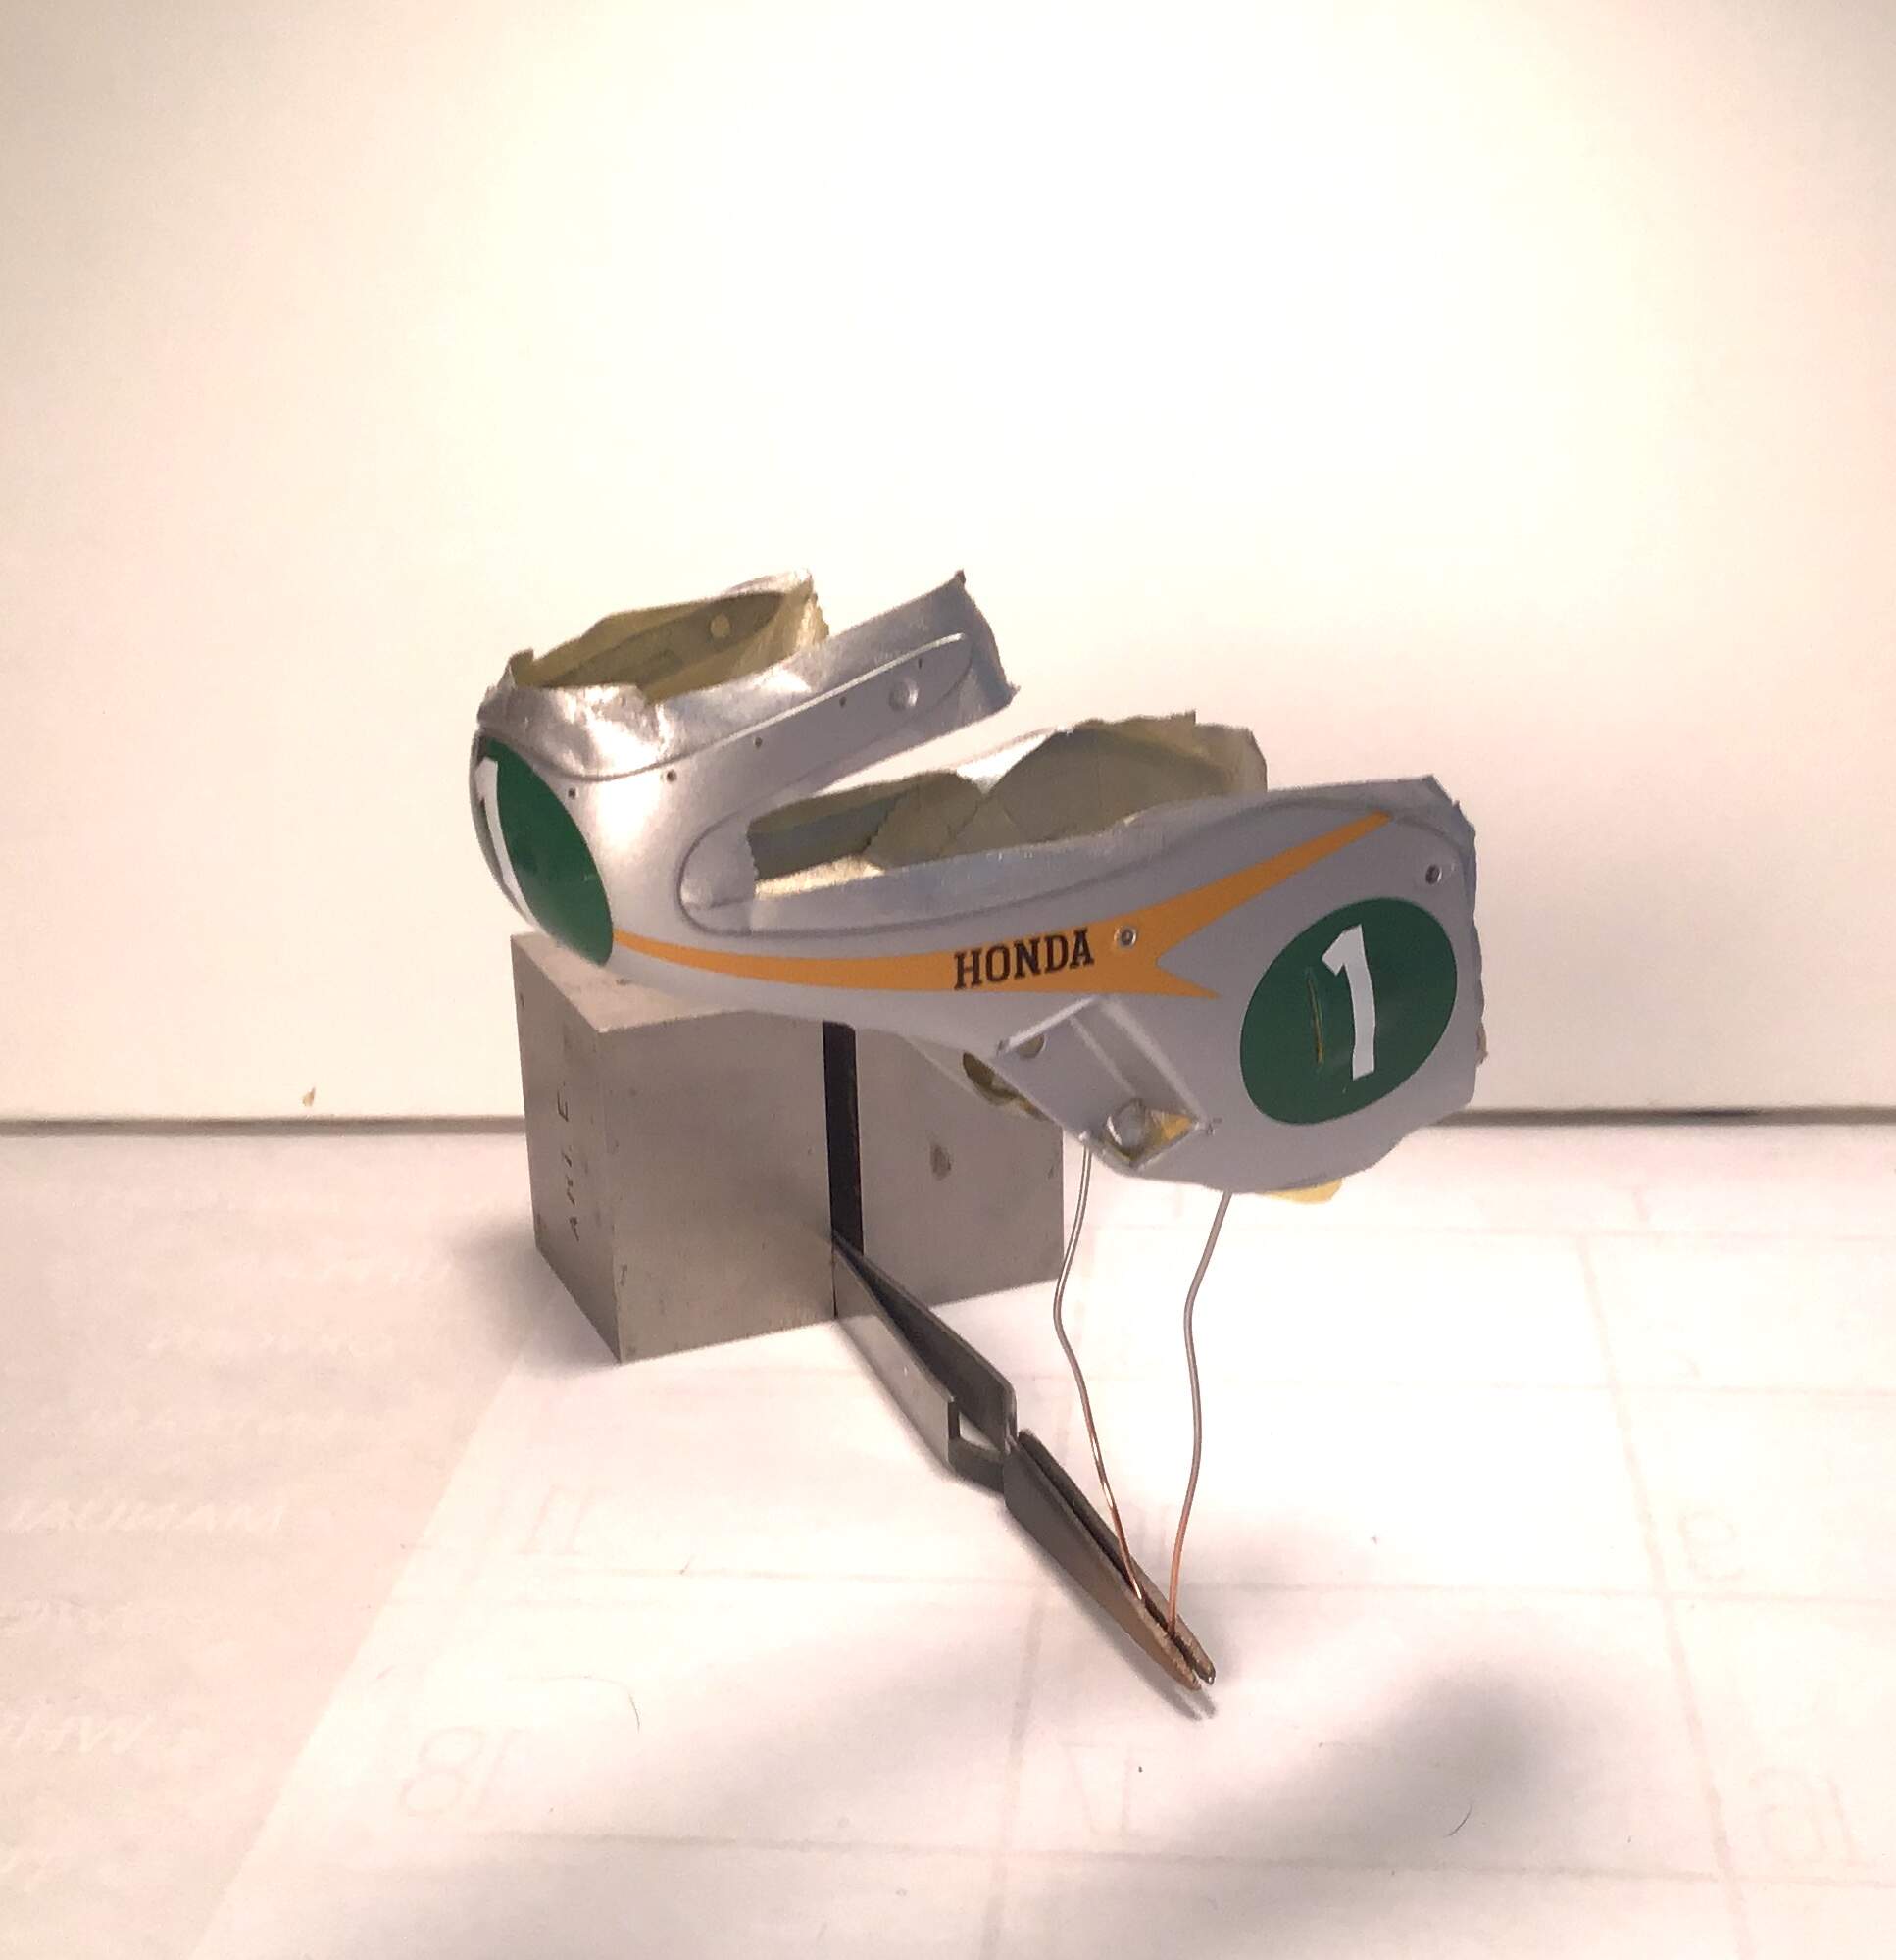
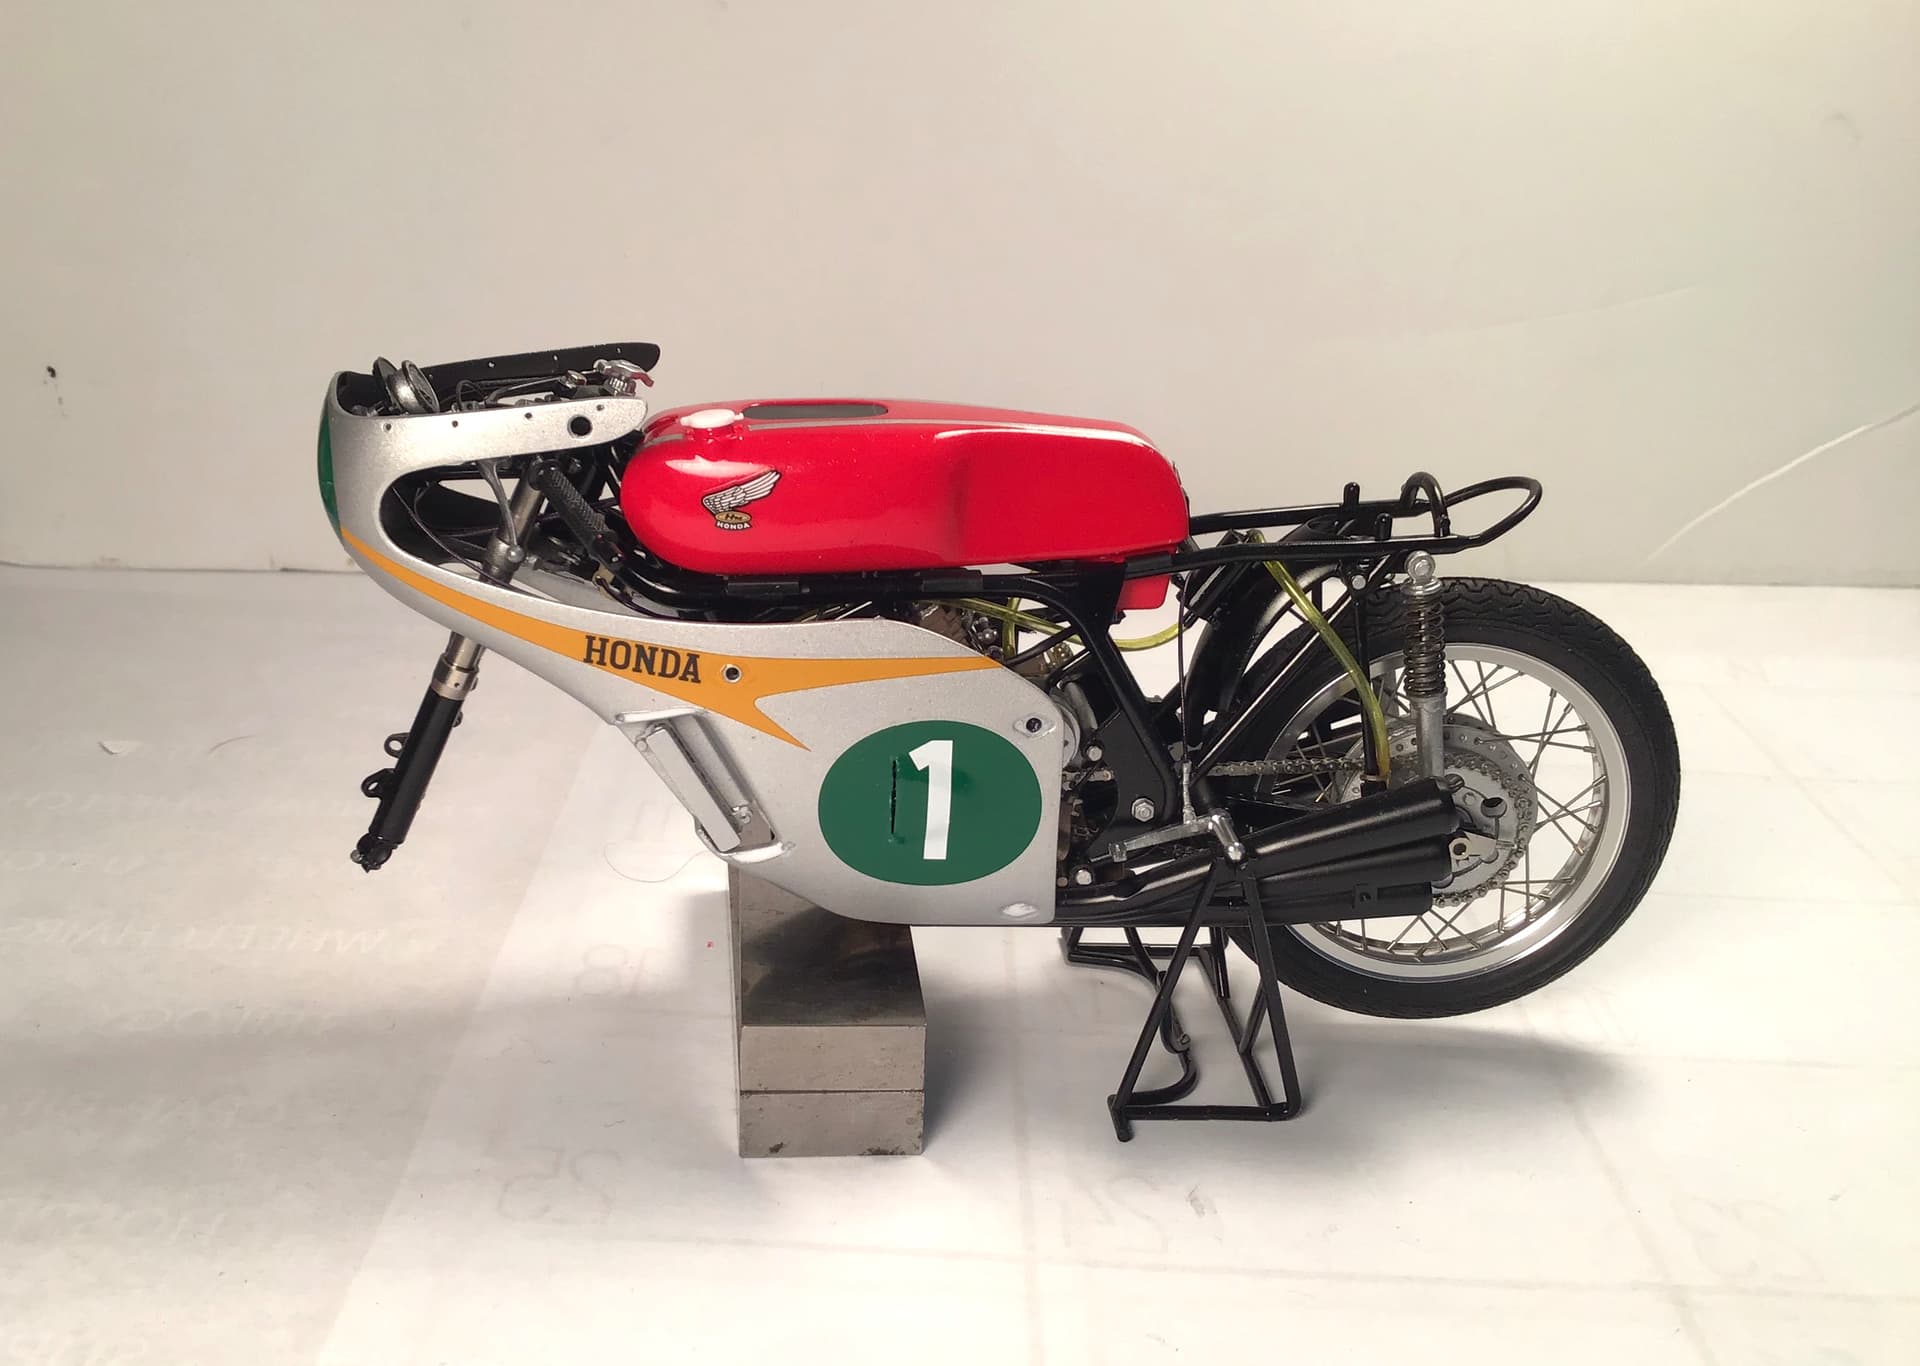
Paint and decals done and ready for clear coat .
Same old rant against Tamiya overly thick decals .
Gallons of Microsol later and still they crease .
I should know better by now and I should have made masks and painted the green number fields .
Model bench closed for a few days - youngest daughter’s wedding day tomorrow !
Cheers - RT
4 Likes
Well they look great in the photos. What color did you use for the silver?
Cheers
Michael
Thanks Michael - the number field on the front of the fairing simply would not conform even though Tamiya have you cutting a V notch before wetting .
Many creases around the perimeter that were carefully sliced and dosed with repeated applications of Red Microsol and brushed with a soft brush . Various spots needed touch up with a custom mix color match green paint. I am hoping that a few coats of gloss clear will hide the flaws further. Fingers crossed.
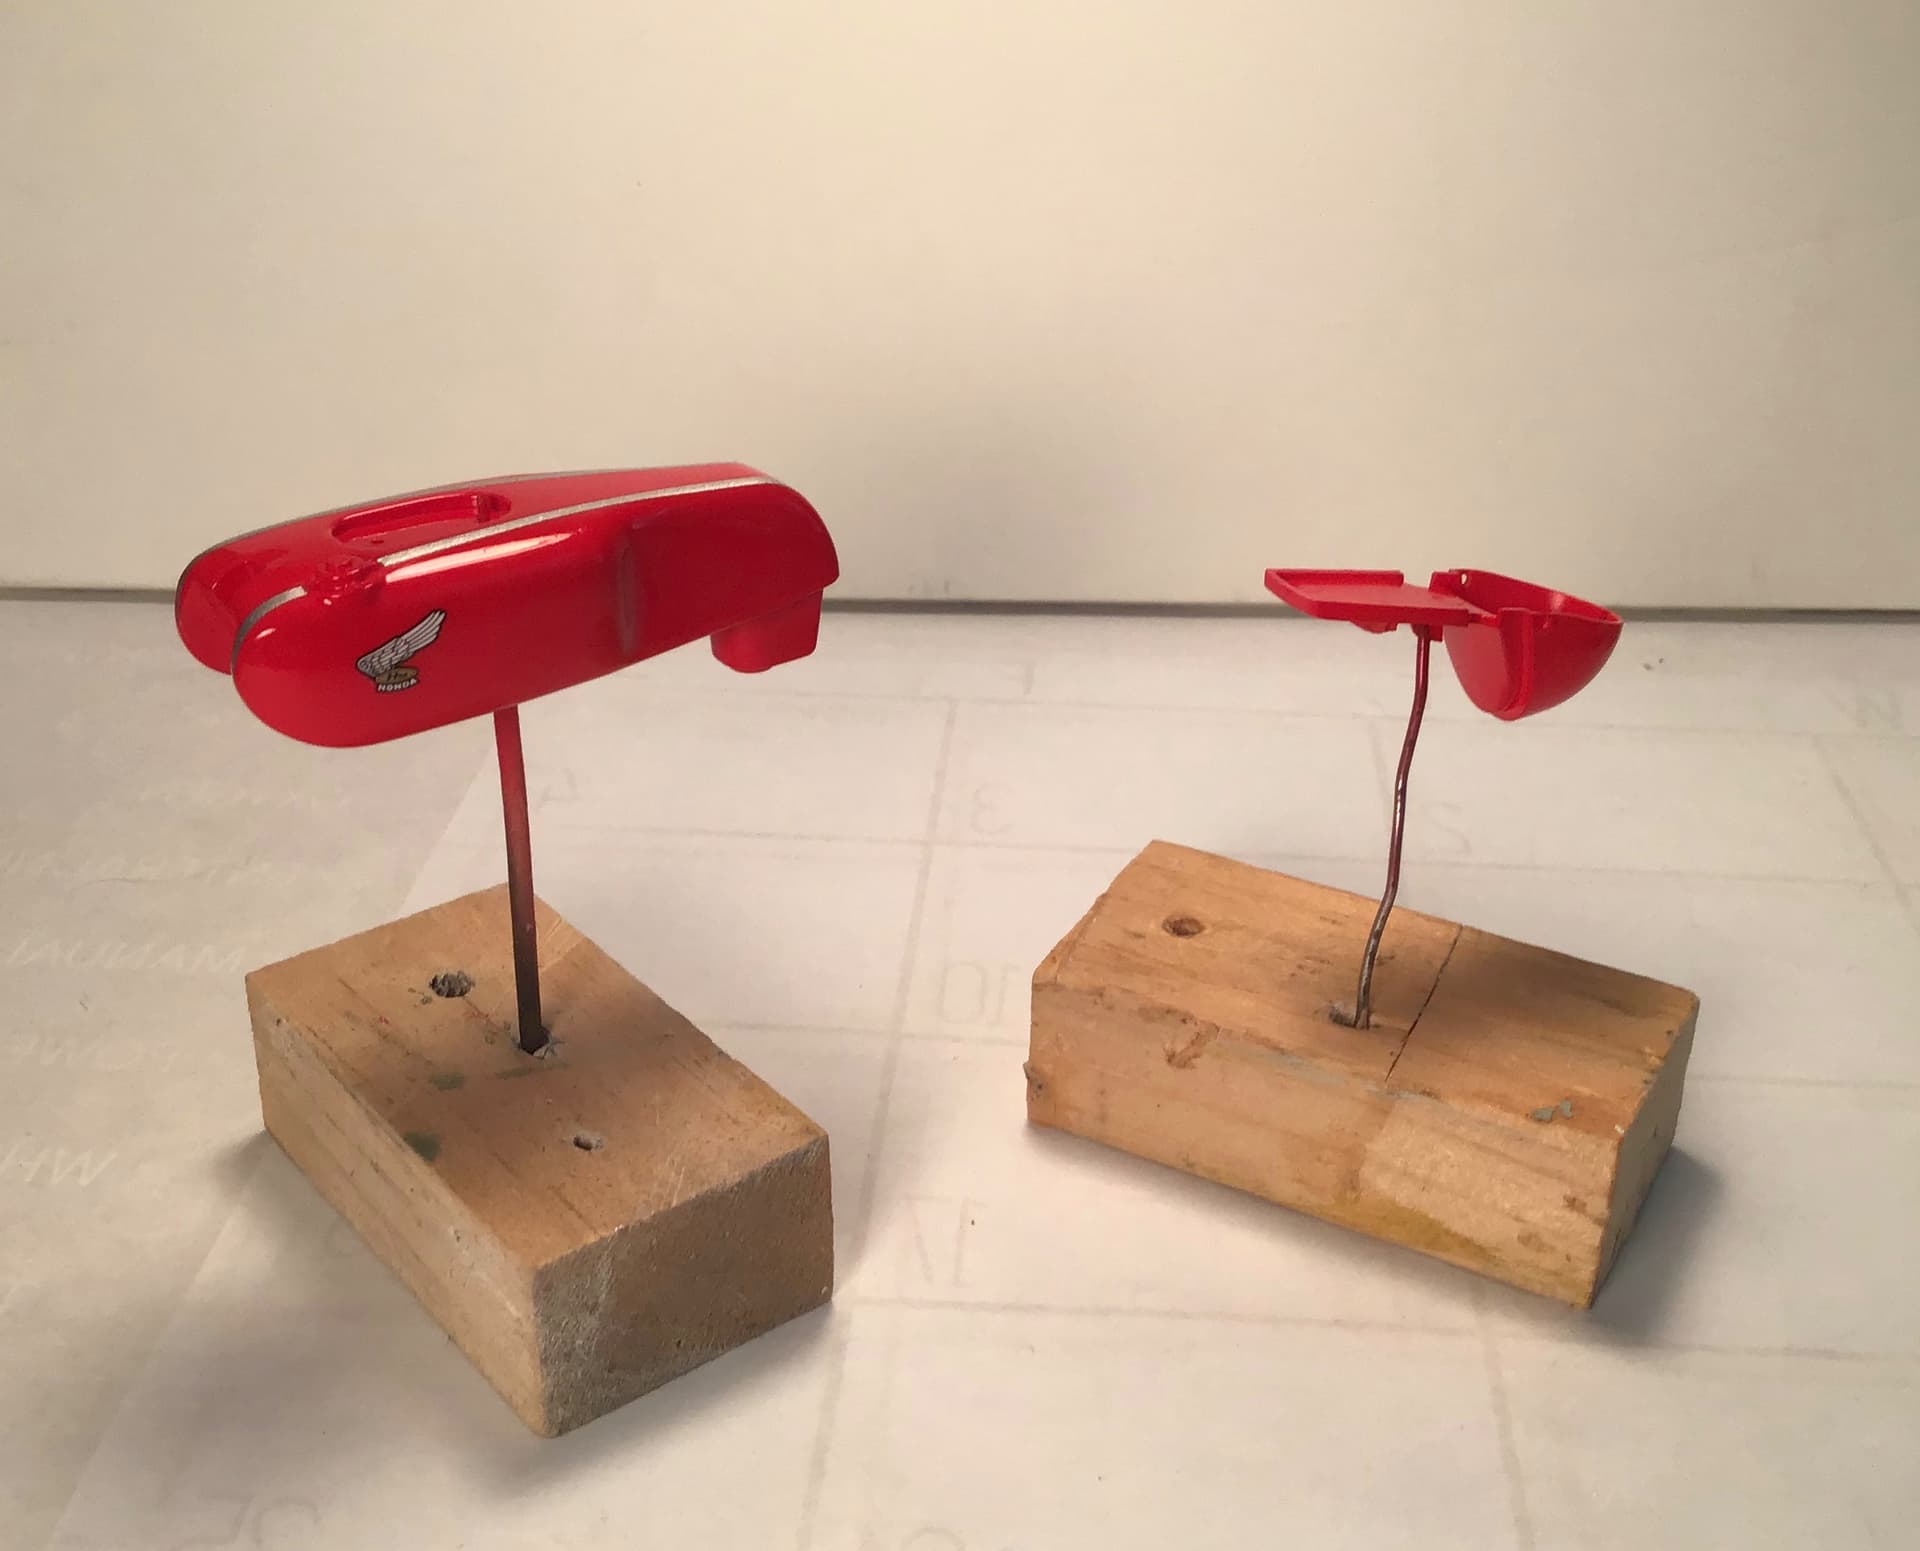
I made test samples for the silver using Tamiya X-11 Chrome silver and Tamiya XF - 16 Flat
Aluminum . The Chrome Silver looked better from a gloss standpoint but the Flat aluminum grains or flakes looked much finer so I went with that and then rubbed it out and the over coated with clear gloss before decals .
Richard,
Slowly but surely I’m working my way towards a bike build. So how was the wedding? I’m sure that you were one really proud Dad.
Great job on the Aluminum paint. Rubbing out the Tamiya Aluminum really made a big difference. I’ve got at least 18 bottles of Metalizer Aluminum paint and most has grain that makes those bottles useless. Mr. Color has some excellent Lacquers that look like they would work, but I keep on going back to Alcad 2’s, but they don’t tolerate a lot of handling nor masking without a clear seal coat.
Decals look darn good even when I enlarge your pics full screen. Like you, I try to never use Tamiya decals unless they’re printed by Cartograf just for their thickness issues. The only way that I’ve got them to conform to compound surfaces is with Gunze Mr Mark Softener and Setter. They’re super strong as they’re formulated for those mostly thicker Asian decals.
I did use a few Tamiya decals on a recent build and their newer decals do seem to be thinner and worked with Solvaset just fine.
joel
Beautiful work Richard, the finish on the main parts there looks great!
You guys all need to get hold of some of the SMS paints and give them a try, they spray really nicely and cure tough as nails.
Cheers, D
1 Like
@Joel_W
Thanks Joel - my baby girl is now married off to a wonderful guy with a wonderful family - I am very fortunate and when I get some pics sent to me I find a way to sneak them in here .
I am going to order some Alclad aluminum finishes and some stronger Decal solvent.
@AussieReg
Thanks D . I have just found a USA source for SMS paints and I’m going to order some BRG and Aluminum finishes for the upcoming Lotus build .
I have read a couple reviews for SMS and they both felt that although they are supposed to be airbrush ready they benefited from further thinning. In your experience have you found this to be so ? Thanks in advance for any input. Glad to see you finding at least a little time for modeling.
Cheers- Richard
Thanks Richard! I have been adding a couple of drops of thinner, either MLT of a premium lacquer thinner, to the airbrush cup. It sprays nicely without that, but I find it gives a smoother flow and finish.
I look forward to hearing your thoughts, the owner of the business is a friend of mine.
Cheers, D

Huge congrats to the happy couple, you must be a very proud dad right about now!
Cheers, D
1 Like
You bet D - I must have had an allergy attack while walking her up the aisle… eyes were watery a bit .
2 Likes
Damn those allergies, they pop up at the most inconvenient moments 

1 Like
Richard,
Your daughter made one beautiful bride. Please post a picture of both your daughter and your new son-in-law when you get one.
joel
1 Like
@Joel_W
@AussieReg
Thanks guys for the compliments - I may be just a tad biased but both my girls are as beautiful inside as they are outside.
Now back to the subject at hand…
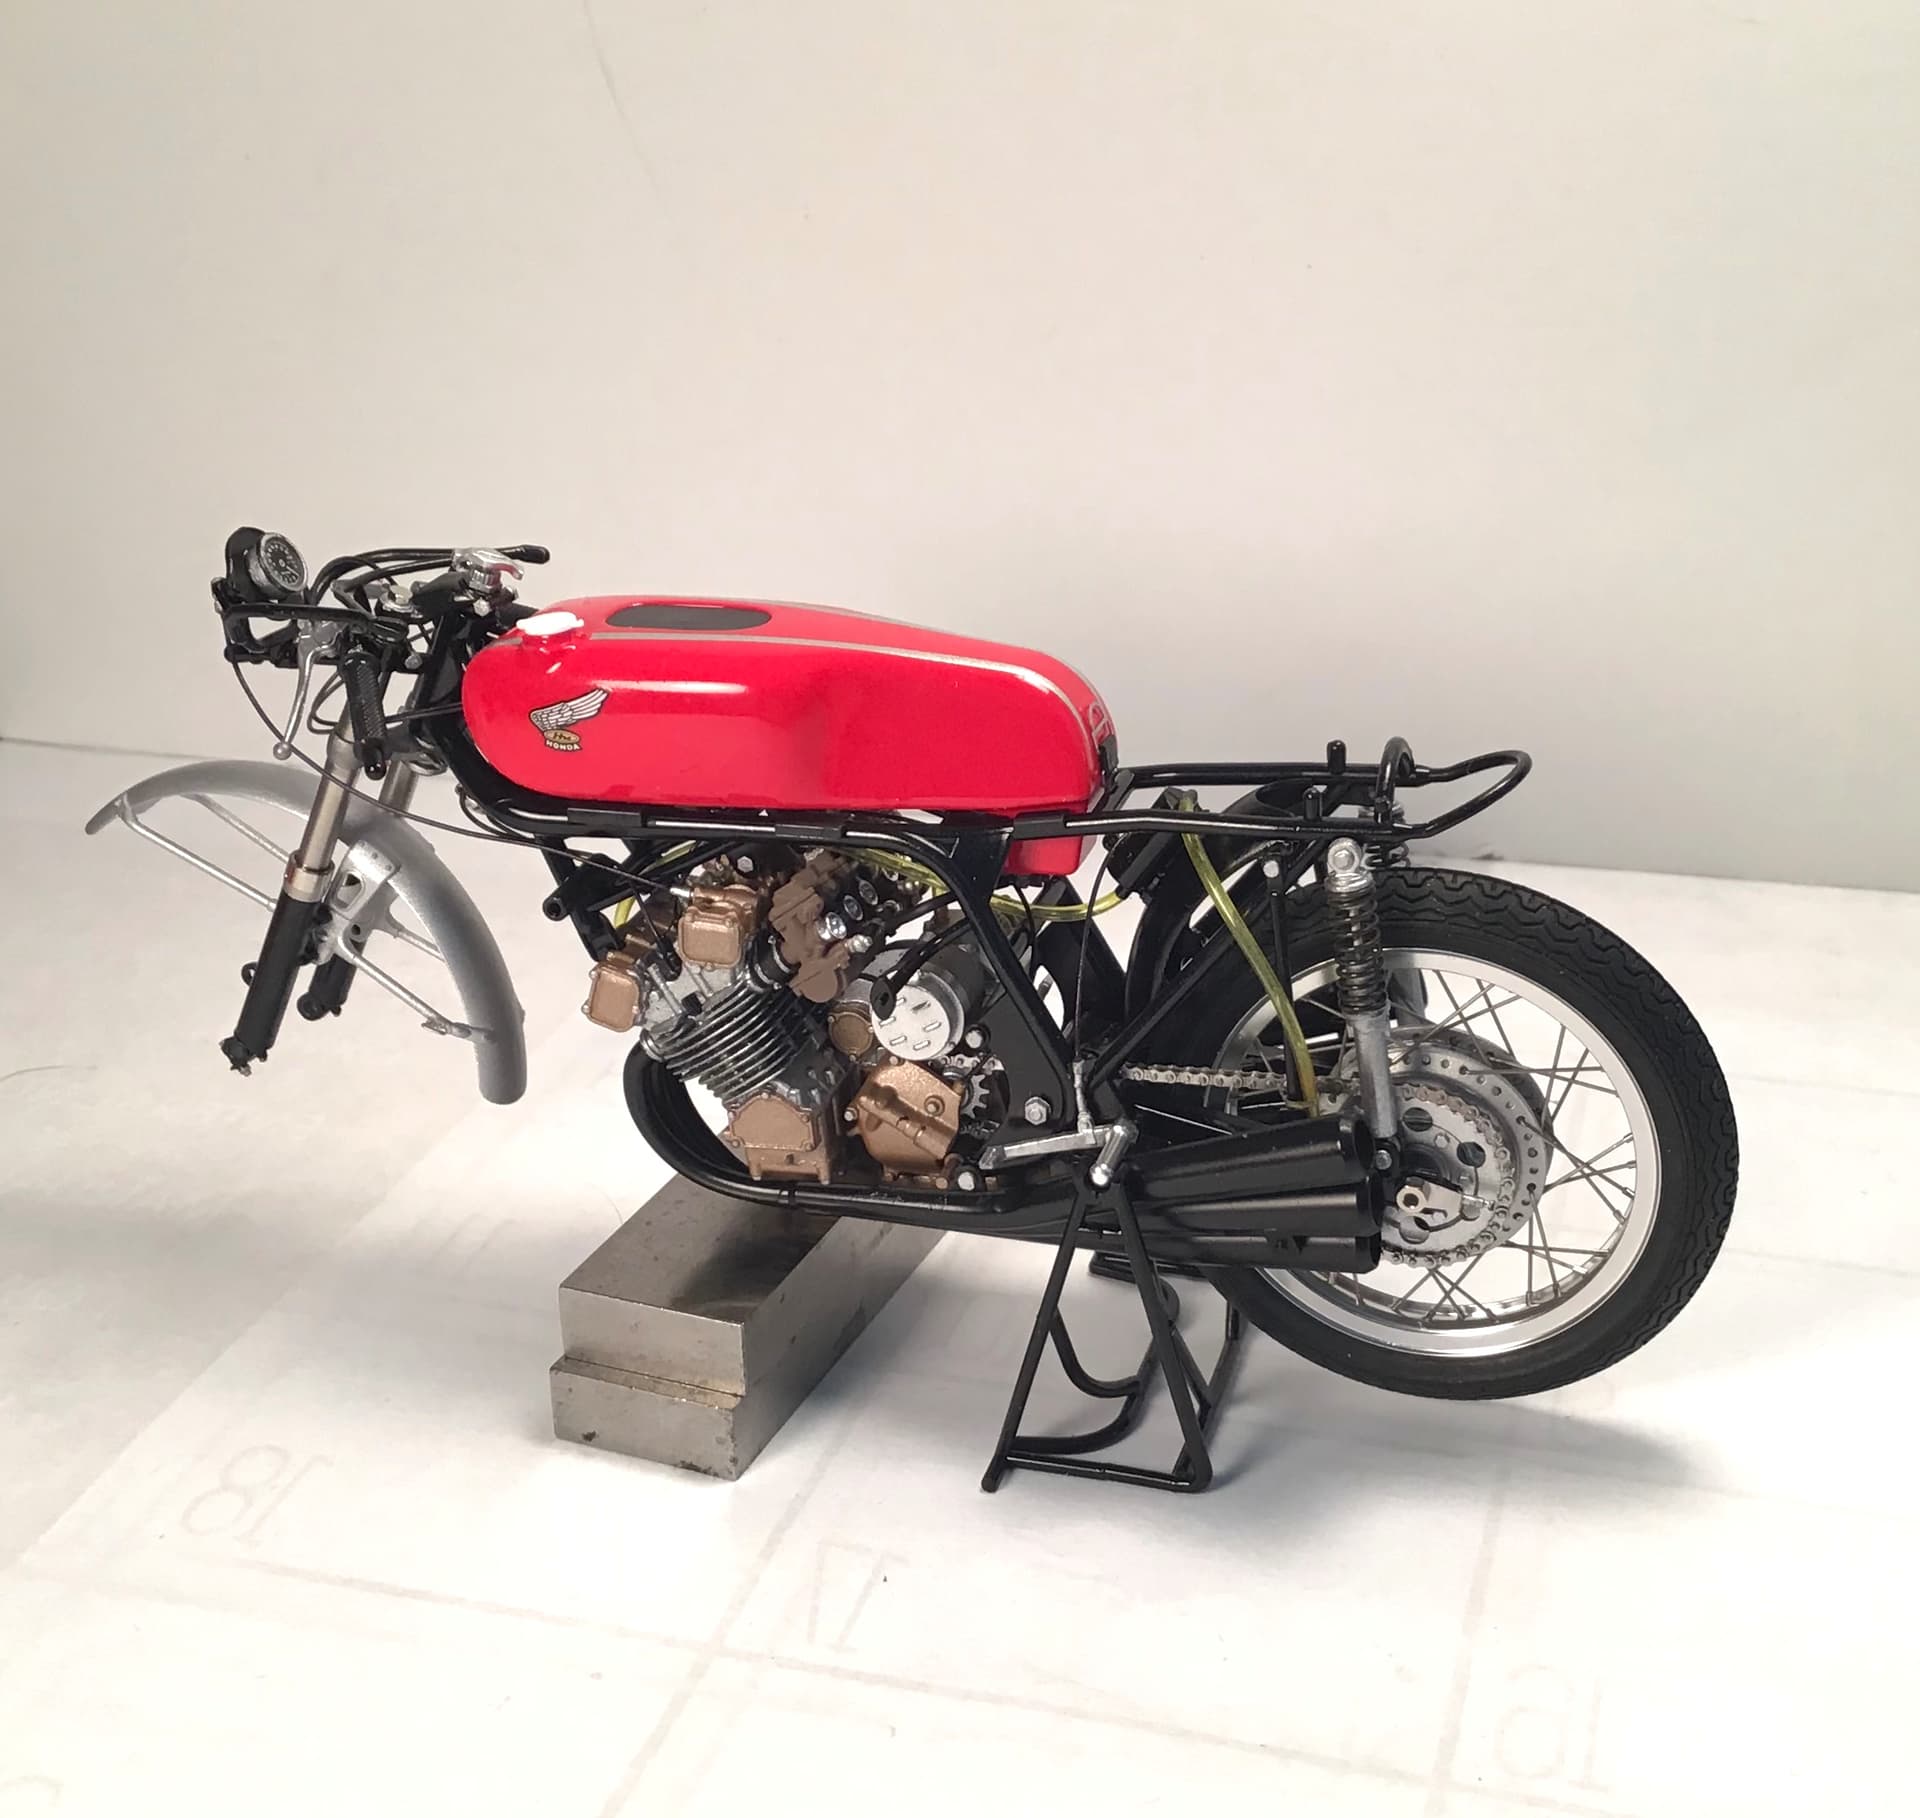
Fuel tank done and installed. More beautiful stuff from Tamiya - same soft black plastic as the grips for the chin rest , bungee hold down at rear of tank and seat .
Fairing in place - some photo etch to install before fastening fairing.


Thanks for looking!
Cheers- RT
3 Likes
Looks amazing Richard, superb work! Tamiya engineering is always great to work with, but you still need to have the skills to pull it all together to look this good.
Cheers, D
1 Like
It does look fantastic Richard. I love those triple exhausts either side. Sort of reminds me of the exhausts on this bike.

cheers
Michael
1 Like
Ho ho, yes I remember this advert! Wasn’t it for Avon tyres; “How to handle a handful”?