MFH use the same process i.e. screws to hold key pieces together but they also provide hex bolt heads to stick on top where they are visible. It’s a pity that Tamiya don’t do this because as you Joel in their F1 builds sometimes they are quite prominent.
Michael,
I completely agree with you about Tamiya stopping just a 1/2 step short from a proper solution to covering up screw heads that actually stick up above the body sections, especially as these kits are very expensive in their own right. What could those caps have cost including the design and molds, compared to how much further they would have moved the kit in the realism category.
Richard,
I just knew that it was never a question of “IF” you’re going to buy the kit, but rather “WHEN” you’ll bite the bullet and officially moved into the realm of MFH kits whose selection is so vast, it’s simply mind boggling.
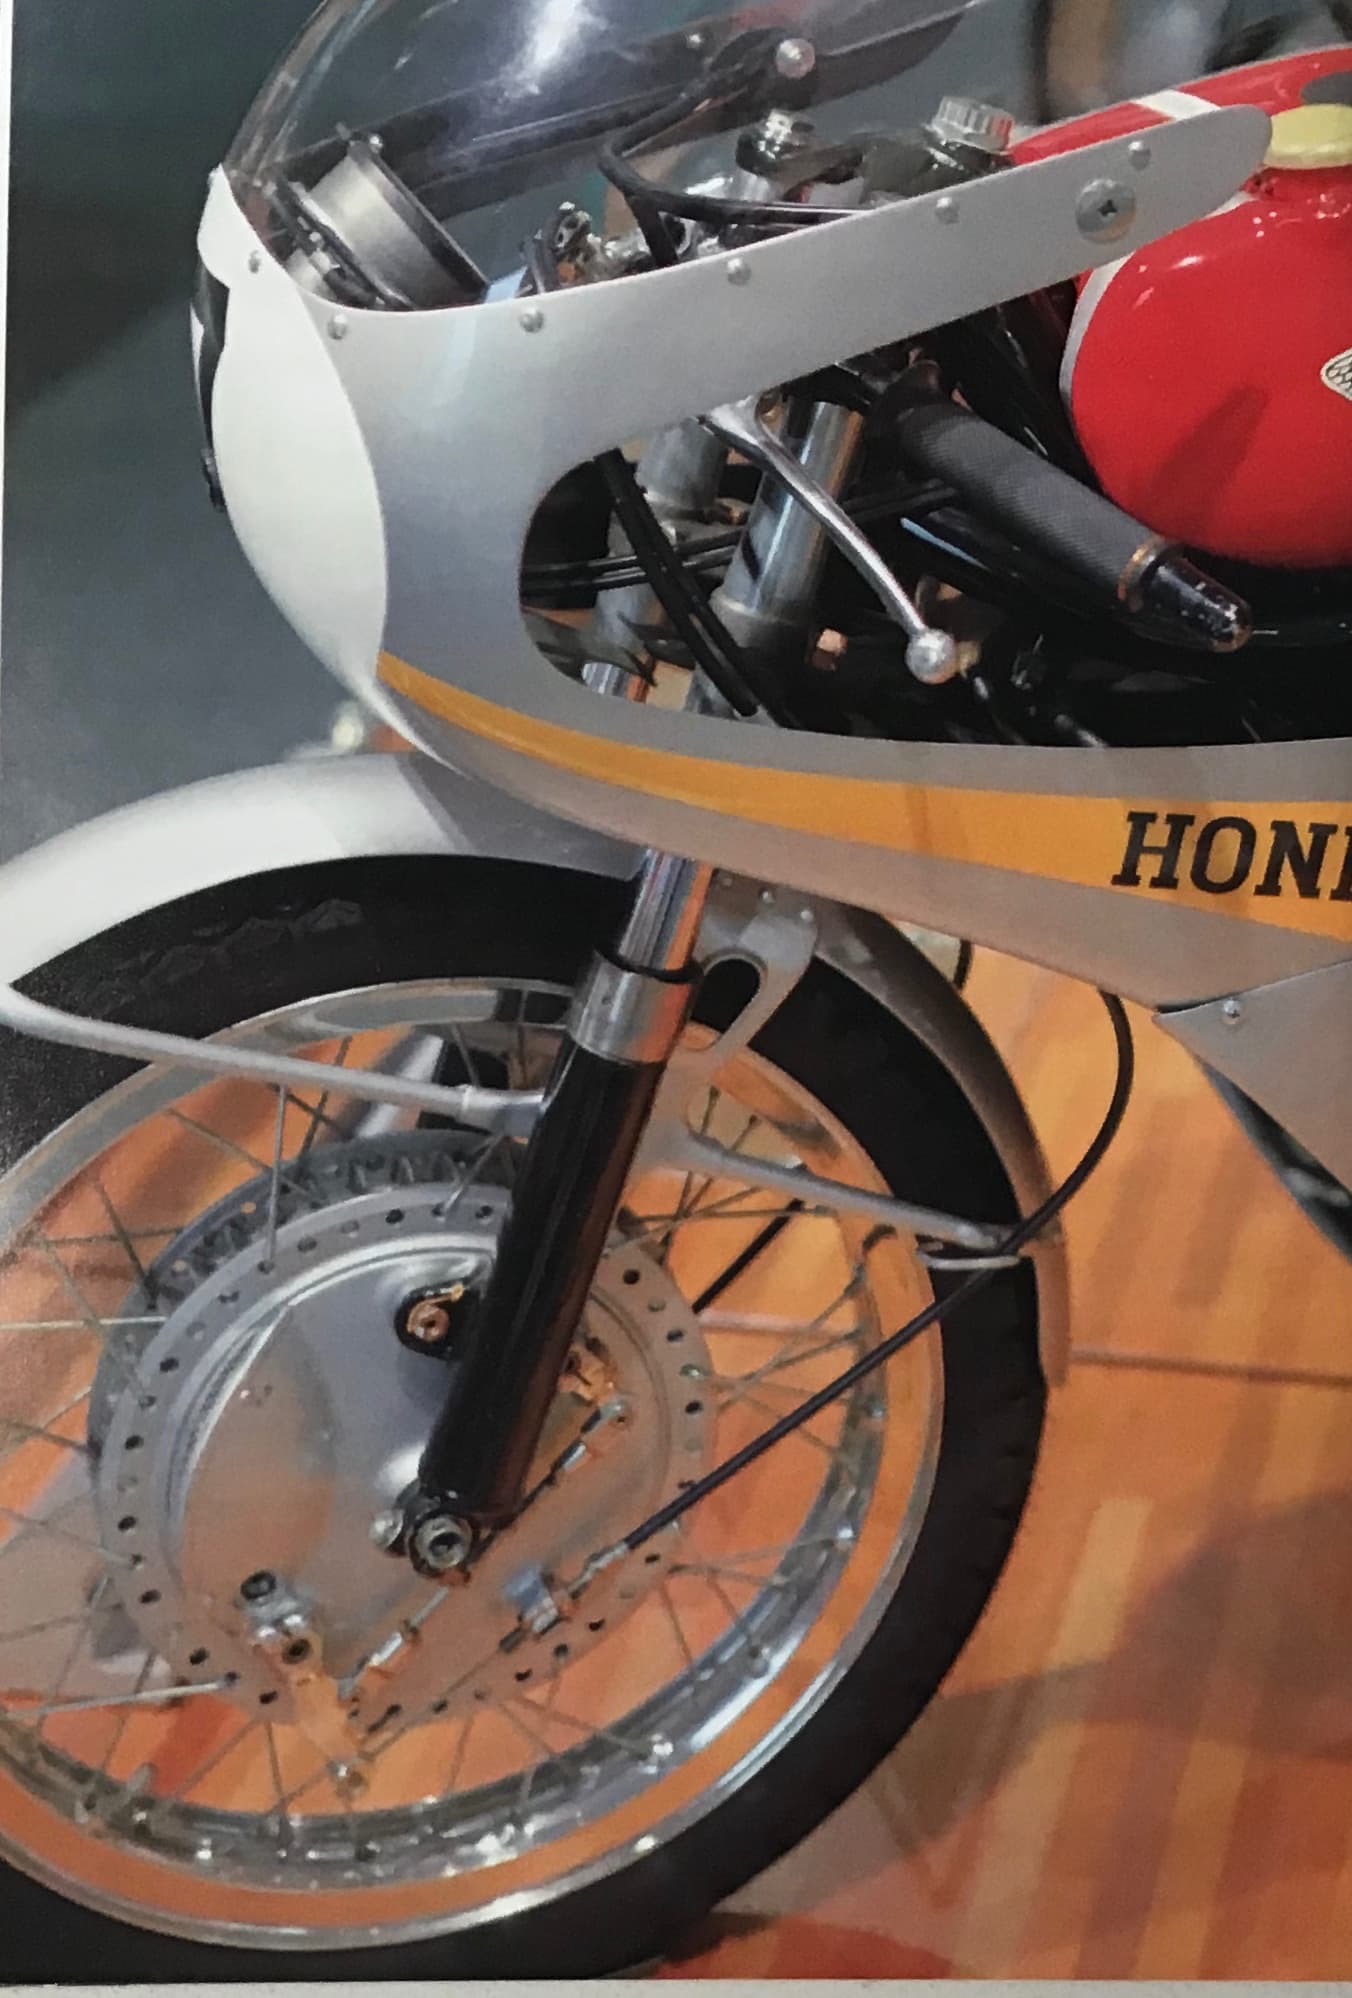
Photo credit : MFH Honda RC 166 in Detail
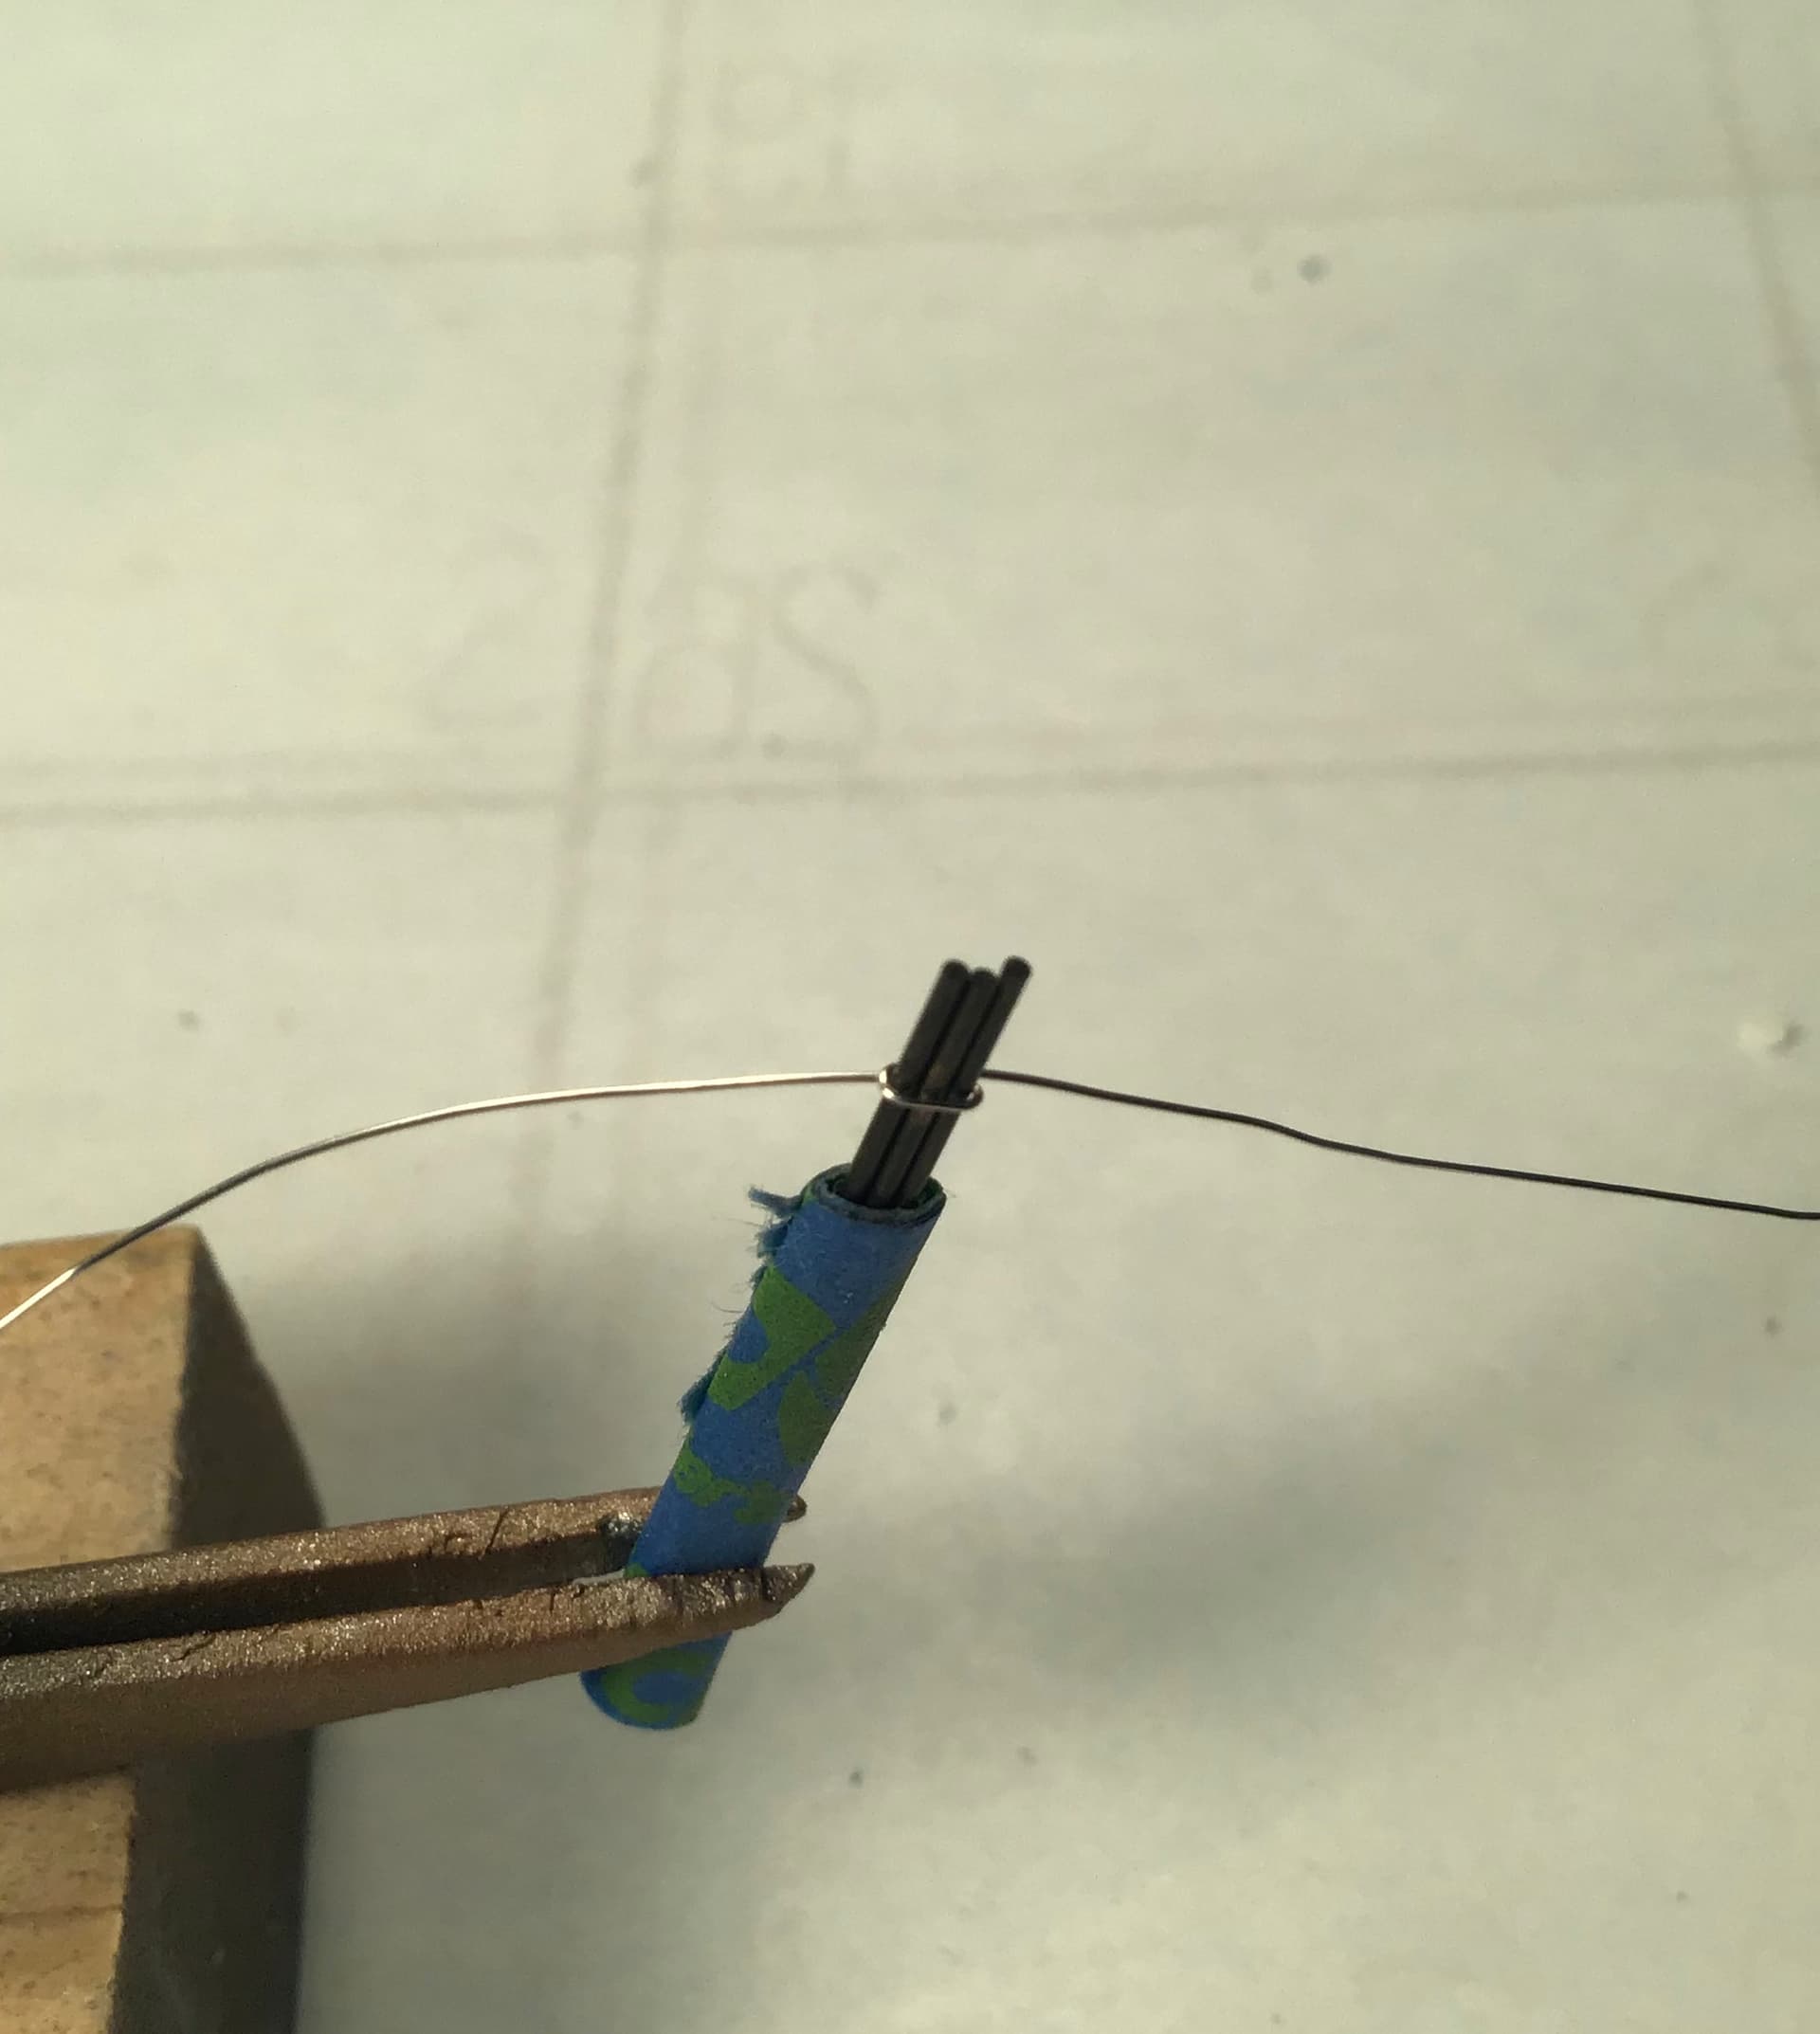
A piece of wire wrapped around 3 drill bits of a slightly greater diameter than the brake cable ,
ends trimmed and then cemented to stays with CA.
@Joel_W
I fought it for a while - then it hit me that I had more than enough points on my business credit card to cover it - well that’s my story I’m rehearsing.
If they become addictive as Michael claims I would likely cave in again if they did a 1/12 Lotus 25 / Coventry Climax with Dunlop Wobble Web wheels.
Hands down my all time favorite race car .
Richard,
I’m betting that with your metal skills, you’ll be addicted for sure. As for the Lotus 25 in 1/12 scale, who knows, but it’s sure possible.
The long time out of production Tamiya 1/20 scale Lotus 25, re-released once or twice has been an instant success. Mine is resting in it’s display case. And the Ebbro/Tamiya 1/20 scale Lotus 33 that hit the Asian market via Hobby Search is already completely sold out. I’m primed and ready to order the kit as soon as Spot Models gets them in and can cover their pre-orders which I refuse to do.
I’d stick to your rehearing your story till it’s spot on perfect, then pray for the best. My wife has never believed a single one I’ve come up with as yet.
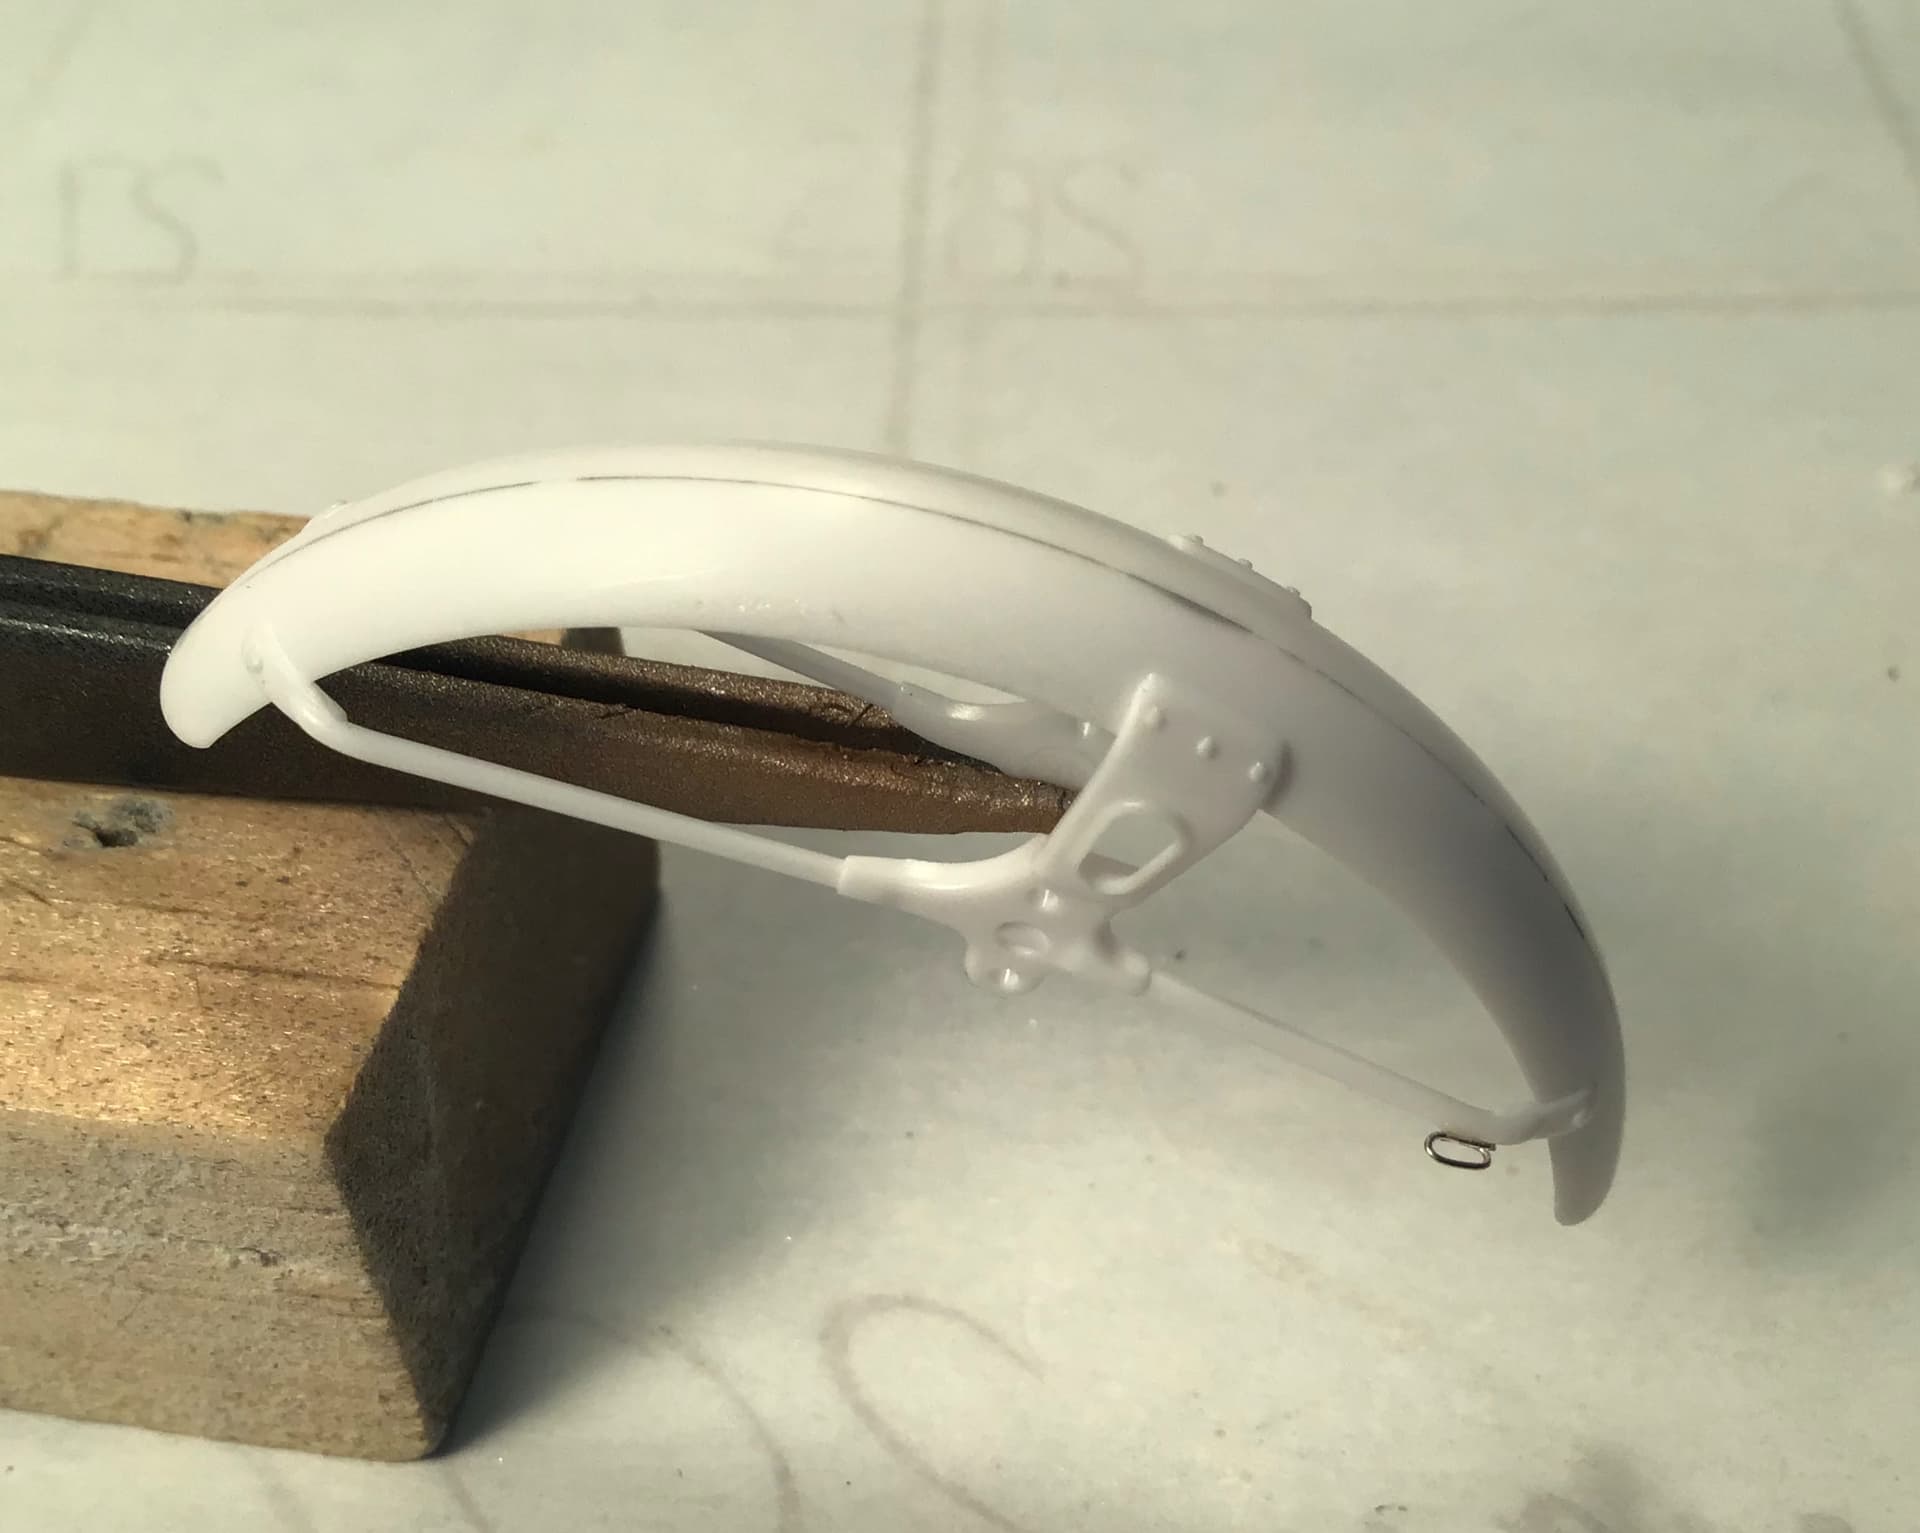
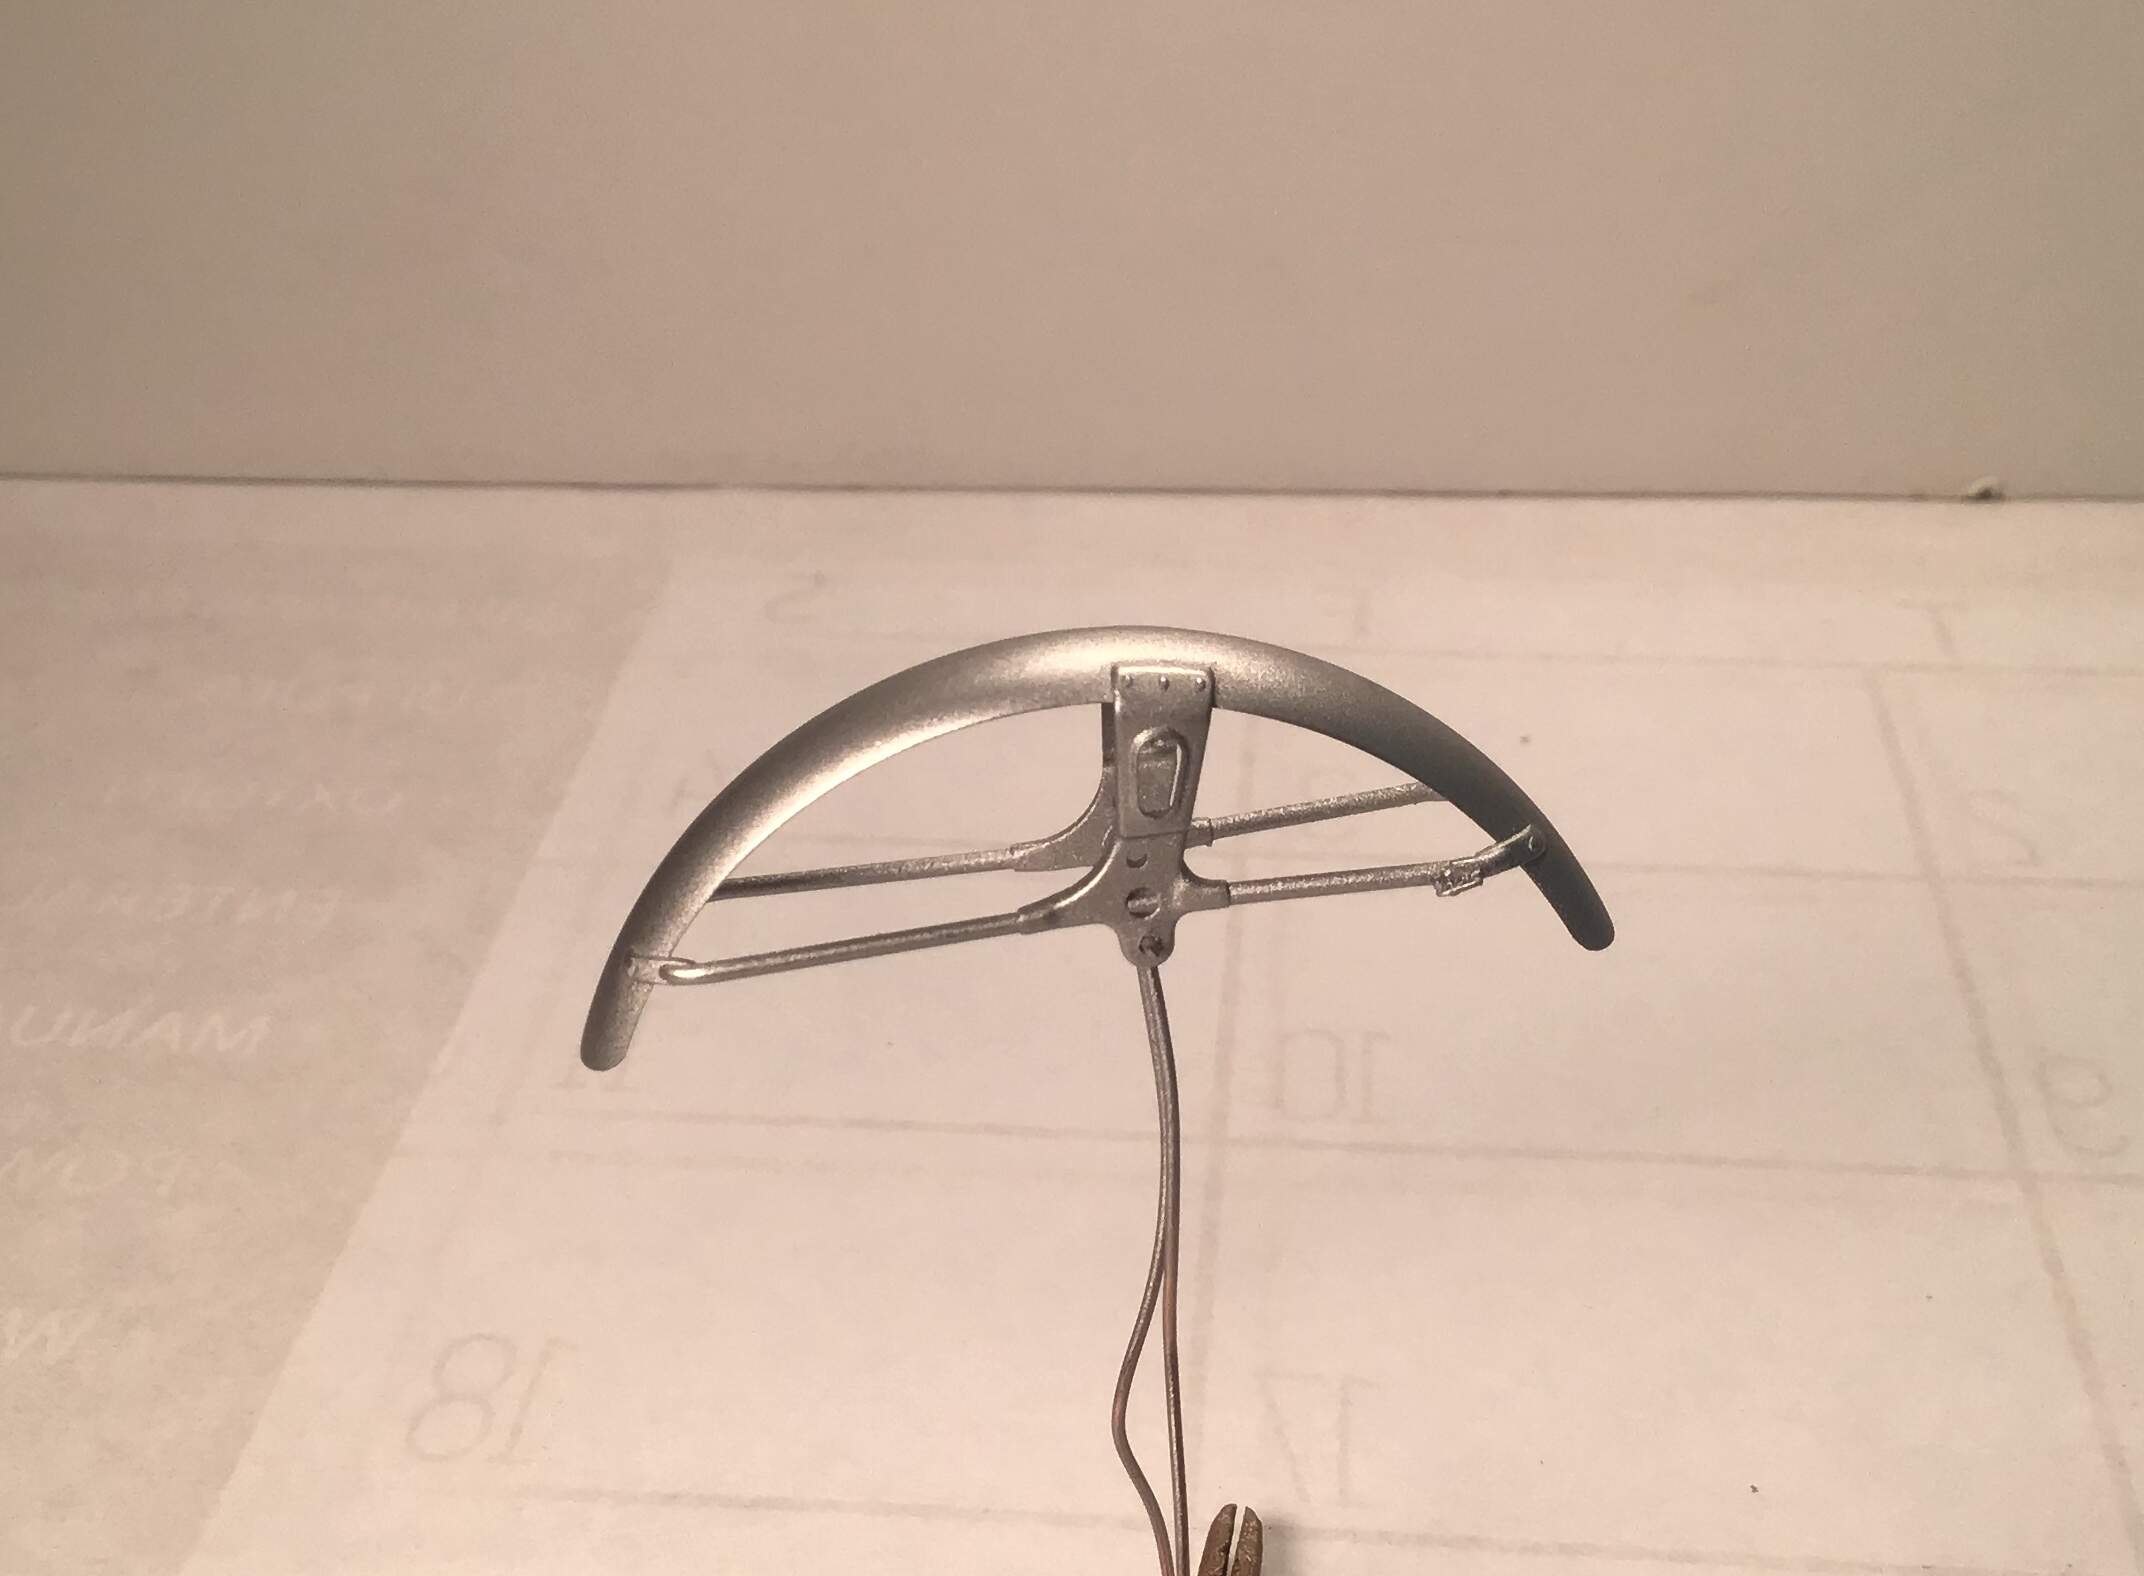
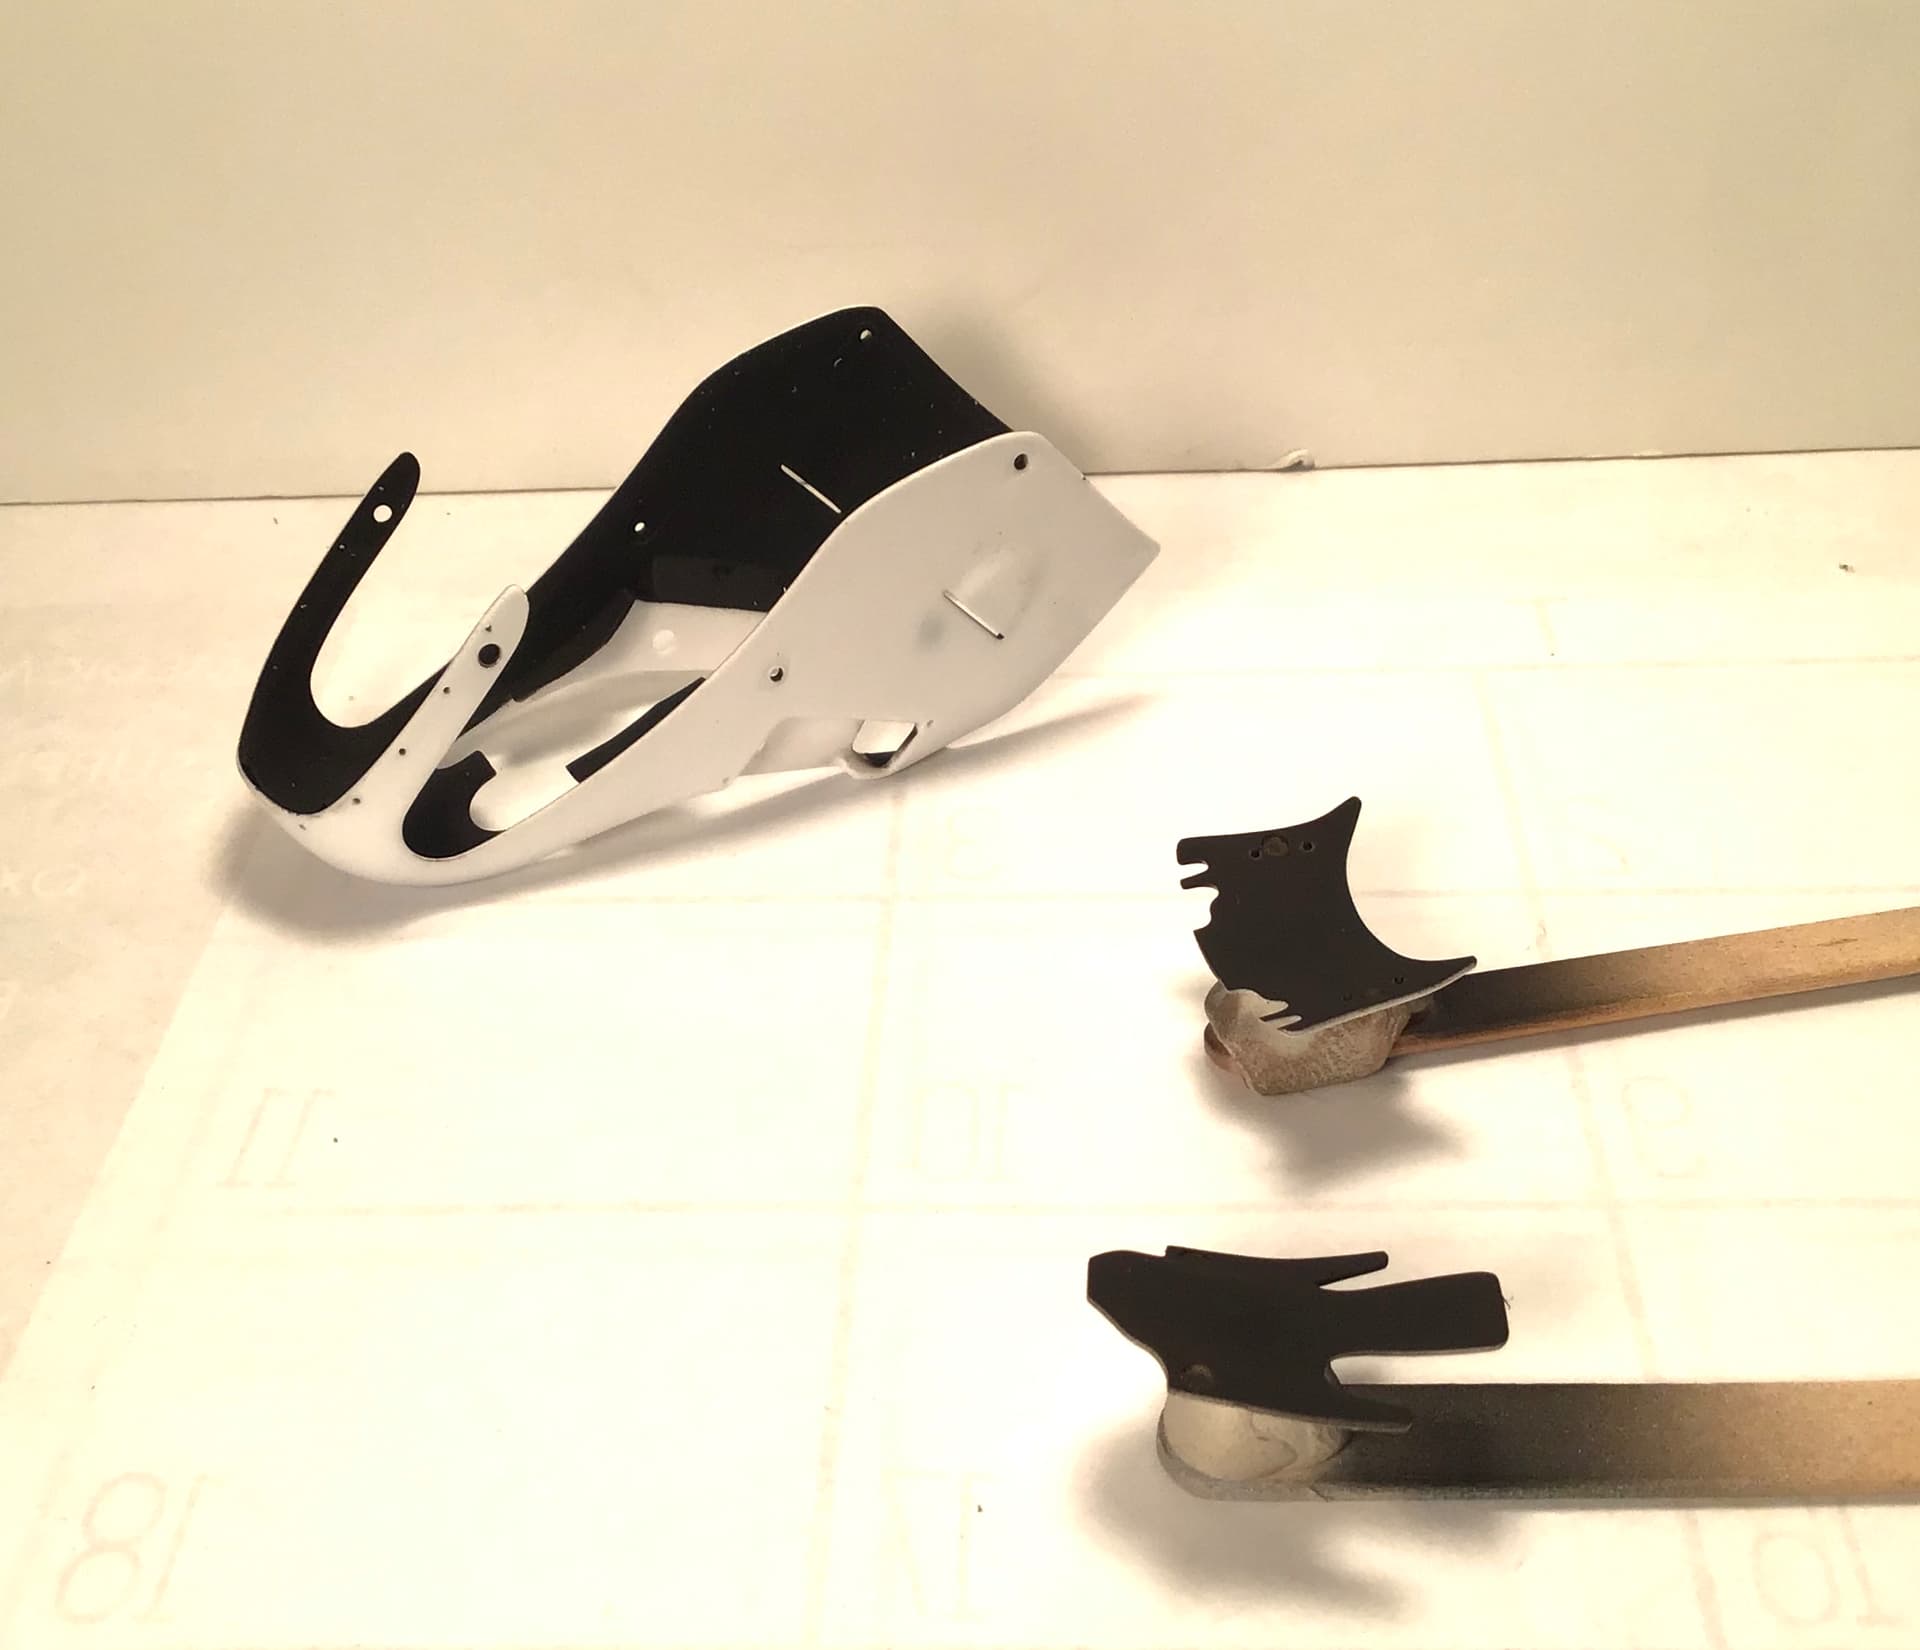
As for those Cable FairLeds, very nicely duplicated, and once painted look as though they were molded right along with the fender.
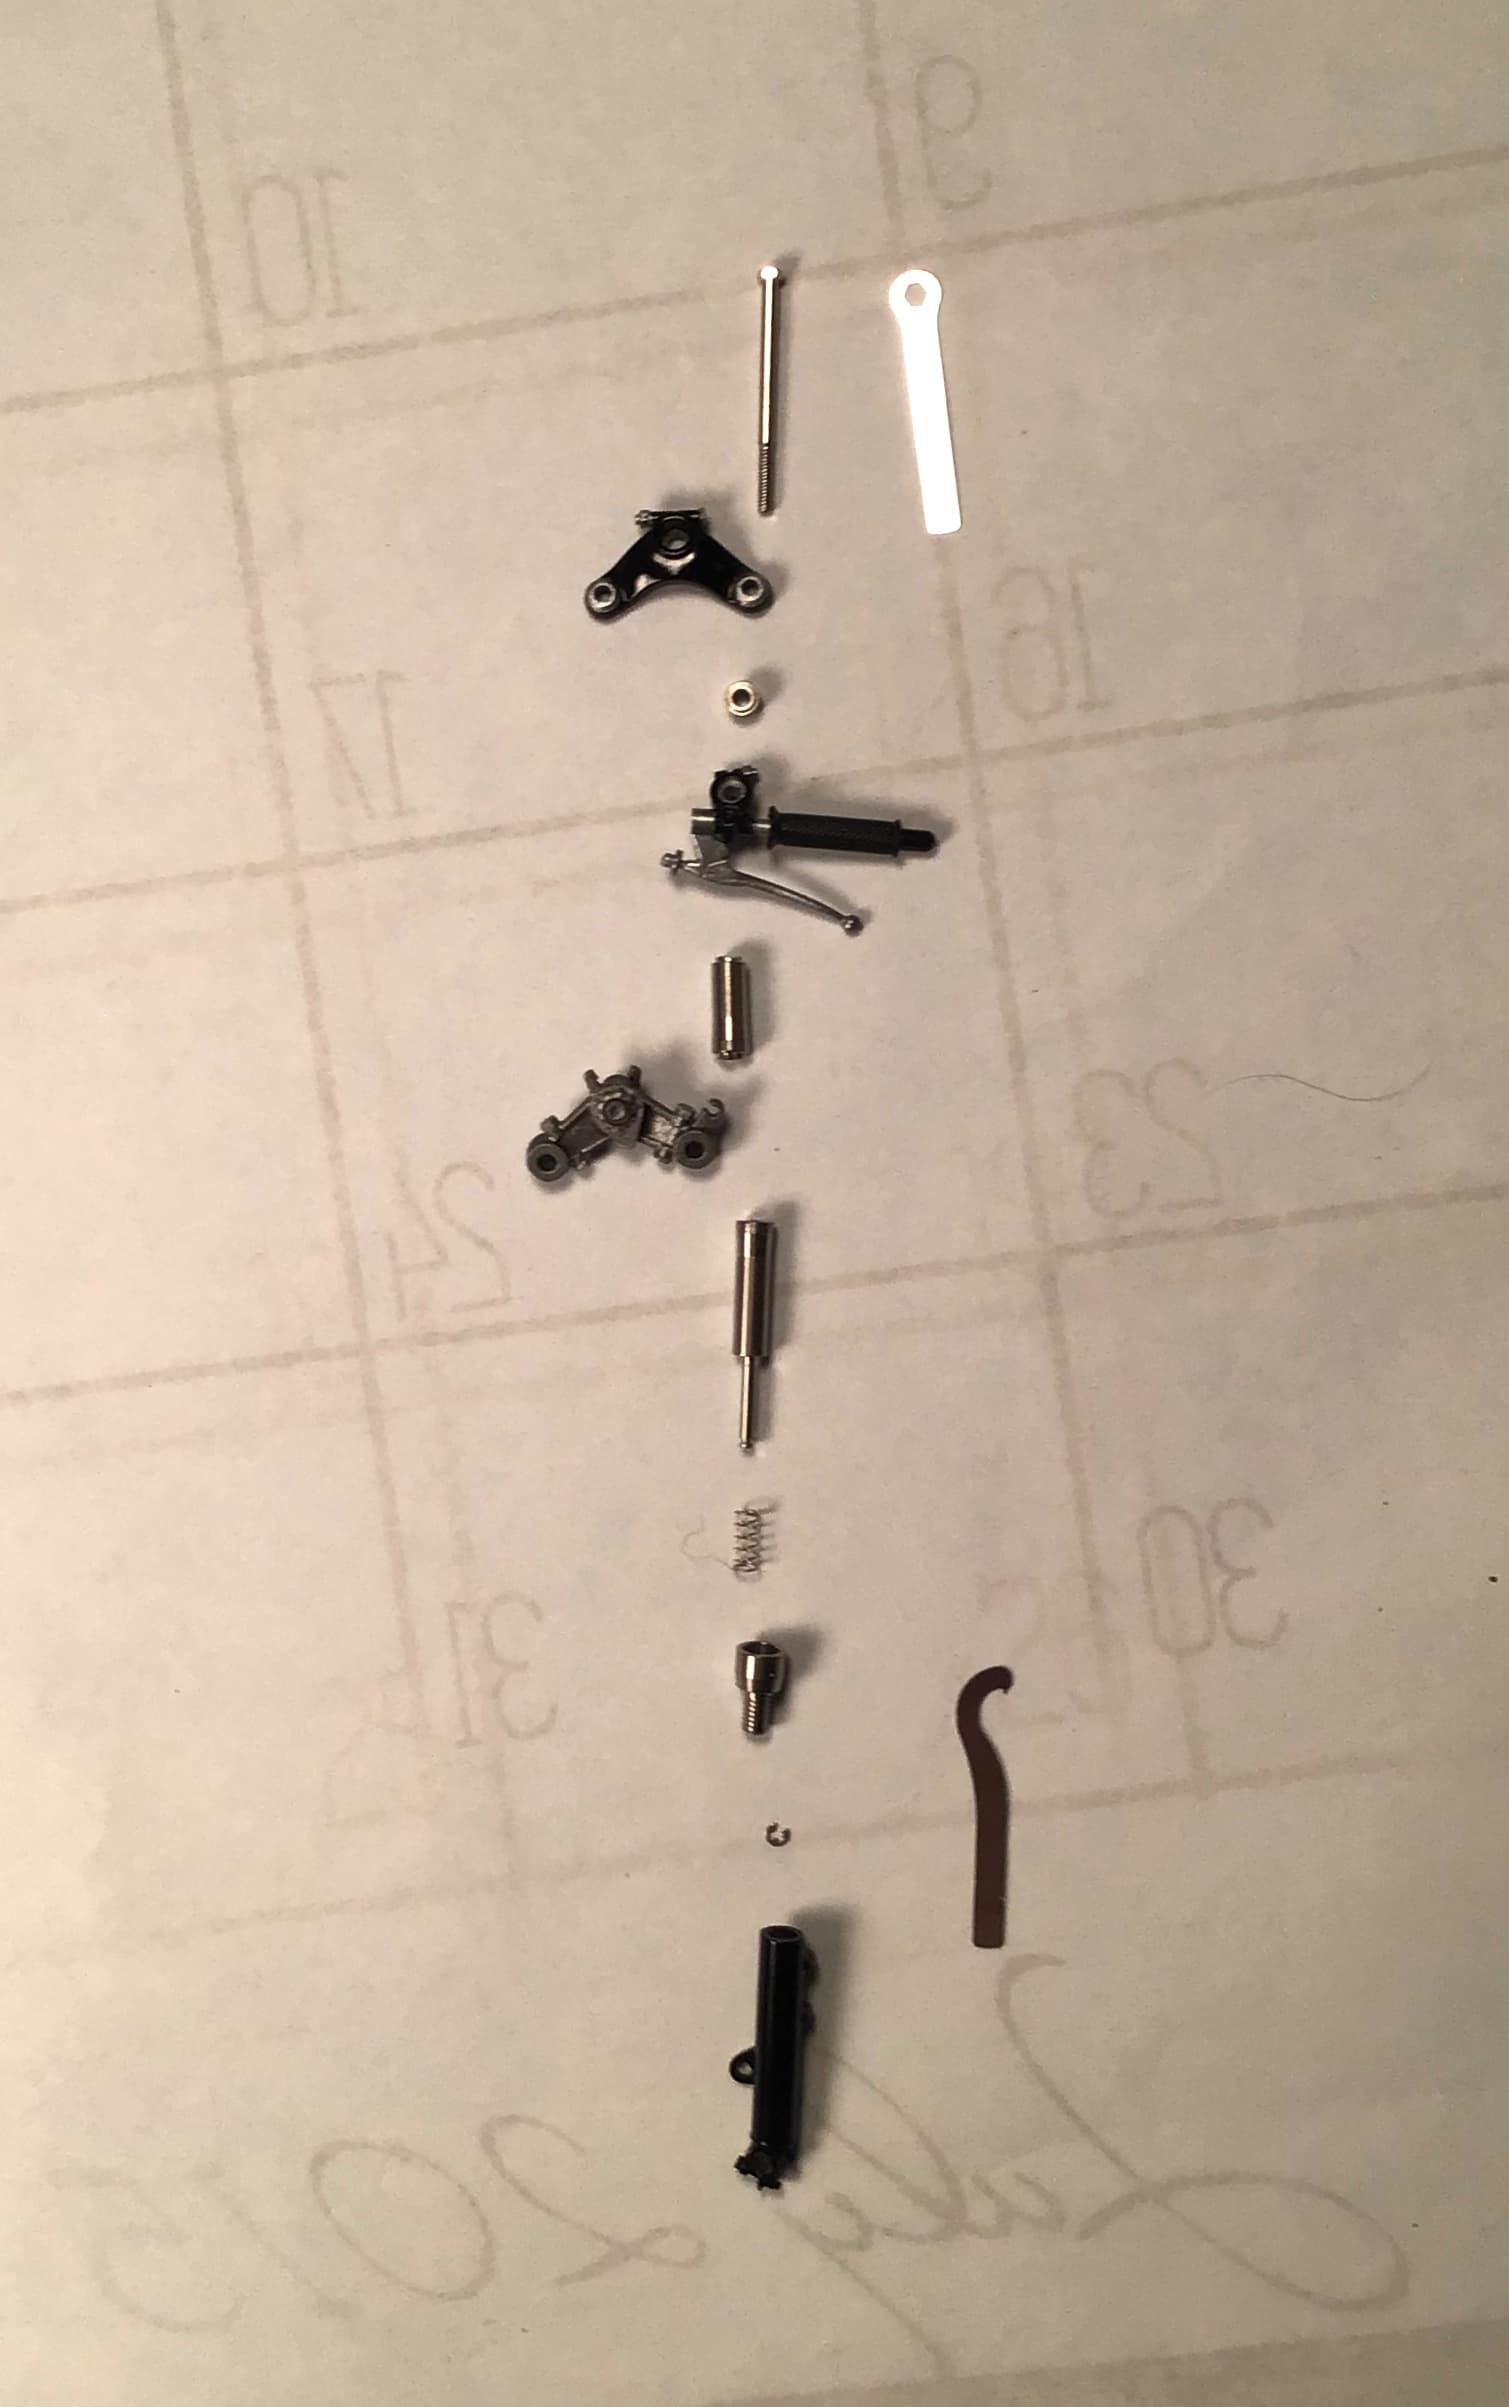
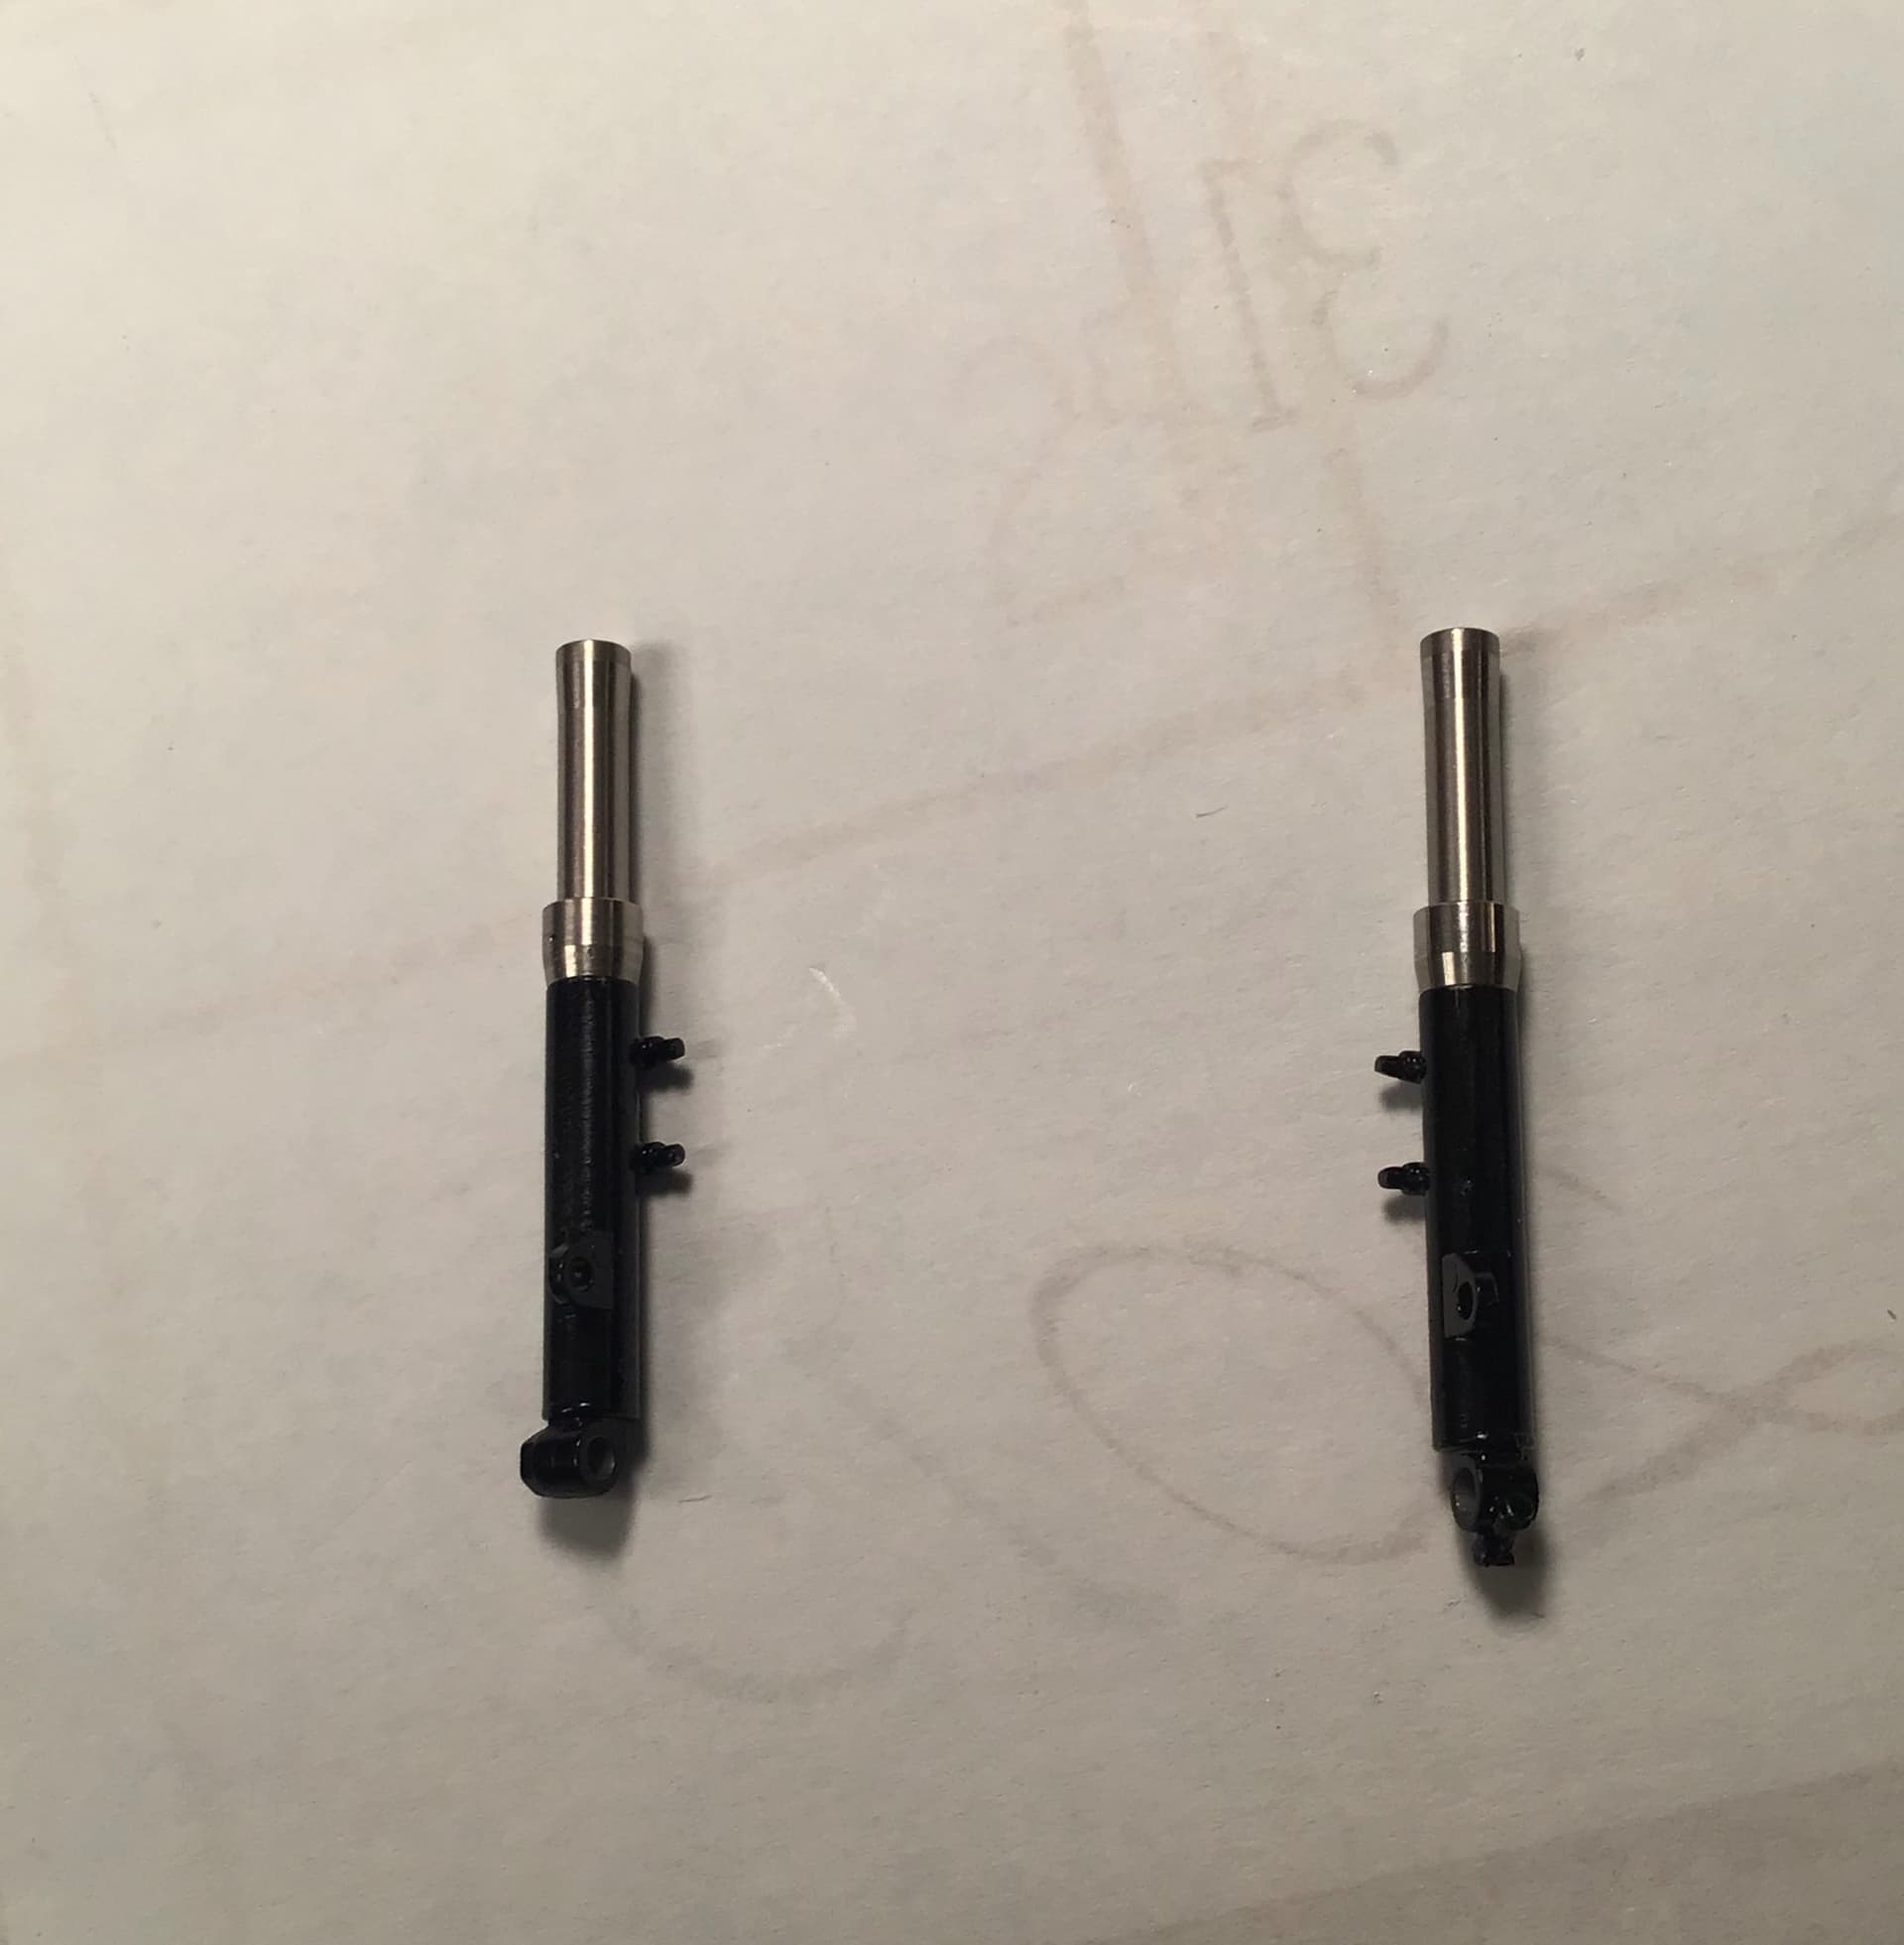
A photo etch “C” spanner and ring spanner
( C wrench and box wrench on this side of the
pond ) Turnings for the for fork internals and externals , springs and 3 TINY circlips to retain the springs. One is a spare and installing these may be fraught with difficulties. Lastly a photo etch spider for the friction steering damper.
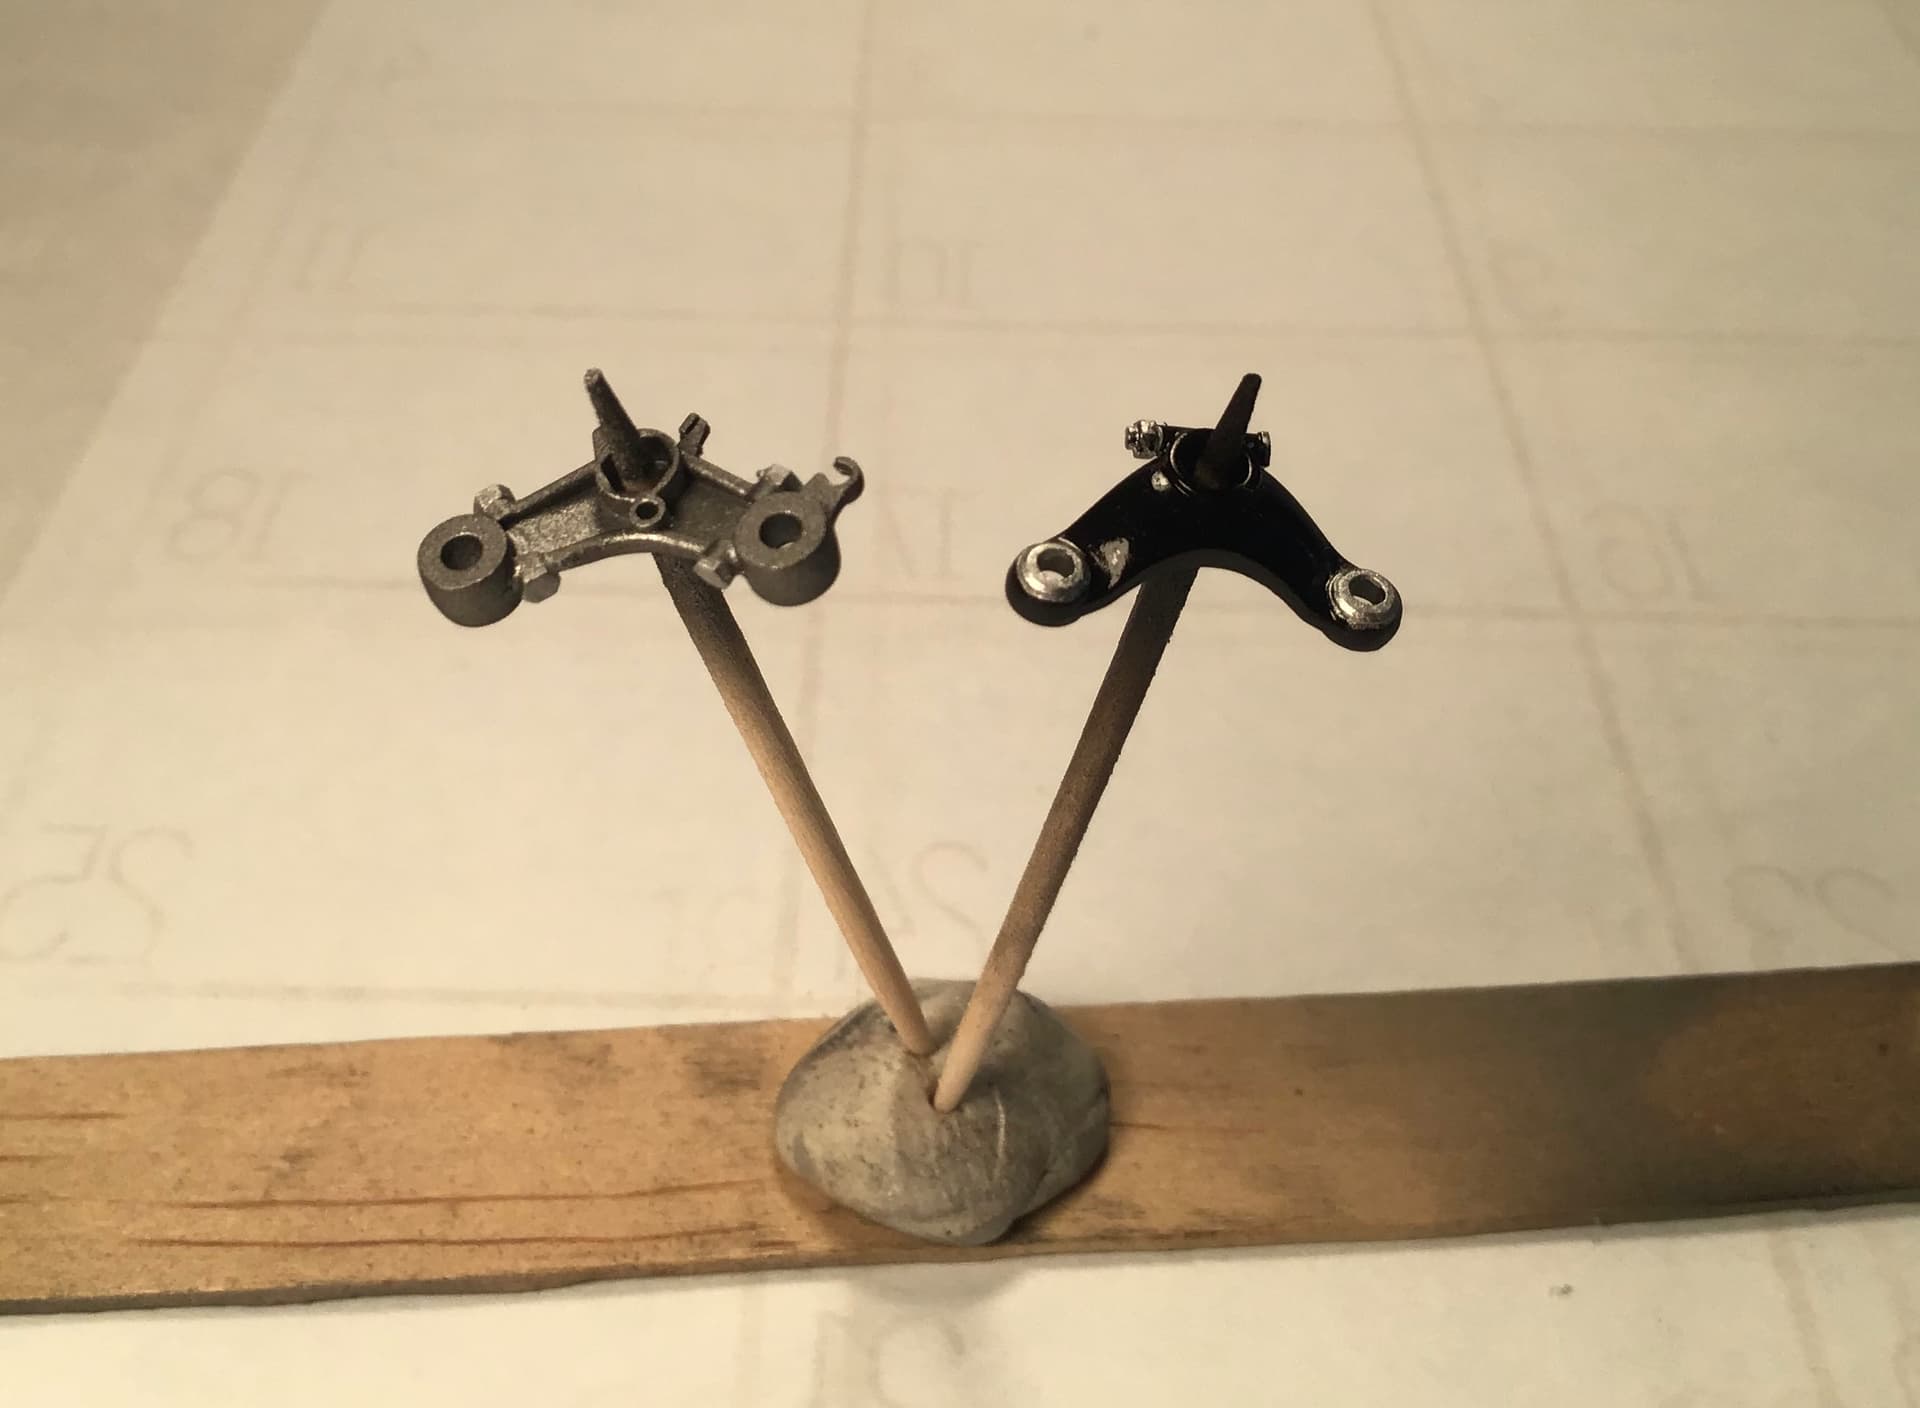
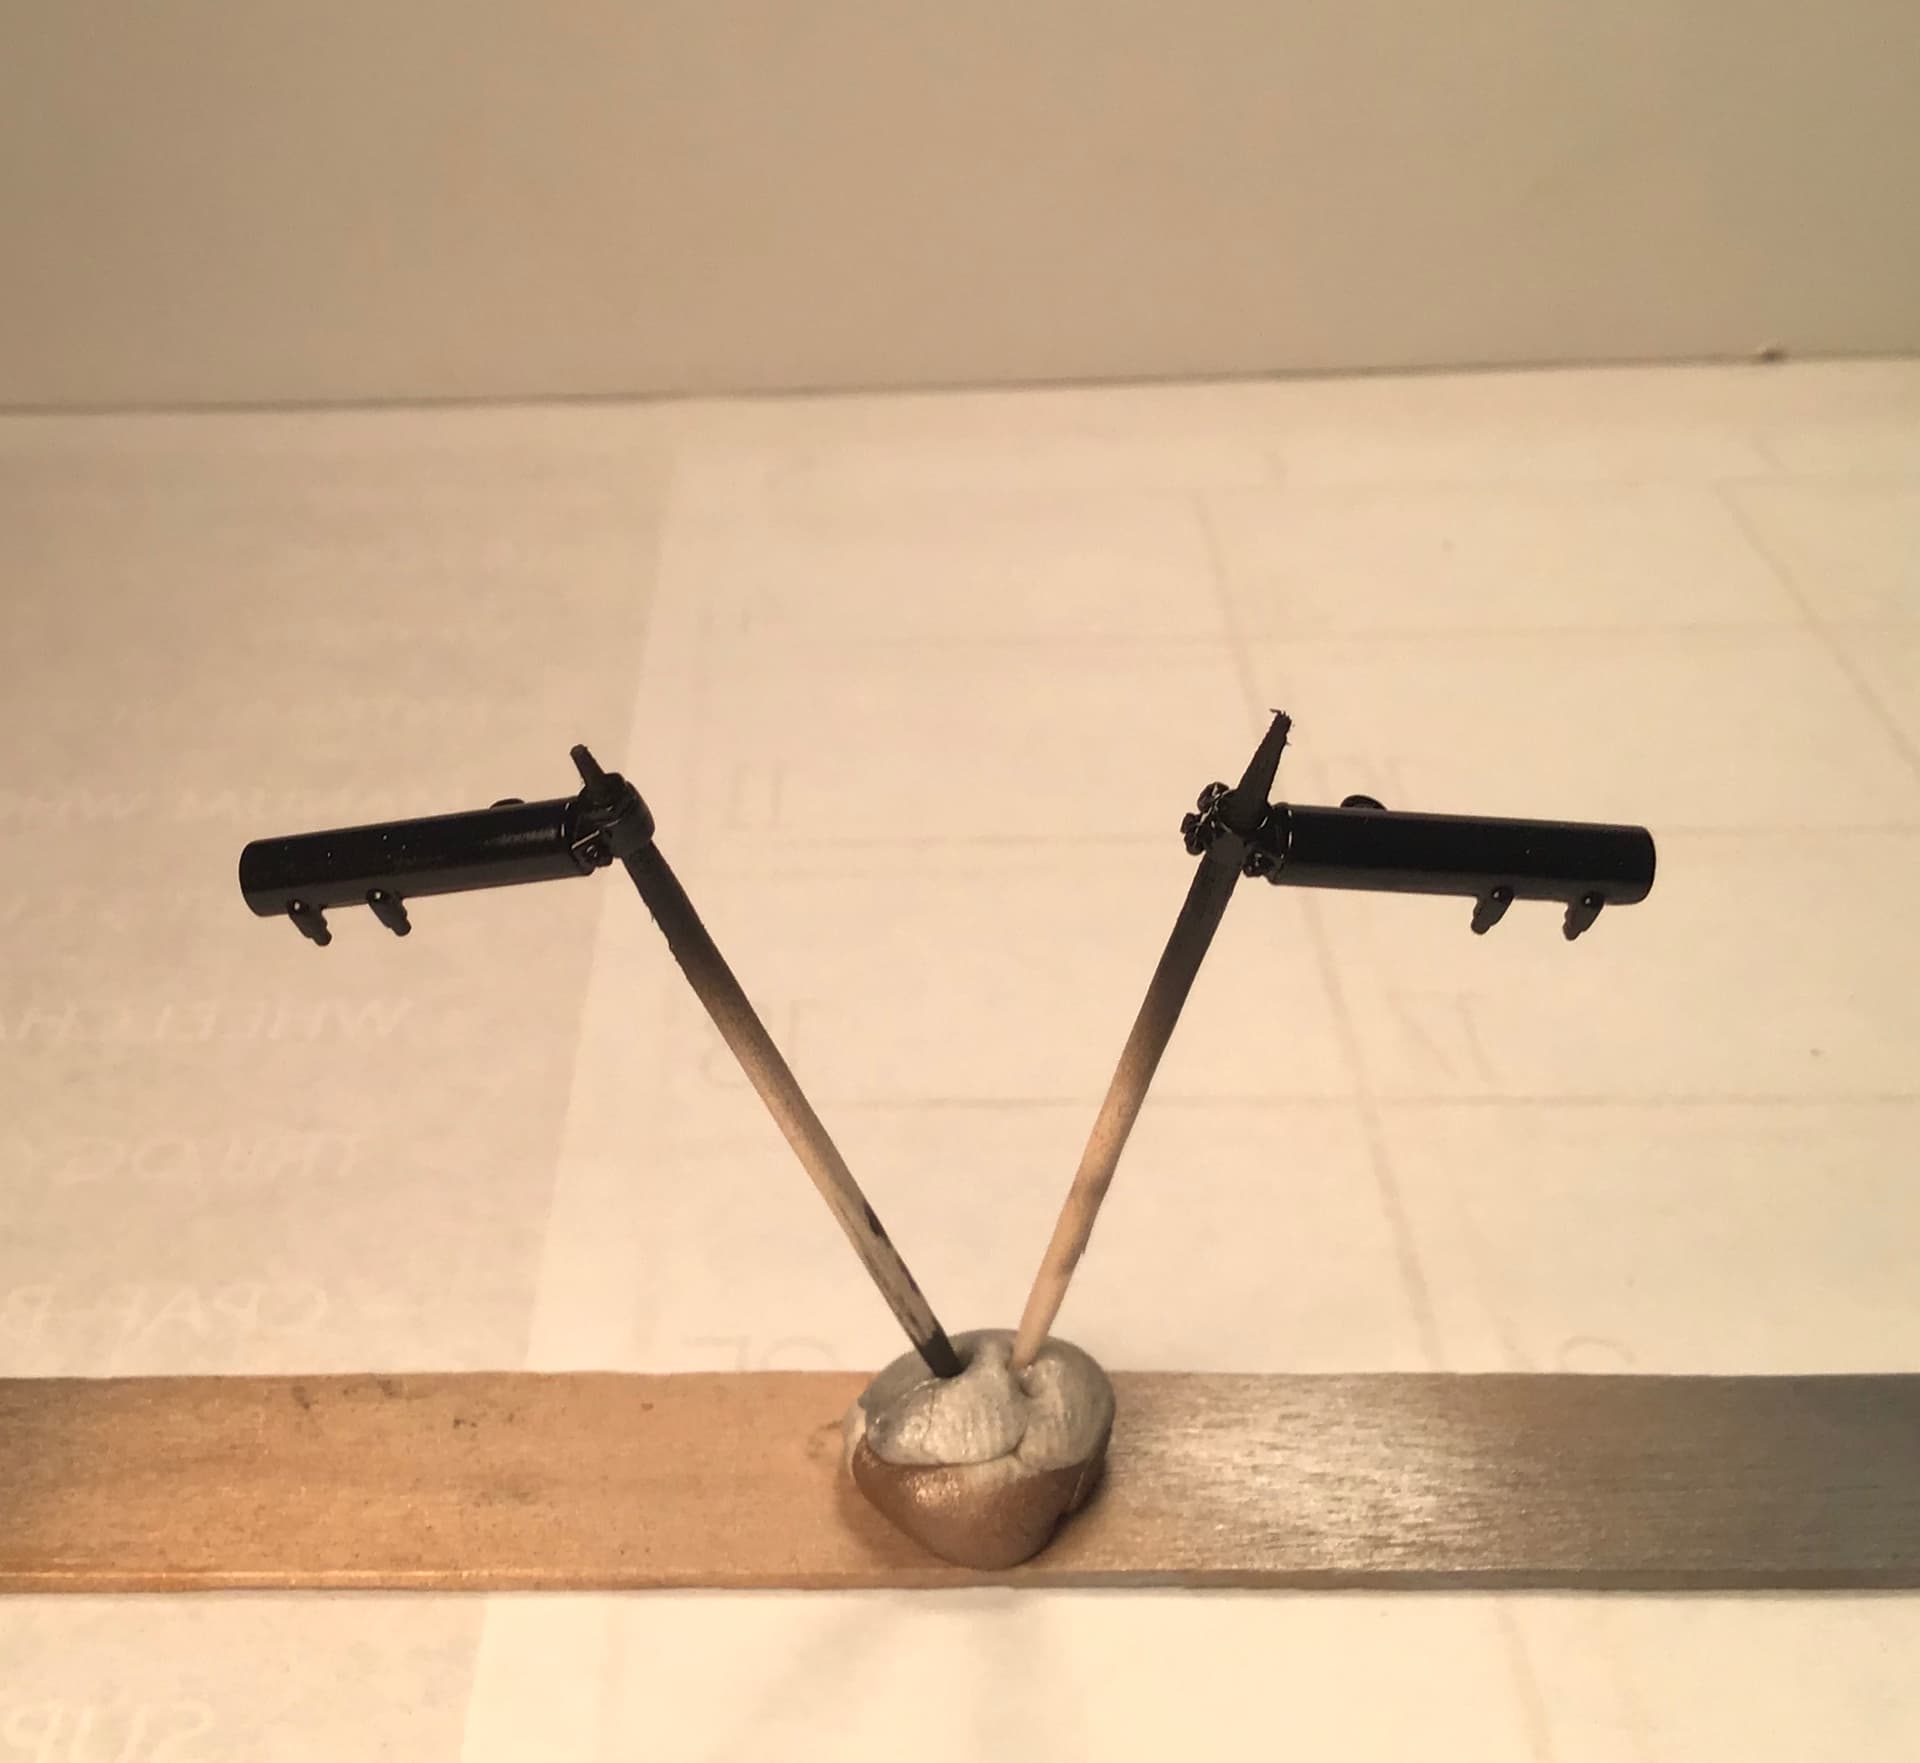
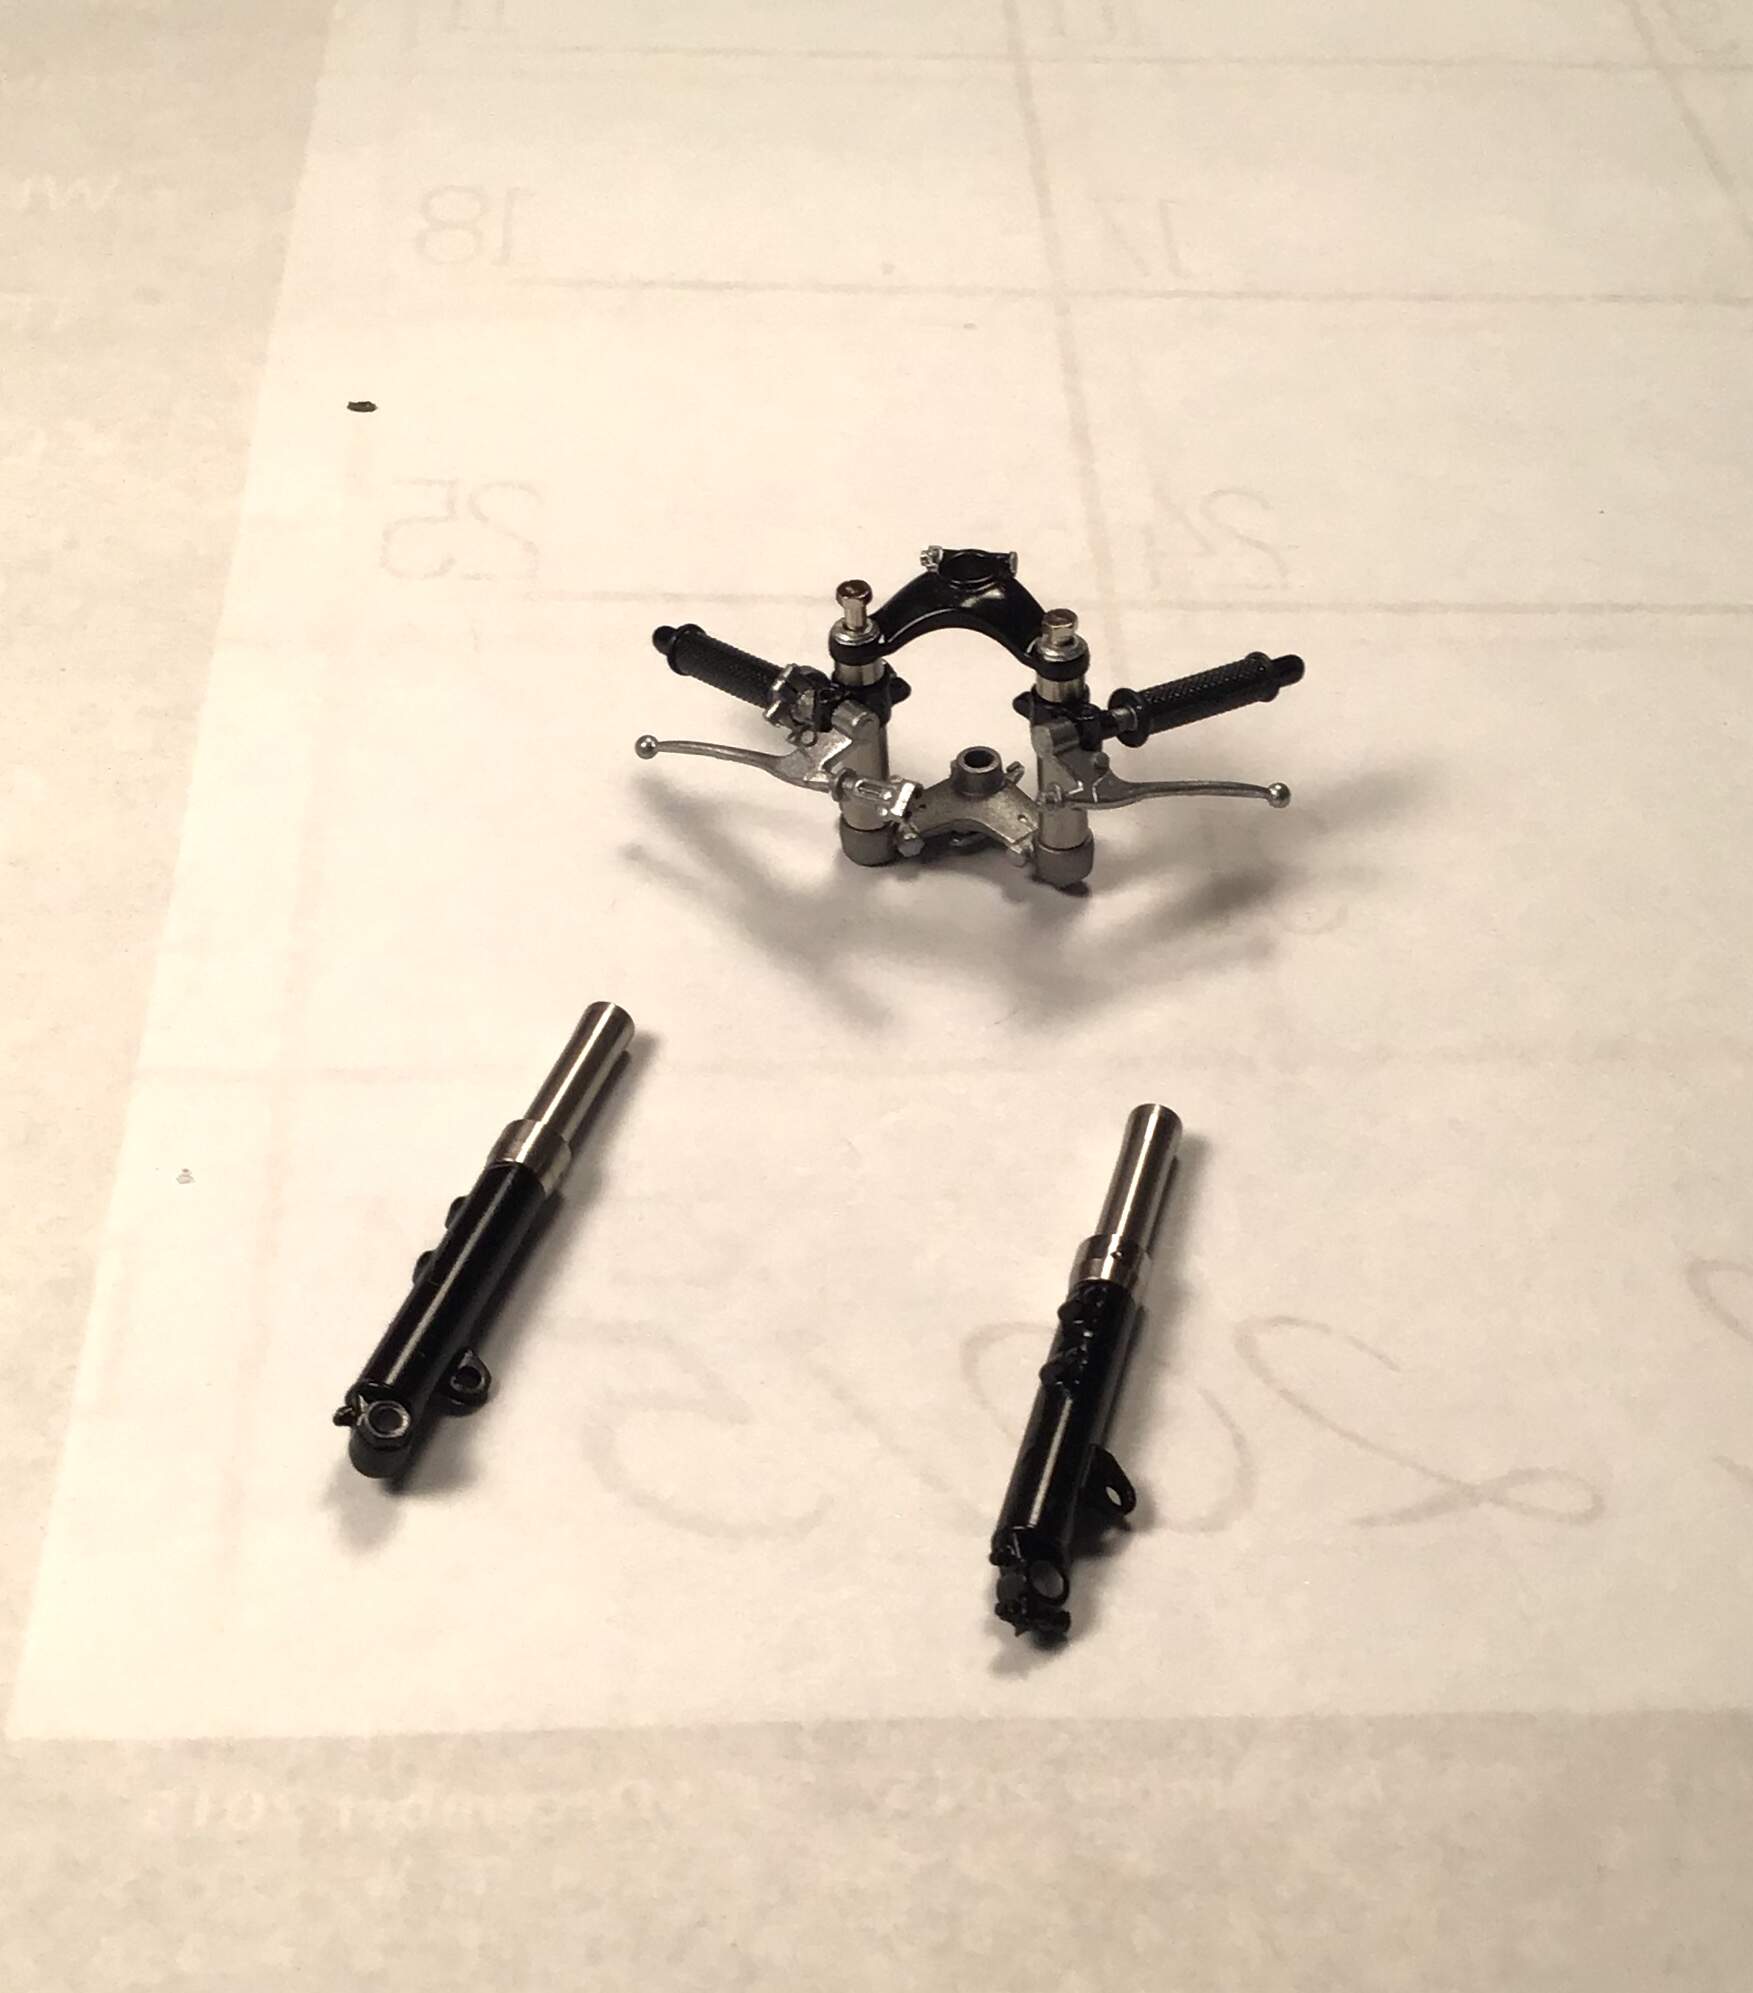
Here are the yokes painted up -
and the clip on bars with clutch and brake levers - the grips are molded in a beautiful soft plastic and they slide over the bars with a little lubricant soap - just like the real ones .
Just as in the other cable and wire locations the the pins for the oversized Tamiya tubing have been cut off and .020” holes drilled to accept the smaller diameter wire.
Fork sliders painted…
Another wonderfully engineered piece of work from Tamiya.
Yet to do are the steering dampers - a friction type at the headstock and a hydraulic type hung on the right side.
Cheers- Richard
Richard,
Those detail sets are certainly quite amazing. The hand grips look just like the real deal to me. As for the Mud Guard, the paint job is up to your usual standard.
I’m more then impressed with the detail and complexity of the Tamiya fork set. the finished unit looks fantastic, and once installed on the front of the chassis looks just like the real deal.
More great progress Richard, this is coming together absolutely beautifully. The combination of Tamiya engineering and your attention to the finest detail is a winner.
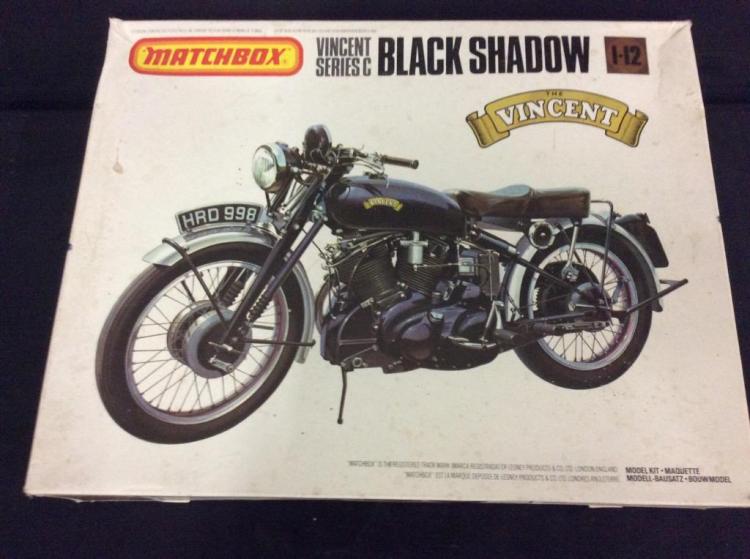
I have a couple of Matchbox 1/12 Vincent Black Shadow kits in the stash, I wonder if they will go together as well as this
Thanks D - I think I would bet on Tamiya in a Tamiya vs Matchbox bout but who knows ?
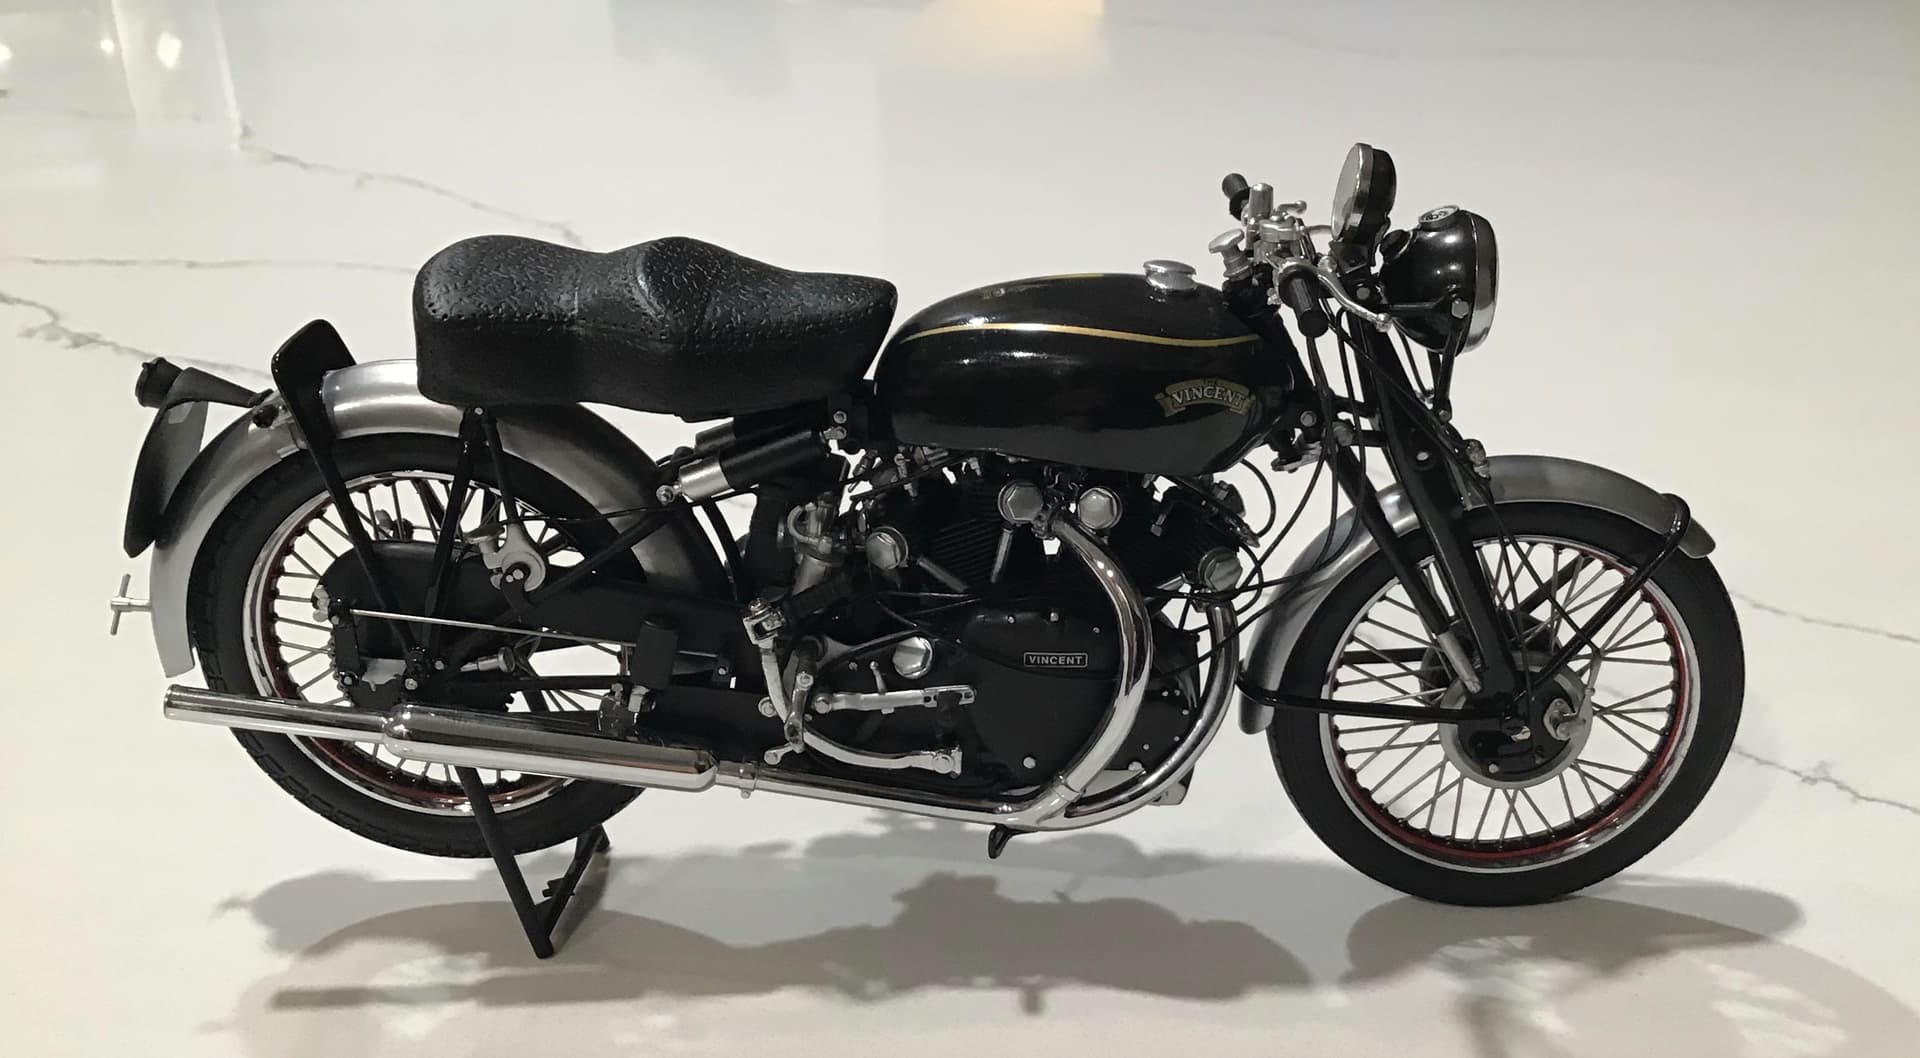
Here is my 1/12 Minichamps Shadow from their now apparently defunct Classics range . These are really beautifully made . I have a few - they are pricey so I only bought the Brit bikes as they are my main interest. If the eBay asking prices are realistic then some have become quite valuable.
I was gifted 2 of these kits a few years back by one of my clients at work who had them stashed away but no real intention to complete them. To be honest I’ve never had a close look at the contents to asses them for complete parts lists or works done already.
Richard,
Wow!! that 1/12 scale Minichamps Shadow Bike looks absolutely outstanding. If you didn’t say it was a model, I’d put my money down that it’s the real deal for sure.
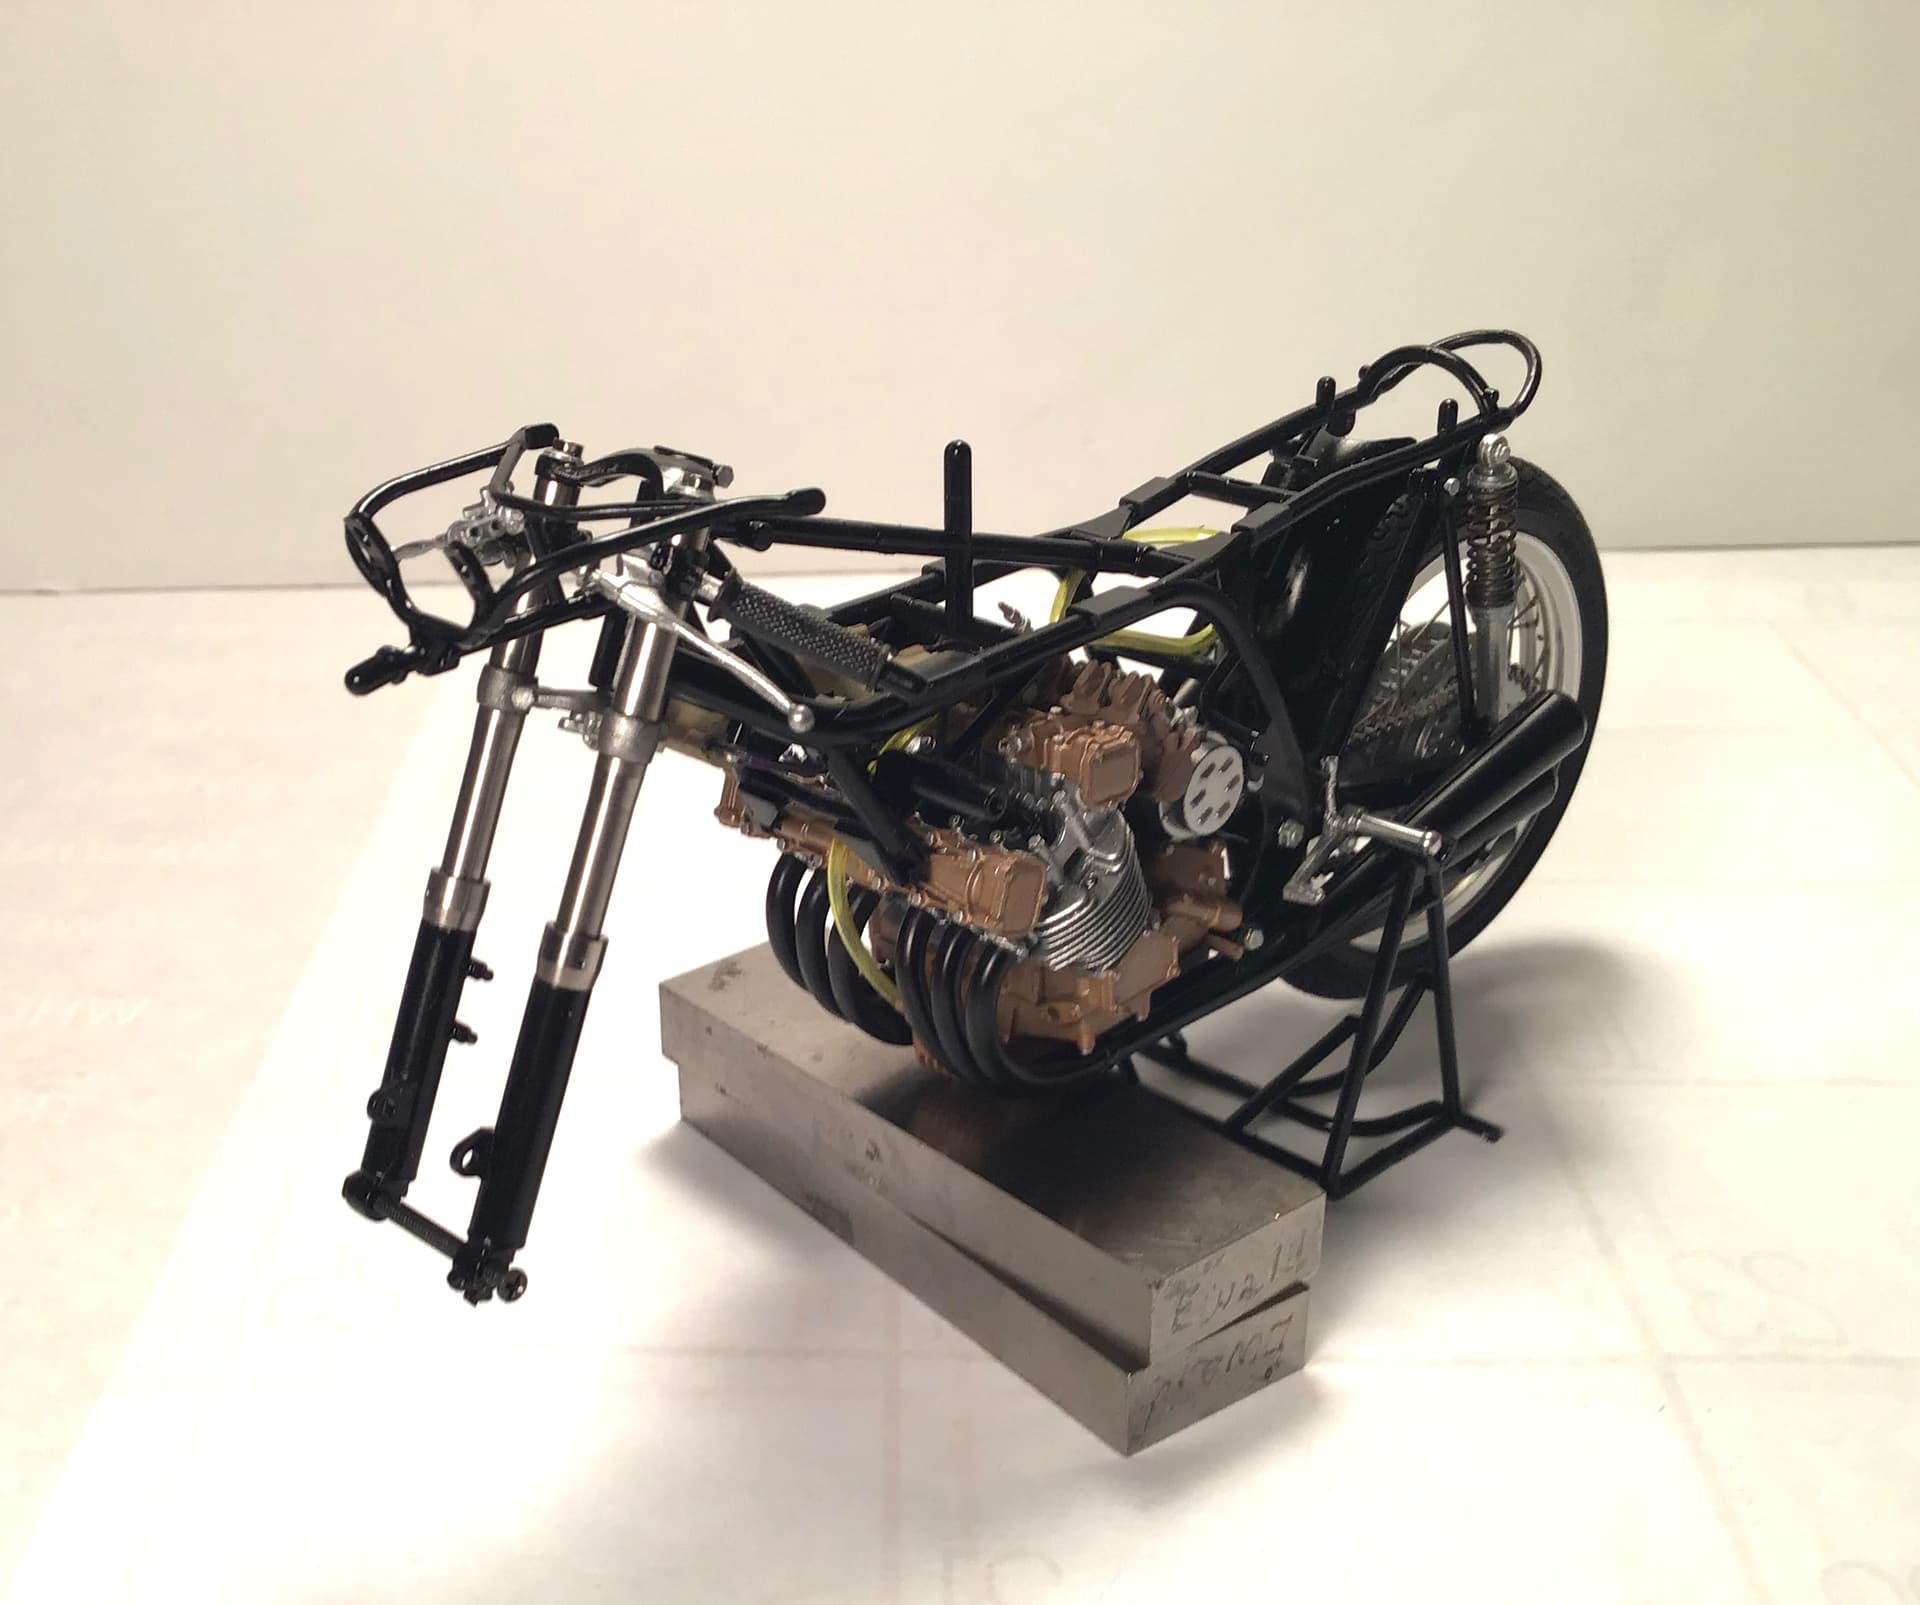
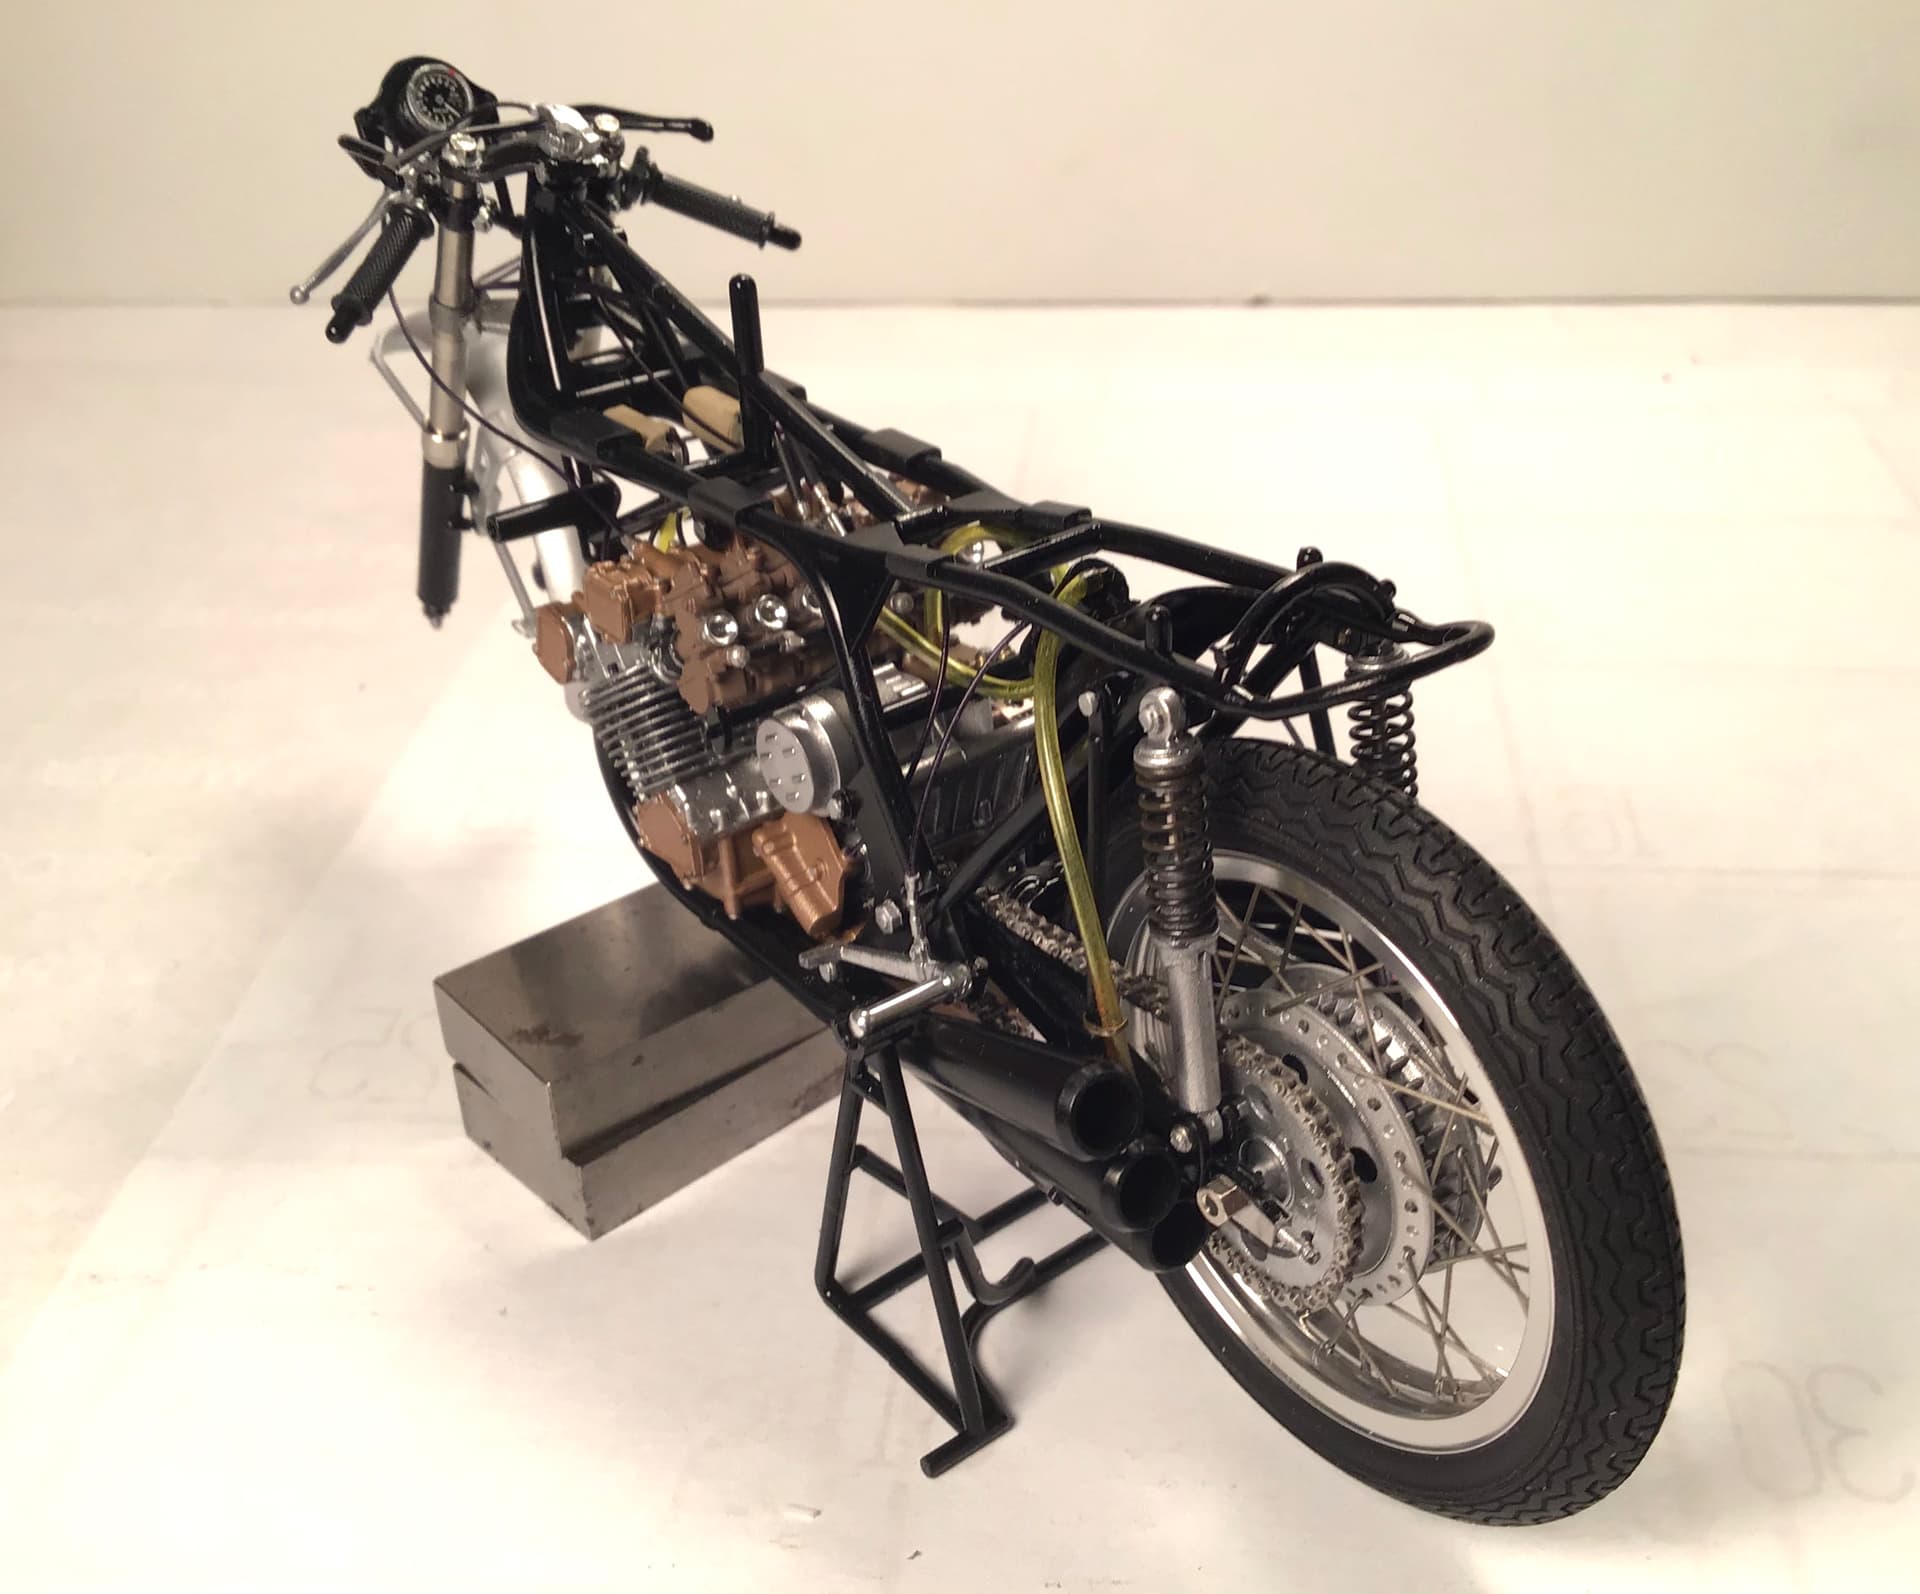
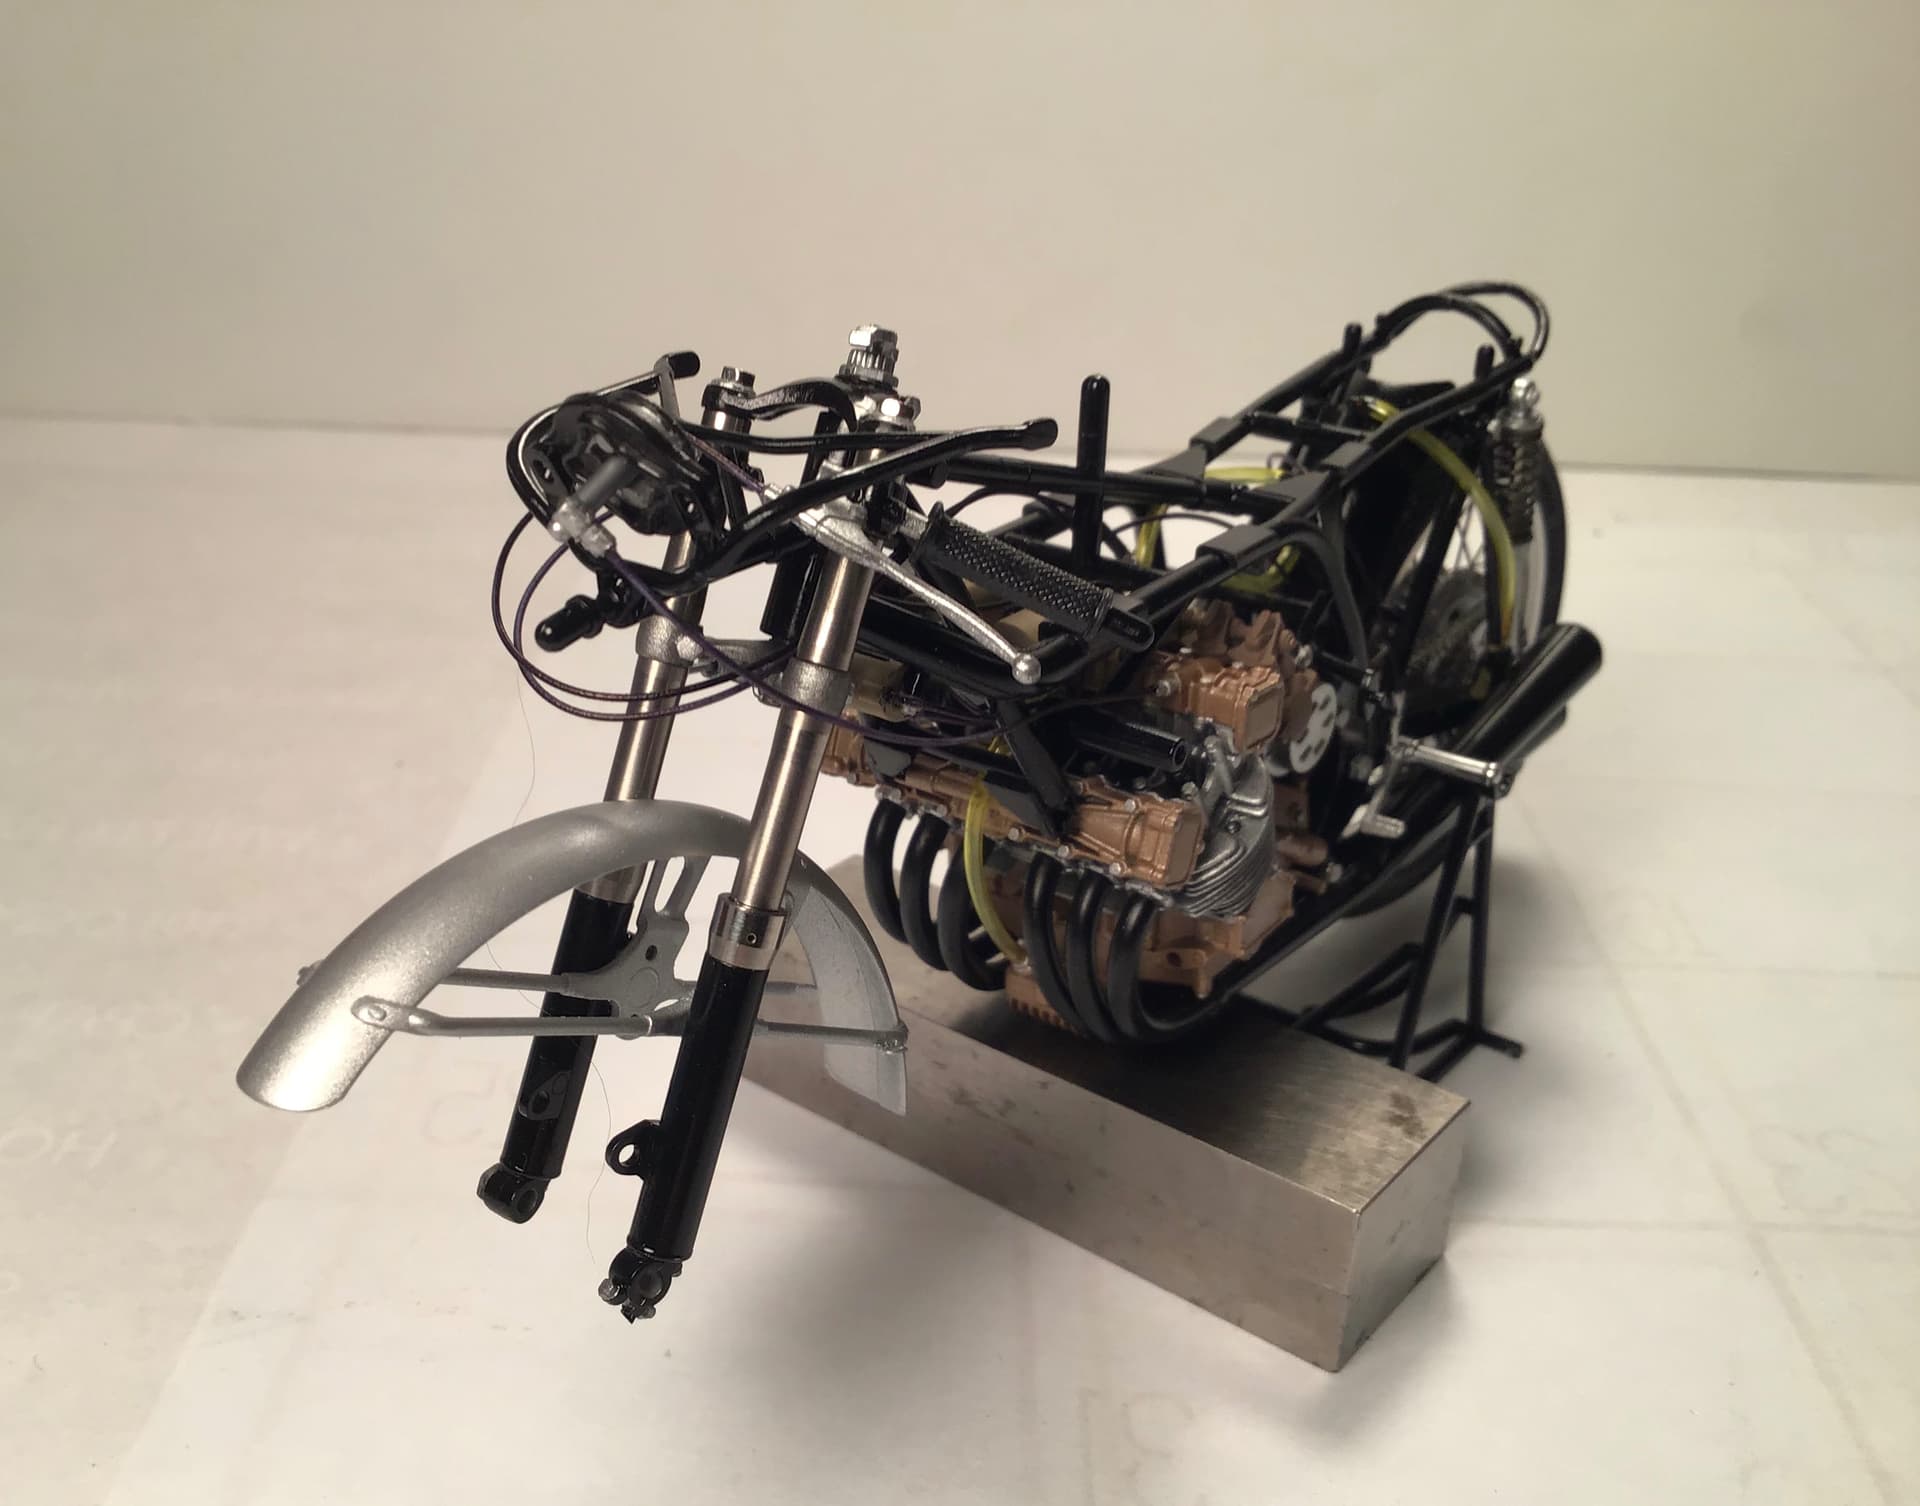
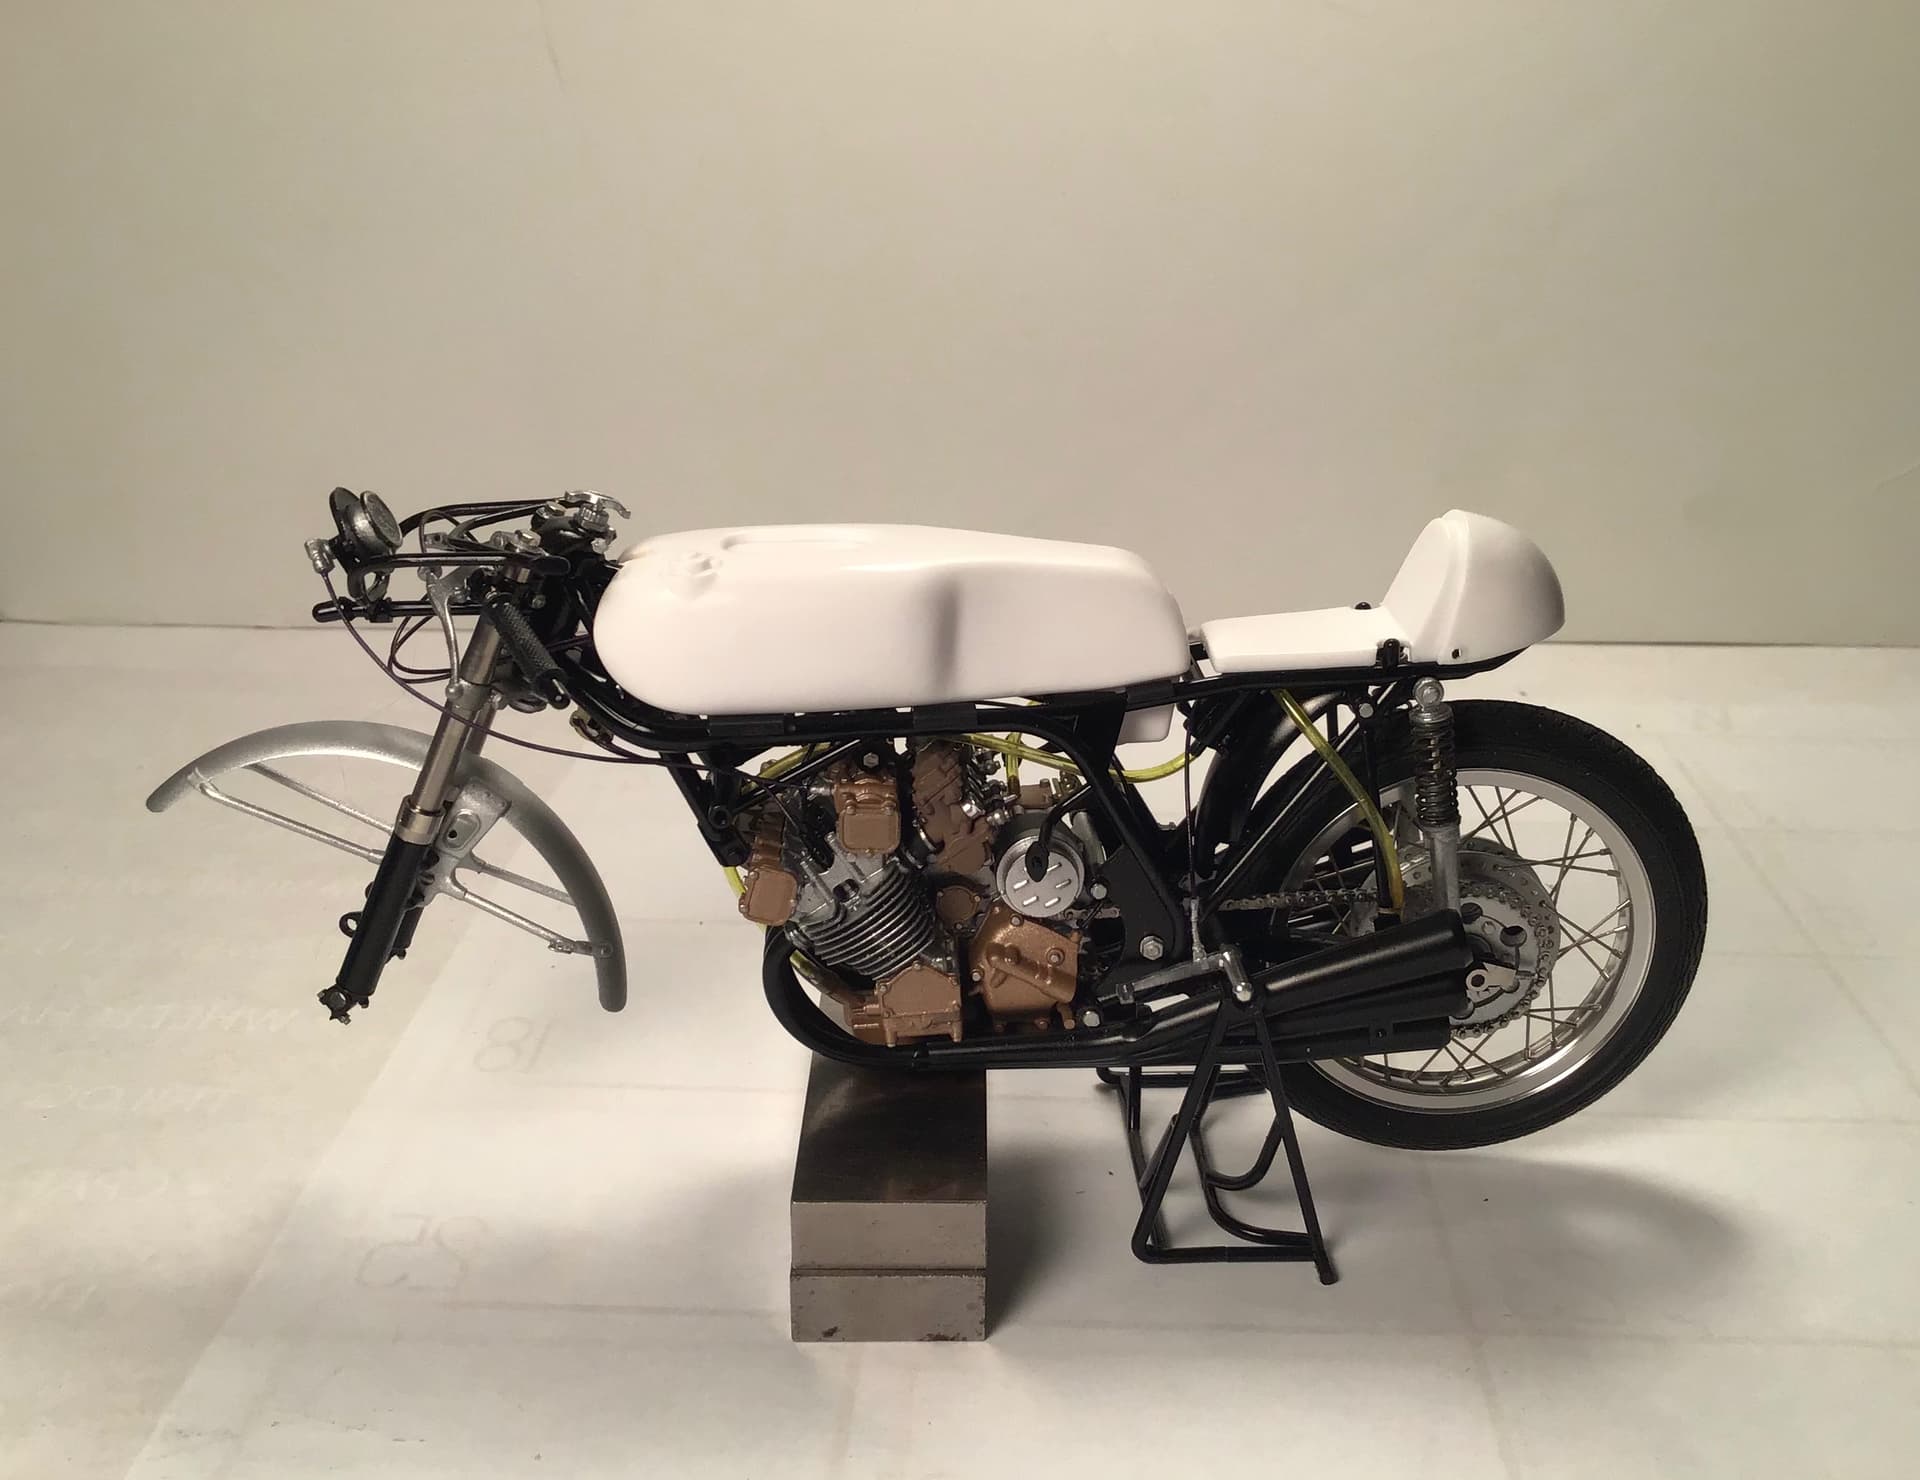
Chassis nearly complete… most recent session spent detailing . Clear vinyl tube supplied by Tamiya For crankcase breather looks right from a diameter standpoint. I tinted it yellow with a permanent marker. One line from bottom front of crankcase and one from tower above gearbox go to a catch bottle
( puke tank in common slang) mounted on rear fender . Drain line from bottle dumps by swingarm / final drive chain . This needed a clamp at bottom fashioned from brass shim .
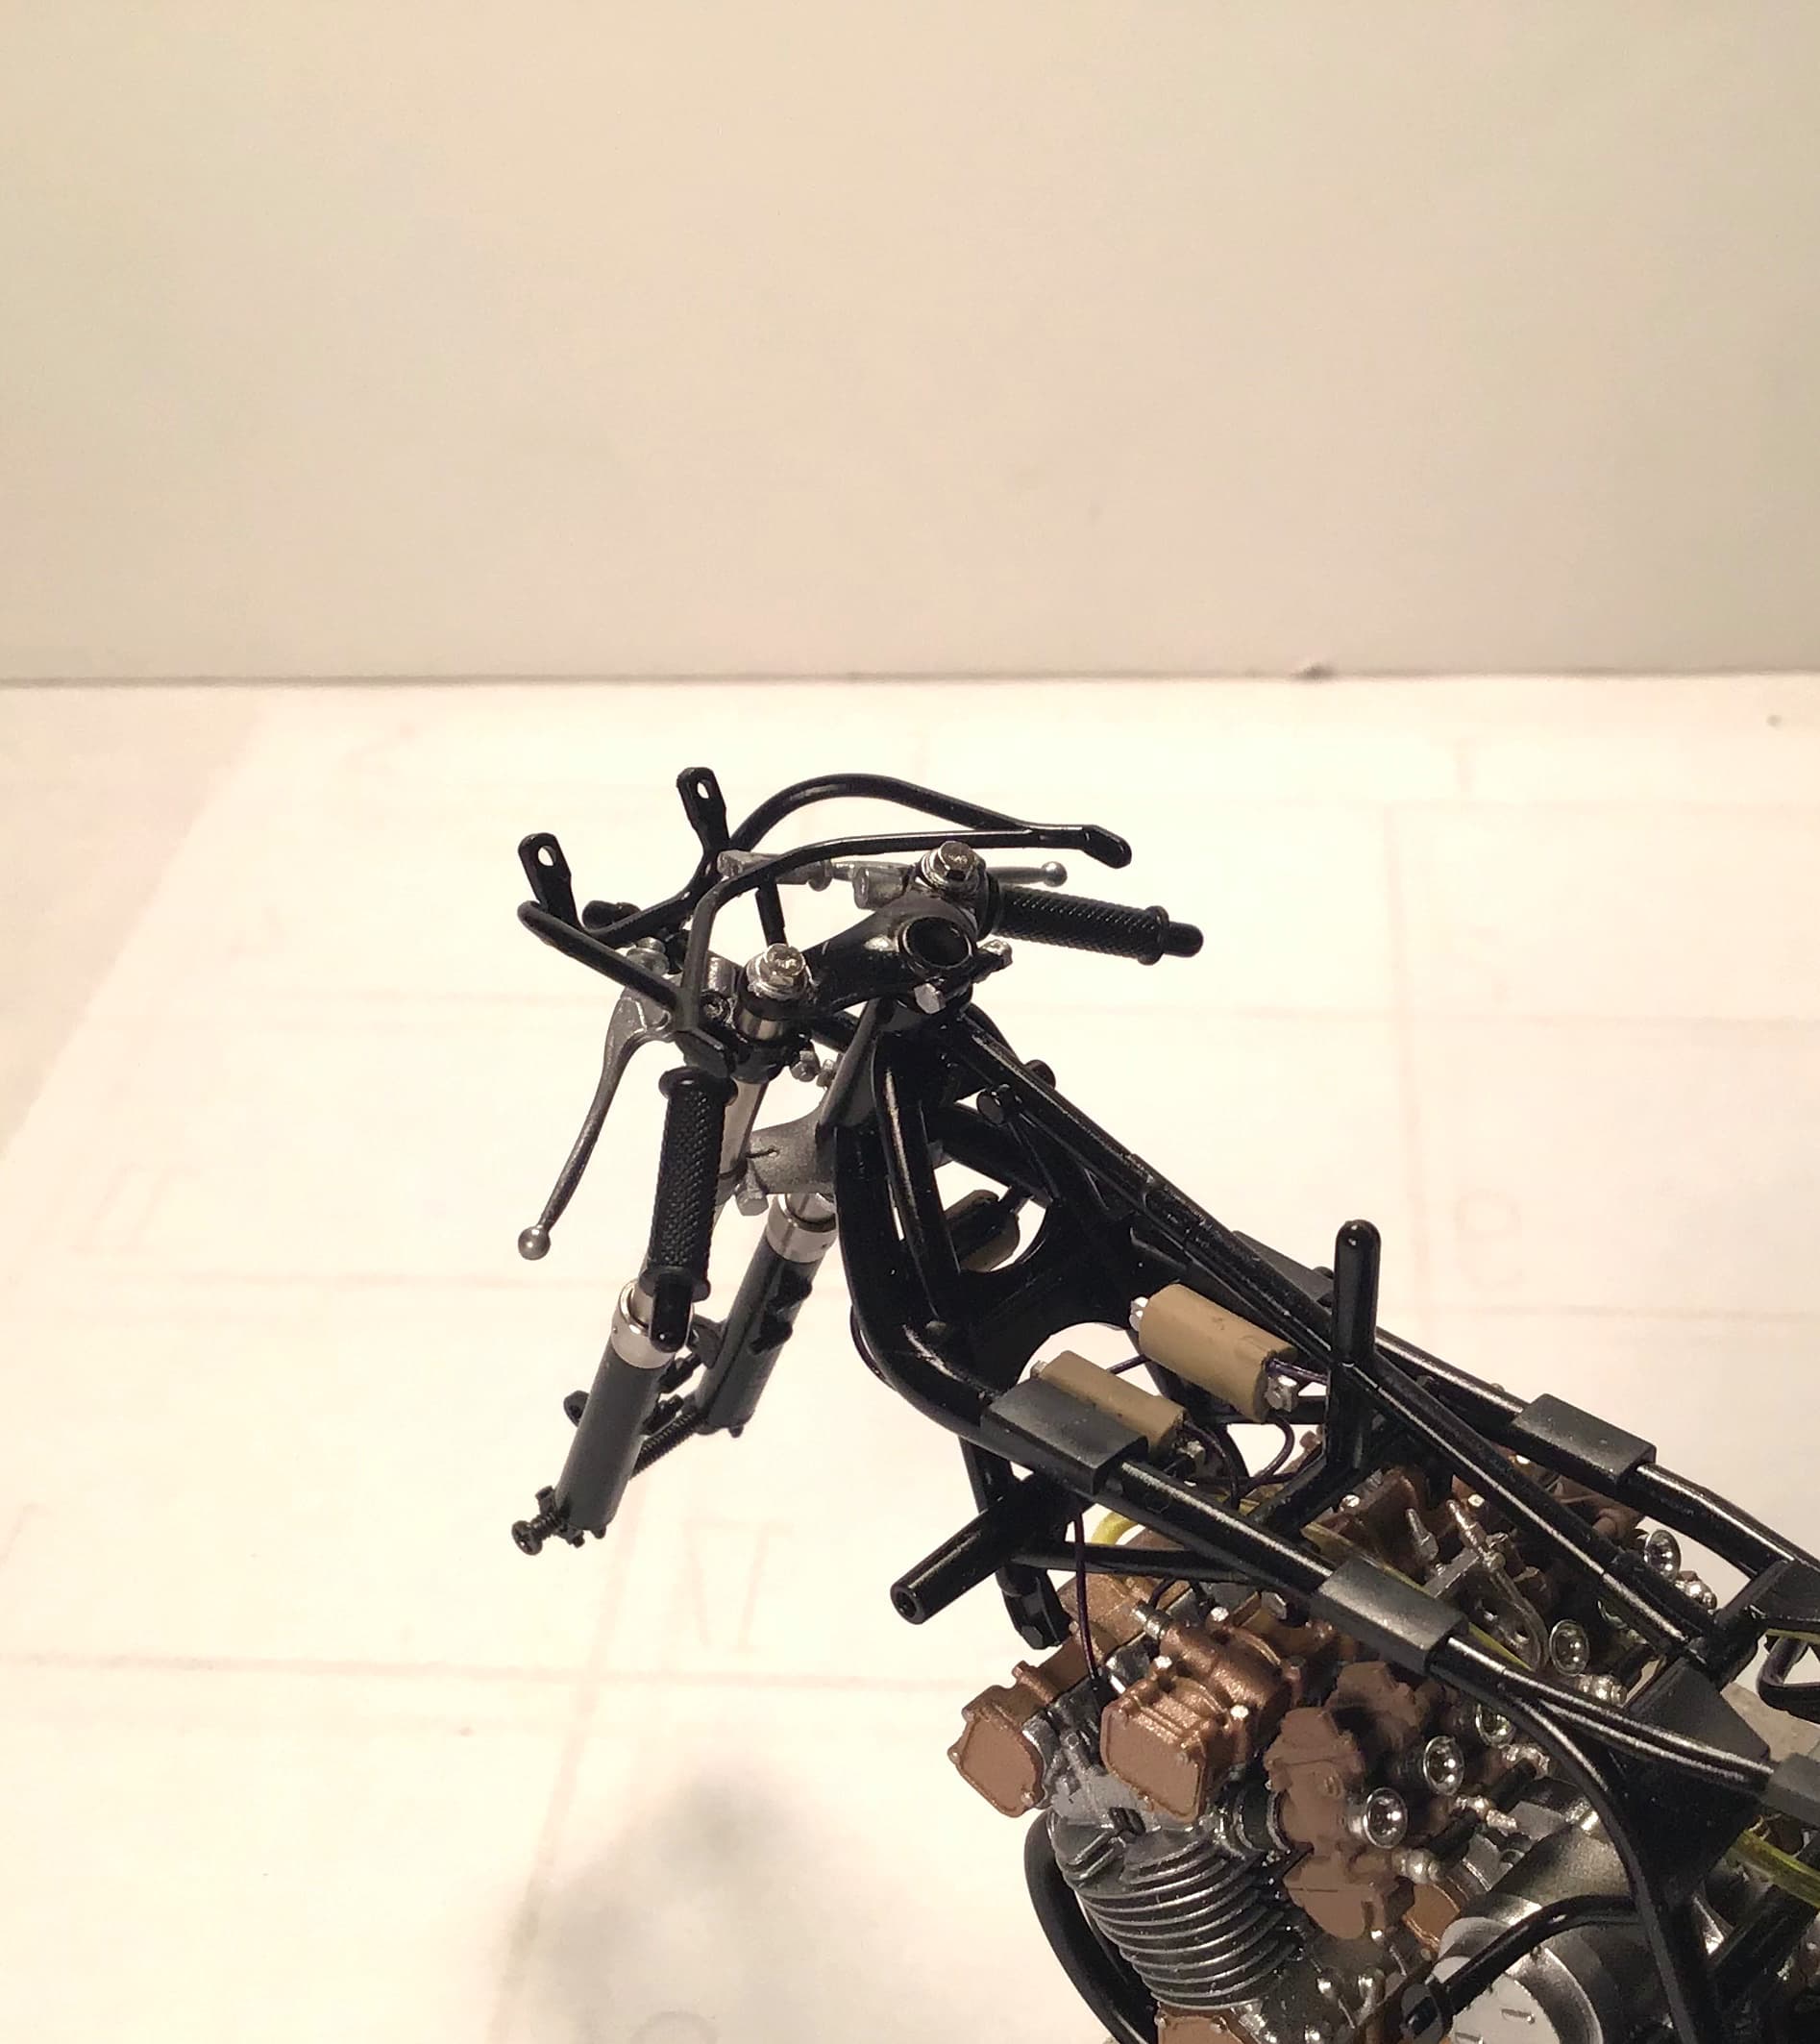
All cables done except for the two for the front brake. These will have to wait until fairing is installed. Tachometer built up and installed- lens made of .005” clear styrene by scribing with needle and circle template, cutting out with scissors and setting in place with Future . 17000 rpm redline warning done with a dot of flat red . Friction damper at headstock and hydraulic damper on right done.
Great tip on using a permanent yellow marker to stain those clear hose lines, I’ve just kind of left mine clear as they would be brand new, but it does loose something in the “Translation”.
The picture looking down and forward towards the Tach shows the complexity of this build to a Tee. What Tamiya has designed and molded is truly a masterpiece which you’re doing proper justice to.
Dunlop racing tyres are pretty much like that. They did a racing type profile for the road called the K81 TT100. It was to celebrate Malcolm Uphill’s 100m.p.h. win in the F750 Production class in the Isle of Man. I’ve ridden a bike with TT100s on, they were fitted to my 1969 Bonneville when I bought it and I didn’t like them. IMHO they fall into corners too quickly, but of course that’s what they’re meant to do. The narrow straight line profile is to reduce friction and increase speed. Some people like them, it’s just a question of taste. Personally I prefer the more rounded profile of Avons.