Tamiya 1/20 scale 1993 Indy Car Ford Lola 93/00

In 1994 Tamiya released it’s one & only 1/20 scale Indy car, and just to make it even more “interesting” they decided to make it as a Snap-Tite kit. I guess that the whole idea was that the model would appeal to a greater range of casual modelers, and even Auto Racing enthusiasts. Since this was the only Indy car they modeled, I guess that their concept didn’t hold true.

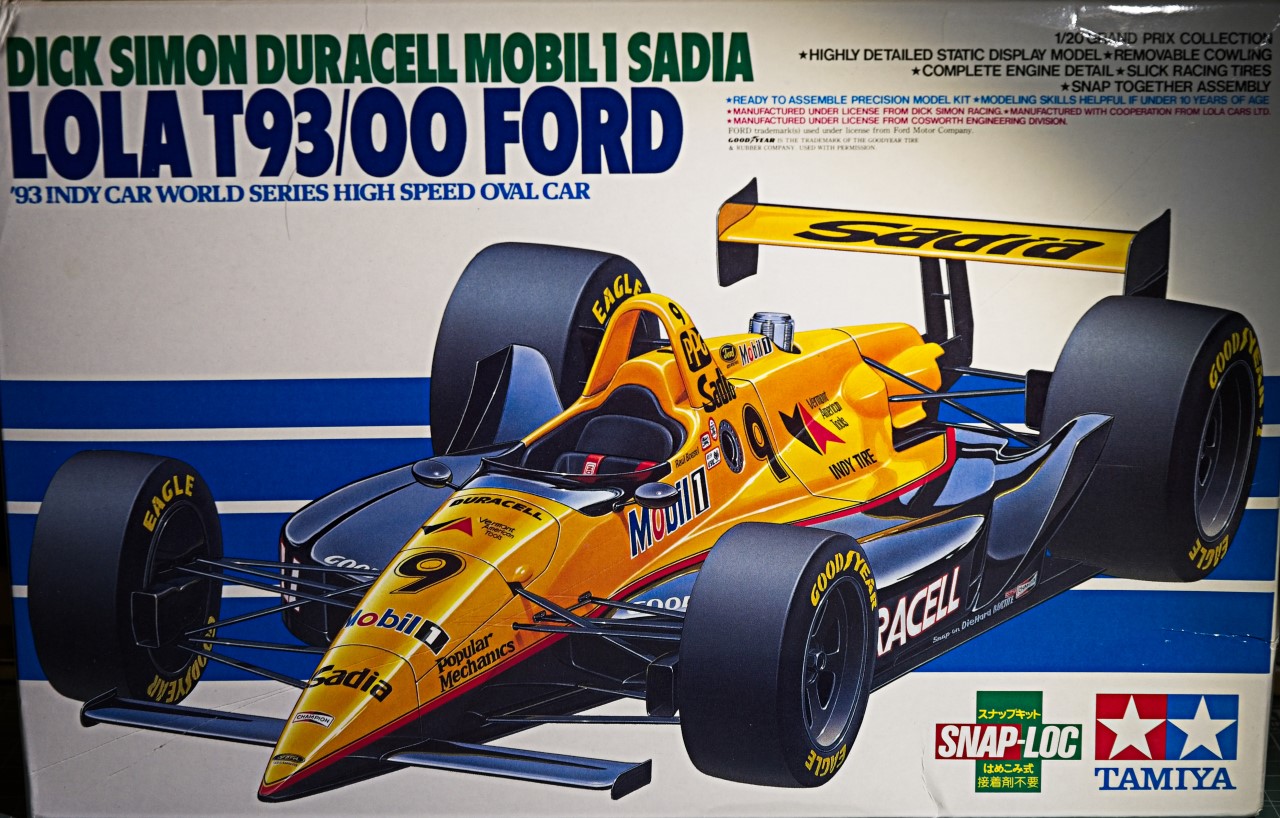
Since it was Tamiya’s 1st Indy car model, why 1993? Well for starters, Indy car was a United States regional series, so it didn’t have much of a world wide following like F1 did. But that all changed in 1993 when Nigel Mansell, the current 1992 F1 world champion, left F1 and signed to drive for the Newman Haas Indy Car Team paired up with and other former F1 World champion, Mario Andretti, as son Michael Andretti left the team to drive for Mclaren in F1. So now the Indy 500 would have fans watching the race from all over the world where available. Mansell didn’t disappoint by leading a good part of the race, but miscued on a late yellow restart, and Penske driver Emmo Fittipaldi past him to win the race while Mansell finished an amazing 3rd. while Luyendyk finished 2nd. Even with all the interest in Indy car racing world wide now, the model kit wasn’t a great success. Perhaps it was the Snap-Tite concept, but who really knows.

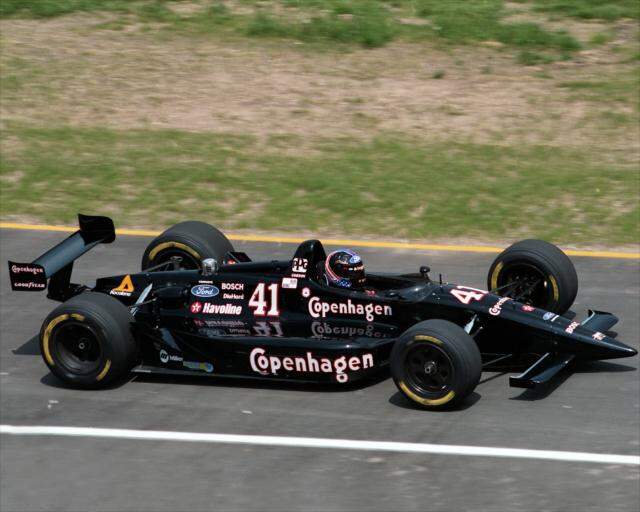
I’ve always shied away from any and all kits that were Snap-Tite for a number of valid and not so valid reasons. I procrastinated for years about buying this kit, and even after reading mostly favorable reviews, continued to find reasons to pass it up. Finally, a deal came my way that I just couldn’t pass up the kit any longer. The kit comes in two versions: the Oval version and the road course version. My kit is the Oval version. What I didn’t want to do was either of the Newman Haas cars as I was saving that scheme for the road course version in 1/25 scale. So I opted for the Foyt Copenhagen car driven by another personal favorite: Robby Gordon. Paint is by Gravity of Spain while the decals are by Indy Cal.

I just noticed that I posted the correct picture for Gordon’s #41 car, but the wrong decal sheet as it’s for the #14 car of AJ Foyt.

For the 1st time in literally years, I’ve taken time off from modeling since my Ford Cobra was completed several weeks ago as I’m once again dealing with Retina issues. As my sight stabilized, and I’ve not got a new pair of bi-f0cals, plus computer glasses that really do help, I’m back at the bench. So out came the Indy Ford Lola 93/00 from my still small but ever growing stash.

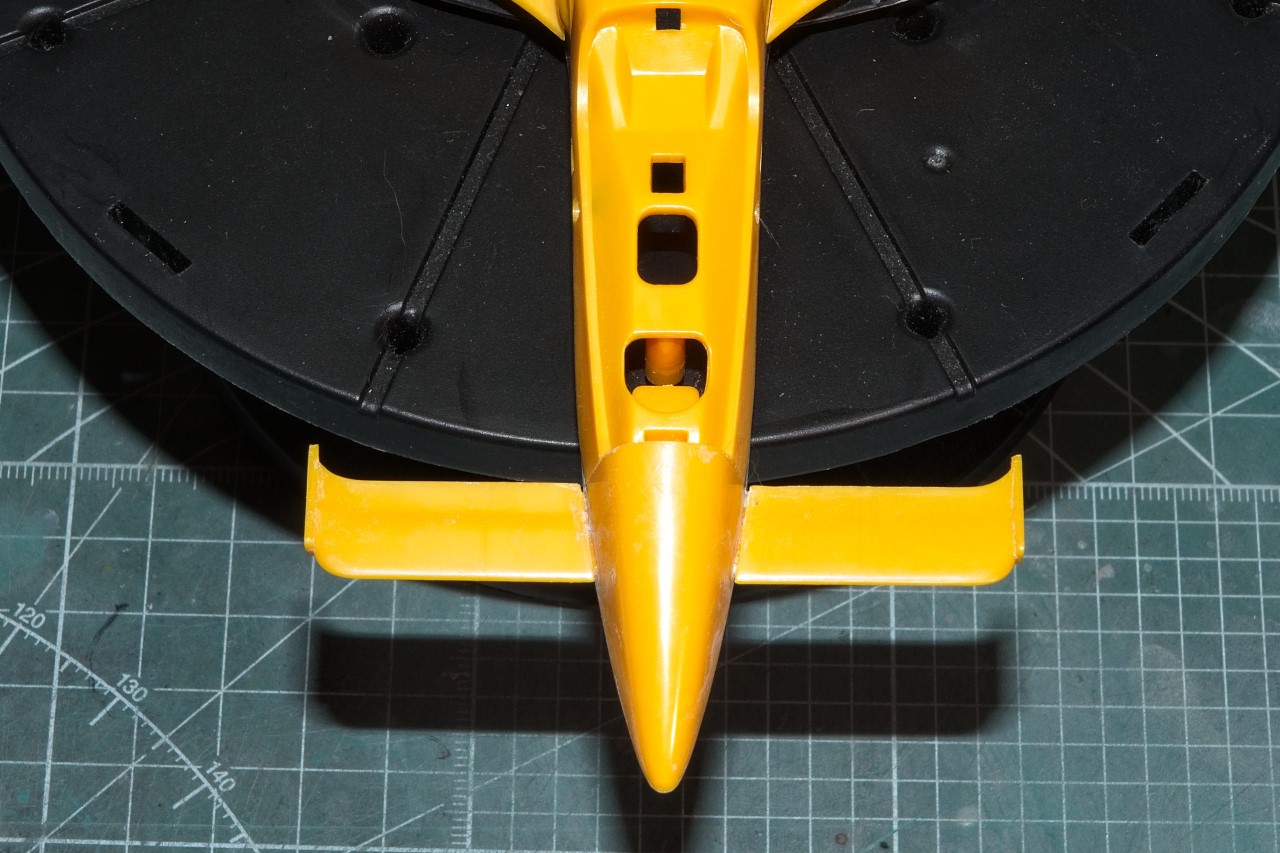
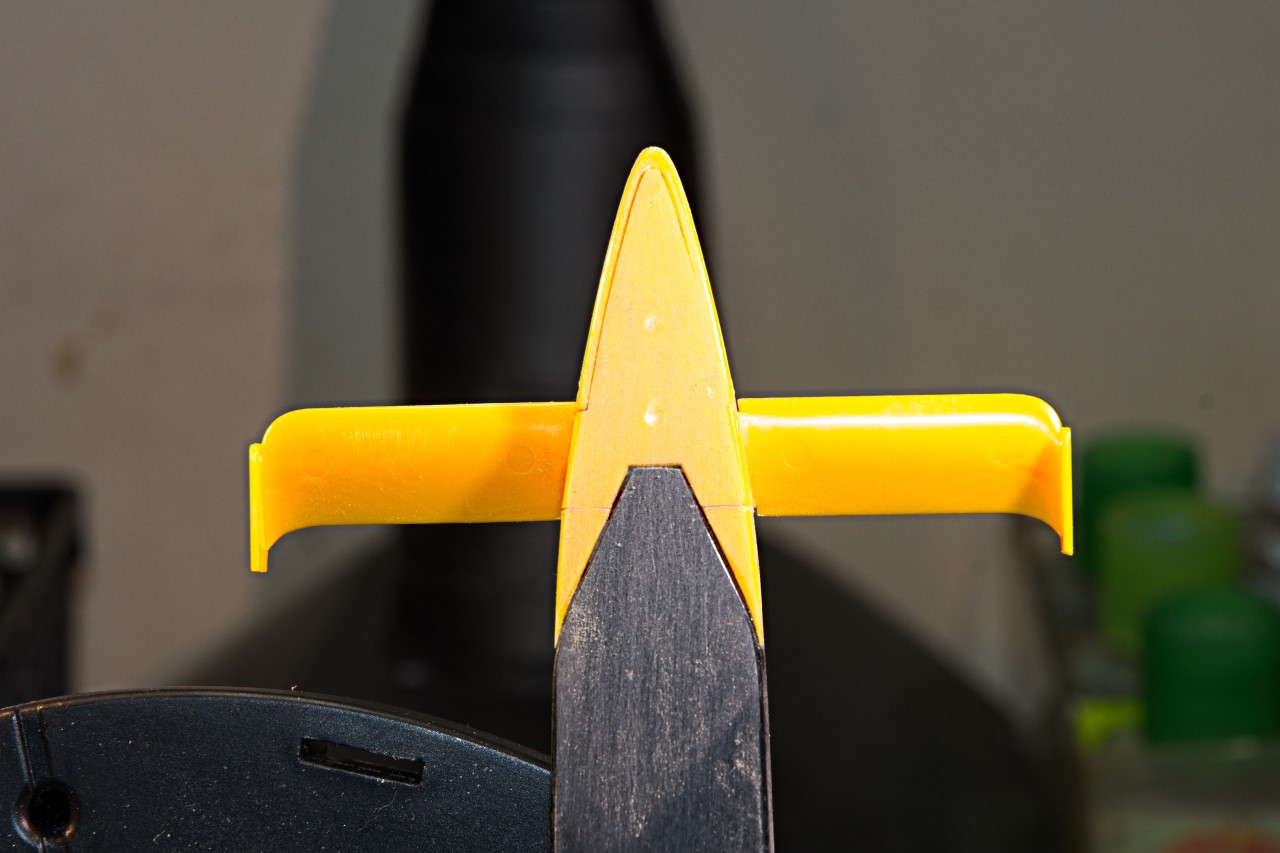
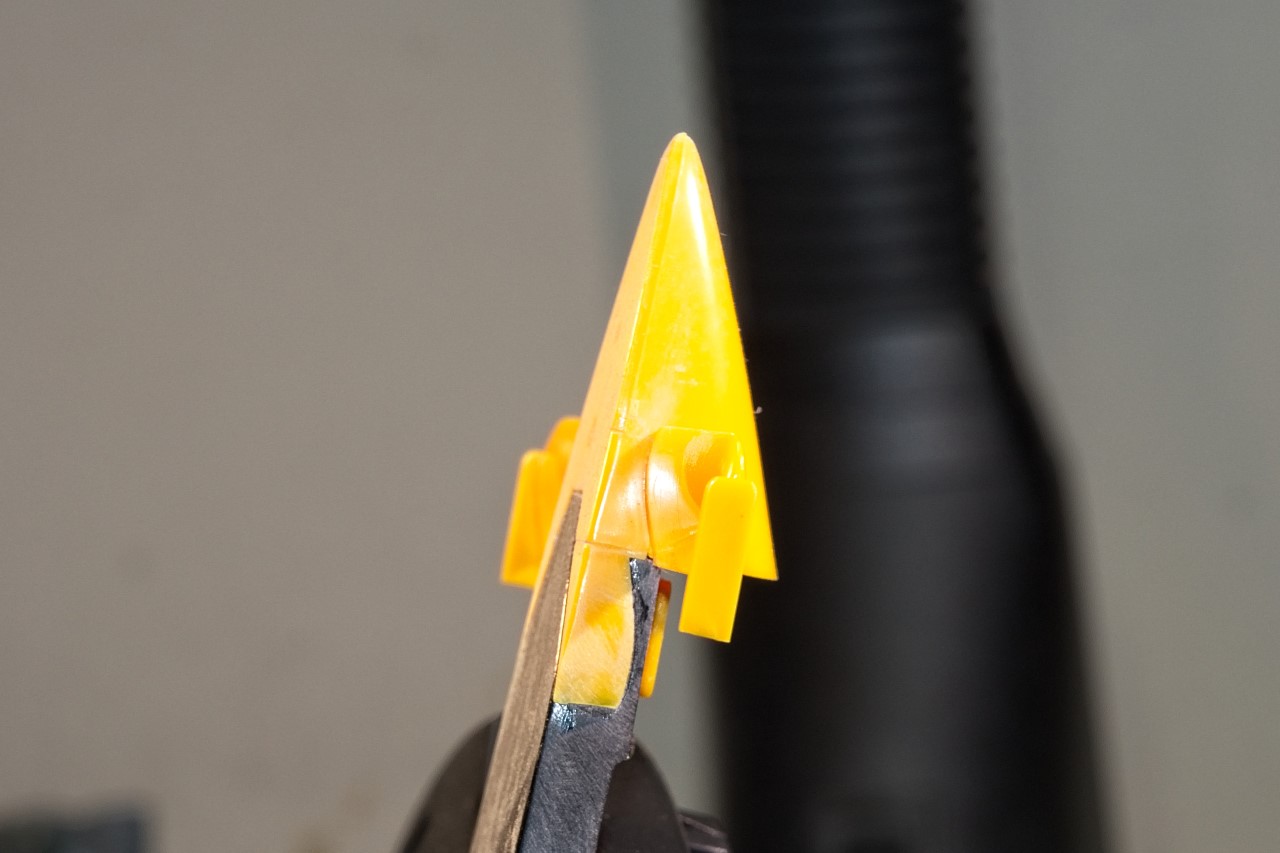
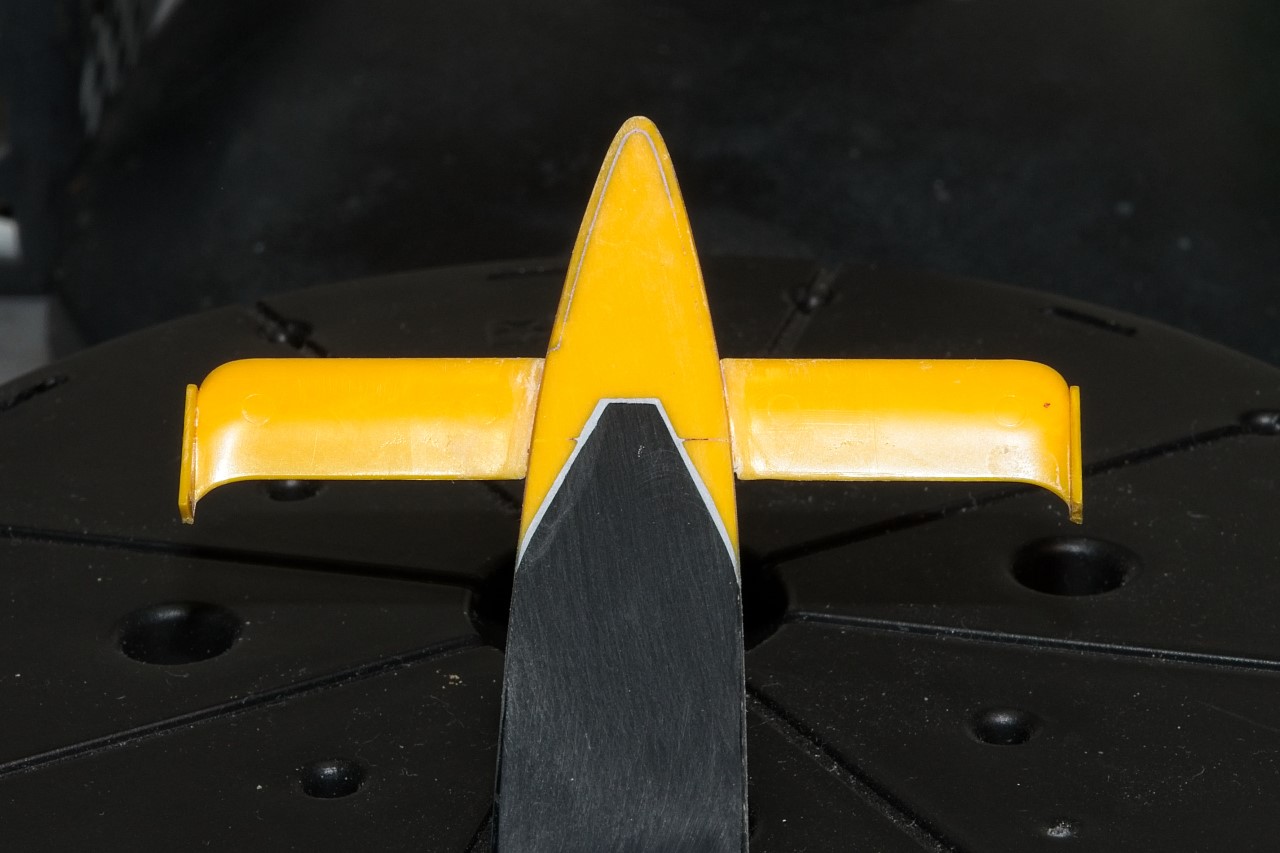
As per my usual work flow, I like to start with the body and chassis from construction through painting, decaling, glossing, and polsih/wax. Right from the start I had to make some decisions as to exactly how I wanted to display the Lola. Starting with the nose cone, I would be closing up the suspension section as its main purpose is for a mounting location for the steering rod. Neither of the 2 coil over shocks, nor any master cylinders, etc are modeled, and the space is just way to shallow to even consider that option. So closed it will be.

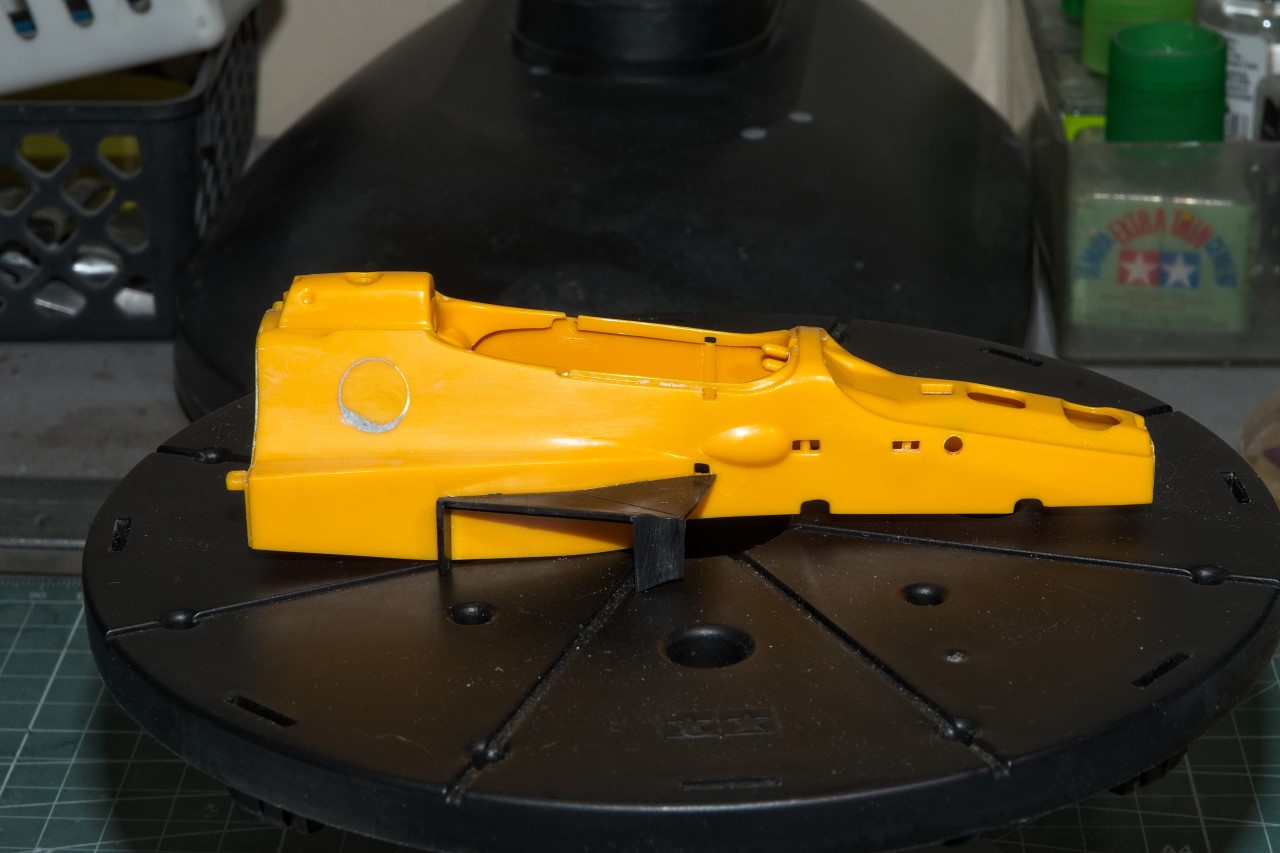
Next up is the one piece side pod covers and engine cover.

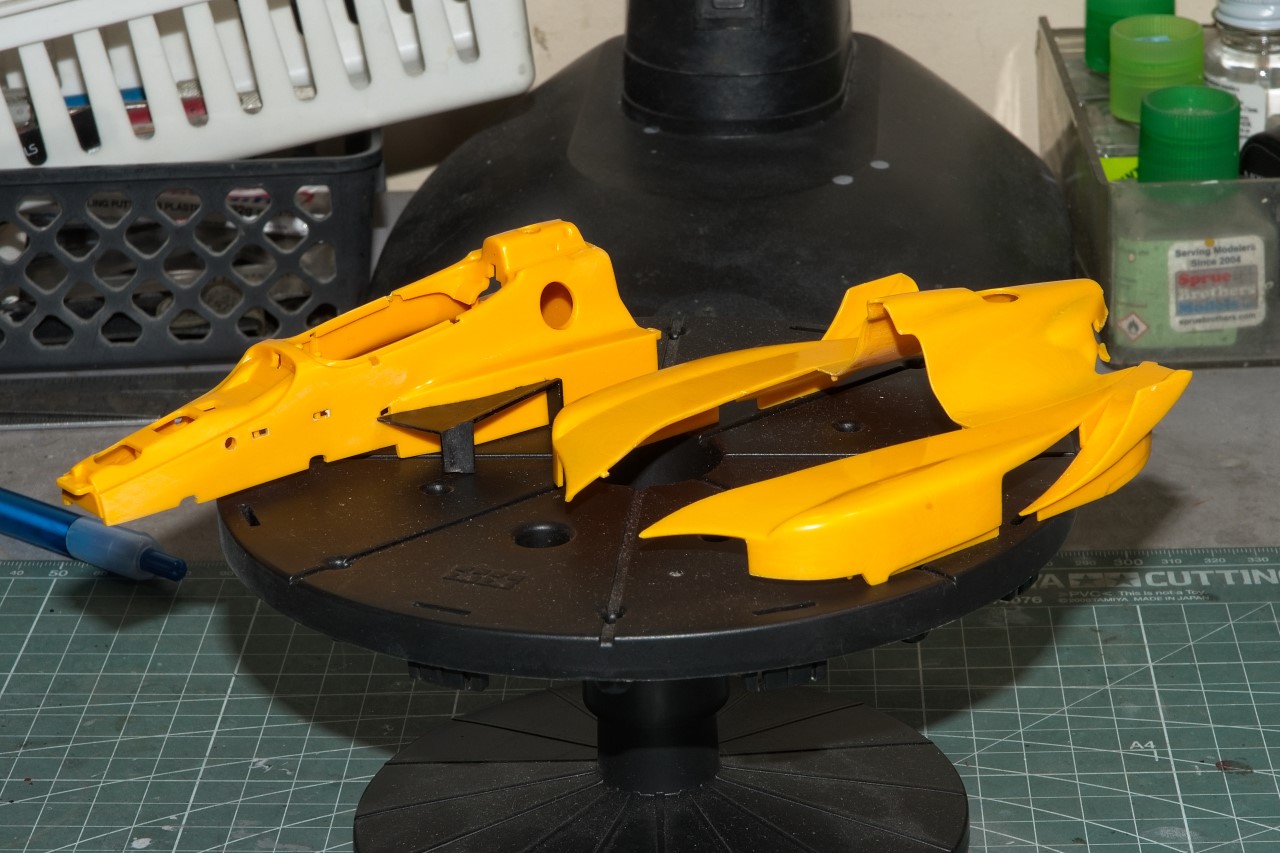
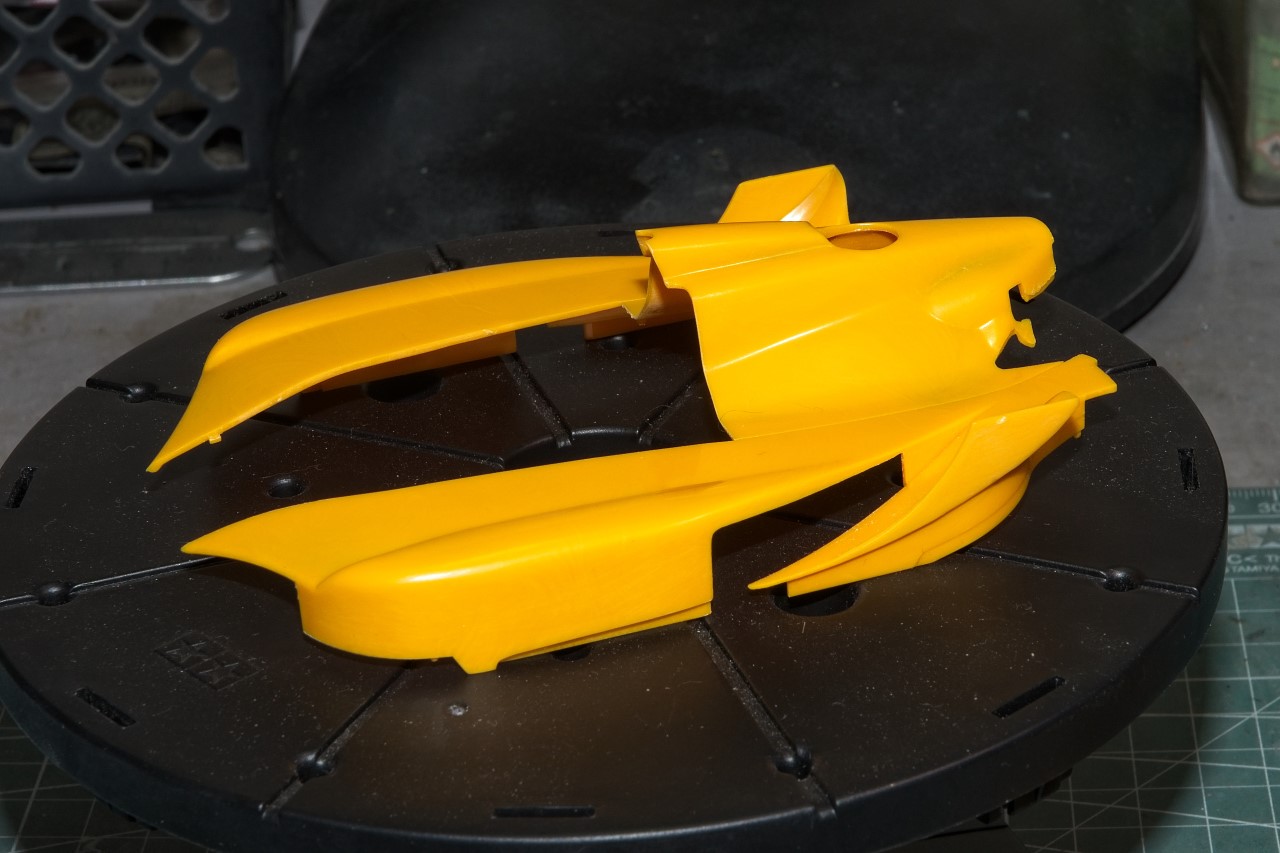
I prefer not to have the entire unit off the car, rather just the engine cover being removable for display purposes, So I cut the 3 sections apart. This also will make it much easier to deal with seam between the chassis pan and the side pods which I’ve gotten nearly perfect, but not quite. The only issue is that by cutting them apart, the seams are now a tad to wide and a gap has resulted. So some sheet plastic needs to be added to widen the engine cover.

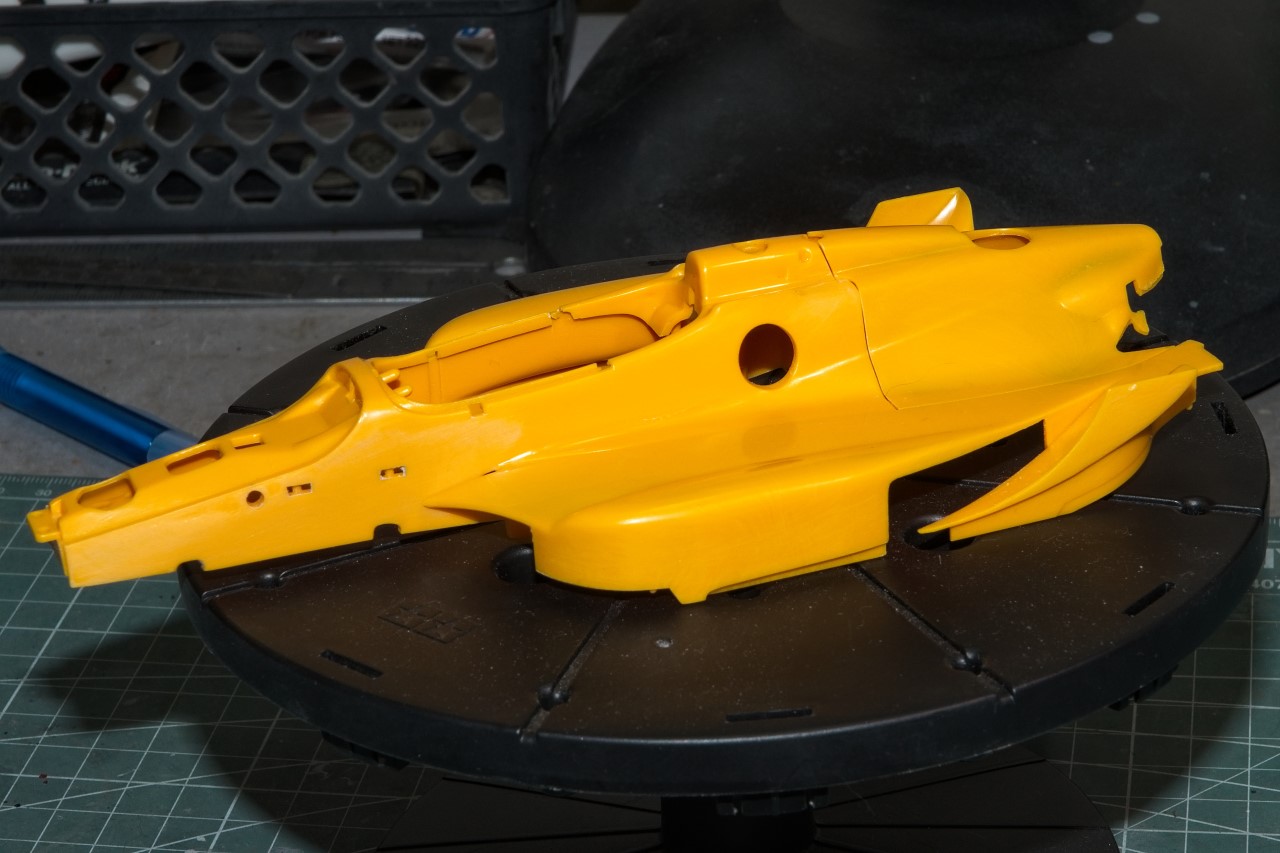
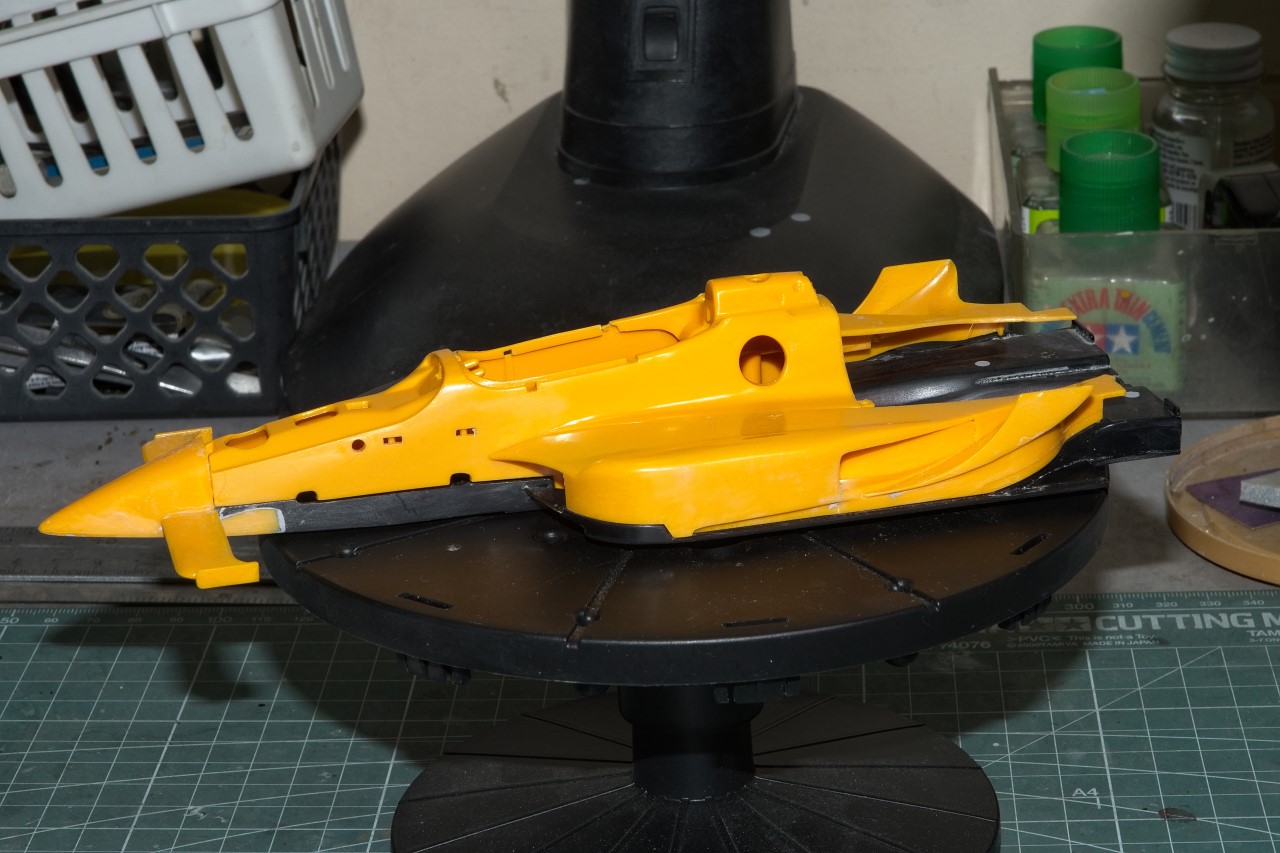
The fit of the two piece nose cone section was just ok at best, requiring sanding to level, then Putty work to blend in to the lower and side of the chassis plate.

Joel

I am here and will look over your shoulder, Joel. But your turn table is far too clean, my friend! :wink:

Hi Joel

Nice job fixing the gap so neatly on the nose. That will make a huge difference to the look of the finished model. :beer:

I’ll be along for the ride too. :slight_smile:

All the best

Rowan :beer:

Tagging along Joel, should learn a bit from following your outstanding work.
Andy :slight_smile:

Torsten, Andy, Rowan, & Ken,

Then guys for your collective thumbs up. Just maybe this will get Rowan to actually build a car

Joel

I’ve seen the kit before, just didn’t realize it was a snap kit. Will be following with great interest.

Jasper,
Welcome to the show.

I still can’t understand why Tamiya of all model companies would go with their 1st Indy Car kit as a Snap-Tite kit. So far the fit issues are just sloppy tolerances, needing sanding for alignment, and then putty to blend in the gaps.

Joel

Great start as always Joel, and wonderful to see you back at the bench mate!

Looking forward to more progress reports.

Cheers, D

D,
Thanks for your thumbs up. And yep, it’s great to be back at my bench.

Joel

PRIMER ISSUE.

I’m running out of my go to black base primer: Gunze Mr. Finisher 1500. I have Tamiya’s Gray and White as I’ve already run out of the Mr. Finishers 1500 Gray primer, but Tamiya doesn’t make a Black Primer. Everywhere I’ve looked on line (lower 48 states only), they’re out of stock on it and in most cases the 1200 which isn’t in the same class as the 1500. So I needed to place an order for basics paints and some supplies from Sprue Brothers which wasn’t easy as I had to use 3 different paint brands instead of just one. I ended up buying a bottle of Ammo by Mig One Shot Black primer that’s supposed to be made by Badger.

After watching video after video from my go to paint guy, Paul from International Scale Modeler, I opted to shoot the primer straight from the bottle at 30 psi through my Grex 5.0 AB. Every min it clogged up no matter what I tried. I opened the air valve so that the trigger when pulled back was more then 1/2 way, then nearly 3/4 of the way, but the AB would still clog up. Way to much paint to start with, then I’d adjust the spray, then back to clogging.

Took forever to do the body shell, the chassis, engine cover, and a few smaller parts. The AB was a mess as cleaning it took forever. I still have my paint booth to clean as it was more like using a rattle can, which would have been easier.

So until I can get a resupply of the Mr. Finisher 1500 Black I’ll be priming with Tamiya Gray. I’m not holding my breath as models and model supplies seem to be at nearly the bottom of the list of items coming in from Asia.

I’ve also tried the pre-thinned primers from Gravity and Zero and they’re just way to thin to effectively be used as a primer other then as a basecoat. Trying to cover putty or various shades of plastic took way to many coats and half the time never really worked perfectly.

As for the final primed finish. I just looked, and I’m not thrilled with it. It’s certainly not smooth as silk, so sanding with 3,000 sponge is next. That is if it actually is sandable.

Joel

Ken,
Thanks for the suggestion.

My problem of no supply channel for the Gunze Mr. Finisher’s Black 1500 is solved. One of my two go to online hobby shops: ScaleHobbyist.com has it in, so I just ordered 3 bottles. I’ll follow that up with another order next week as I don’t want to hog their stock.

joel

I hate hearing anybody having paint issues, it’s such a drain on the enthusiasm!

The Ammo One-Shot is rebadged Badger Stynylrez primer, and is designed to be hosed on at high pressure as you did. I’m surprised that you had the clogging issues.

If you get stuck, go to the USA-Gundam store and get some of the SMS black or grey primer. It is basically like using pre-thinned MS1500.

I hope you get past this and get some more progress soon Joel, your progress reports are always a highlight here mate.

Cheers, D

Hi Joel

I’m looking forward to seeing you get going again once your fresh supply of primer arrives. I’ve never tried Mr Finisher, but I love Mr Hobby/GS paints in general so I may well track some down.

All the best

Rowan :beer:

D,
I bought the Ammo One Shot because it’s relabeled Stynlrez which is super hard to find here in the states, as it’s always out of stock. Gee!! what a surprise.

I’ve been looking forward to trying it out as Paul from International Scale Modeler’s loves the stuff, and I’m a true follower of his air brushing technique, just like I am of Paul Budzik’s decaling procedures.

So I was pretty sure that I had the technique’s basics down good enough to air brush on the primer coat. My Grex Genesis .5mm setup was used as is my standard practice for primer coats. psi opened up to 30psi and the air flow adjustment stop valve on the AB (still double action with a pre-selected stop for even coats without having to concentrate on the flow rate) set so that the max pull back of the air button was just past 1/2 way, which is how I air brush on Gloss Clears and color coats but at 1 Bar or 14-16 psi of pressure. Never, ever, had any issues with clogging. I’d have to go back to my test runs with both Life Color and Vallejo acrylics which both had the same exact issue. Needless to say that all true Acrylics have been used since those days for just hand detail painting.

After a full day to try to come to some conclusion as to why this happened, my only thought is that I needed to open up up the air valve to at least 3/4 pull back. But that would in my way of thinking flood on the primer and cause other problems. I guess it’s just not my cup of Tea for now. I do intend to experiment with it just to see if I can get it to work down the road.

In any event, as I posted, one of my two online modeling supply resources got in a fresh supply, and I ordered 3 bottles. Not wanting to hog their whole supply, I’ll wait till mid week and follow that up with another order for 3 more bottles and some other supplies as well.

One valuable lessen I’ve learned is that during this Pandemic crisis, never let any item or supply run out. I’ve gone to having a backup of literally every basic detailing color, primer, decaling solution, and even Gunze Mr. Color #400 self leveling thinner in the 400ml bottle has a full sealed backup, as well as all glues and even Tamiya tape, and sanding supplies. And yes, it does get to be rather expensive at the expense of maybe a new kit or two.

Joel

Rowan,
Have no fear my friend, the Lola 93/00 was completely primed yesterday. Late last night I tested an area that would be under the seat/cockpit to see if the primer does sand smooth to what I need it to be. And it does quite nicely.

So my thoughts is that the primer does basically work as Paul said, but I couldn’t get it silky smooth right out of the AB like he does. Since i do final sand even the Mr. Finisher 1500 primers with 8,000 then 12,000, the steps are the same to get ready for the color coats.

Like I alluded to, was all the time and frustration trying to unclog the needle/cone and then resetting the flow rate that drove me nuts. Then the difficulties I had trying to cleanout my AB. Once dry this primer is like glue and even Straight Lacquer thinner didn’t remove it without a lot of work. That’s something I’m just not use to. Although, I’ve read and seen that auto windshield cleaner (the Blue stuff) works well for that plus as a thinning agent.

joel

Hi Joel

Nice one! I’m glad you’re back up and running.

I don’t often prime mainstream kits - I usually save it for things like major conversions or resin/vacuforms (but I’m coming from an aircraft perspective, of course). I’ve long heard of people thinning and airbrushing Mr. Surfacer, but I’ve always been wary of trying it. So, I guess I lumped Mr. Finisher in the same category. I’ll give it a go. :slight_smile:

If you ever do need an alternative, I can certainly recommend Alclad’s grey microfiller primer - it sprays beautifully. It used to be available in a really useful 120ml plastic bottle, but they only show a 60ml glass bottle on their website now - the same size as their metallics.

I’ve found Brush Magic from Deluxe Materials is excellent for cleaning almost anything from an airbrush. It’s not like the usual solvent-based cleaners and a bottle has lasted me years. I wouldn’t be without it. :wink:

All the best

Rowan :beer:

Glad to see you back at it Joel ! I’ll be following along.
Having backup supplies is a good idea in these crazy times , and the shipping problems compounded by really terrible service from the USPS .

Rowan,
Never to old to learn new tricks. How about the most effective way to clean your air brush after spraying real Acrylics (not like Tamiya’s mainstream line of paints), is to simply clean with very hot but not boiling water. I’ve watched a video using this technique and it seems to extremely effective and super quick. Plus the cost of the cleaner is Zero dollars. just heat to near boiling and go.

The reason that I think Mr. Finisher’s Primer/Sealer is that it’s just way to thick to air brush without needing to use the pressure of a fire hose to force it through a air brush.

Priming for me is to give the super thin color coat a base to stick to, air brushing otherwise can easily cause runs, drips, and what nots. Back in my aircraft days, I’d rarely use primer as the paint was matt and on the thicker side compared to how I thin paints for car models. Like you, I used primer to cover different color plastics found in some kits, putty, etc.

Joel

Richard,
Welcome aboard for another journey. This one shouldn’t be to difficult as it’s main focus is a kit that’s not super detailed, but will get a little in the way of engine details. The side pod covers as I’ve said will be glued in place, so all the radiators won’t have any plumbing, and electrical black boxes located within them won’t even be duplicated.

But without giving up my next build will be, it will be the exact opposite, and take several months to get across the finish line.

Believe me, the last thing I ever thought I’d need to keep lists of is supplies and always trying to stay one step ahead of not having what I need, when I need it. And that’s just general building and painting supplies. I can’t believe just how difficult some of this stuff is getting to find. Never thought I’d have to literally go to 2 or more sites, and then use various brands.

Hopefully, with the vaccine’s now coming online, the pandemic will become the next yearly flu shot we need, and not dominate our lives to this degree.

Joel

Hi Joel

Although I very rarely spray purely water-based acrylics, I’ll remember the hot water trick - especially as it’s great excuse to keep a kettle in my workshop and will save countless trips up and down three flights of stairs to make a cuppa! :beer:

All the best

Rowan :beer: