Tamiya 1/20 Scale Lotus 1979 Type 79 F1 car

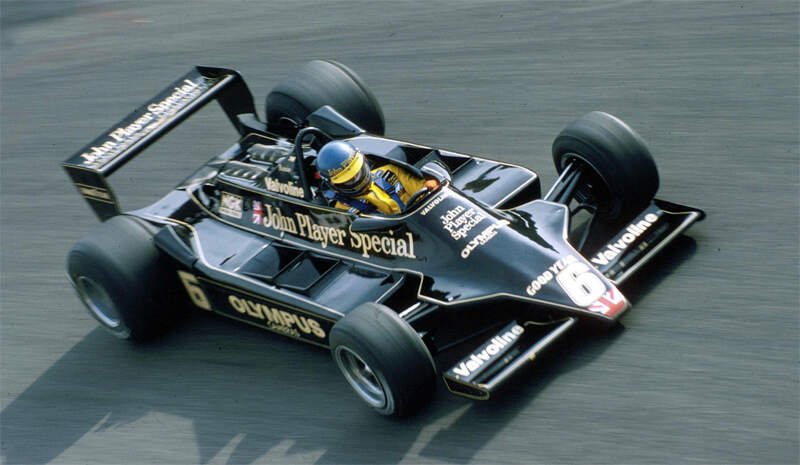
Tamiya has kitted both the 1978 Lotus type 79 as well as the 1979 Type 79 that had a change of sponsorship from the Black and Gold colors of John Player Special & Olympus Cameras.


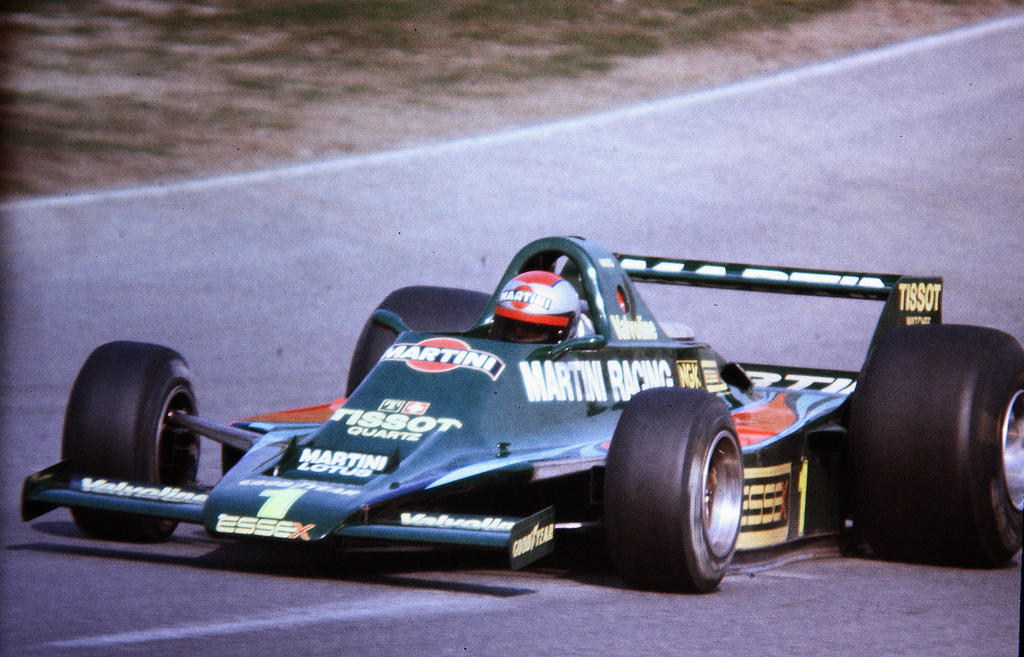
to the Martini Sponsored 1979 type 79 in BRG

The 1978 car revolutionized F1 racing with the 1st true use of ground effects that was a full year ahead of any other team. The result was that Mario Andretti won the driver’s championship with his teammate Ronnie Peterson placing 2nd. While Lotus won the Manufacture’s Championship. The car was truly way ahead of the rest of the field.
For the 1979 season Lotus was working on even a better ground effects car: the type 80 but it wasn’t ready for the start of the season, so Lotus simply used the 1978 cars which was a common practice back in that era. Unfortunately the other teams had made great gains in ground effects, and the type 79 wasn’t even able to compete as a front running car till the type 80 finally made it to the grid.
Tamiya pulled out all the stops with this kit as it captured the complex body work both top and bottom.

What’s more the decal sheet has been printed by Cartograf which took me for a surprise. My kit was molded in 2006 so the decals are 15 years old, and the kit was purchased off of ebay a while ago already opened. As an alternate to the kit decals I bought the AM decals from Indy Cal. Right now I’m not sure which way I’ll end up going.
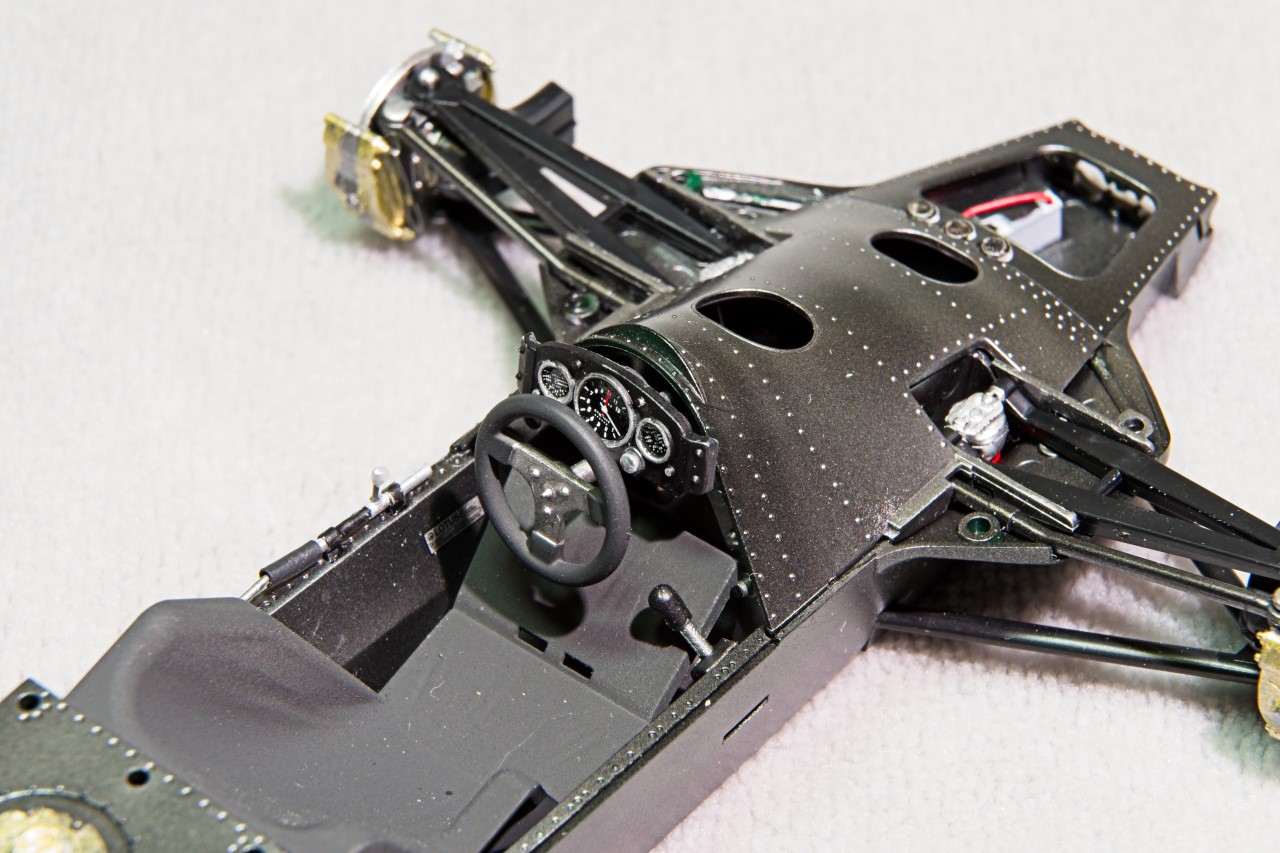
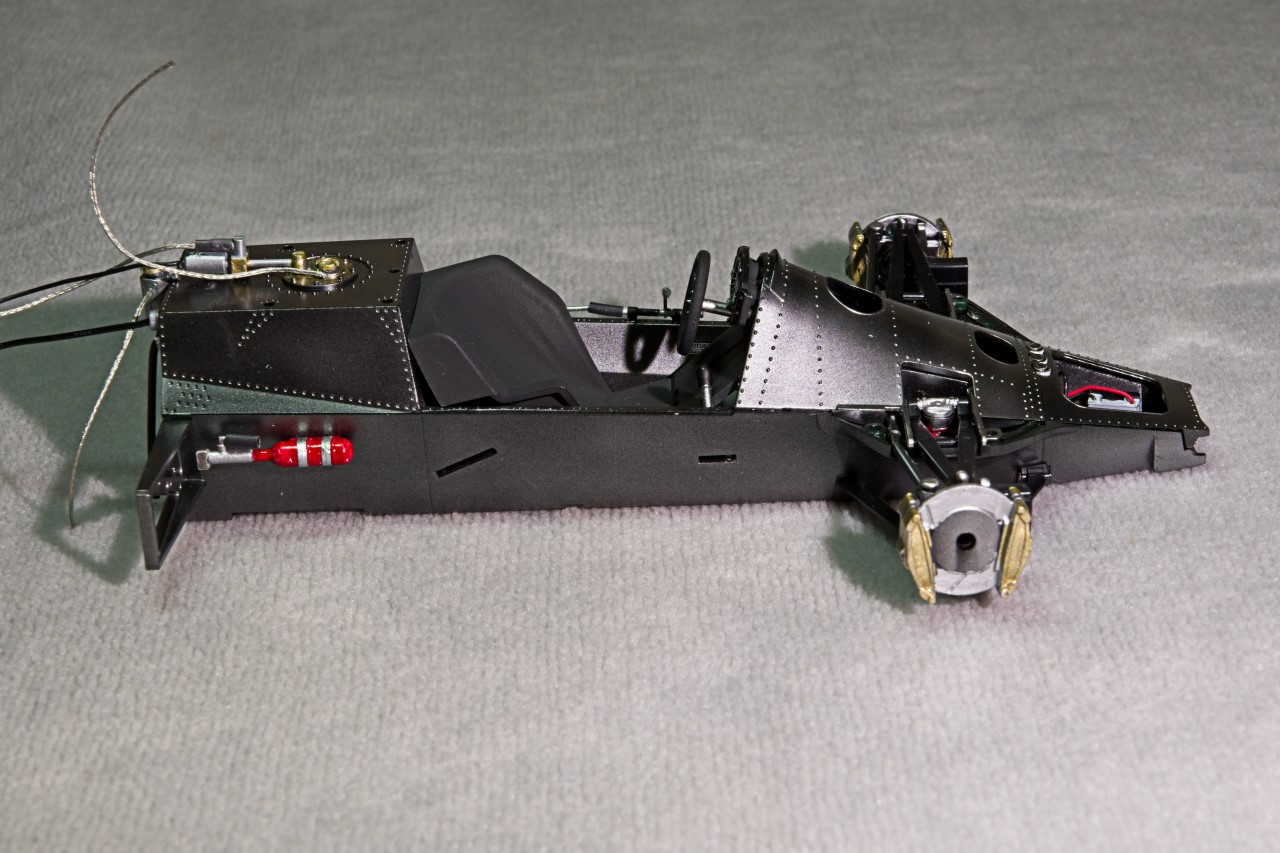
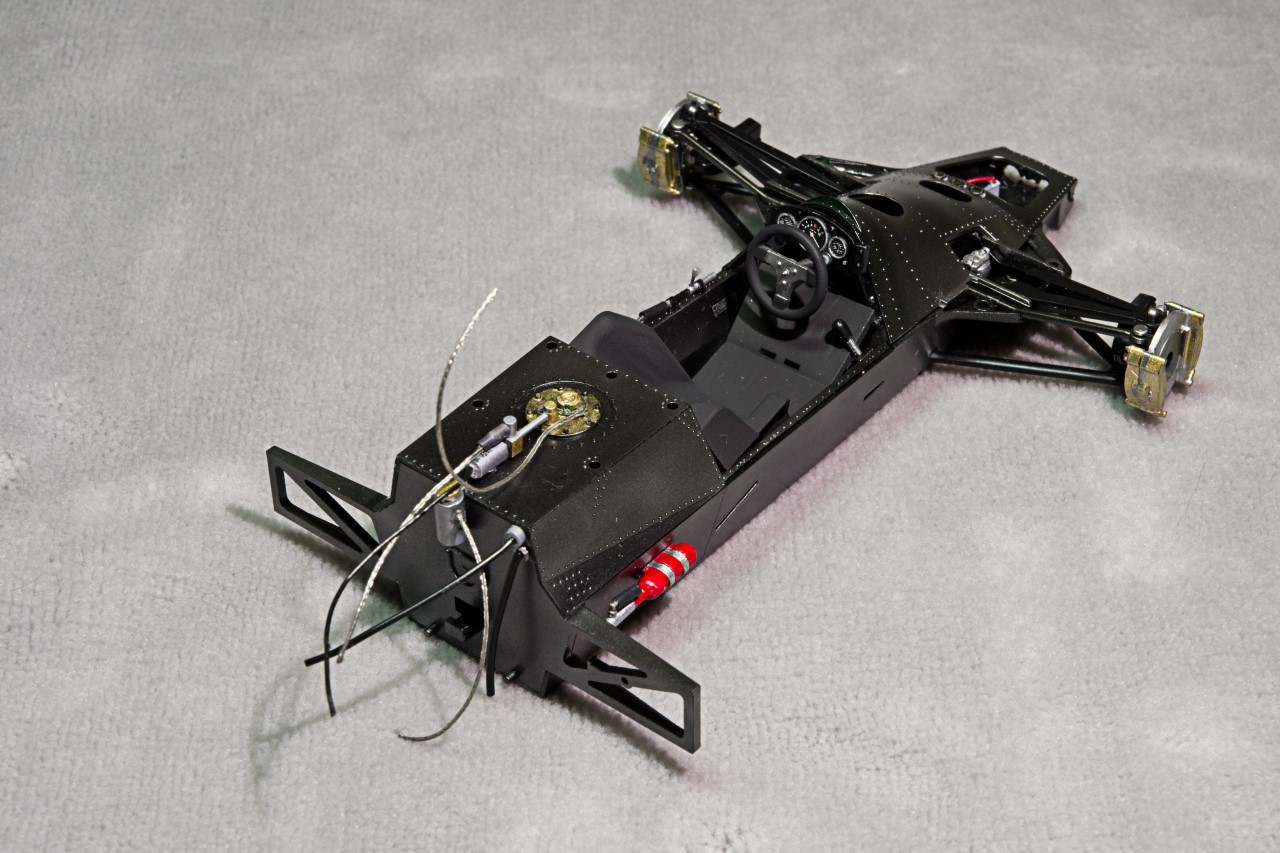
the Body is quite complex and is comprised of almost 30 pieces and is built around the aluminum monocoque chassis. So unlike nearly all of my previous builds, I can’t start with the body right through painting, decaling, and polishing. Work this time starts with the monocoque chassis.
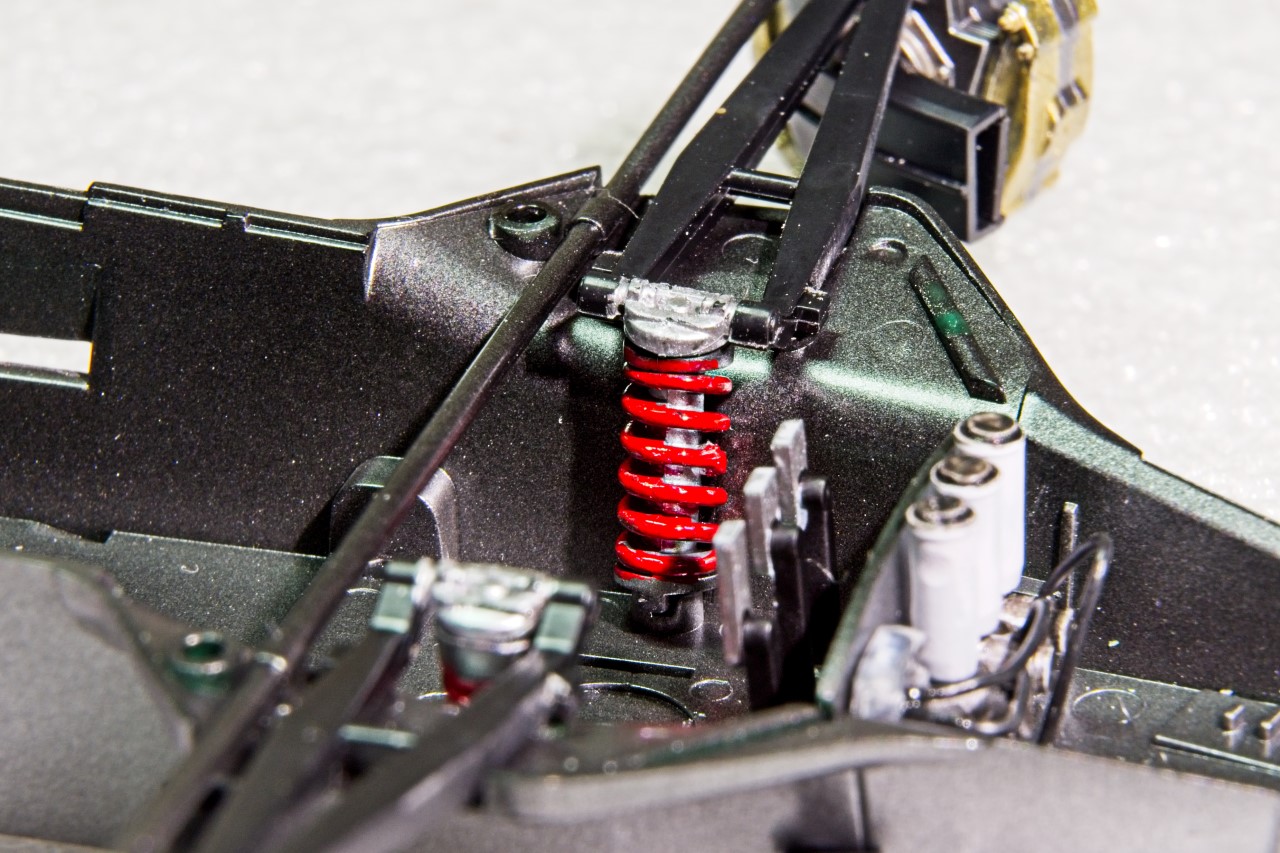
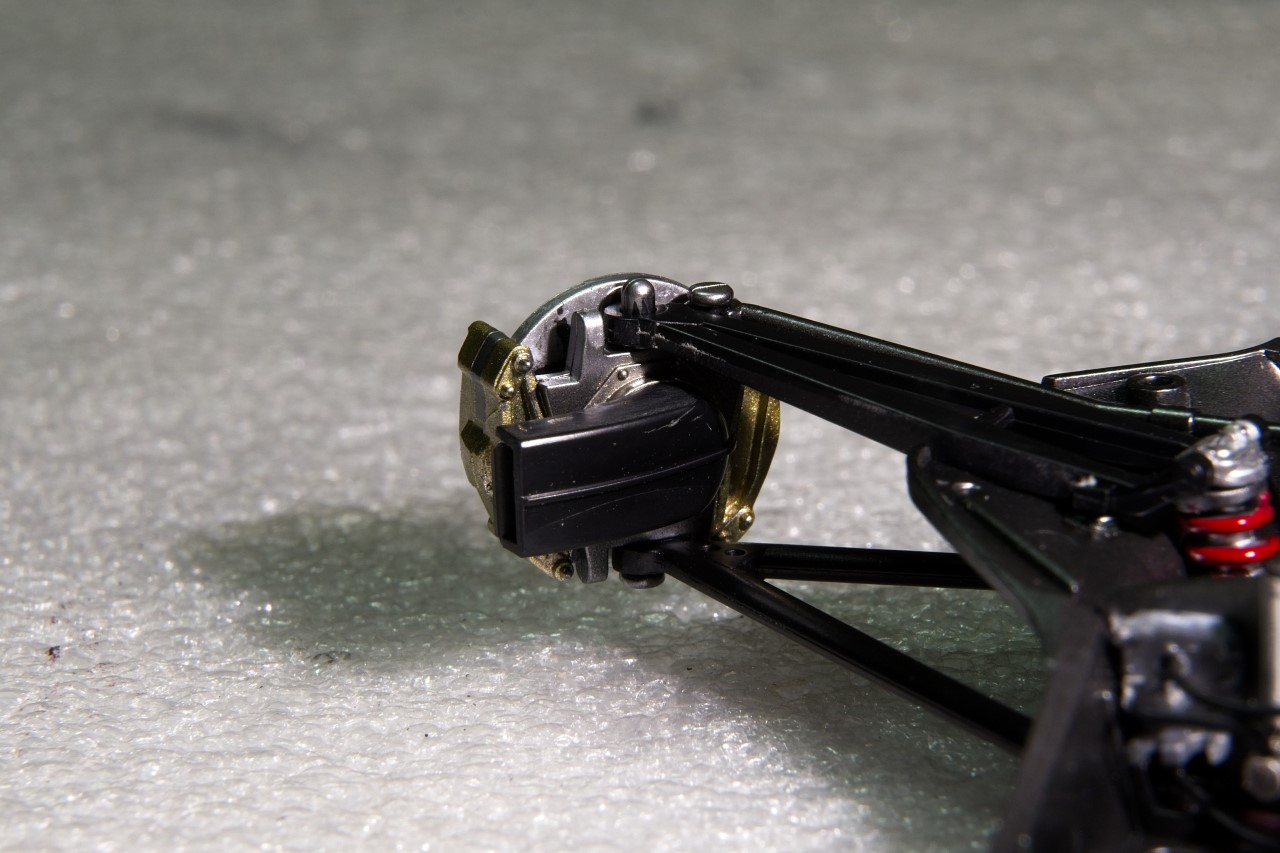
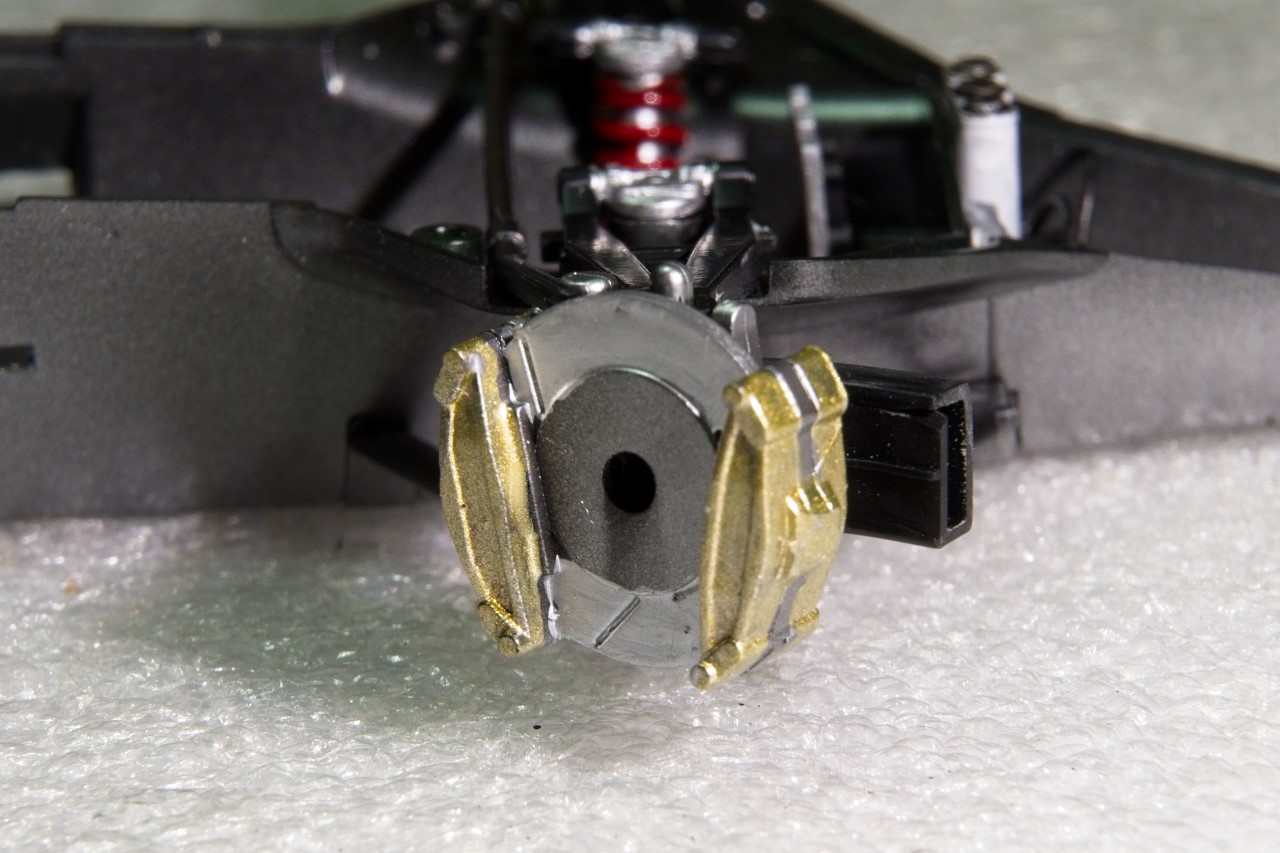
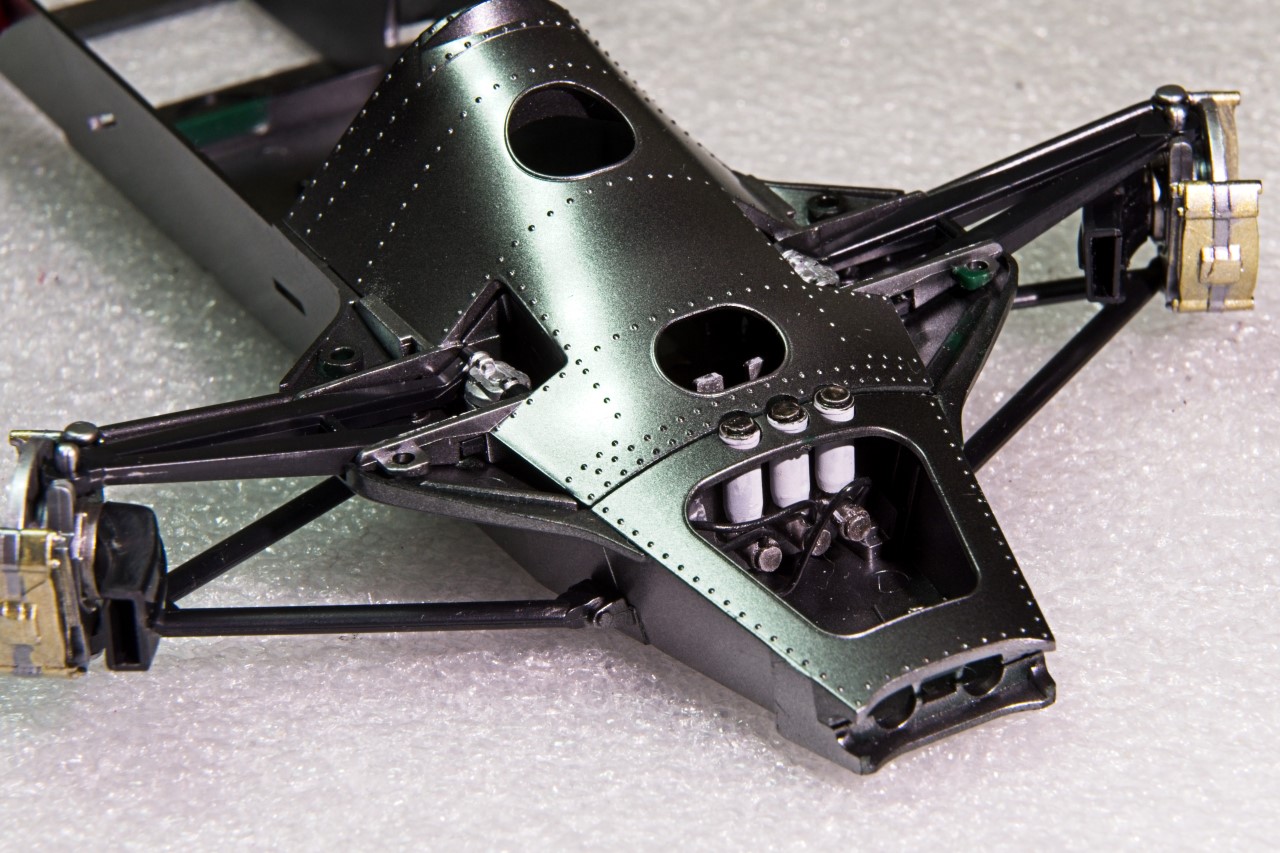
I prepared for painting the 1st 6 steps in the instructions to build the monocoque chassis including the front suspension. Any parts that need to be Aluminum was AB’d Tamiya X-1 Gloss Black. I don’t prime under it as the primer adds texture to the Gloss Black and that’s exactly what I don’t want. Here’s the main sections after the Gloss Black has been applied.

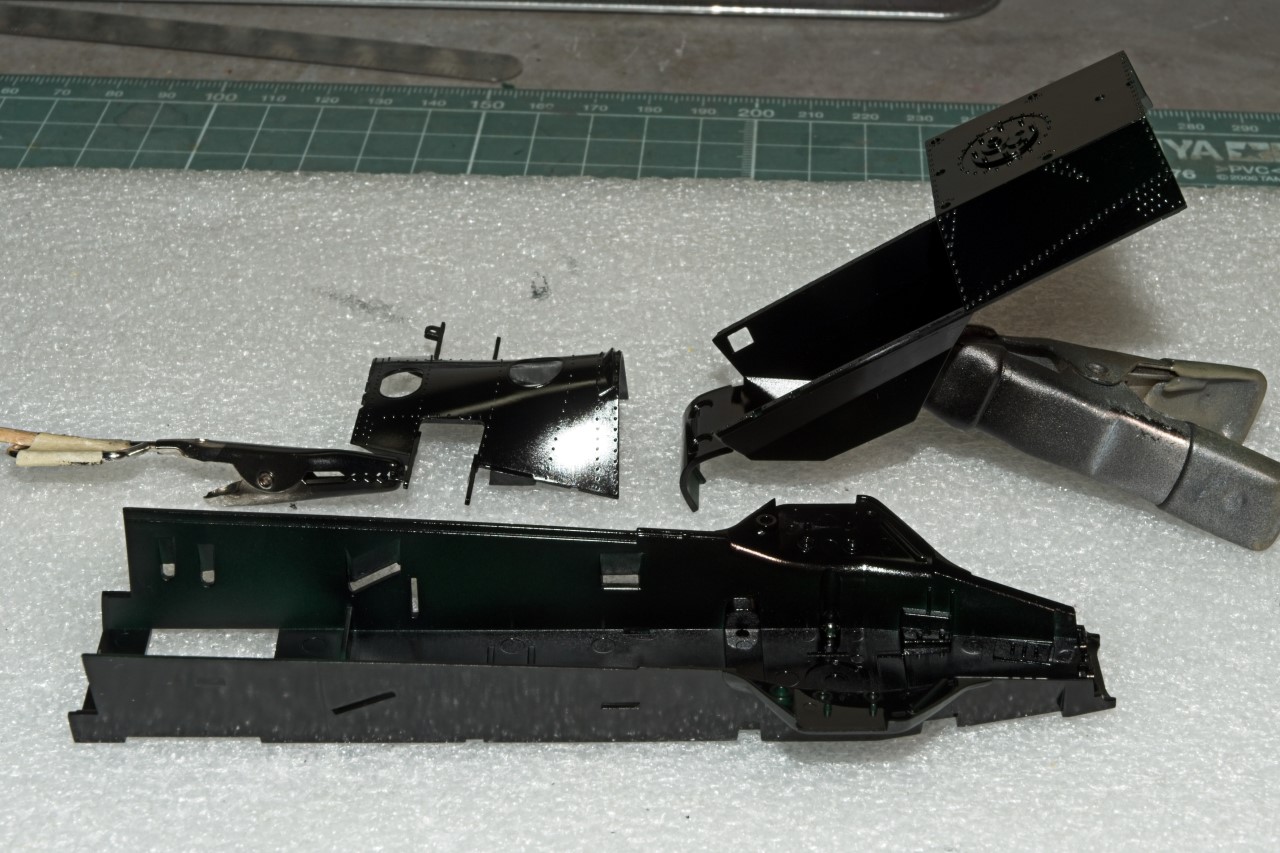
I gave the Gloss Black a few days to cure, then I air brushed on Alcad2 101 Aluminum.

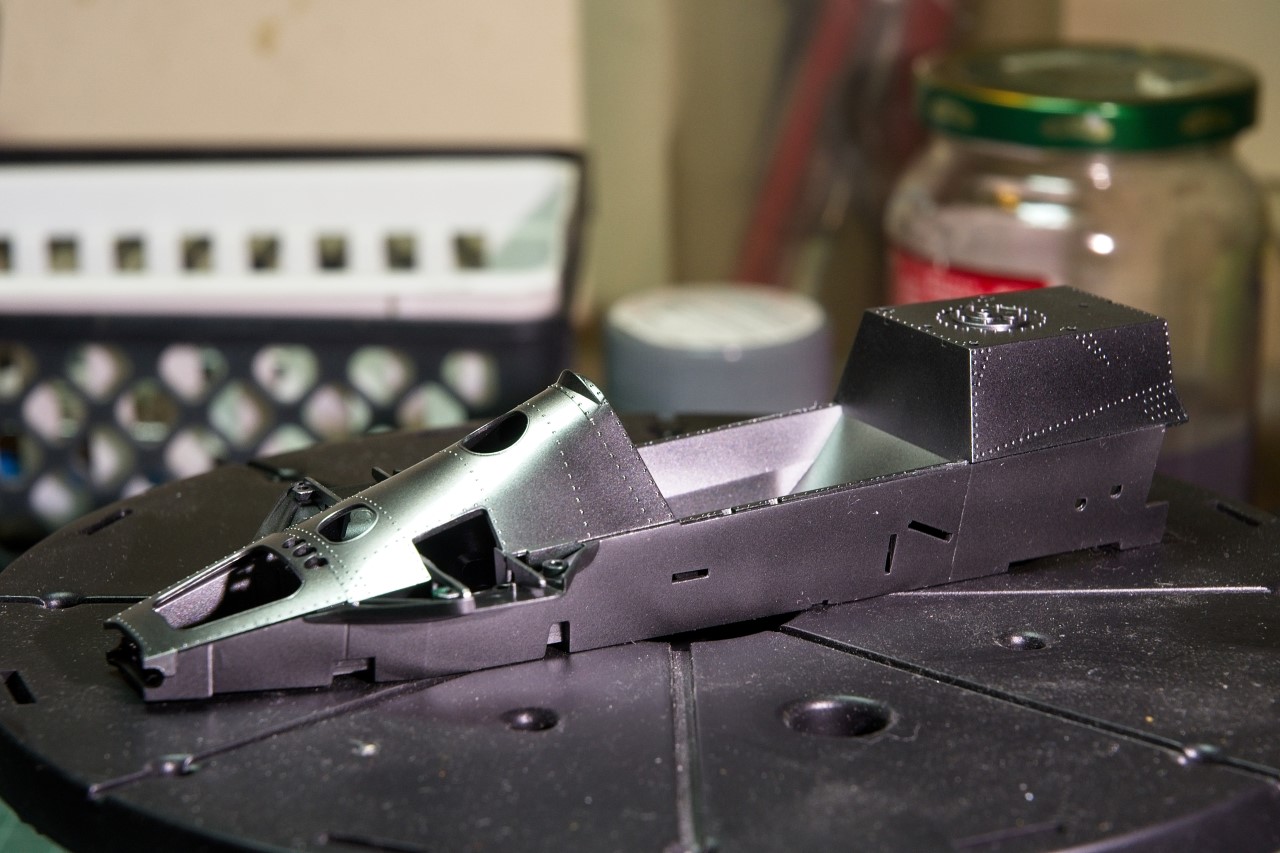
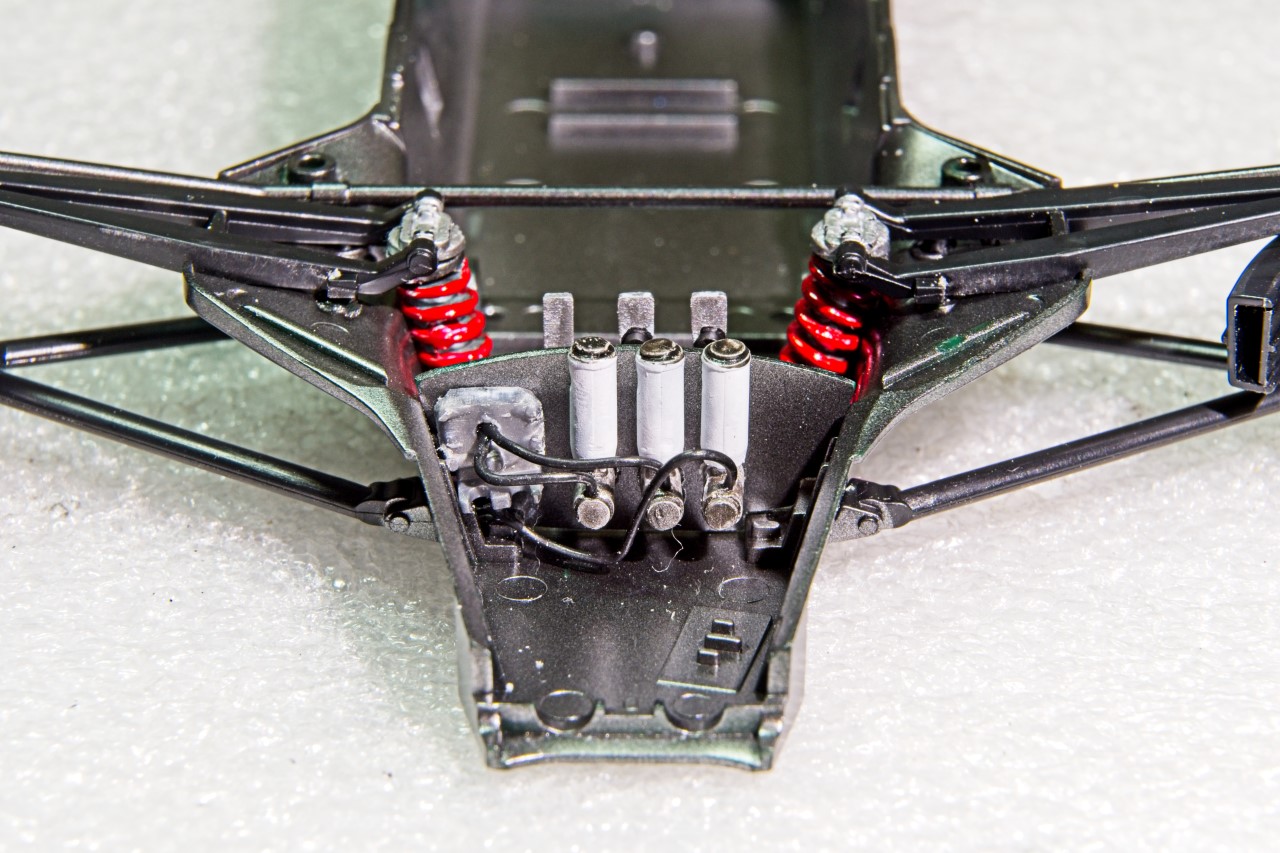
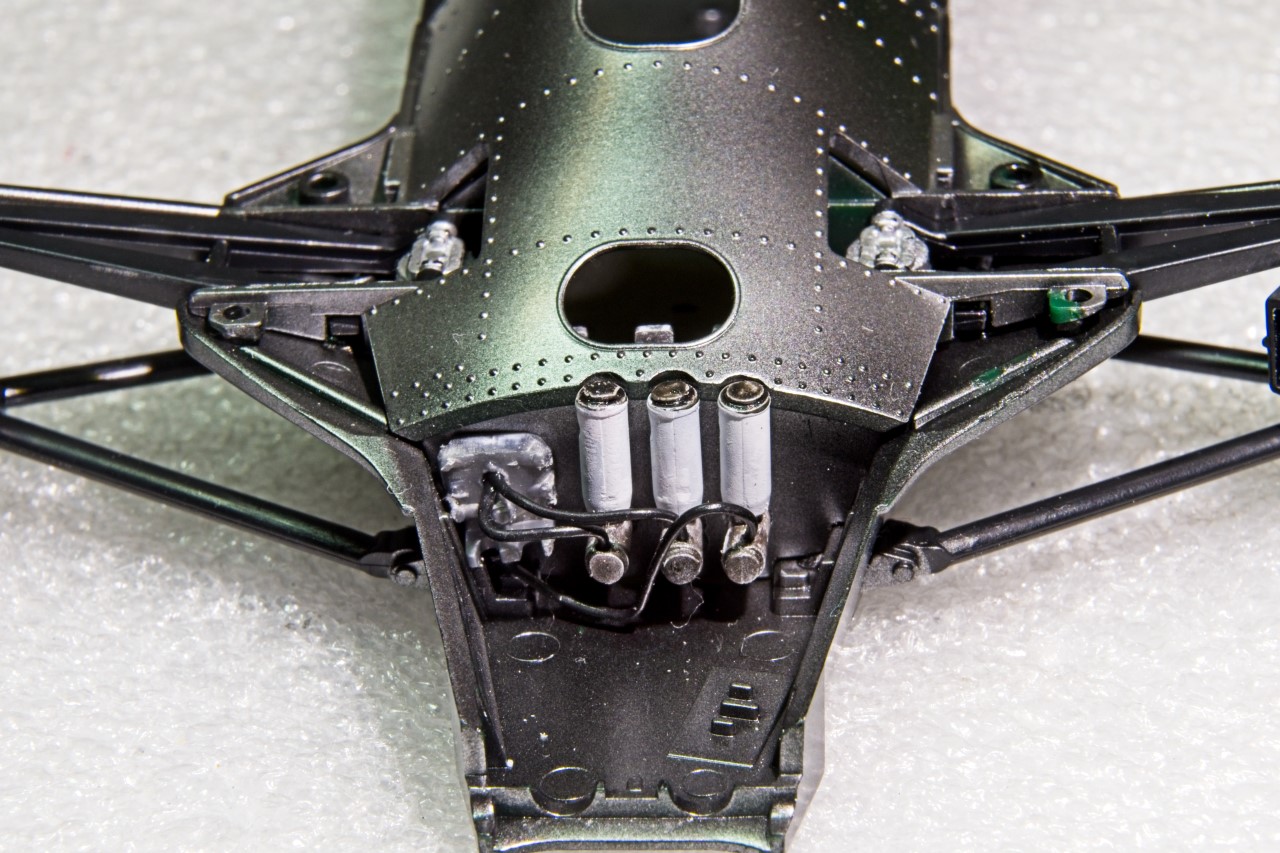
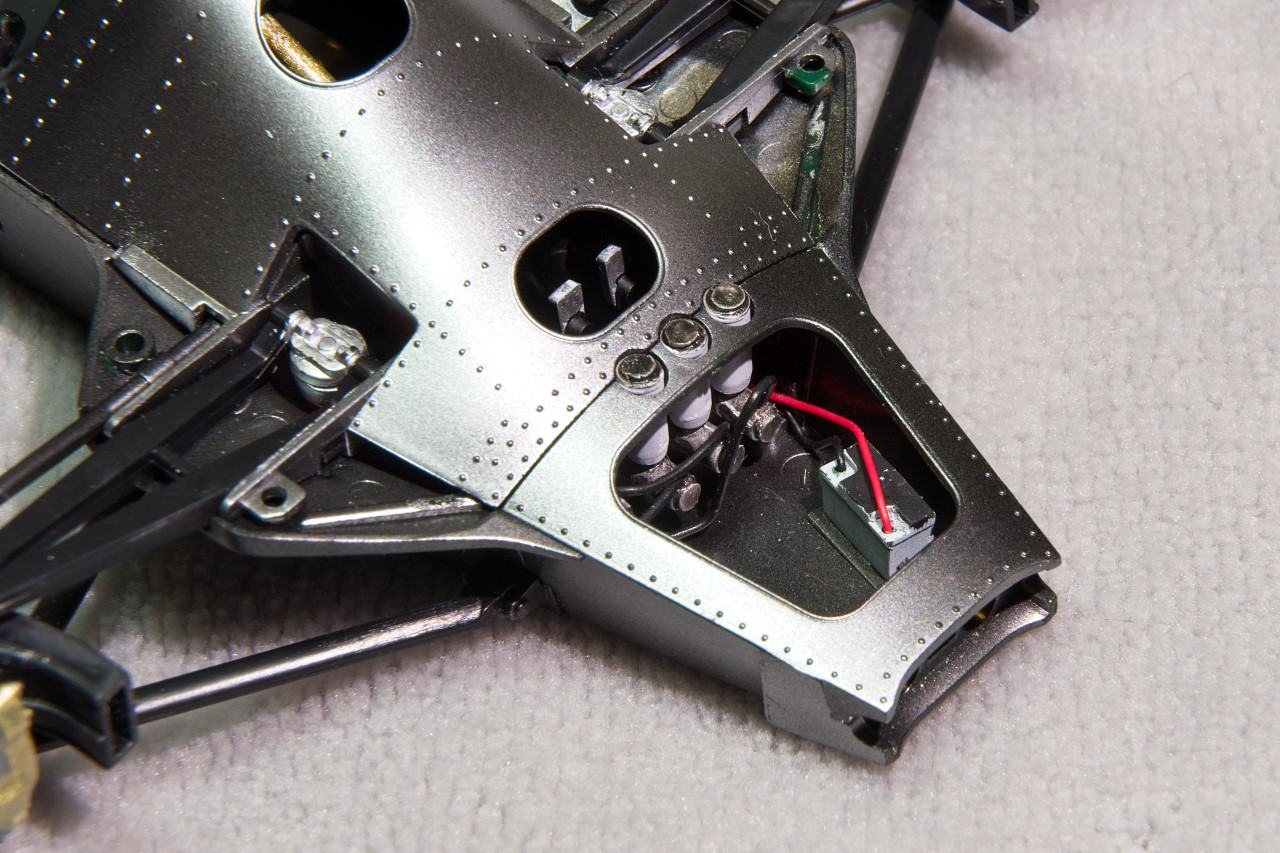
The 4 main sections are just dry fitted at this point. the front section will contain the small battery and leds as well as the 3 Master Cylinders with lines.
And speaking of the Master Cylinders here’s one with a pin through the holes drilled for the lines as well as new tops for the caps.

joel

9 Likes

Ooo a Lotus that’s me hooked, my first introduction to F1 was watching the black and gold JPS cars going round the track (on tv) and they had me. I followed Lotus through all their ups and down until they departed F1 then followed them again when they made a brief return a few years ago. Now I follow Alfa Romeo.

Enough of my F1 history, looks like your off to a solid start on this one Joel.

I have most of the Tamiya and more recent Ebbro Lotus kits although one which I got second hand has damaged decals and I’ve not been able to find replacements even at Indycal.

Great start Joel, love seeing another open-wheeler on the bench now!

Nice tip on not using primer under the gloss black as well, very nice finish on the Aluminium Alclad.

I’m signed up and settled in, looking forward to updates.

Cheers, D

Luciano,
My 1st love in F1 started when I got my 1st copy of Road and Track in 1964 or so as they had a road racing section in the back that was written by Rob Walker (owner of the walker F1 racing team that always used Lotus cars. His family owned Johnny Walker Scotch, so you know just how much money he had to play with), and even though all the F1 news was 3 months old by the time it got published, I was hooked on F1 and Lotus mostly because of Jim Clark, and later to join the party was Graham Hill. I followed Lotus till the better end. But as a bonus I was also a huge Gurney fan as well. To bad his bad luck followed him to F1 as well. From Lotus I jumped to the McLaren team that I follow to this day as i love Lando Norris, but from the time of Mark Webber and Red Bull I also became a Red Bull fan. Gotta love Mad Max the Dutchman.

I also planned on buying every Ebbro release and back tracking the Tamiya kits, but those plans still get side track with all the new Tin Tops coming out these days.

So glad that you’ll be joining us for my Lotus adventure.

joel

D,
Having you along for ride is always a special treat as you keep me focused when I get off track. Agreed that it was way past time for another open wheeler as it’s been quite a while. My plans are now to alternate open wheel and tin tops or at least keep the ratio a lot closer then it’s been the last year or so.

My theory of no primer under Black gloss base coats really has made a difference in how my metallizers look. I gotta admit that I was leery about just how well the gloss would stick to the raw plastic, but it does just fine.

joel

Wasting no time at all, you’re back on the circuit and ready to go with another great build :slightly_smiling_face:

Looks like you’re off to a good start, Joel. I really like this car. Built the 1/12 version back in 1986, then it had a run-in with the cat! Wasn’t pretty.

I’ve always wondered why F1 cars are released in 1/20 scale, and not 1/24 or 1/25. Kind of odd, don’t you think?

Jim

Russelle,
Actually I took a whole week off before I started the Lotus. Since I never have more then 1 kit on my workbench at a time, I tend to start a new model a day or two after I’ve completed the current build.

joel

1 Like

Jim,
That surely had to hurt. I always worry that my cat just might jump up on my display shelving and knock some of the display cases off. In that case he’s off to the the Chinese restaurant ASP :upside_down_face:

Interesting question about why 1/20 scale. From what I’ve heard and read the scale was actually started in the early 1960s right here in the USA by MPC. Many model kit companies tried that scale but the kits weren’t popular, so they basically dropped the scale. But Mr. Tamiya loved it as 1/24 scale F1 cars were just to small. His kits sold and the rest is history.

What I never understood is why we have both 1/24 and 1/25 scale. 1/25 isn’t a multiple of any other scale.
joel

I reckon you can blame that one on Revell, who have a tendency to scale their kits to fit the boxes as opposed to the other way around: as car sizes have grown over the last few decades, they’ve had to downsize (in scale) to fit the boxes they already have :thinking:

Russelle,
thanks for that info. I never thought of it, and I have several Revell 1/25 scale IMSA and SCCA GTO kits in my stash. I tend not to build them as they look to small next to similar 1/24 scale cars.

joel

1 Like

I agree Joel… I generally like all my models of similar genres to be in a constant scale too: ships 1/350; cars 1/24; and planes 1/72. That way the onlooker can get a true sense of proportion for each topic…

PS have a look at some of the oddball scales Revell has made and is still making kits in just to fit boxes! Has put me off more than one of their kits over the years…

Ken,
Thanks so much for checking in and liking what you’ve seen. Like you I’m always promising myself to build more open wheelers, but those darn Tin Tops have gotten control of me for the past few years. But I’m breaking free now.

As for your build, i’ve been following your Renault RE29 T every step of the way as i do with all your builds. Love this one as you’re pulling out all the stops.

joel

Update #2
I made enough progress this past week on the front end of the chassis for another update.

Work started with the 3 master cylinders by pre-drilling a vertical hole in each for the brake lines. I primed them with Tamiya White so that the reservoirs were an off White color, the cylinders were hand painted Model Aire Aluminum, and the screw tops were painted Model Aire Metallic Gray. I used a slightly modified part from my spares box to represent the brake bias assembly. The 3 cylinders were glued to the bulkhead previously air brushed with Alcad2 Aluminum, then glued into the front nose section of the chassis. Brake lines were glued into the hole of each cylinder and then into the brake bias glued into the corner of the front nose section.

Next came the front suspension, and Tamiya once again pulled out all the stops for a 1/20 scale model. Simply outstanding engineering as each piece fit perfectly once I scraped off any paint on the mounting surfaces. I started with the coil over springs/shocks. I primed them good old Mr. Finisher 1500 Gray primer. Then hand painted the tops, bottom, and the piston Model Aire Silver. For the springs I used a little modeler license and painted them with Tamiya X-7 Gloss Red for a little much needed color. I painted the front of the springs with two coats and let it dry. Then I very carefully tried to paint the sides using the finest detail brush I had. The pictures are greater then 1:1 so every goof shows, but in real life they do look pretty darn good.


Too bad I didn’t study the instructions for the next step as there is a 3 sided shock tower that just about completely covers them. Up close and personal you can still see a little of the springs, but honestly, it’s not worth the effort once the top of chassis is glued into place.

The front disc brakes are just 4 pieces with two of them forming the brake air scoops. Tamiya really added a lot of detail to these assemblies. I primed them with Tamiya X-1 Gloss Black, then air brushed on Alcad2 White Aluminum. The Calipers were painted with Tamiya Titanium Gold, and the discs were painted with Model Aire Steel.


The bottom suspension control arms are one piece for both sides, and was painted when I painted the Chassis as the center section is Aluminum, while the top control arms are each separate pieces.

Each side of the rear chassis has what I assume is a fire extinguisher. One has a black connector I added as there is a line that goes to the drivers compartment. I can’t run the line till I at least add the basic cockpit shell. The other extinguisher I’m assuming is for the engine area. although I can’t see how one small canister could possibly put out a fuel fire.


I dry fitted the the chassis top section over the front suspension that will be glued into place once I’ve got the fit as best as I can get.

The top front chassis nose section I’m hoping to make removable as I still have the battery and both cables to install.

Joel

7 Likes

Daaaaaaaaaaaaaaaaaaaaaang!!! The detail that’s in these cars is amazing!!!

Joseph,
Tamiya sure set the standard. And since Ebbro is an division of Tamiya, they’re following right along with the Tamiya standards.

joel

Time sure flies when you’re at the bench these days, and after more then another week, I’ve once again got enough done for a short update.

While I’m not really a major detailer by any means, these days preferring to concentrate on enhancements as needed so that the finished model is the best display model I can realistically build. But for some reason I decided to add more and more details to the Lotus type 79. But with my luck a good percentage of it will be under various body panels that need to be removed for viewing or display. At least with a little effort or change of display, almost all of the detailing can still be seen.

1st up was painting, adding the positive an negative/ground cables to the small battery used in F1 cars, and then installing it along with running those two cables. Then the nose compartment that the battery shares with the 3 Master Cylinders had it’s top cover glued into place as you can see everything that I want the viewer to see through the top opening, as that’s how the mechanics do it.

The gas tank unlike in todays F1 cars was refillable during the race, so it’s just that massive sheet metal structure at the end of chassis. The fuel pump, metering unit, and fuel injection lines were added but for now just end up sticking out into space.

Ok, it’s finally time to pay some attention to the driver’s cockpit. The gear shift lever is just the kit part, painted and installed into a notch in the right hand sidewall. On top of the left side wall is a slide level that I attached a rubber coupling and ran a steel rod towards the engine, but I have literally no idea of what it is or used for. The slide lever is made from a steel pin and the knob just white glue that still needs to be painted Gloss Black. The simple 3 gauge instrument panel was painted, decaled, and the lenses are just Pledge floor Polish. The steering wheel was painted Aluminum while the rim is Tamiya Nato Black that looks just like the worn rubberized wheel grips of the day. The foot pedals are there but you can barely see them. The seat also has been given a base coat of Nato Black with the 6 point harness yet to be installed. the seat is just dry fitted at this point for a better visual of the pit.

I almost forgot to add the single maker ID. plate to the left front side of the cockpit as represented by a decal. Luckily, I was able to apply the decal after the Instrument panel and wheel was installed.

Finally, I glued the rear chassis bulkhead that the engine will be attached to into place with good old fashion Revell Professional tube type glue as long term strength is super important as it hold up the entire rear suspension, engine, and transaxle.

Here’s 3 pictures of the chassis to date:

Thanks to all for stopping by and checking out my build to date. It’s always much appreciated.

joel

9 Likes

Great update Joel! All of those little splashes of colour and neat details continue to lift this build and it will make an awesome addition to your crowded race display!

Cheers, D

The Lotus is looking great Joel. I am looking forward to the body work being attached, which makes it one of the iconic cars of the 70’s!

cheers
Michael

Details are really popping, Joel :slightly_smiling_face: