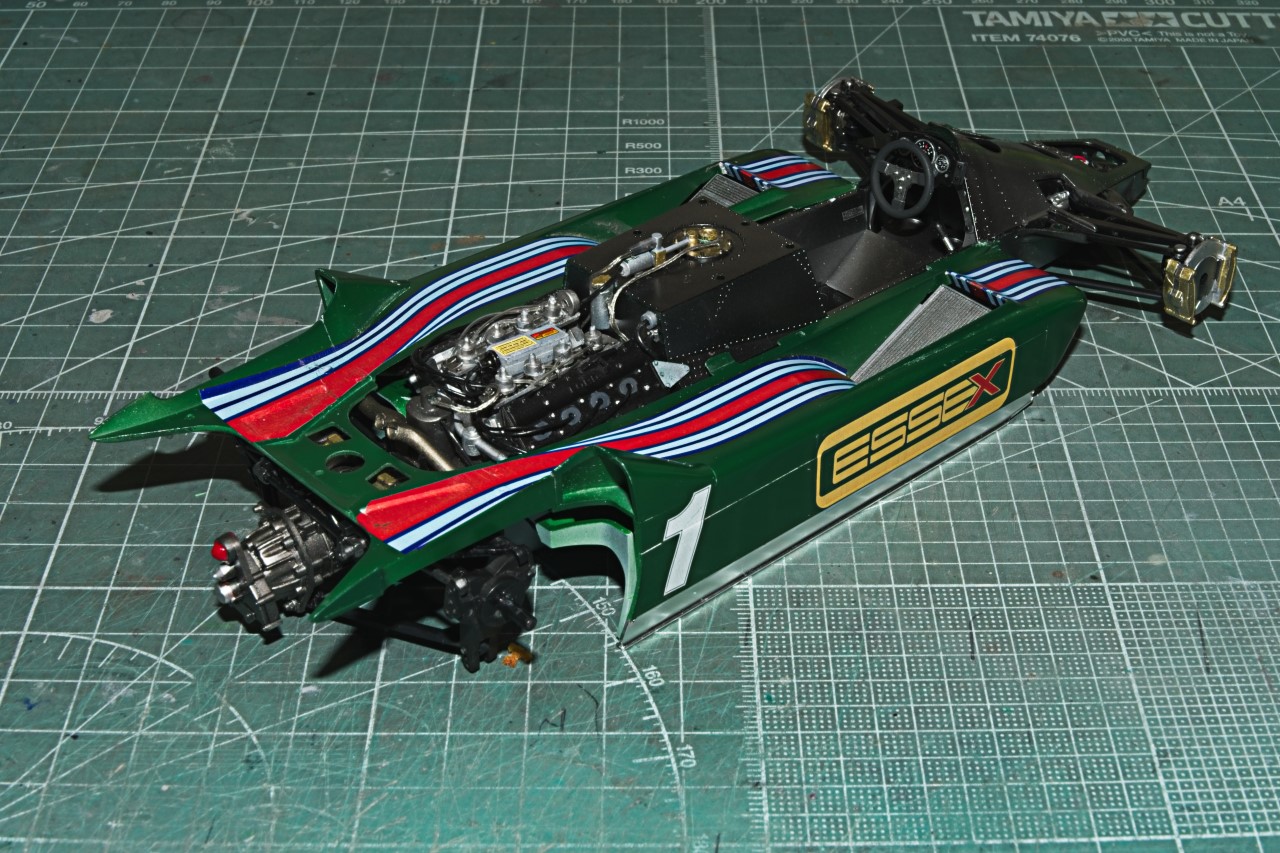
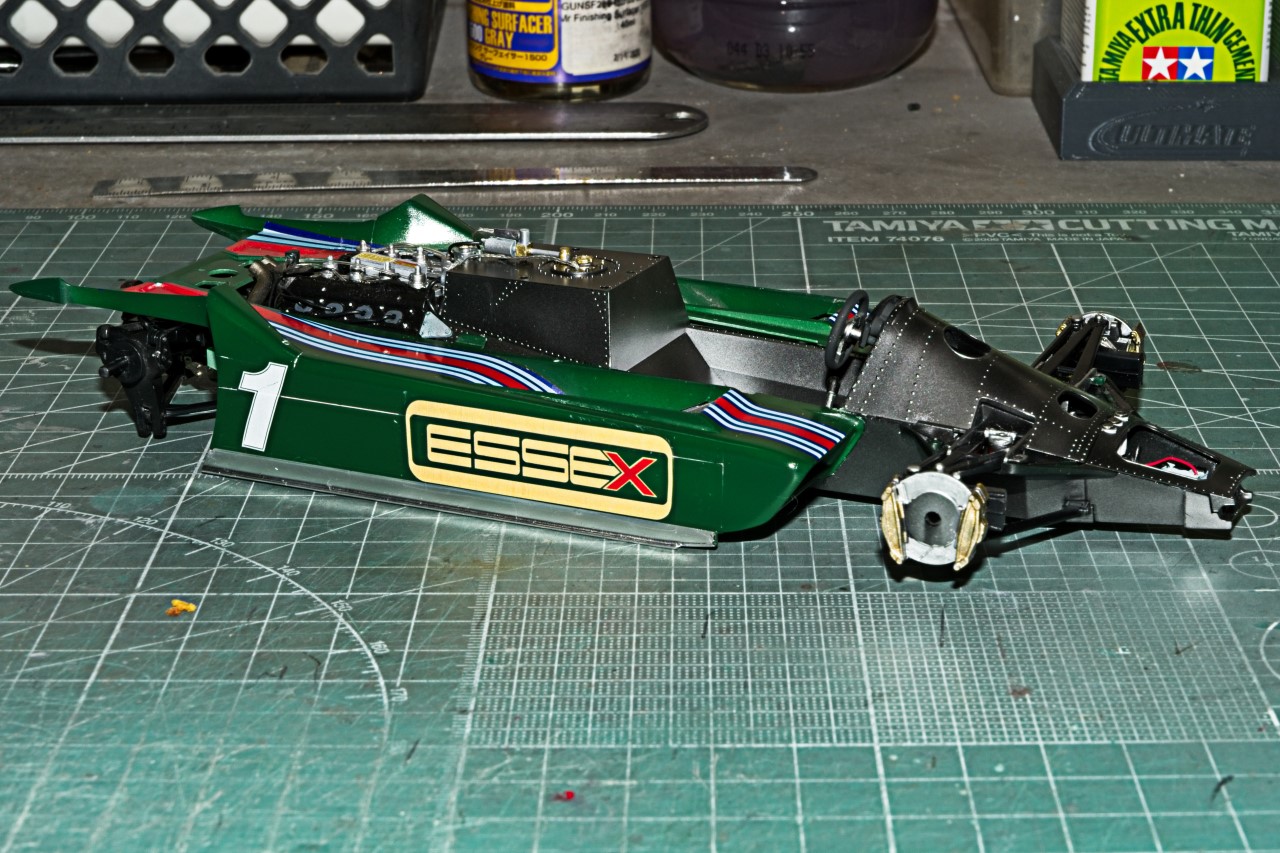
Tamiya 1/20 Scale Lotus 1979 Type 79 F1 car

Joseph & Jesper,
Thanks guys for those really positive thumbs up. As always it’s greatly appreciated.

The key in wiring the Ford Cosworth wasn’t my skills ( which aren’t more then average at best) it’s finally finding both the correct type of tubing with the correct diameter. Tamiya’s ignition wire is exactly that, so I bought all three sizes of their black coated wire for future builds.

I’ve always struggled with the fuel injection tubing because the generic stuff I always bought was usually to large in diameter and certainly to stiff. The MFH solid tubing is neither. It goes where you put it, and stays there. The ends that go to the metering unit that you can’t see aren’t glued in place. Like I said they just stay where you put them as long as you don’t ask them to do more then is reasonable.

joel

1 Like

Richard,
I’m now 101% certain that having you involved in race cars and bikes is going to be a BIG plus for all of us both in terms of modeling, detailing, and historical background info. I’m already loving it.

I was aware that Chapman through some of his connections had an in with Ford. The DFV engine 1st competed in 1967 in the Lotus 49 with Clark driving to the win at Zandvoort. But the origins go back a few years.

One needs to remember that Henry Ford II was looking to buy Ferarri and just become the King of Endurance racing the easy way, but the deal went belly up when Ford assumed that they would buy both the street car division that The Commodore could care less about, and his main and only real focus, the racing division. Ferrari said no to the entire deal and actually showed Ford the door.

The rest is history. The original GT40 was designed by Eric Broadley, the brains behind Lola cars. And as far as I know (which isn’t much), that’s the link back to Duckwork.

I also have no idea exactly what Costin did on the design and manufacturing of the DFV engine, but it had to be the equal to Duckworth as he’s the Cos in Cosworth.

joel

1 Like

Finally time for the next update. Unfortunately, family medical issues just keep on getting worse, and modeling time has decreased proportionally. My wife will be getting hip surgery to replace one hip as there’s no other options left. And my brother in law fell down the steps and broke his ankle in 3 places, so he’s going to need surgery to repair the ankle as soon as the swelling goes down.

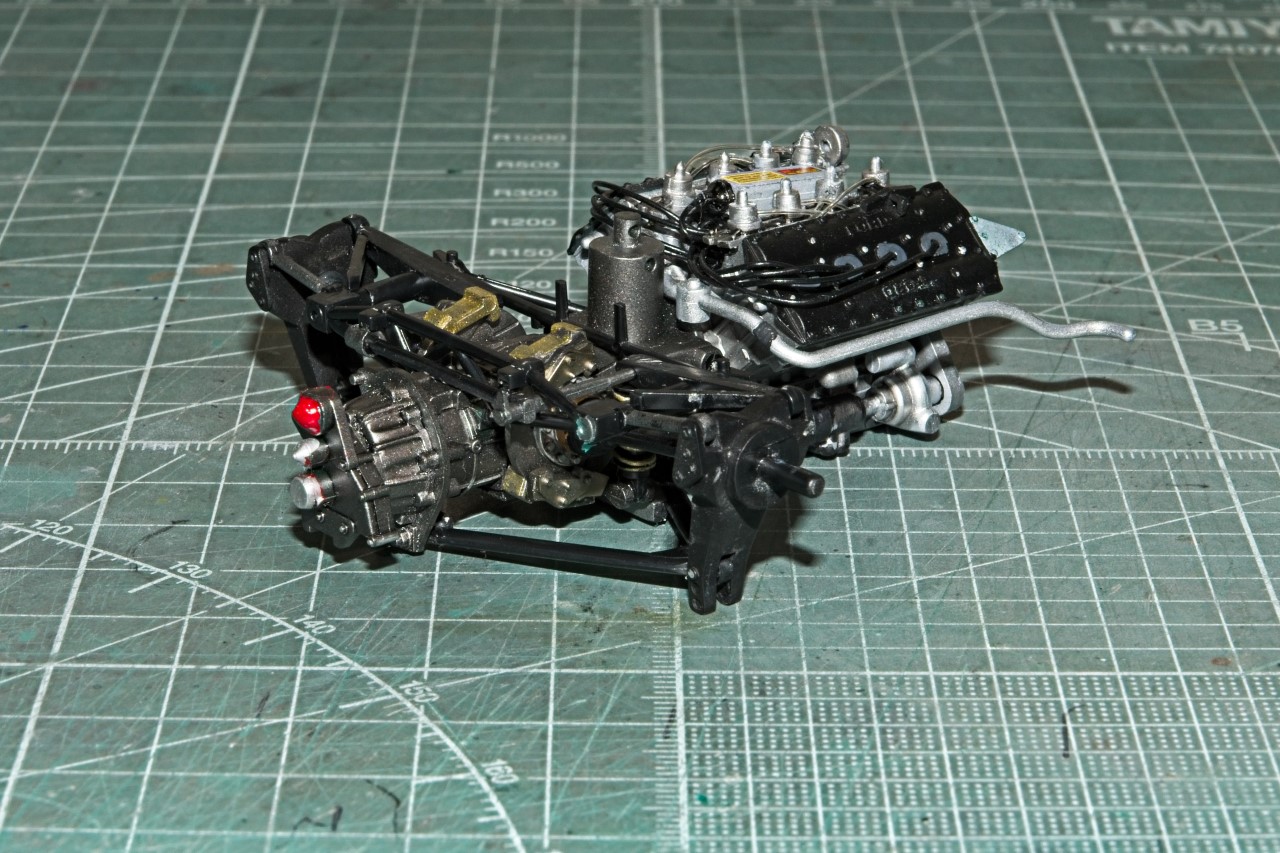
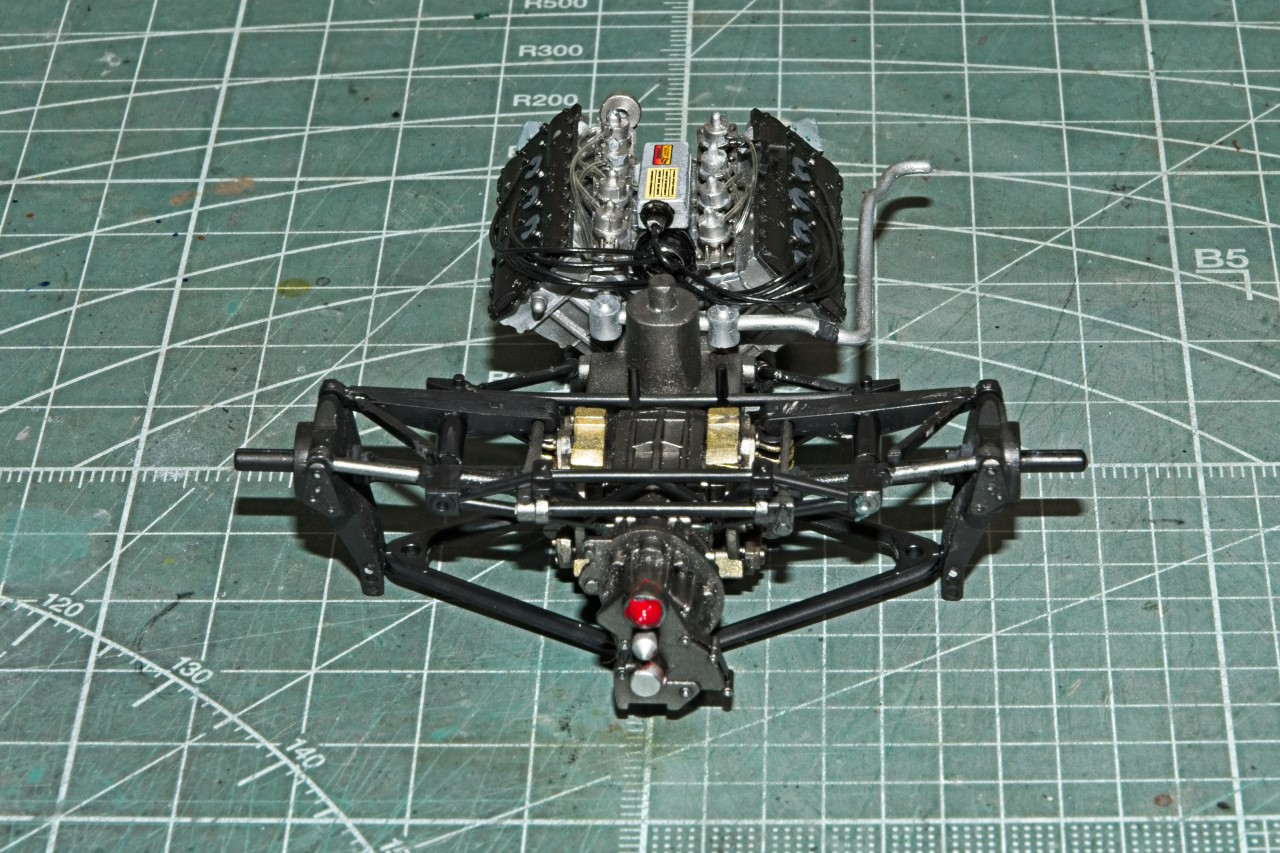
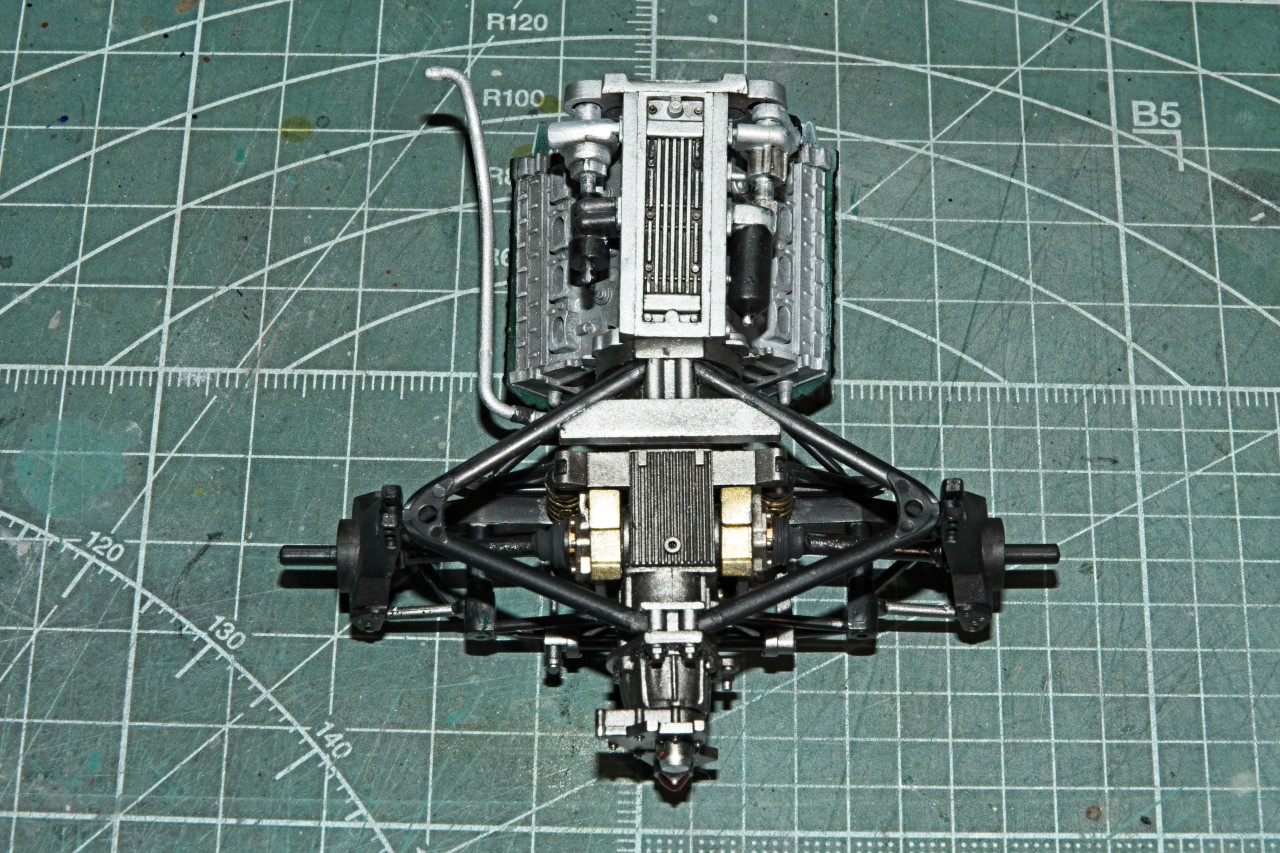
I’ve been concentrating on the Transaxle/rear suspension which I finally finished yesterday. The Transaxle, and rear brakes were painted with 6 different Alcad 2 colors. I can now cleanout my air brush and apply the next color in just a few mins time.

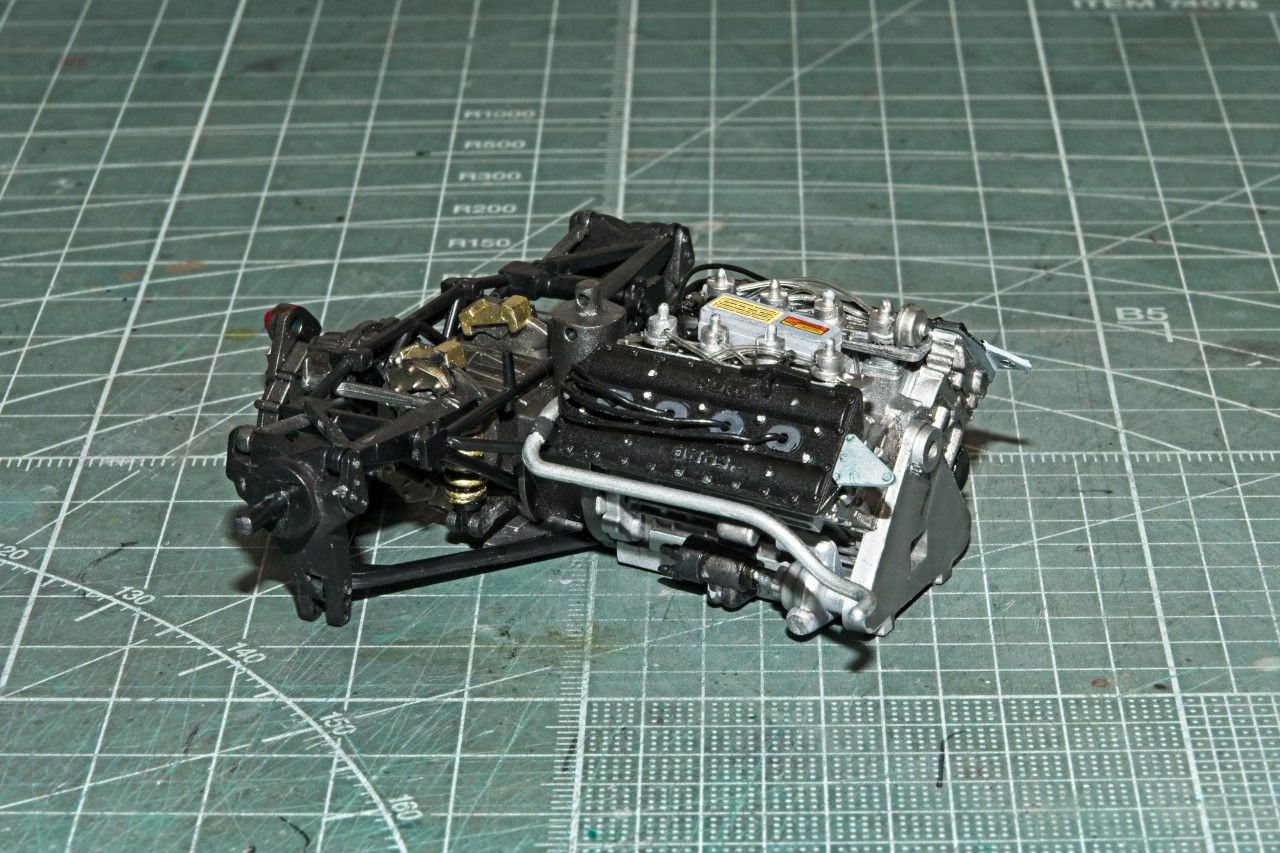
Rather then going through what colors were applied to what areas, here’s a few pictures with the transaxle/rear suspension try fitted to the Ford Cosworth engine so you can judge for yourself the effectiveness of the various Alcad 2 Metallics. I’ve applied a Black panel line wash to the casing and brakes, then highlighted the raised areas of the gearbox with a lighter shade of Aluminum.

Joel

7 Likes

The engine, gearbox, transaxle all look great with their subtle variation of metallics. The only drawback I have found with that approach is if you need to touch up a piece I can never remember which Alclad I use where!

cheers
Michael

Michael,
Thanks for checking out my Lotus 79. Glad that you liked how the engine/transaxle/rear suspension is turning out.

And like you said, touch ups are a pain as remembering what shade was used where is a loosing proposition for me these days. So what I’ve started to do, is list what color was used where. With Alcads, Tamiya, and Mr. Color paints it’s easy as I just use their numbering system. But as usual, I forgot to do it every so often.

joel

Sorry to hear of the health problems Joel! Best wishes to all of you at these difficult times!

The work on the engine is great! Connect it up to a tank and fire it up!!! :slightly_smiling_face::+1:

Yes, I always have great intentions at the start of each build. It never stops me loosing track though :slightly_smiling_face:

Joel, fantastic update! You are keeping up your standards with the detail painting right through, the various metallic shades and small highlight colours and decals really set this sub assembly off beautifully.

I really hope that your family medical dramas are short-lived and full recovery is fast.

Cheers, D

Very nice Joel - as others have noted I like all the various shades . Keeping notes for when I do the big scale Lotus .
Keep your chin up and hope the med issues turn out well .
Cheers - Richard

Russelle, Michael, Richard, & D,
Thanks so much guys for stopping by and your thumbs up on how the Lotus engine/gearbox/rear suspension is turning out. It’s hard to believe that Tamiya squeezed all that detail into such a small space.

Now my attention has turned to the exhaust headers. I’ve already primed and base coated them with Alcad2 Dark Aluminum, and will be followed by Tamiya Titanium Gold, and their translucent Blue in the bends. Well, anyway that’s the plan. Then the full assembly gets attached to the tub as it also the rear stressed member of the chassis.

And thanks to all of you for your support during another round of major family Medical issues. BTW, my twin brother has beaten the stage 4 Bone Marrow cancer as it doesn’t show in any scan, and the stage 4 Non Hodgkin’s Lymphoma is in full remission. We’re hoping for 10-15 more years together.

joel

3 Likes

Great news about your brother Joel !
My mother , her mother and my mother’s older sister all succumbed to cancer but my older sister beat hers . Medicine has made great strides in my lifetime !

Richard,
Thanks for the support as it’s much appreciated. Just wouldn’t know what to do with out my other half. The deal has always been that I go 1st.
joel

That’s great news about your brother, Joel! :+1: Hope, everythings stays that way and than slowly gets better. Who is the older one, you or your brother?

Sorry to hear about the health issues of your wife and your broth in law. I hope it’s not too painful and they soon get better. Best wishes from me to them!

Just checked your work. That’s amazing, Joel! Well done! I always have problems with the suspension on my vehicles as on the ATF Dingo last year.

Ken,
Thanks so much for your concerns, it’s much appreciated.
joel

You sound like you’ve got your dang hands full in the real world Joel. Hope things get better for your family brother. Progress is continuing to look stellar my friend.

Great to hear your brother has beaten the cancer Joel. As Ken said, it’s such a hateful disease!

Joe & Russelle,
Thanks so much my friends for your most kind words and support. And yes it does get a little stressful as at times you just never think that there’s a end to all of this. But my Brother has so far won the battle with both Cancers, my wife’s hip surgery hopefully will let her once again be her, and I’m sure that my brother in law’s ankle will be fine once it’ screwed back together.

And Joe, thanks for checking in on my Lotus 79 and liking what you saw. It’s always greatly appreciated.

joel

1 Like

How time flies, as it’s actually time for another update.

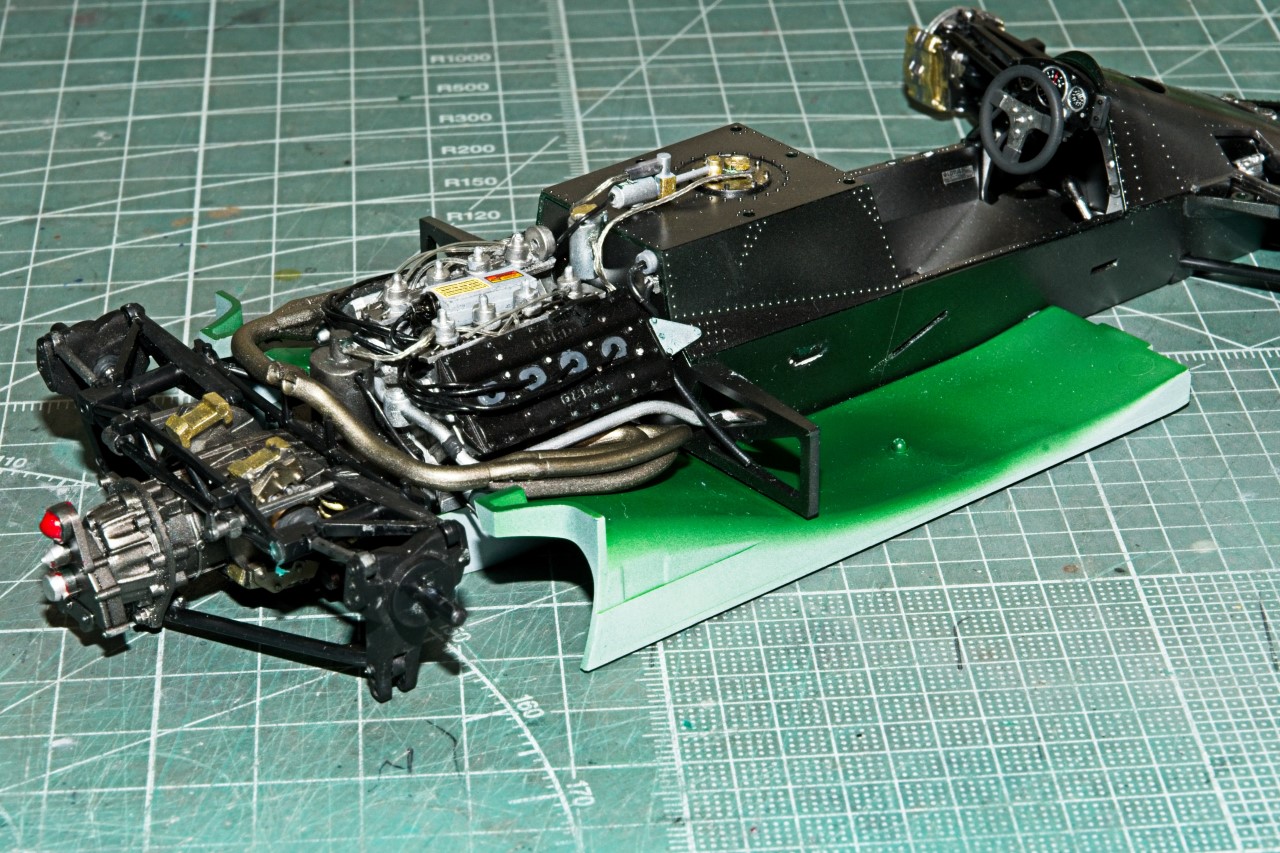
As you recall in my last update I said that I’d continue with painting/metallizing the exhaust pipes. Since i’ve already primed them as well as a base coat of Alcad2 Dark Aluminum, a quick cleaning of my airbrush and this time loaded it with Tamiya’s X-31 Titanium Chrome but thinned it 2 parts LC to 1 part paint, then using just lite quick coats, built up the sort of transparent color till I liked the effect. Not perfect by any means, but way better then my usual various shades of Alcad2 Aluminums. Here’s basically the same pic as in the last update with the headers painted and added.

I didn’t pay much attention to the few ejector marks, as the bottom view won’t be visible once the model is in it’s display case.

Next up was attaching the engine/transaxle/rear suspension assembly to the chassis backplate. Tamiya has this exposed clip with a slot above it for the reverse of the clip plus a small circular recess that it’s counter part on the engine front plate slides into. Looks easy enough for even me to accomplish, especially since no glue is needed. Well it took me a good 1/2 hour to finally insert the front engine bulkhead clip into the chassis rear plate, then using more pressure then I thought wise pushed the engine in till it stopped, made sure that everything looked basically aligned, took a deep breath and PUSHED down hard enough that the engine actually started to slide into the slot this time. Then there’s actually a clicking noise, and it’s in, secure, and nothing broke except for the nth time my finger managed to break the lever assembly on the top side of the cockpit.

In my excitement, I totally forgot to take a quick grab shot of the big occasion.

I quickly moved on to test fitting and then gluing in the bottom section of the body that contains the 2 Venturi tubes. The quick over coat Green paint is the result of starting to paint it when I realized that there’s no way anyone will ever see it, so I just stopped.

Now comes the make it or break it main body section. My goal was to get it to fit without needing any added external pressure that could cause the body to warp. I was close, but after painting, clear coat, it just didn’t fit like a glove. More like a glove one size to small. Slowly and carefully I found and worked the few issue areas till it once again fit. the only issue is that the noise section while aligning correctly, just wouldn’t lay flat. So I had to concede to the fact that the top section won’t be removal, or won’t be attachable. I opted for the won’t be removable. So the only main body panel that will be removable is the large engine cover when I get to it.

Thanks to all for stopping by and checking out my progress to date. As usual, it’s always appreciated.

joel
8 Likes

Looks beautiful Joel - I have never been a fan of removable pieces or operating features on models -
just something to break . Truth be told , once the model goes in the case it usually stays there untouched .
Keep at it - Richard

1 Like

It looks just great Joel.
And I agree with Richard, once the kit is built I never bother with having opening sections to see the engine or cockpit because for sure something with break.

cheers
Michael

1 Like