Haven’t had much if any time at the bench for some time, and what time I did have, I just got bogged down in my McLaren M8B build as there’s more wrong with the kit details then right. So over the winter hopefully I can get it on the right track as it’s my all time favorite Can Am car.
A few false starts and then I decided to pull down the Tamiya 1/24 scale 1954 Mercedes-Benz 300 SL from my smallish stash. I’ve always have had a fondness for the 300 SL which started life out in 1952 as Mercedes entry back into post WWII sports car racing, and even winning LeMans in 1953. In 1954 at the New York Car show, Mercedes 1st showed their street car version with its Gull doors, and it was a hit from day one.
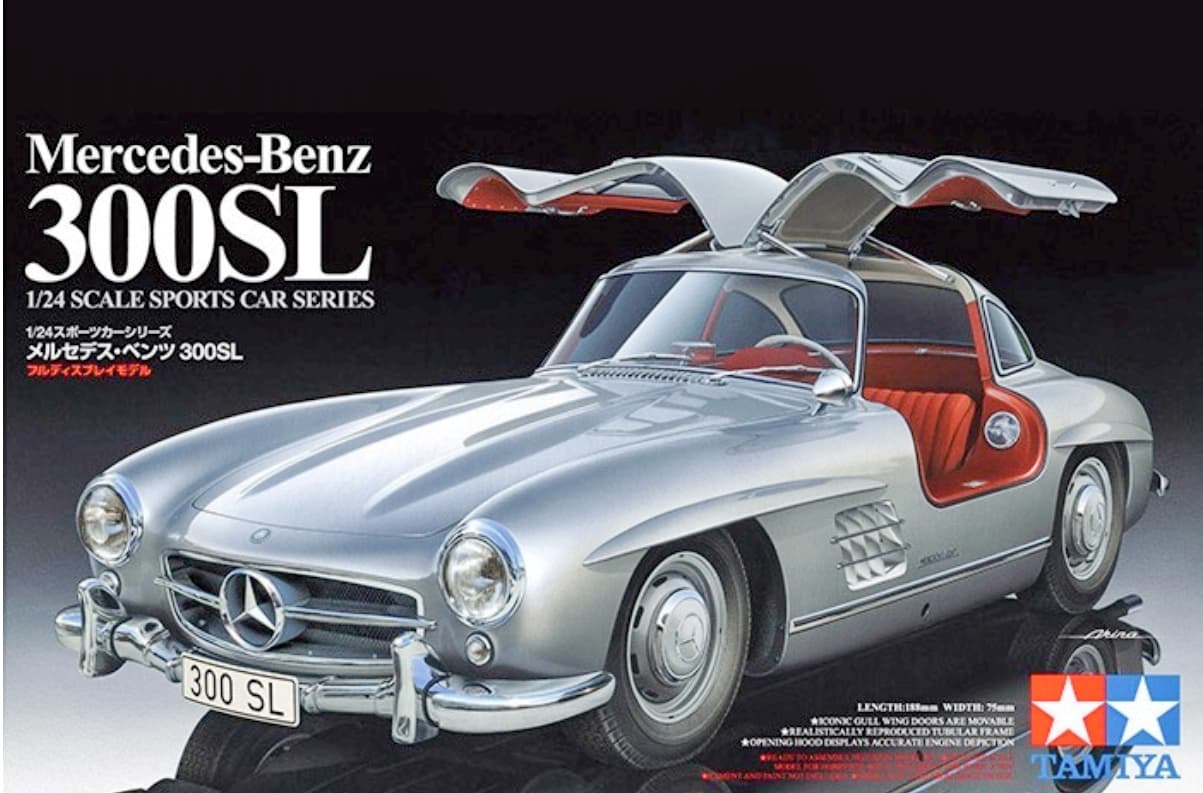
So as my usual build sequence I started my build with the body shell: Priming, painting, clear coat, and trim work, then turning my attention to the chassis and kind of following the instruction sequence.
I’m not a great fan of the Silver/Gray body with a Tan or Red interior. The car car was offered in Black, Red, White, and custom colors as per dealer. The interior as far as I could tell had a contrasting color to the exterior color.
My color choice was Gravity’s Ferrari Rosso Corsa, a deep bright Red over my Mix of Tamiya White & Gray lacquer Primer.
The following day I very lightly wet sanded the body and the other parts with Tamiya 3,000 Sponge.
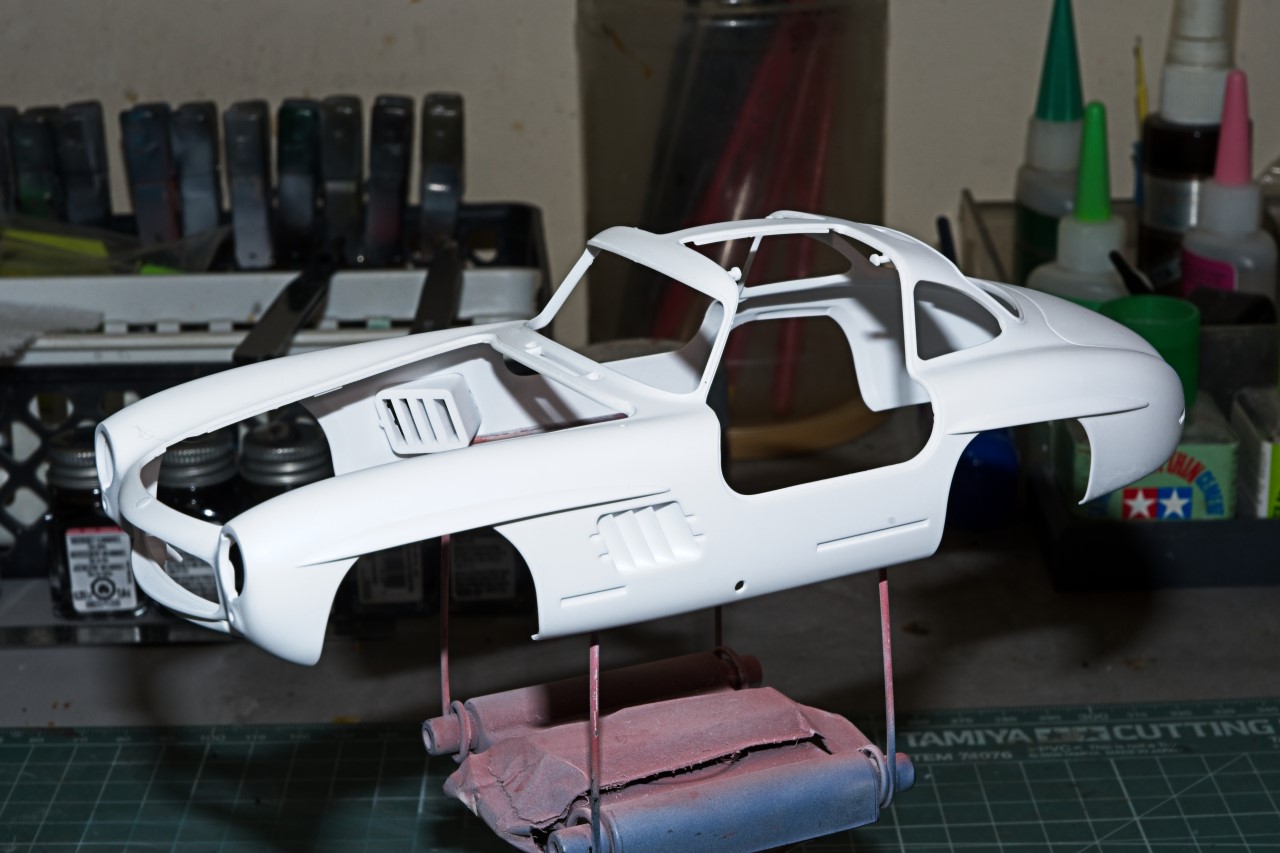
Next up was air brushing on the color coat with Gravity’s GC-107 Ferrari Rosso Corsa.
When dry I was amazed that the paint was more then smooth enough for the gloss coat without the need for some lite wet sanding. So for the gloss paint session I used Tamiya lacquer LP9 thinned 1: 1.5 with Mr. Leveler #400 applied with two tack coats, two semi wet coats, and two wet coats with 10 min between each coat. The results are more then I expected.
Michael,
Thanks for checking in and taking a look at my Merc 300 SL. It’s really been a fun build with no surprises to date. What did surprise me is how the paint process is turning out. For me it was just going back to the basics that somehow I keep on looking for the perfect method and just got away from what works for me.
As for the McLaren M8B, it’s on my radar for the winter. The kit has issues with the vinyl lines and fittings that need way more TLC then I can give them, so full replacements will be needed. I’ve also come to the realization that the rear deck is either going to be glued on, or displayed off as every build I’ve seen online has the same fit issue with it and it just doesn’t look right. I’ll try to get it as close as I can. But for me my memory of this car at Bridgehampton was leaning on it when I met Bruce McLaren and Denny Hulme for the 1st time. Those guys looked fast just seating in the pits.
joel
Richard,
Glad to be back here and at the bench. It’s also great to see you back here on the dark side even if it’s just visiting without a car build on your bench.
Yep, so far the Tamiya kit even though it’s far from a new generation kit, is proving to be a real joy to build. No surprises and fit of even the complex tub chassis is coming together perfectly.
joel
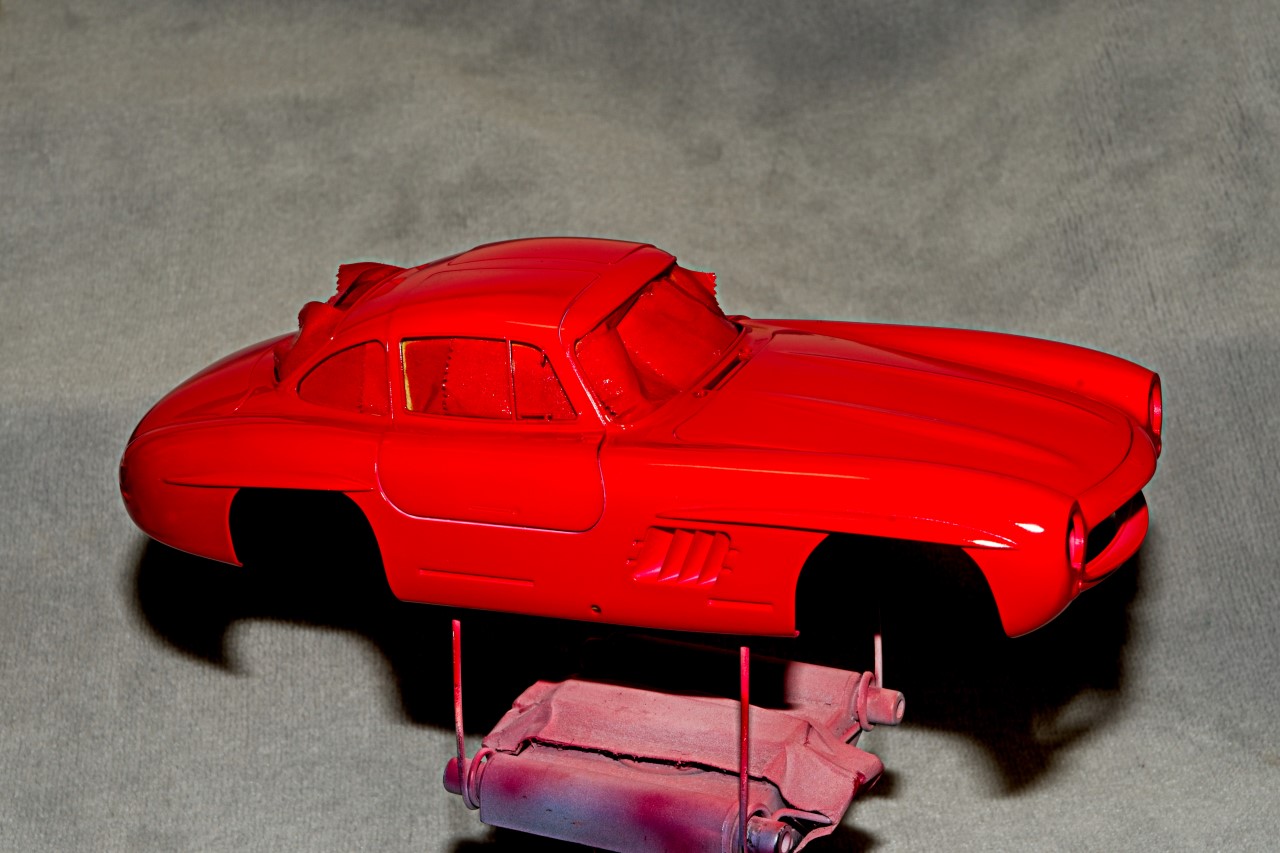
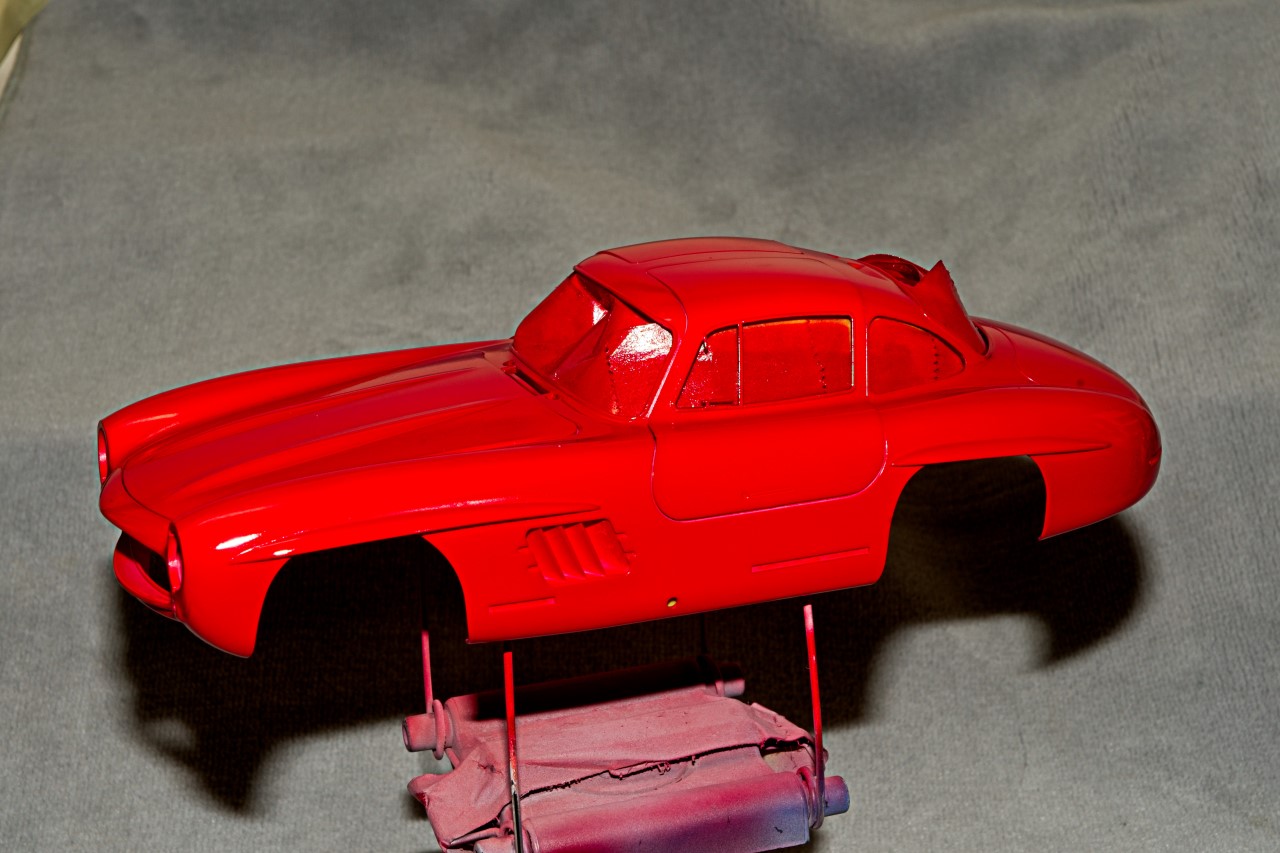
Time for the next body update as the tube chassis awaits for my attention.
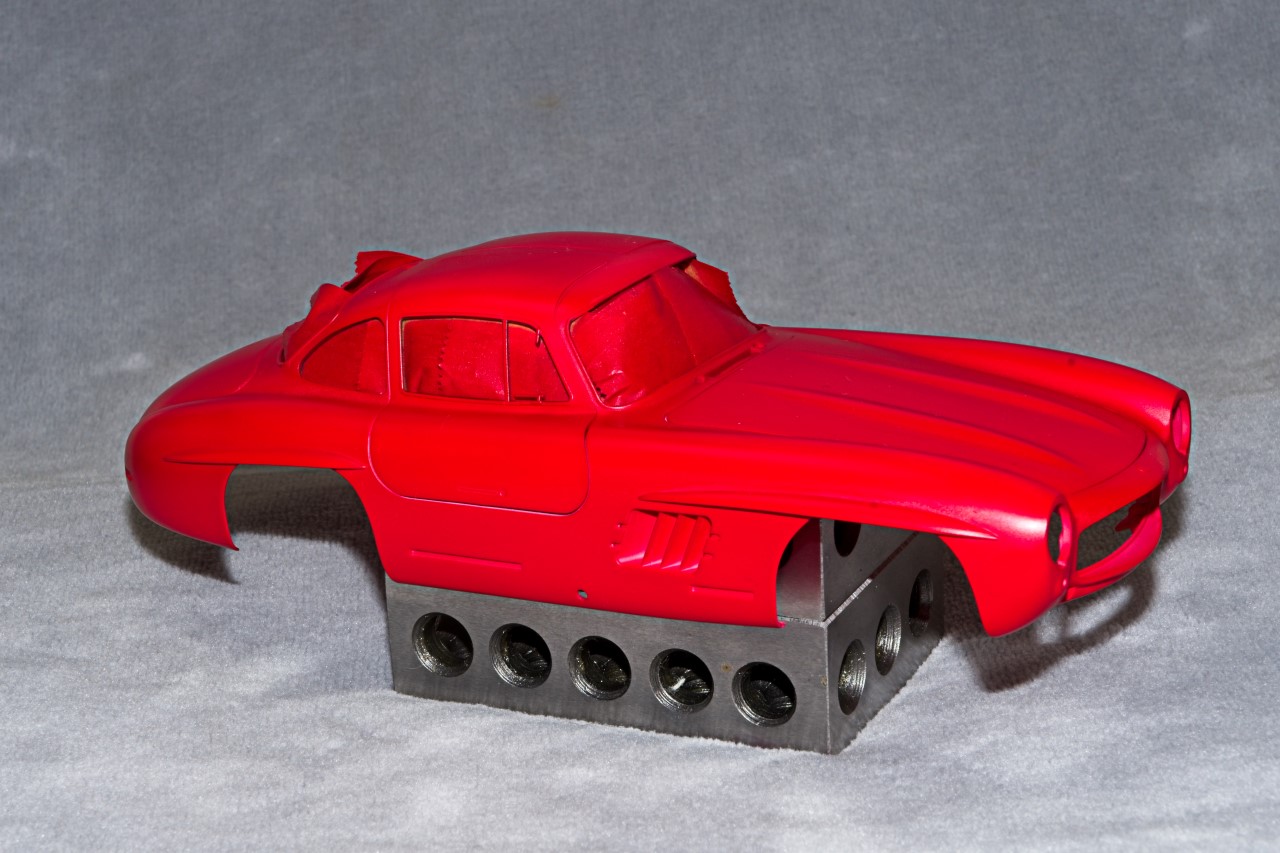
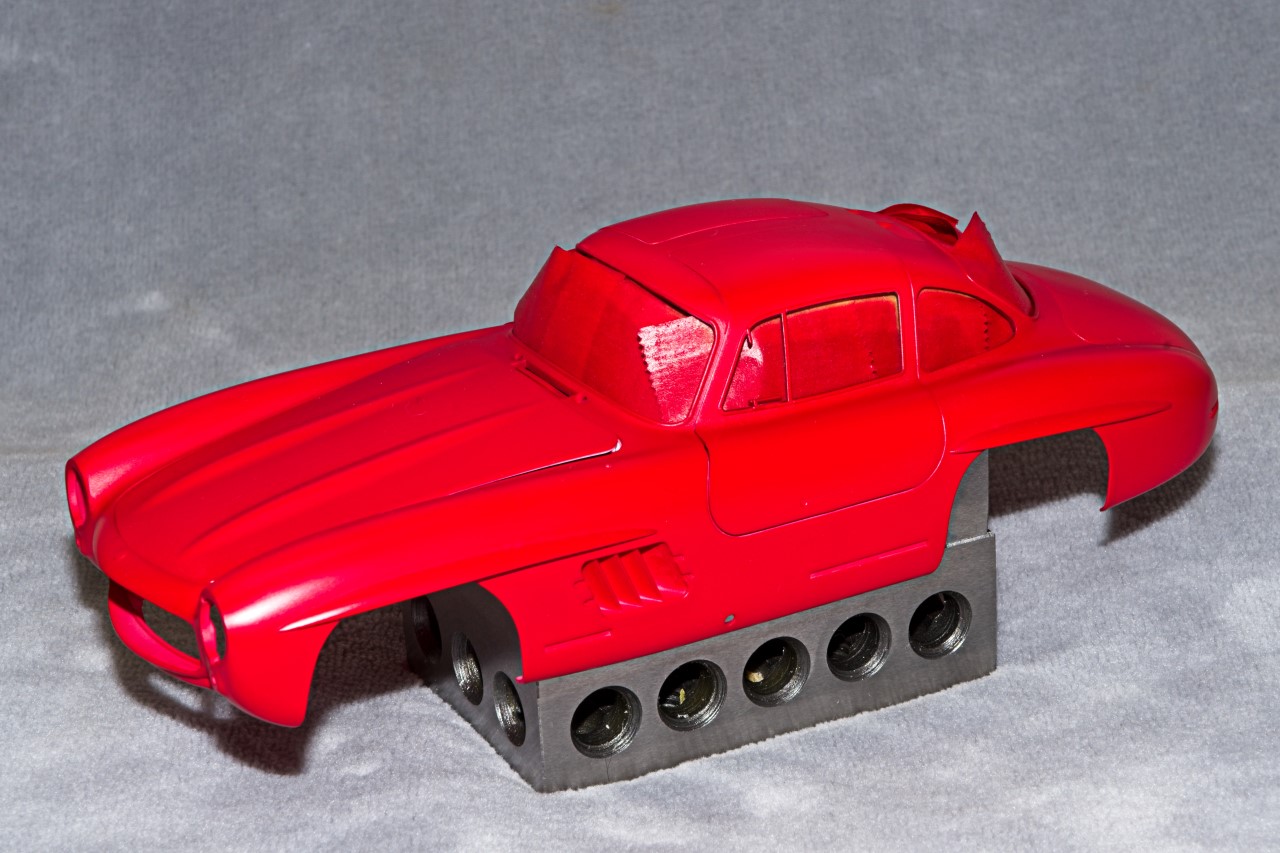
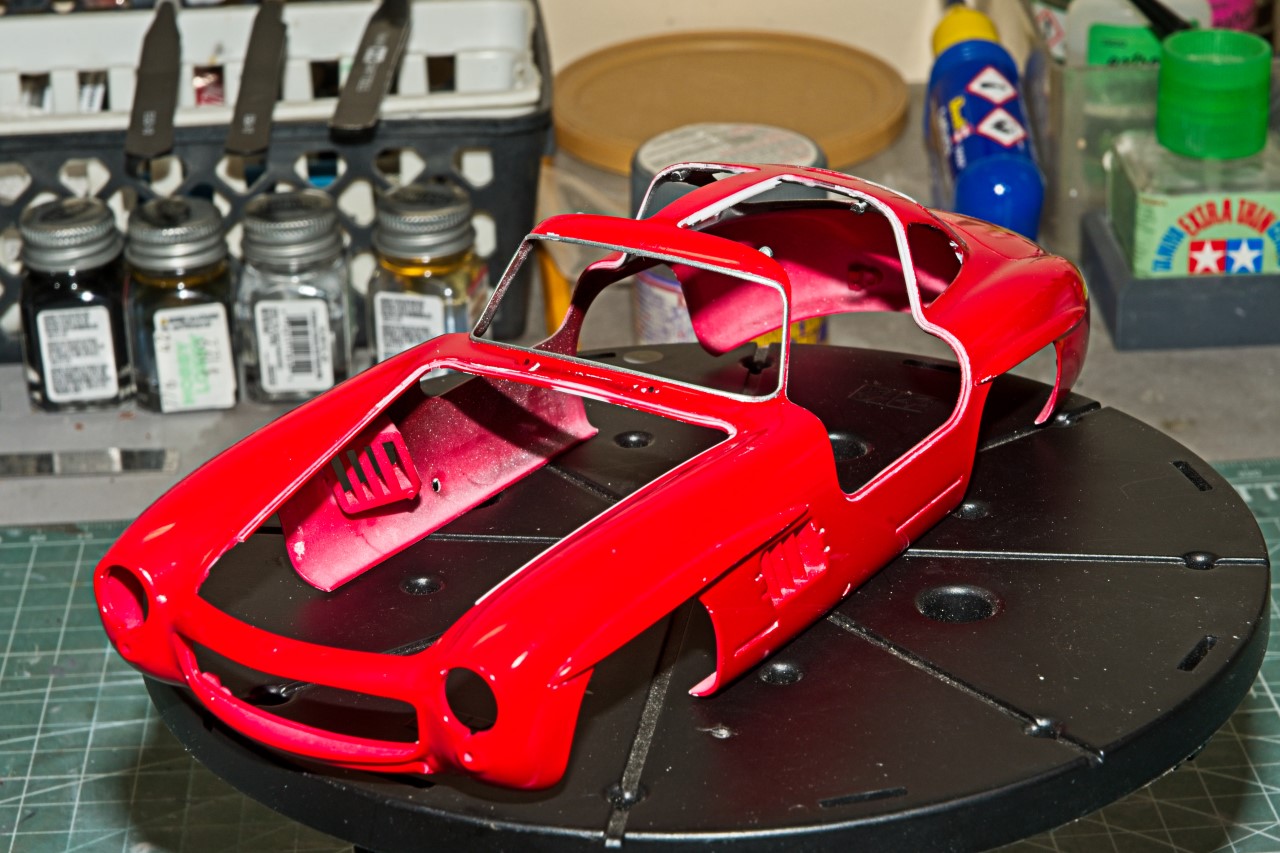
As I previously said, I felt that the Gloss finish was smooth enough not to need going through the wet sanding process from 4,000 to 12,000, so I opted for the Gravity polishing compounds. Course, then Fine, then Finish. The waxing will wait till I finish all of the painting. Here’s how the 300 SL looks after the polishing.
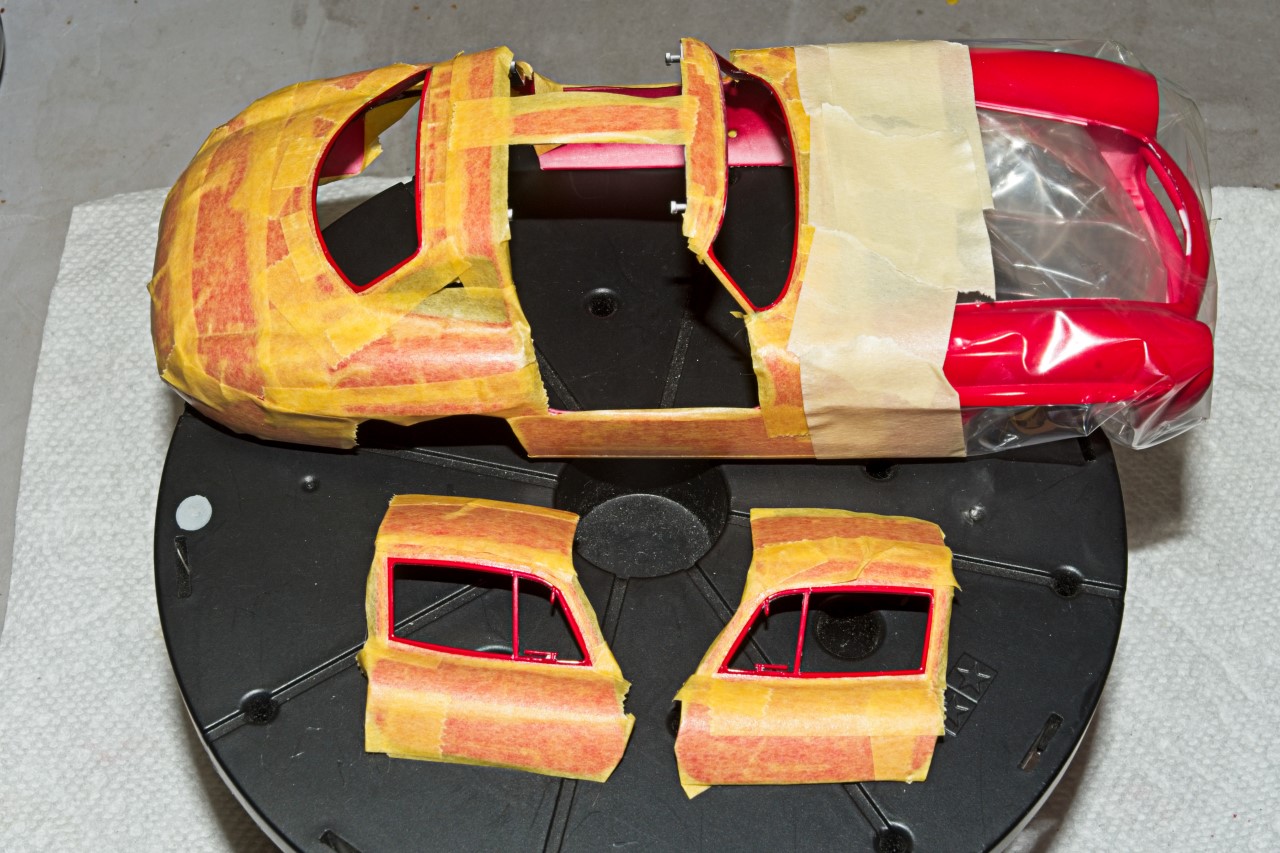
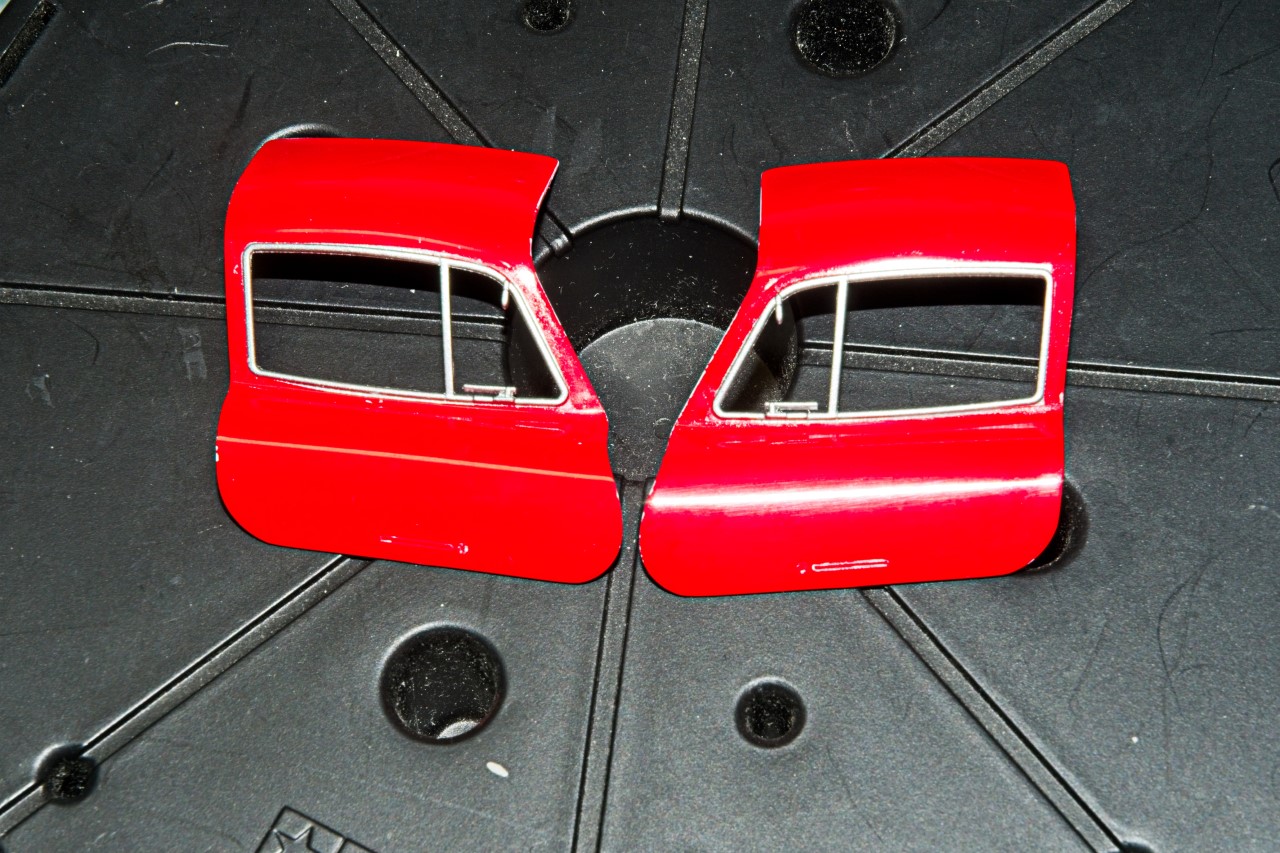
Next up was chroming the side window frames, front windshield frame, and rear glass frame. My 1st choice was once again trying BMF, but I just struggled trying to get the BMF to stick in place as I worked it with a toothpick and Q tip. After way more then 1 hour the results were once again more then pretty poor, so off it came, and next up was hand painting with a detailing brush. I’ve seen two builds where this was the option taken and the results looked excellent. So out came The Model Aire Acrylic Silver and while I got it to cover OK, the paint was far from smooth, and just looked way to uneven. So out came a well worn piece of Tamiya 3,000 sponge wet and I very gently sanded the paint off. Fortunately, no damage to the surrounding paint. OK, 0-2. And now the pressure was really on. Decided to suck it up and follow my good friend Torsten over on Aeroscale and mask out all the frames. I used 1mm then 2 mm Tamiya tape carefully aligning it against the frames which was a feat for yours truly as I no longer see straight lines as straight. Then I used various sizes from 6, 10, 18, & 40mm to cover the body. A little liquid mask around the tight corners, and finally working my way to the back of the engine compartment I used a sandwich Ziplock bag and a little more tape.
Now for the actual paint session. I wanted to go with a Chrome Silver or straight Silver and pulled 4 different shades from my Mr. Color section. All of the bottles have never been used but are going on two years old. And everyone showed evaporation issues, with two that were a complete loss. I’ve read some posts about others having these issues with lacquer paints, so Tamiya and I think Gunze came out with a Replenisher used with their LC to bring the paint back to what it originally was. How about not making us pay more for your super profitable paints and fix the bottle/lid issues that causes these problems. So I pulled out a bottle of Tamiya Chrome/Silver which was twice as old as the Mr. Color paint, as well being used all the time, and it was still at the consistency it usually is. I thinned it 2 -3 with Mr. Leveler #400, and using a .3mm Grex AB got down to work. The end results were way better then I honestly expected. Some touch up and clean up was needed but that’s it.
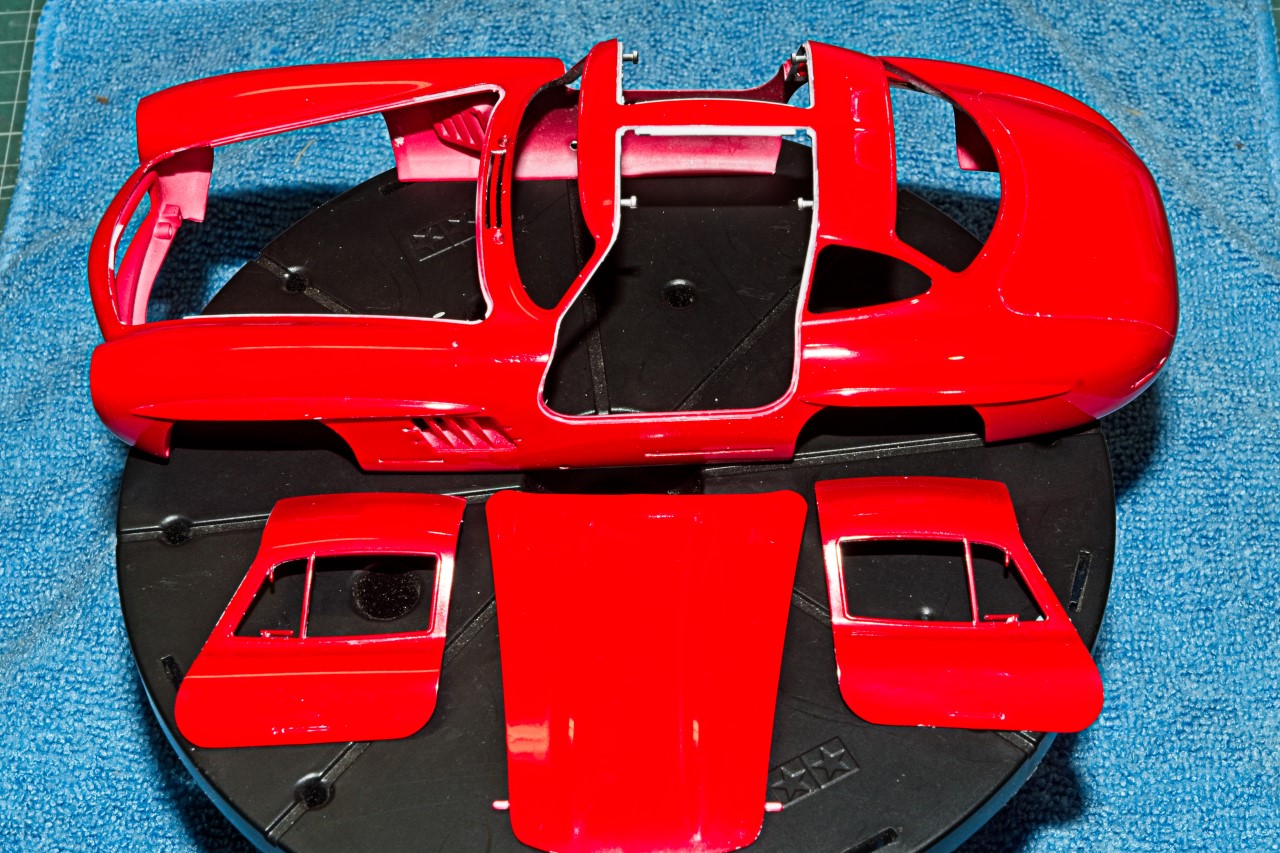
Finally, I’ve got enough accomplished on the baby Benz 300 SL for a update.
Painting all the rubber gaskets for the engine hood and doors were done by hand using a Micro fine brush and Model Color acrylic paints. Next up was dealing with all the body and doors sides as I made the dumb decision to tape them in place during painting to insure that the paint coverage was exactly the same. That goal was certainly achieved, but the issue of hand painting the sills, door jams, and insides of the frames that didn’t even have primer was a major effort. I painted them several times with the same Micro brush and Model Color Acrylic paint that over the white plastic came very close to the actual body color.
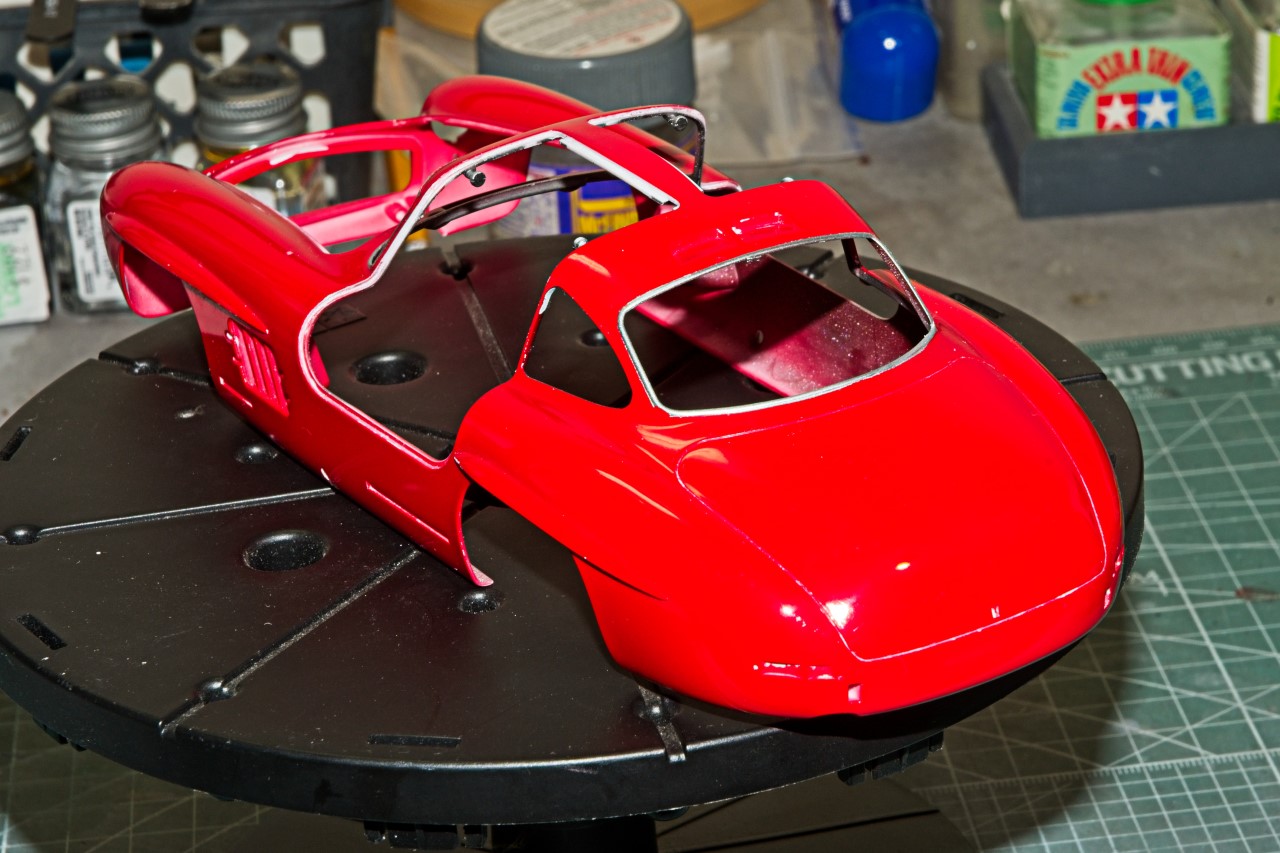
And here’s the the body, engine hood, and doors look.
Tamiya did an excellent job of engineering the doors hinge assembly, so both doors and the hood will eventually open and close.
Time for a break from the shell as there just seems to be a near endless number of detail parts to go, so I switched focus to the tube frame.
Tamiya once again did a fantastic job of engineering this very complex tube frame in such a way that it just about falls together without any real issues. I found that the easiest way to accomplish this was to start at the rear mounting points and work my way forward. The tube frame, rear end, and all suspension parts were primed then painted with my mix of Tamiya Gray & White Primer. The drum brake assemblies certainly were a novelty after years of just working with disc brakes. I did have some issues figuring out how to align and correctly installing the rear drums and springs as they actually use the same mounting hole. Eventually I installed the springs but didn’t glue them but rather pushed the mounting post as far back as I could until the brake drum fit correctly. Great engineering once again, while poor eyesight prevented me from seeing the solution sooner.
Next up is finally getting to the engine and drive train.
joel
That tubular chassis looks amazing. It’s great that Tamiya replicated it considering you won’t see much of when the body is on. Out of interest, do you get an full engine with this to go with the detachable hood?
Michael,
Tamiya even thought about not seeing all that lovely detail especially the tube chassis since the car has a full body pan to protect it from damage and dirt, etc from road junk. Tamiya molded the full pan in a kind of frosted clear plastic so you can kind of see what’s behind it. My plan is to paint the pan but not put it on, claiming it’s my show car and not driven on the streets. Which would logically give me a bonified reason in real life to convince my wife that I need another sports car or coup as my daily exotic driver
And yes, the Baby Merc 300 SL does indeed come with a very detailed engine and engine compartment, which I’m looking forward to.
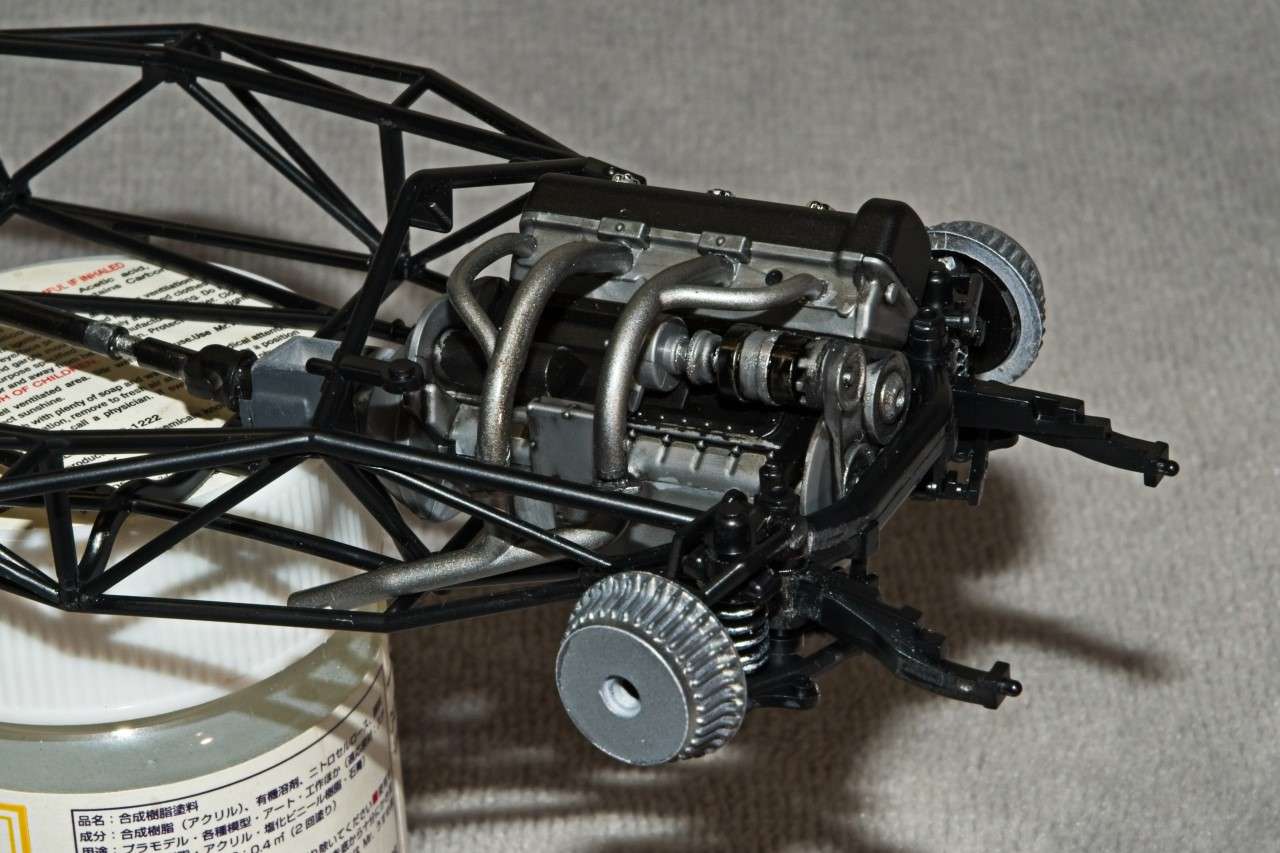
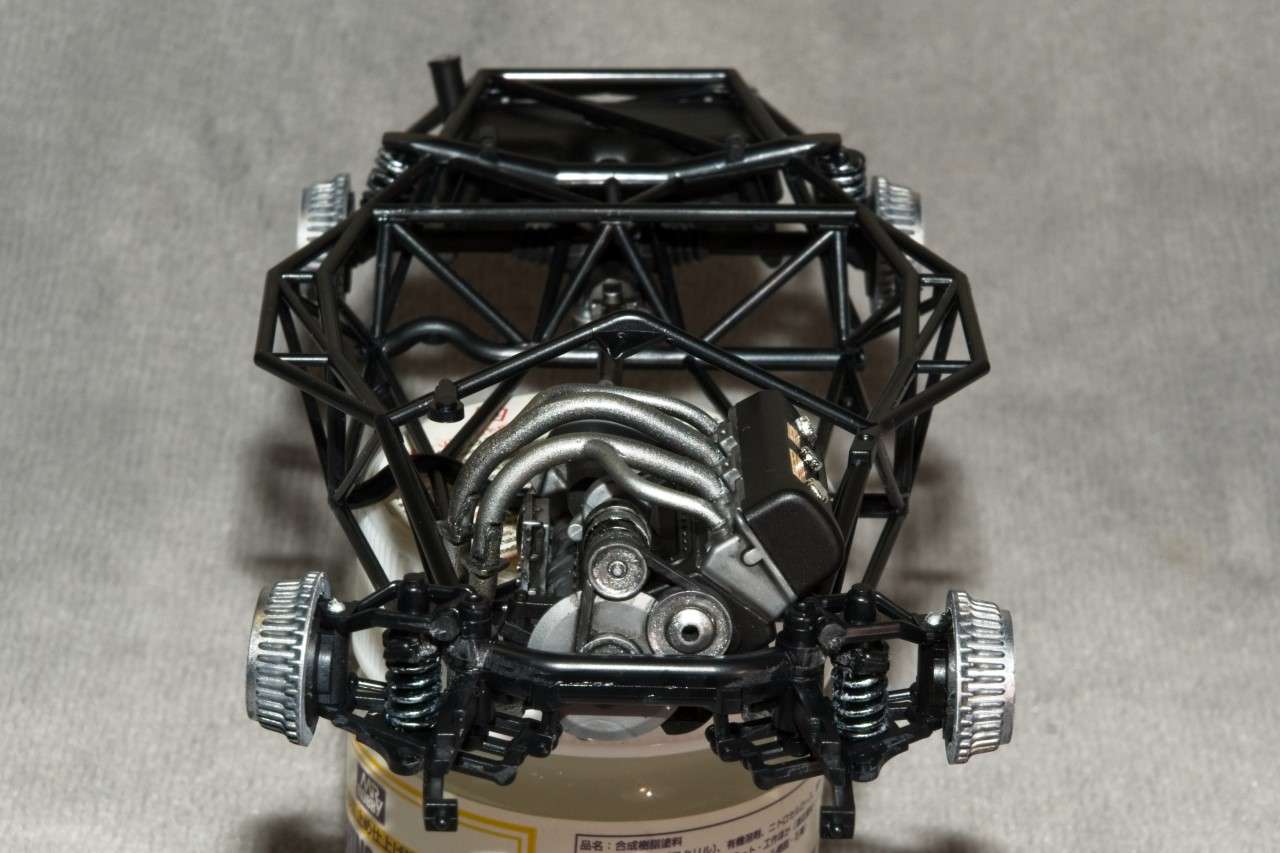
Time for another update. This time it’s all about the engine and installing it in the tube chassis.
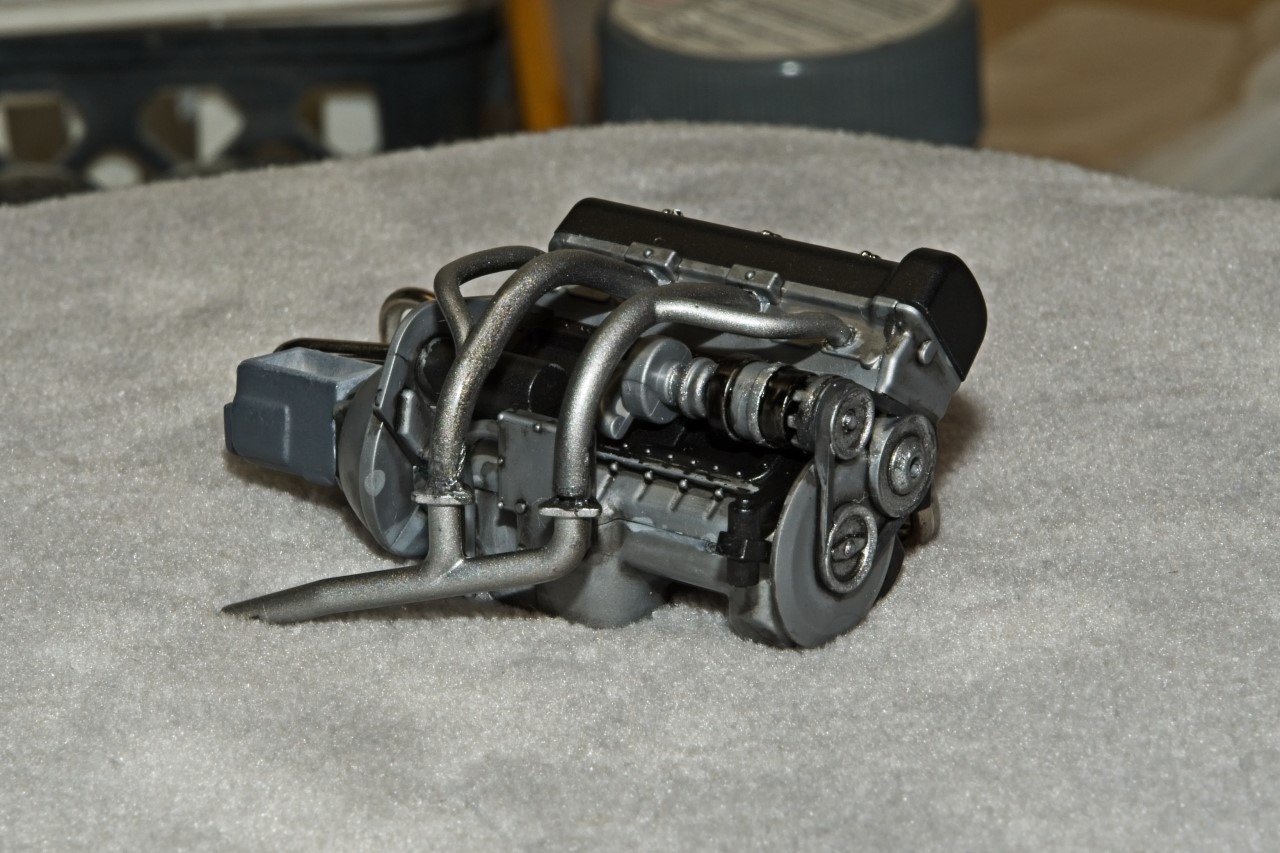
Tamiya once again proved that they could mold a complex straight six Mecedes engine/transmission where all the parts are extremely well molded with sharp details on every piece, and fit like a glove. Once again, no putty or excess sanding was required.
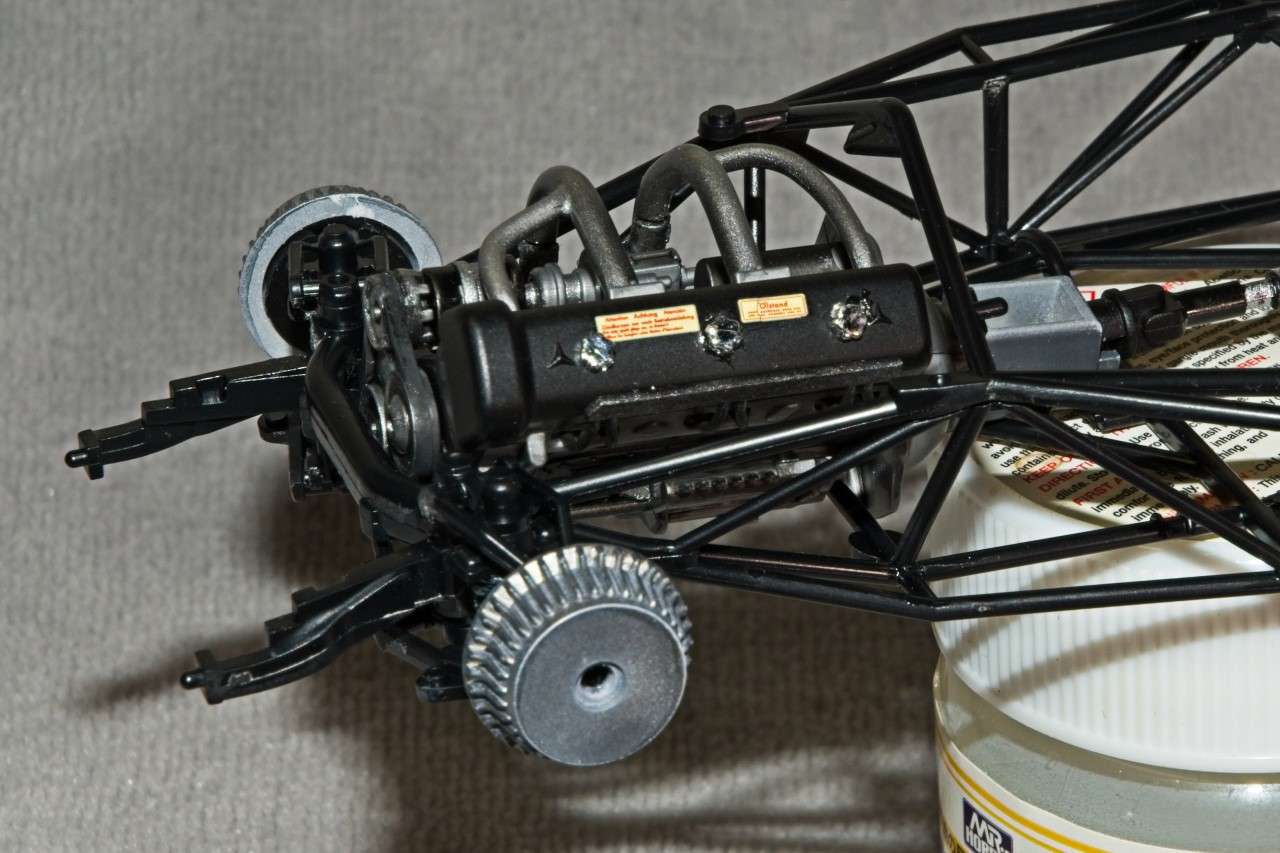
The hardest part was painting the engine/transmission where masking for Semi Gloss Black was needed for the block except where the exhaust manifolds and intake manifold attaches, and the transmission which I used one of the metallic shades of Mr. Color Aluminum. I did use the same shade of Aluminum for the fuel metering unit as well. I also used Mr. Color Semi Gloss Black for the valve cover and the block as well as for the drive shaft and the fuel tank that gets installed during these steps now.
What I did have issues with is gluing up the exhausts which I painted with Tamiya Aluminum, then a dusting of Tamiya Smoke for a more dullish look to the headers. as you glue the two header pieces to the block, and then to the collector pipe. My issue is that no matter how I tried, the alignment looked wrong, so I needed to come up with a simple answer. I just popped off the front header pipe assembly and left it unglued, yet it stayed attached to the engine. After all the various pieces were detailed painted and glued to the block. came trying to shoe horn it into the chassis, which also proved to be a major issue as the hand drawn instructions just wasn’t clear enough for me to figure it out. So I checked a few Vids on you tube and one had two pics that turned on the bulb above my head. While still a challenge as I was trying to weave the collector pipe through the wrong chassis tube opening, when I got it right where it went, the engine snuggled down into place. Some Revell Contacta glue was used on the mounts to give me enough time to align the engine correctly and seat squaring on the motor mounts. A few hours later I installed the drive shaft which needs precise alignment or it doesn’t fit.
There’s still a few more parts to deal with including the intake manifold, and then all the plumbing which Tamiya gives you all the major pipes.
Here’s a few pictures of where I’m at.
Nice solution Joel. The chassis with its tubular frame and the engine installed looks very similar to the Ferrari I am working on, which shouldn’t be surprising since I guess they’re both cars from the 1950’s.
Michael,
Through the 50’s and 60’s till Chapman/Lotus came out with the monocoque design, the tube chassis was basically the only game in town. I remember reading that when Jack Brabham showed up in England for his 1st F1 ride, and asked where his car was as he couldn’t find it in the garage, he was told that it was in the stacked piles of tubing, and that he’d had to make it himself.
Buit there’s just a certain elegance to all those tubes coming together to form a race car chassis that we just don’t have today.
joel
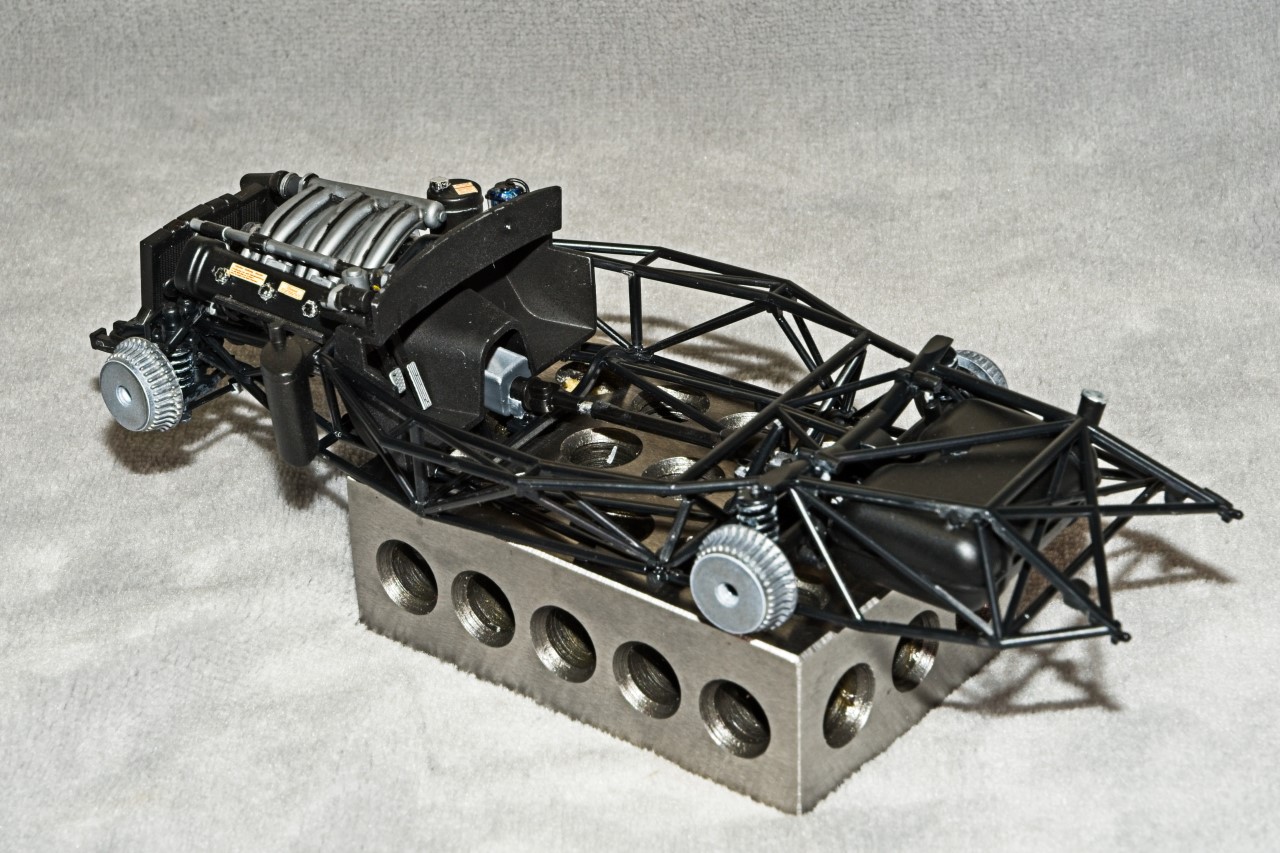
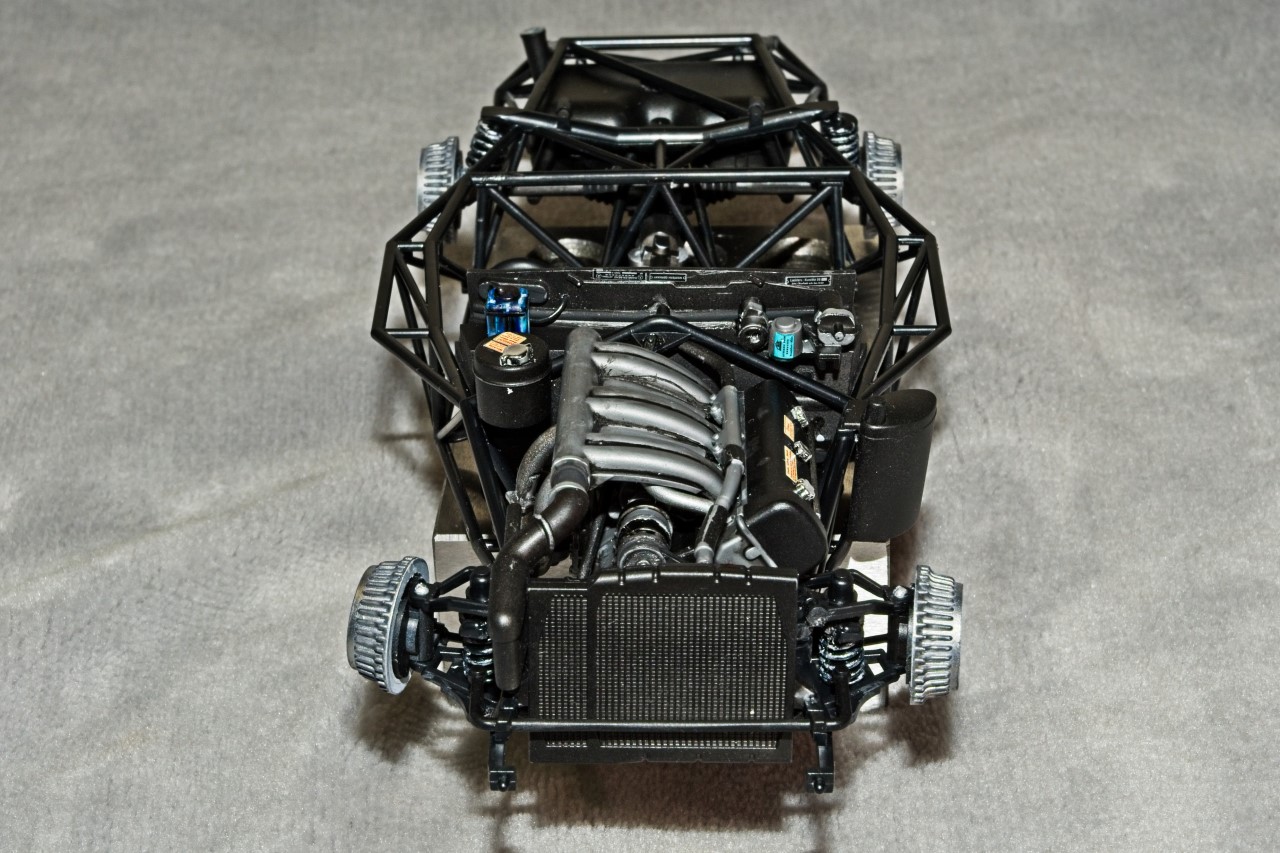
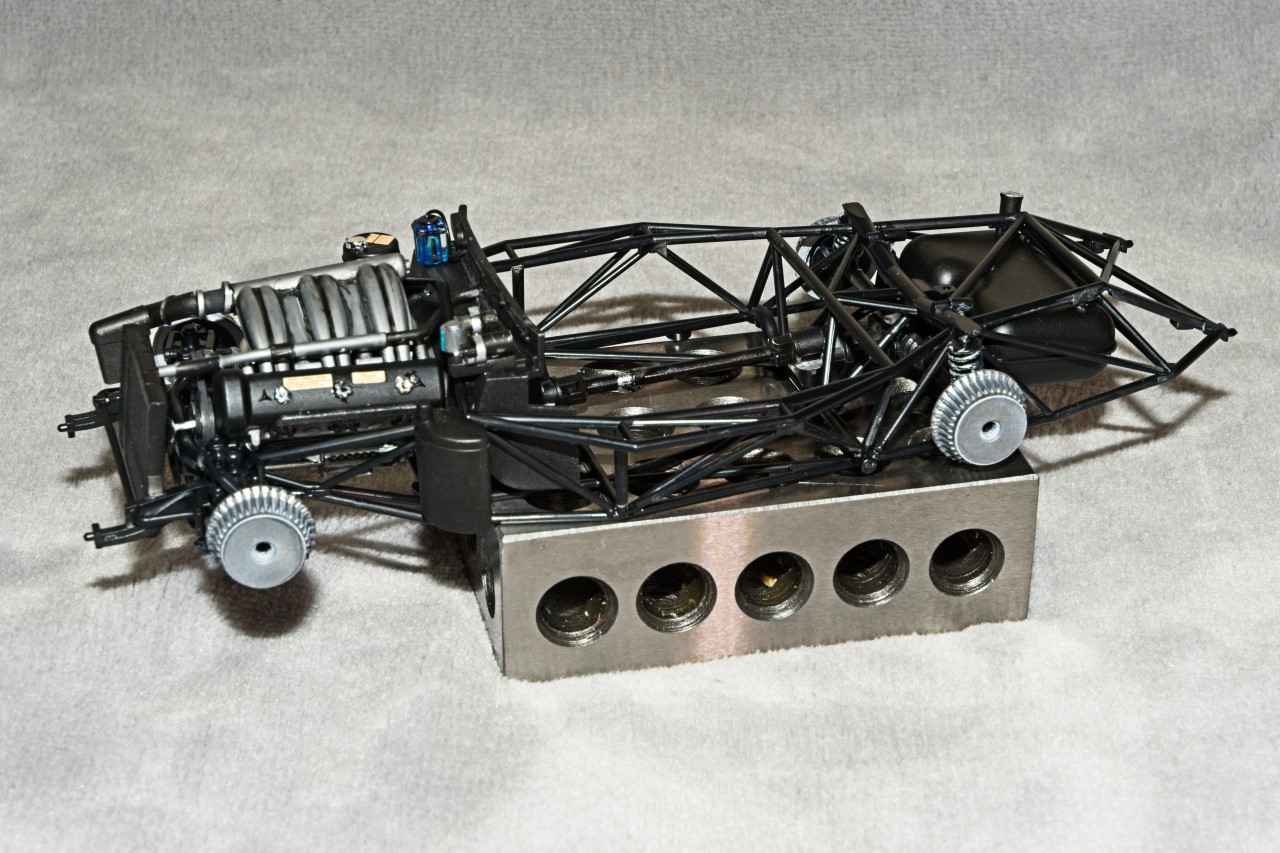
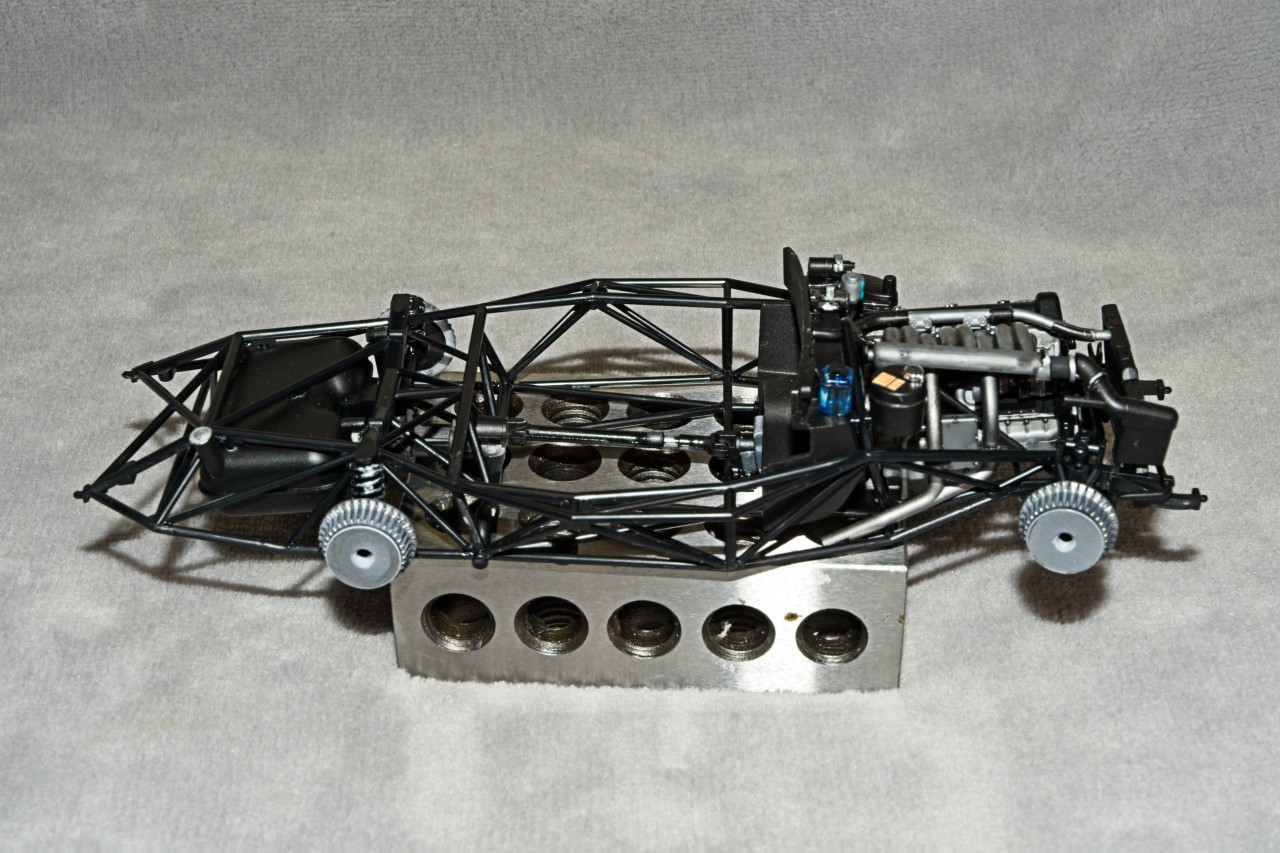
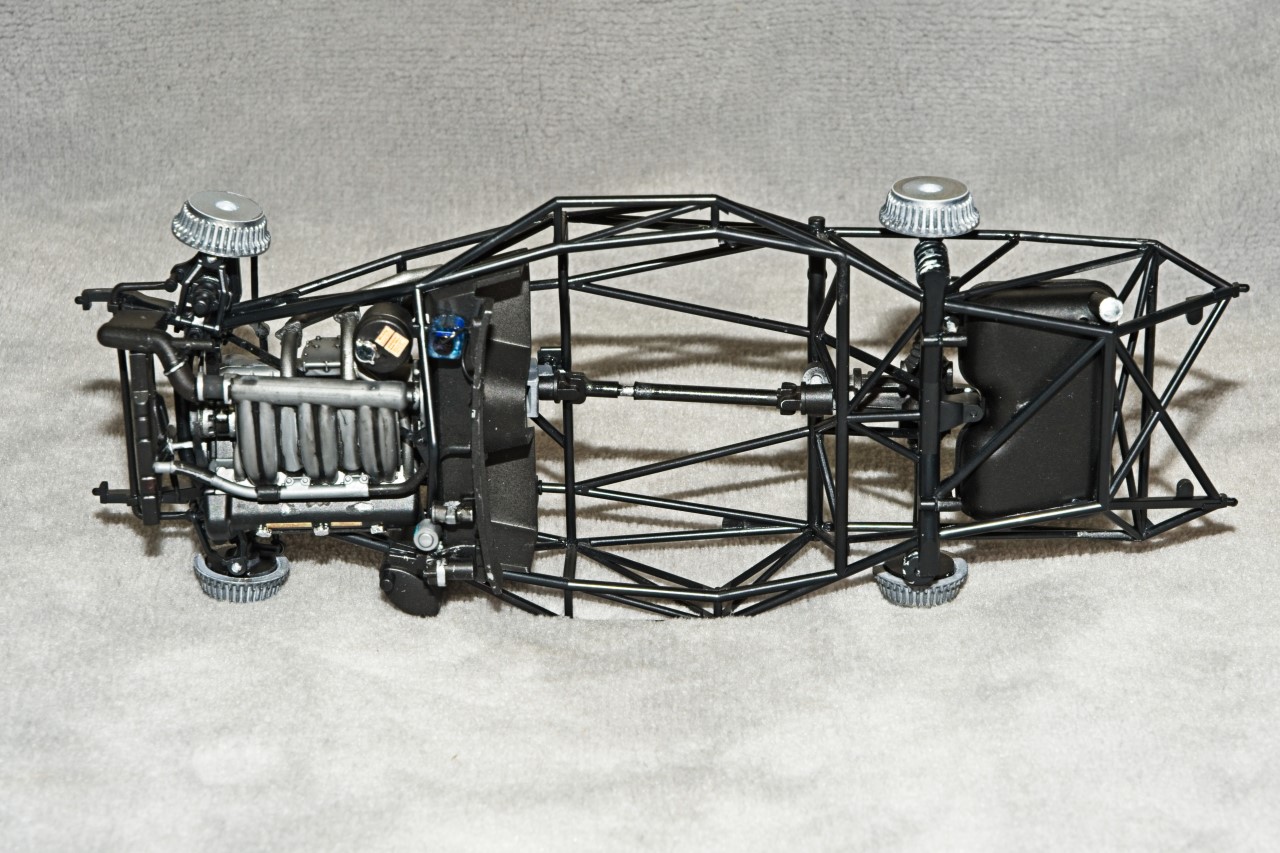
Finally finished up the engine bay and chassis. Took a lot of time as the Tamiya instructions certainly aren’t up to today’s standards. Way to many arrows curving one way then another, and I just love those dash lines to represent where a part goes behind something less, so it’s a lot of guess work and dry fitting. More then once I made the wrong decision, but was able to correct each one.
Now on to the wheels, hub caps, and tires. Sounds easy, but the Hub caps are proving to be quite a challenge to paint correctly. More on that in my next update.
Here’s a few pictures of the completed chassis and engine compartment.