Tamiya 1/24 scale Porsche 911 GT1

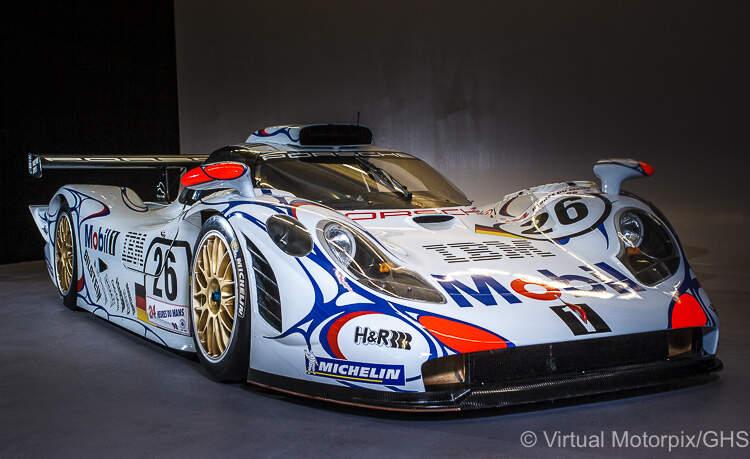
By the mid 1990’s Porsche once again focused on returning to the top levels of International Sports car racing in the GT1 class, with the 24 hours of LeMans being the number 1 priority race.

GT1 cars were at that time super modified versions of a manufacture’s street car such as the Ferrari F40.

Porsche bent every rule in the book, actually they rewrote the book. They designed 911 GT1 as a full race car in every respect of the word, even using the design of the rear chassis of their 962, a full race Flat 6, 4 valves per cylinder, fuel injected 600 hp engine mounted in front of the rear wheels compared to their 911 GT2 car which was still air cooled, and had just 2 valves per cylinder with the engine mounted behind the rear wheels as is their usual arrangement. Then to adhere to the rules they designed a street version that was actually legal for street use even here in the USA. Of course the rules only required 25 cars to be built, and that’s exactly how many Porsche made and sold.

To say that is car was more then up to the task of winning LeMans, the GT1 reached 205 mph on the Mulsanne Straight at the La Sarthe Circuit during practice sessions for the 1996 Le Mans 24 Hours Race, and won the race in 1998.

Tamiya 1st released their Porsche 911 GT1 in 1997. One would think that being a Porsche fan I’d have bought this kit a long time ago, but somehow it always fell under my radar. Well, finally the day came as ScaleHobbyist.com had the kit in stock and on sale, so I grabbed one for my stash with the expectation of building it sooner then later. And later is finally now!!

P1070893_convert_20191206125845

Tamiya has done an excellent job of designing this kit with full rear suspension, engine/transaxle, disc brakes, etc., while the front clip isn’t much more then just the bare basics, which is ok by me as there’s no real point in doing up the suspension, brakes, gas tank, etc, and then have no way of displaying any of it without major front end surgery. So my focus is going to be exactly as Tamiya presented the kit with a detailed interior, and the fully detailed engine compartment.

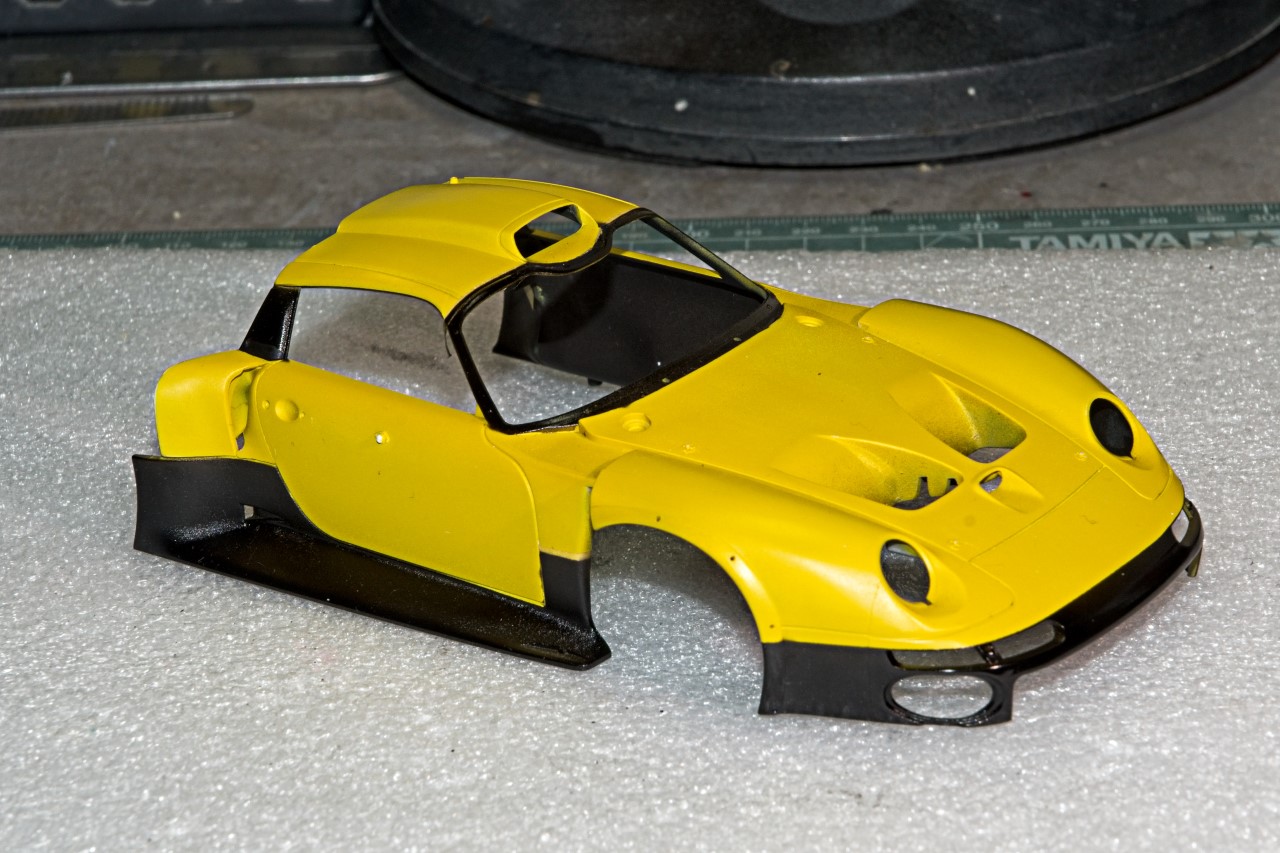
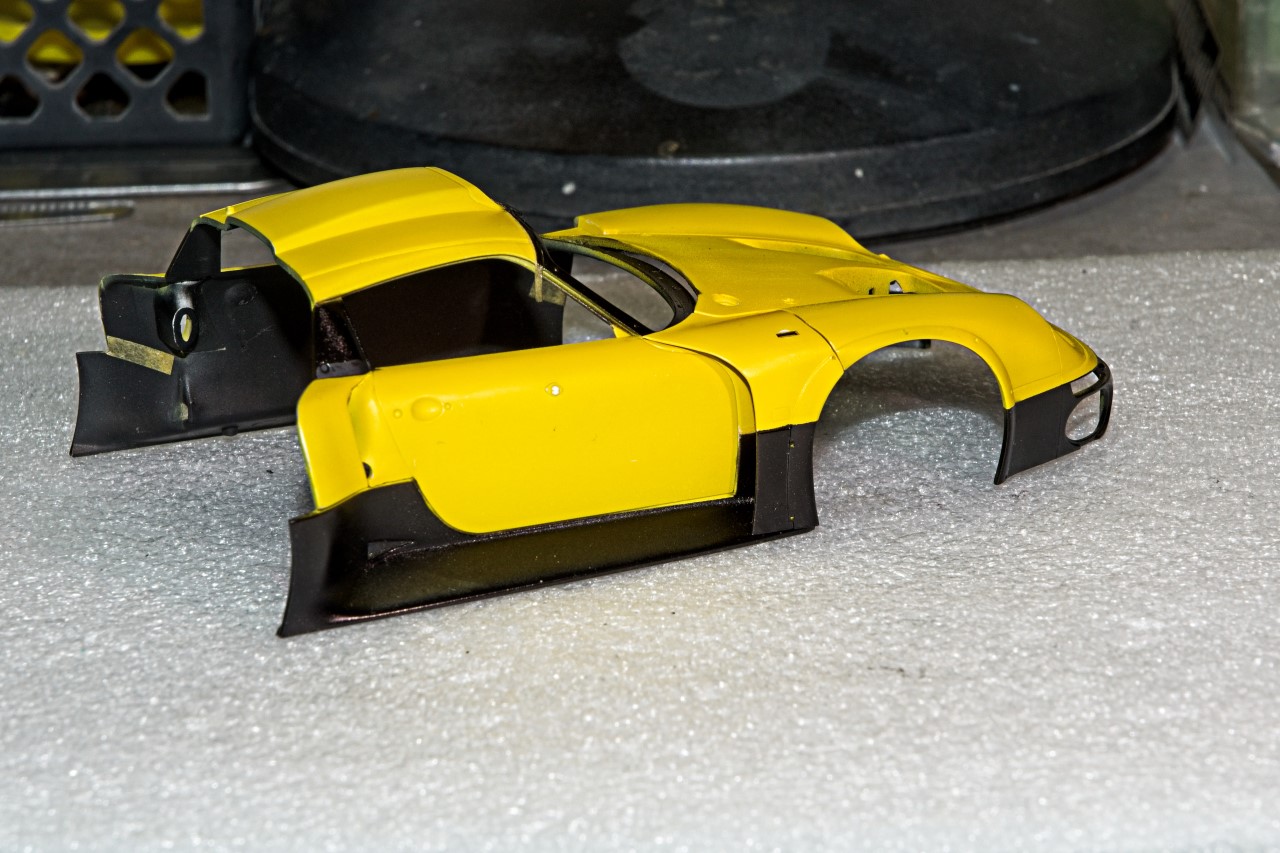
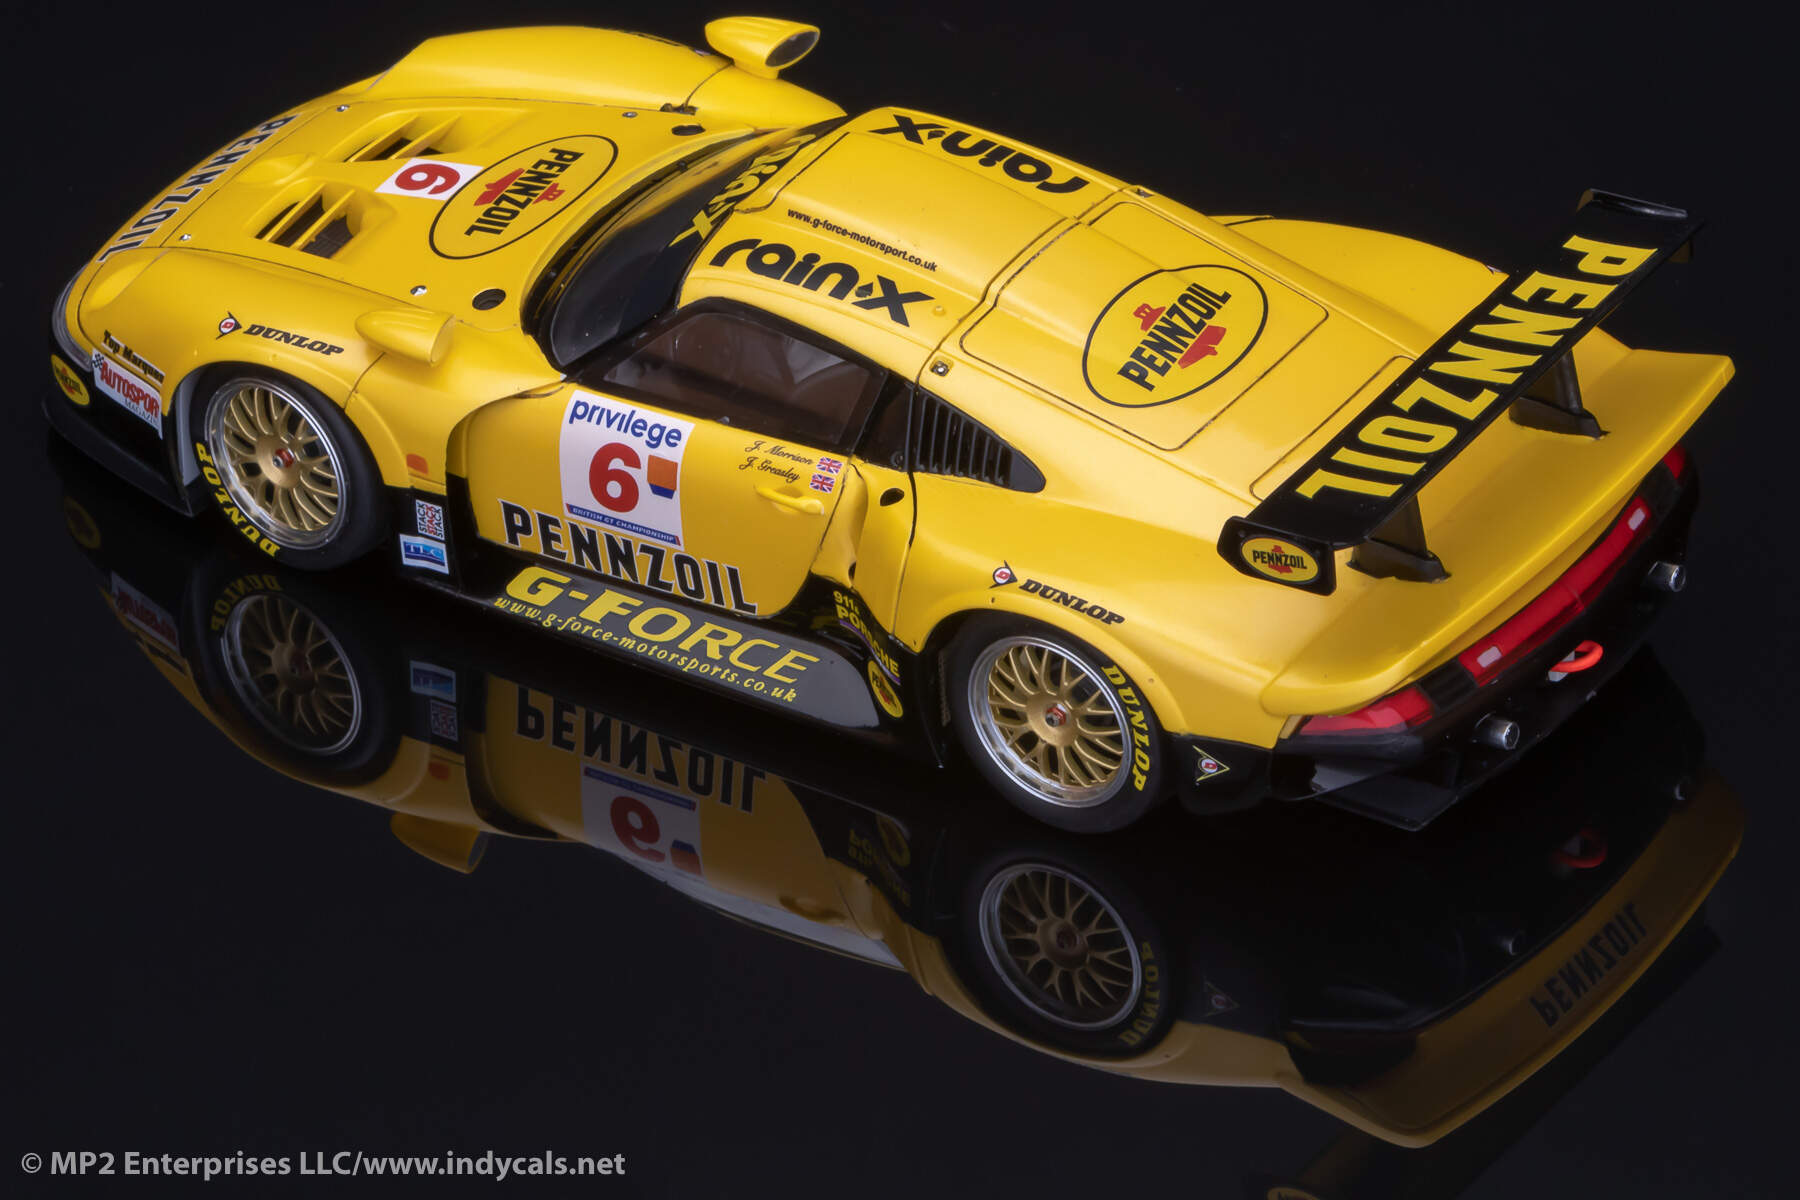
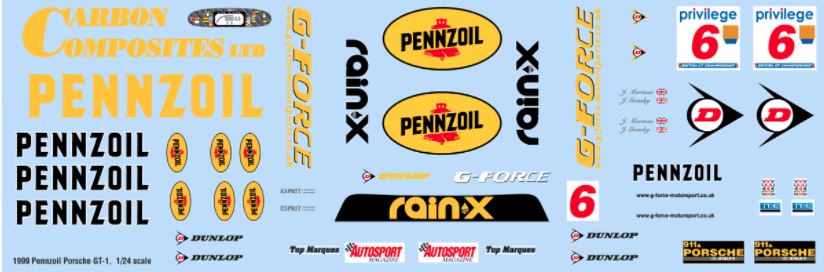
As with many of my builds, I prefer to pick a different sponsor/paint scheme then what comes in the box. And in this case that’s a really good thing as the Tamiya decals are really, and I mean really on the thick side. A quick search of my Go To Decal company: Indy Cals, actually has the Pennzoil sponsored car campaigned in the 1999 British GT Championship Series. I’ve seen other liveries all with a Gloss White car, but once I saw the Pennzoil car, no need to look any further.


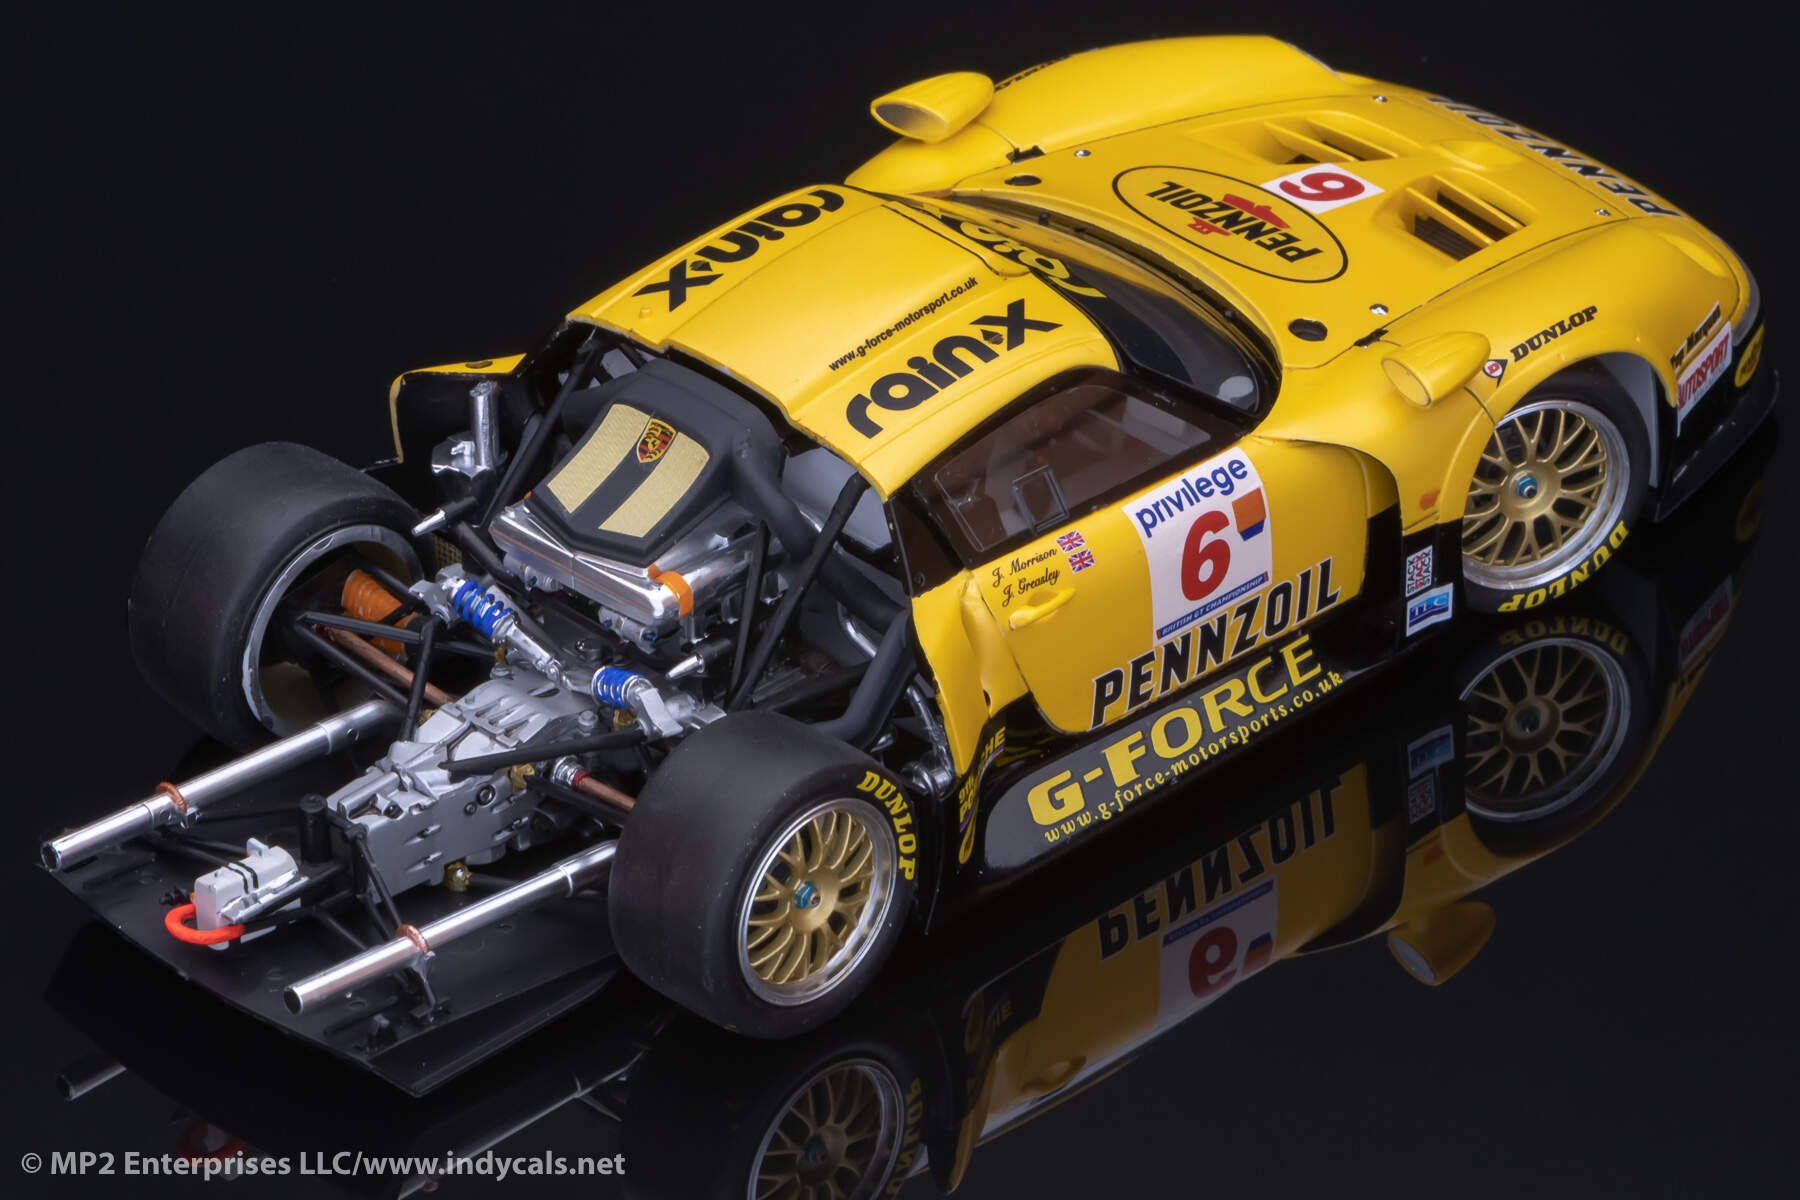
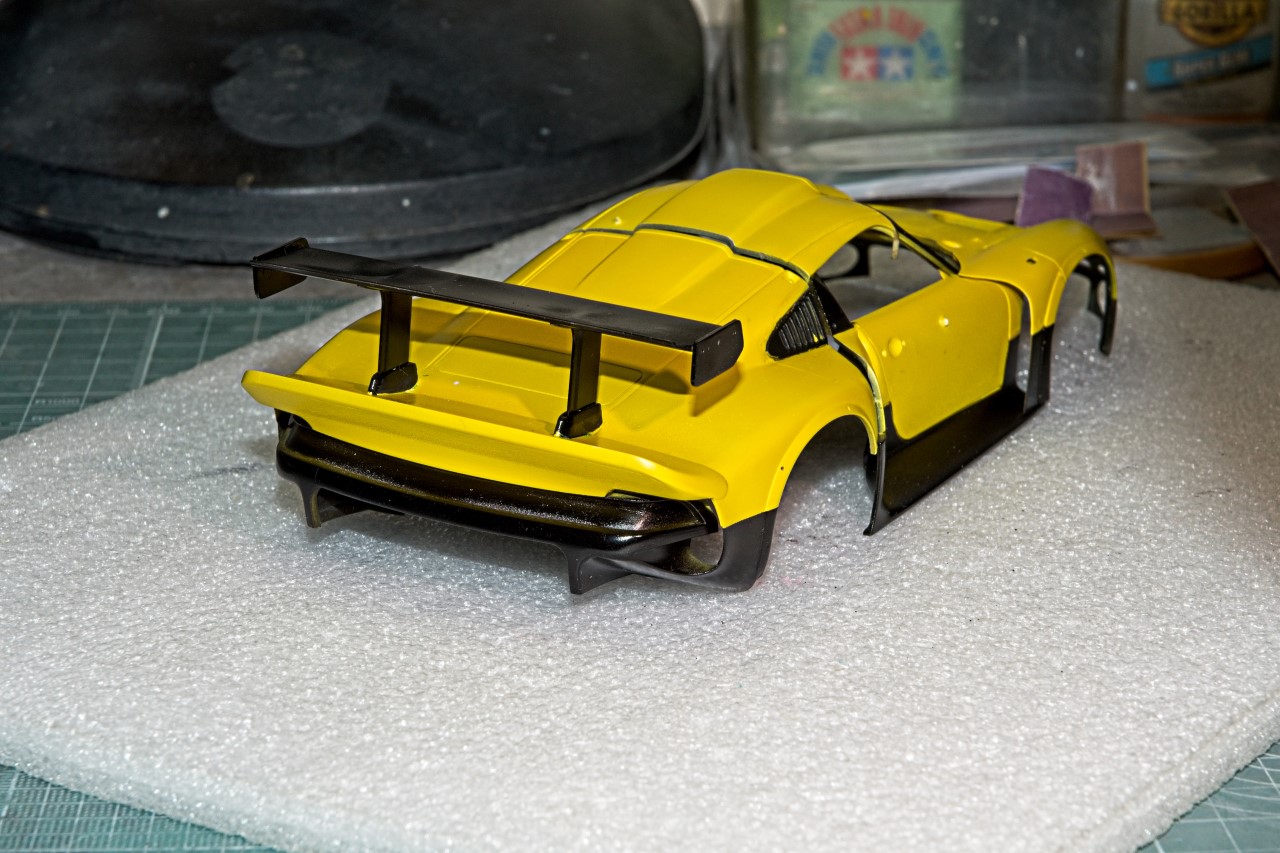
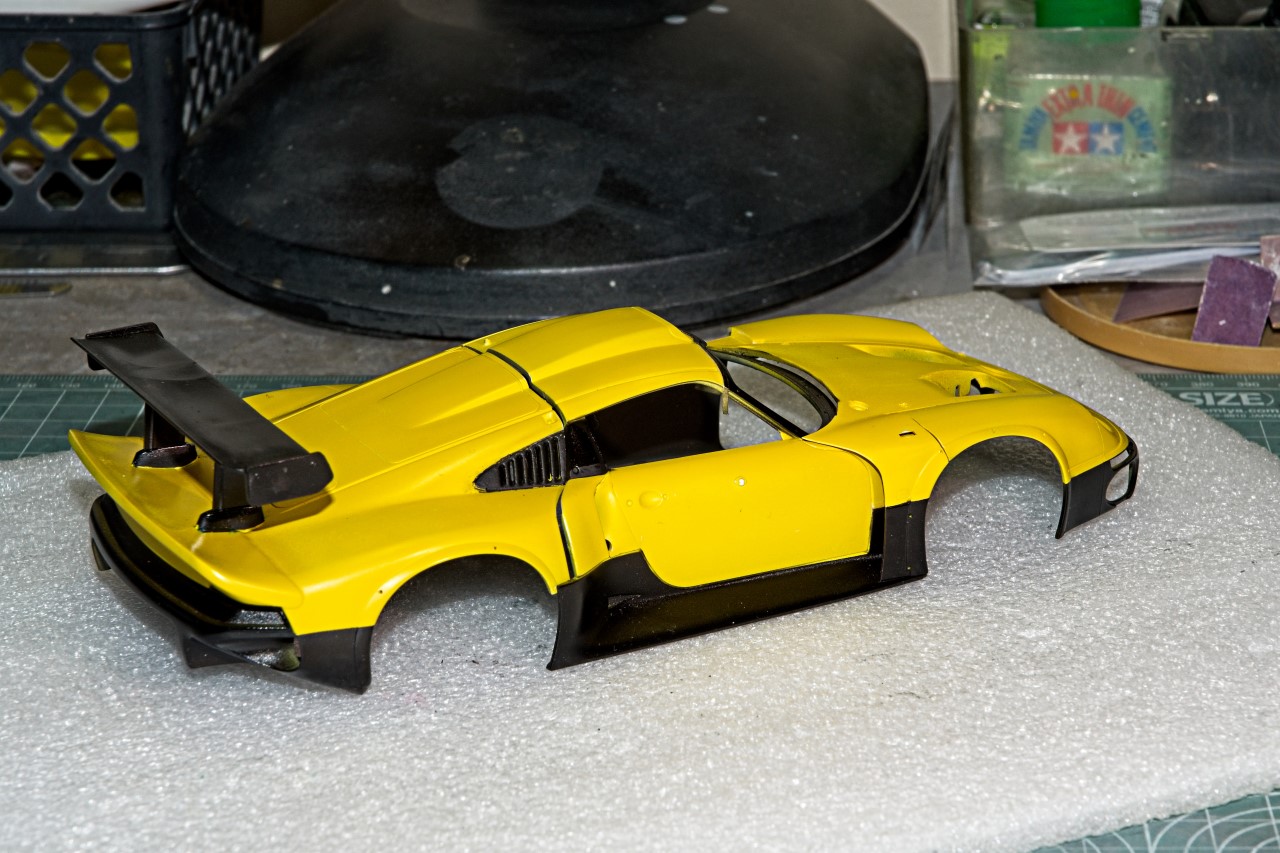
So with the Lola needing a full re-strip & a whole lotta love, the Porsche 911 GT1 is now my focus build. As with all my builds, I like to start off by painting, decaling, and polishing the body, so that’s where my build has started.

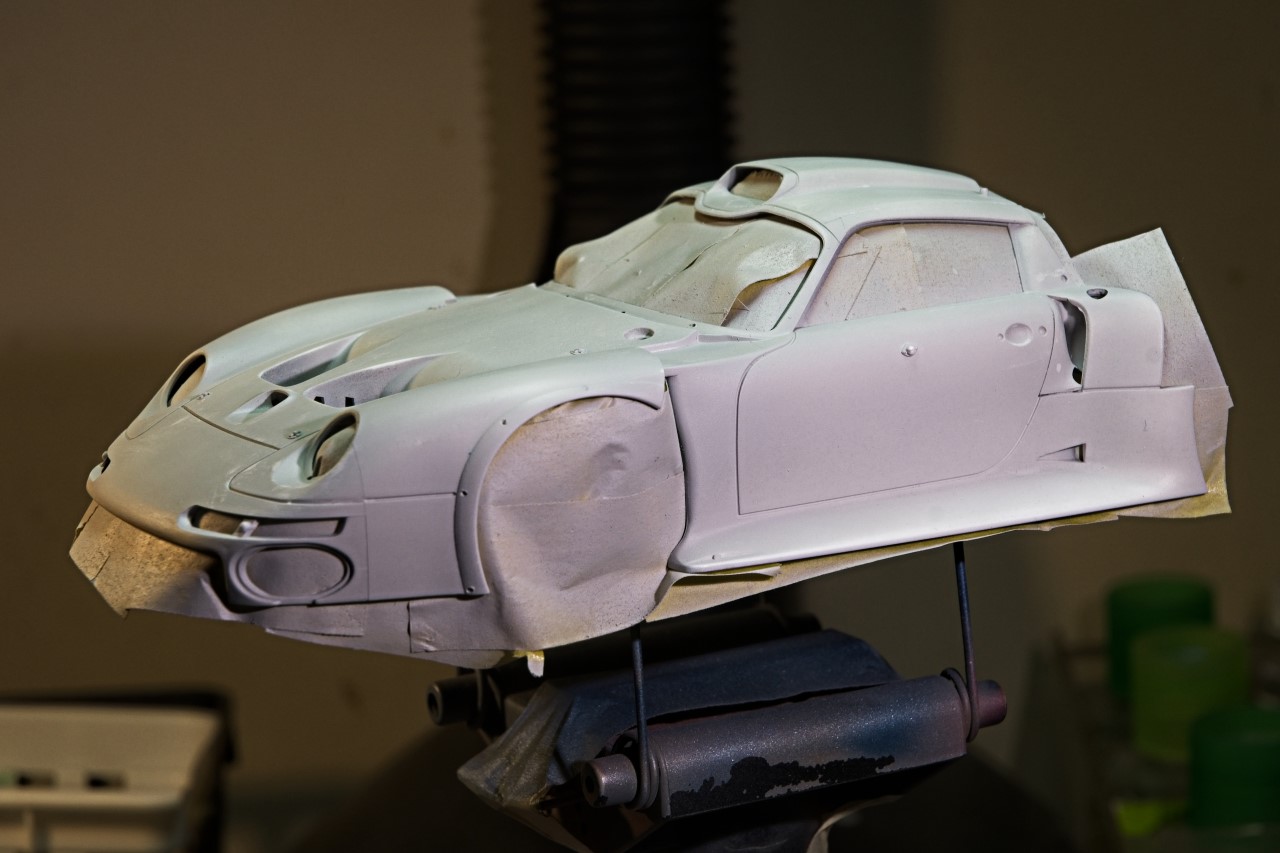
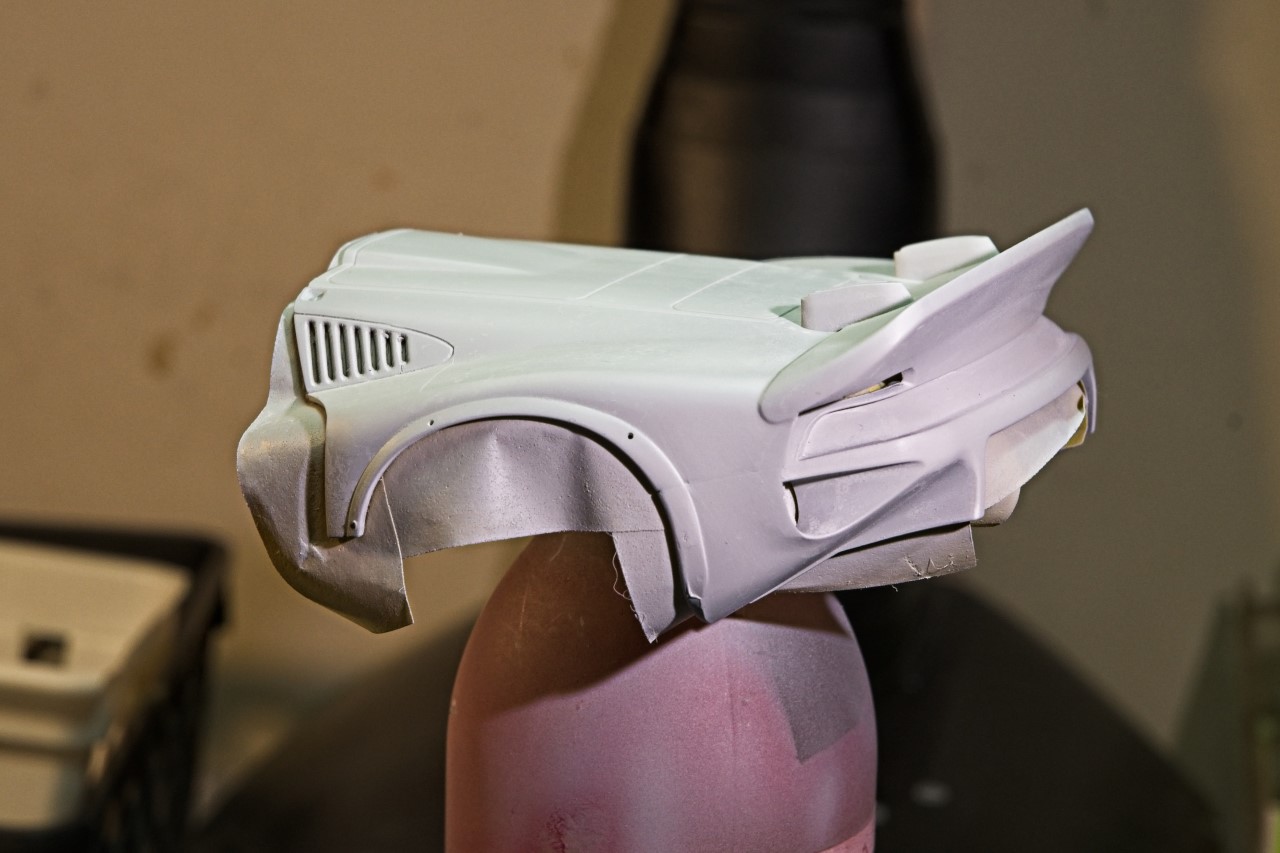
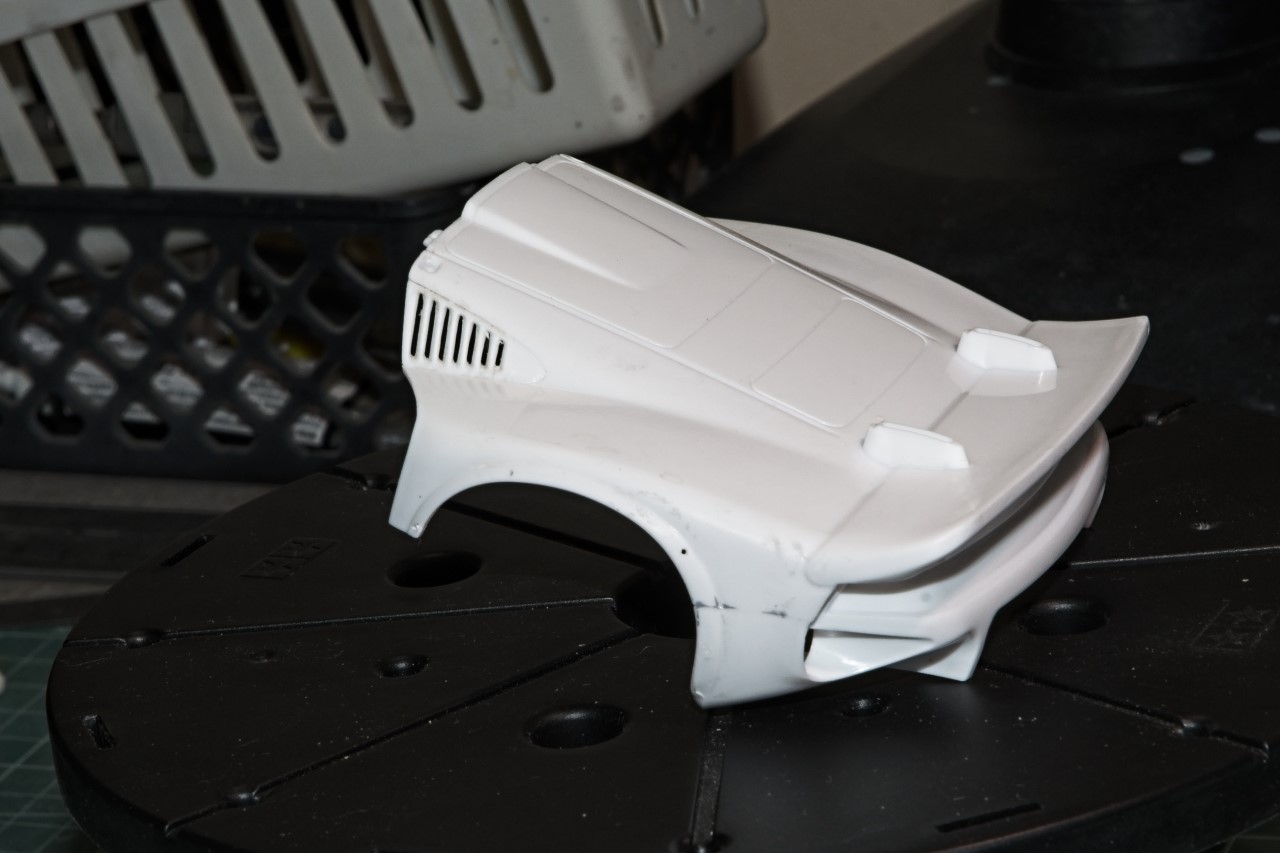
1st up is the front clip. The wheel arches each have a flare with 4 rivets. Unfortunately, they’re so shallow that with primer and paint they’d be covered up, so I drilled them with a .3mm drill bit. there’s also the front brake exhaust shroud that’s a separate piece on both sides that has 4 rivets that need to be drilled out as well. But since the shell is Pennzoil Yellow, I have to paint the inside of those large shrouds after priming the body shells then glue them to the body before the color coats. Can’t figure out any other way other then leave the gluing till the end of the build, but 100% certain I’d get some glue on the body and screw it up.


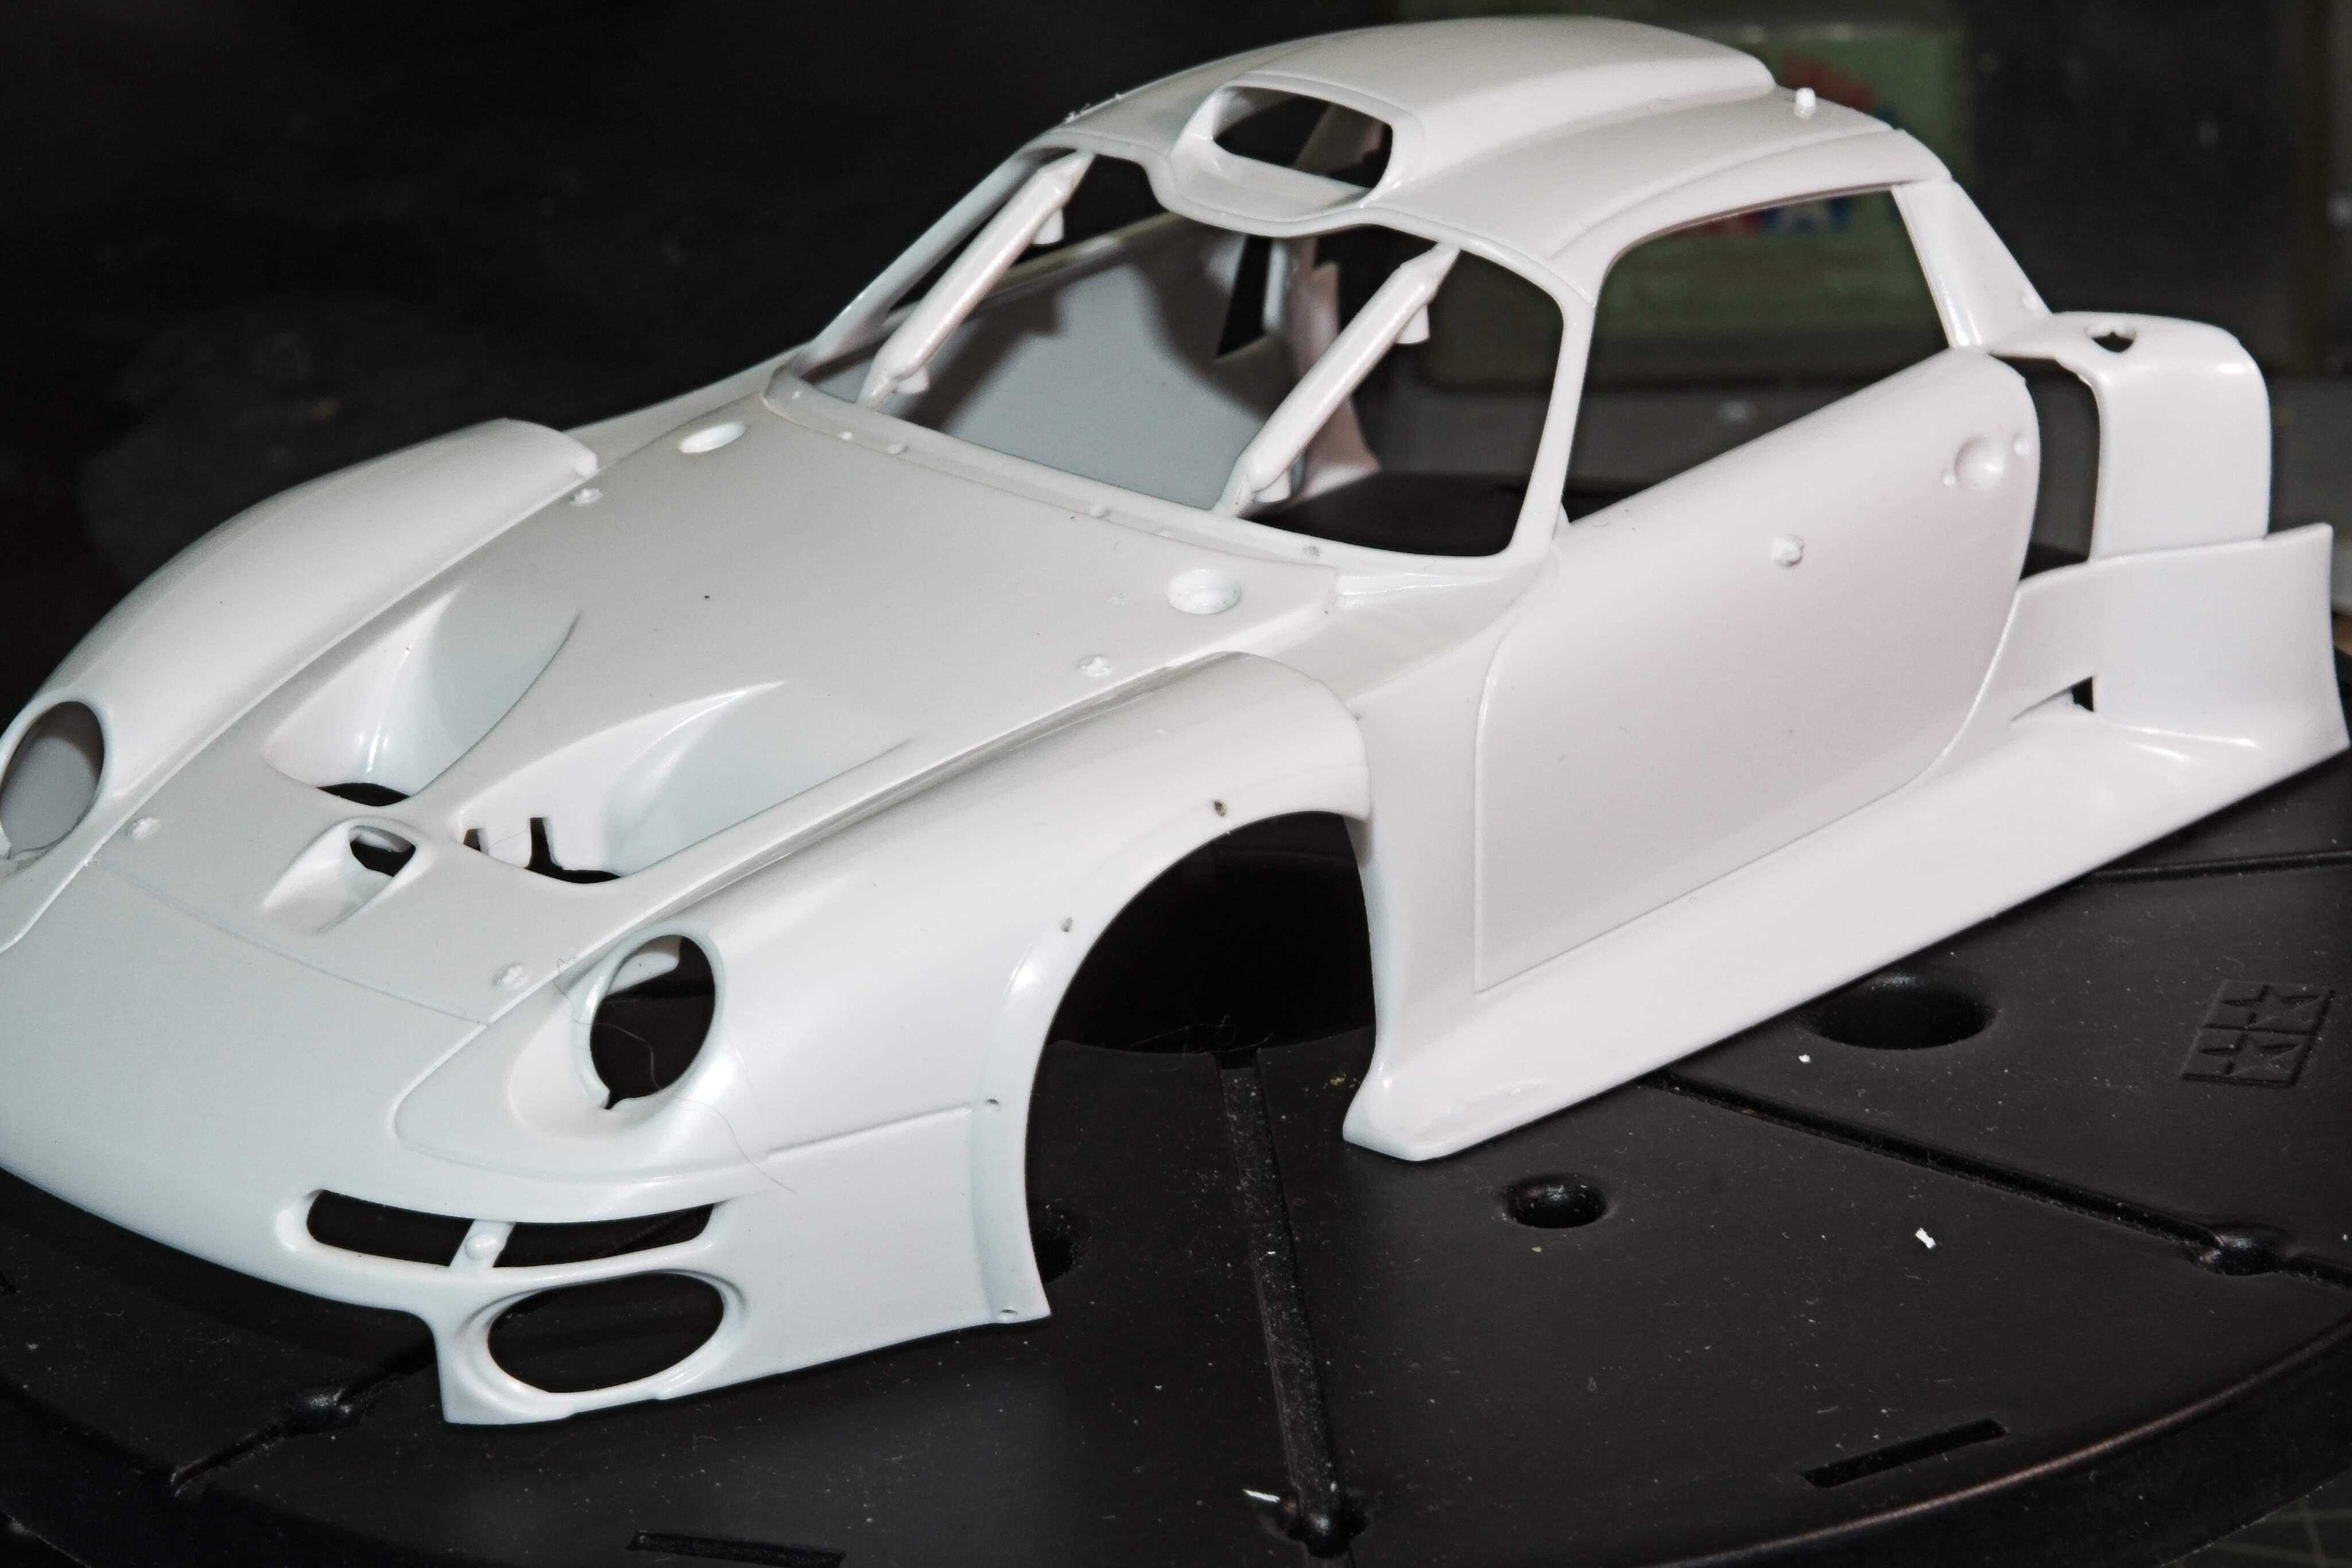
the front clip hood for the tanks, brake reservoirs, etc. is slightly raised above the body directly in front of the windshield. Tamiya molded it closed, so I opened it up and thinned out the plastic for a more scale effect.

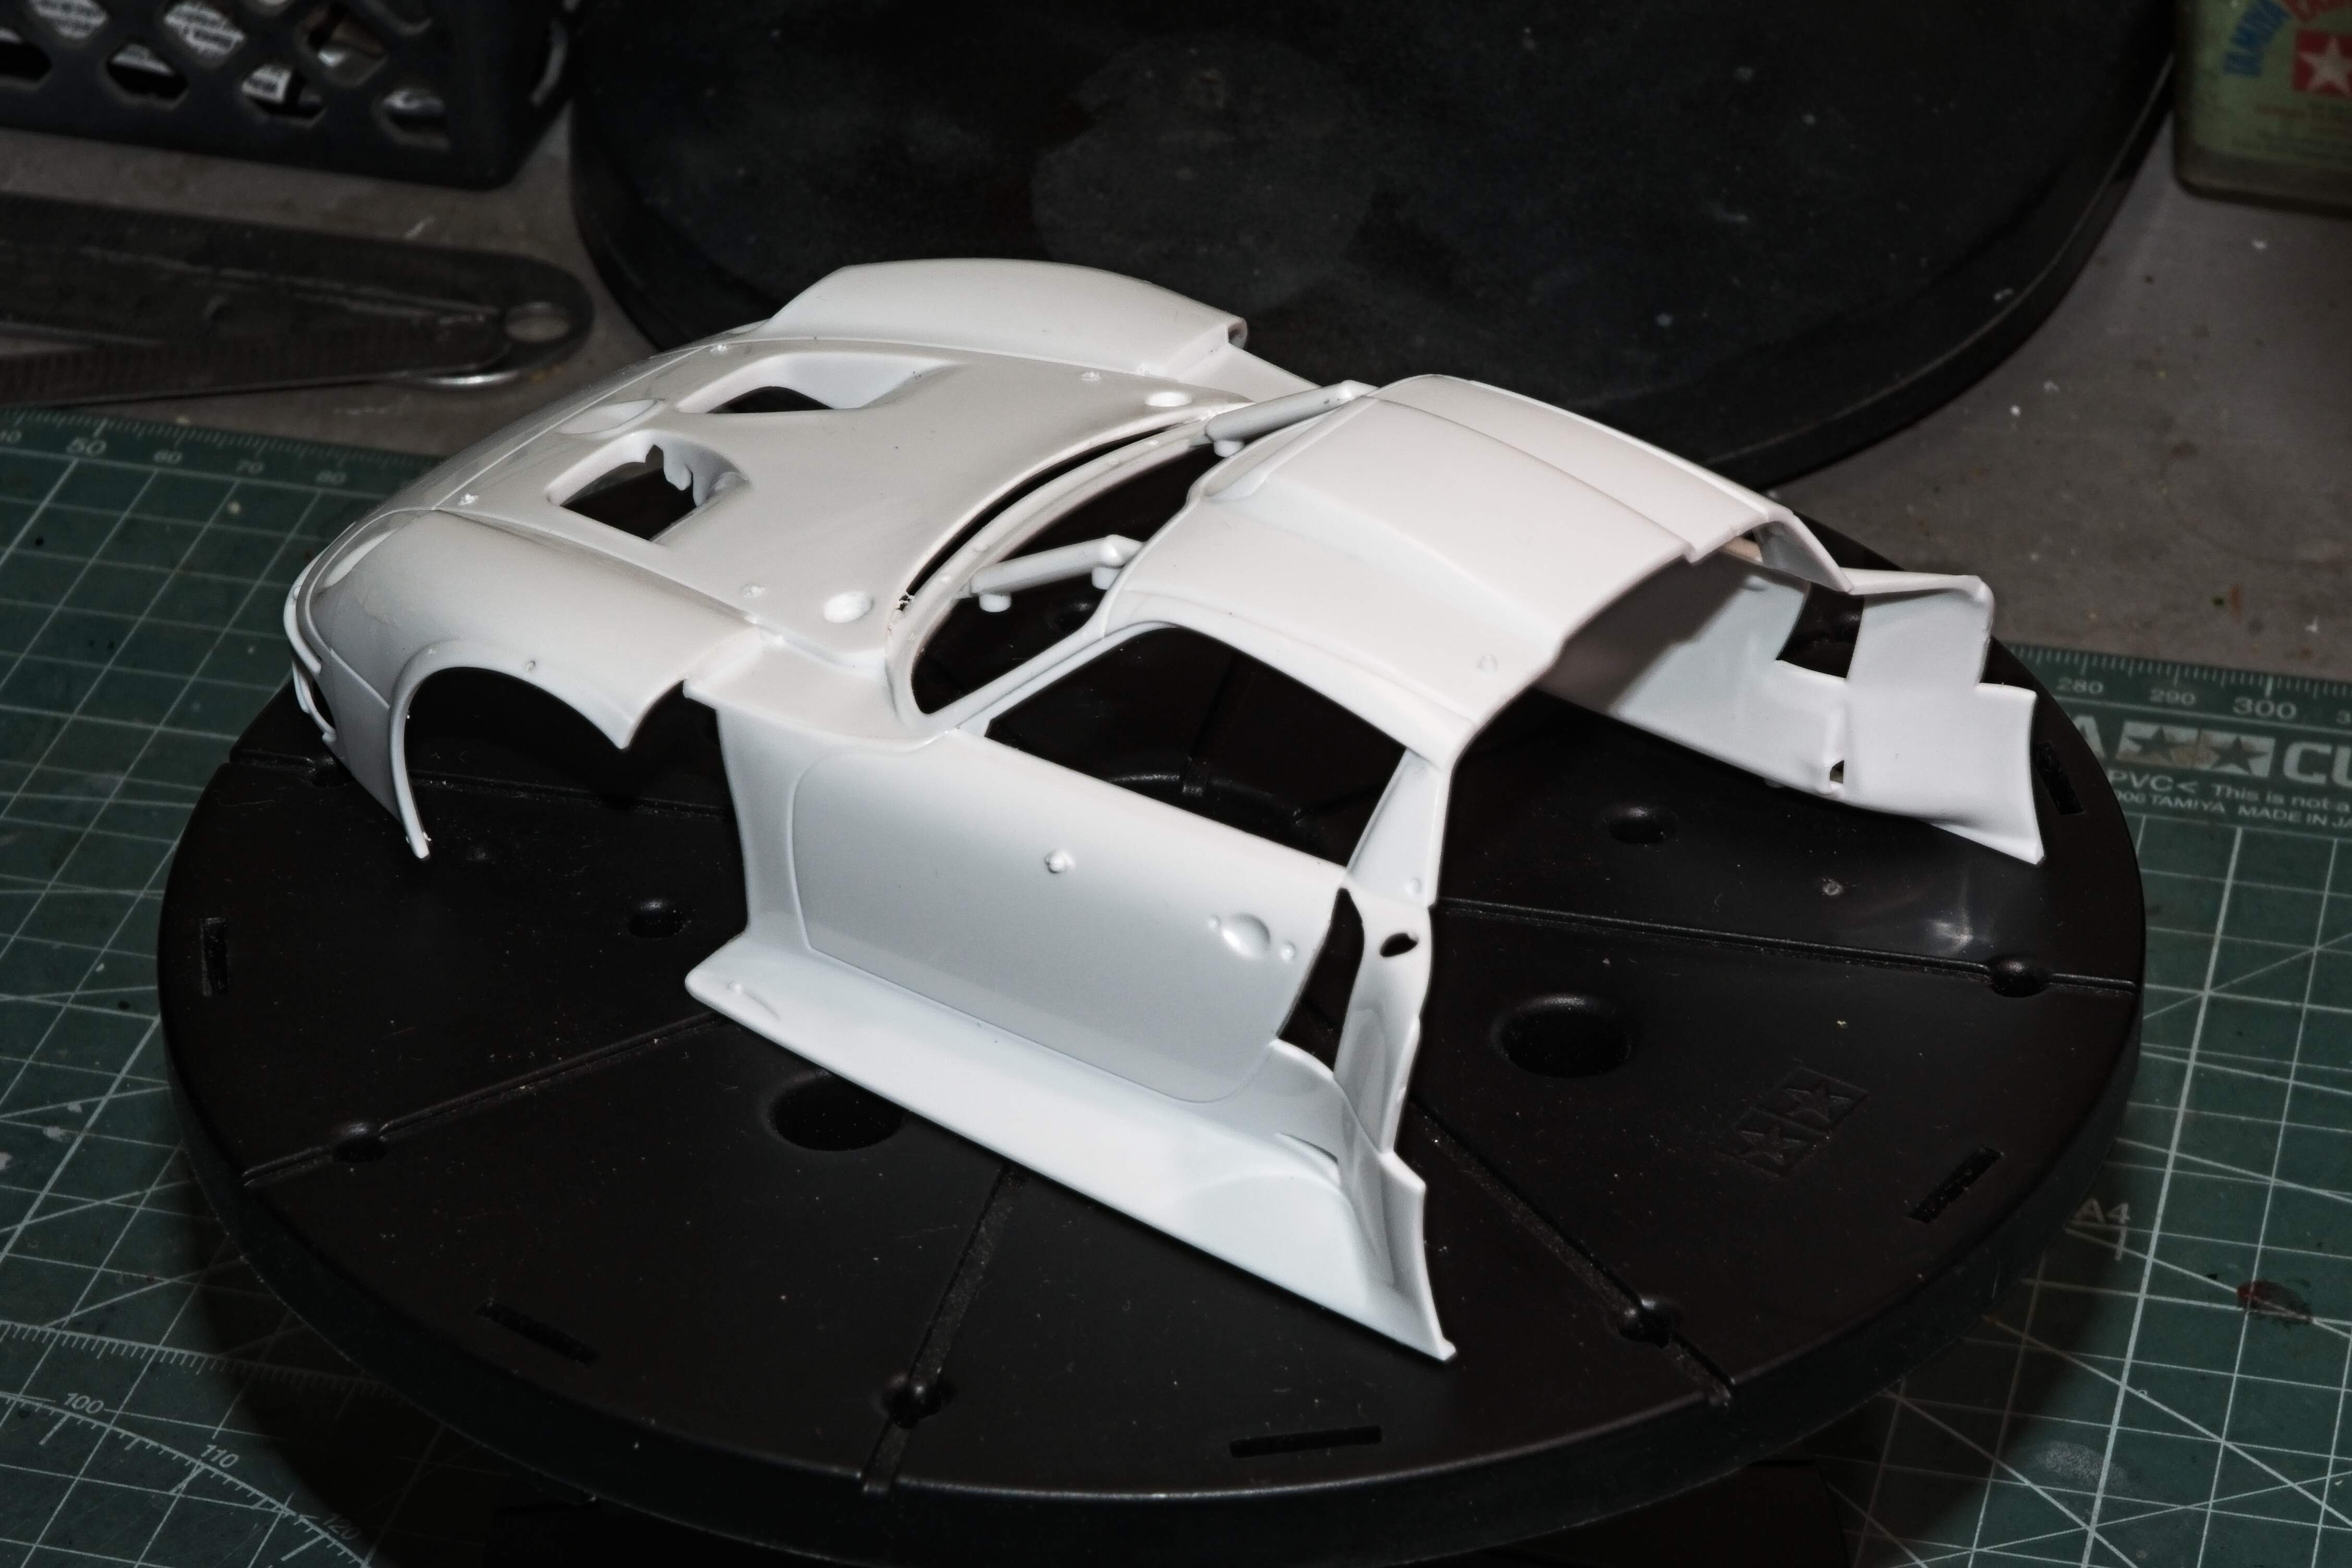
the rear clip right behind the doors has side vents on both sides, that while molded open, needed a more scale appearance, which I achieved with sand paper till there was a closer scale!


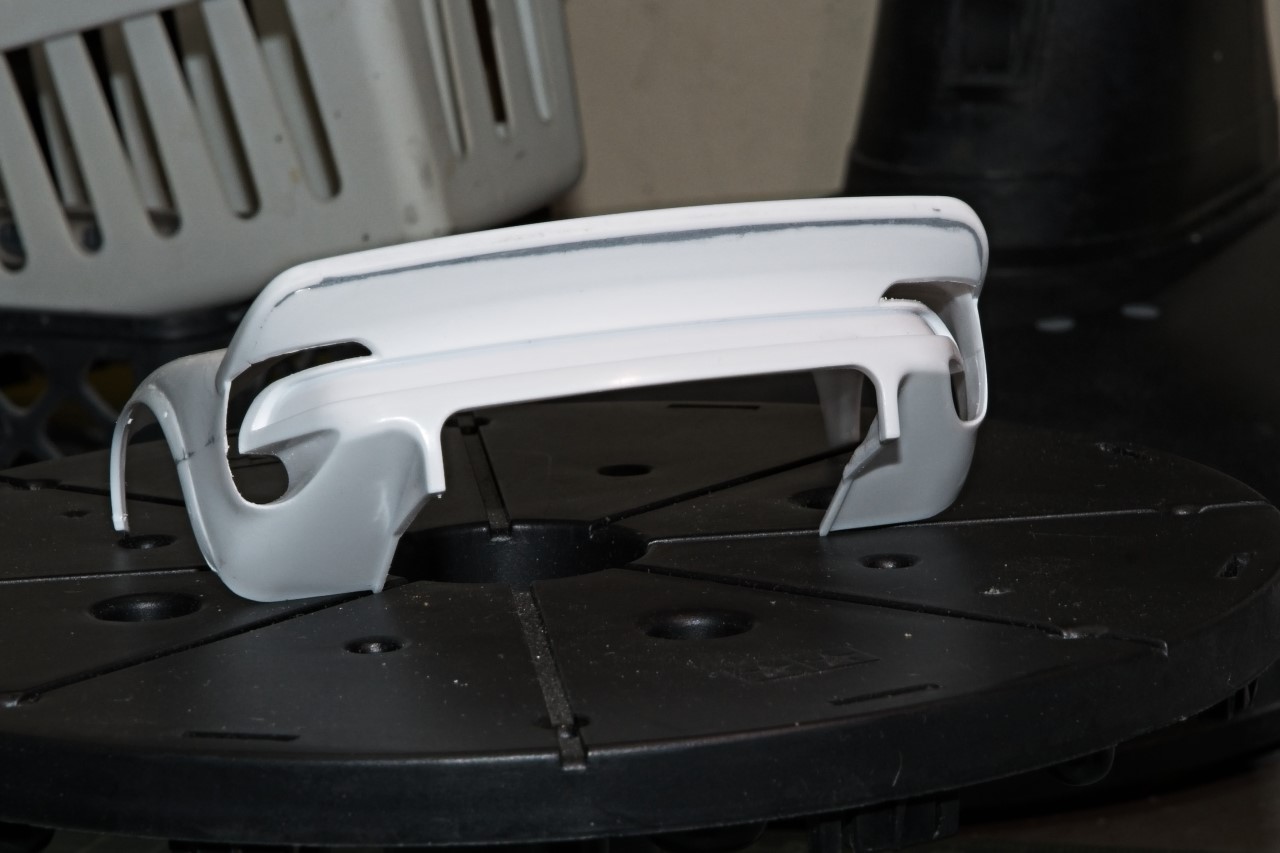
As with almost all cars the rear bumper clip is a separate part, and that applies to the Porsche as well. The fit is pretty good as the seam is on the bottom of the rear movable deck. it did require some putty work, but nothing major. The two side seams were literally a perfect fit.

At this point the body just needs a good alcohol bath to be ready for primer, then hopefully the Matt black interior of both body shells.

Joel

2 Likes

What a superb looking design, and excellent choice of scheme. Great start as always Joel, this should be another very interesting build and thread to follow.

Cheers, D

Looking forward to this build Joel, popcorn at the ready.
Andy :slight_smile:

D,
Thanks for checking out my newest Porsche build. While not as super detailed as some of Tamiya’s other Prototype GT cars, it’s more then enough detail to work with.

Joel

Andy,
Glad you’ll be along for the ride. Hope that you’ve got enough popcorn for both of us.

joel

Watching this one for sure - I hope the paint gods smile upon you again …

Beautiful race car, the Pennzoil livery is an excellent choice.

Richard,
Glad to have you along for this one. As for the paint Gods, I’m with you for sure. I’ve got my new supply of Mr. Finisher Black 1500 and yesterday shot the full interior with my usual mix. Came out smooth as silk. By now that crap black primer should be at the recycling center as I tossed it as my personal protest.

Joel

Jesper,
Glad that you also like my sponsor/color choice. At this point I’m trying whenever possible to avoid the base body color of white, as nearly 50% of my builds seem to feature that color.

Joel

Best of luck on this one Joel, you are going for the one paint color that truly scares me. Yellow, I have never gotten a satisfactory paint job. White, no problem, but yellow, nope.

Dave,
I’m actually 1 for 1 with Yellow paint schemes. Hopefully, I’ll get to 2 for 2. Sure hope that I didn’t hex myself. I built the Tamiya’s Camel sponsored Lotus 99t early last year.

Joel

2 Likes

This is going to be one to watch and a great colour scheme too boot.

Now seeing your colour scheme gives me hope I can find another scheme for my GT1 especially as it’s the clear view version which will not be clear view when I get round to building it.

Ken,
So glad to have you along for the ride. As with all my builds, I’m sure that they’ll be all sorts of issues that pop up, but I’m 101% convinced that the Porsche will once again cross the finish line in grand style.

joel

Luciano,
Welcome to my latest Porsche racing car journey.

I’m looking forward to following your build when you finally start it. Come to think of it, I didn’t even know that Tamiya released a clear version.

As for optional kit decals (the kit ones are as thick as a door mat but I’ve seen some skilled Japanese builders use them with great success). Spot Models has a few After Market sets in similar all white car with similar splash designs. One set is by Studio27, so you know that they’re top flight.

joel

I’ll have a look around Joel, I got the clear view version several years back as when I was looking around for a 911 GT1 the standard kit was as rare as hens teeth however I have never had plans to build it clear. Just need to find the right scheme.

Update: Primer & Paint
Since my last update where I ended off with air brushing the full interior Mr. Finisher 1500 Black, the next step is to paint the shell, rear wing, hood intake splitter, front brakes/tires hot air exhaust shrouds, and the mirrors.

Since the car is painted in the Pennzoil colors of Yellow & Black, and the raw plastic is White, I needed to custom mix a very lite shade of Gray primer. For this i used Tamiya Gray and White primer filler mixed 50/50, then thinned 50% with Mr. Color’s Leveler Thinner #400. Usual air brush set up of a air flow rate of 20 psi with lite, even coats. When cured the following day, a very lite wet sanding with Tamiya #3,000 Sponge wet.

For the color coat I opted for ScaleFinishes Lacquer based Pennzoil Yellow pre-thinned. OMG, was impressed with this paint. I simply air brushed it exactly like I did the primer coats. Coverage was fantastic, only using a 1/4 of the 2 oz bottle.

As I said in my previous update, I decided not to attach the front wheel air exhaust shrouds for the brakes and tires as the insides and the body panels also needs to be painted both Yellow and then Black.

I let the paint cure for 48 hours, then I spent the next two days masking out the Black sections including around the windshield, air intake on the front of the roof, and the two front air exhausts.

The only Black lacquer paint I had on hand was an open bottle of Gravity generic Black, so that’s what I used. Worked just fine, but I did notice that I needed to use a lot more paint then with the ScaleFinishe’s paint.

Once I had cleaned my air brush, I removed all the extensive masking in like 10 min time. For the most part it came out perfect. Some touch ups needed especially in the trim work. This is an area that I really struggle with as I have almost no depth perception. I did the best i could, so I’m satisfied with the results.

Here’s the shells dry fitted including the rear wing and one exhaust shroud for the front wheel.

So far, so good.

Joel

4 Likes

Looking great Joel, you really nailed the yellow well.

Good to know there are no issues with the Scale Finishes lacquer. I was hemming and hawing on purchasing from him for a future Folger’s Mustang build.

Dave,
As I said, I loved the paint. Can’t stress that enough. And the coverage ability puts Gravity and Zero to shame. I’ve also used MCW which is excellent. I have Splash on my list as well, so I no longer need to order over seas for paints, which is a huge deal maker for me.

The key is lite, even coats. Don’t go back and hover over any one spot. I also had the usual issue of swirling in tight corners, but it sands right out with a #3,000 sponge.

I’m also planning two Mustangs this year. I have the Miller Time 1981 Roush IMSA/GTO car, and his Folger’s car with the bath tub rear wing.

Joel

Looks great Joel. Masking looks very sharp, no bleeding to be seen.

No argument here, beautiful paint job Joel. This will look amazing with the Pennzoil race sponsors logos!

Cheers, D