Jesper & D,
Thanks guys for your thumbs up. They’re always greatly appreciated.
Looking at the pics in the original high resolution and full screen on my 32 inch monitor, I did find 3 little bleed throughs that I couldn’t even see on the model. So I used a fine Micro brush damp with Iso Alcohol and lightly rubbed the goof off. Came out perfect to these old eyes.
If you look closely at the side front pic of the front wheel/brake scoop, where the Carbon Fiber and support arch meet, in the crease there is a slight amount of over spray from the tape pulling up. It’s gone now. Also by the right side A pillar I masked it incorrectly. Same procedure fixed my screw up.
Today I’m going to start the decaling process after I’m rested with snow blowing and shoveling 16 inches of snow off my driveway and small walk. The driveway holds 6 full size American cars from yester year, and I need to clear every inch of it to get the cars out of the garage as the driveway is an L shape.
Took 1 1/2 hours with my new Toro snow blower, the biggest one in their home owners line up. Even did the mailbox for the mailman. Took a shower, and made coffee. The plow guys came through once again in a two truck Conga line and dumped more snow in front of my driveway. I’ll worry about that later this afternoon.
Joseph,
thanks for checking out my progress to date. And yes I’m taking my time with the build. Right now I’m decaling. Just finished up 4 hours on day 2, and have another 3-4 days to go.
Not all that much time the last week or so for modeling even though I’m retired. But I still was able to work in several sessions and get the decaling done.
I started off with my usual very lite wet rub with a piece of Tamiya 3,000 sponge, then a few water washes to remove any residue left on the body. The paint is now smooth enough for decaling without any clear gloss coat even though the paint is a Matt finish at his point.
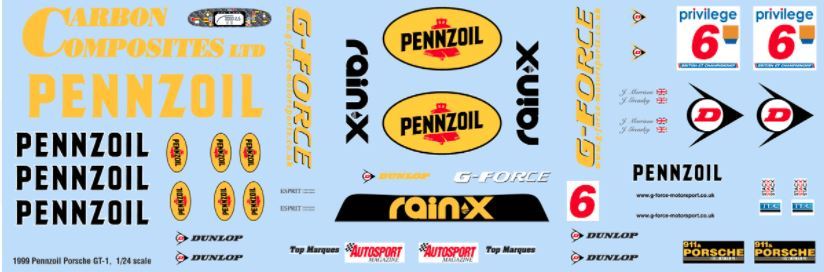
As usual the entire sheet is one big decal, so every decal needs to be cut and trimmed, which takes a ton of time, but the end result makes it more then worth it.
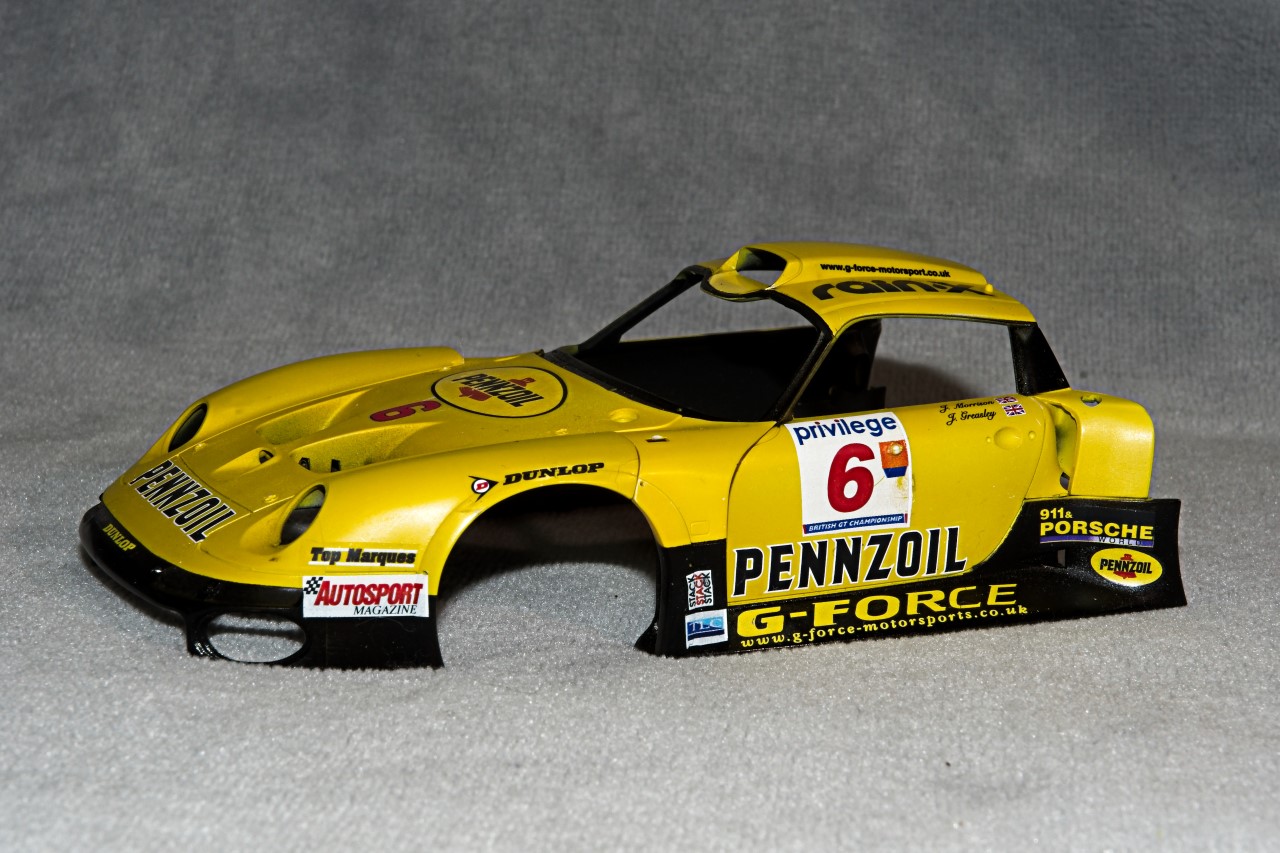
These close up pictures do show several paint issues I’ll try to deal with, but honestly guys, I do really struggle with any close up work due to my poor eyesight, so at times I have to settle for what once would have been a no brainer gotta fix.
I did a little research a few years ago about the matt finish on racecars. It has to do with what is called the boundary layer that occurs. Sort of like the dimples on a golf ball help it to lower the wind resistance the matt finish microscopic crags helps to create a thicker boundary layer that allows the moving air to flow smoother.
David,
Now that’s very interesting. I’ve often wondered by Ferrari and Red Bull have chosen that path. I just wonder if the actual decrease in wind resistance is worth the effort. But on the other hand, the clear Epoxy or Urethane gloss coats is a weight saver if they’re looking for just a few pounds.
In any event, the Porsche will indeed have a proper gloss finish. As my usual decaling procedures, all that’s necessary for decal application is a smooth surface not necessarily a glossy one. And the Paint is more porous then the gloss finish, so that porosity of the paint will further help the decals to really suck down to the surface.
thanks guys for your really positive group thumbs up. It’s really helping my Mojo and staying focused as my families medical issues has and still does take up a great deal of my time. But it’s worth every minute of it.
Stupid me has found the reason for two not so perfect separation lines on the back of the front fender wells. Maybe if I actually finished taking off the 2mm tape the issue wouldn’t be an issue, and that’s exactly what happened when I removed the tape. These two very small pcs were just plain missed.
So there’s a lessen for all of us older guys with not so perfect eyesight. The Tamiya’s 1,2, & 3mm masking tapes are so thin and narrow that it’s really easy to miss small pcs in a major taping removal job.
It’s always great to see how perfect your decals look on the build. And you Automodeller guys have the advantage that you can keep it all gloss while I have to get the gloss surface for the decals dull again on my warbirds in the end …
Torsten,
Thanks so much my friend for your most kind words. But my decaling procedures don’t even include a gloss base, and the Lacquer color coats are a matt finish. All I do is give the cured painted surface a light rubbing of 3,000 Tamiya sponge so the peaks are knocked down. The surface is now smooth enough for decaling. Top clear coat of your choice and finish.
I’ve seen every single build come down your assembly lines (Props & Jets), and I’ve never seen anything but a perfect decaling application and finish.
D,
Thanks for your thumbs up, it’s greatly appreciated. Just saw that your Chevy build won 2nd place in Gabriel’s international online contest. Congrats for scoring a well deserved 2nd place.
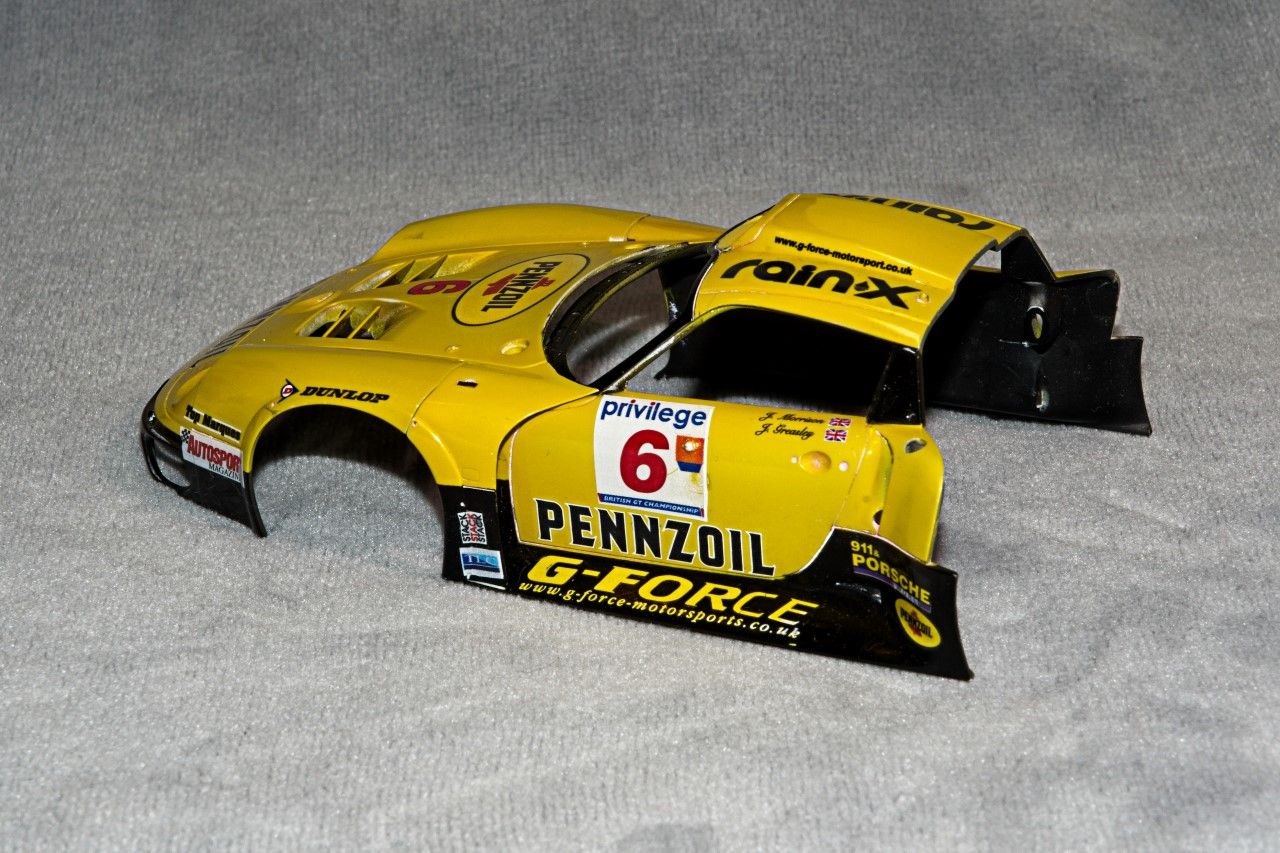
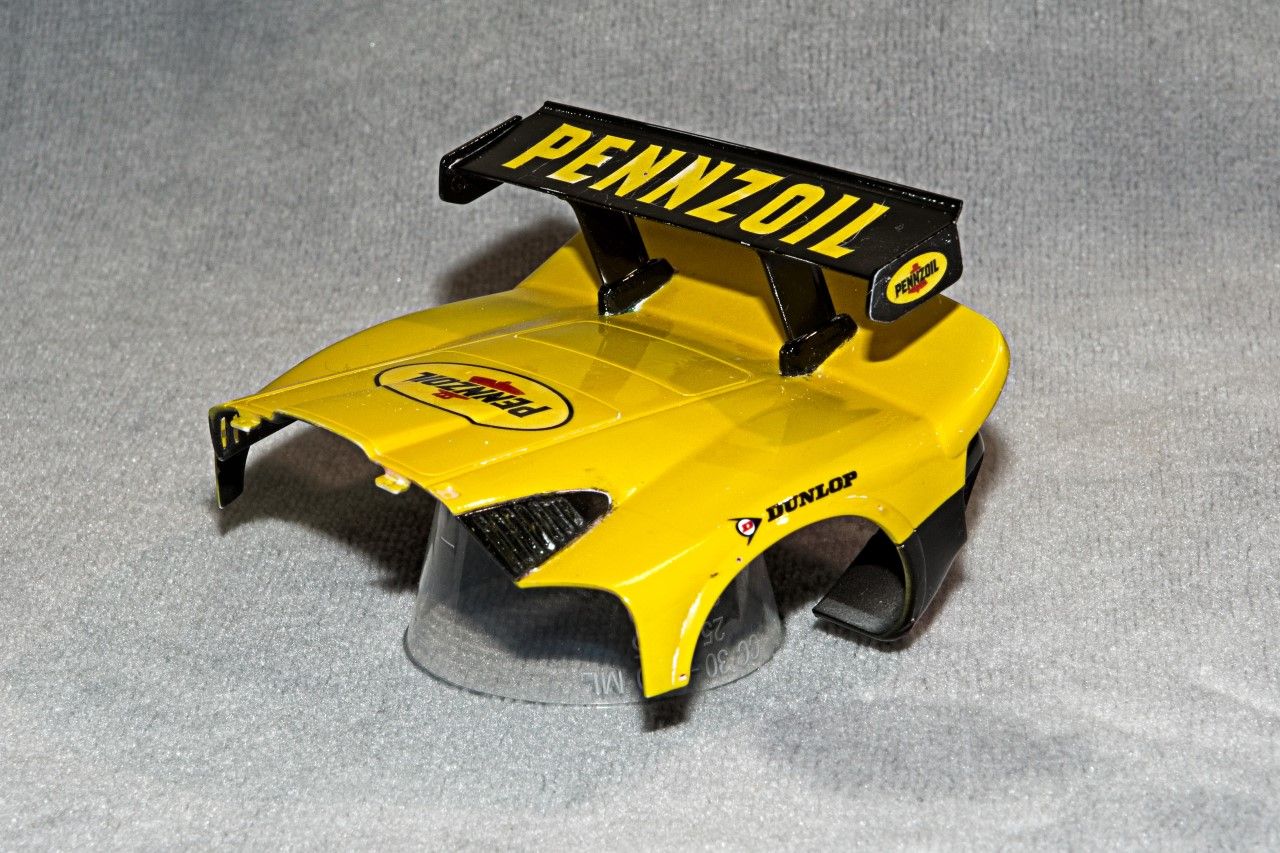
Slowly but surely making progress as I’m inching along with the build. Before I turn my attention to the engine/trans/rear suspension compartment, I wanted to get the body shells ready, and then rubbed out and waxed. So I installed the front wheel wells brake and tire exhaust air shrouds, and the front hood air deflectors. I left off the door handles and mirrors as I’m 101% sure I’d knock them off as many times as I attached them, so they’ll wait for installation till the very end of the build. I still have all the lights, light receptacles, lenses, and all the glass to go, but those will be added to the build further down the road. Honestly, I haven’t even air brushed on the rubber insulation as yet on each piece of plexiglass.
I’m still using the 3 part Gravity polishing set, as well as their wax, so that’s what I concentrated on if for no other reason then to protect the paint and decals from my constant rough handling.
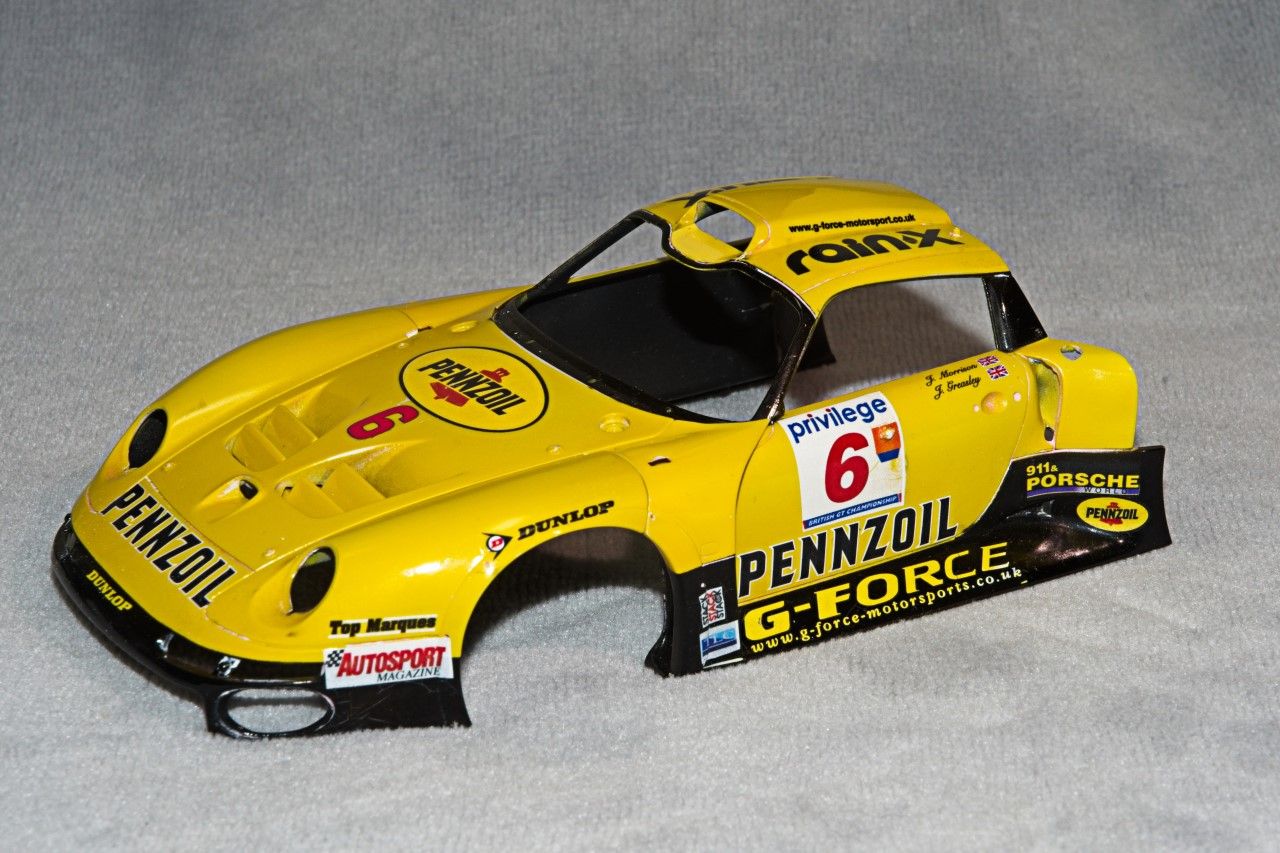
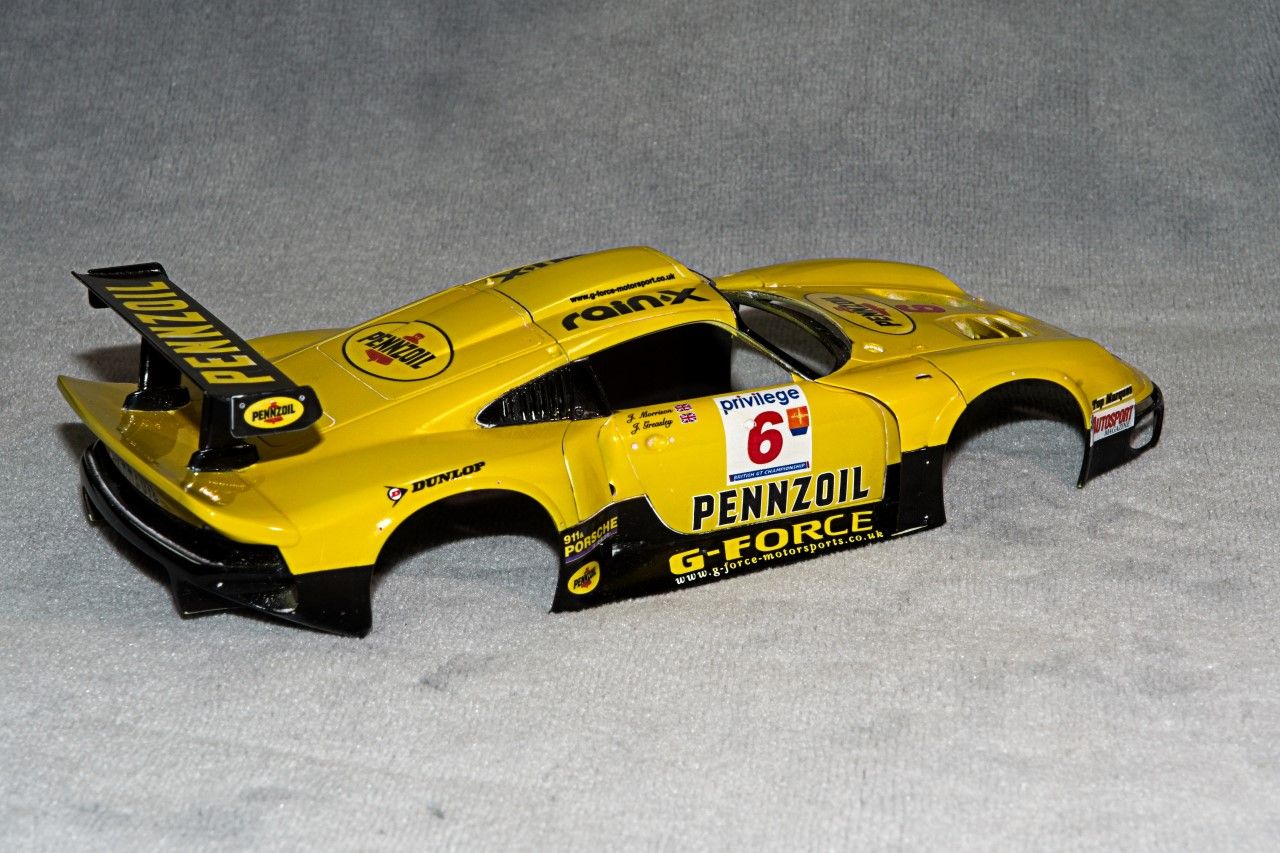
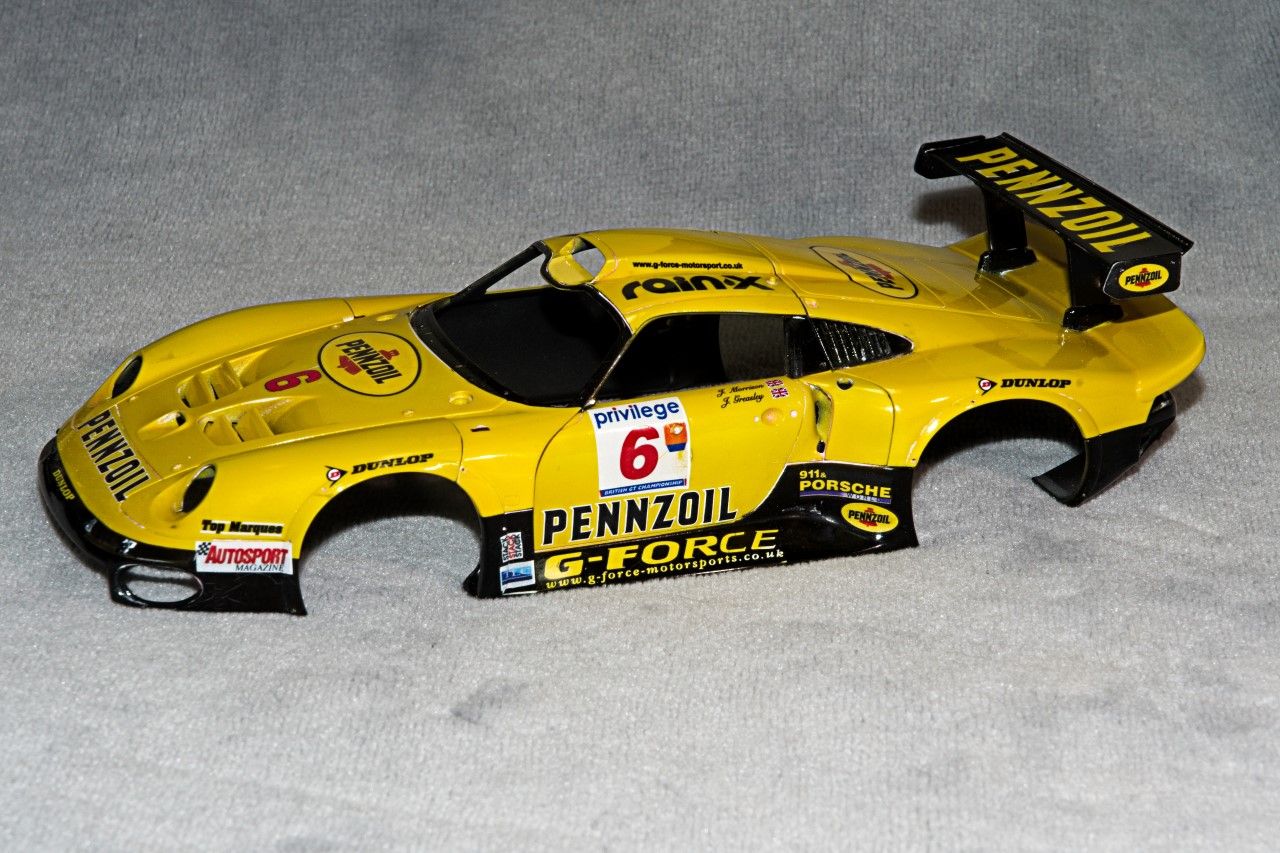
After the final step of waxing was done I left the shells to dry for a day or so, so that I could actually see the wax build up in all the recessed lines. I approached the removal with a dampened sharpened toothpick, then a stiff flat brush and water. I was pretty sure that I got most of the residue, but after looking at my pictures
it’s evident that I did a horrid job of it, and will have to go to my Plan B: air brushing plain water along all the recess panel lines. Hopefully that will really help.
Here’s a few pictures of where the Porsche is in my build.
you certainly have the touch with getting bodywork to look right - wow - very nice!
For what it’s worth, I built this kit a while ago, and remember, getting the engine/firewall to work right was a bit tricky, very un-Tamiya! haha - maybe I screwed it up along the way! who knows? might just be worth a dry fit or two more than normal along the way to get it all to go together. Seems I had trouble on the top side, where the air induction, roll bar. firewall meet - again, I might have just been asleep at the wheel?
Nick,
Thanks for the thumbs up. Coming from you it means a lot.
I’m going to test fit the engine/drivers compartment wall today. If you had some issues, it’s a bet I’m going to run into some issues myself.
So far the fit of the kit has been typical Tamiya. I’ll slowly go back to the shells and work on the lights, etc. while I start with the engine/trans/rear suspension. I’m actually going to try to do some detailing and even enhancing the braid and solid lines so they look like they actually have the correct fittings. The real model ones are just to expensive for an old retired guy to even consider for a home display build.