Tamiya 1/24 scale Porsche 911 GT1

Hi Joel,

Looking forward to seeing what you do with the engine detailing. I agree with you about the prices of some aftermarket parts - not cheap. That isn’t saying they’re necessarily too expensive, or somehow not “worth it”, instead, just not what I’m looking for, especially when considering like you and many others here - we build a lot of models!

I’ve found buying one go-to set of resin connectors (rather than several sets in all sizes etc) that I like and know how to use is helpful - (sometimes not exactly the right scale), to get the results I want.

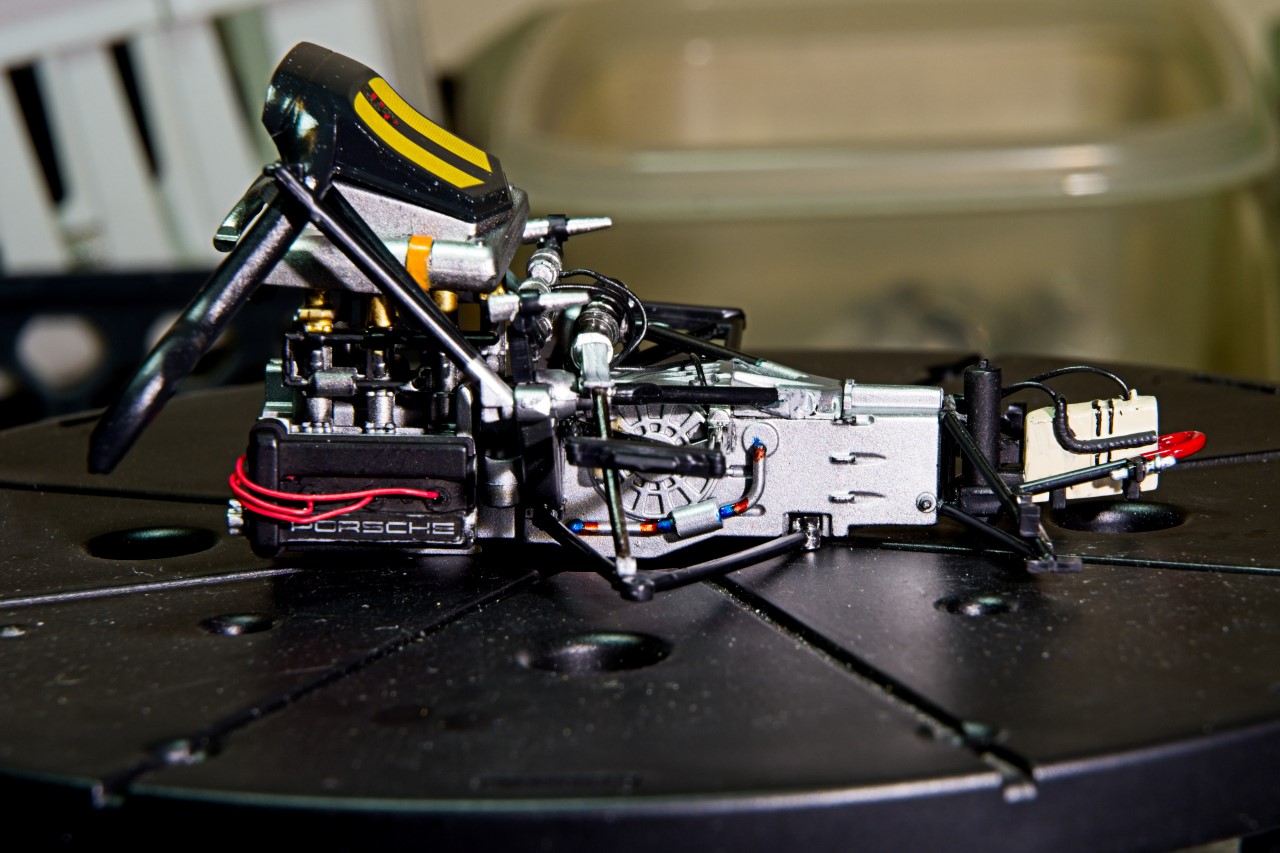
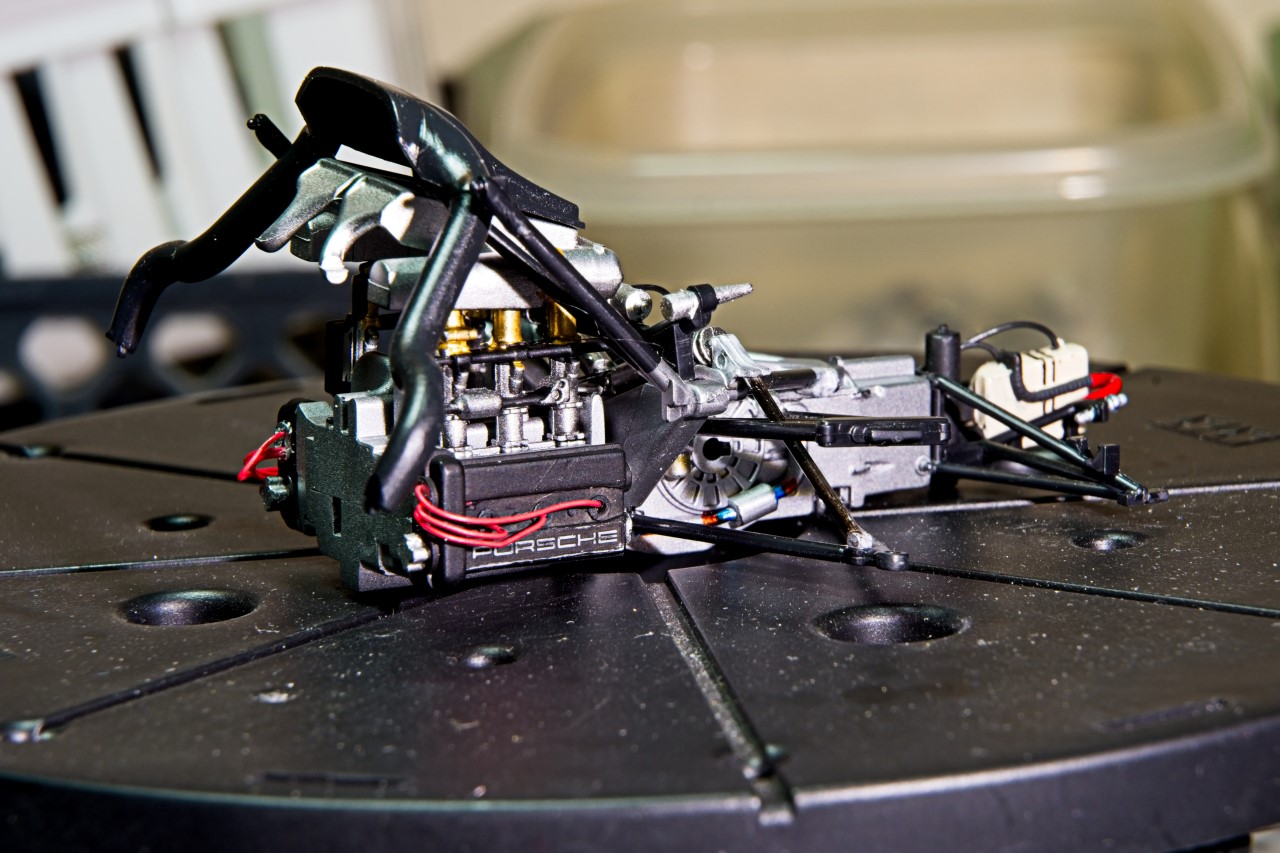
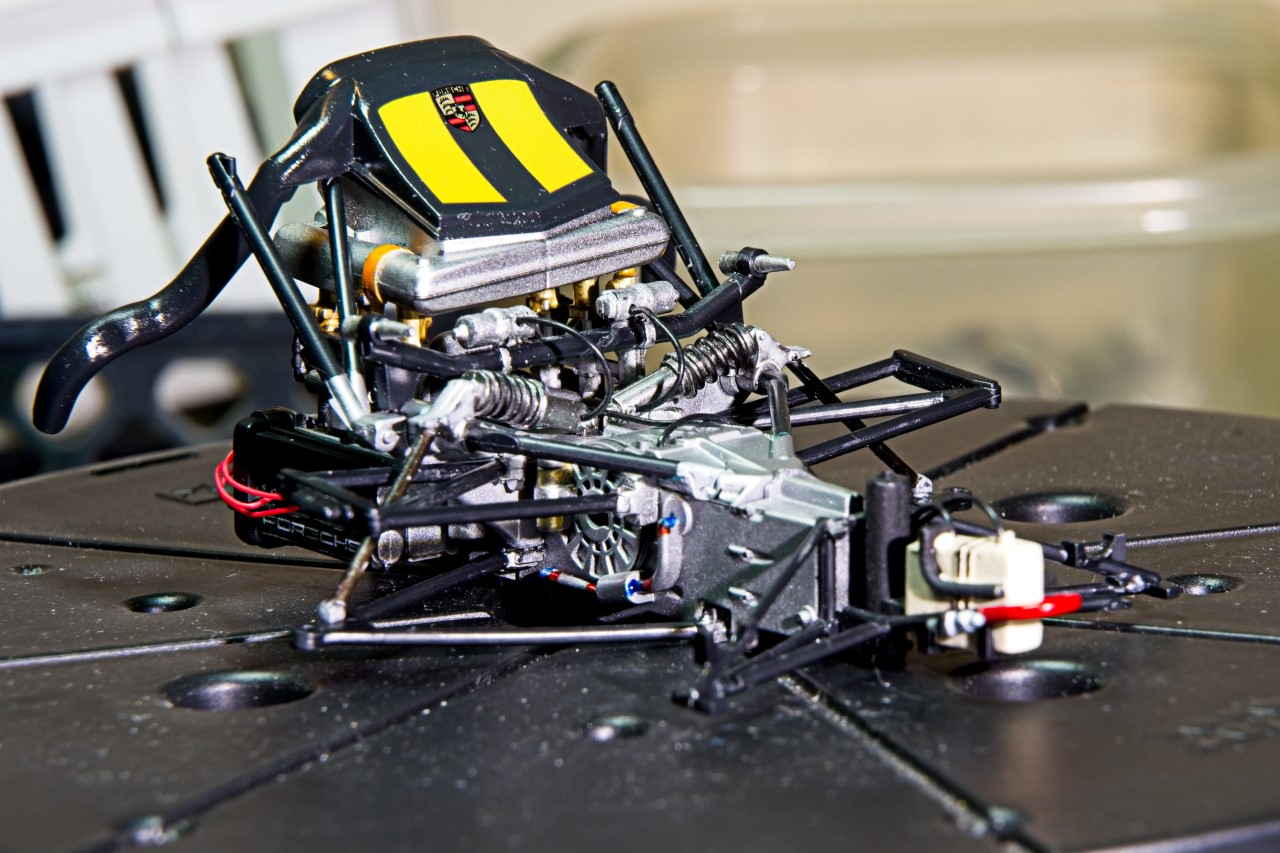
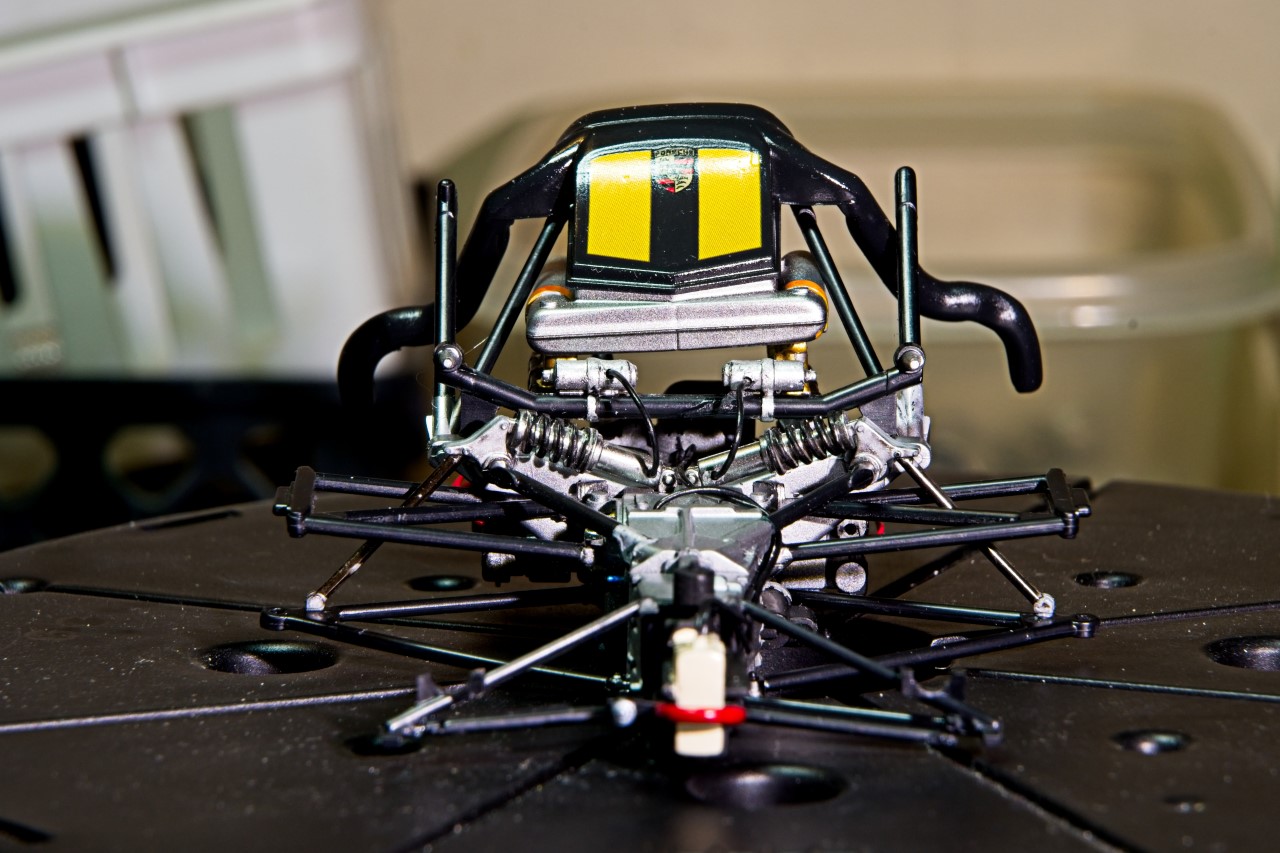
If you run by your local art store, you can find beading wire (I think that’s what it is) that looks a lot like braided lines and is not expensive. It’s very shiny, so I add a wash of anthracite grey to tone it down. Various sizes of solder wire work too. There’s a fly fishing shop near me that sells all sorts of small diameter solder, tubing, and even little beads that look like connectors, that aren’t too pricey.

As for the anodized fittings, I’ve never bought a set. They look great, but not for me. Instead, I paint the part with a a bright aluminum or silver base, then paint over with my own “anodized” blue or red, made by blending blue or red with aluminum paint, which with some experimenting can look pretty good. I’ve also heard of people painting the part silver, then coloring with a red or blue sharpee - which I’m yet to try.

I’ve also concluded, that for the scale we’re working at (1/24 and 1/20) that if you can’t clearly see the part, I won’t go to great lengths to make it pop more. It can be a lot of work, that is nearly impossible to see once the model is done (of course, I still do it more often than not - just not the most visually rewarding task when you’re done).

I keep broken iPhone/elec device cables and strip them as needed - both for the thin wires inside, and for the outer tubing, which can work for brake ducts!

Thin lead sheet (the material used on wine bottle necks) and 1/16" dia aluminum tubing have many uses when making or “faking” :grin: tubing and lines!

And finally, as it’s a hobby, we can each do what we want! Unlike work, where predicted results are required, here, we can experiment and see how it goes. If not great, well, leave it alone, or try again!

Cheers and stay well -
Nick

1 Like

Nick,
That’s a great list of detailing suggestions for sure. Some of which I already do use, but a lot that I’ve never thought of, or acted on. The Arts & Crafts big box store near me: Michaels is on my list with a focus on the beading dept. I’ve seen a few Vids on You Tube about model engine detailing, and each one does recommend those various size beads and wires. Honestly, I’ve kept on putting of that trip, and now I’m kind of nervous about visiting any stores that I really don’t have to especially since the South African Covid virus was officially diagnosed hear on LI (Just my luck as every injection site is booked for months on end and not even taking appointments). I do like the idea of a super sharp/smallest tip size marker over silver or Aluminum. like I said, plenty of great ideas.

Right now I’m making those fittings the old fashion way of Aluminum base paint, then using a #05 brush hand painting on Tamiya transparent Blue and Red.

Hopefully, the beading wires will work just as well as all those very expensive braided line sizes I’ve bought over the last few years.

Will be posting a few pictures later today or tomorrow of the cleaning up of the black border lines on the front clip for the windshield using Tamiya Black panel line wash. The problem wasn’t so much the masking as my not so perfect AB’ing where I didn’t get down into those recessed lines on a consistent basis. Not perfect, but a lot better.

Thanks, and stay well & safe my friend,

Joel

Ken,
I try to avoid jewelry so I have more of my funds for modeling. This always doesn’t work out as planned, as my lovely wife wants to finally replace her engagement ring that just vanished into thin air more then 15 years ago. This isn’t going to be an exactly modest expense for sure. Now throw in the new car that she’s getting this spring, and I just might have to go back to work to pay for the double wammy. :pray: :see_no_evil: :hear_no_evil: :speak_no_evil:

BTW, what modeling things can one find in a Jewelry store other then metal polish?

Joel

Ken,
Will check it out for sure. I’m still procrastinating going to Michael’s Arts & Crafts to checkout the beading dept. I hear that’s also loaded with detail modeling things.

joel

Since my last update, the two body shells are as far along as I intend to take them till later in the build. So now my attention is focused on the engine/trans/rear suspension sub assembly.

Tamiya’s design, along with plenty of included details really builds up to a very complete looking assembly. So I concentrated on priming sub assemblies with either Gray primer or Gloss Black primer for numerous shades of Alcad2 Metalizer that I used to replicate different metals, as well as highly polished to basic cast Aluminum. Even the shock assemblies required 3 shades of Metalizer, followed by Gloss Black for the springs.

I added ignition wires but didn’t bother with a proper distributor cap as you can’t see it once the engine is fitted to the rear drivers compartment bulkhead and the twin turbo charges are attached to the engine.

Rather then listing the various wires and hoses I’ve added so far, with more to come as i continue with the engine/trans/suspension, here’s some pictures that better explain what I’ve done. the air induction housing is only dry fitted, which is why it’s not exactly square to the engine at this point.

joel

5 Likes

Looking good Joel :slightly_smiling_face:

The suspension and air filter combine to make it look like a spider has taken up residence on top of the engine, ready to strike any challengers :grin:

Looks good Joel - now stop screwing around with models and go get another job to buy your bride jewelry and a wheelbarrow to haul it home with -
:sweat_smile:

That’s looking really great Joel, like Russell said it’s ready to pounce. You’re getting close to pulling the major sub assemblies together now, progressing very nicely.

Cheers, D

That’s looking great Joel! I love the colour variations in the engine and the attention to the little details. It takes time but always worth afterwards.

cheers
Michael

Russelle,
Thanks for the thumbs up, it’s always greatly appreciated.

As for the spider effect, I concur as well. but there’s still 4 more stainless steel engine mount rods that I can’t install until I’m ready to mount the engine to the cockpit rear bulkhead. Then there’s the little issue of two complete turbo charger assemblies that need to be painted, built, and wired to some degree. And to think that this was going to be basically a OOB relaxing build. I should have known better.

joel

1 Like

Richard,
Glad that you like my efforts to date,

Funny that you should mention buying my wife more jewelry (which she really doesn’t wear much of any these days), but she wants to replace her engagement ring and wedding bands for the both of us as they were stolen nearly 10 years ago.

As for the wheelbarrow, I was thinking more along the lines of the little Red wagon I have being pulled by my new 6 speed Toro Snow blower. Best investment I made in years.

joel

D,
Always glad and reassuring to hear from you on my progress to date.

joel

Michael,
Thanks for stopping by and checking out my progress to date.

I was also pretty amazed at the number of shades of Alcad2 I ended up using plus a few Mig shades for super small jobs.

The little details as usual always take way more time then gluing together main pcs. So far so good, but with my luck, who knows what can happen nex.

joel

1 Like

I was going to complement on the color, decals and body work, but then I saw THAT and have to reset my jaw before saying anything else.

HG,
Thanks so much for your most kind words. Coming from you it means quite a lot.

joel

1 Like

Spectacular work Joel.
Body work looks amazing, flawless decal work, as usual.
Engine detailing is neat and sharp.

Jesper,
Thanks so much my friend for stopping by, as well as your thumbs up. As always it means a great deal to me.

The engine detailing is only about 70% complete at this point, as it really needs to be installed on the chassis, and that means I need to focus on the rear driver’s compartment bulkhead as it also attached to it, and has to be glued up prior to chassis installation. This certainly isn’t the usual Tamiya perfect and precise fit as dry fitting has proven extremely finicky and shall we say tricky and leave it at that. Nick’s words of caution were all to precise and true.

joel

Ken,
Thanks. It’s much appreciated.

jole

Yes, spectacular work on the suspension, Joel! :+1: :+1: :+1: Ooops, I have only 2 thumbs, where did No. 3 come from?
And it has indeed something of a spider, as Russell stated.

Nice work on the engine and transmission setup Joel.

Oh think I’ve found a scheme for mine just ordered it.