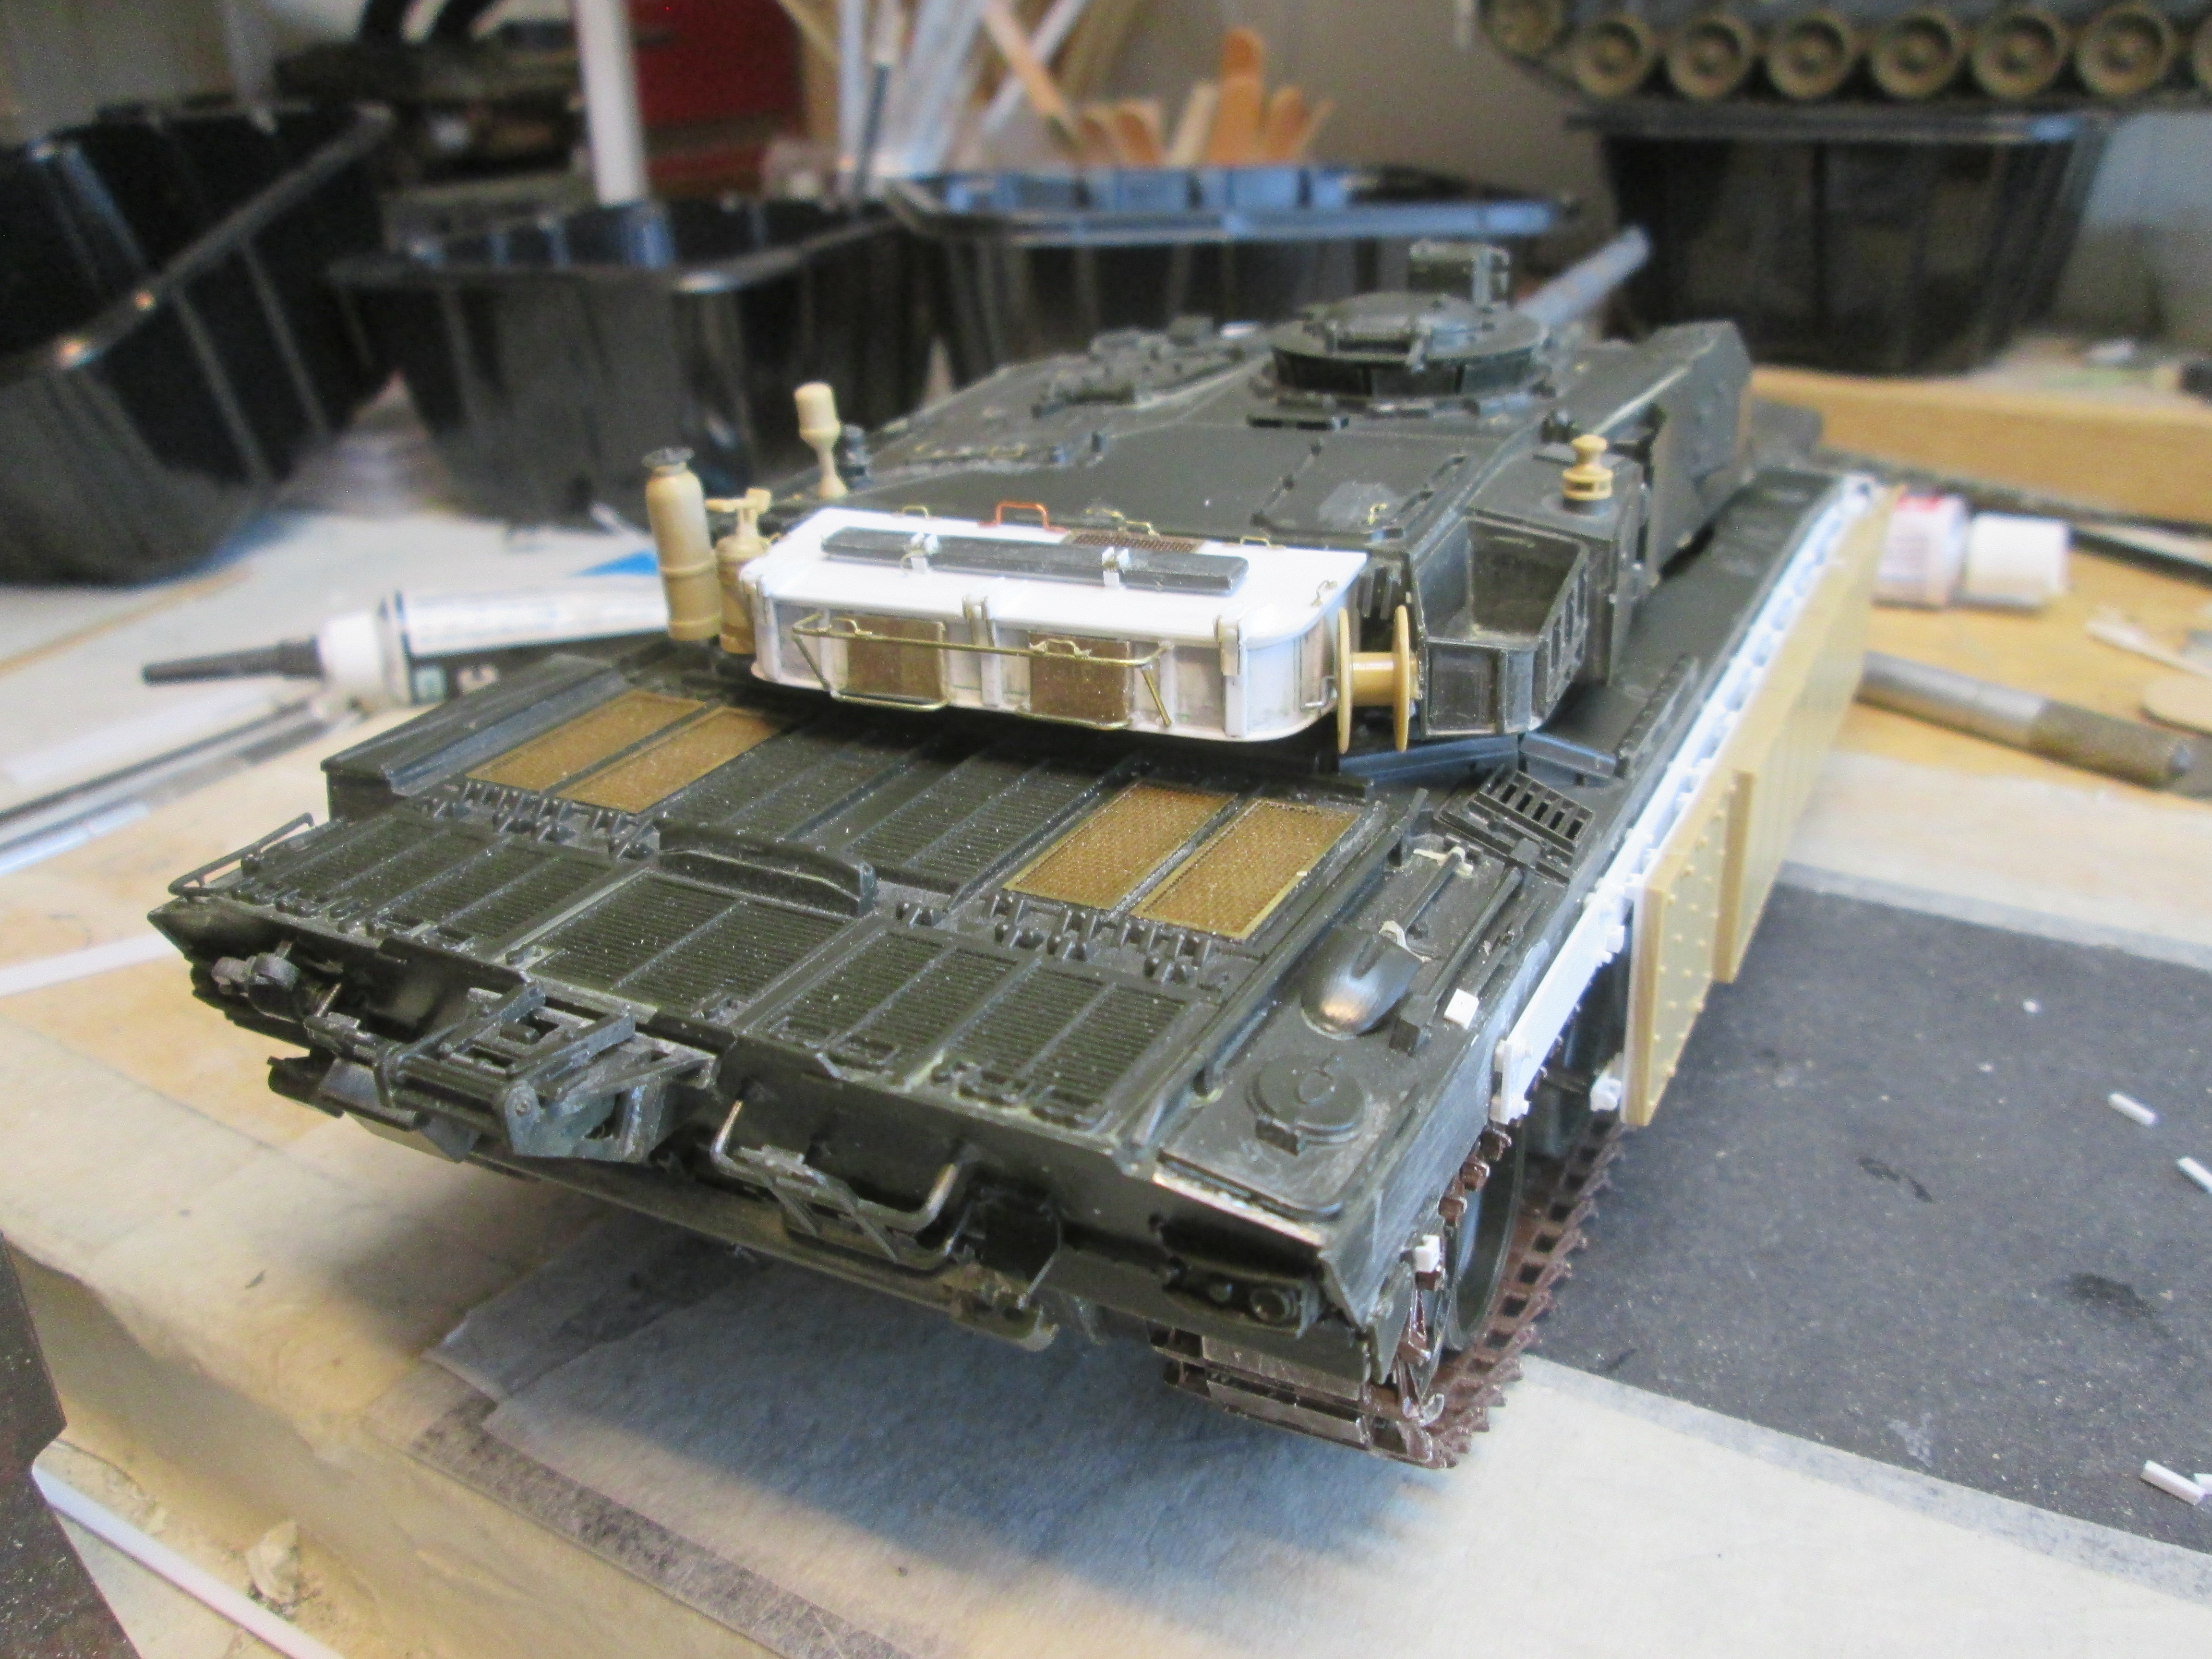
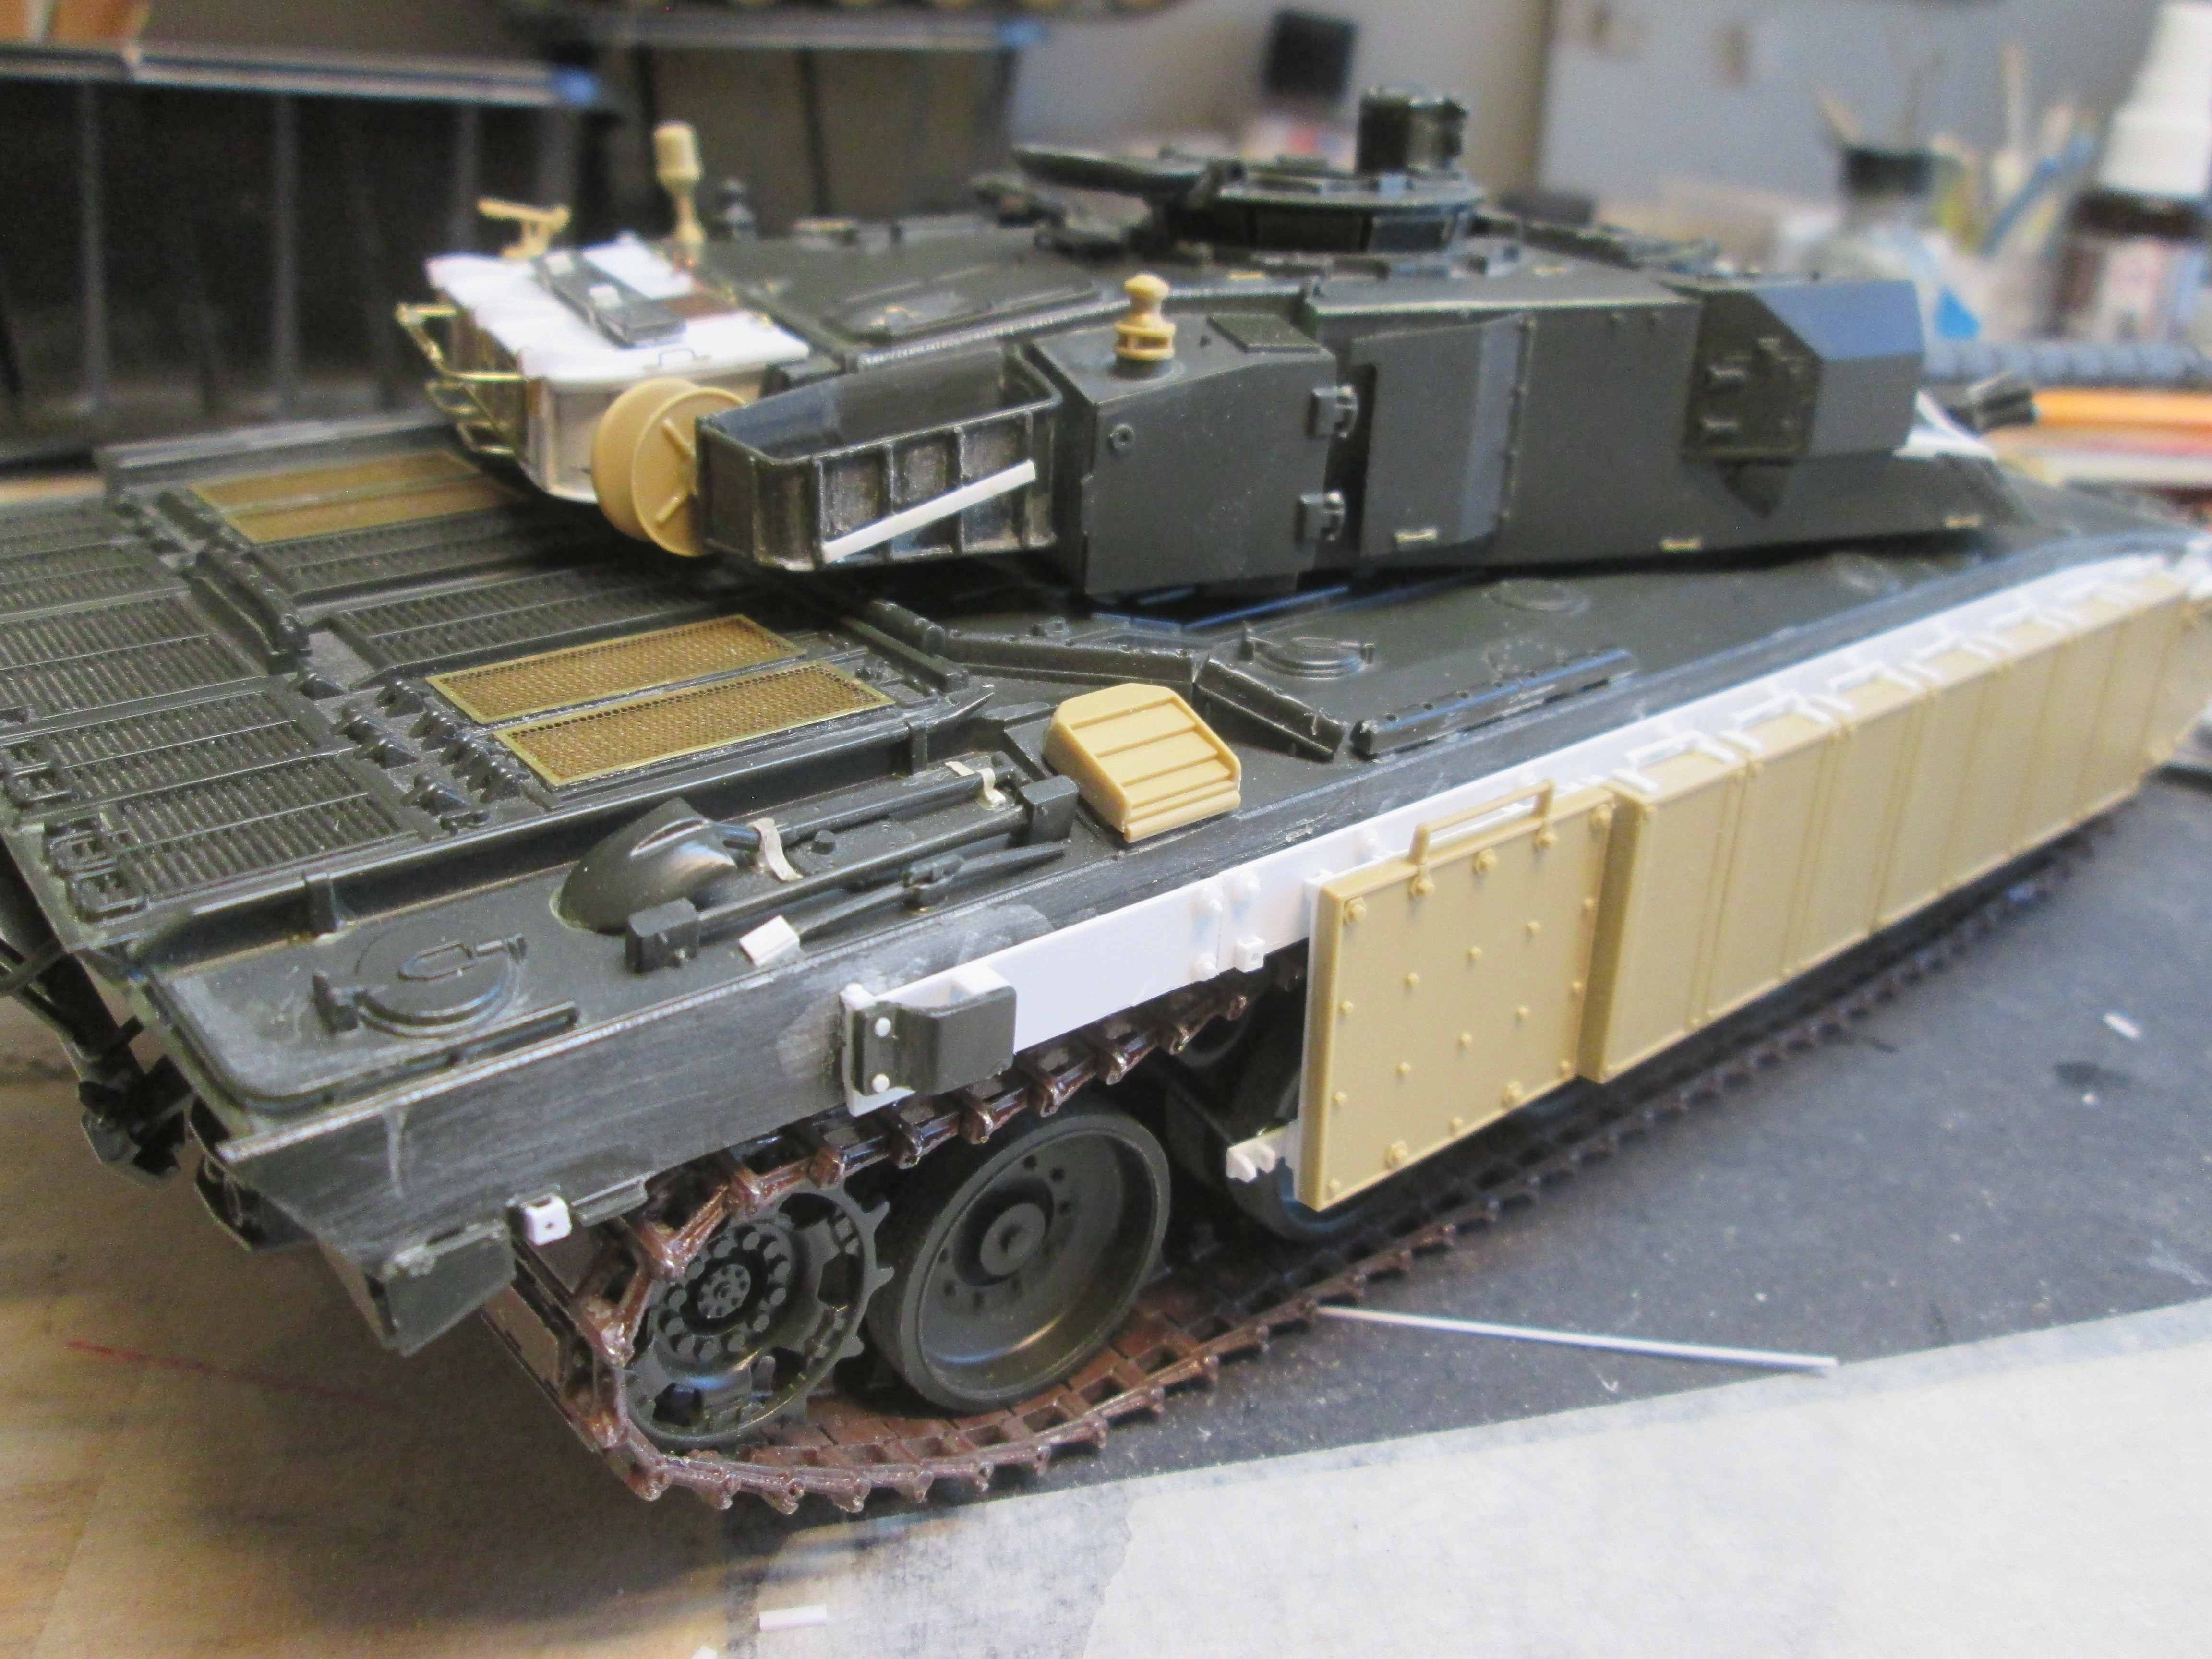
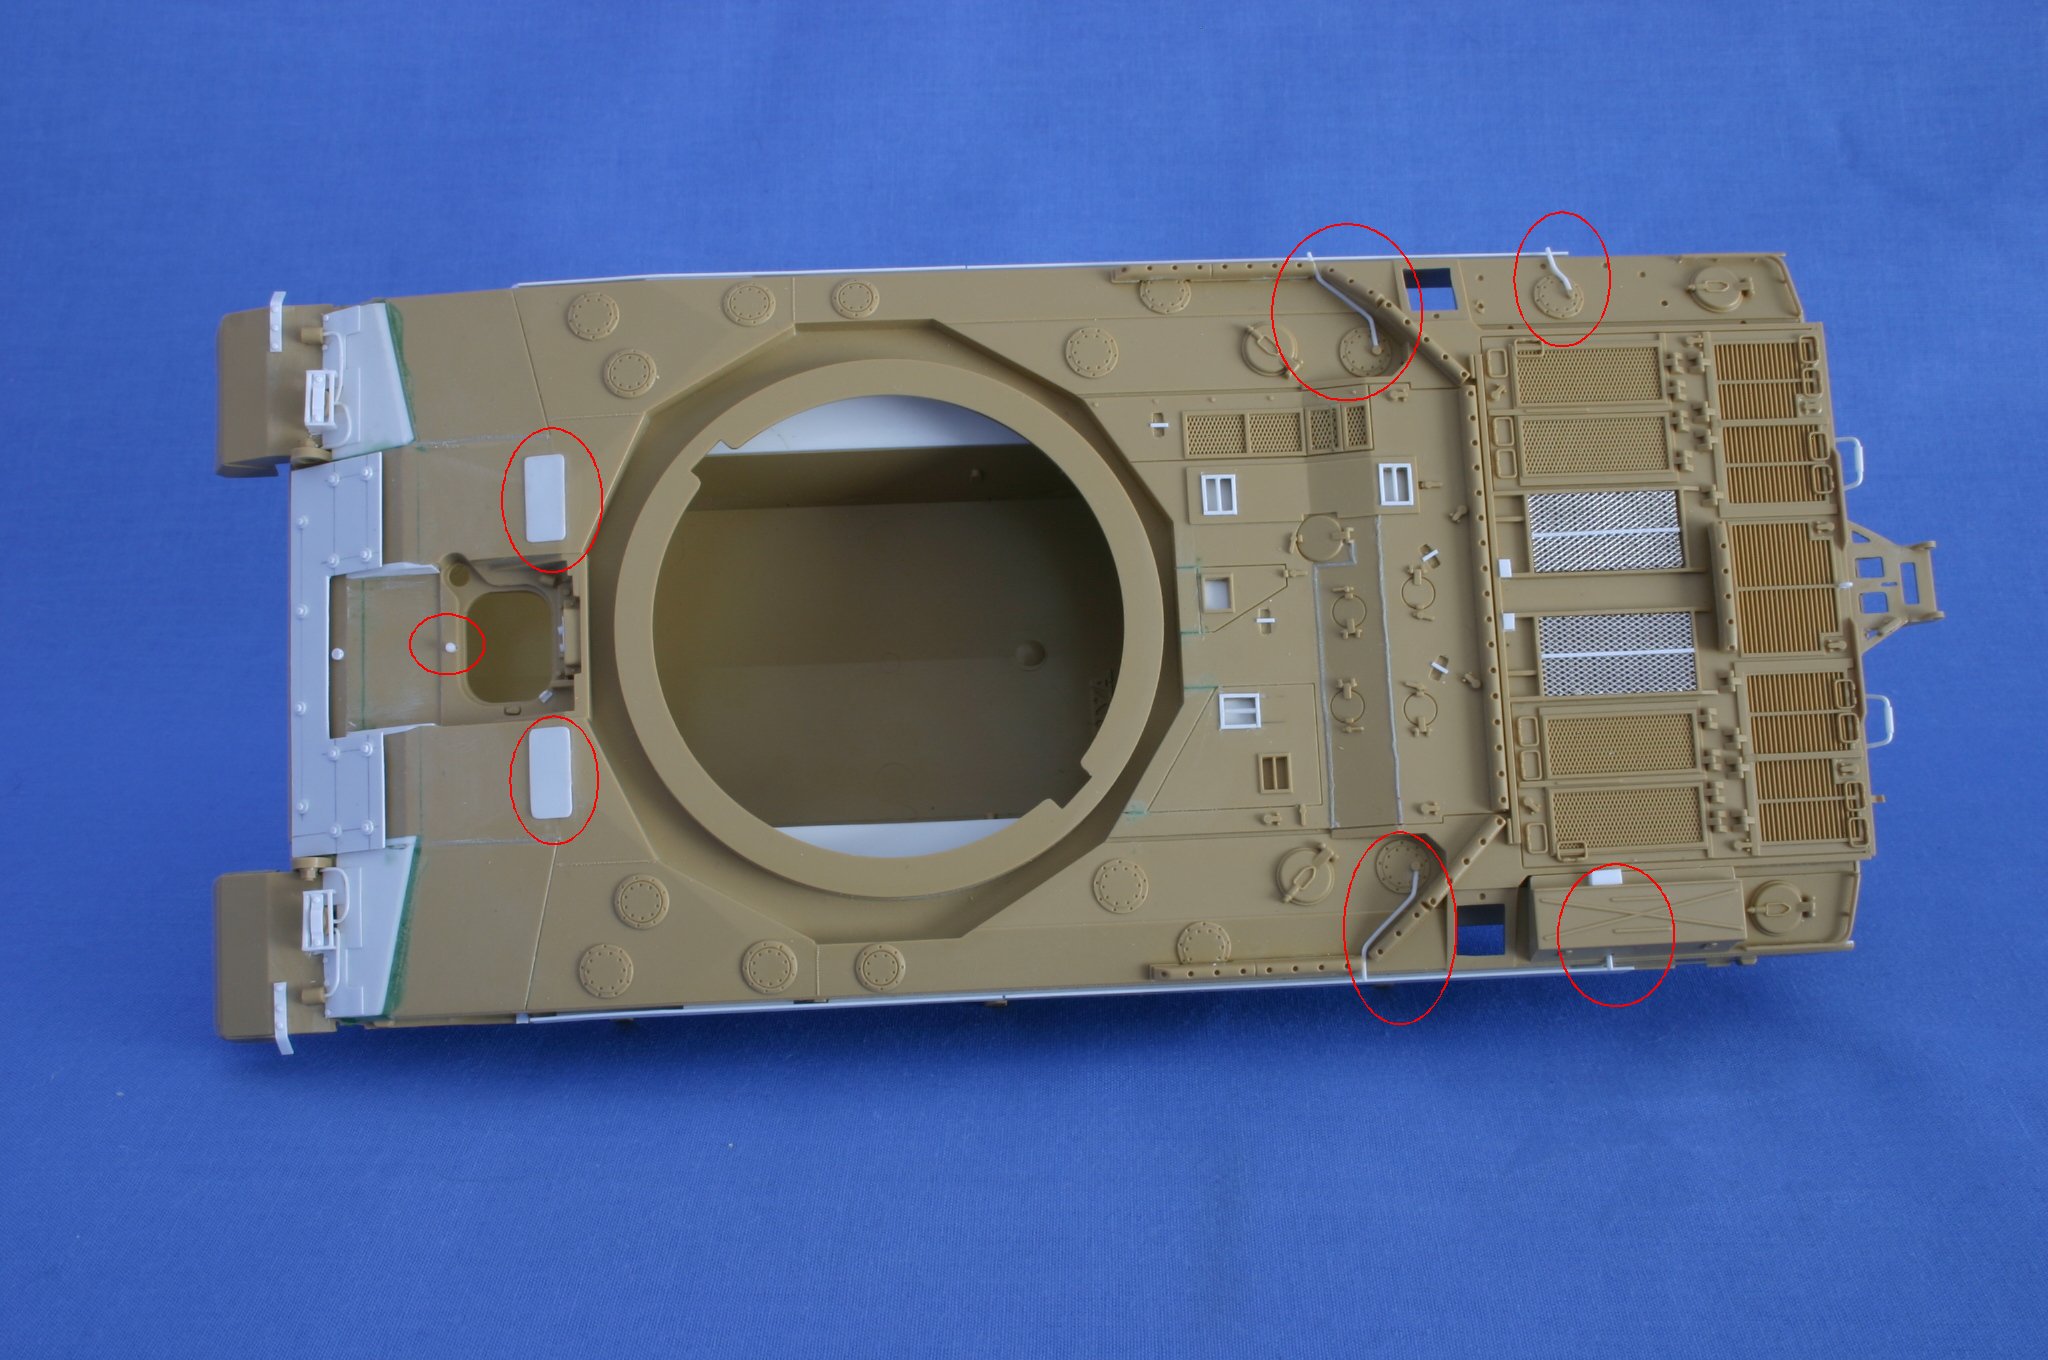
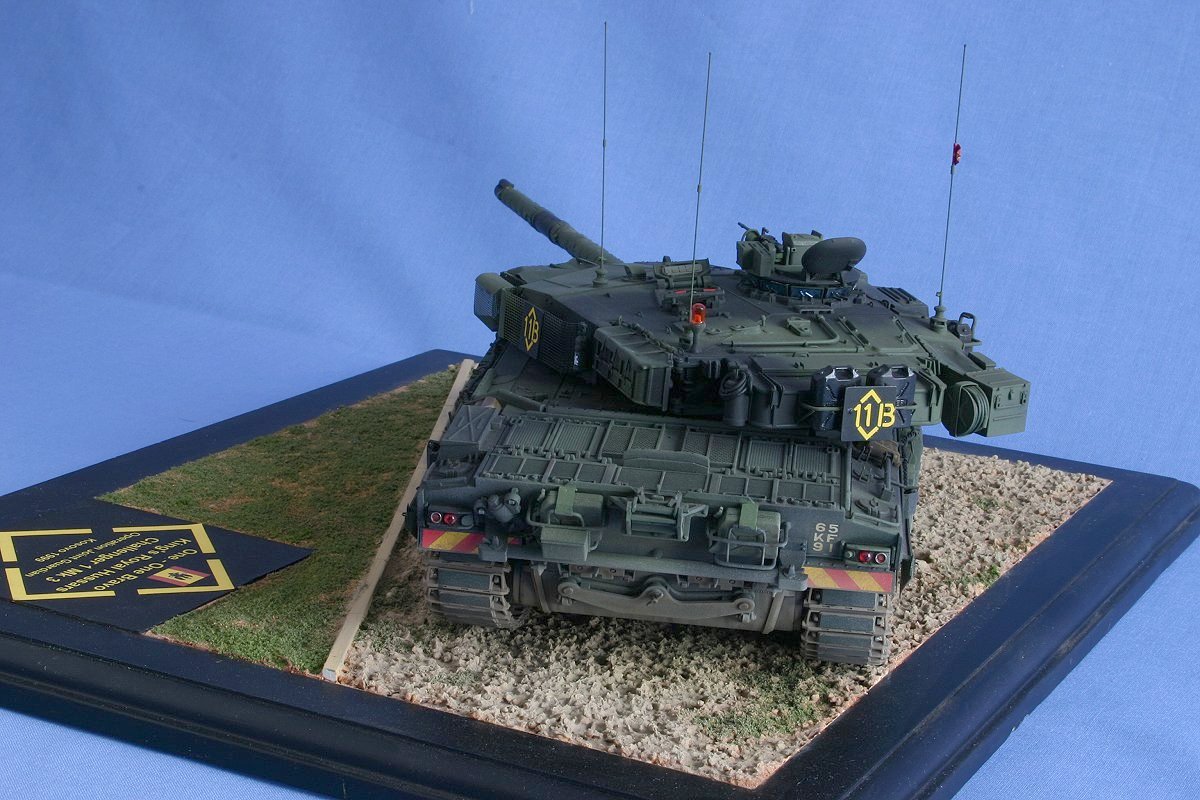
A shelf queen from a year ago, now nearing completion. I started with the old original release, then snagged the Mk3 and decided to add the Romar package. I still have the details on top of the side armor modules to add, and the tow cables and brackets, but it’s getting close. IMG_2891 by Russel Baer, on Flickr
I scratched the turret bin, several hour’s work there, and the side armor is also a fair amount of work, mainly since Tamiya has the parts attached directly to the hull sides.
 IMG_2891 by Russel Baer, on Flickr
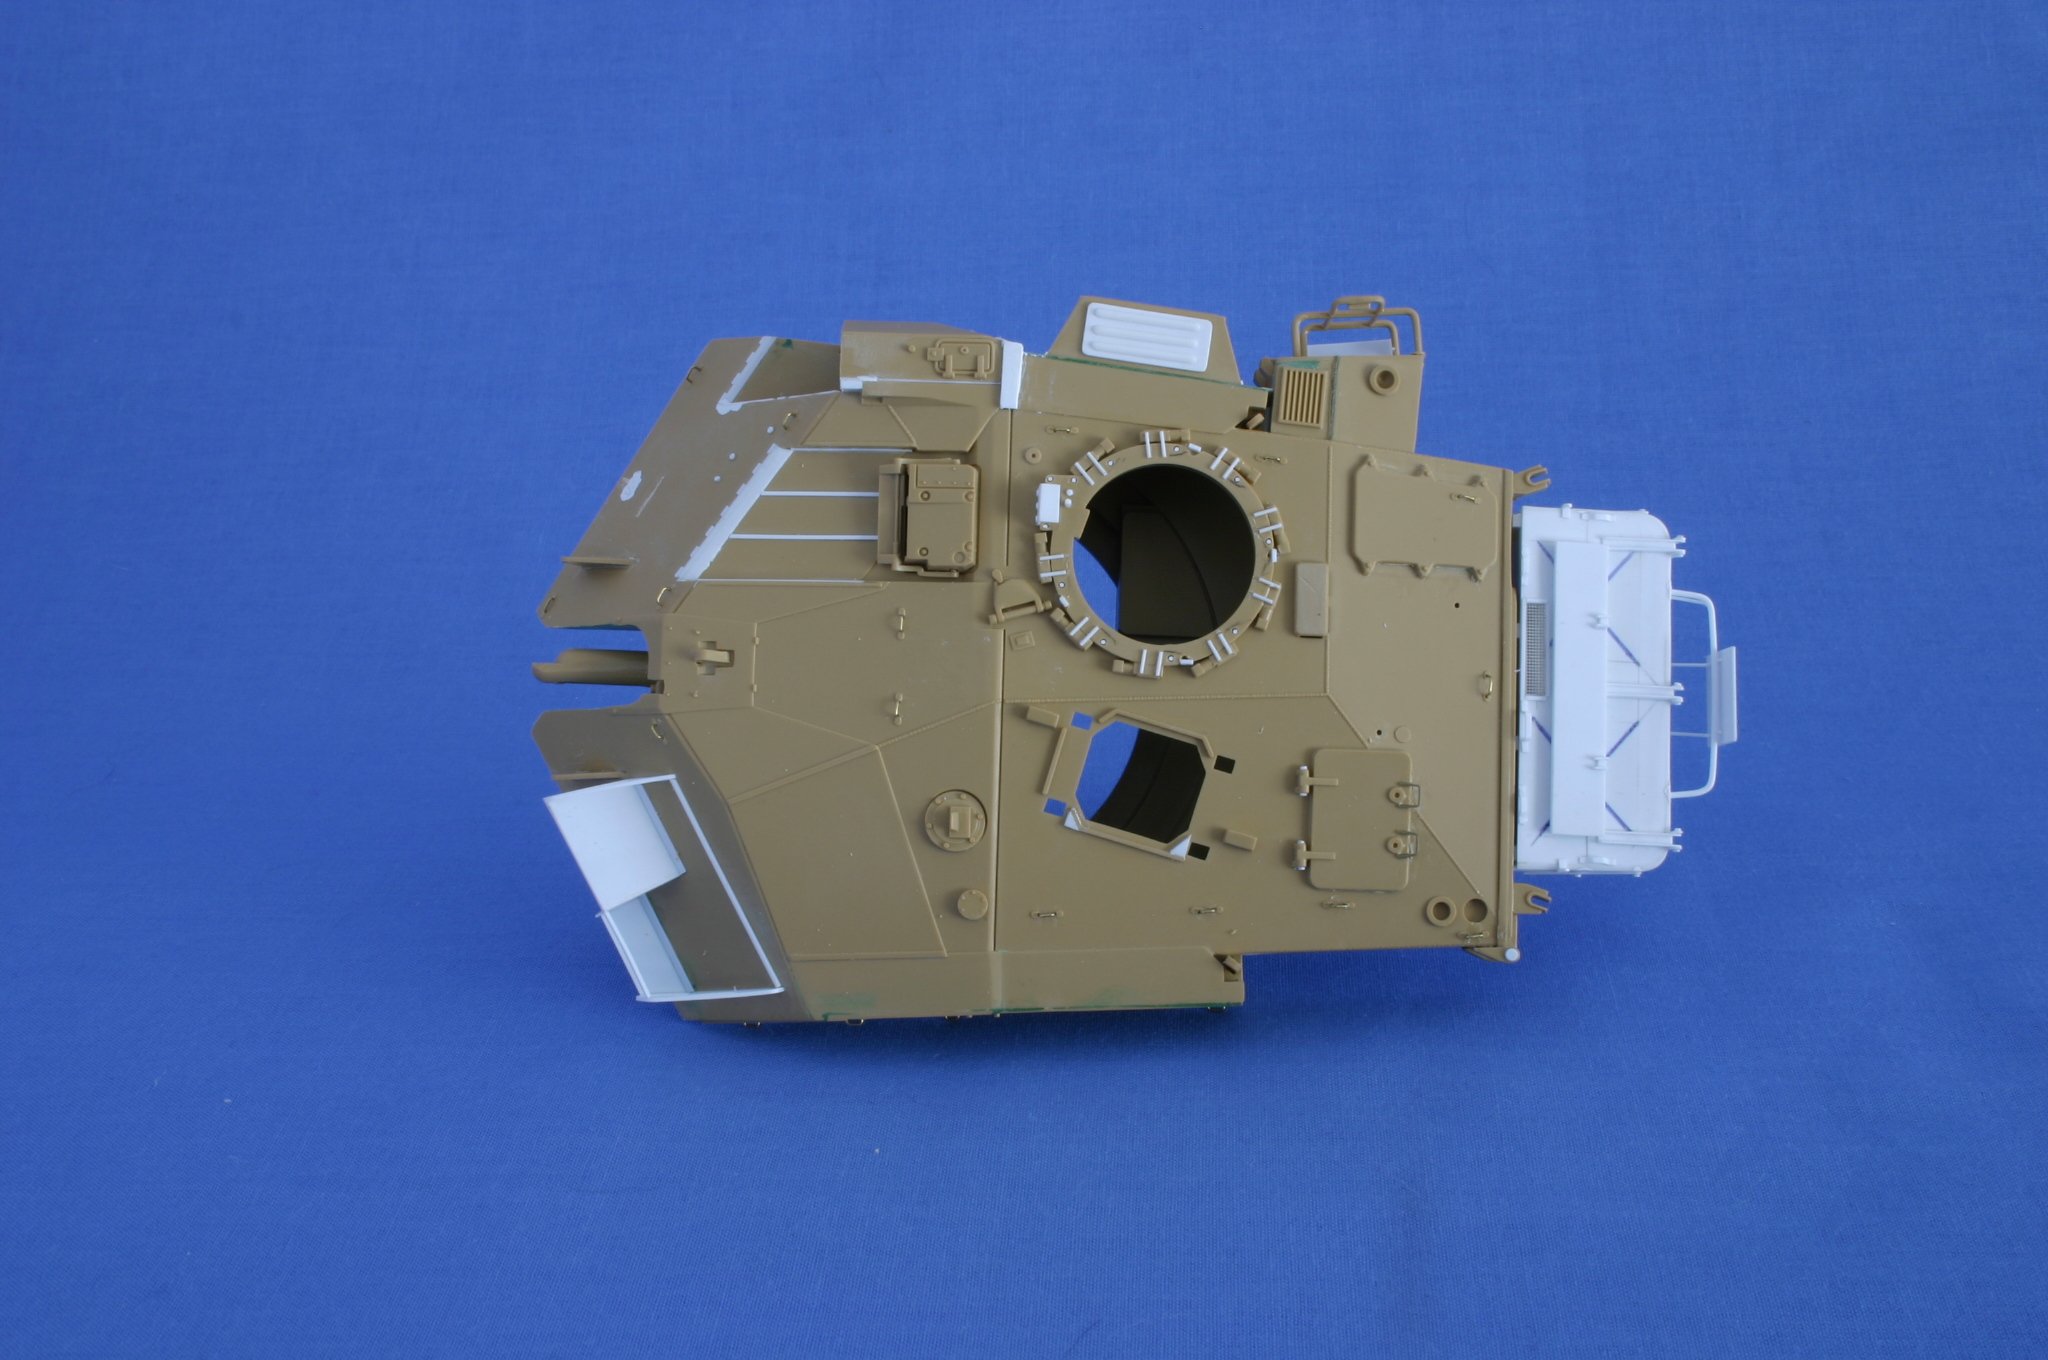
 IMG_2890 by Russel Baer, on Flickr
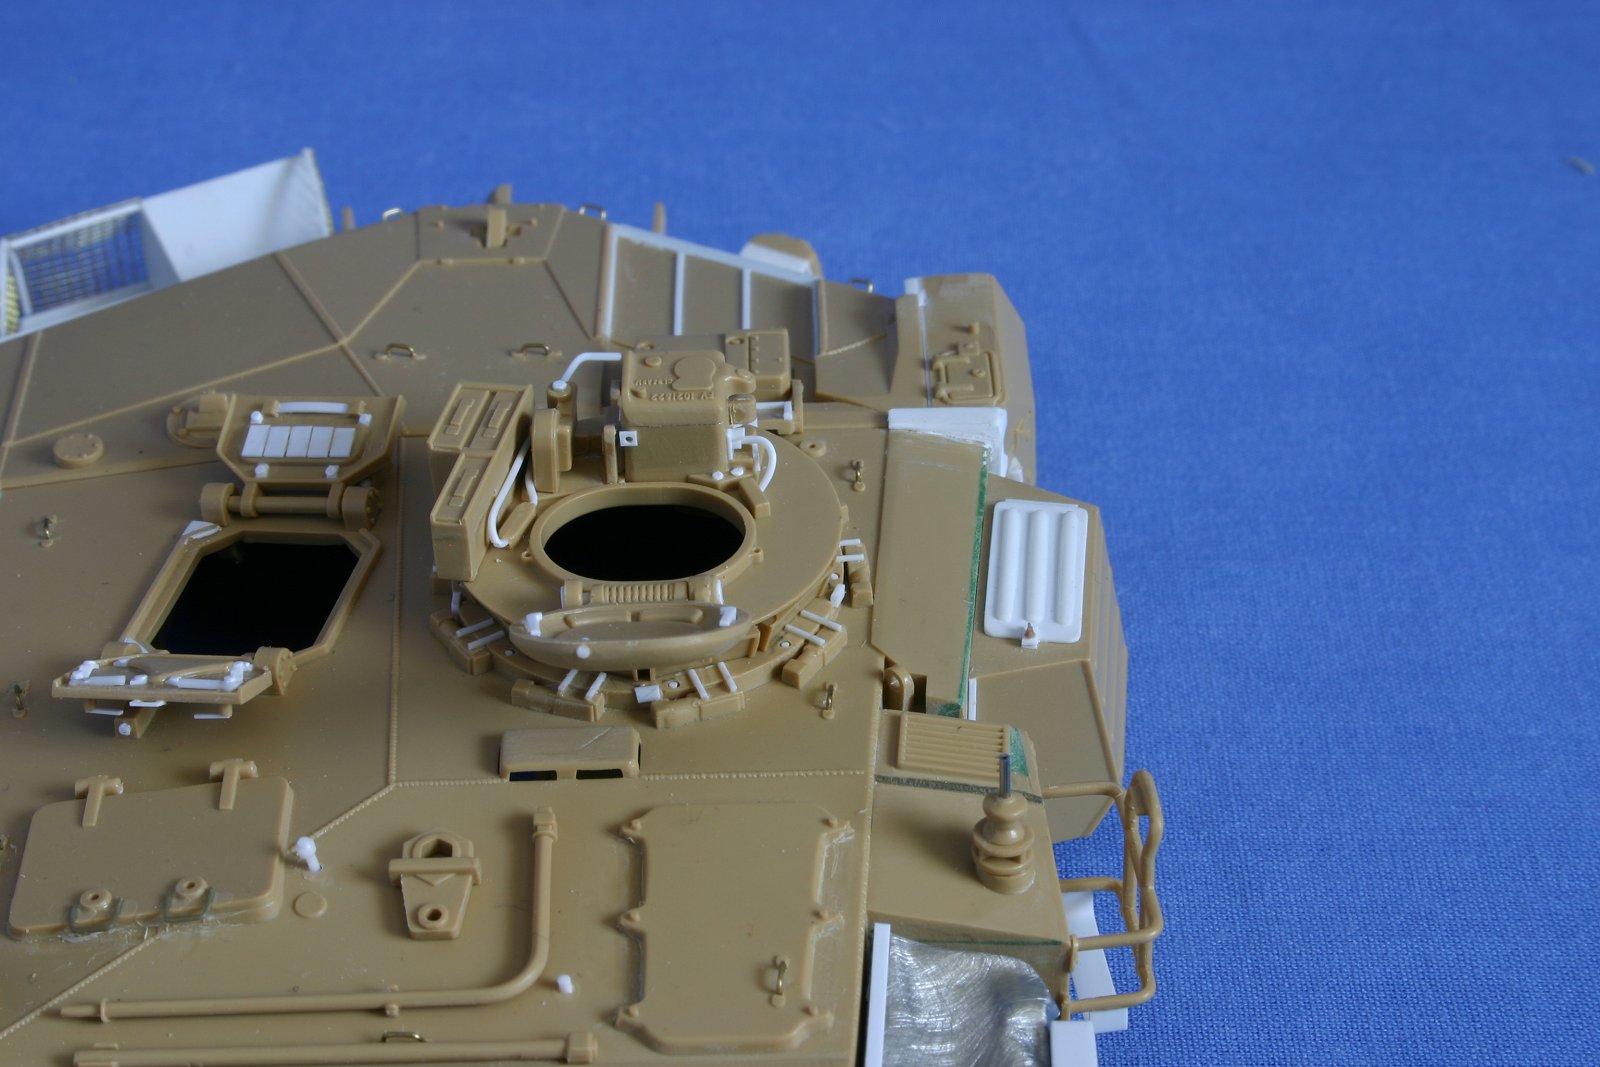
 IMG_2889 by Russel Baer, on Flickr
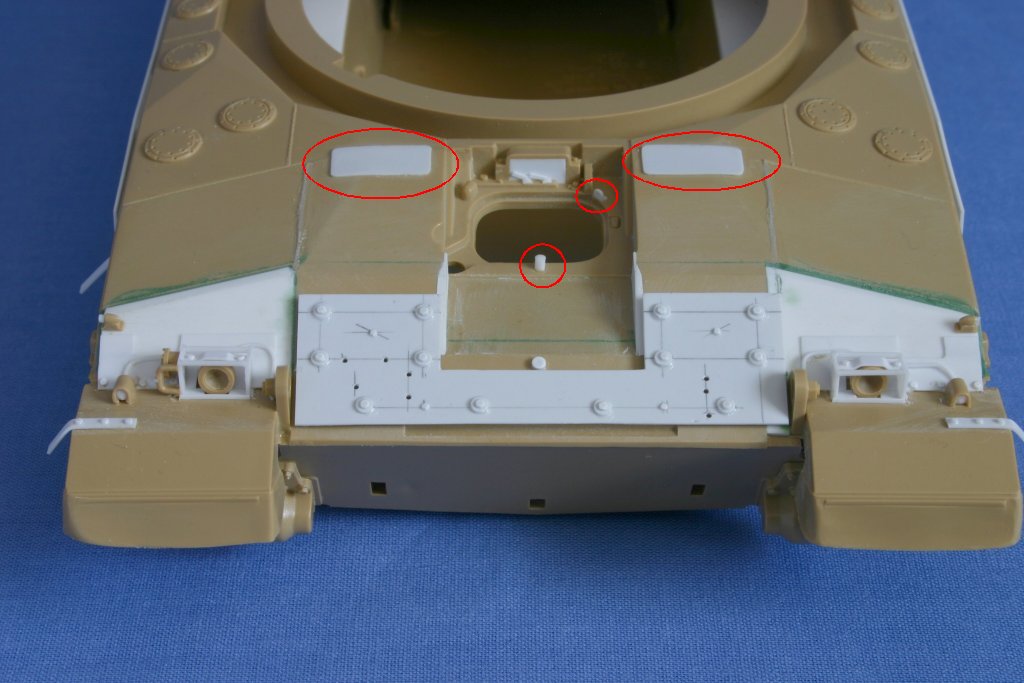
I made the main mount plate from pics, then “simulated” the rest, having next to no pics of the actual thing.
I do have a question: all the pics I have of these tanks show a rough surface on the turret roof. Is this a fine anti-slip?
Looking great Russel. The detail you are adding is well worth it, trust me.
Are you adding the missing details on the turret too?
Not my pic…
These are…
The framing on the two side turret bins is not quite right either.
Don’t laugh but I’m using that same build article (top pic only) as one of my references. And I missed the framing on the side bins. I should be able to fix that, thanks.
Regarding the reinforcements on the turret around the TOGS barbette, I don’t think the tank I’m modeling has them, but I’ll look closer.
Any idea on anti-slip? And after double checking, the tank I’m modeling does not have the reinforcement on the turret. Perhaps this was added on turrets originally built w/o the TOGS barbette?
Rustoleum texture spray paints. I prefer the Terra Cotta one for modern vehicles. It gives a smooth, relatively fine texture.
All Ch1s had the TOGs barbette fitted on issue. Only the initial batch of Mk1s didn’t have the TOGs system fitted inside it. The TISH would of been inside the barbette.
Ref the reinforcing… One or 2 wagons may of escaped having it all fitted but would in all likelihood had parts of it added. I know some wagons didn’t have the castleated bit on the sloped part of the turret… It’s hit and miss really. The majority all would of had the reinforcing parts in front of the gunners sight area and as it goes down the front of the turret. If you are doing it with that add on armour pack on side skirts and front of the wagon some or all of the reinforcing would of been present.
Reference the anti slip. Don’t bother with it. On Ch1 it was hardly noticeable and at this scale, you wouldnt see it, especially when it’s all primed and painted.
From what I understand, these also had the rear turret box like the kit.
The reinforcing is hard to see in the grainy pics of the time, but you can just make it out in some.
Yes that’s right, they had the awkward opening rear stowage box on the back the turret, which were a pain. I had one on my wagon for about a month until I got a new one demanded.
Ref your build Russel @rfbaer , if you have the Dorchester add on armour for yours, it would have had the upgraded exhausts on it by then, and I’d also lose the massive extinguisher on the right rear turret basket. They were Mk1 features.
The Dorchester wasn’t fitted generally unless they were deployed, only a few kept it on for demo reasons. I don’t think they even bothered with it for Bosnia. I know it was used in Kosovo for KFOR wagons.
Okay, thanks all.
Gino, I use a product from Ammo by Mig, it’s a paste that goes on with a brush, very easy to use and fine grained.
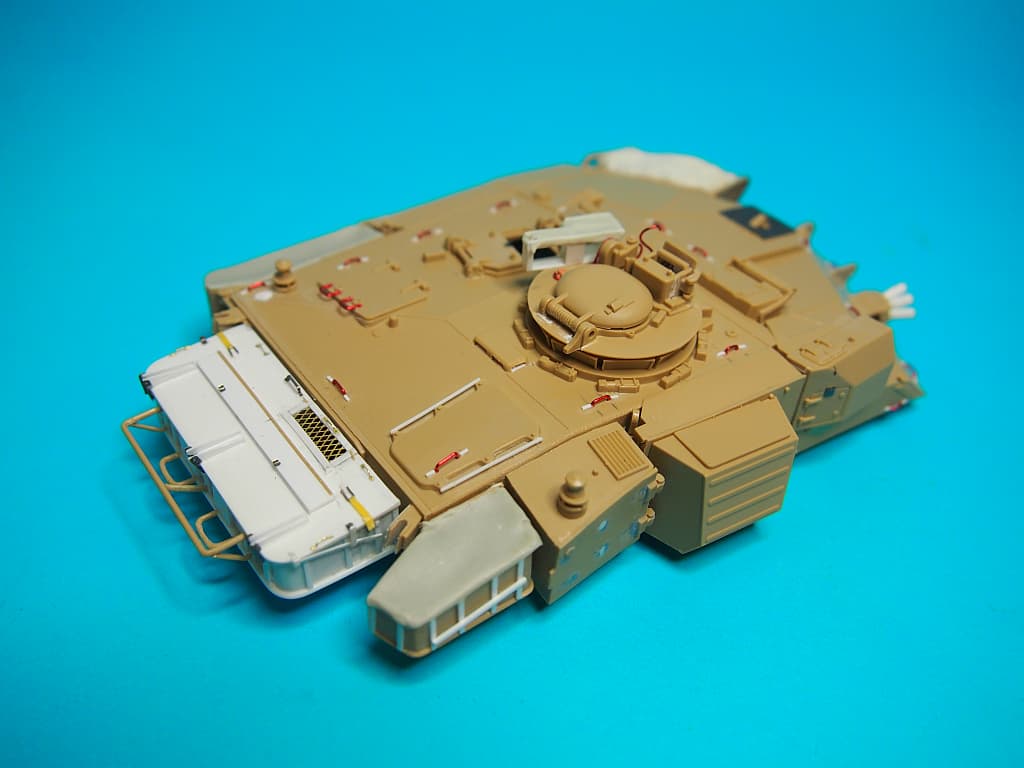
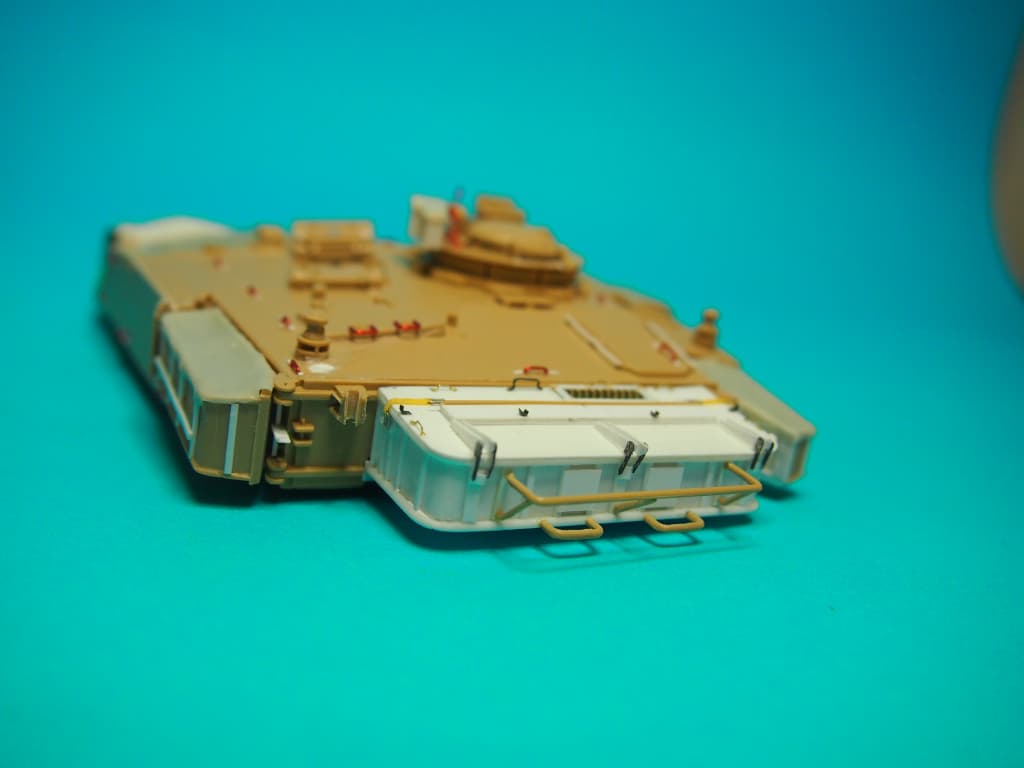
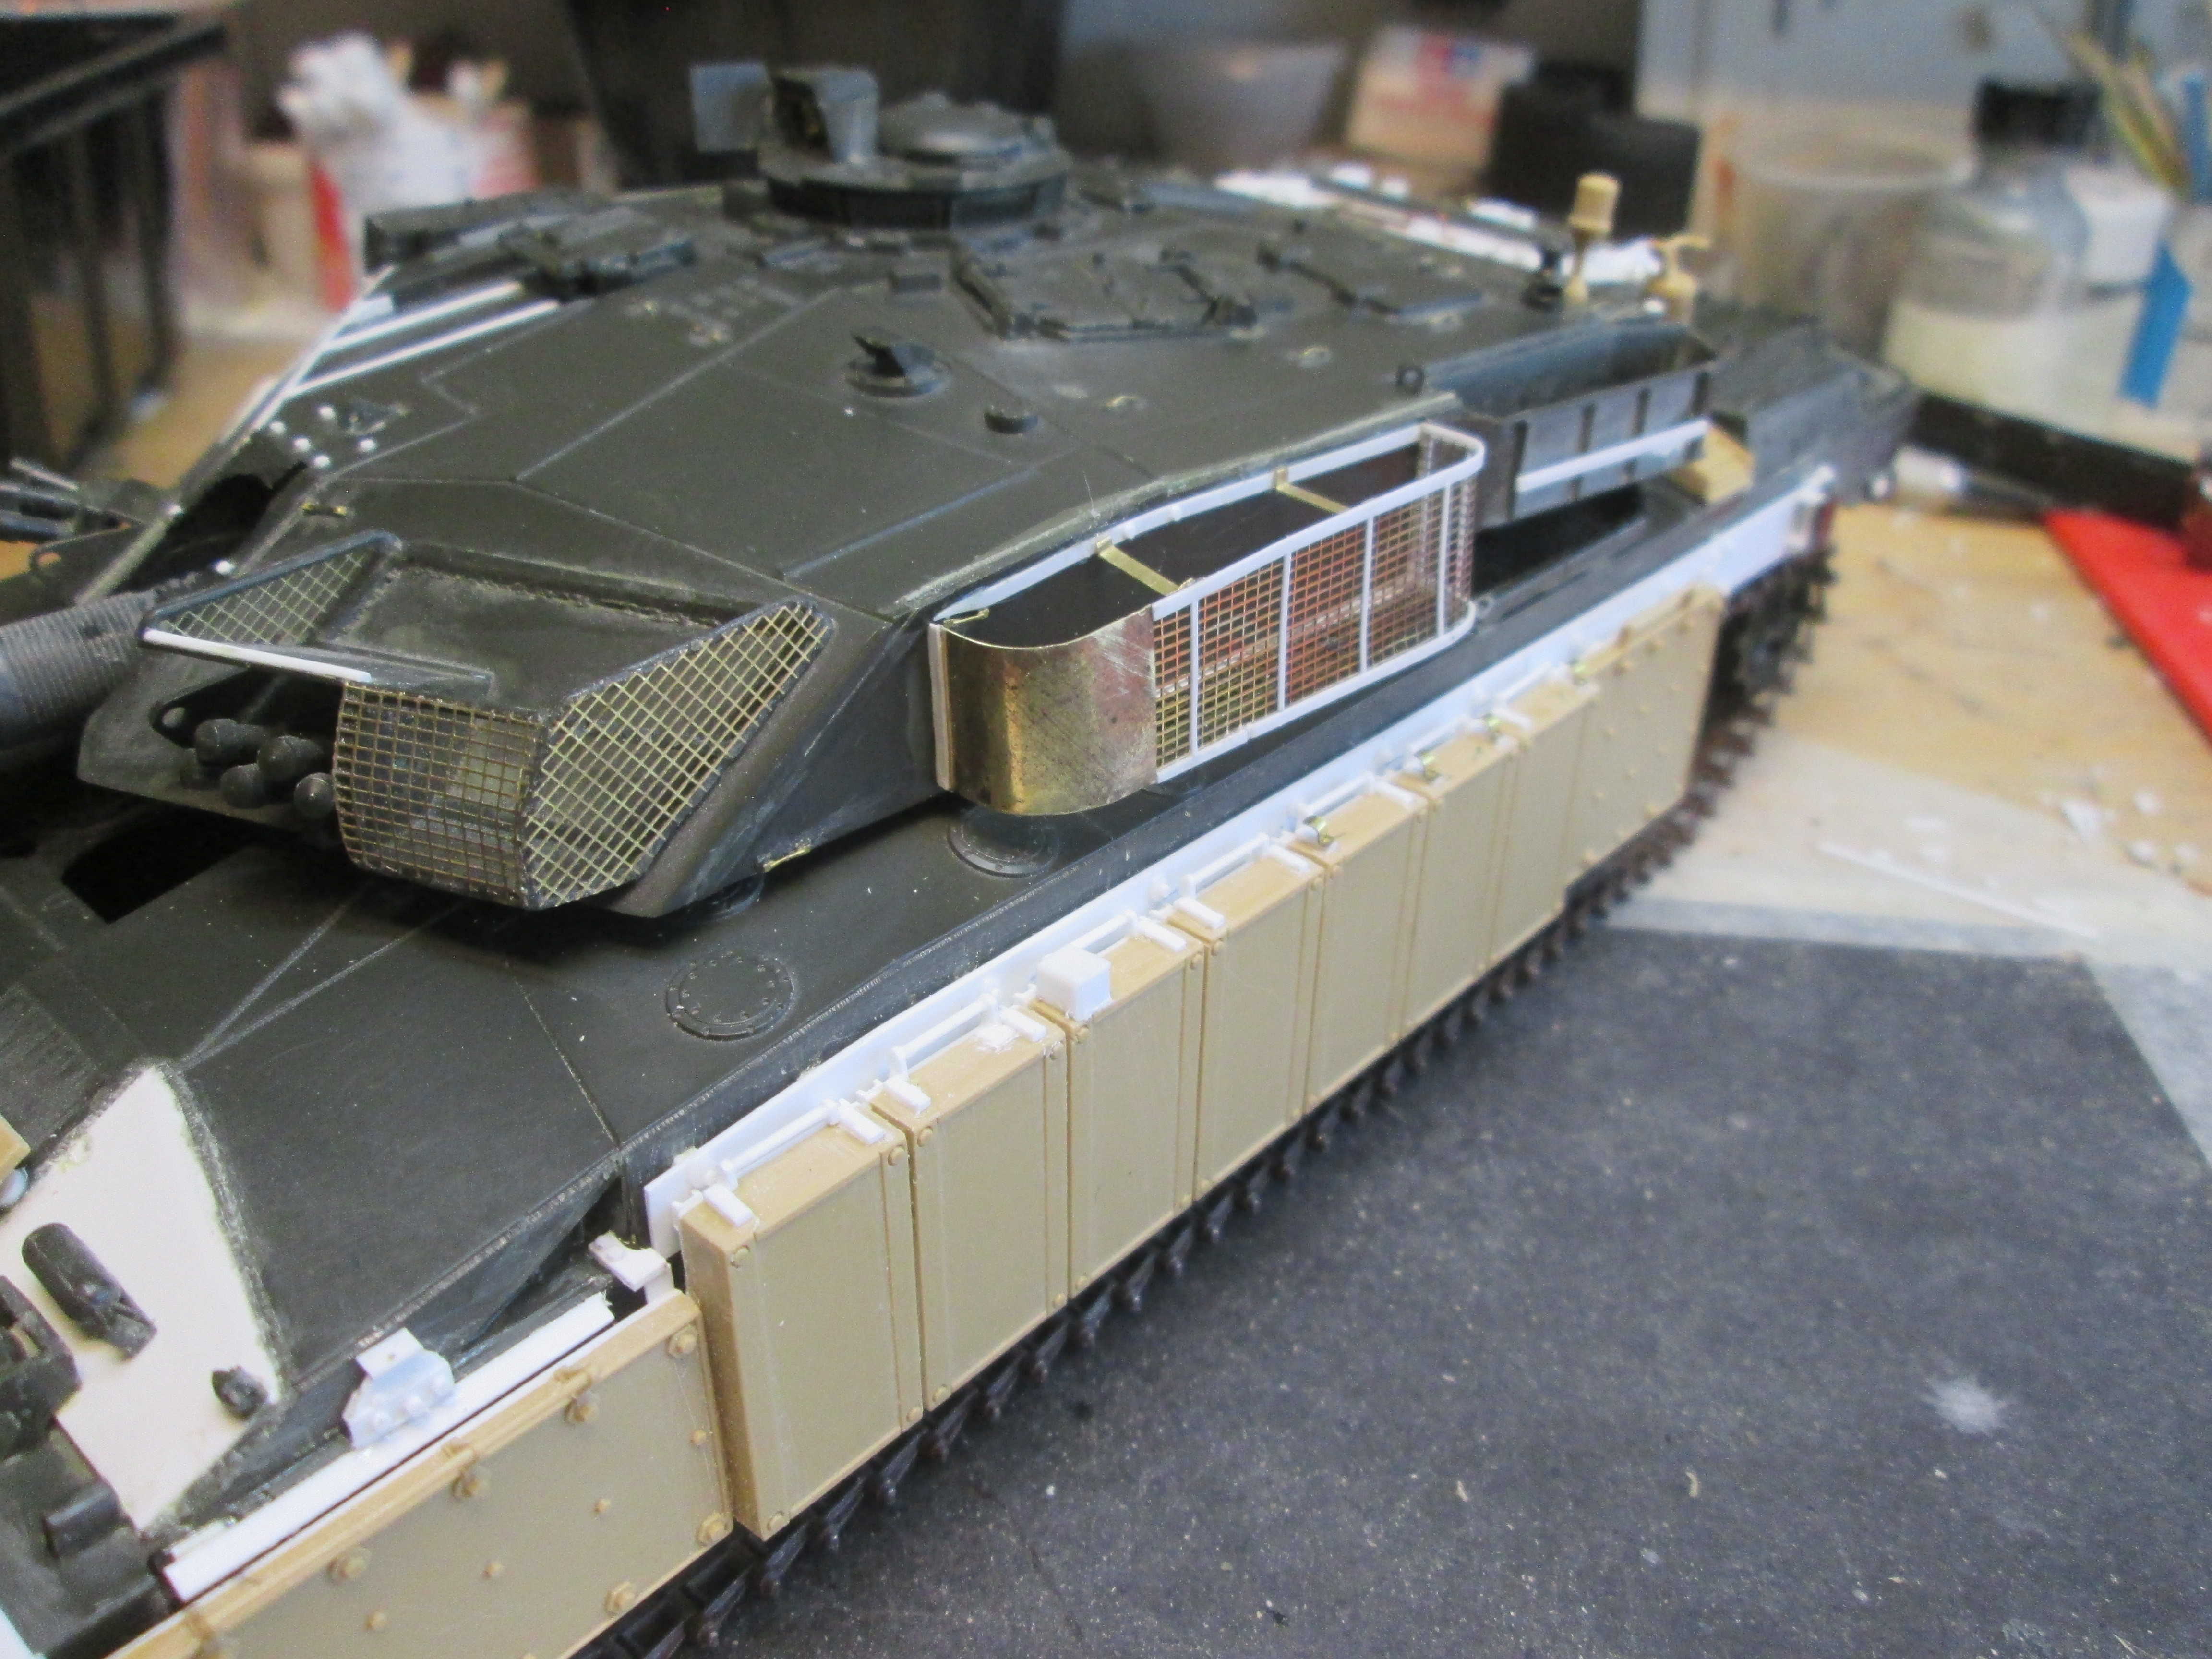
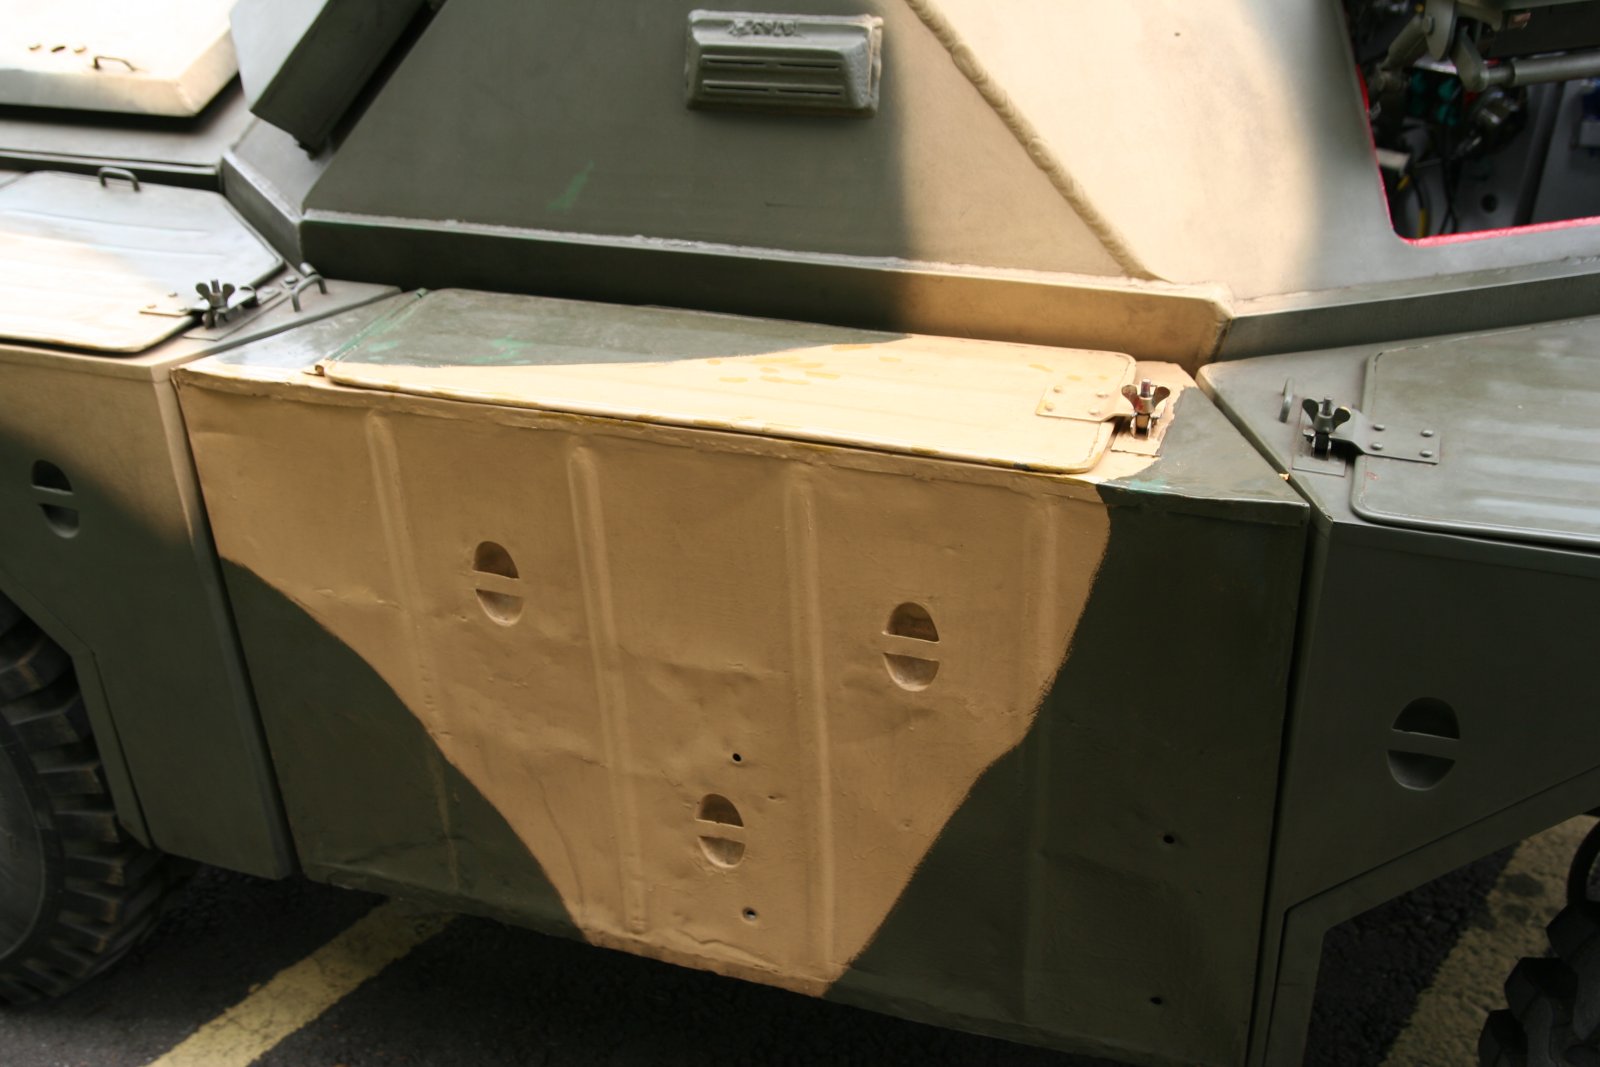
Regarding the turret reinforcements, I took a good look at the pics of the tank I’m modeling and it does appear to have it, so I added it this morning. I also lost the big fire extinguisher and corrected the two side storage basket reinforcements. I plan to add the hose to the grease gun later. While I was at it, I swapped the exhaust outlets for the ones from the Mk3 kit. And also added were the grab handles on top of the side modular armor. I know they’re over-scale, but the best I could manage. Tow cable brackets still to come. If anyone has a copy of the April 2020 issue of MMI, the tank I’m modeling is on page 58. It’s deployed to Kosovo, June of '99. I picked it because of a couple things: one, the bow armor is in desert tan, and two because it does not have the extra fuel tanks or brackets fitted. I was too far along with the Mk1 kit when I picked up the Mk3 to add them, and the Tamiya parts aren’t that great anyway. It does have a small extinguisher mounted on the back of the left rear turret bin, I think I have one left over from an IDF build that should work there.
Pics as of this morning:
 IMG_2895 by Russel Baer, on Flickr
 IMG_2894 by Russel Baer, on Flickr
This tank also has a basket on the left turret side, different than the one in the Mk3 kit, so I’ll attempt that later. I also think I’ll just texture the turret with Mr.Surfacer cut with MEK, my usual method to show either texture or very fine anti-slip.
Nicely done ![]()
Yeah, really nice work Russel.
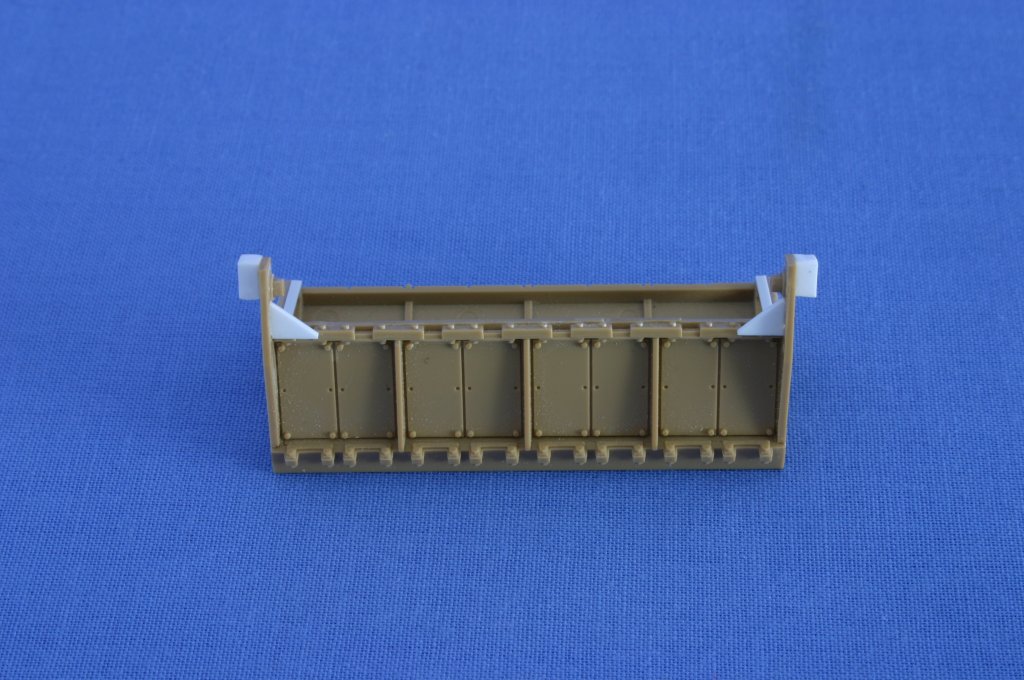
A fair shot at the left side turret basket, and the tow cable mounts are about done too:
 IMG_2896 by Russel Baer, on Flickr
 IMG_2898 by Russel Baer, on Flickr
Really great work on the basket. This is exactly the sort of thing they produced themselves before they introduced the ready made standard ones. Very good ![]()
Great work on the Challenger so far - always been one of my favourite models for detailing.
As Johnnych01 states, the Dorchester armour package wasn’t fitted to Challengers during IFOR deployments (although it was apparently stored ‘in theatre’ just in case).
Depending on how far you want to take your detailing, there are some other small things you might want to add:
Breather pipes are fitted to the circular bolted access plates on the edges of the rear deck
There are a couple of extra metal fillets on the frame for the nose armour.
If the driver’s hatch is open, you can add the safety ‘lock’ - a pin that rises up just in front of the hatch coaming to prevent the hatch injuring the driver (Tamiya indicate it in the ‘down’ position flush with the hull)
The two recesses either side of the driver are generally plated over
The aerial bases should have six fillets rather than the moulded four - leave two in place and use thin strip to replicate the other four.
You could also upgrade the engine deck panels to the later standard (but they will be mostly hidden under the turret so it depends how obsessive you are).

Excellent work and info John. Thanks.
Thanks - I had a chance to clamber all over a CR1 in 1991 (with full armour package except for the ERA blocks in the nose frame) so I noted a lot of the smaller details.
Way, way back in 2006, I did an article for AFV Modeller. As with all their published articles, you can pick it up direct from AFV Modeller as a PDF - https://www.afvmodeller.com/product/issue-29-kfor-challenger/
Fantastic info John, thanks! I’m going to use your pics as a reference! I needed a pic of the lid on the big bin the the right turret side, thanks again, although I’m not sure if the tank I’m modeling has one or not. I’m guessing it was a standard fit by then.
Re the Dorchester armor: I’m working from two pics of a particular tank in Kosovo, around 1999/2000 that has the armor fitted. It’s in MMI, April of 2020 issue, pg 58, identified as part of 1st. Troop, A Squadron, of the King’s Royal Hussars.
That type of bin on the right hand of the turret was not a standard fit on all Ch1s
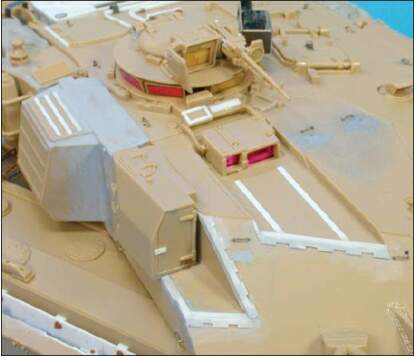
That big stowage bin is an old Ferret Scout Car bin - very common (but not universal) on Challengers of that era. The side facing out is the ‘inside’ of the ferret bin - it was shaped to fit between the fenders of the and flush against the sloping side of the scout car hull (bottom picture).
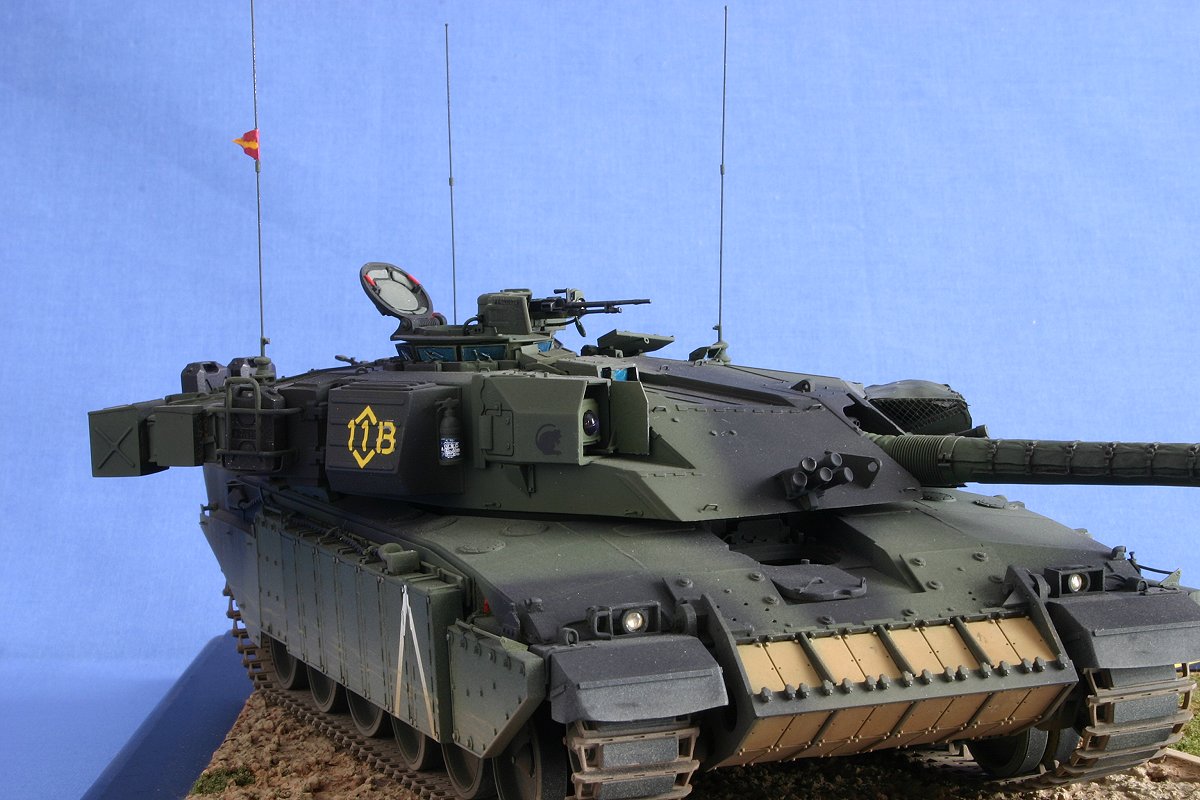
I finished my Challenger as One-One-Bravo from KRH.

I’m gonna so copy this… and I’m looking for Issue #29 of AFV Modeller, no joy so far.