Yeah, I’m very happy with the brass tubes. They are nice and thin and quite hard to bend, but easy to cut with rolling a fresh blade over them.
Hovercraft has always been my thought too. And how very British with the inventor of the hovercraft, Sir Christopher Sydney Cockerell, being from Blighty too!
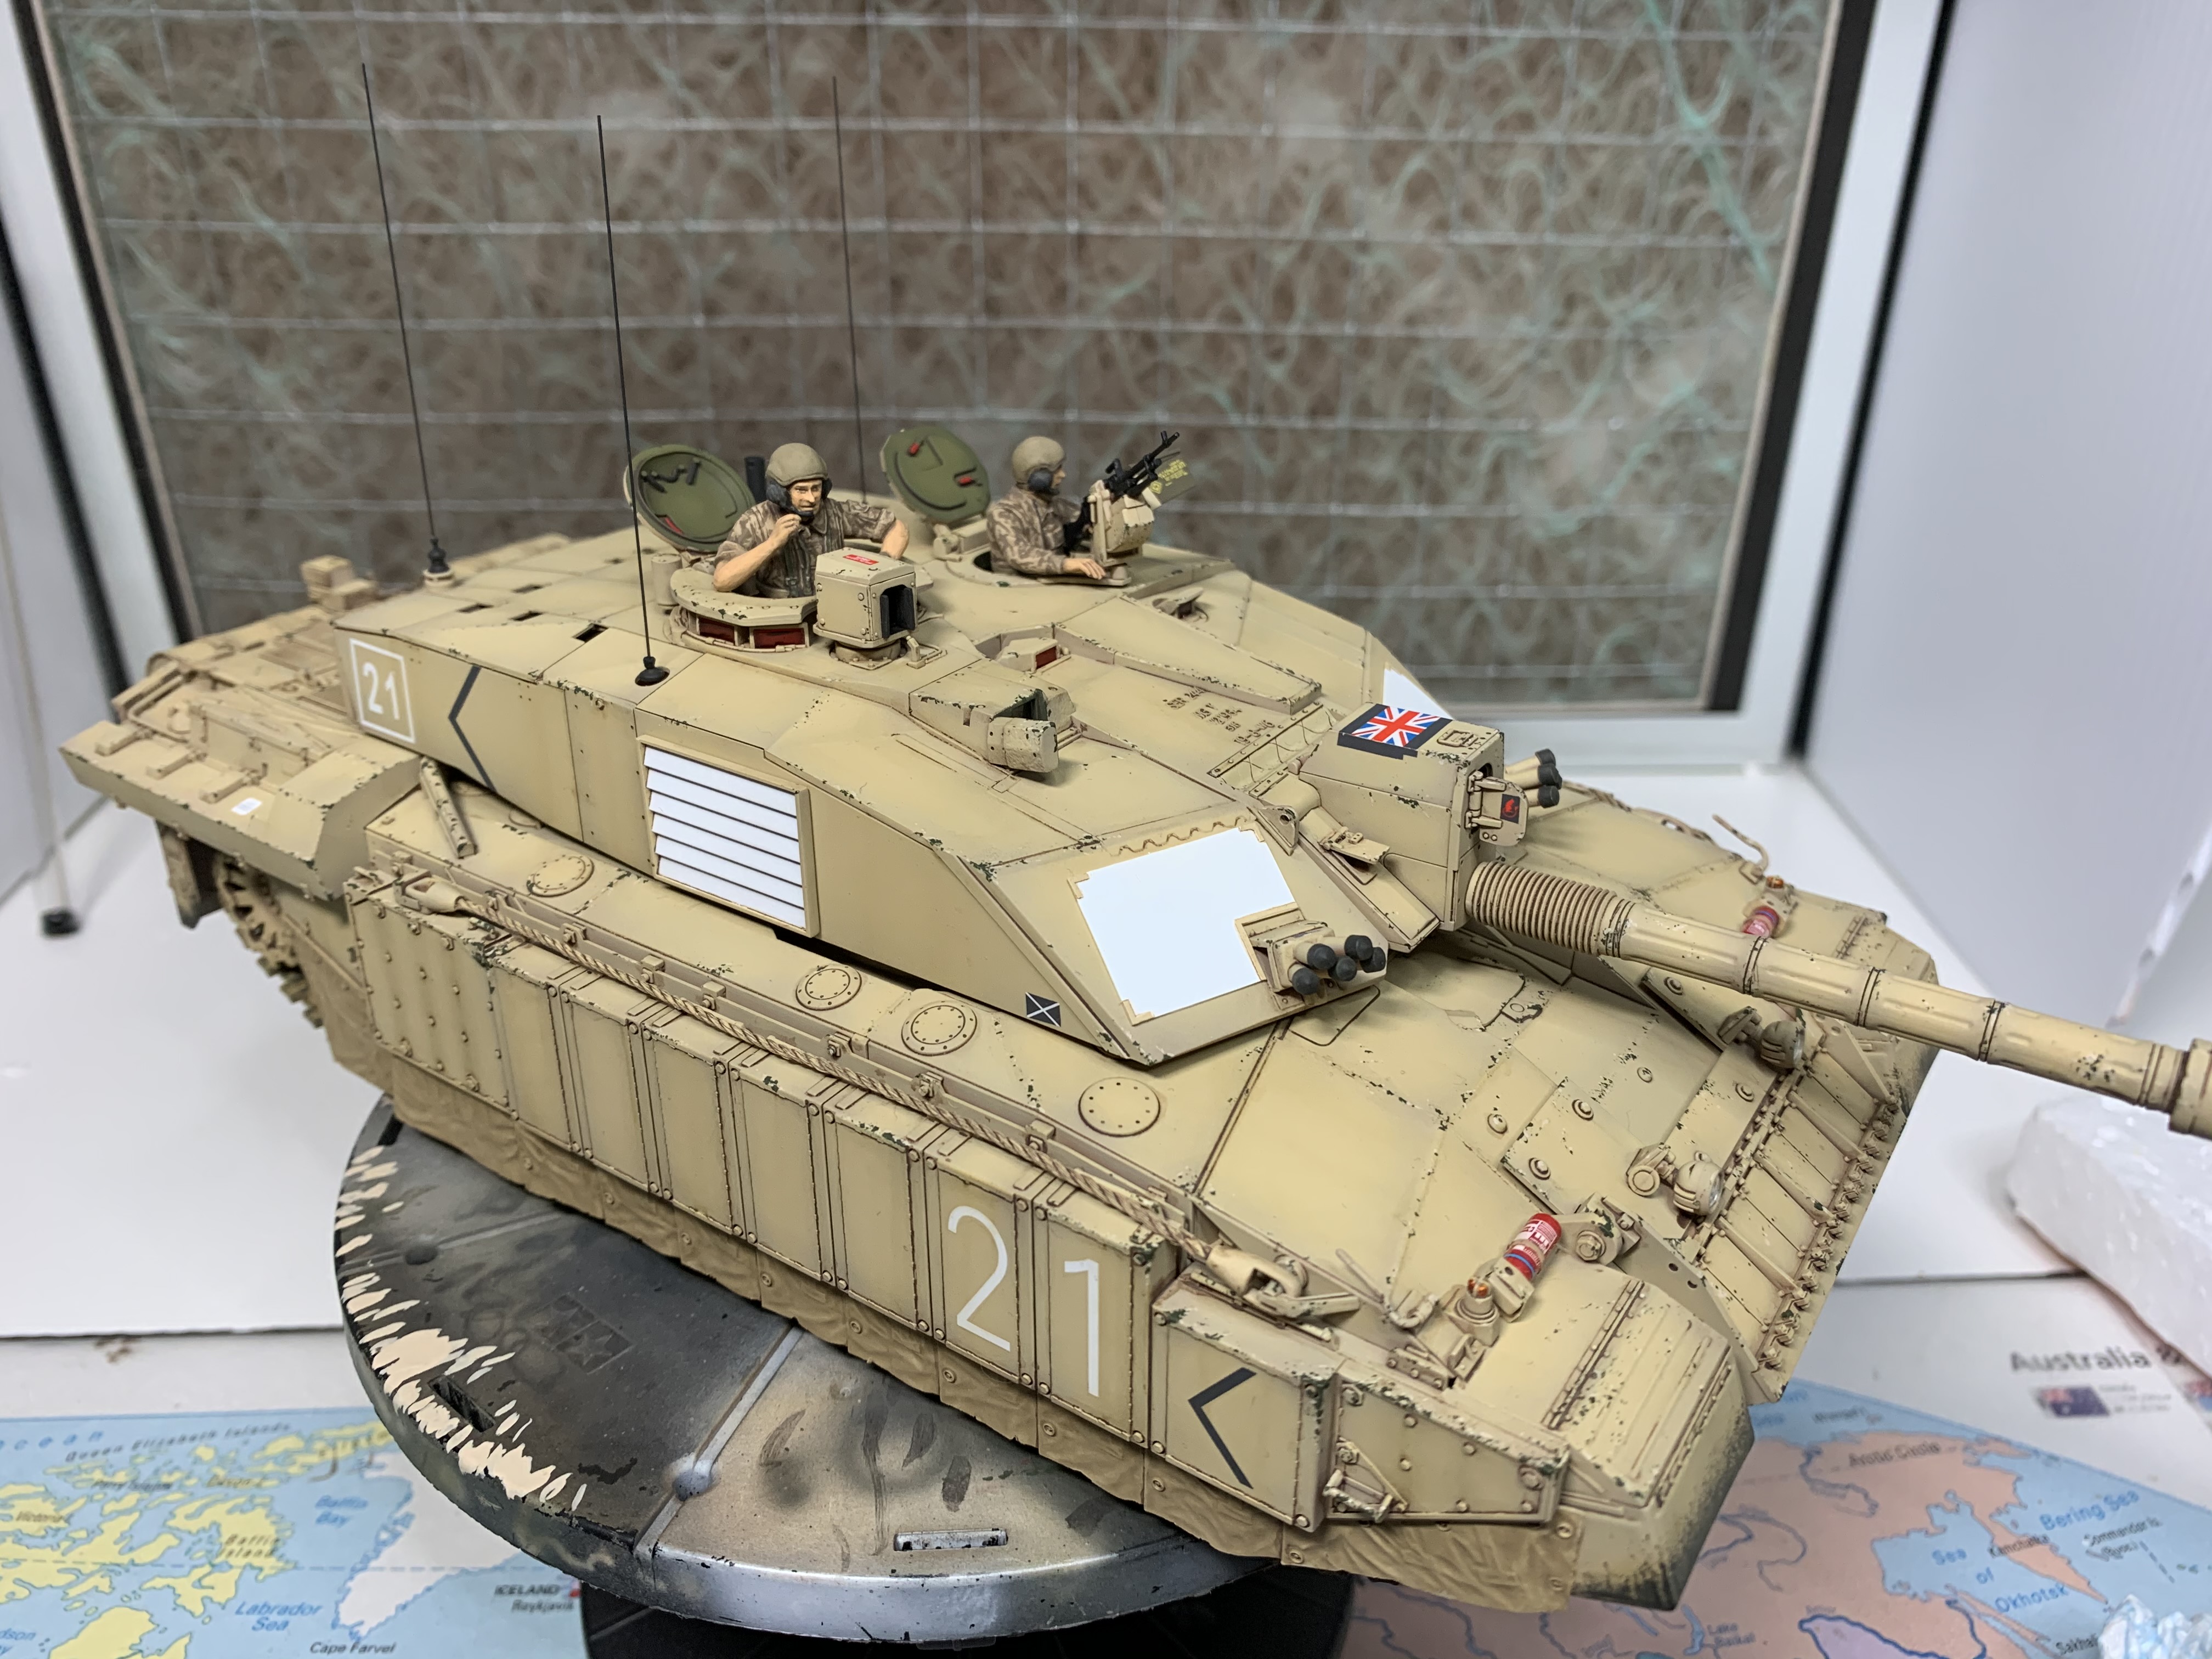
And aye, from what I have read the canvas skirts, or with the Scottish saltires on the tank, kilts, are for dust control, although I have read of there being an effect on thermal signature too, but I think keeping dust out of filters and optics makes more sense.
I do have a complaint about this build. It cost me $60. After seeing the photos I ordered one from Scalehobbiest. If only you had done a lesser job on the paint and finish I might have avoided buying one. I think you are partly if not entirely responsible and you can expect to receive a bill in the mail.
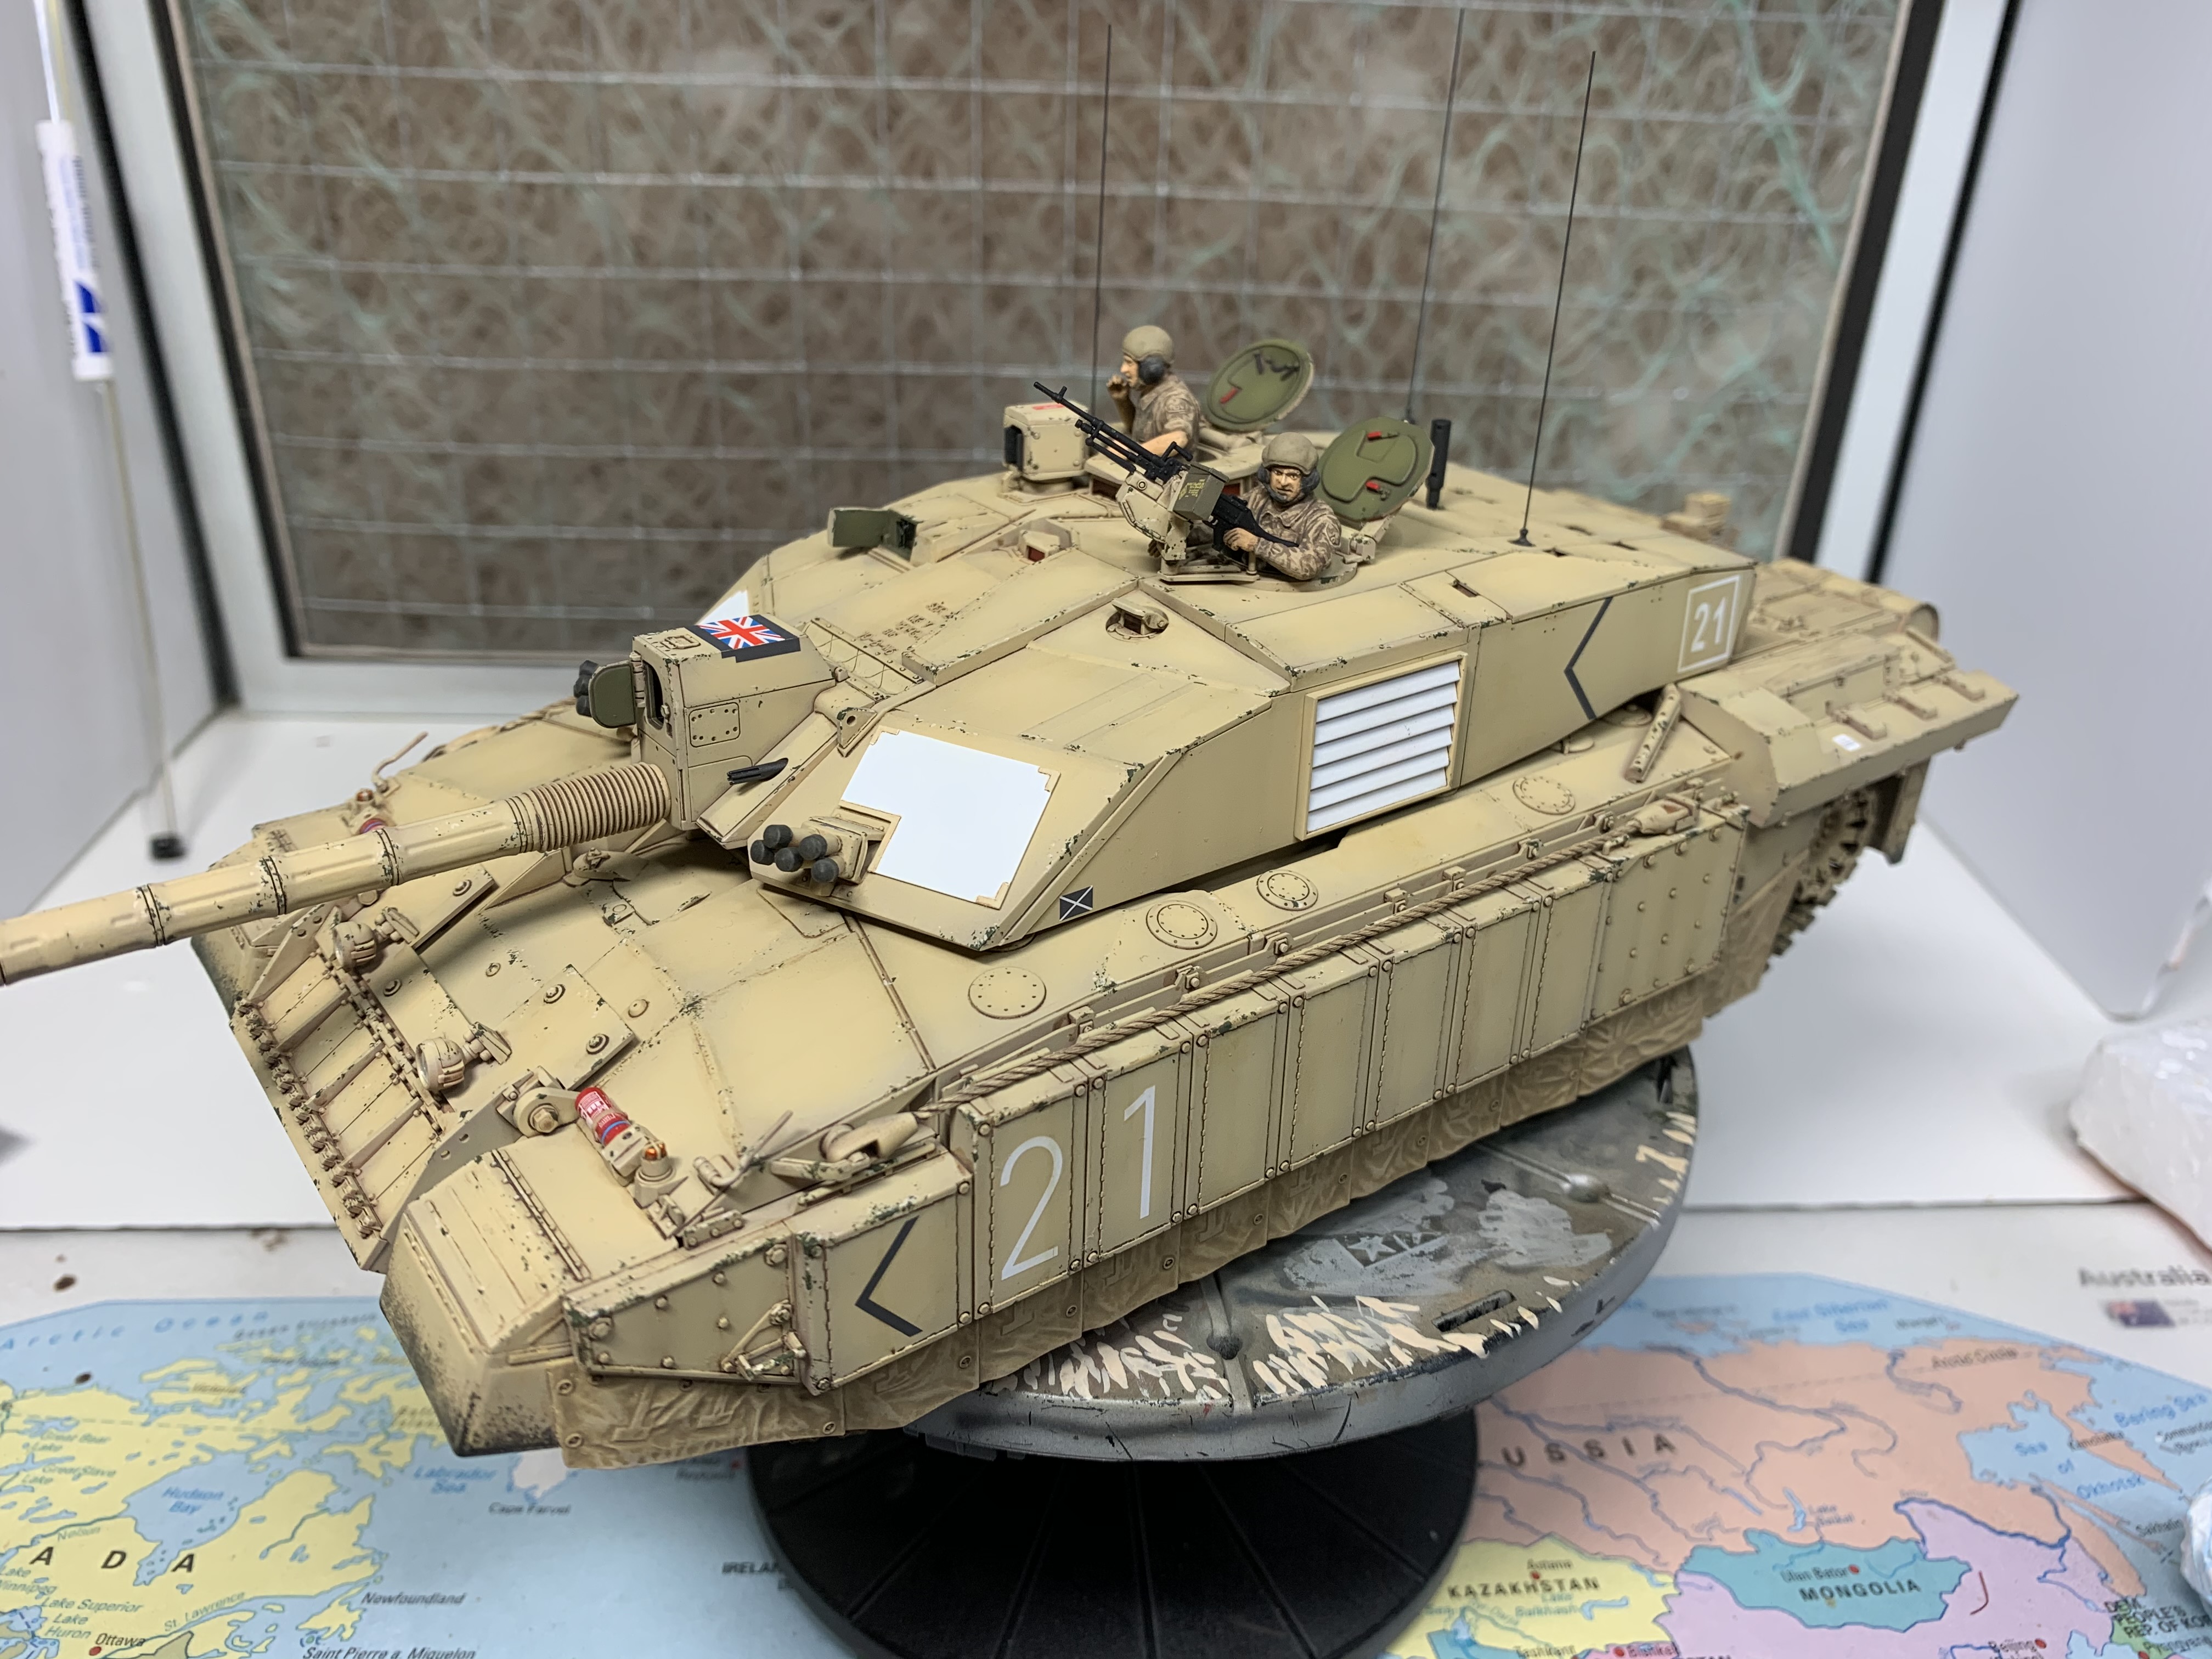
Rich, I painted the tracks with Tamiya xf1 black, with a little clear gloss added to make it more satin. Then I gave a wash with AK4062 light dust deposit and when dry removed from the rubber blocks and road wheel contact patch on inside with cotton buds. Then I applied Mig pigment 3018 Middle East dust. I worked the pigment in dry by brush, then removed the excess first by brush and then used cotton buds again on the rubber pads and contact points. The tops of the tracks that are hidden have all my experiments with different colours and processes still on them!
Greg, I feel your pain, I have many, many kits in my stash that were inspired by other builds. In fact I even have the old Tamiya Model Magazine with the article that convinced me to buy the kit in the first place!
Thanks Akio, I think a Base would be great for this one, but that is not something I have done before, so don’t have that skill set. However maybe now is the time to change that…
Greg, I painted the skirts a mix, around 50:50 of Tamiya Deck Tan and Buff. I applied the wash when the gloss coat was still on. I removed some from the high spots on the left side using cotton buds, but didn’t touch the right side. I liked them both so left them slightly different.
Link to the original thread on the old clunky forum;
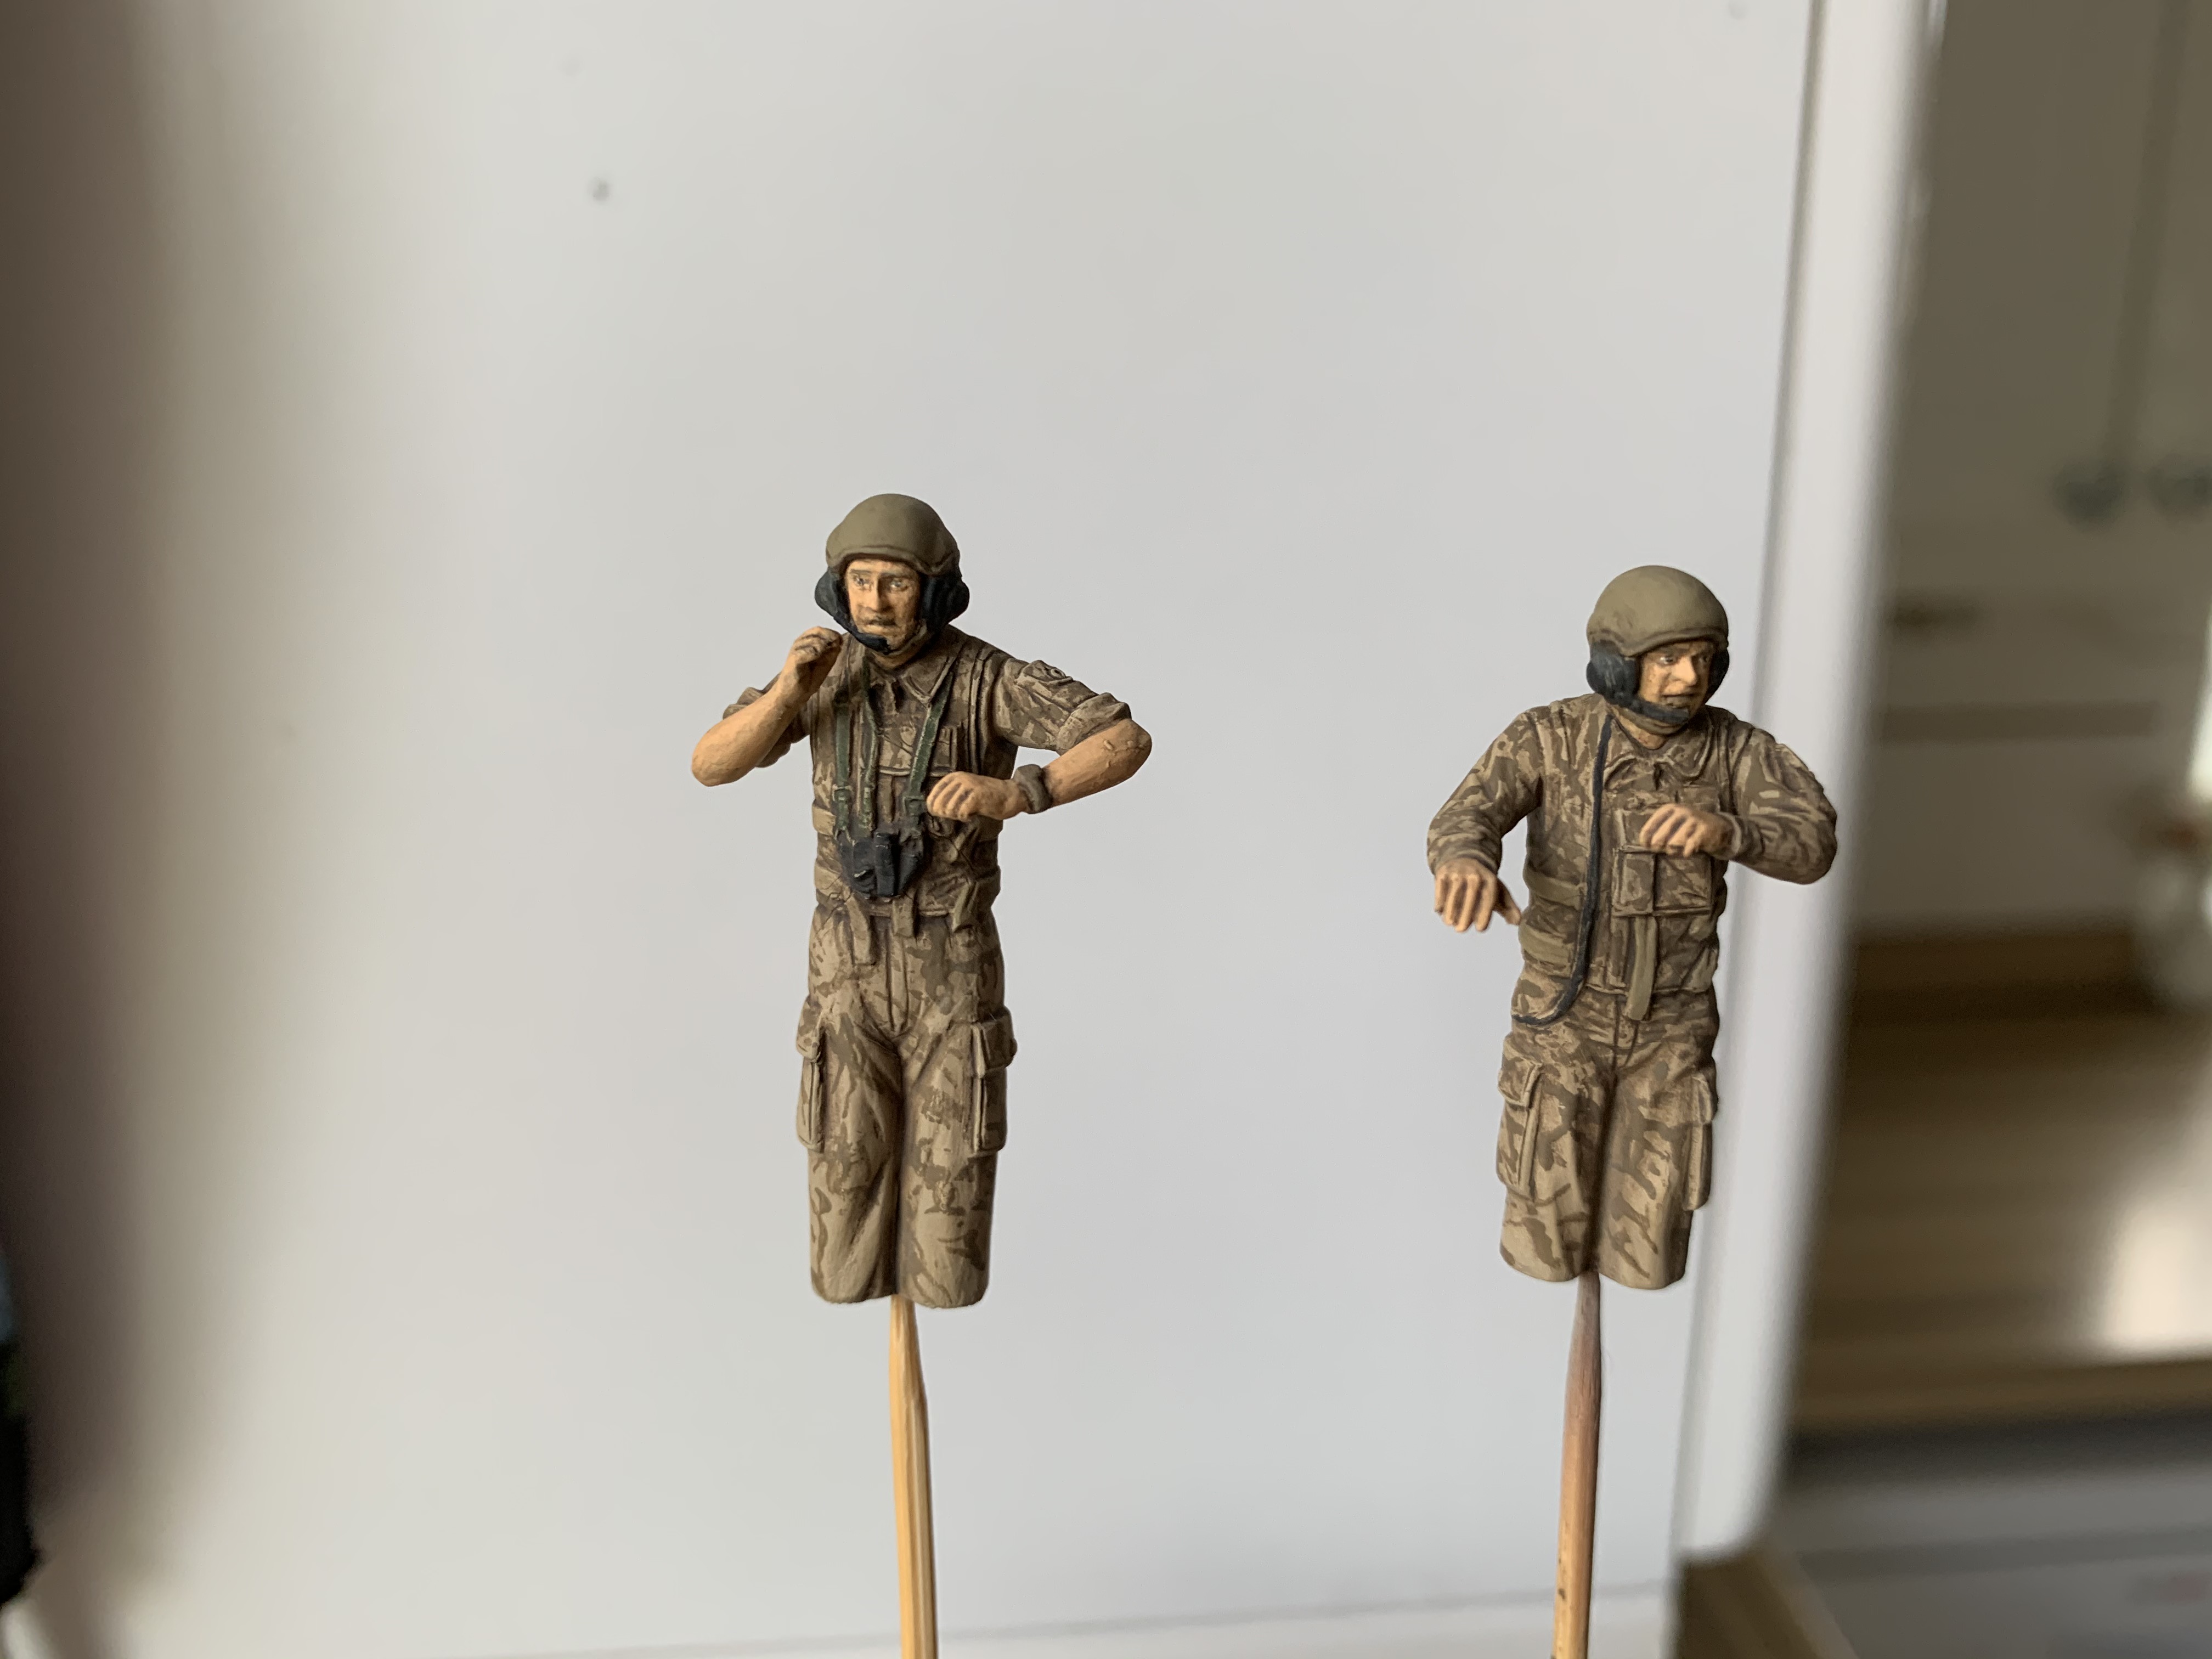
I think I’m just about ready to call it done. I’ve painted the figures that came with the kit, something I never do and now I remember why! I have an all new respect for figure painters. It. Is. Really. Difficult! I just wish I hadn’t glued the loaders hatch open all those years ago. Ha!
I apologise to all you experts in figure painting…
Been following with great interest. This has been on my to do list for some time. Your build has motivated me to crack it open and get going. Just need to track down the engine deck screens.
Jim, that is quite an impressive and awesome build and enhanced by the crew. Figures do have a way of giving scale to the vehicles we build. I will admit that painting figures requires a bit of skill and practice, you’ve done an excellent job on yours. Your vehicle looks very realistic and pleasing to the eye. I haven’t ventured into building a modern kit yet but that could change.
Thank you for sharing and for providing a lot of tips on obtaining such a great overall paint job. Looking at those figures I don’t imagine I could fit that tank inside my garage, it’s huge. Hoping to see more of your work here.
Thank you very much for your kind words Eddy. I really enjoyed this build. For once everything I did just came right first time, especially the brew for that colour, dumb luck mostly but I’ll take it! It is a great kit and yes it is enormous. I am building a King Tiger just now and it feels dinky in comparison!
I’m sure your model shelf is quite full already and peoples stress level is up due to this pandemic and all so why don’t I help you out being a good sport and all. I do have some space on my shelf if you need a place to store it. It’s no bother really, anything to help a fellow modeler.