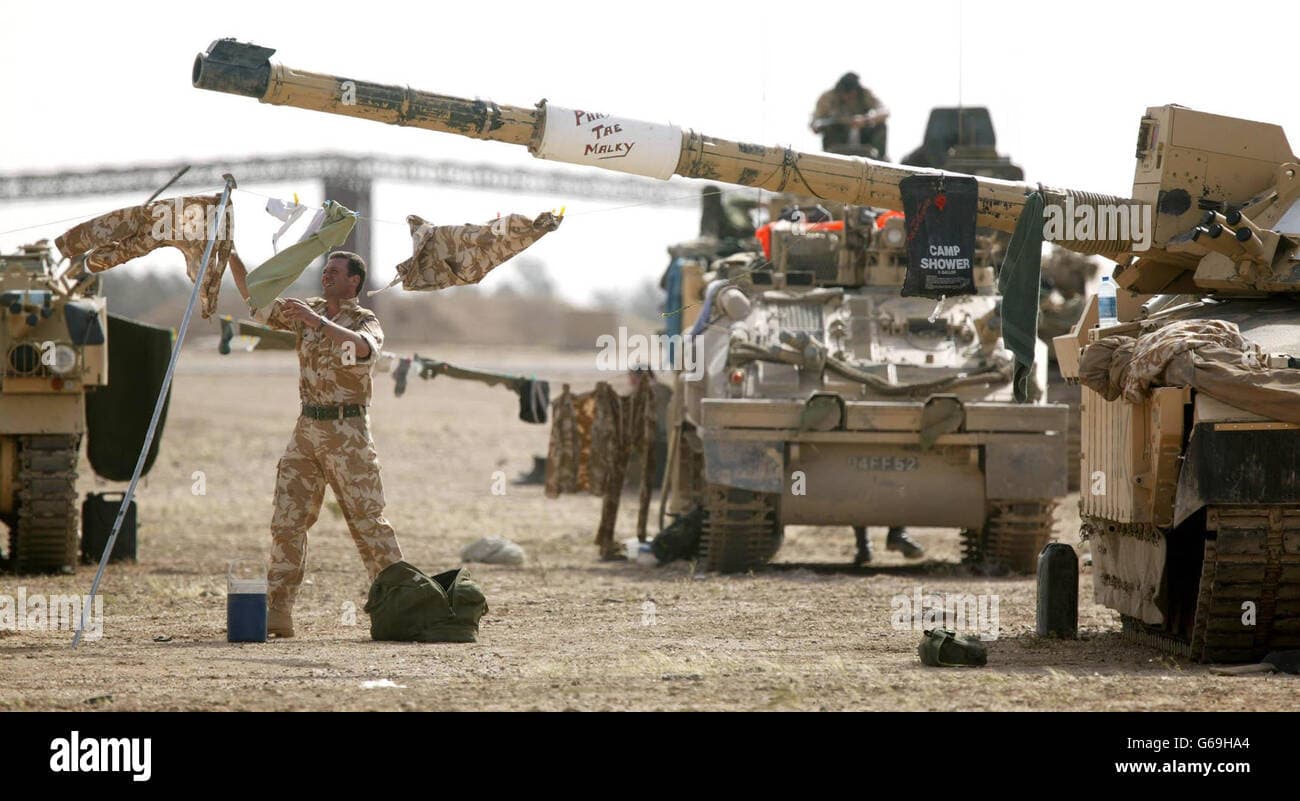
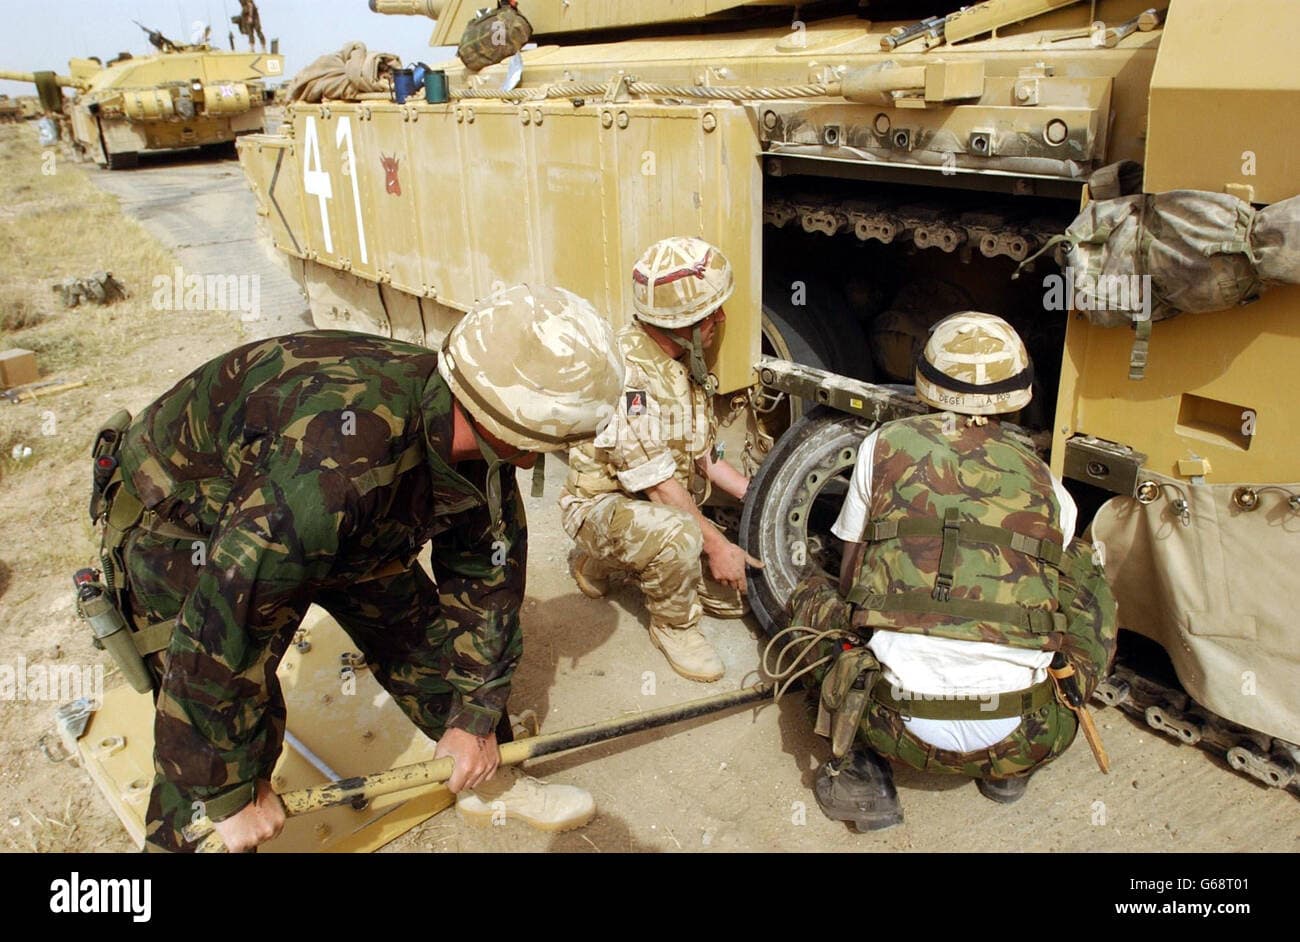
I thought it was time to finally build this for a couple of reasons. 1) I have some very usable AM even though this kit is fine OOB, 2) I have lots of bits and a whole Trumpeter kit, left over from my first Cr2 build, and 3), I found a couple of really good pics in this book:
IMG_4279 by Russel Baer, on Flickr
For illustrative purposes only, these two: IMG_4278Russel Baer, on Flickr
But my favorite, IMG_4277 by Russel Baer, on Flickr
So with all this stuff, IMG_4273 by Russel Baer, on Flickr IMG_4274 by Russel Baer, on Flickr IMG_4275 by Russel Baer, on Flickr
I’ve got a fair start. All I need from the Trump kit are the separate turret bins to go on what I think is an Accurate Armor turret, found at a show for $5. It’s got some really nice details molded on and the Tamiya detail parts and Trump bins should be nice. So far, after about an hour, the lower hull is coming together, sponson bottoms covered with .040" card stock. IMG_4276 by Russel Baer, on Flickr
I’m going to wait to install the swing arms so I can test fit the side armor and check the suspension ride height, hoping to avoid the look of a tank that’s been parked for a while. Also, I did ask about the figs below, specifically what would be an appropriate time period, so forgive me if I ask again. To me they look to be wearing the same coveralls and helmets as the figs in the Tamiya kit. Am I far wrong? IMG_4280 by Russel Baer, on Flickr
They’re nicely molded with much better detail than the kit figs.
Looking forward to this one Russ. I really need to get another RFM Cr2… So good to build …
Ref yours … Don’t overly worry about the cold ride height, the uprated next gen Hydrogas units sort of cancelled it out, and it’s no where near like a Cr1 cold suspension…
Ref the figs, the helmets are ok, but the coveralls and clothing in that set is the wrong type for those Cr2 images you have …they are just in desert cam looking at them…
Would it be passable to just paint them desert camo colors? I suppose I could use the heads on the kits figs but I’d rather not. I might also want to use one of the figs to populate one of the Cr1 models I did last year too…
Personally I would say not. In that time frame we were still in just normal desert combats and on patrol they would also be wearing CBA … It was also pretty common to mix it with normal temperate combats (parkas and jackets usually and desert trousers). The figures you have are in the MTP type coverall which has a total different look and cut.
Your time frame …
Images from online and for ref discussion only.
They do. Several modern/desert ones for AFV crew. At a push, yo ucan even use the Comd figure you get in the Tamiya Cr1 kit and just paint his helmet sand and trousers desert cam and the parka in DPM
Not thick at all mate… MTP was brought in and initially issued about 2010 - 2011… It was meant to bridge the gap and combine normal woodland DPM and Desert cam after they found neither worked very well in Afghan and the army could then just use one cam uniform for multi mission profiles… Ergo Multi Terrain Pattern…
Back to stuff I understand, and in case anyone was curious, the RFM tracks are a very nice fit on the Tamiya sprockets. IMG_4281 by Russel Baer, on Flickr
RFM says to use 79 links. I tried 78 but the tracks were tight. Seventy nine seems a tad loose, but it’s getting skirts anyway, and I would not be surprised to learn the RFM kit has adjustable idlers.
I like these tracks too. Once the three parts per link are ready to use, they go together fast and seem to be very sturdy once assembled and dry, remaining totally workable.
Hi ! I don’t about that kit, but the tension wheel is use to tension the track. Maybe ( and probably here with Tamiya ) the idler can’t work on its axle ( crank ). But maybe you can manage.
Eric- got that, but Tamiya’s design of the idler doesn’t really lend itself to adjustment. I can live with loose tracks since the upper run will be covered.
Well gee whiz Wally. I got a little more thoughtful here and did a couple of things on the second run that really made life better. One, I made up a jig to use to cut the links out of the sprue. Easy peasy, use a new blade and no clean-up. Two, I was using Revell gel/liquid glue, this stuff: IMG_4289 by Russel Baer, on Flickr
I like it but occasionally I got too much in the very limited area I needed it, meaning a mess. So I put some of the same stuff in here: IMG_4290 by Russel Baer, on Flickr
I should have done that a long time ago. Second run took about 90 minutes, start to finish. And then I ended up with 78 links per side after I tried tonight’s run like that, getting this: IMG_4285 by Russel Baer, on Flickr
So I took a link out of the other, first side I did: IMG_4286 by Russel Baer, on Flickr
I’ll sleep well tonight.
Petticoats are off the side armor, looks like it will work. I built up the same units from a Trumpeter kit but Trump’s kit has the earlier style front pieces. Oops. I’ll probably save those for the Cr1 build I will probably do after this. Also done are the extra fuel barrels, set up for “dry” storage, and the mounts. I’m trying to not re-invent the wheel here and build this as close to OOB as I think I can comfortably do. I have decided to use the kit turret too. The Accurate Armor turret id just not that much better than the Tamiya part, and with the PE I have for the Tamiya kit, life will be just fine.
So far ('scuse the fingers, imagine blu-tack holding the side armor pack on): IMG_4302 by Russel Baer, on Flickr
I kind of hate covering up those lovely tracks…And the back end: IMG_4303 by Russel Baer, on Flickr
As I work through applying the anti-slip to the hull and adding bits and pieces I find myself really wondering why I used a Trumpeter hull on my first Cr2 build. The Tamiya molding is so much better than Trump’s. Too bad Tamiya tooled all the suspension units like they did. Oh well, that’s what skirt armor is for. IMG_4304 by Russel Baer, on Flickr IMG_4305 by Russel Baer, on Flickr
I’m using MrSurfacer 500 thinned with MEK, easy to use but beware of the fumes.
I had a senior moment and remembered I had the Eduard PE for this kit so I dug it out. Hmmm. A lot of pieces that are better left in plastic, but some other very useful bits. I’ll pick and choose as applicable.
 IMG_4279 by Russel Baer, on Flickr
 IMG_4278 Russel Baer, on Flickr
 IMG_4277 by Russel Baer, on Flickr
 IMG_4273 by Russel Baer, on Flickr
 IMG_4274 by Russel Baer, on Flickr
 IMG_4275 by Russel Baer, on Flickr
 IMG_4276 by Russel Baer, on Flickr
 IMG_4280 by Russel Baer, on Flickr