No Ryan, for the simple reason there is no evidence they were actually fitted apart from the one used for trials.
2 Likes
Does the kit work the trial tank? Any information on what markings that tank might have had?
1 Like
At this point. I have most of the lower hull built up including the suspension arms, road wheels, rear plate, front plate, mounts for the tow hooks, and some brass detail assembled and/or cleaned up. I tried to solder the smoke dischargers in the Eduard set but it was too complex for me. Instead I ordered some 3D printed ones from T-Rex which should arrive by the weekend. The road wheels were a PITA to clean up. That had a thick mould line all around the circumference and some weird raised striations near the bolt detail (I think this is likely due to scratches in the moulds). Not insurmountable to deal with but it did require some careful sanding

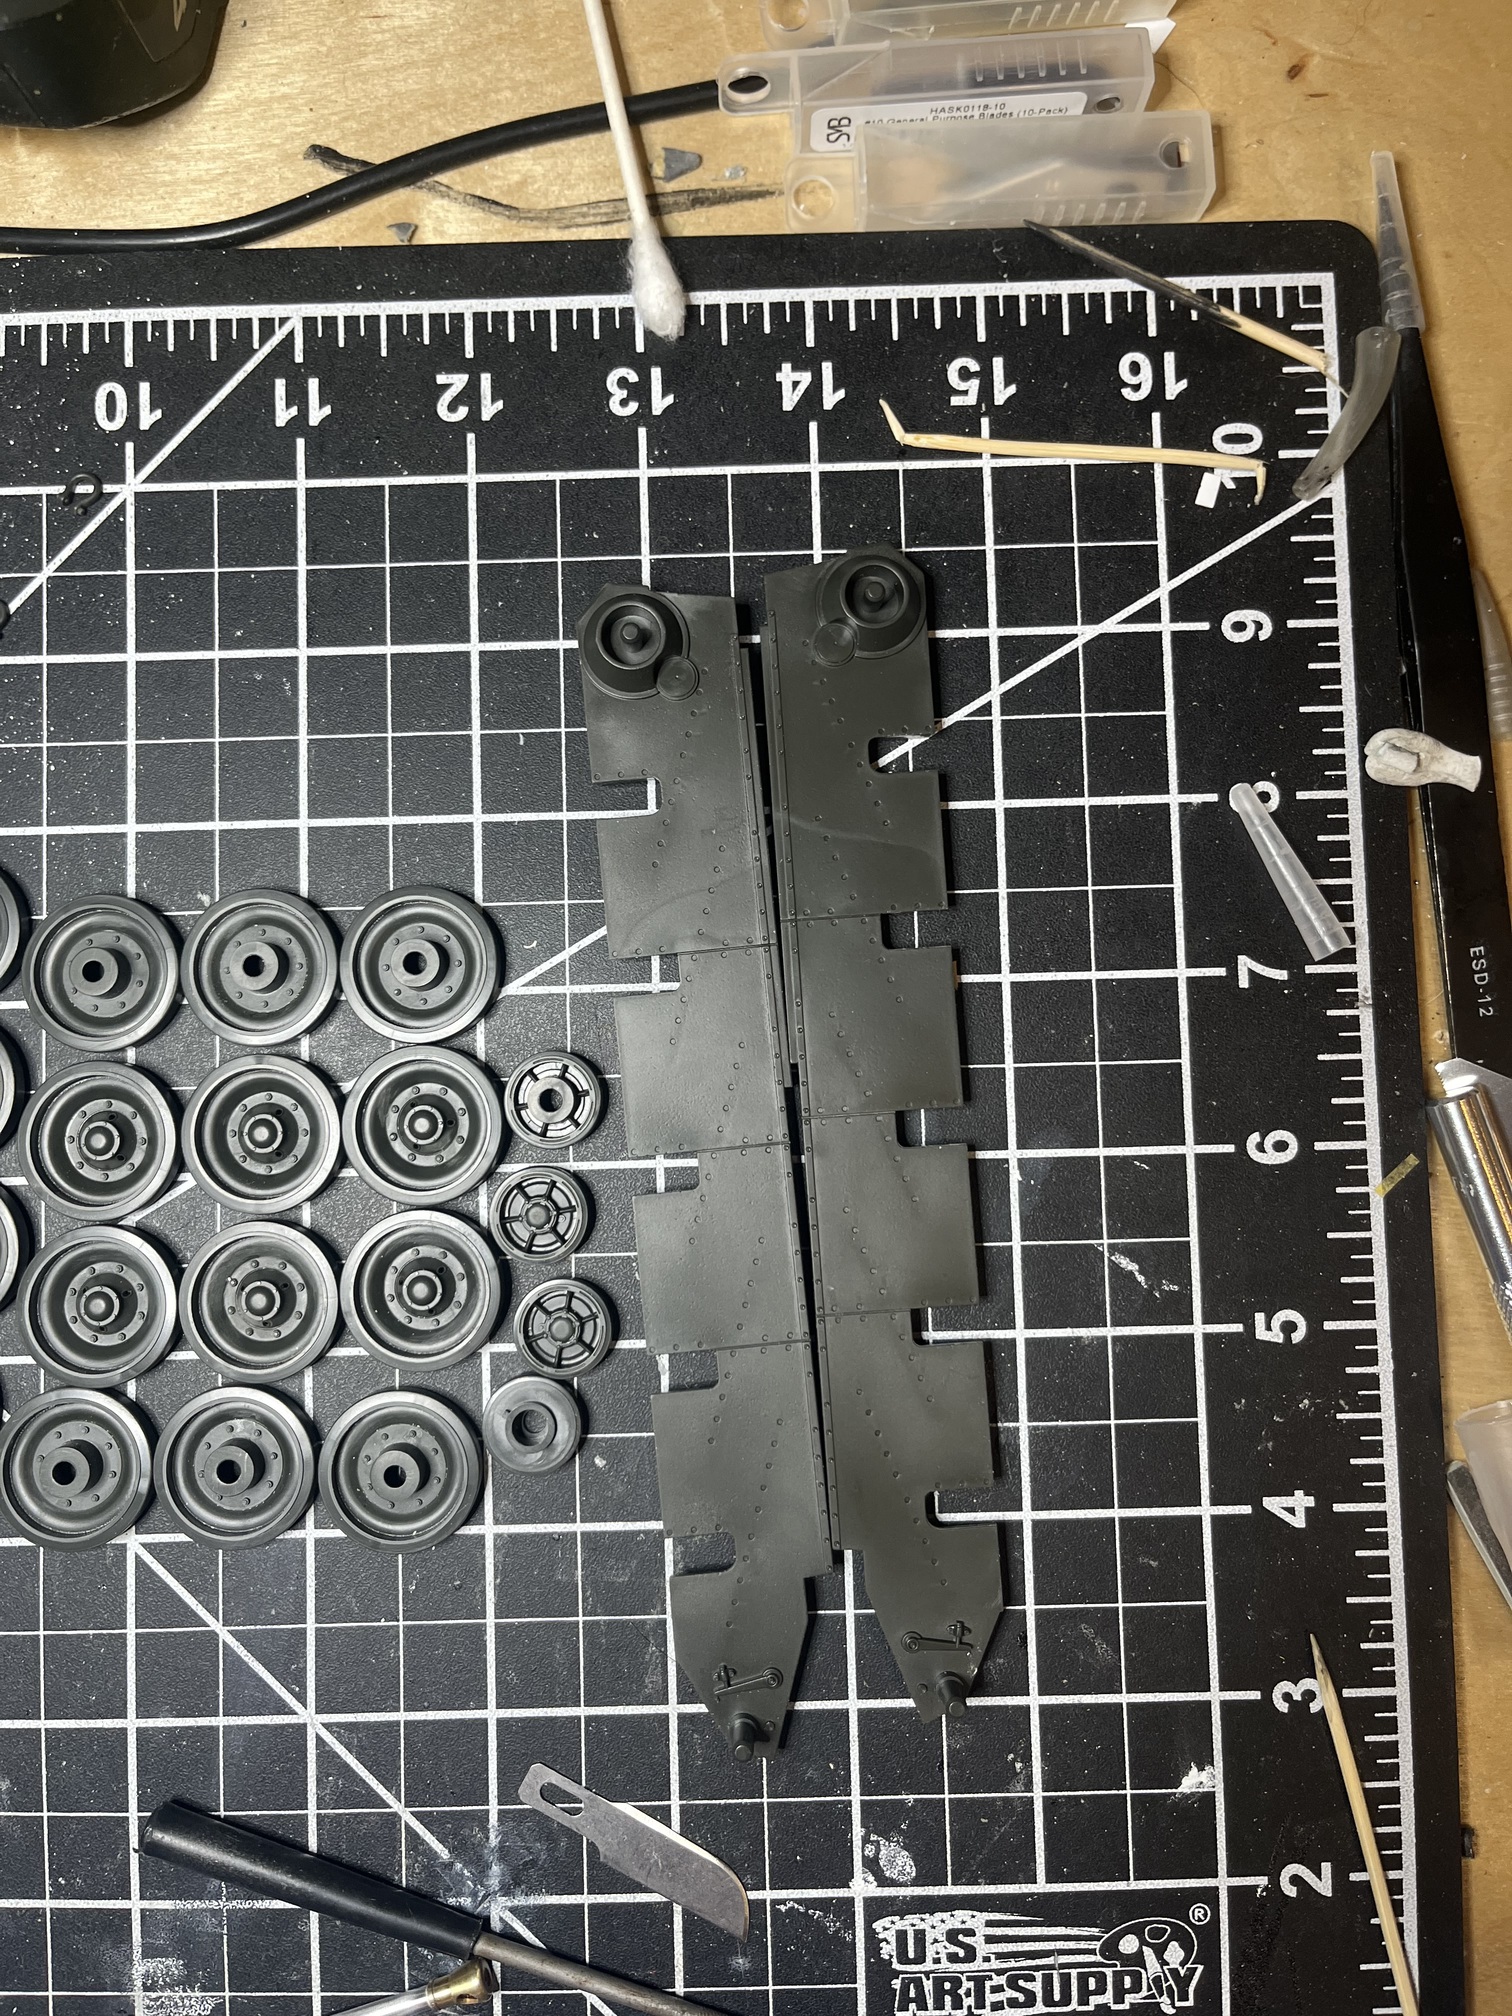


The front plate has a little side to side slop so I used the side plates held in place by tape to align the front plate

At this stage the lower hull is ready for paint and weathering. I am going to paint all of the lower hull as is shown here then assemble and weather. The way the Cromwell suspension is built up painting after would be a challenge
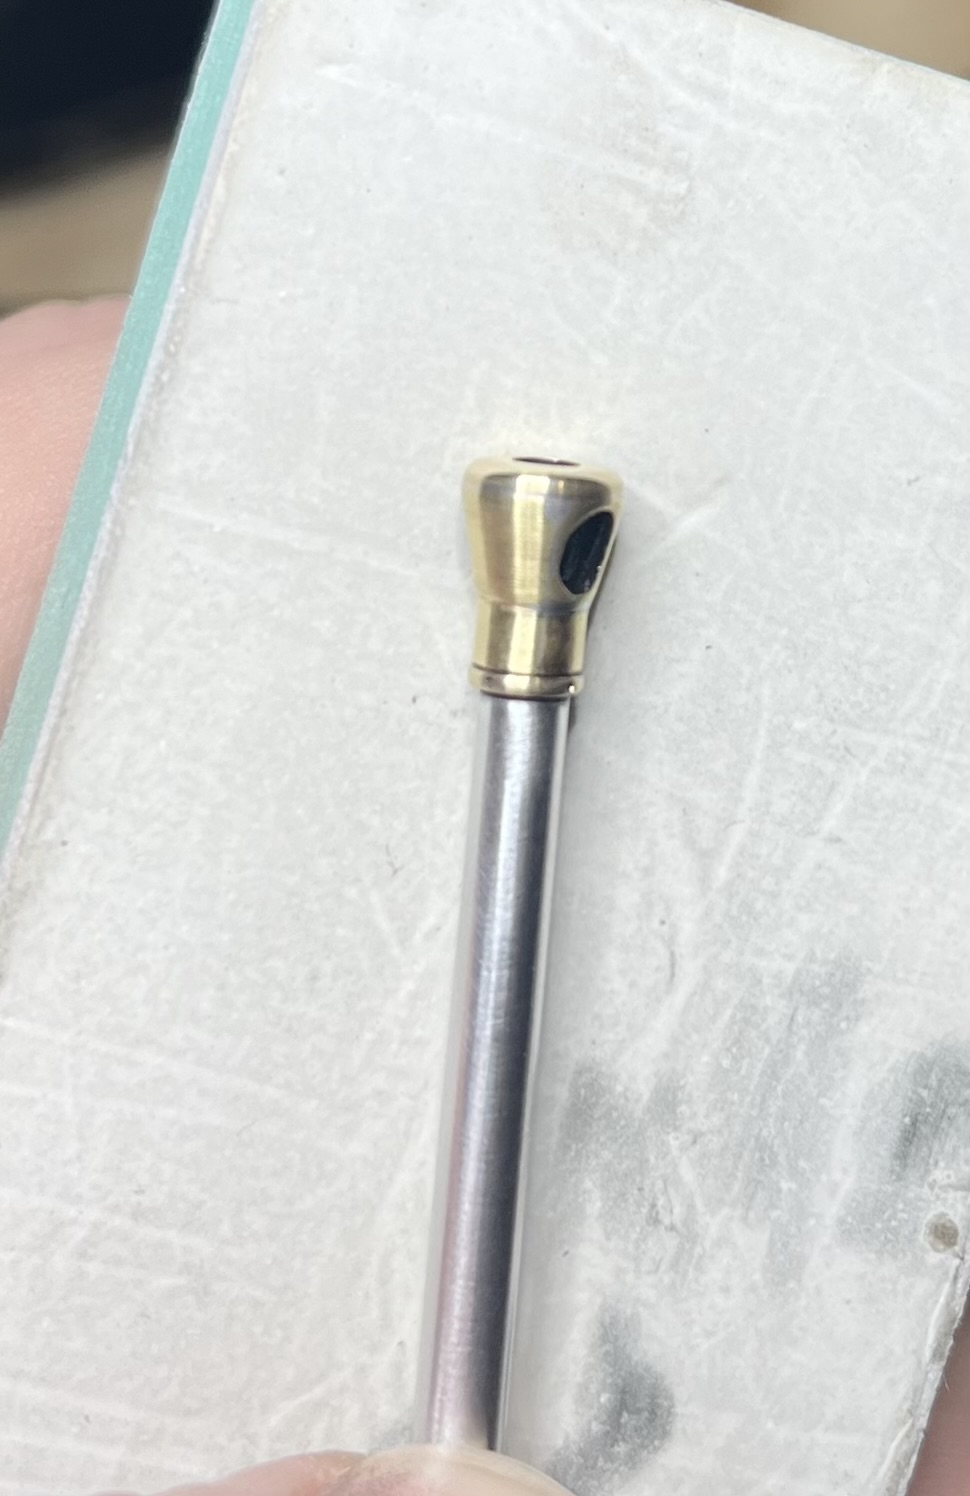
Next up was the metal barrel which I decided to build up as I only had a short build session. This is without a doubt the worst Aber barrel I have worked with. Upon open the package I notice a crack in the rear section of the muzzle brake across its entire length. While dry fitting the front half of the brake to the rear half, a chunk of brass popped off this cracked leaving a hole in the muzzle break when assembled ![]()
I was able to fill the crack and the hole with some solder during construction but I will see how it looks with primer, might need to use the kit barrel. You can see where I had to fill with solder in the second photo

6 Likes
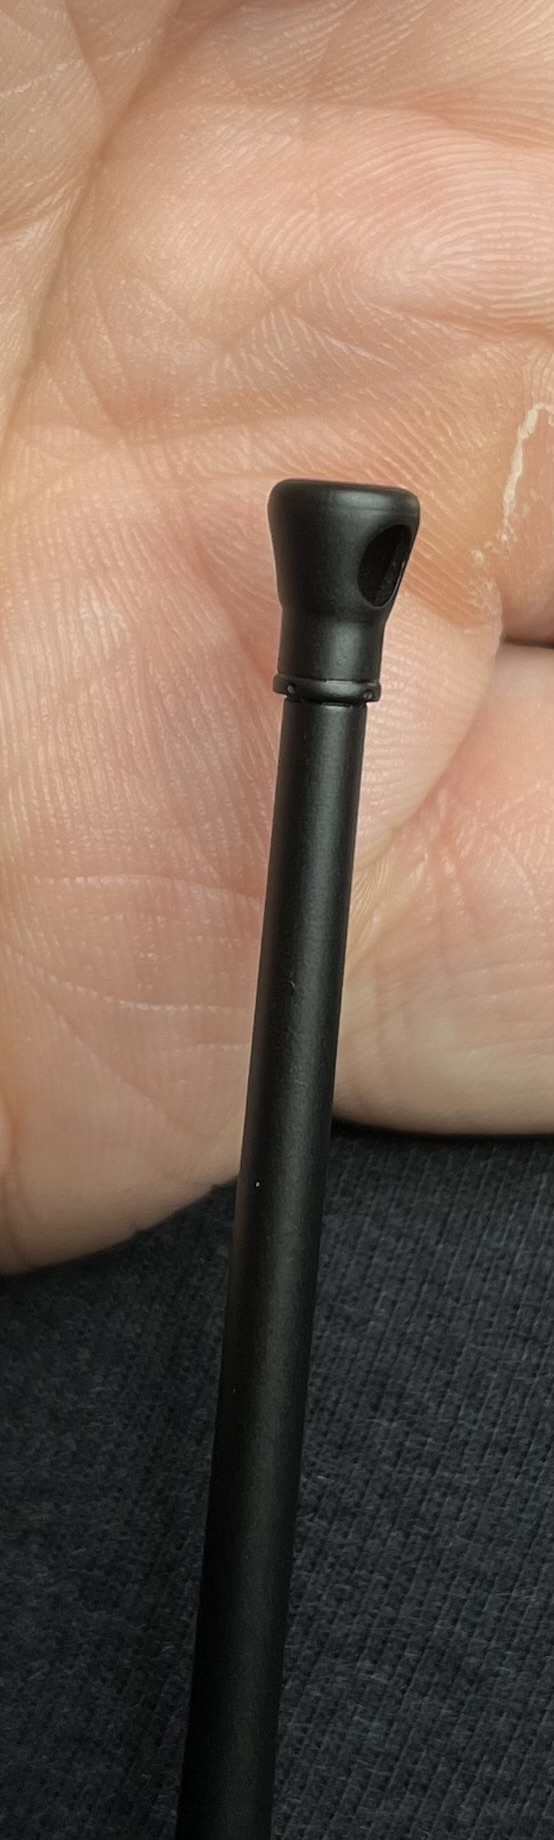
Put a coat of primer on the Aber barrel to inspect the repaired crack. It is actually pretty much invisible with primer and with a second coat plus paint I think it will look fine so I think I will role with the metal barrel.
I found a copy of David fletchers book on the Cromwell used for $5 so I ordered it. I hope it shines some light on how to fix the engine deck for a hull more typical of Europe deployment. Until that arrives I will work on the turret and cleaning up some warts.
Among those warts are the number of punch marks on the underside fenders that need filing

I also plan to add stowage to the engine deck to somewhat hide the incorrectness. I pulled out some stowage I made a while back for a Sherman build I never used. I plan to build off what I have. I quite like the look of the tarp but I am going to add more and rework the netting

4 Likes
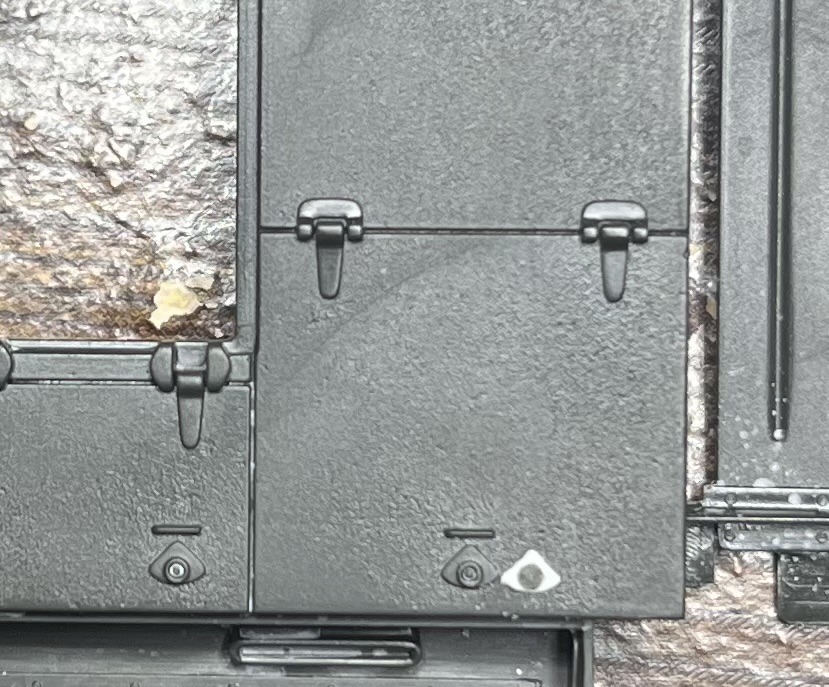
Don’t know if this helps or hurts you but I found an easy illustration for the rear deck.
In the kit
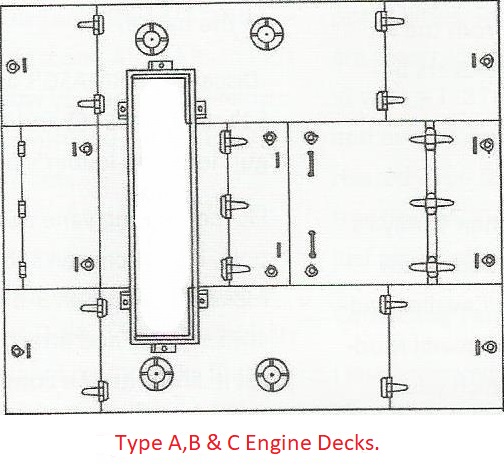
What the kit should have at least for the rear deck.

2 Likes
Cheers! That is what I found too! Looks pretty straight forward actually. Would just need to figure out how to replicate these

2 Likes
You could go old school - press a blob of clay (or Blu Tak?) on them to make a one-shot mould, then heat the end of a sprue til it melts and press it in.
5 Likes
Not a bad idea at all! I will definitely experiment with that
2 Likes
These are lift-and-turn panel locks. You lift the handle flap to vertical, and turn the handle to unlock the panel and open it. I’m sure you can make them from PE scrap or thin sheet styrene and rod.
3 Likes
Carrying on with the project I switched gears to the turret. This is an engineering marvel. The detail is spectacular and the fit is absolutely perfect!


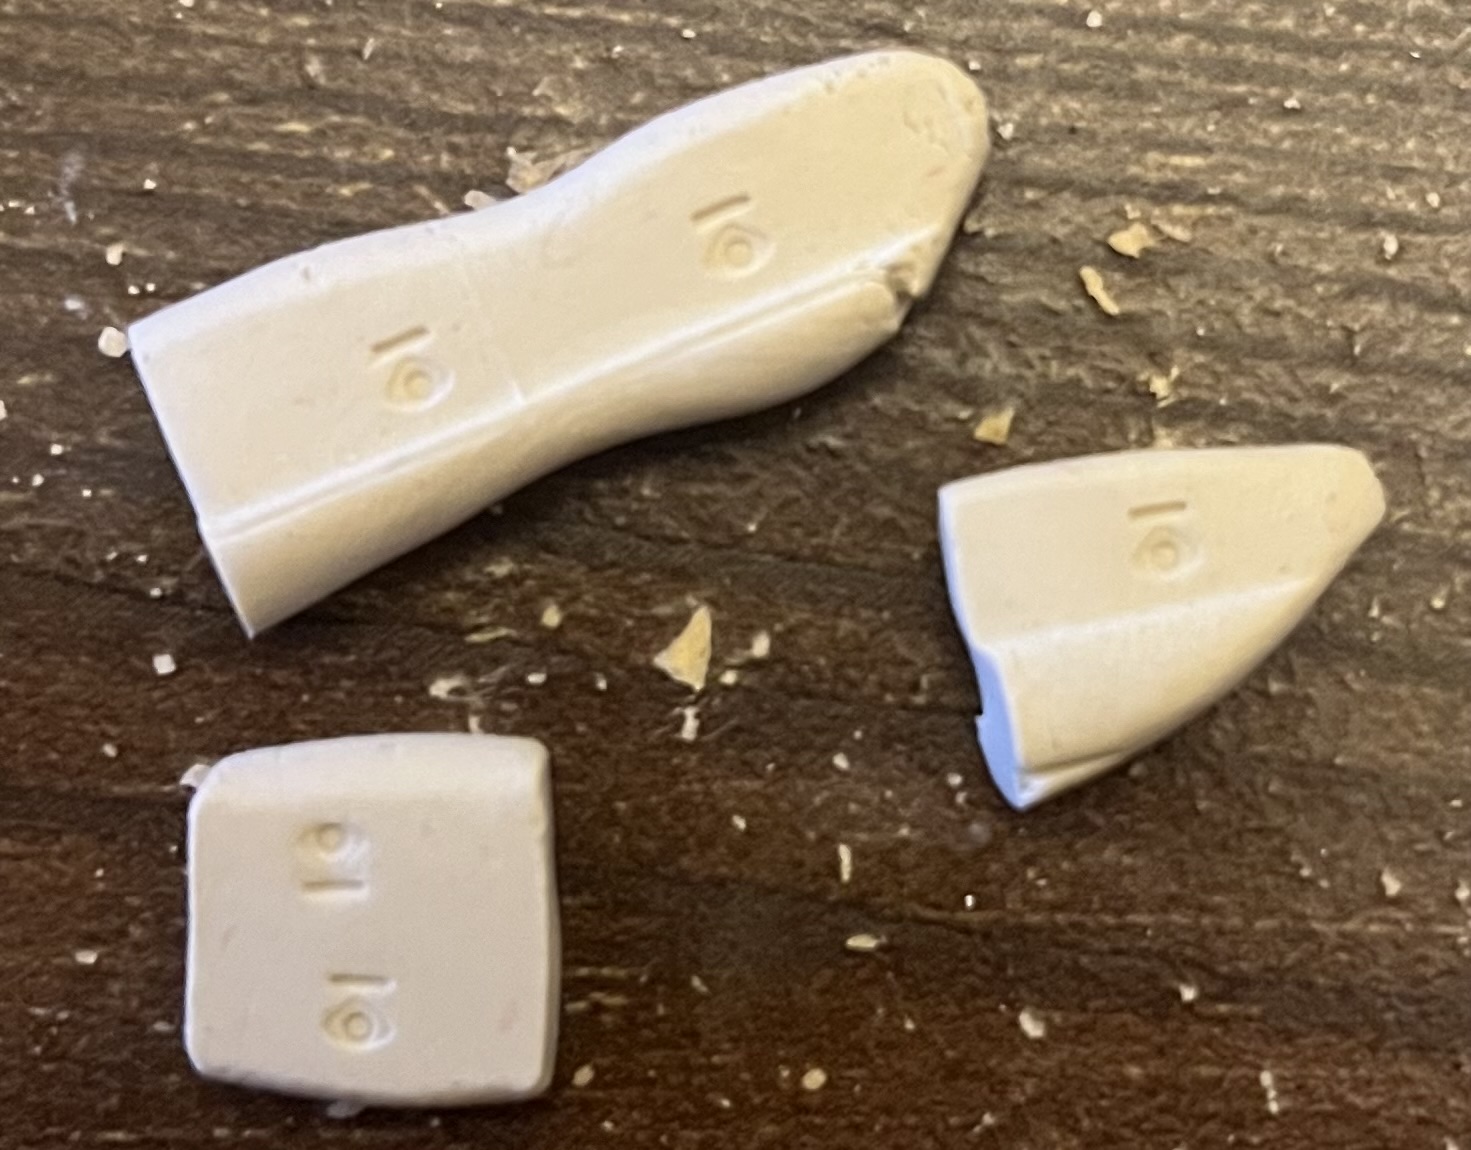
Unfortunately the barrel crack reared its ugly head once more. The solder filled fell out and the hole is back. I am spending too much time on the barrel for the minimal uplift provided by using a metal barrel for the 6 pounder. So I am just going to the kit barrel. I also made some molds out of clay for the missing detail I’ll need to add to the engine deck. Once it dries I will try sprue goo and a melted sprue pushed into them
5 Likes
Started work in the kit barrel to find the muzzle brake was quite a bit smaller than the Aber muzzle brake. Checking reference photos I am convinced the Aber barrel is the right sized and tamiya one under sized.
This left me with the choice of ordering new barrel or trying to fix the one I had. I went with option 2. I took a small chunk of sheet brass that was just bigger than the hole in the barrel and soldered the crud out of it. I then sand it back with 400 grit sand paper till it was nearly flush. Finally I put the barrel in a drill and carefully spun the muzzle brake against a sanding sponge meant for nails. This gave the brake a nice polish and ensured it stayed round. I was pumped with the result, so I sprayed a coat of primer to confirm the fix was invisible and it is basically indiscernible ![]()
And with that she is staring to look like a tank


The front of the turret is just taped in place. I plan to have the hatches open with figures so need to a basic painting of the interior and breach.
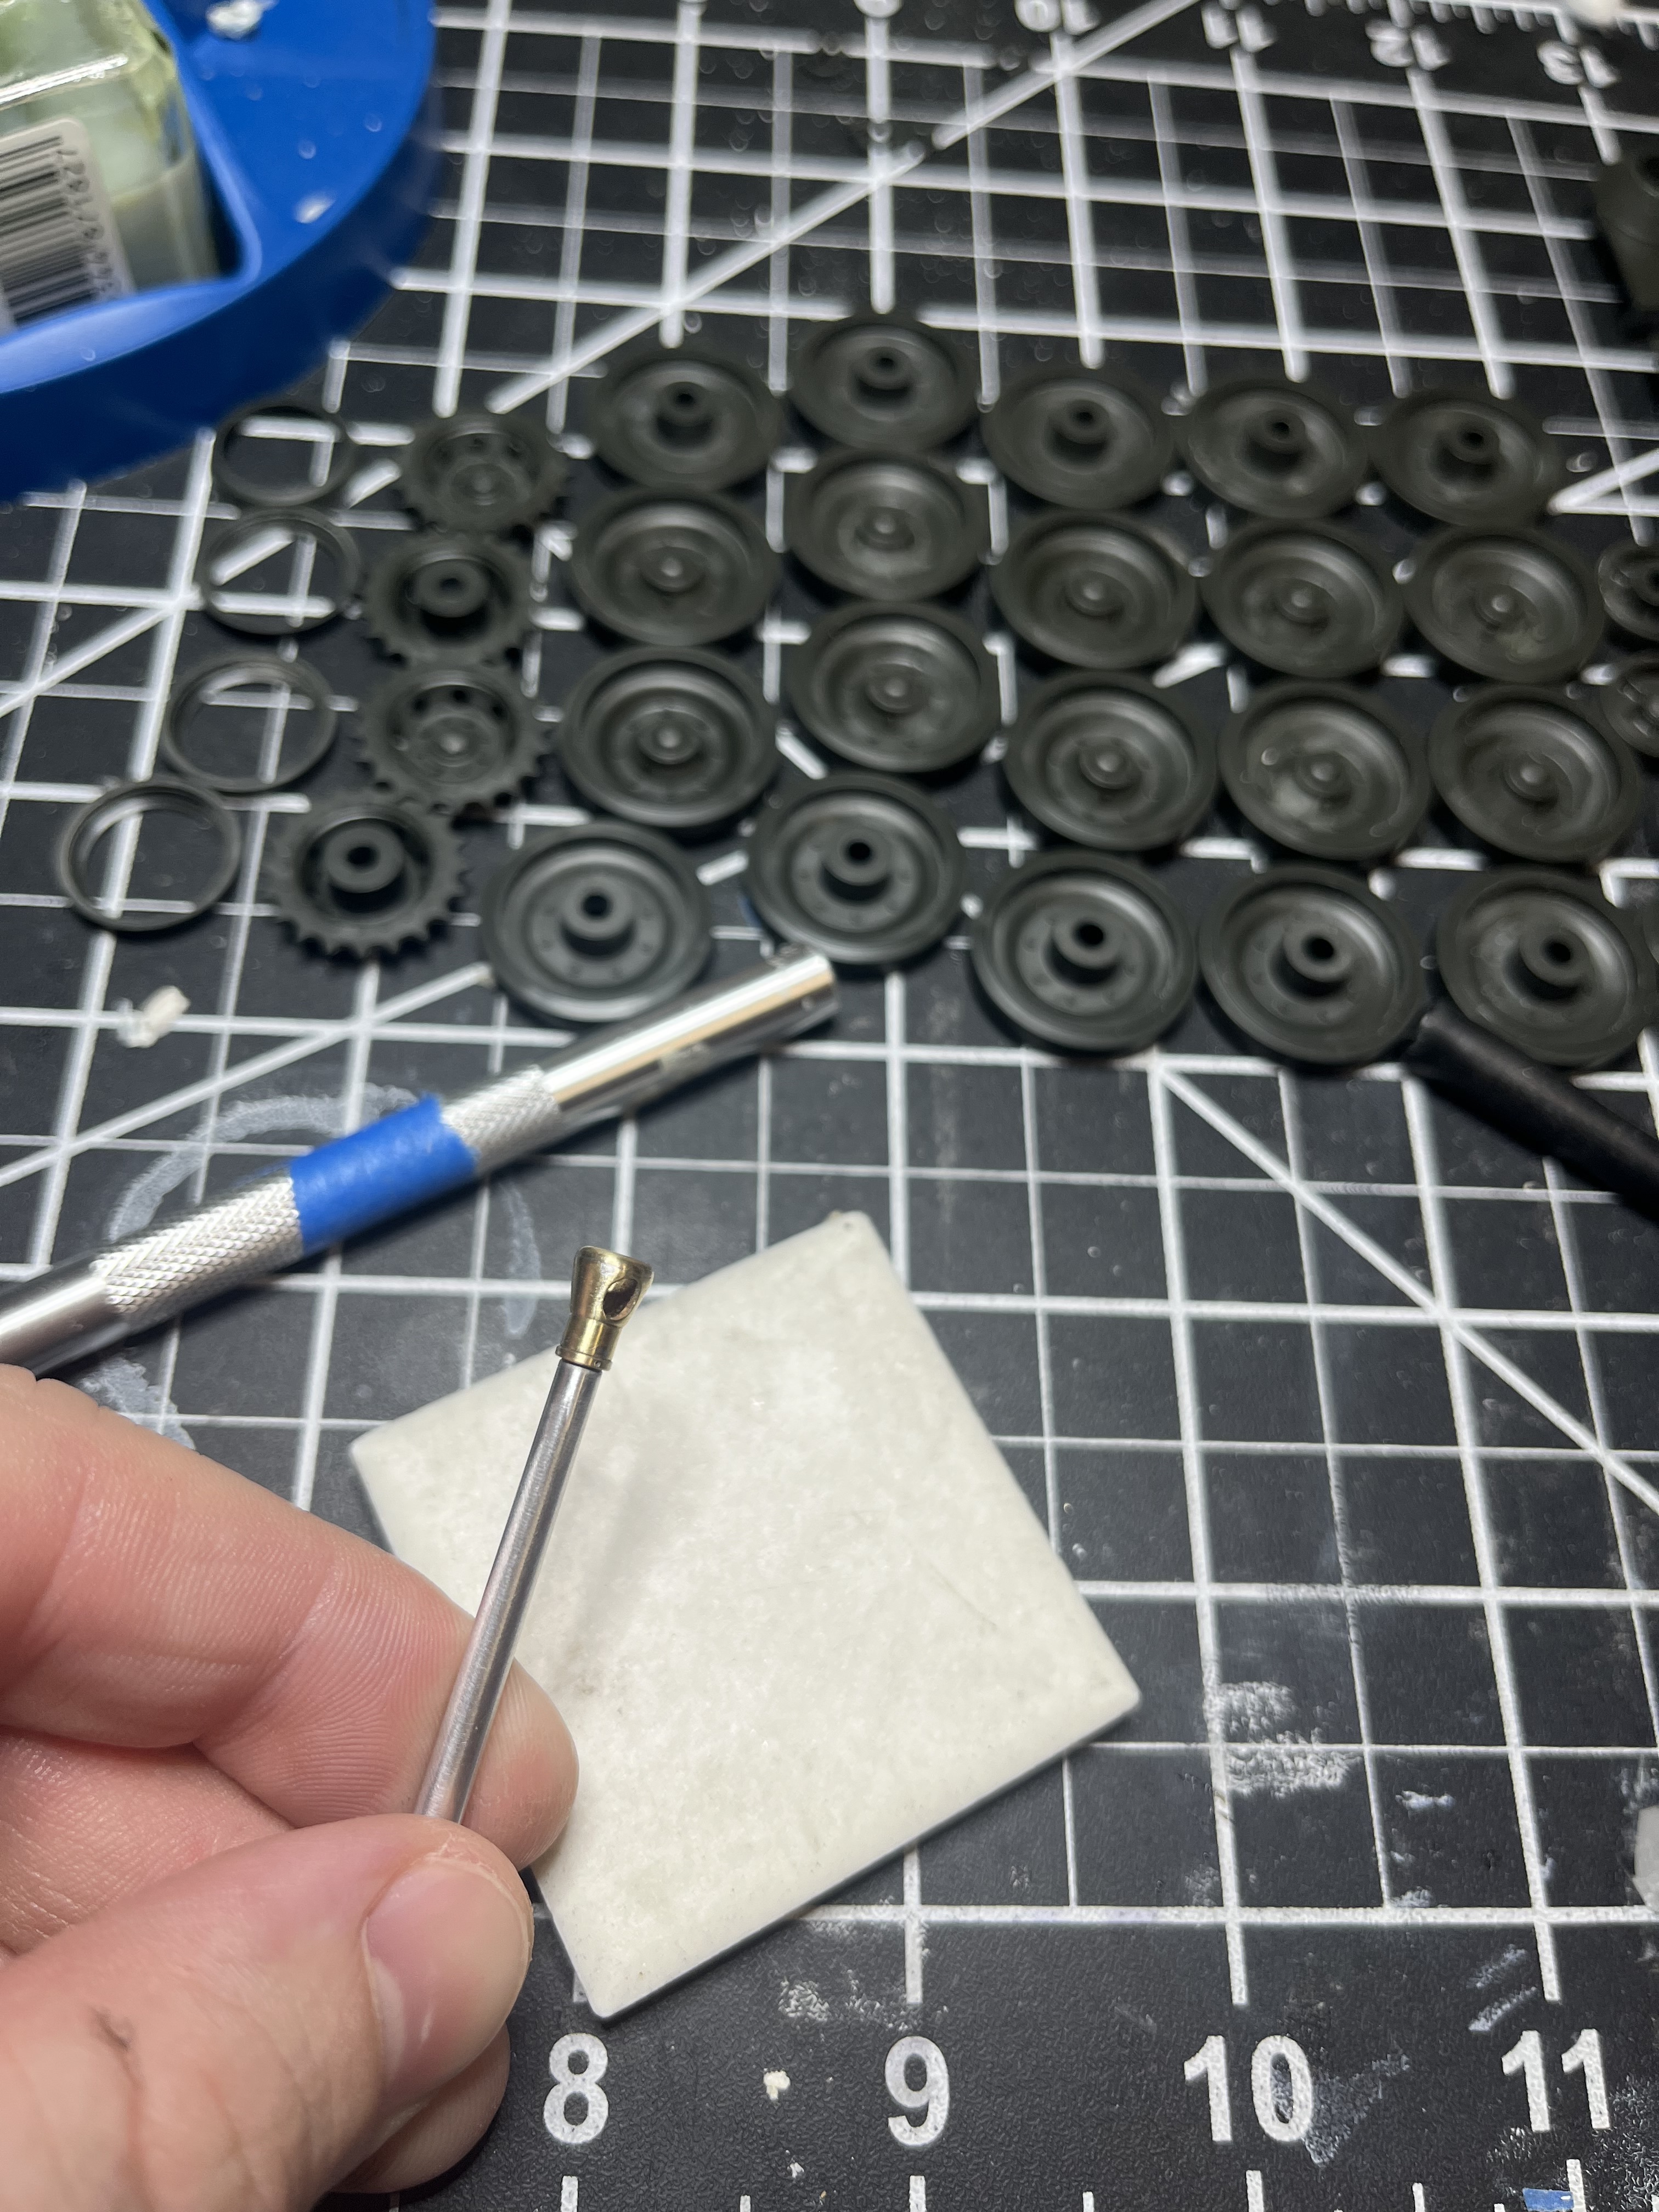
With a bit of spare time tonight. I turned to tackling the hull latches I need to replace. I tried the mold method but it wasn’t working. I reverted to scratching them. I built up one prototype by carefully sanding a small triangle of thin sheet styrene to shape. I then stretch some sprue and pulled it through a metal circle template to shave it down to the right shape (I didn’t have a punch small enough). I think it looks the part, just need to drill out the center of the green disk from the sprue. I will use this one to trace out the general shape on the sheet and make 3 more
11 Likes
Looking good! Very nice on the Aber barrel repair and engine deck tweaks.
3 Likes
Looks the part. ![]()
![]()
2 Likes
Womp womp, abandoning this build, this kit fought me at every turn. First the metal barrel had the cracked muzzle brake. Then it wouldn’t fit the mantlet at all, was way oversized so it wouldn’t fit snug in the hole and was sloppy. Next in my attempt to glue in the gun I got super glue spill on the mantlet.
When sanding the punch marks on the underside of the fenders I went a little to aggressive and now the fenders look all messed up.
Just not having a good time with the kit, and the fun is gone. Pretty discouraged as this is supposed to be a really easy kit to build and o made a mockery of it… on to the next one I guess
3 Likes
Oof, tough break but I get it though.
1 Like
Unfortunate turn of events. I’ve enjoyed following your Cromwell build very much. Learned a great deal and appreciate the share.
Hopefully, a touch of quality debonder can help with CA spot and the side skirts with fenders at a future point.
After a bit of time, repair & restoration may be possible. In the know on that having left a thumb print on the turret roof before etc.
Looking forward to the JSU build!
A+++ on subject!
3 Likes
Yeah I have learned too put kits back in the box and take a breath instead of trashing them. I was actually able to carefully sand back the glue slot, I planned on a light rolled armor texture anyway so this will be fine. The side skirt issue is another story ![]() I accidentally sanded a low spot in it so that it thins from the from of the tank to the back on the port side. This manifests as a top hull to lower hull for that goes from perfect at the front to an unsightly gap at the back
I accidentally sanded a low spot in it so that it thins from the from of the tank to the back on the port side. This manifests as a top hull to lower hull for that goes from perfect at the front to an unsightly gap at the back ![]()
I will get back to it one day and fix the fender issue but for now I need a change of pace before I get too frustrated
3 Likes
cover it with stowage or battle damage!
5 Likes
I think I may order some PE fenders! That would solve my issue on the fenders and allow me to get this guy done!
4 Likes
Crises averted, was able to order some voyager fenders off hobby easy for $10. Should be able to finish this guy A okay. Thanks for talking me off the cliff edge
6 Likes