Hi’yo gents!
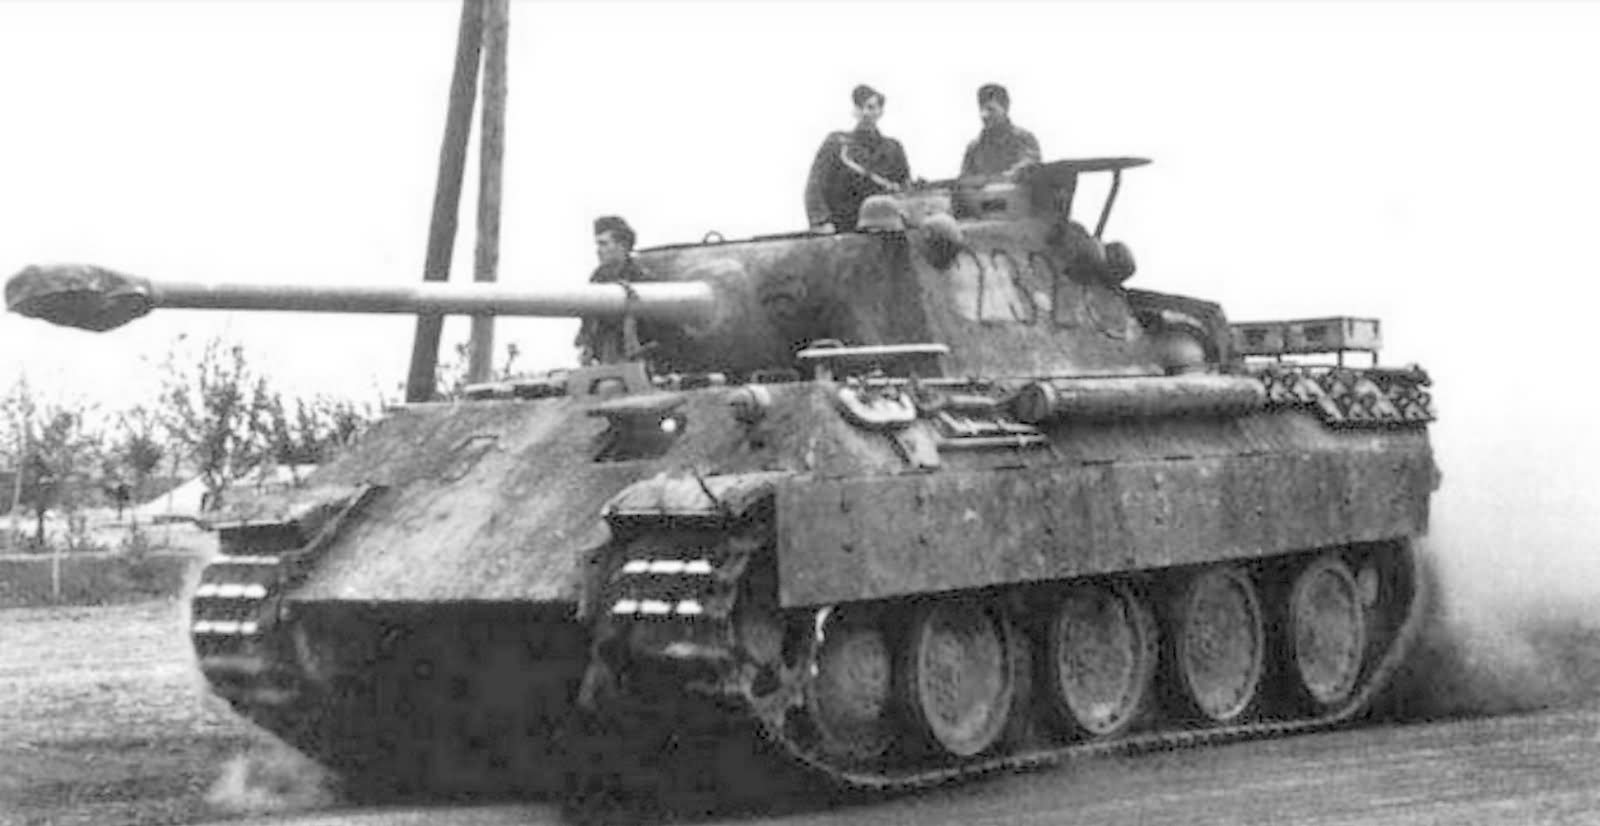
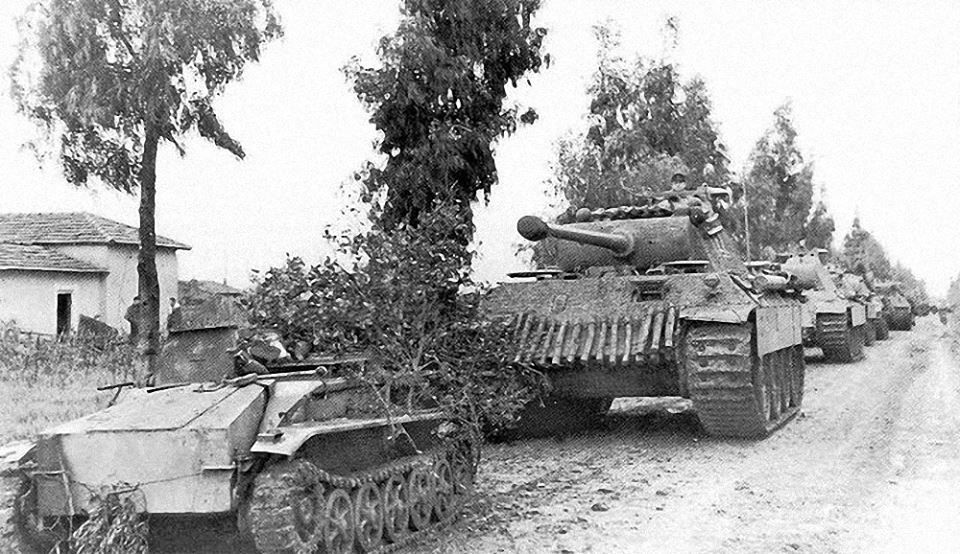
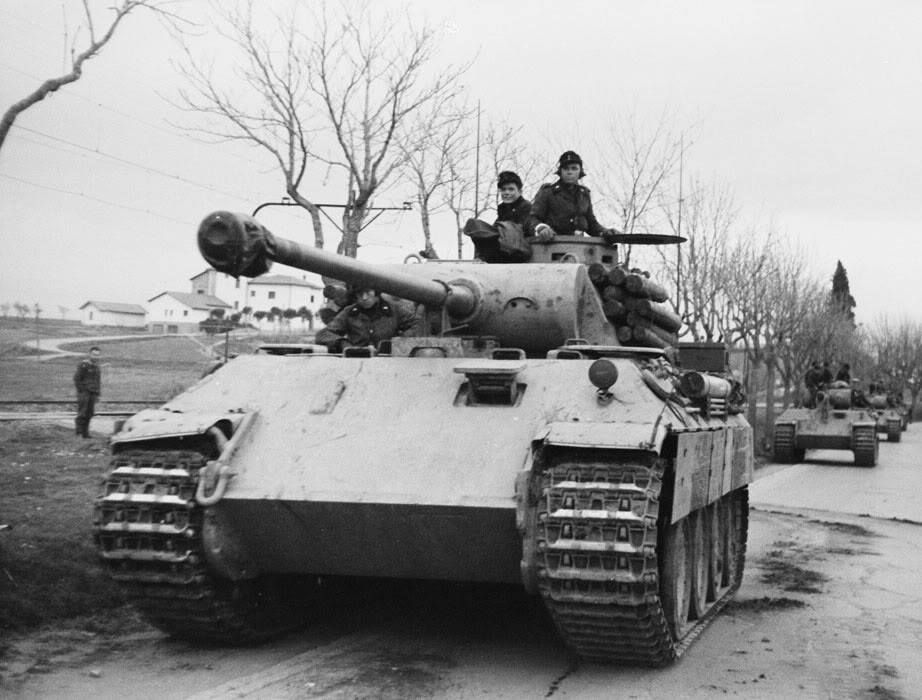
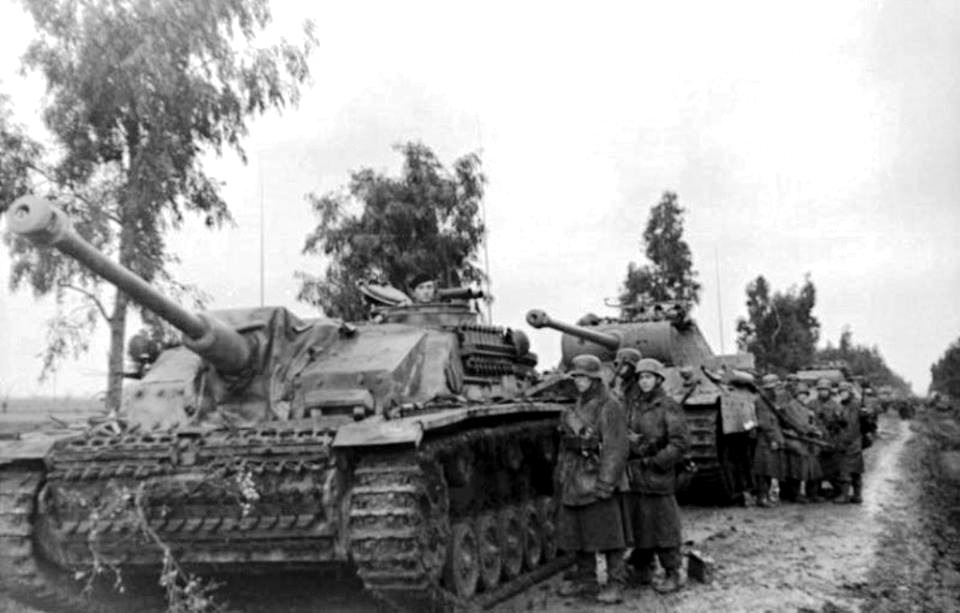
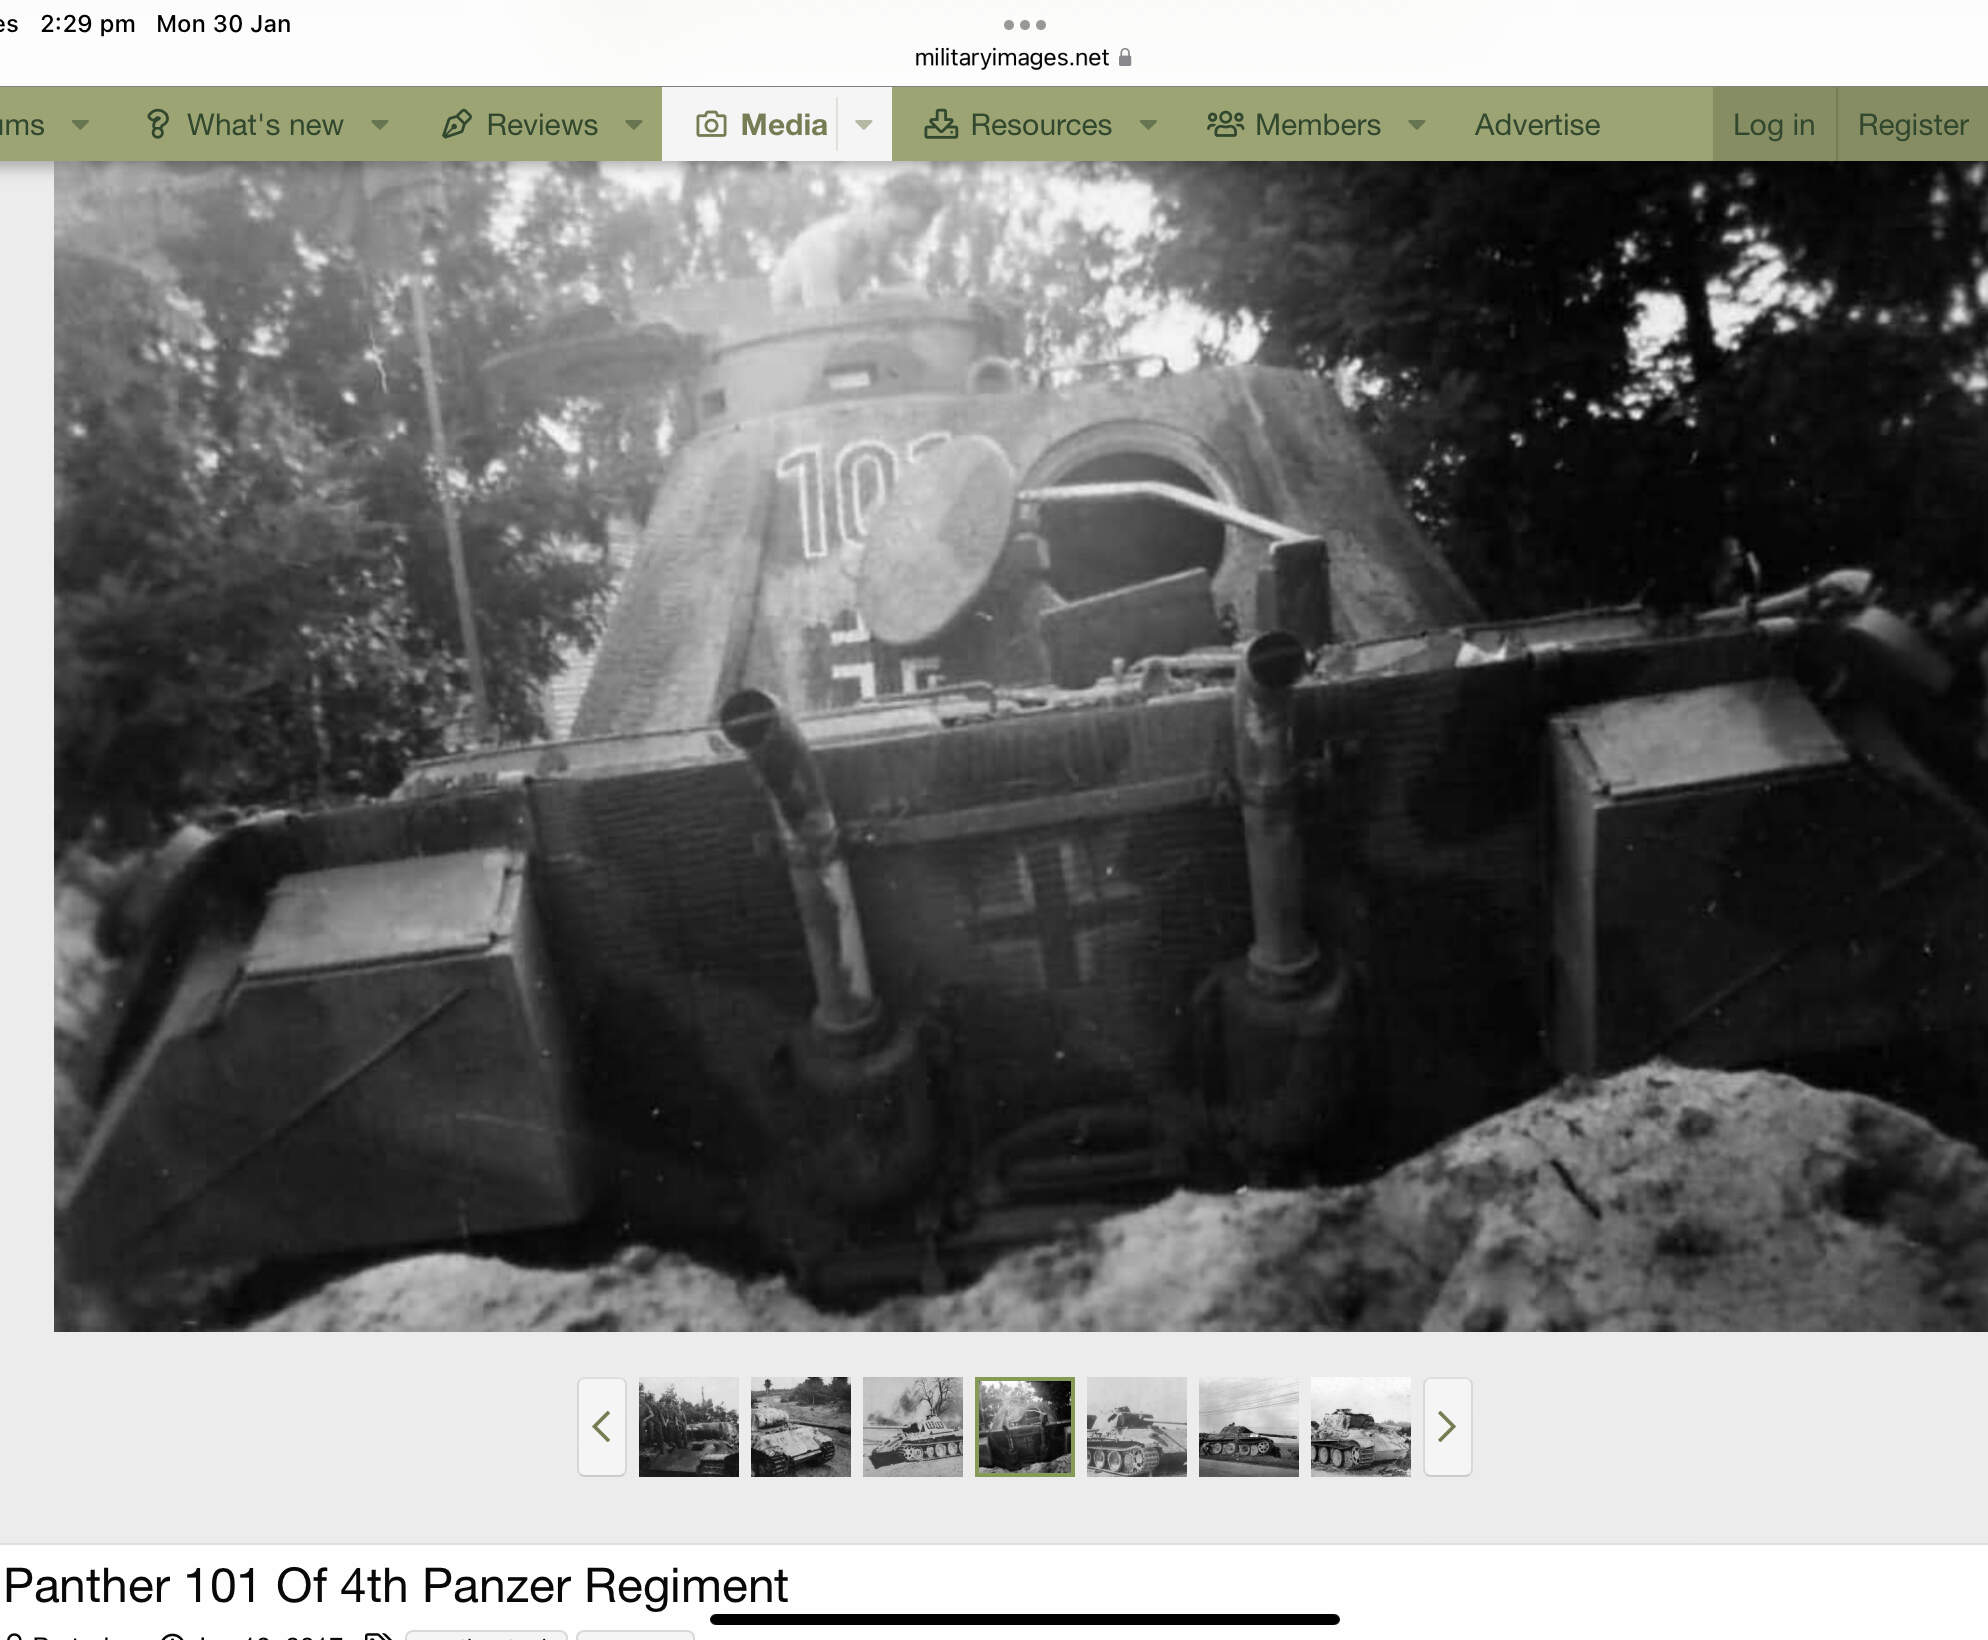
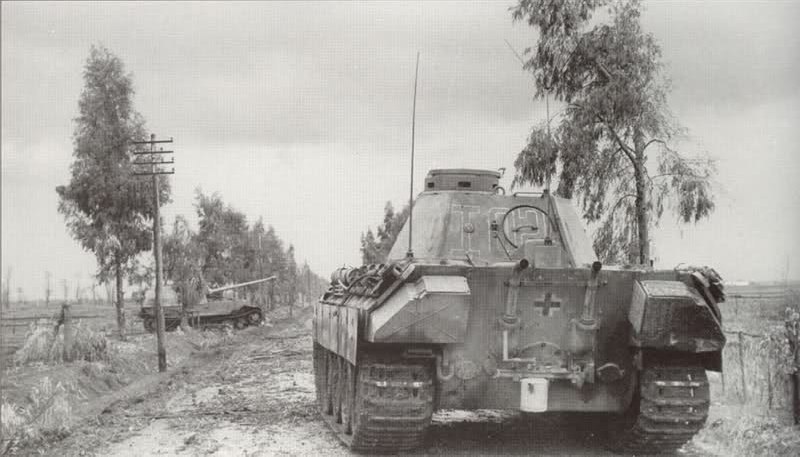
I’m building a pair of Panther Ausf. D from Pz.Rgt. 4 at the Battle of Cisterna, shortly after the Allied landings at Anzio, Italy. There are a couple of photos of possibly the Regimental XO’s or CO’s track with number I02 close to a mobility killed Ferdinand on a side road.
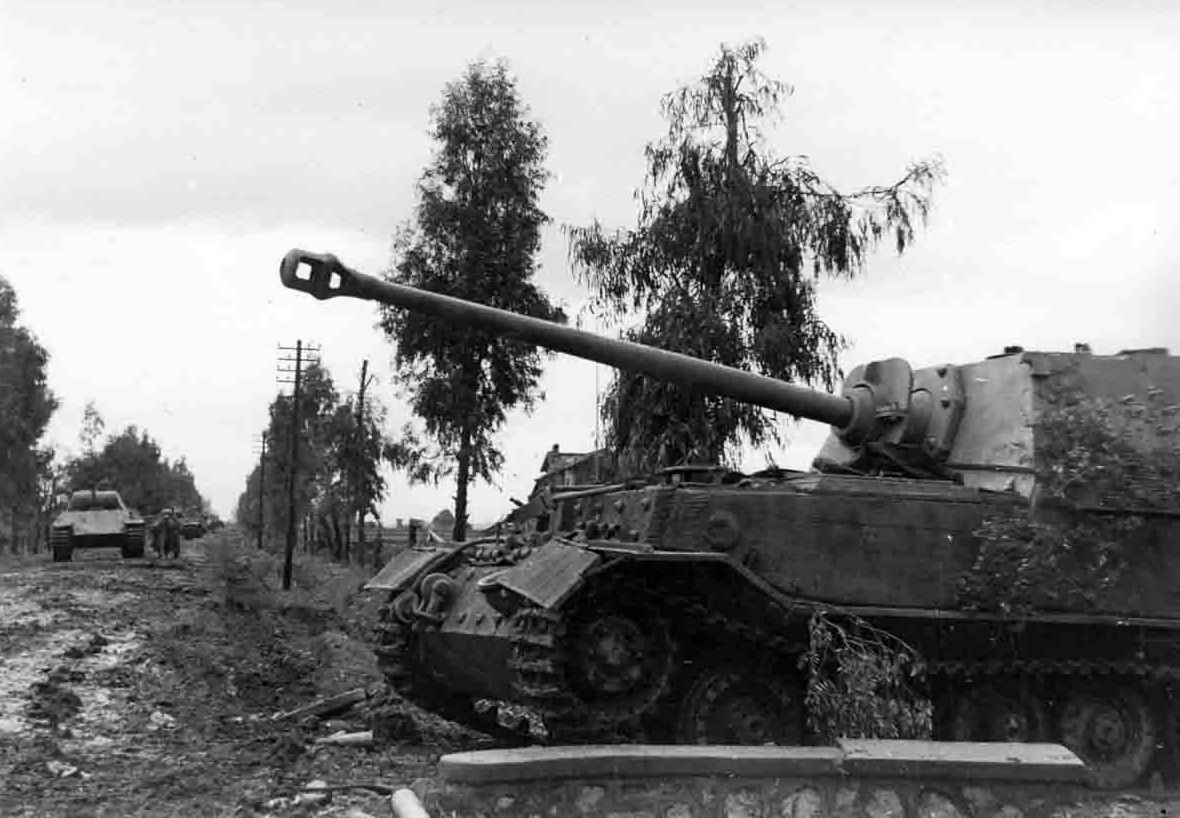
There will be a diorama built around this and my initial thought was just that single Panther on a section of road. But I’m getting ambitious (maybe too much so) and saw an ICM Panther pretty cheap on Amazon so I picked it up as well. As a result the diorama will end up being about 2’ x 10" (61cm x 25cm) to replicate part of the column in that scene. The Tamiya Panther will be the lead Befehlswagen no. I02 and the ICM will be the trailing track with the turret turned to the “threat” of whatever knocked out the Elefant.
Additional parts were ordered for this project with 2 sets of Tamiya’s indy tracks, PE radiator mesh for both tanks, Aber aerials including the Sternantenne D, and MR Models’ upgrade resin kit for the Ausf. D.
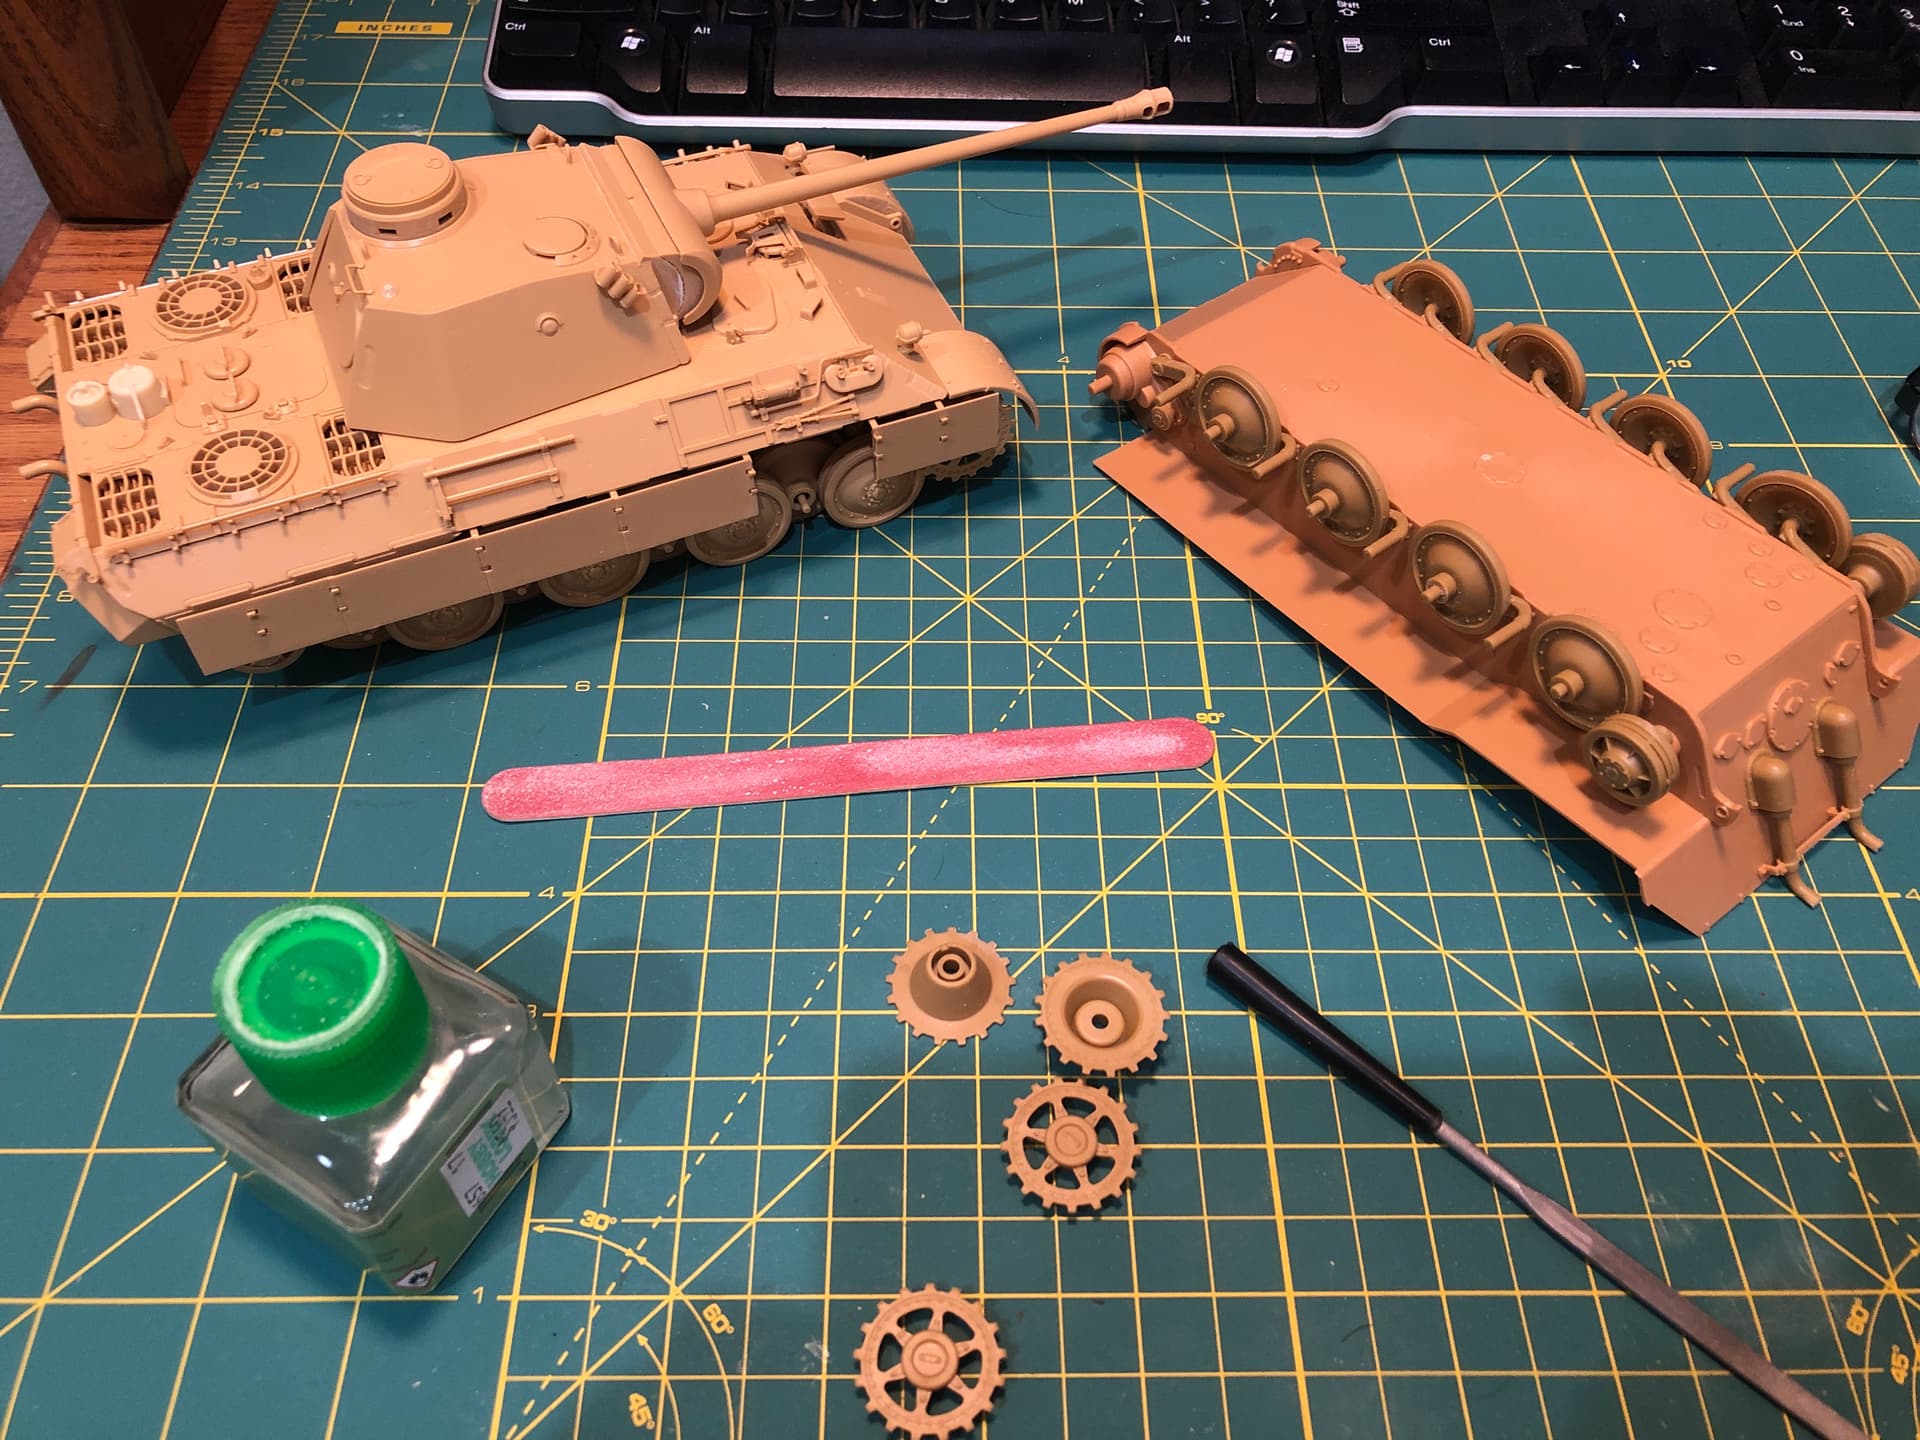
Here’s the first shot of the Tamiya mostly done with the Sternantenne D mount and armored cover for the snorkel as well as the track links starting to go together.

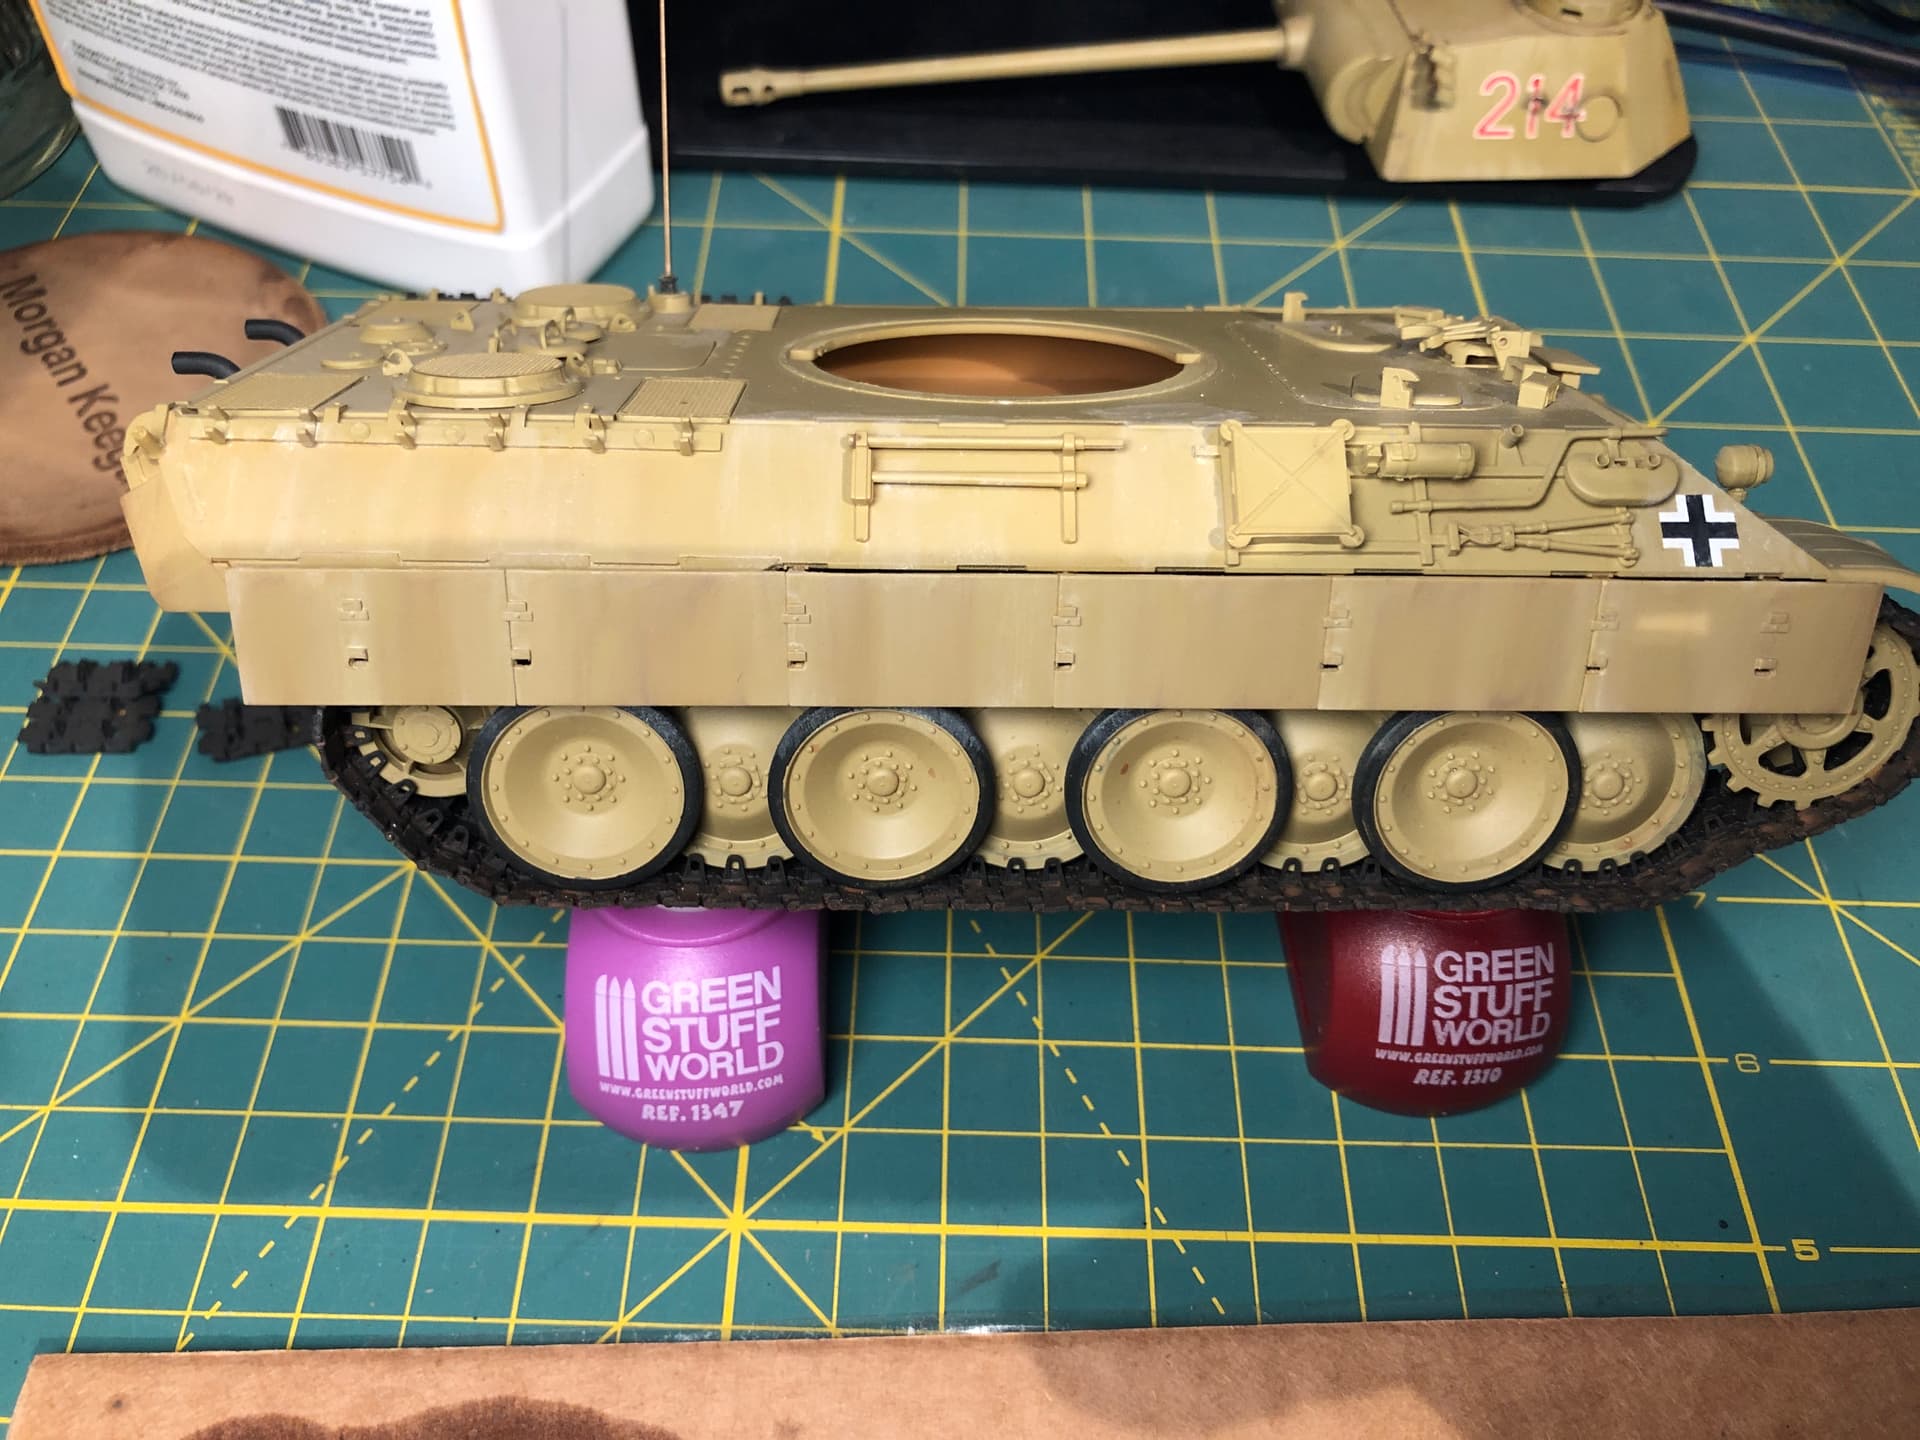
Here she is pretty much assembled (Schürzen won’t go on until after the tracks are on). The Sternantenne is not glued in place as it’s way too delicate. Just look at it wrong and it would probably crumple. It will literally be the very last thing glued on once the entire diorama is complete.

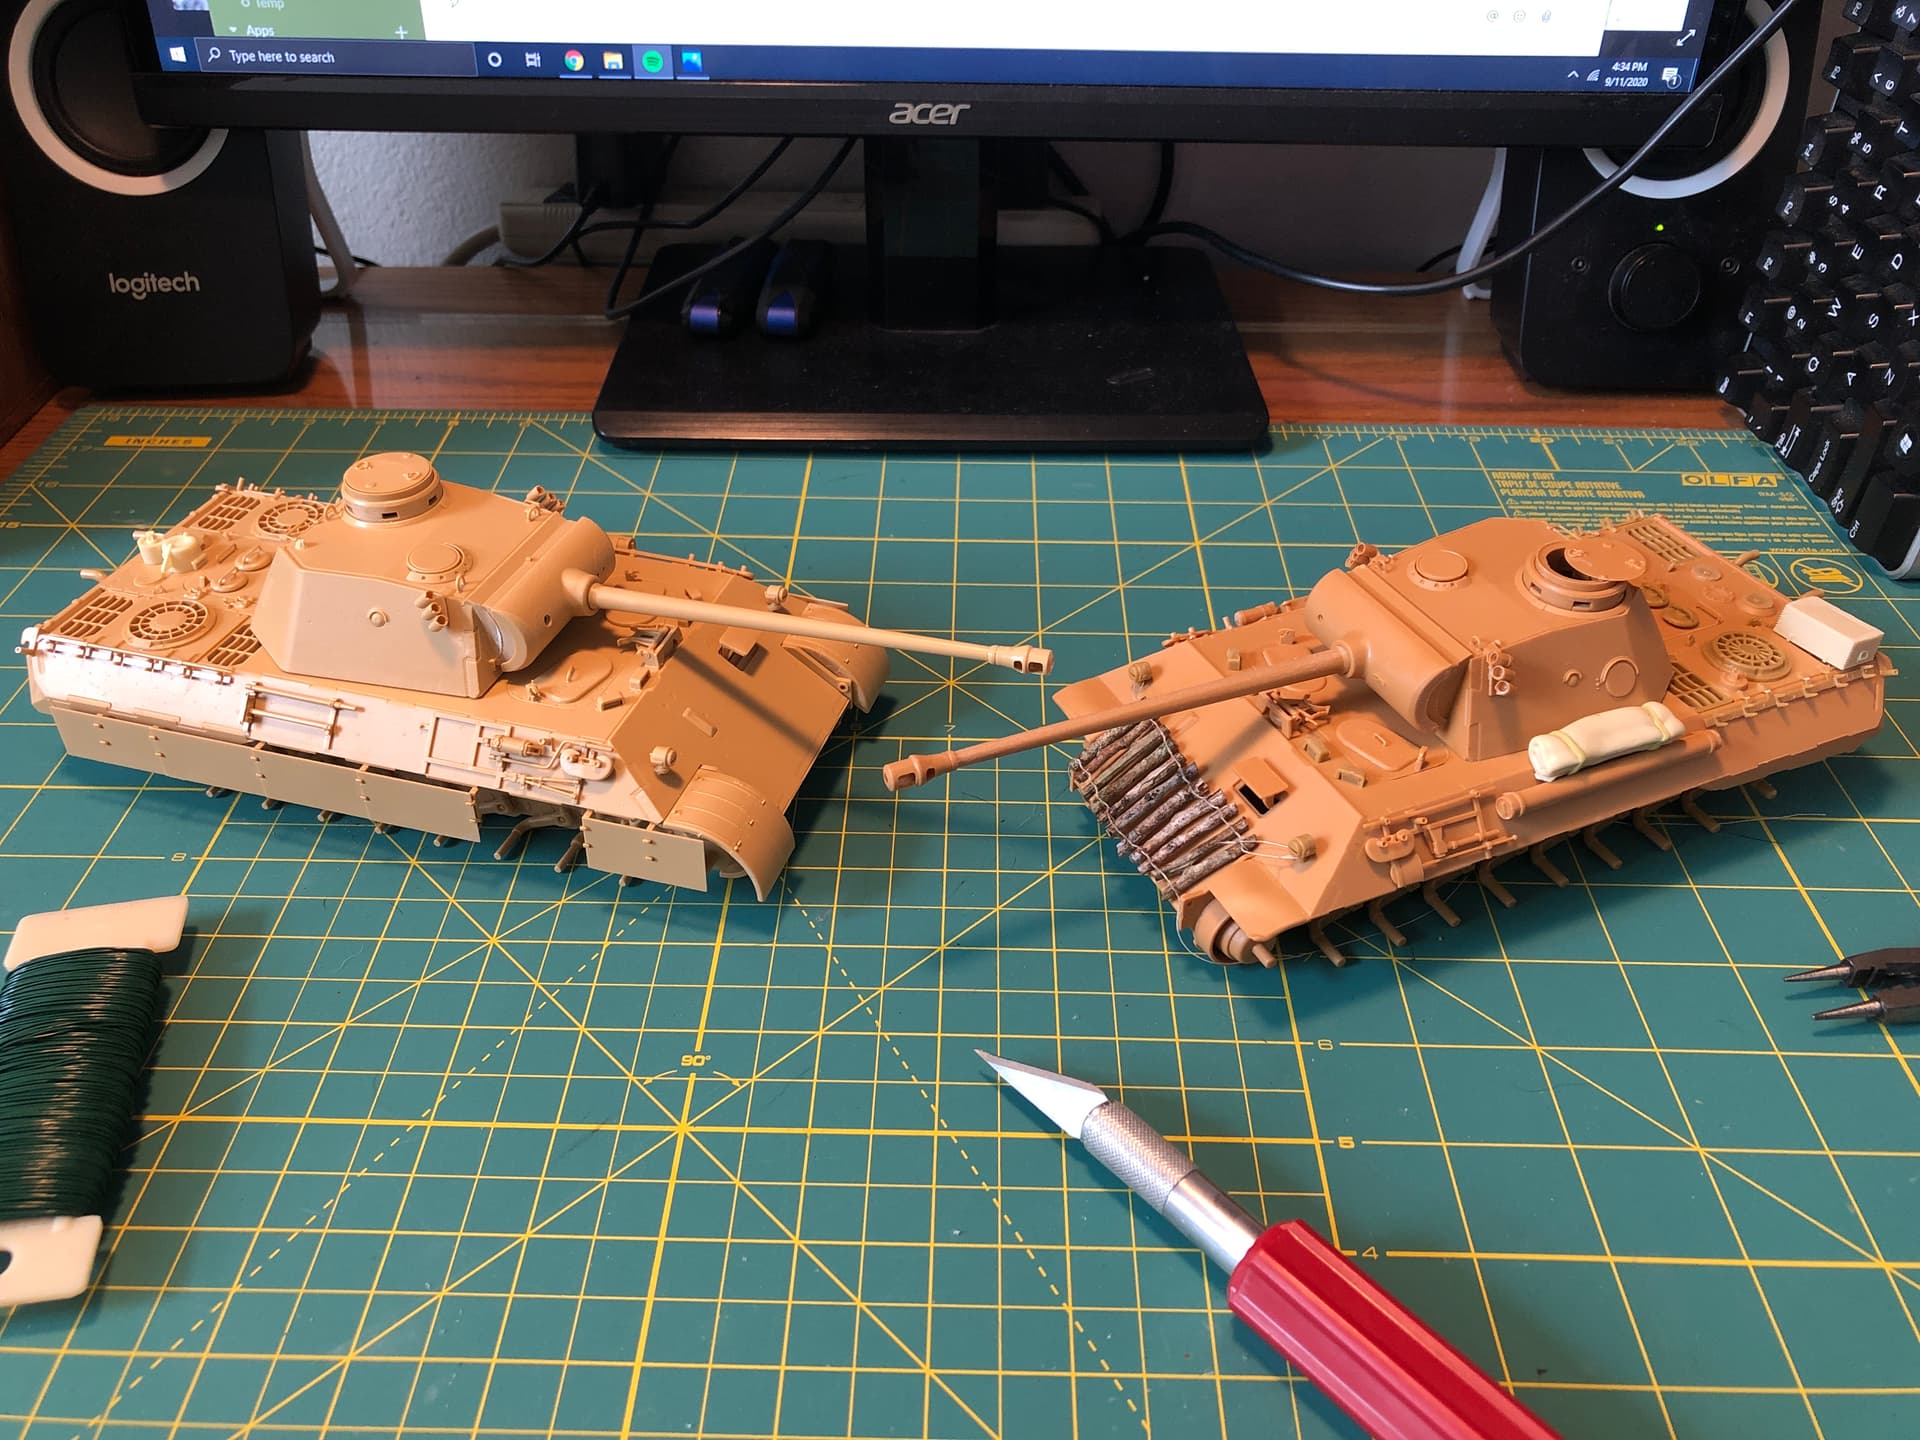
Here’s the ICM kit starting to go together. Unfortunately no poly caps for the wheels but other than that I’d say it went together really well. I was expecting some decent problems getting it assembled but that wasn’t the case. If I had any complaints it would be that the engine access hatch and the front hull plate that has the hatches for the driver and radio operator were separate pieces. And they took quite a bit of sanding to get to fit in the upper hull.
Both pretty much done with assembly. I created the field expedient mud recovery logs out of twigs in the yard. Apparently there was quite a lot of rain that particular year and a lot of the Panthers from Pz.Rgt. 4 are carrying similar kit.
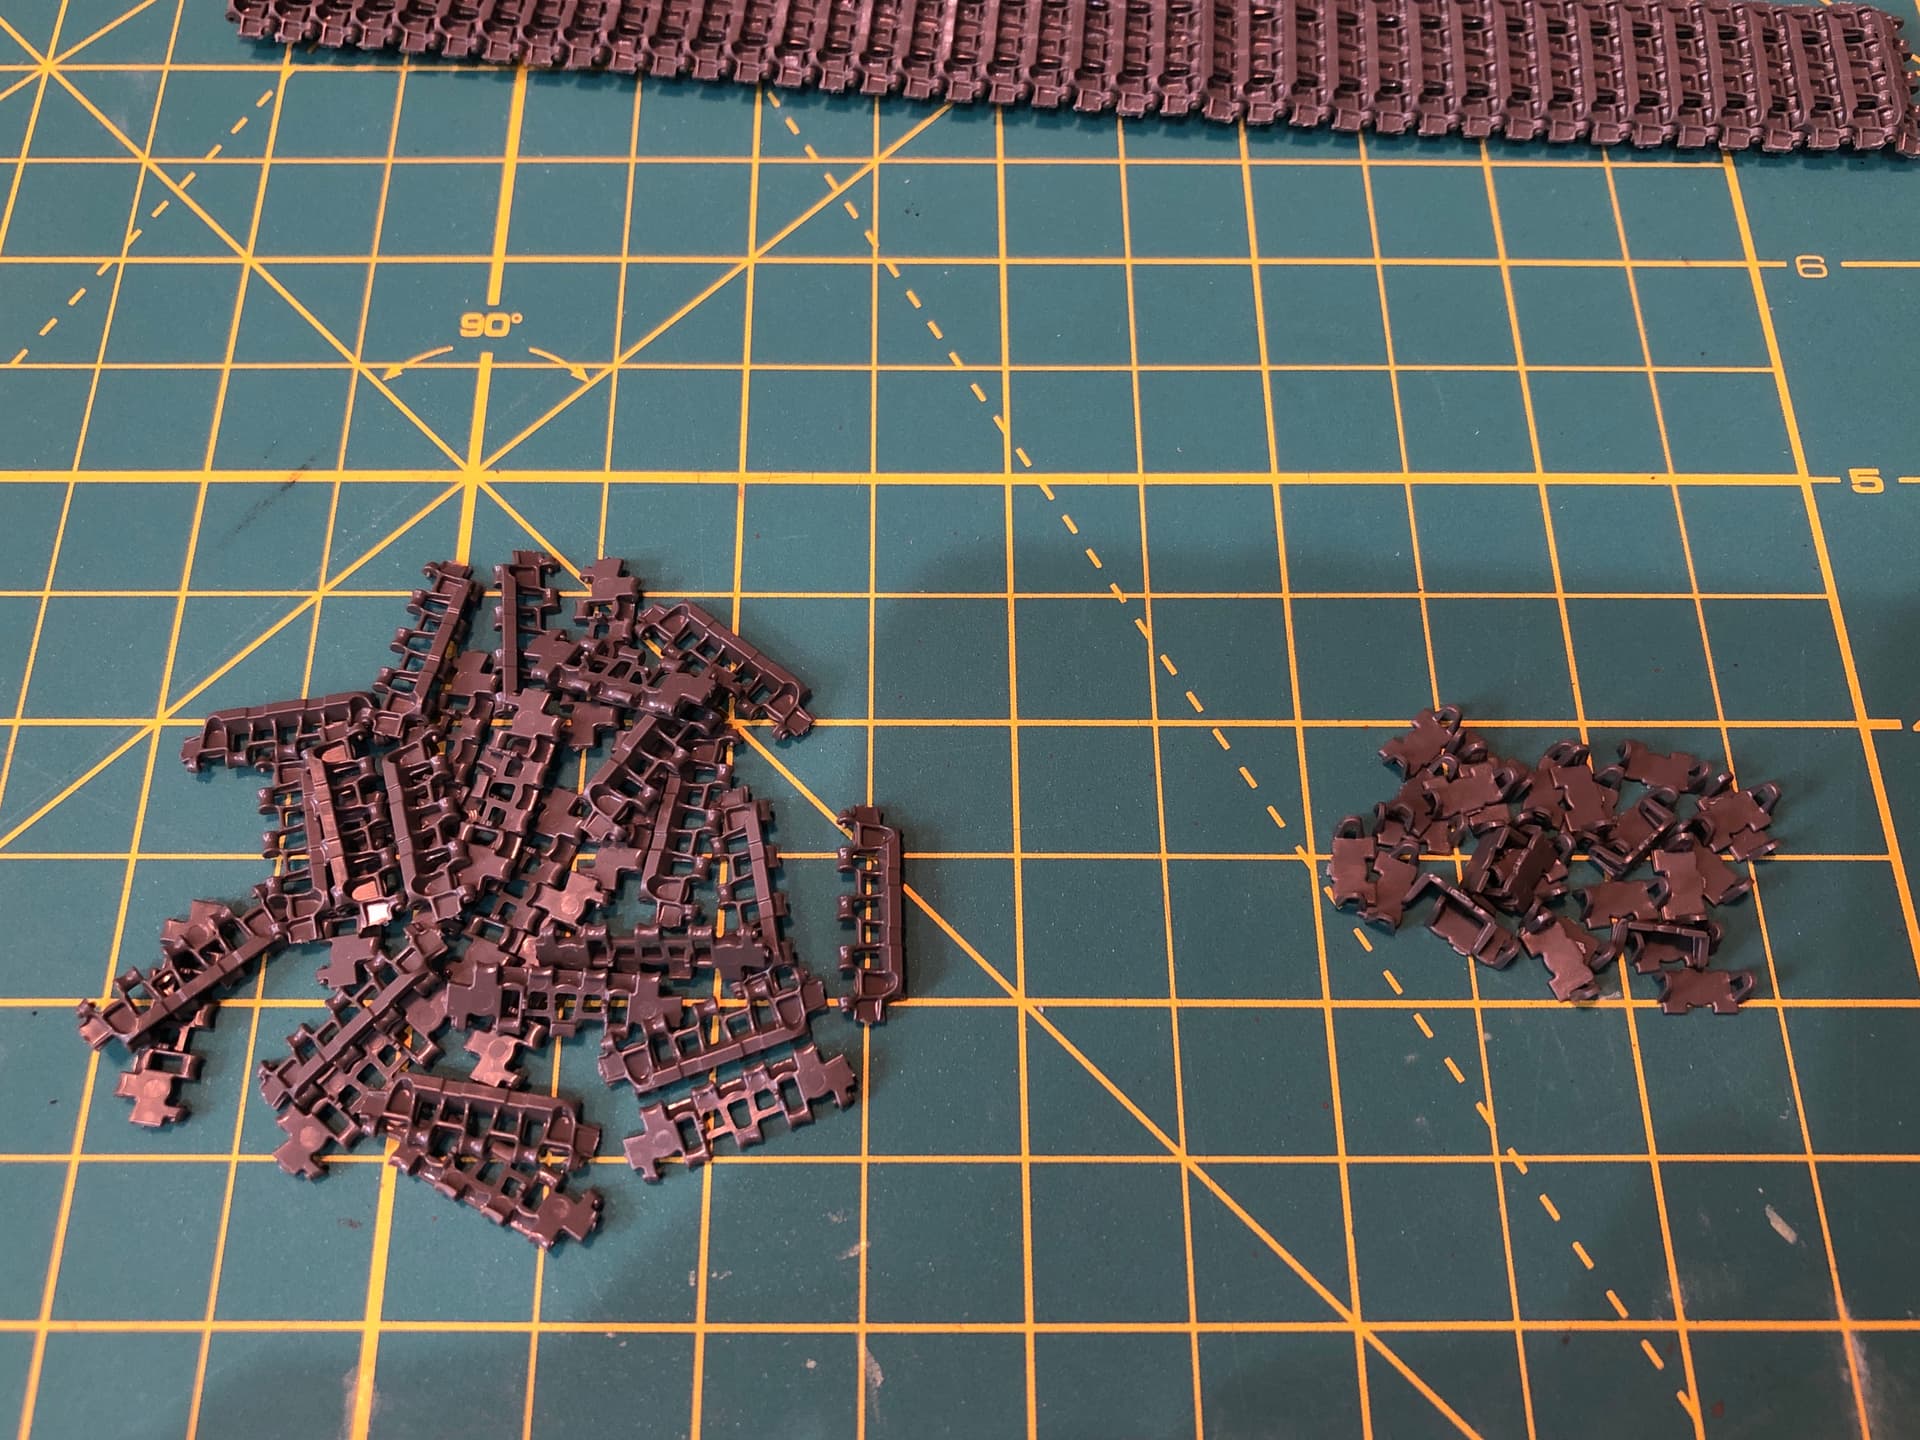
Perhaps two complete sets of tracks (each link two pieces) was a recipe for insanity.
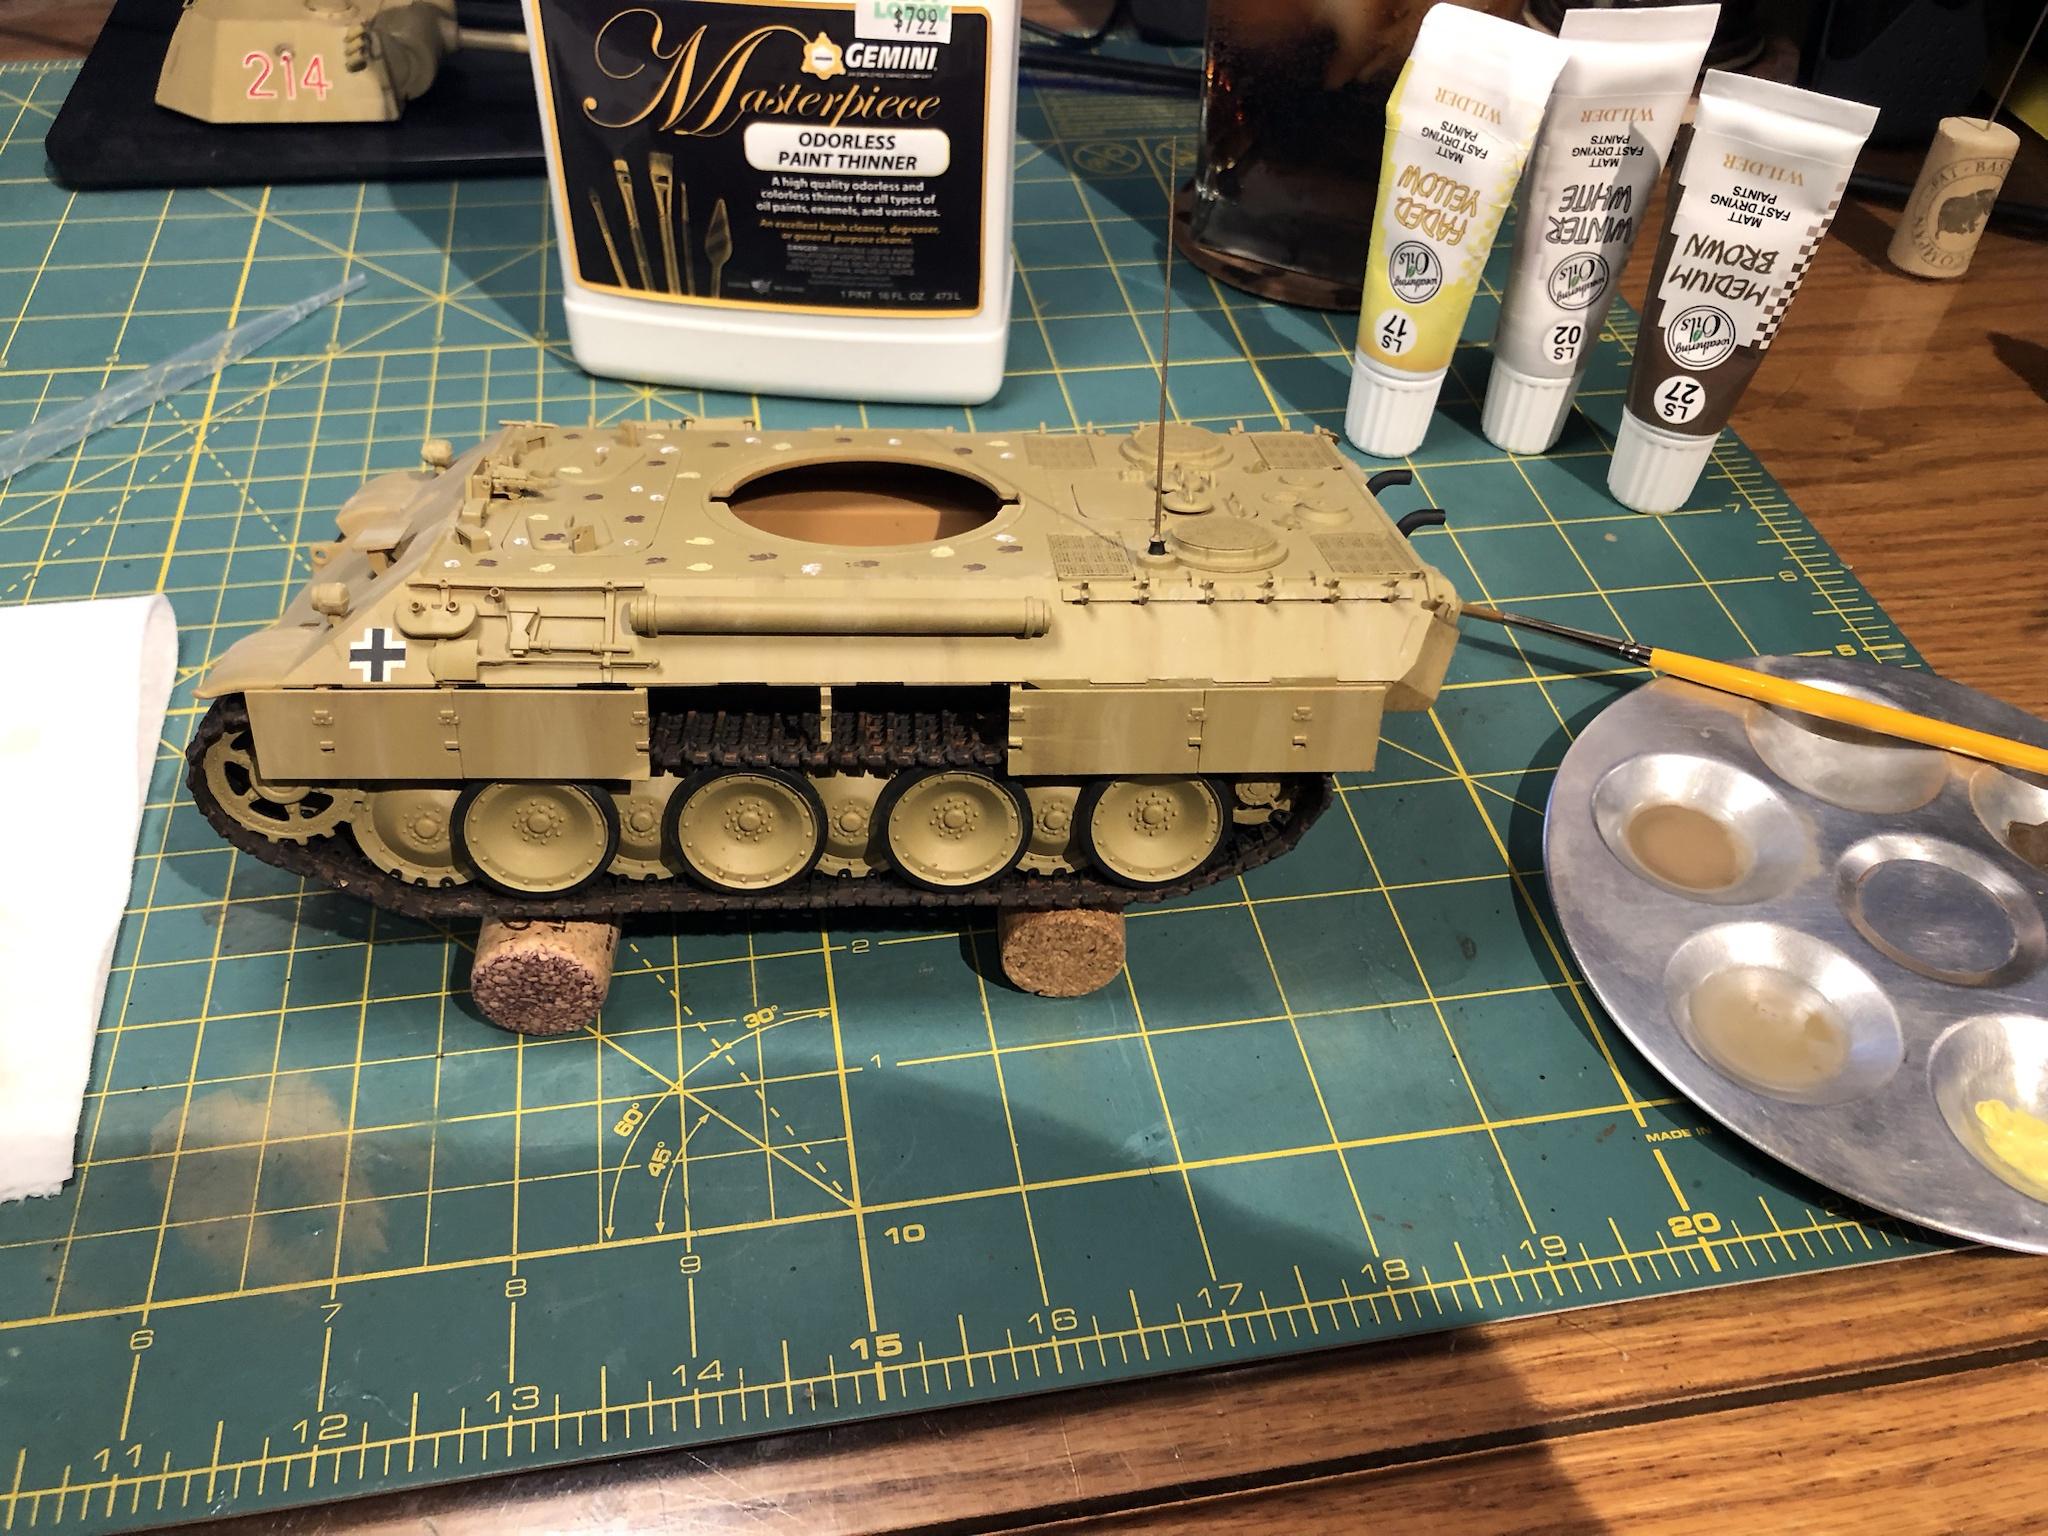
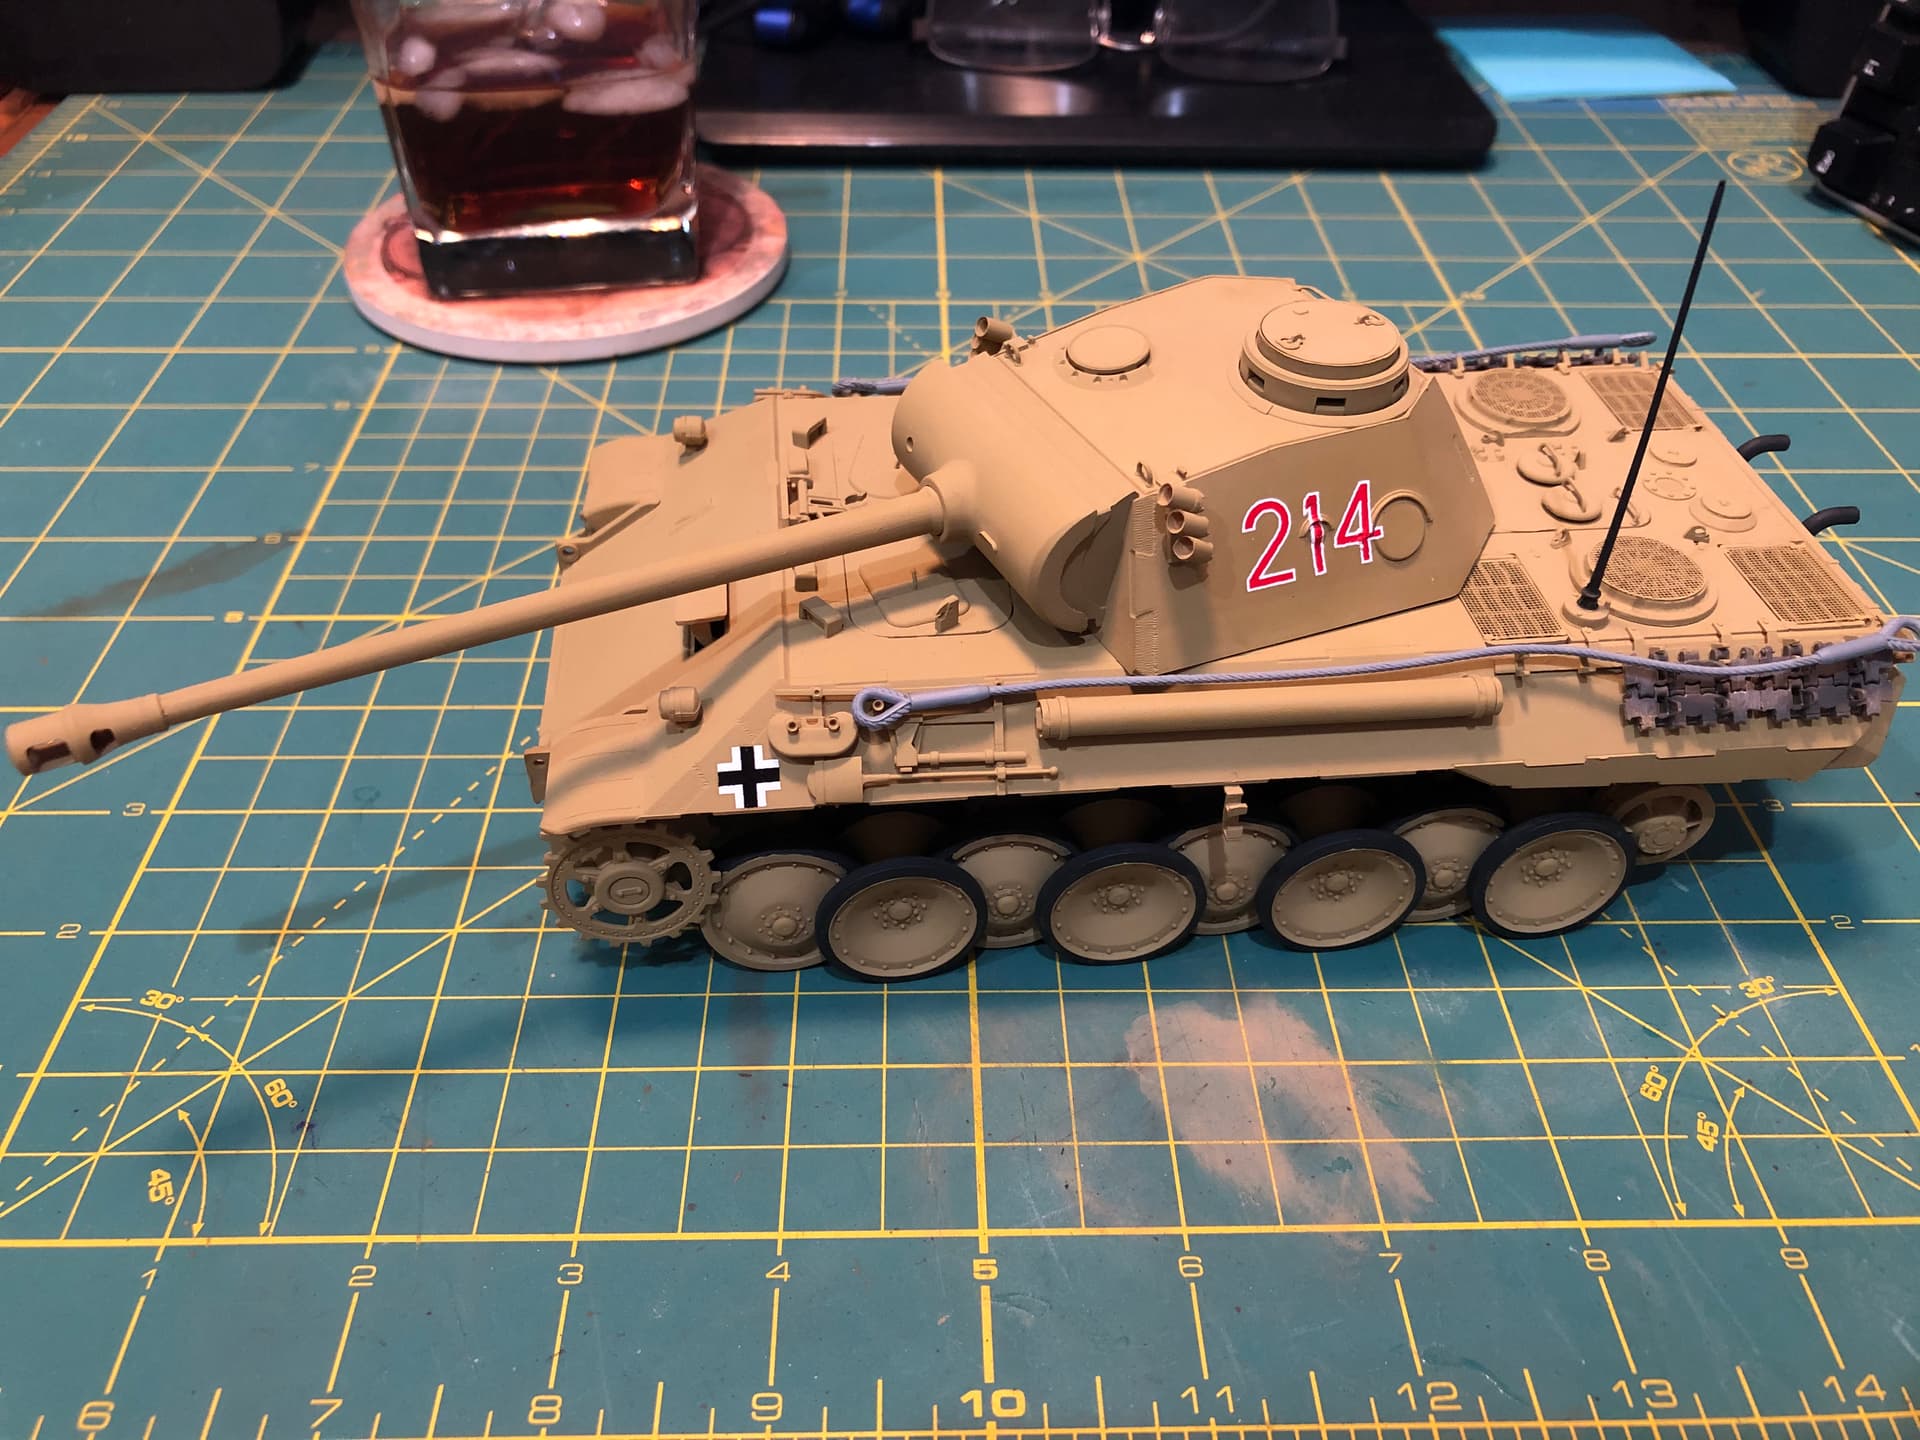
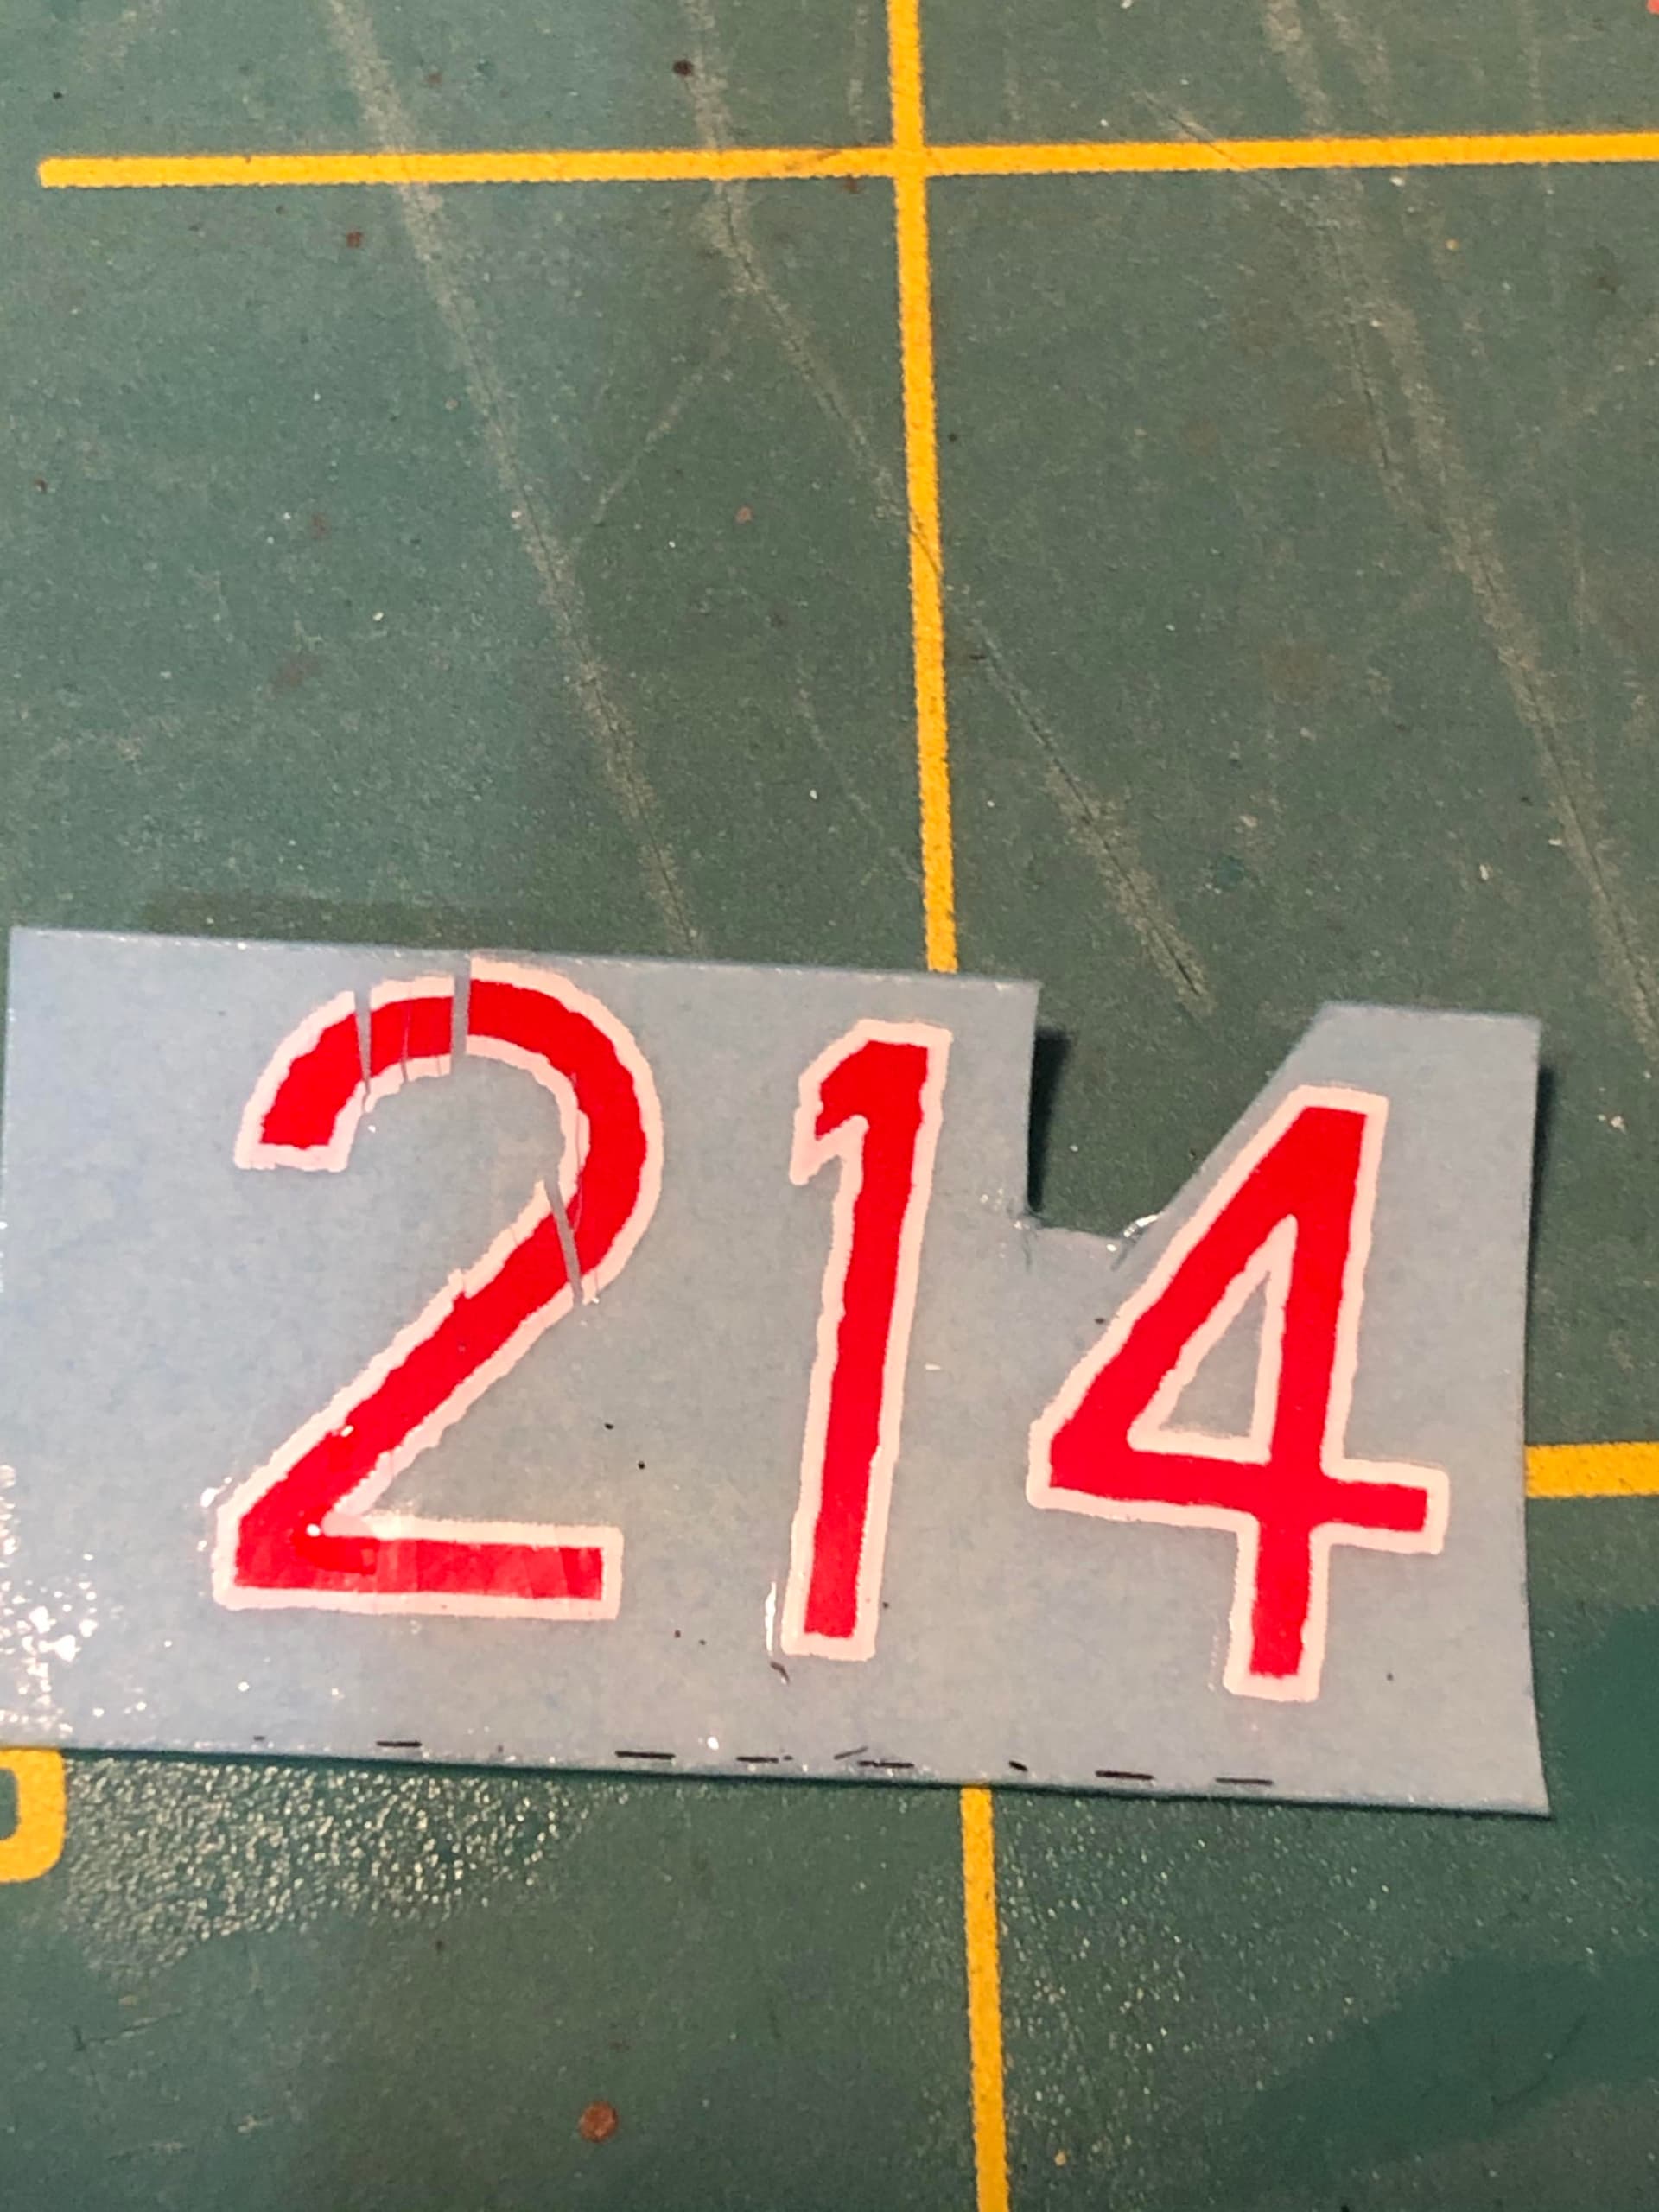
Both have been primed and have their Dunkelgelb applied (Tamiya XF60). Decals are on the ICM Panther. But I ran into a problem with the last set of tactical numbers that were going on the rear turret. When they’d been soaking for a good 10 minutes I started to use a brush to transfer them onto the model and they started ripping to shreds. Has anyone seen this problem with Echelon decals?
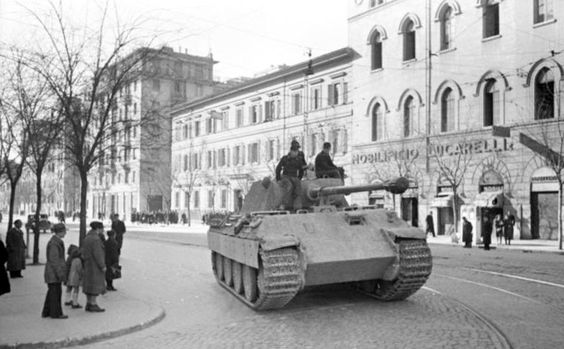
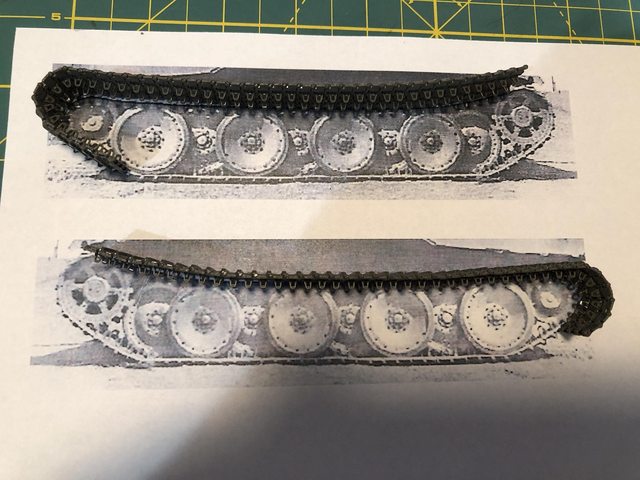
I wanted to build a jig so they’d have the right sag when I glue the track links because they’re not staying together on their own. I was thinking of this complicated process of using calipers to measure the height of the idler wheel and drive sprocket, creating stands at those heights, then running string from one to the other to act as support for the tracks, space them at the correct distance, and then start laying out the tracks and glue them together.
The more I thought of this the more I realized one wrong move and it’s all going to come down like a house of cards. Unless I went out to the garage and knocked something together with scrap wood . . . and it’s too cold out! I needed to come up with an alternate plan. Below was the simple solution. A photo of a Panther from the side scaled so it matched the distance from idler wheel to drive sprocket on the model. Works like a champ!
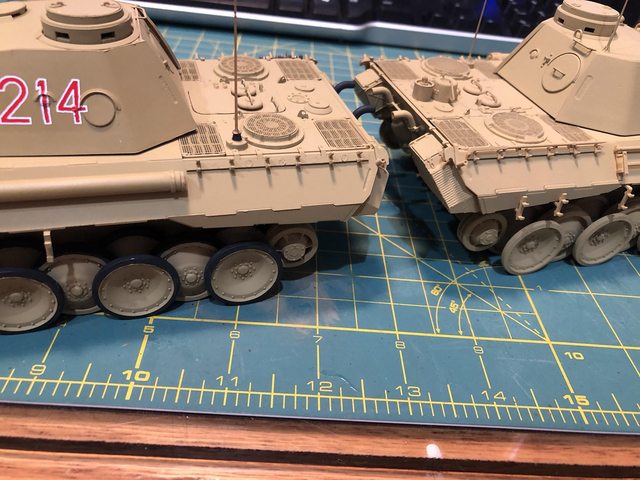
I wasn’t happy with the Schürzen mounting bracket I scratch built for the ICM Panther so I got some thinner sheet styrene and fabricated a new one that more closely matches those that came with the Tamiya Panther. Considering some of the cuts are only 1mm and it’s the first thing I’ve scratch built I’m rather happy with it (ICM Panther on the left).
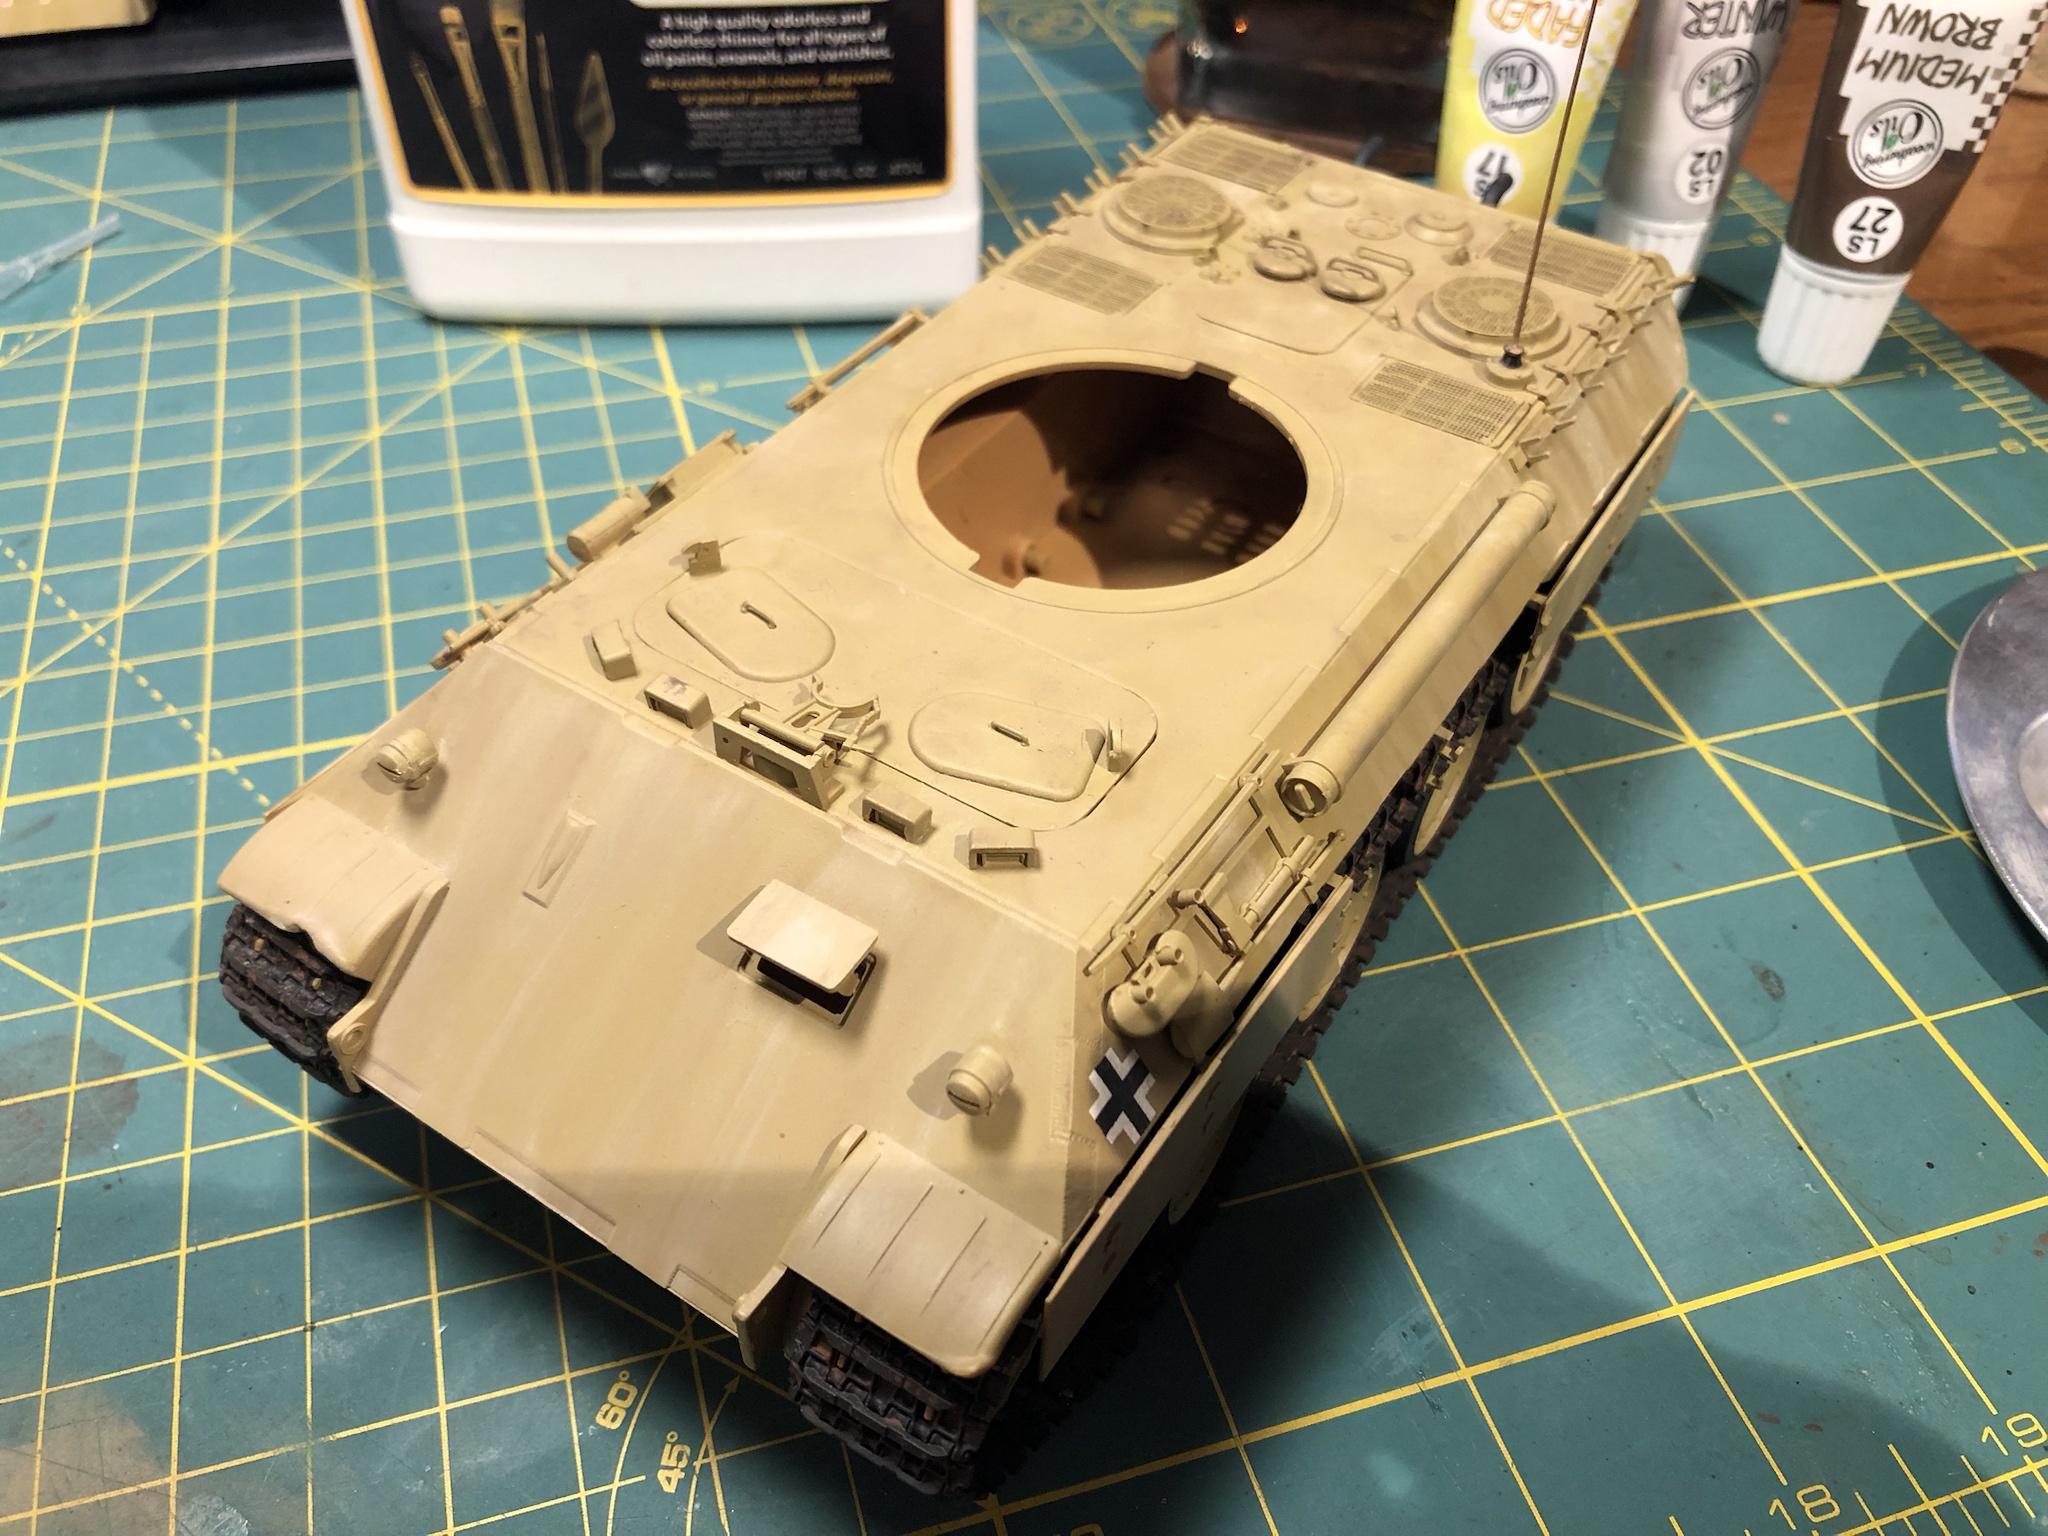
Dot filtering and pin wash is next. Both are new techniques for me. I haven’t built a model since my teens.