Tamiya M2A2 ODS kit 3D design improvements

Just wanted to start a topic covering things needed to make the Tamiya M2A2 ODS kit:

  1. More accurate

  2. To depict a M2A2ODS-SA in Ukraine

I will do a overview of what I have done so far and then start touching on where I am at/going.

I will gladly entertain constructive criticism, suggestions, and even wishes so long as photos or diagrams are provided (to keep discussion clear).

6 Likes

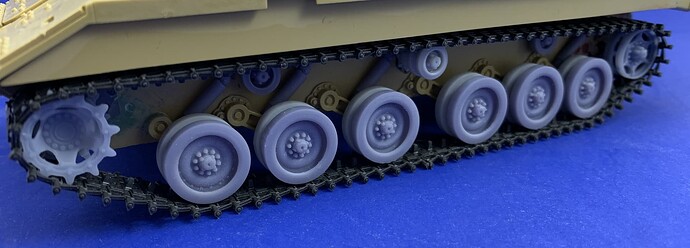
I started with the suspension on the kit.

Using the M2A2 ODS vehicle on display at the Minnesota Military Museum at Camp Ripley, MN I did a LOT of measurements all over the vehicle to help create accurate parts.

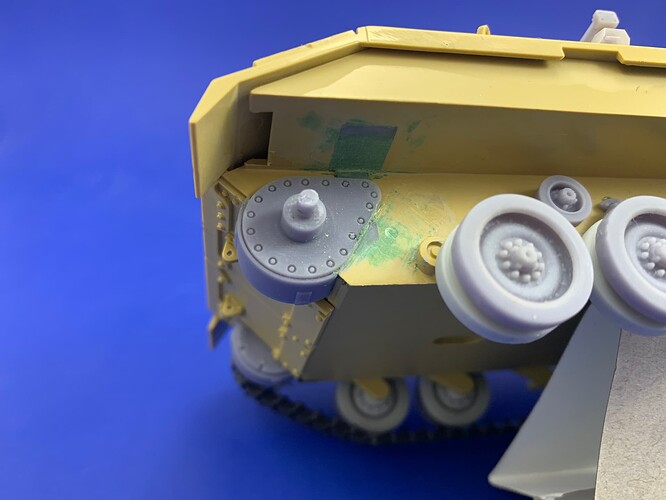
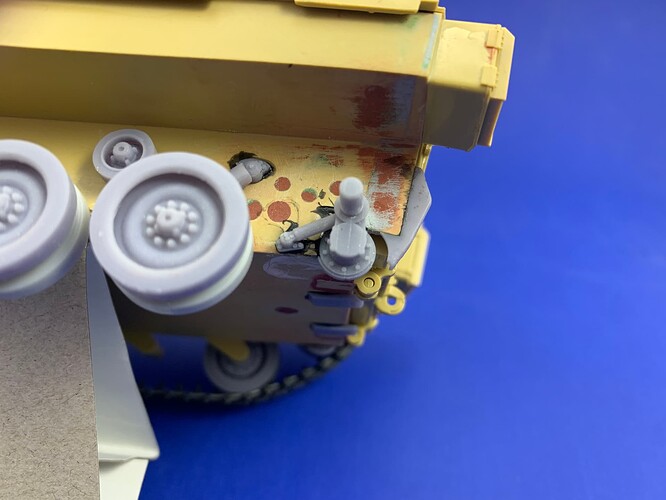
The M2 series roadwheels are unique: Gino once pointed out long ago that the M2 and M109 roadwheels do not have “rims” - the vulcanized rubber goes all the way up and around the rim edge. The rim also wraps inside the wheel a little bit, which modeled even though it cannot be seen without cutting the wheel in half. I did retain the ability to use the plastic grommets to mount the wheels on the arms, more usable but the backside of the inner roadwheels are not so correct. Oh well.

With the roadwheels done, I made some faux shock absorbers to represent these very obvious missing pieces on the kit. However, they are not a full fix…the roadwheel arms are molded to the lower hull, so it would take major work to fix. Not worth it in my mind, but they do the job well.

Return rollers are very simplified, so I made more detailed wheels with correct mounts. With the side skirts on, not really seen.

I did the idler mounts as something MUCH more realistic and created them so they the idlers are mounted staggered so they reflect the actual mounting on the vehicle. With this done, I made the idler so it was more accurate but without the ability to use the plastic grommet to attach it to the idler mount. Less easy to use (they have to be glued on) but so much more realistic.

The Tamiya sprockets are notorious for being incorrect, so I decided to take a crack at them. It took a LOT of work, but they eventually came out great. They fit the T-157I (Bigfoot) track well from many manufacturers (not every track tested) but they fit the Tamiya rubber bands, the AFV Club indy tracks, the MENG Indy track, and the Orochi kit tracks.

Finally, I made the front idler mounts so they would be oriented correctly, fill the motorization holes, and have better detail.
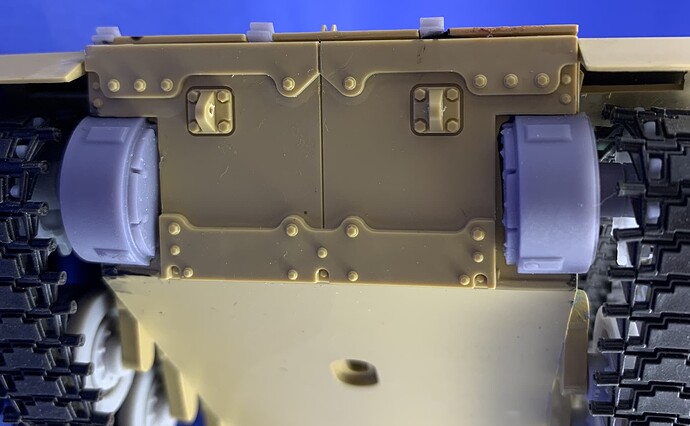
8 Likes

Hull Detail Updates

I noticed there were more details on the hull, but separate from the suspension, that needed to be addressed. Here we go:

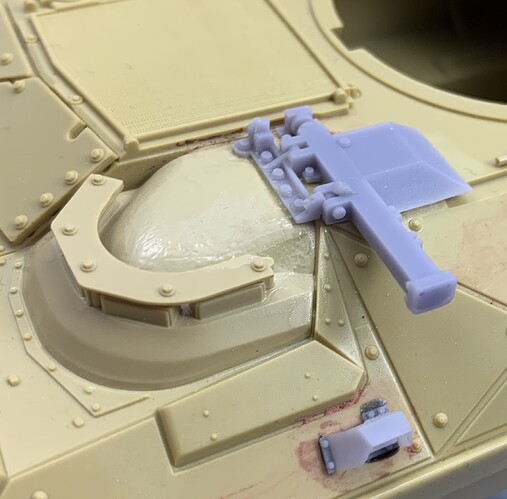
  1. Drivers hatch updated with the large rectangular offset bar. Better detailed, more accurate, and updates it relatively easily.

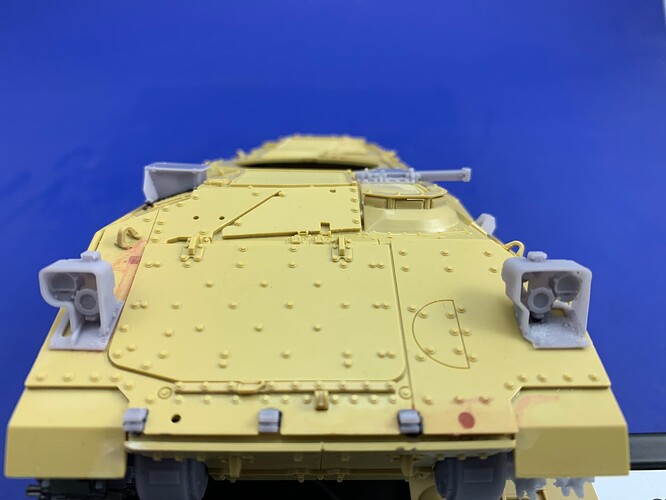
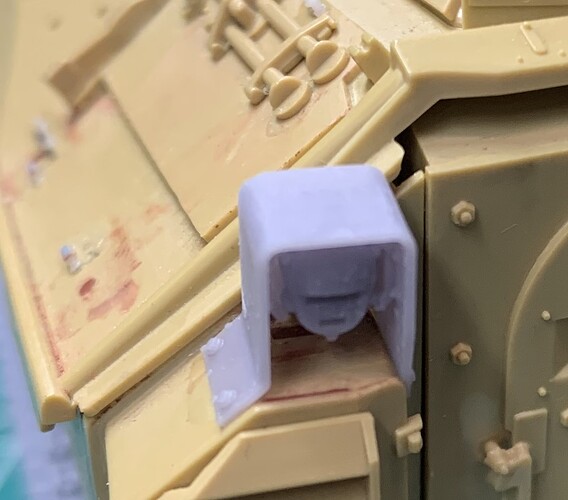
  2. Drivers Thermal Viewer. All new, hallow with the camera head inset, with correct details.

  3. New, much more accurate fire extinguisher housing and pull handle

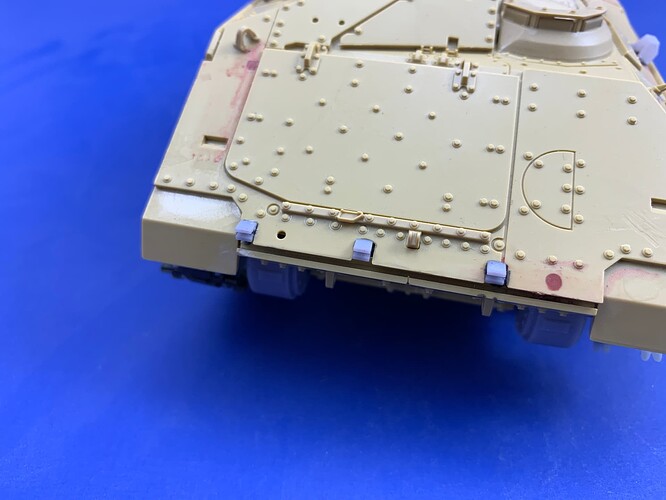
  4. “Blocks” to fill in the holes on the front glacis of the Tamiya kit. These are used on older M2A2’s that have had their swimming equipment removed, leaving three large mounting holes with these blocks.

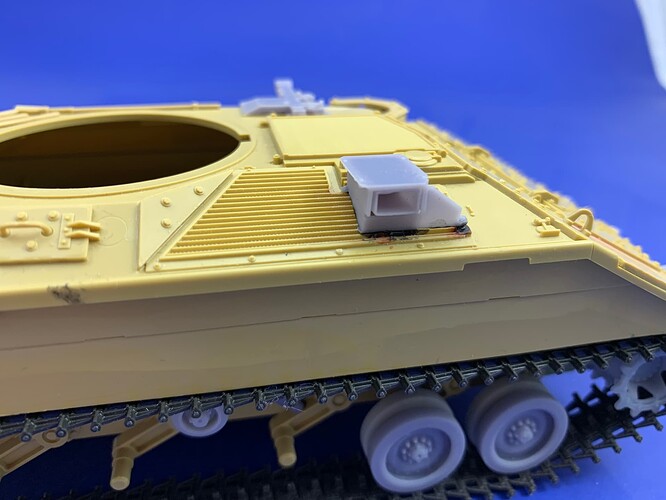
  5. New exhaust. The kit exhaust is ok, but not fully accurate. This gets the exhaust up to date on the Tamiya kit.

  6. Small lift rings that were missing from around the engine deck screens and exhaust.

  7. New ACCURATE front AND rear light assemblies. Fixes a lot of problems on the kit parts (mostly on the front) and makes the front lights available to put on top of added ERA if desired.

  8. New under the rear hull bolted towing plates. Missing from the Tamiyia kit.

  9. Lower left side detail for under the rear troop door. Made for the door being closed.

  10. Footmans loops (small and large) for accurate detailing, properly sized.

Not all issues are solved, but this really addresses many glaring ones.

12 Likes

The Bradley is not my thing so I don’t know if its accurate but I do like the work. :+1:

2 Likes

Jacques parts are great. I have a few of his sets/parts and can vouch for them. His T161 tracks are jewels and have the proper open guide teeth. I highly recommend them.

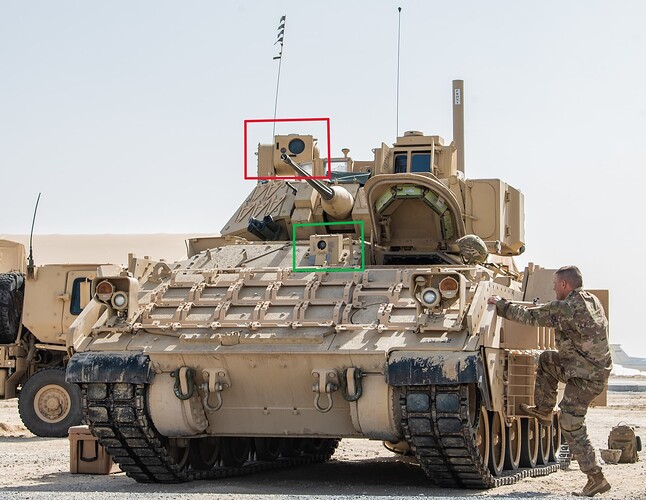
A note here, the Drivers Thermal Viewer is not on a standard M2A2 ODS Bradley. They were originally added to the M2A3 versions. They have also been added to the M2A2 ODS SA (as sent to Ukraine), which is basically an M2A3 minus the Commander’s Thermal Viewer on the right rear of the turret.

3 Likes

Nice. And you added the rivets. The “lip” on the outer face does become more apparant if you put clear resin behind it to simulate rain water…

2 Likes

I did rivets and no rivets. Rivets mean the roadwheels had the aluminum inserts to make the wheels lighter and reduce overall vehicle weight. They are mainly seen on earlier Bradley’s.

1 Like

We had a discussion about them several weeks ago, when DEF Models came out with theirs. I’m putting the early wheels on some OG Bradleys.

1 Like

Gotcha. Yeah, dealing with the M2A2ODS Bradley is a real mess. So many rebuilds, partial rebuilds, new builds with all parts, etc…

I have been told there was something like 13 refits for the M2A2ODS upgrade, but that they could be implemented piecemeal. So I have been documenting M2A2 vehicles with some, but not all, upgrades. One had only the new drivers hatch hinge setup. Another had only the new upper hull troop compartment hatch replaced. And another had only the new exhaust. Really a mix-n-match mess.

2 Likes

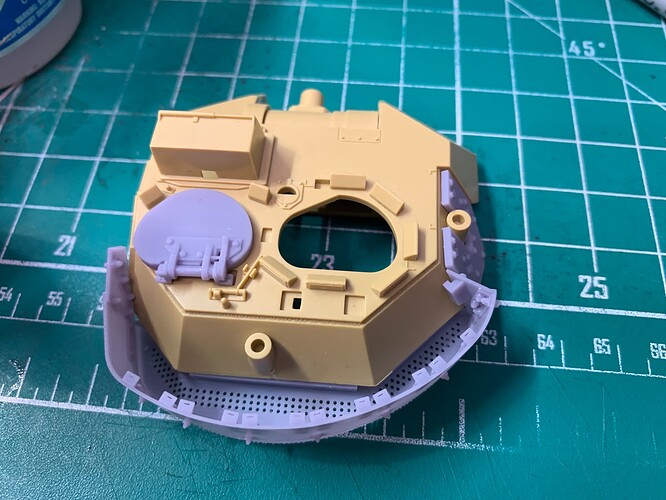
Now I am working on the turret corrections for the Tamiya kit. So far I have:

  1. Designed a new turret bustle to the correct shape with all associated details and panels.

  2. Designed a new gunner hatch the proper size and thickness, with correct shapes and details.

  3. Designed a new turret armor panel under the commanders side with correct detail and fit for the Tamiya kit

  4. New “splash brackets” found on the rear quarters of the turret, just below the roof line. This includes the lift ring for the rear left side (under the gunners hatch).

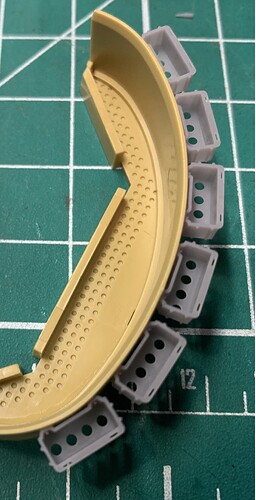
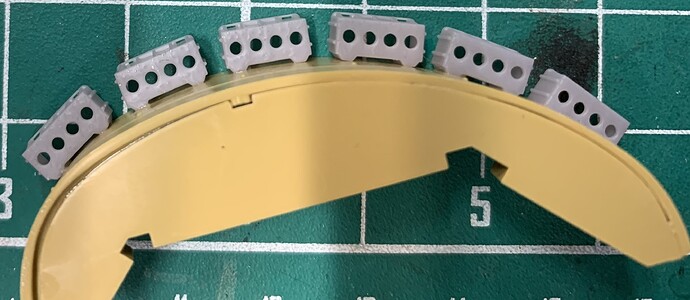
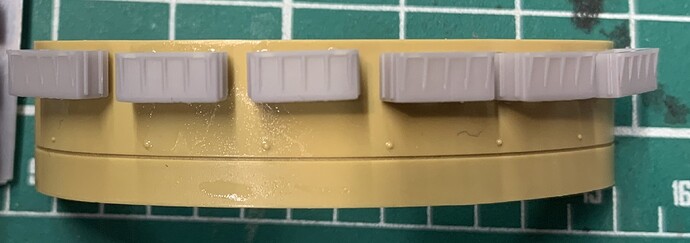
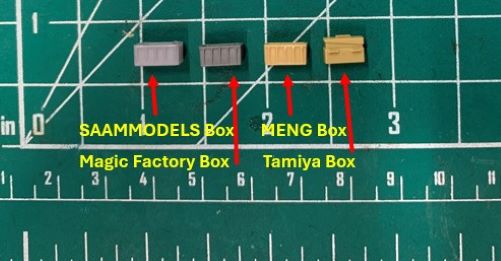
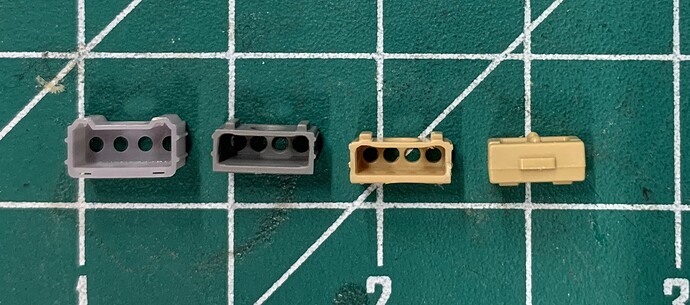
  5. Designed new ammo holders for the turret bustle, these are accurate and will actually hold a scale .30 cal ammo box. (This is the only piece I currently have photos of)

Screenshot 2024-03-23 181450

8 Likes

Turret things I am still working on are:

  1. The mantlet. I already posted on Youtube one way to fix the issue of the entire mantlet moving with the main gun, but I am trying to design a new mantlet that will be a simple replacement piece.

  2. Support bar for the turret bustle.

  3. Dog House bracing for the blue tracker system without the blue tracker equipment

4 Likes

Do you have a link to the YT video ? Those ammo box holders look great !

Edit: it came up when I searched SAAMMODELS https://www.youtube.com/@saammodels6561/video

2 Likes

Yes, existing M2A2s were upgraded at unit and depot level by Modification Work Orders (MWOs). These are parts and pieces to update certain parts that the unit or depot can add to bring them up to ODS standards. As you said, they were somewhat piecemeal as parts were available and some Brads got all, some Brads only got some. Then you had new-build M2A2 ODSs that came from the factory complete.

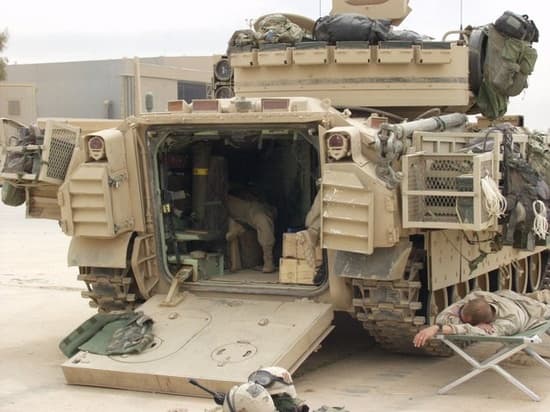
A note about the Tamiya ammo box holders. They are not necessarily wrong, just and older style. Again, going back to the above MWO discussion, some had new ones, some retained the older style. It also depends on when/where you are depicting your Brad as to which mods they may have had or not.

For example, this is a MWO M2A2 ODS seen in Iraq w/3ID during the invasion in '03. It still has the old-style ammo can holders.
image

You can read up more about the M2A2 ODS MWOs below. You may recognize some of the items in some of the later posts too.

3 Likes

Commander’s Thermal Viewer (in Red)

Driver’s Thermal Viewer (in Green)

1 Like

I’ve been tracking your growing list of updates and hoping you’d get around to the mantlet, so that’s a vote from me.

2 Likes

Picture of progress

9 Likes

I’m looking forward to seeing this and how it will work.

1 Like

Impressive work

1 Like

I have recommenced work on the mantlet.

2 Likes