Hi All,
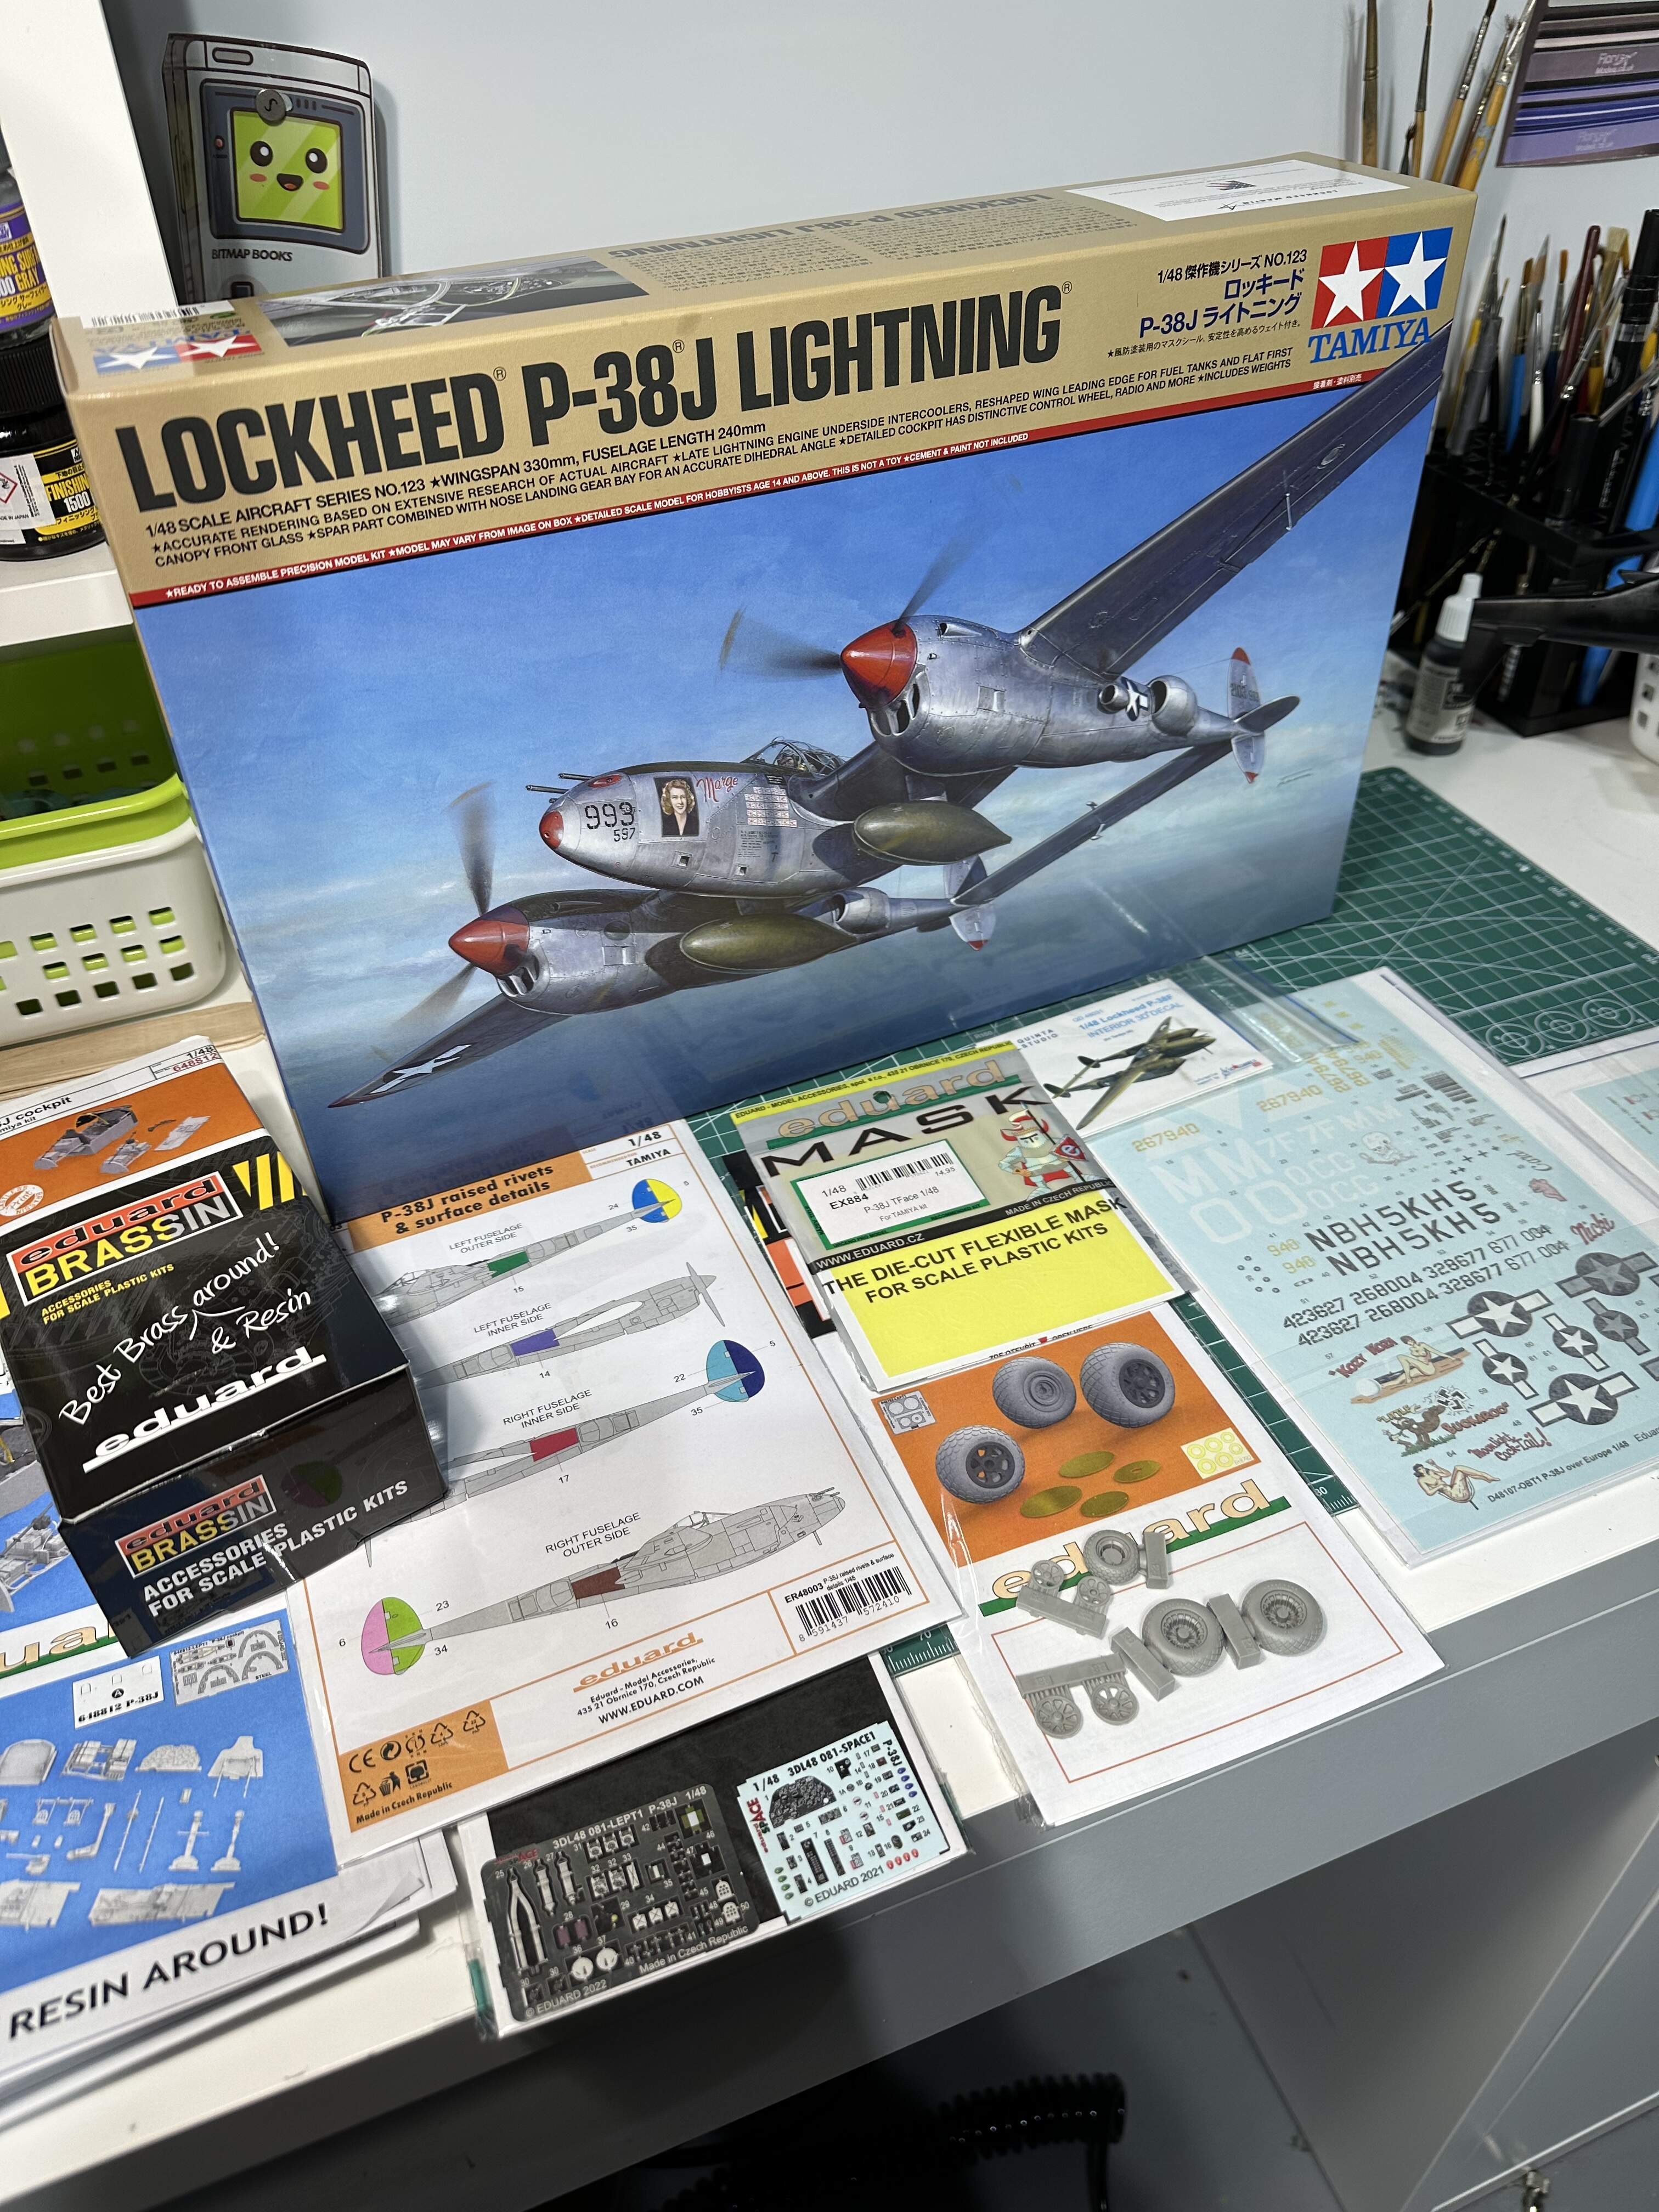
Going to start on my second Tamiya P-38J. Learned a lot and enjoyed the P-38G I did, so I really want to try to work on my skills by improving on it the second time. Going natural metal. Currently wrapping up my first ever natural metal plane, an Eduard P-51, as practice for this.
The extra bits I have to accompany the kit are:
Eduard Resin cockpit
Eduard Resin Wheels
Eduard SpAce Cockpit Set
Quinta Studios Cockpit Set
Eduard Positive Rivets
Eduard Decals
Wish me luck!
10 Likes
Steve, sounds like a fun build to follow, along for the ride!
1 Like
I built the Tamiya P-38F and was amazed at what a great kit it was, so bought another one to do as a G. I’m keen to see a J with a metal finish, though fear if I do I’ll want one for myself too…
1 Like
Haha yeah I was the same, like 85 percent through the G and was like “I need to do this again”, and ordered the J. Natural metal scares me but working on it.
2 Likes
Thats gonna be a beaut !
Got the kit as well with a few extras .
If you can get it grab a can of the Mig Titans Metal Primer that stuff is amazing .
1 Like
Scares me too. Planning a future Mustang prototype build that will be very bright NMF so I have a few kits lined up just to hone my skills before all that work!
If your results on the G model are any indicator, you’ll do just fine.
2 Likes
Thanks for the tip! Never had heard of it before but looking it up it seems great. I’ll lay out a few proposed painting sequence ideas soon to get feedback!
Thanks! We’ll have to compare paint steps soon! I’ve got some thoughts that I’ll type out in full in a few days based off what YouTube tells me and my own anecdotal experience with one plane.
2 Likes
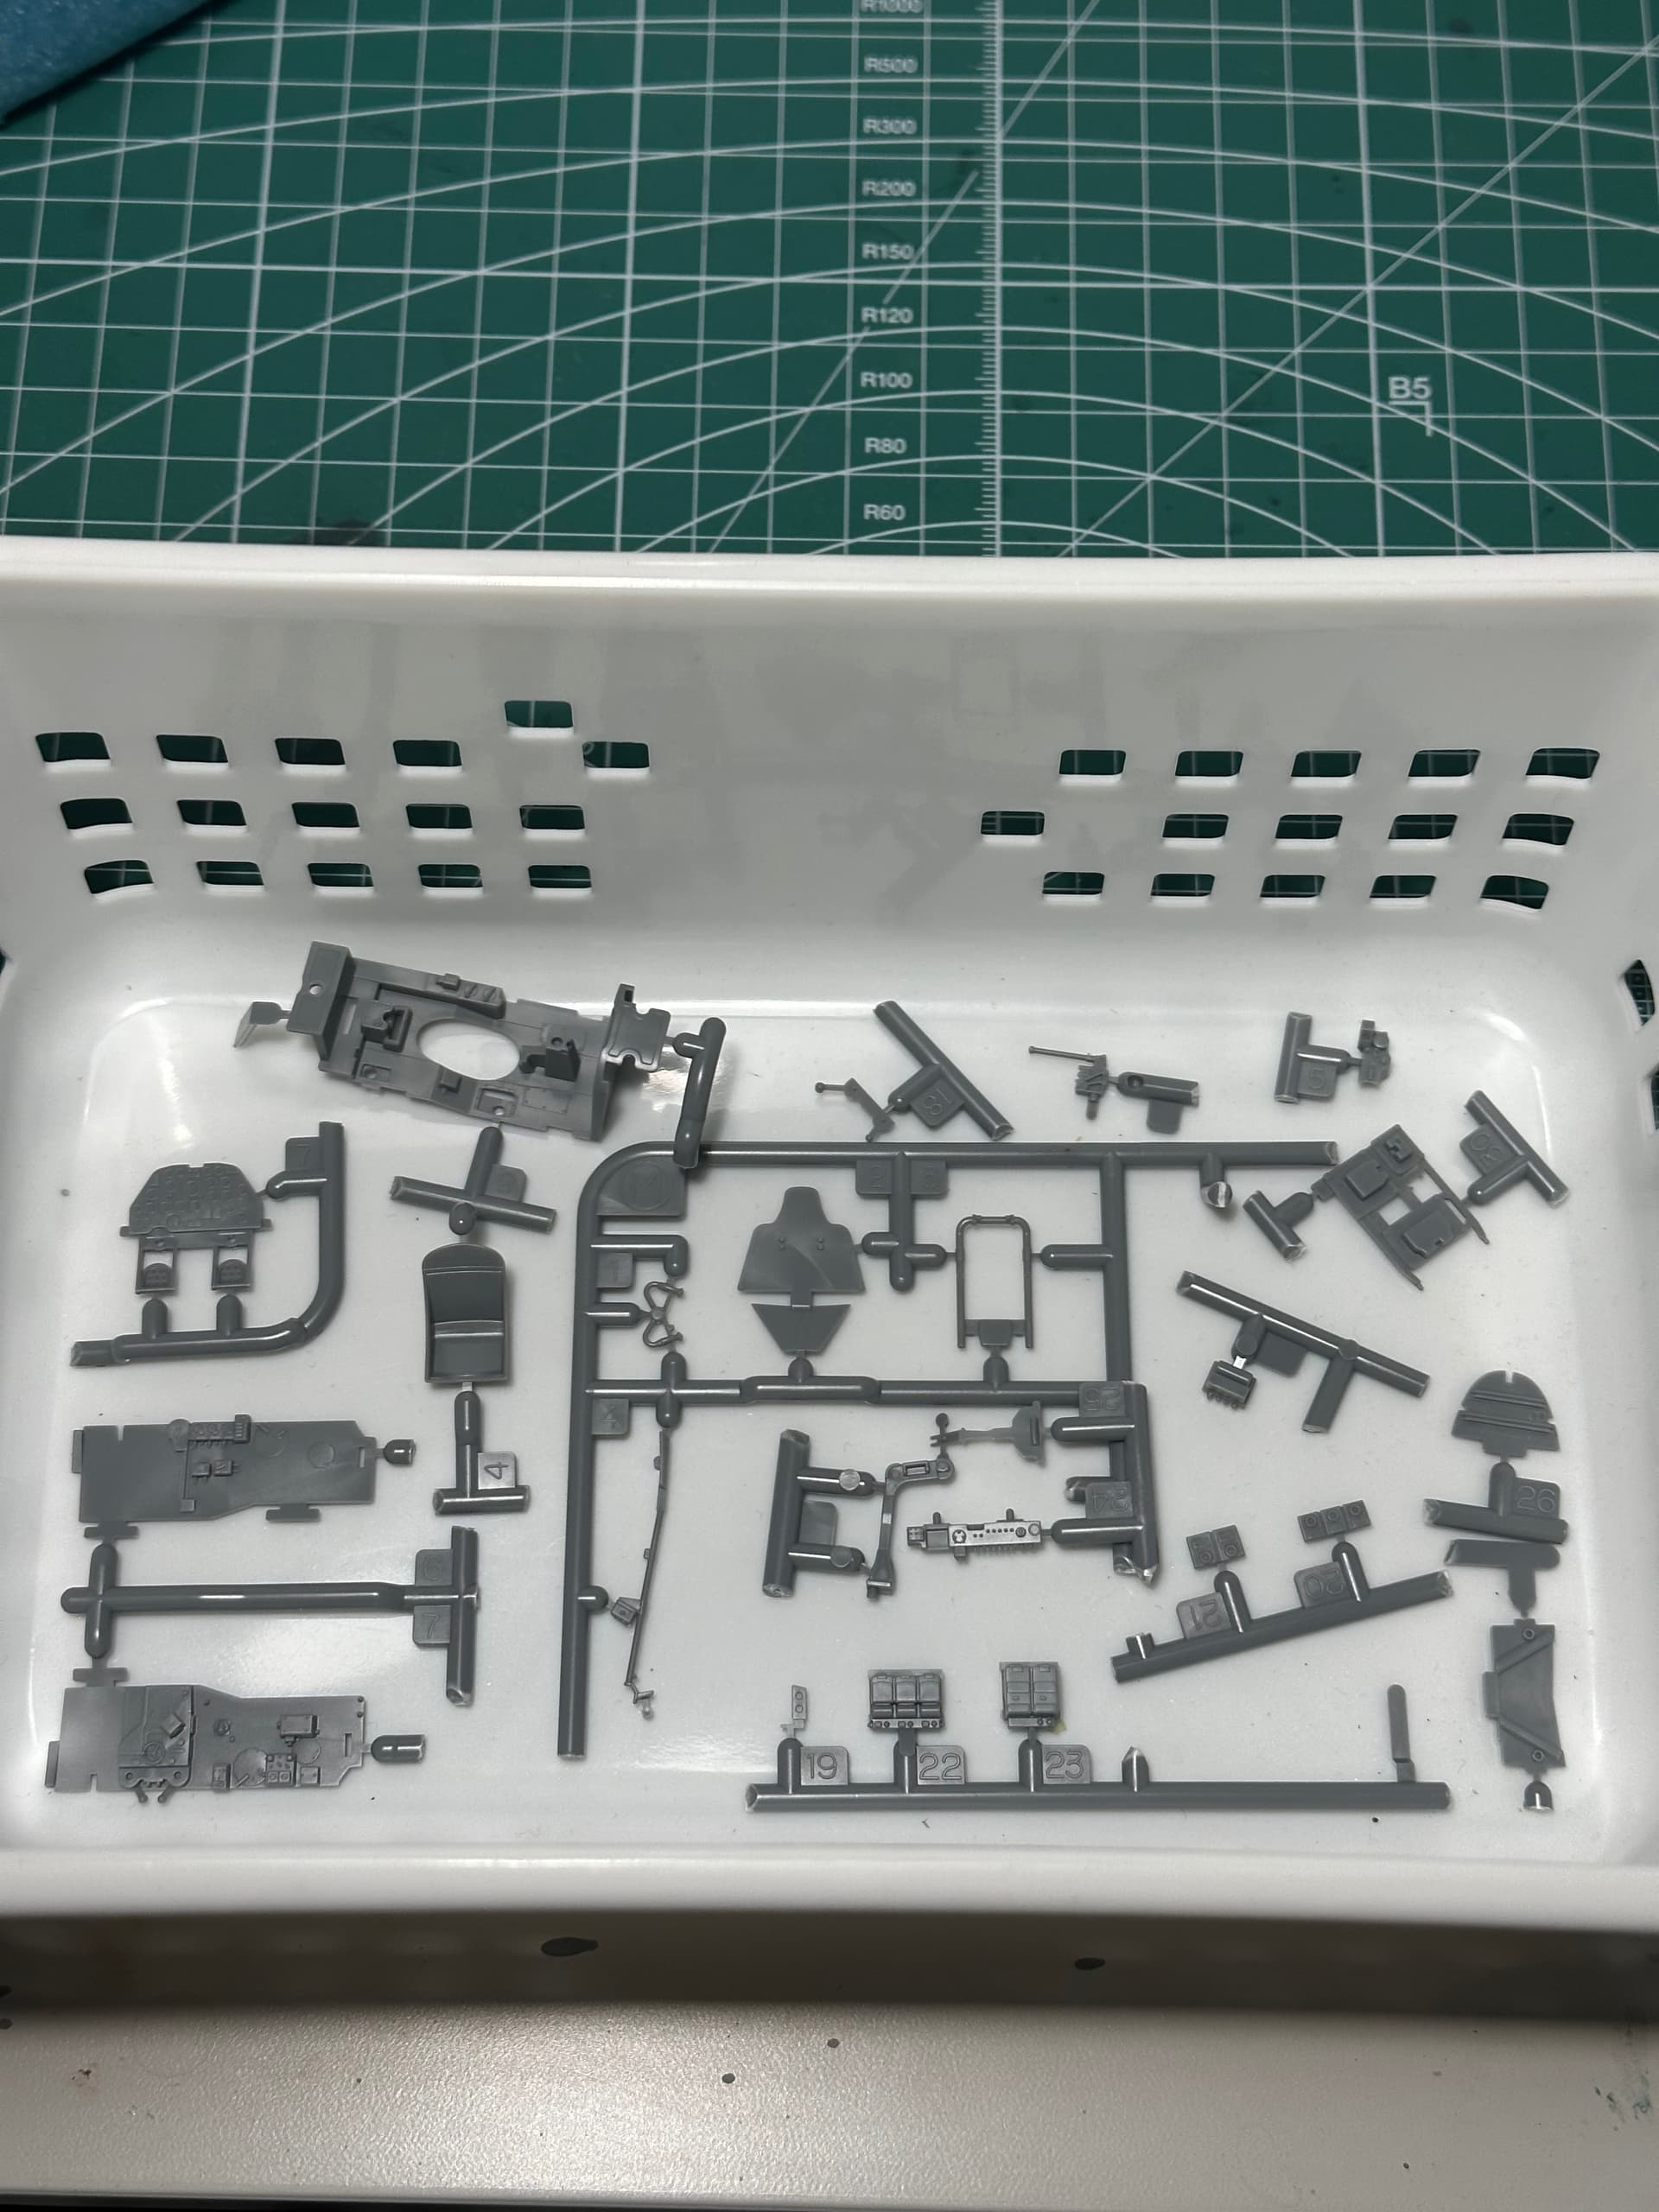
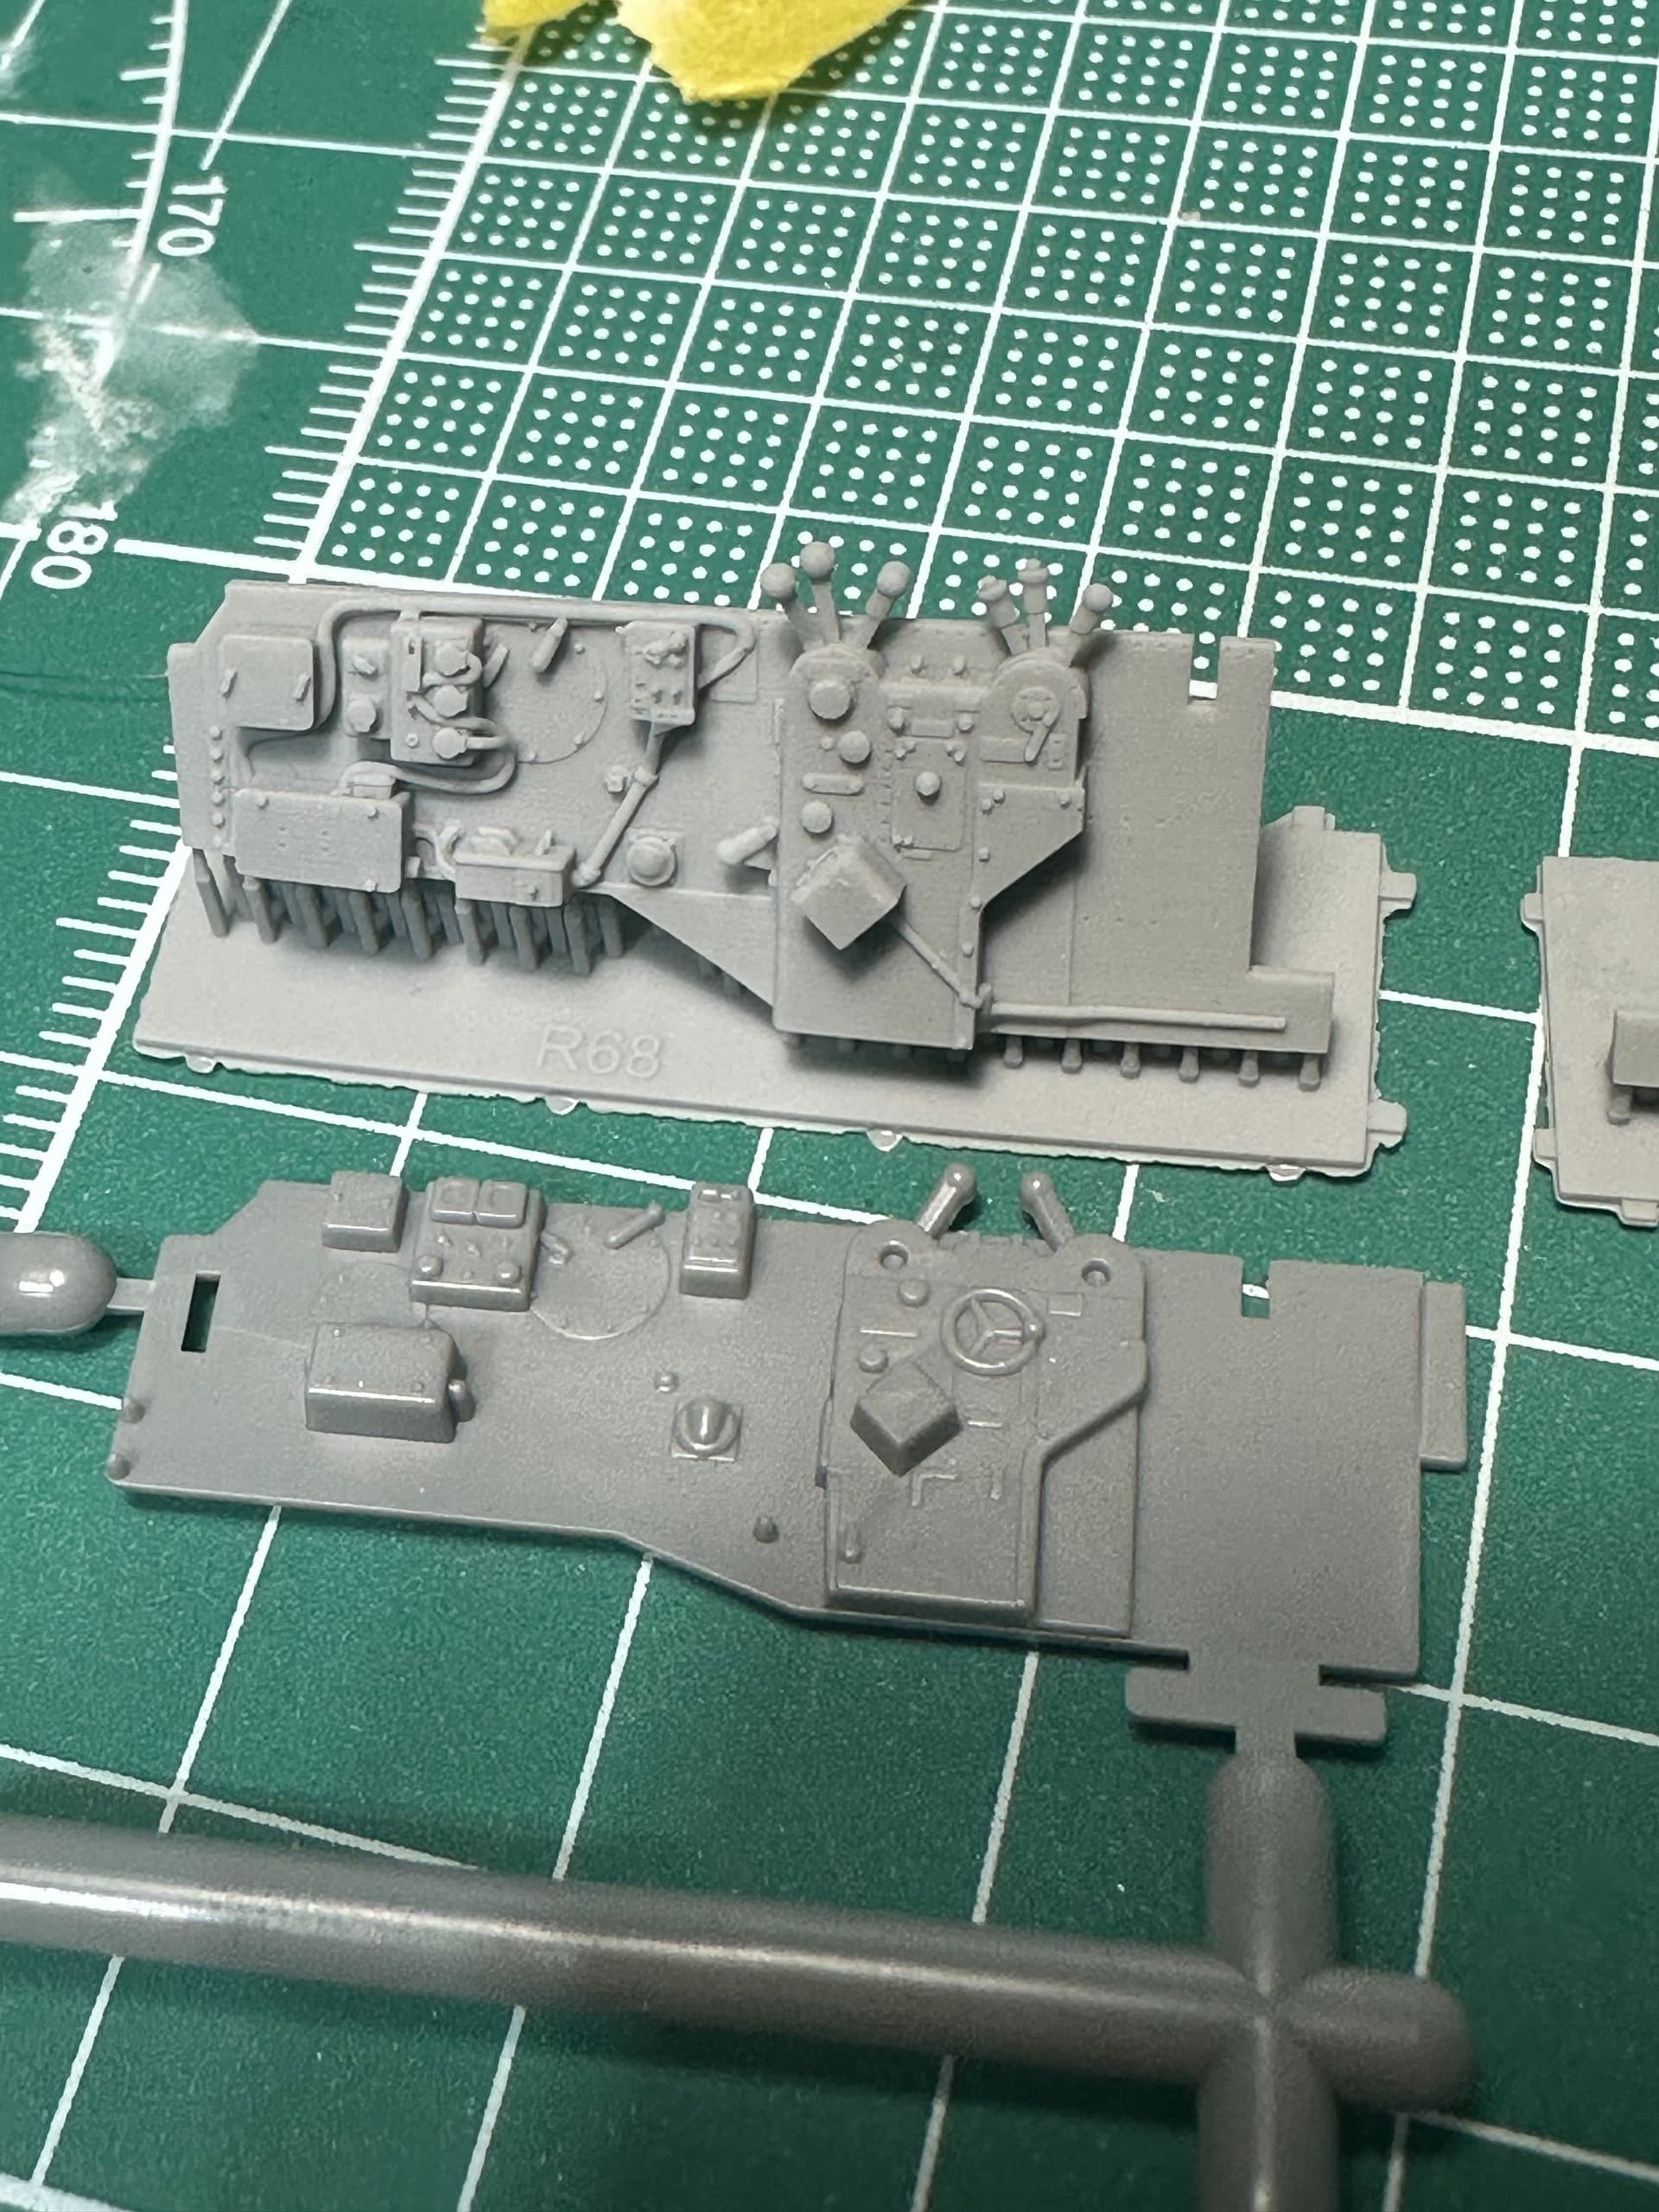
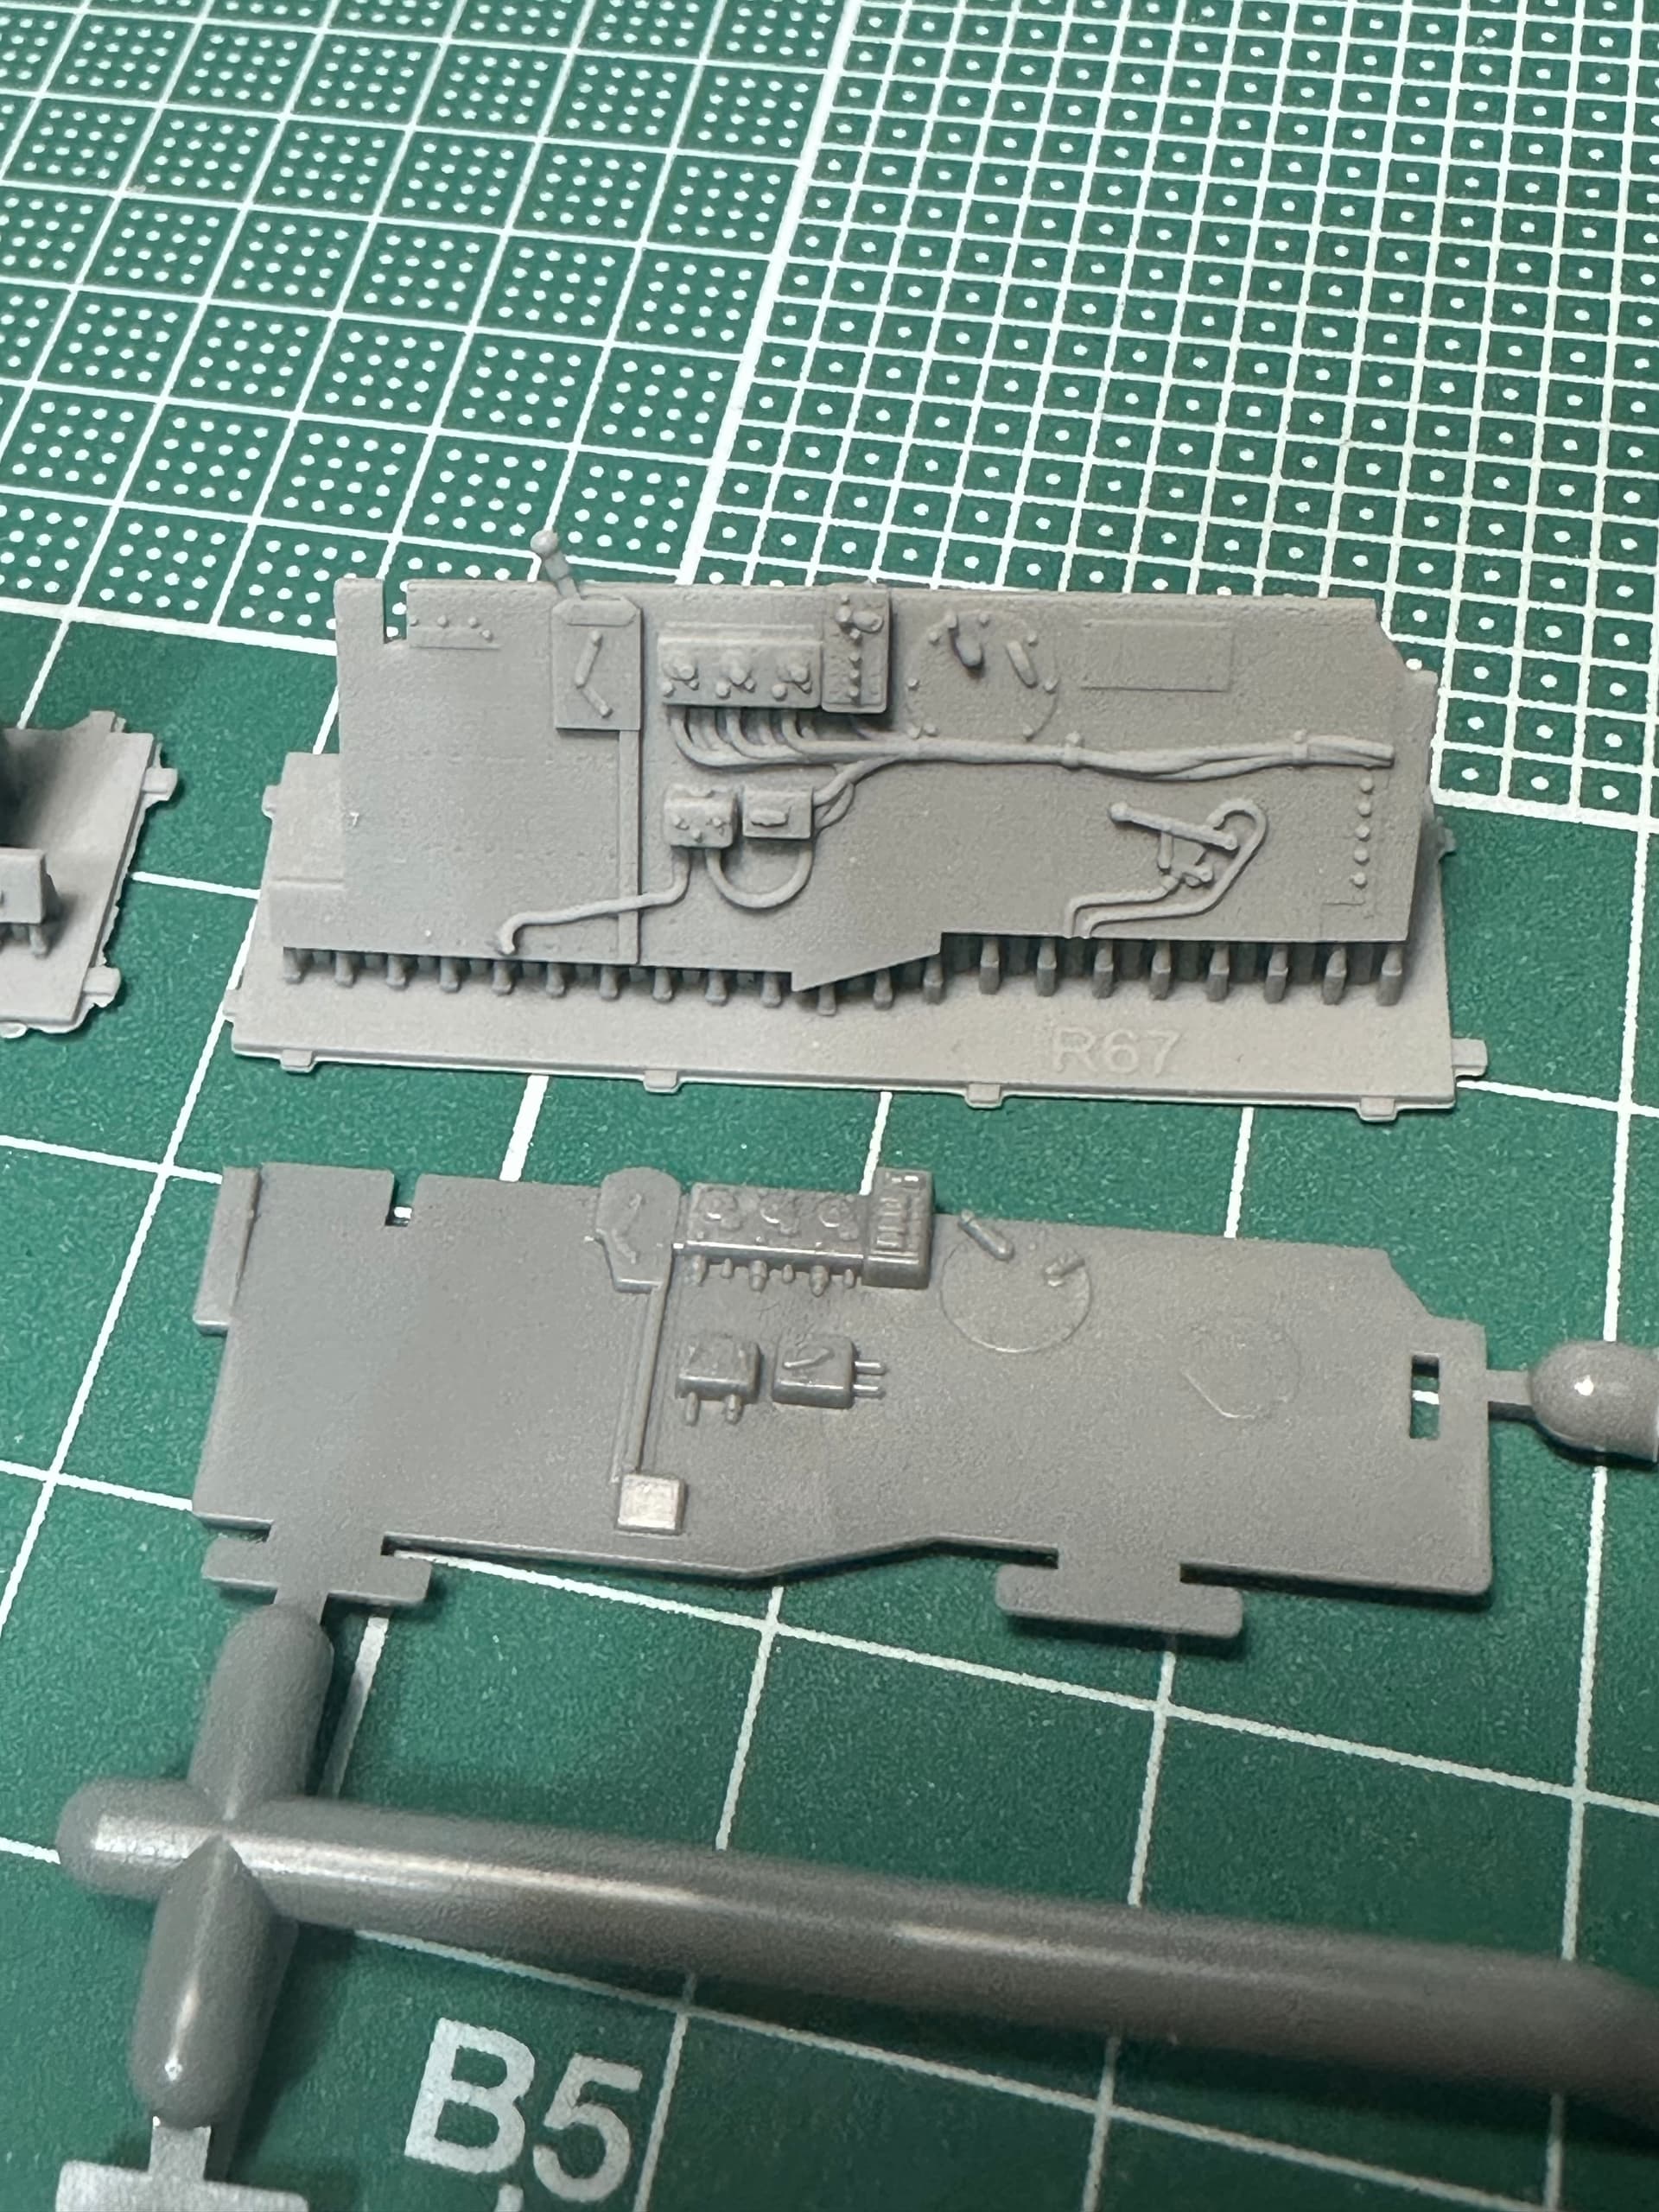
Kit parts clipped off to facilitate easier priming and painting and Eduard 3D printed Cockpit parts. Will post close up comparison shots of individual parts in the near future.
Both Tamiya and Eduard have thought things through to be able to effectively paint without much of a fuss. Attachment points are in locations that won’t be seen for the most part.
Will use Mr. Surfacer 1500 as base primer for for all cockpit parts.
1 Like
Hi All,
Still in the prep work stage for the P-38J Build. As I said in the first post, I am working on a P-51 as practice for this build. Here is my first attempt at Natural Metal Finish. Used Tamiya LP-70 on Wings as Aluminum Lacquer color and Mr. Color SM-201 on fuselage. Learned a lot, and it looks “OK”. Very rough where wings meet fuselage as I didn’t get a good sanding in of the Mr. Surfacer which laid down pretty flat/rough as my primer.
4 Likes
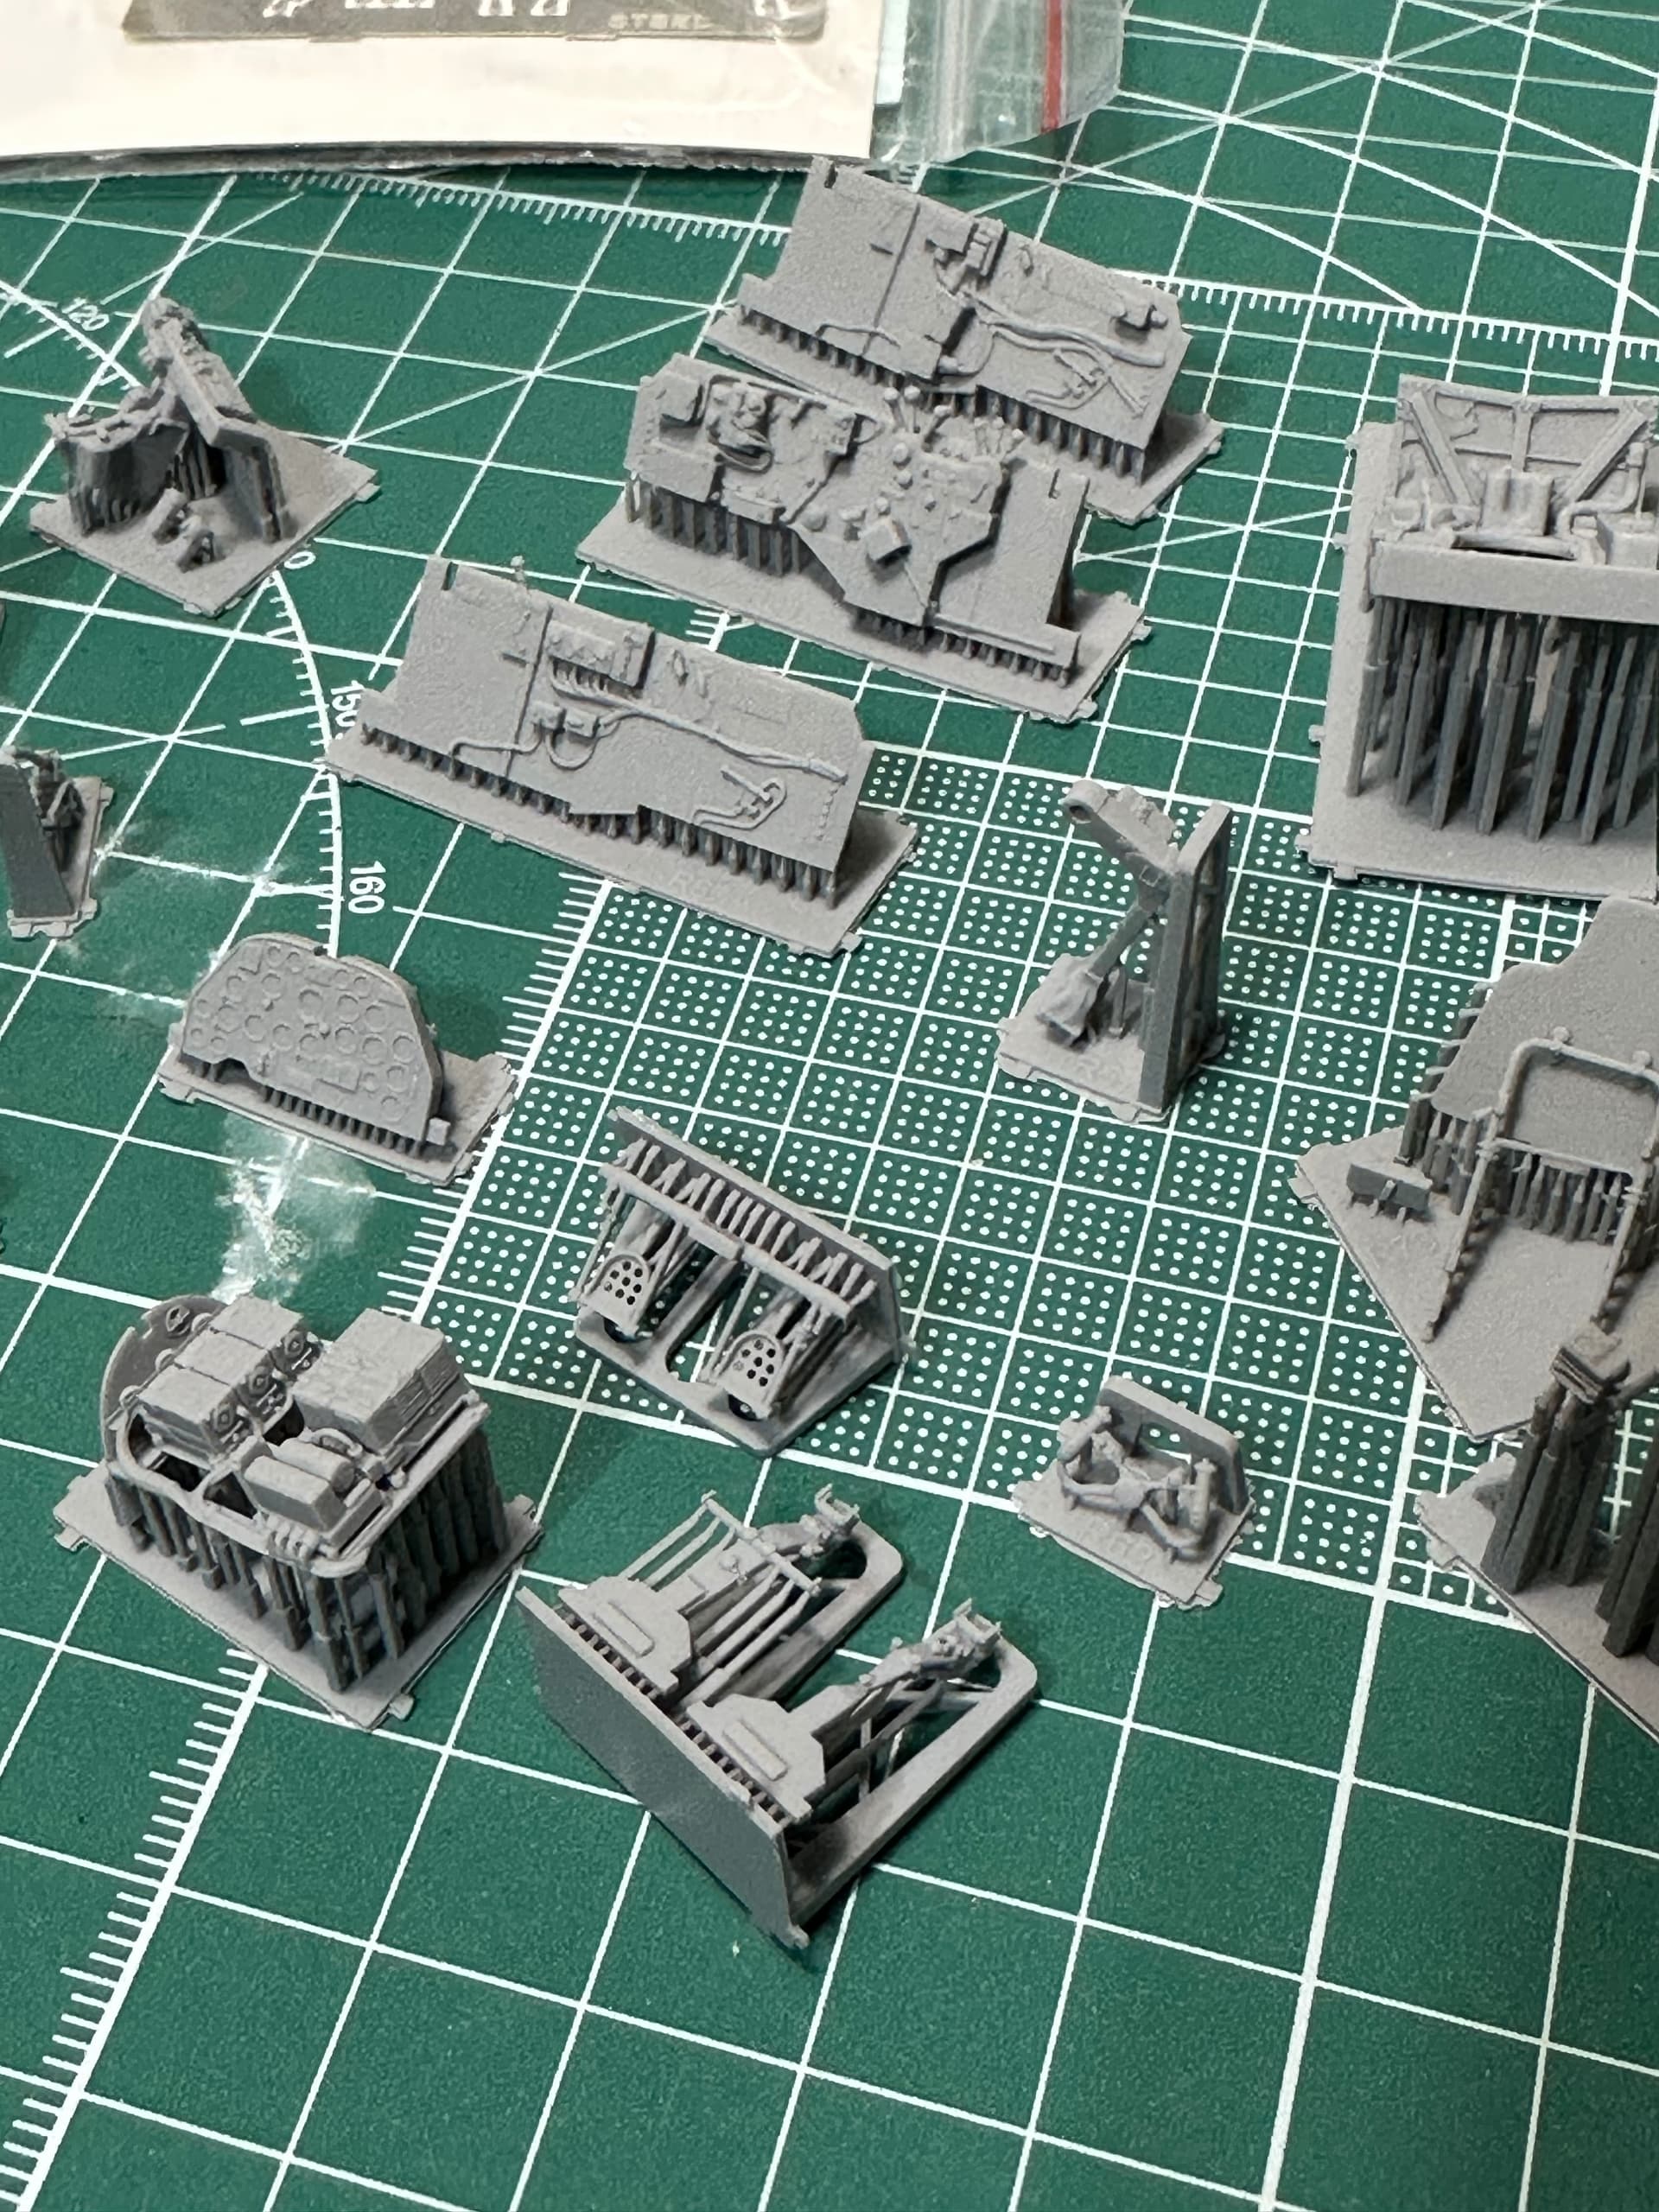
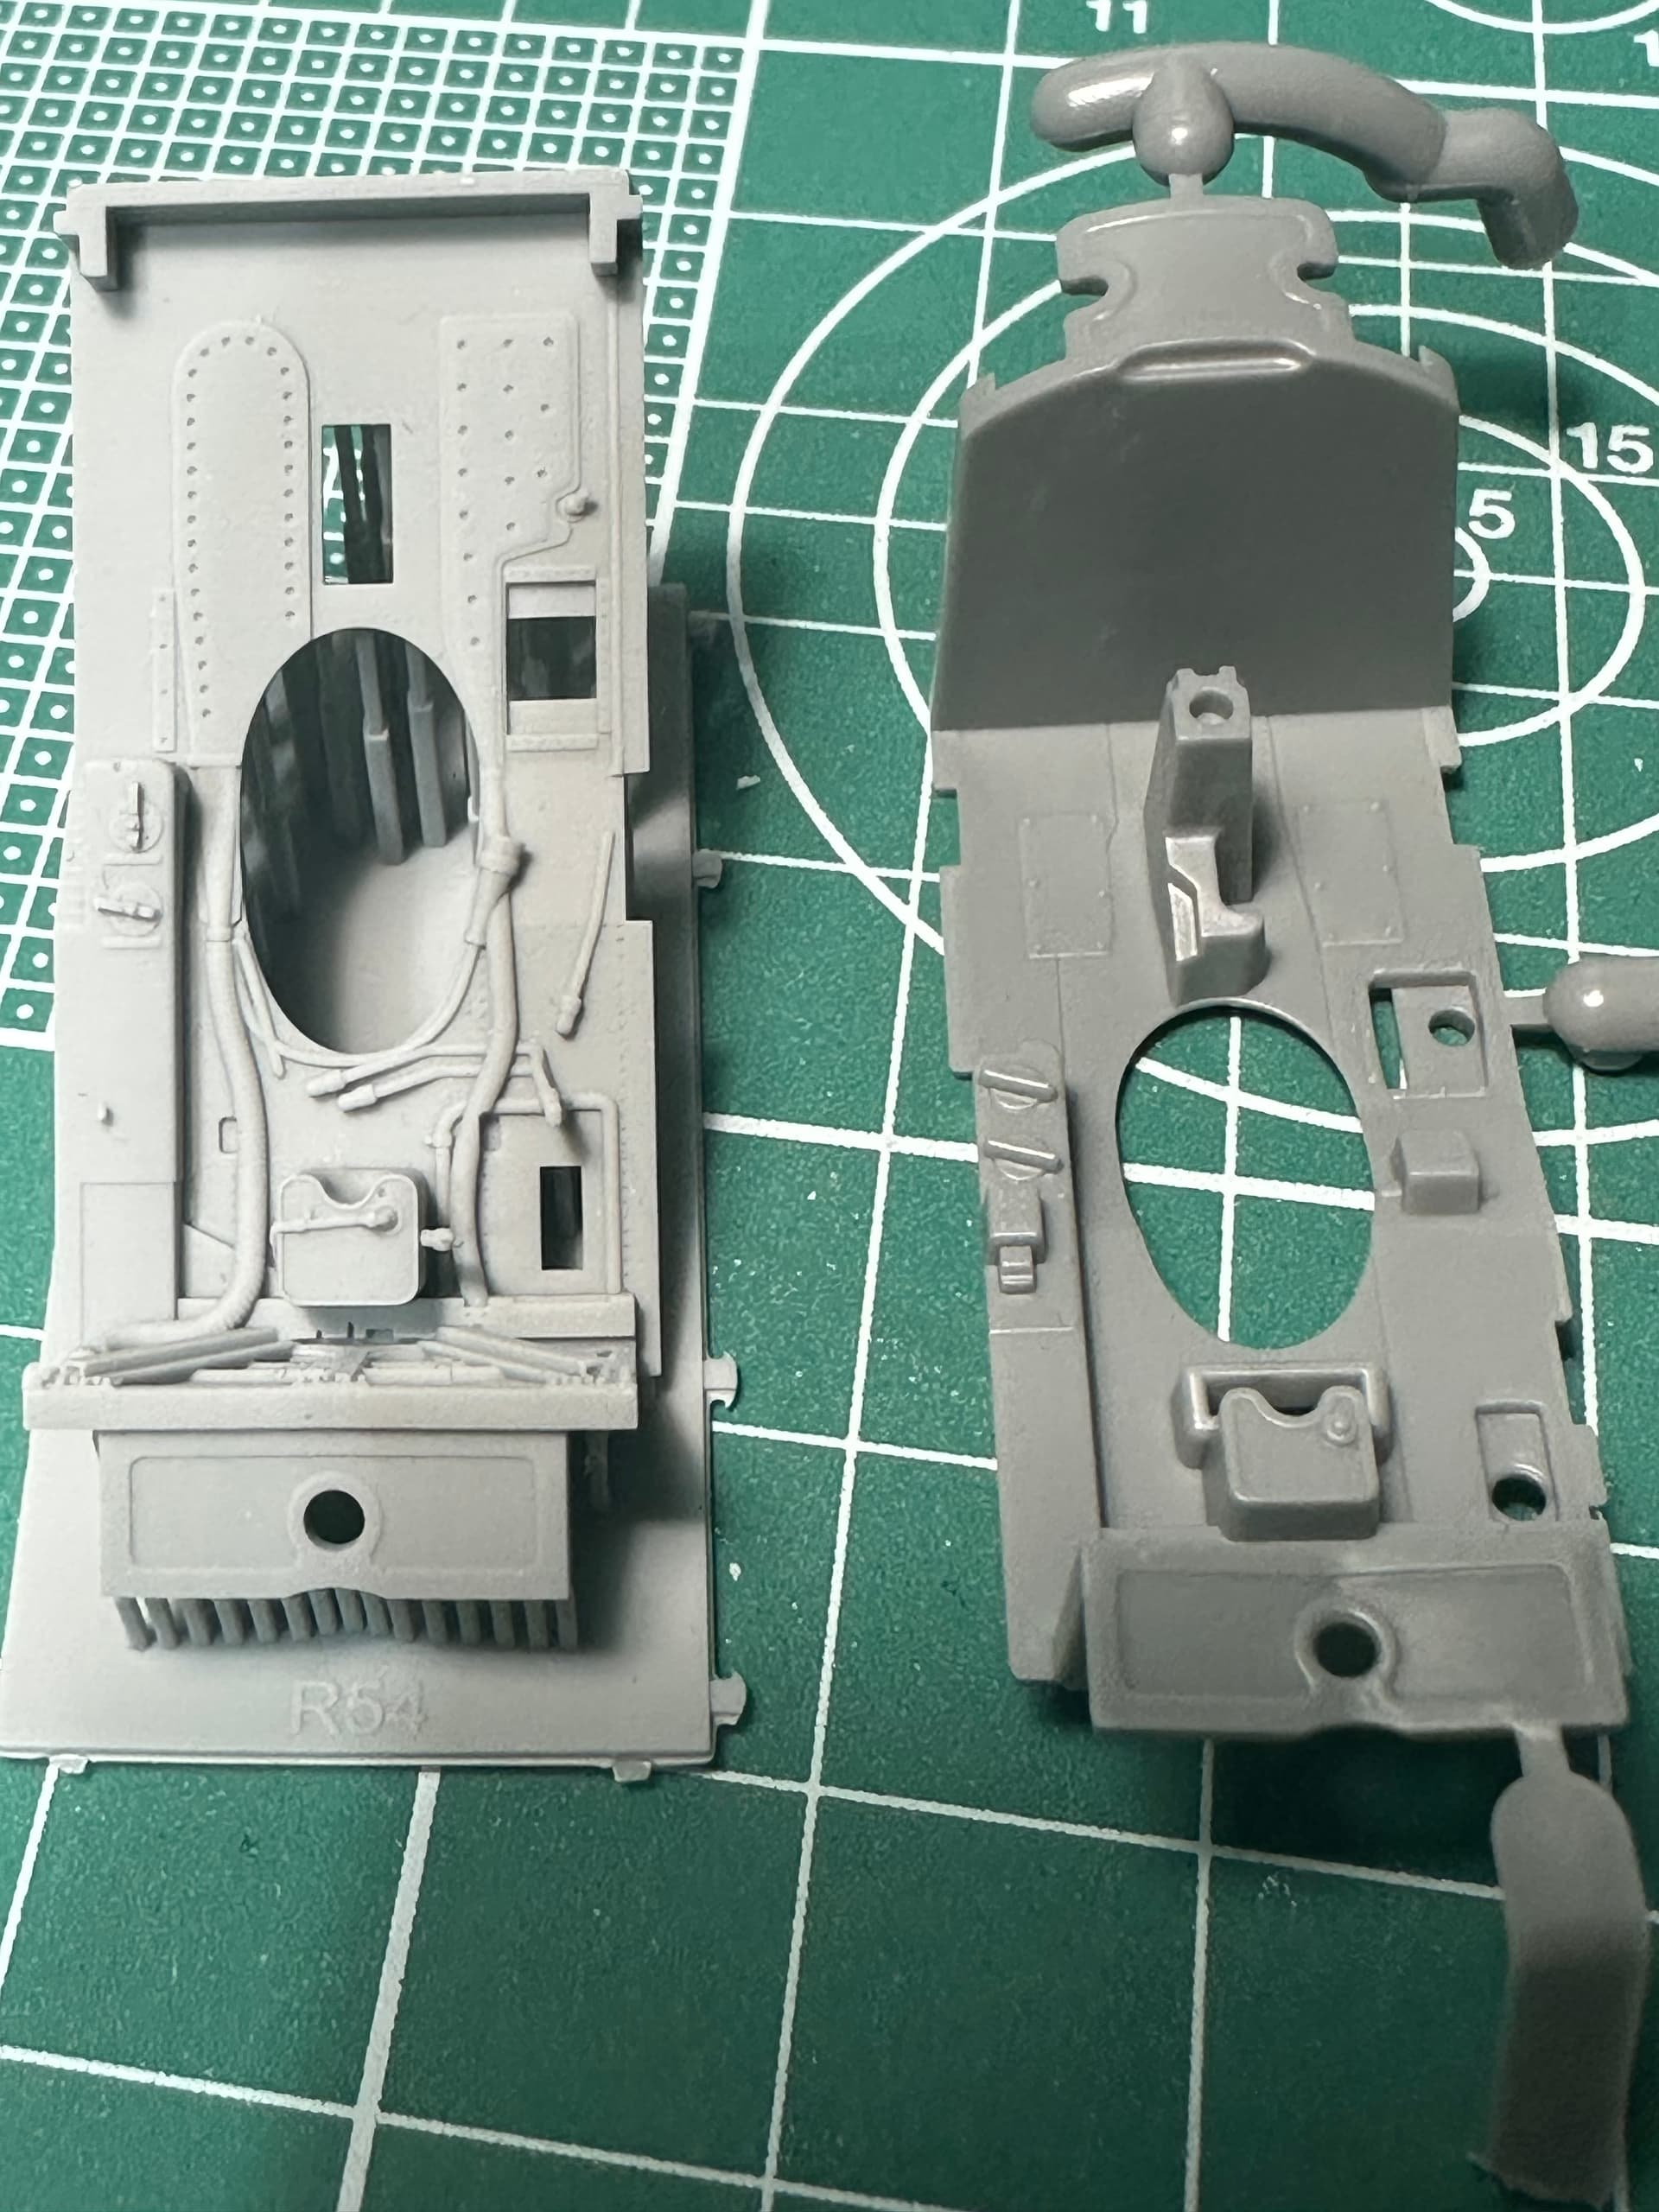
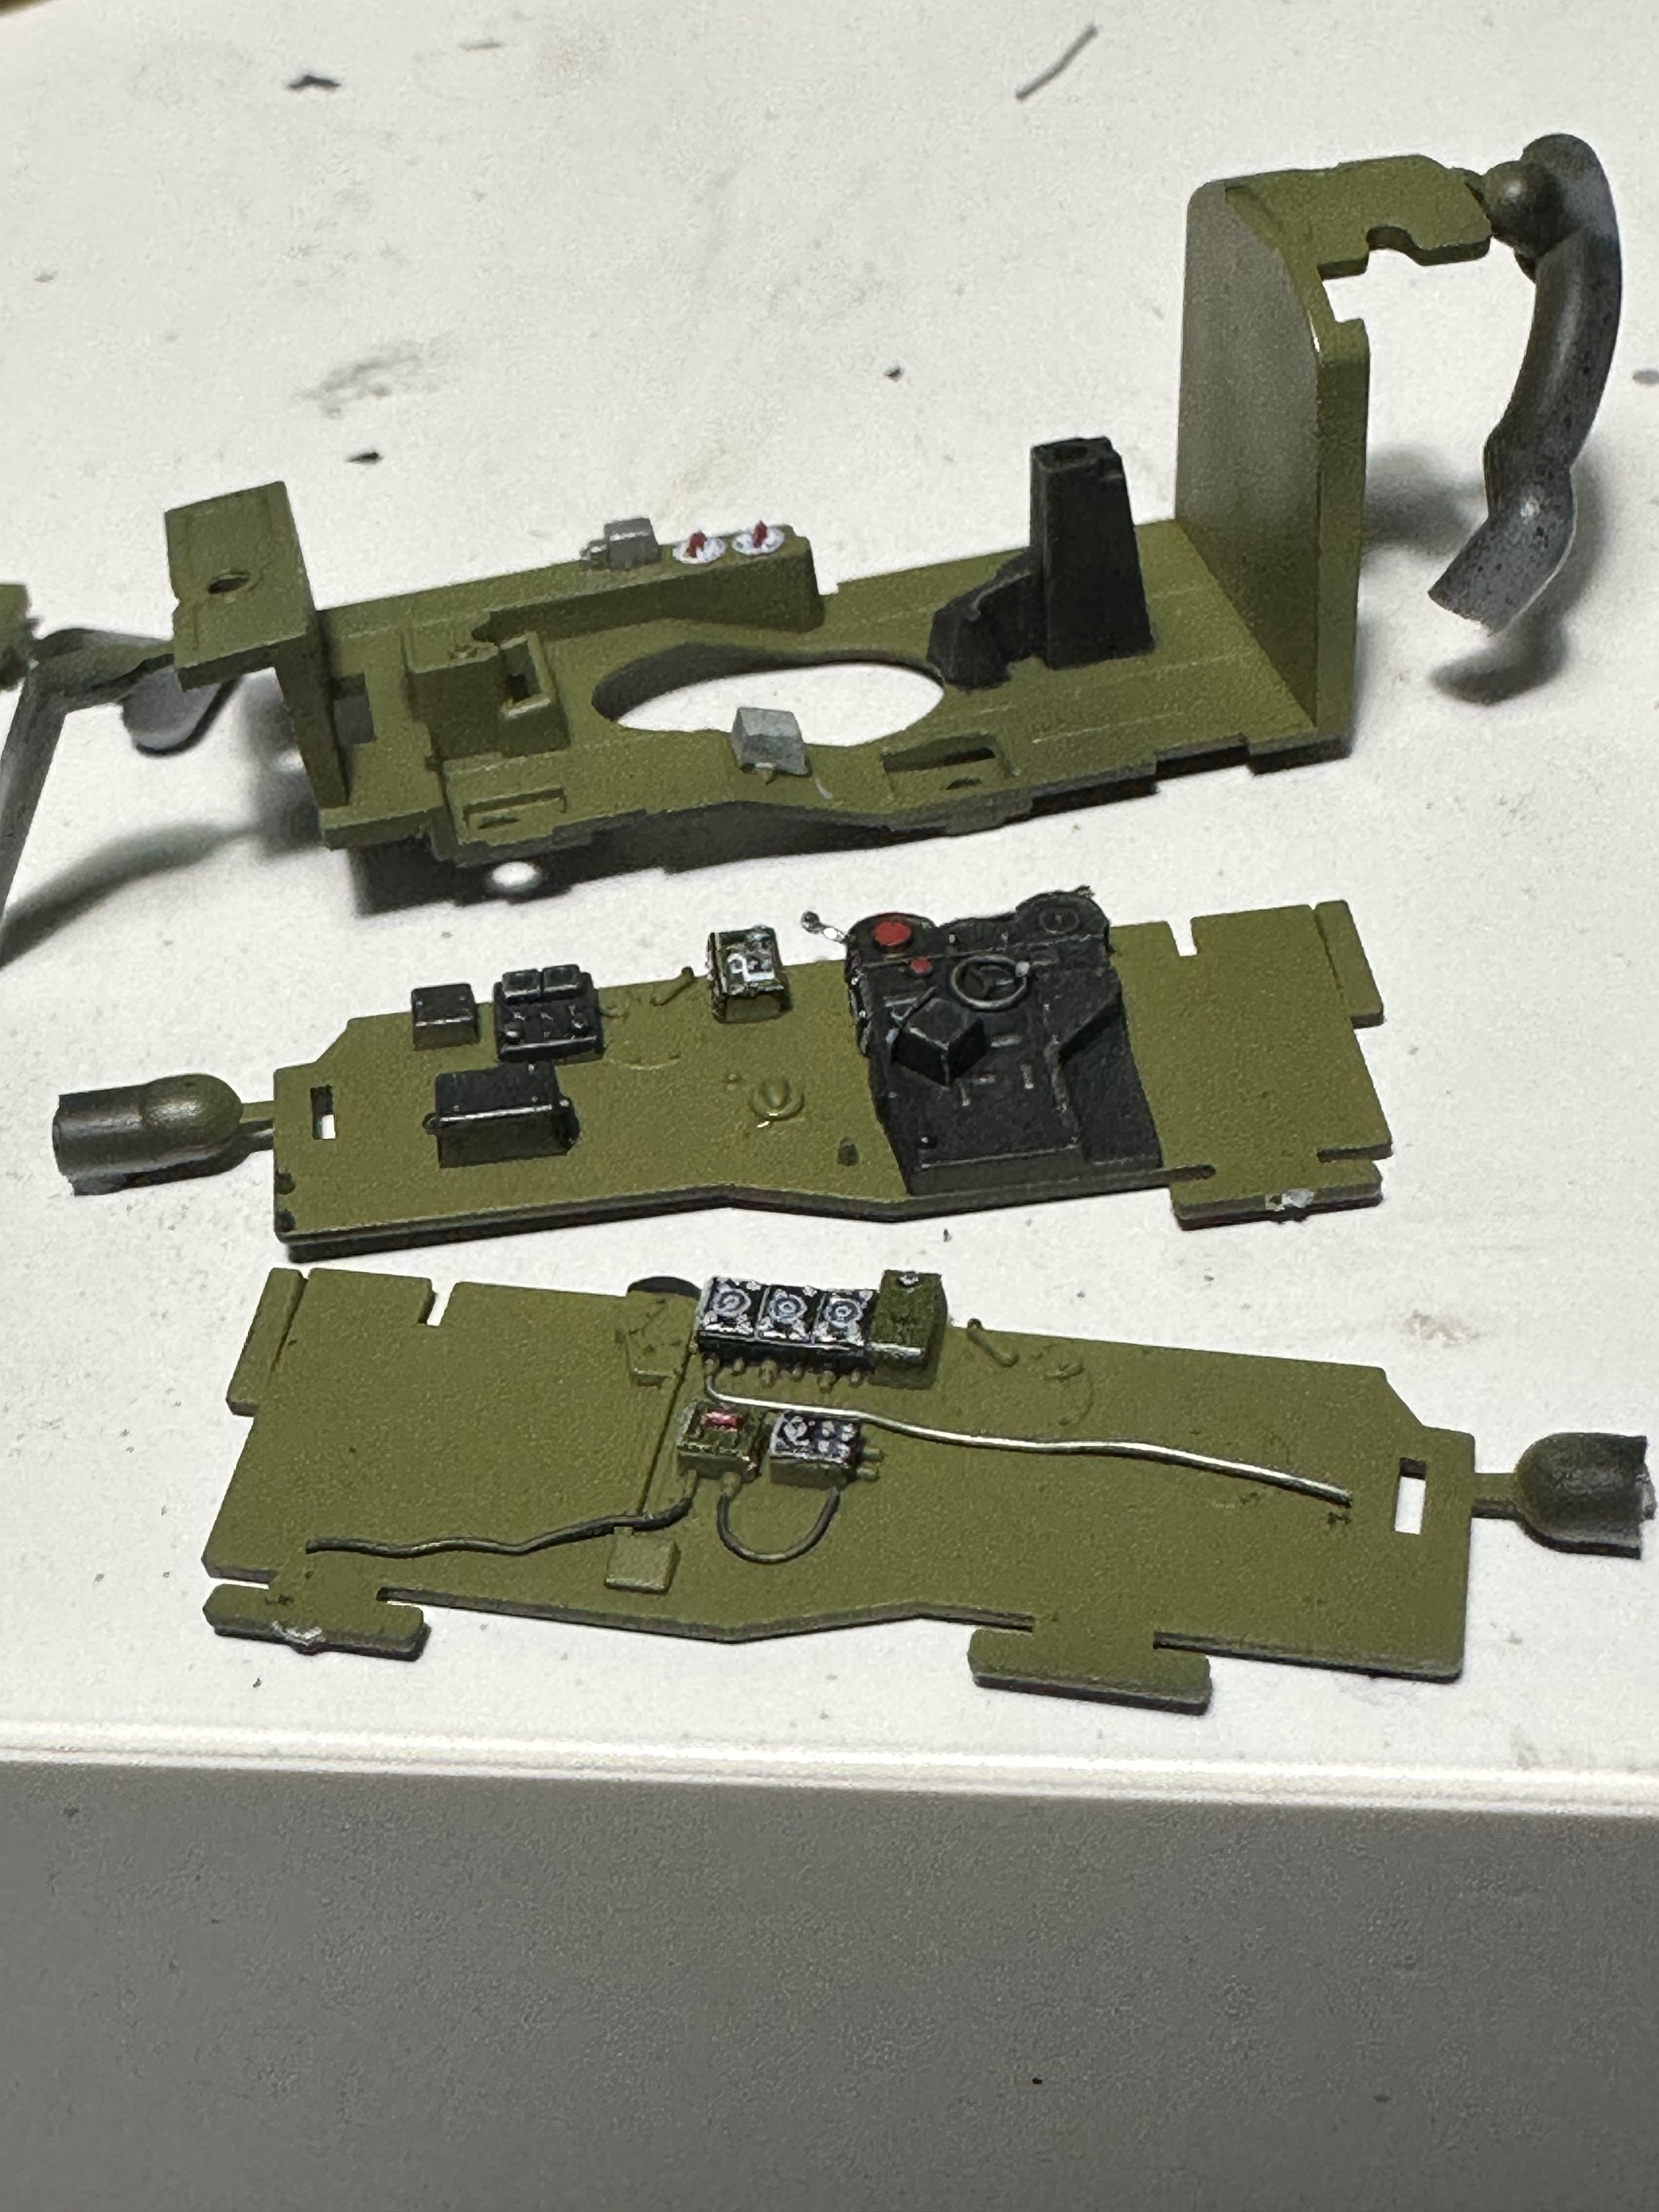
Comparison of the kit parts to the Eduard Cockpit Set. Clearly better details on the Eduard one, will plan to build up both and use the best one. I typically prefer less detail ironically because I don’t trust my hand painting work enough to not make it look poorer than a well painted bland cockpit.
2 Likes
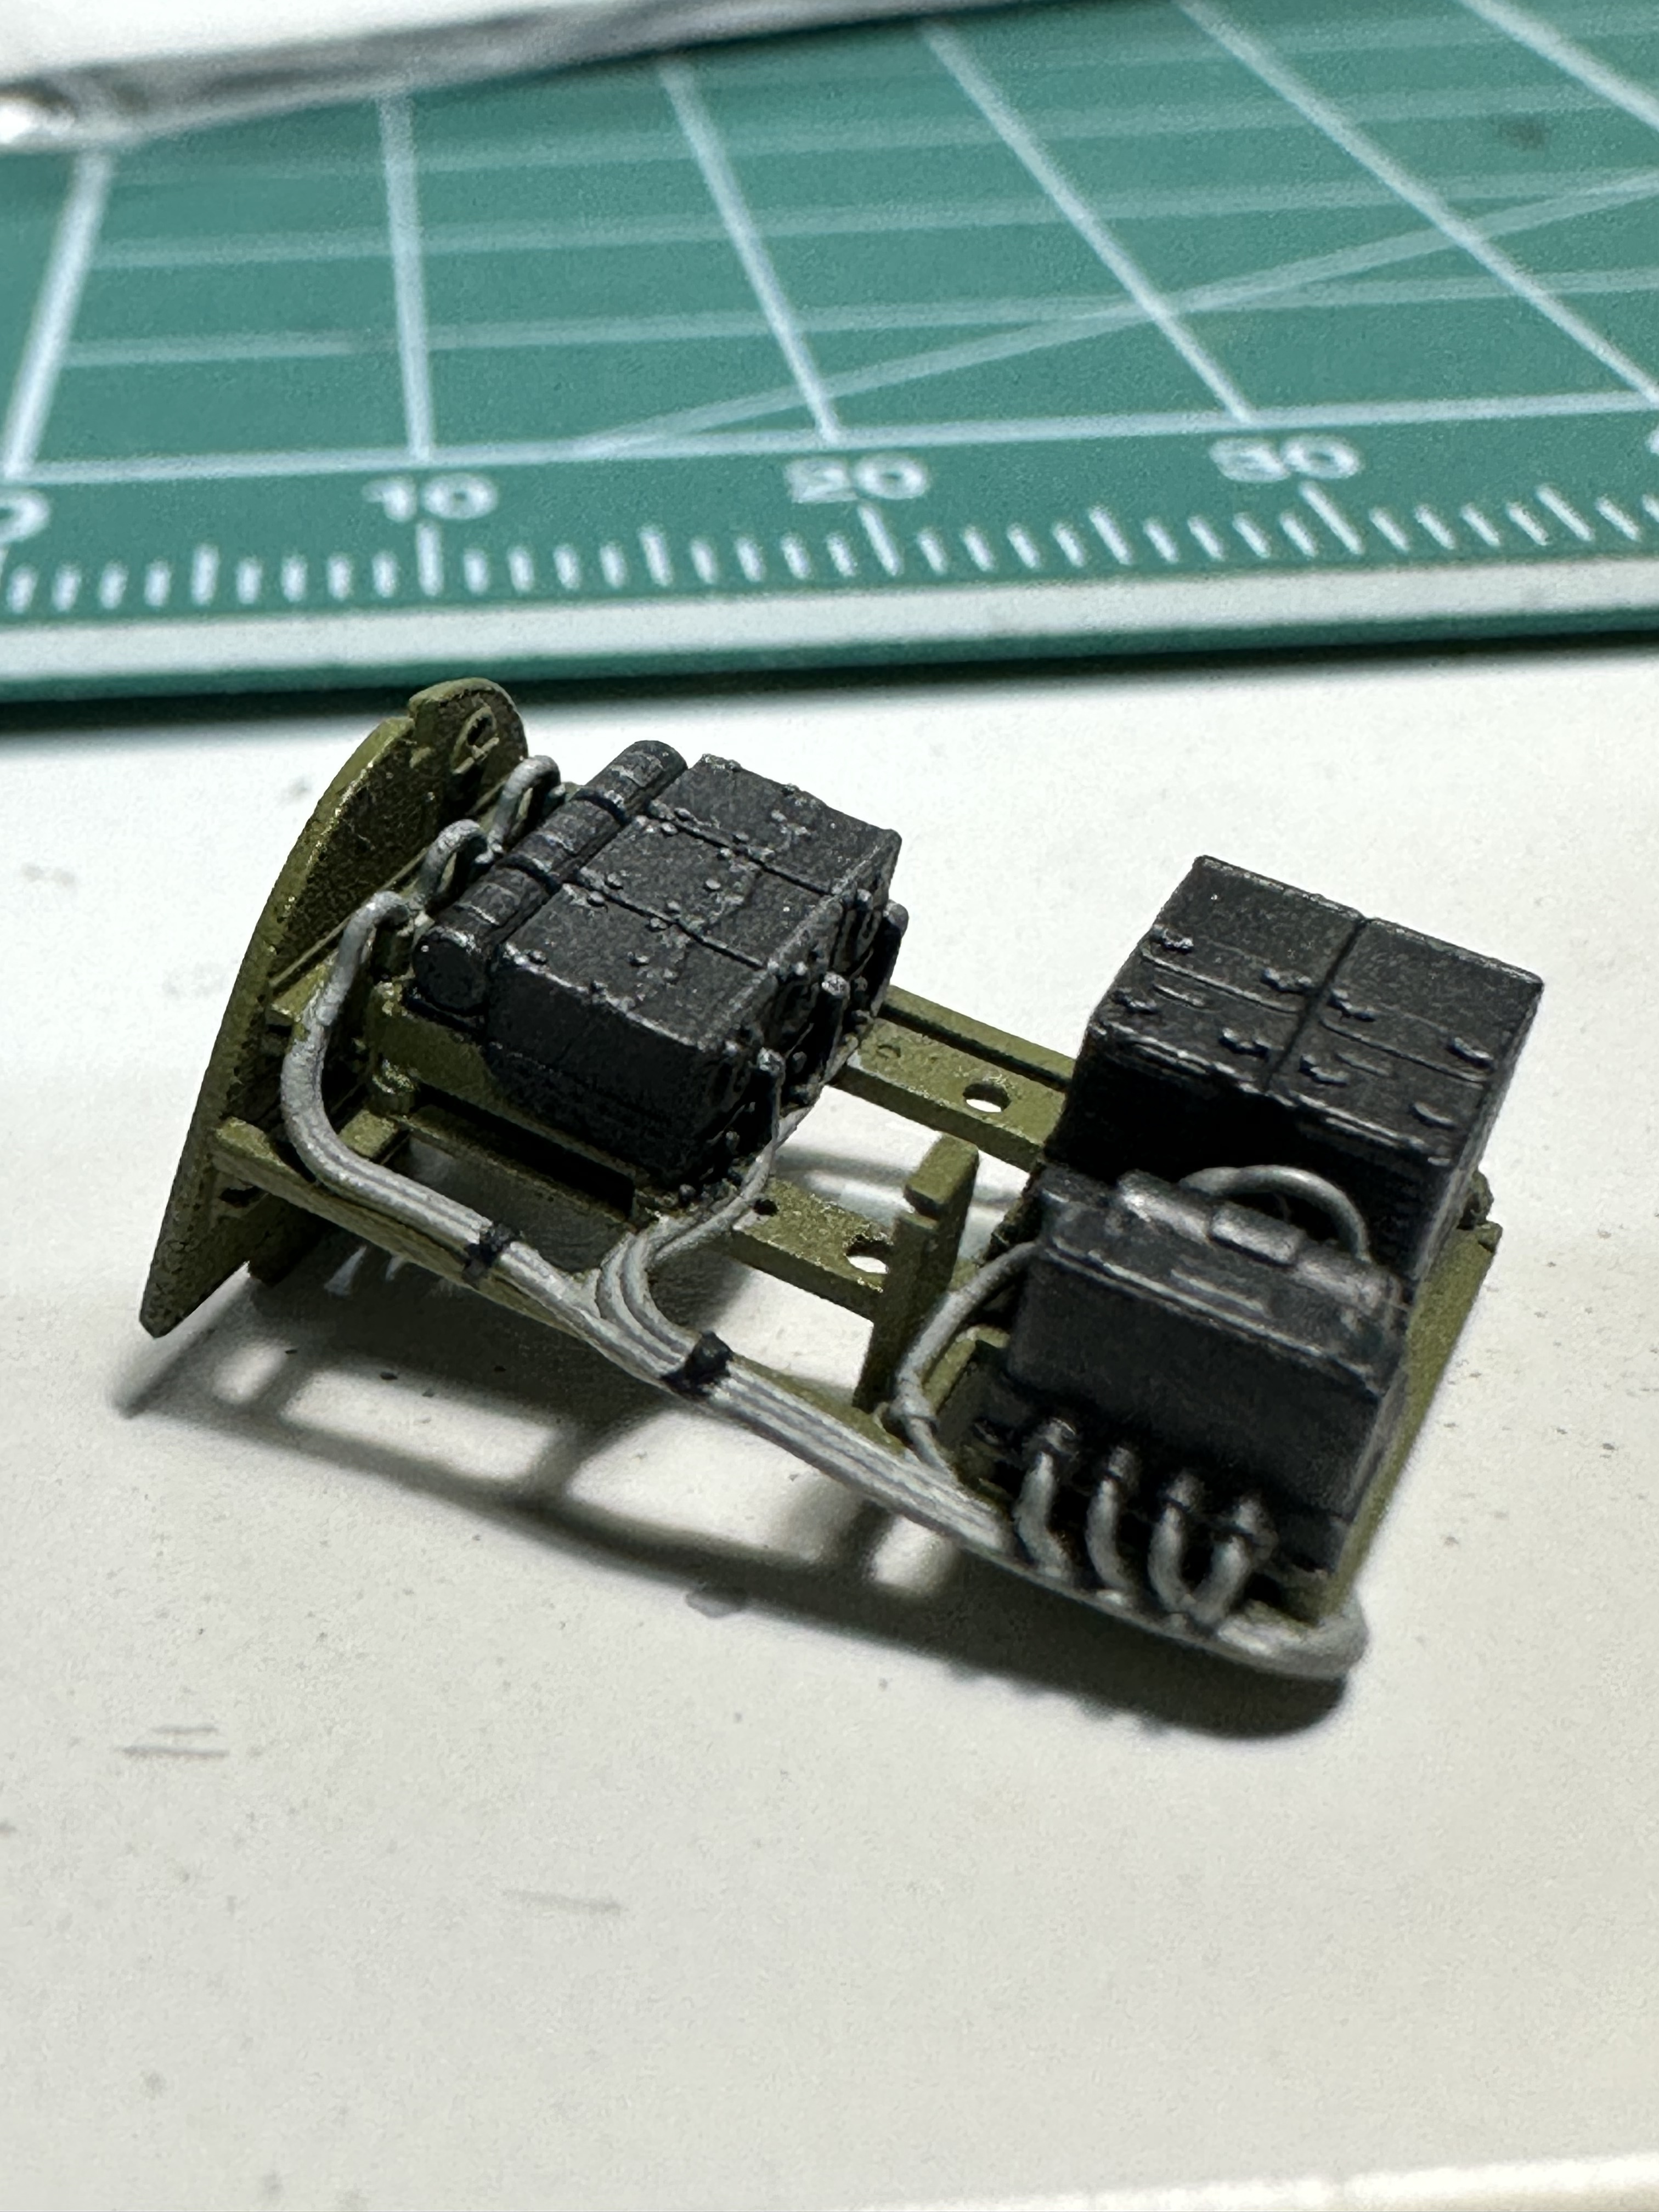
Started working on both the kit parts and the brassin cockpit. Very impressed with both but am really trying to prioritize the brassin as I’m not a good painter so I’m taking my time. Lots left to do.
5 Likes
Not a good painter?? I wish I was as “bad” as you! 
Looking good.
3 Likes
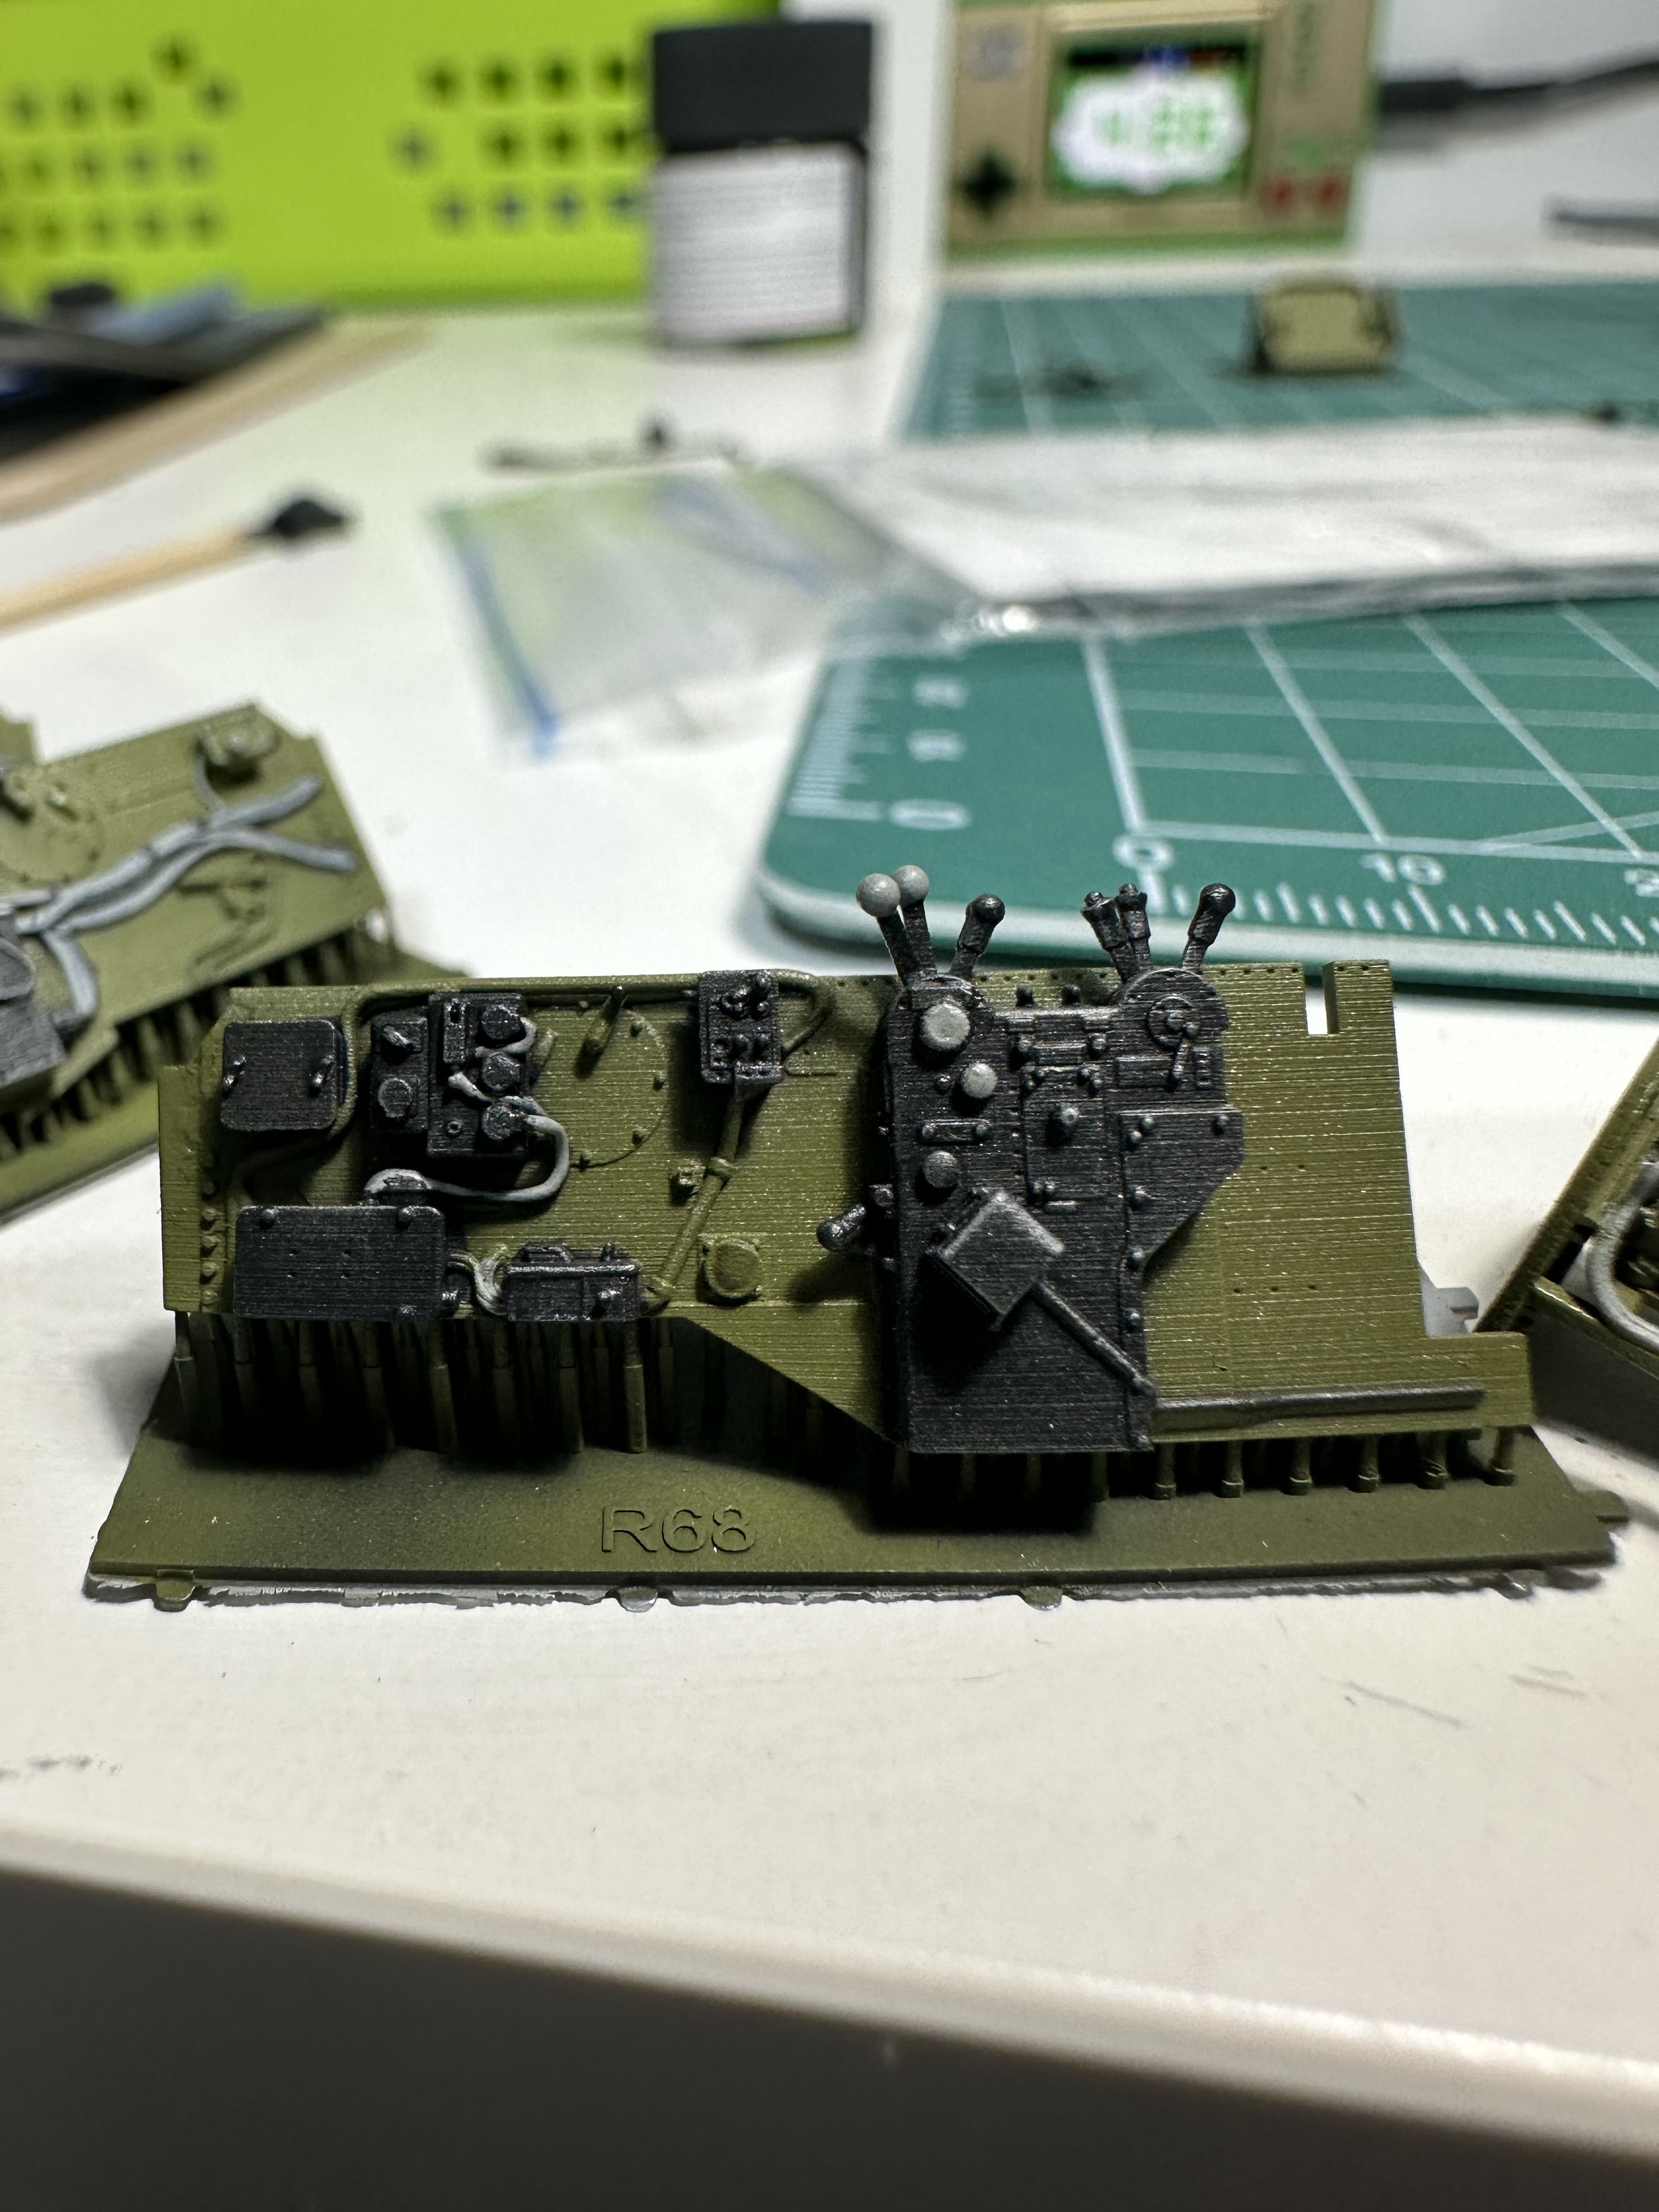
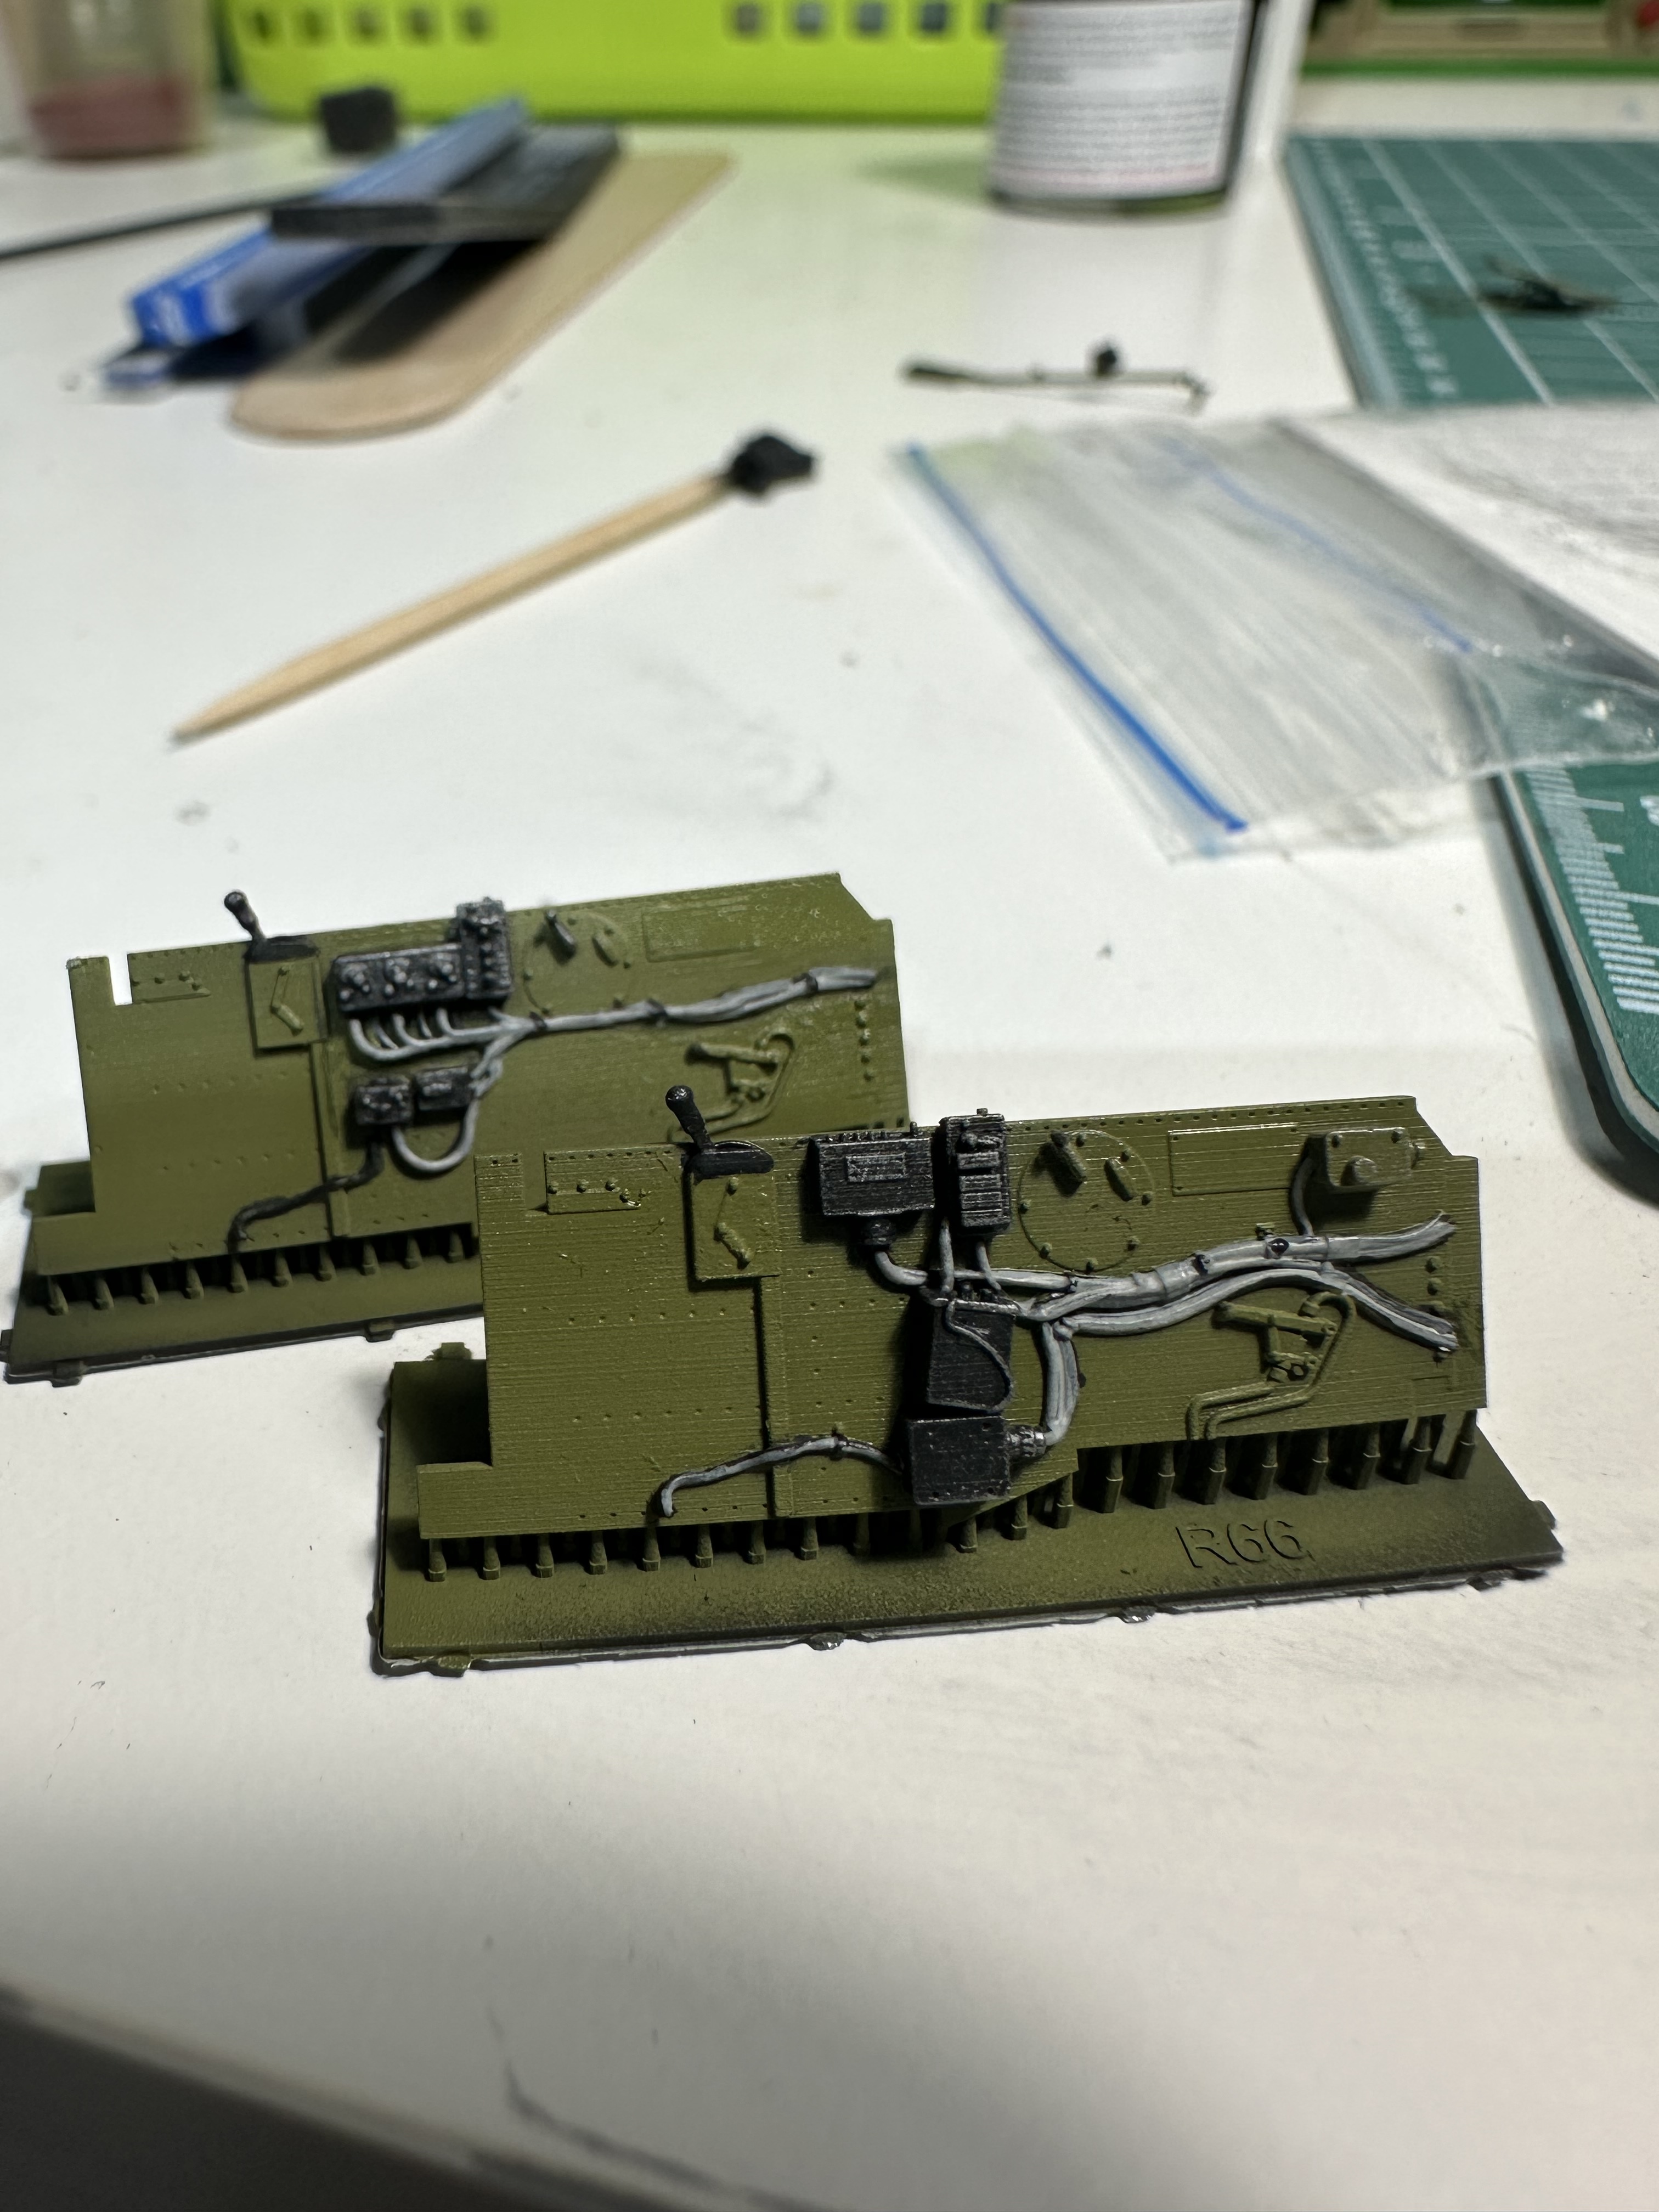
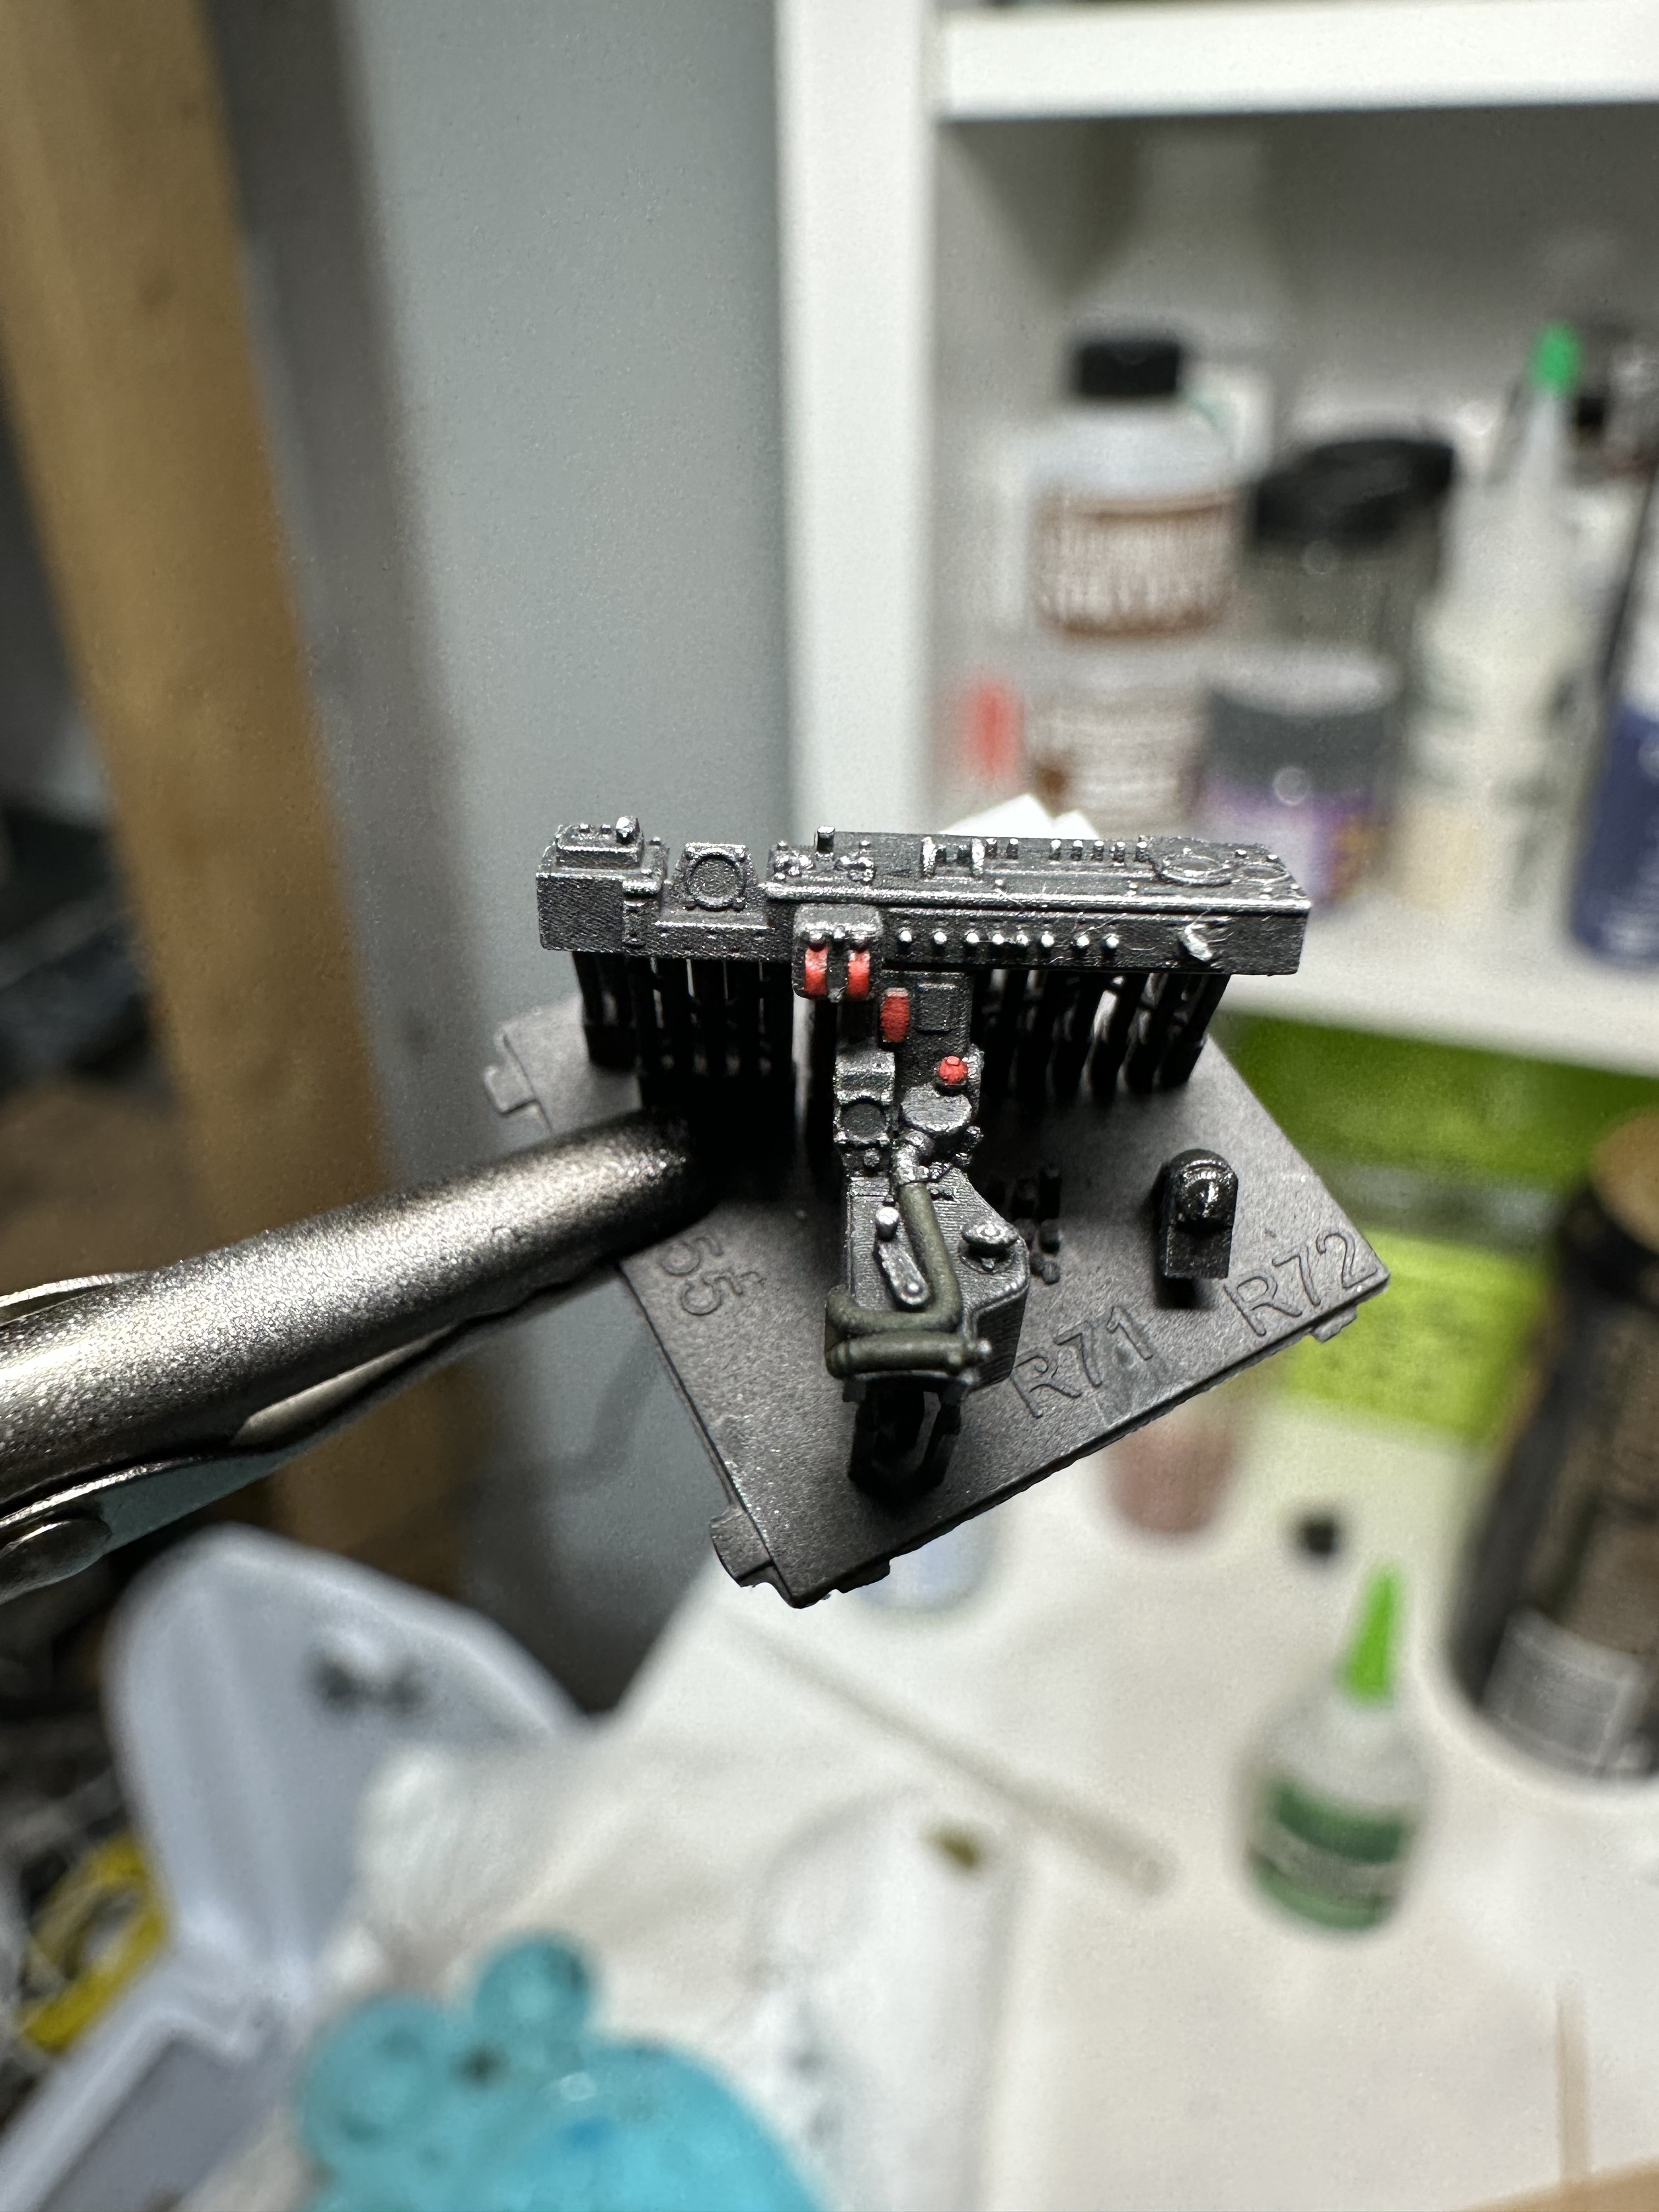
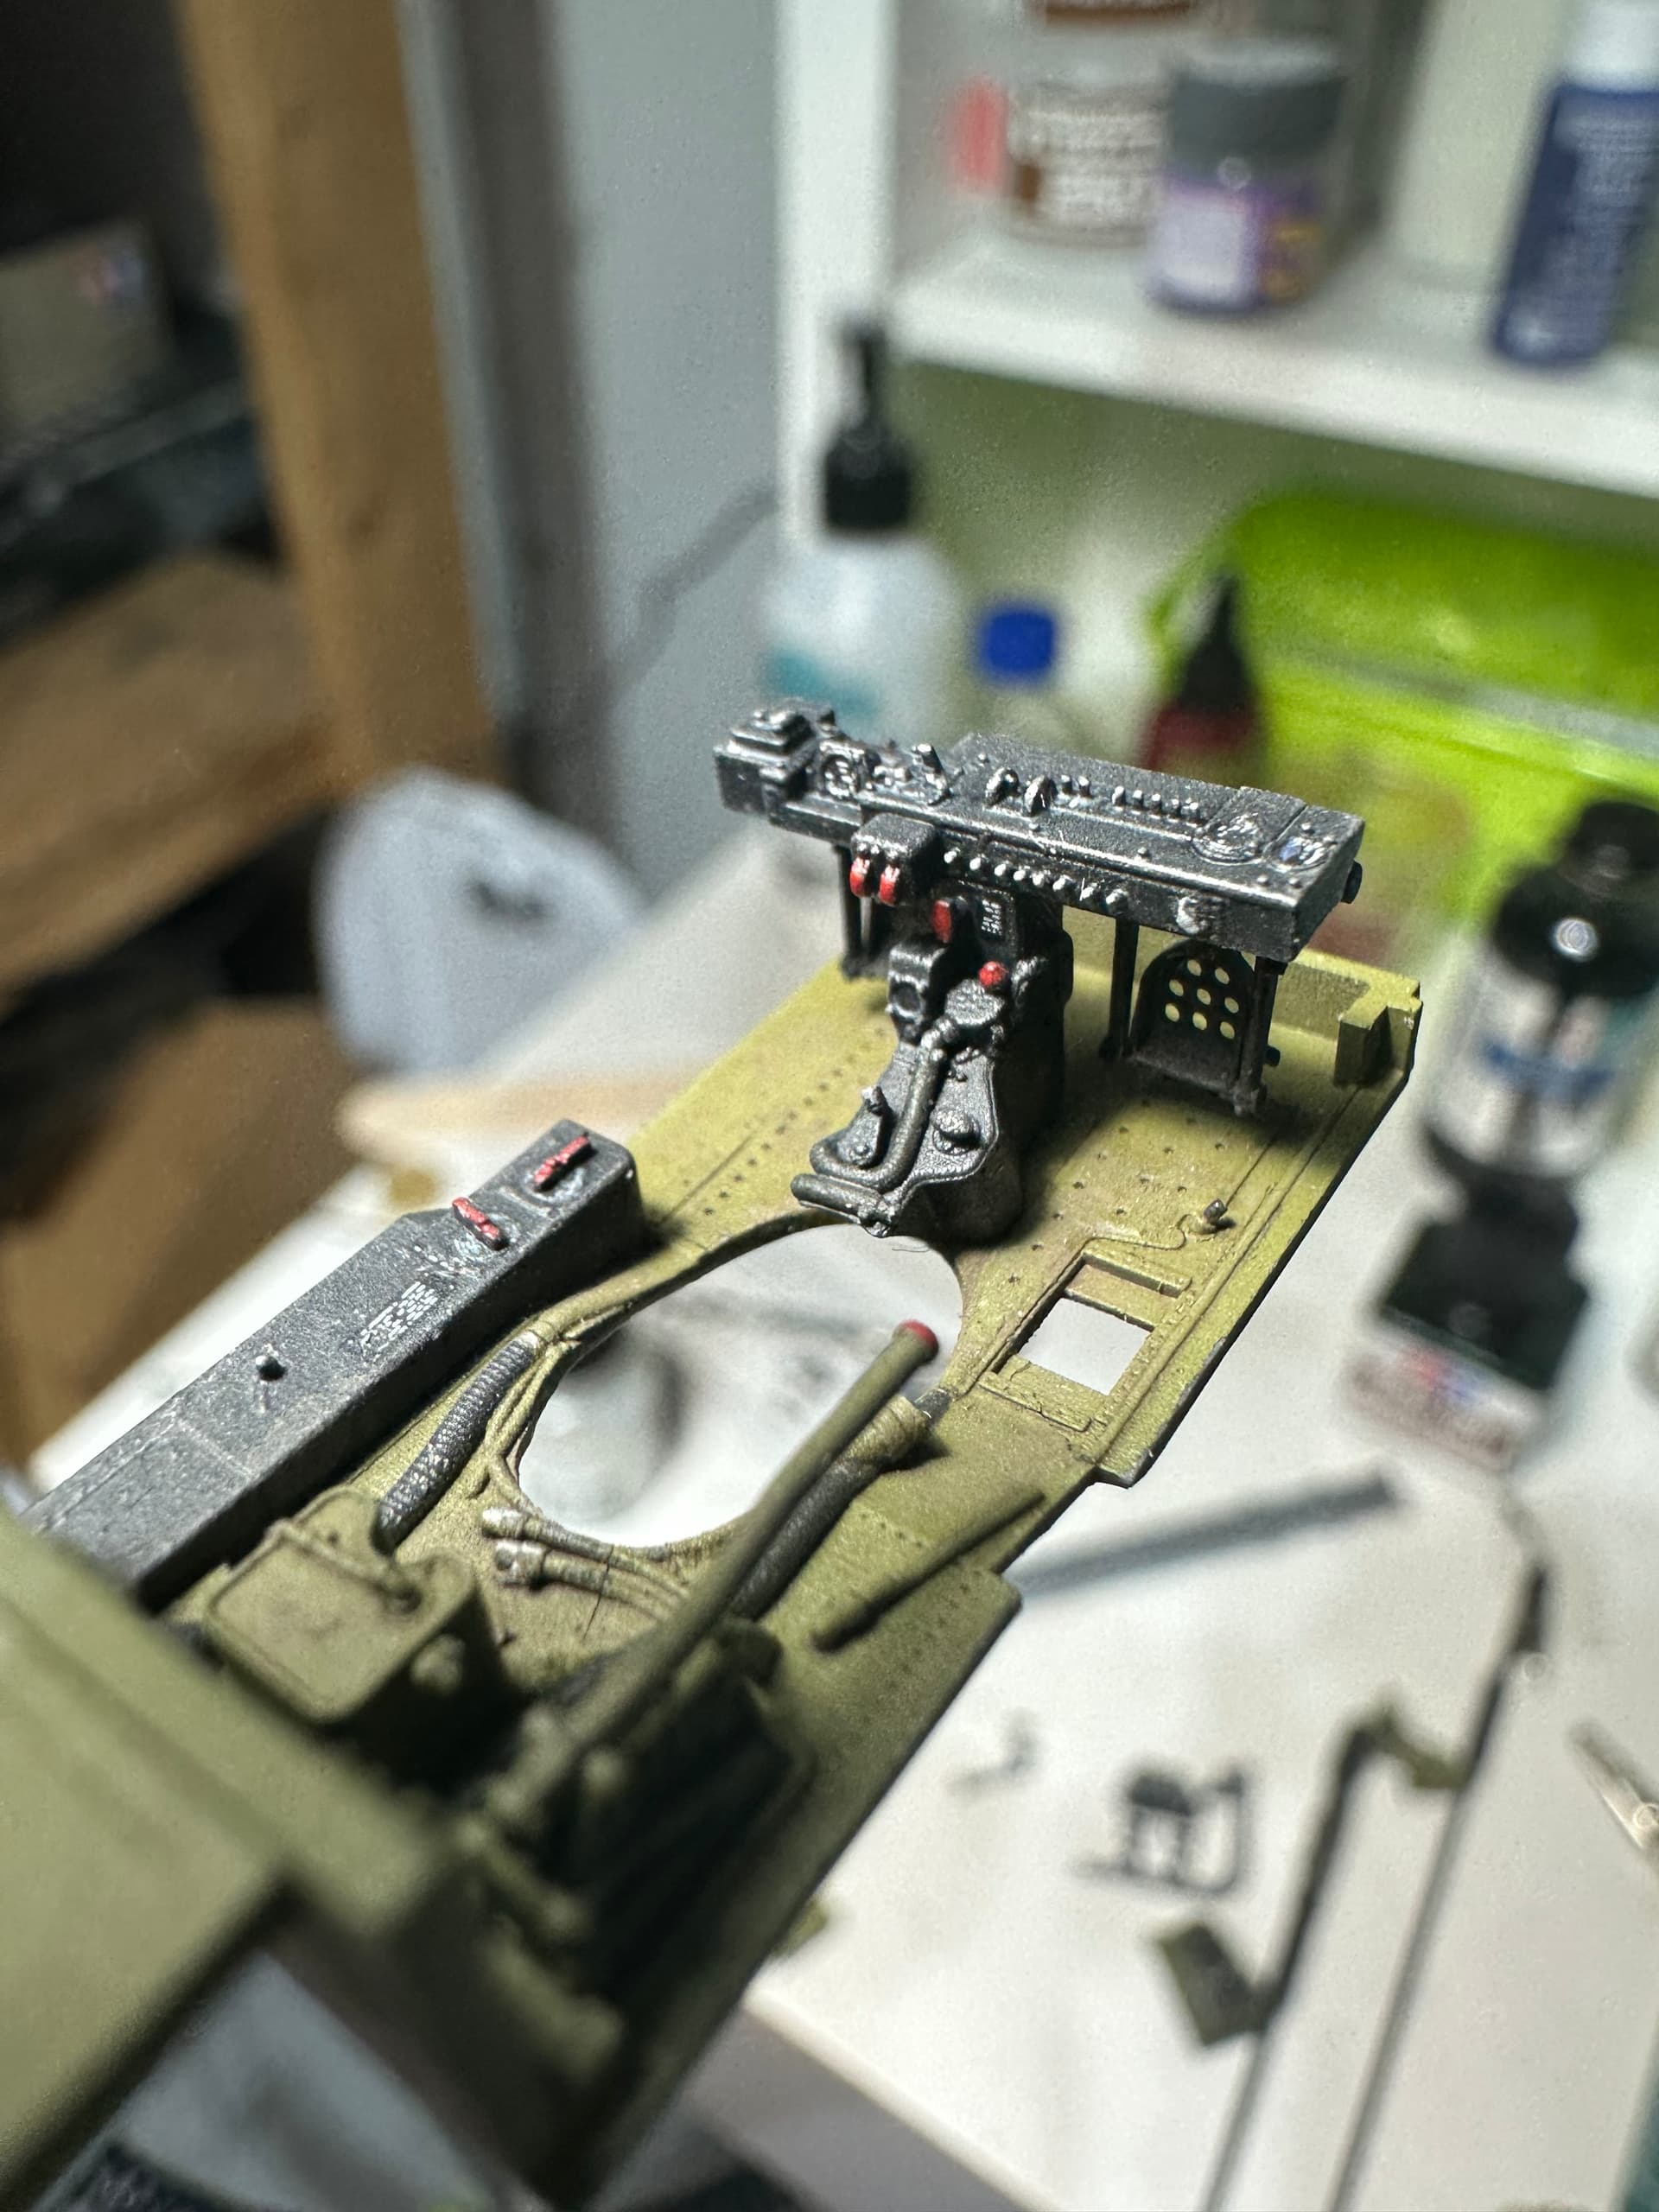
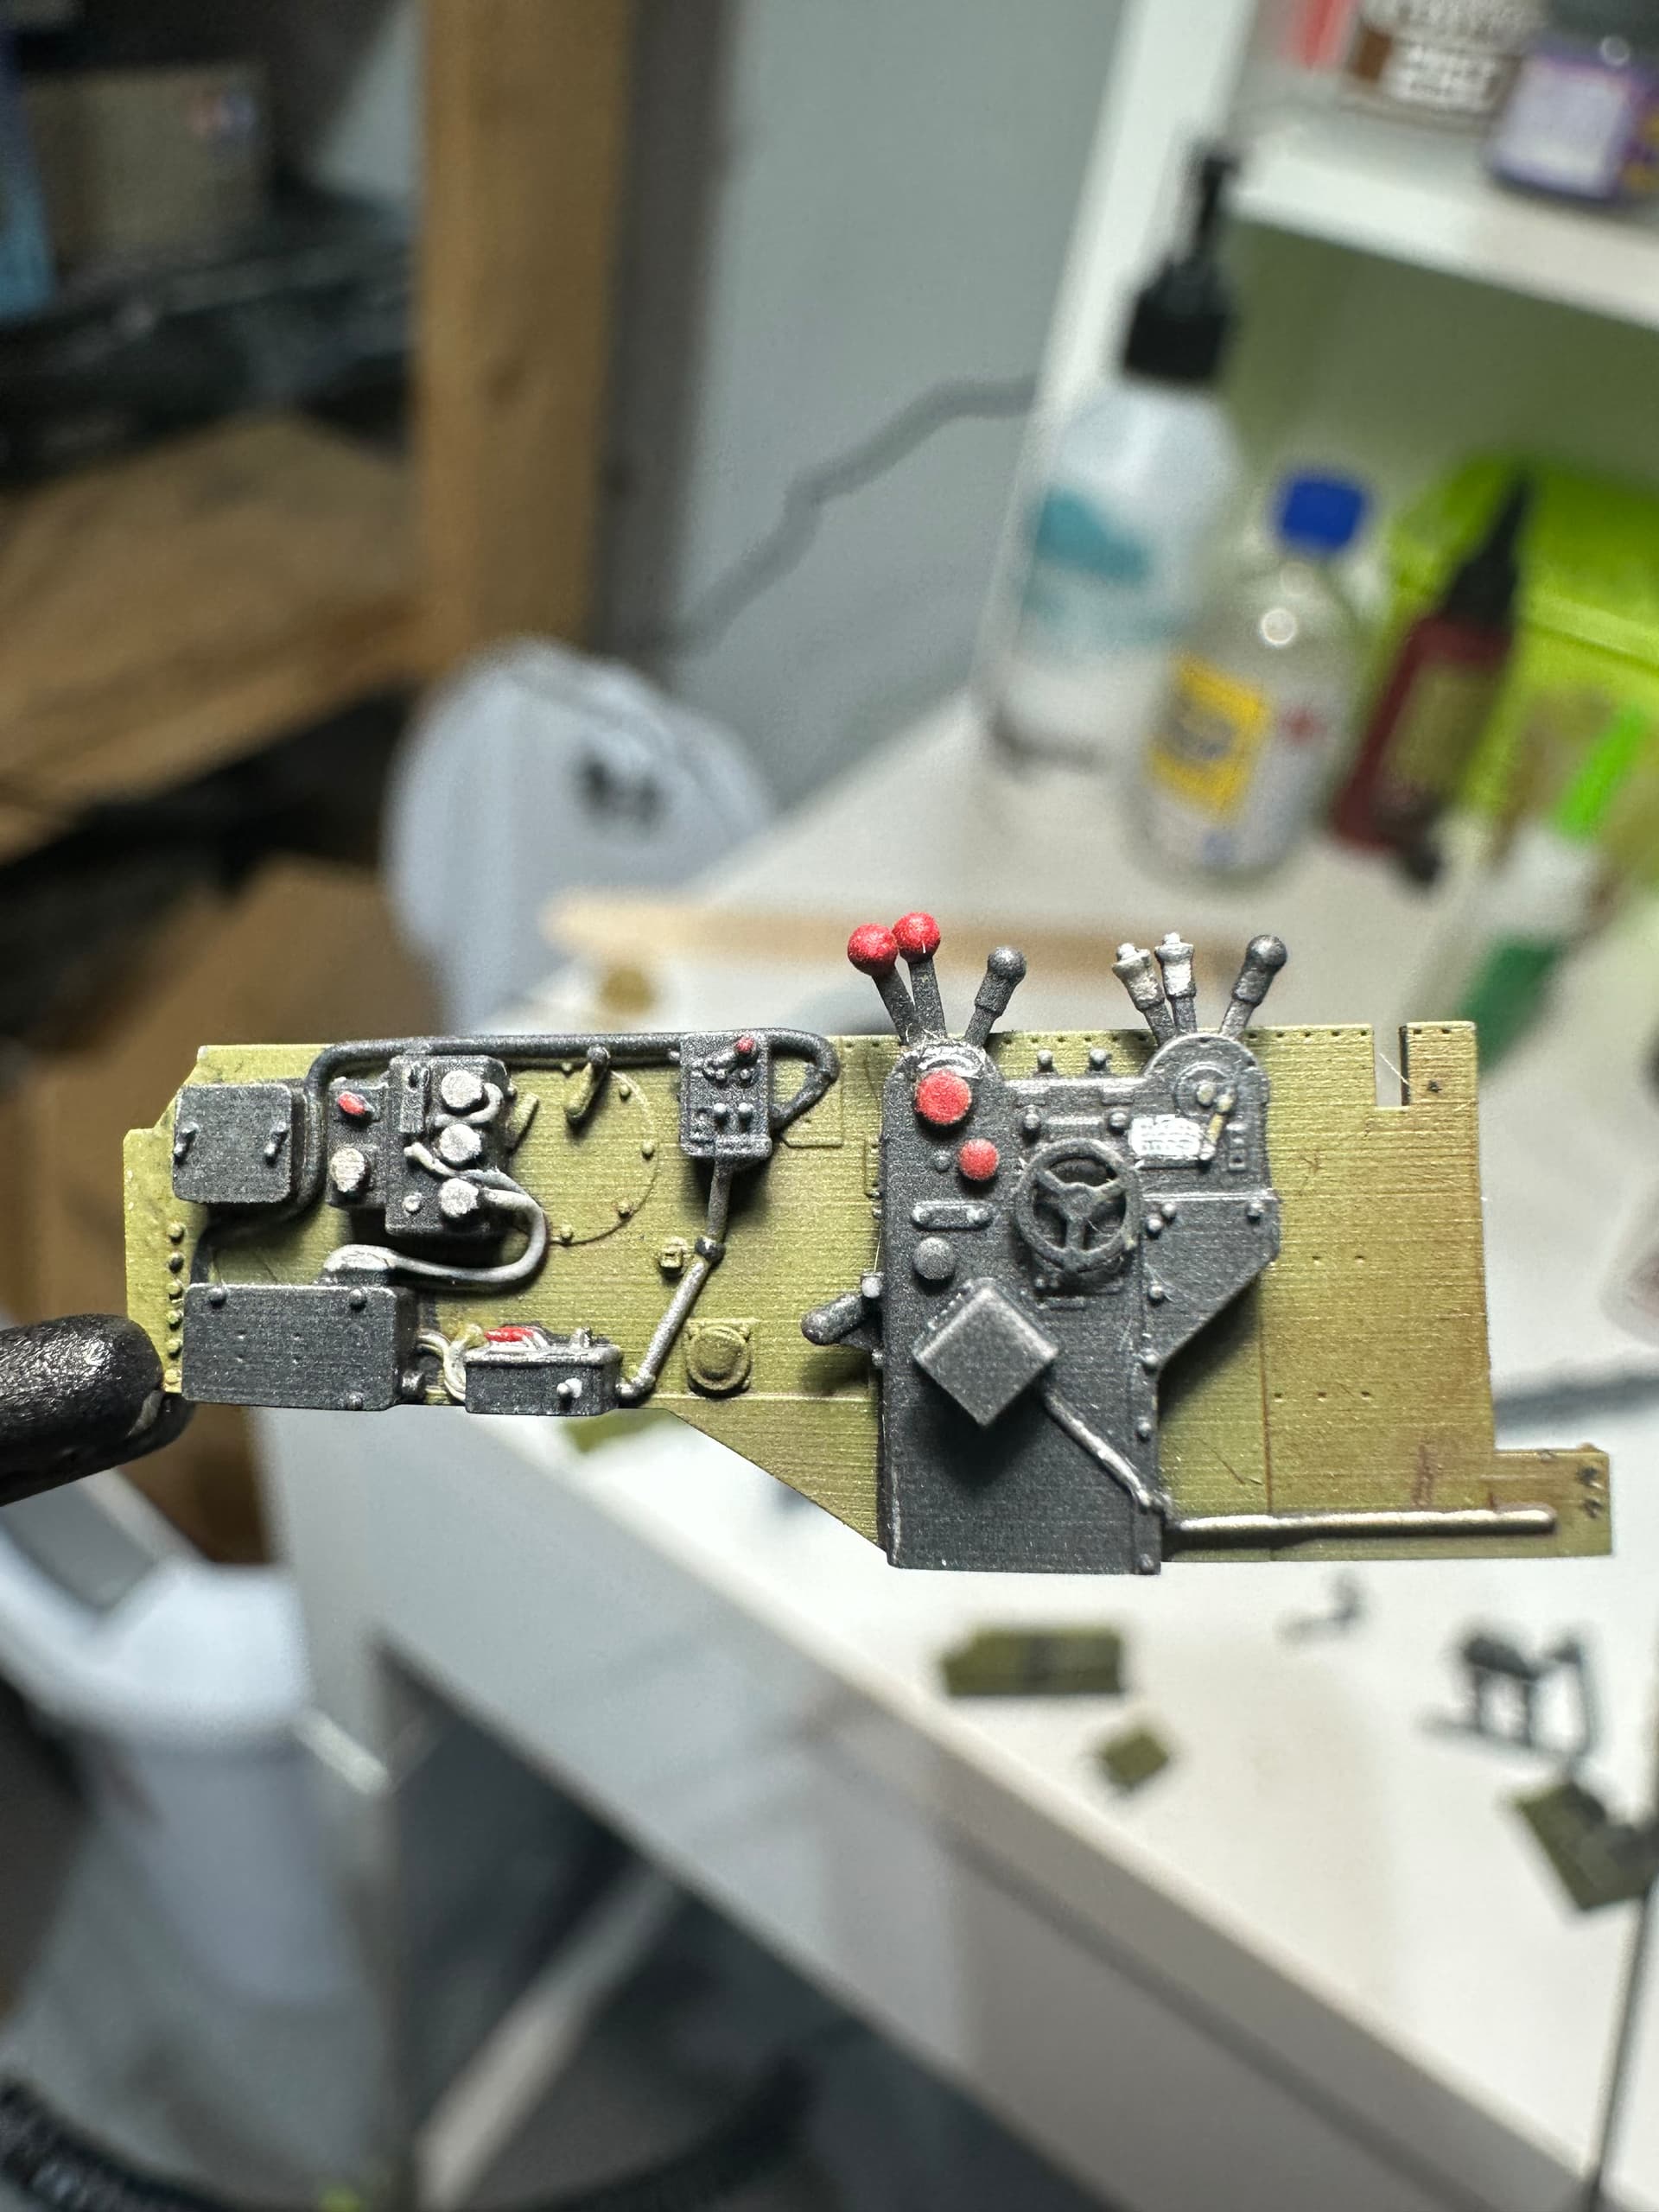
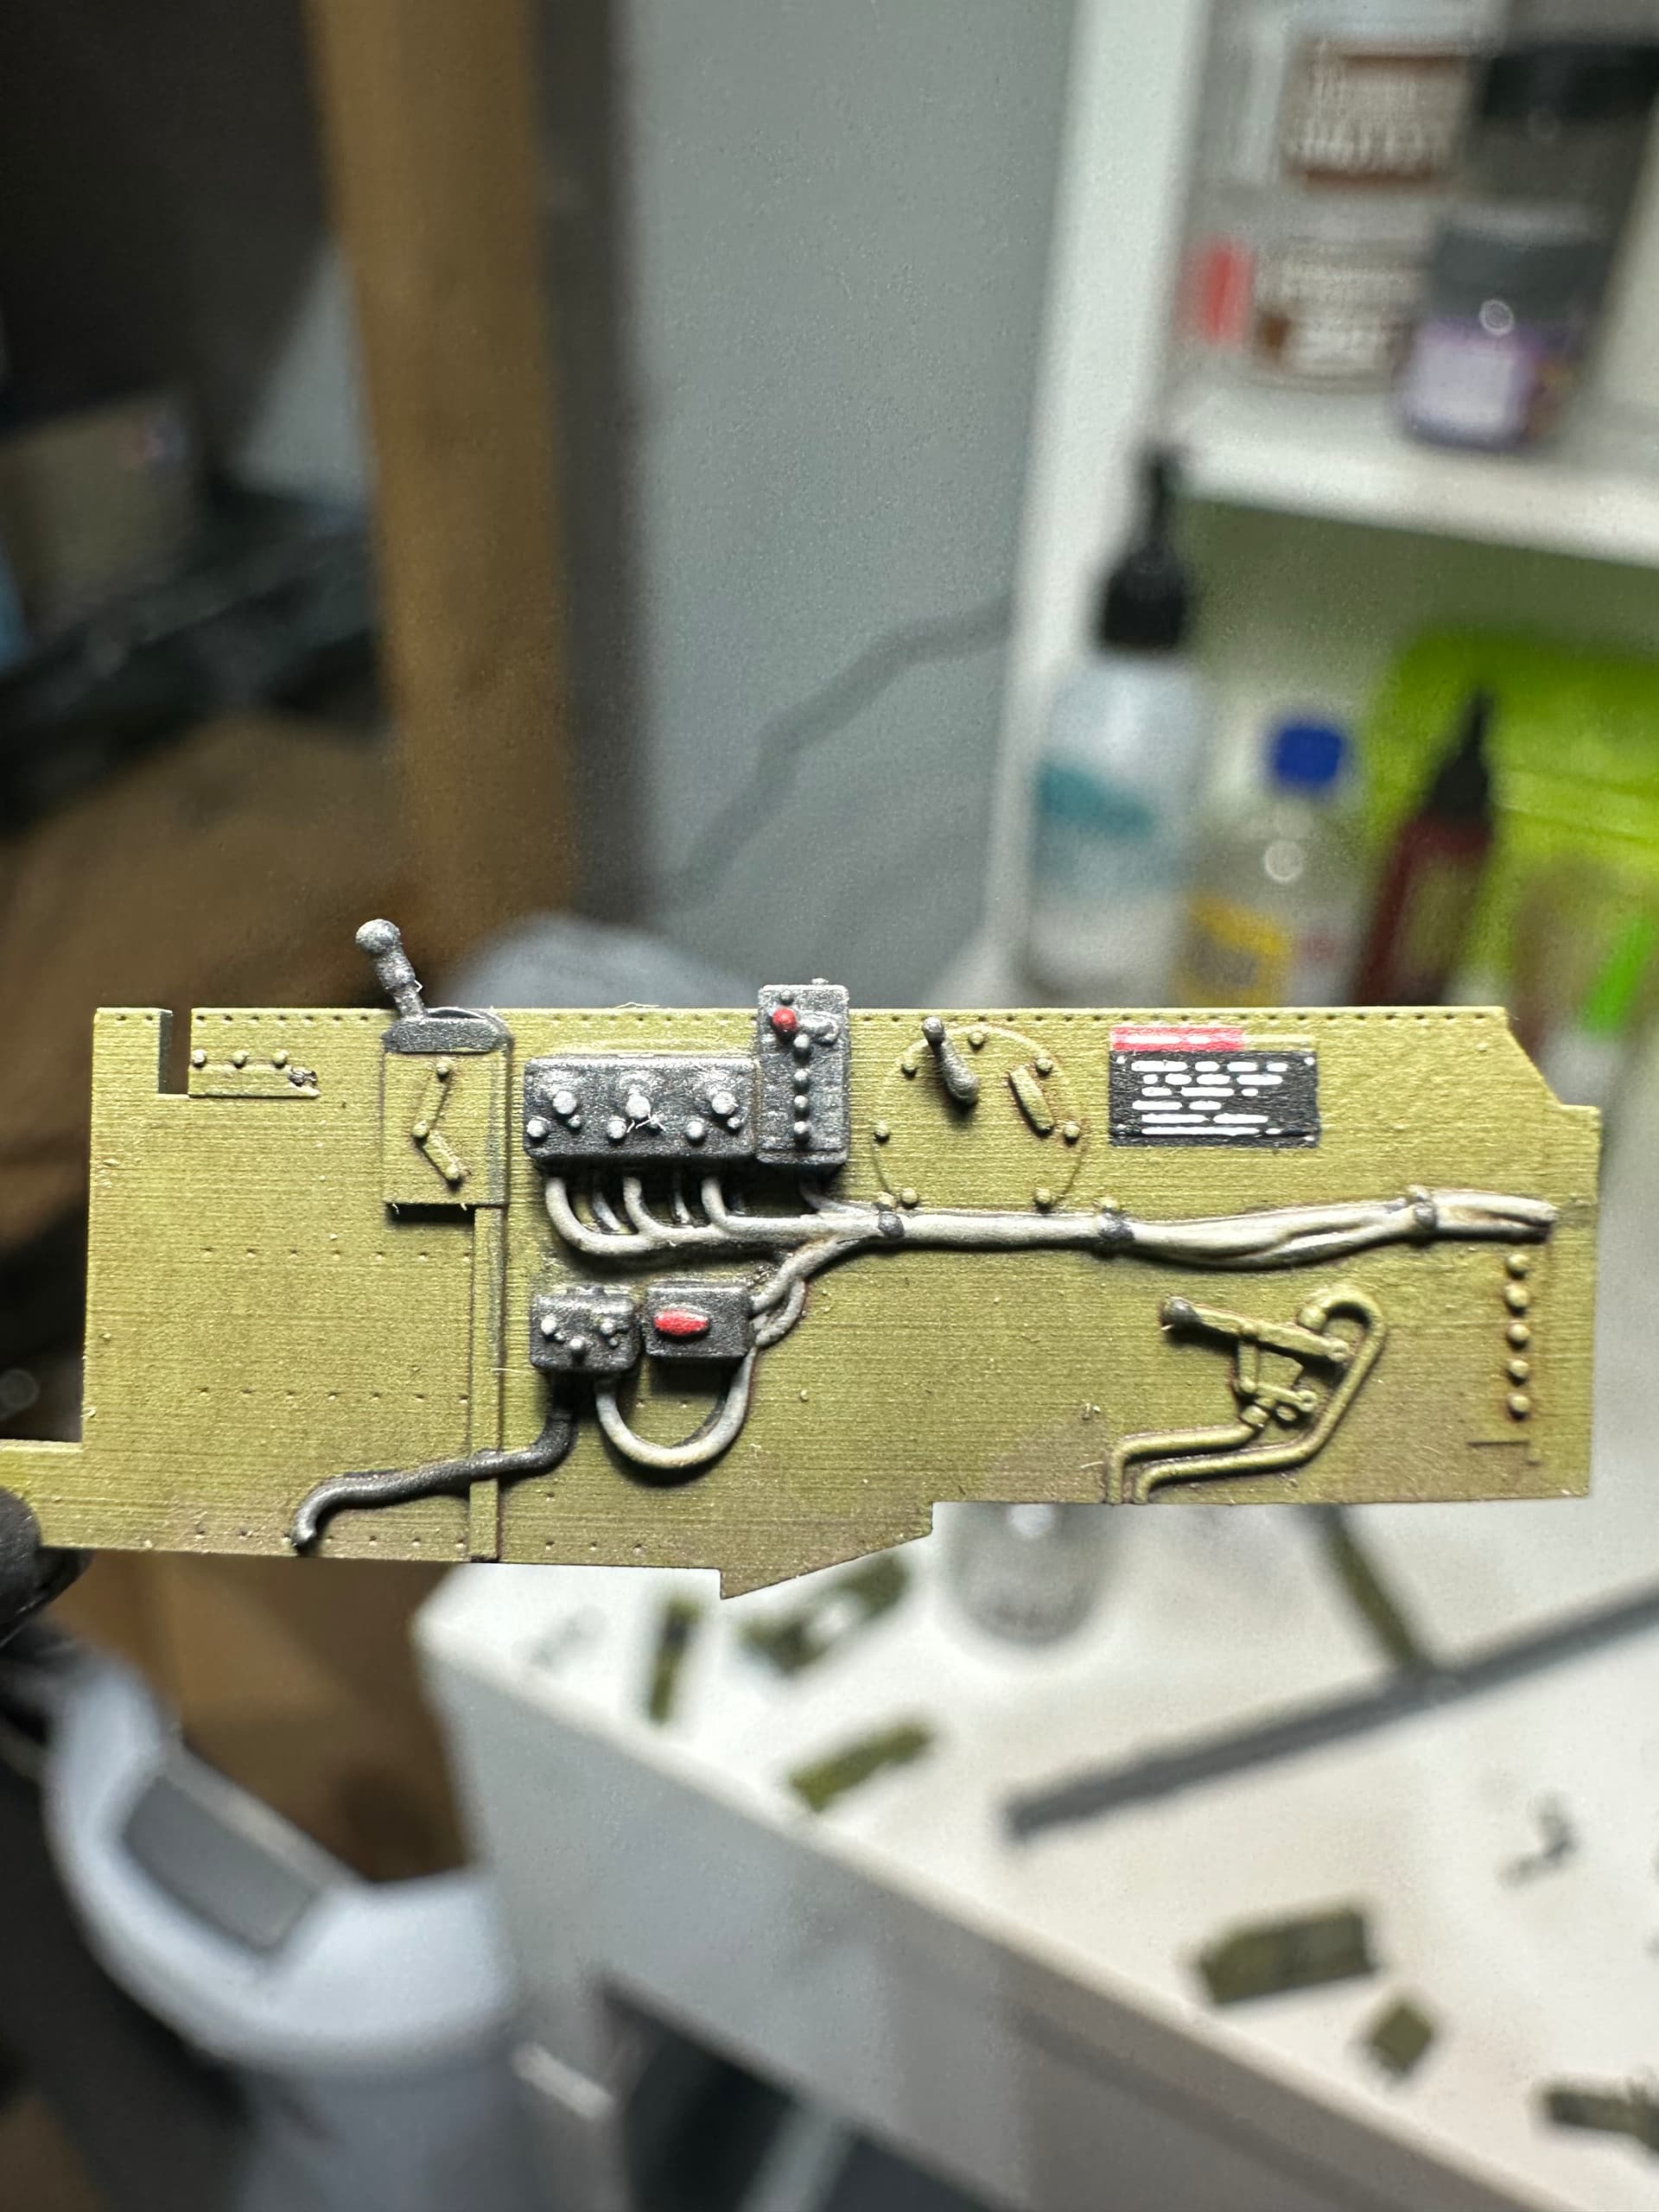
As I get closer to gloss coating for a grimy wash, I am leaning more and more to using the brassin set and discontinuing the kit cockpit work altogether. The levers and knobs on the sidewall kind of seal the deal for me, they look significantly better as I wrestle with the Eduard space photo etch for the stock sidewall.
Next up gloss coat and seeing if I can get a million decals in the tiniest of spots before a flat coat. Thanks for any feedback!
12 Likes
That’s some excellent work.
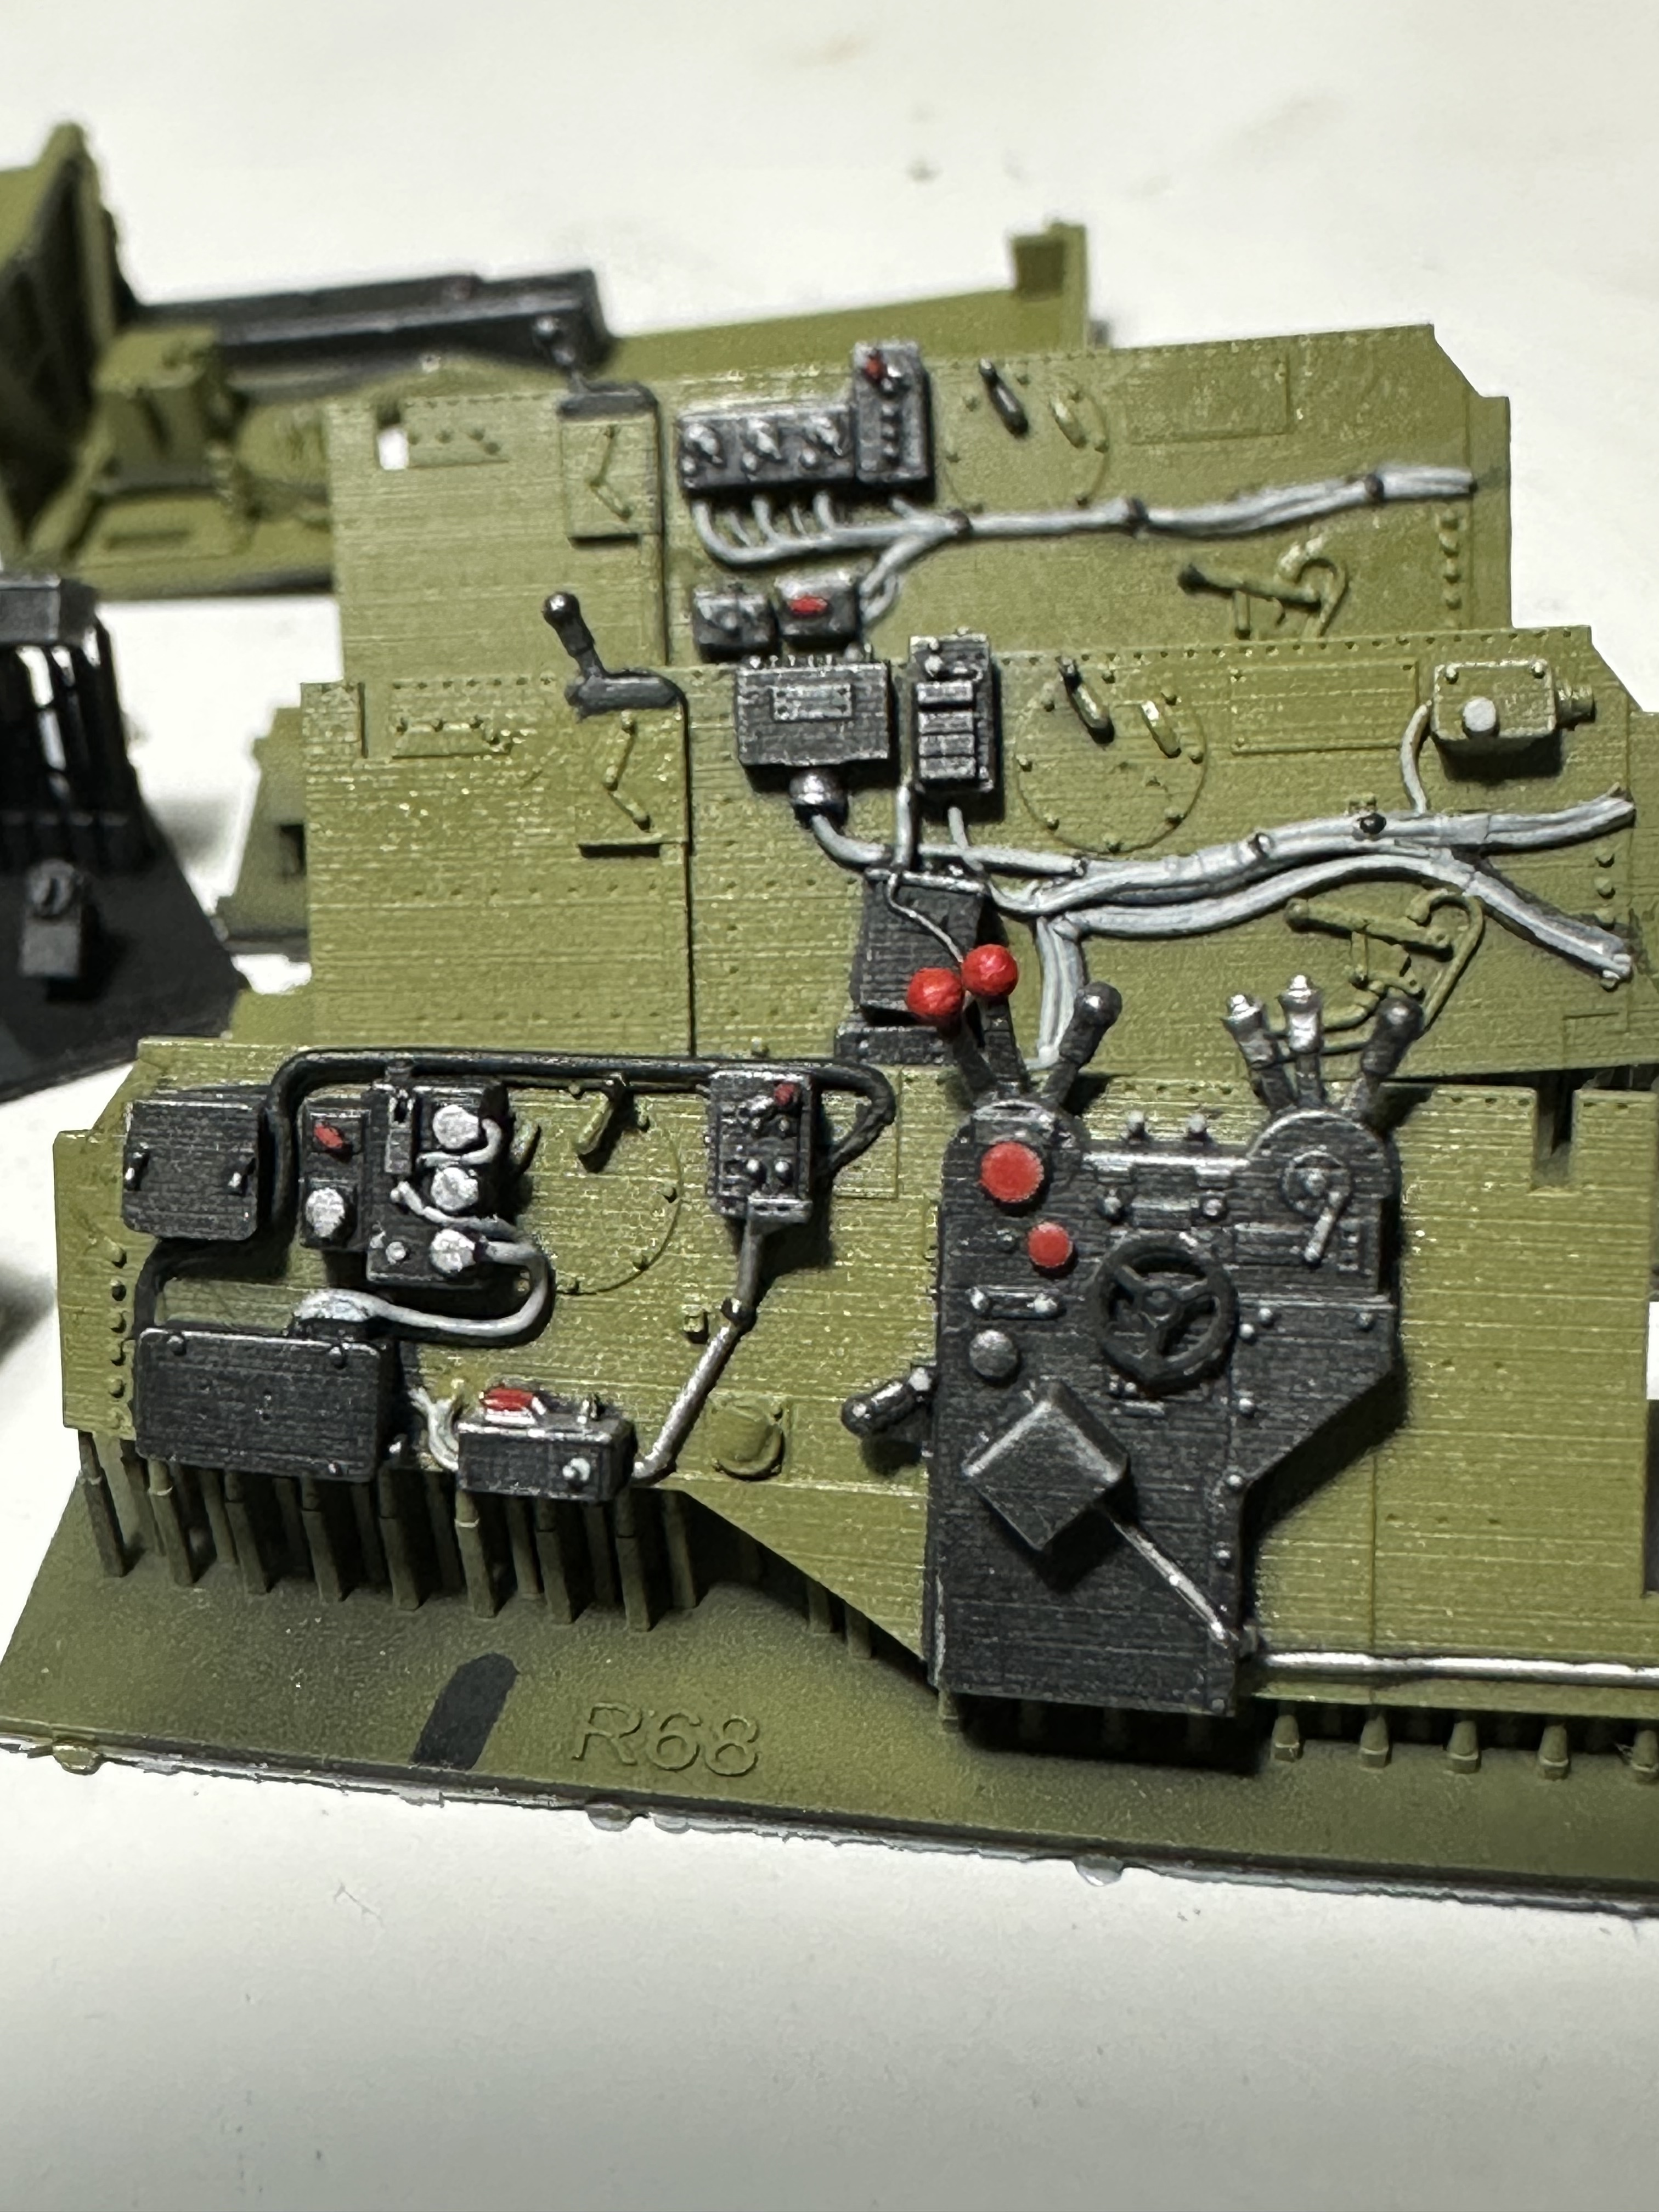
Tell us about your technique. I’m assuming the green, then details picked out in black, then drybrushed with silver/gray, and then white and red details painted?
Thanks! Yep I used SMS Interior Green as the base coat and then Tamiya NATO Black which was then dry brushed with flat aluminum. All piping and buttons picked out painstakingly with light gull gray, flat aluminum, red, nato black, and white.
Holy hell did I almost go permanently cross eyed painting. Using a Tamiya super fine brush made it possible.
Biggest helper for me was thinning the few drops of paint with a few drops of Mr. Color Levelling thinner to smoothly lay down and it conformed just well enough to the small details without being too thin and acting like a wash. Careful balance and testing on scrap plastic helped.
2 Likes
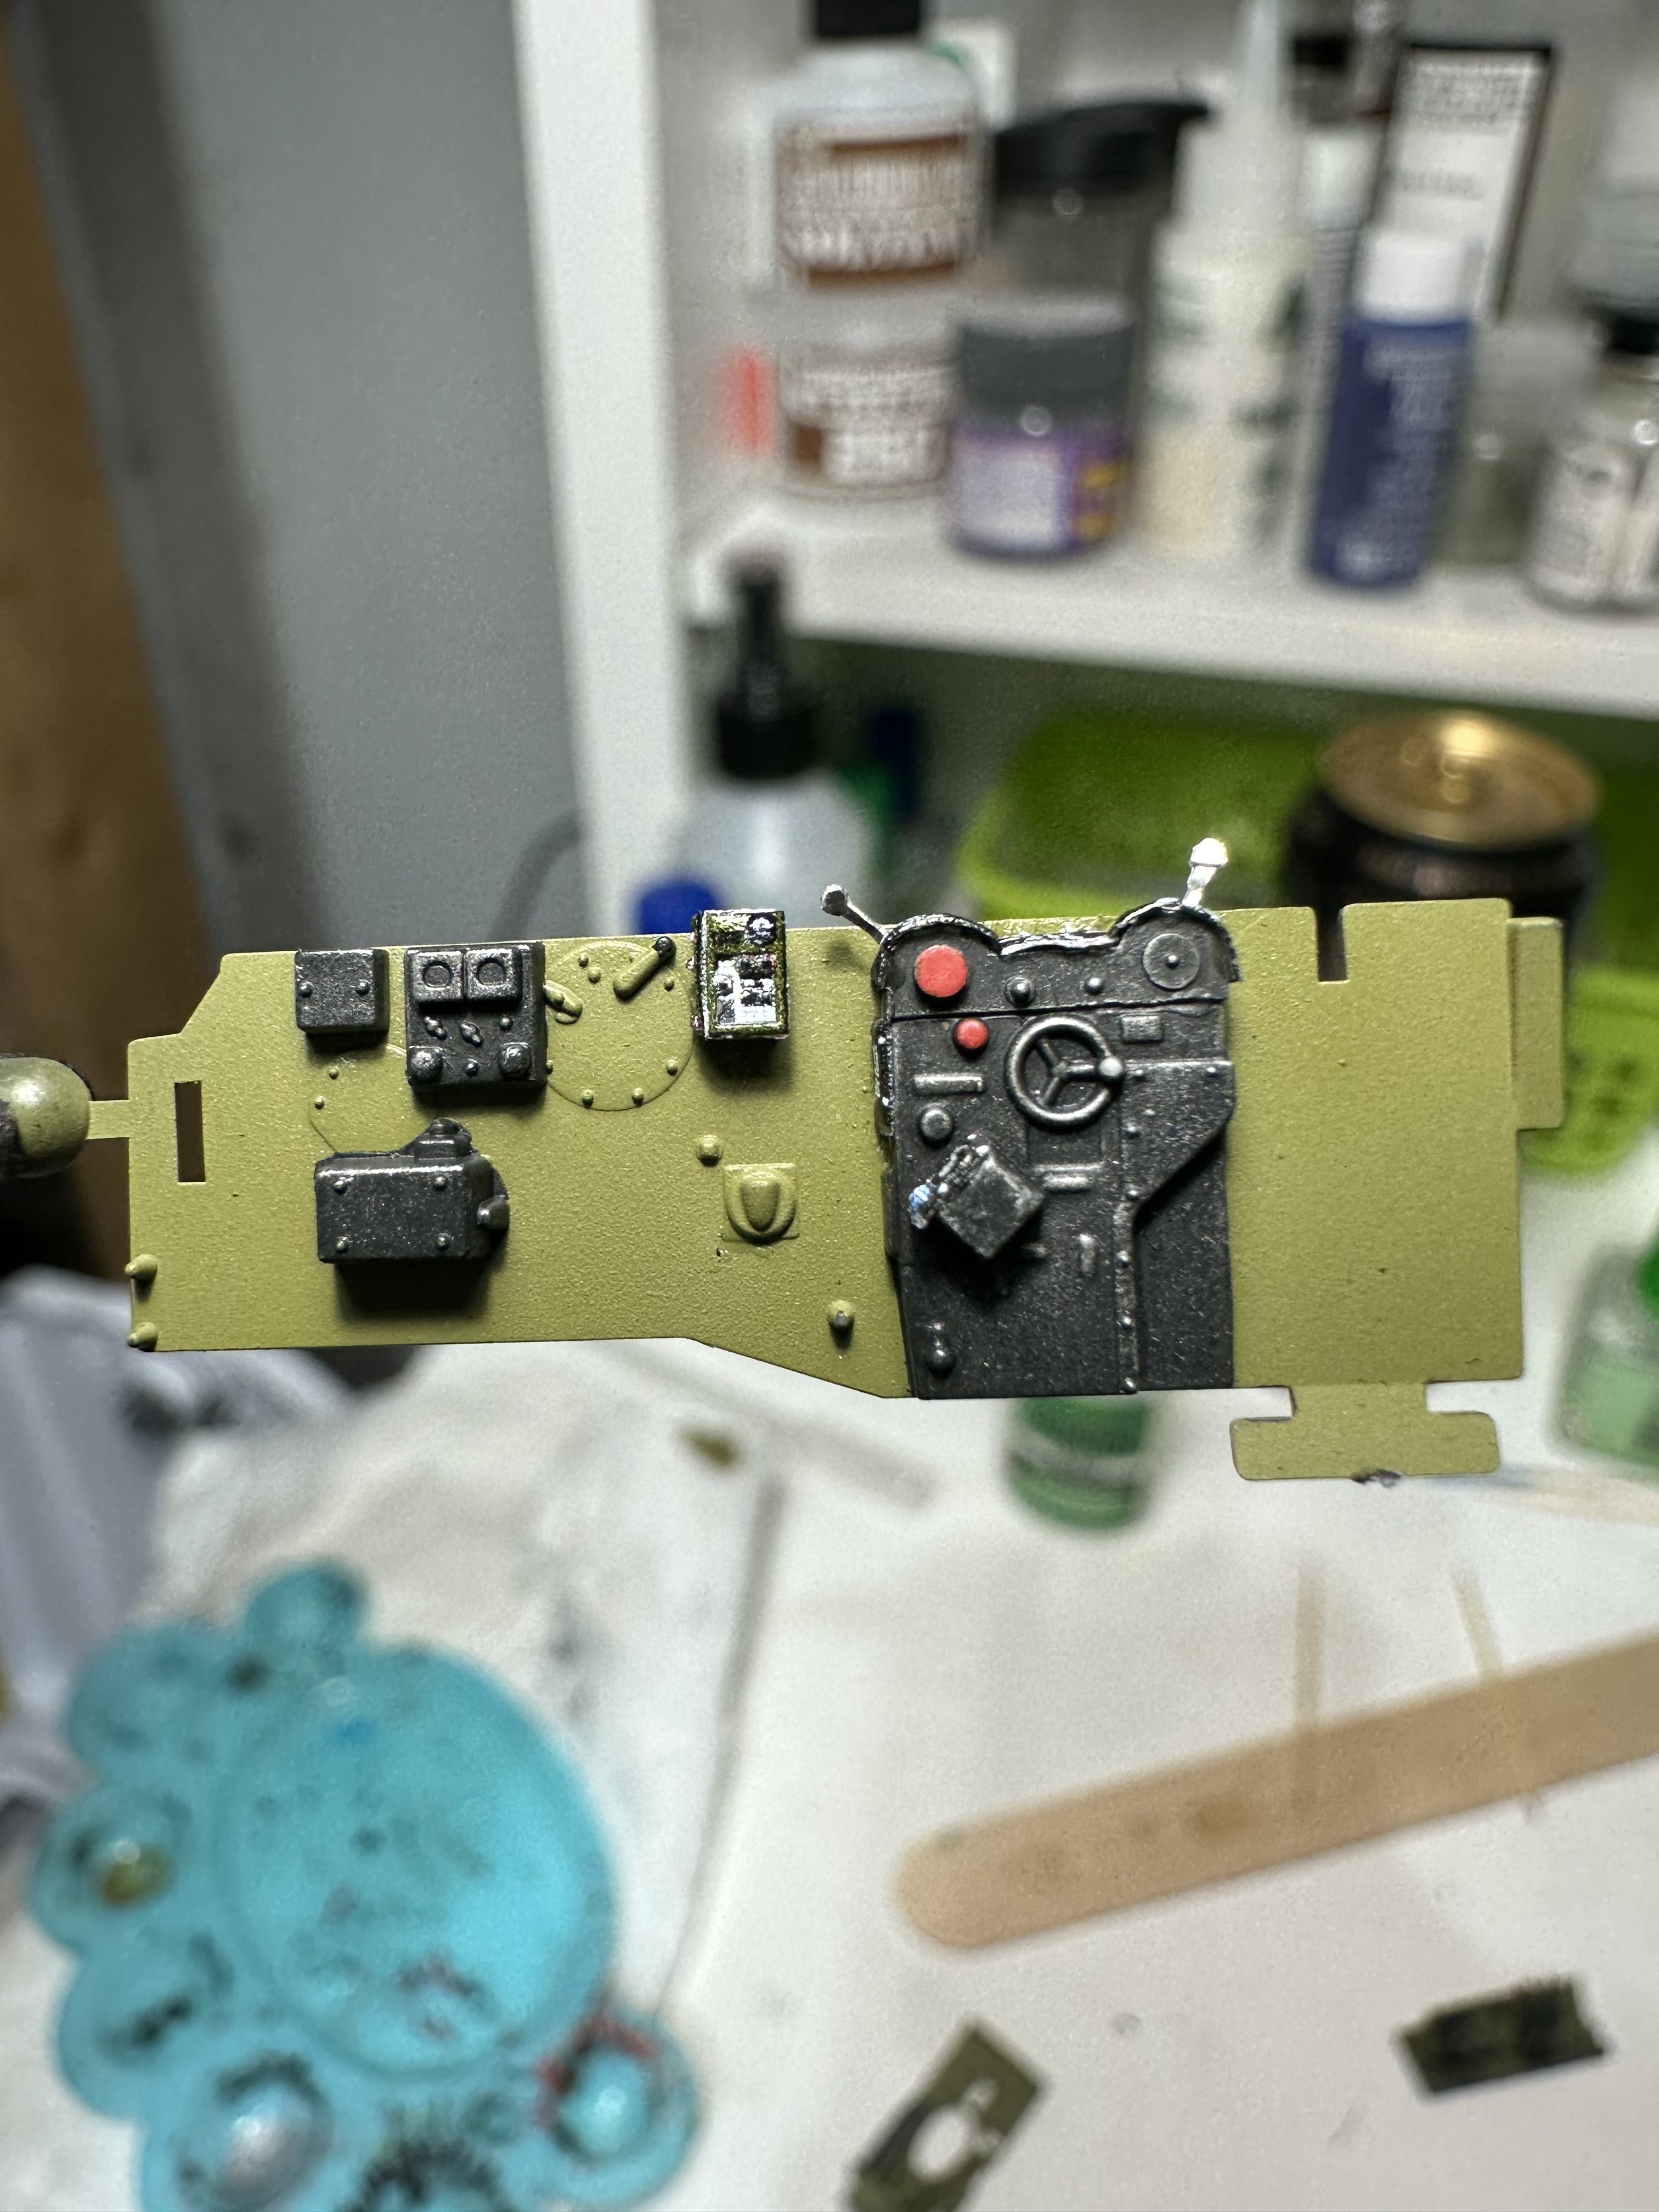
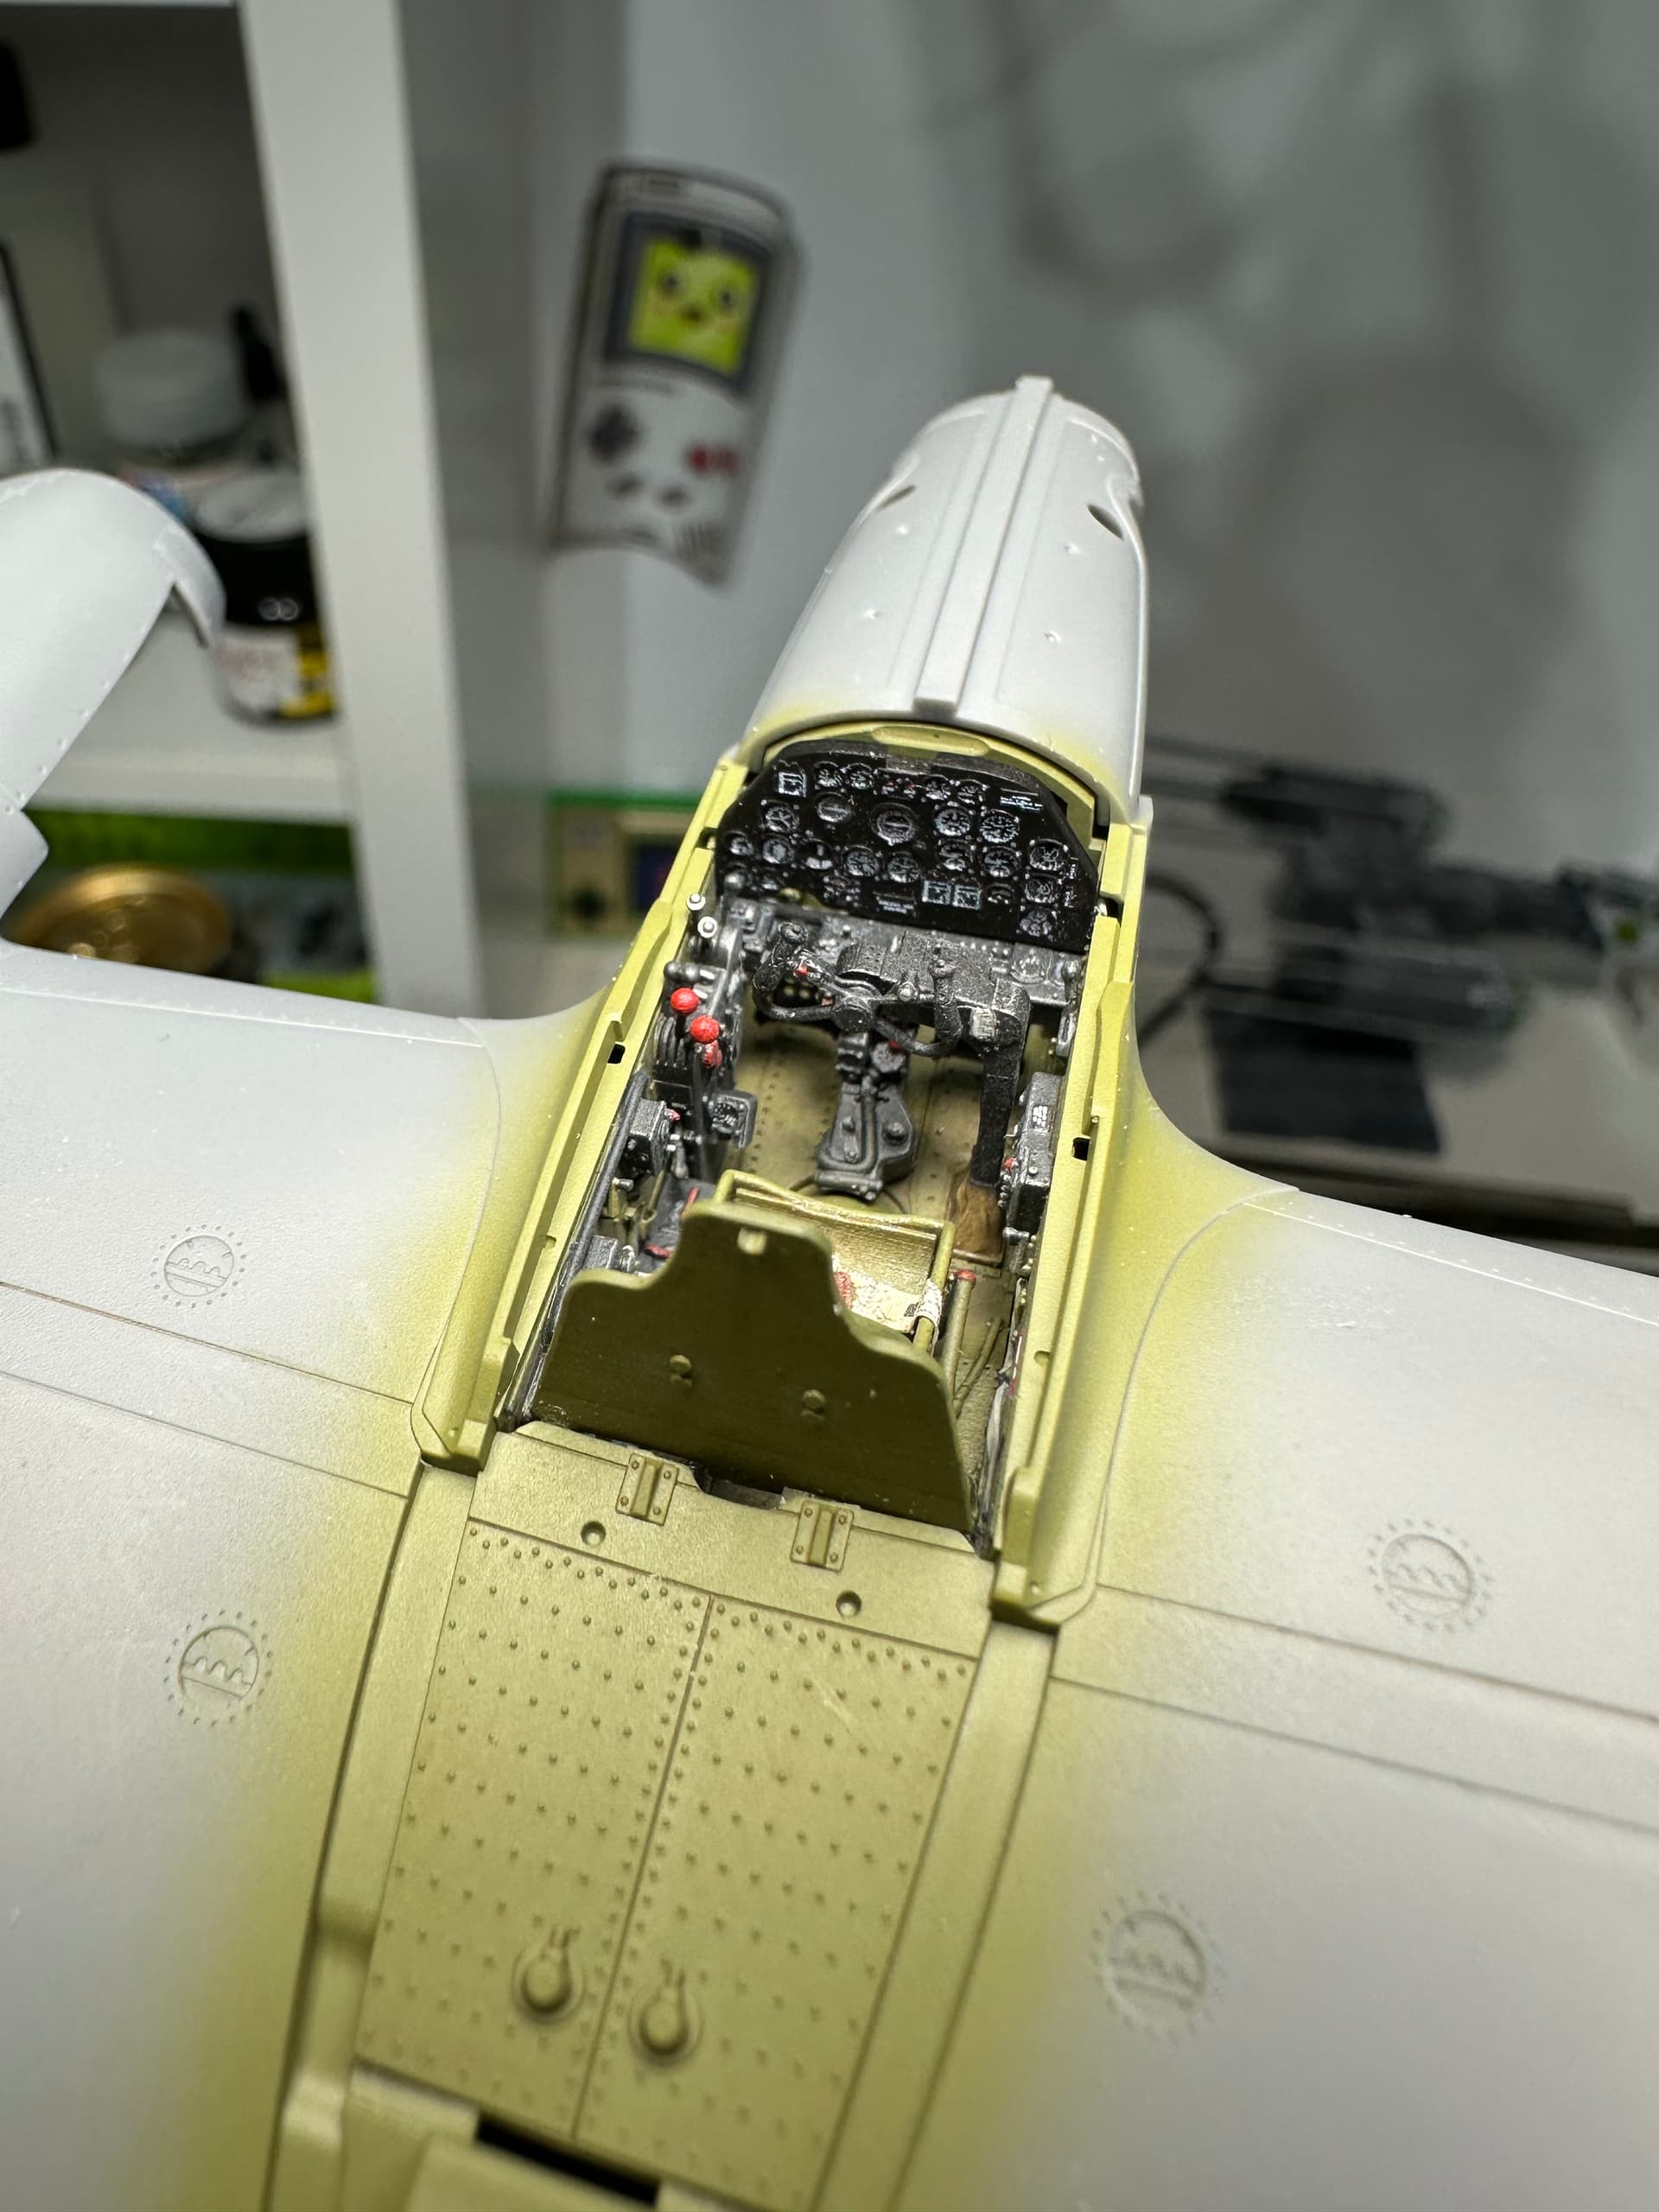
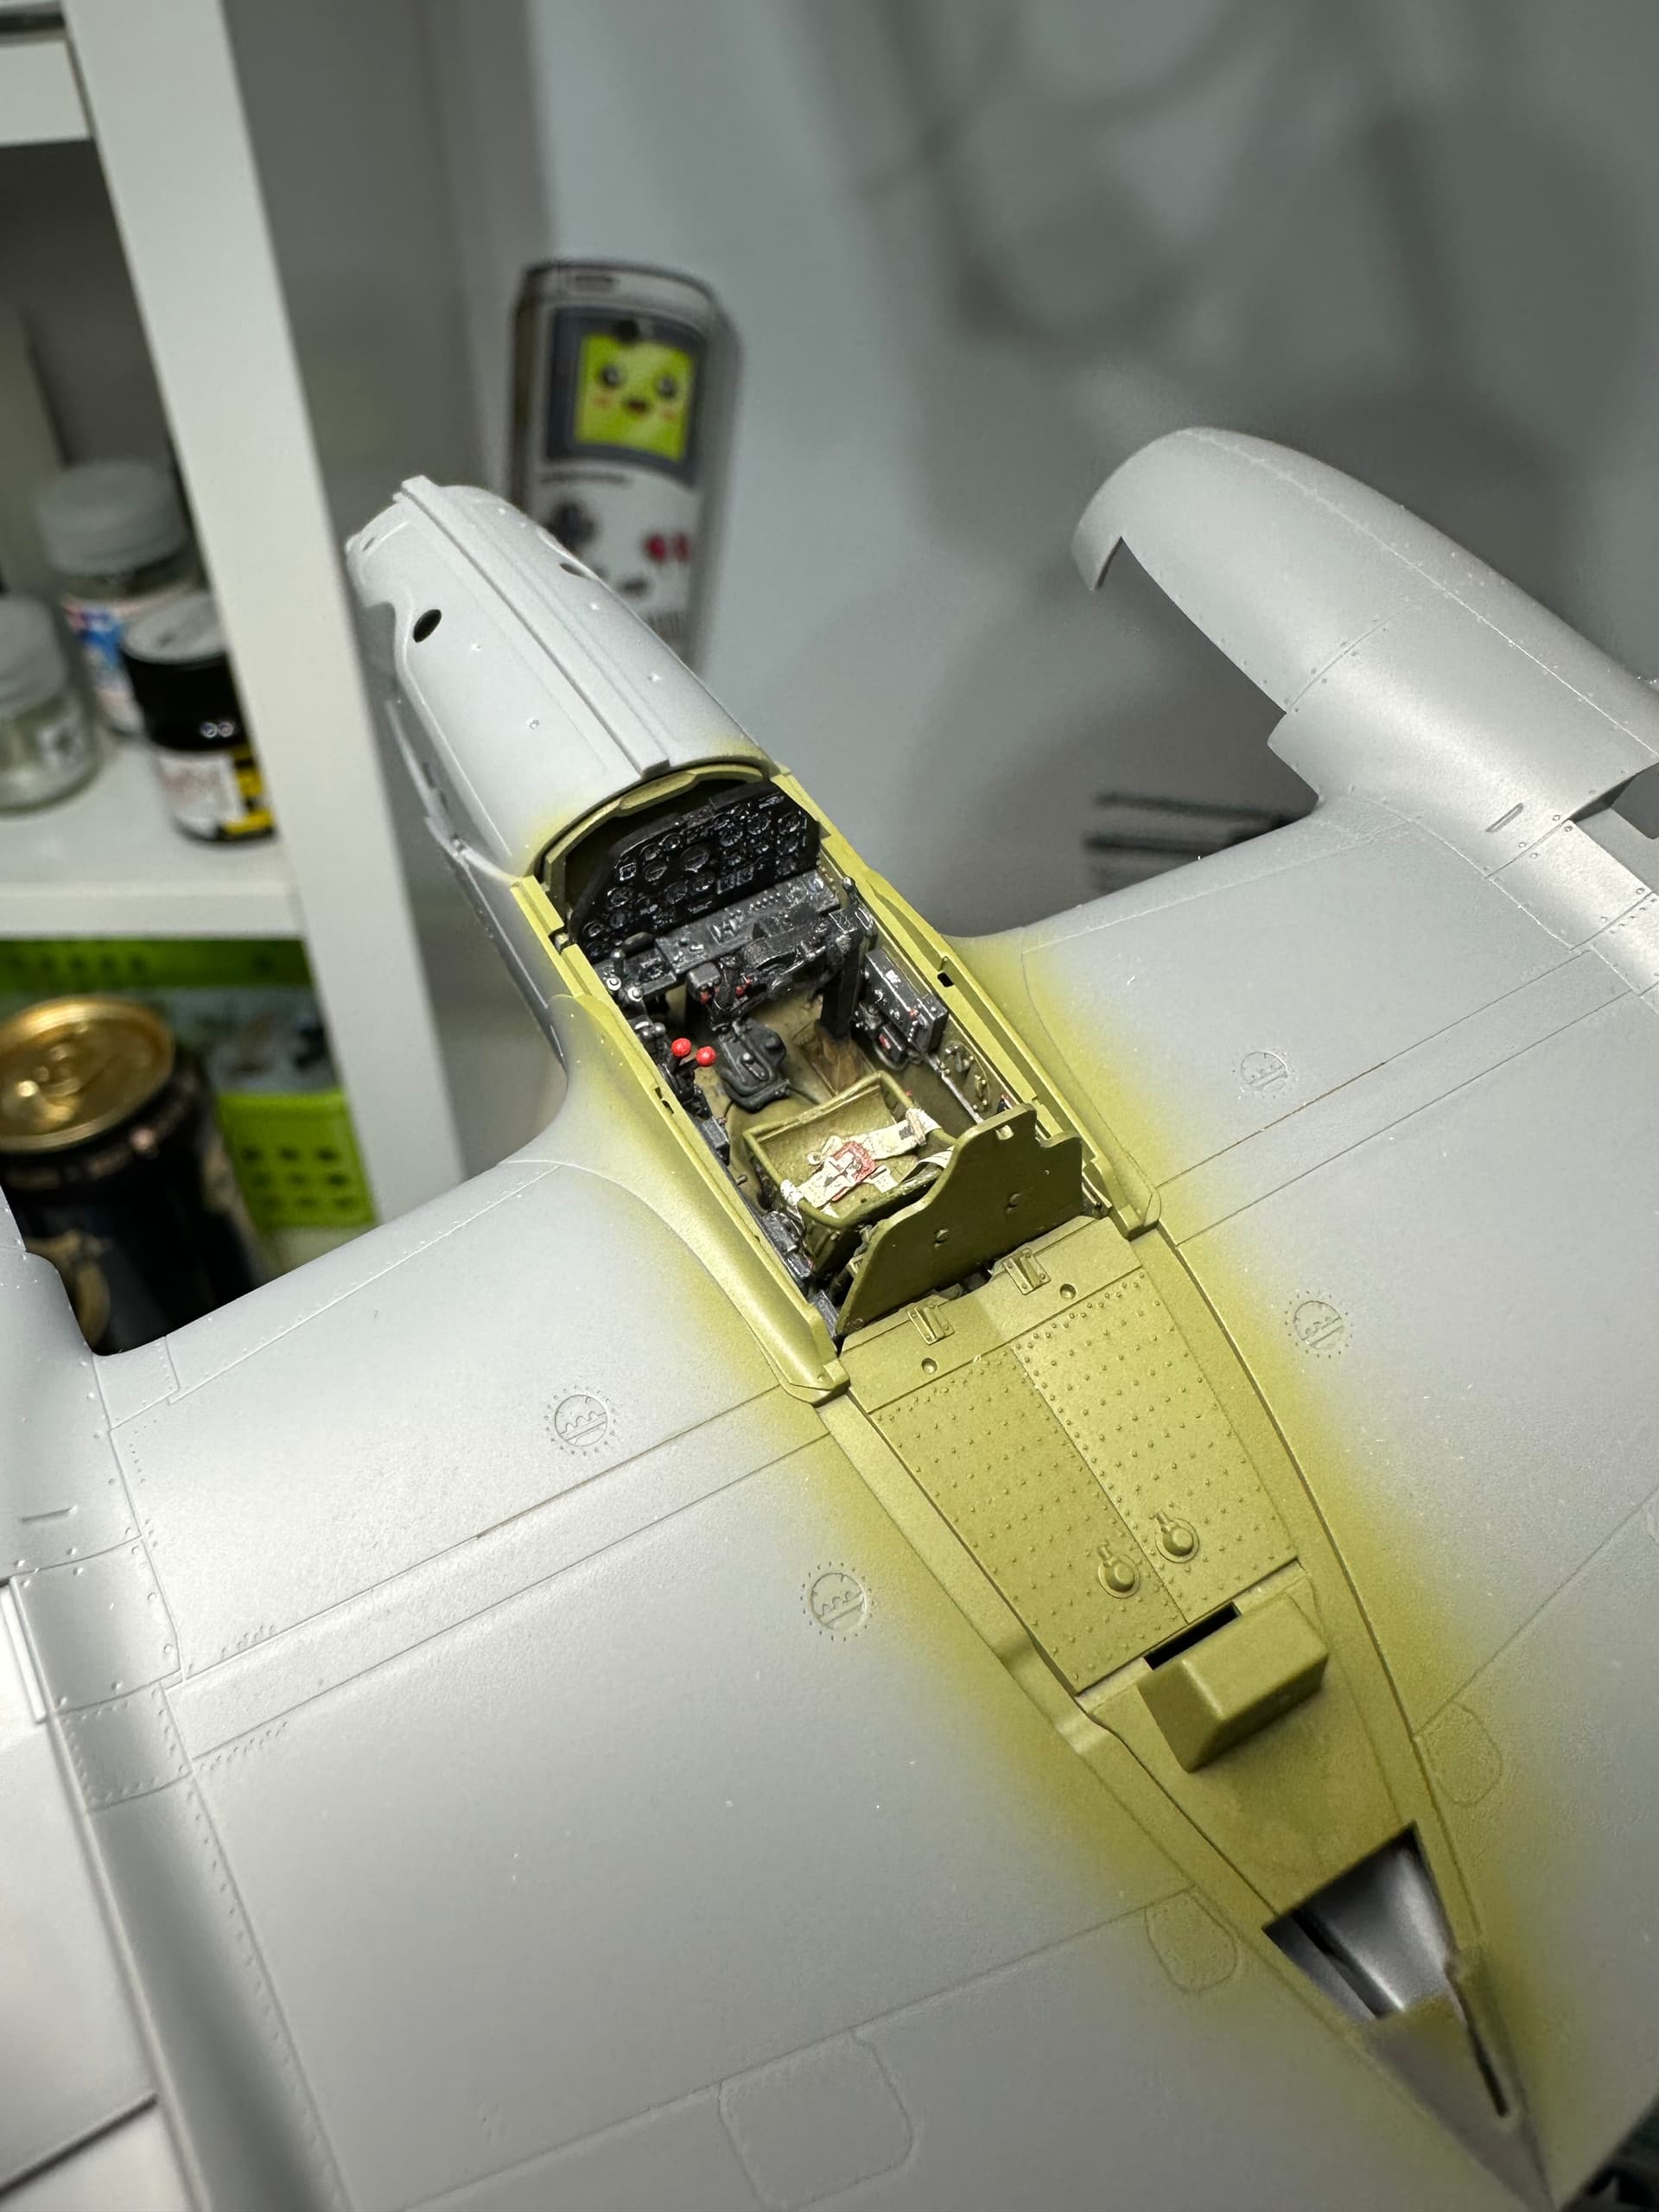
Cockpit all painted up and hoping to glue it all together this weekend! Tamiya Brown panel liner subtly applied in places and Mr. Weathering Color used for a little heavier wear. Didn’t want to go nuts as my previous Pacific P-38G was a dirty mess. Loved it, but wanted to go less is more this time. Flat coat over everything and with decals added really finishes it all off.
11 Likes
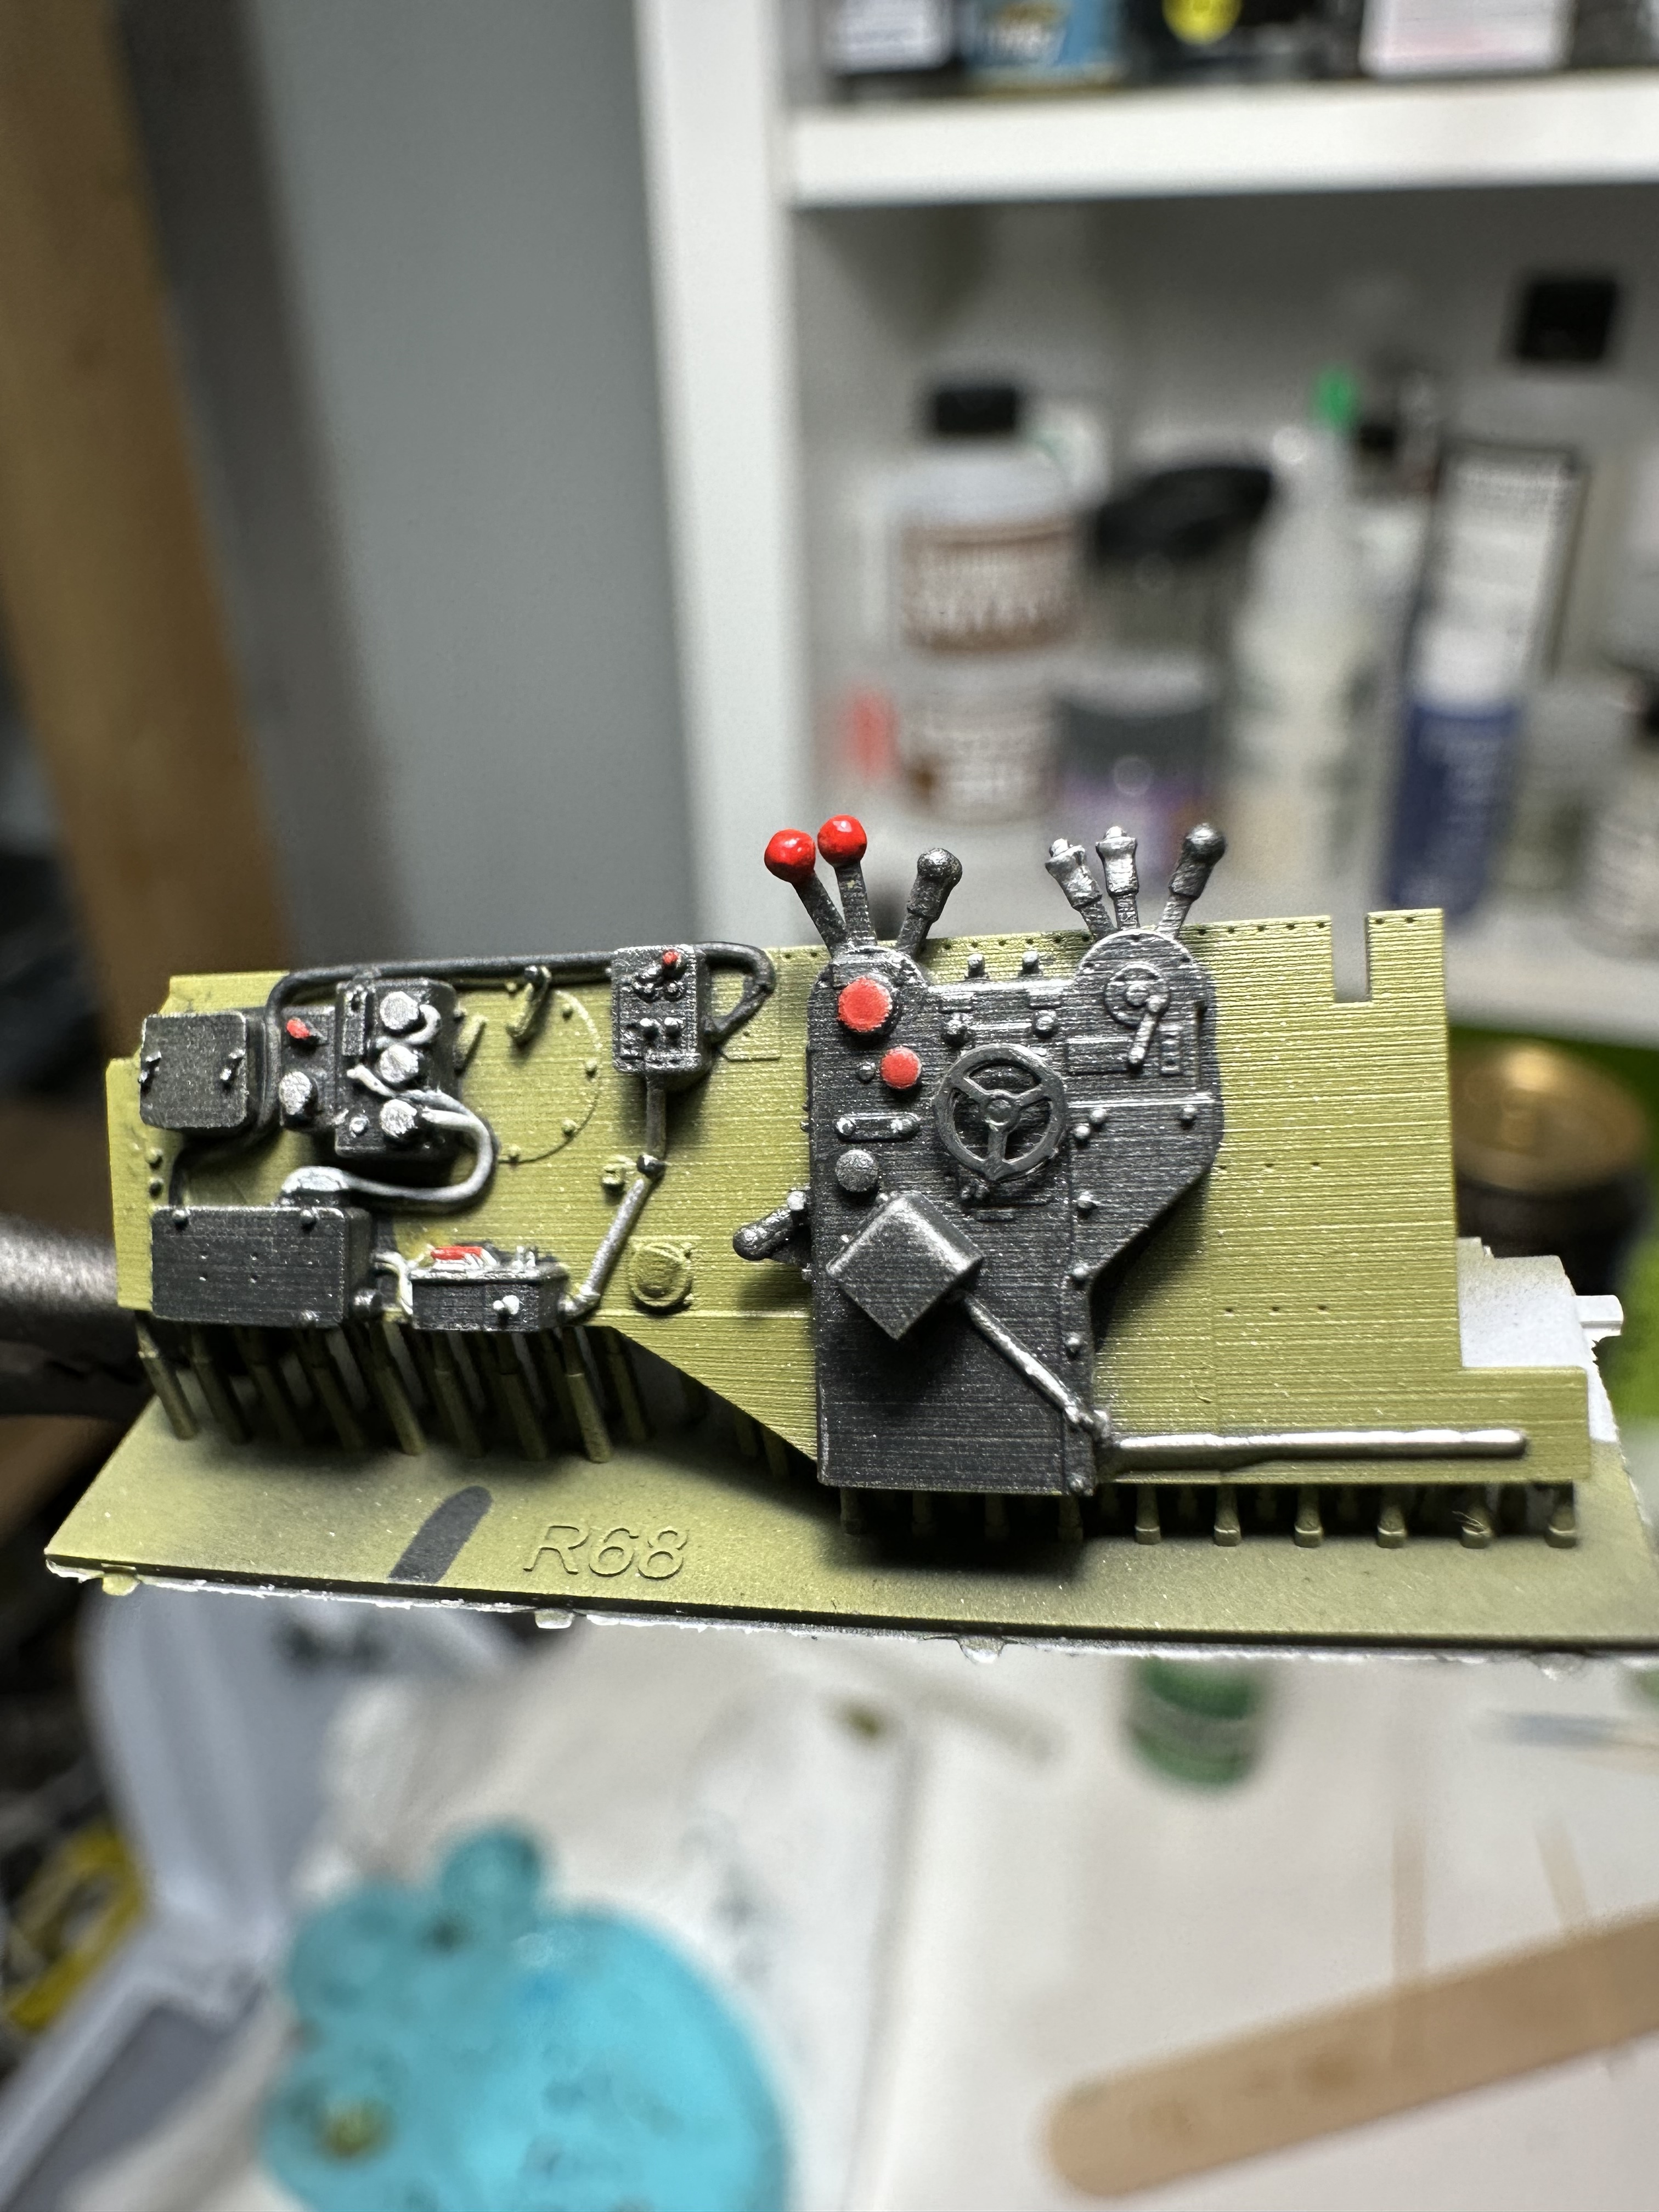
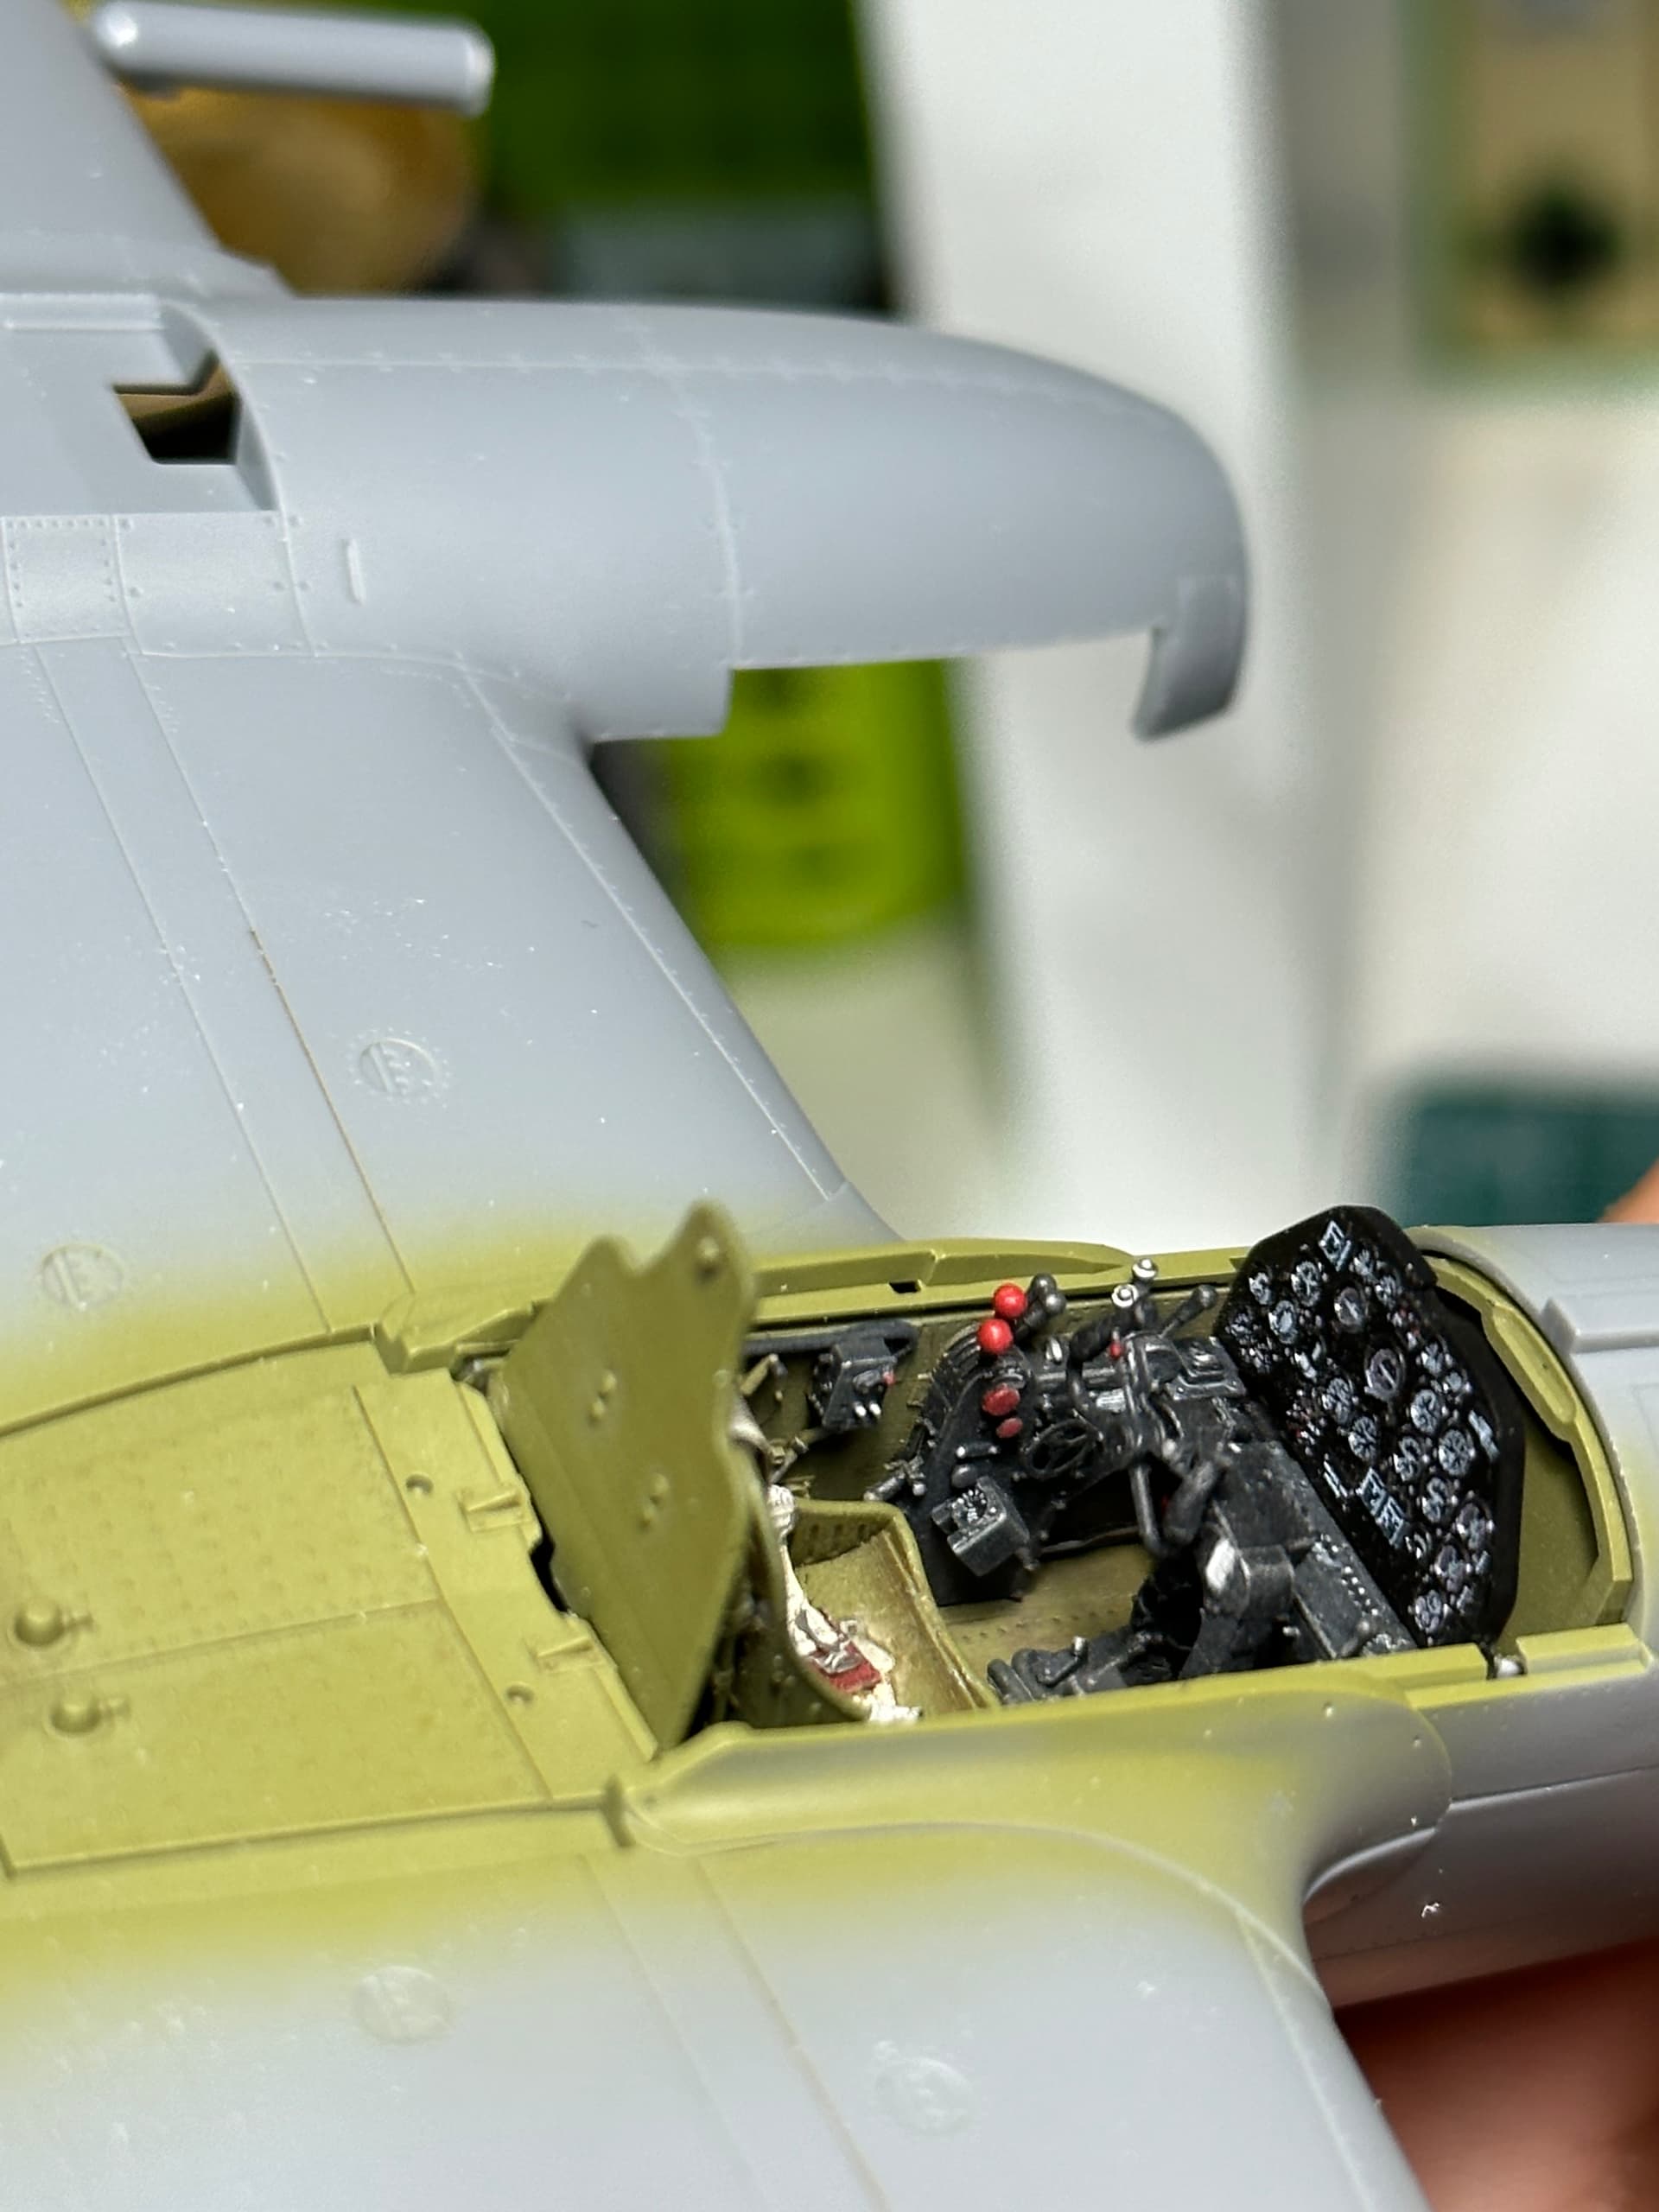
Cockpit is done! Had to sand the sides heavily to get to fit into the fuselage and shave plastic on many pieces. So much detail hidden by the seat. Close to closing it up.
14 Likes
Well done Steve - looks great 
2 Likes