Good Progress  Following this closely.
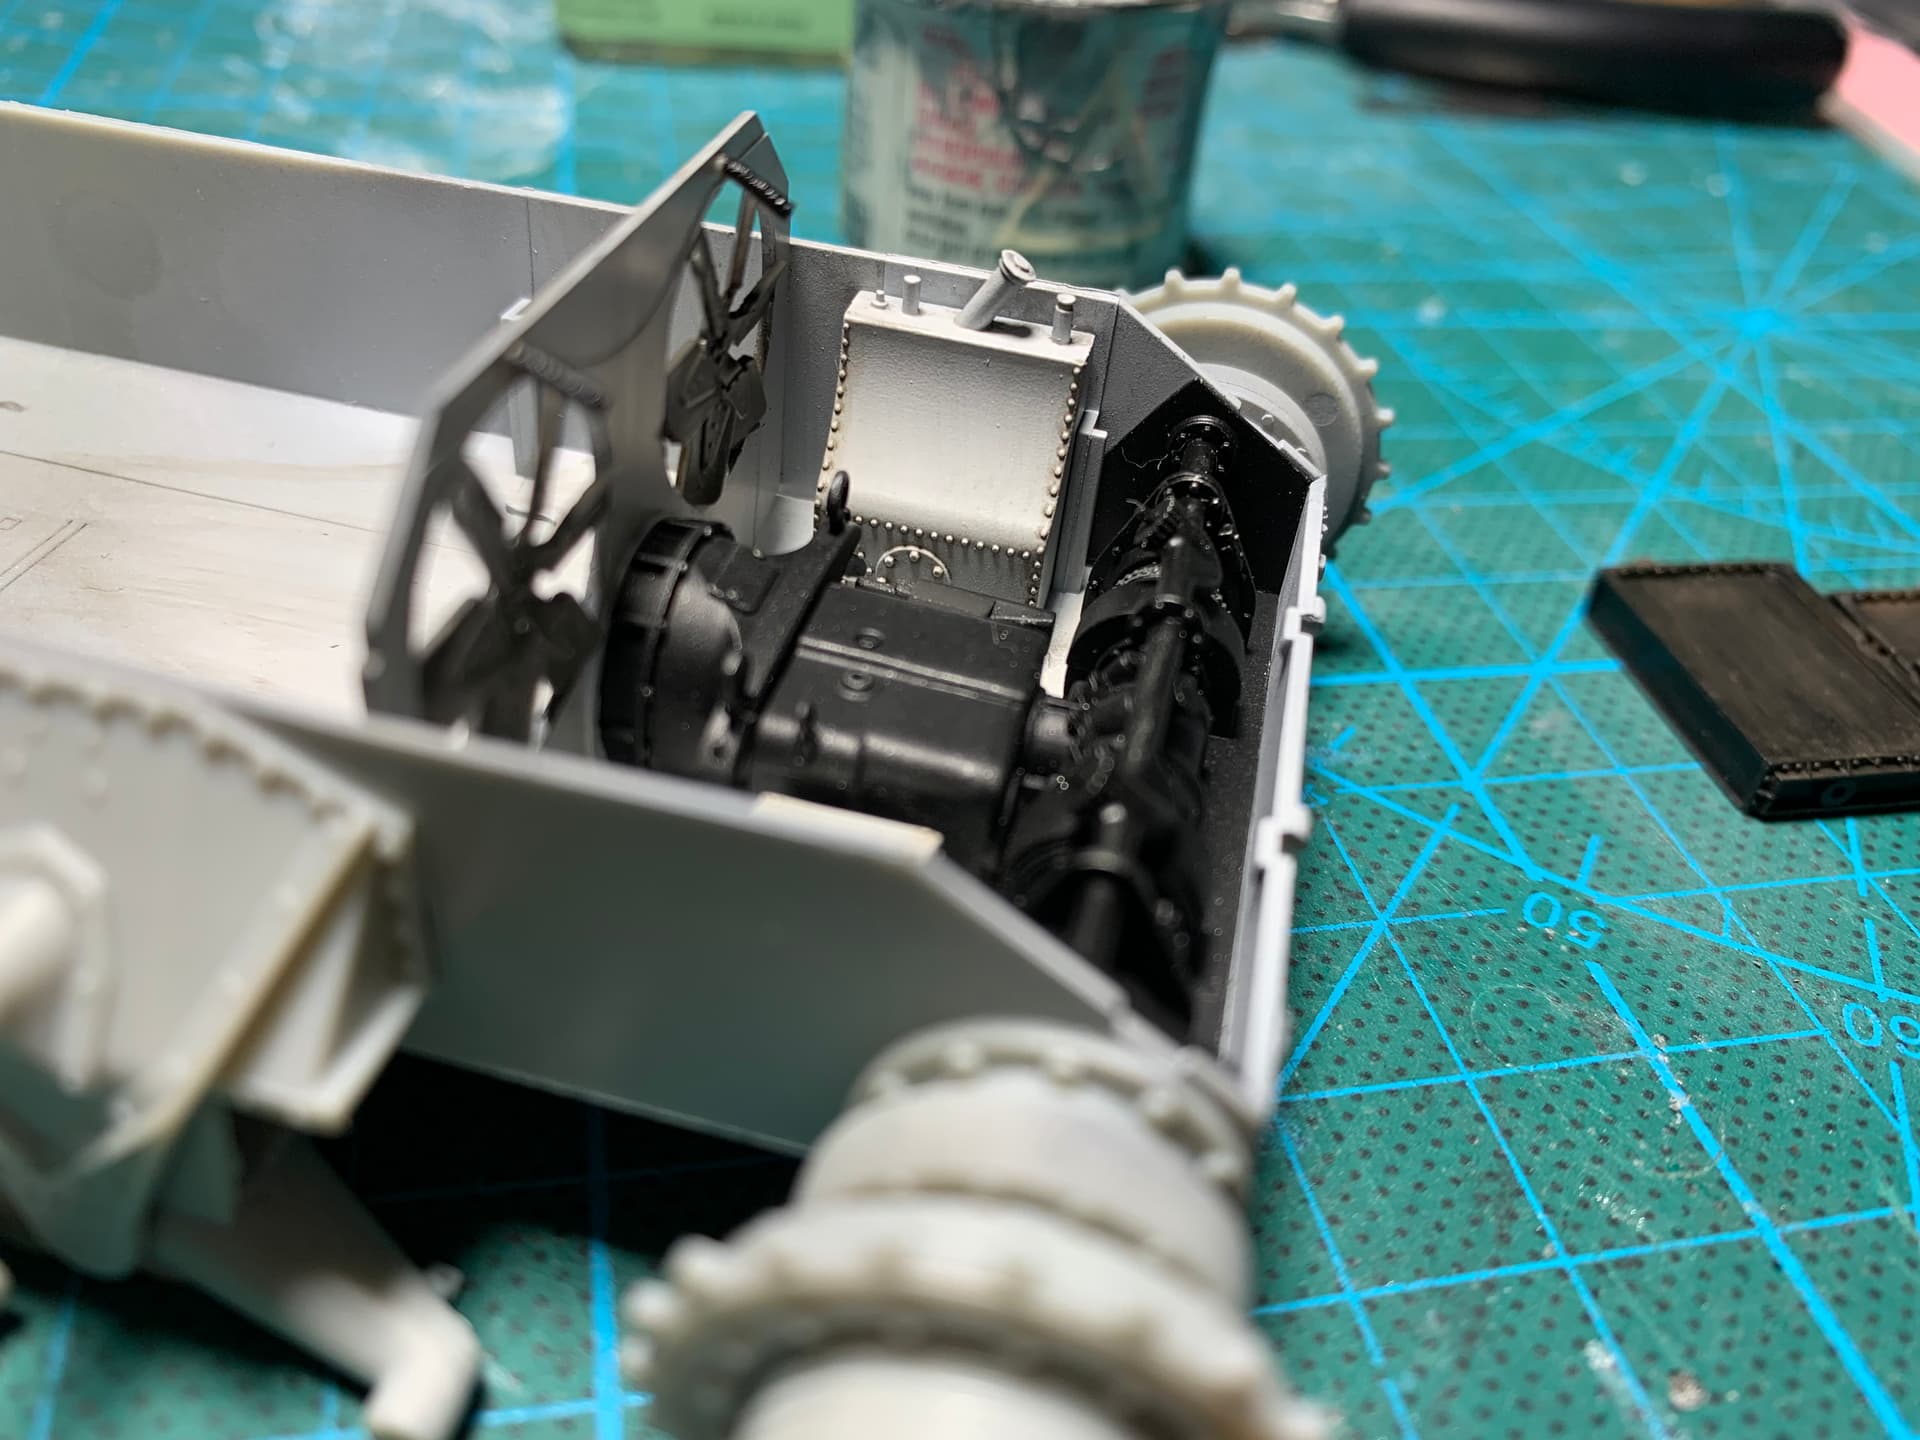
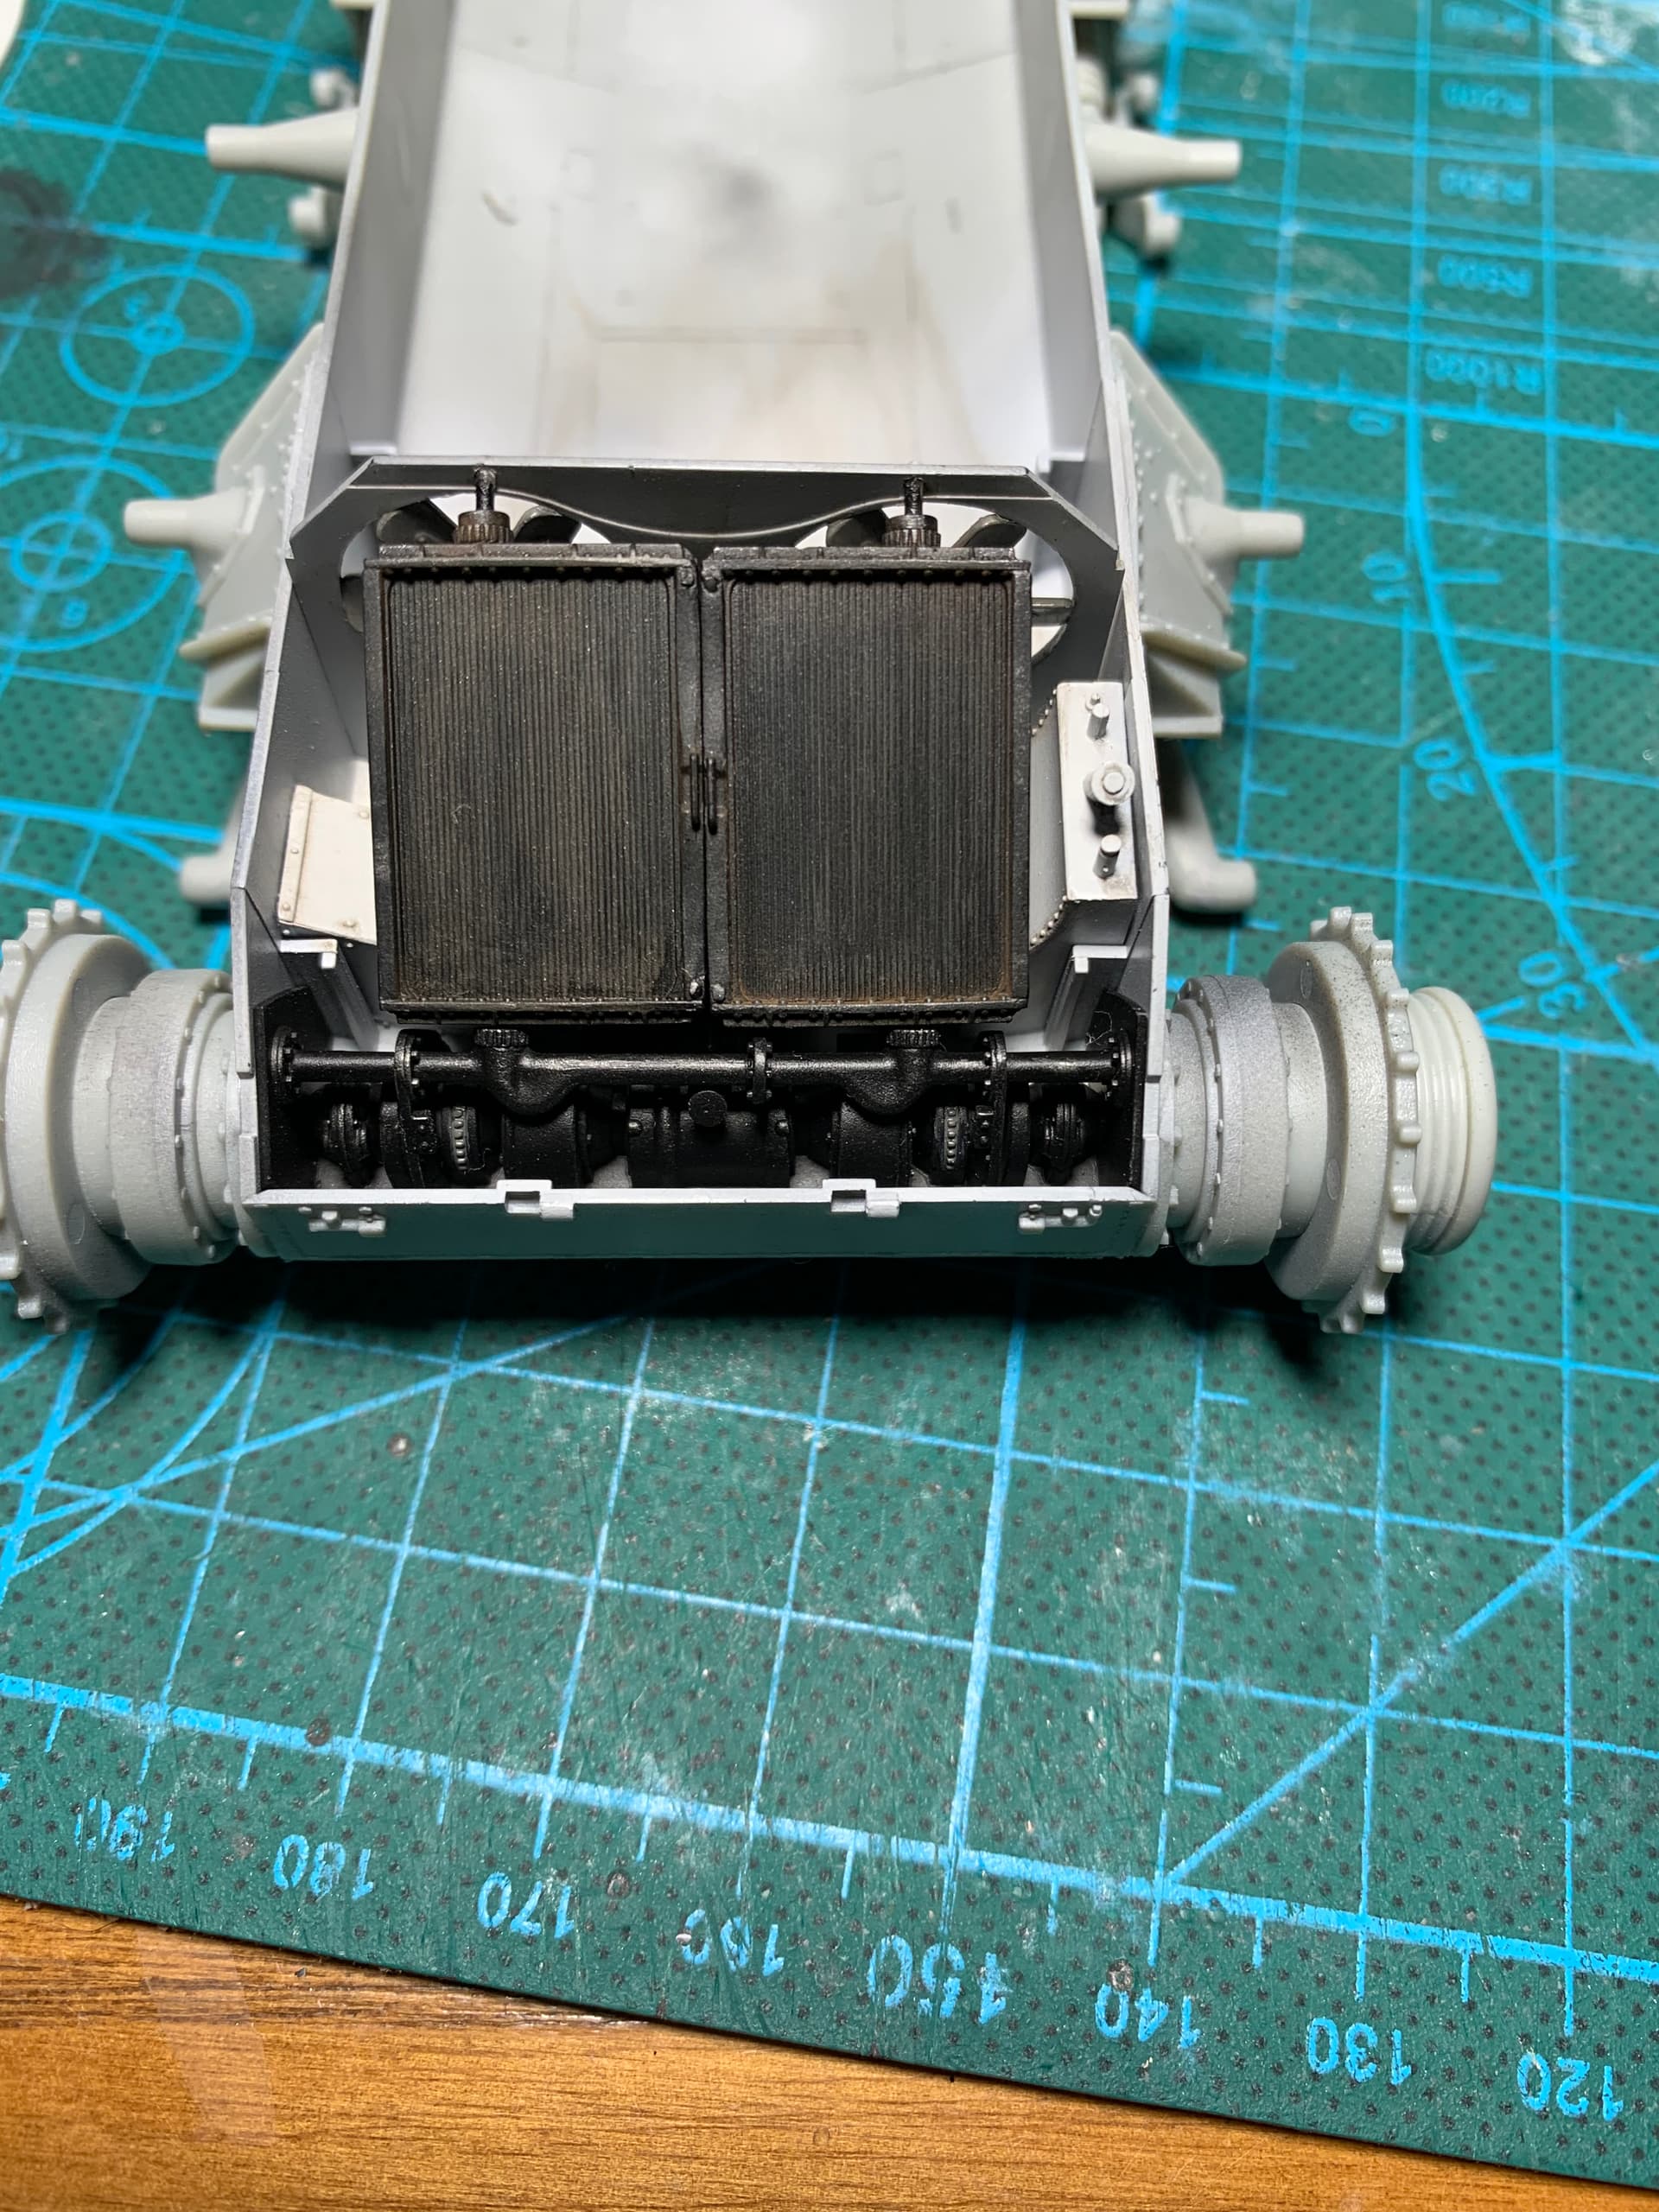
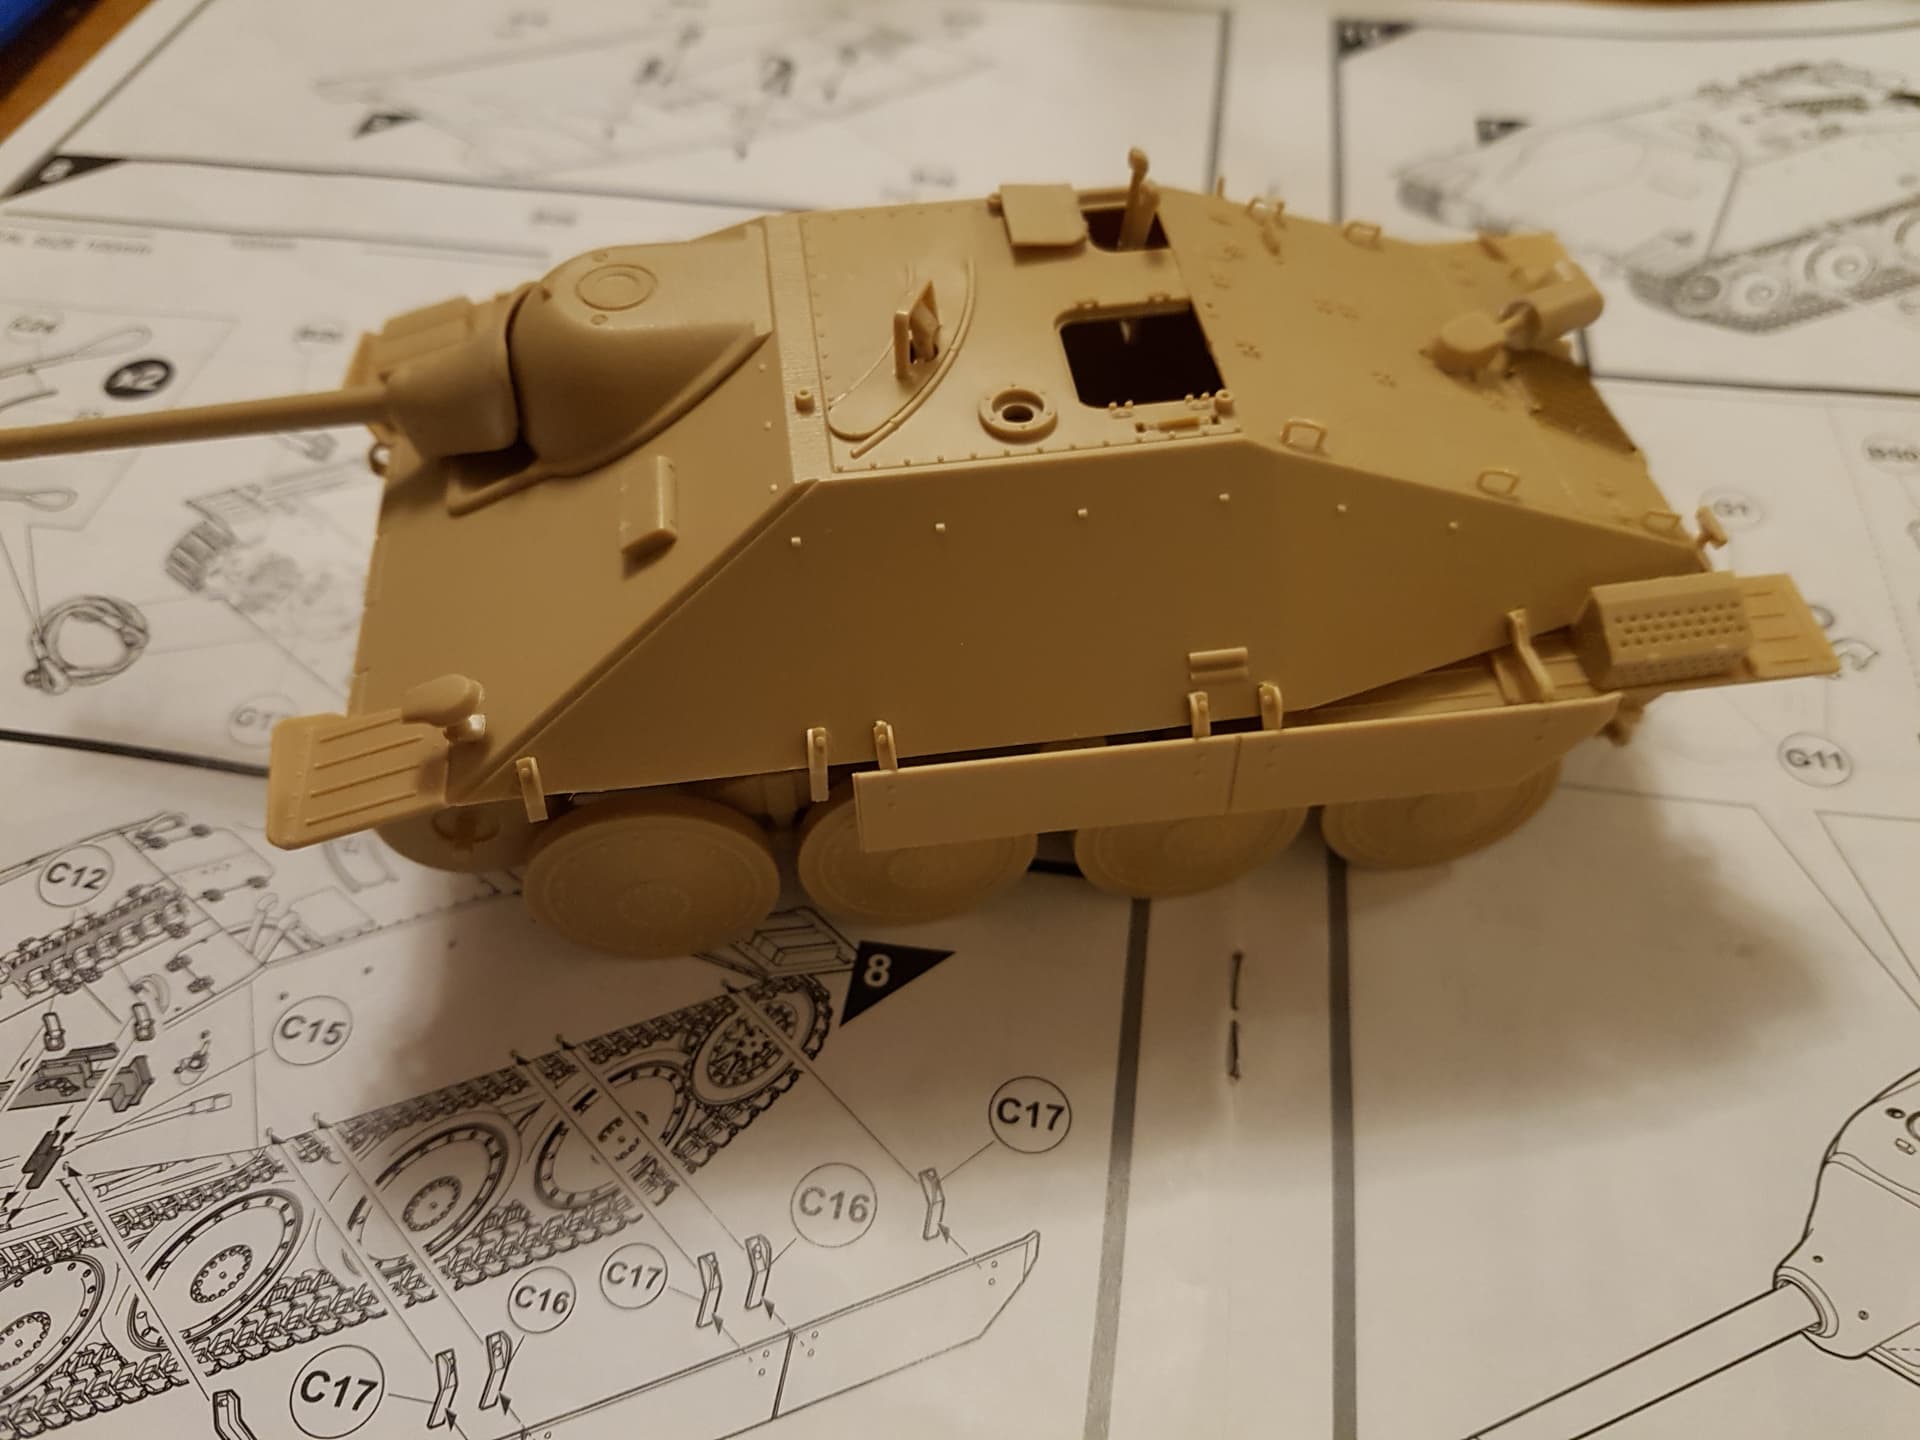
Chugging along on the archer, painted the transmission area. The black is just mr surfacer and is a nice semi gloss black so I don’t think I’ll actually paint the black bits, the white is flat white mixed with future. Still need to paint the fan blades steel and then do washes some chipping and grime. The way in which the kit allows for the radiator covers to rotate is pretty flimsy and it’s easy to glue the rotating parts solid (don’t ask me how I know). So I drilled out the hole and remade the pin with a paper clip. Much better now!
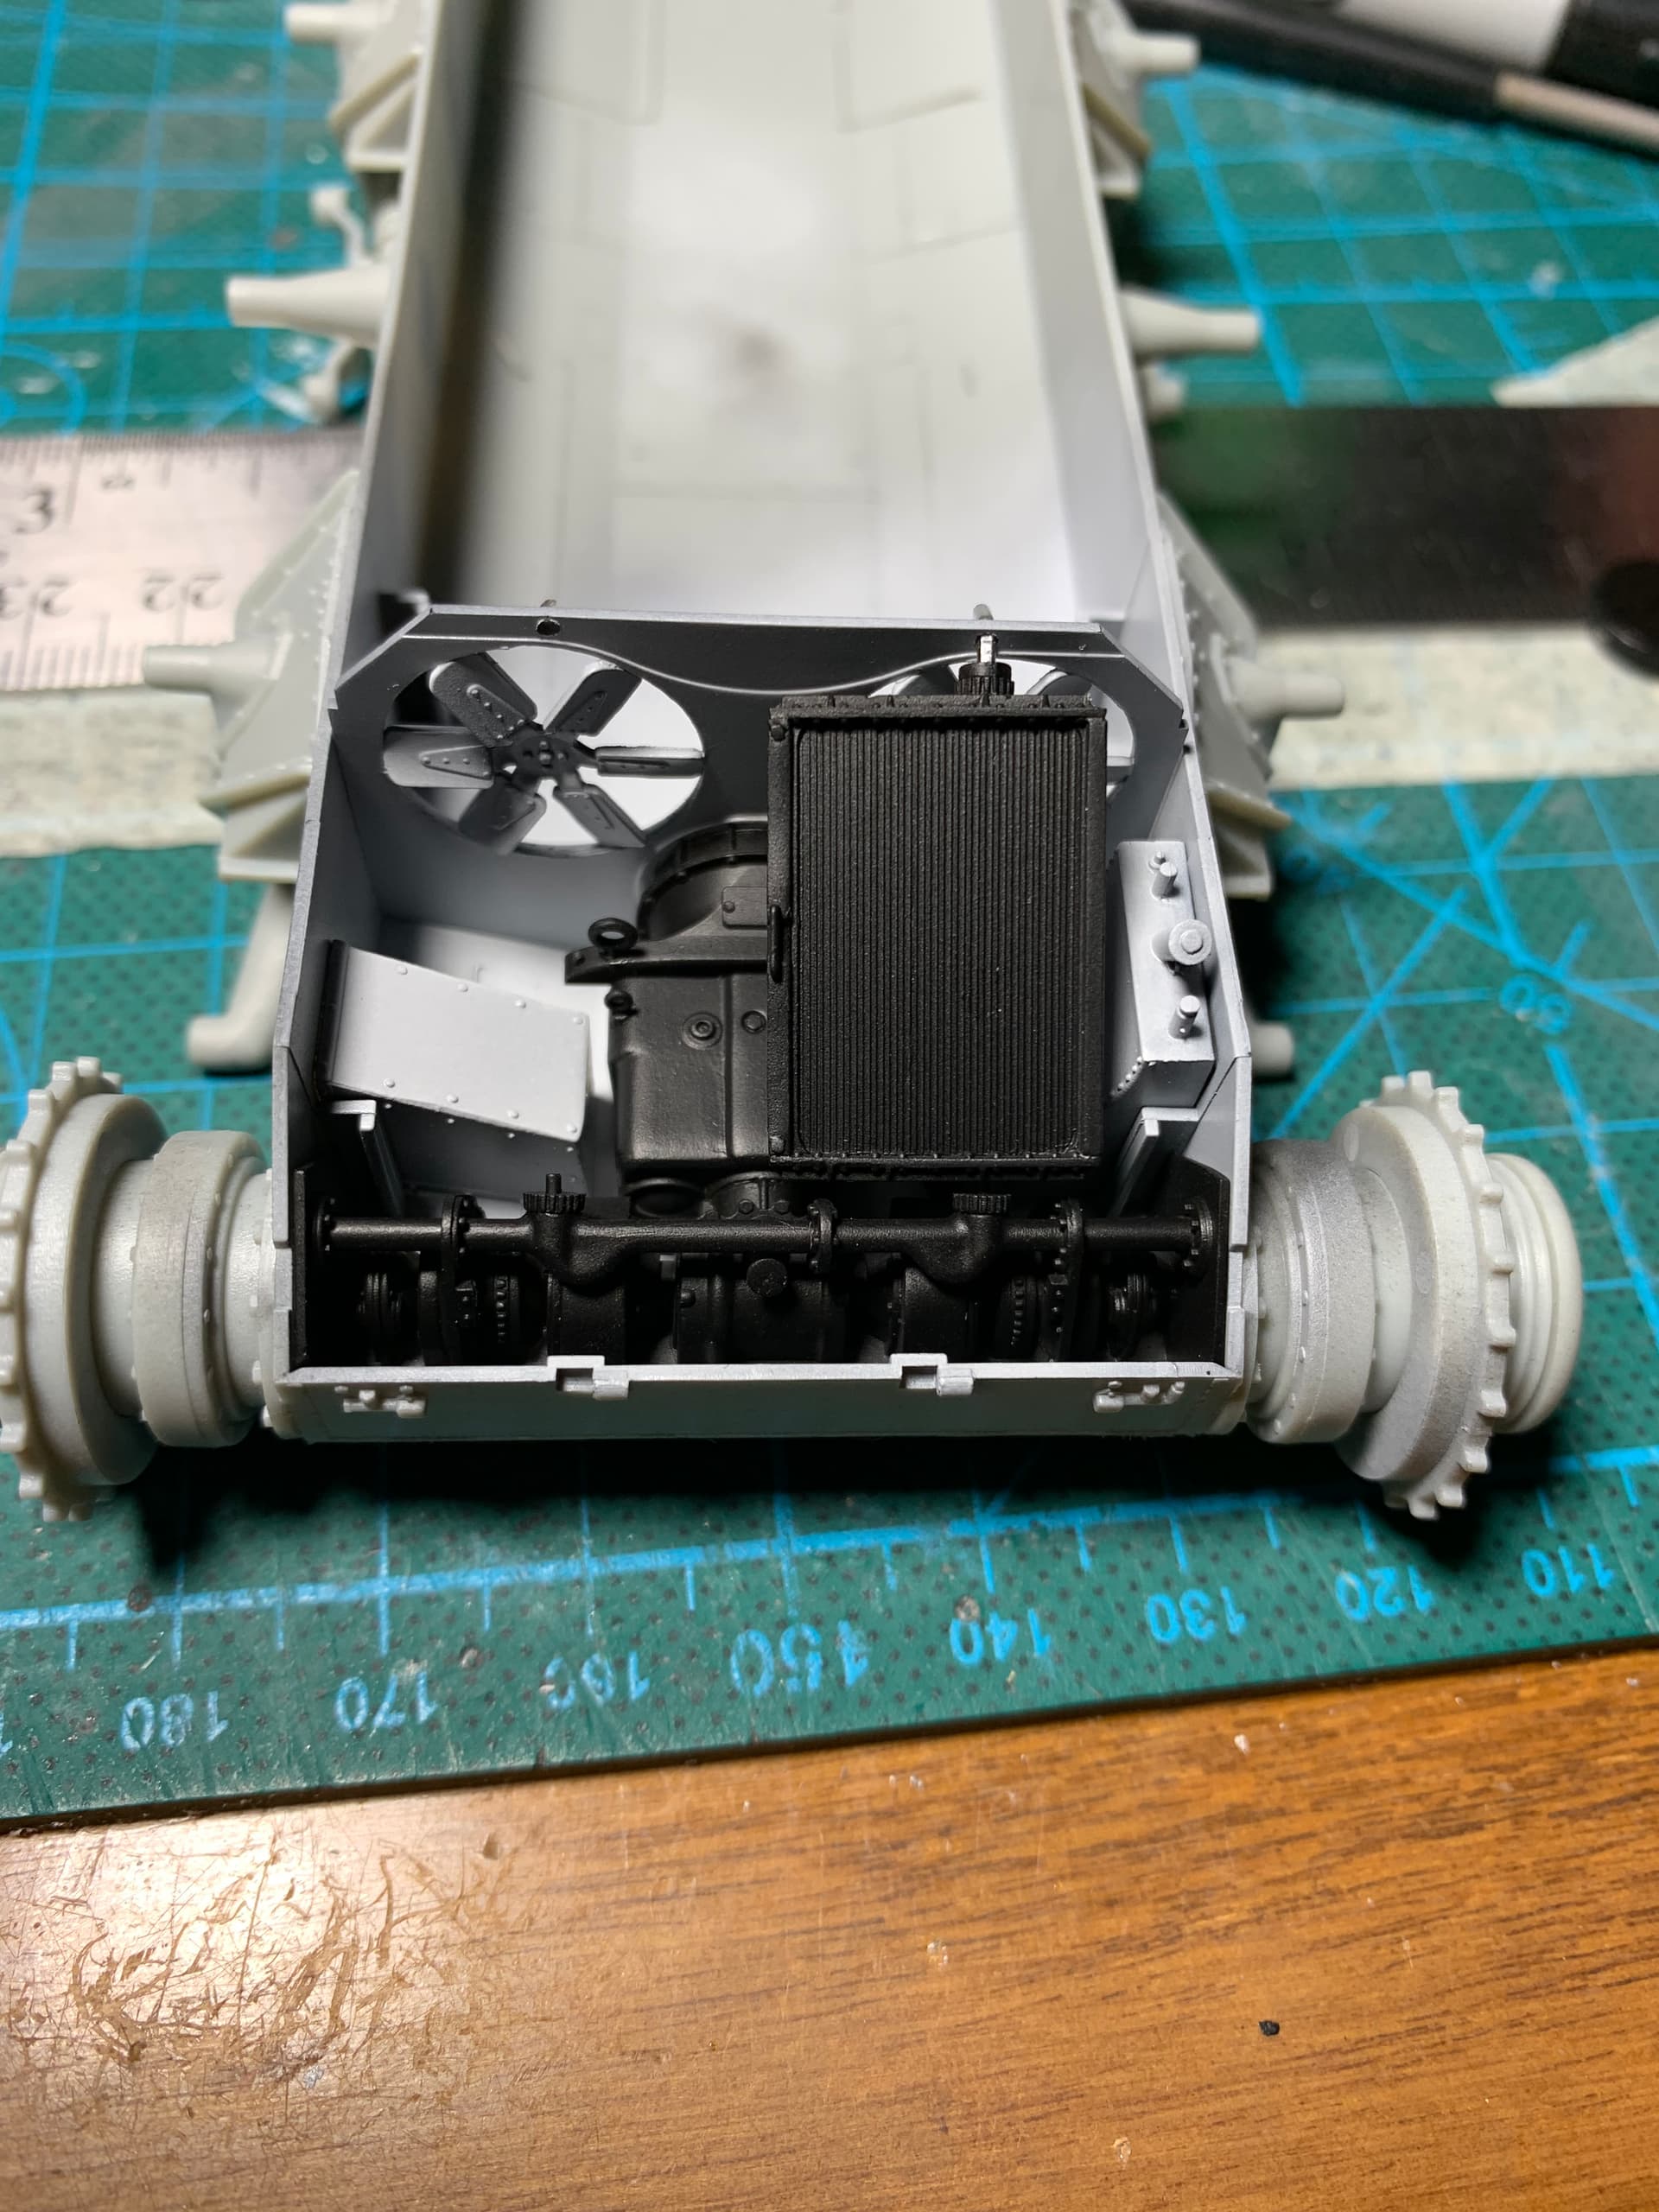
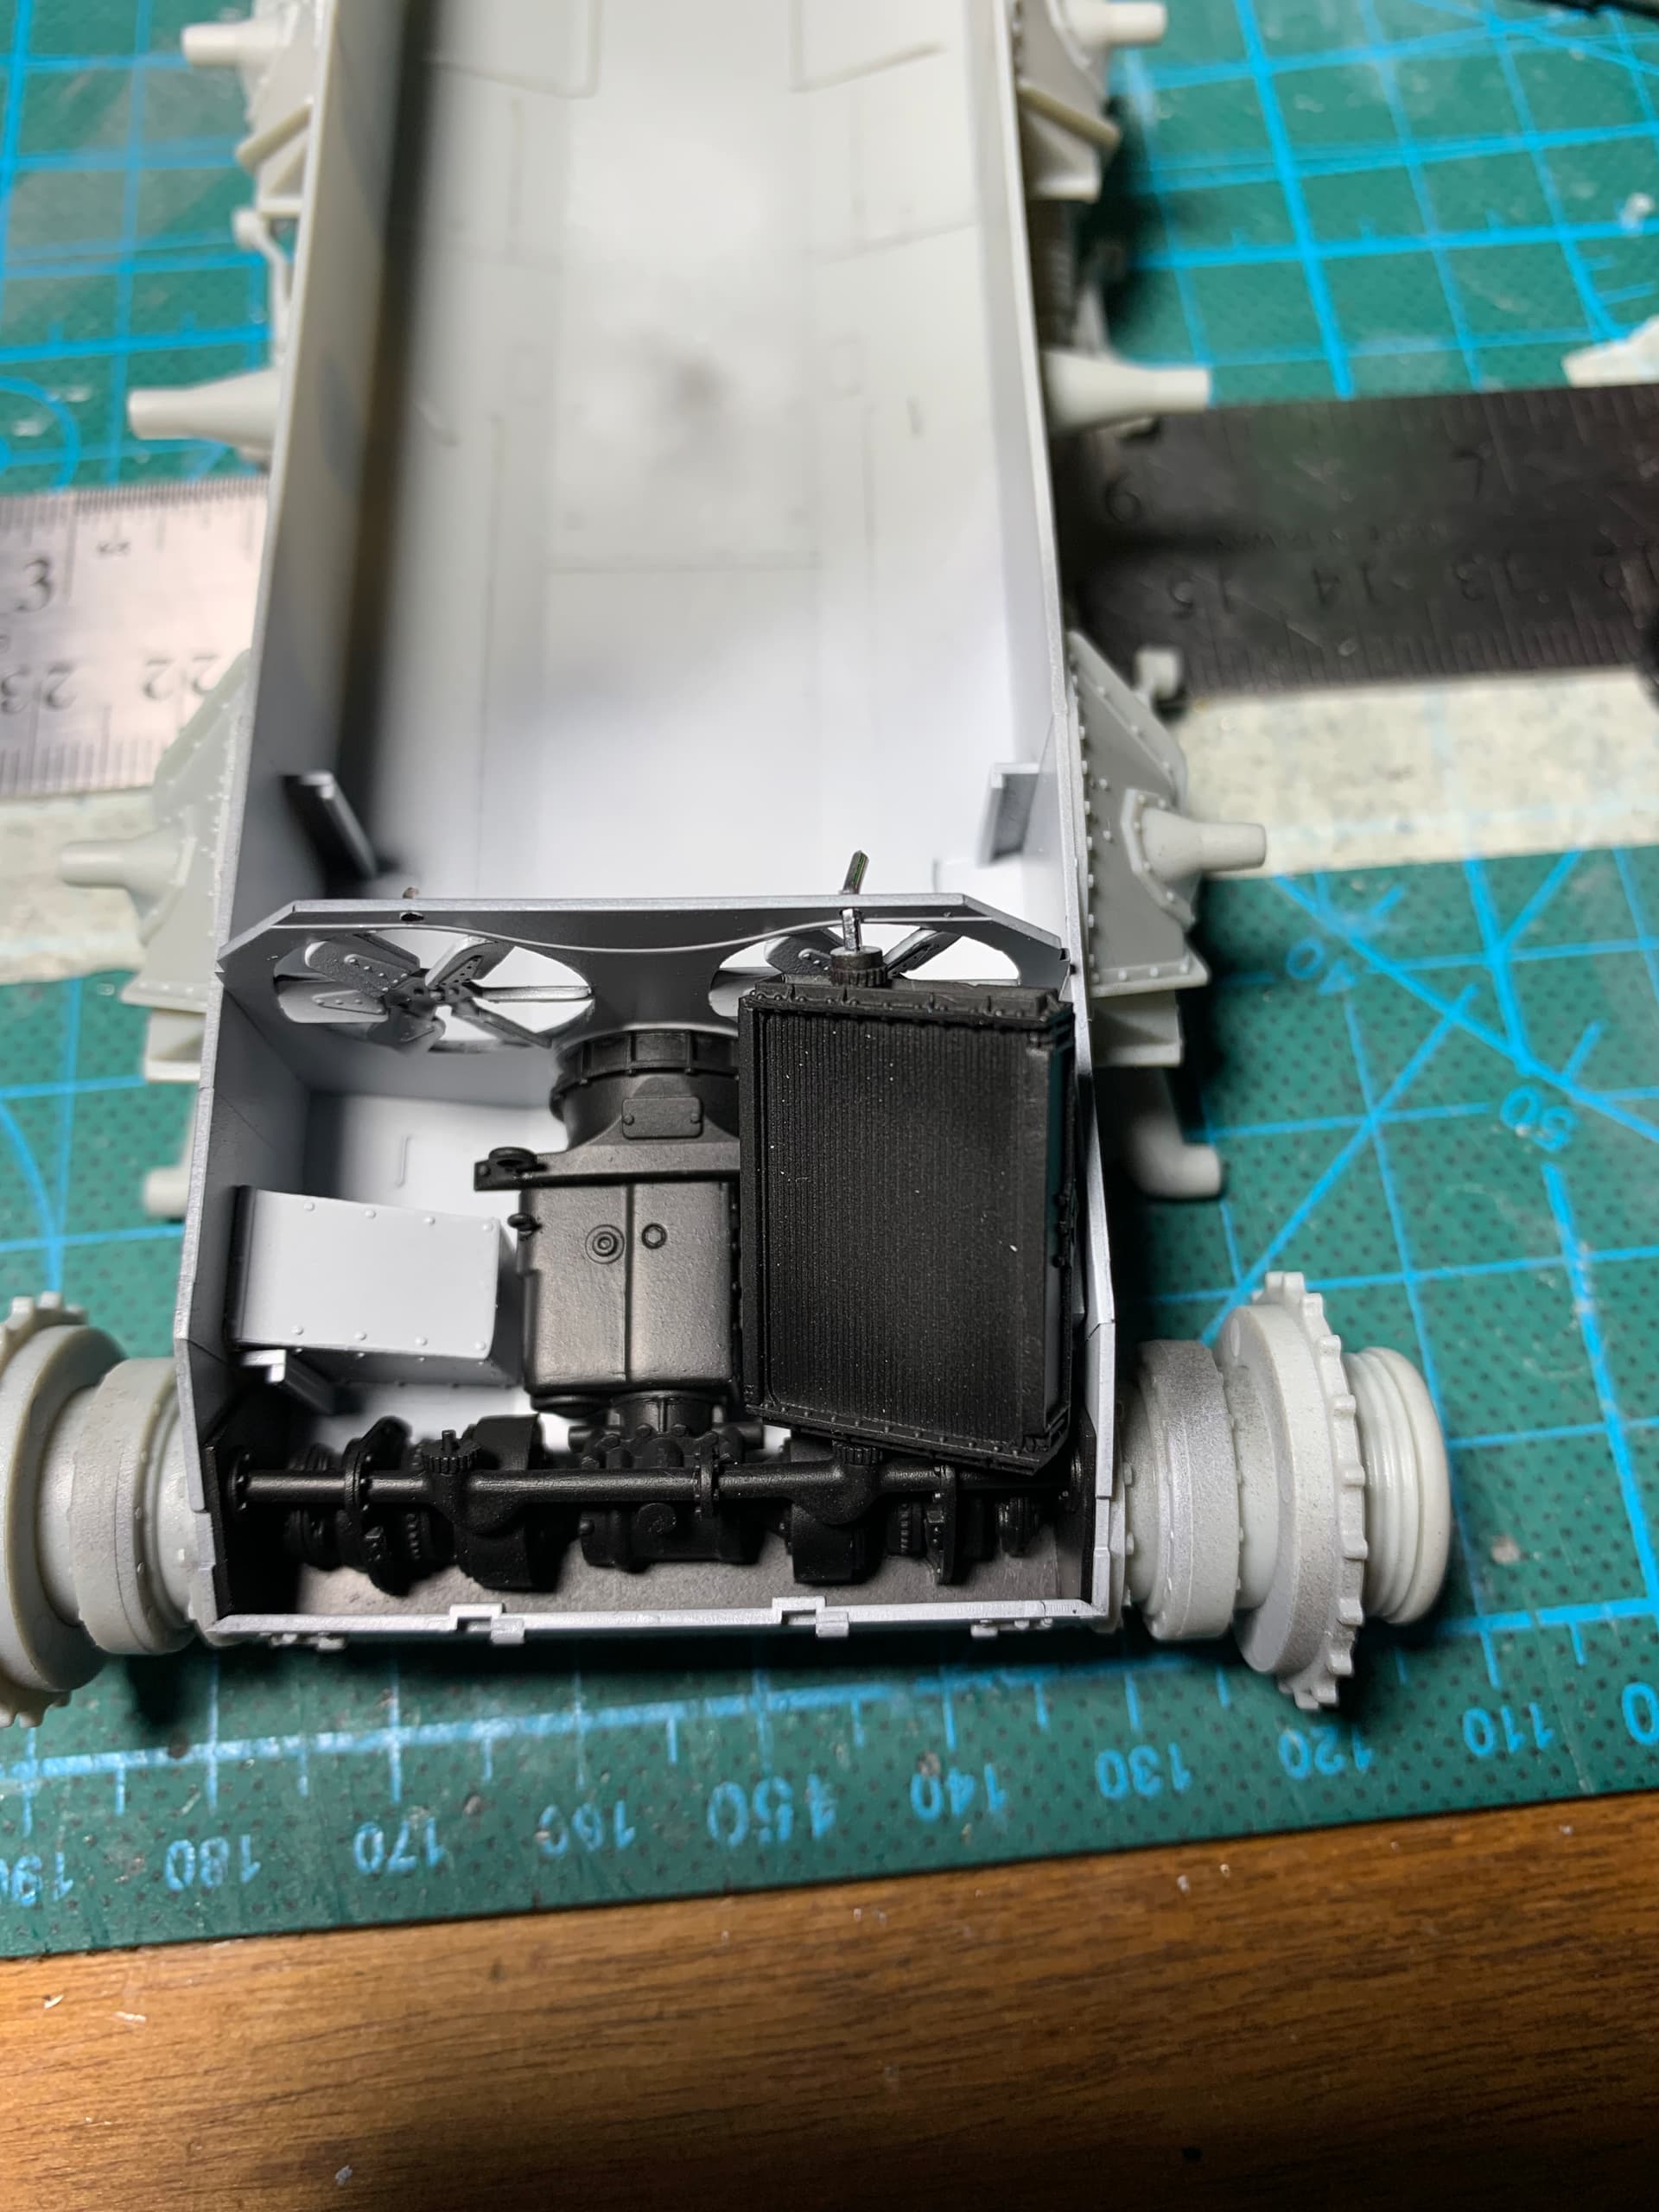
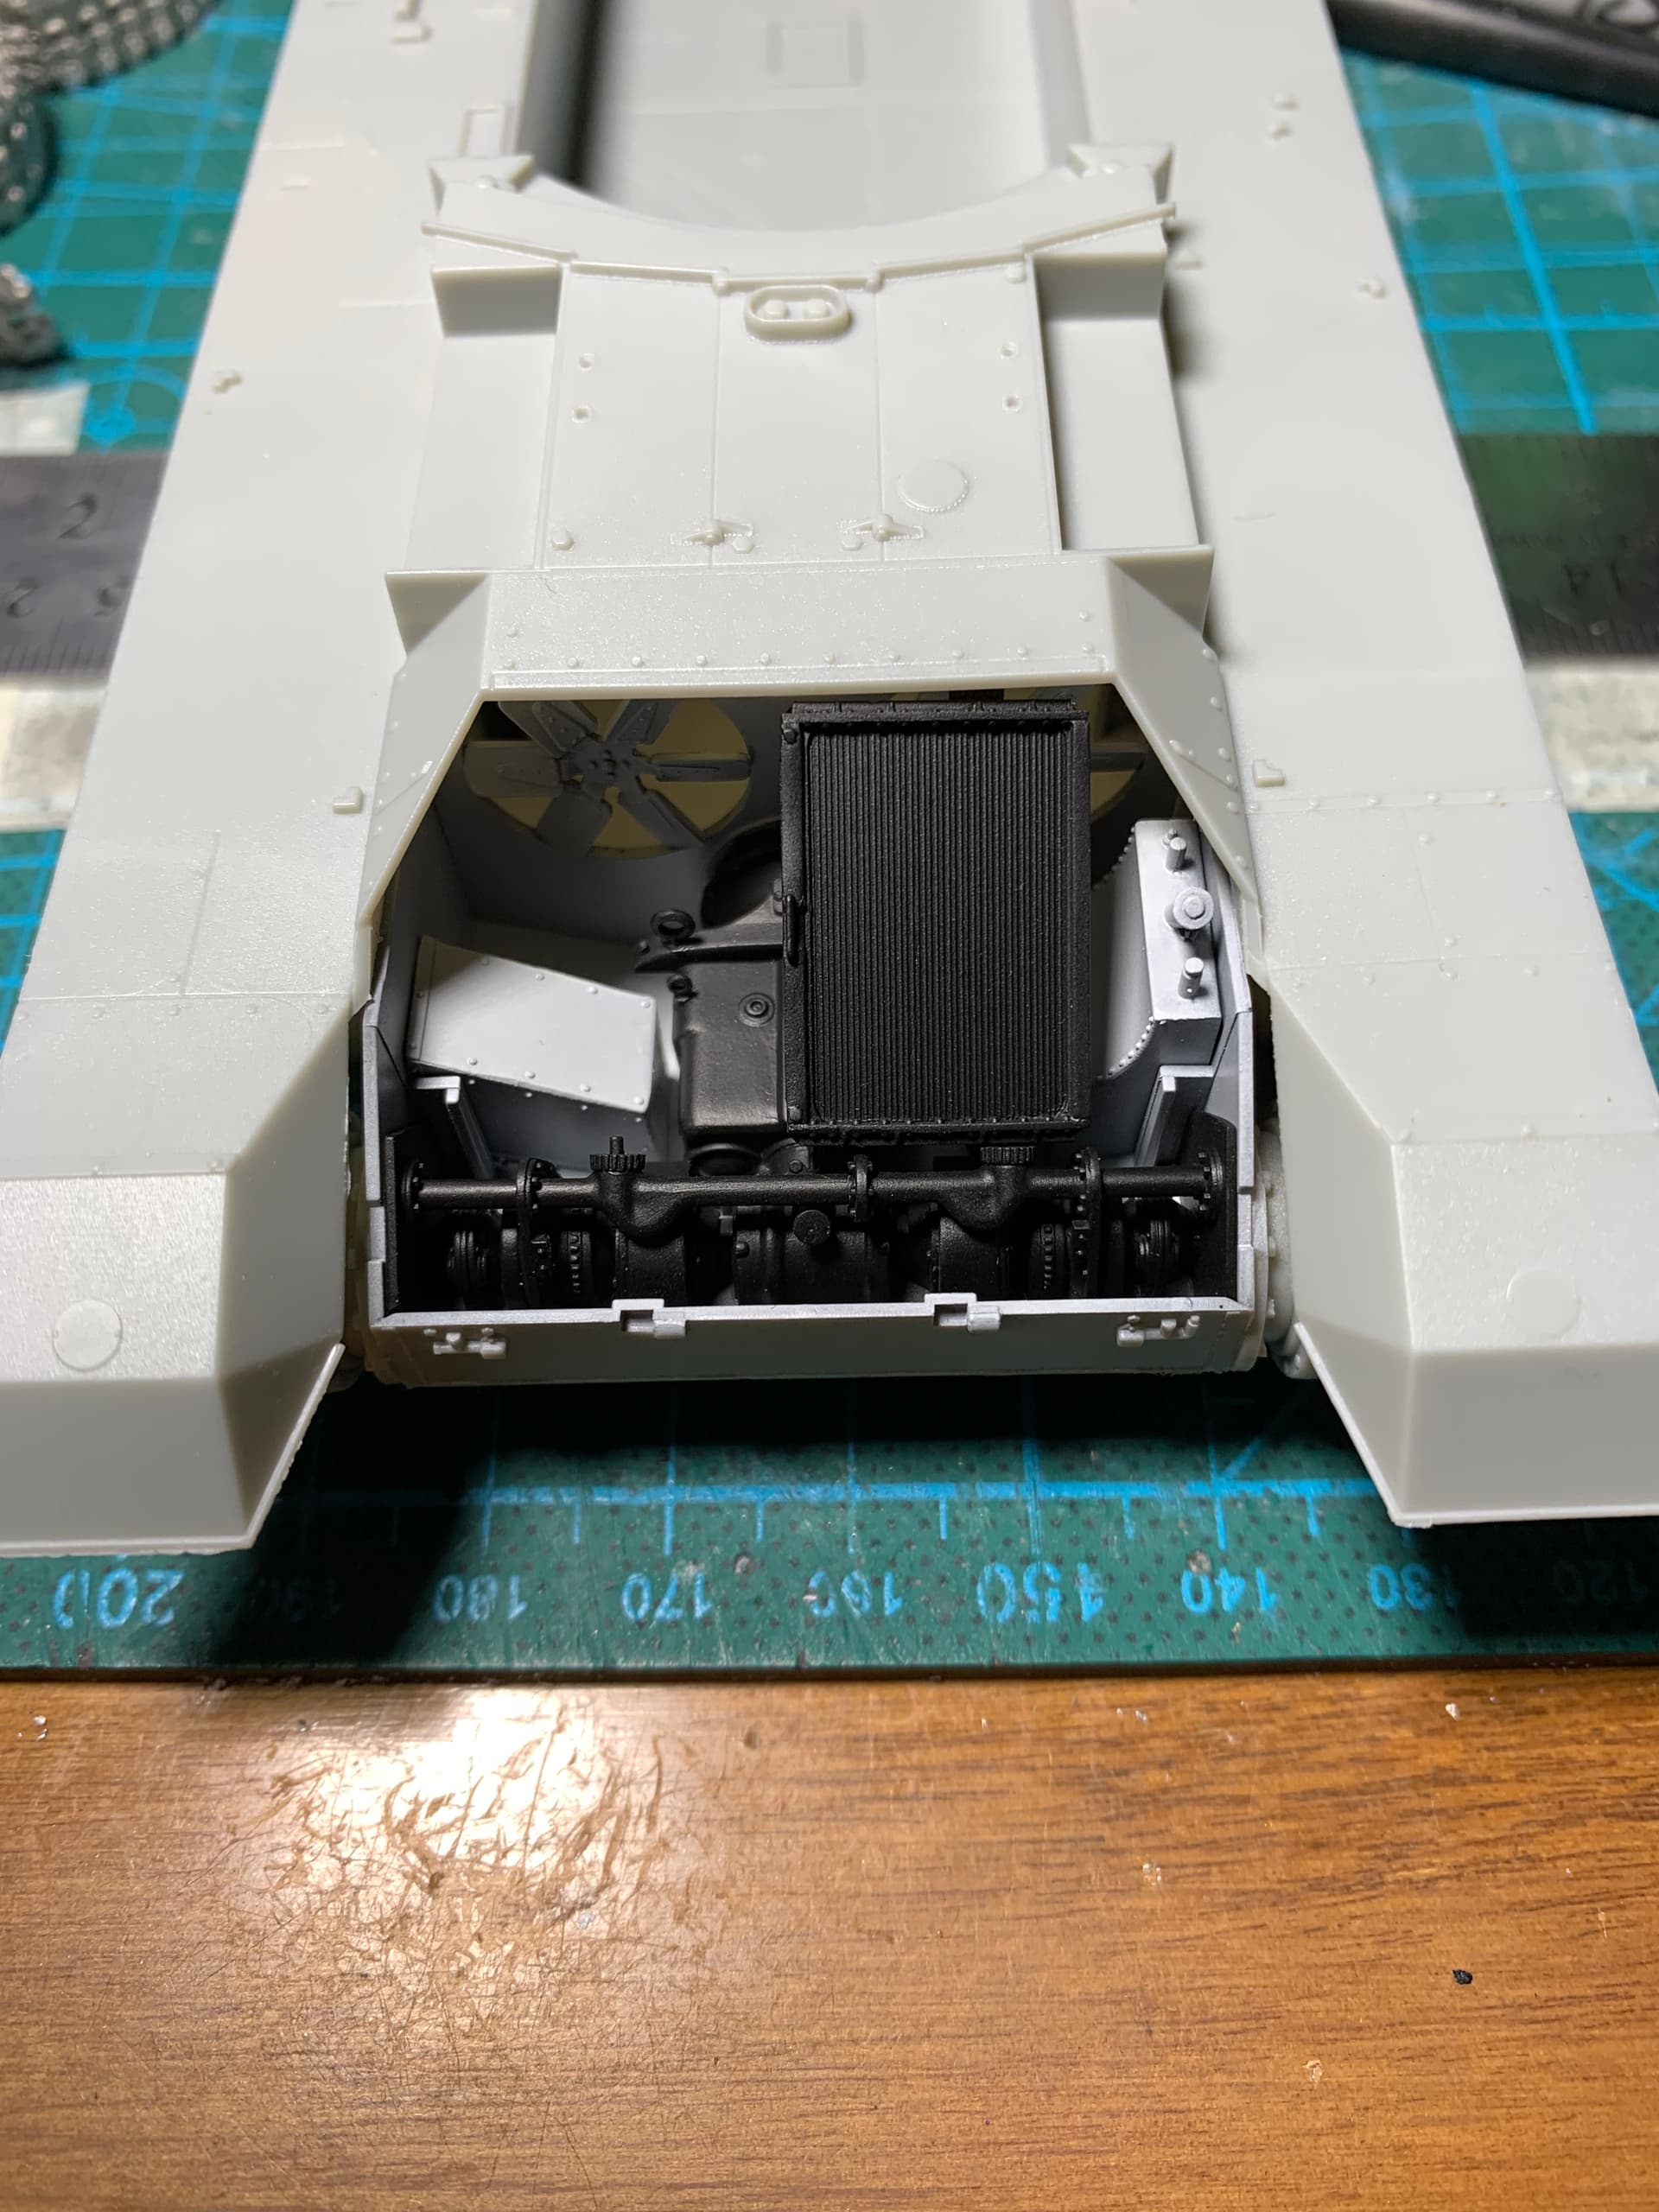
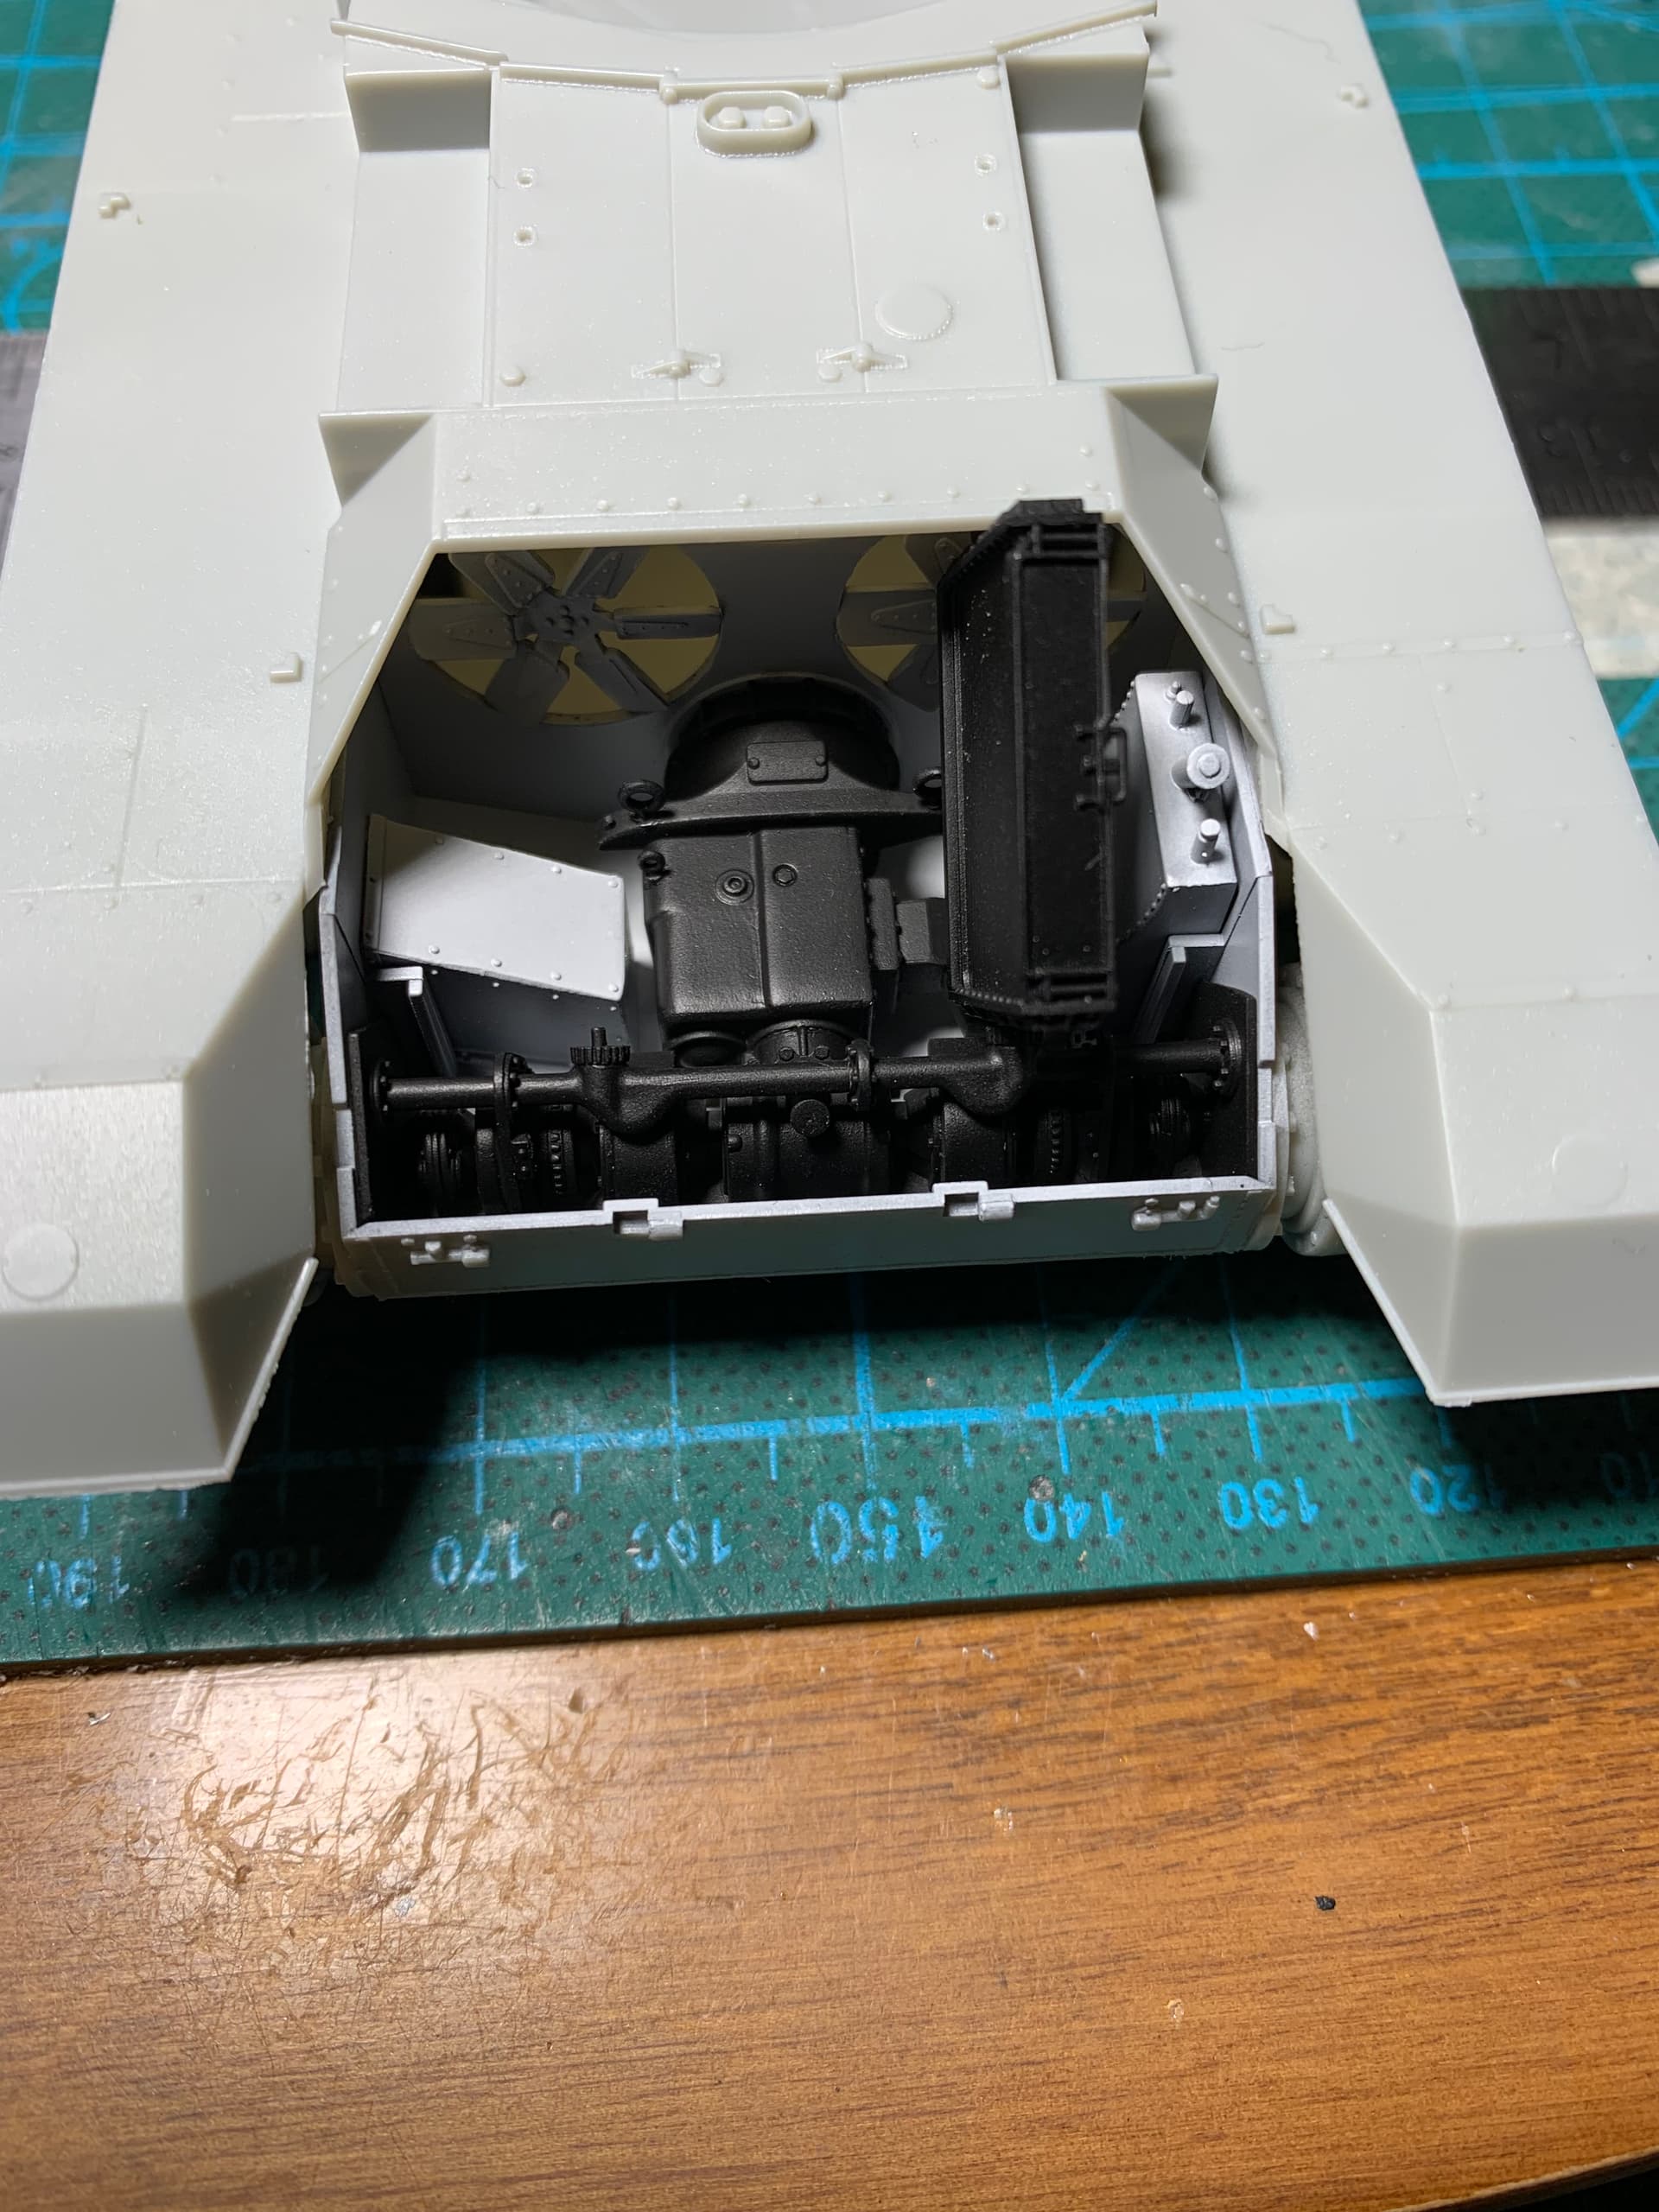
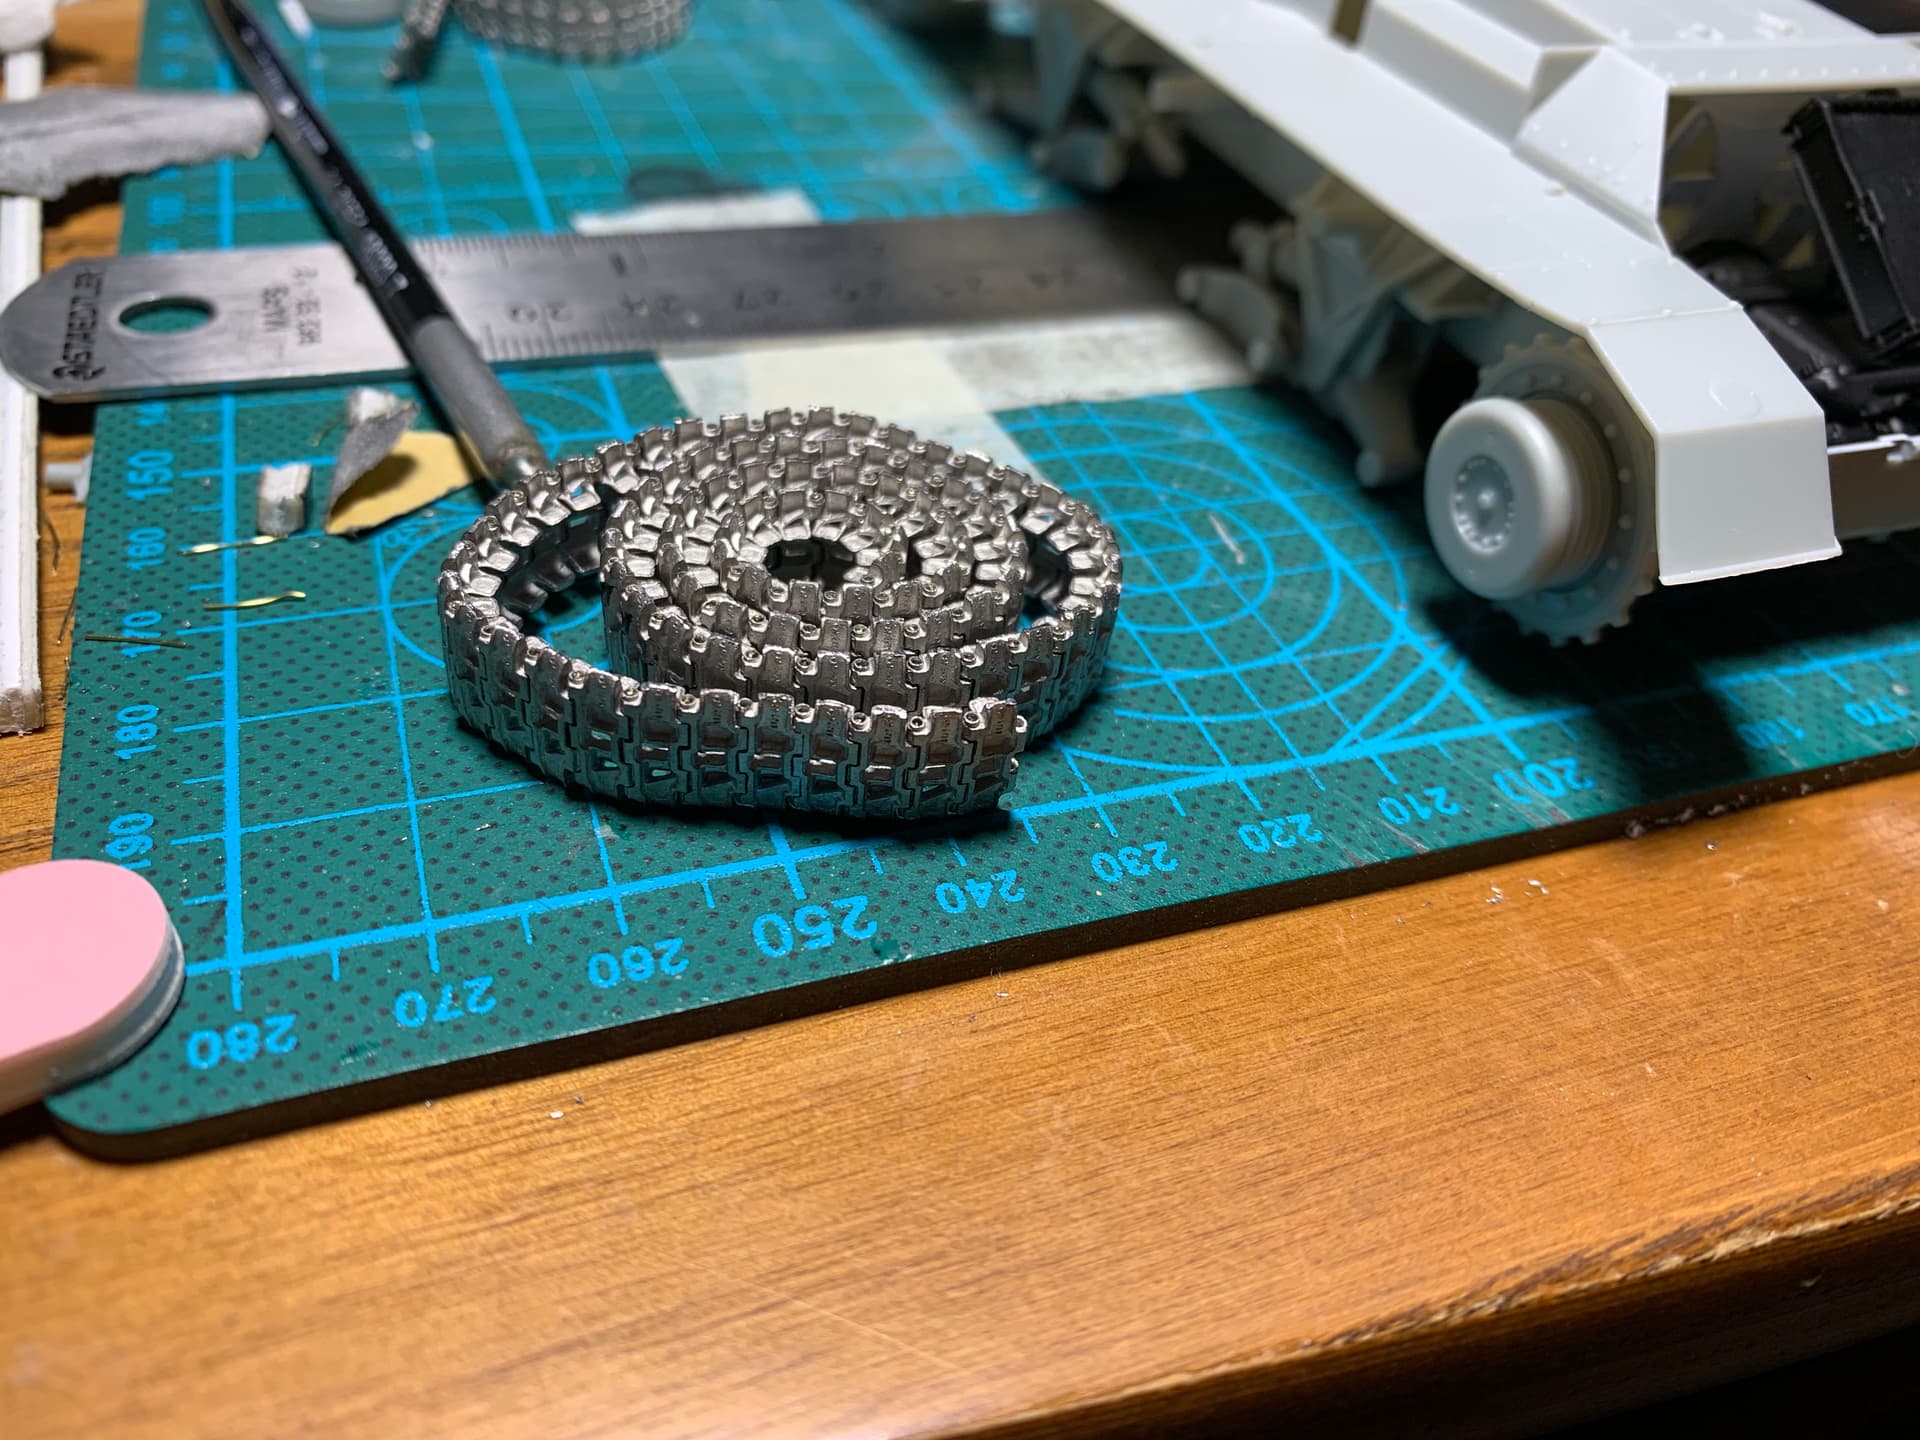
Still need to do the other radiator cover but I’ve also been busy chugging away on the Friul tracks. I’m in love with metal tracks, each run took one day so two days on tracks instead of the 5-6 days it takes me to do Indy tracks. Not sure how to proceed though. I’ve done 90 links for each track run. This is clearly too short but I didn’t want to do the 101 the kit calls for in case the Indy links and the metal links are different size. I’m at the point where I want to add a single link to each run until I get the right sag. However, the road wheel attachment in this kit is super flimsy so I’m finding it hard to tac them in place while I try to set the track length. Option two is leave the tracks for now and set their length once the kit is done. Any thoughts?
8 Likes
Mead, I suggest you do the whole 101 but do not glue the wire in on the last 5 -10. Kink the wire before you insert it and leave a good section of wire hanging out in case you need to remove the link. That way the bent wire doesn’t fall out easy, but you can remove however many links you need to later. Just snip off the excess wire and glue those that are still in the length.
3 Likes
That’s a good call! Then I can “finish” up the tracks and move on as I’m not quite ready to glue the road wheels on.
3 Likes
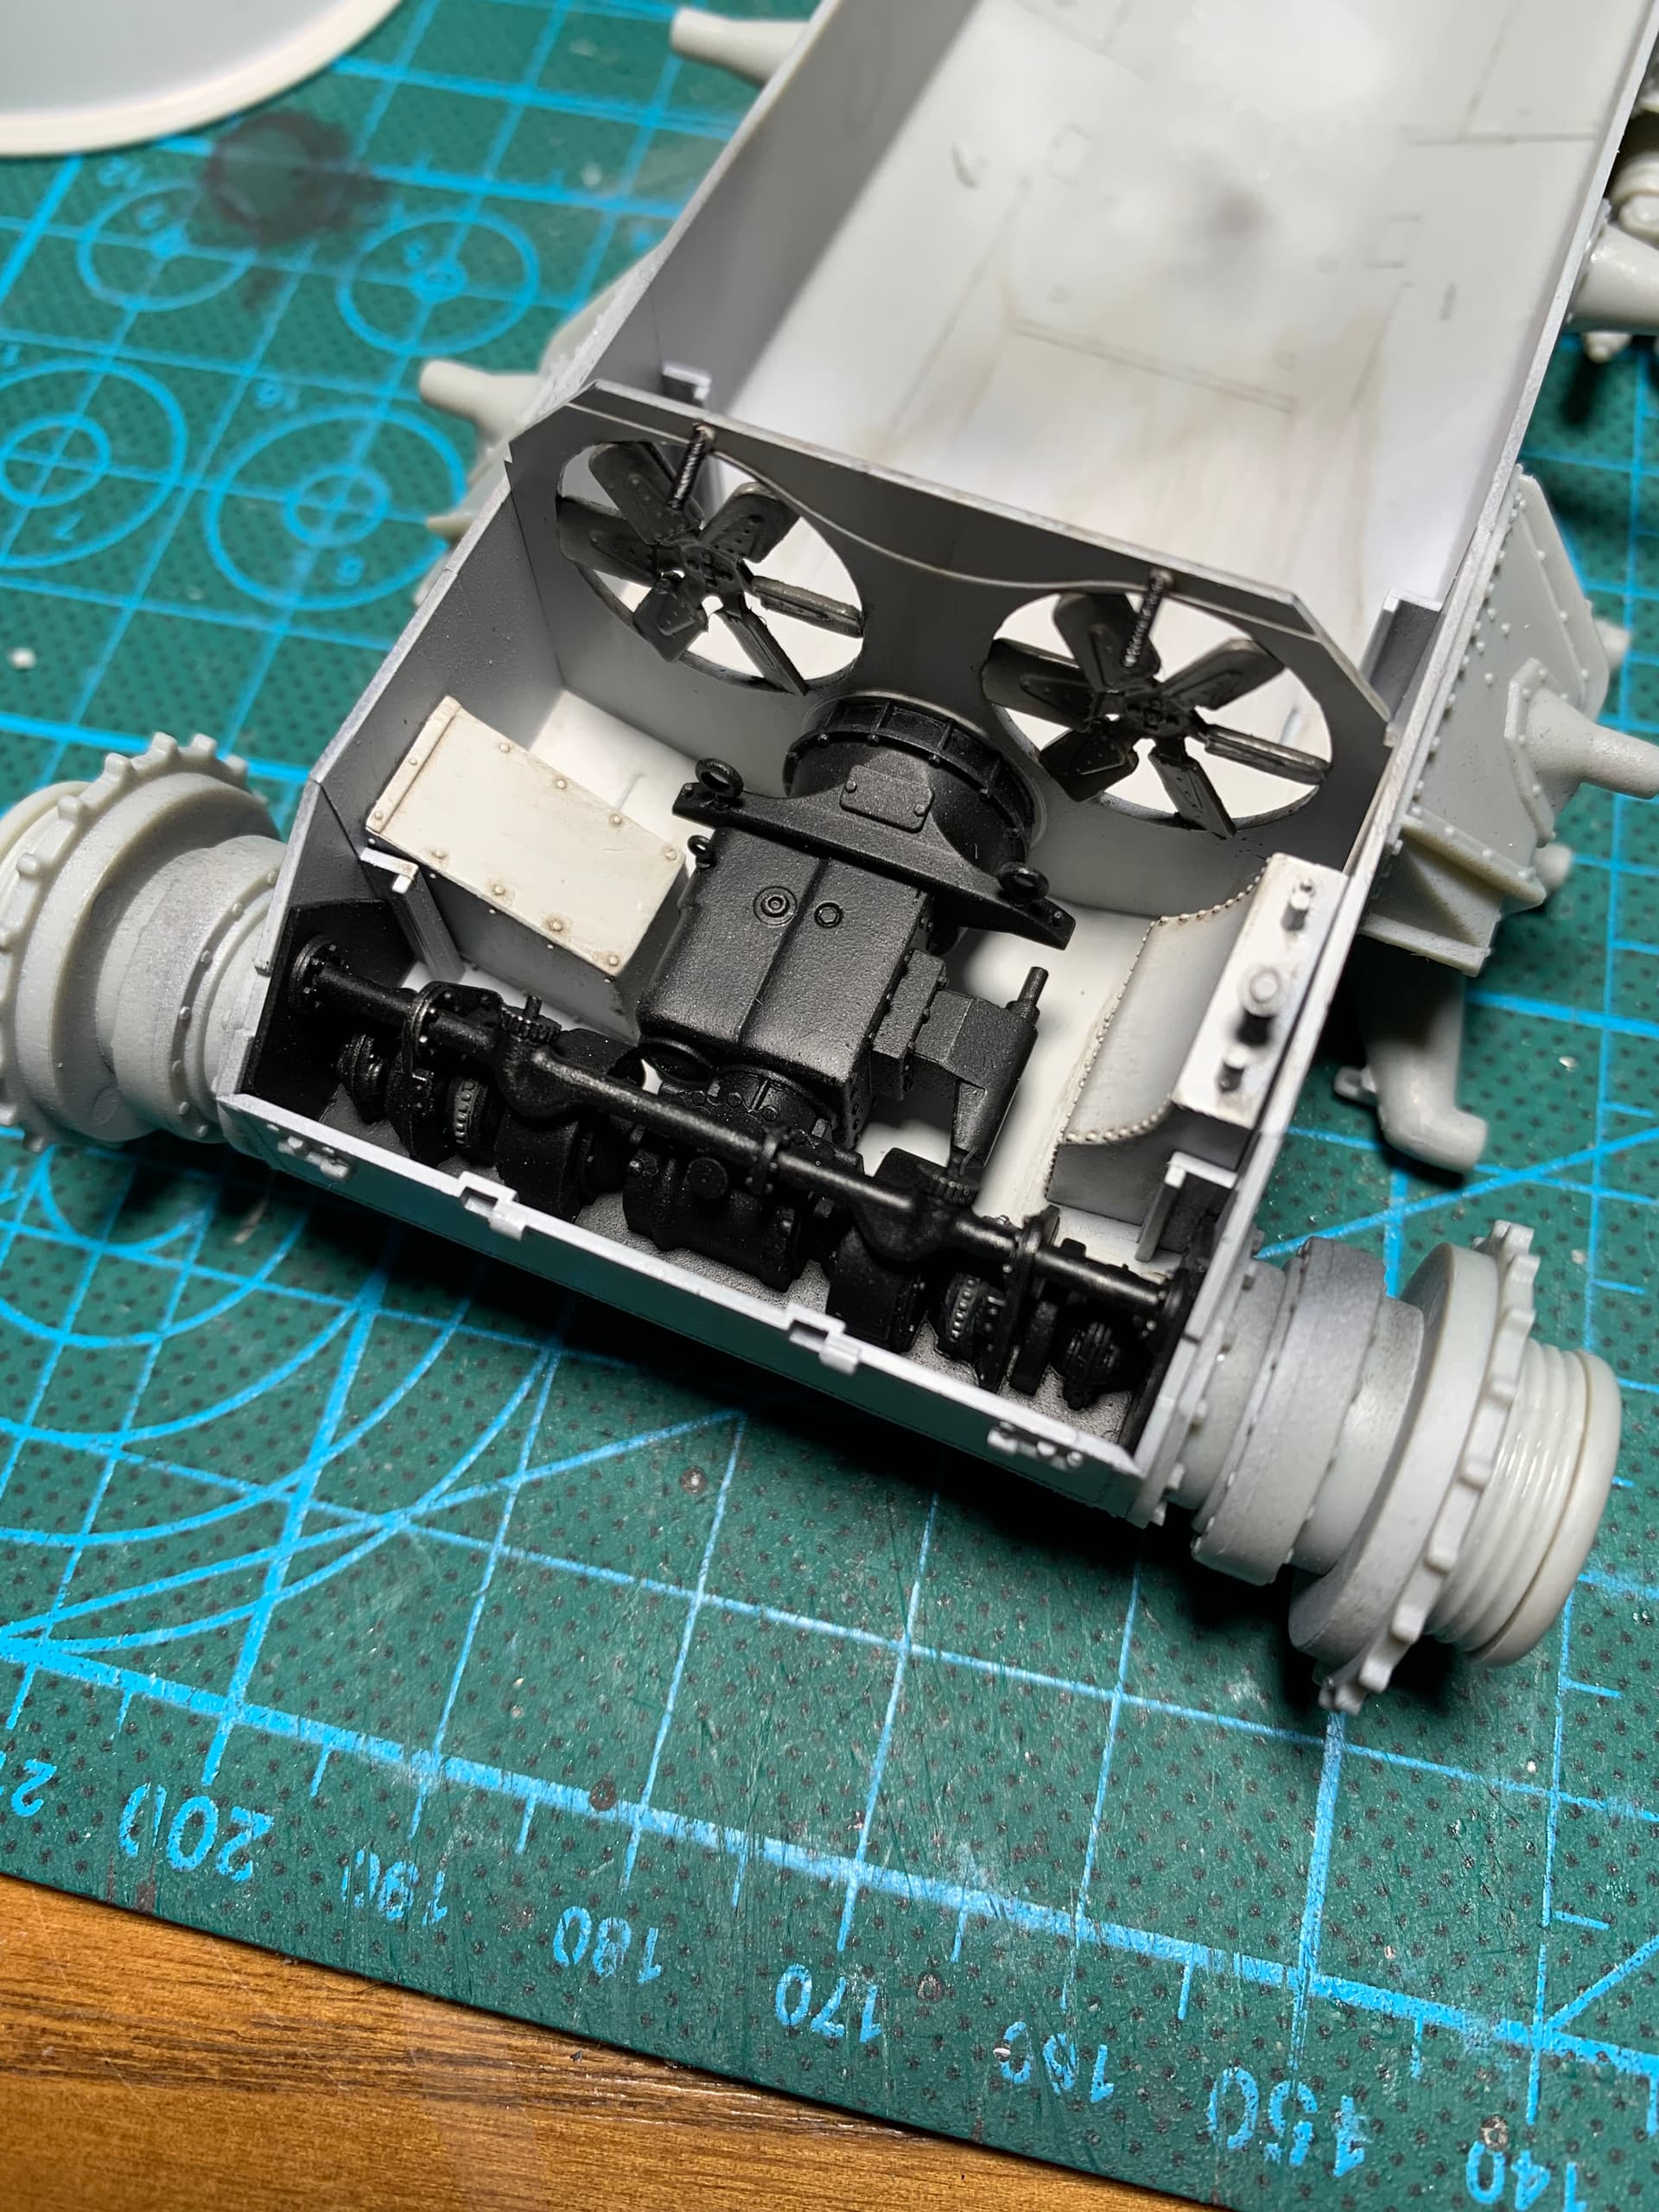
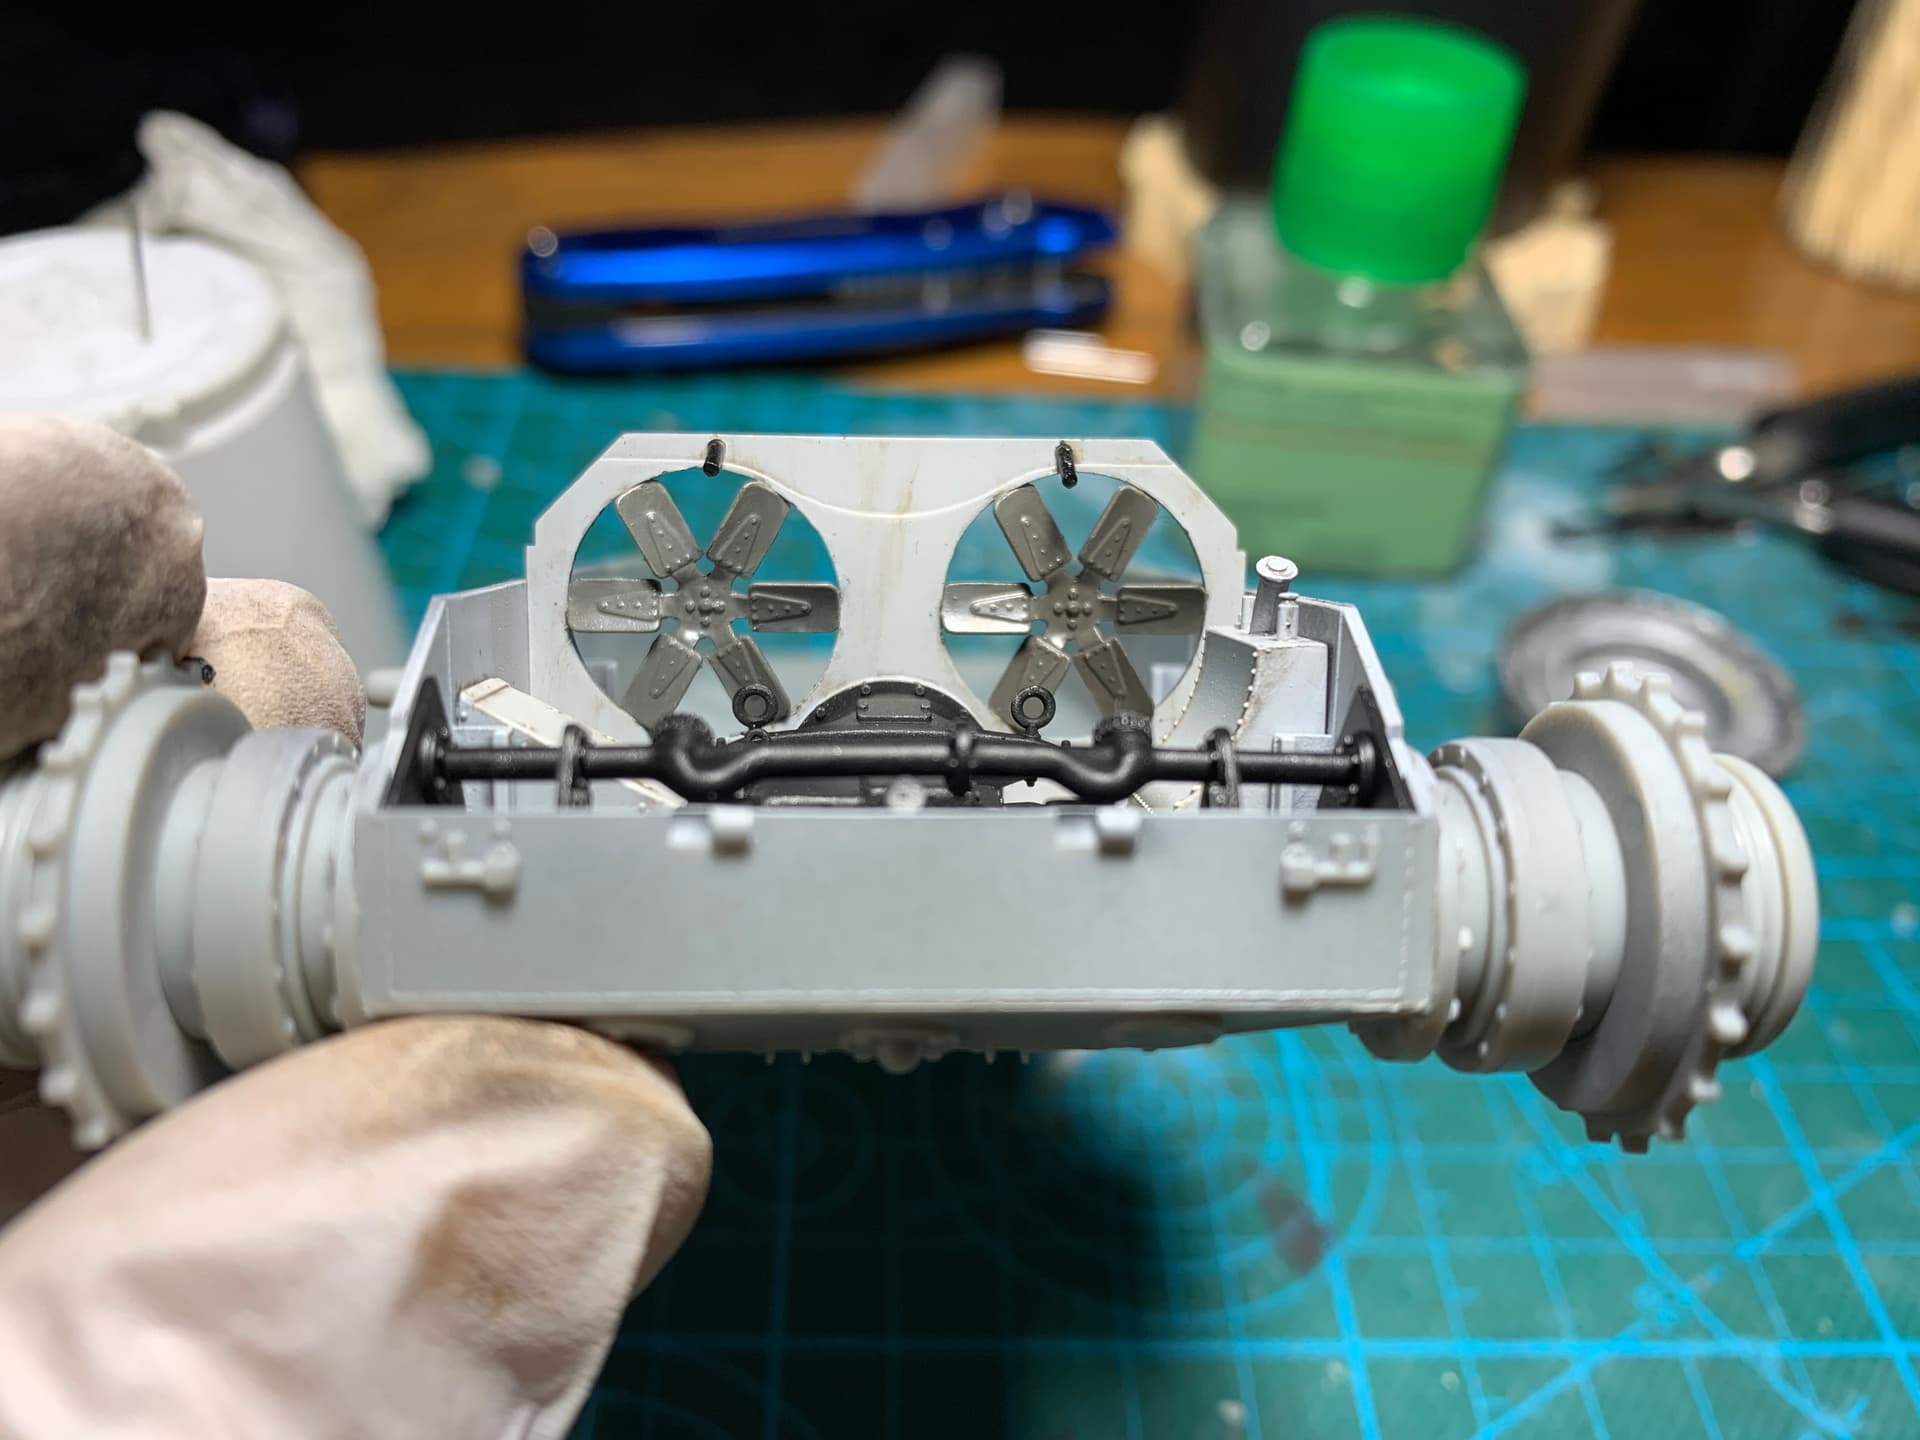
Weathered the transmission interior area and radiator screens. This consisted of painting the fan blades steel color followed by a dark grey wash and a brown wash on the rivet detail.
After letting this dry I then did a light gray dry brushing on the fan blades, a light steel dry brush on the transmission and final drive parts, streaking using oil dots and finally some pigments to simulate dust on the radiator screens. I doubt I’ll leave this area exposed but it gave me some practicing for weathering. That concludes the lower hull parts up next the upper hull!
7 Likes
Looking nice @Mead93 … Good progress. Very crisp details
Since I got my new compressor. I am very exited to paint 
Mine is an old Dragon kit. So no suspension alignment template of the Takom’s Jagdtiger. I am not sure the camo is accurate or not. Just following a very old Tamiya Model Mag’s build article… As long as it looks nice I am happy…
It would be very much appreciated If you could point me out if there are any glaring mistakes…Thanks for looking…

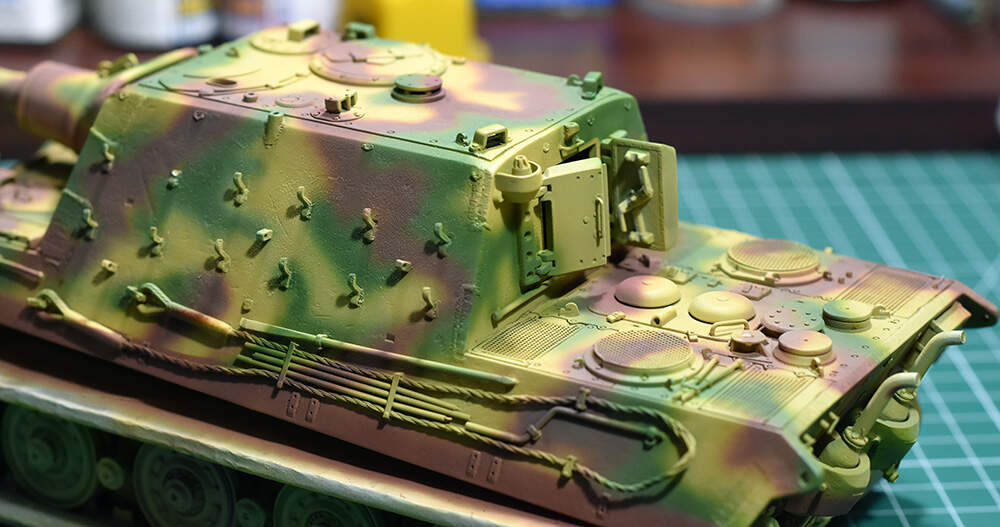
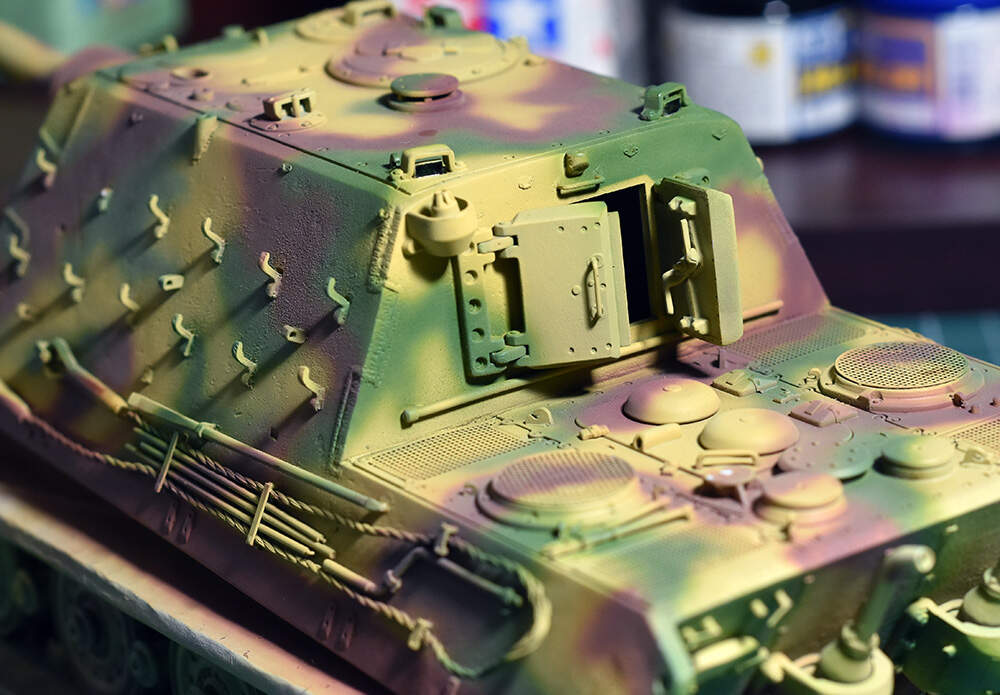
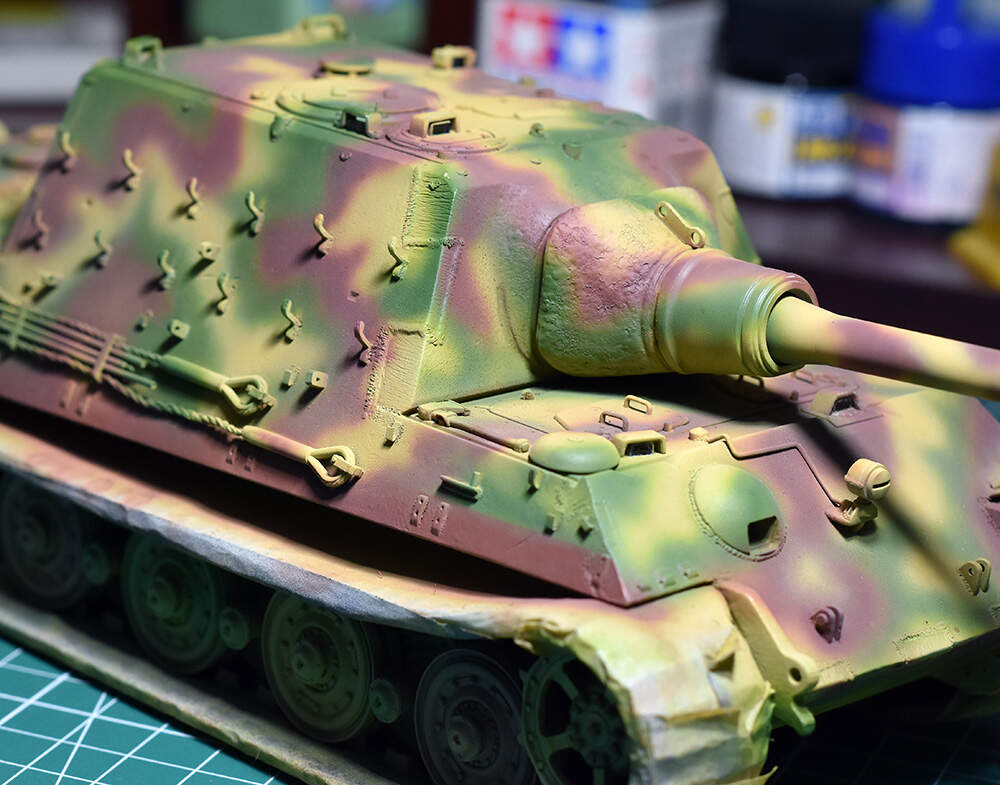
I am not very sure of the hooks for spare tracks in the middle column. Most of the old pictures only have 4 track links per side…But the build photo shows hooks for 6 links per side… Any pointers welcome…
Have a Great weekend
Mukund
9 Likes
Great job on one of my favourite WW2 vehicles
1 Like
Great work on the Jagdtiger. Cammo looks good.
Had a bit of time this afternoon to do a bit more work on the Type-1. Just the tedious job of assembling the coil springs, drive and idler wheels. Cleaned up the upper hull parts and filled some annoying ejector pin marks.

4 Likes
Beautiful work on the camouflage, Mukund! 
1 Like
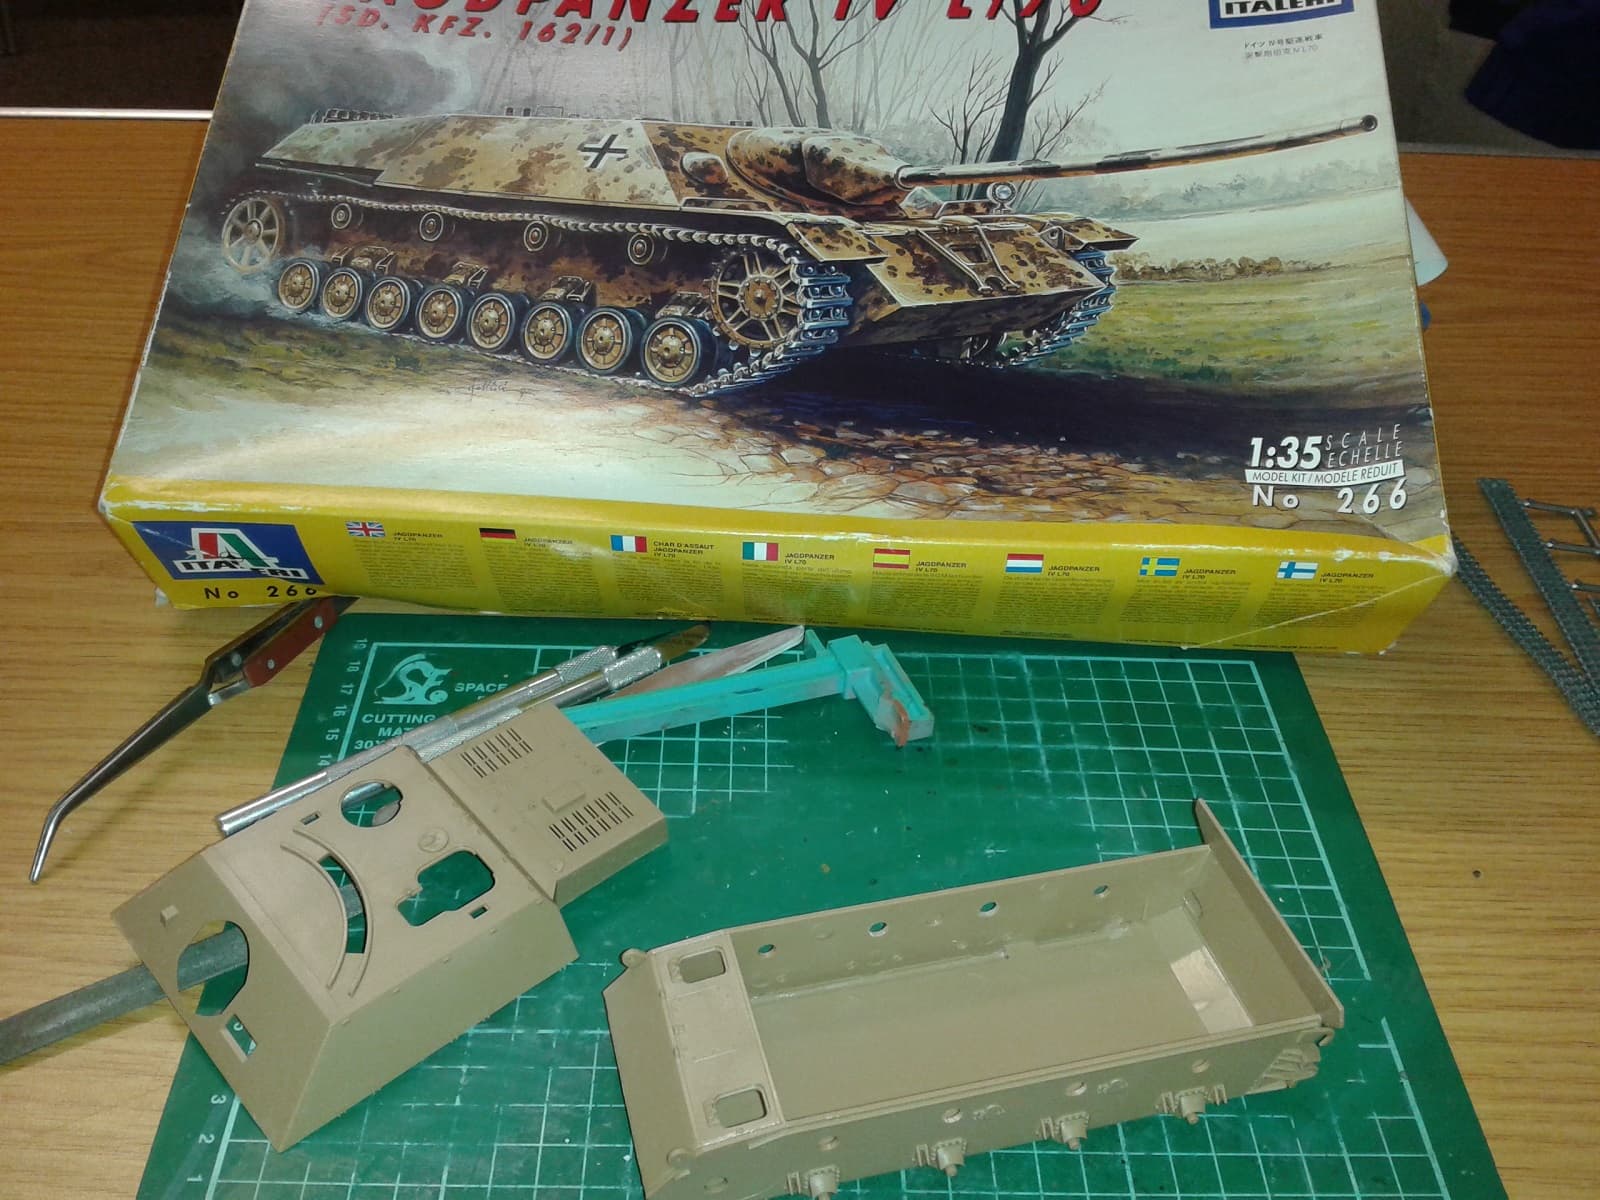
Right, it’s about time I get off my backside and get my entry going! It’s the old Italeri JagdPanzer IV Lang, which I will build OOB as a “palette cleaner” between my usual AMS-stalled uber-builds. I got a couple hours of quality build-time at our monthly club night - starting photo below.
6 Likes
All your builds look great guys!
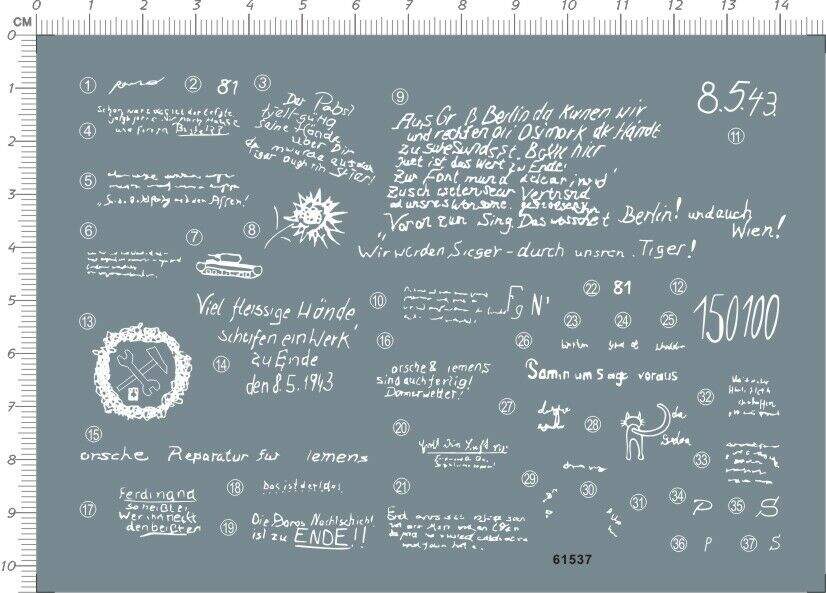
My Ferdinand is still underway, Im just fixing a few construction errors.
I was originally gonna paint it as one that was at Kursk but the kit decals were so terrible.
Im now going to paint it as a final production Ferdinand.
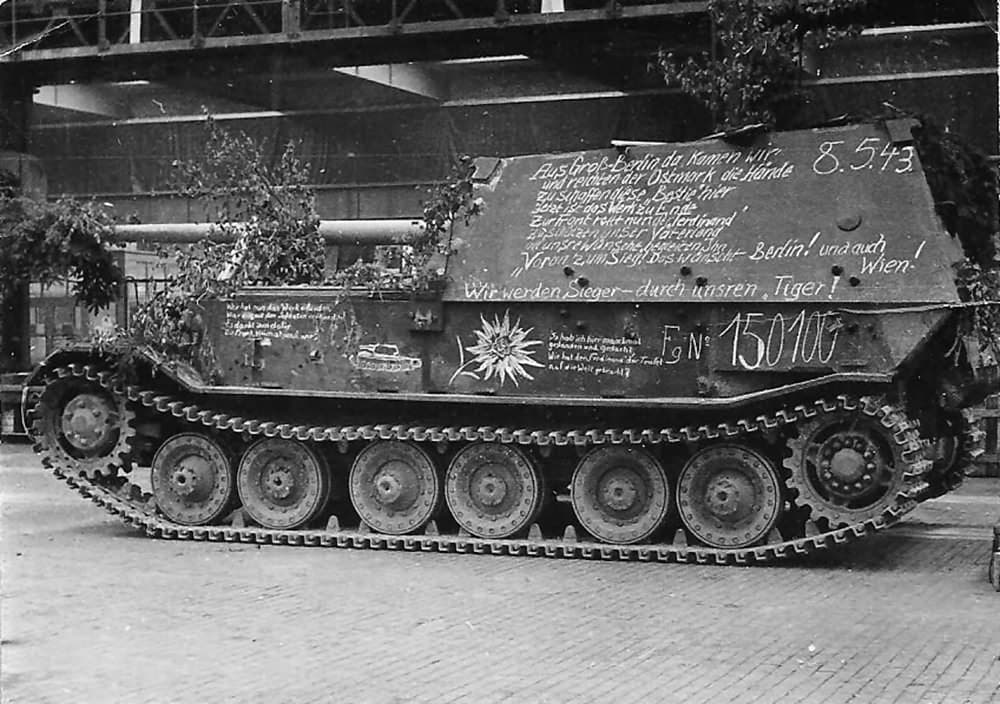
Dont know how Im gonna do the writing yet… maybe someone does masks or something.
5 Likes
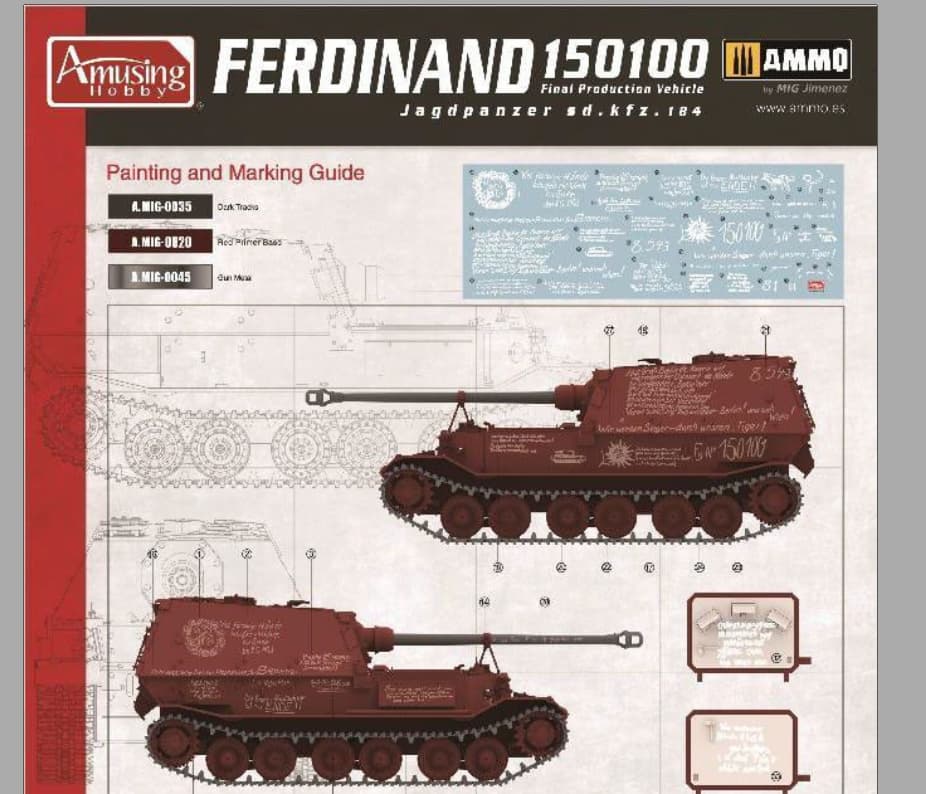
@Panzer_modeler Ezra, maybe does aftermarket decals for that subject, I really hope you can pull it off.
Im not sure where Ezra, but I am sure I have seen a decal sheet with that type of writing and layout. Someone else may know which firm make them. Would look very cool.
Poor image quality but it was the first I found after a 10 second Google search
(I knew about the model already which obviously made it easier, ahem …)
@Johnnych01 @Panzer_modeler @Klaus-Adler
Edit: Better option in Peters post below
3 Likes
2 Likes
Sweet! Just bought that decal set. Thanks Peter.
Its coming from china though…who knows how long that will take…
1 Like
Pretty sure it will be long after you need them as fast as you build.
Well, the campaign runs for another 9 months so maybe you will get lucky and have them before they finish ![]()
2 Likes