To be honest I didnt do any research online apart from the types of wheels that were used lol … The wing decals were placed as they were in the instructions - so Arma may have got that wrong ? It shows that one aircraft (84) with the wing numbers that way, and the other decals for other aircraft are shown as the other way round ?
1 Like
Just looked at this as I admit I hadnt looked myself until now. A very interesting history of the then Capt Joe Foss and what he went on to achieve. Some my find it interesting.
1 Like
The numbers were painted that way so that they would be right side up when the wings were folded.
1 Like
makes sense… ![]()
I did but I have read it a few times in the past and I recall the 2002 incident with TSA when it happened.
Arma has a nice write up of the battle.
Your comment about one of his planes, while some planes may have pilots names on them, Marines fly what is available that day (squadron size was 18 planes then, 12 now) and don’t have one bird assigned to them to fly that they only fly.
2 Likes
Hi Everyone,
I’ve been remiss in not making any sort of an update, my apologies. It would seem this campaign has turned into Wildcats on an Island build, and I’ll do my part to help.
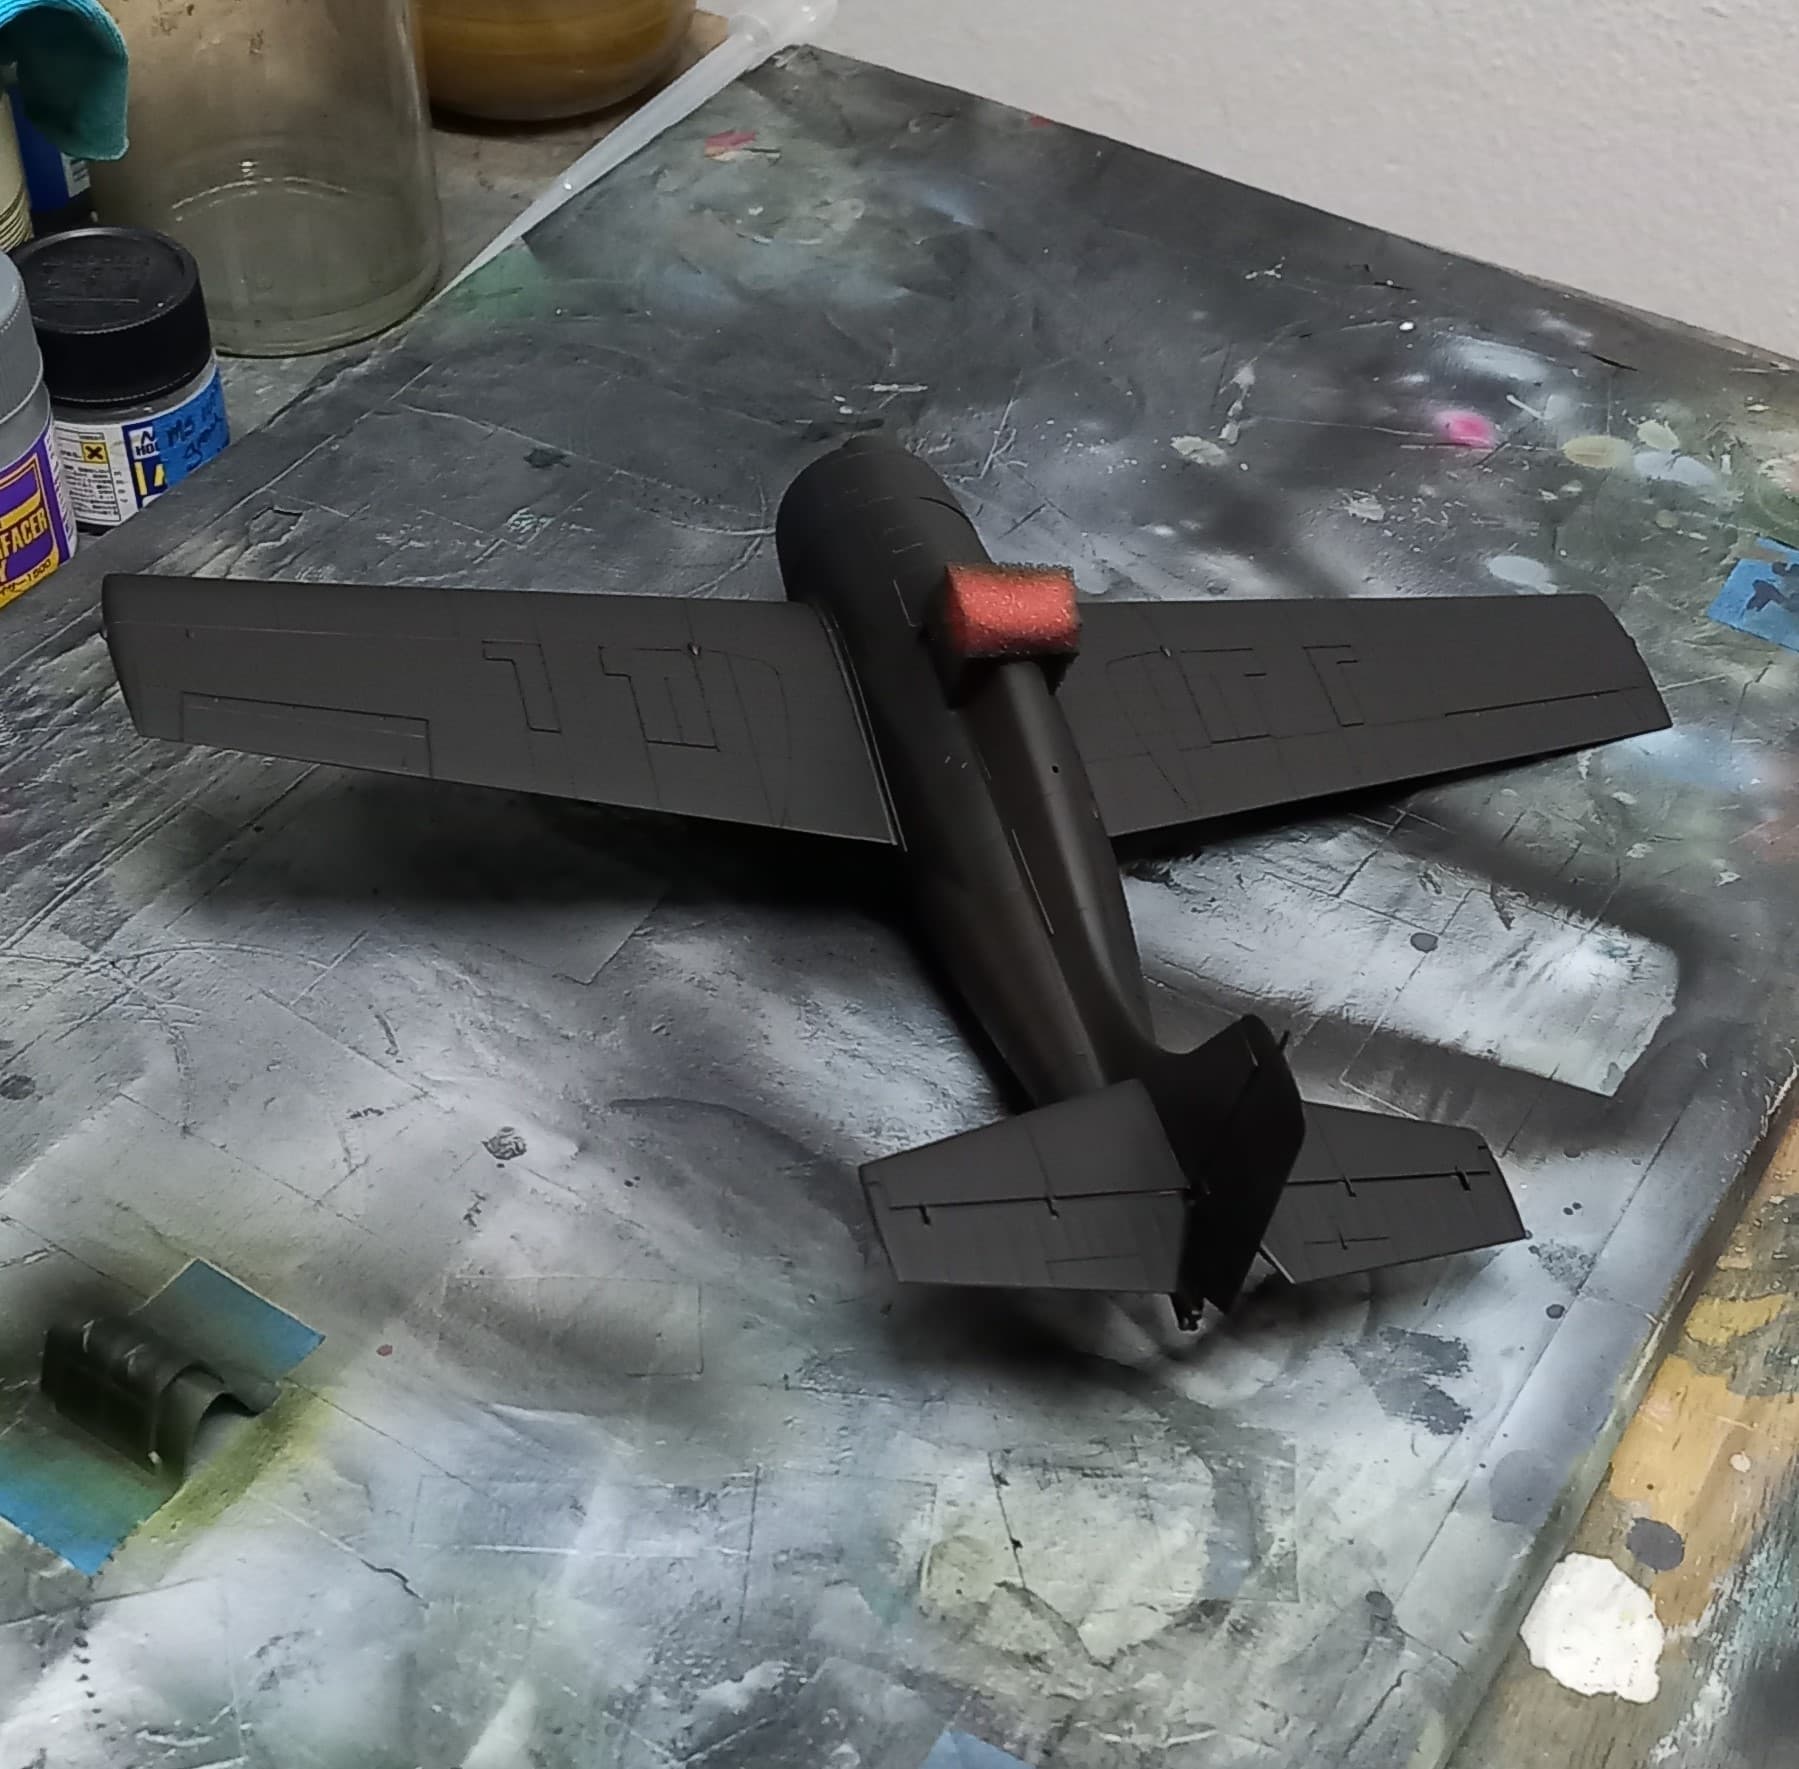
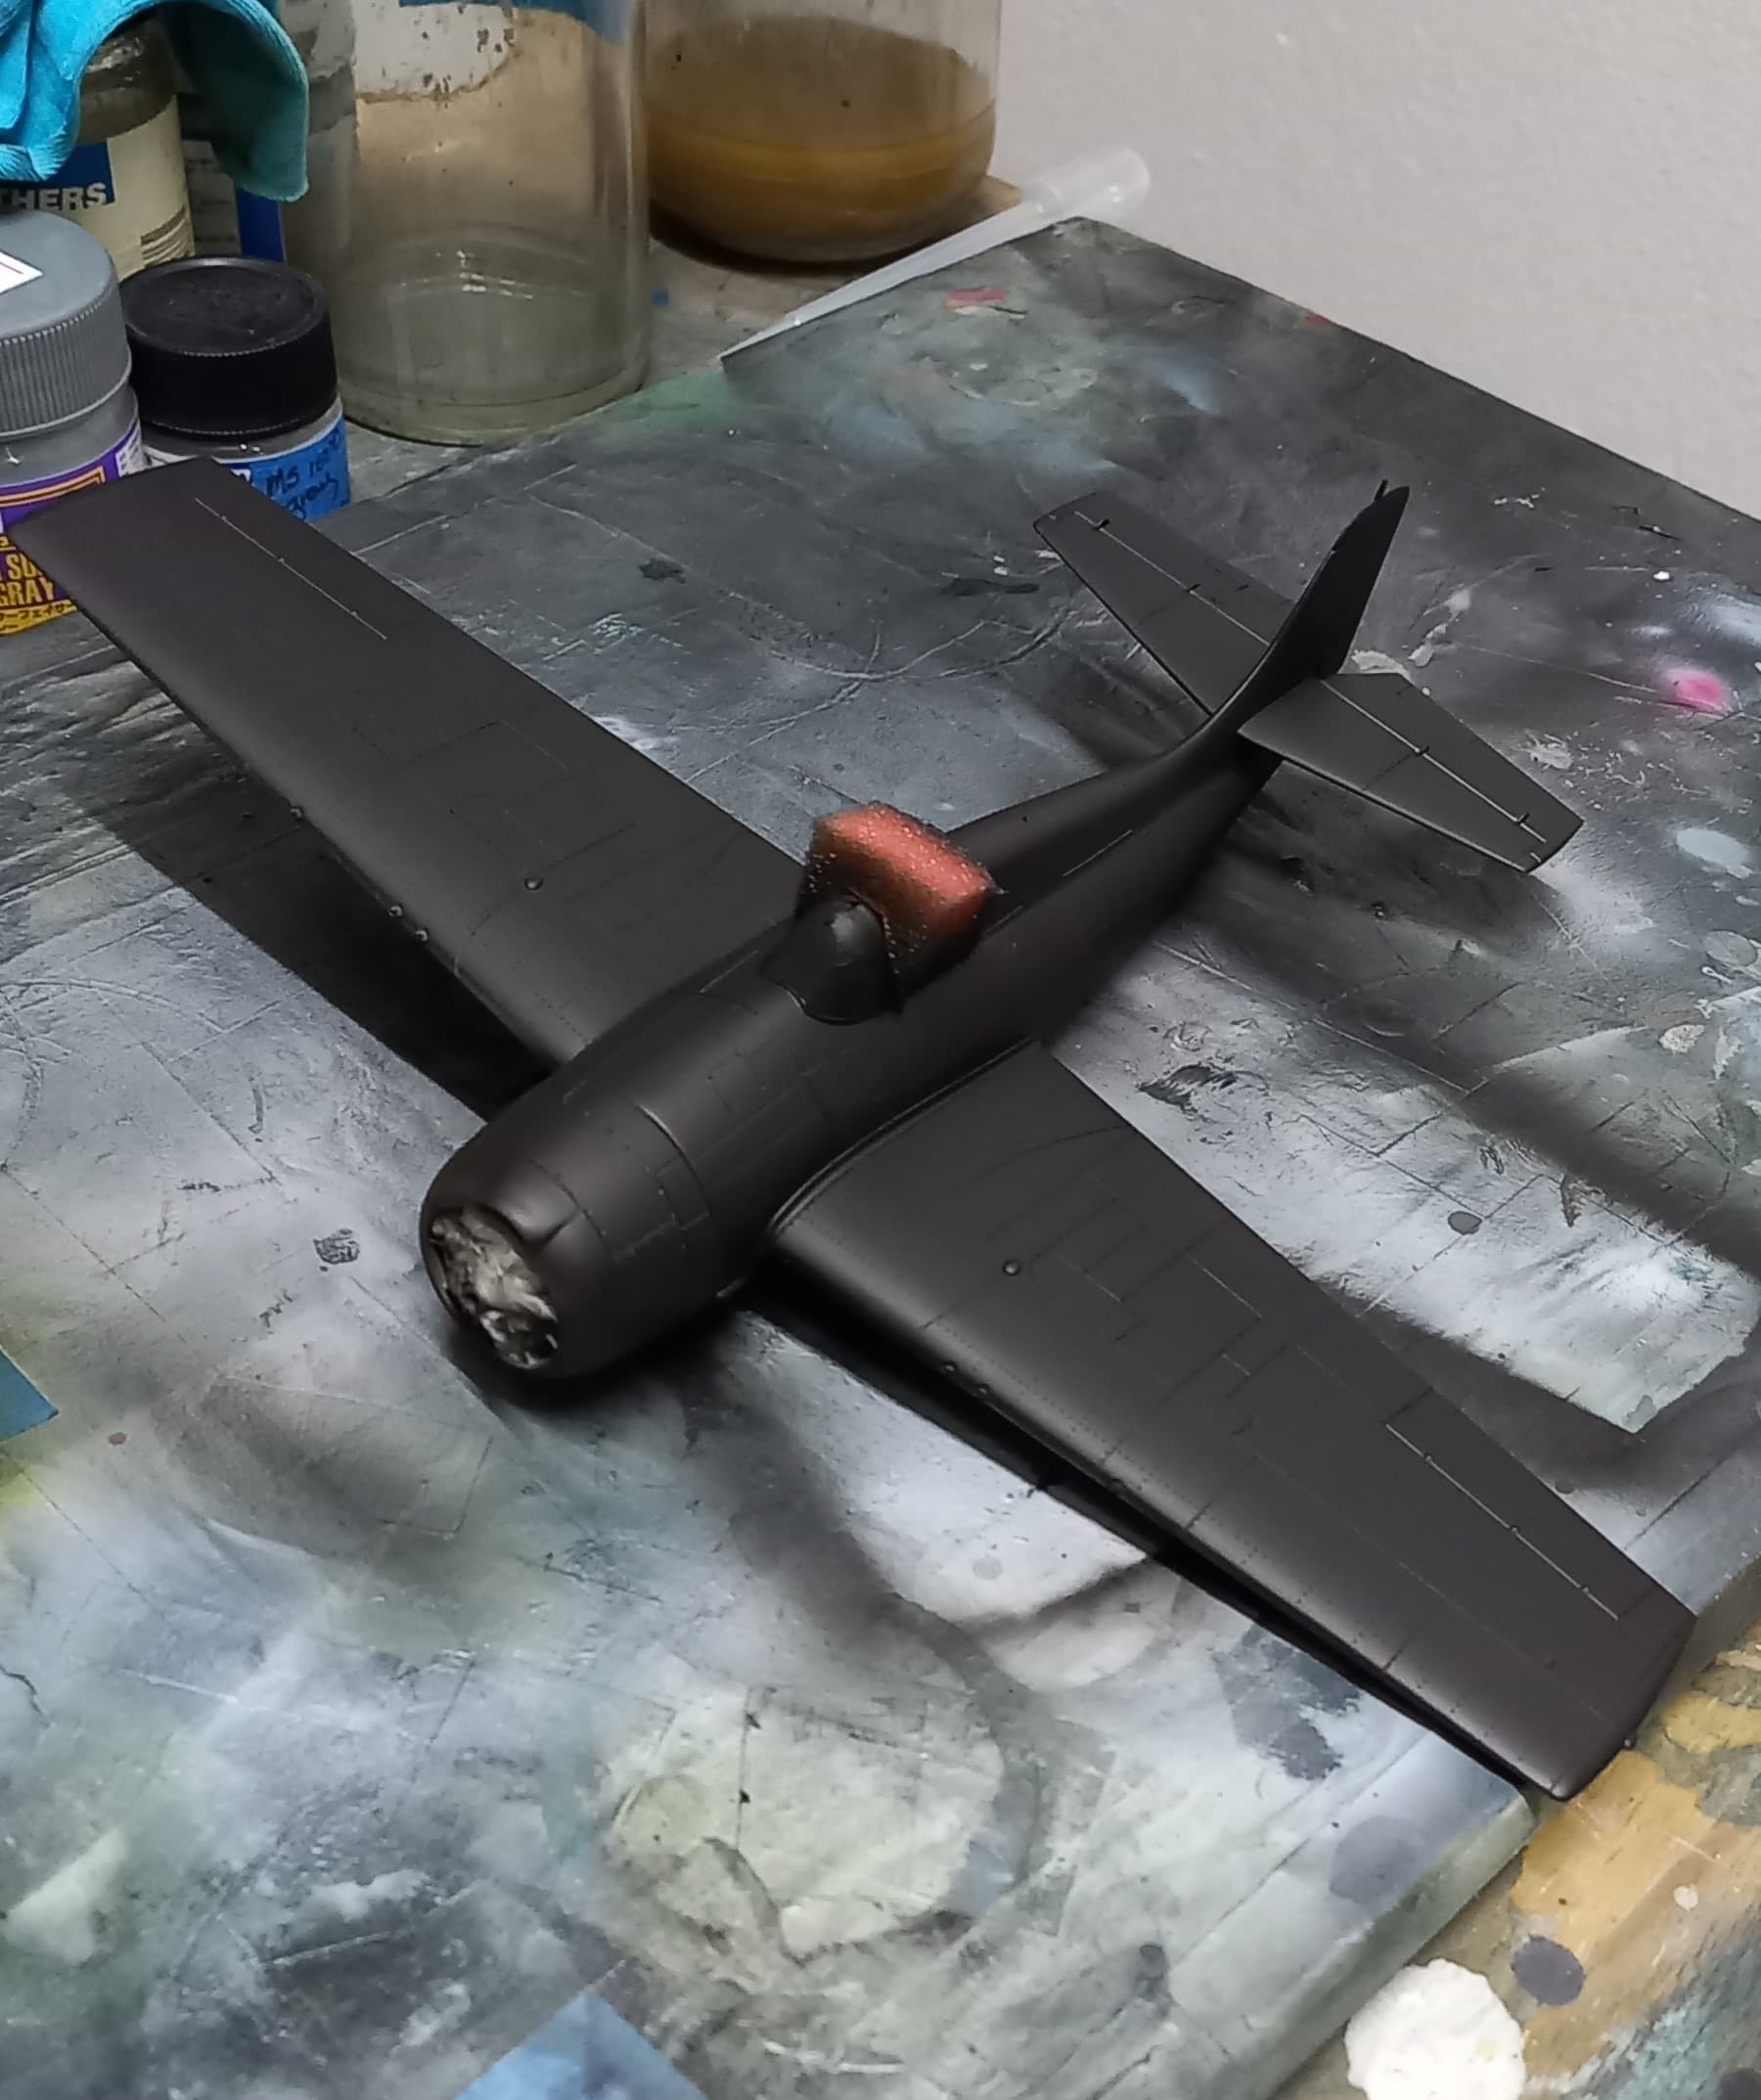
After all the internal parts were painted, it was time to get the cockpits together. While the Ultracast seats proved to be a little tough to get attached, once done everything fell into place. A little weathering and they looked pretty good.
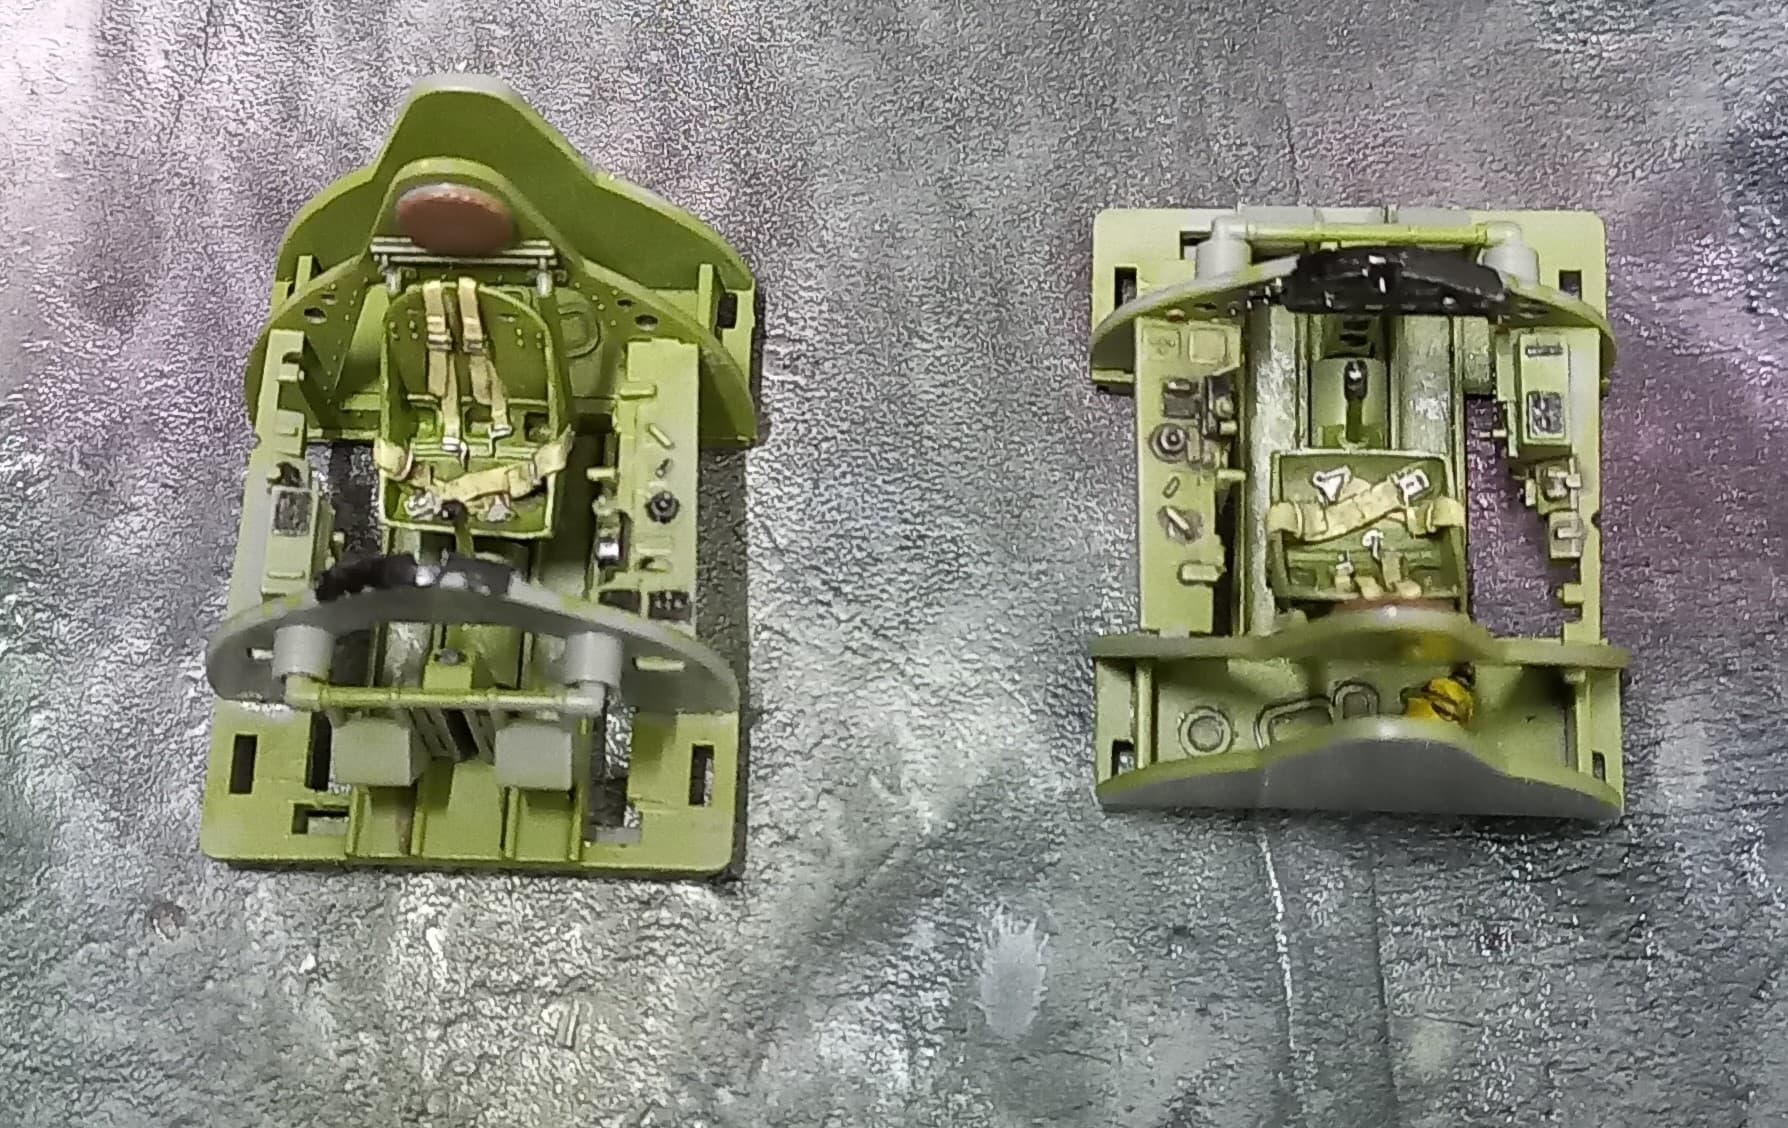
Work was also conducted on the firewall and the engines. Both these areas are nicely detailed and with a little painting and washes, they look very nice.
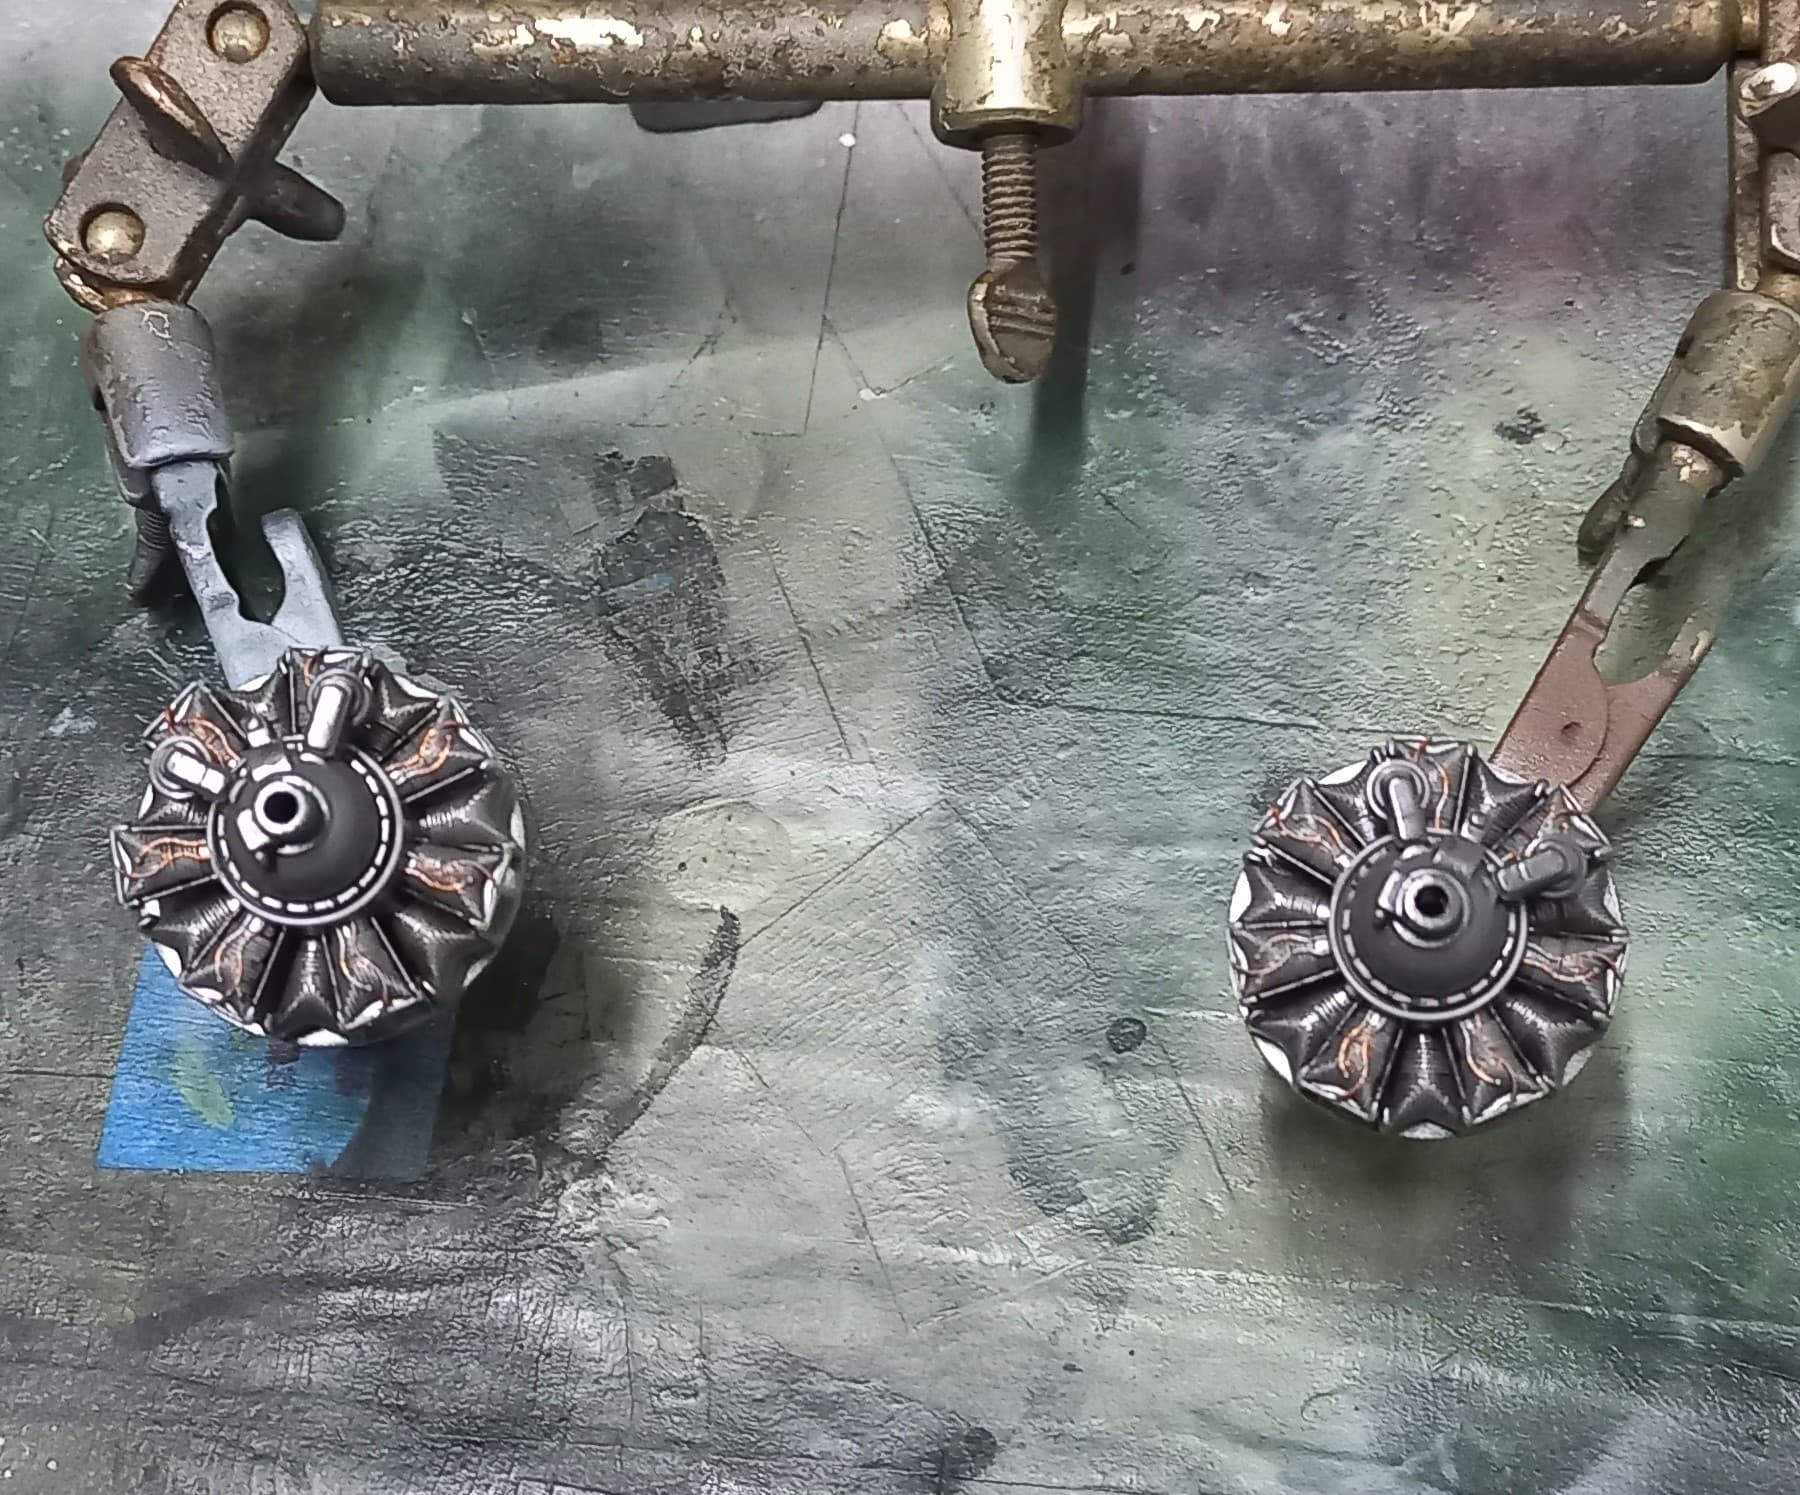
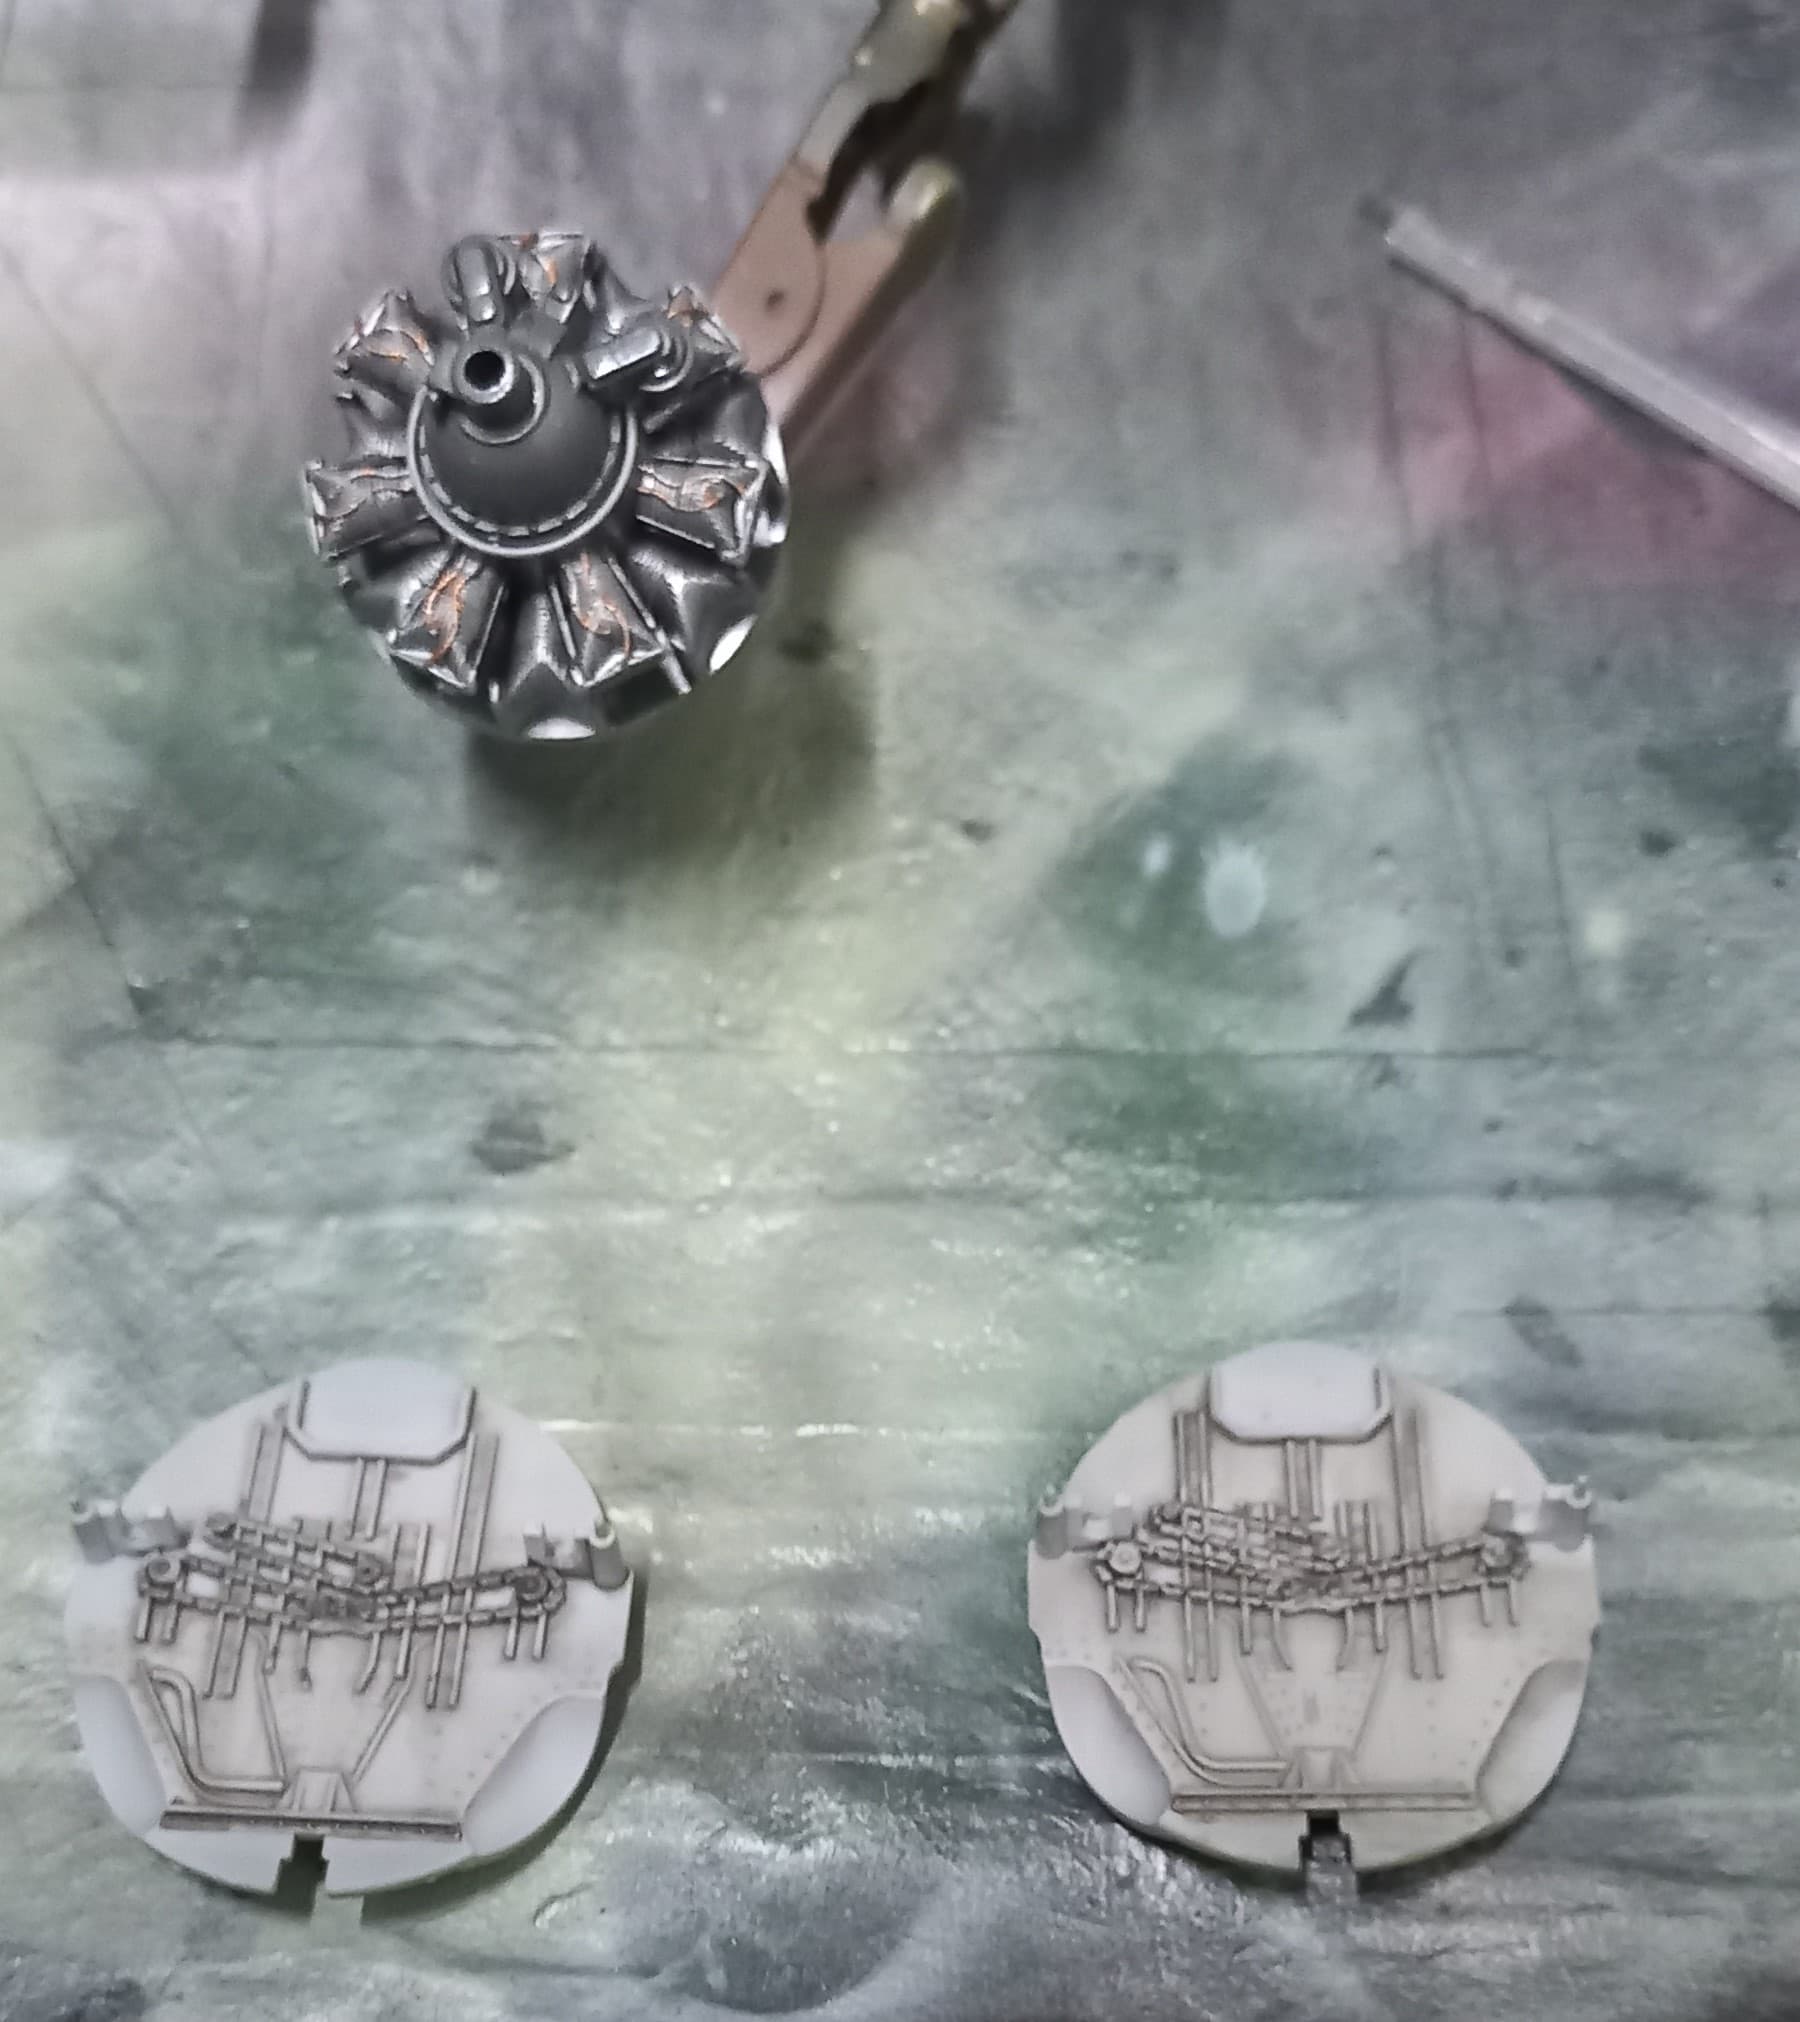
Construction is straight forward, and after a couple of hours it was time to let the glue dry. Also, I assembled the landing gear, which is the fiddliest part of the builds.
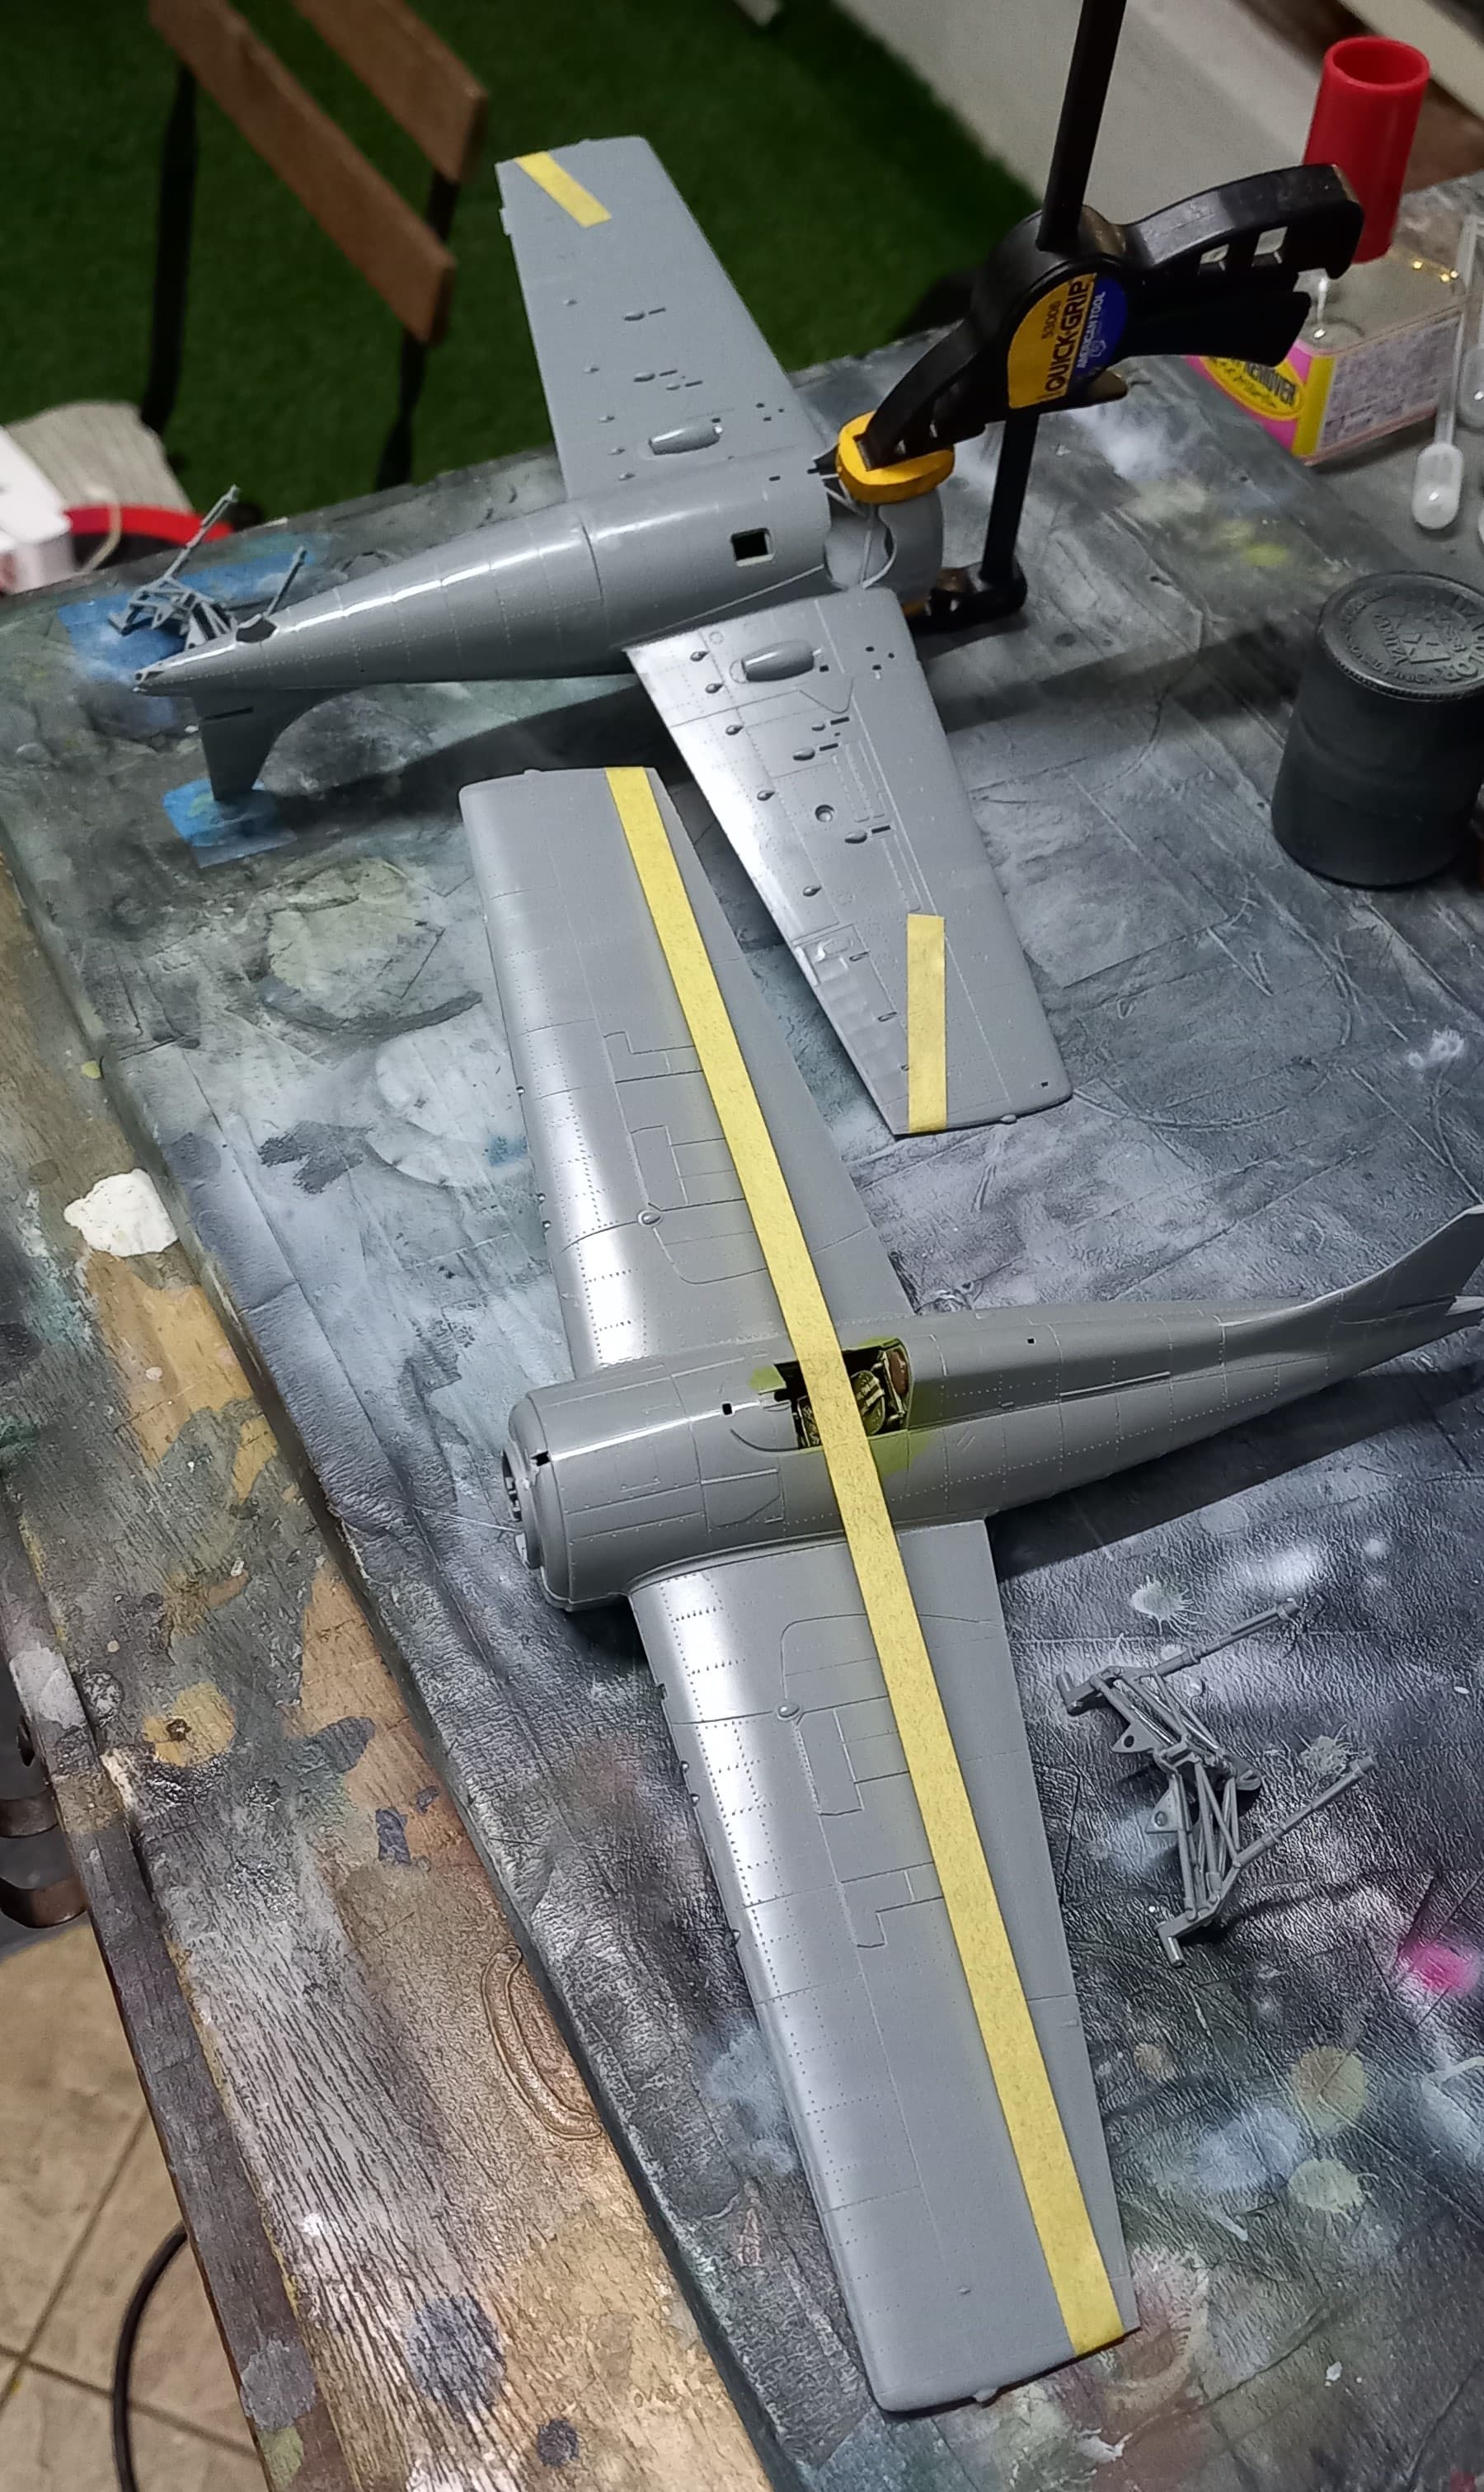
This is where I decided to split the build, one straight out of the box, and the other I’ll be dropping the stabilizer, something I’ve not done on this kit.
I’ll be updating the OOB build soon.
Till then, happy modeling, and Happy New Year!
4 Likes
Hi Everyone,
Hope the new year is treating you well so far!
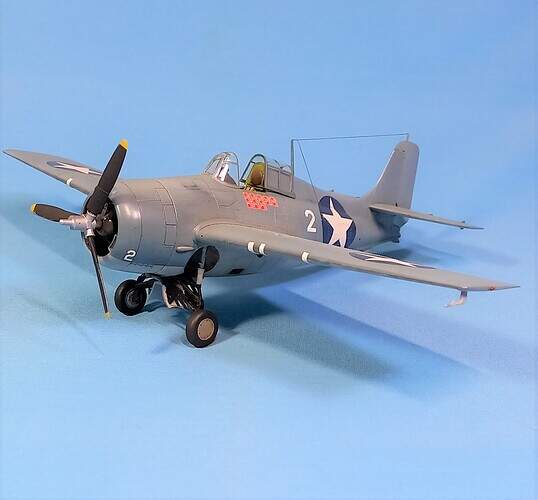
I originally wanted to model Joe Bauer’s Wildcat, but upon further research, turns out he flew a -3 and since I only have one and it’ll be O’Hare’s at the Coral Sea, I had to turn to someone that had a -4. So, I decided to do notable pilots from the beginning, and then end of the battle. With Joe Foss covered for the latter part of the battle, I thought about the beginning. This led me to an early hero pilot, Marion Carl.
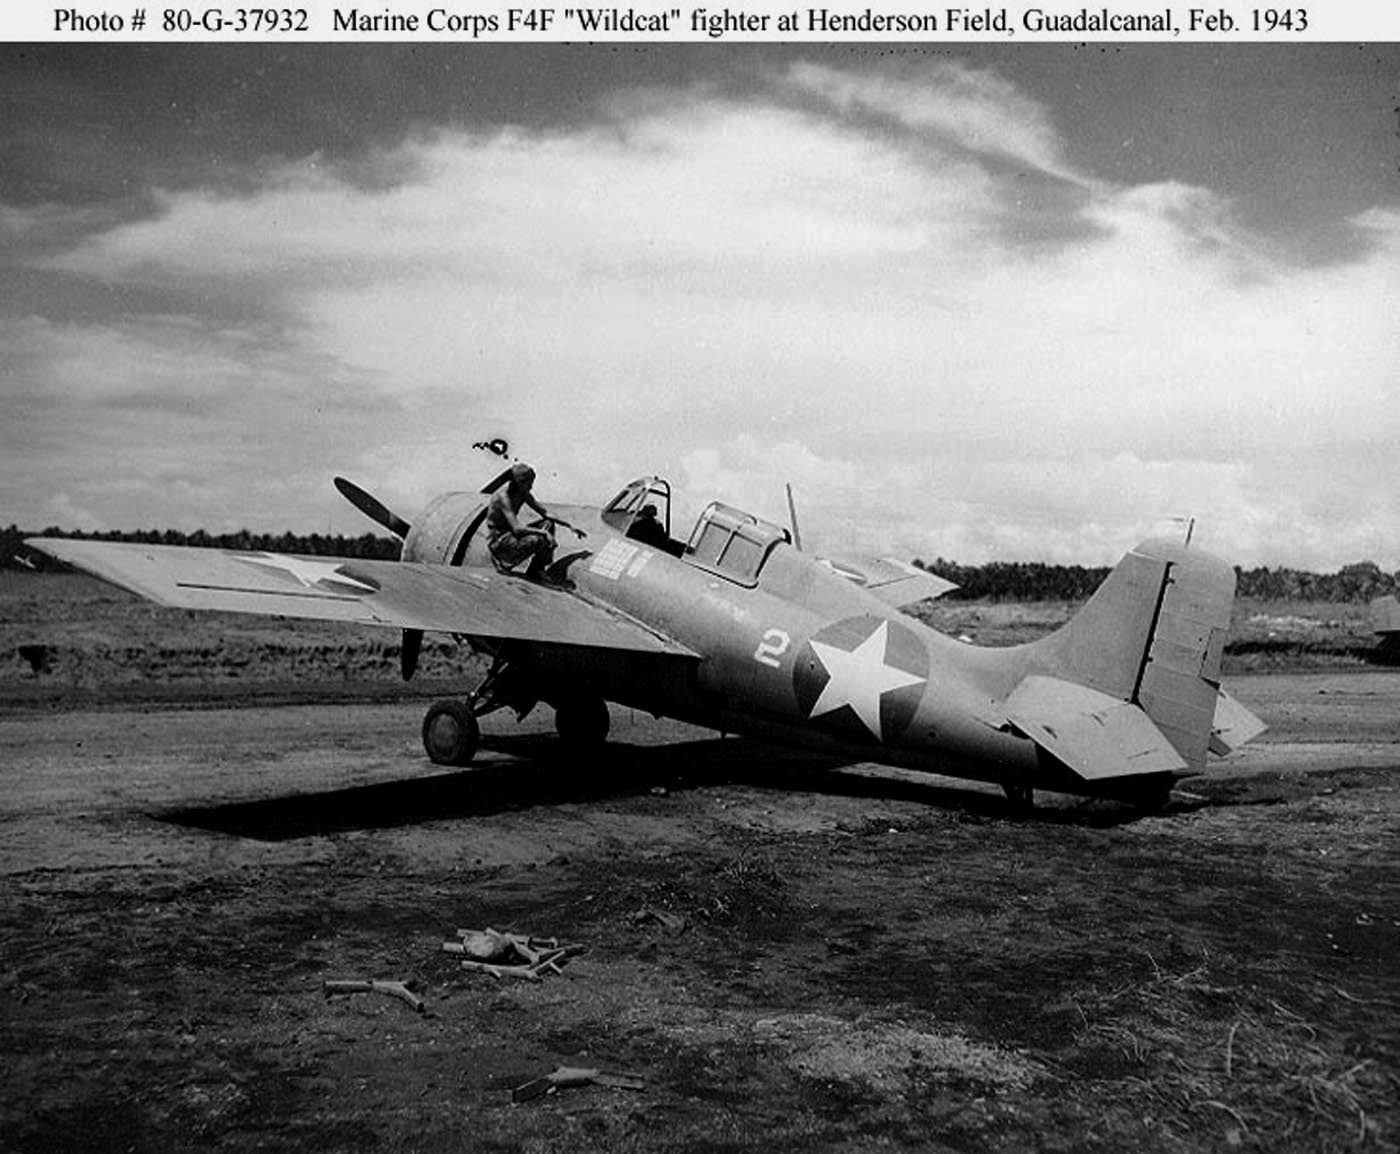
Carl resigned his commission in the Army so that he could become a naval aviator and was commissioned with the Marines in 1939, being assigned to VMF-1. He became a flight instructor for a year and then was assigned to VMF-221. After Pearl Harbor they meandered the Pacific aboard USS Saratoga, ultimately winding up on Midway. Six months later he survived the bloodbath his squadron received during the battle, despite downing one Zero. As a result, he was reassigned to VMF-223 and was part of the initial invasion on Guadalcanal on August 20, 1942. Over a two-month period Carl became the first ace of the Marines, and at the end of his tour was the second highest scoring American ace, he is also believed to have downed Japanese ace Junichi Sasai over Henderson Field. With 16.5 kills he gained celebrity status for a hero hungry press. So, the Marines arranged a photo-op for Carl using plane White 2, placing kill stickers on the side of the plane. Kill markings at this point in the war were a rarity as the pilot with a bunch of kill markings on the side of the plane became a magnet for any Japanese pilot that saw him.
I started the paint job with giving the bird a primer coat of Mr. Surfacer 1500 black.
A check of the seams found any issues resolved and I moved onto painting the underside in PTO grey, Tamiya XF-19 sky grey and white (two parts to one). Since this would be a heavily worn plane I based the panels with a white motteling and then using a 1:4 dilution of the grey started to apply the underside.
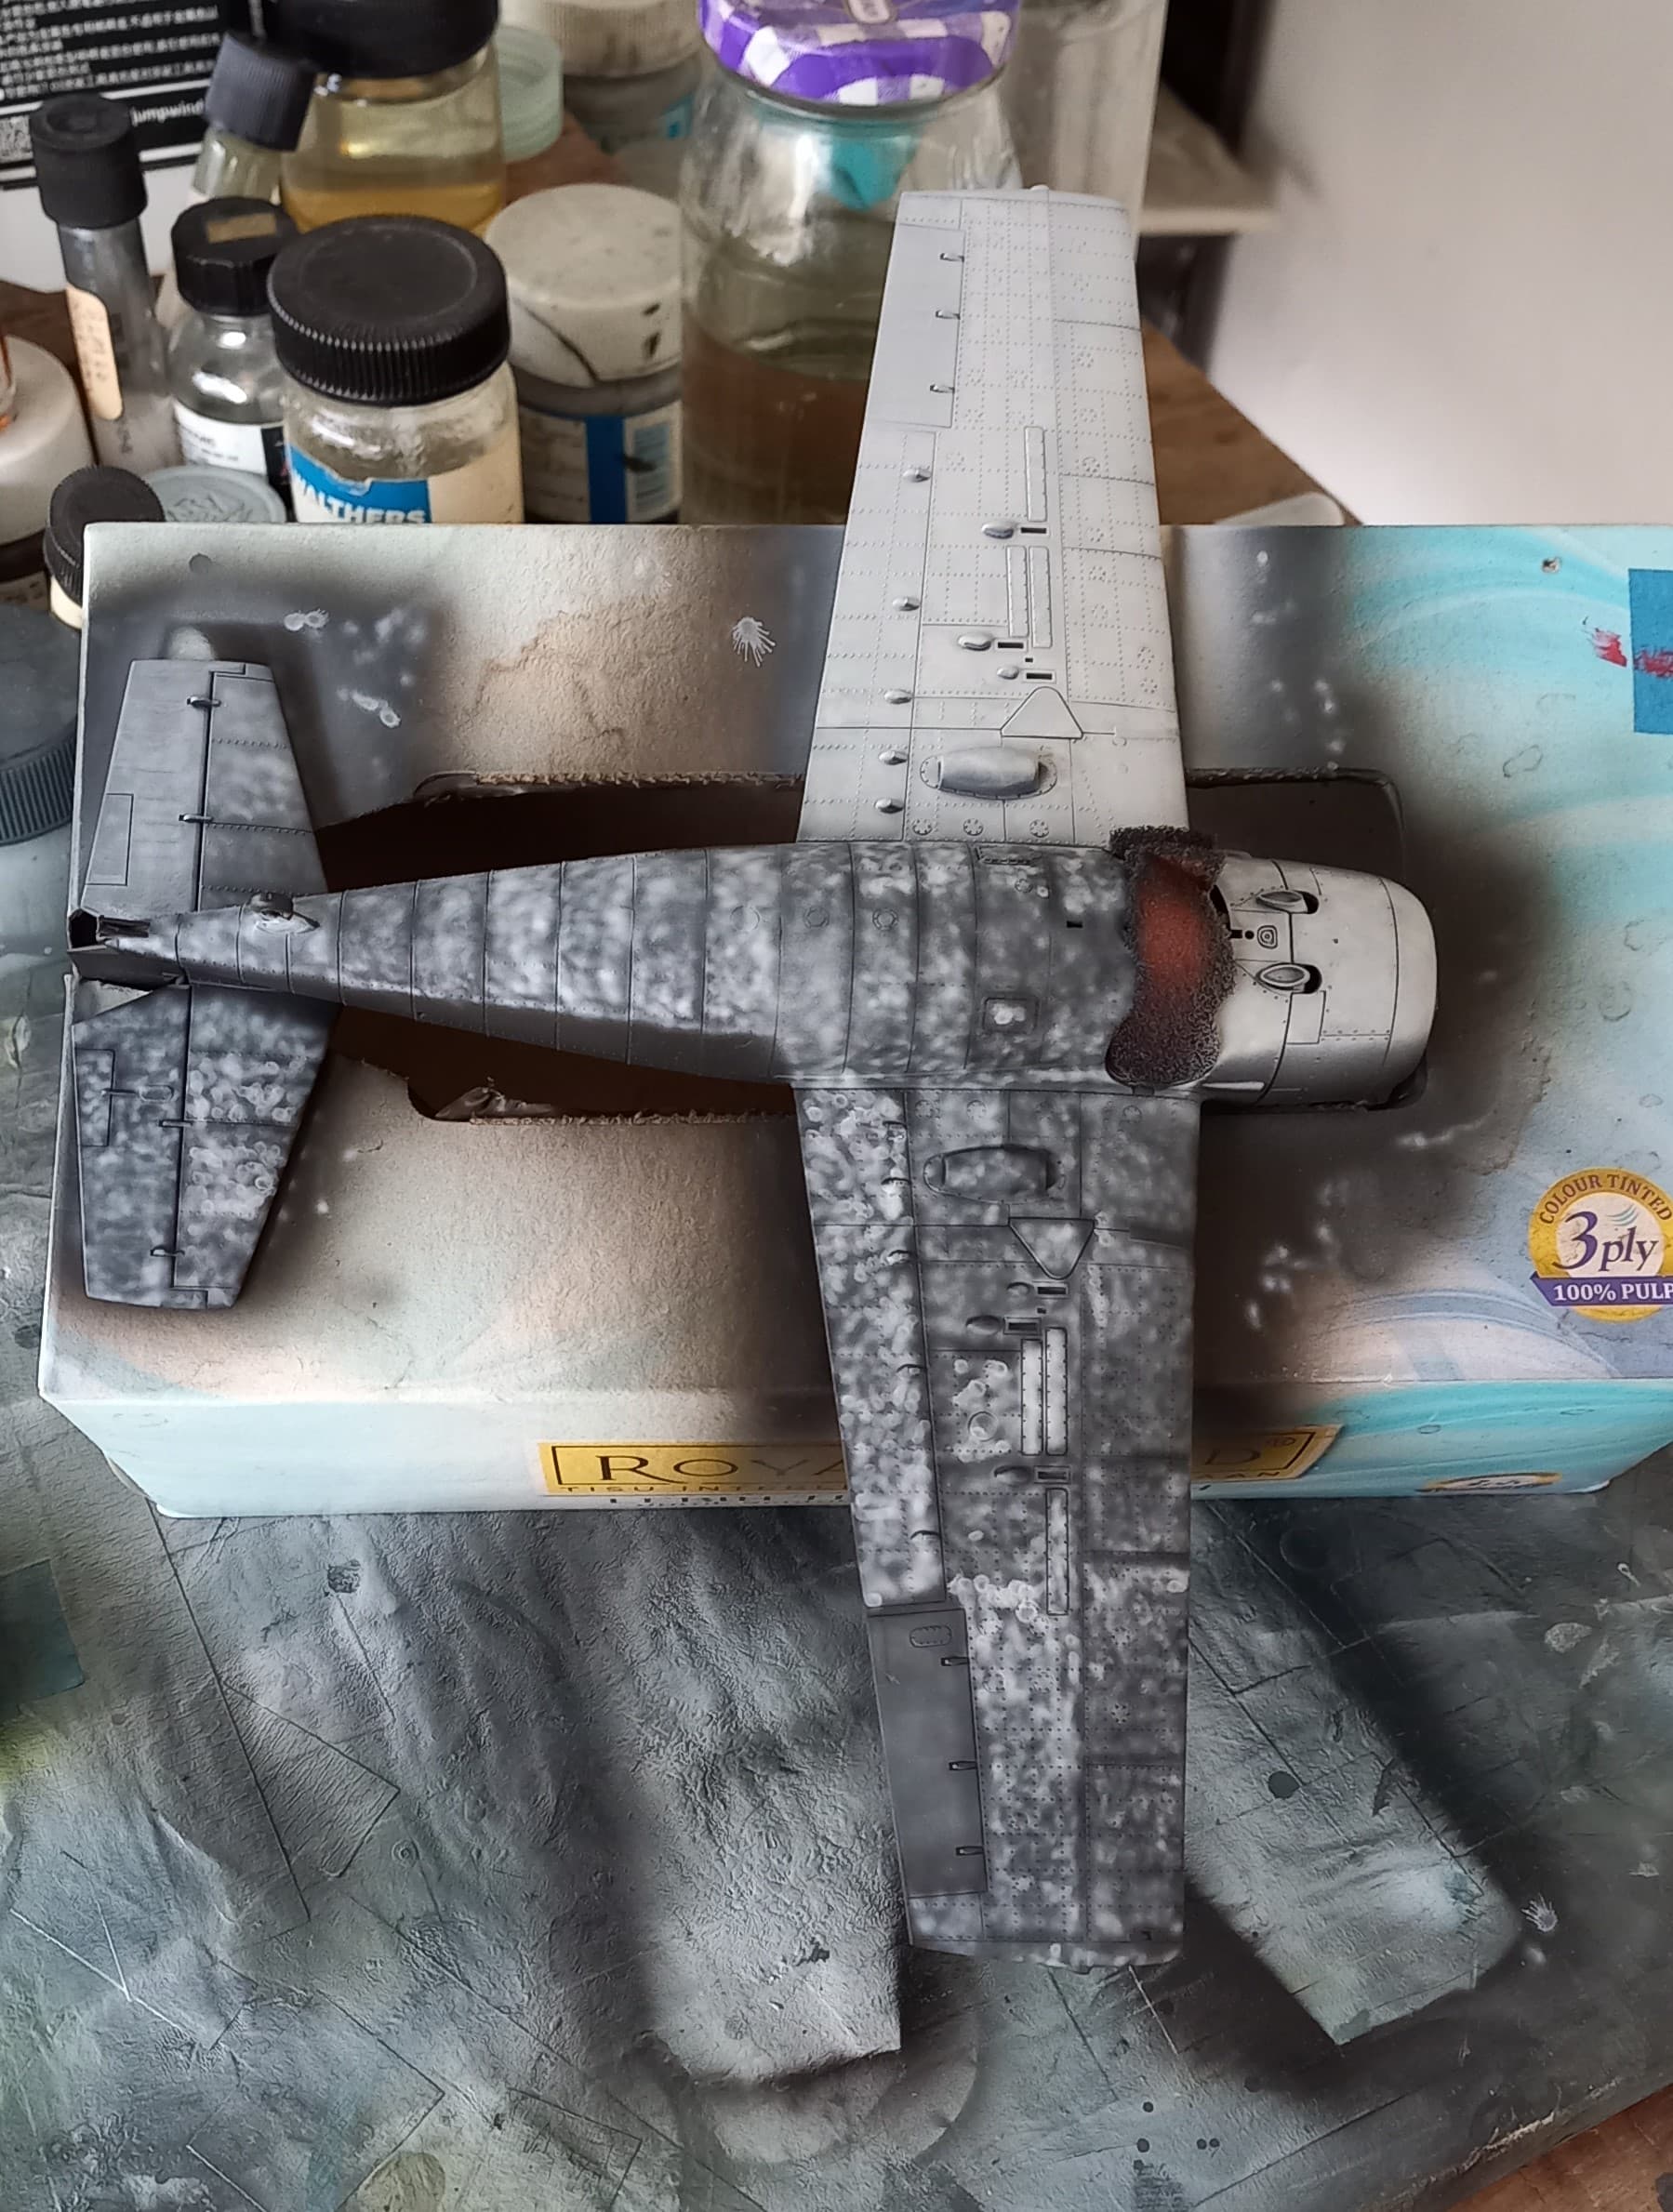
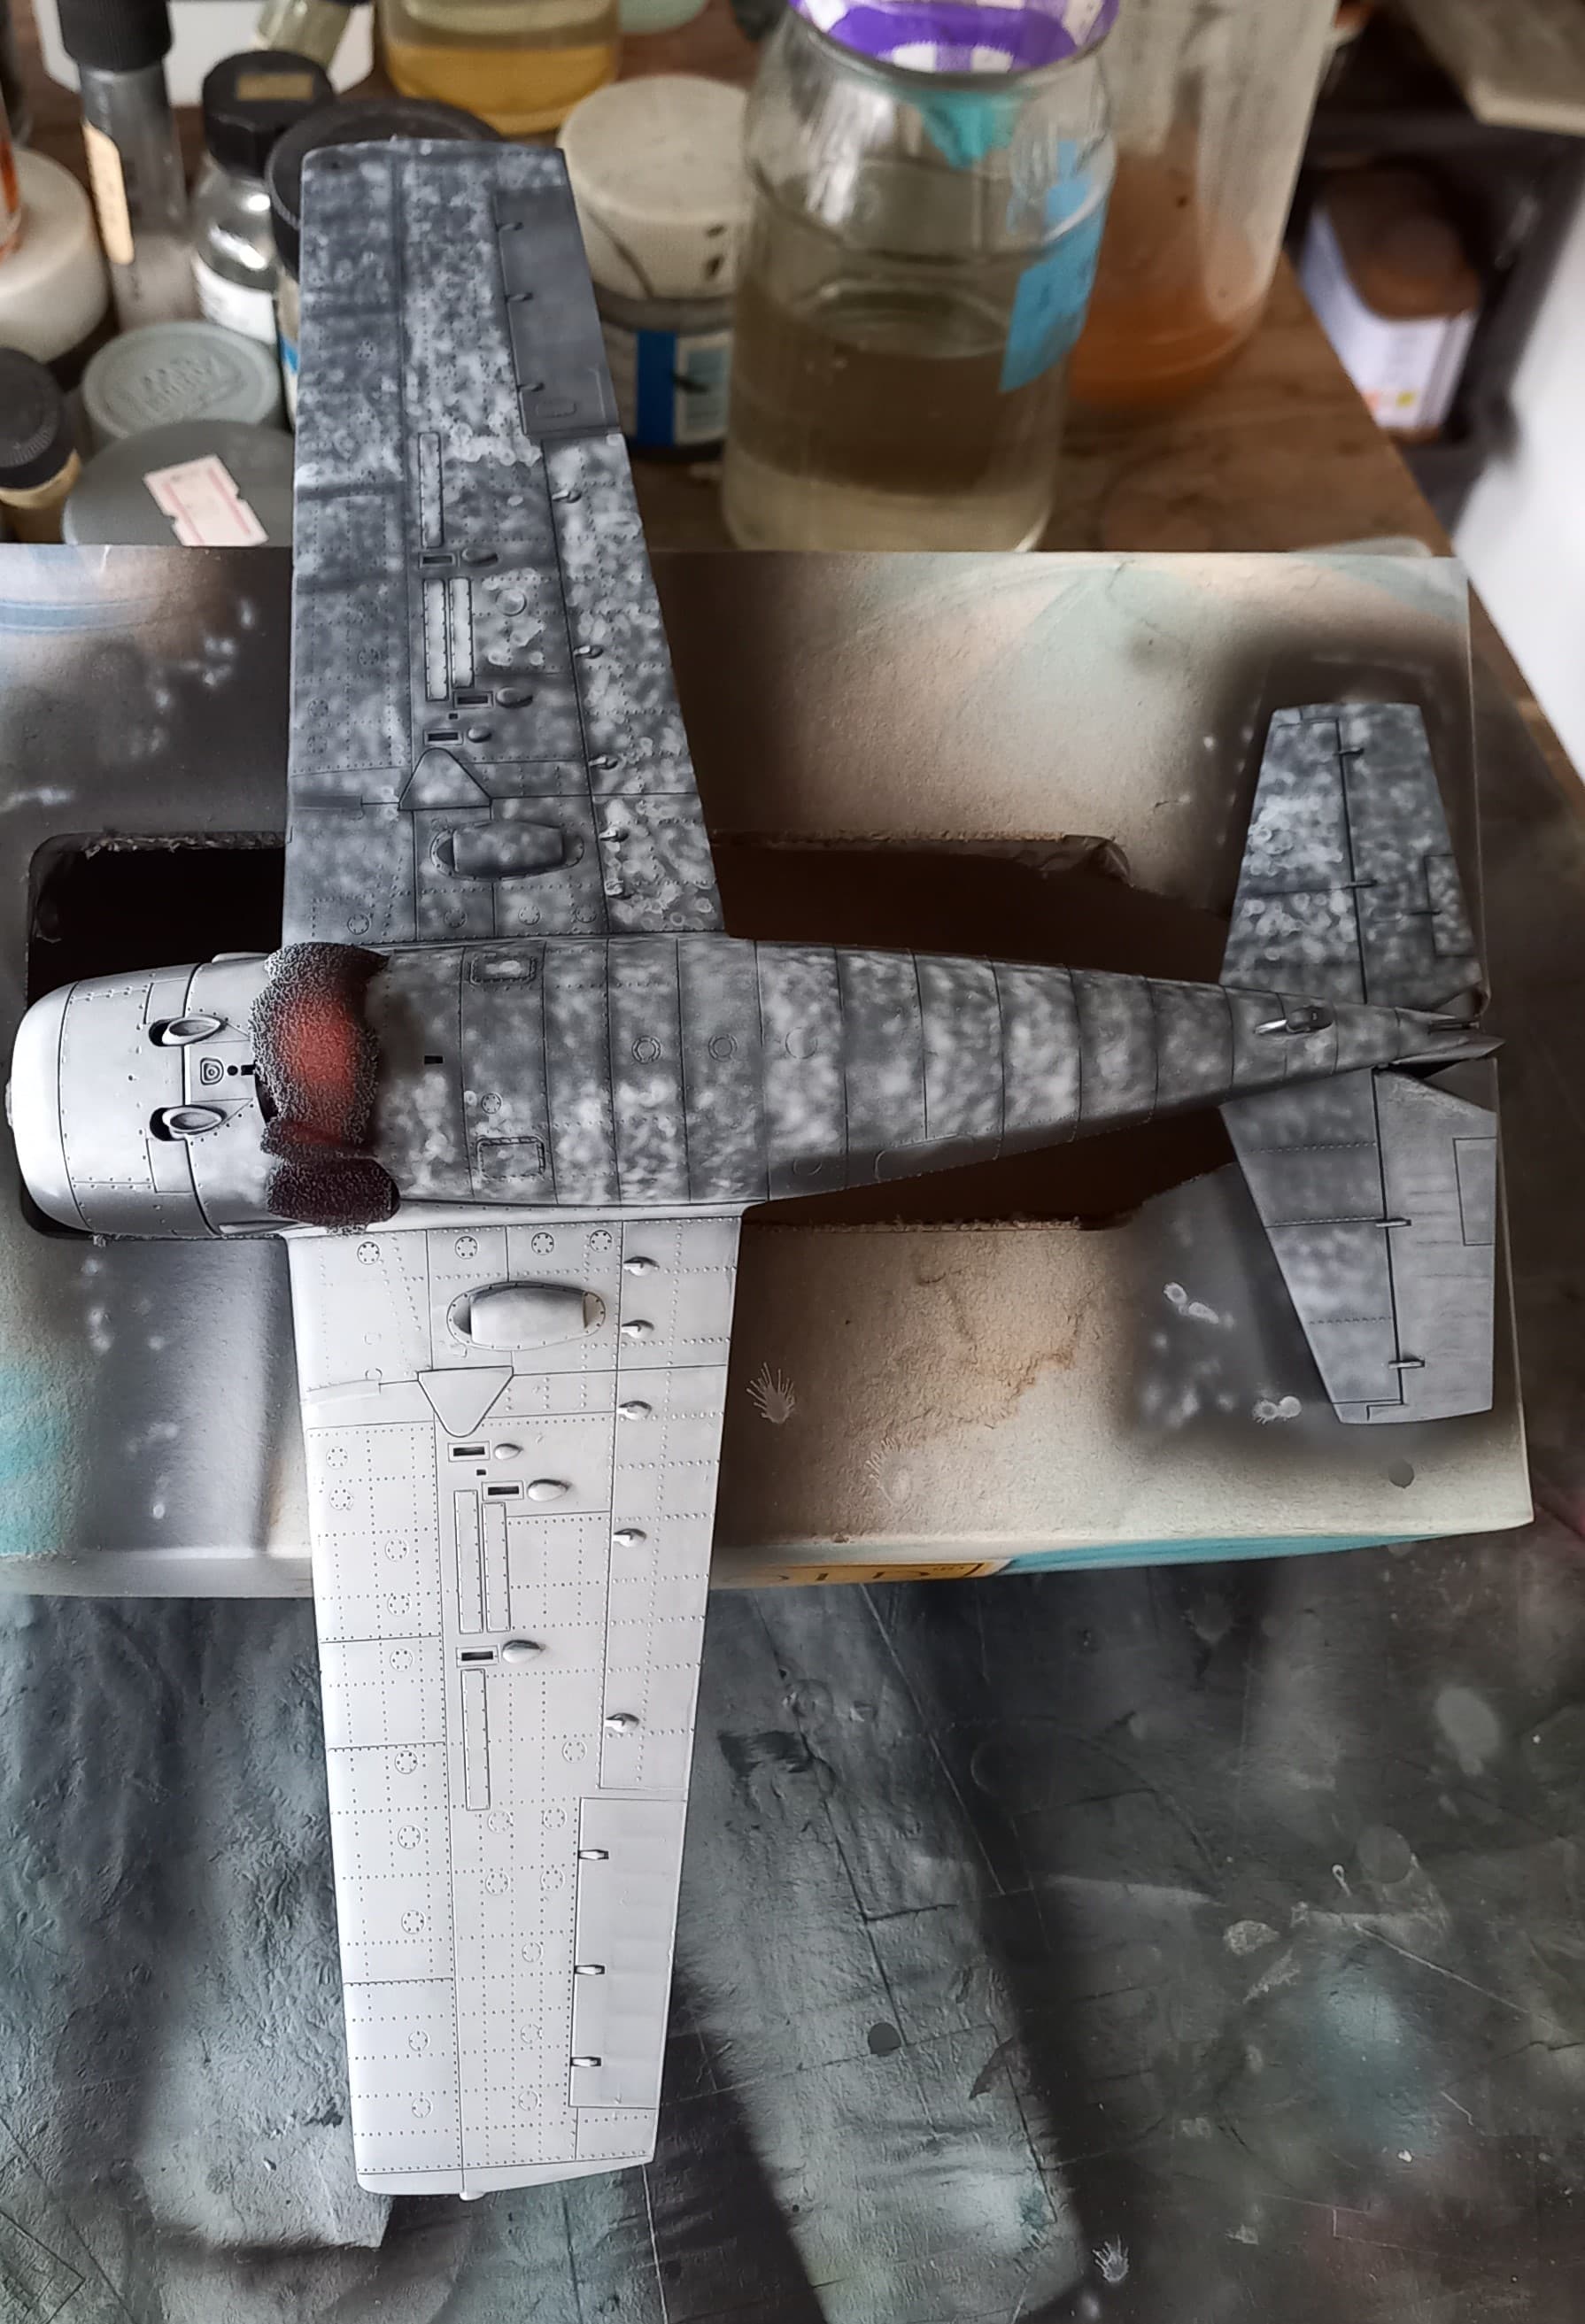
Using masking tape, the bottom was taped noting the area for demarcation between the two colors. Then it was onto adding a lot of diluted white in a mottled pattern over the upper side, with attention to the control surfaces being an even lighter shade of the blue/grey upper color.
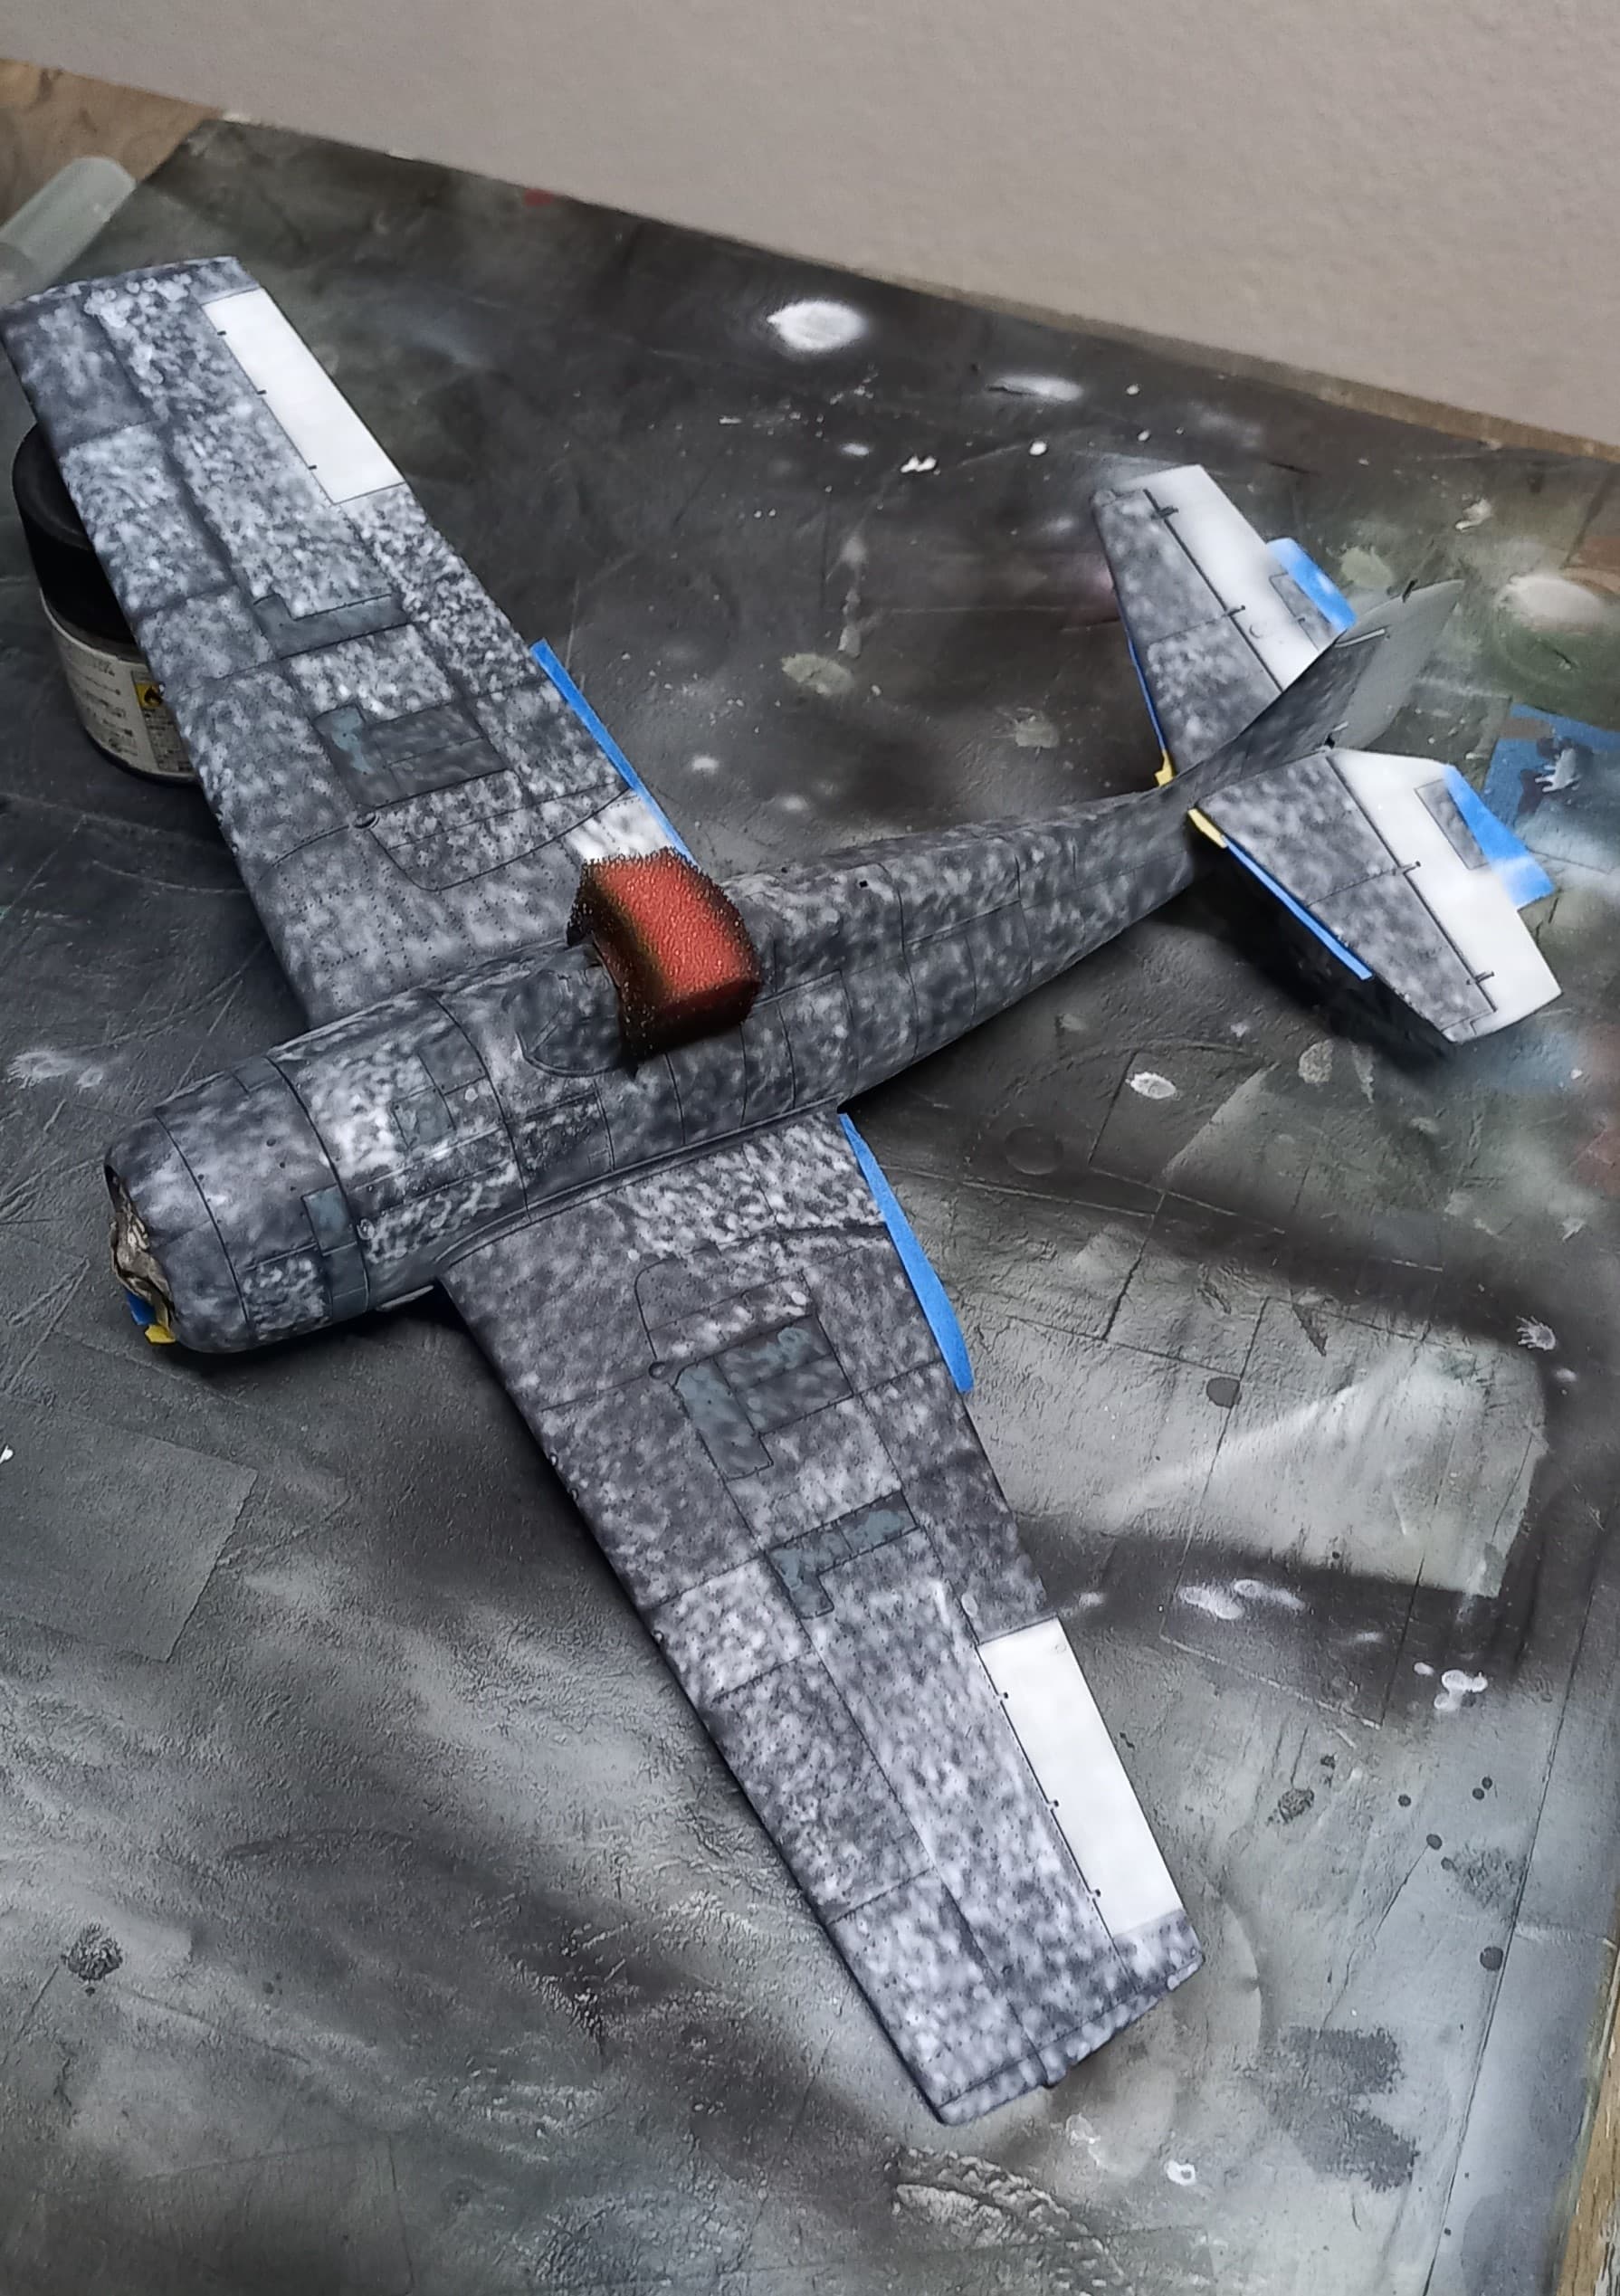
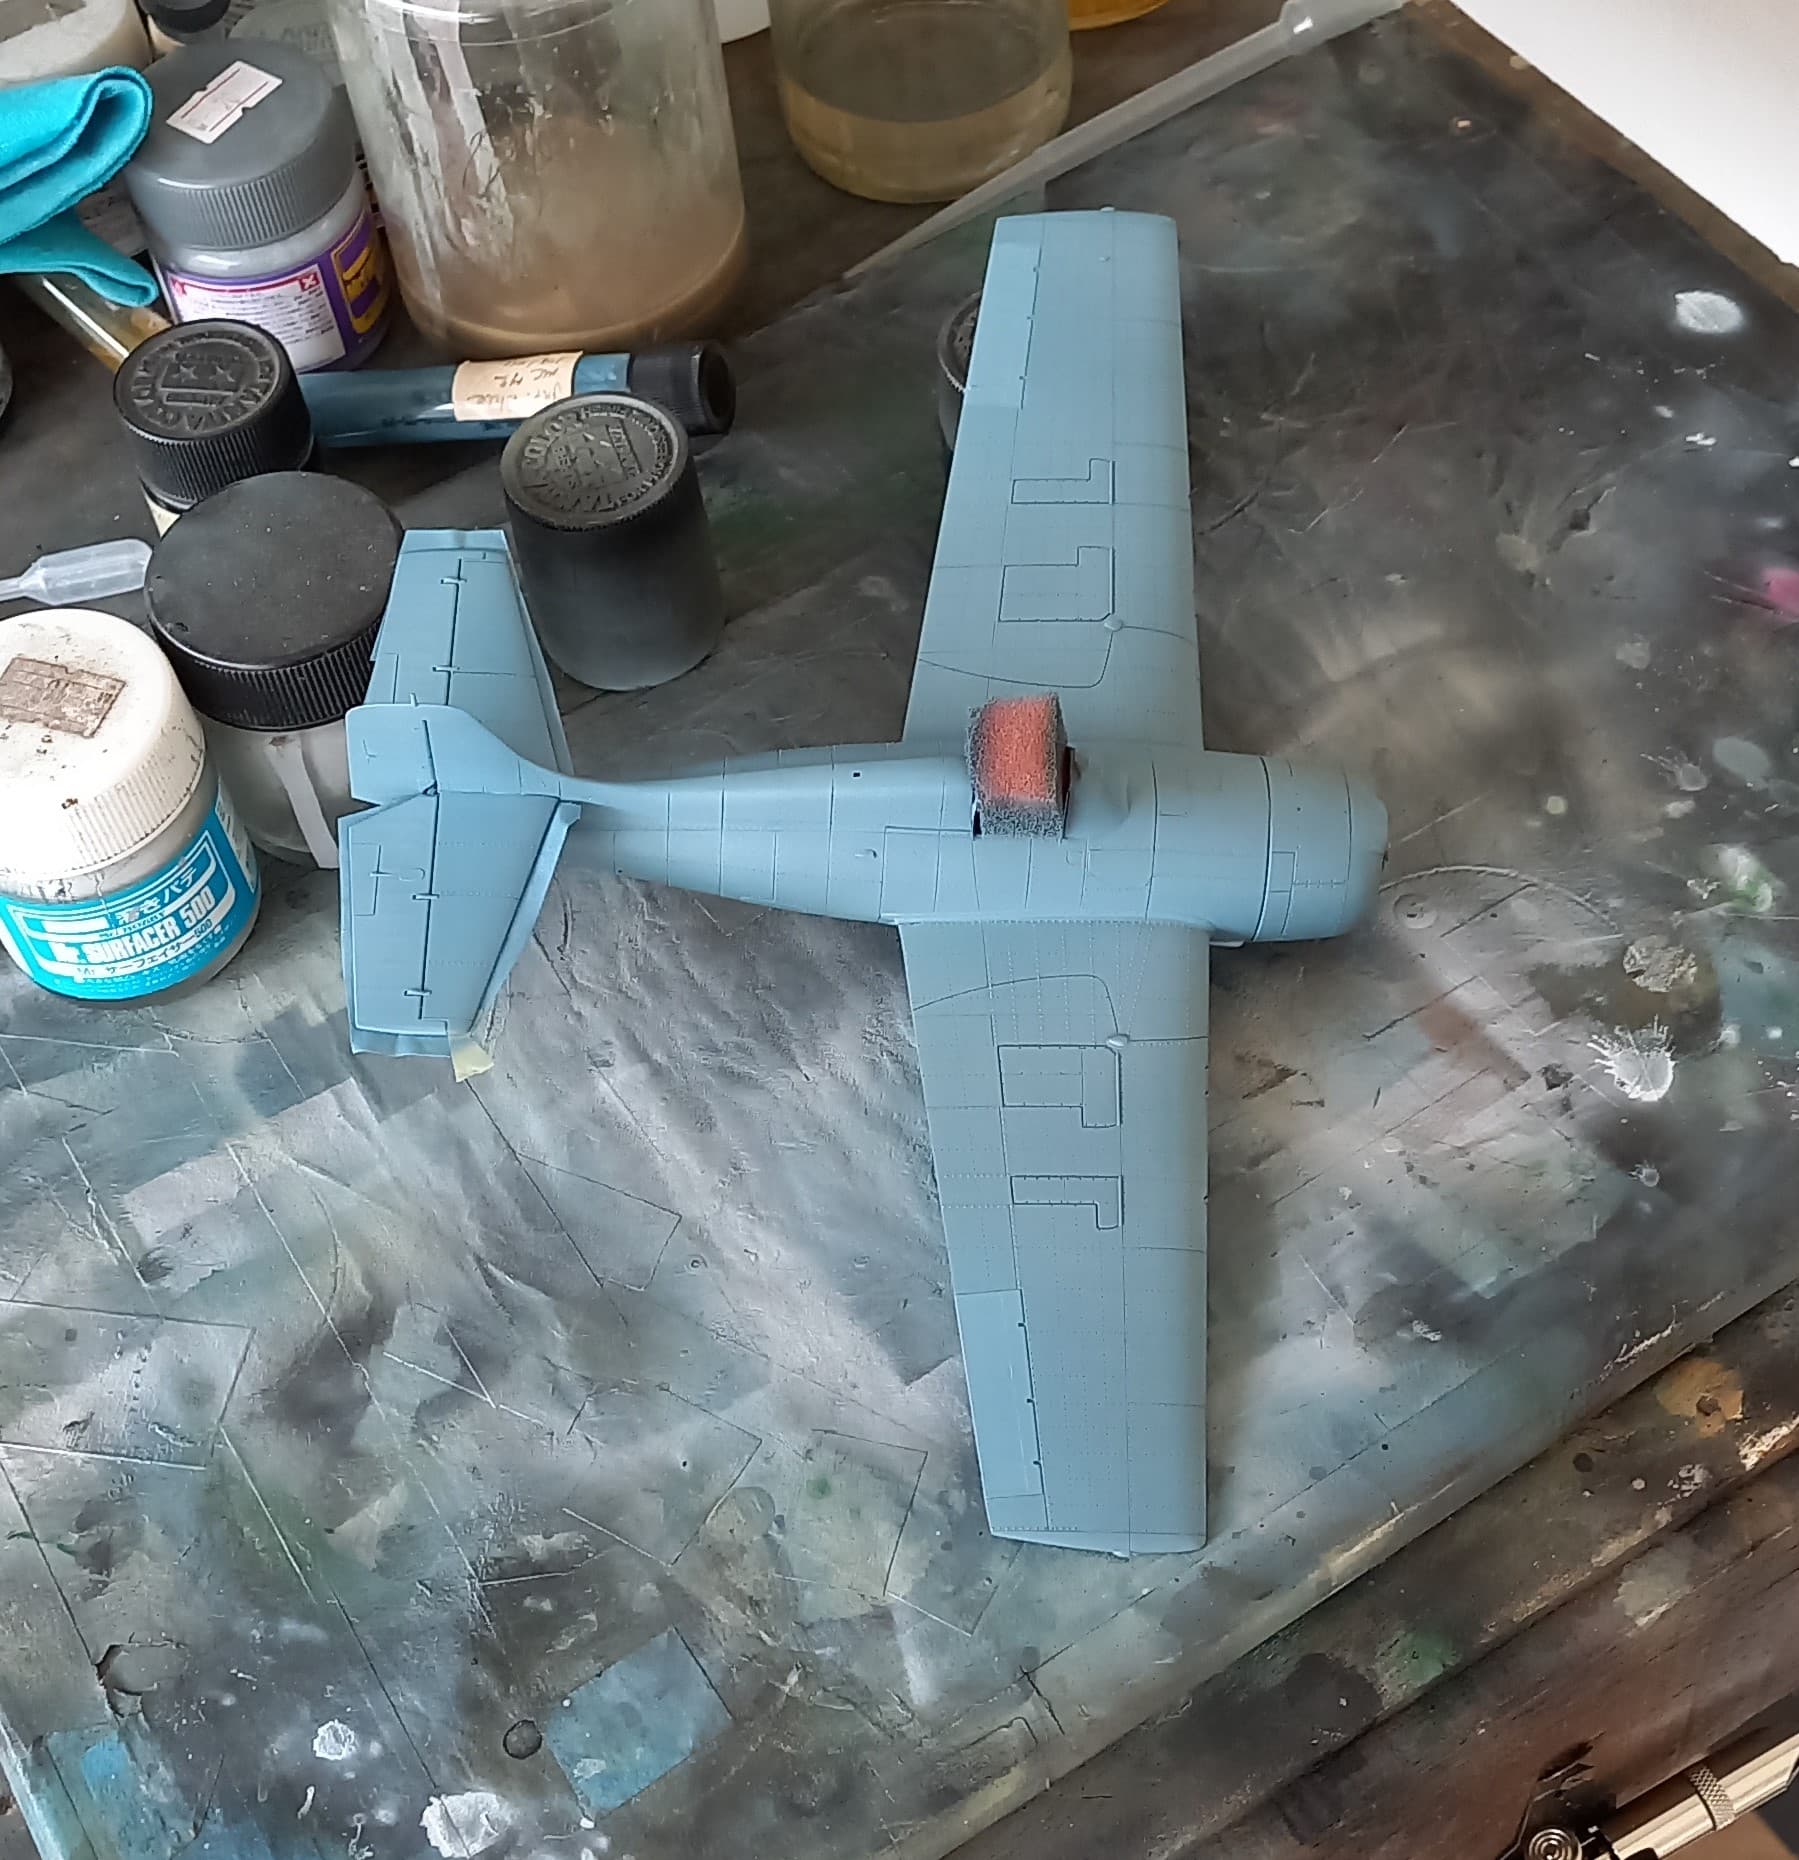
I then applied the blue/grey (Tamiya medium blue plus white 2:3, diluted 1:4).

While it looked kind of cool, it was way too blue for this project, having already anticipated this I then applied a dusting of dilute white (1:10 of a 1:4 dilution, Mrs. Lenz was right about needing math beyond the 3rd grade!).
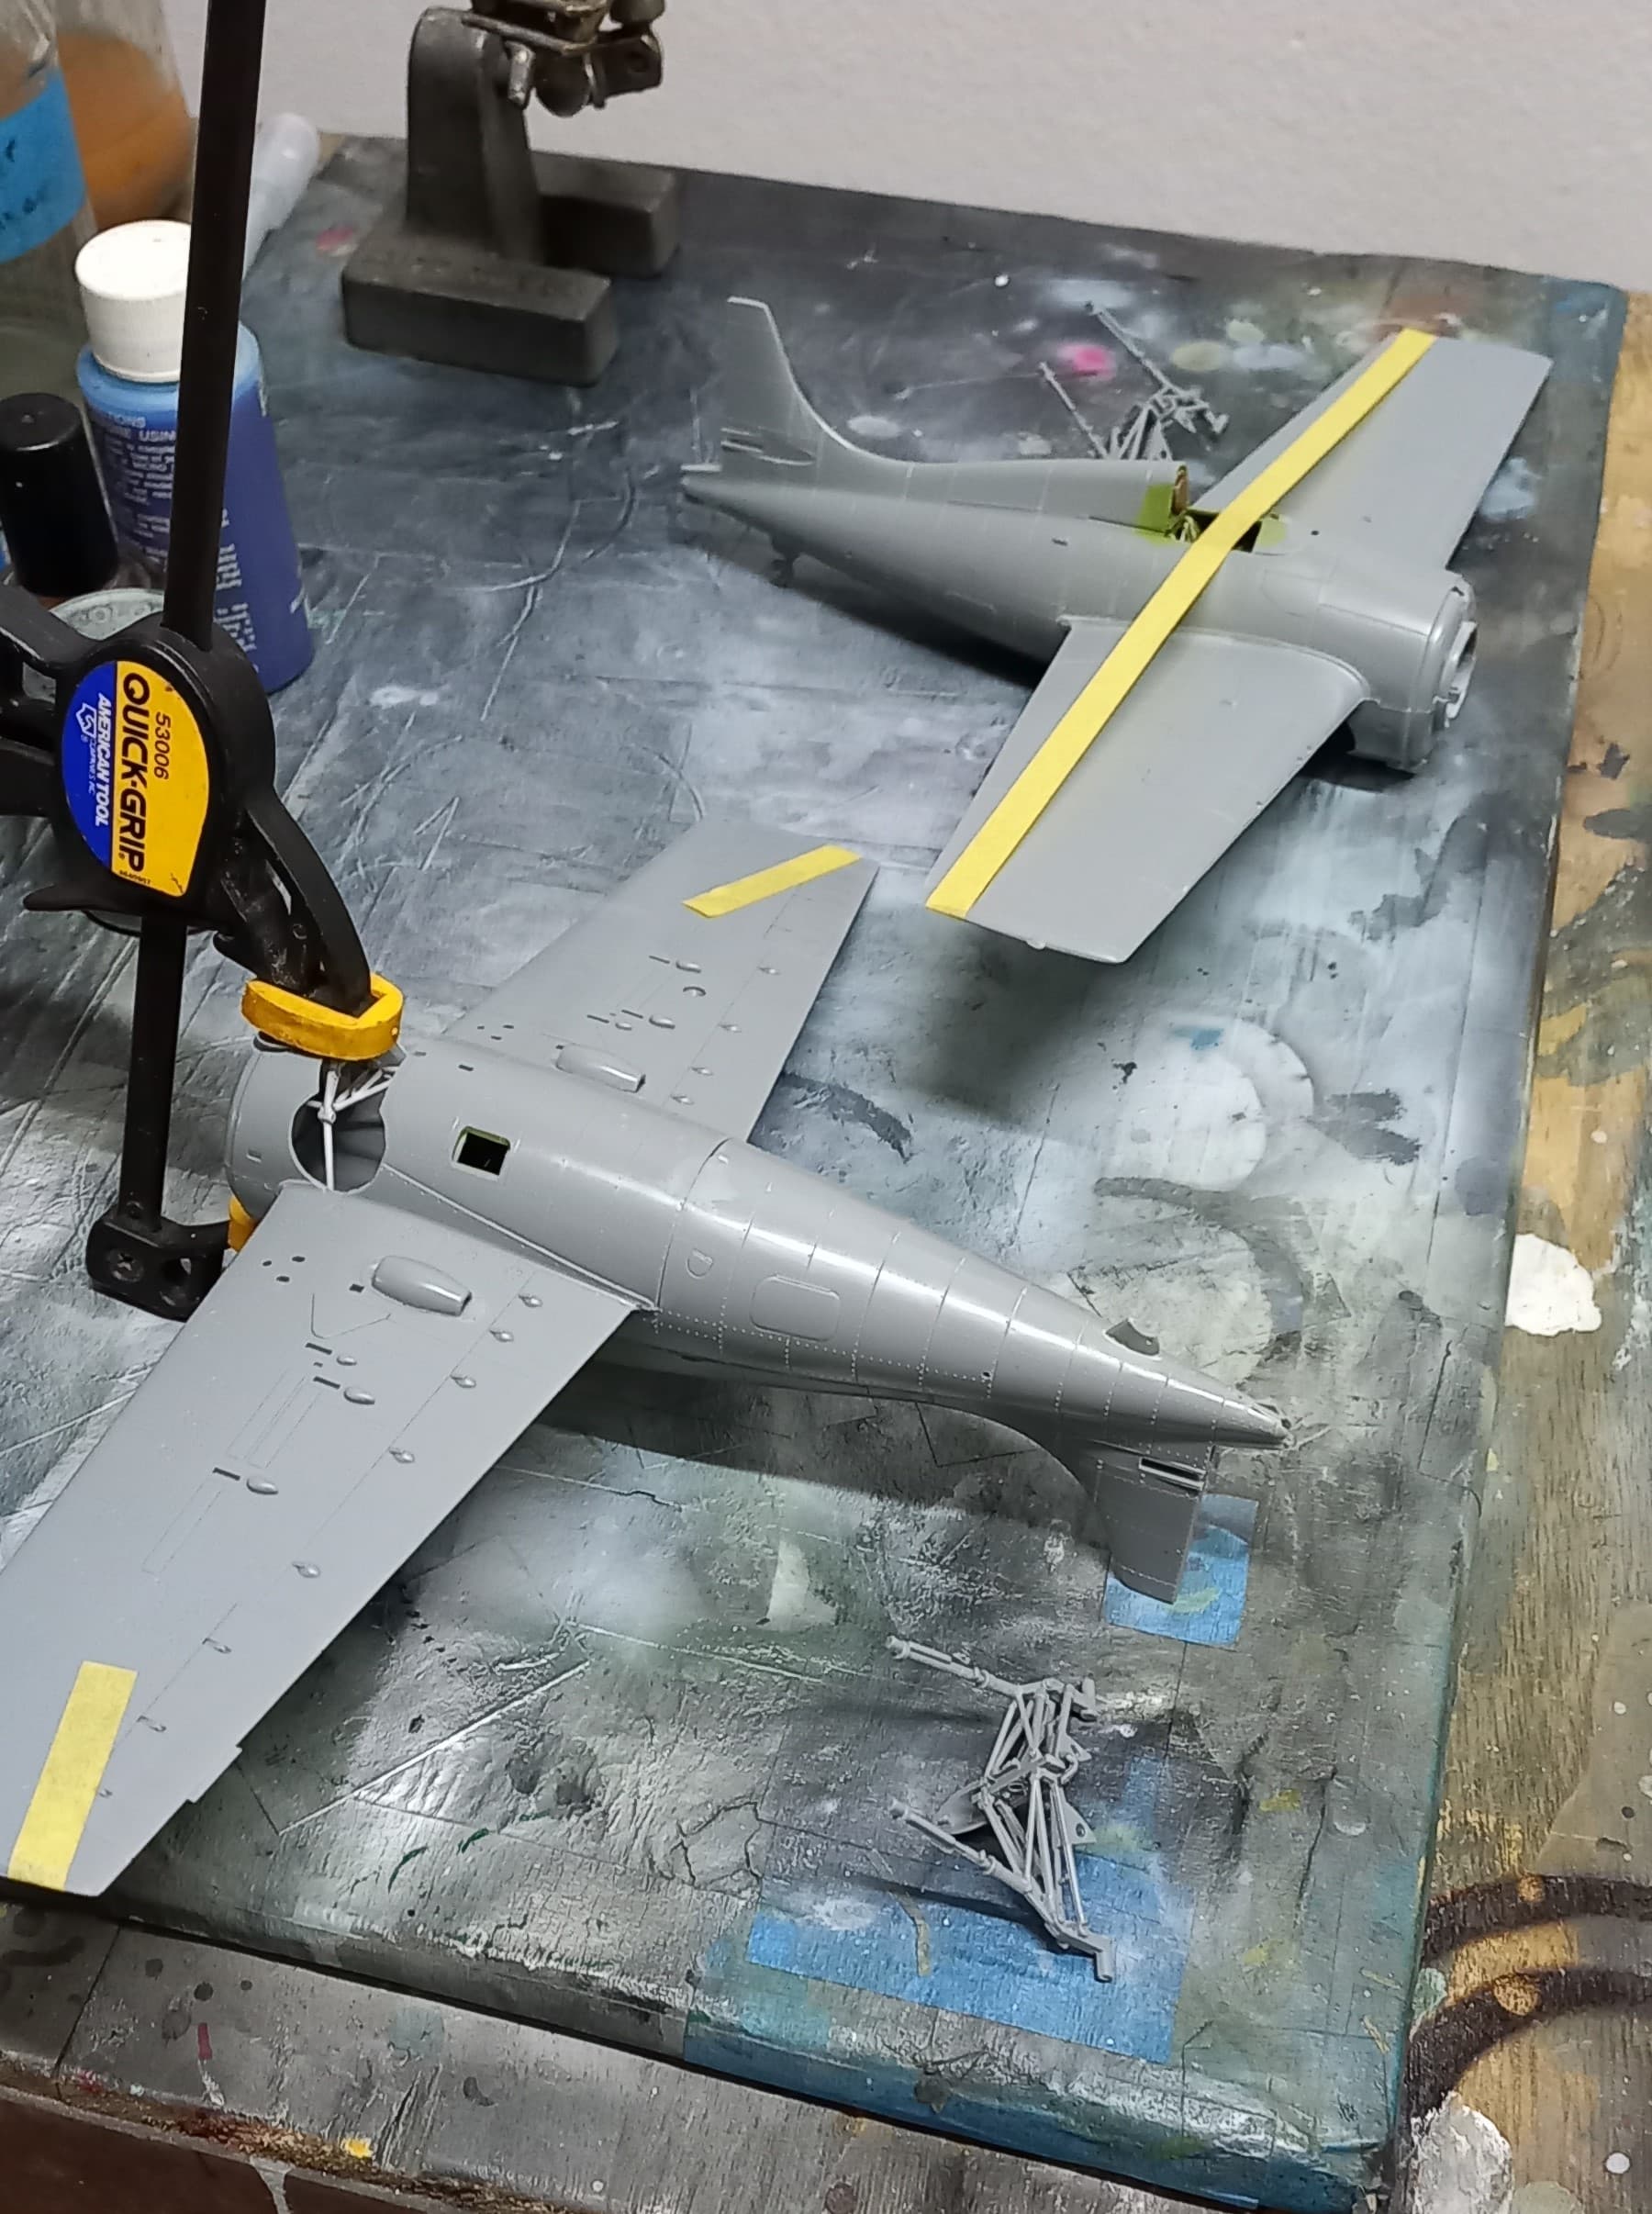
Satisfied, I gave the bird three clear coats of Future that were brushed straight onto the model. I then gathered a hodgepodge of decals from the dungeon, with kill markings from Fantasy Printshop.
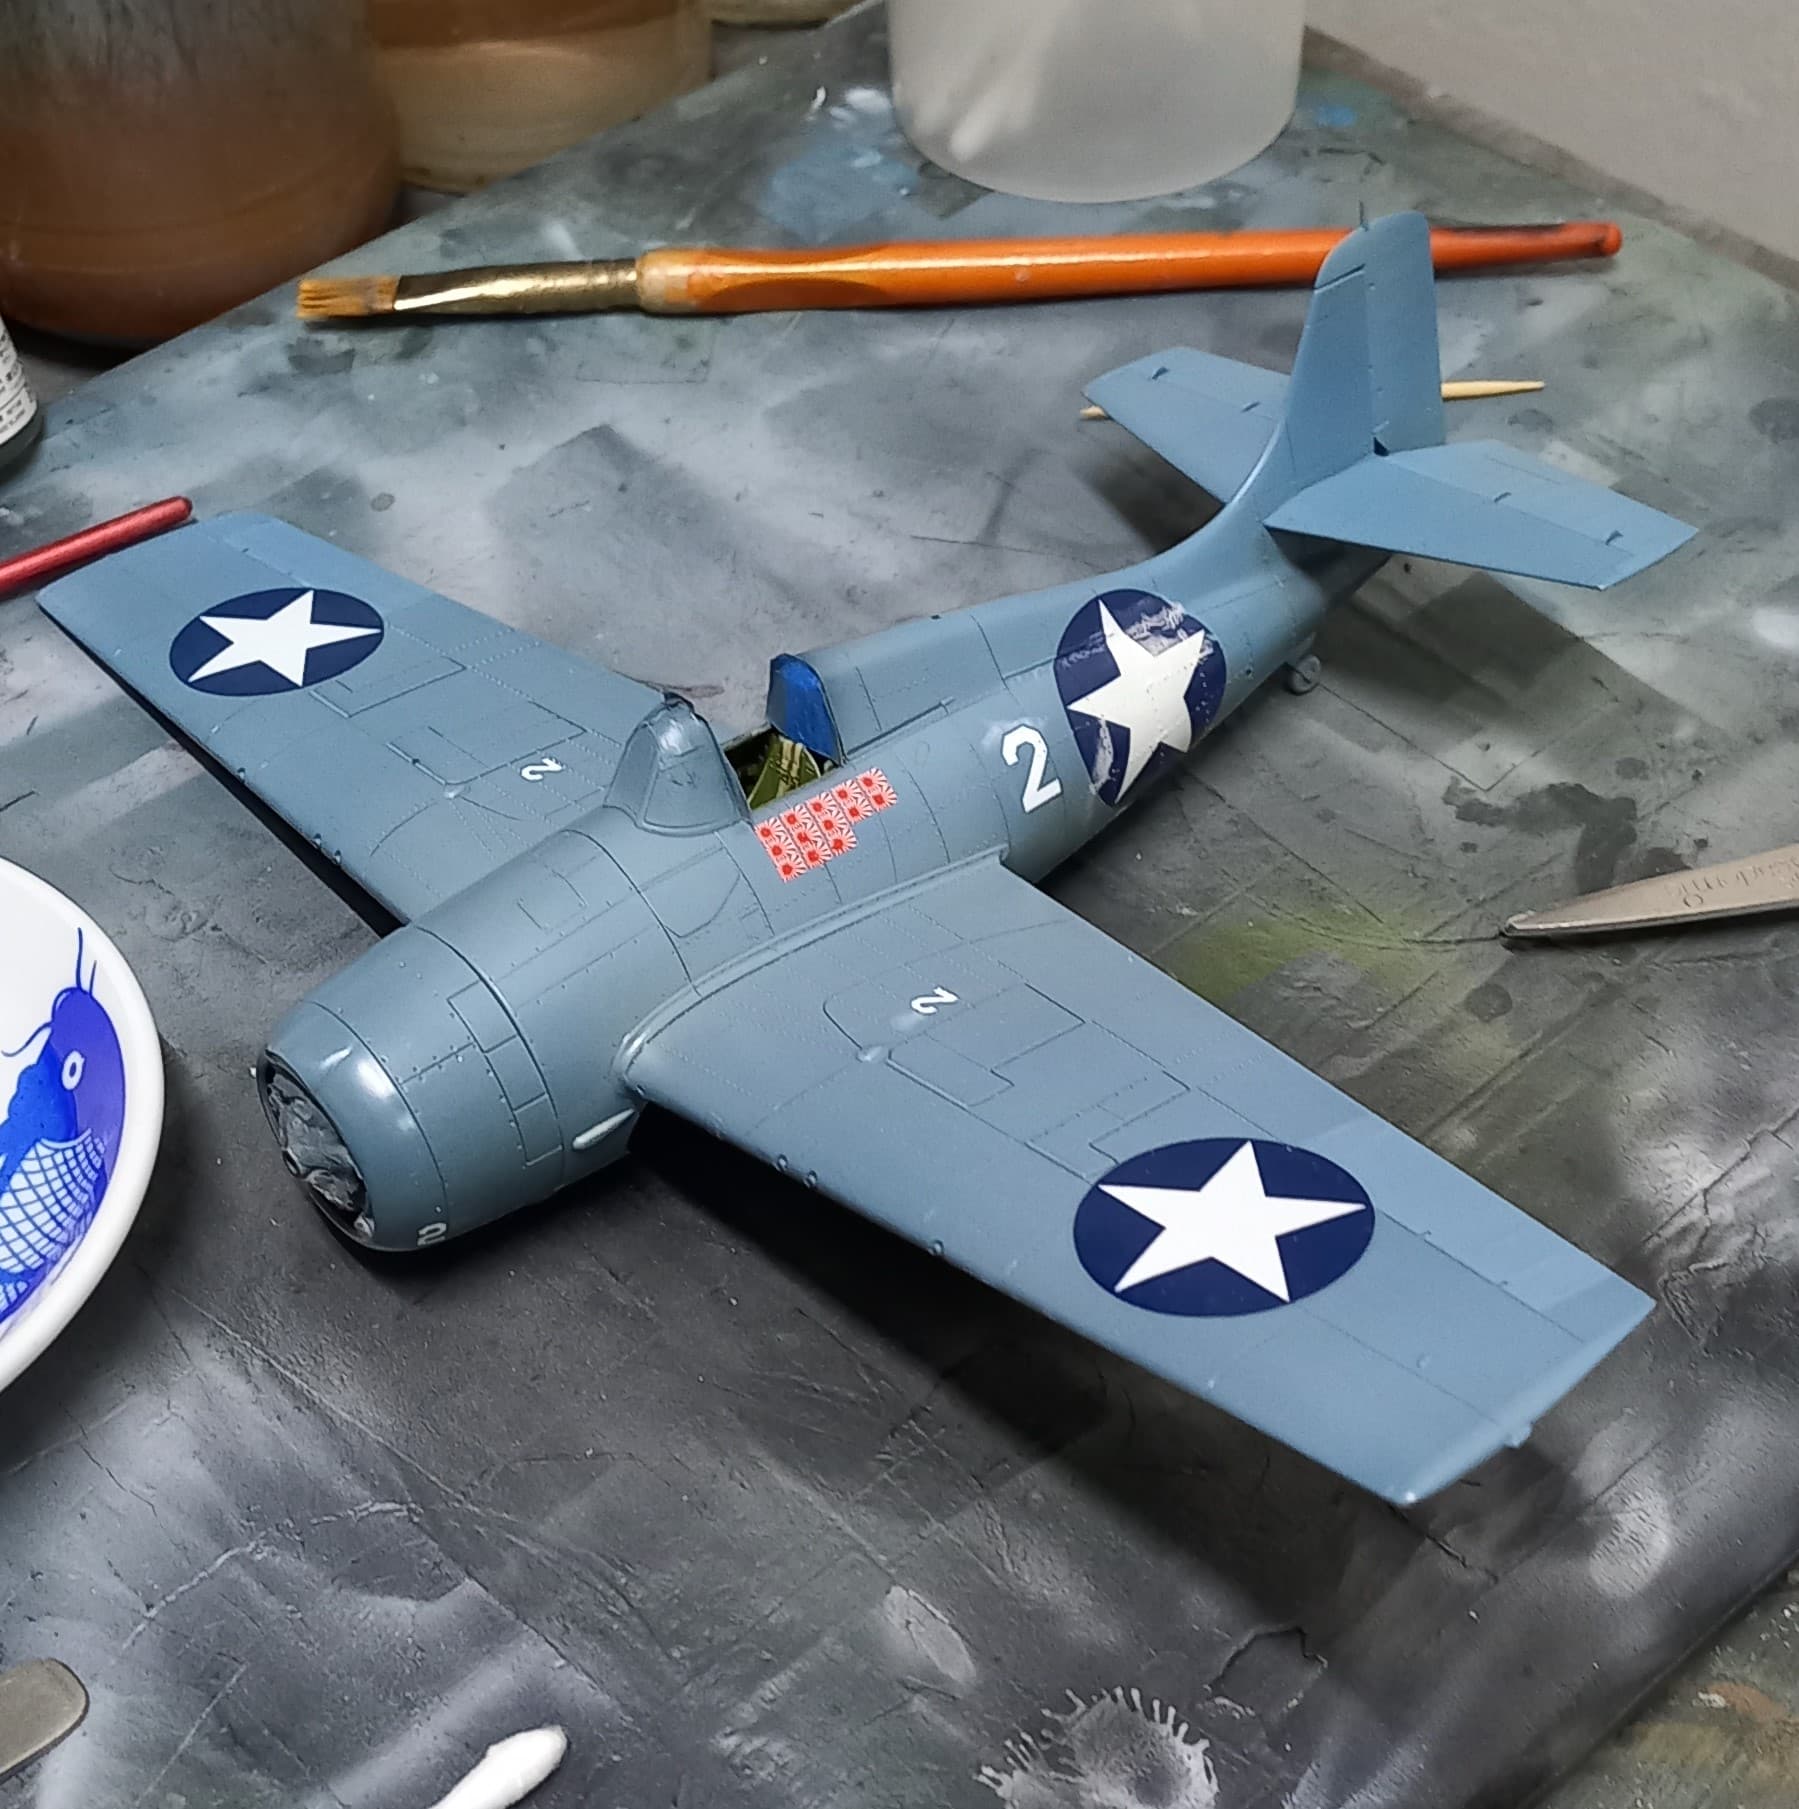
I brushed three coats of Future onto the bird to seal the decals, added the landing gear and then set about doing some weathering using burnt umber oils and silver Prisma pencil. I’m pretty sure I underdid the weathering, but I’m happy with the outcome. I finished the build by adding the antenna and rigged it with EZ-line. And here it is!
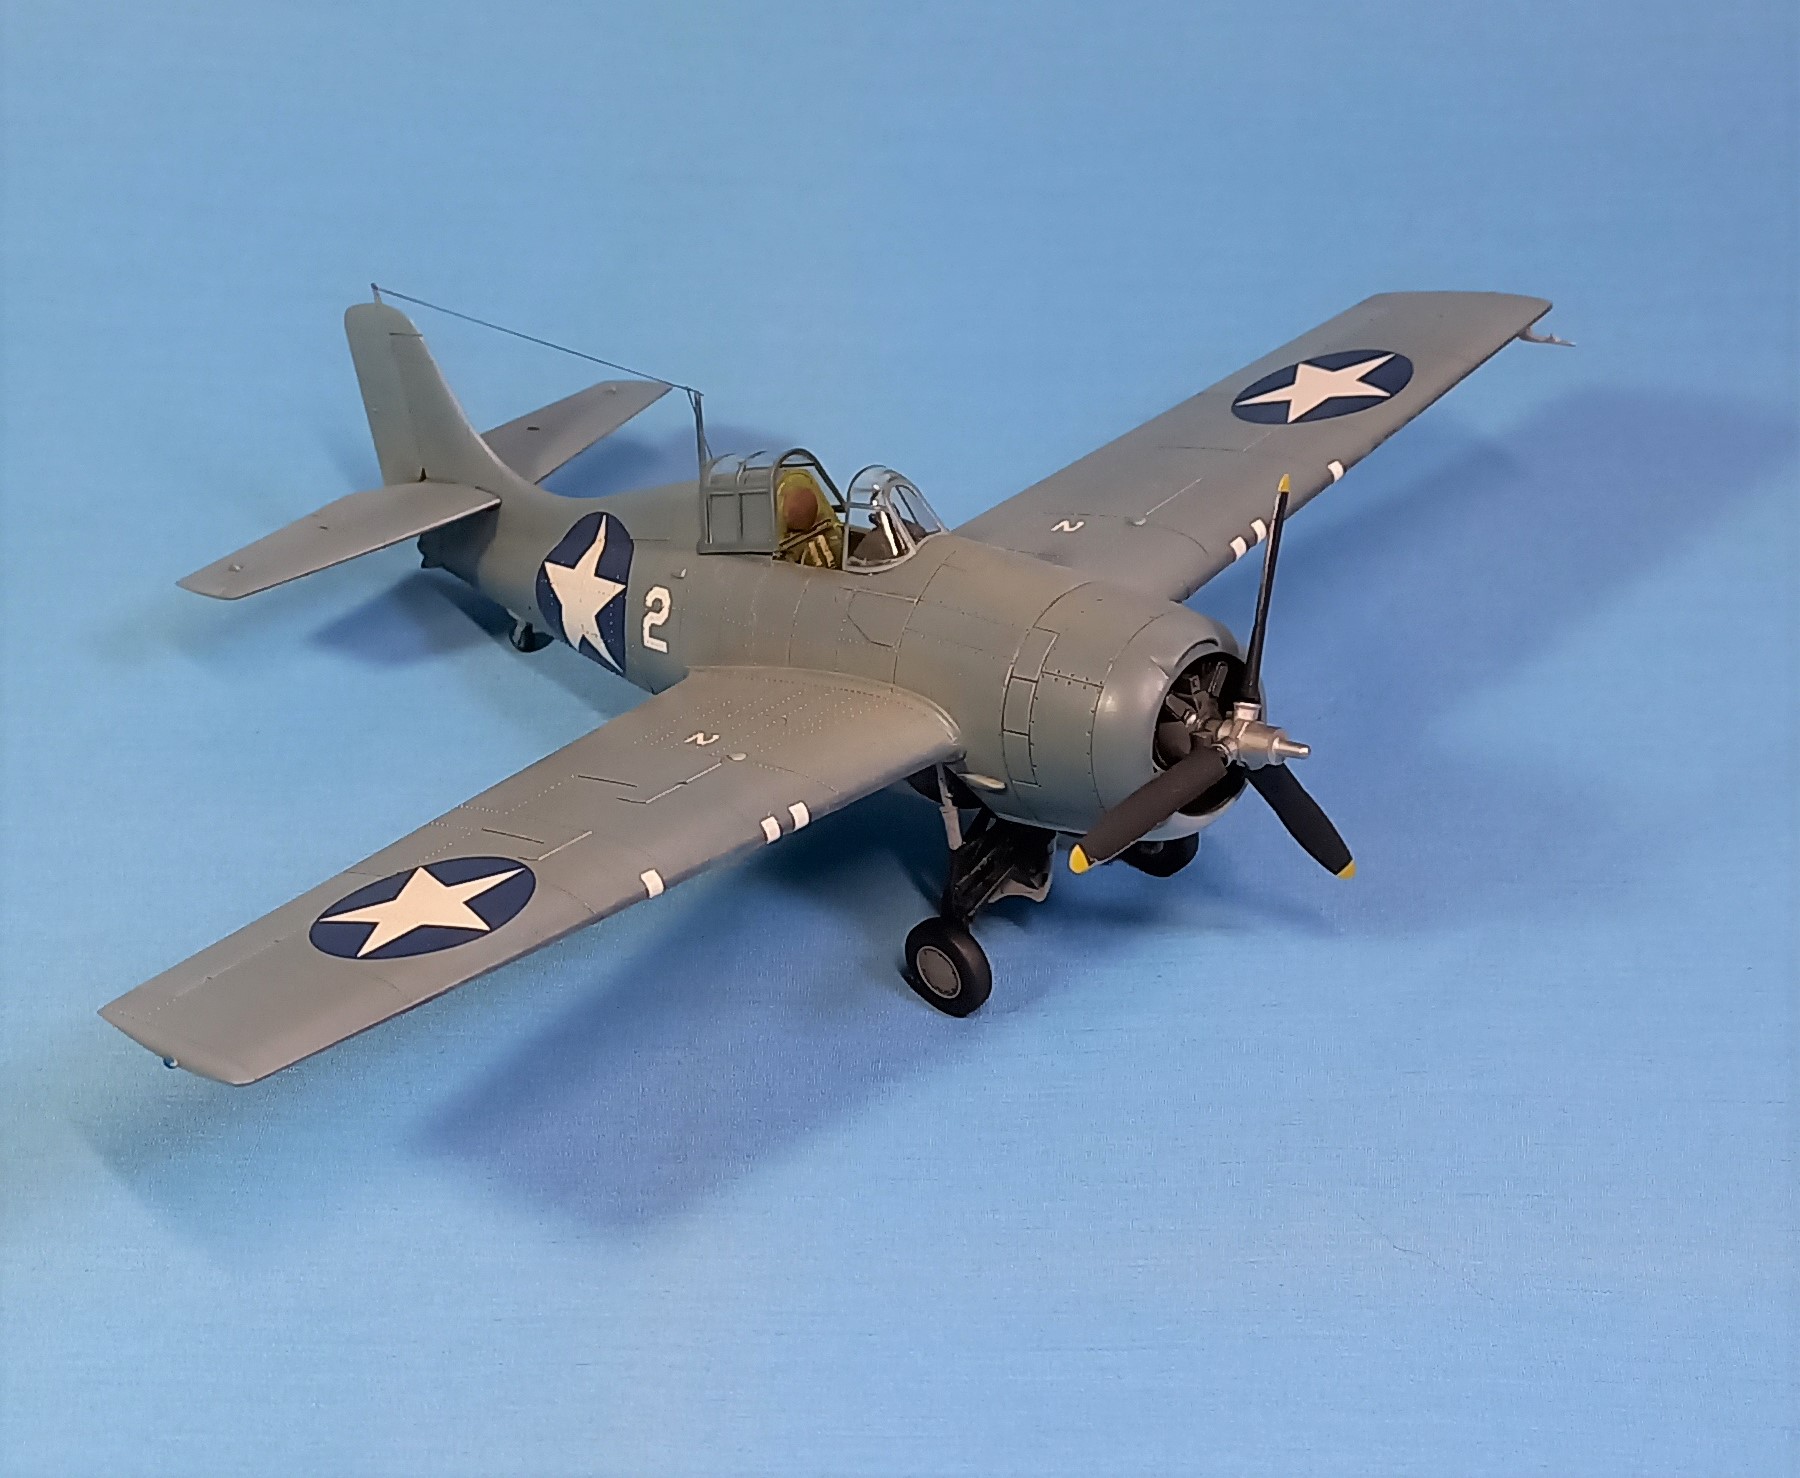


The Tamiya kit is great kit despite its age, and accurate when the floorboard is cut to allow the pilot to look down through the bottom windows.

Overall, I’m pleased with the outcome of this build, and would recommend the kit any modeler.
7 Likes
Fantastic paint and finish on it. I really enjoyed doing the Arma Joe Foss one, cool little aircraft that seem to of happily held their own in the dog fights ![]()
2 Likes
Hi Everyone,
John, thank you, and yes the stubby little flying barrel did quite well once the pilots were able to assess the weakness and offset them with the strengths.
So, we’re one week away from ending this one, unless anyone is looking to extend this through the “mop up” period. I’ll be getting my Joe Foss finished and posted and start compiling the list. Please let me know.
Keep having fun out there!
1 Like
Still working on my submision for the “IDF 75 Campaign”; however, I might jump into this one:
My possible submission would a US Marine M3 Stuart Light Tank.
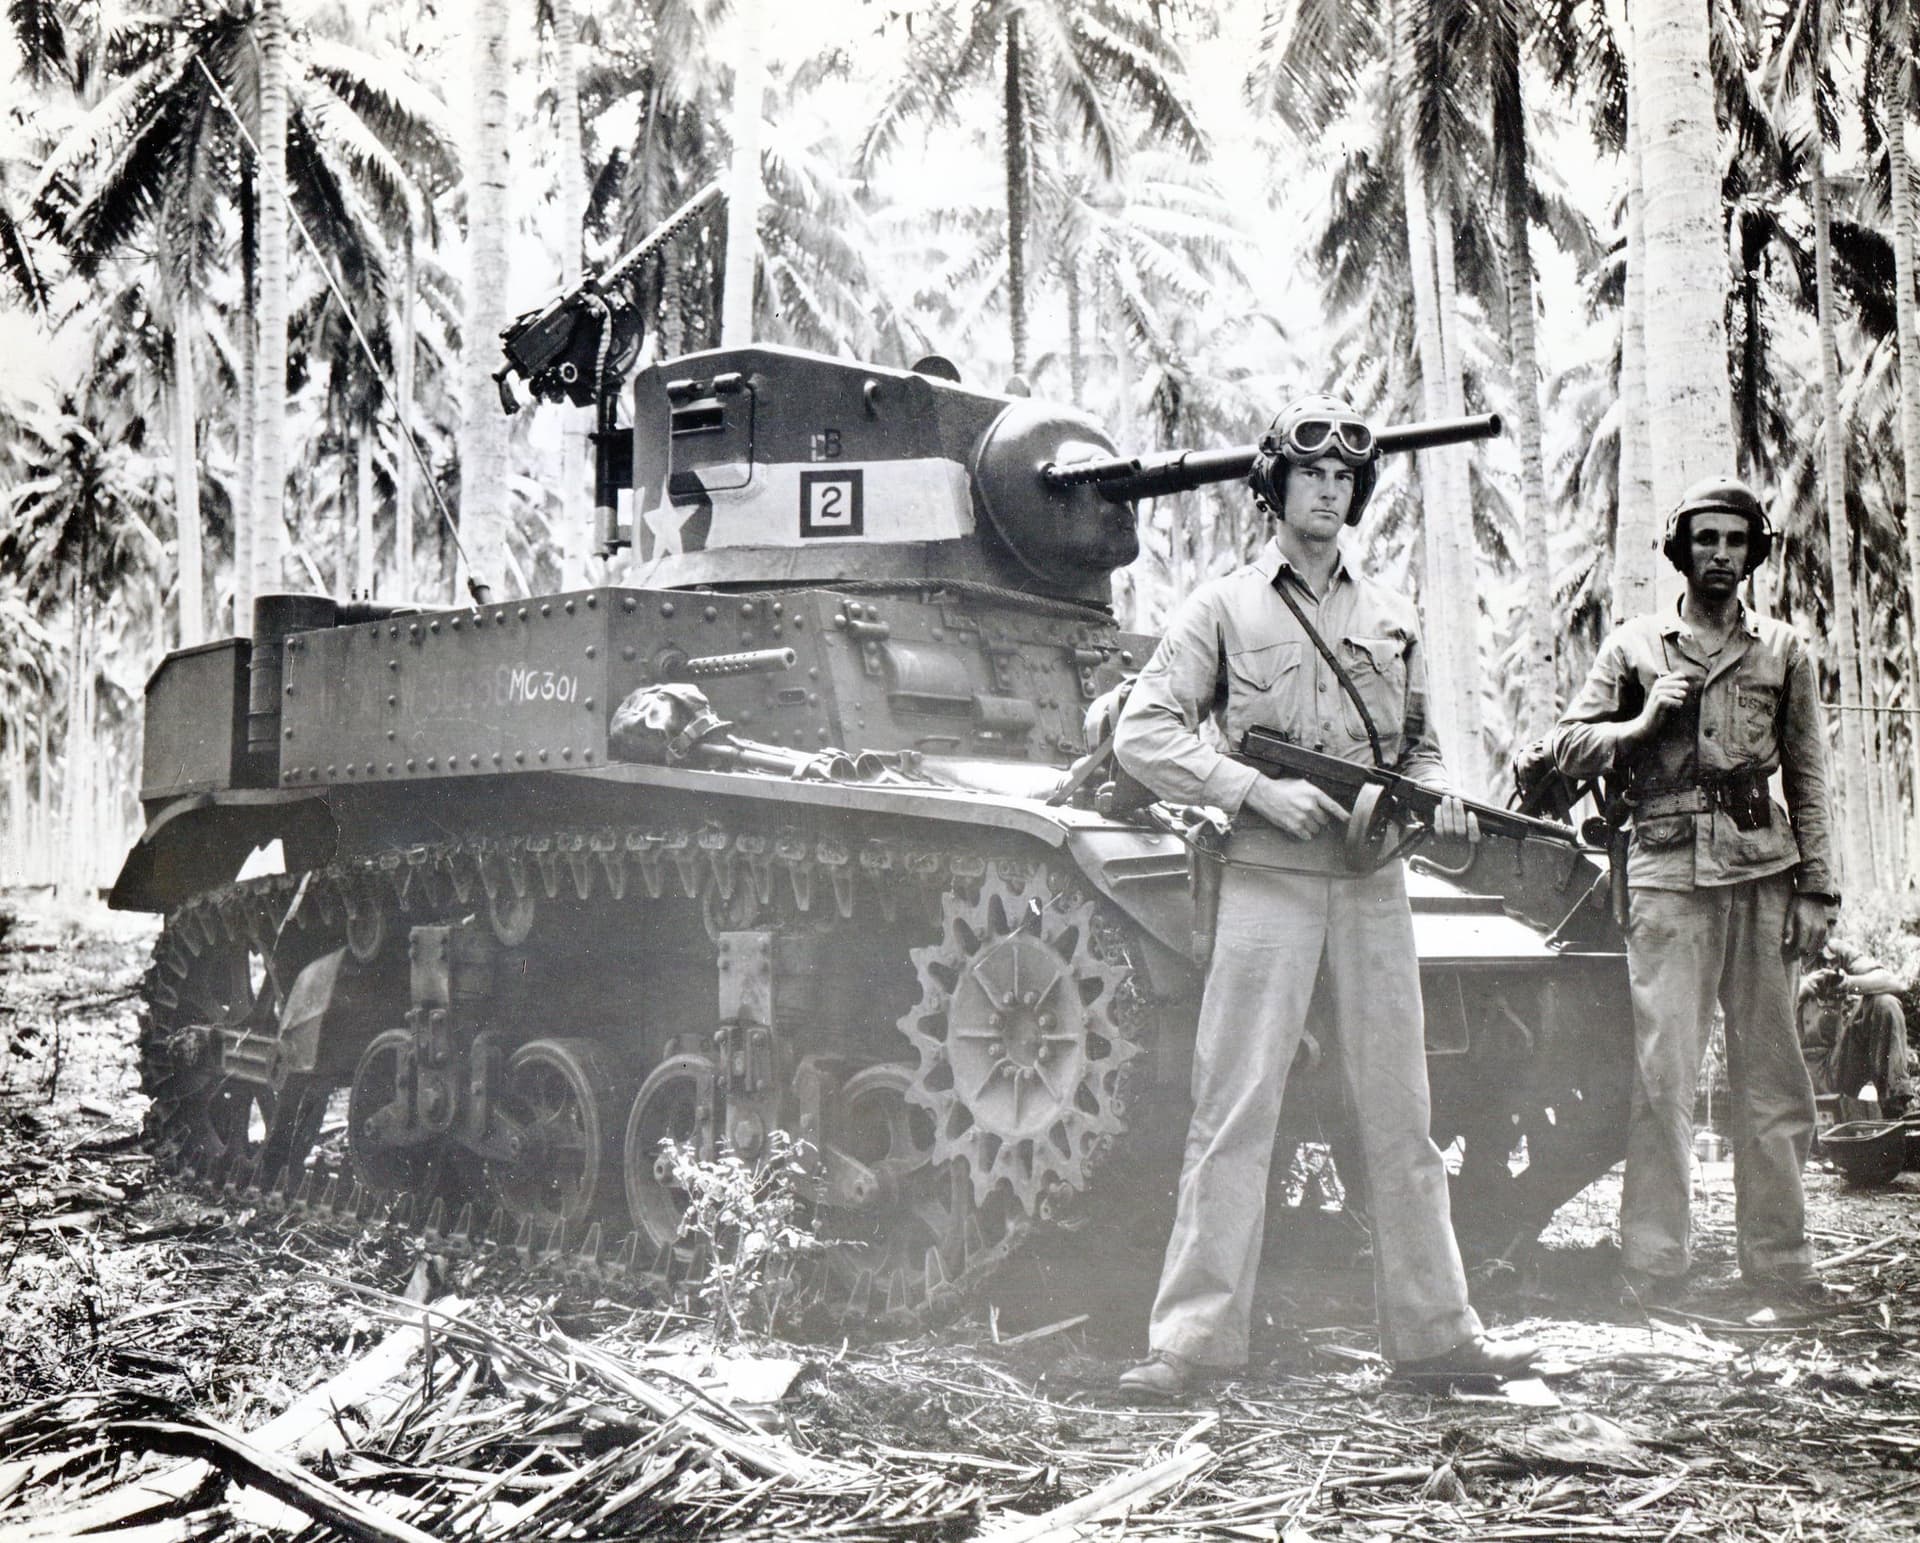
Using a Tamiya M3A1 Light Tank as a base.

Already built one and it’d be pretty easy to do it again… But I won’t commit to it just yet.
2 Likes
Typical MP lol … told ya ![]()
![]()
1 Like
YOU HUSH YO MOUF! ![]()
Don’t conpare me to those lazy bums at the House of Commons.
2 Likes
Sadly, what I would like to call them can’t be printed here …
3 Likes
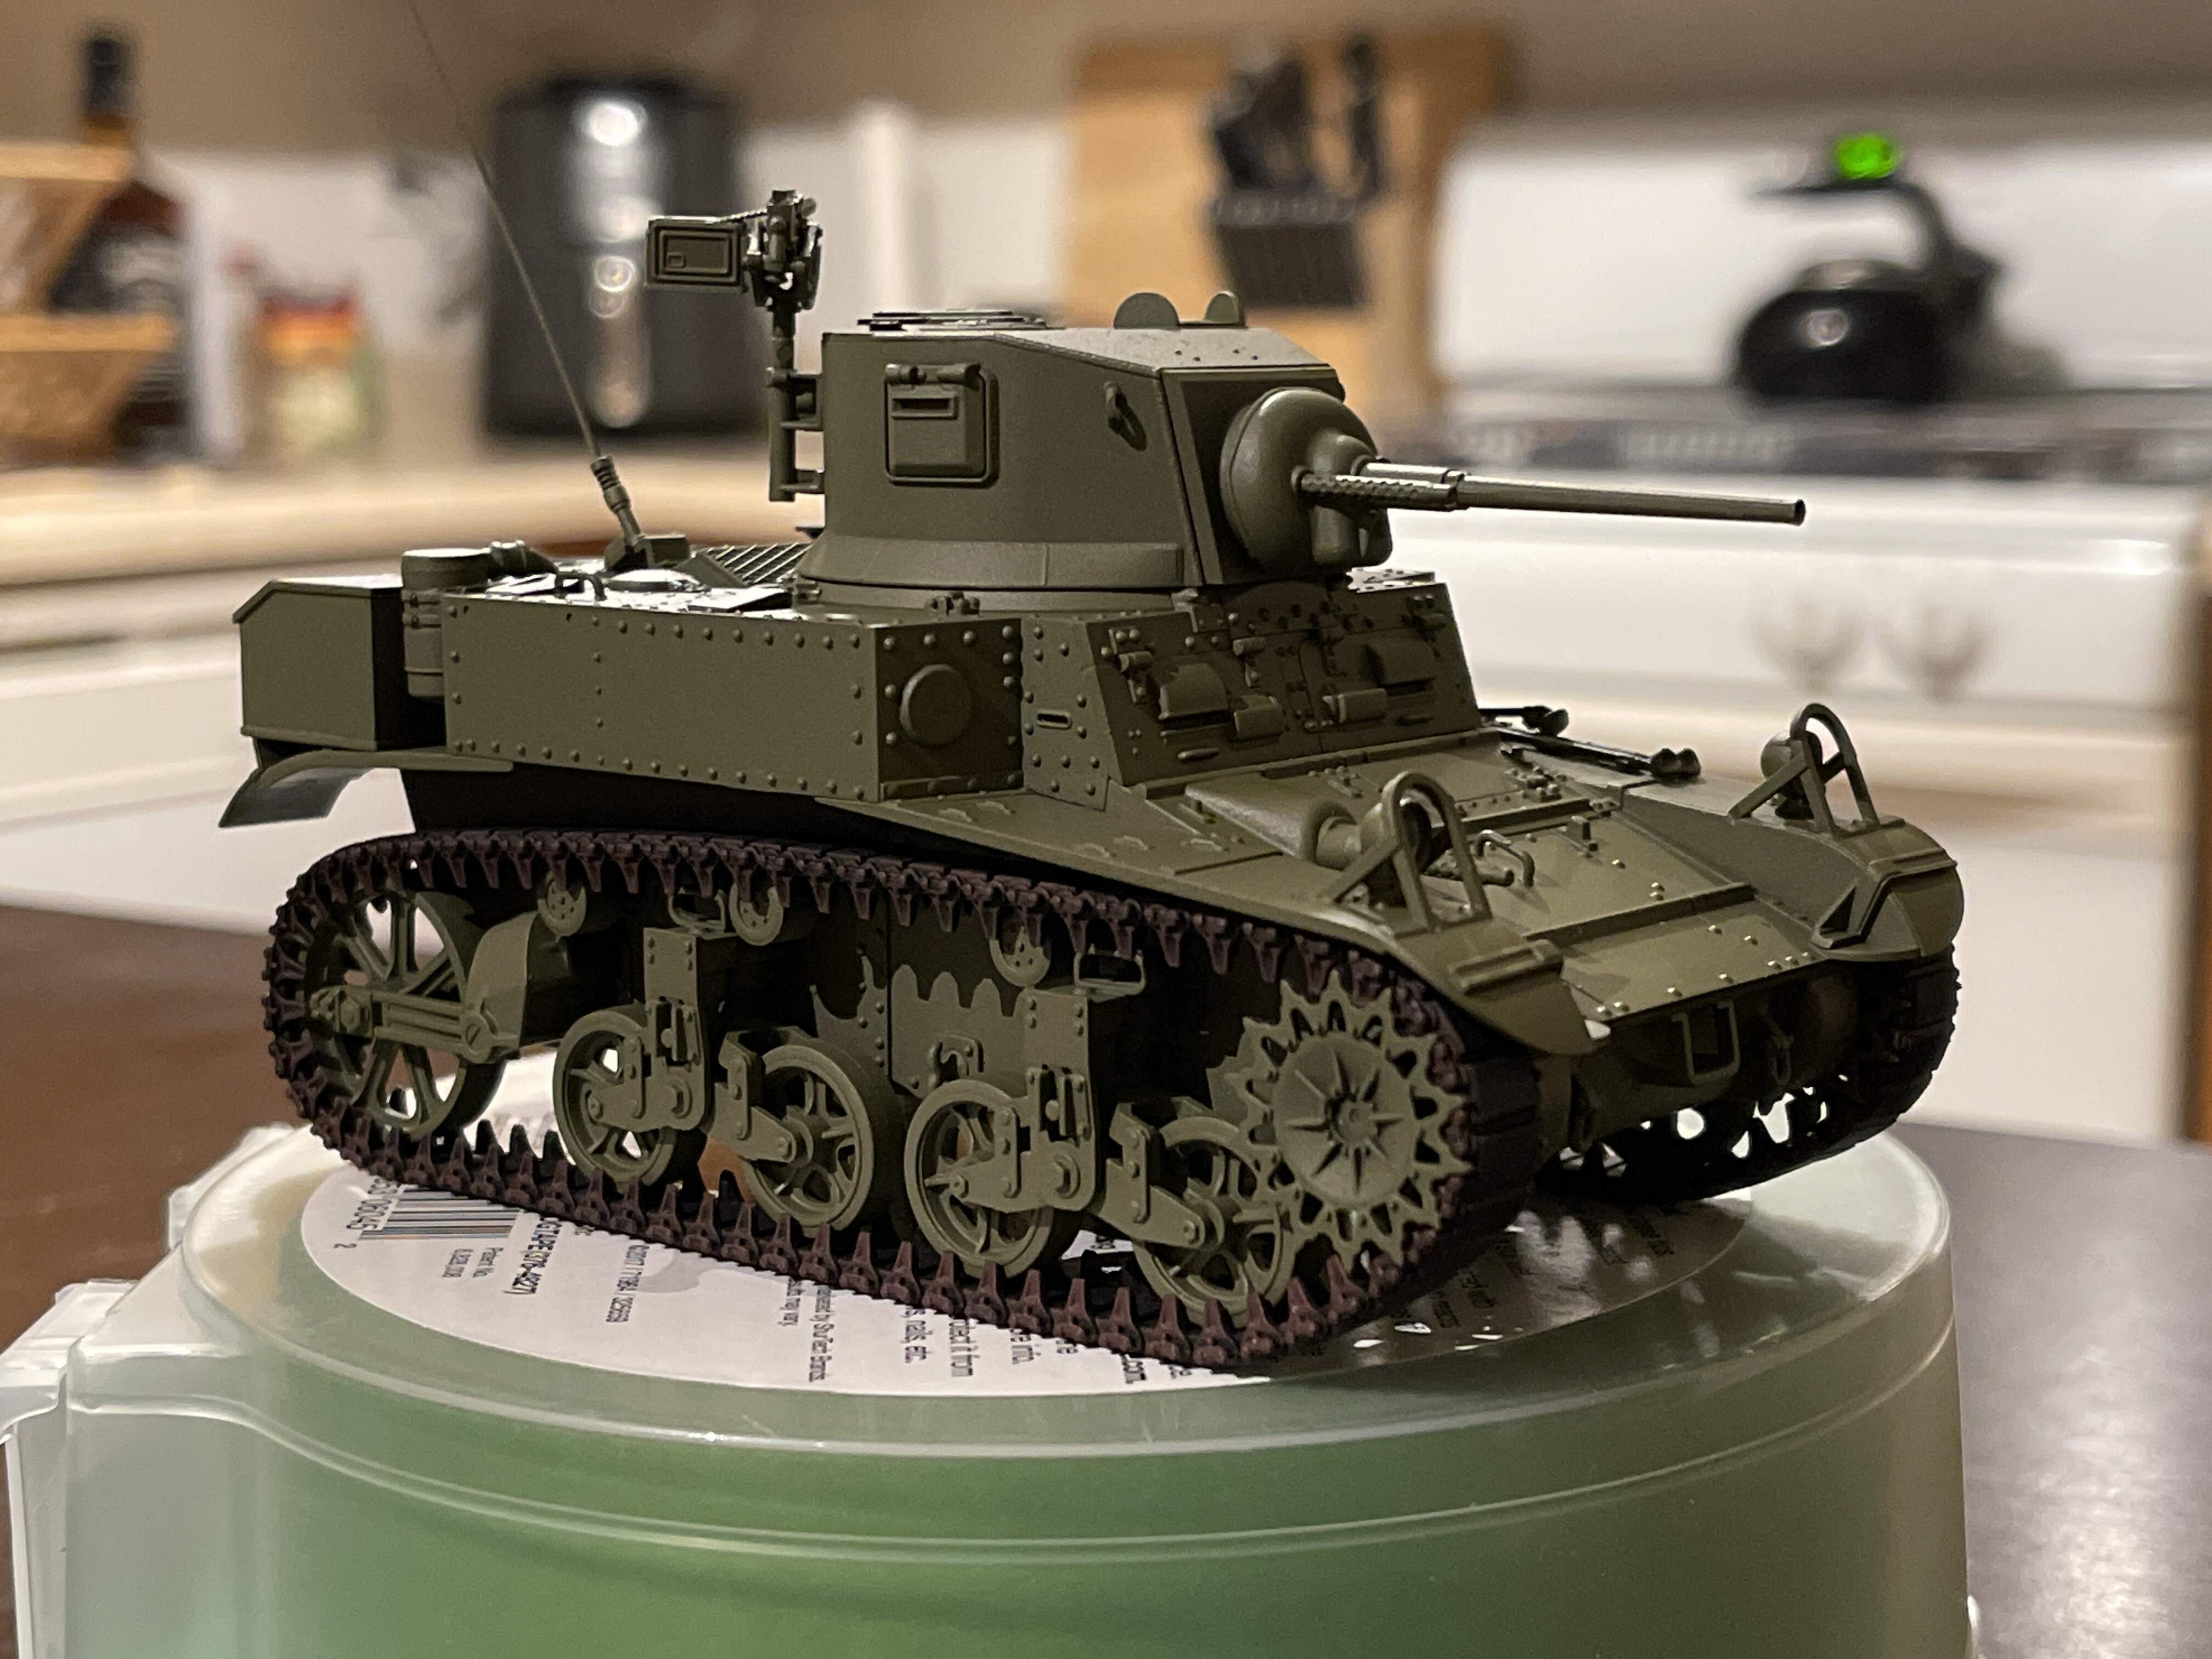
Well? @Johnnych01 just lit a fire under my rump and I was able to gather up all the pics i had of my earlier M3Stuart build… So I am in…
A little background to the story. it was September last year and I was visiting family in Texas for my 48th birthday, and I decided to stop by one of the local hobby shops there, it was Hobbytown USA in Hurst, where I picked up this kit as a way to entertain myself while staying with the family.
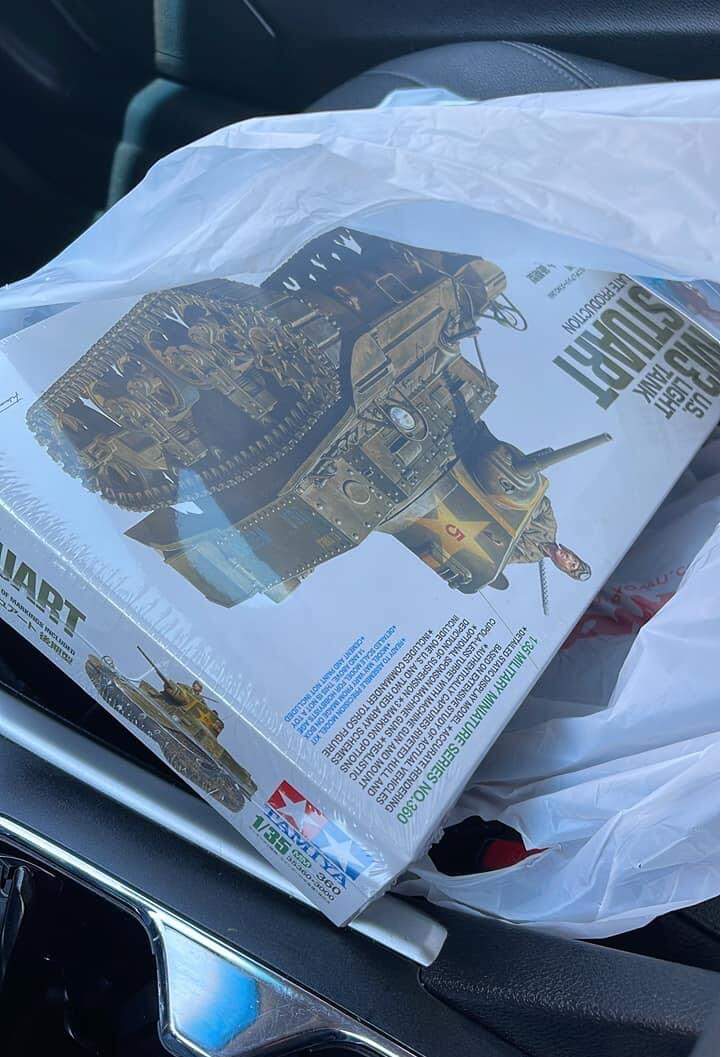
Always loved Tamiya models because of their ease of building and some kits turn out to be great models, albeit older models require a little more detail and aftermarket parts to make them look the part.

The M3 Stuart Light Tank is a newer model and was a breeze to put together. Literally finished it in a day. The only tools I had were sprue cutter, an X-Acto blade and tweezers my brother gave me, a bottle of Tamiya Thin Cement and a couple emery sticks I picked up from the local CVS Drug Store.
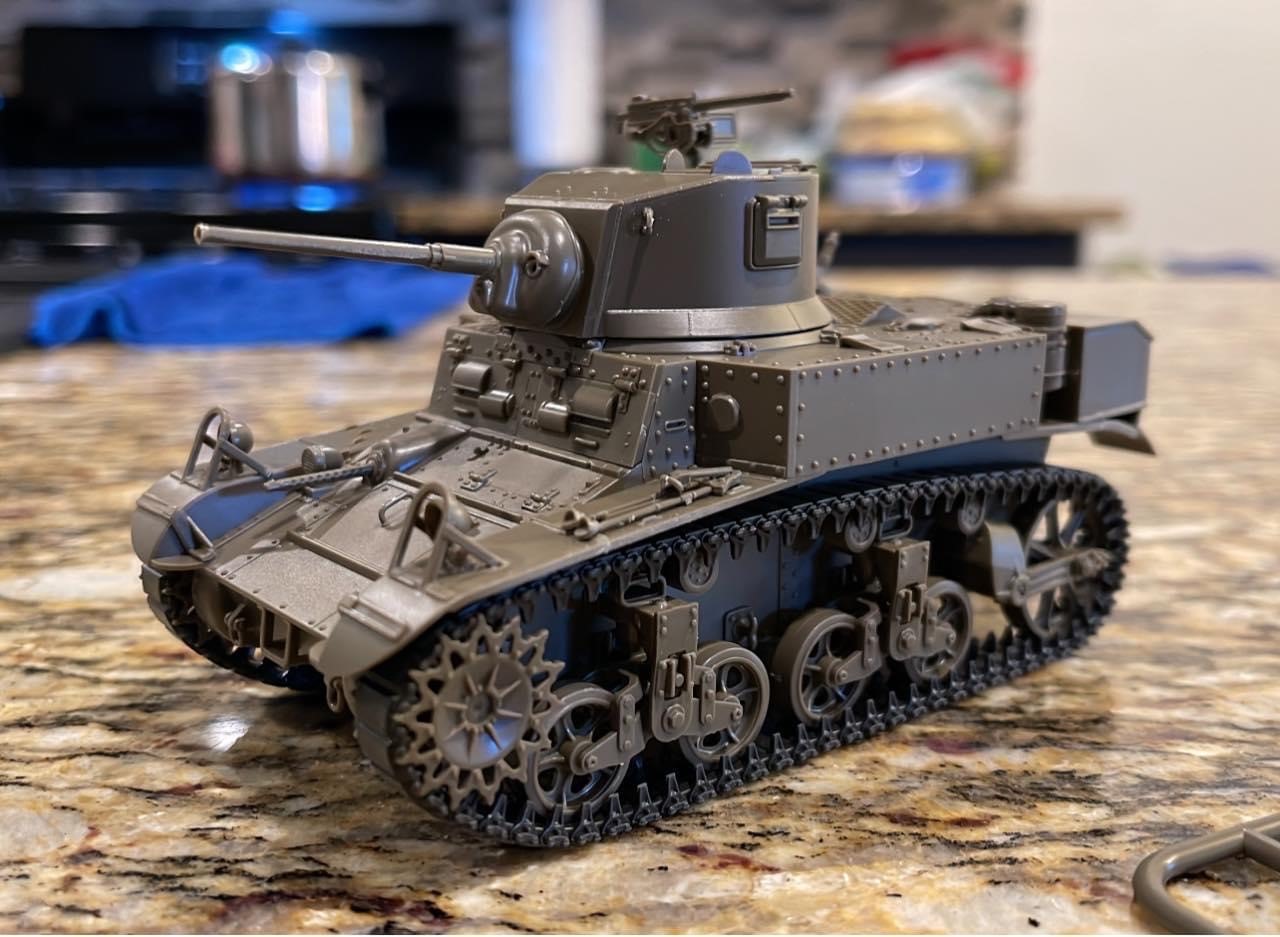
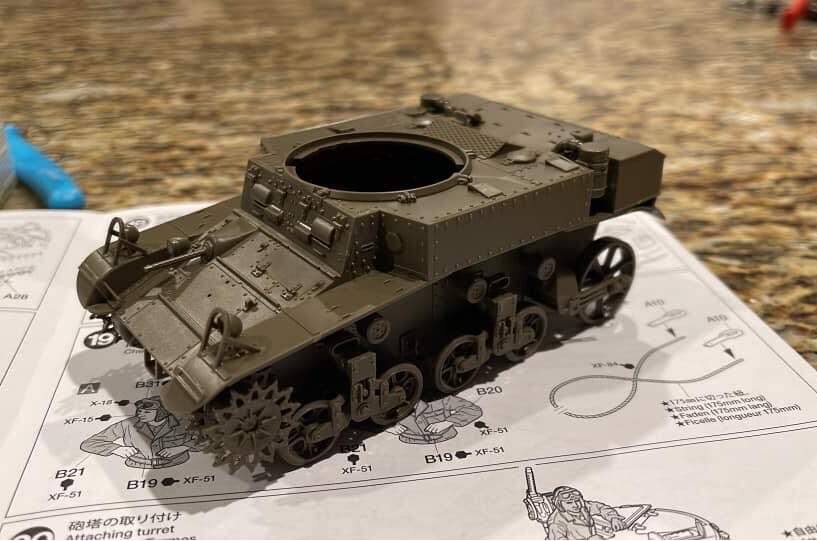
Wham! Bam! Thank you, Ma’am! the kit is done (kinds/sorta)…
Then i simply took the assembled kit home to Arizona to start painting it, but with the multiple other kits I have half finished, this puppy ended up in the backlot of my workbench while I worked on other kits.
FFWD to today and… Well? You figure out (as the great Paul Harvey would say)…
THE REST OF THE STORY. ![]()
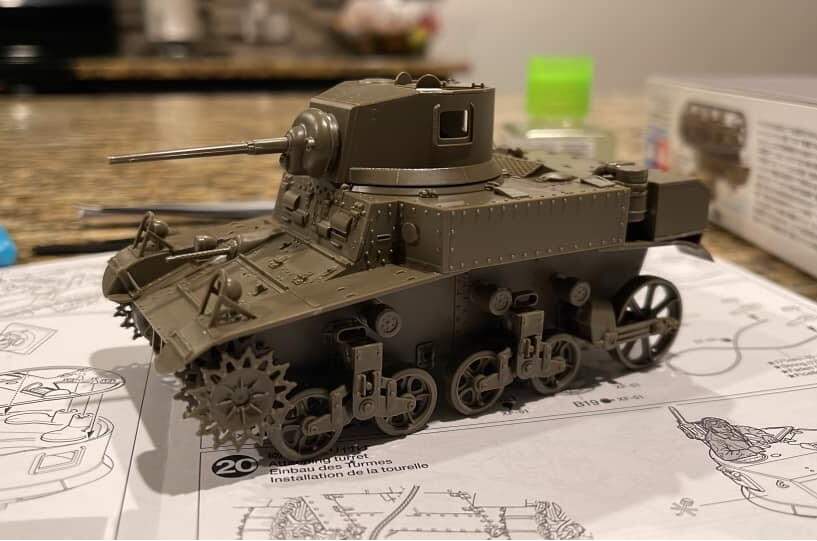
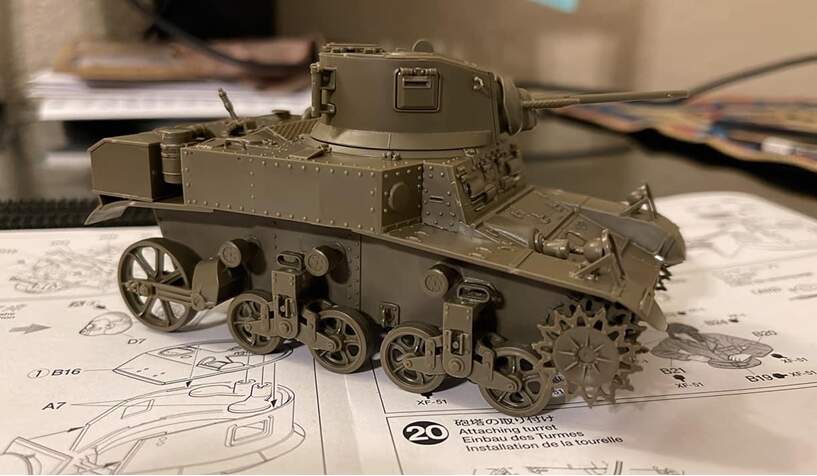
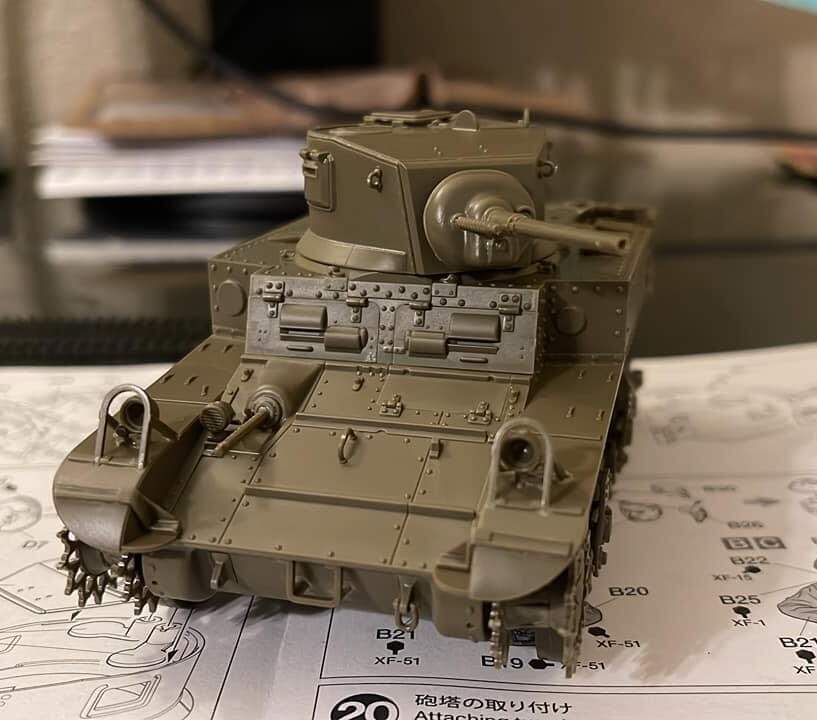
And this is how it currently sits; tracks fully painted and coated in Mr. Finisher 1500 Black primer, waiting for a coat of OD green paint and some decals. More to come.
ETA:
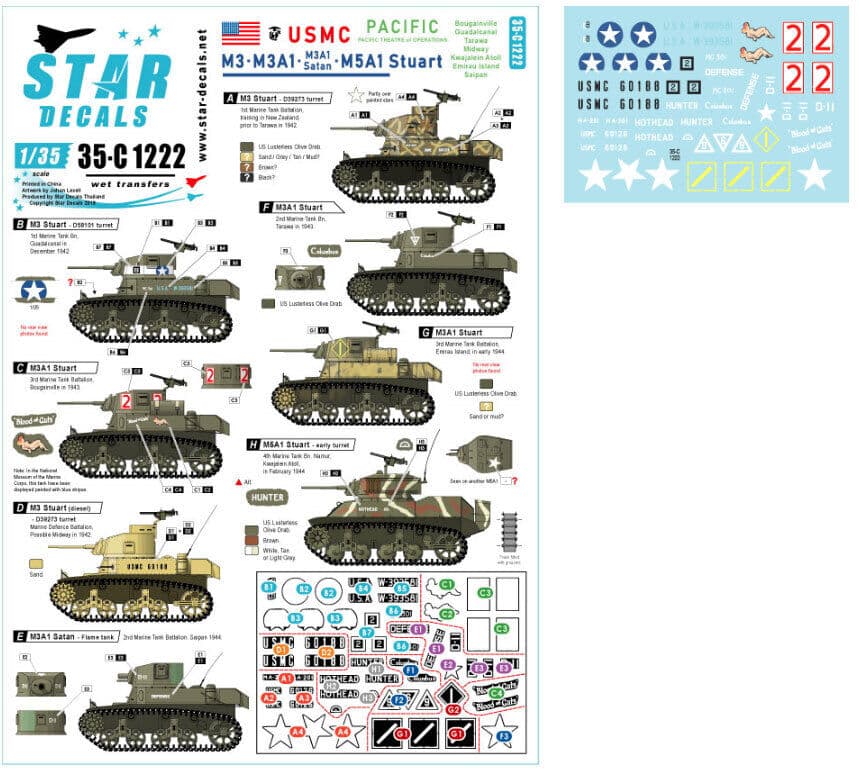
I’ve ordered this set of Pacific Campaign decals for the Stuart from Star Decals. This should complete the build.
4 Likes
That’s a neat little build there…looks very nice . Good old Tamiya strikes again… Looking forward to it painted ![]()
Good looking build so far….even I finished this one. I have another kit to do some other options on the decal sheet with the sponson guns removed and welded vs riveted.
2 Likes
Hi Everyone,
Sorry for the late response to this, but one has to take ones health seriously. I was hoping to see a few skitter across the finish line but looks like this is it. I’ll put the list of finishers together and forward onto Jim so that the awards can be sent out. Here’s our finishers:
Johnnycho1

john41492
A big thanks to all that participated…
John
5 Likes
Shame we didn’t get more across the line John… Was a great idea for a campaign as well… Looks like the wildcats win the day ![]()
![]() … Thanks for organising it all
… Thanks for organising it all ![]()
1 Like
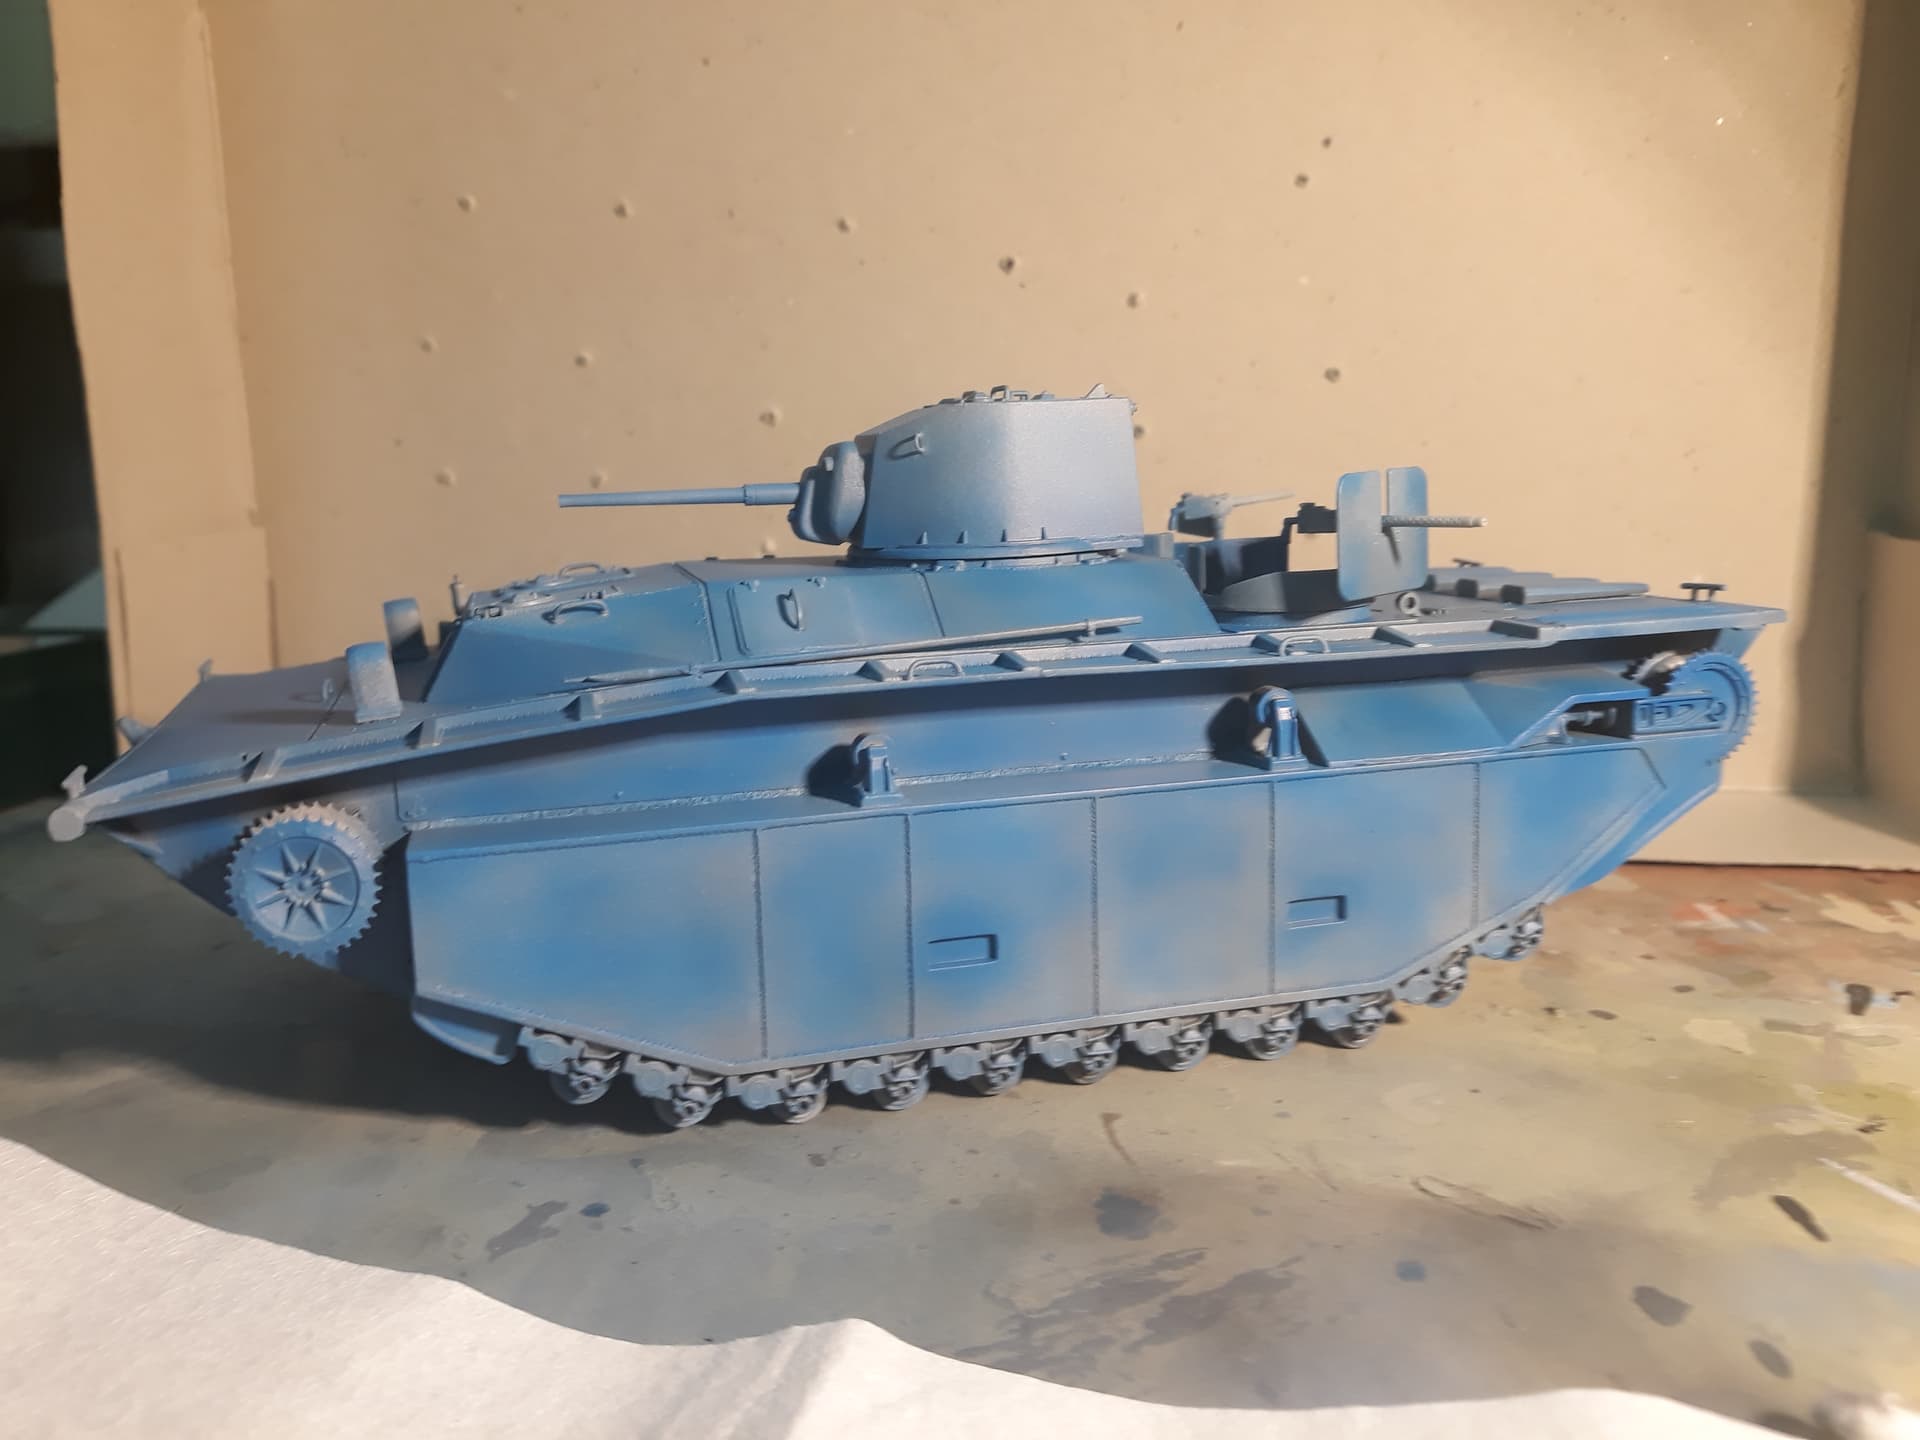
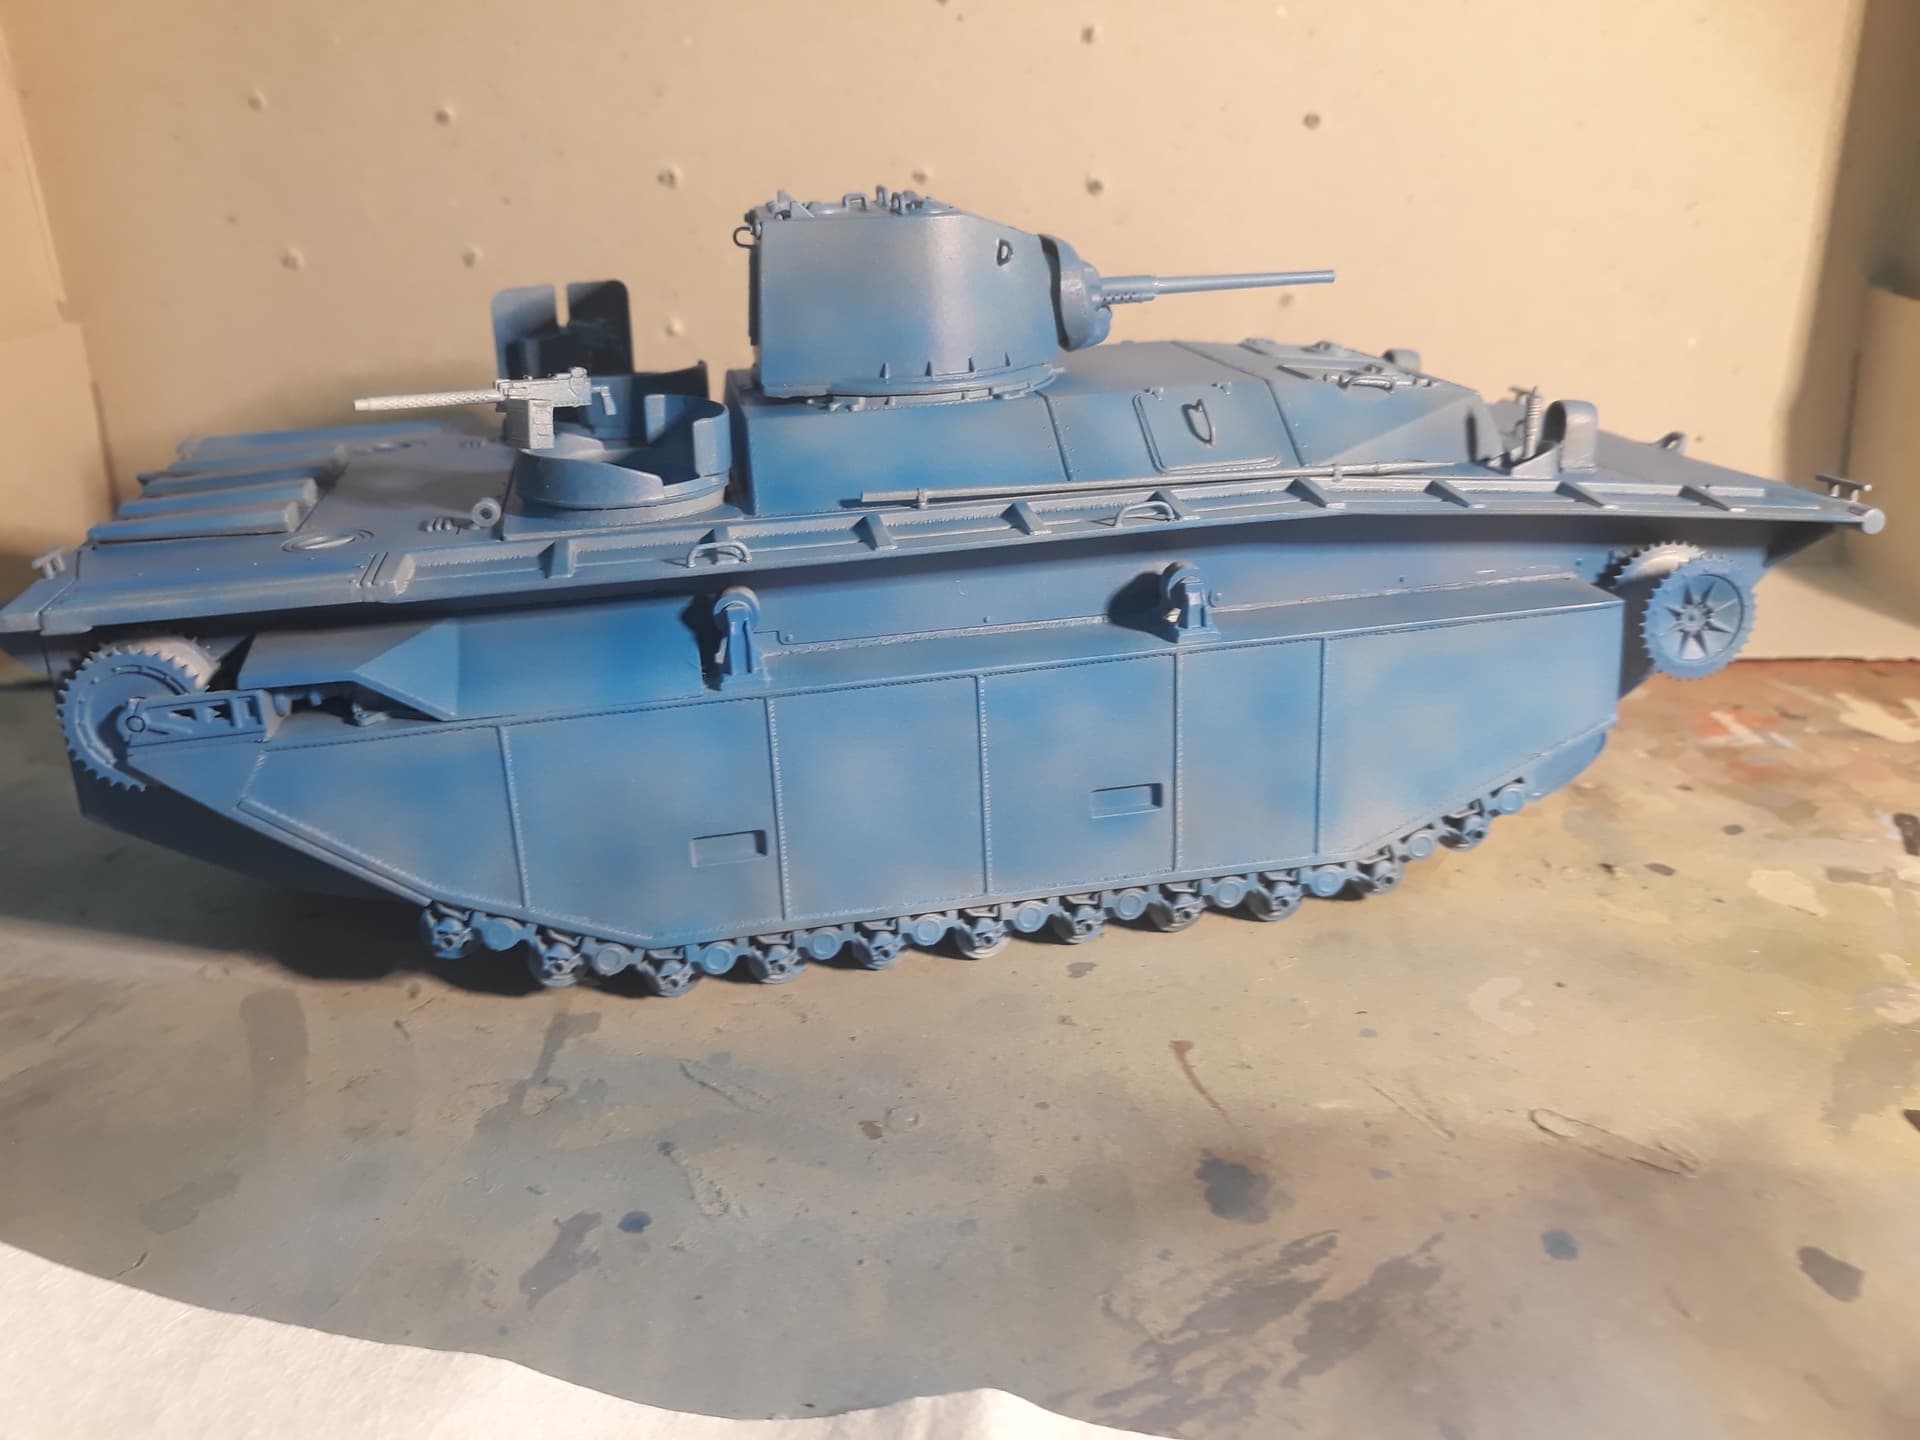
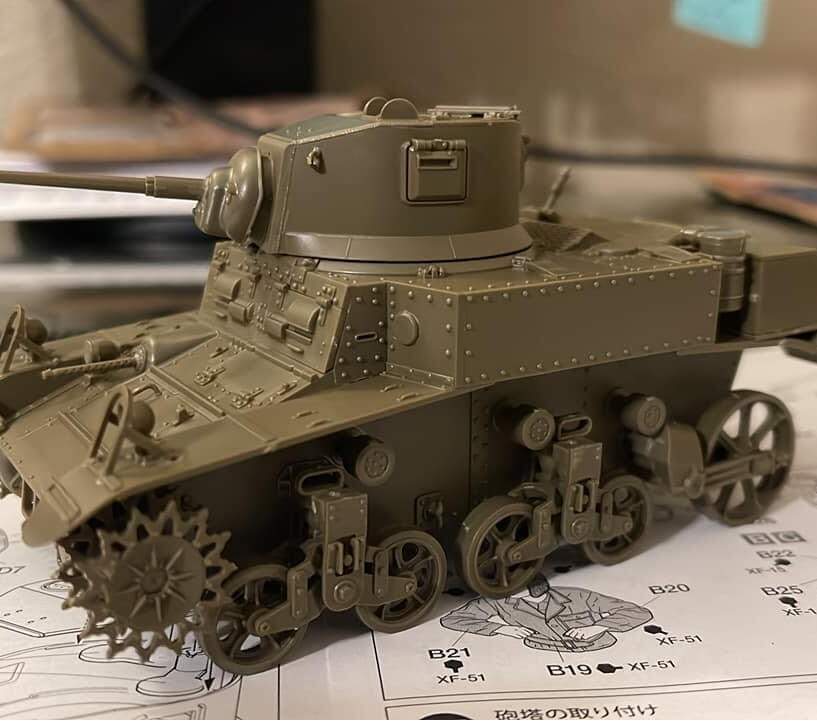
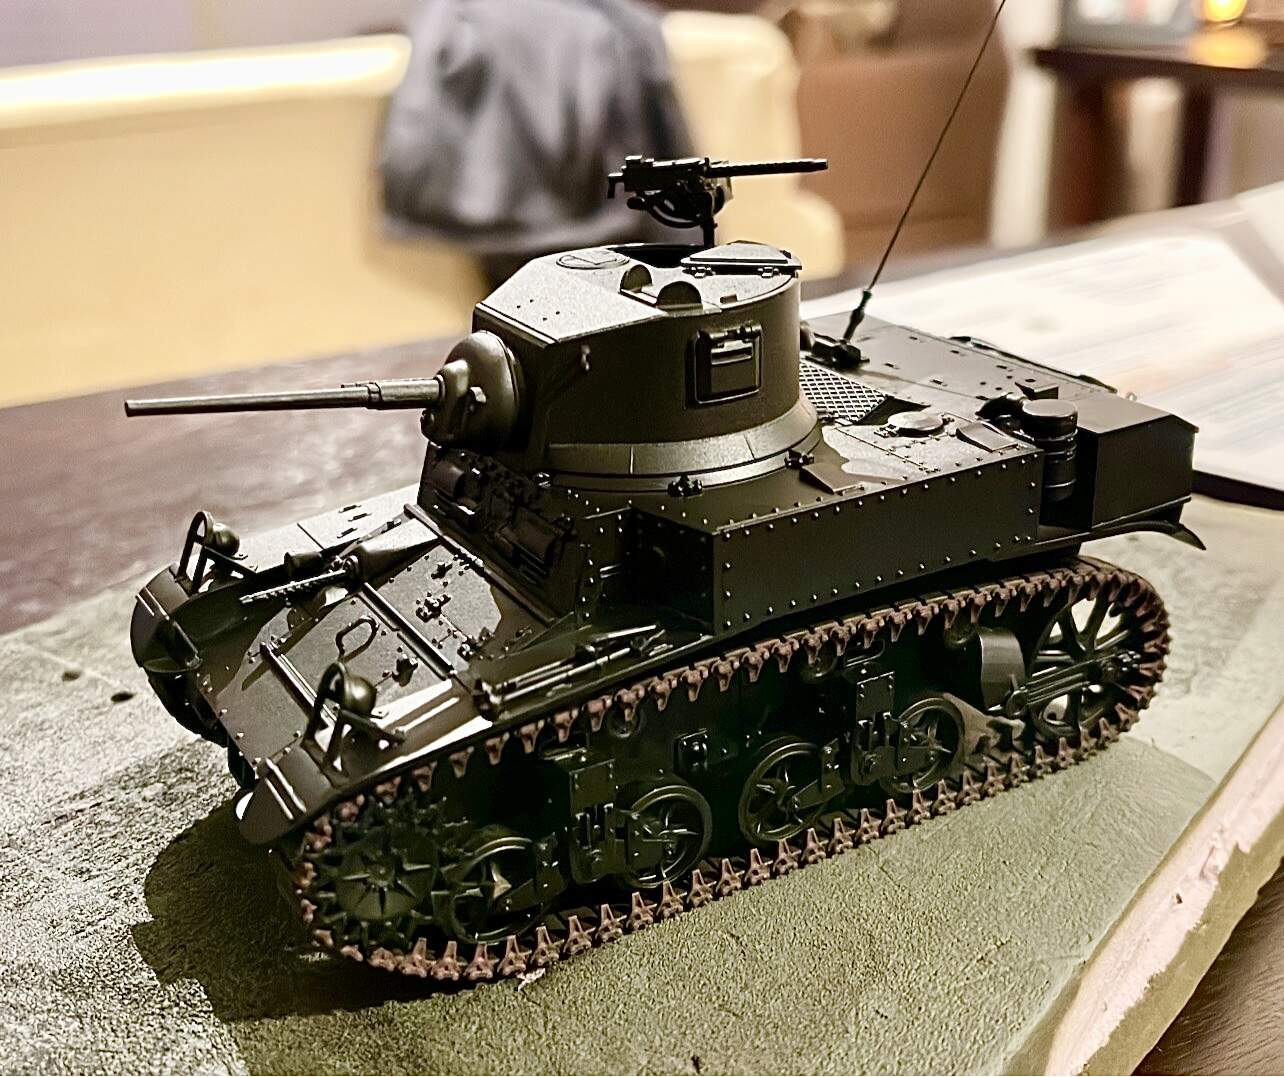
Finally threw some paint on my Marine Corps Stuart tank.
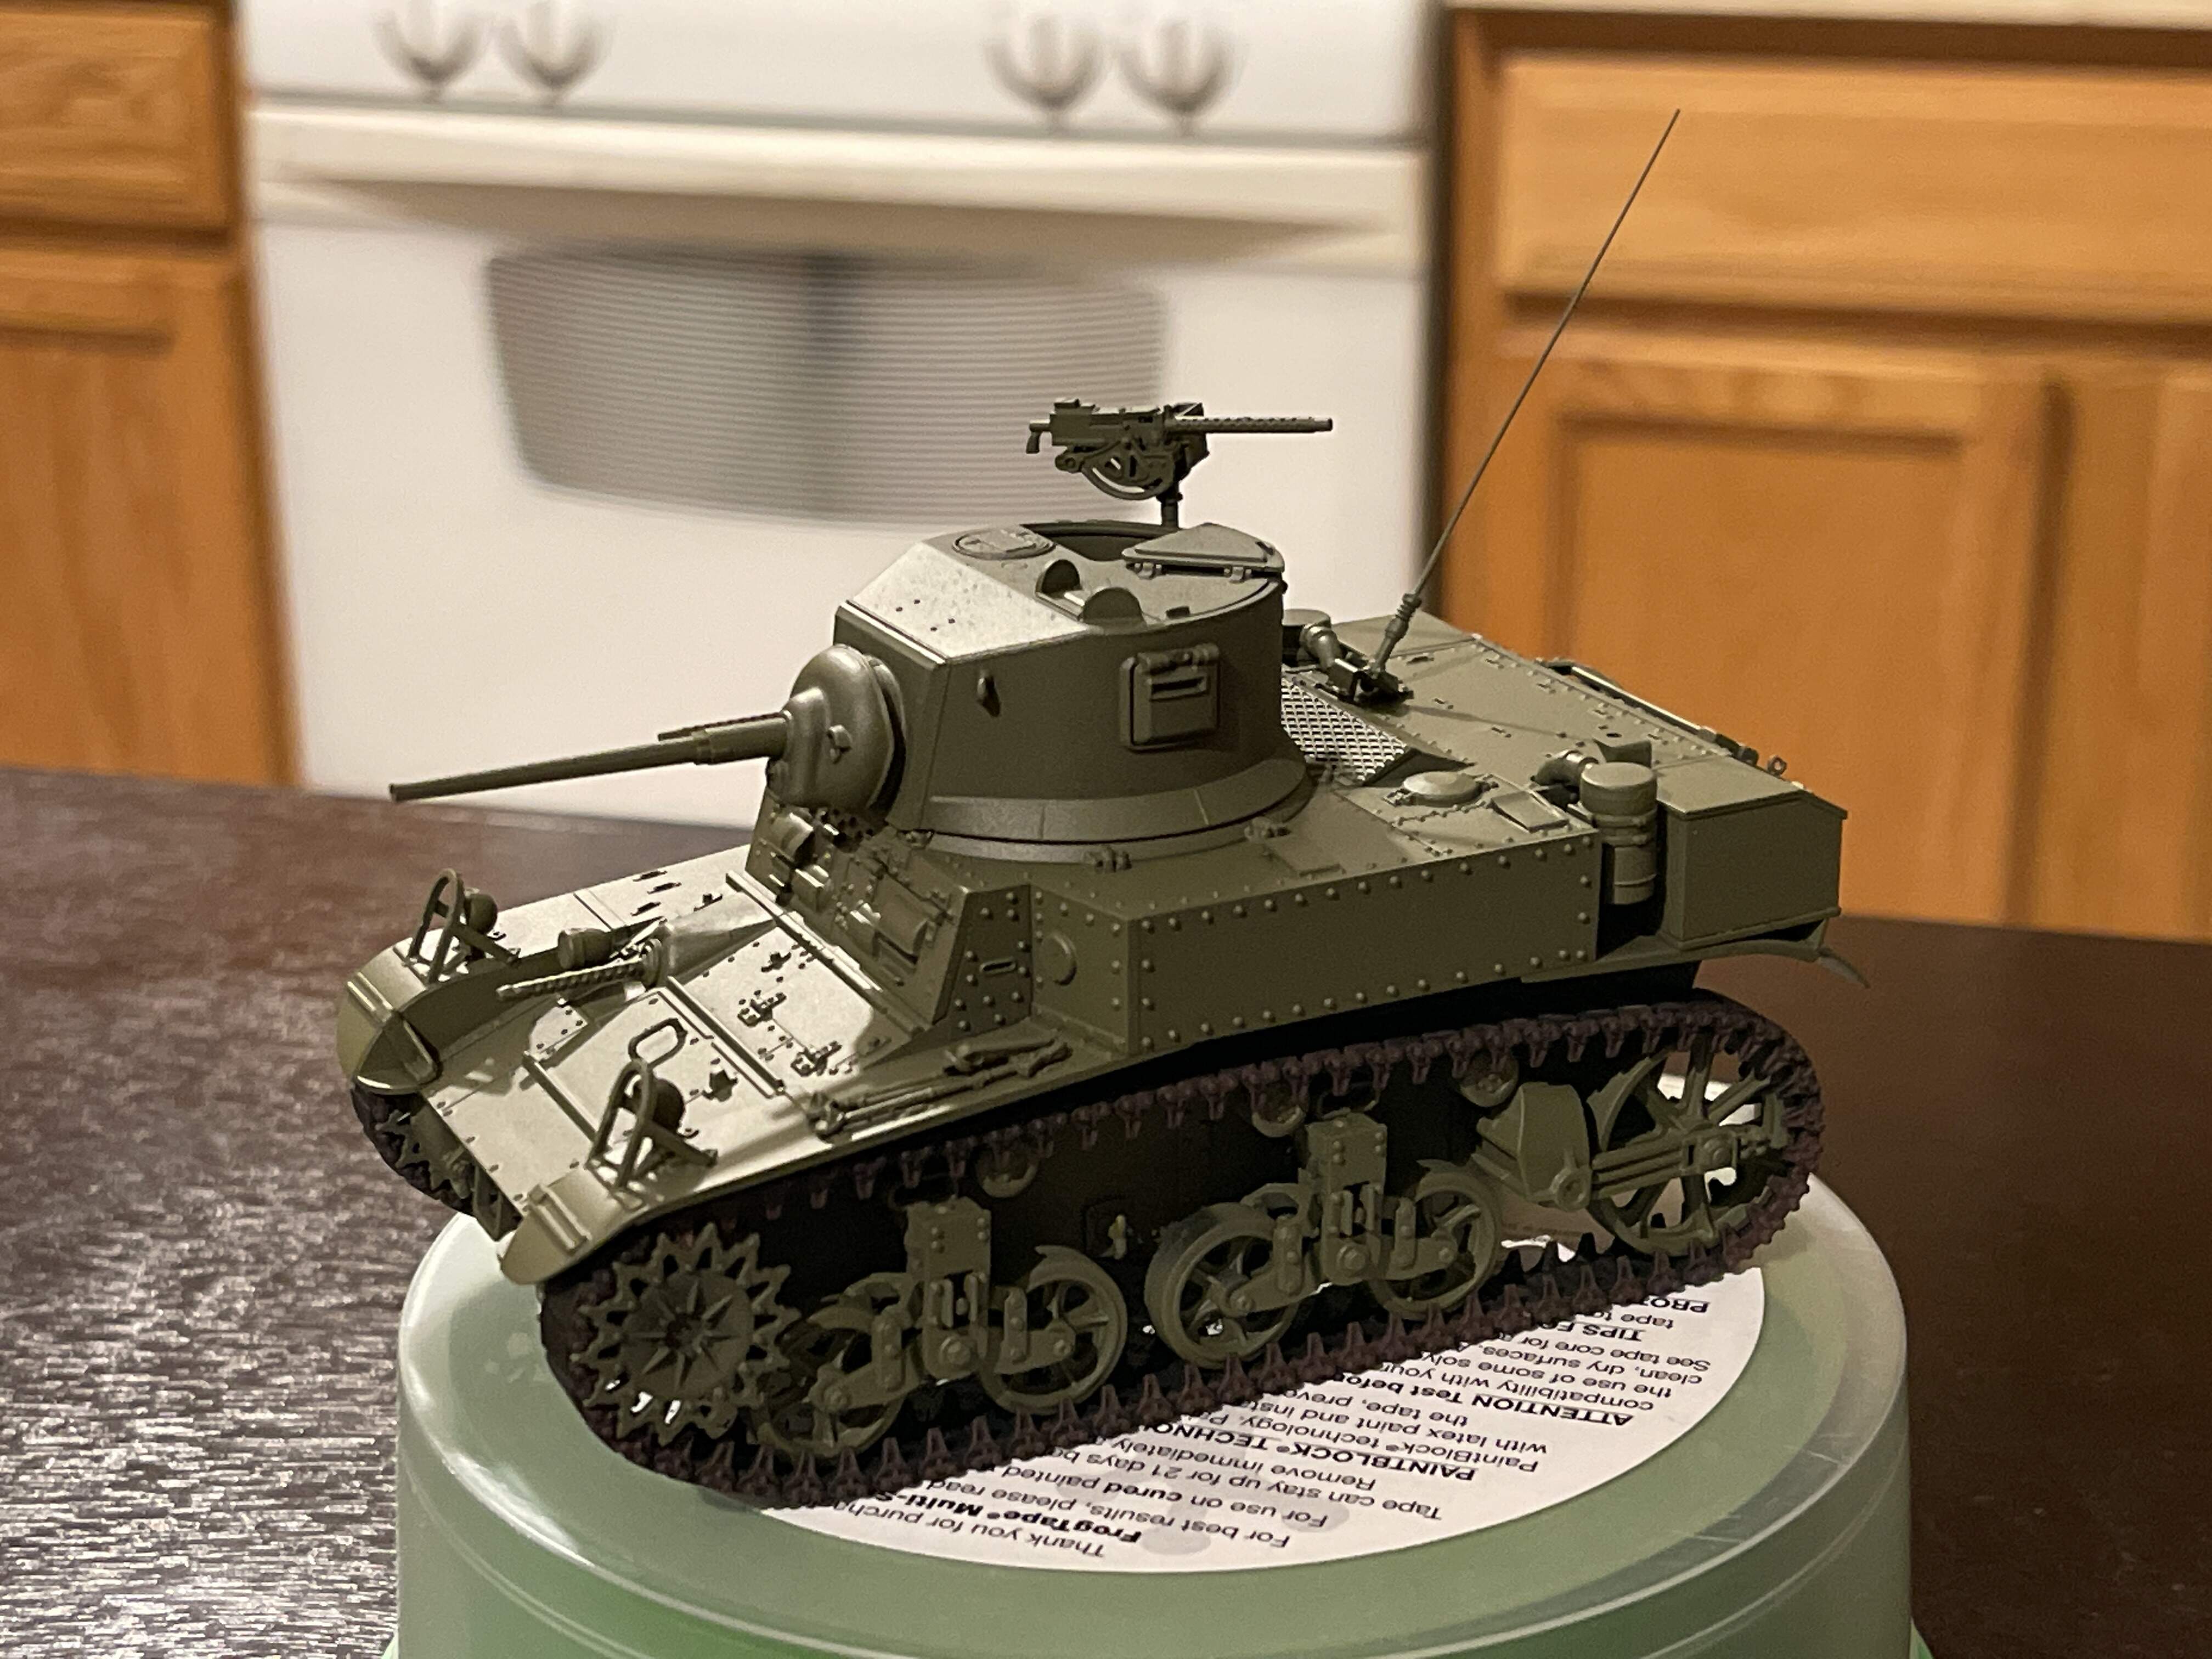
Already have the decals. All it needs is to fully cure, then gloss coat, then decals and weathering, then the final flat coat.
5 Likes