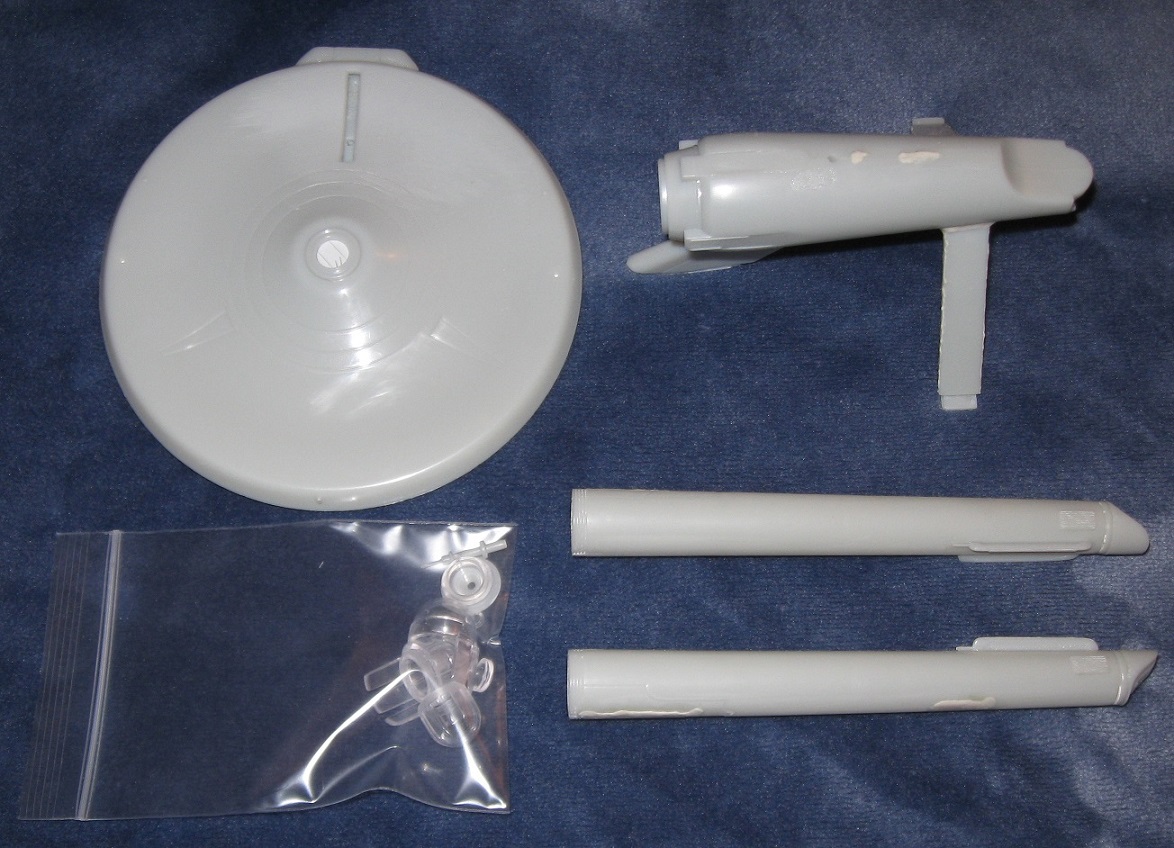
This is 5 hours of work. On the secondary hull and warp nacelles, almost all locating pins were cut away to get a better and tighter fit. On the saucer, the locating holes were cut down for the same reason.
In an effort to keep seam filling to a minimum, all joints were flooded with glue and then squeezed very hard so that the melted plastic mushroomed. This works because the plastic is so soft. Putty was used for problem spots and the warp engine struts.
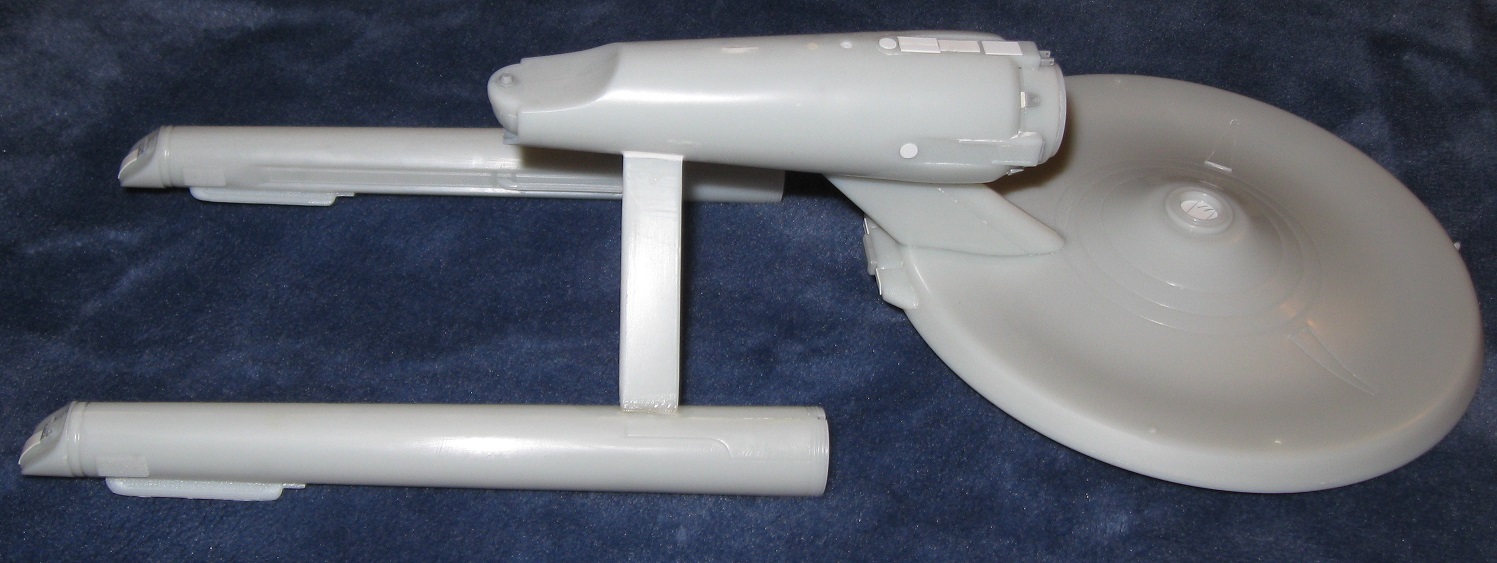
The warp engine strut assembly was redesigned, allowing it to drop in after building the hull. It was also made to sit lower so as not to form a hump along the spine.
The insides of the lower hull were chopped, allowing the sensor array to ride higher and center on the front of the secondary hull.
Bussard collectors, running lights, and the sensor dome were redesigned so that they can be dropped in after painting.
After putty dries, I will sand out all these assemblies and spend a couple hours adding some extra details just for fun.
I totally forgot this model contains an extra set of warp engines. Those may end up as a second starship for the other Sci Fi campaign currently running.
Great work, I’ll have to remember that about the pylon/hull joint. That can be problematic and awkward to sand flush.
It really is a great kit with all the options. So much spare for kitbashing and scratching. I’ve got a couple of ideas brewing I might try and get done in the new year.
Fitting the warp nacelles to the engine pylons is really problematic. In an attempt to get a better fit, I sliced off most of one tab at the top of one engine pylon. That was a significant mistake. The tab is supposed to slot beneath a pin inside the corresponding warp nacelle. Cutting off the tab did not help with fit and made the connection between nacelle and pylon very weak. The mistake also made aligning that warp nacelle very difficult.
There are approximately 7 knock out pin holes inside the rings of the navigational deflector. Filling these shallow holes would require significant effort and probably fail. Instead, they were filled with small disks punched from thin plastic stock. More disks were added until the inside of the navigational deflector looked like a rosette.
The next step is to putty and sand both joints were warp nacelle meets engine pylon. This step could wreck the joint with the cut tab.
The stand that comes with this model kinda sucks so I decided to add a new mounting point. After filling both kit stand holes, a new, 3/8 inch hole was drilled in the bottom of the secondary hull as close to the center of gravity as possible. With no access to a drill press, this hole ended up slightly off center and a little too far aft. A piece of 3/8 inch styrene tube stock was then inserted into the hole and glued it in place, keeping it as close to vertical as possible. Once set, the tube was sanded flush with the bottom of the hull. The model can now mount in level flight on any 1/8 inch rod.
With construction finally completed, the model was given a second wash which caused two new problems. First, one of the primary hull running lights went missing. Fortunately, the part can be replicated fairly easily from a piece of stretched sprue. The second problem proved far more troublesome–wash water could not drain from the model. For a week, every attempt to shake out and dry the model failed. This morning, while priming the model, water was still draining from somewhere. This stupid issue held me up for a week.
Water eventually stopped draining and priming was completed. This revealed many subtle seam lines and small blemishes. The model will now go back into the shop for another round of seam filling, sanding, cleaning, and priming. Going forward, the model will be wiped down rather than washed in a basin.
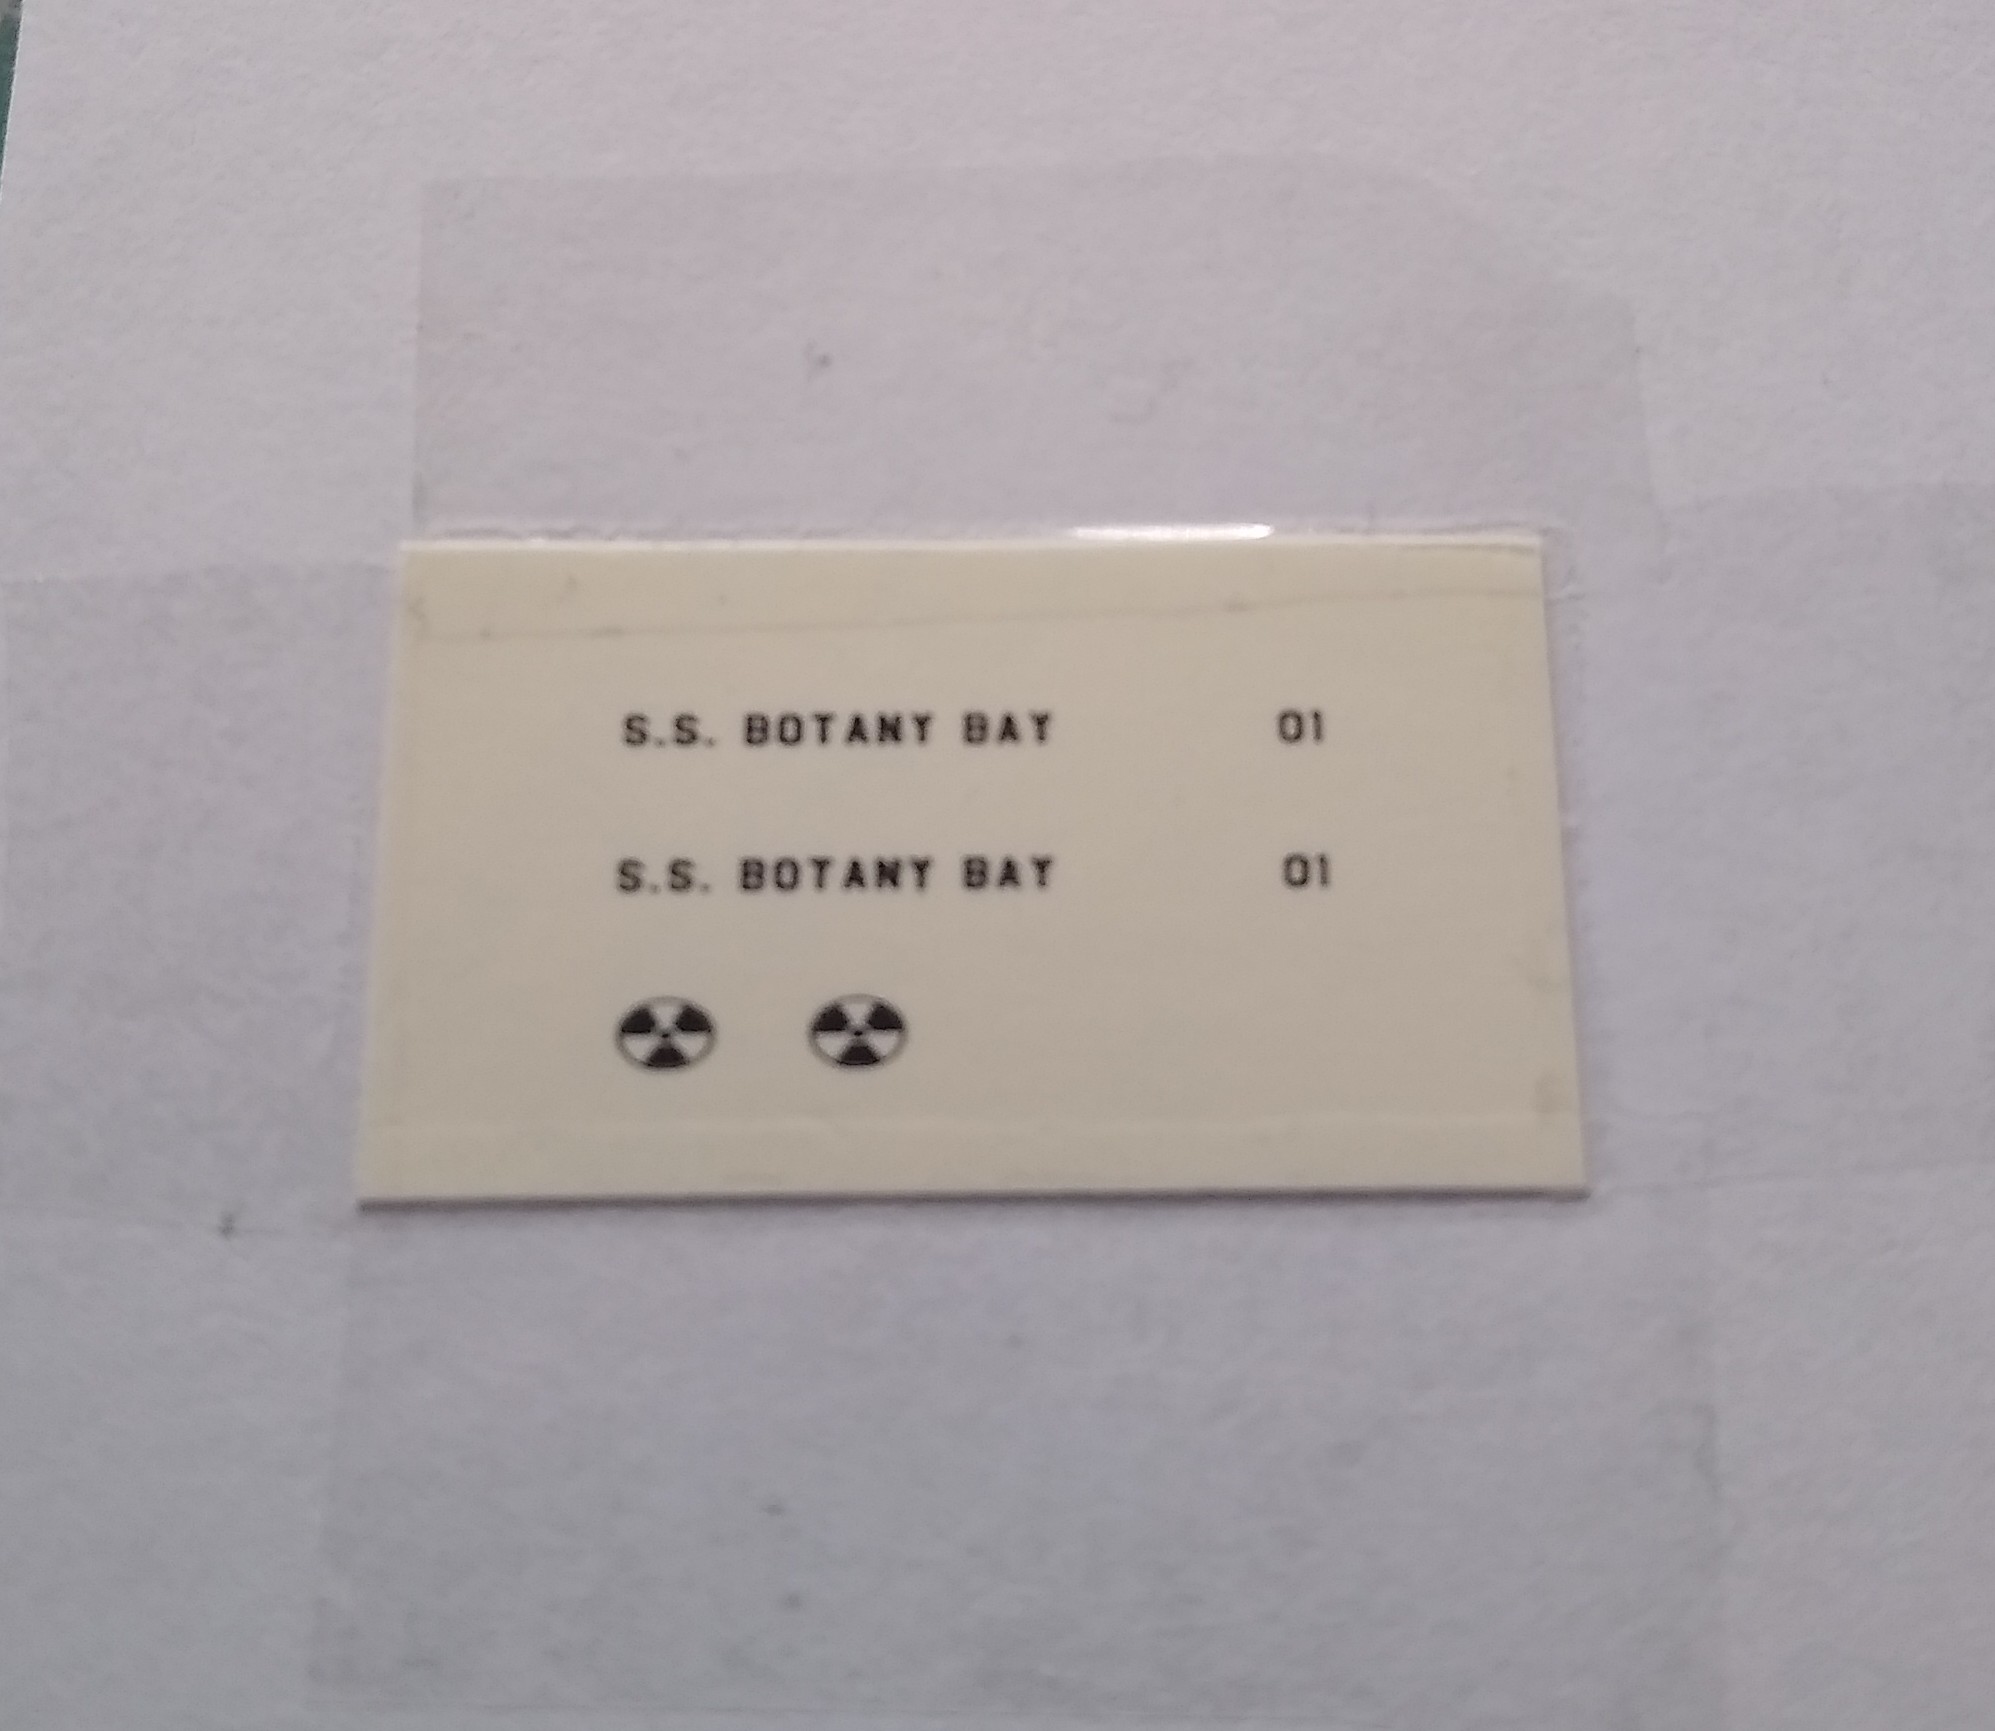
Decals printed today.
Was hoping to print in colour for the radiation symbols, but the eBay seller I bought the replacement cartridge for sent the wrong one. Externally identical, but because it’s for different model of printer the contacts on the back are different. So my printer couldn’t detect it. Hopefully they’ll agree to a swap for the correct one.
Water continues to come out of the model every time it is handled, making priming and painting really difficult. Also, remember to turn down the air pressure when switching from primer to paint. Oops.
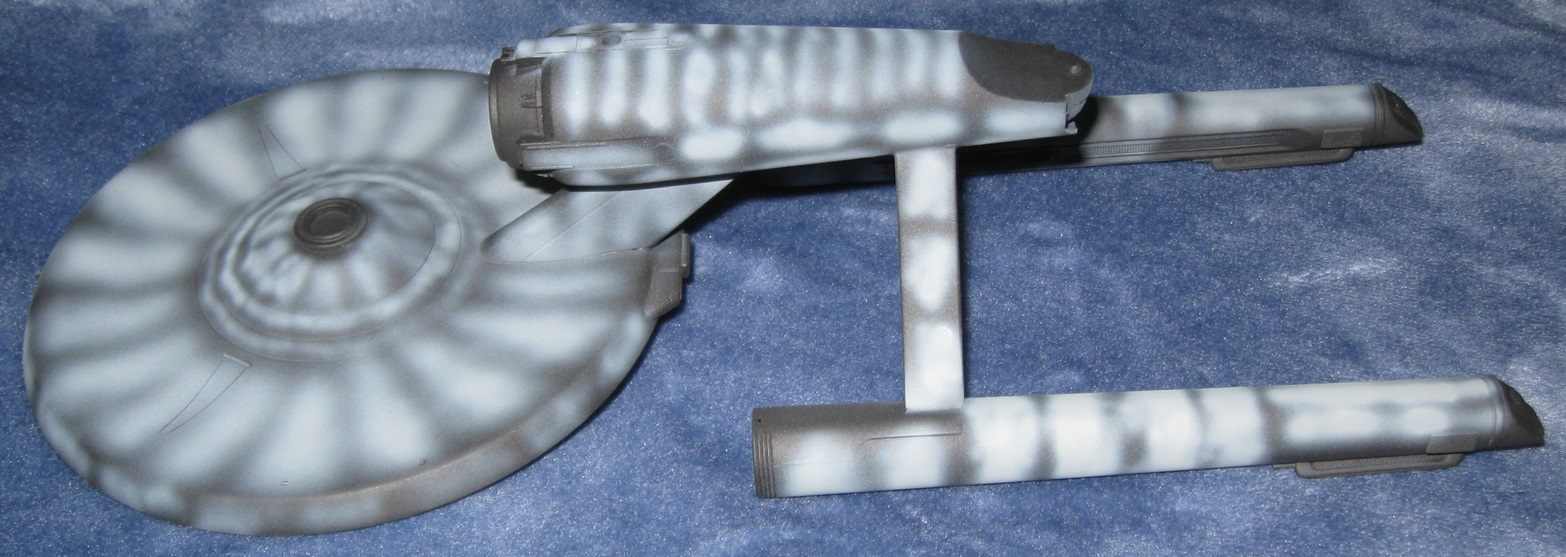
A top coat of Vallejo Sky Gray was applied to the entire model. Since this model is cursed, three problems ensued.
Fall arrived and the temperature plummeted. When preparing the Sky Gray for spraying, too much thinner was added to the color cup. As a result, the paint dried in the air, dusting the model.
For an unknown reason, paint in the cap of the Sky Gray bottle coagulated just enough to clog my airbrush. Just a few days earlier, Wade (Armor_Buff) suggested I strain problem paint before spraying. I responded that Model Air paint never gives me problems. Well… Cleaning the airbrush mostly solved this issue.
This model attracts paper towel fibers like a magnet. I leave my paper towels in the garage and took a 6 week break from airbrush work. My hypothesis is that the dry, hot climate dehydrated the paper towels, causing them to break down and release lots of small fibers.
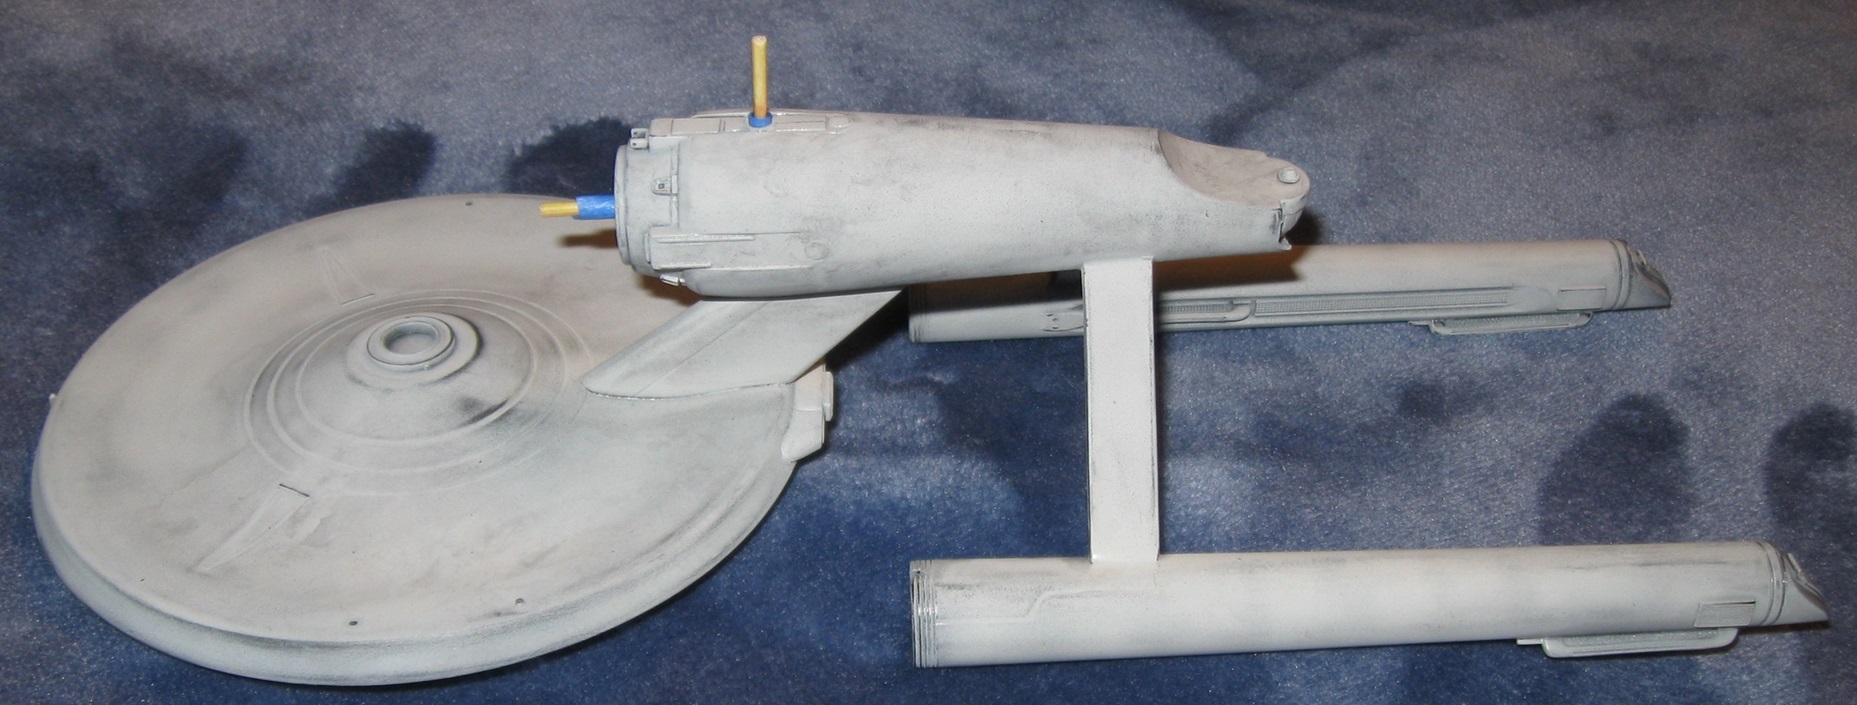
After spraying Sky Gray, the model looked excellent but the surface was horribad. Many years ago, I belonged to a Car and Sci-fi model club and the members regularly discussed this sort of mishap. Following their remembered advice, I waited a day, then used 2500 grit sandpaper to polish the paint. The picture above shows the result. All the crud and paper fibers are gone. I can now shade the model a second time and spray a new top coat.
Water did not come out of the model during this session! To prevent another water disaster, I used toothpicks to plug the two largest holes in the model while sanding and washing it.
Upon consideration, I think water entered through those two holes, flowed into the neck, and then pooled in the primary hull. When building the model, I sealed off all other pathways into the saucer. When I next build this model, I will not seal off the hole were the sensor array mounts. That will allow water to easily drain from the primary hull.
Looking at that picture, if I were building a Star Wars model, I would have nailed the paint finish.
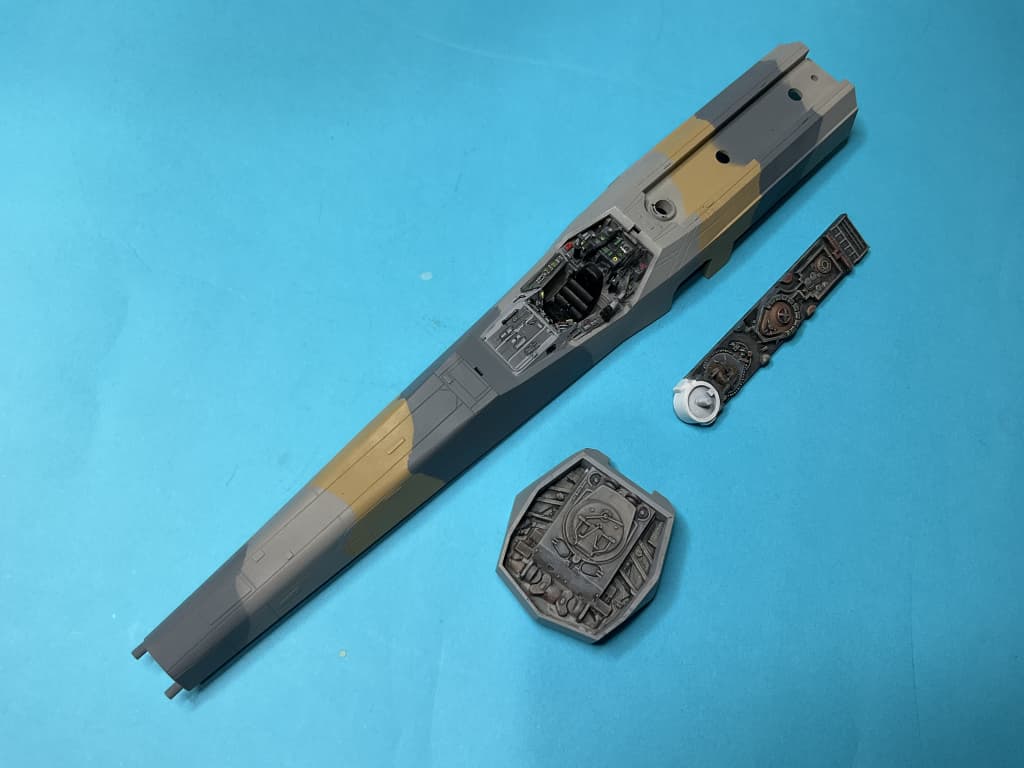
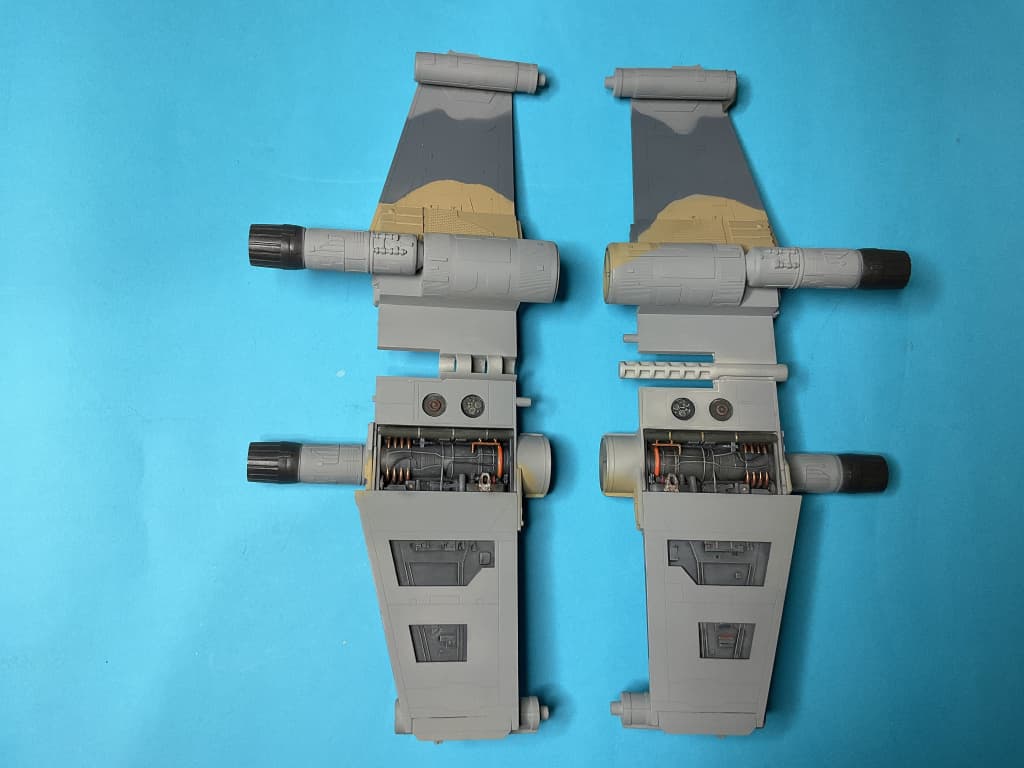
Spent the last week painting my Finemolds X-Wing. Still a ways to go though.
I first painted it a scheme of 2 greys and a light blue, but hated it. Changed the light blue to buff, and got a more harmonious result.
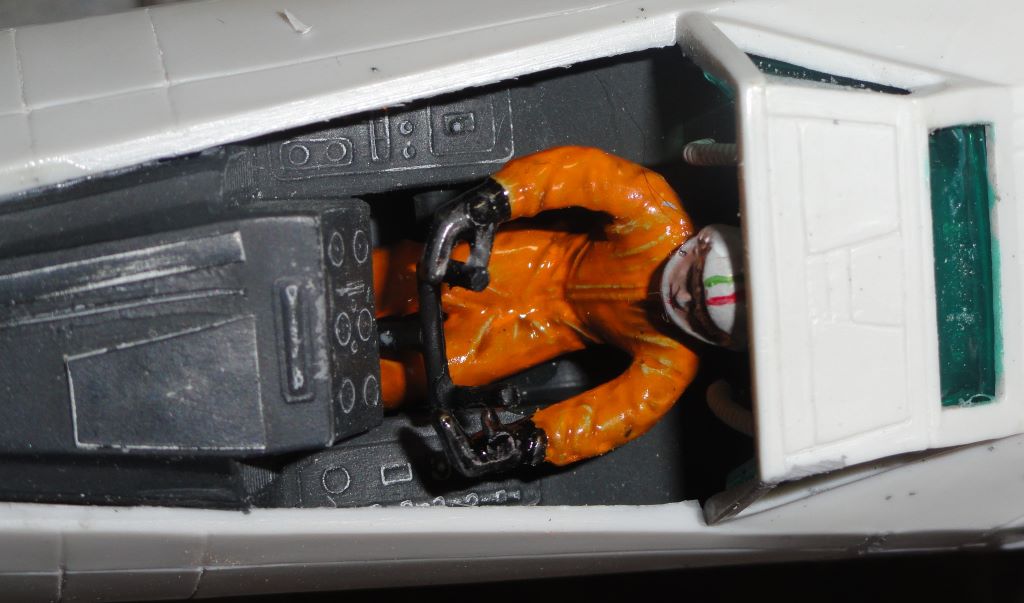
The cockpit and rear fuselarge:
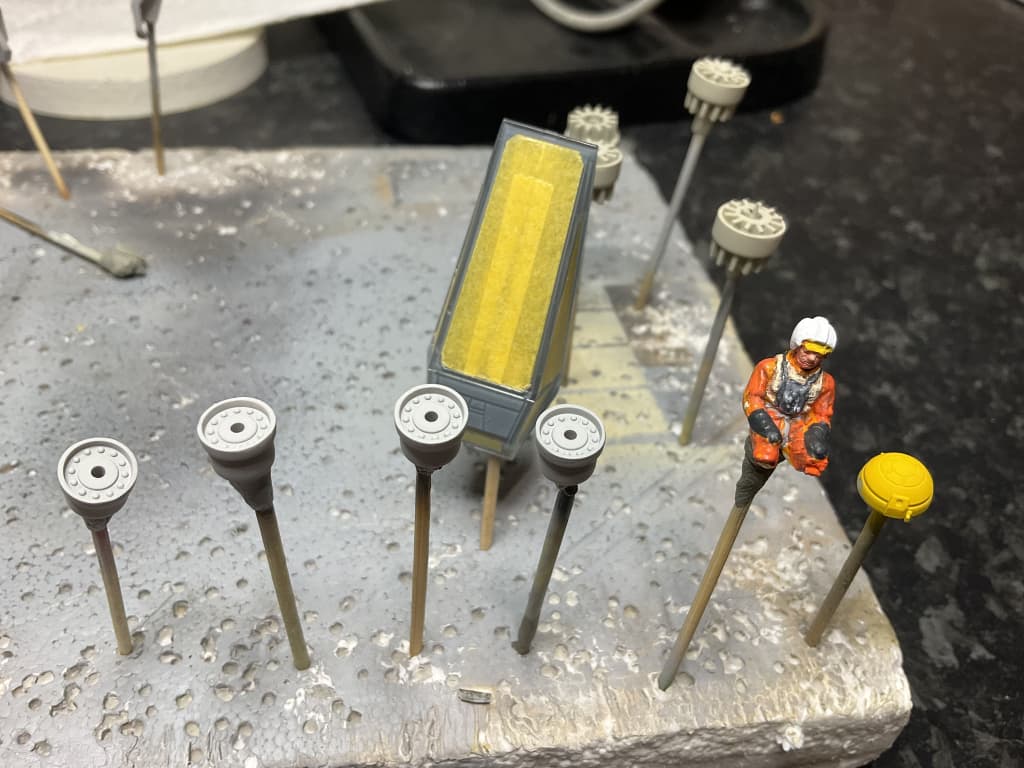
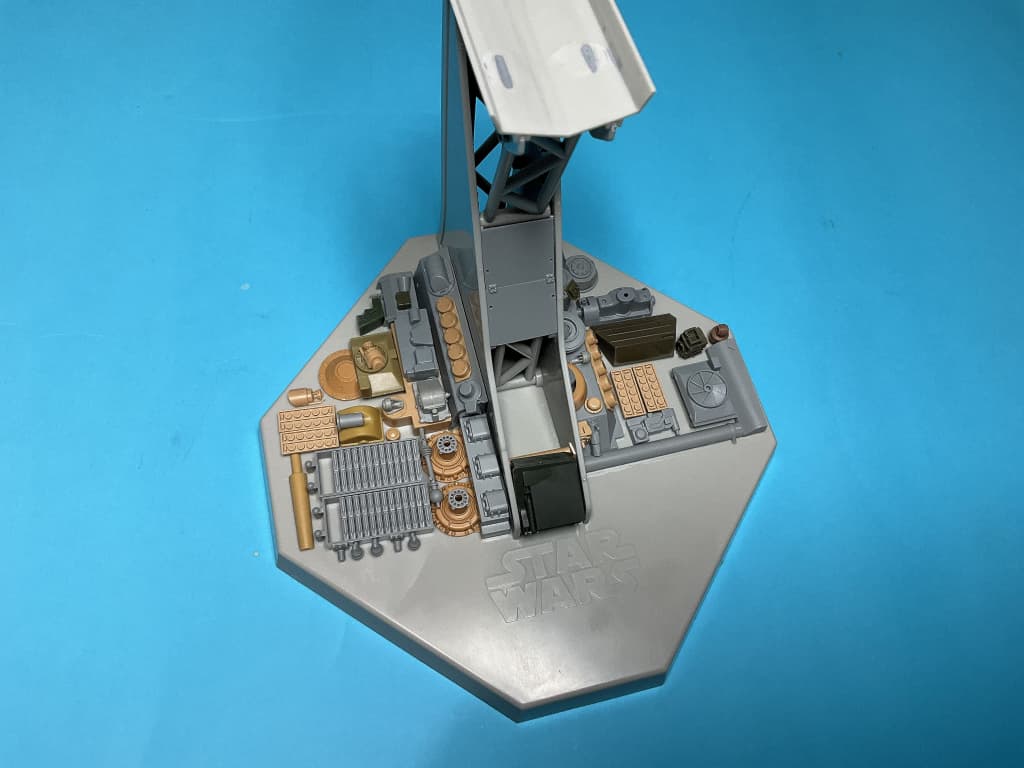
Also adding greeblies to the base. I felt the plain flat base did not do justice. All of this is loose, except the tiny added bits on the larger parts. Just test fitting the position and look.
These are just in place as I go through the spares boxes. Some will be on platforms raising them a bit, with some pipes and other bibs and bobs. There are also some knock out nubs to remove too.