@petbat Indeed a great explanation!
I used to do them in enamel, just it took too long to dry and the smell lasted for ages. I also tried the ‘oil dot filter’ technique, but just never liked the streaky result and unnatural shift in colour. Nature has tan and brown hues for dust, not blue and green and white… unless you are depicting your vehicle spending its life on the white cliffs of Dover… Yes, when blended they shift the base colour and are not so noticeable as their own colour, but still, I leave that to the more artistic modellers with their chipping. It looks good for their intent, it is just not to my own personal taste.
I model based on real life observation of photos, film and being up close and personal with working vehicles. I have been to Tankride here on many occasions. Australia is a dry dusty place and here we have severe Summer storms, that makes a real palate out of the tanks there. Tim never washes the Centurion gun tanks, which are parked outside his main hanger, and one is set up for people to climb all over and into. The numbers of people that clamber over it daily is probably more than what an in use vehicle would see, and still the paint is relatively chip free for the most part.
In the end, it is all personal choice and how you feel a certain technique fits your own style. You have to try one first, before discounting it or adding it to your repertoire.
1 Like
Great info once again Peter!
The tracks for the TUA painted. I Used Vallejo dark rust for a base, dry brushed with orange rust then the rubber pads painted then all the steel parts burnished with graphite.
Of course they will get some dry mud later.
Road wheels next.
3 Likes
Base coat is on. Not happy with my free hand attempt UNEF markings… (overall, the brush strokes I can make go away) might be a repaint in the works.

Edit: Ok. Already toned down the blue and cleaned up a little. Much happier now. Masks just weren’t doing what I needed them to do. Too many surface details to burnish down nicely and i was getting bleed through.
Aaaannd I just painted over everything. Brain needs a beer and time to consider options.
6 Likes
That actually looks pretty decent. I’m looking forward to seeing how you go about the repaint though!
1 Like
Yah I agree it looks very good. Can’t wait to see the repaint.
On my modeling side I wasn’t wearing gloves and a large fingerprint appeared in my white… 
Im currently adding a few more light coats of white to deal with it.
Curious. Does your kit have the poly caps for the idlers? They appear in step 7, part T3, I think it’s an error held over from other kits, but want to co firm.
Big question here. I’m hoping someone here can answer before I go deep diving into my library -
In WWII, where did the Canadians get their paint? Should I paint my Ram Mk II Olive Drab or SCC 15?
I’m fairly sure I read that they used the SCC standard
1 Like
They probably would have been painted Khaki Green No. 3
SCC 15 wasn’t introduced until later in the war and they probably wouldn’t have been repainted given their rear echelon status
Edit: You could probably go with SCC2 Brown as well
1 Like
As the others stated, they mainly used British colors, so SCC2 brown, which is what I think my churchill should be, khaki green no.3, or SCC15 for later vehicles. SCC15 is similar to olive drab but as far as I know a tad more green and brighter
On that topic, does anyone know if the Churchill’s at Dieppe were SCC2 or khaki green no.3? I’ve seen both referenced and would appreciate a definitive reference
1 Like
I’ve got a nickel that says there is no definitive reference.
Despite the myriad of colour changes during the war, policy was always to use up remaining supplies of existing paint stocks and not to reprint vehicles just to conform to the new standards.
Given that the Churchills were issued to us for the raid however, and would have (presumably overhauled) I’d say it’s safe to say they were more likely SCC No. 2
1 Like
I was leaning towards scc 2 as well. The first use of the Churchill Mk III as far as I know was at dieppe. Since they were newish, I am guessing they would be SCC2.
I’ve also read a recent post by Mike starmer saying SCC2. Reason I’m asking so early is I need to pre paint some parts as they’ll be hard to paint once on the vehicle.
Thanks gents, Khaki Green No. 3 it is, then. I have the hull finished up, will have the turret finished today.
9 Likes
Don’t know what you’re doing for markings but
Here’s a bunch of colour plates for you
There’s a couple Rams in there on top of every other bloody thing under the sun
Interesting vehicle. I’ll be watching this one more carefully.
Yep, that photo album is going in the saved folder
1 Like
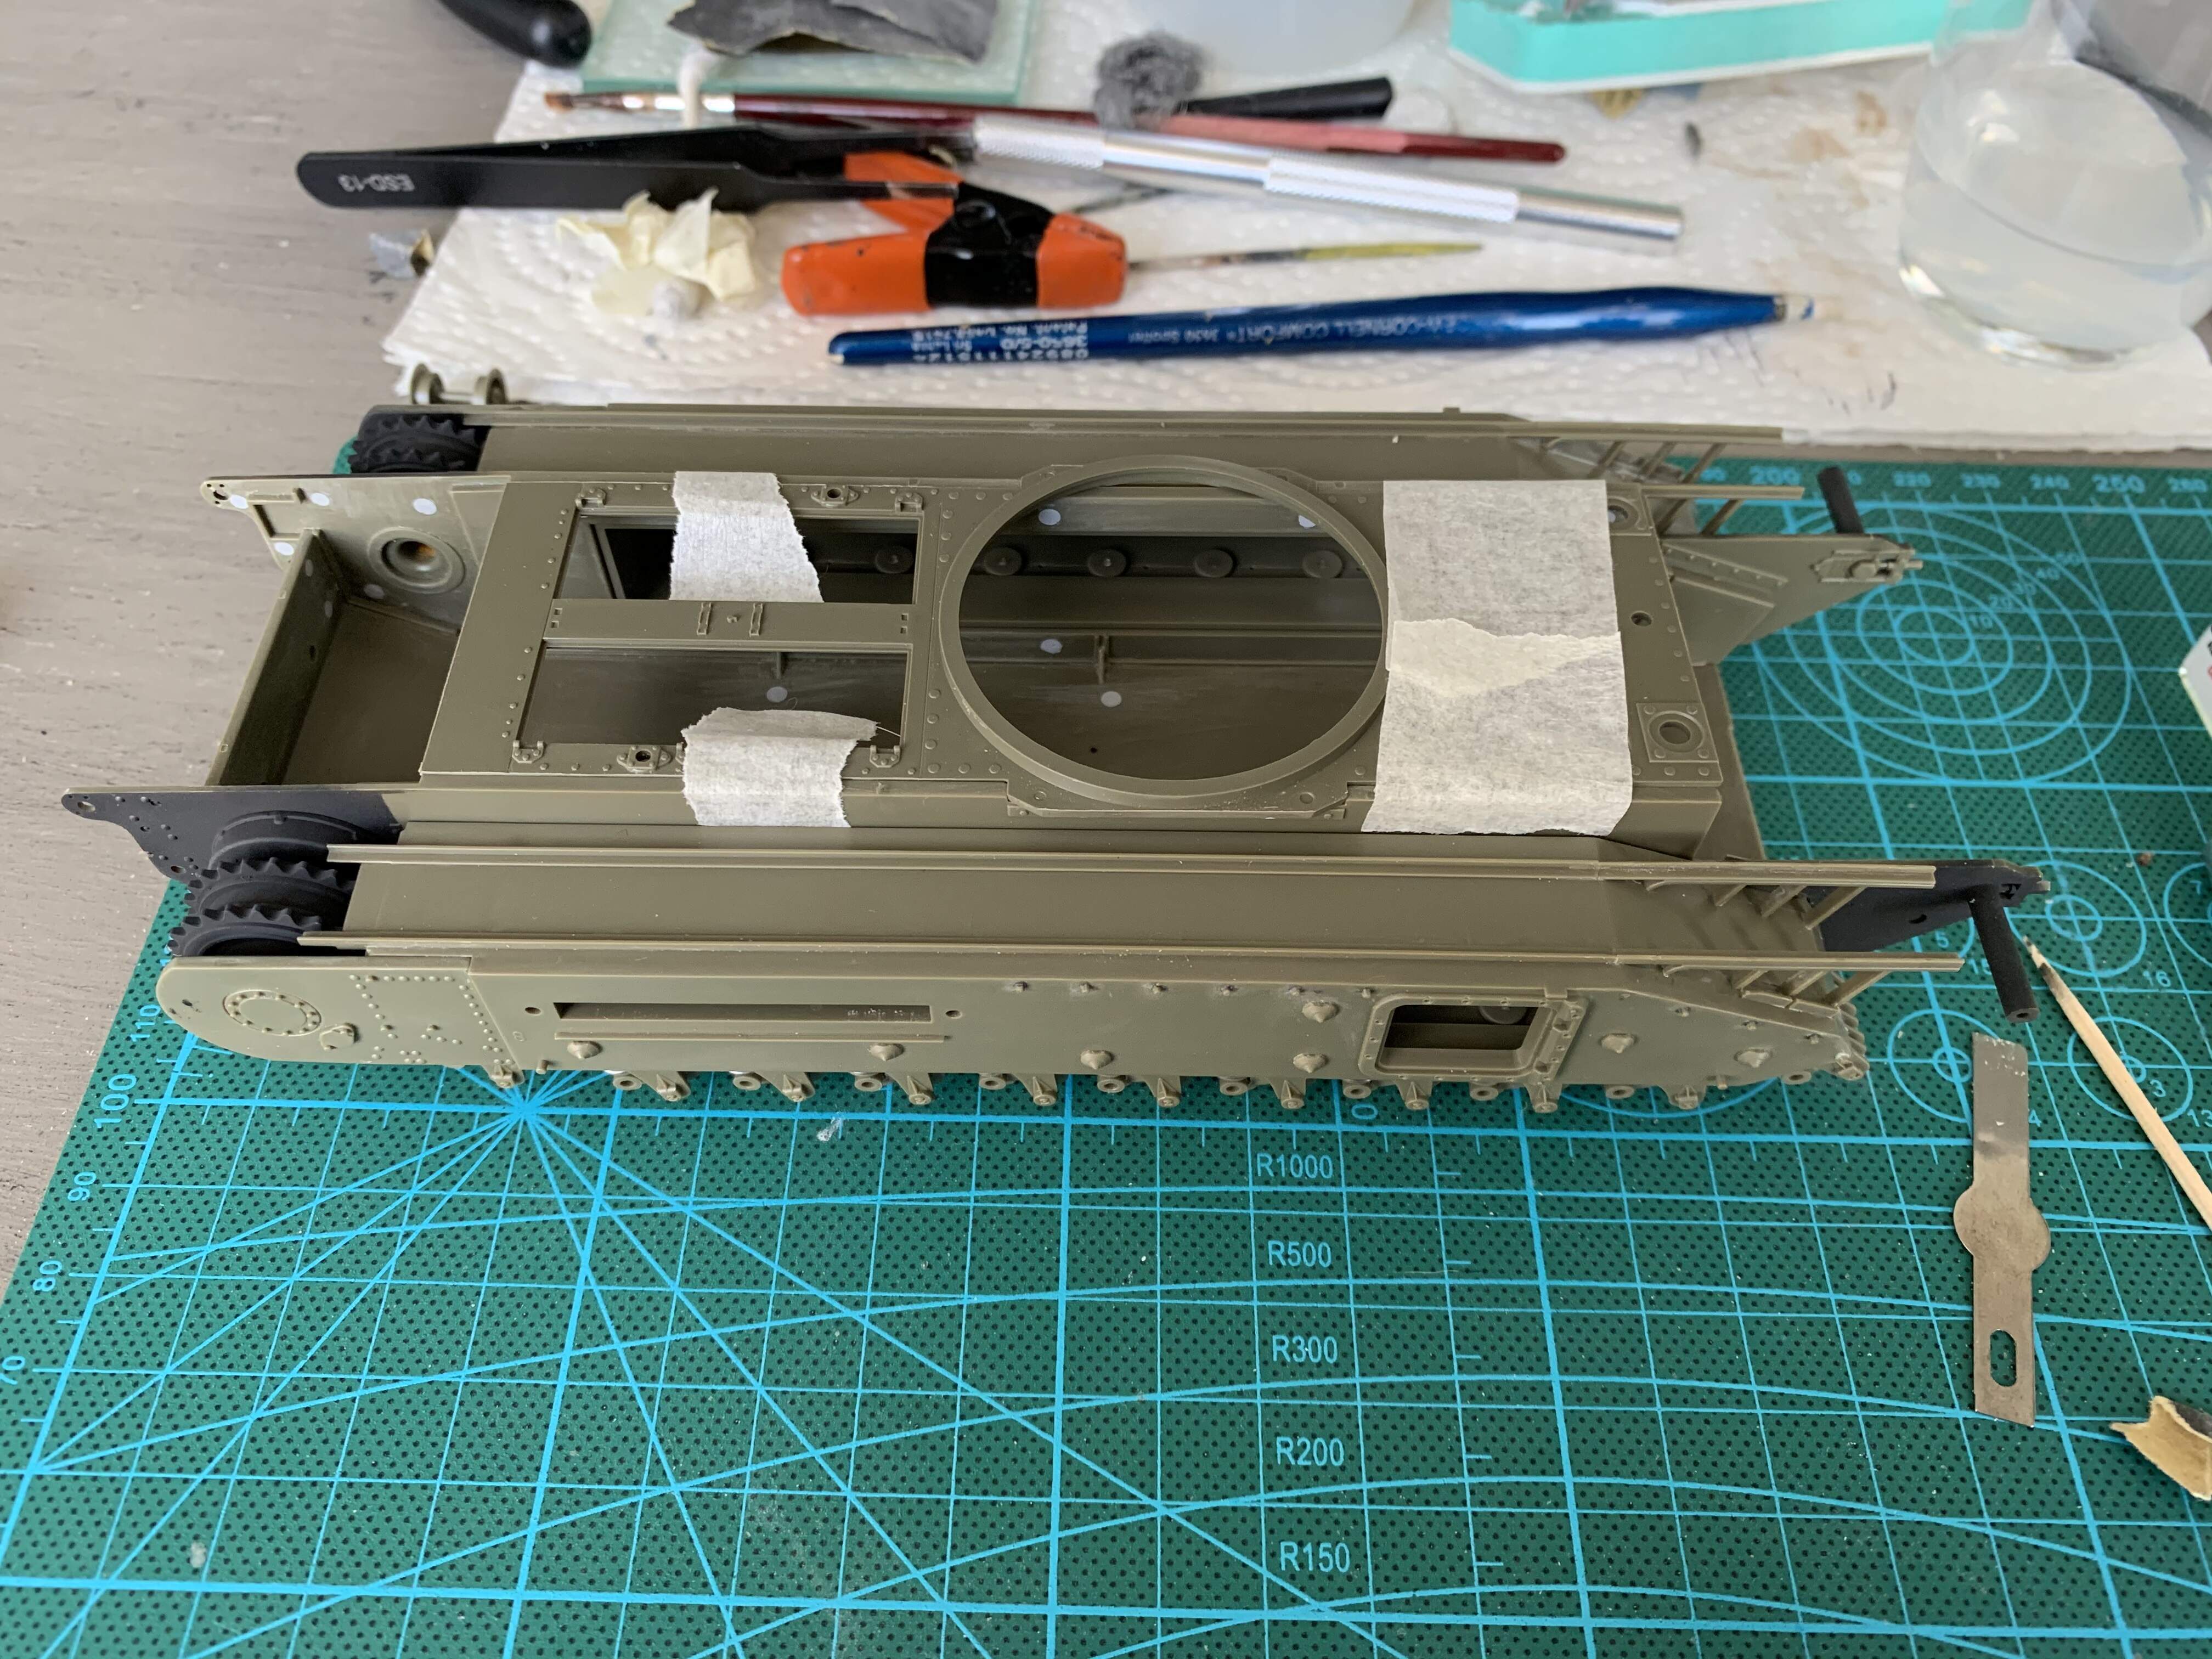
Got the hull tub mostly fitted together, sides are dry fitted right now but will get glued on tonight. Was bogged down a bit priming areas that will be hard to reach later and then letting the primer cure. Should be a really smooth build going forward. The suspension is easily the most complicated part here. I normally hate multi piece hull tubs, too much room for catastrophic error. But I’ll give AFV club credit. Their engineering made it super easy to make sure this one was square

6 Likes
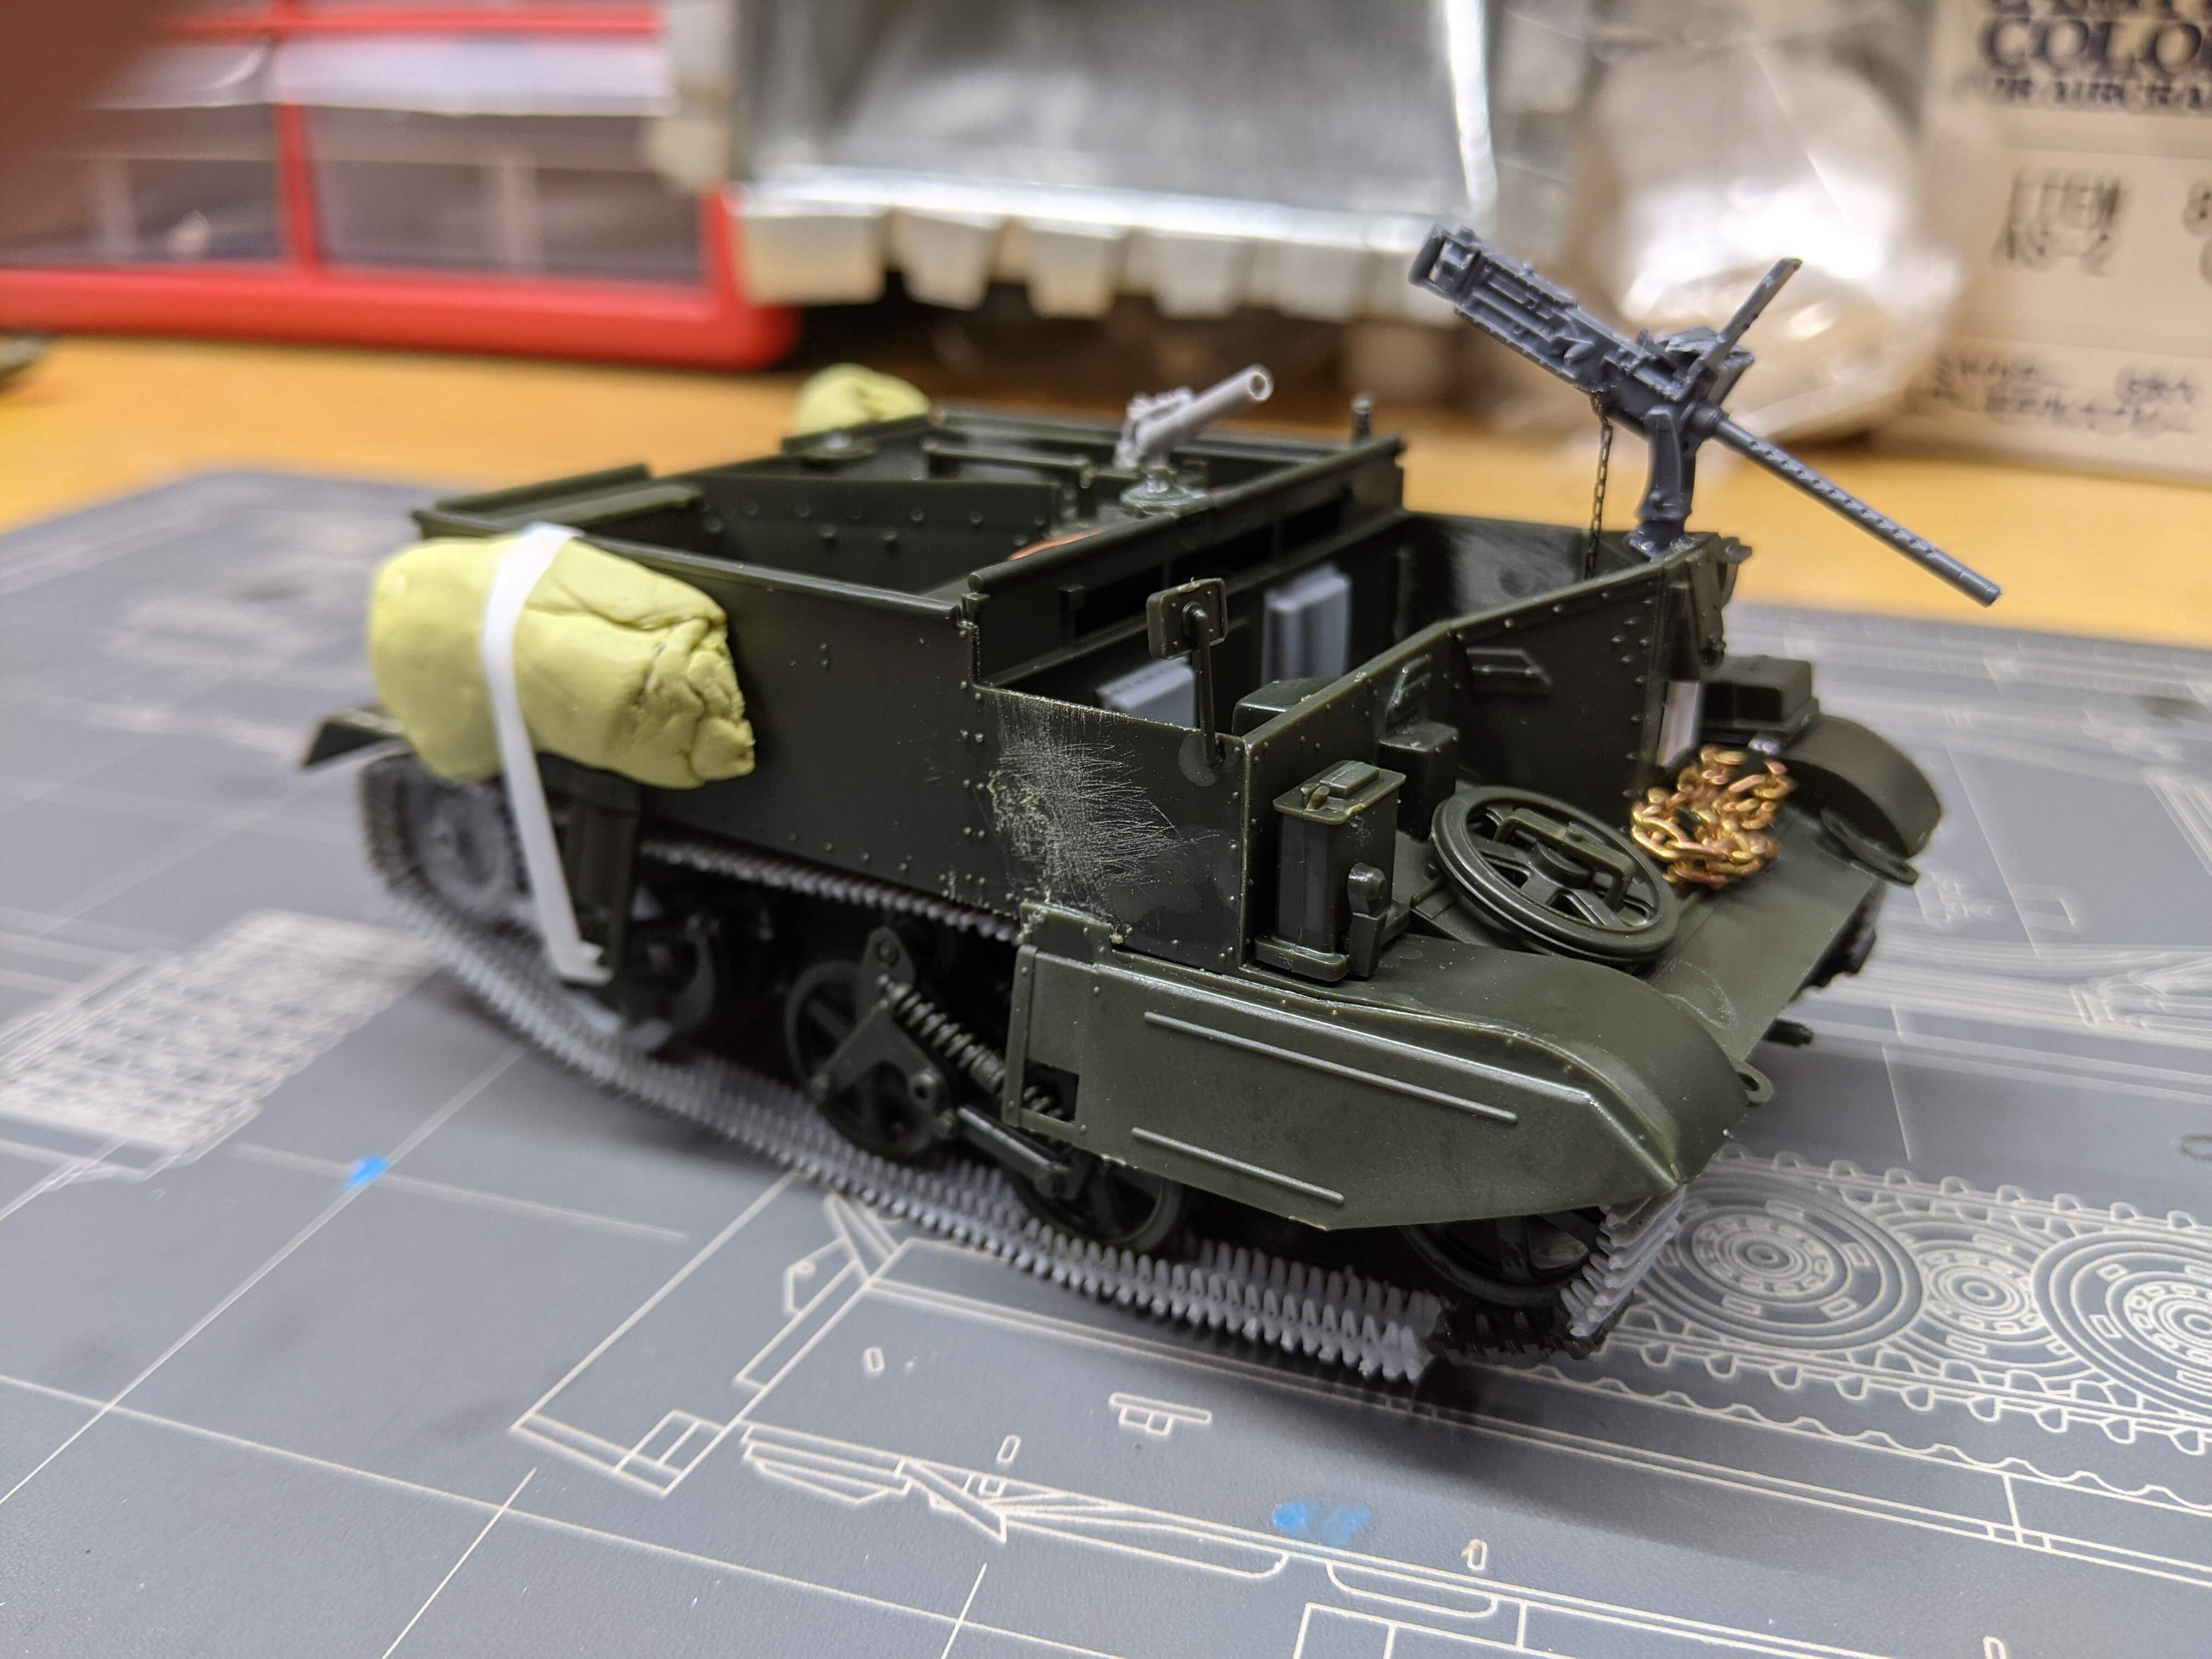
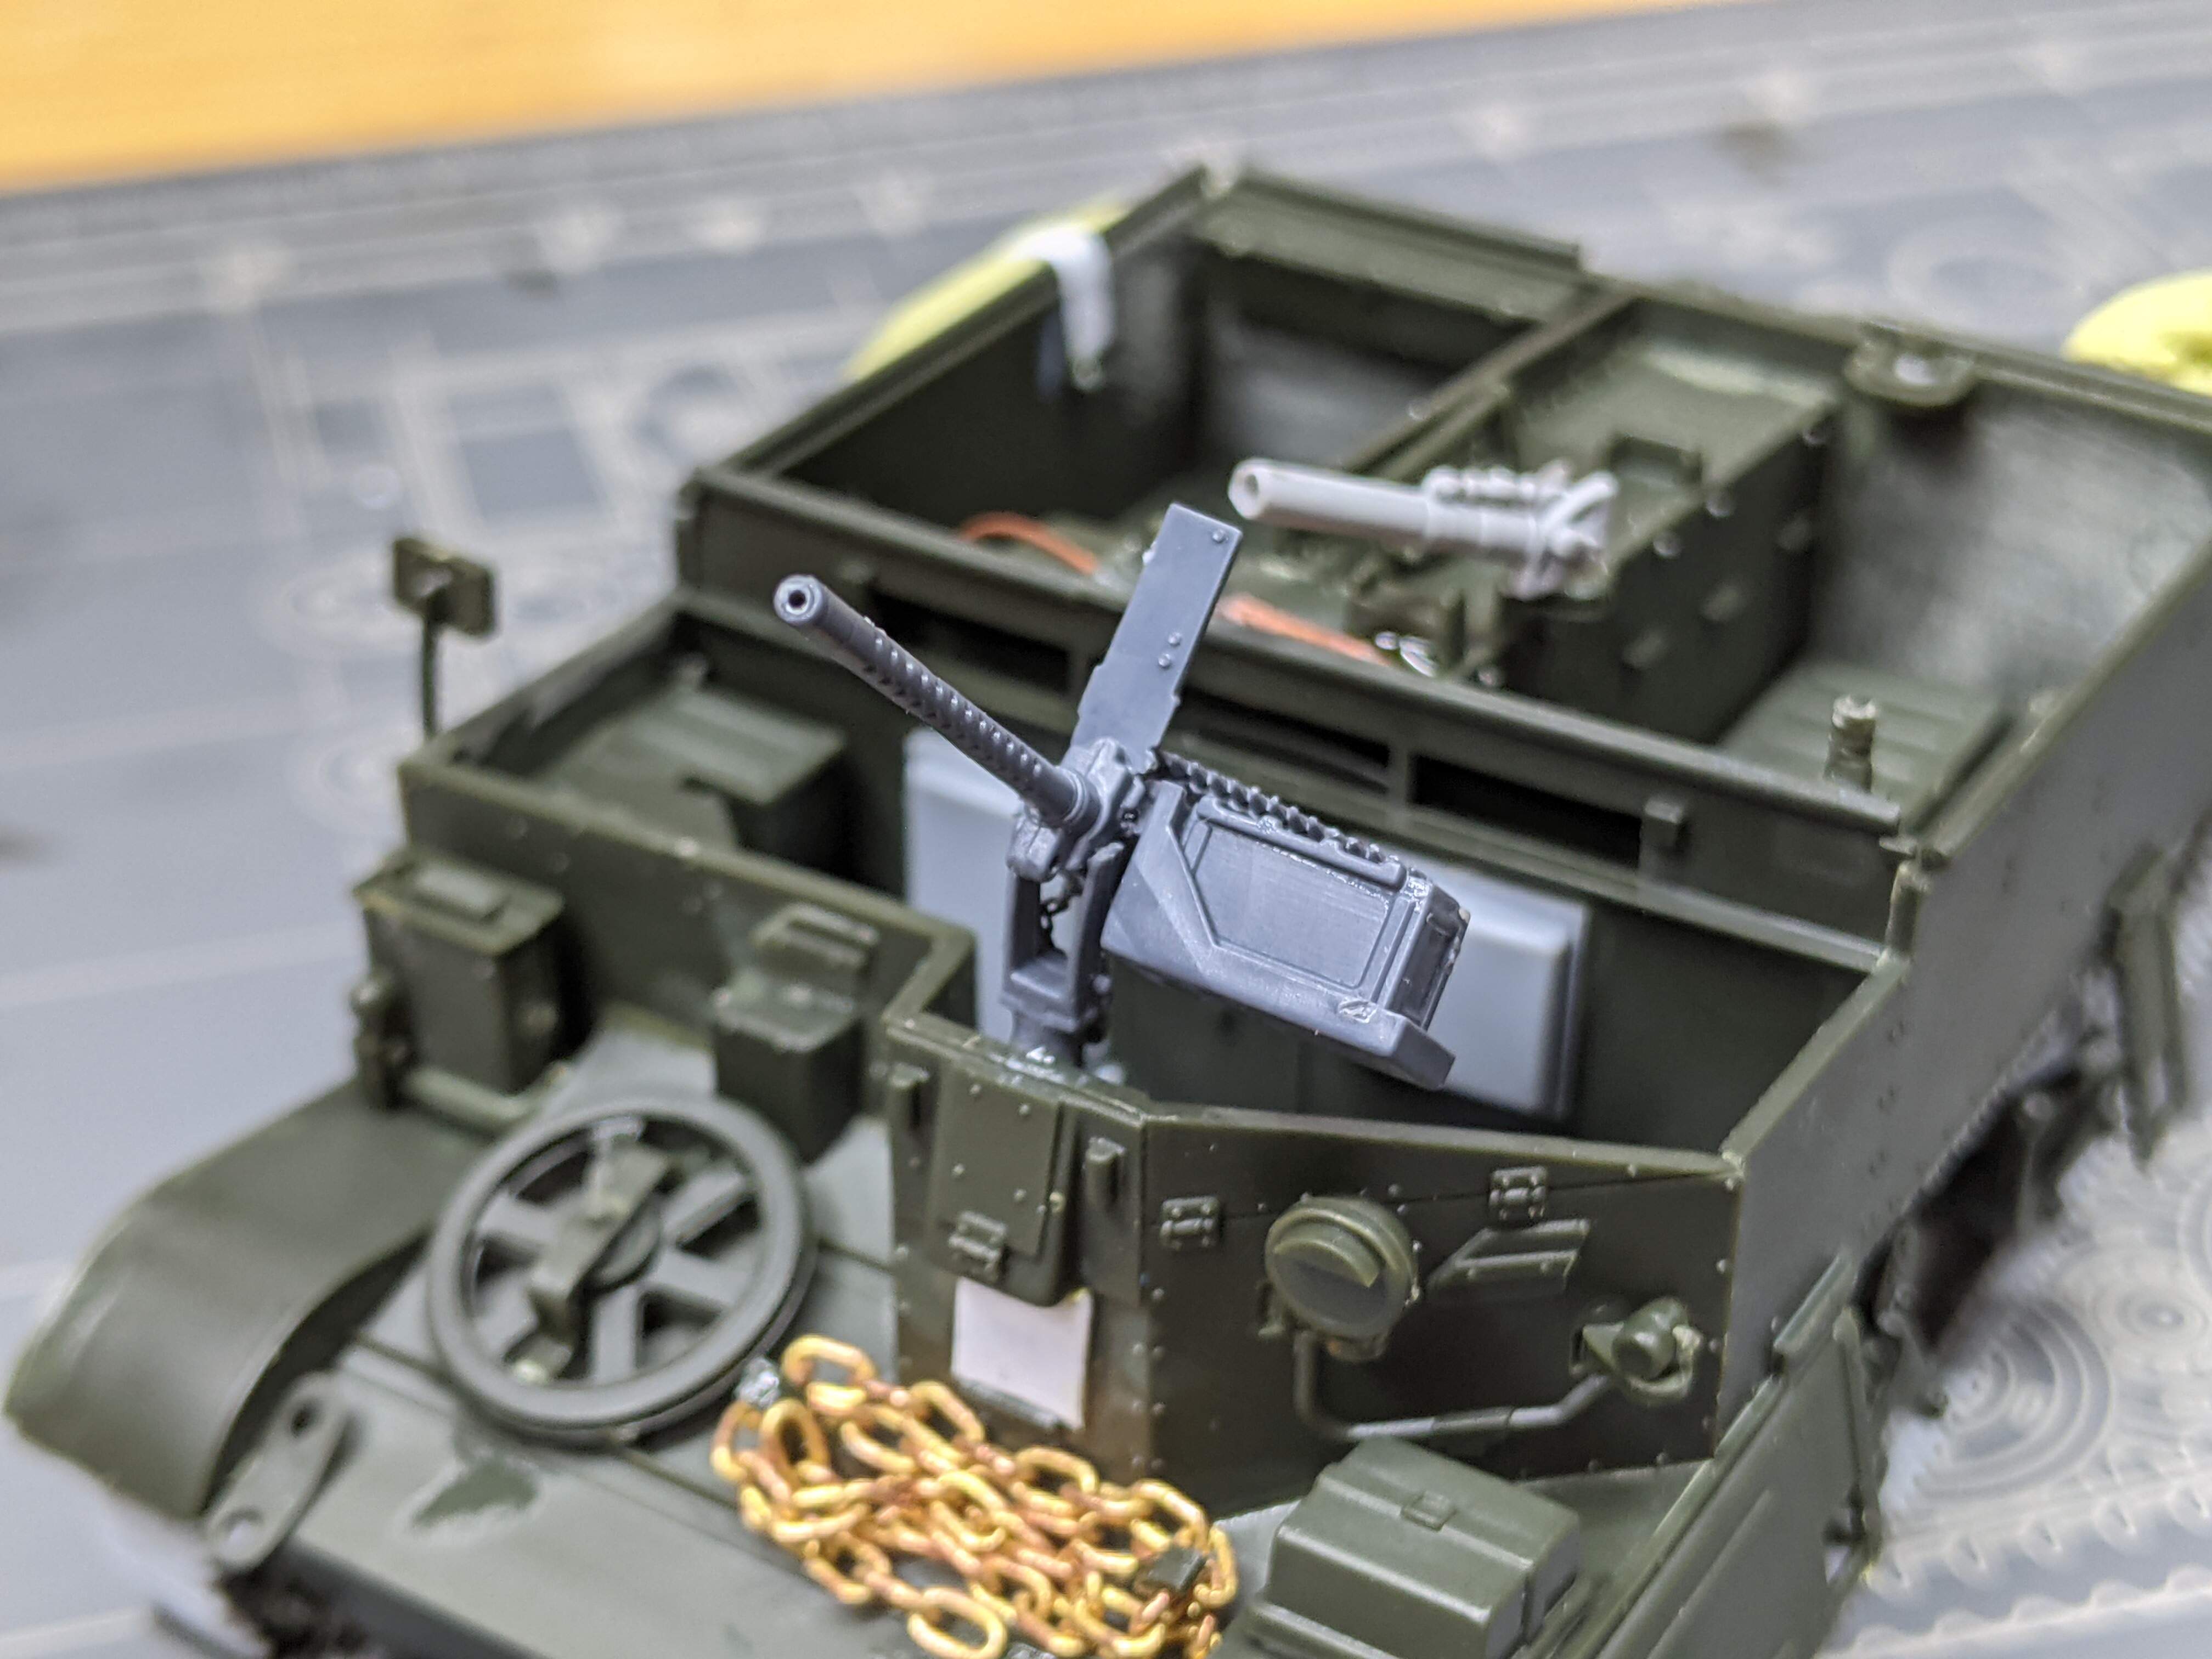
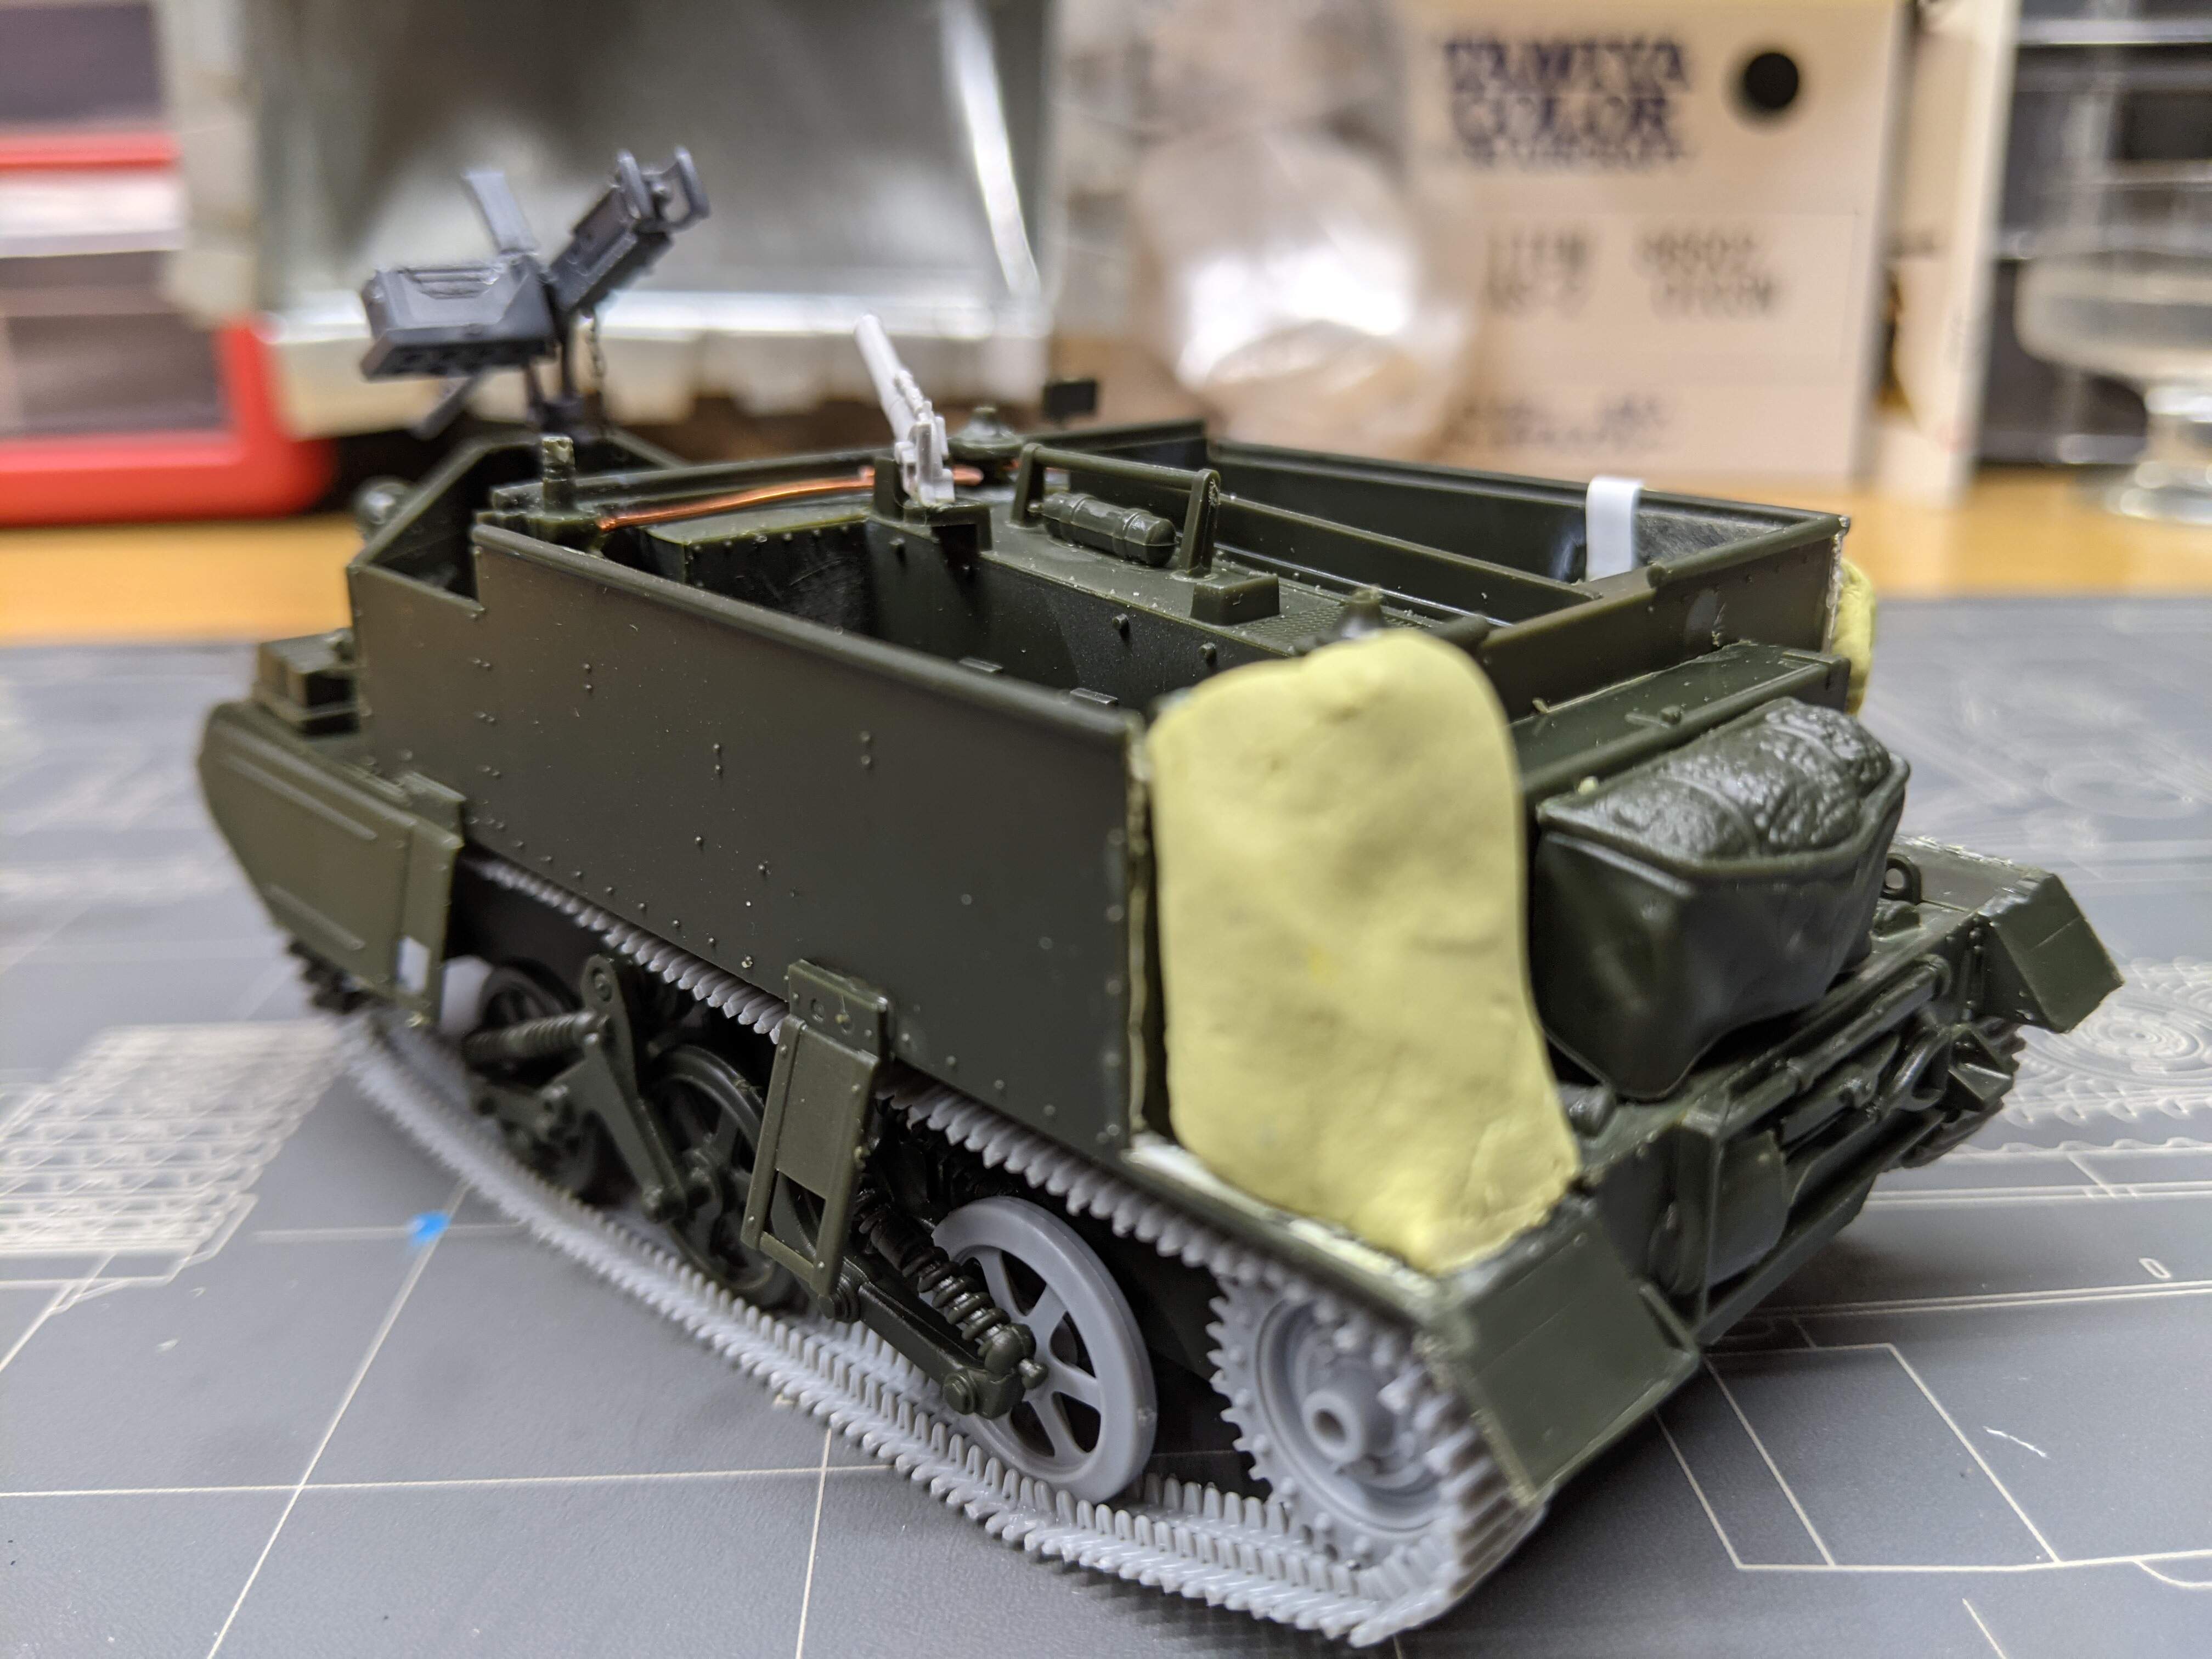
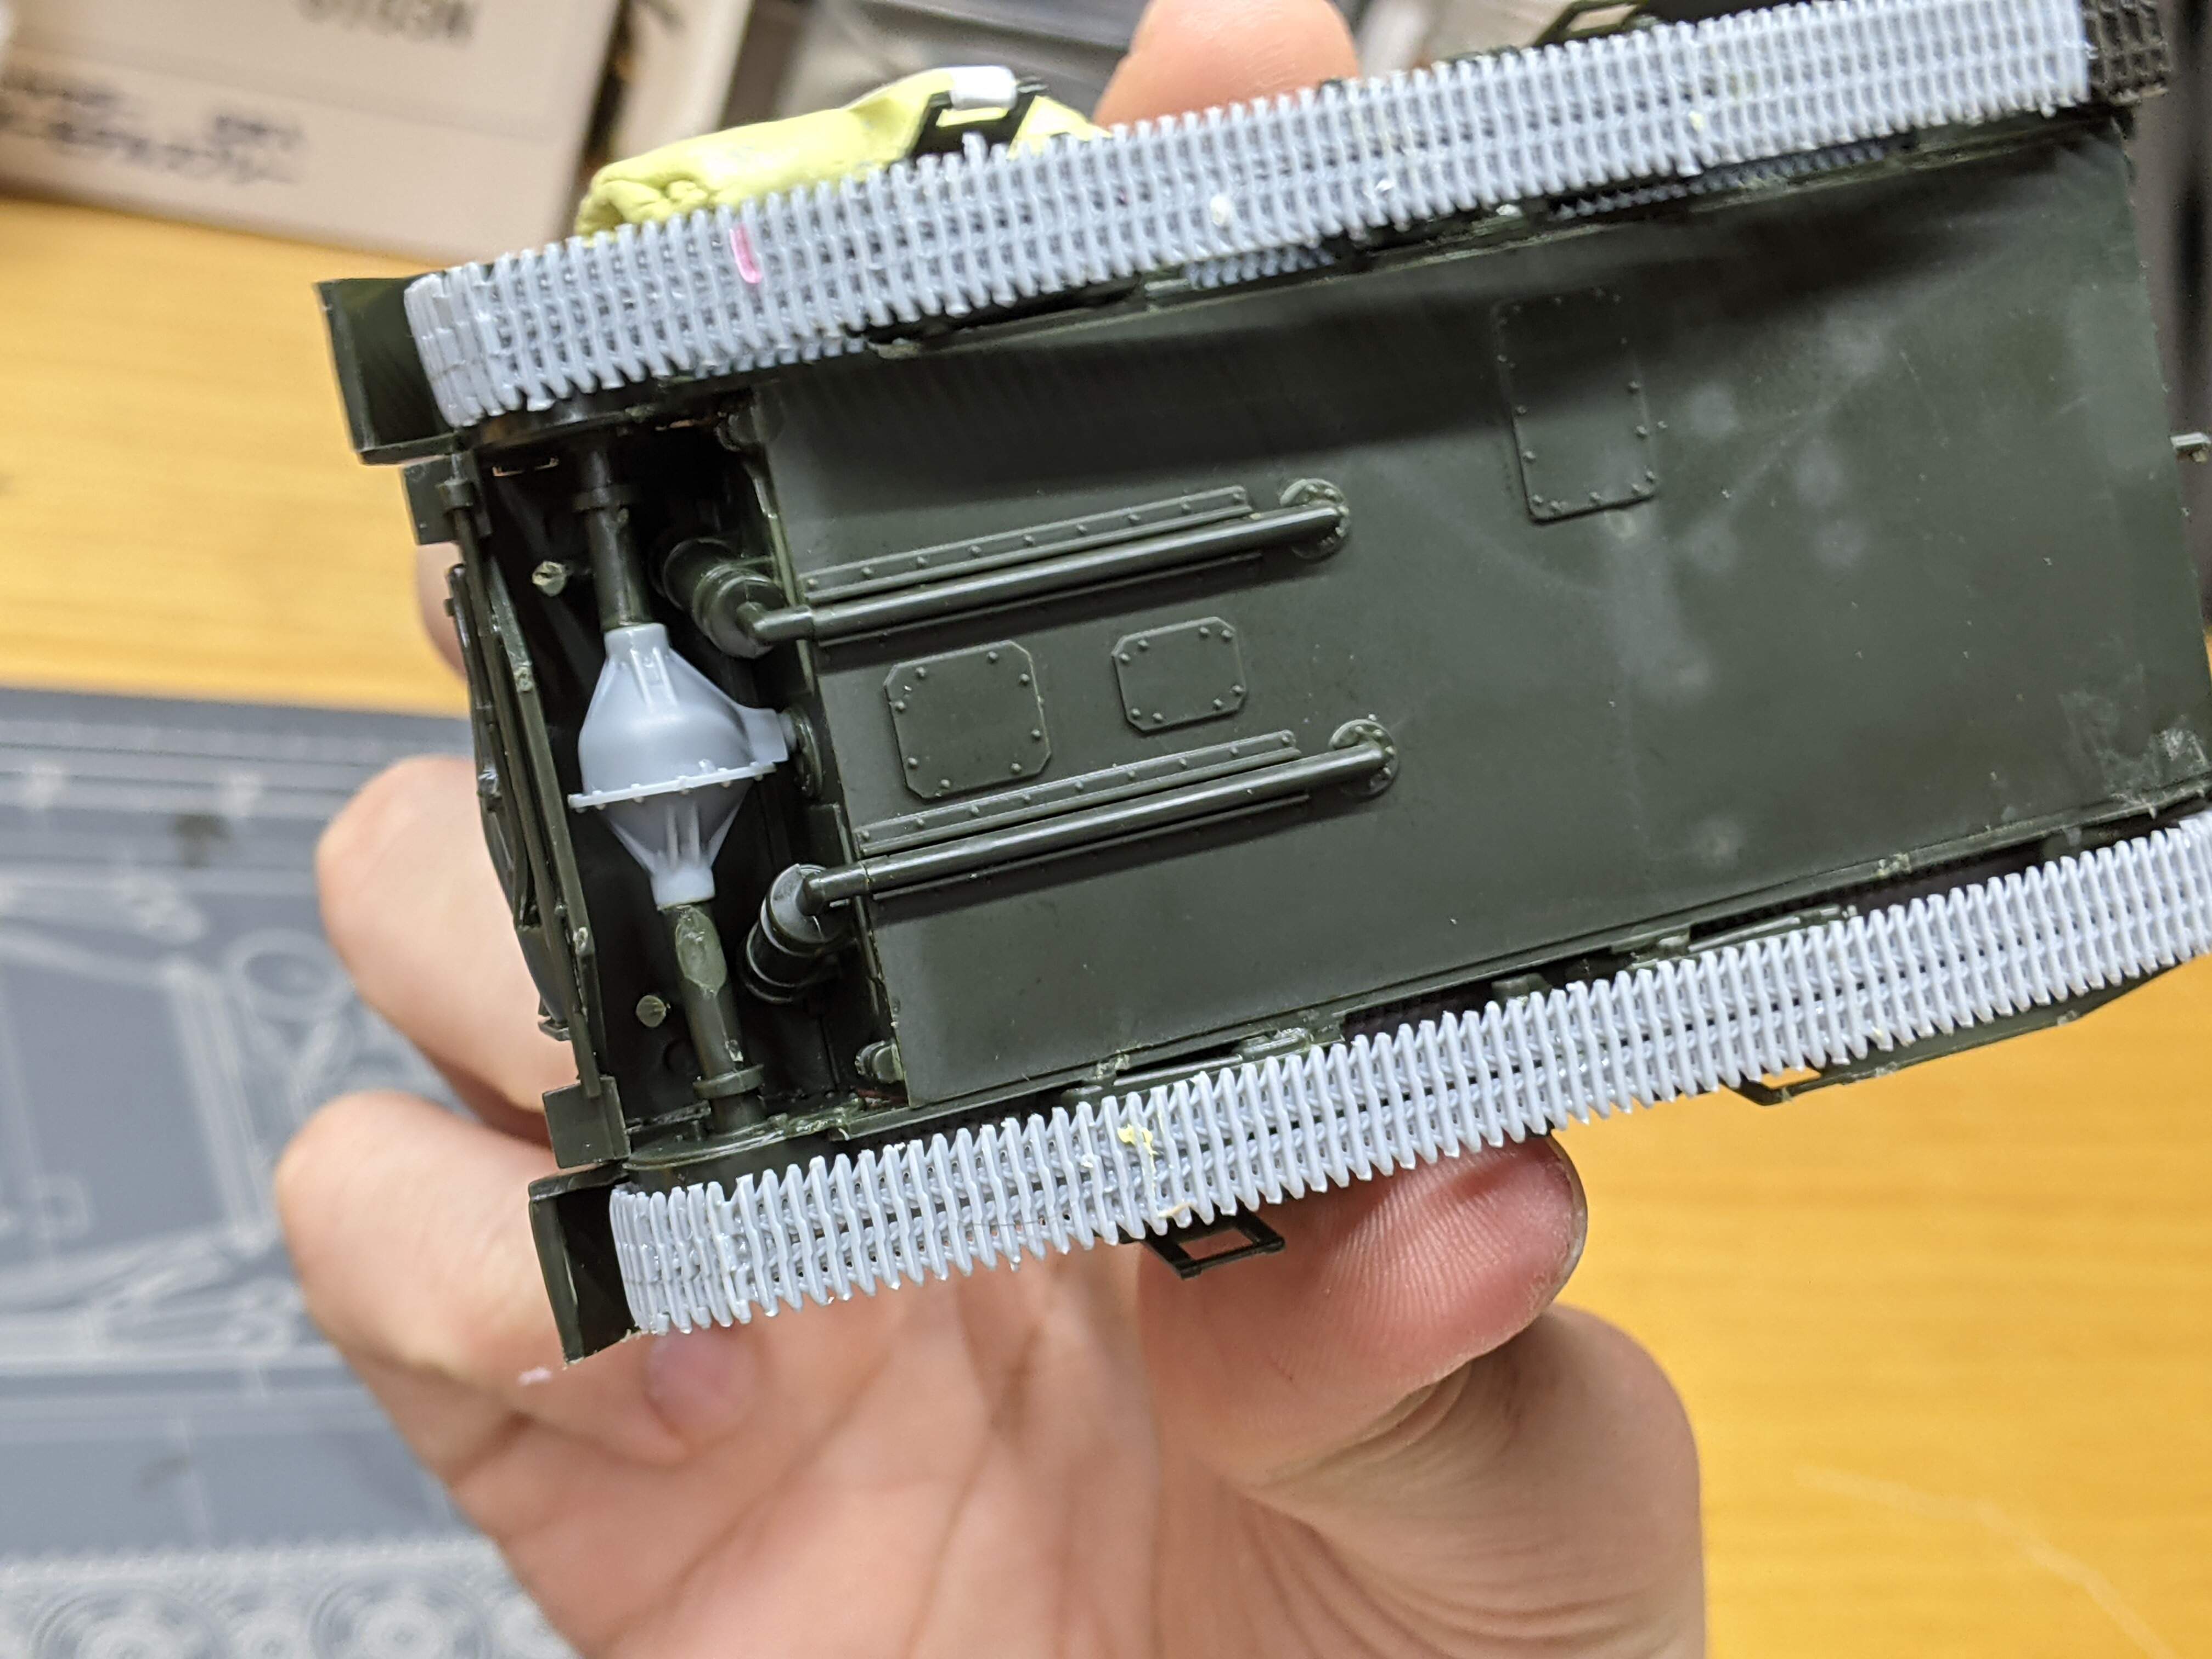
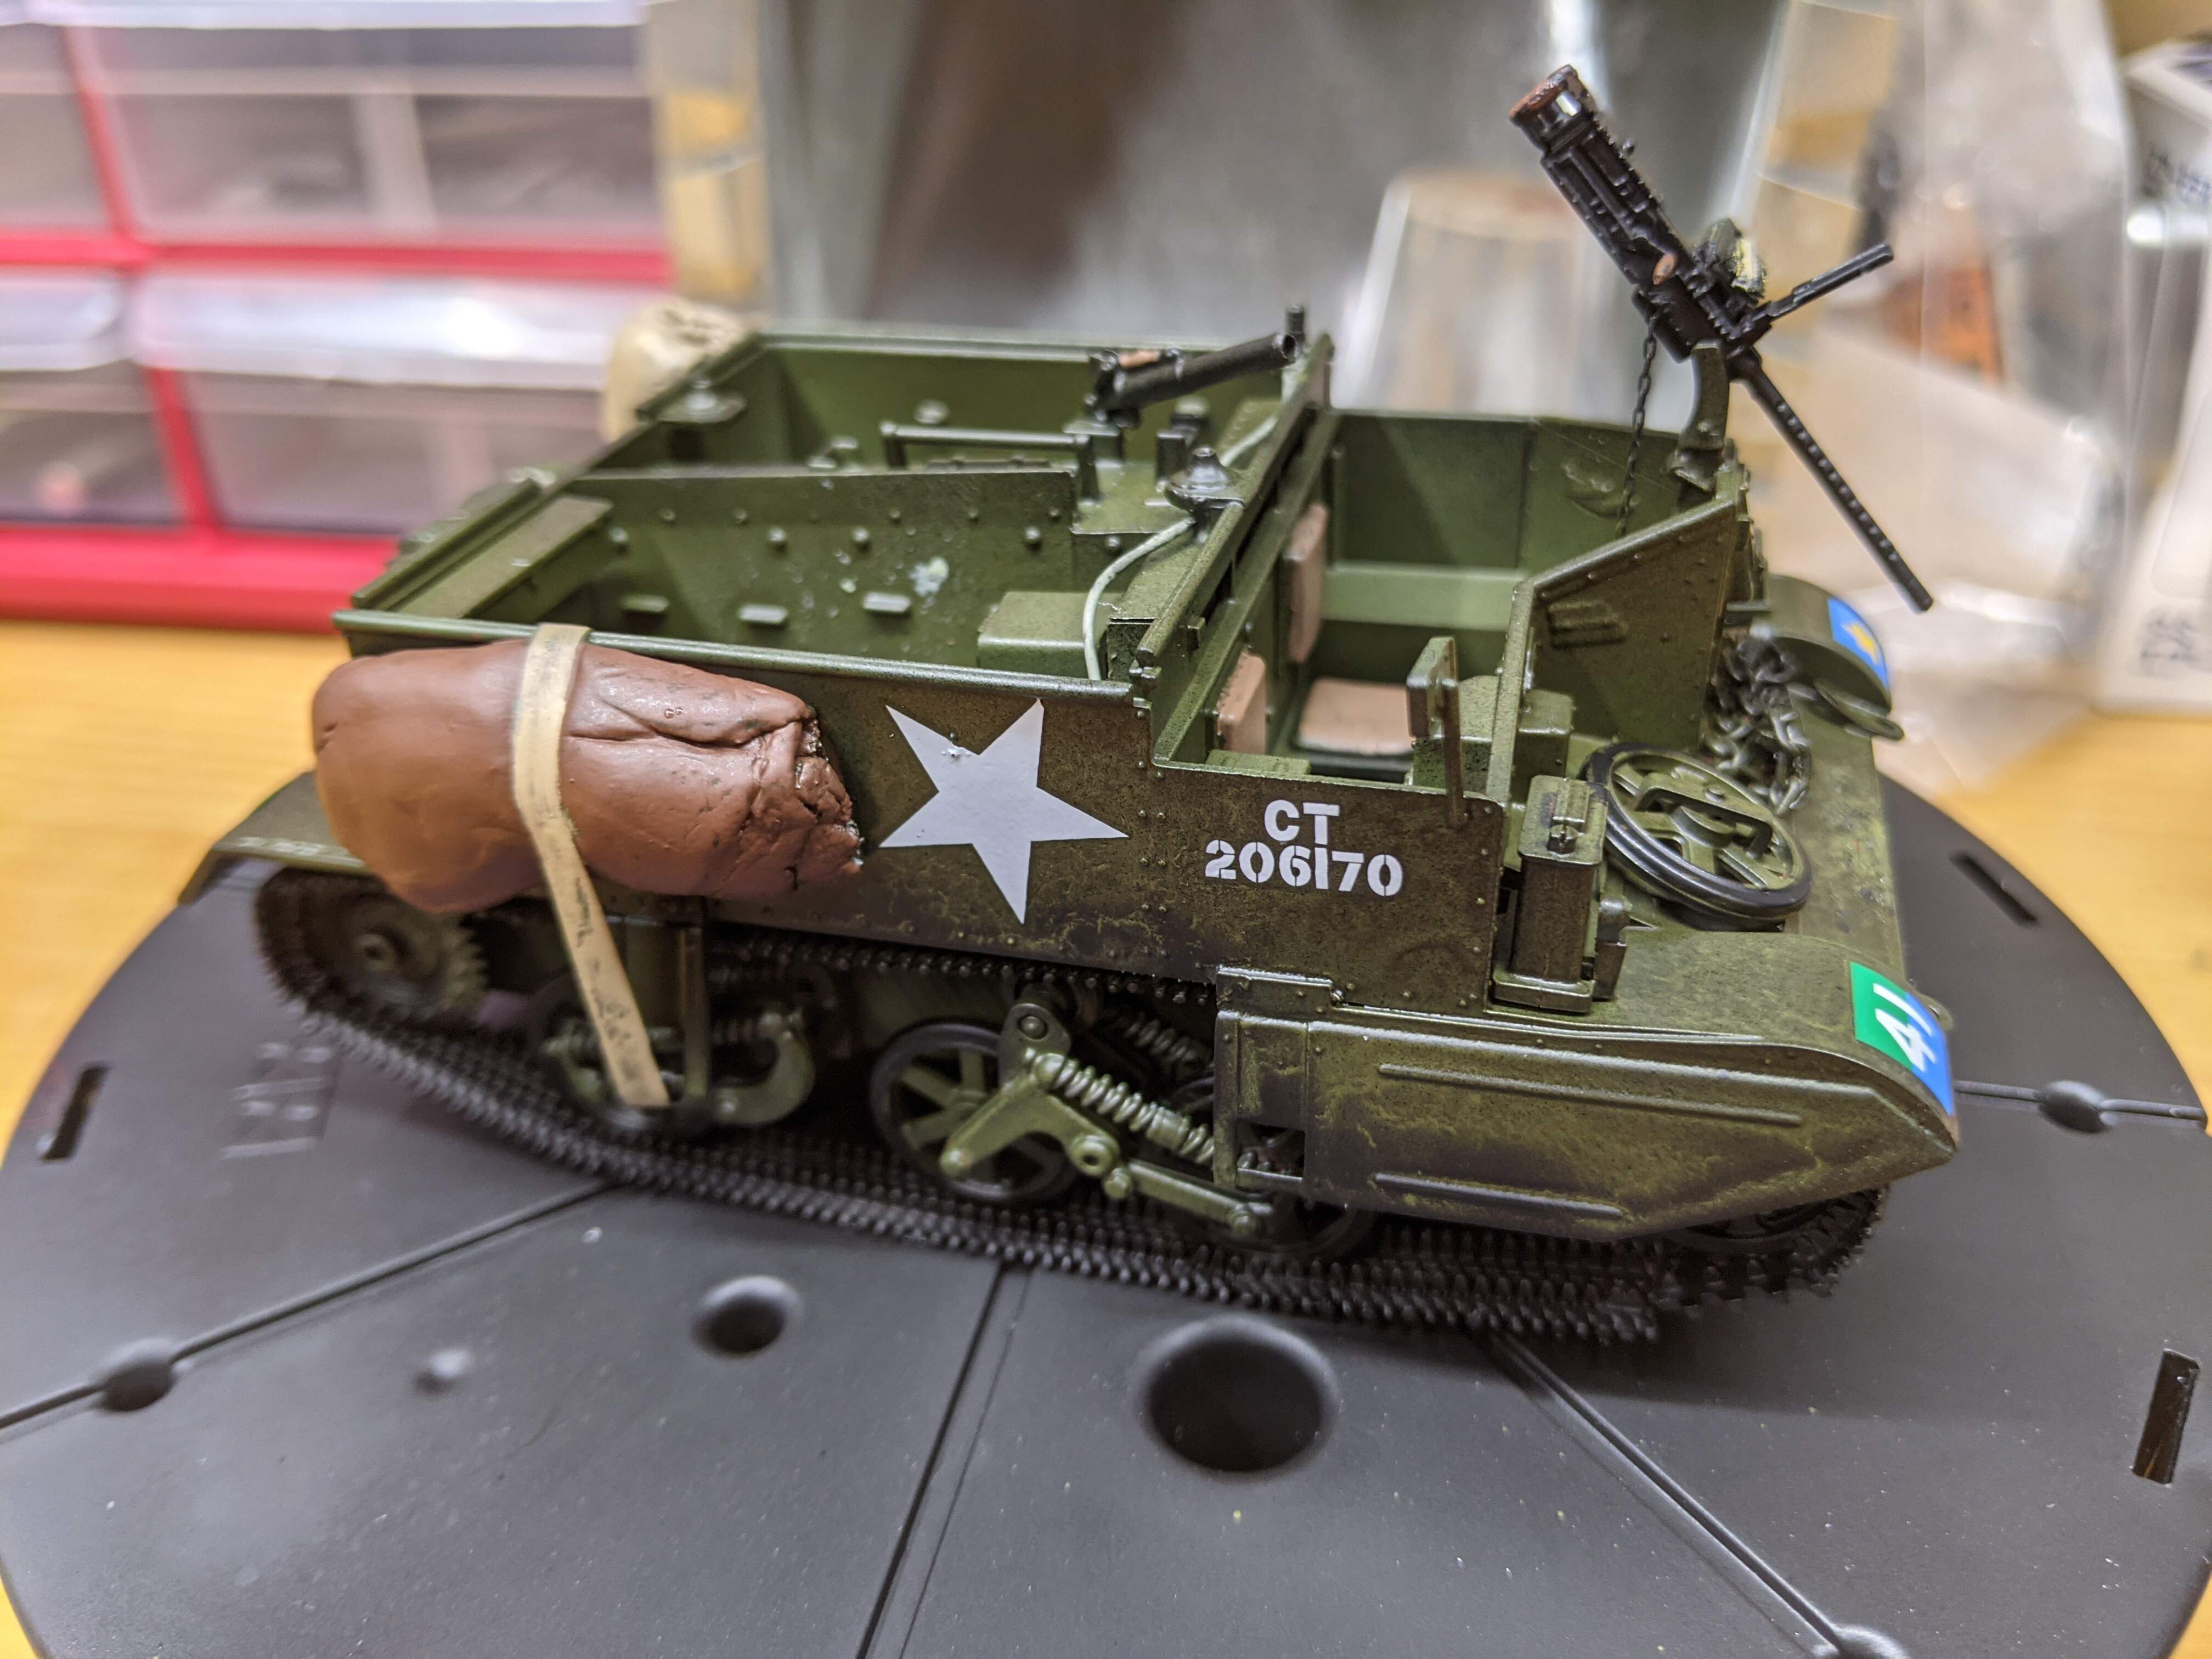
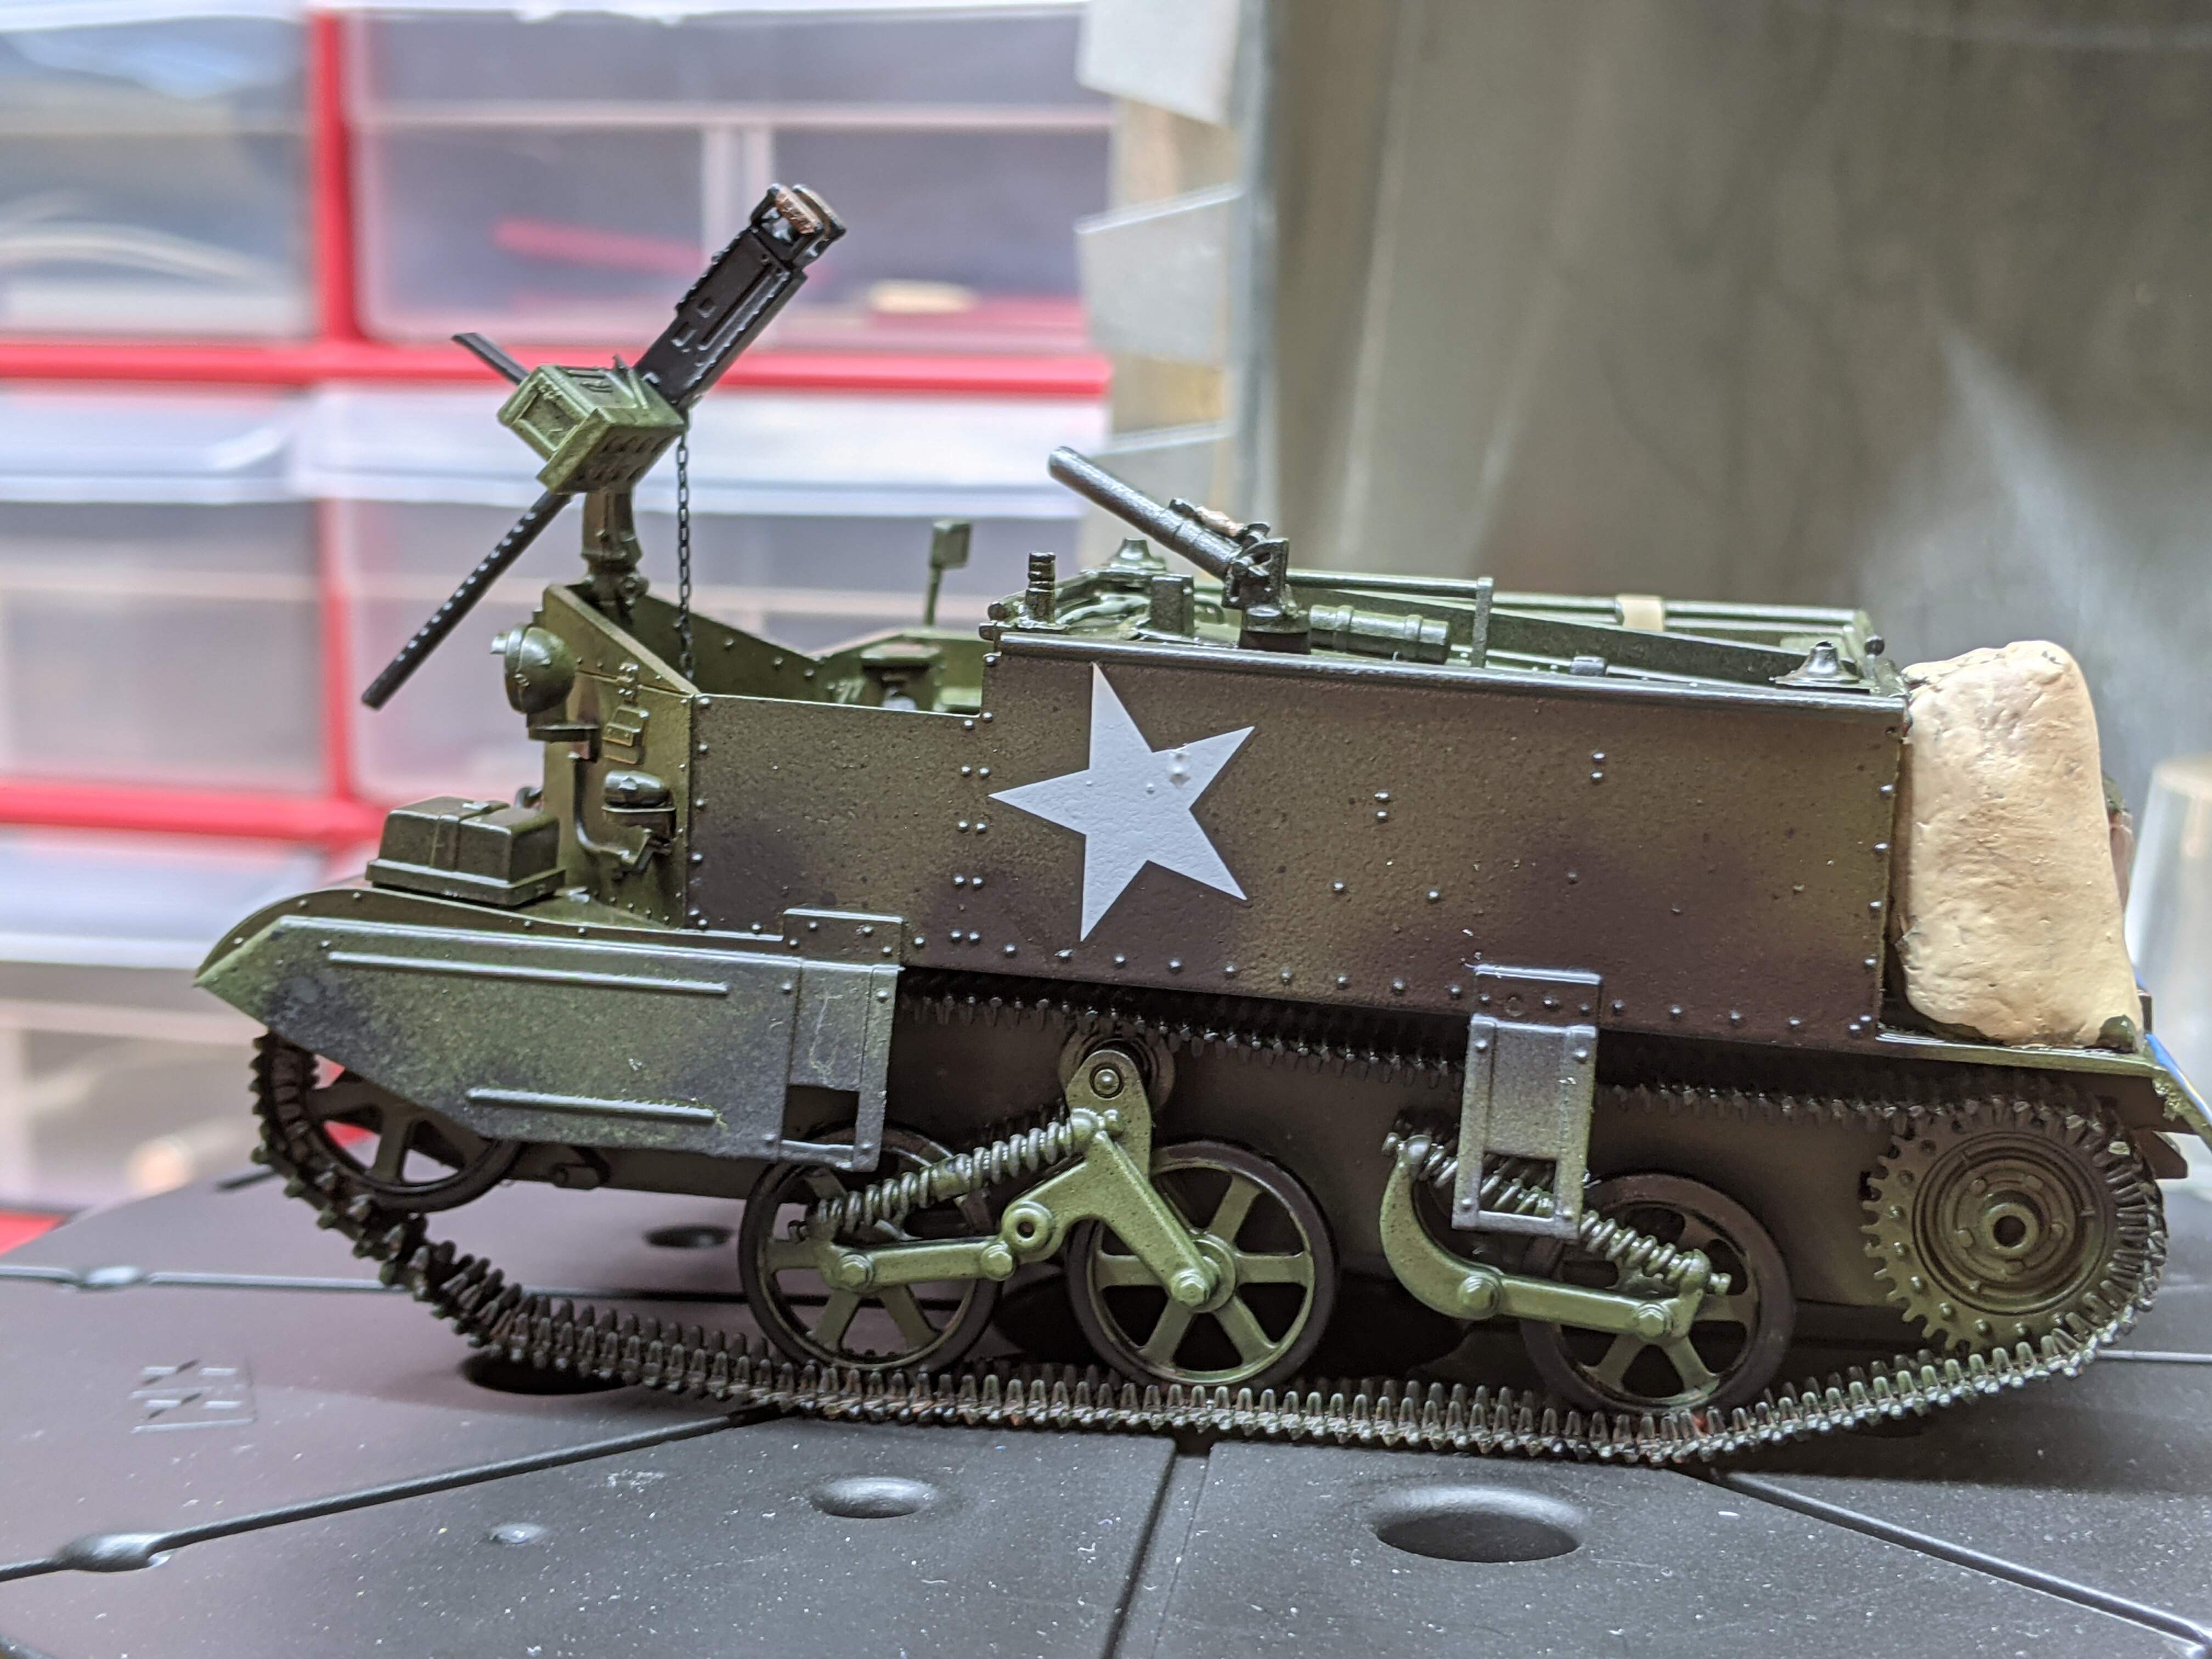
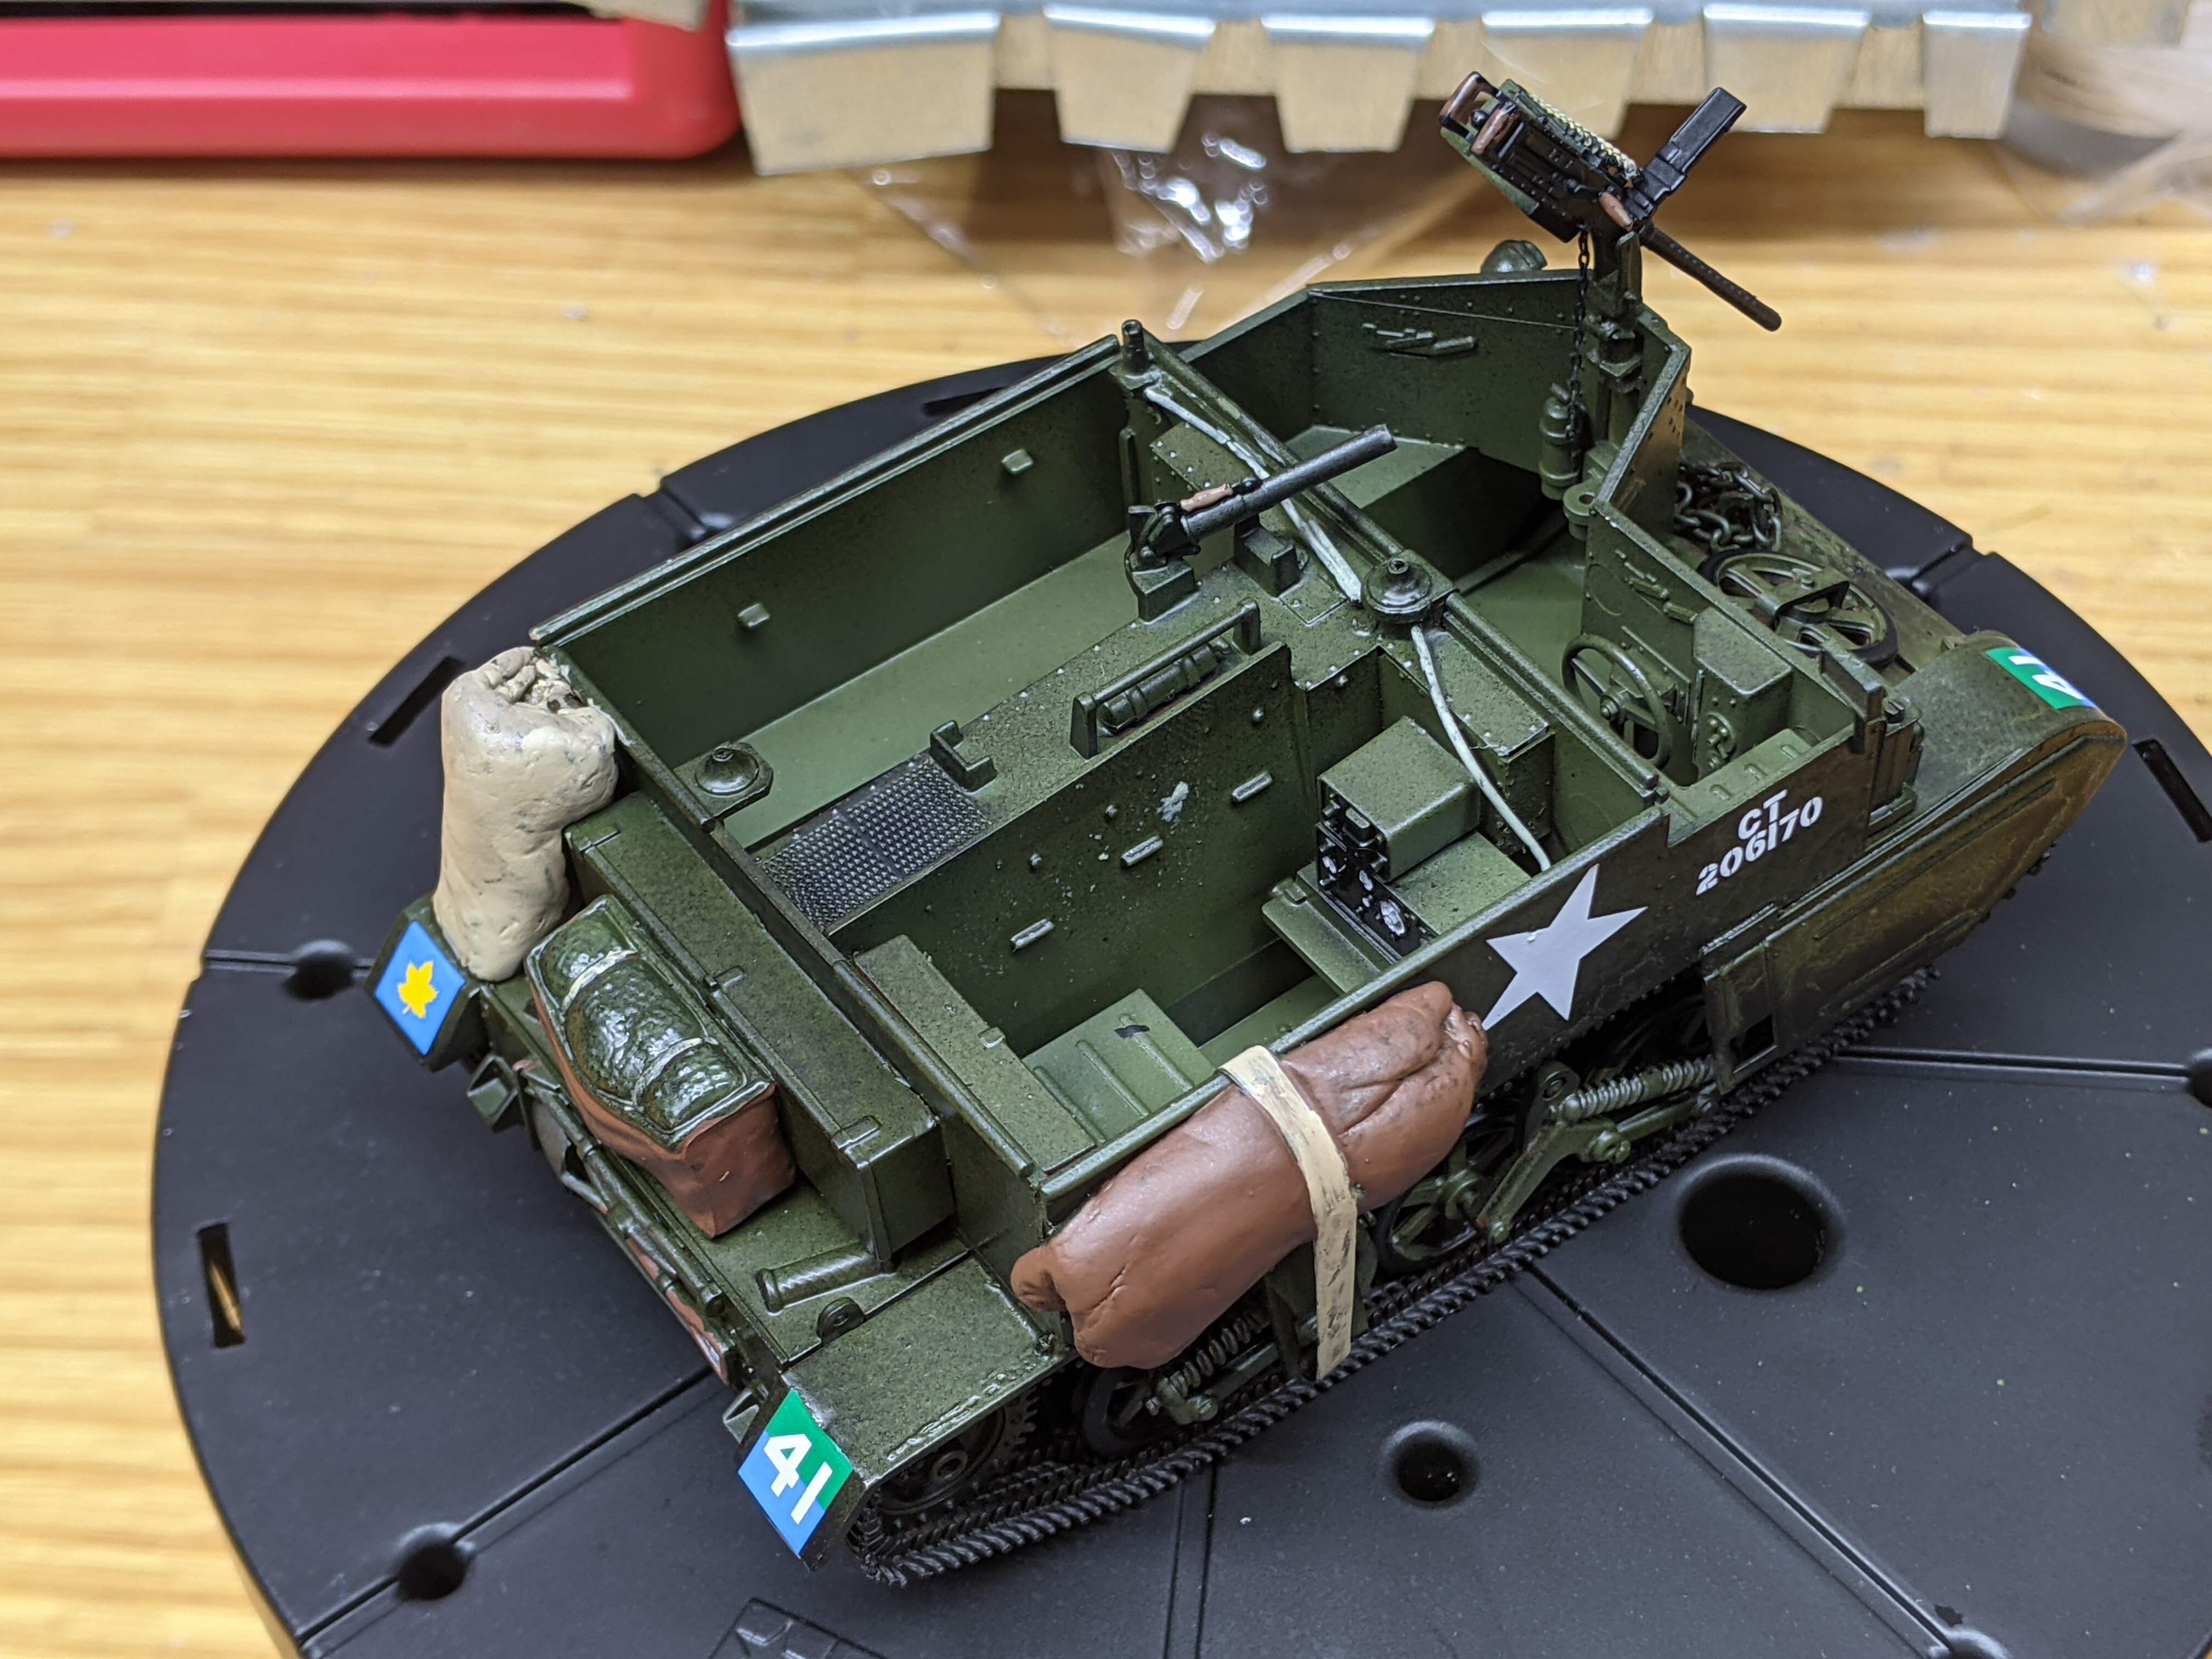
Time for my first update on my second build for this campaign - the universal carrier.
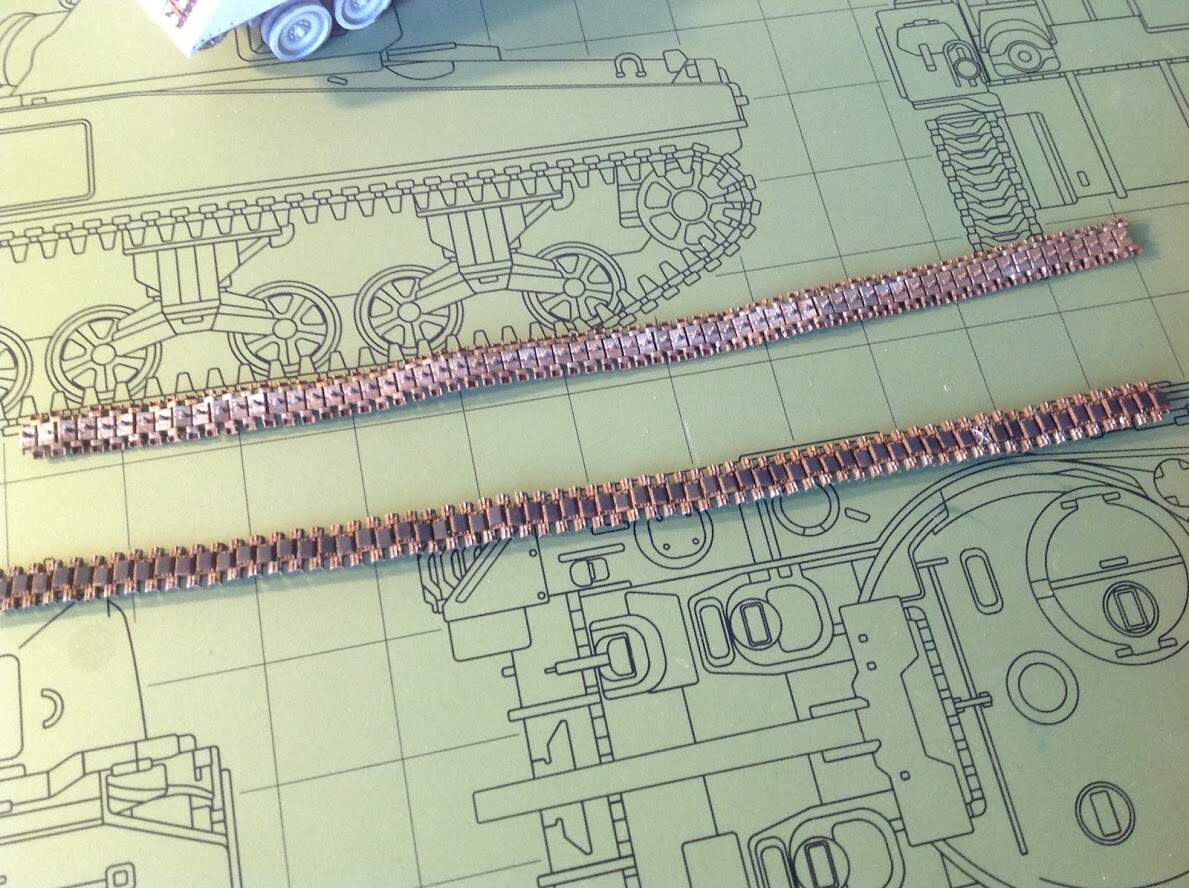
Canada used a number of variants of the universal carrier throughout the war, such as the Windsor carrier. However, the UC would still be one of the most frequently used vehicles in the Canadian Army. (Don’t forget, Canada on a per capita basis was THE most heavily motorised army of any country in the world at the time.) At first, my intention was to build this as a PIAT Carrier, an experimental vehicle which carried two racks of PIATs for use as indirect fire support. However, as things turned out, I wasn’t really feeling it. Instead, I’ll be making a vehicle from the Second Canadian Division in northwestern Europe. Why? Because I saw a photo on MapleLeafUp of a 2 Division carrier mounting an M2HB with an air cooling jacket. I saw that photo and thought “That’s cool! I’ll build that instead.” No fear though, the PIAT will still make a cameo in this project  To make my carrier, I’m using Tamiya’s European Campaign UC kit. It’s an old kit, but it’s pretty good dimensionally and cheap too! To update the tracks, arguably the weakest point of the Tamiya kit, I’m using the link/length tracks from Riich, which turned out very well. I also used their differential and some seats. As well, I’m using Riich weapons for the 2" mortar and PIAT. The burlap bags are mine, made with epoxy putty. Painting thus far has been with Tamiya lacquers. Here are some photos from the build so far -


That’s all for tonight. Thanks for taking a look!
- Dennis
9 Likes
Looks awesome! That .50 looks like a beast on the tiny carrier!
1 Like