Work continues
Okay, dragged out the Riich Universal Carrier MMG Mk II that I proposed to do way back when. To be honest, I took it out ages ago and put it back, after looking inside the box. This is NOT a kit for the faint hearted. All you guys that think Bronco and Dragon have too many parts, then you have never seen one of these kits.
Very small, very delicate parts, etch that has to be used or replaced by scratch building parts. This is particularly relevant to the seat supports that are so thin the etch curls and you can’t straighten it.
One disappointing aspect is, despite the number of parts in the box, there is no radiator detail in the kit, even though you see right into the engine compartment through the hole between the seats. Riich supply a full engine in their mk1 kit, but not any of the other variants they offer. I had to build that and the coil myself:
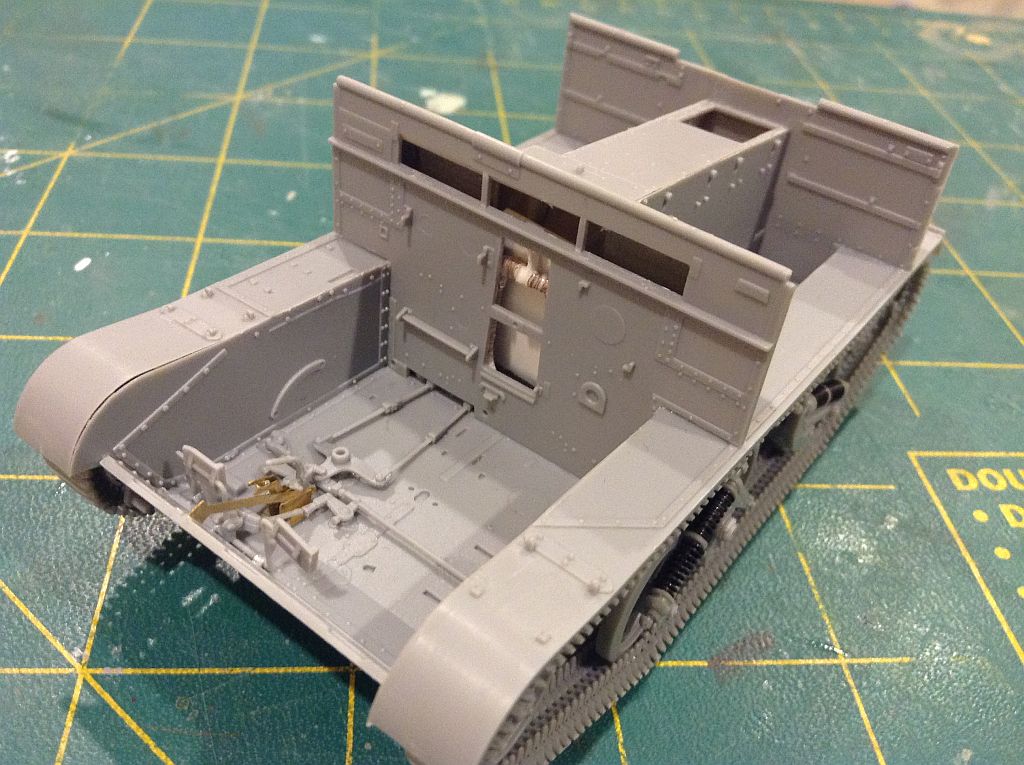
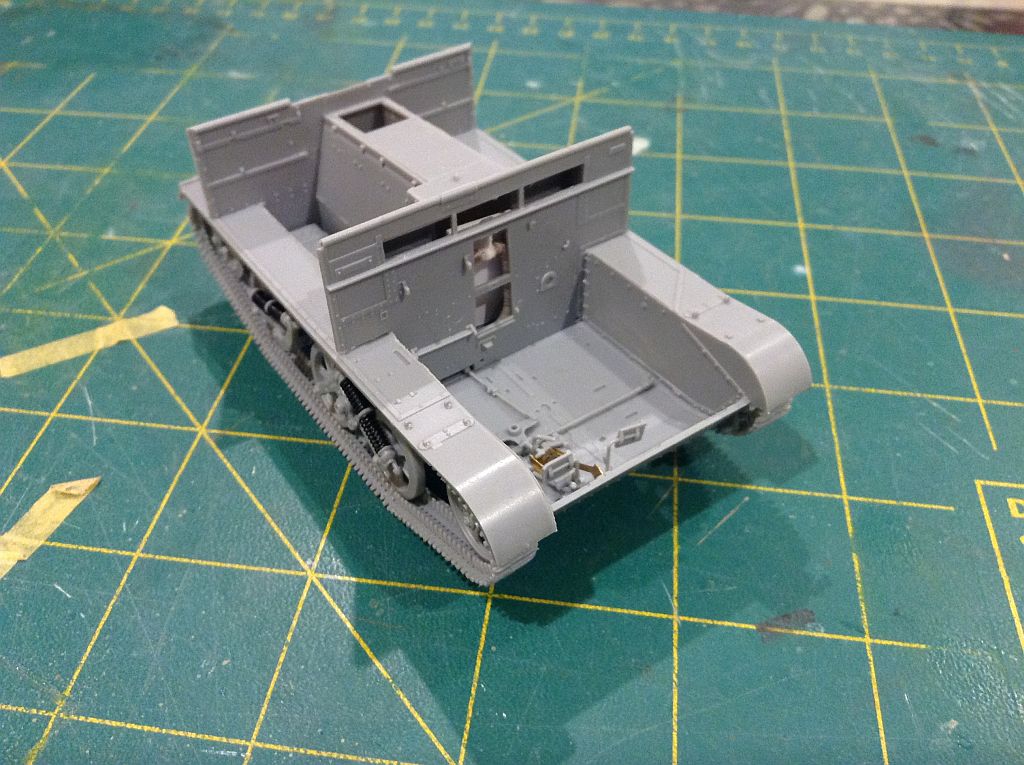
I took those pics a while back, but did not post them as I put the kit aside at that time.
Well, bit the bullet and moved on some more:
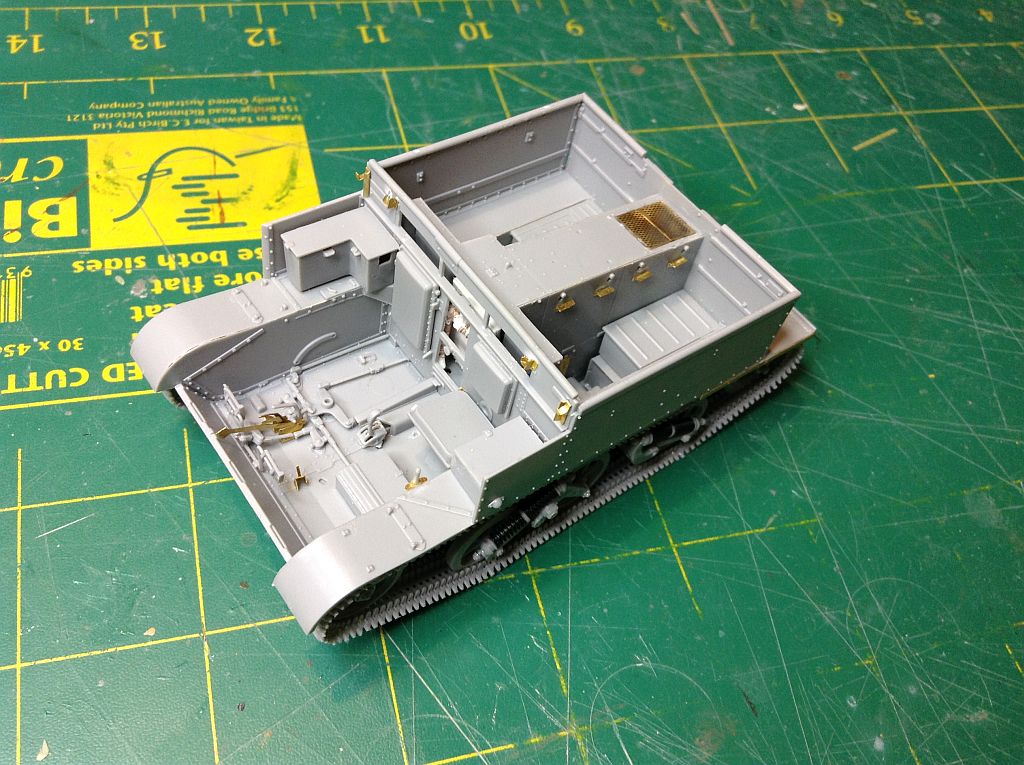
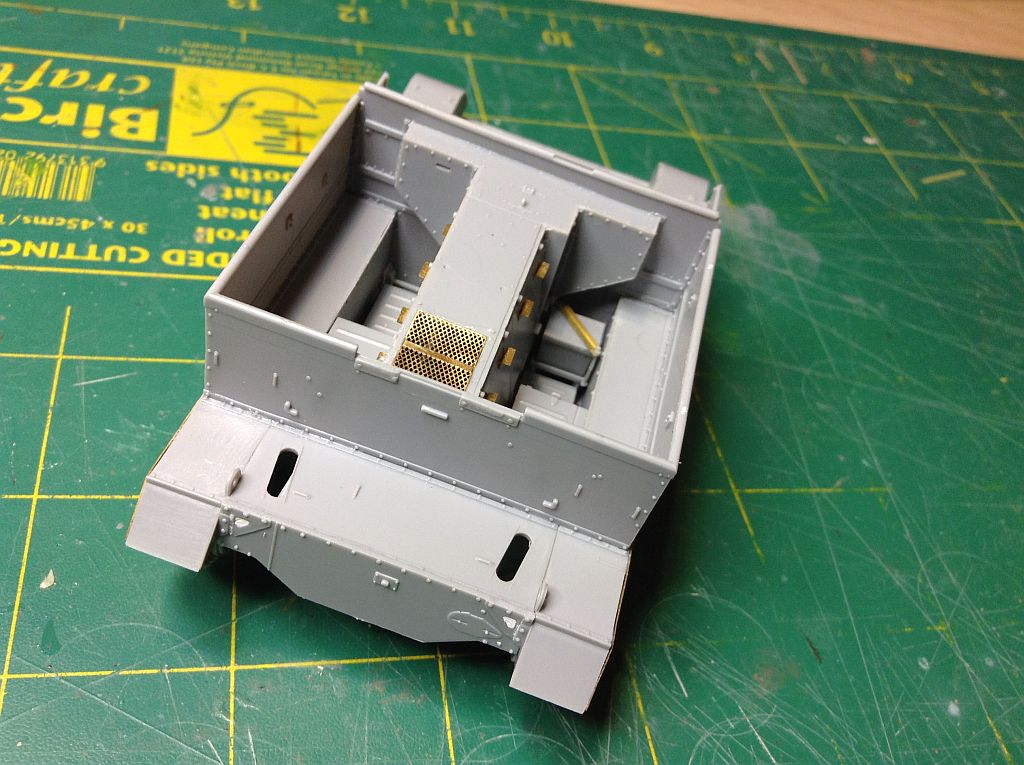
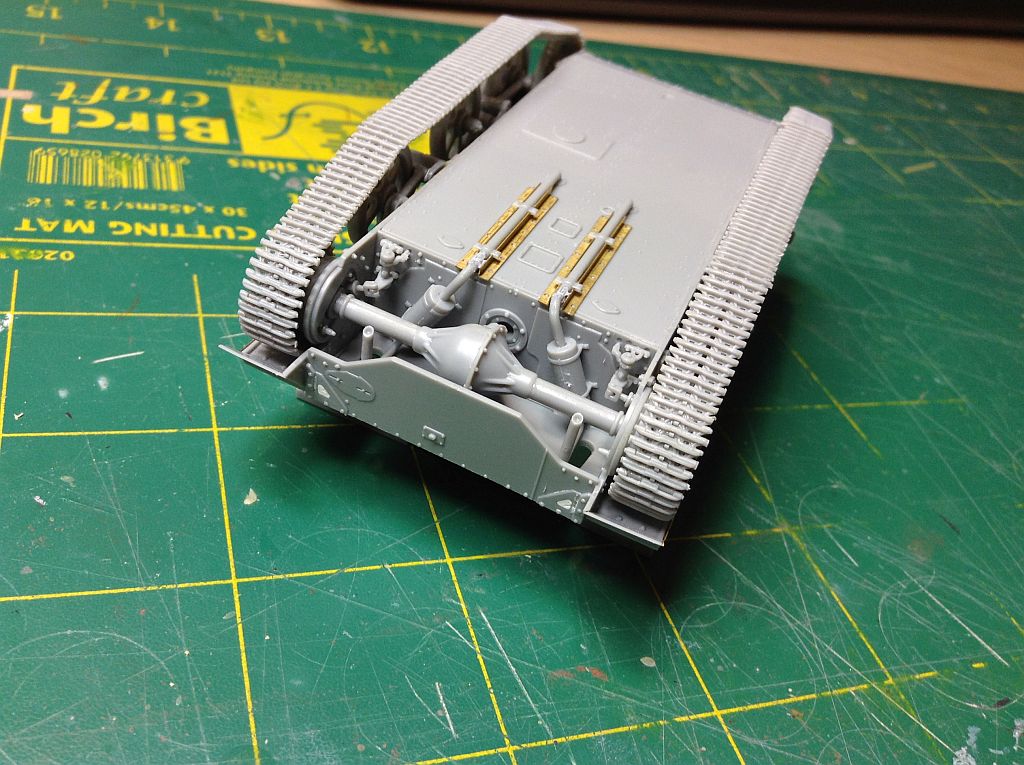
Totally unnecessary etch which cannot be seen when the vehicle is right side up ( the exhausts are also hidden when right side up, so clean up was rudimentary on the mufflers).
6 Likes
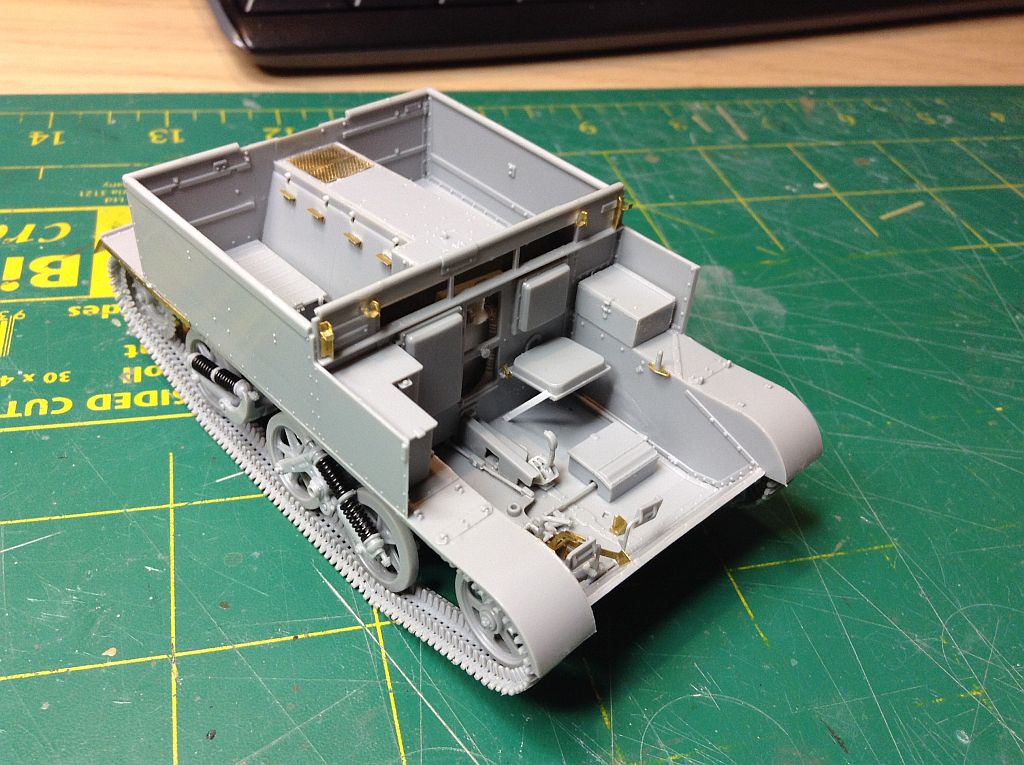
As you can see, I replaced the seat supports with strip styrene. The other seat will be much more difficult due to the shapes of the struts.
Another frustrating thing is the instructions. The instruction book page is smaller than A4 and has from 3 -6 steps, showing all or at least 1/2 of the assembled kit in each diagram with the exploded view of parts!
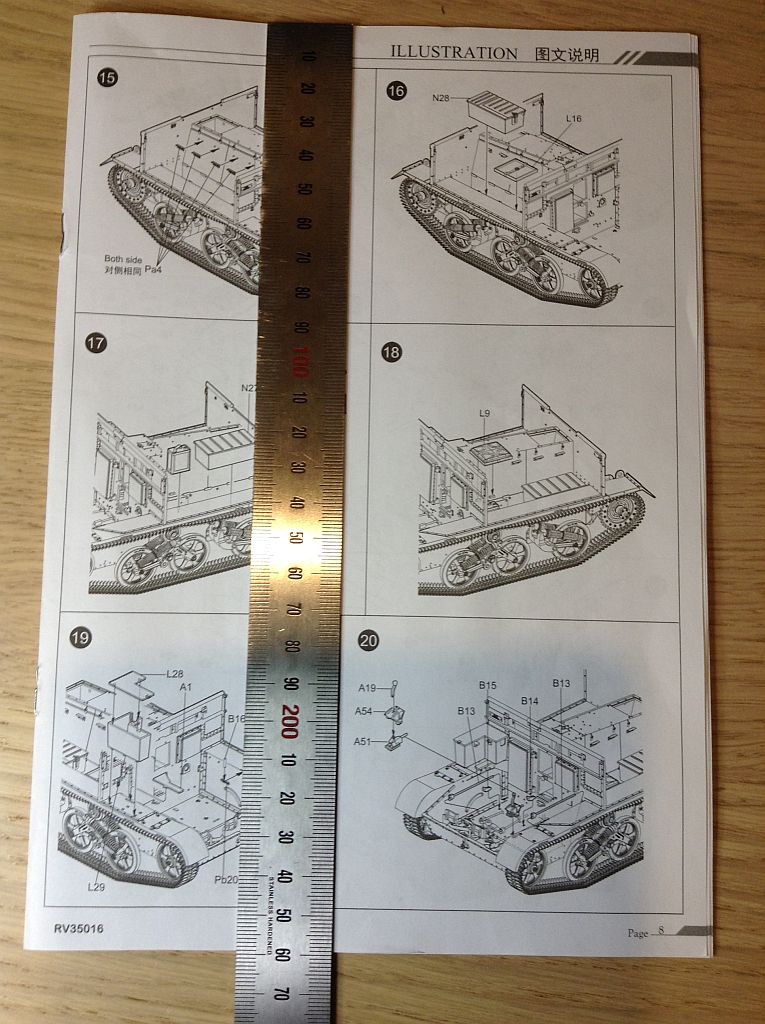
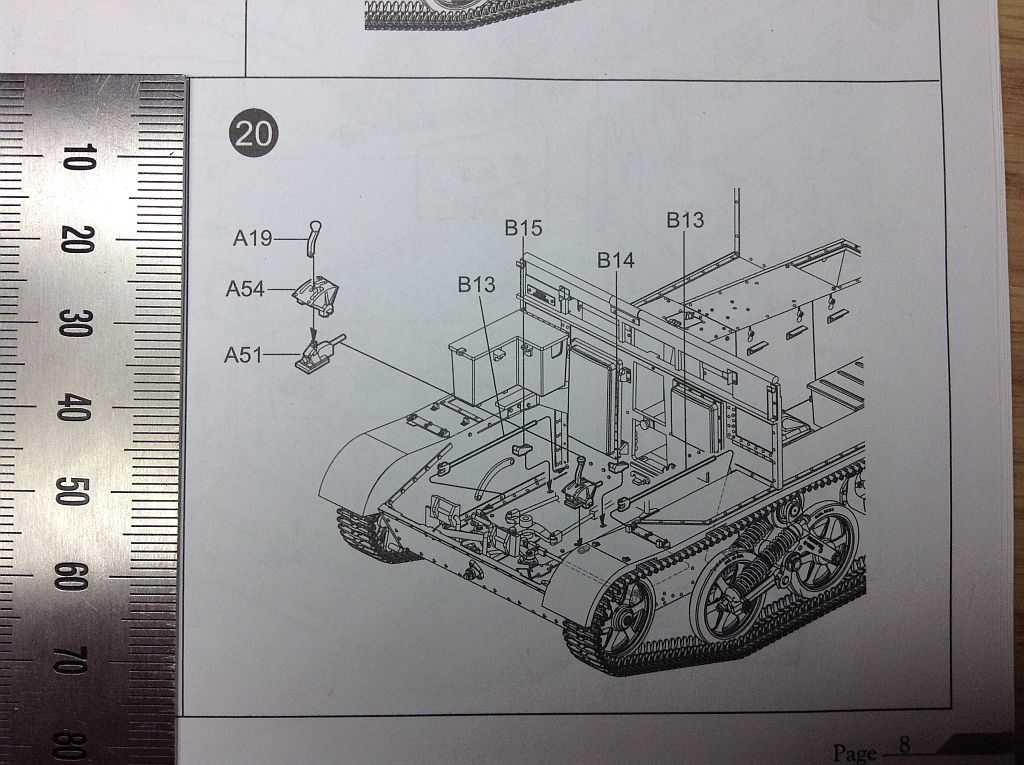
The instruction pictures are tiny and trying to work out what direction a part is supposed to be glued and where it is to be glued is quite hit and miss. I have had to photograph the booklet image and then expand it on screen to actually see what I need to do! Look at B13 on the right. Where it is supposed to go is hidden by the side wall of the hull - luckily, it appears it mirrors the B13 on left.
4 Likes
Wow… good luck with that Peter. I have faith in your abilities!

This is the step I am most concerned about - 36. Pb and Pc stands for Photo etched part…
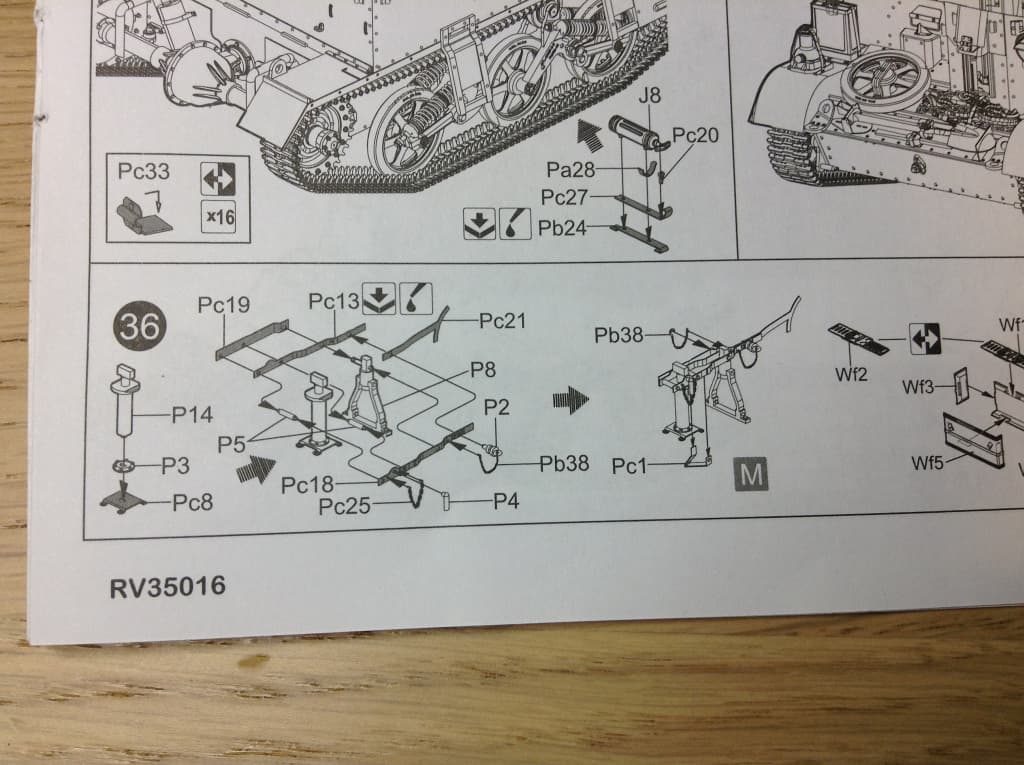
I can see tears looming.
5 Likes
Looks simple enough  oh wait, I forgot the instructions are always zoomed in 500% so something that looks okay is actually insanely hard!
Best of luck!
That riich kit is looking great!! I have their Canadian Wasp myself, I think I may take that on next after my 1/32 CF-104D.
2 Likes
Mk IIC external tank or Mk II twin internal tank version Dennis? Canada acquired both types.
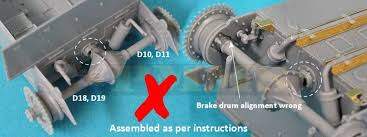
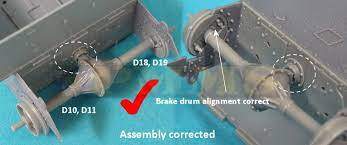
Just a heads up - there is a kit instruction error I do not notice until too late:
https://www.perthmilitarymodelling.com/reviews/vehicles/riich_models/rv35011.html
3 Likes
I’ll note that! And I’ve got the IIC, the “safe” version 
1 Like
I really do not like etching and you are demonstrating why perfectly.
Good luck with this one!
1 Like
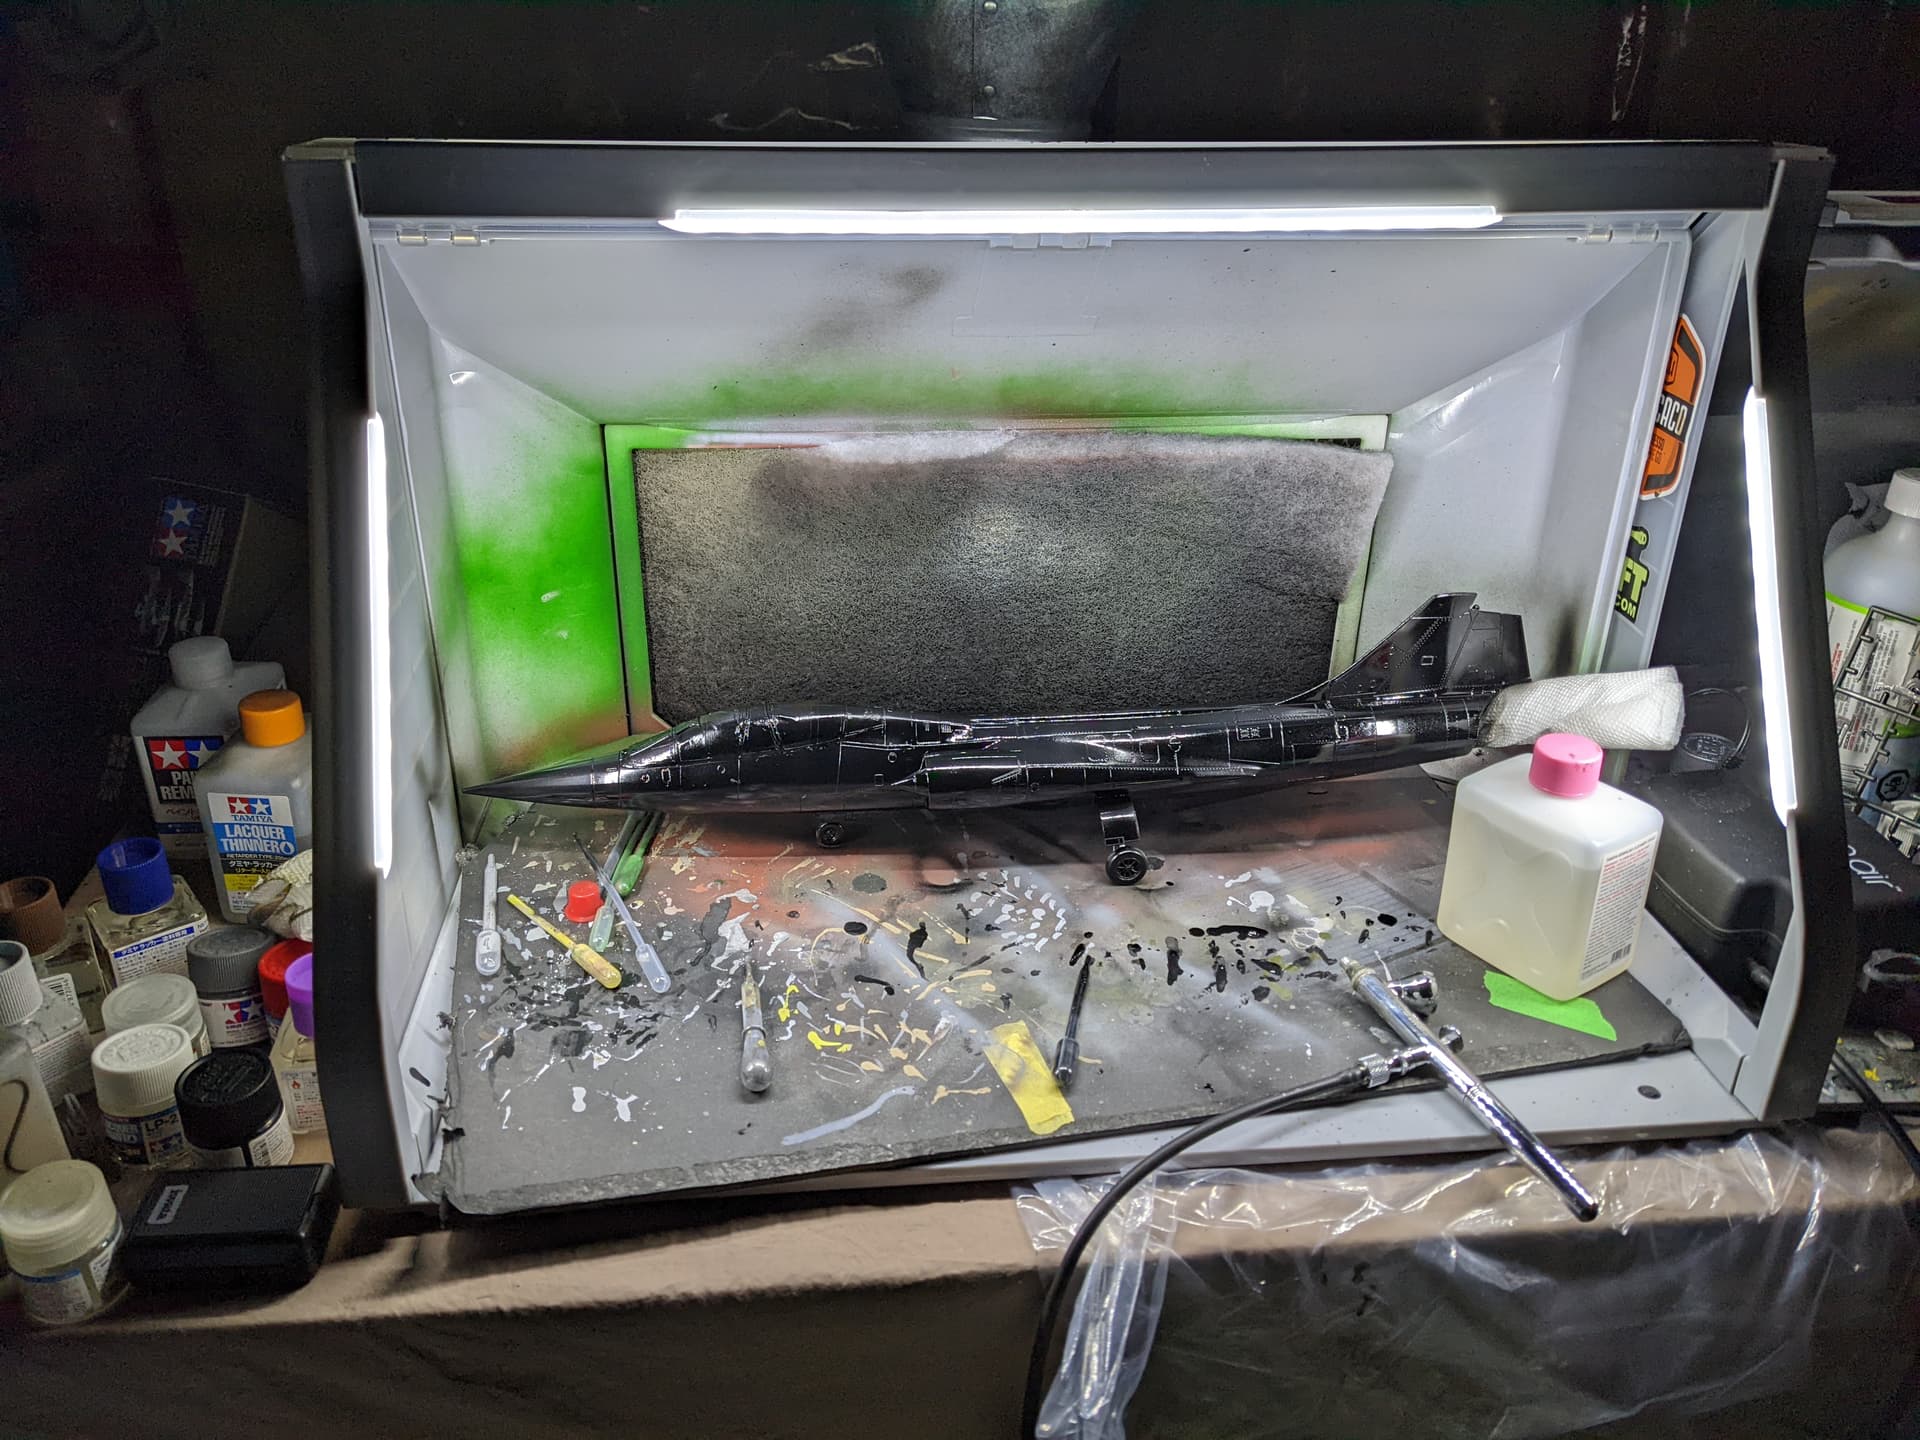
Time to get working on something new!
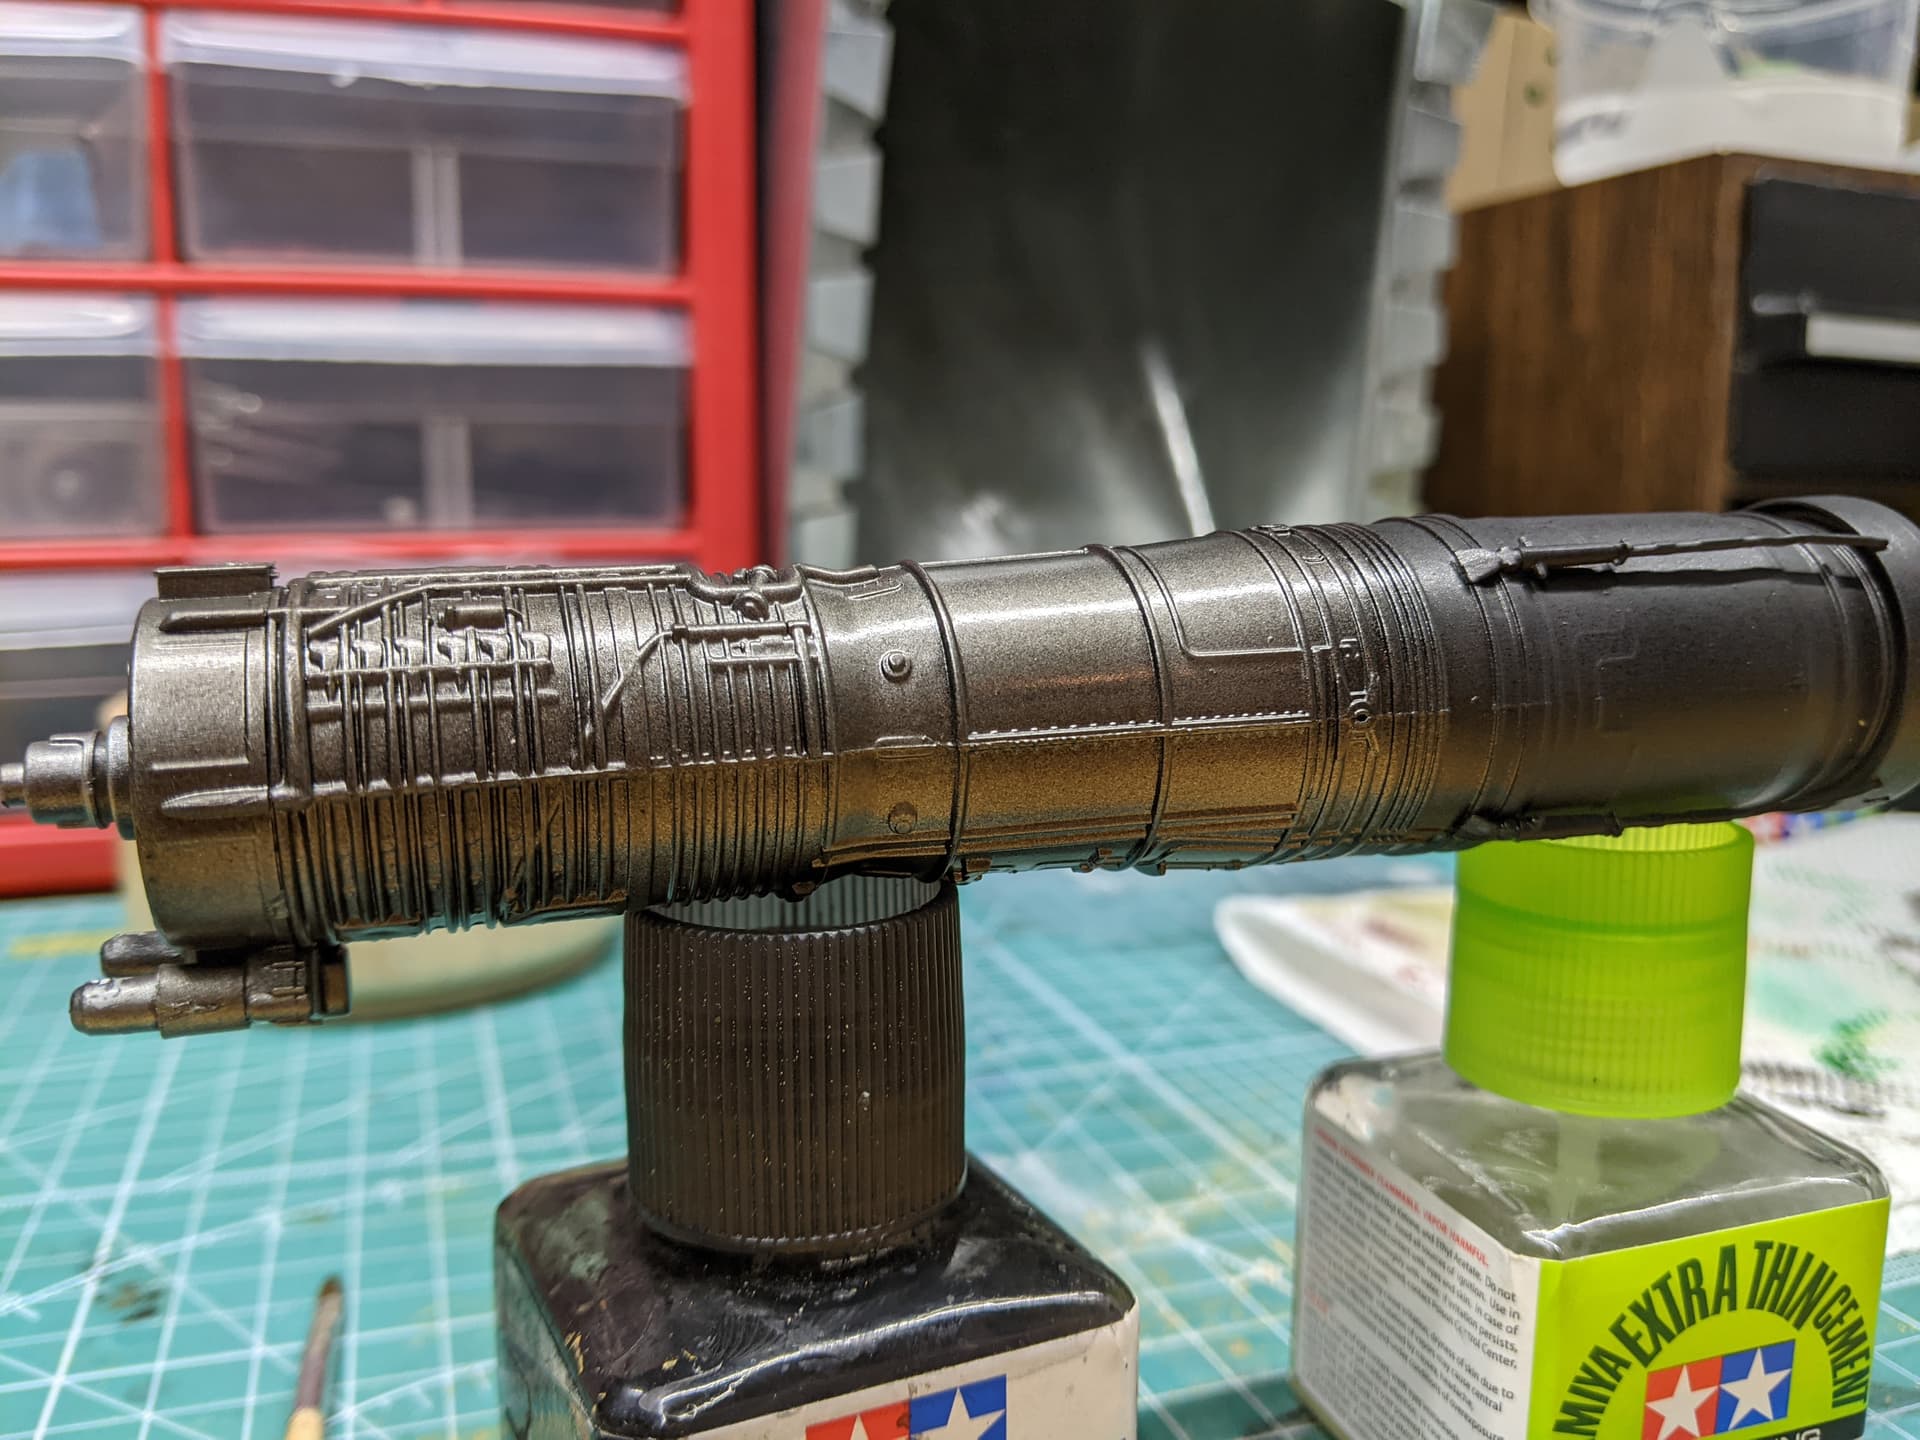

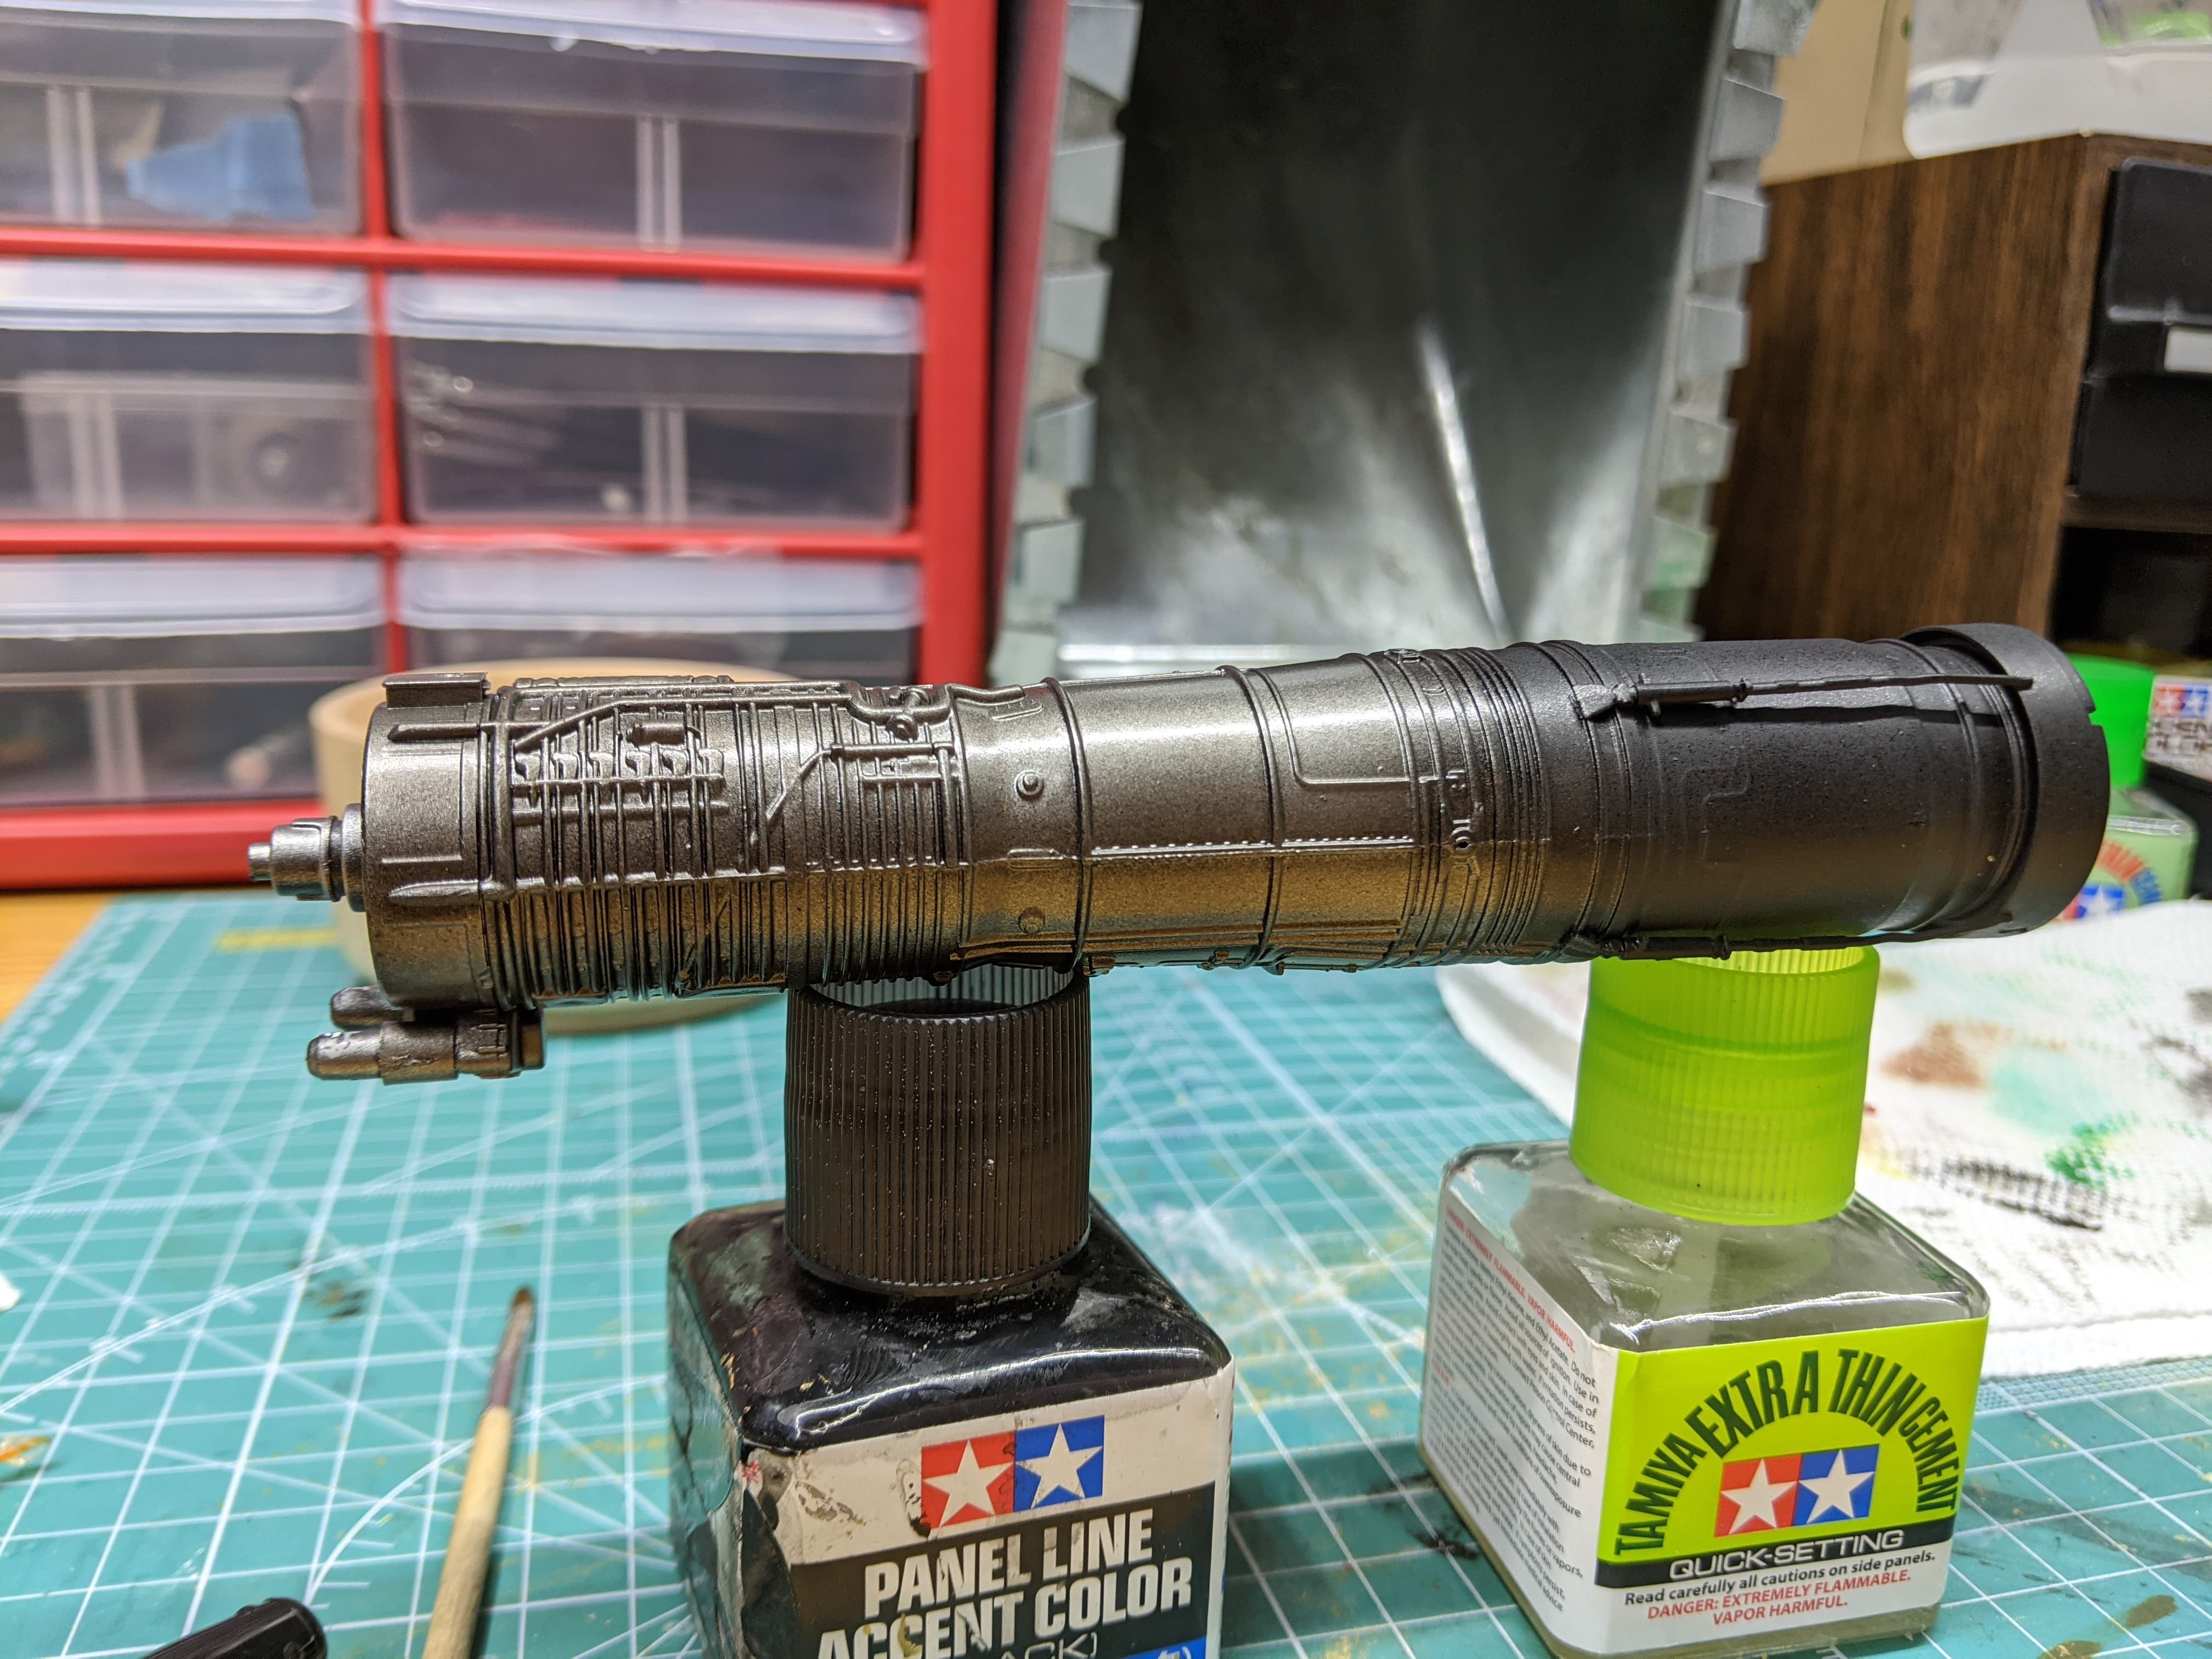
I’m going to be doing Italeri’s 1:32 CF-104D out of the box as a Canadian trainer bird, and to start I’ve built the J79 engine as a testbed for some new Alclad paints. I must say, I’m incredibly happy with them (though in these photos they’re covered up by Tamiya and AK metallics). It’s literally a mirror in a bottle, and I fully intend on making the chromiest lawn dart of all time with them.
6 Likes
Looking good! Glad you like the alclad! Aren’t they magical?
Mead, prior to this I thought LP-48 “Sparkling Silver” from Tamiya was as good as metallics got. I’ve never been happier to discover my ignorance 
1 Like
I too came from Tamiya metallics and was quite disappointed. First time I sprayed alclad I was blown away
1 Like
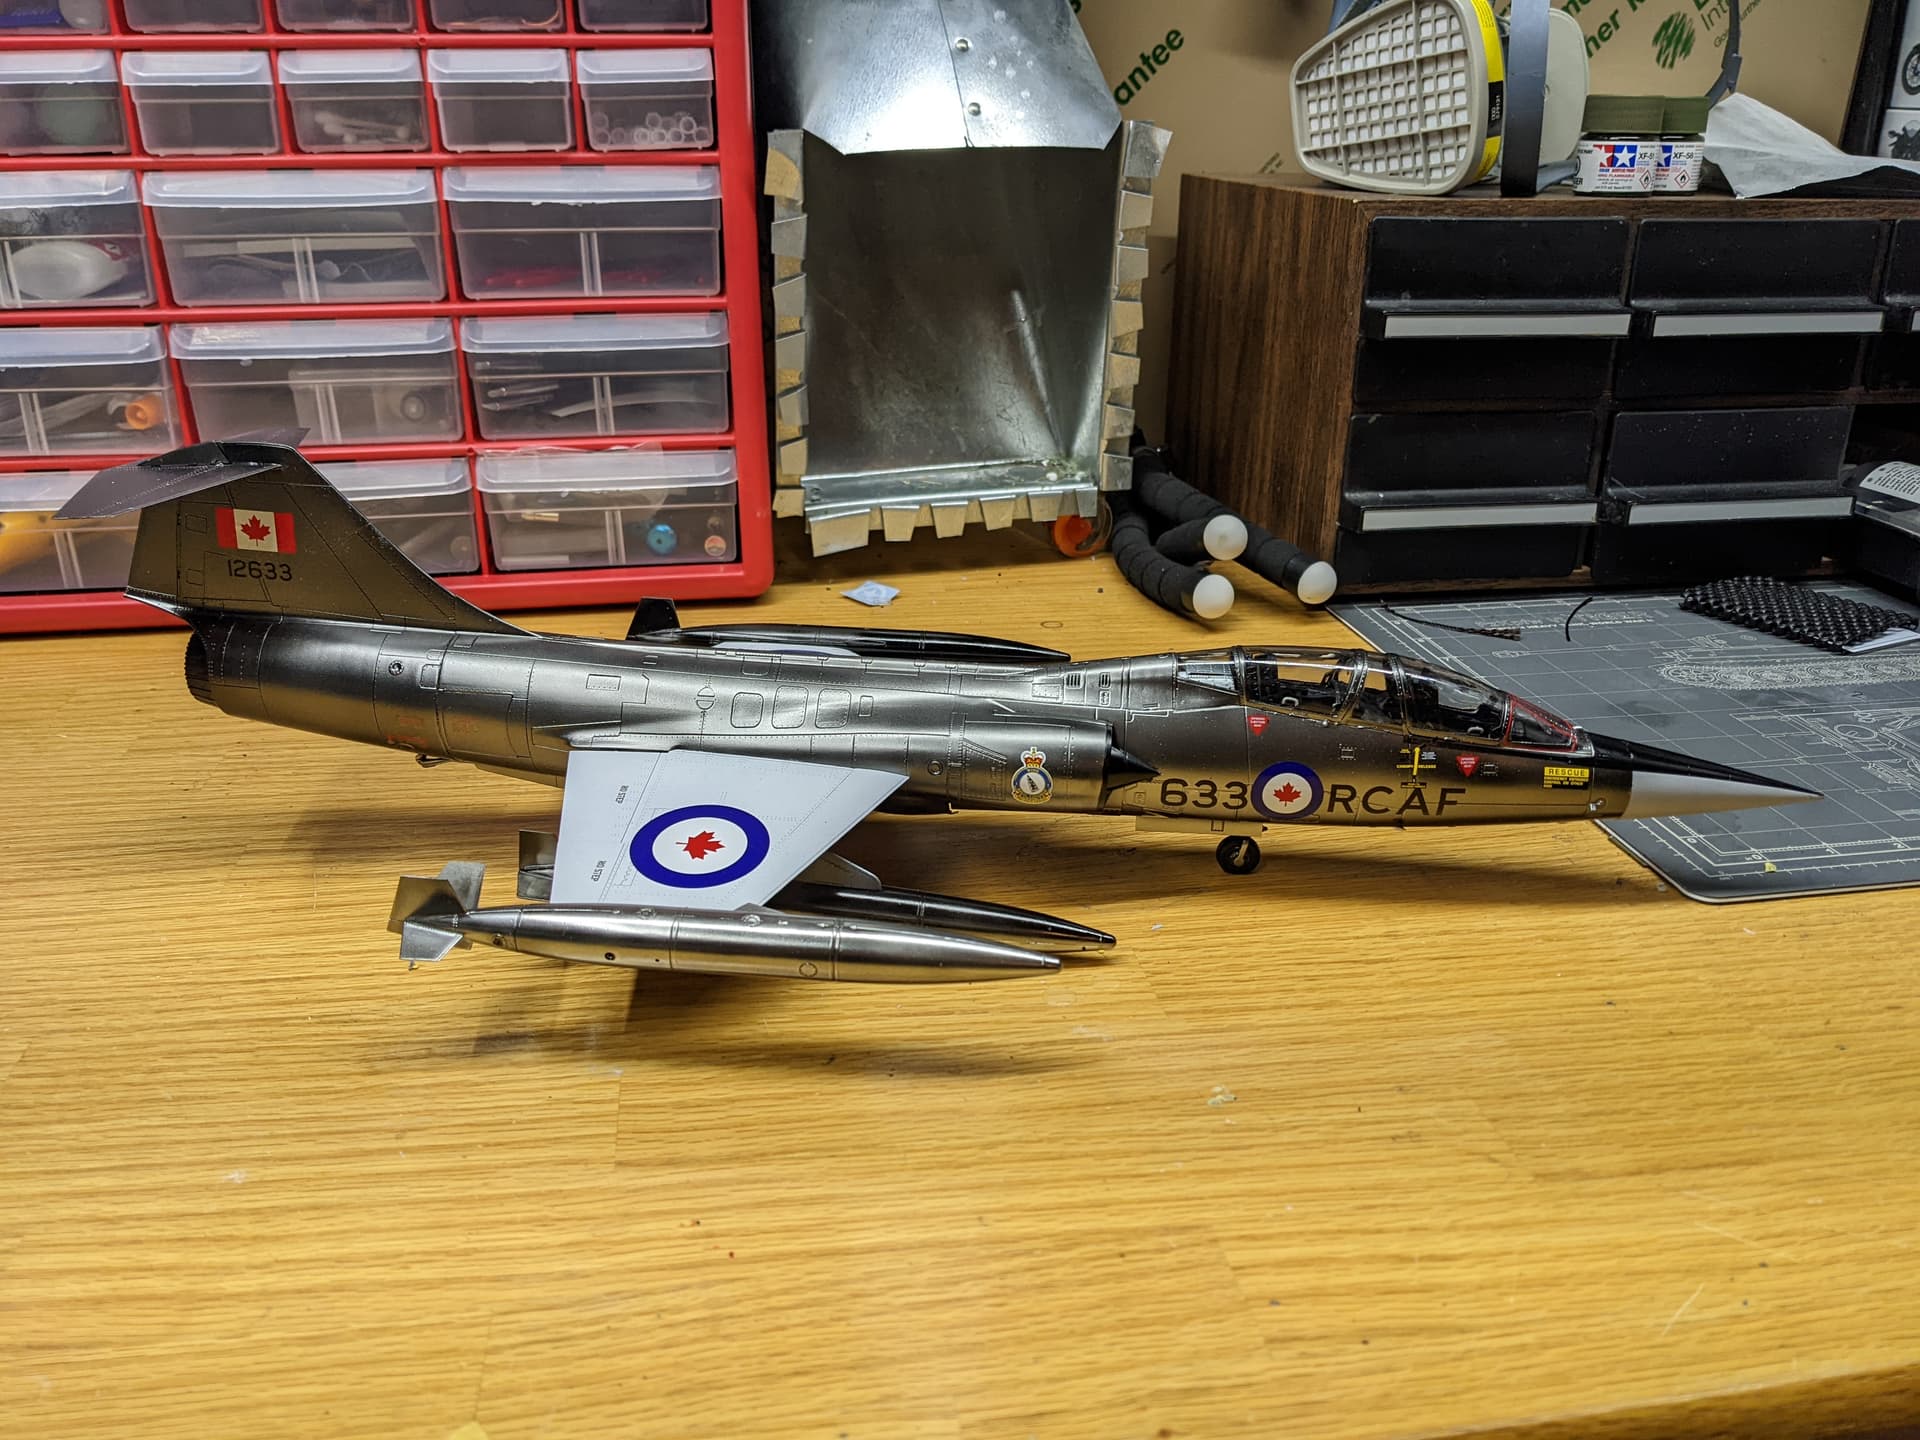
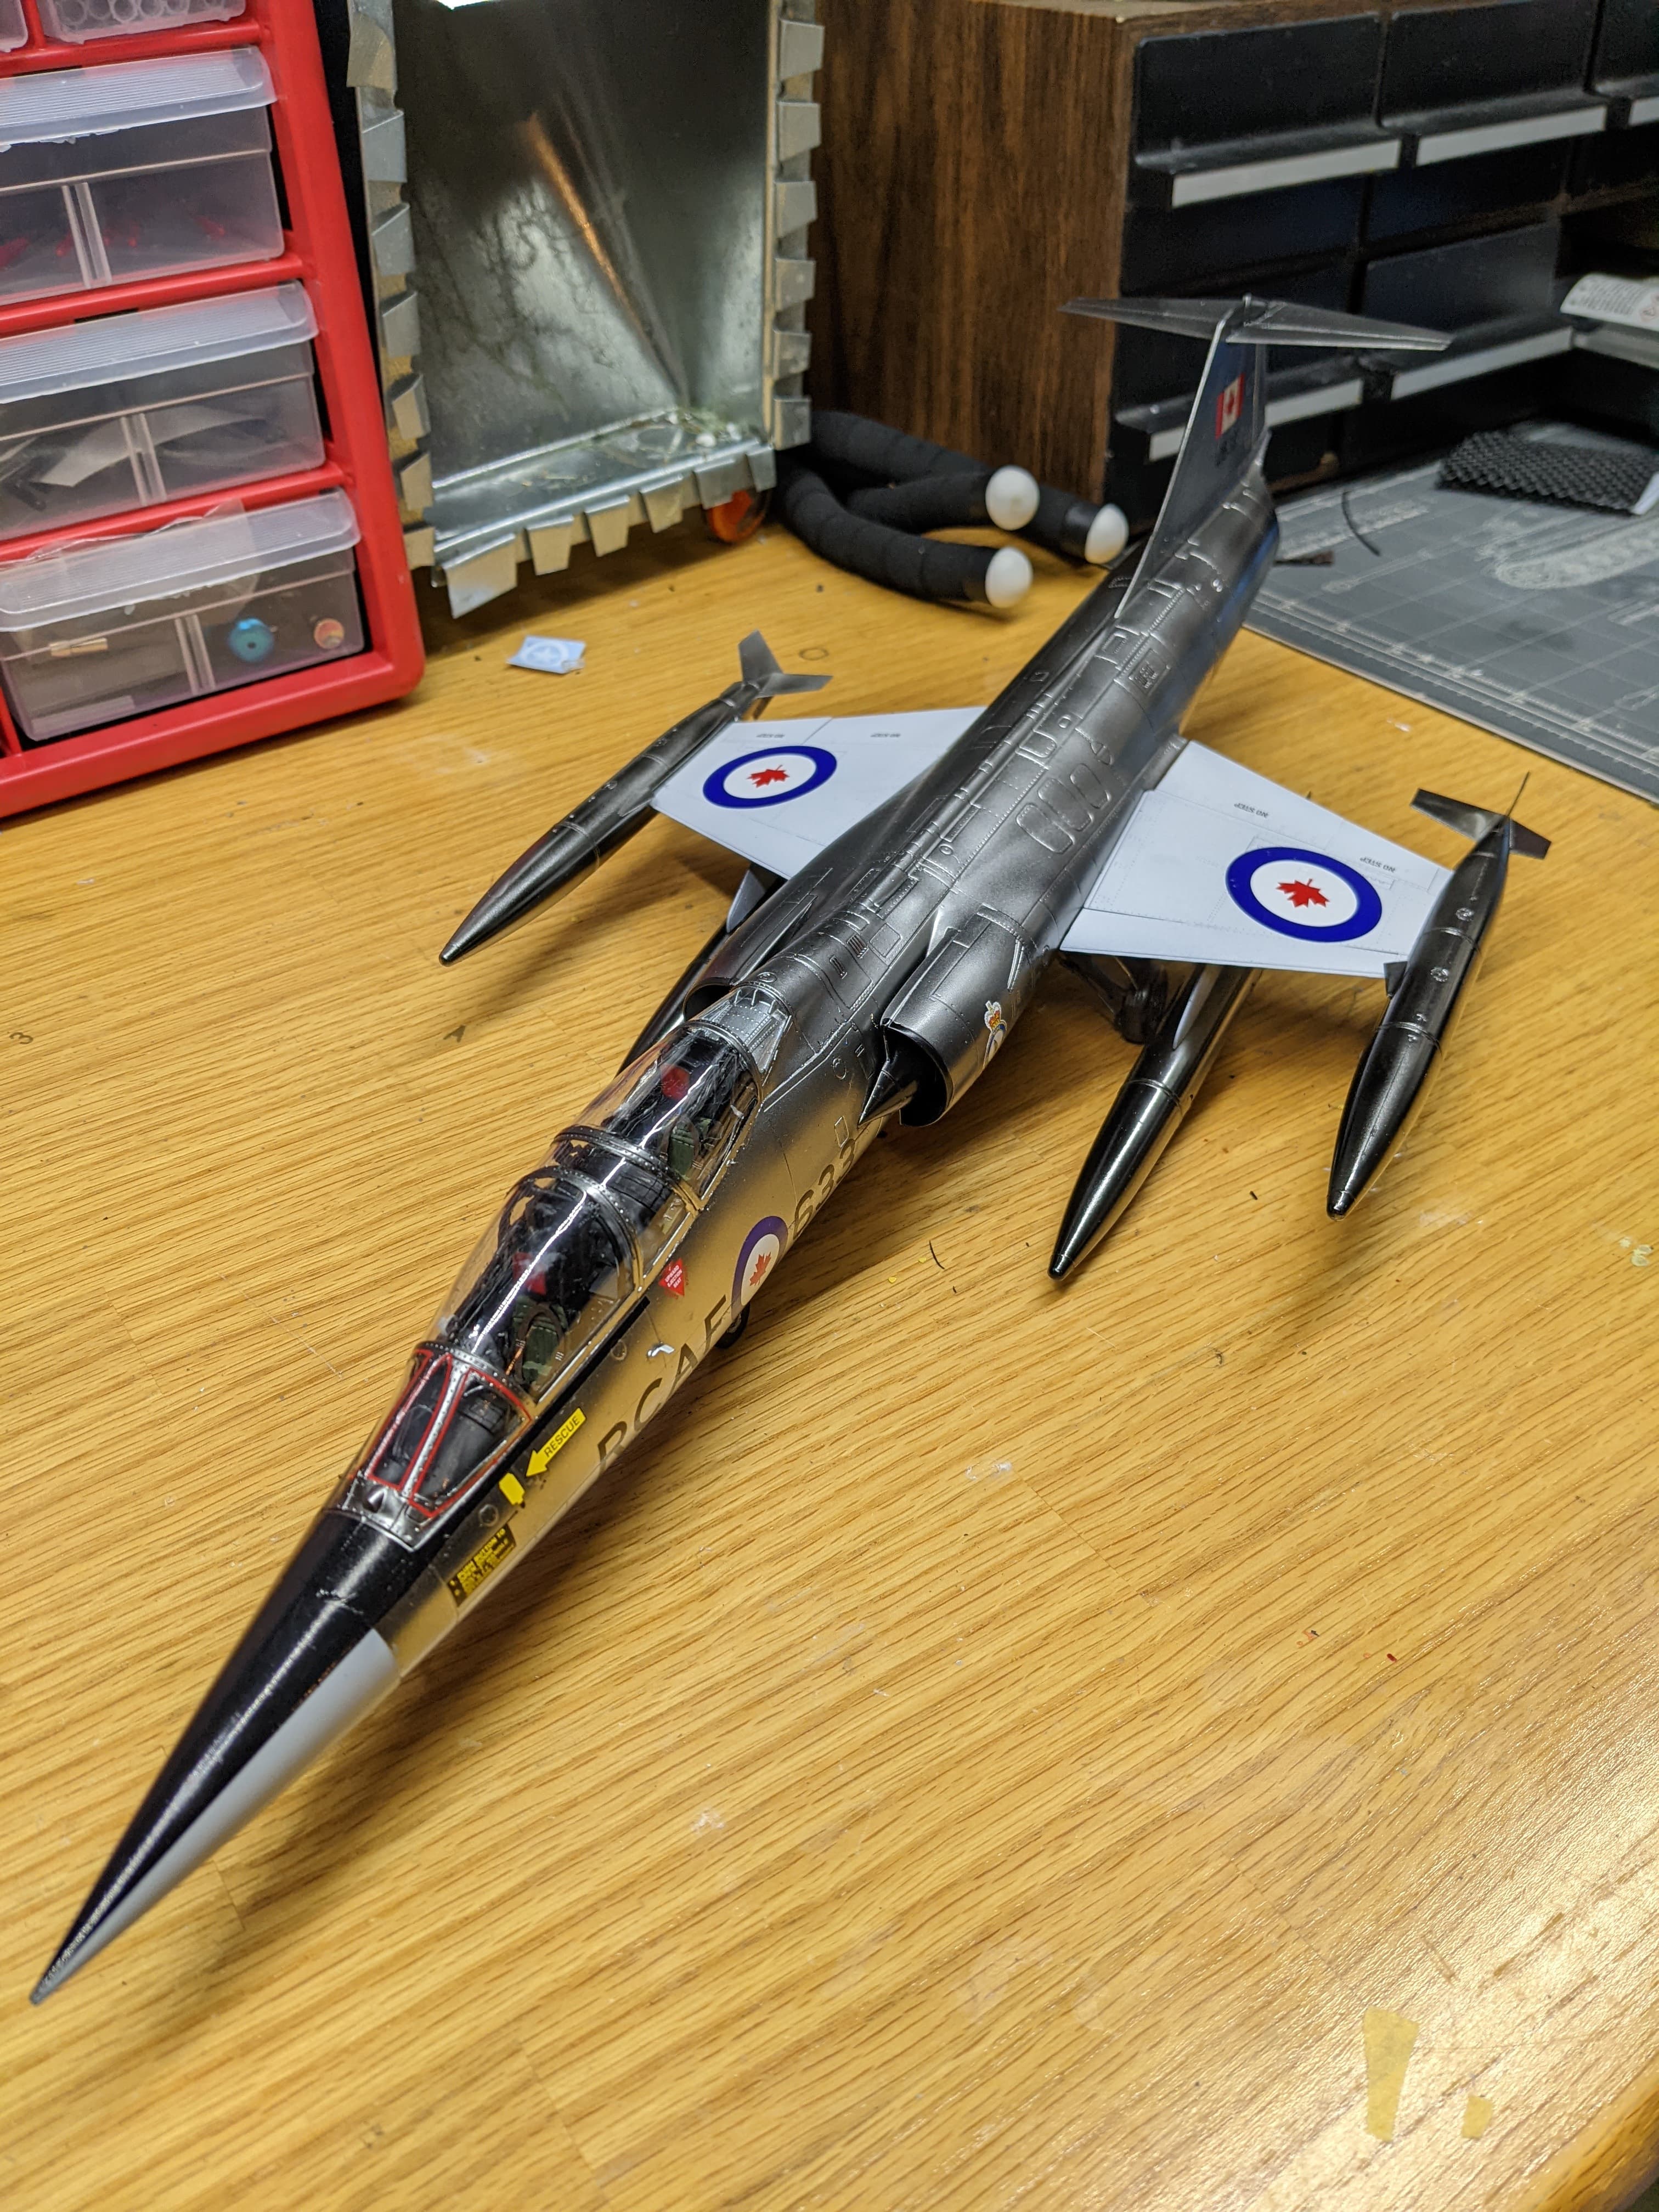
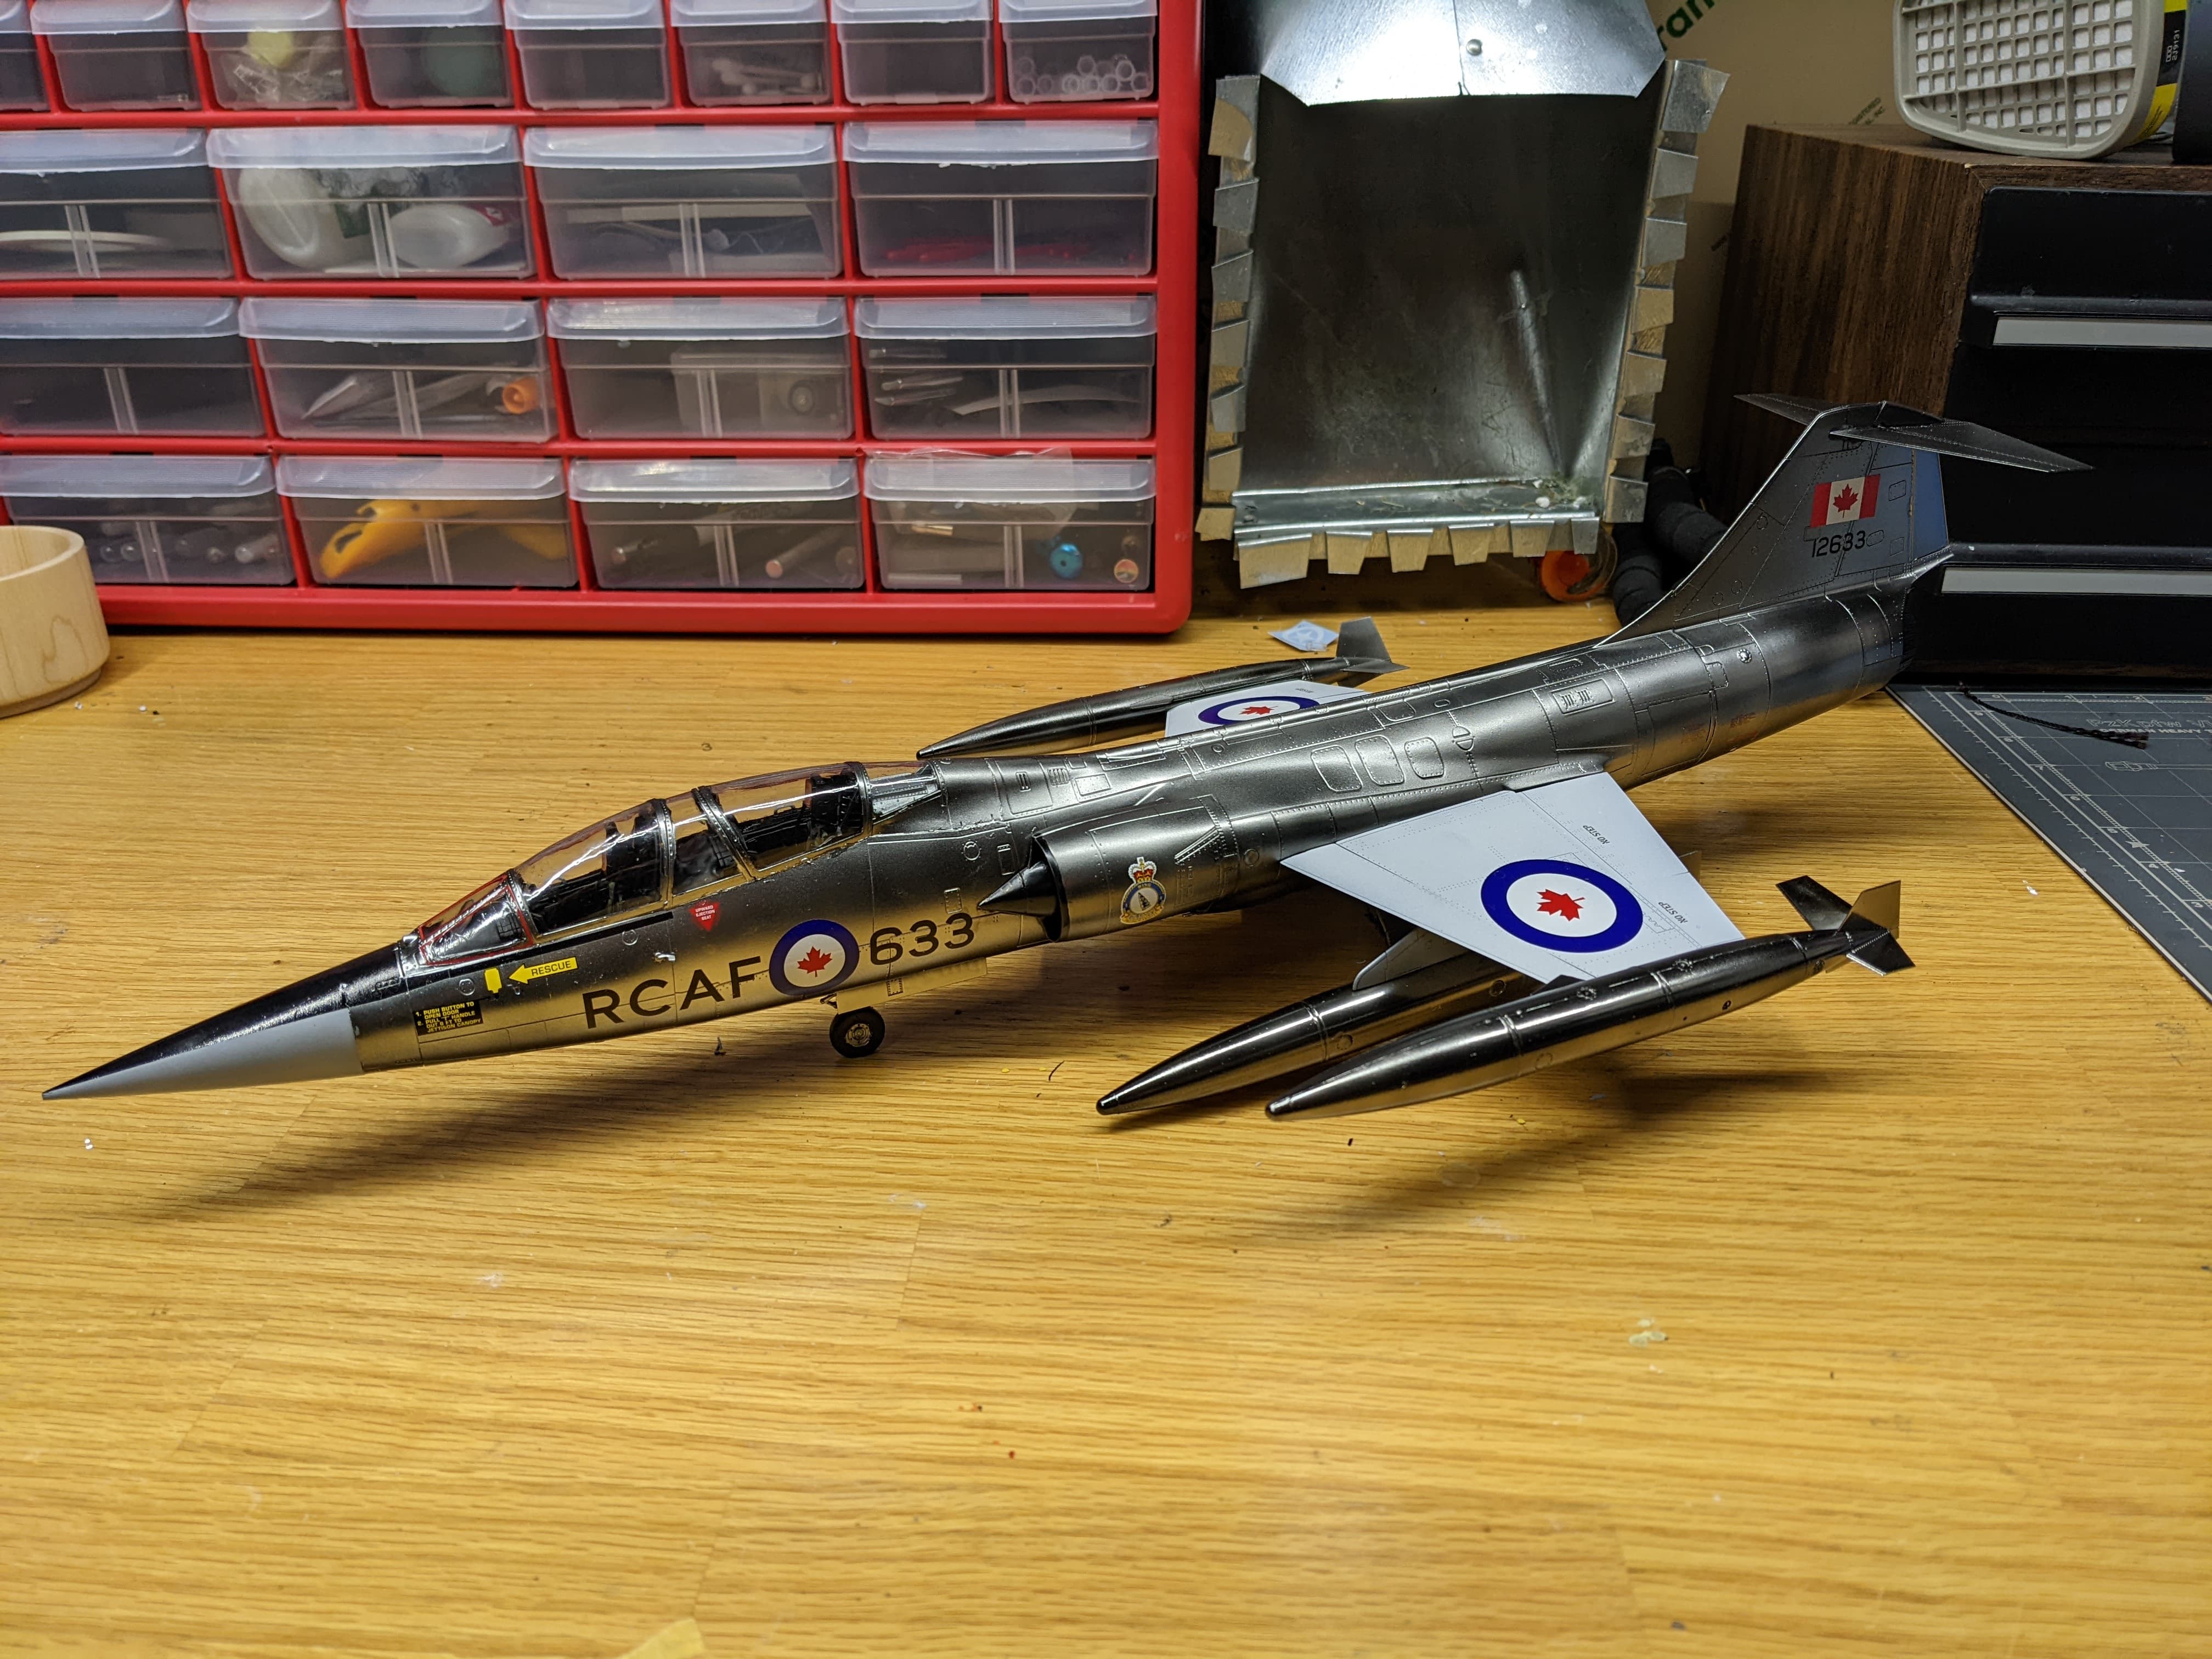
13 Likes
Hot damn Dennis! That is one mighty fine looking lawn dart! I’ve always had a soft spot for that thing given that it looks like a prop from Thunderbirds! rather than a functional aircraft.
You’ve done a real nice job there.
3 Likes

That is one mighty fine wingy-thingy Dennis. Love it.
1 Like
Looks awesome! Waht color alclad did you use for the fuselage? It’s fantastic!
1 Like
Thanks! I used plain old Chrome - perfectly accurate? Nah, probably more of a duraluminum finish would befit a well-used jet, but I do like shiny things
1 Like