I stand corrected.
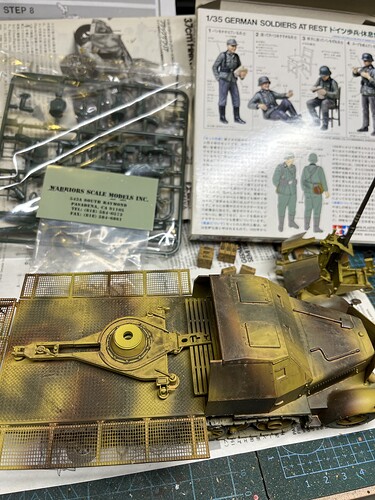
More weathering going on.
I am waiting for some more stuff coming from AK-Interactive for weathering and trying out the new real color marker pens.
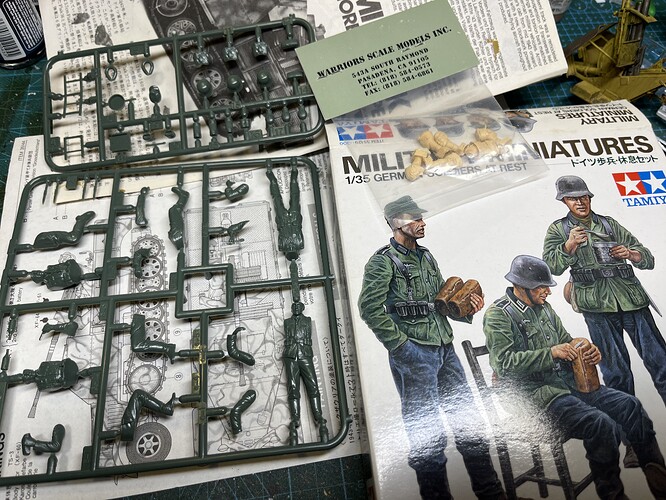
In the meantime I will work on the crew and the head conversion.
More to follow ![]()
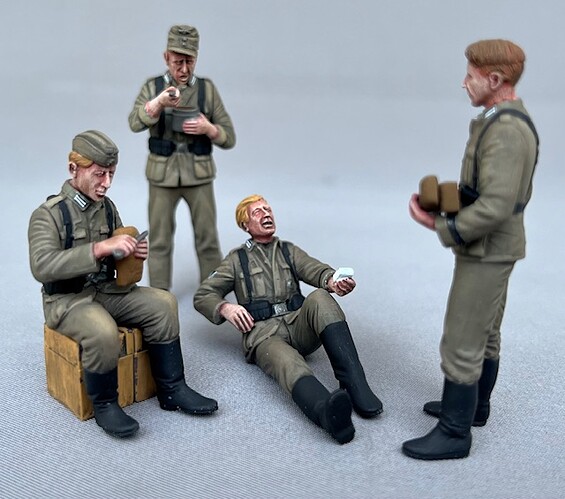
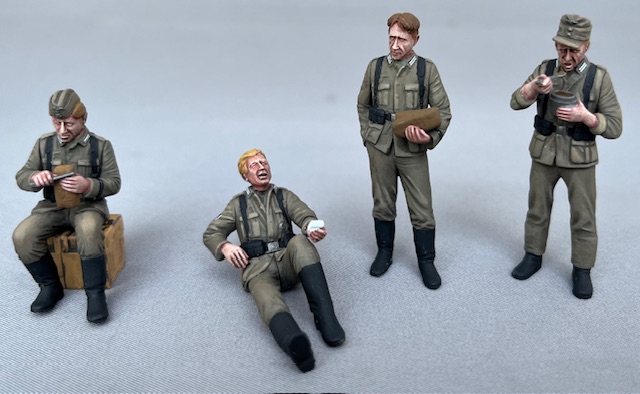
Construction finished. Simple figures and the resin heads fit very well. Clear upgrade vs. the old Tamiya heads.
More to follow ![]()
Colours seem a bit dark?
Darker background color is always a good start.
Bob ross once had a viewer write in to say she couldn;t get her clouds to “pop” no matter how much titanium white she used. He demonstrated how you have to start with a darker shade of sky to begin with.
Multiple jumps would be in the US mainland.
I think there was only a couple of disastrous jumps into Sicily.
A couple of terrible jumps in Italy.
Normandy got the scattered D Day jump and the Market garden jump. I am not aware of any other jumps so weathering due to jumps would probably from training jumps back in the states. and not the combat zones.
The C-47s that supported jump school at Benning were probably assigned to a nearby training unit.
There were multiple practice and rehearsal jumps for Normandy for the troop carrier pilots in England. Yes, Sicily was a Charlie Foxtrot, but that was mainly due to Navy AA gunners opening fire on anything that flew over them and destroying formation cohesion along with pilot discipline. Serious contagious friendly fire there. Salerno actually was textbook, as it was the first use of Pathfinder to mark a DZ ahead of the main force. Normandy is a well known tale after Band of Brothers. After Normandy there was much less opportunity for train up drops as was done for Normandy. Holland/Market-Garden was textbook in spite of minimal preparation time. As the troop carrier pilots were told, “Put us down in Holland, or put us down in Hell. But put us down together.” They did just that.
Southern France also was a good drop, although ground fog played havoc with the initial serials. Varsity, the Rhine Crossing, was about as good as could be expected considering the circumstances- a daylight drop against an alerted prepared enemy. Two full divisions, including some light tanks, delivered in a single lift. Normandy and Holland both required several lifts to deliver three divisions.
The Pacific saw some interesting airborne ops, with the 503rd PIR operating in much the same way that today’s Ranger Regiment has… airfield seizures for follow on air landed forces or high value high risk drops such as Corregidor. And then there was the classic Los Baños prisoner rescue raid drop by a small element of the 11th Airborne.
I’m dropping this here, just in case of a catastrophic failure of project prioritization.
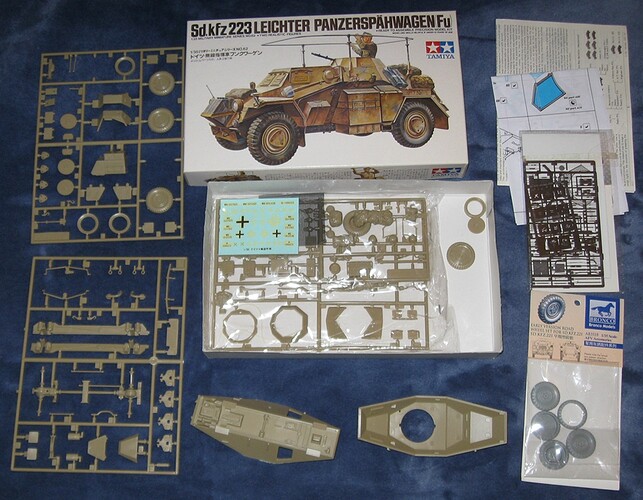
Bronco wheels and Eduard brass parts will not be used. They are for reference only.
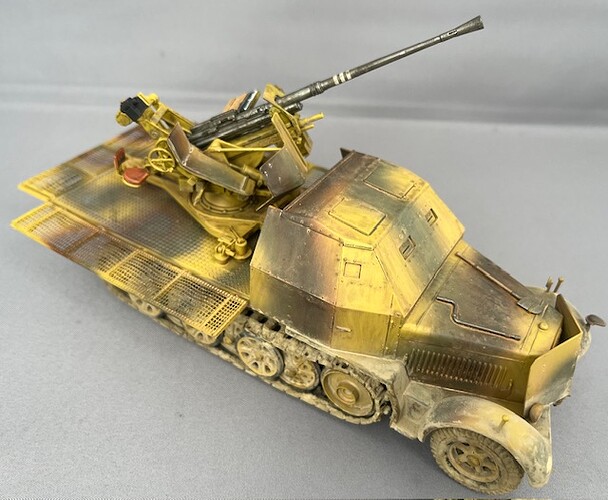
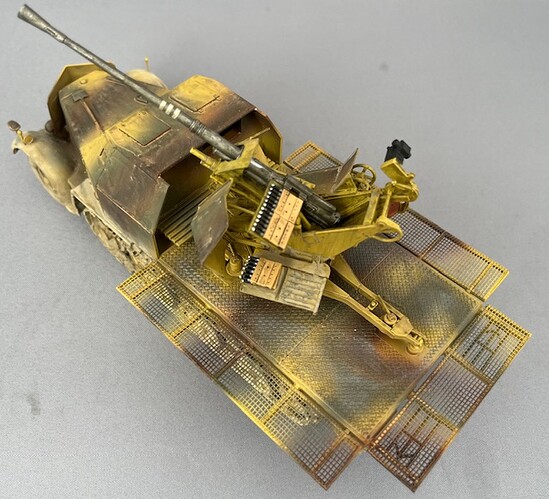
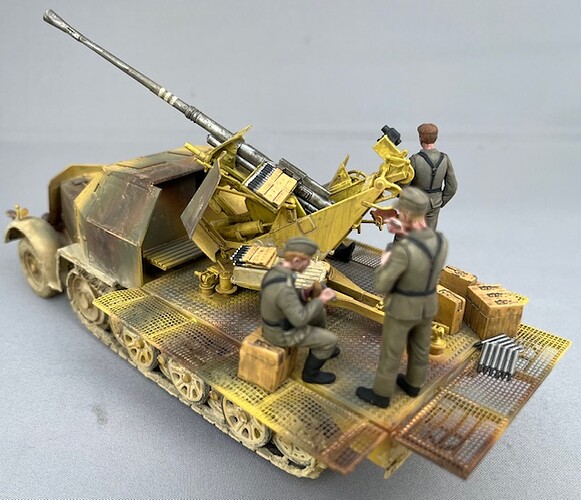
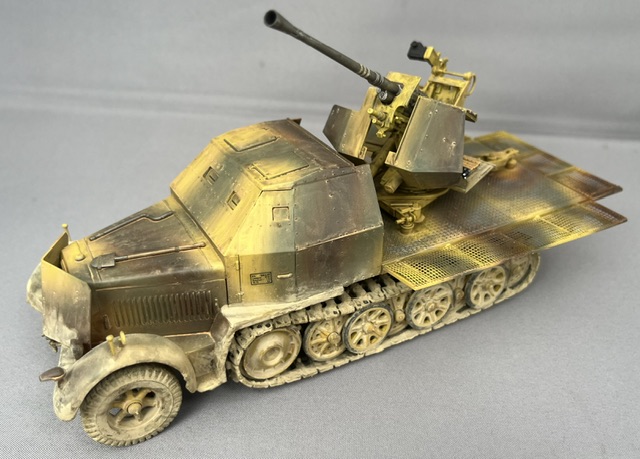
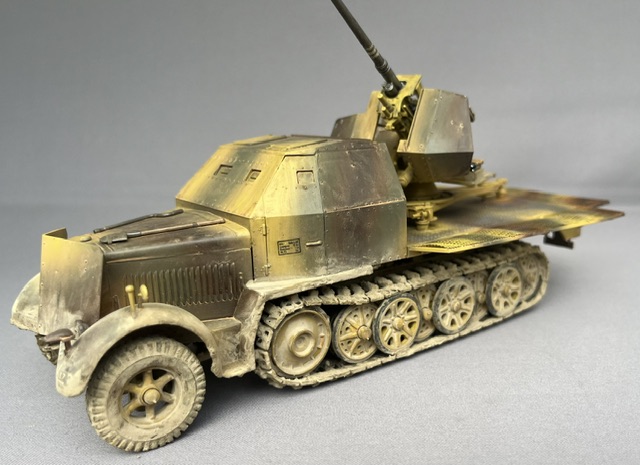
I am done with my old school 1/35 Tamiya Sd.Kfz. 7 with 37mm Flak.
I went for a dusty summer look. The old Tamiya “German soldiers at rest” set is being converted with new heads as previously posted. They will be added as crew.
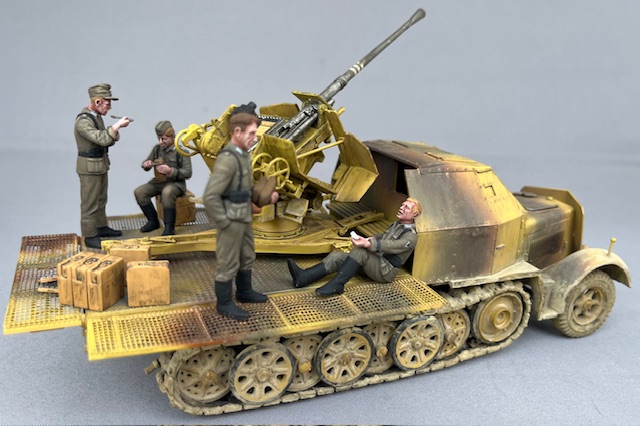
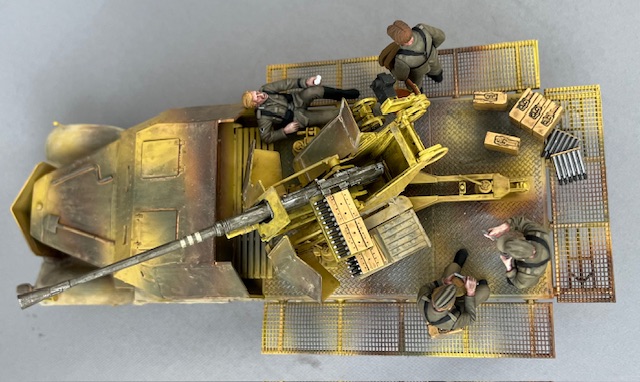
I will post the complete build including the crew later. Here is the finished half track.

Well, you sure achieved the dusty-look!
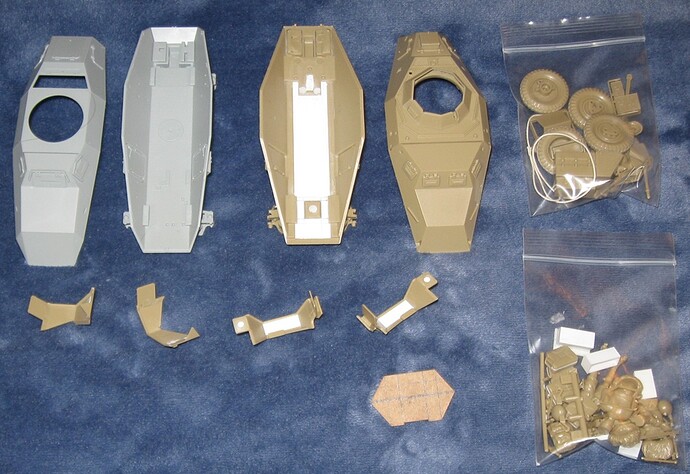
Tamiya Sd.kfz. 223 Armored Radio Car
As most of you very probably know, this is a really quick and easy model.
Rather than fill ejector pin marks on the underside of the rear fenders, I plated over them with thin plastic sheet. That trick does not work for the front fenders,
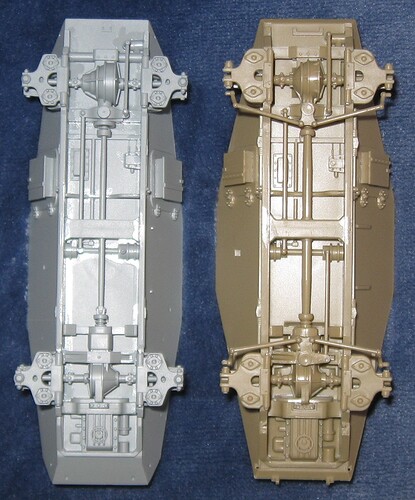
Using a Bronco Sd.kfz. 221 as a rough reference, I built up the floor in preparation for adding interior details. German armored cars interest me and I own a lot of books on the subject. The floor should run perfectly flat and have tread plate pattern, well depicted on the Bronco model. The Tamiya model has a bulge where the front differential connects to the underside. Leveling this hump would require significant reconstruction so I simply went around it. Putty was used to fill seams and make things look a bit more tidy.
The most difficult thing to make is the wall that separates the crew and engine compartments. It has a really odd shape. Rather than waste sheet plastic to figure out the geometry, I used a piece of card from a soda pop box. The little cardboard diamond shown fits almost perfectly.
The Sd.kfz. 221 and 223 have different bodies but share the same chassis. Please note that some chassis components changed over time. The body of a Sd.kfz. 223 is wider to accommodate a radio operator sitting next to the driver. A comparison photo of the two models shows how they differ. Nearly identical details appear on both models but almost everything on the Bronco model is more petite. The wheel base of both models is nearly identical but total length varies, partly because the subject vehicles have different armored bodies.
Most of my reference books heavily feature the Sd.kfz. 222 restored by Jacques Littlefield and his team in the early 2000s, a vehicle I have personally inspected. Interior pictures of Sd.kfz. 223 armored radio cars are harder to come by. I have one good picture of the driver’s area and one decent video of interior components.
Fabricating the interior will involve some guess work and take significant time. The gun and turret will make it difficult to see most of this effort.
Doug, if you’ve been all over the Littlefield 222 then you have excellent references, I’ve had access to it too at the American Heritage Museum. I was going to offer photos but you’ve probably got the same ones. If you are doing all of this interior work, you should consider opening the side doors for more visibility. It would require careful surgery but it’s not as hard as you may think and it would add a lot. Or you can tell me to go pound sand.
I closed the doors to make the project easier.
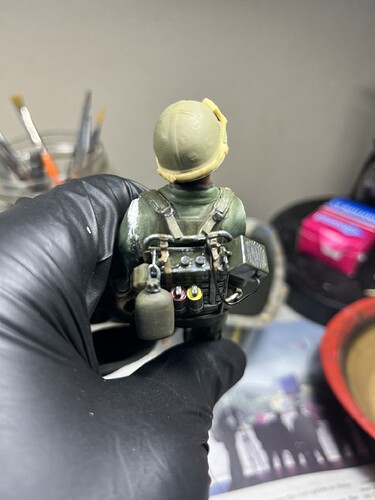
Here are some updates. It might look like minor progress, but as we all know, it is sometimes the small decisions that can delay our models a long time. As I mentioned before, I was rather stumped on how to model the buckles and straps connecting the shoulder straps to the frame. I considered wire and styrene but nothing seemed feasible for tiny buckles, particularly if I had to thread lead foil through them. Ultimately I decided to fake the buckles by cutting them out of lead foil and crimping it a bit and then painting a “strap” through the middle. I then added multiple strap sections above and below the frame to mimic a strap going from the shoulder, through the frame and through the buckle and out of it. I don’t believe the quick photos do it justice.
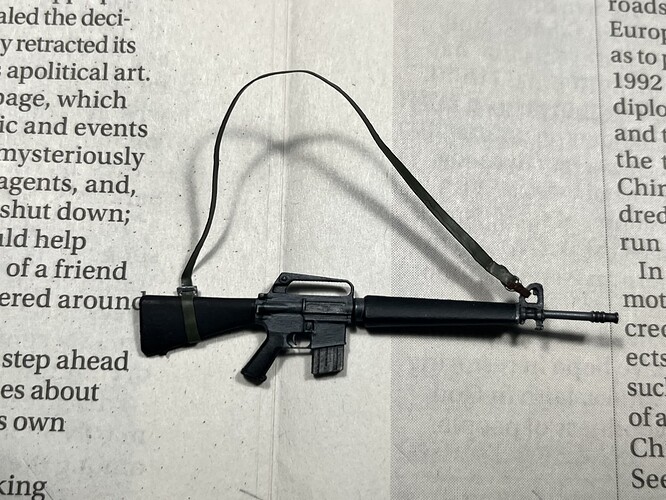
I painted his M-16 and built Chi-Com SKS type sling for it. These slings were popular pick-ups as they were easy to convert into “assault slings”. Note the leather thong tab and D-ring in the front and the buckle in the rear. The straps were made with lead foil and the D-ring was thin gage wire carefully bent around a set of needle nose pliers. The rear buckle was cut from a larger Verlinden photo etch accessory.
Really nice details, Travis!
Looking forward to see more ![]()
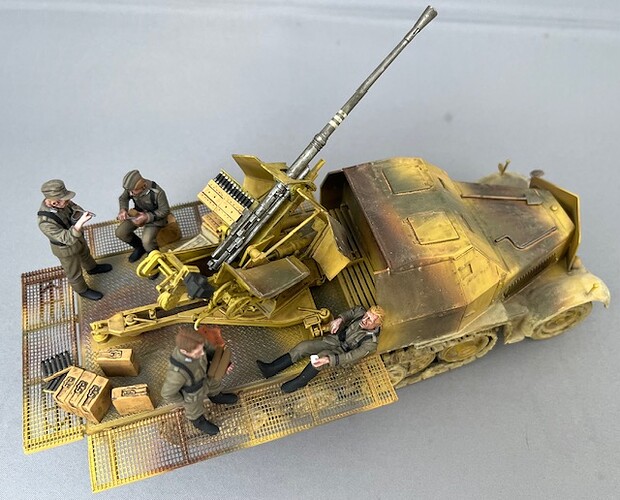
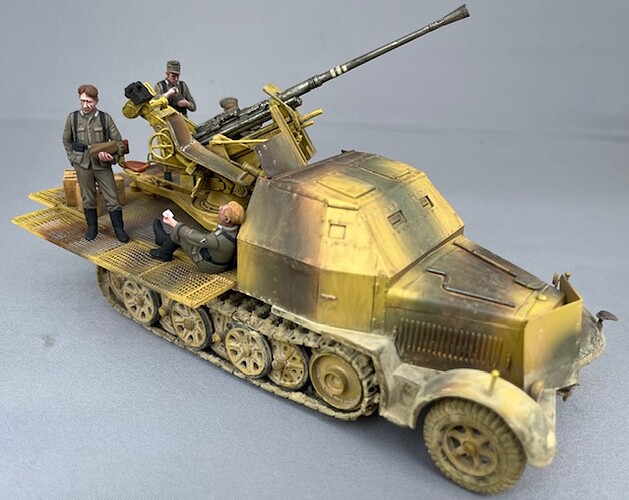
I am calling my entry done with the figures now also finished. Grossdeutschland division 37mm Flak Half track with the crew resting.
I am quite satisfied with the final result and it feels like the I made it in the spirit of the Great Ones.
Thanks for looking - and looking forward to see some great entries in this campaign! ![]()
That came out excellent!!
Well done!
Even if I doubt if the uniforms match the vehicle timescale-wise.
Why would the uniforms not fit - the pleaded pockets?
