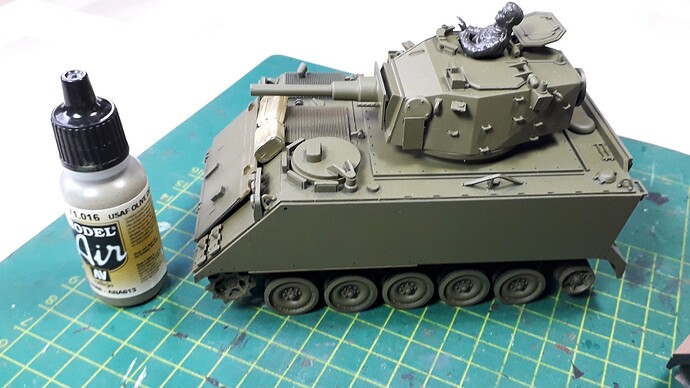
…and belly. These had that as well.
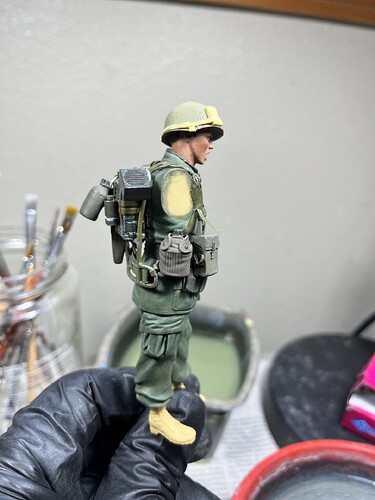
Colour looks pretty good for Aussie Lusterless Olive Drab Ron.
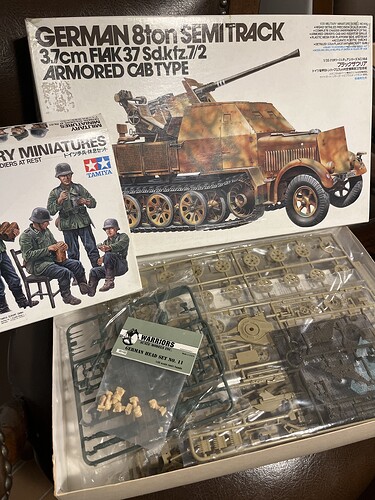
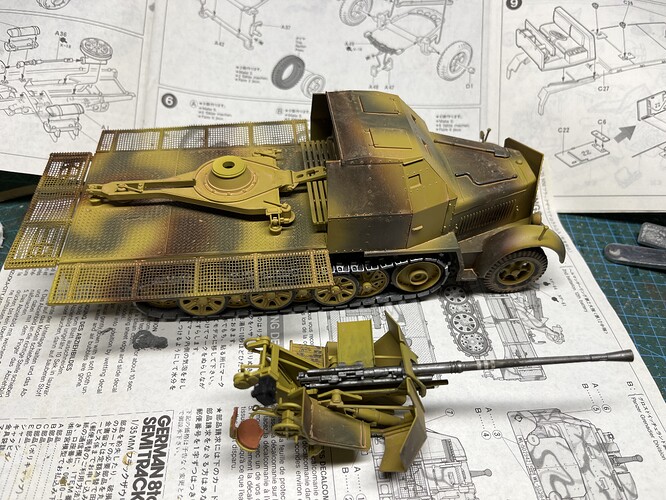
A bit of progress on my Sd.Kfz. 7. It builds as easily and smoothly as one would expect from the late 80ties Tamiya kits. Slightly thicker parts, but overall a beautiful build so far.
More to follow soon ![]()
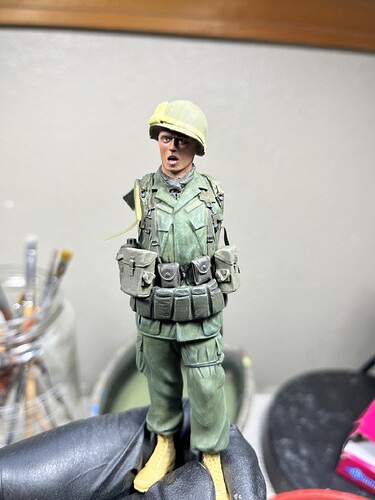
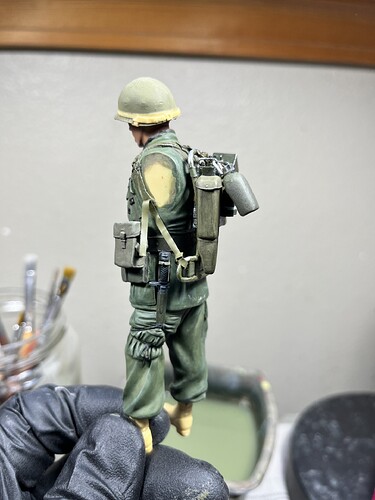
It’s a good thing these campaigns last for a long time. Aside from some hotel room painting on small scale items, I’ve been out of modeling for a couple of months. I was out of town in April and when I returned it was time for yardwork and other late spring activities. I’m finally getting back to this guy, so here are some updated photos.
Working on the 1" webbing straps has been a challenge. My biggest obstacle right now is figuring out how to scratch build the corresponding buckles (or something passable) for the shoulder straps. After I figure that out, the rest will be pretty quick.
A bit more progress on my old school Tamiya flak wagen.
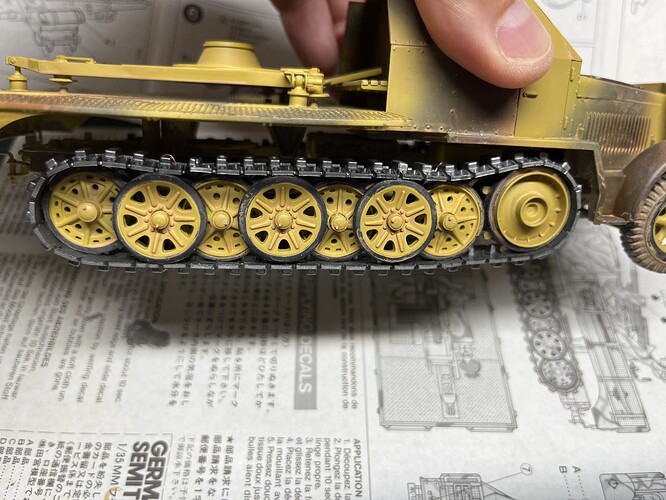
Fixed to old rubber tracks with wire to get the right sag.
More weathering to come - going for light dried mud and dust. Sort of Summer southern Europe feel.
More to follow ![]()
I still need to select a kit and get started… ![]()
This is a tough one. I am not familiar with the three model builders in the description but want to gain more experience scratch building. A few months back, I decided to build a fantasy cart/train/wagon with a figure. It would be a complicated project. I have never completed a 1/35 scale figure. Expectations for figure painting in 2024 are daunting. I know nothin’ 'bout carts, wagons, and trains. The project now seems excessively…ambitious.
Doug, have a look here for Sheperd Paine’s work with Monogram
That Sherman M4A3 conversion was my first real attempt at doing something major. Redoing the suspension was beyond me as a kid but I did buy some Bondo to do thsat cast transmission housing. My grandparent’s house smelled like Bondo for quite some time.
A true master, I’m sure he inspired many a young modeler.
I did my best to copy his C-47 diorama also. In progress photo of rare (for US at the time) two tone cammo, and dropped flaps:

Is that chipping on the rear of the door frame? From forty years ago? Say it ain’t so.
I think it is, but this chipping is realistic, since the paint would wear off by multiple jumps, hands grabbing and jumplines chafing away at the edges.
@SGTJKJ You are doing a superb job on that oldie!
I am waiting for the summerheat to ease up. I need to get some painting done!
Wow! 1973! I did not realize model conversions and dioramas were already a thing that far back. Those 50 year old articles read like modern how to books.
…
A fantasy train is not right for this campaign. One of Shep Paine’s dioramas depicts a Sd.kfz. 232 and a Sd.kfz. 263. I recently purchased the book, “Scout’s Out”. What if…
I build an old Tamiya Sd.kfz. 232 for the 1942 campaign…
I build a Tamiya Kubelwagen for the Give Me Sum Luvin’ campaign…
I build an old Tamiya Grant for the Sherman campaign…
I build an old Tamiya Sd.kfz.222 for The Great Ones campaign…
…and then I combine all 4 models into a diorama for this campaign.
…and then I crash and burn on another campaign because I have no idea how to build a diorama or paint a figure.
On the other hand, in my defense, those old articles were written for someone like me.
Oh man. This is how I get myself into a lot of trouble.
Doug I’d say you’d be overstretching yourself just a tad. Just a tad, mind you.
It was the only way back then - no resin, photo etch, 3D printed parts, multiple kits from which to bogart parts from.
I even read once about a Russian railroad modeler who made Russian rolling stock out of plastic sheets that he made himself from old sprues.
There’s a certain satisfaction to making something out of those kits, even if there’s something “better” and newer out. Welcome to the dark side.
@SSGToms Yeah. It is a guaranteed fail. Even if there was enough time, a 10" by 10" base will not fit 4 vehicles.
@18bravo I have great respect for people who build everything from spare parts and styrene stock. It makes sense that would start with railroad modelers, and probably architecture modelers before them. Kinda wonder when model railroading became a thing. Should research that.
…
Thinking out a better plan…
Some of you build your dioramas in sections to ease transportation. A few months back, I asked about making modular diorama bases. I could plan the diorama as a 4 by 4 grid of 10" by 10" square sections. Each section holds one vehicle. Each display case holds two sections.
For this campaign, I need to plan out all 4 sections but only need build one section with one vehicle. The diorama will depict a radio section of a German reconnaissance platoon in…Afrika?–one Sd.kfz. 222 and one Sd.kfz. 232–parked near an abandoned M3 Grant. Someone in a kubelwagen has come by to inspect the tank. There is also a dispatch rider on a motorcycle talking with the radio section commander.
Desert dioramas always looks so…desert. Therefore, I will make my life really hard and attempt to depict an oasis after a very rare rain shower–lots of trees, blooming plants, and greenery. This will require researching what an oasis looks like, what plants grow there, and scratch building all those plants.
Or…I could go to Russia. Now there is lots of greenery. The M3 Grant becomes…wait. Did the Russians have M3s in 1942? I need to research that.
Mr. Paine recommends leaving a one inch border around each diorama and planning vehicle placement in advance, so I need to measure some models and make some sketches.
For the scratch building part, I will add an interior to the Sd.kfz. 222. I will copy the interior of a Bronco Sd.kfz. 221 and parts from an Eduard etched brass set.
For figures, staying true to the rules of the campaign, I will need to chop up figures from old kits. This part will suck hard because I have no experience with figures. If they turn out horribad, I can snap some pictures, get a completion, then throw them in the trash.
Mr. Paine also describes scratch building air recognition flags, boxes, chairs, signs, and other junk so to stay true to the campaign, I need to do some of that.
This is ambitious, for sure. Is this a good plan? Am I staying true to the campaign? Kinda worried because I failed two of Ron’s campaigns in the last year. Don’t want to fail another.
Again, look to model railroaders. Clubs use modular railroads with standardized dimensions and track locations so they can be displayed together in other locations such as train shows.
Look for some articles on modular layouts - not only with they tell you how to attach them easily but securely, but also how to hide the joints.
I’ve been working on a huge one for years now. It’ll never be display in my home but more than likely in North Kakalaki.
Actually the doors were partially taped up.
1, to prevent the static line and jumpers equipment from snagging and getting hung up onto the aircraft
2, to prevent any sharp edges that could potentially cut a static line and cause a failure of chute deployment
There would be some chipping, but it would be reduced by the taping up of the door frame area.
Quite true. I was copying Shep’s example as much as I could. Since then, for many years one of my mantras has been Don’t use a model as a reference. Even the great one got it wrong once in a while.
I started that build in 1983. By that time I had jumped C-130s, C-141s, and Hueys. But never a C-47. As you know, being a jumpmaster yourself, we didn’t tape up anything. We just inspected those static lines for burn marks. No beer canning!
Point being I didn’t know any better at the time.
However, even now I think the tape was more to prevent a hung jumper than cutting the static line. Otherwise the tape should go all the way up the edge of the door frame.
FWIW on the figure modifications, Hornet had released a few resin replacement heads by 1990. I plan to try an old Hornet head on a ~1980’s Tamiya figure as my figure mod. Chopping the head off, drill the neck, fitting the old “new” head& filling isn’t too bad, did that once long ago.
![]() dread the idea of figure painting…
dread the idea of figure painting…
Best wishes with your project.
