Speaking of seams, decided to break over and pick up a tube of the red automotive glaze putty. Mr Hobby wasn’t working for meand I left the Molak Stucco at home.
After splashing the seams with thinned red putty decided to mock up what’s assembled.
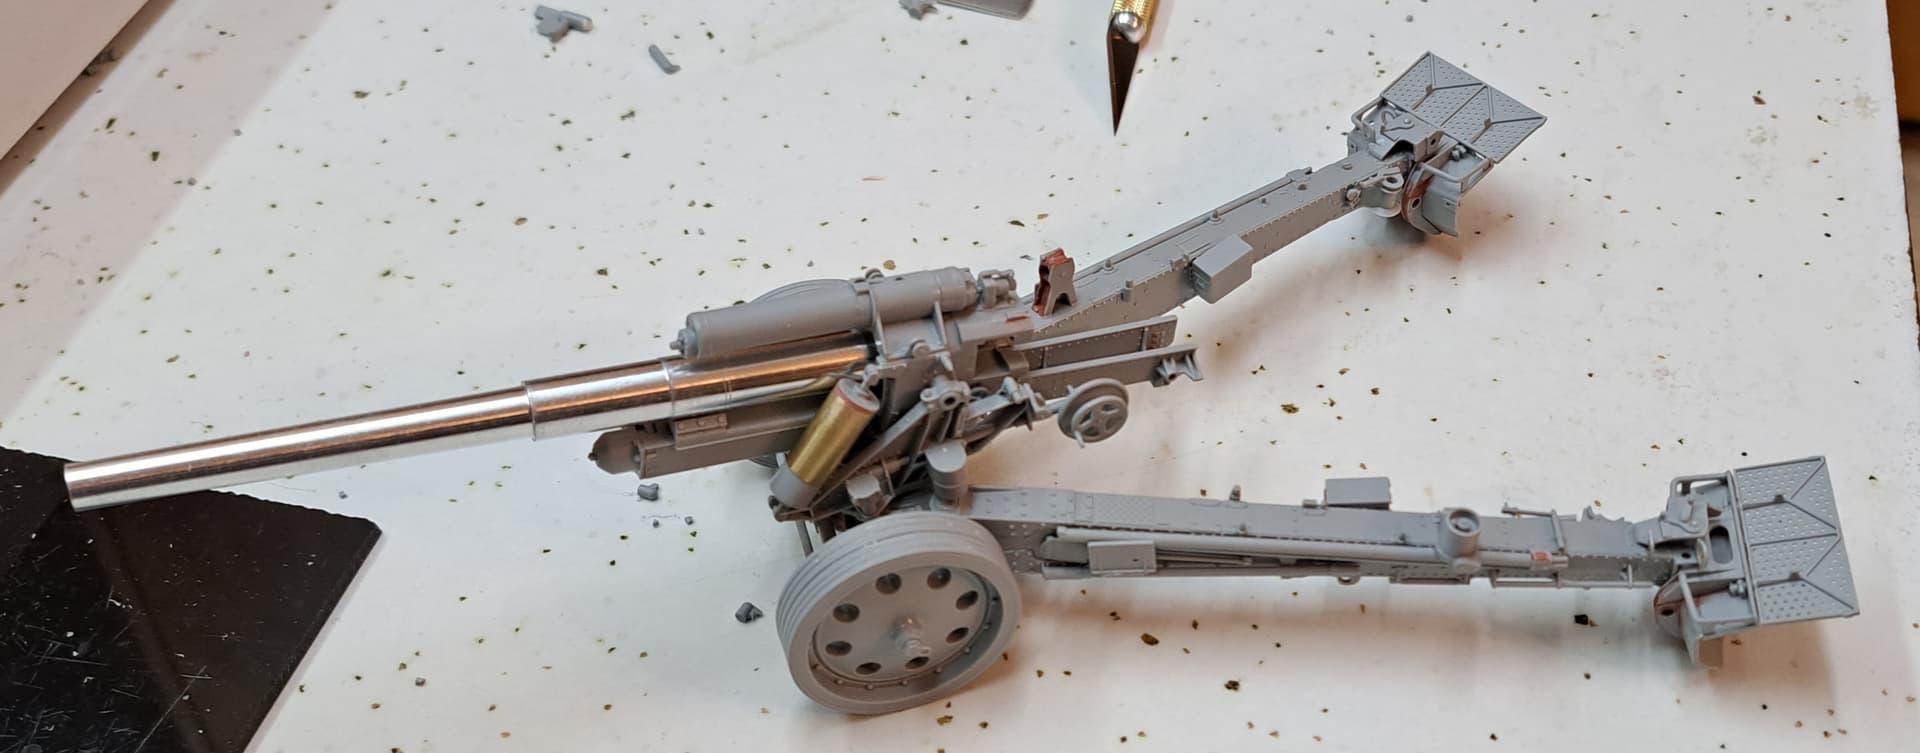
Whoa! What’s mocked up with the metal barrel is major nose heavy without the spades & arms attached.
How well does this thing sit in firing position in firing position when fully assembled? Will the rear arms need ballast inside them?
8 Likes
Nice progress Wade. I have to say, after 50+ years of model building, Bondo spot filler and glazing putty in the tube is my go - to putty for nearly everything. I know you love your Molak and I love my Bondo. Whenever a new putty comes out I try it, to see if newer is better. I’ve tried all the manufacturers brands, all the famous name brands, Perfect Plastic Putty, you name it. Nothing has the adherence, versatility, and sandability of Bondo spot putty. No dedicated modeling putty can touch it. I enjoy turning people on to it - they’re so amazed!
3 Likes
No ballast should be necessary. I have never had any issue with balance.

6 Likes
Matt, thank you. The gun is slowly grinding along.
Yes the Bondo is definitely one of the best putty’s I’ve tried. I’ve tried a lot of them too and found most model putty generally terrible. What do you like to thin out the Bondo putty with?
Love being able to get that like paint thin application. The Molak Stucco seems to thin better (for me) with Testor’s Liquid Cement for that thin as paint coat.
Pet favorite’s…#1 Molak, #2 Bondo & #3 Tamiya Basic Gray, #4 Mr Surfacer, the other putty’s - trash can worthy. Didn’t care for Perfect either.
Thank you Brekinapez, that’s good to know.
2 Likes
Working on spades, tools and lower carriage. Dragon had B26 & B27 criss crossed which are critical parts, Perth Military Modelling review proving invaluable. Looking forward to wrapping the construction.
4 Likes
I wish Terry would get the Perth site up and running again. It is still an invaluable tool for us. But so many new kits, and Facebook isn’t the same. The reviews are indispensable there.
3 Likes
@steel_tiger1 Tom, fully agreed  , Terry’s Perth Military Modeling site as good as it gwts with helpful kit reviews and information. I wish the Perth site had more updates with new release kits too. Facebook isn’t of interest to me.
2 Likes
Decided to skip step 12 for the limber for the moment and jump to step 13. Still working on #13 however the gun is taking shape.
My impression is the model is going to be fragile and almost require being mounted on a base to survive intact at home.
9 Likes
That is looking very nice Wade. The PE and metal barrel make it pop. Is there any over weight at the front due the barrel or does it all balance out ok ?
1 Like
@Johnnych01 Johnny, it balanced without any issues. The trailing arms & spades do the trick without having to add any weight. Thank you for the kind words. Other than instruction sheet having so many errors this is one of the very best Dragon kits I’ve built. Great quality plastic, excellent fit, nice PE, sweet metal parts & well engineered.
2 Likes
May as well add my review and rating of Dragon’s #6392 15cm Howitzer. Just my opinion, it’s based on the Howitzer with limber not considered much of a factor.
4 Price ~$50 now (paid ~$25, 2014)
1 Instructions - horrible, need update
4 Molding Quality
5 Plastic Quality
5 Parts Clean Up - I was surprised!
4 Ease of build - good instructions 5
4 Accuracy - Perth listed omissions
5 Fit - excellent, this type model!
5 Doesn’t Require Aftermarket
5 Details built Out of the Box
42 points out of 50
Overall Best kit I’ve assembled in a long time. Highly recommend.
5 Likes
It will balance told you I did.
2 Likes
@Armor_Buff , as I understand it, acetone can be used to thin the Bondo Spot and Glazing putty (red color in black tube). I haven’t tried it yet, as I need to go to the store - my wife’s nail polish remover is acetone free. :-/
2 Likes
@JaredFinkenbinder Jared, thank you for the tip on using acetone to thin Bondo spot putty. I’ll have to try that.
2 Likes
Check if your wifes nail polish remover contains ethyl acetate.
If it does it can be used to “weld” styrene.
Test it on some bits of sprue.
4 Likes
@Uncle-Heavy good to know. So you can use it instead of glue?
1 Like
Ethyl acetate is a rather powerful solvent (see what it does to nail polish …)
It turns styrene into goo so use it very sparingly.
Hold surfaces together, use a small brush (think 00-size) to apply a very small amount to the edge of the joint. Capillary action will draw the liquid into the joint, styrene from both parts “melts” and mixes, liquid evaporates fast, styrene goes solid again. Done.
Thanks to the fast evaporation the joint has some basic strength as soon as the liquid has evaporated. Parts that are not under stress can now be put aside to dry for another couple of minutes before handling them further. Full strength after some hours.
When I “glue” parts that need to be forced I start off at one end, glue a bit, let dry, push a little more, glue the new contact surfaces, the solvent will re-weld the end of the previous joint, continue bit by bit until the whole joint has been glued. This can happen with gun barrel halves, upper and lower hull tubs for tanks et.c.
Do not try to use it as regular glue, i.e. apply to surfaces, put the tube or bottle aside, pick up parts and join them. The solvent has evaporated before you pick up the parts.
The beauty of this is that you can take all the time you need to get the parts lined up correctly before the solvent gets close to the parts.
I said capillary action, the liquid is drawn into small spaces (capillaries, pores), it’s a force of nature Capillary action - Wikipedia
The space between adhesive tape and styrene part = capillary
The space under a rubber band or a clamp = capillary
Fingers = CAPILLARIES You can mold your fingerprints in styrene, press clean finger lightly against styrene surface and apply a small drop.
I think you know what I’m getting at …
Tamiya has Extra Thin Cement which is basically the same, can be bought cheaper if bought as their thinner. Ethyl acetate can be bought from well sorted paint shops since it is a paint thinner for lacquers (remember that nail polish?).
Another option is toluol/toluene or xylol/xylene, these two have more adverse health effects than ethyl acetate AND wife can’t complain about the smell of ethyl acetate since she uses it herself, hint hint, wink wink …
None of the chemicals mentioned above are supposed to be used for inhalation, ethyl acetate is the least harmful of them, remember: it is used for nail polish …
Try the nail polish remover on some scrap plastic first
4 Likes
Wow thanks for the explanation. I just sourced some hypodermic needles from the vet, intending to get some of the extra thin/airbrush cleaner cement, but I’m going to go check the nail polish remover ingredients list again. That might work out cheaper than going to the hobby shop (2 hour drive).
2 Likes
Don’t forget the paint shops … they should have lacquer thinners (xylene, toluene, ethyl acetate or blends of these)
This might be worth checking up:
https://www.sciencecompany.com/Search?Keywords=ethyl+acetate
3 Likes