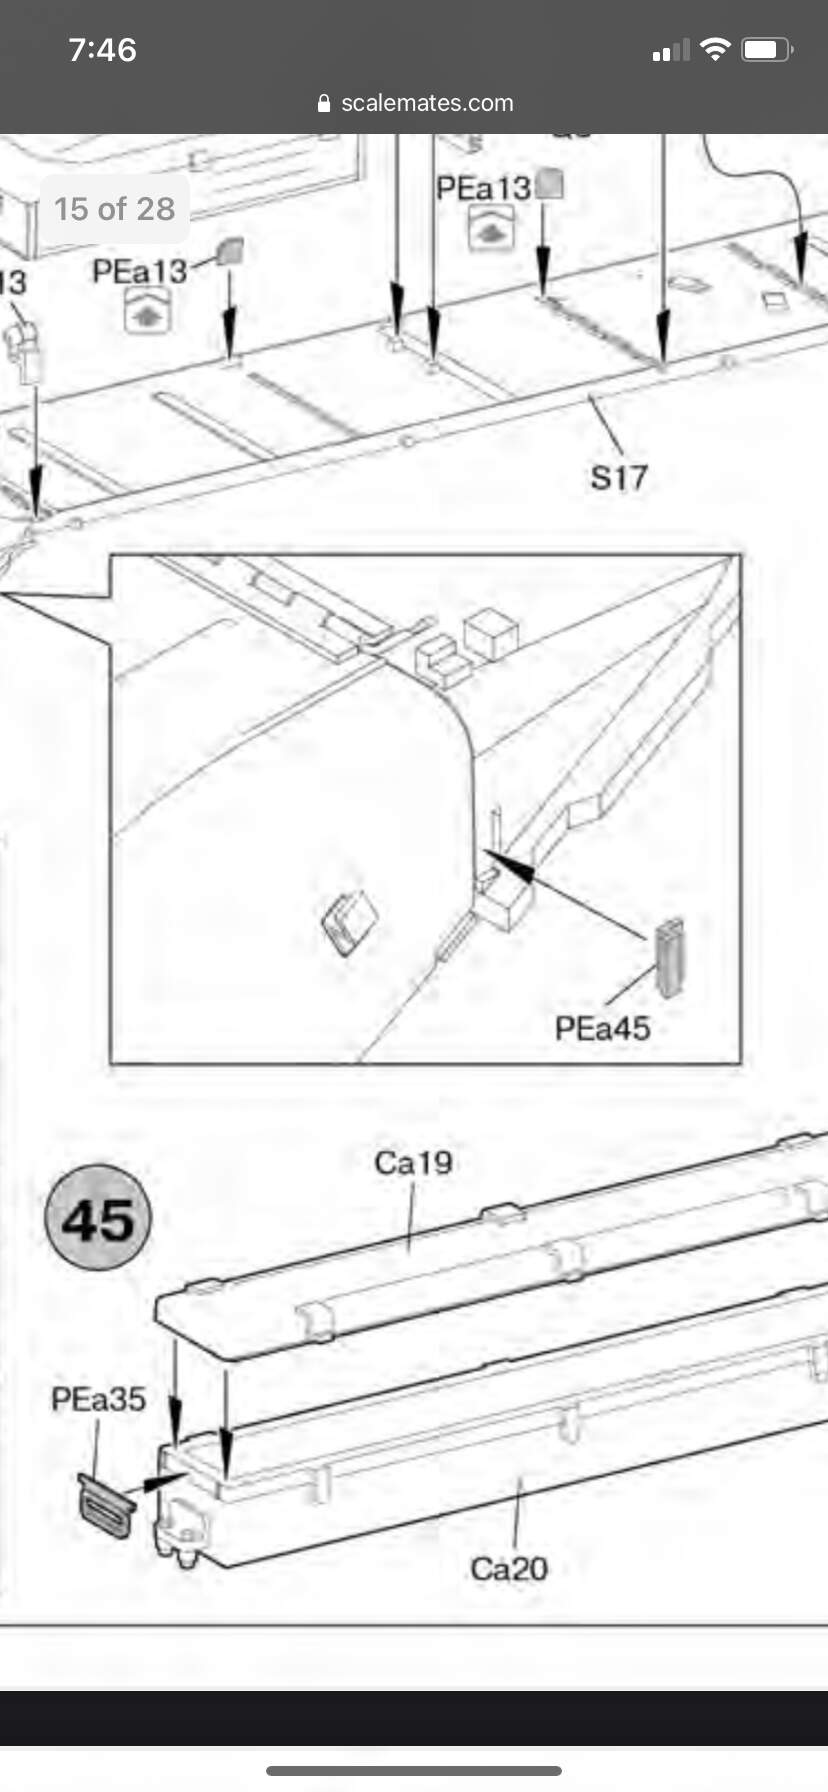
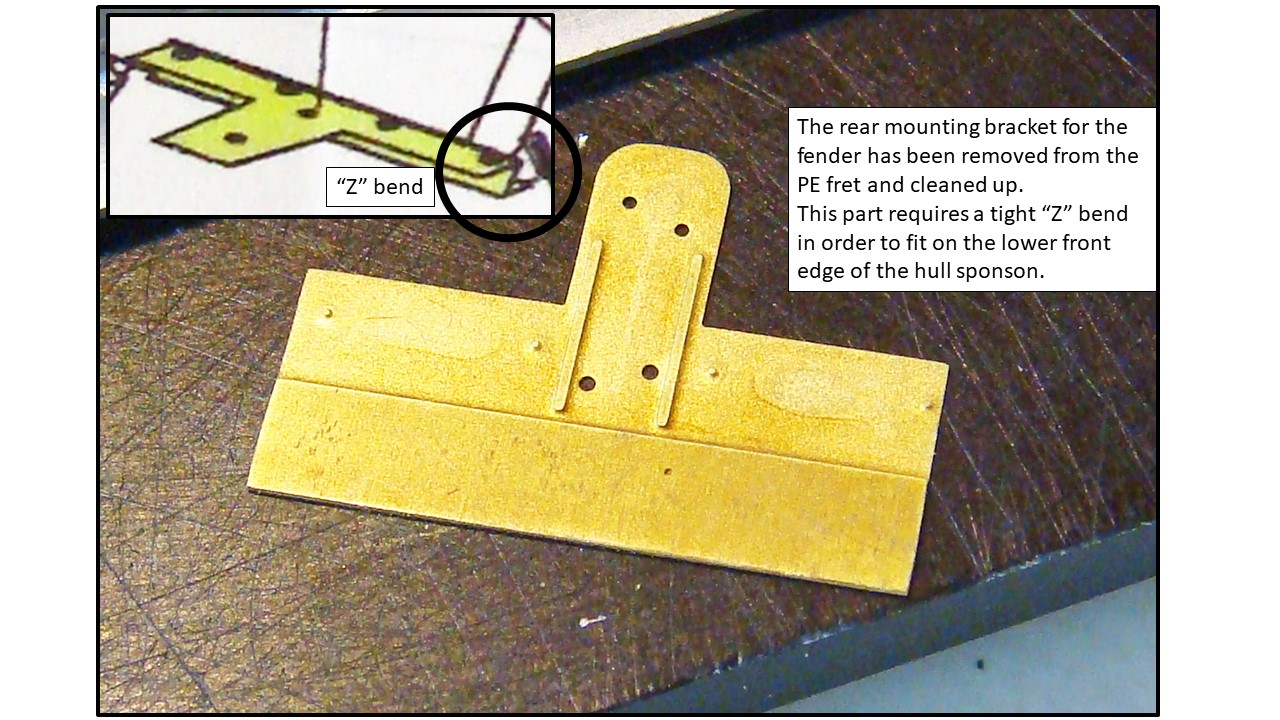
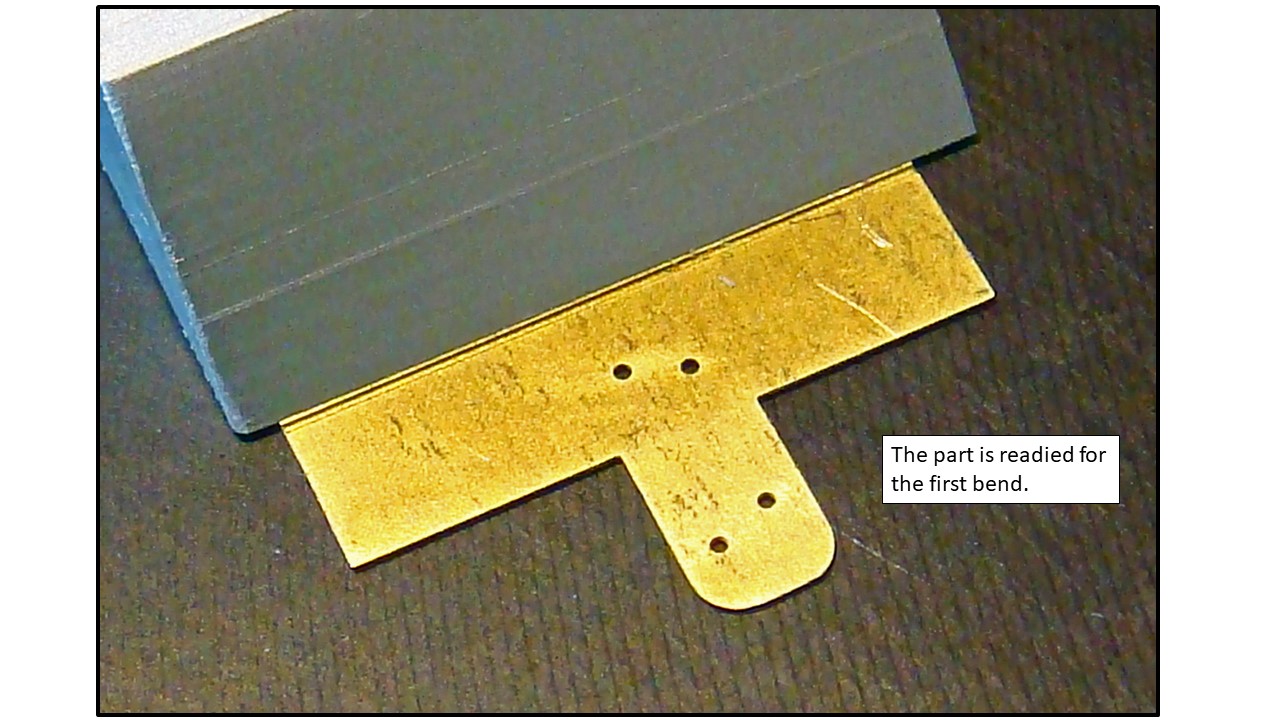
Anyone have a strategy for doing tight z-shaped bends in photo etch? The offending part for me is this one on the Miniart T-54-3 kit (pea45)
I am able to easily bend one of the two 90 degree bends in my bending too but when bending the other side I end up flattening out the previous bend leaving me with one 90 on the other side but a flat piece on the original side.
@Mead93 I’m sure there are a lot of ways to do a z bend for part 45. Here’s what I do.
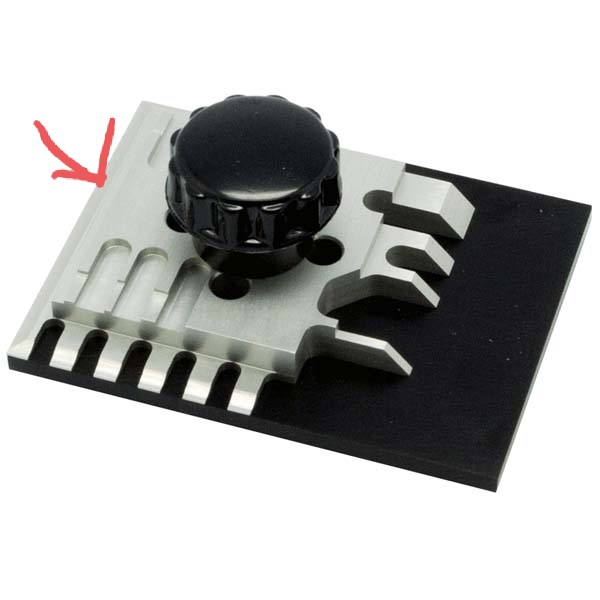
Put the PE part in the SIDE of the bender like the one with the red arrow. Make the first bend. Loosen the brake and ease the part out to the next spot to bend. Bend in opposite direction. I use the edge of a metal straight edge for pressing basically in the middle for the second bend.
Try on a scrap piece of fret first to get the hang of it.
3 Likes
I’ve been trying this technique out but with no luck. Maybe I’ll need to anneal this part first. The issue I am finding the the first and second bends are almost on top of each other. So when I ease the part out and try bending in the opposite direction for bend number two I end up ruining the first bend
Annealing usually helps.
What sort of tool is being used to bend the PE?
With edge of the metal straight edge, one can usually push and coax the tight bend for the Z from the opposite side.
The middle of the bend is narrower than the straight edge, I haven’t done one that tight.
I’m away from my tools, it’s hard to explain in words.
Best wishes
Do one bend as normal on the bending brake. Then hang the part off the edge of the brake at the second bend line. Make the second bend down (or up).
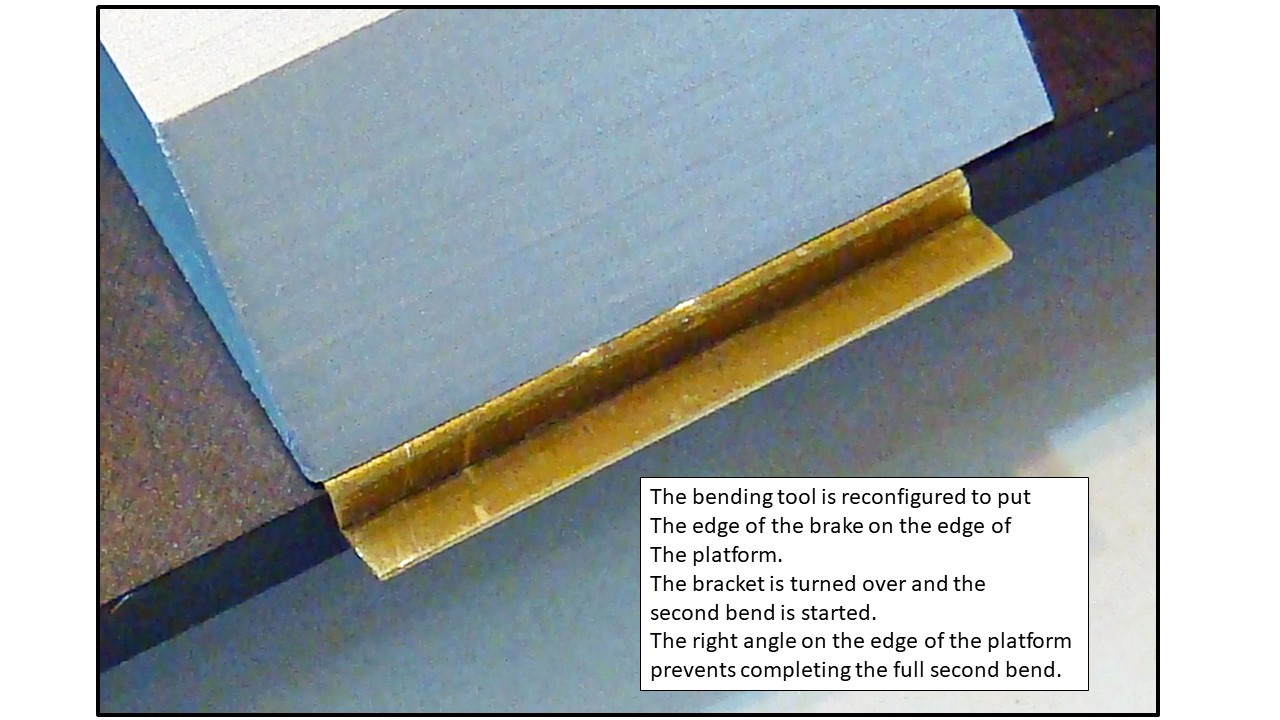
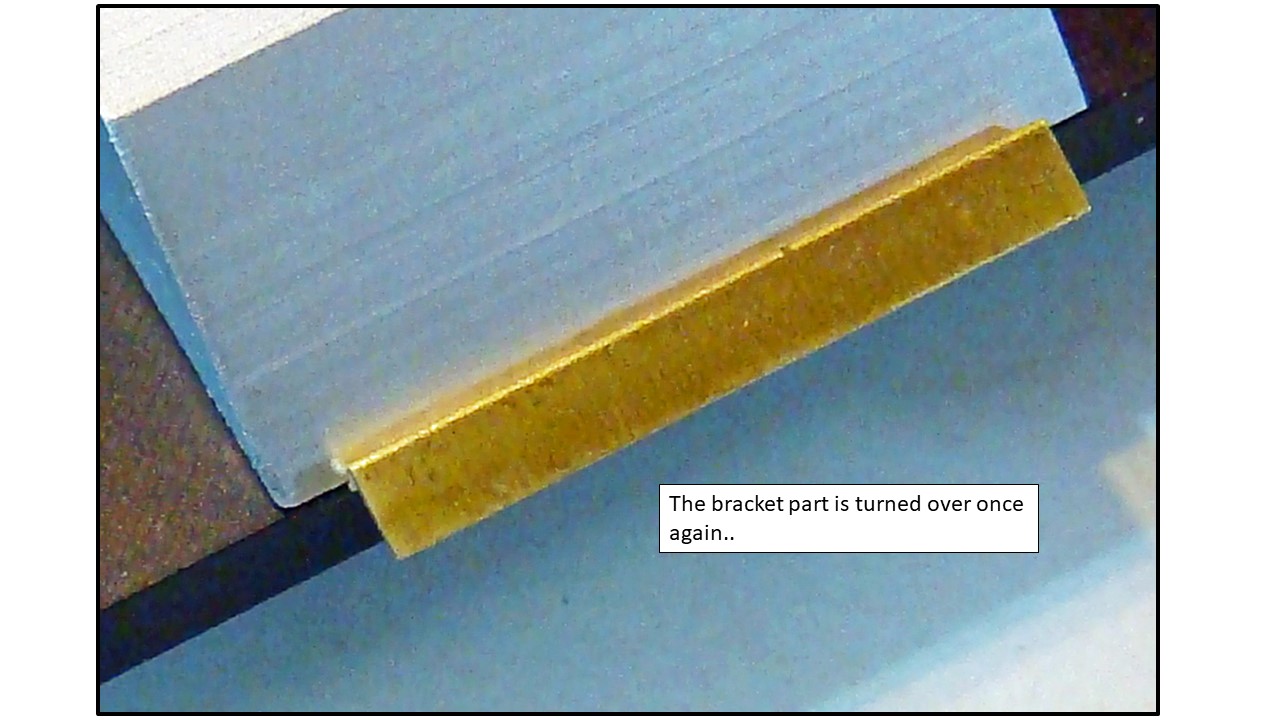
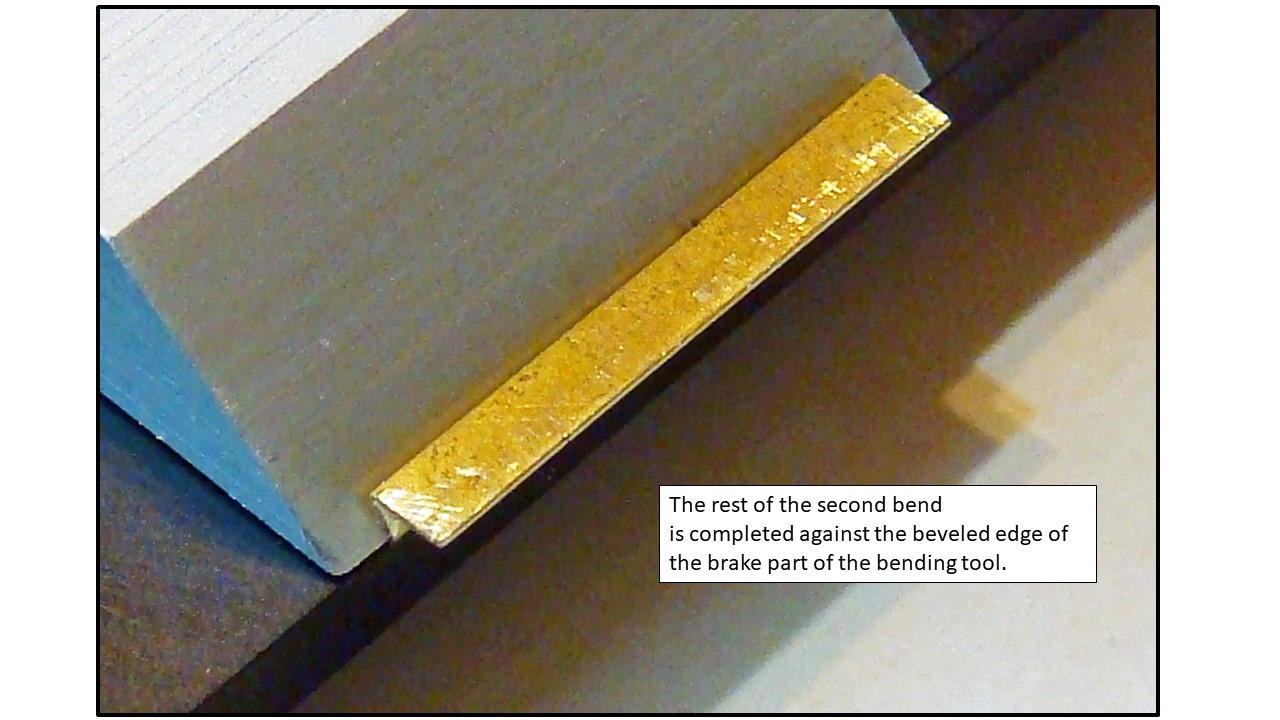
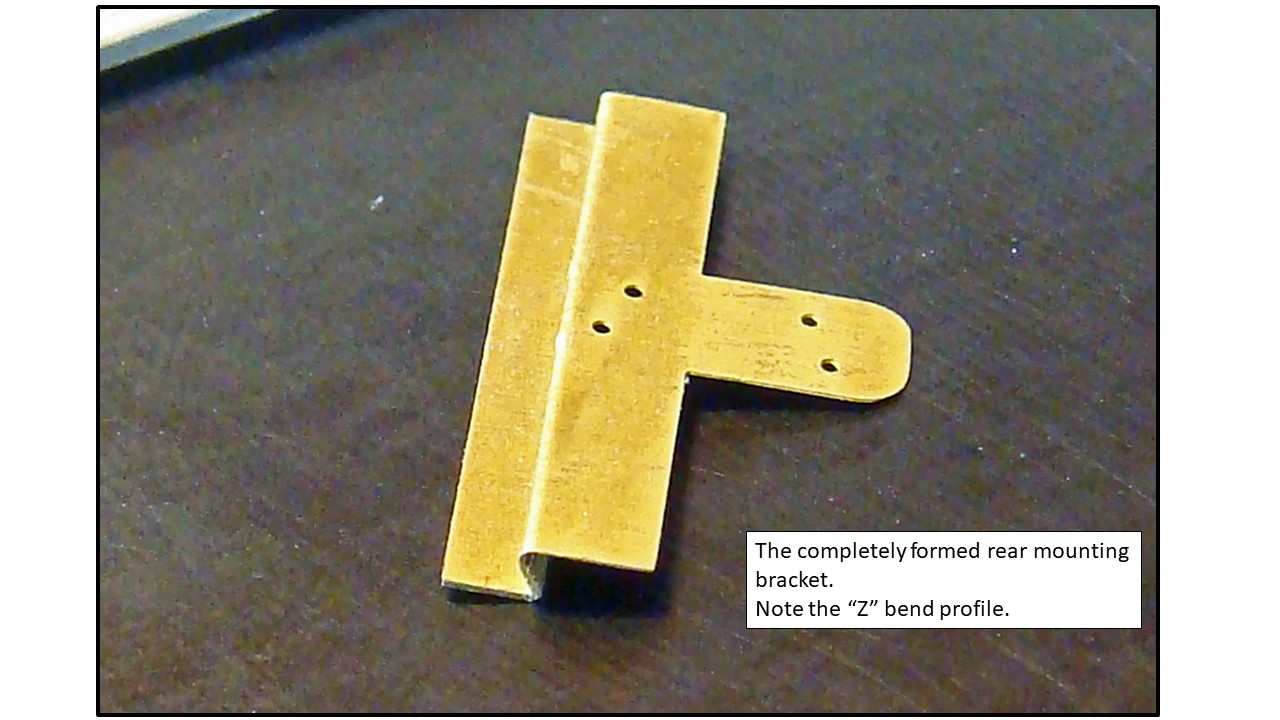
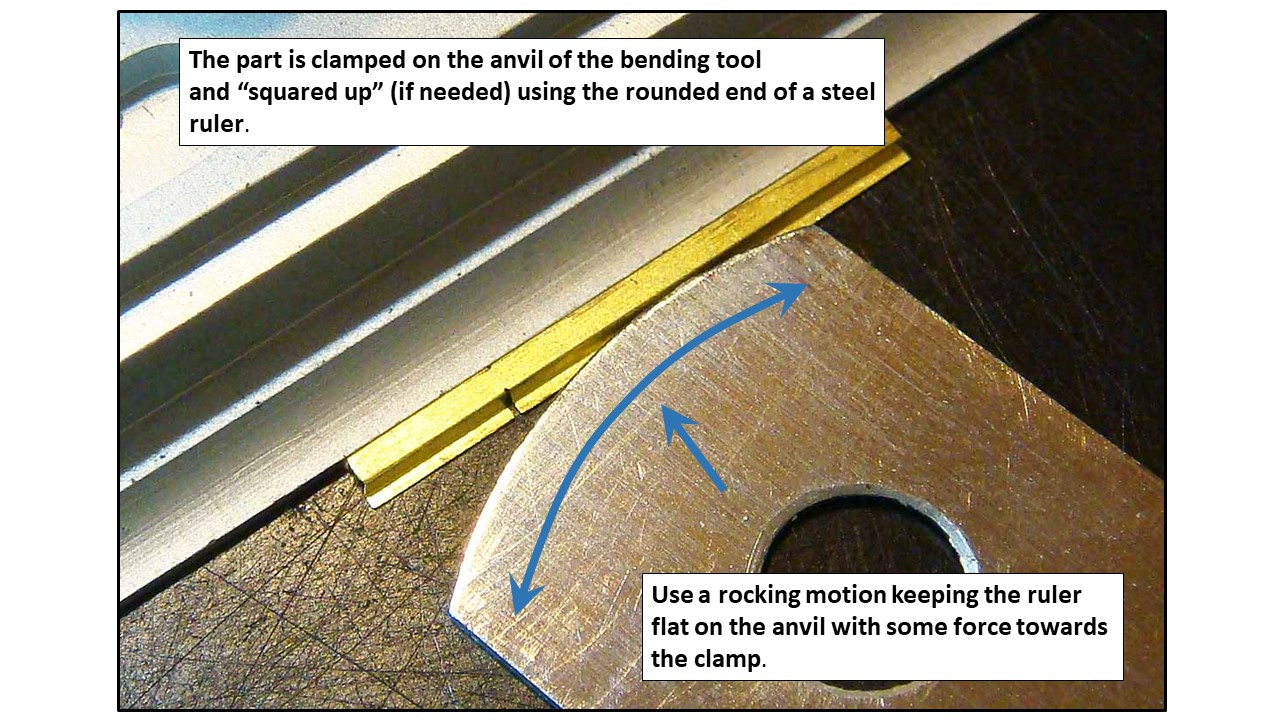
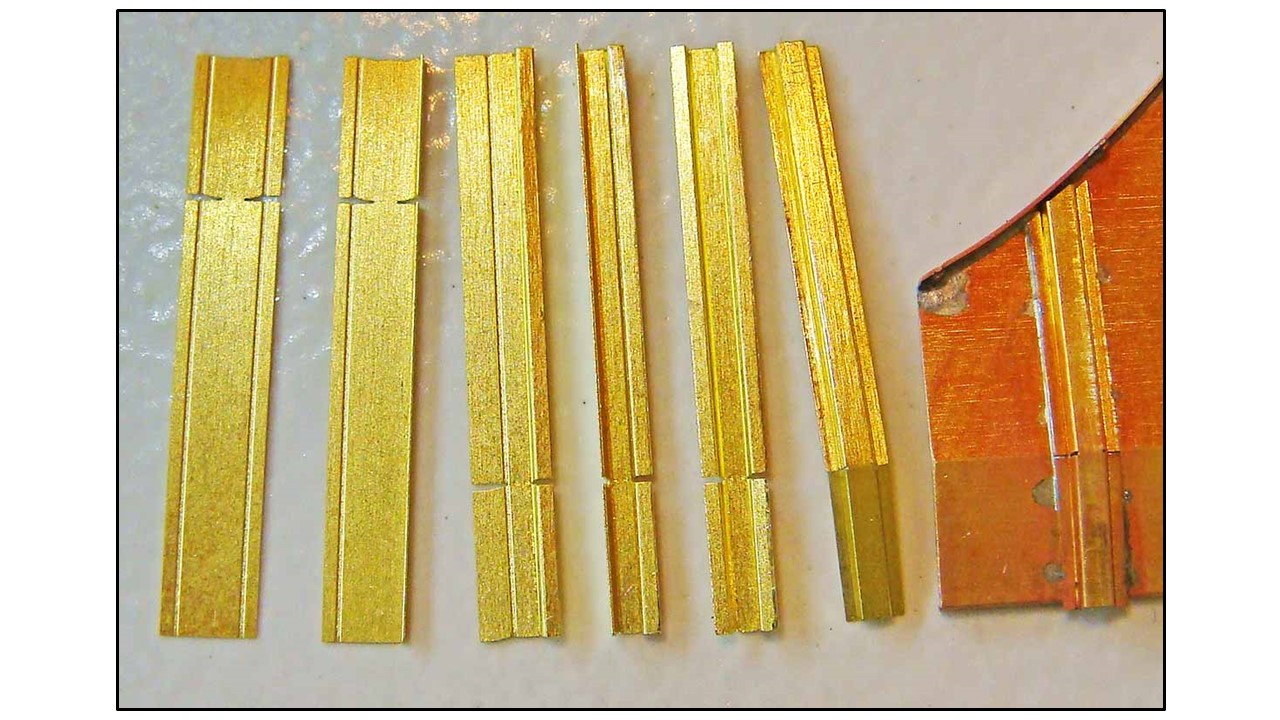
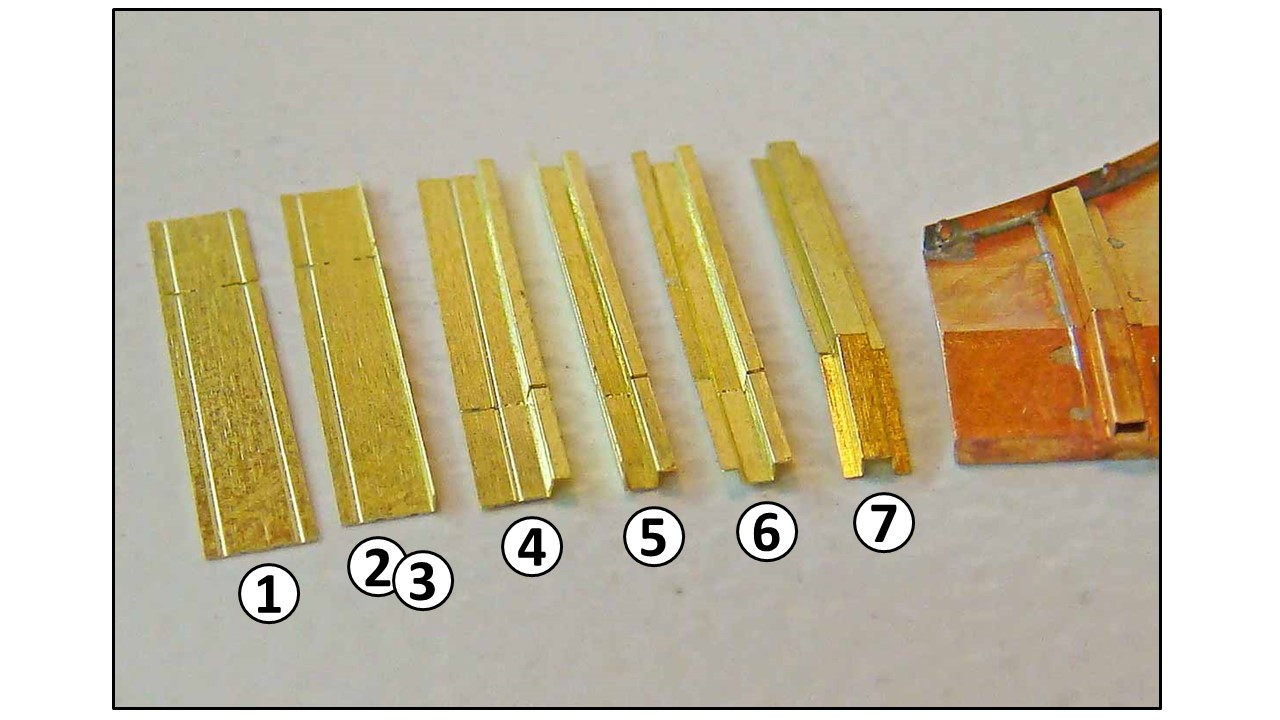
Here’s a quick SBS on making a Z-bend or two, opposing 90* bends from a PE seminar that I pitched at a couple of model shows a few years back:
2 Likes
The trick is using the edge of the blade, pushing the area that must fold and avoid pressing the rest of the part. Magnifier/optivisor helps to ensure you are doing it right.
1 Like
@SdAufKla Mike thank you for the pictures of what I,was attempting to describe.
1 Like
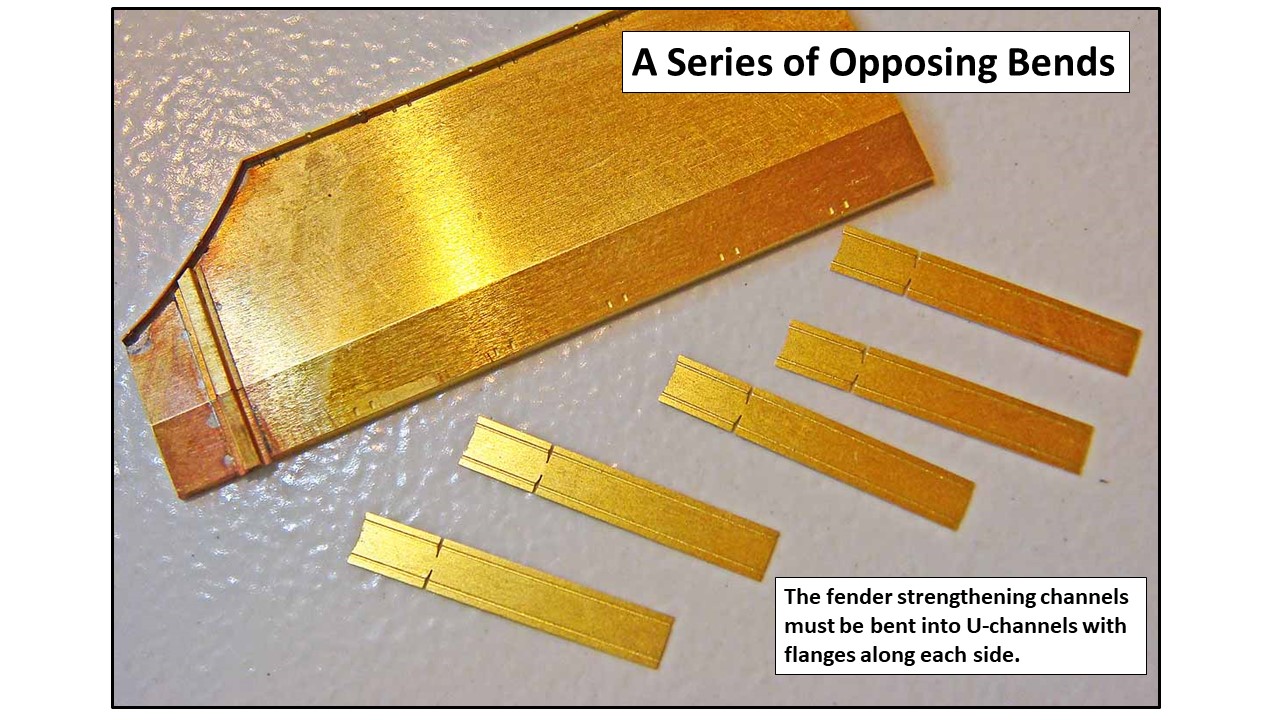
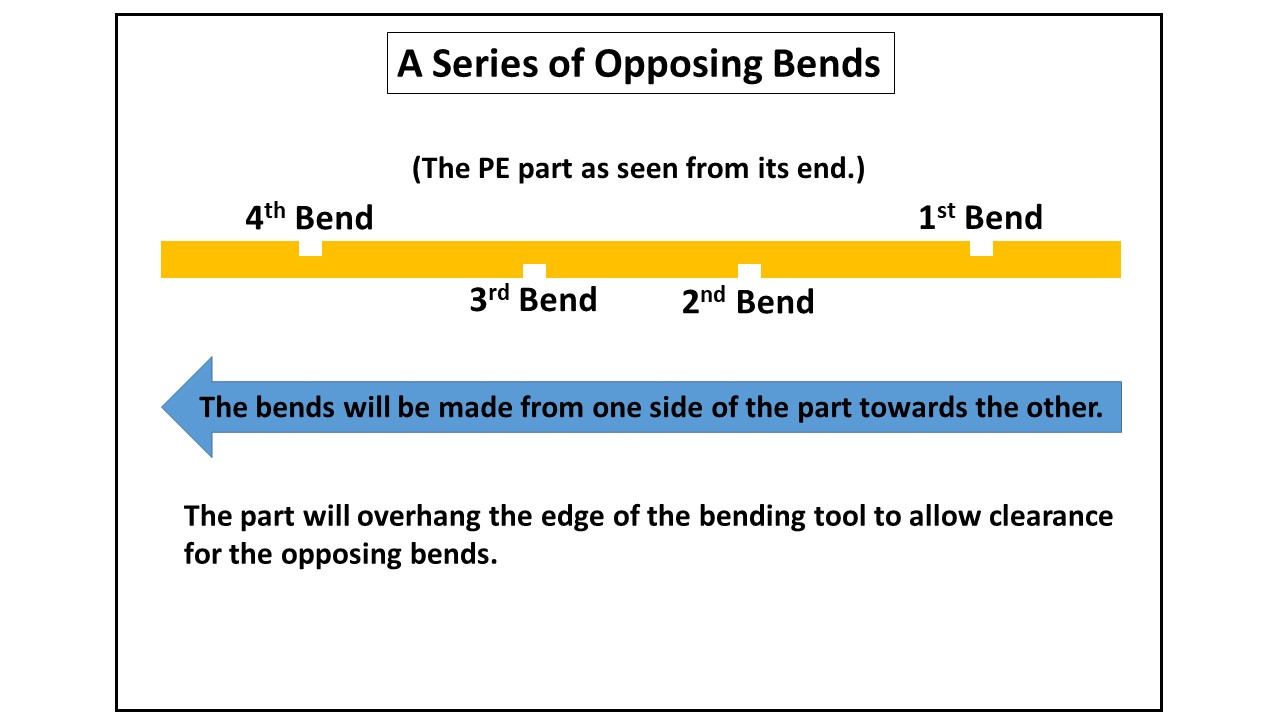
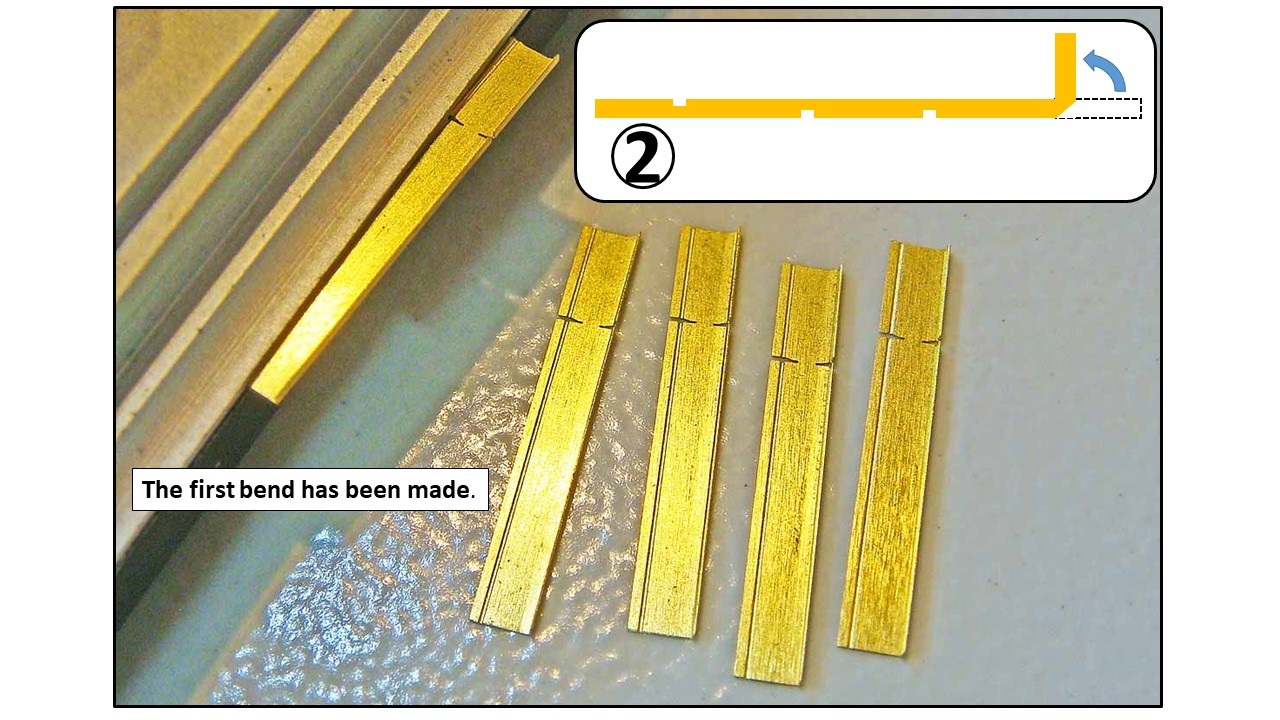
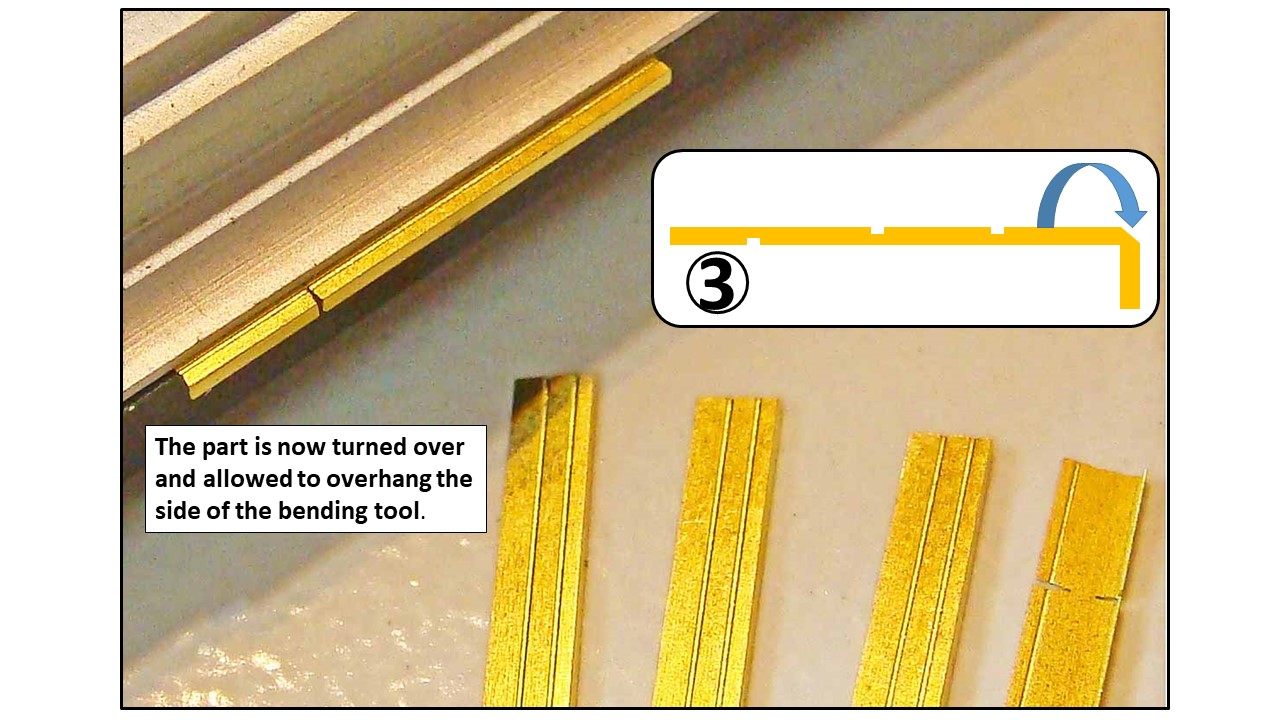
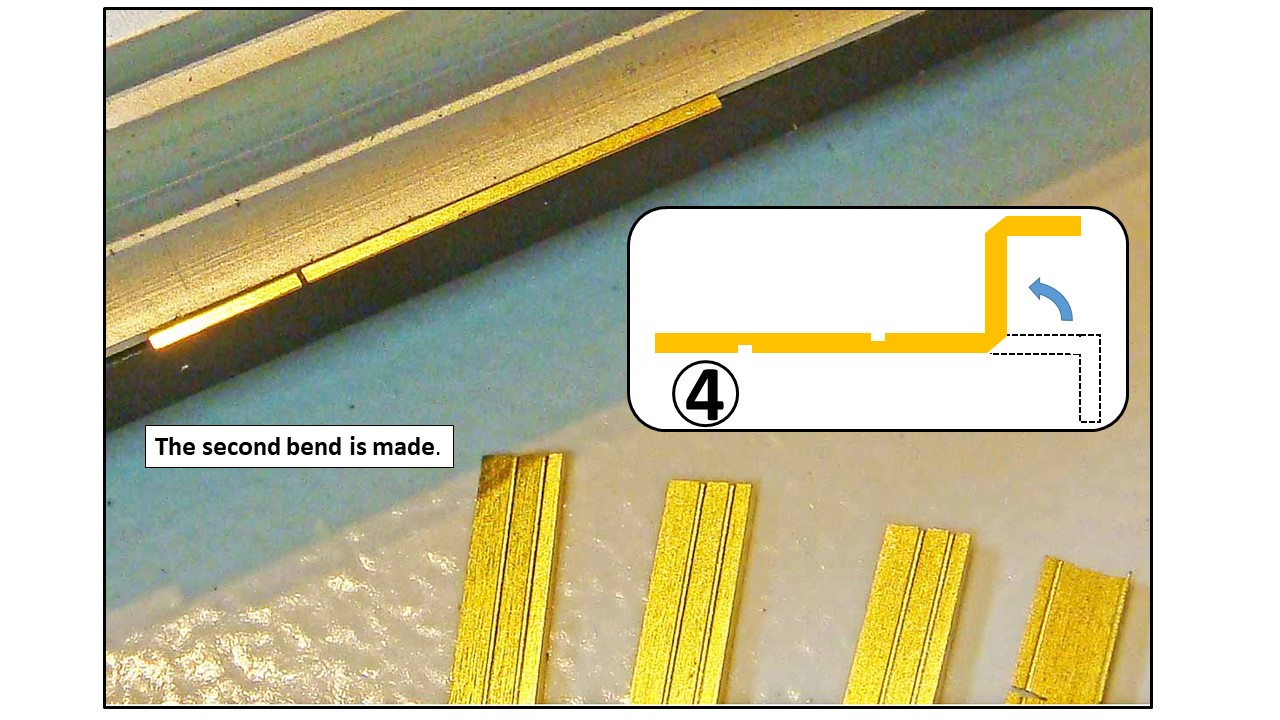
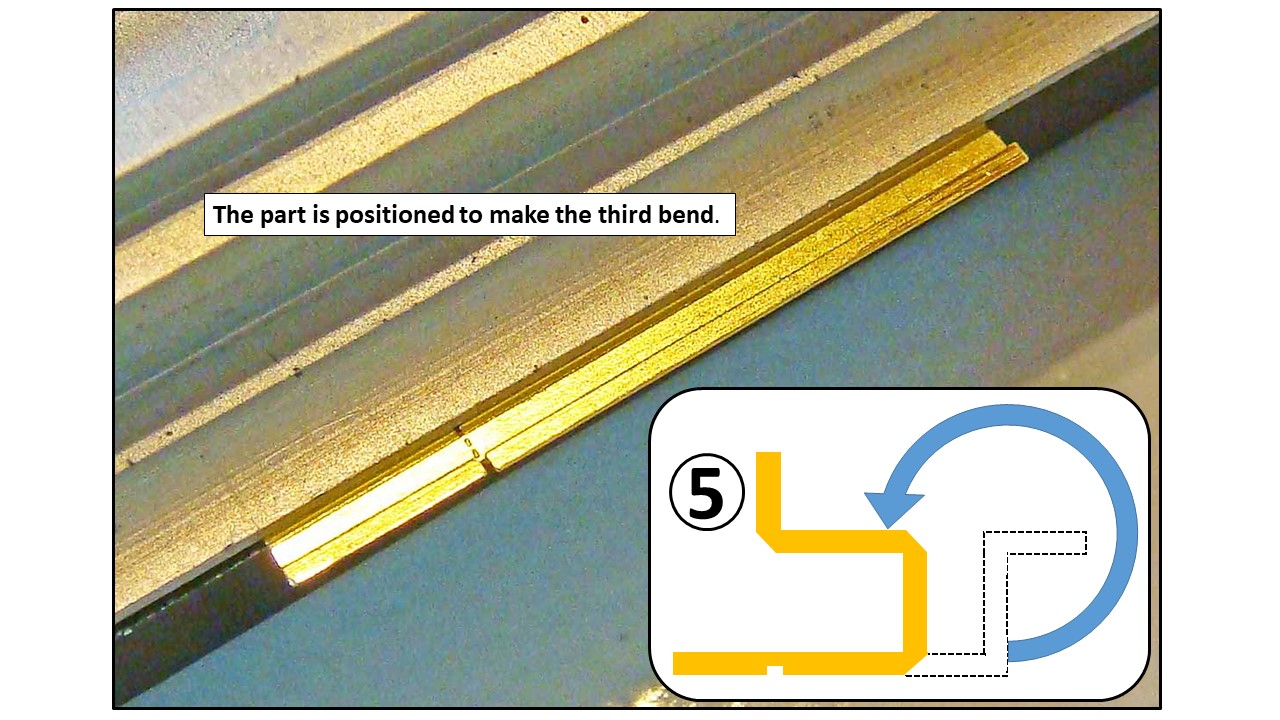
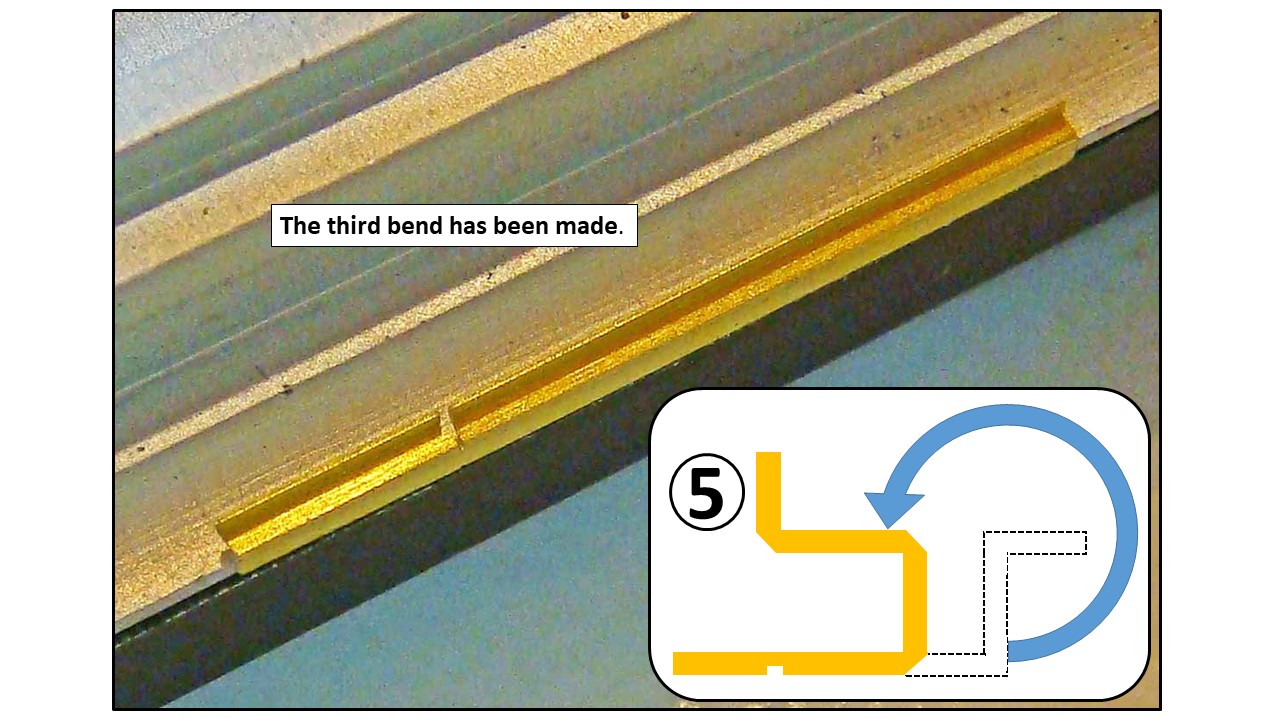
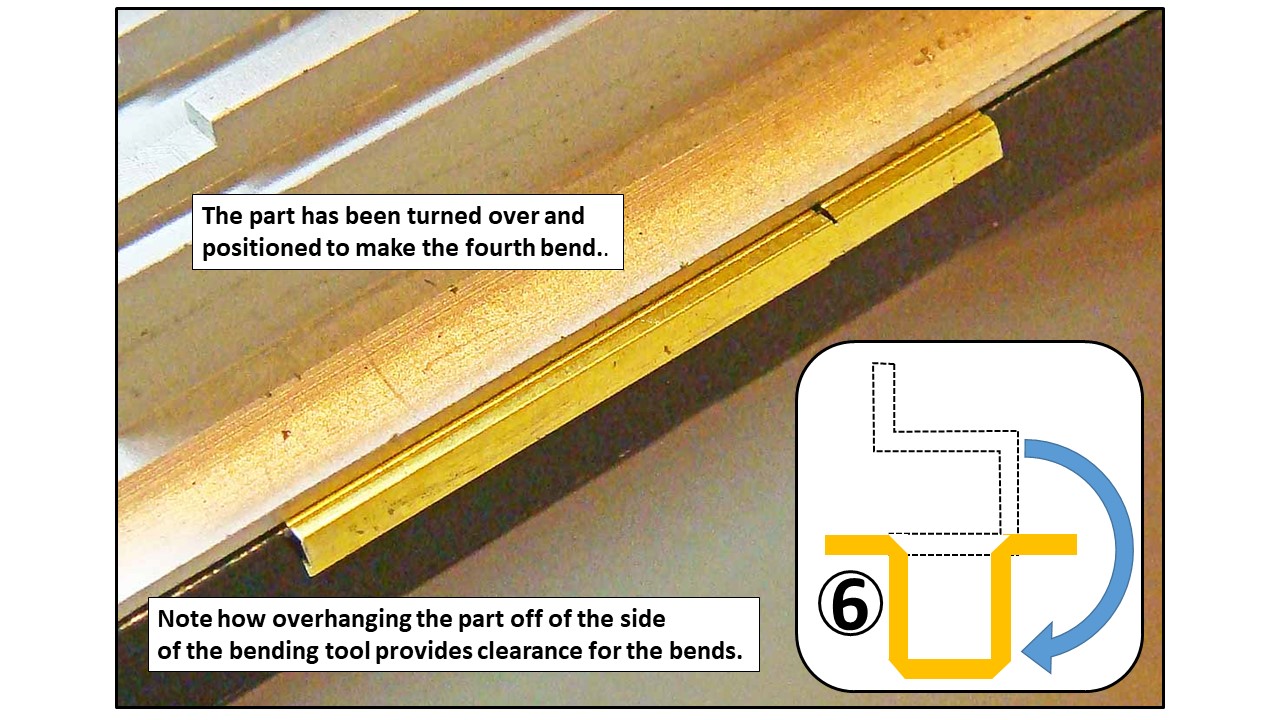
Here’s another tricky kind of bend, a series of opposing bends. This process is really similar to making two connected Z- or S-bends. Again, the key is using the overhang space off the edge of the bending brake.
4 Likes
In really frustrating scenarios like that I usually replace the annoying PE with various widths and thicknesses of plastic strip!

Thank you for taking the time and effort to put this out there.
1 Like
@Buckeye Easy peasie… I actually have all of the seminar materials. It was a two-three hour presentation. These Z- and opposing-bend SBS were just small parts.
Thanks for all the tips and @SdAufKla for the great pictures and explanations.
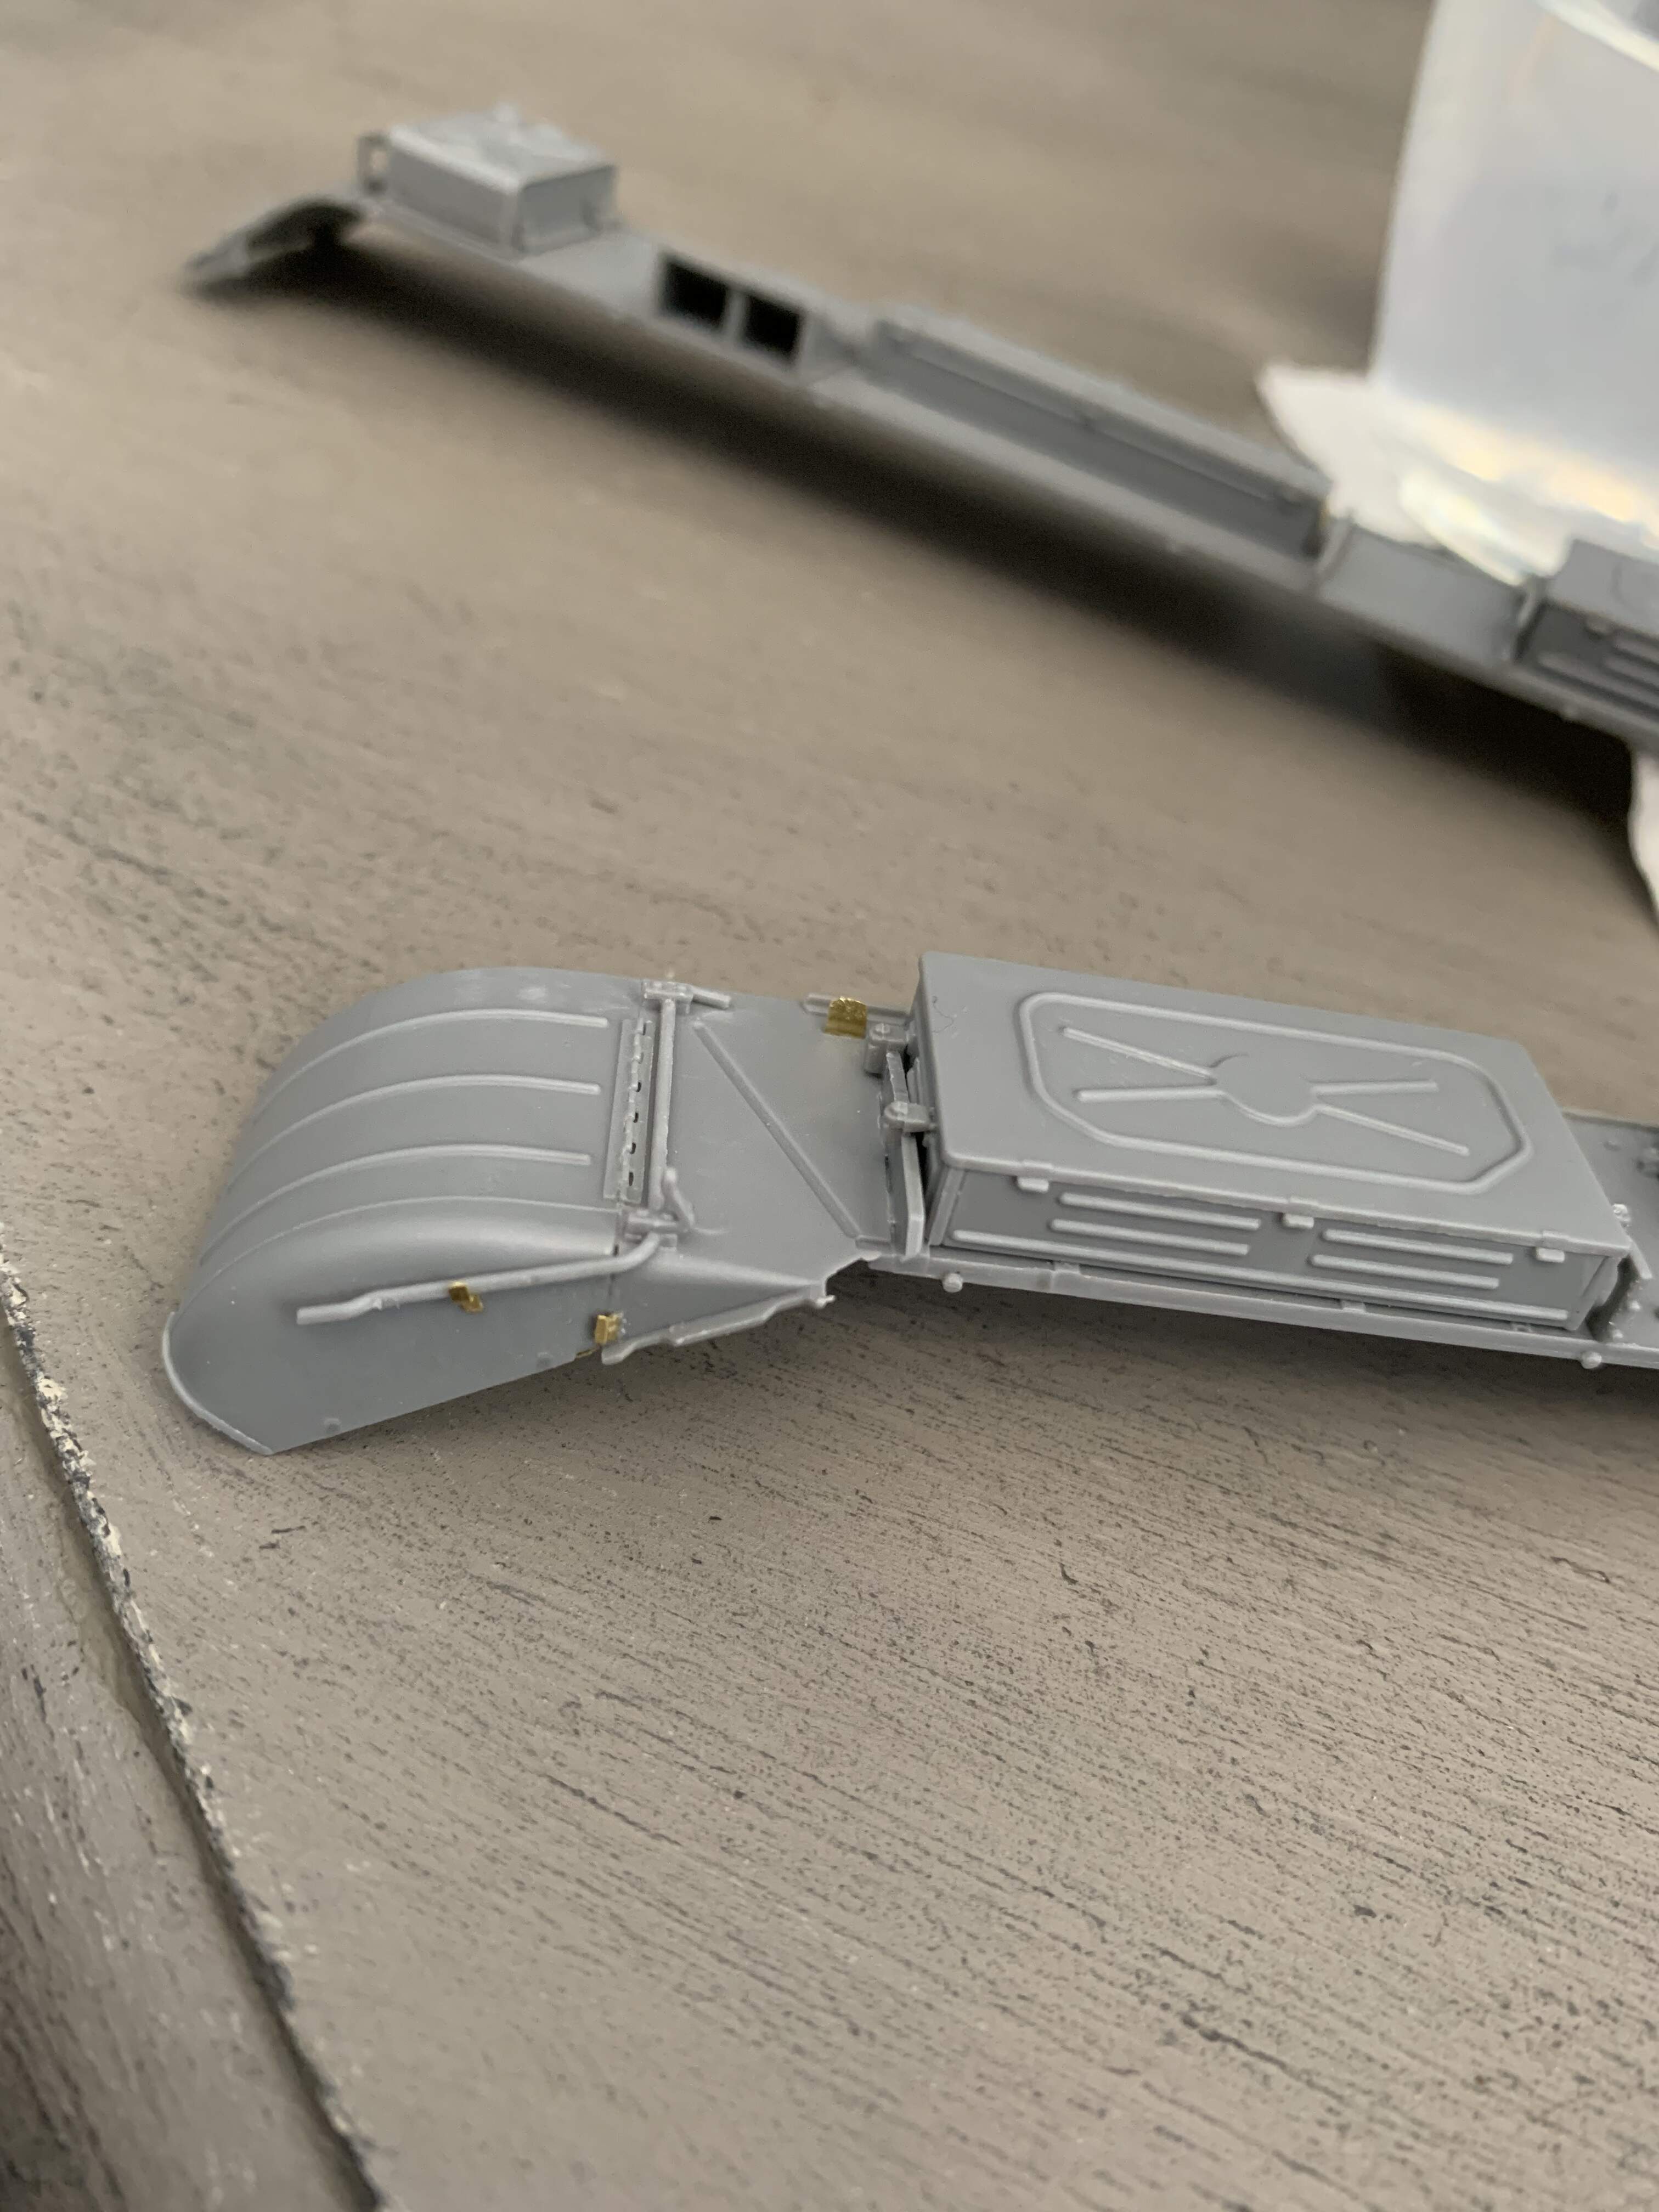
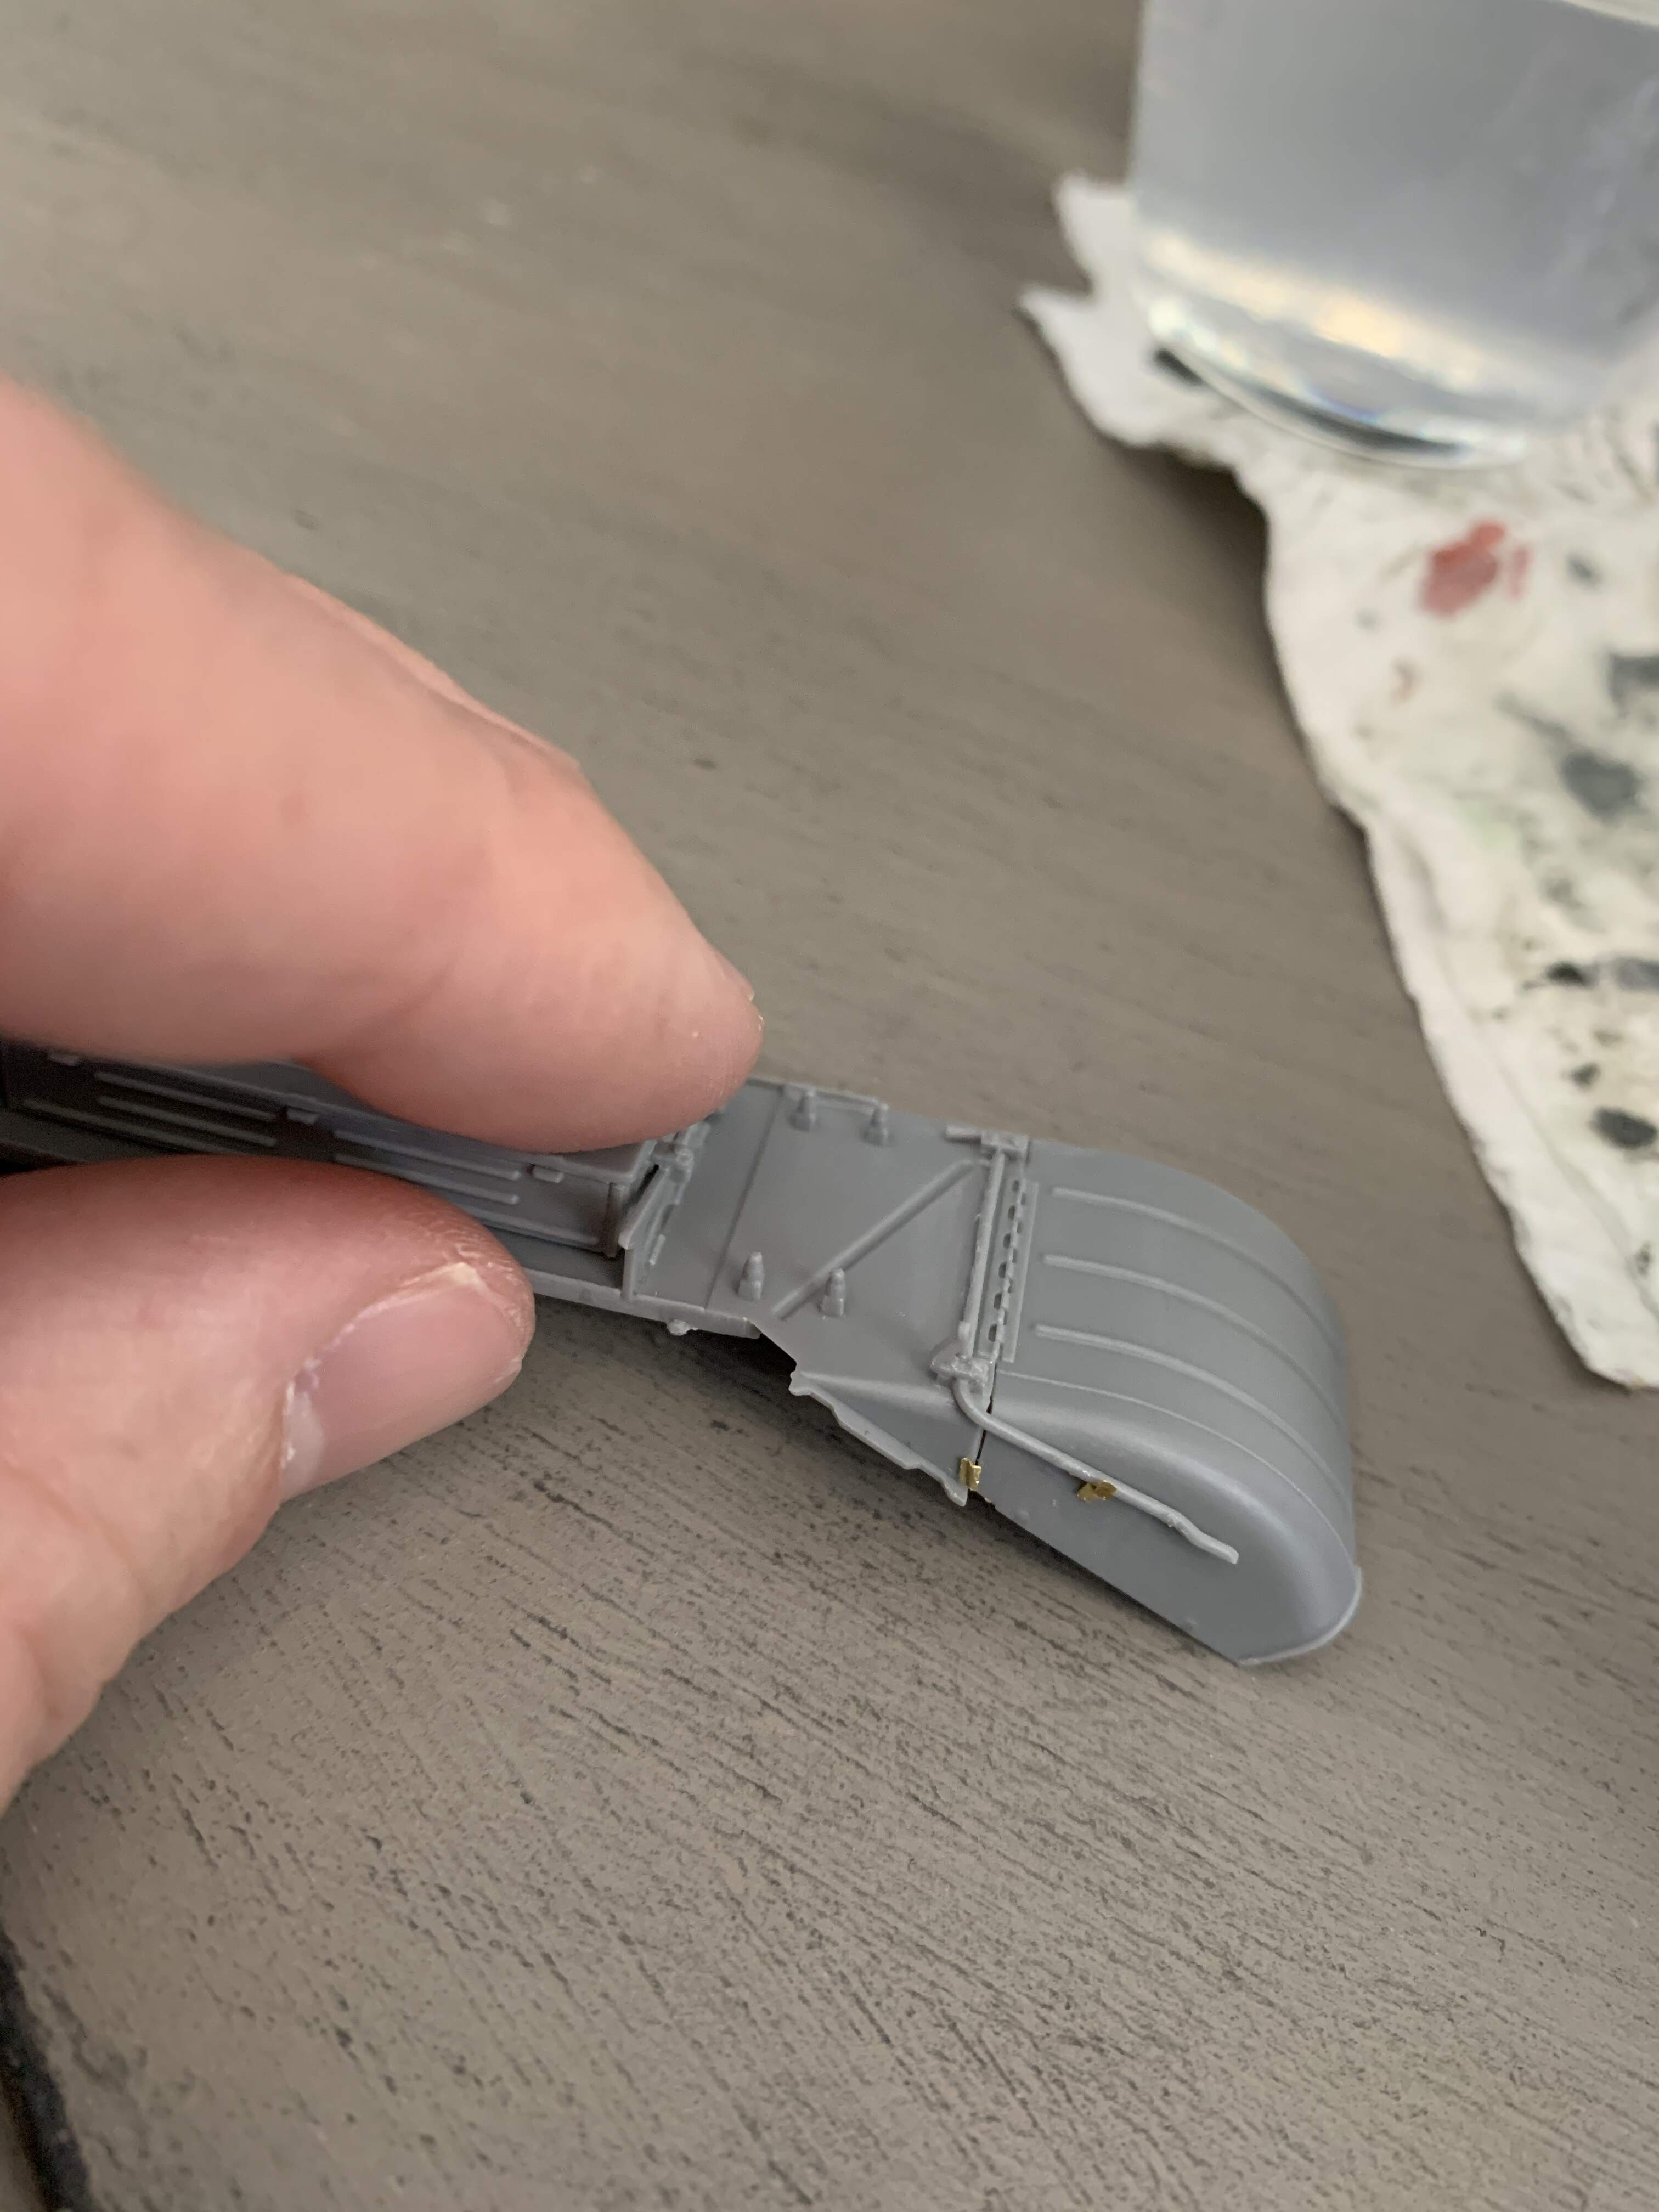
I broke the original part, bent it one too many times. I was able to make a replacement out of spare fret but couldn’t get the bend quite right, this bend was very tight on a very small part. However, I think in this case I was close enough.
Original
My part
1 Like