Torsten's bench works

I hope, I have not forgotten anything, so after 60+ w.i.p. pics I call this nocturnal bird ready for take off. The parts for the Lichtenstein Radar are brush painted, it was the best way.

Heinkel He 219 A-7, I./NJG 1, Sylt Island, North Germany, April/May 1945
Kit: Tamiya 1/48

Some quick shots from this morning. More and better photos soon in my Assembly Line Thread. Building time was 6 weeks. Thanks to everyone who supported me along the way with comments and/or likes! :slightly_smiling_face:

Take care!
Torsten


8 Likes

Torsten, you know my love for the big night-fighters, and this is one of the best designs! Beautiful job my friend, another really neat build and great work on the complex paint scheme.

Cheers, D

1 Like

Great work Torsten. Really nicely done. That last pick with her upside on the jig makes me nervous just looking at those antennae though.

2 Likes

Really great work Torsten! :relaxed:

The mottling turned out great and those antenna are really refined :+1::slightly_smiling_face:

Thanks for sharing another fantastic build :blush:

1 Like

Not an airplane guy but I gotta say that’s one sharp looking bird. :+1: :+1:

1 Like

Thanks for all your comments, guys! I’m glad to hear, that you like what you see. I’m also happy with the final result. Another dust catcher on my shelf of pride … :smile:

Peter, these radar parts are indeed very delicate. I often use the Bundeswehr antennas from Modellbau Schatton on my tanks and they are also very fine and can easily be deformed, same here with the radar parts. That’s one main reason why I won’t show this model on expos.

Okay guys, on to new sins. My plans for the next build were completely different. I wanted to join the folks on Armorama again and build the new MCV Type 16 from Tamiya. But I had to change the plan because of the death of long time Aeroscale member Steffen Arndt, who died early in January 2021. Rowan organized a Memorial Campaign and it’s no question for me that I take part in it, as I knew Steffen personally from his time in South Germany where I live. Oh man, it’s already my third memorial campaign … :cry:

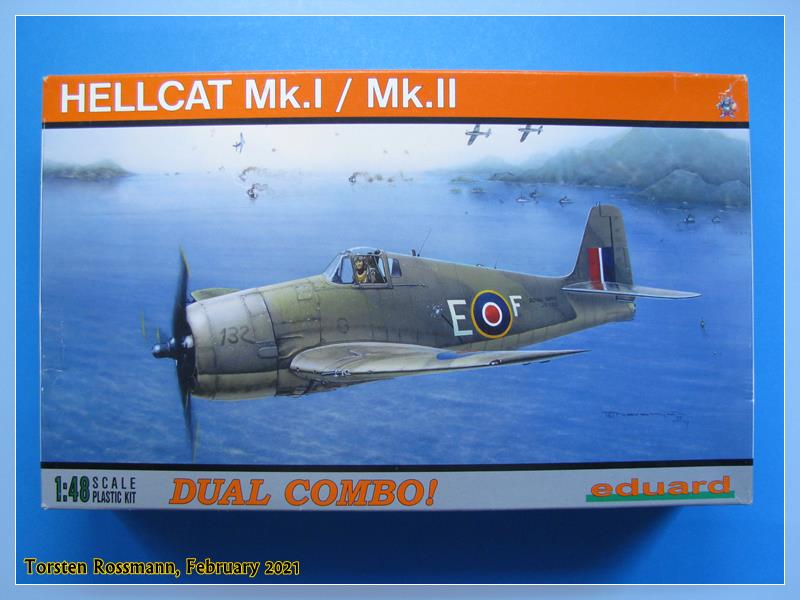
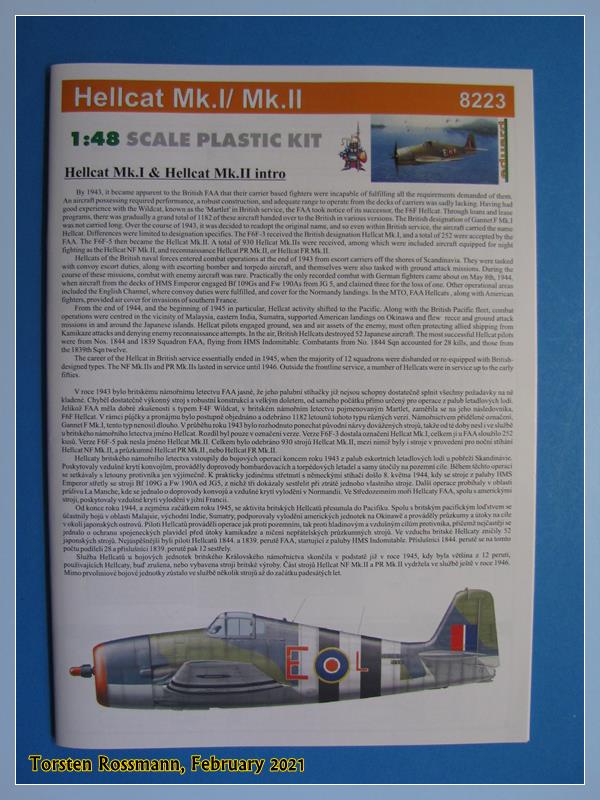
Anyway, here is what I will dedicate to Steffen. This kit was in my production plan for this year anyway, so it just moved a bit forward. It’s another fine Dual Combo from Eduard which came out in 2008. Never built a F6F before, so it’s time now for these “Royal Hellcats” …


… a box full of building fun for weeks and weeks … :slightly_smiling_face:

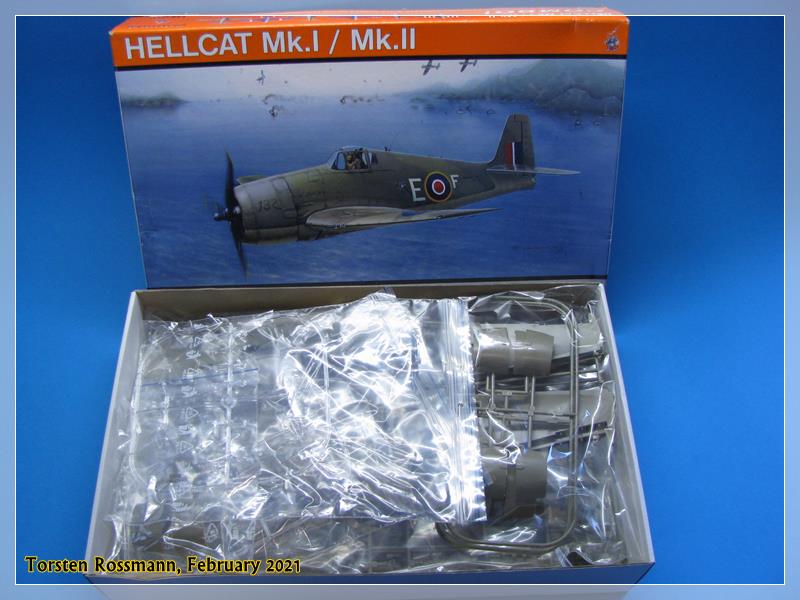
… the kit includes parts for a Hellcat Mk. I and Mk. II …


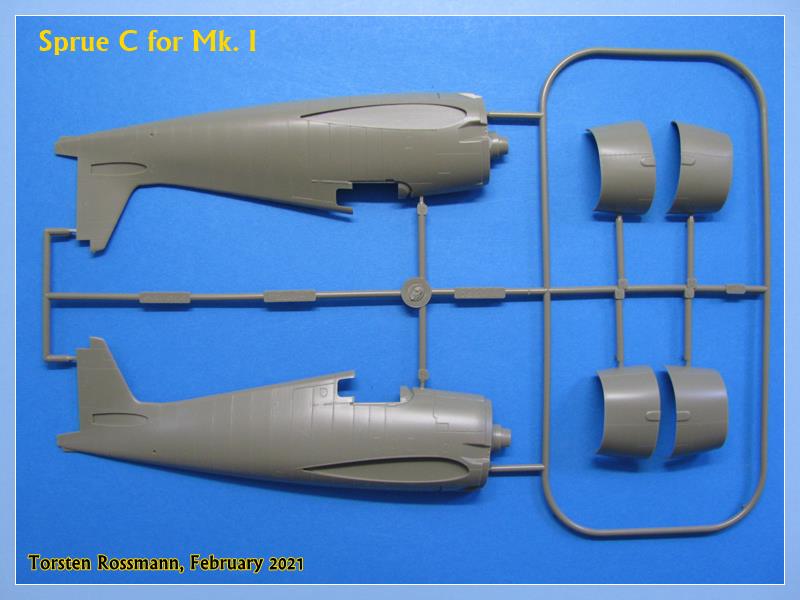
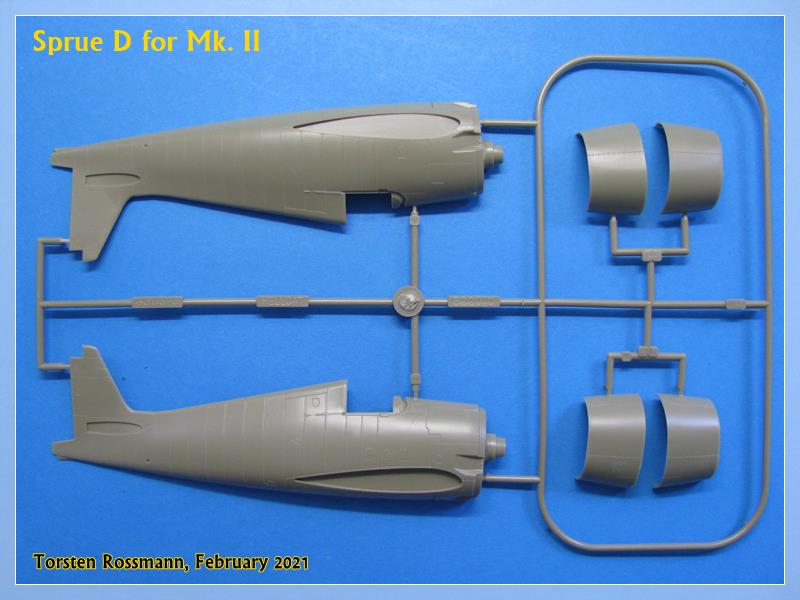
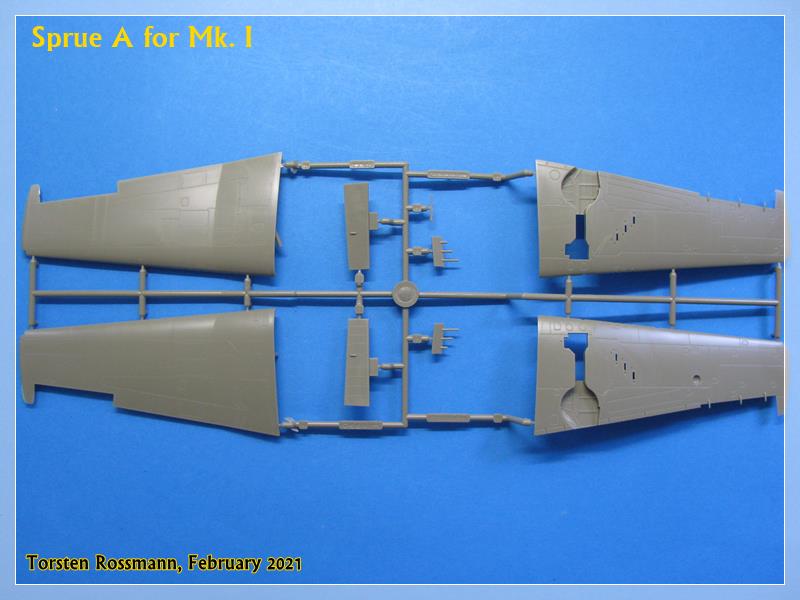
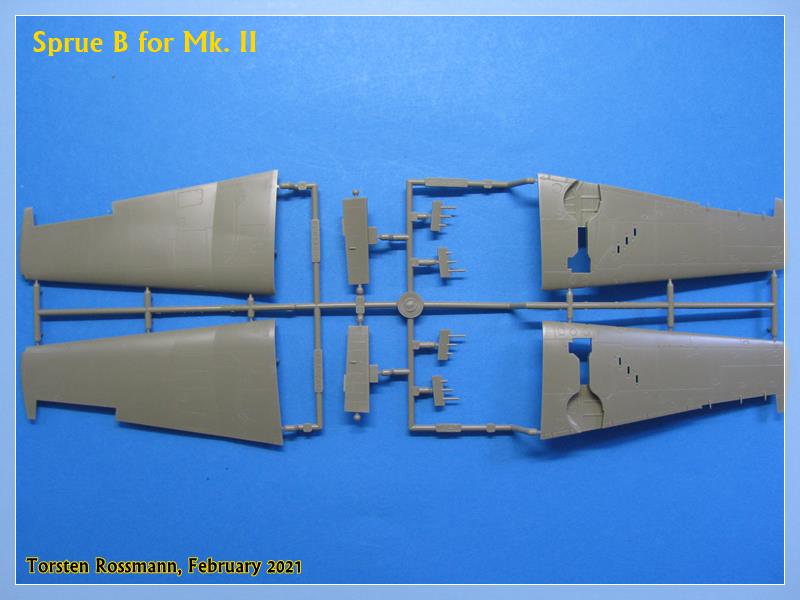
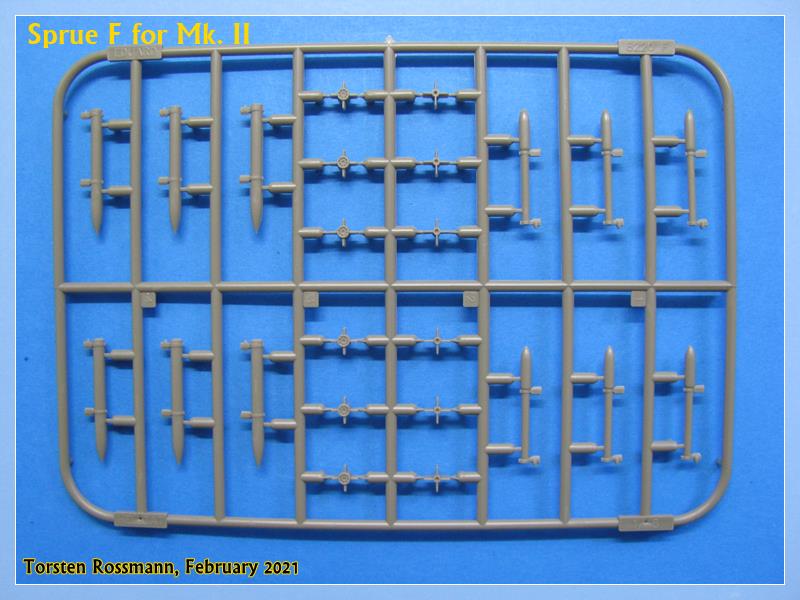
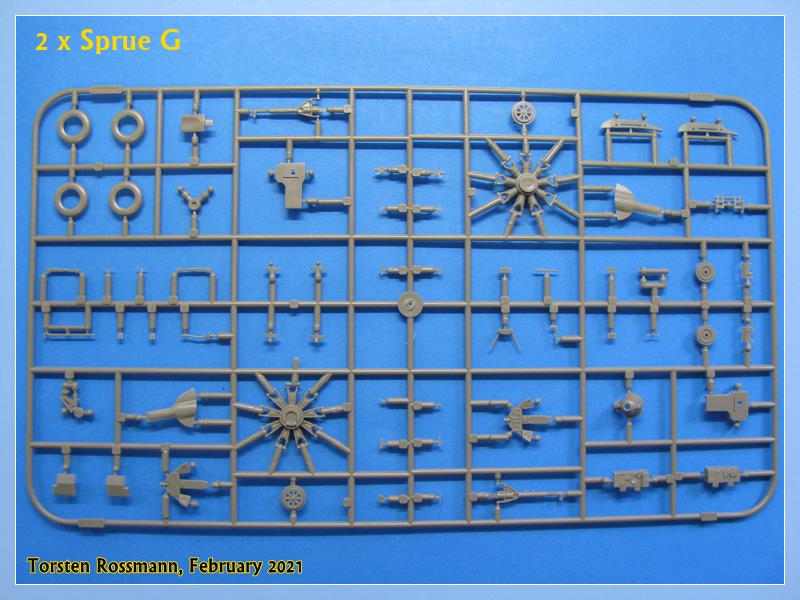
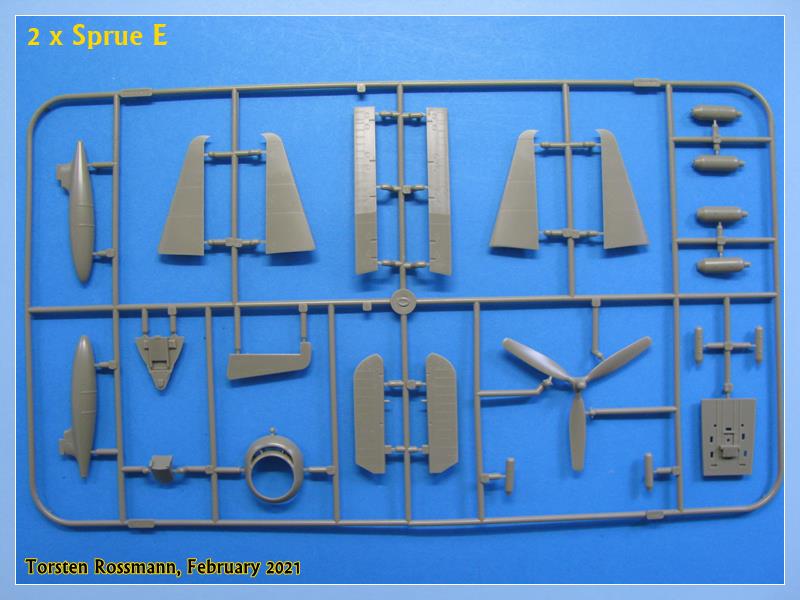
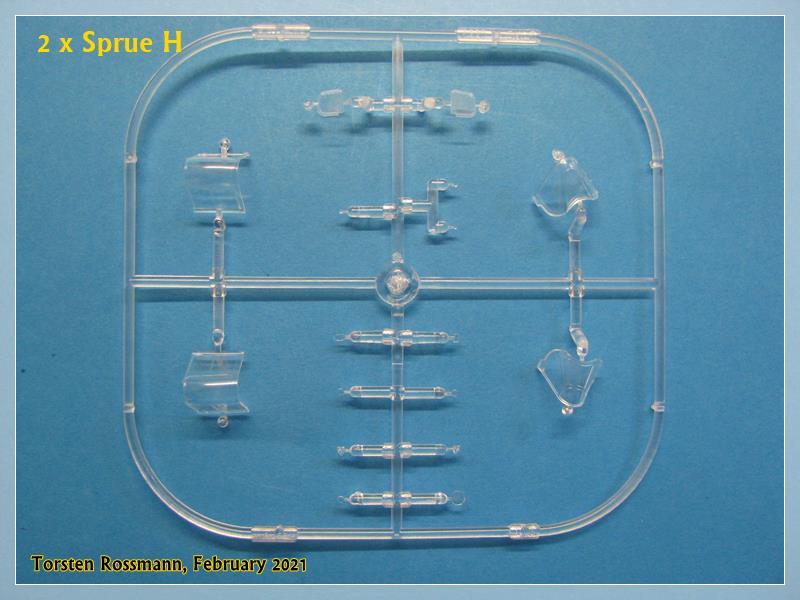
… all other sprues are double …


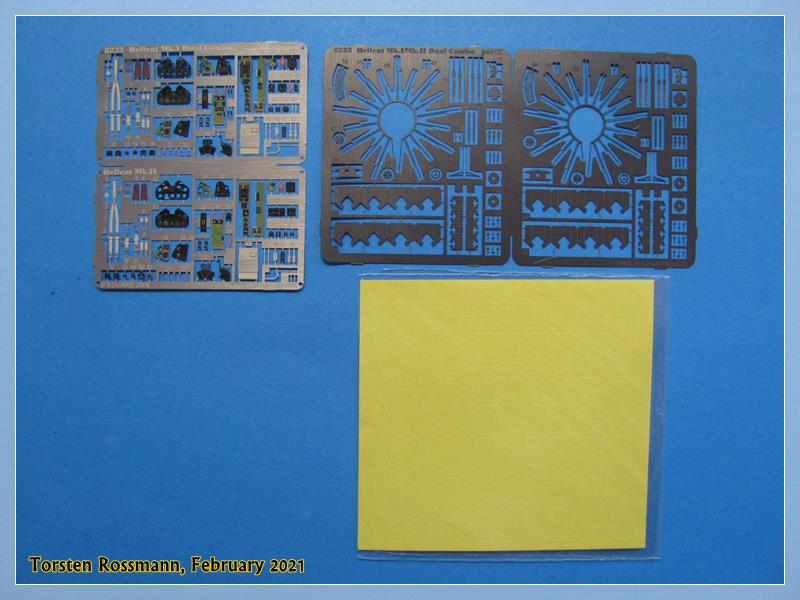
… the package also includes PE parts and masks for both kits …

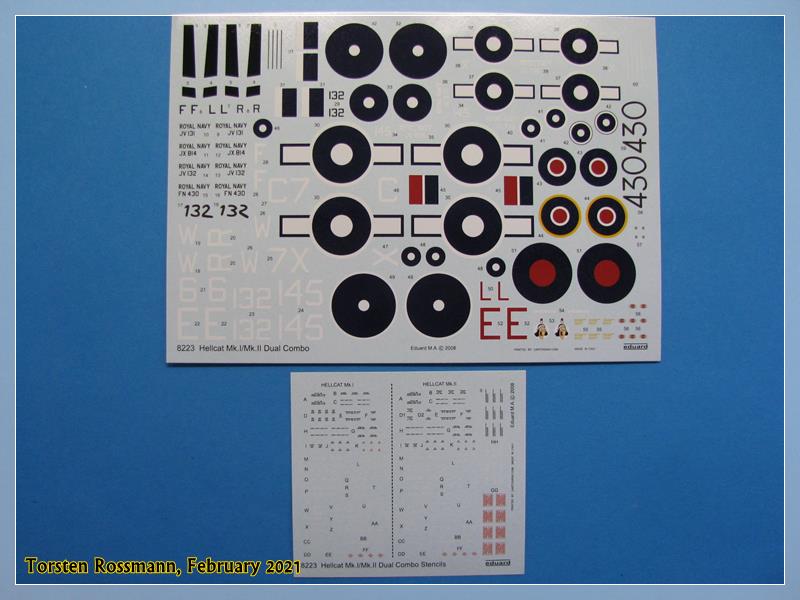
… and some fine decals, made by Cartograph, which means perfect printing quality …

… the instruction booklet is not build up as the Finnish Bf 109 booklet. Here both Marks are mixed, so I have to read carefully before building … :smile:

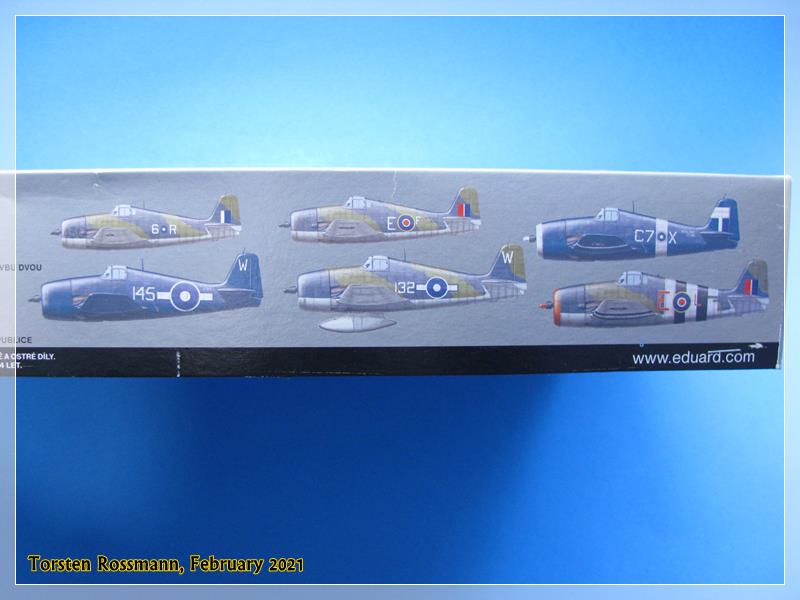
… Eduard offers 6 different Royal Hellcats, 3 x Mk. I and 3 x Mk. II …

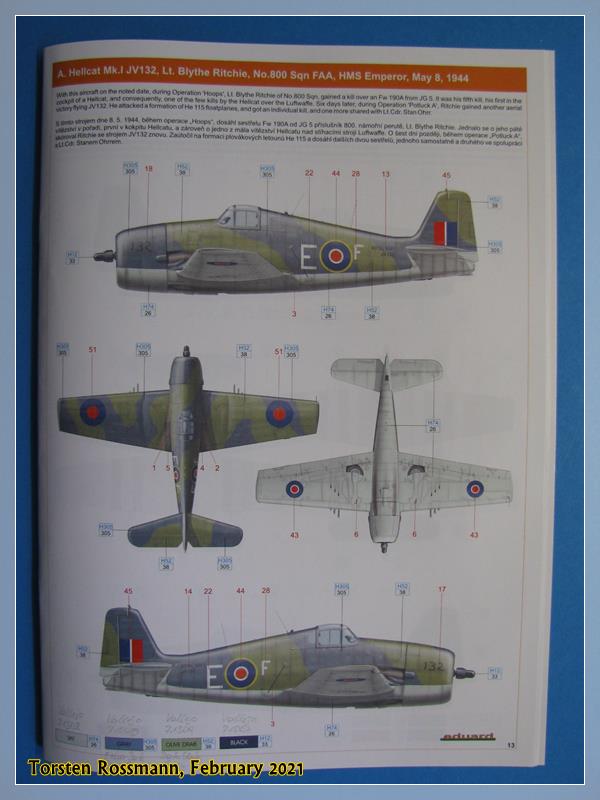
… and I have decided for this JV132, a Mk. I, flown by the Scotsman Lt. Blythe Ritchie 1944 …

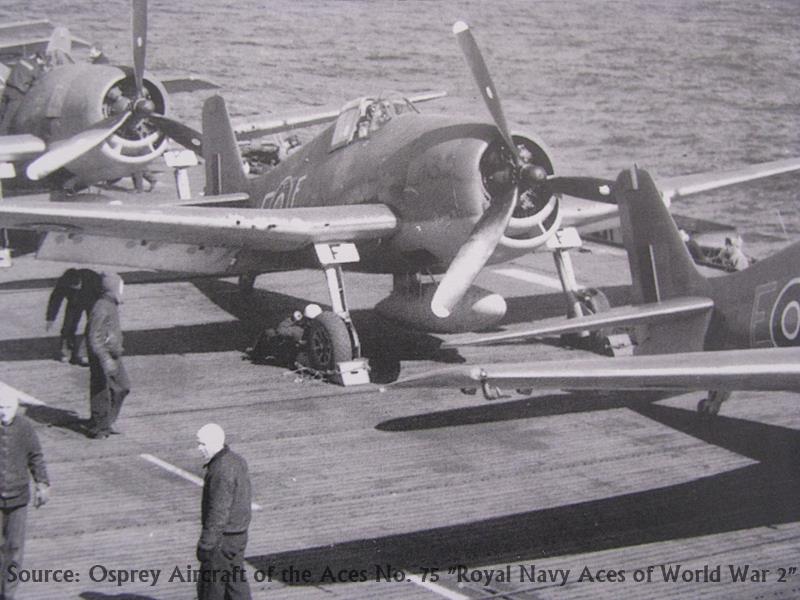
… found even a photo of the plane in Osprey’s “Royal Navy Aces” …

… the other build will be JZ796, a Mk. II, flown by the Argentinian Sub Lt. Oscar Lorenzo 1945 …

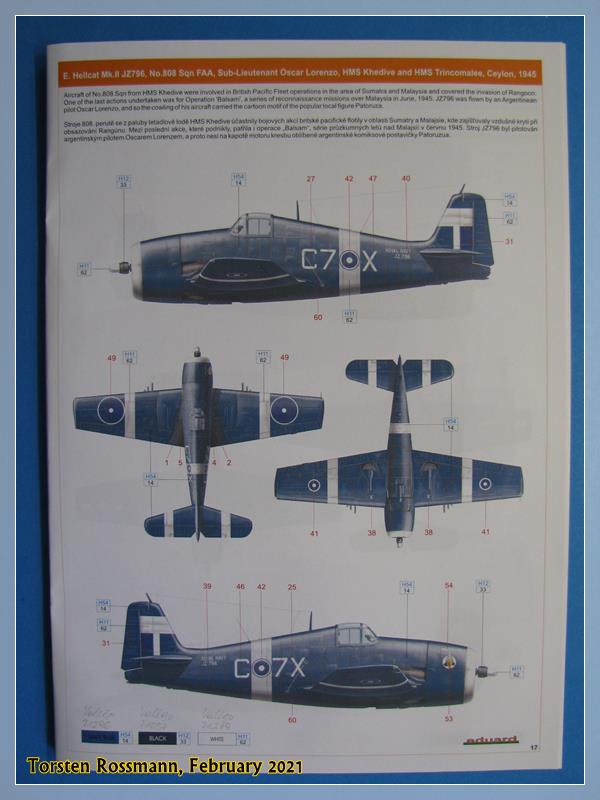
… unfortunately I have found no informations about this guy yet. I will start with the builds in the next days, so a first update will follow soon afterwards. The camo is easier than on the He 219. I will mainly use Vallejo paints.

Hope some of you will join my along the way again.
Torsten :beer:

6 Likes

Looking forward to them Torsten.

1 Like

Thanks, Peter! As always I will try my best …

First small update on my Hellcats. It doesn’t look like that, but I managed to glue all 15 PE parts per IP. Some are so tiny, that I hardly can see them. Not too bad for my clumsy fingers. The gun sight is still missing …


… and the cockpits are also done now. More PE parts …

I’m not really a fan of PE parts and I think not all are really necessary but I tried to use as many parts as possible. Some are so small that my tweezers can’t hold them. The cockpit was painted again with Interior Green 71010 from Vallejo …

Have a nice weekend!
Torsten :beer:

6 Likes

A bit more progress is done in the last couple of days.

Cockpits are glued to the fuselages. I needed a bit of pressure to get them right in place. The fitting here could be better indeed. Here on JV132, the same problems showed up on JZ796 …


… and the fuselages are closed, I leave them to try thoroughly over night …

… just finished sanding both this evening …


… next steps will be working on the engines and wings. I hope to have finished the major assembly by next weekend. Stay tuned …

Torsten :beer:

6 Likes

Looking good Torsten! :slightly_smiling_face:

Tempting me to start on Eduard’s 1/72 version of the same :shushing_face:

1 Like

@BlackWidow Good progress and well done with the PE. I’m of the same opinion as you, I’m not too fond of the stuff either…

@Russelle Group build anyone :slight_smile: ? I have the same kit in my stash!

:raising_hand_man:

Magnus

2 Likes

@magnusf tempting, but build speeds for me are a challenge :wink:

Thanks for your comments, guys! :slightly_smiling_face:

Russell, it’s a nice kit with not many problems so far. Had only some minor troubles with the fitting of the cockpit in the fuselage but with a little push and pull it works. I guess the 1/72 kit has the same quality.

I’m already a bit further with both birds. Had some engine test runs which were a lot easier than here:smile: and currently I’m working at the wings. Hope to show some progress photos soon.

Torsten :wave:

1 Like

@BlackWidow can’t believe they went on to fly it after the engine had so much trouble! :astonished:

Yes, she made it after the bang, Russell. There’s a follow up video from a different angle of the same event which shows take off and landing. I have a few more Hasegawa and Eduard Hellcats in my stash and one option is this “White 32” from the USS “Randolph”.

Did some work on the Hellcats. First the engines, painted in Black with some dry brush in Revell Steel. I left the ignition wires on the PE fret. That’s far too fiddly work for me and barely visible in the end. Maybe that’s why my test runs were so successful … :smile:

… and with cowlings. You can see the ignition wire as part PE66 in the instruction in the background …

… most work in the last days was at the wings. Added them to the fuselages just today. I opened the gun muzzles on JZ796. On JV132 it was not possible - too tiny …

Work for the next week is masking the canopies and preparing also the landing gears for primer and painting. Still along way …

Have a nice week!
Torsten
:beer:

4 Likes

A bit more work in the last days. Have masked the canopies, the fitting of the masks is very good. As there are open and closed canopies offered in the kit, 2 different masks are on the sheet.

There’s no explanation in the instruction which canopy for which Hellcat so I had to check my references. The rear part is equal only on the windshield is a small difference (see arrows) …


… as I want to have open canopies on both Hellcats I had to cover the cockpits with Kip Tape, here on JV132. The canopies are glued with Micro Kristal Klear to the fuselage. And no, I did not forget the gun sight … :wink:


… here you can see which canopy for which Hellcat. It was easy to figure out looking at my references


I think I can start with painting this weekend. Hope to show some more progress soon.

Wishing you a nice weekend!
Torsten :beer:

6 Likes

Torsten, these are going to look sensational with paint on! Can’t wait to see the chosen schemes :slightly_smiling_face:

1 Like

Hallo Torsten,
I just dropped in to Your excellent build. These two look great so far! I will keep watching!

Oliver

1 Like

Thanks for looking, guys! :slightly_smiling_face:

I just come back from painting the canopy frames Interior Green, so I think I can start with primer tomorrow. Yes, Russell, I also think both Hellcats will look fine in the end, especially the Mk. I with its upper camo Dark Slate Grey and Extra Dark Sea Grey. Not often seen on Hellcats.

Torsten

1 Like

Work went pretty well last weekend on my Hellcats, so I can show you another small update today.
First primer over all (no, they are not joining the UN-Forces now …)


… and the sub assemblies. There will be only an external fuel tank for JV132 as seen on the original photo. JZ796 will get none …


Yesterday I sprayed Sky on the underside of JV132 and Insignia White for the stripes on JZ796 …


… have used Vallejo 71302 for that …


… I noticed that Vallejo 71279 Insignia White is a bit on the yellow side, just like RAL 9001 …


… so much masking just to get the hub white … :woozy_face:


… today I masked the stripes on JZ796 with 10 mm Tamiya Tape and Parafilm. The roundels on the fuselage are 11 mm in diameter, so the fuselage band is now 12 mm wide. The roundels should fit well between the borders. Masking the cowling ring was a lot easier … :smile:


I think I can start painting US Navy Blue on JZ796 tomorrow. I’ll let you know how it worked out …

Torsten :wave:

7 Likes