Hi Torsten! Awesome work as per usual! I’ve been toying with building the academy version of this jet but the price hasn’t been quite “right” yet. Look forward to the build!
Cheers
Chris
1 Like
Chris! Welcome back, mate! So good to see you here again! Where have you been hiding?
The Hobbyboss F-80 is not an expensive kit. I have paid 20 Euros at my here LHS which are roughly 33 NZD, though the price might be a bit higher down there.
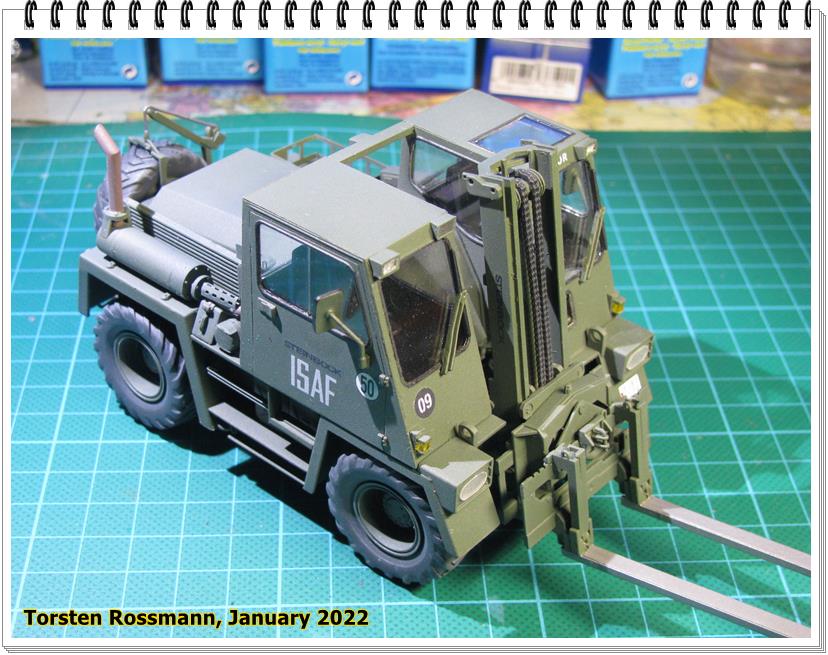
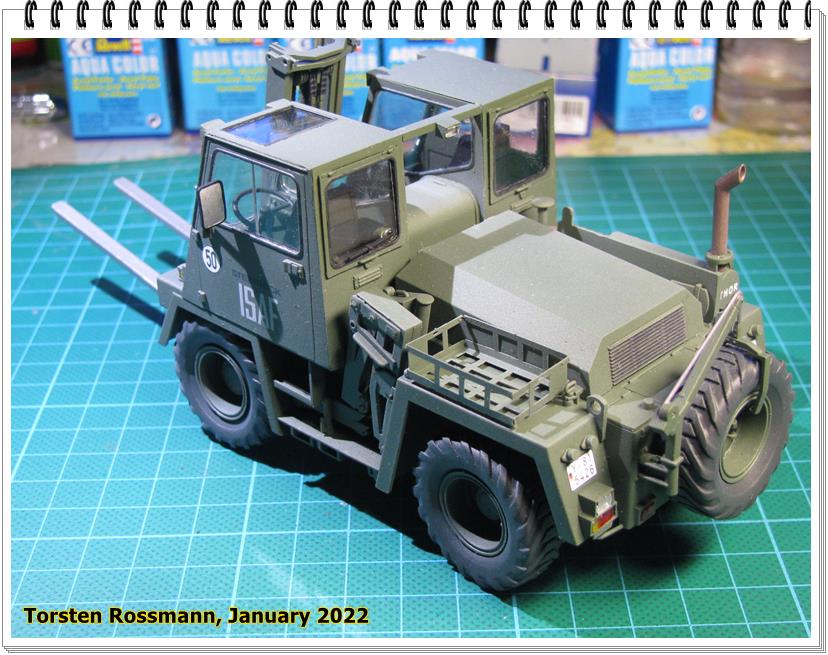
Well folks, I have biten more than I can chew with an extra kit. Usually 2 kits on the work bench are no problem for me but this time the FUG Feldumschlaggerät needs more of my attention than I thought but the main assembly is done now and today I finally could spray primer on it. My goal is to finish the FUG by the end of this year, which looks possible now …
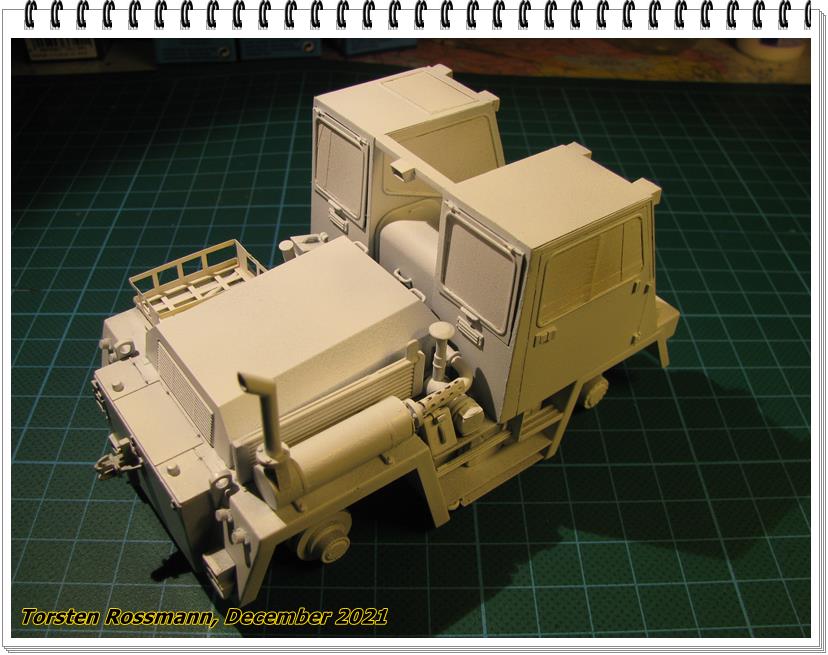
Maybe I can start with the Shooting Star next week, maybe …

6 Likes
Haven’t been intentionally hiding buddy, just getting used to the new layout, etc. And a lot of my time is now spent working on commission models for a client. I’ve got plenty of kits on the go just haven’t felt they were worthy of blogging about them. I did however just purchase the 1/32 Revell He219 and that kit I may very well start a build log for.
Cheers
Chris
3 Likes
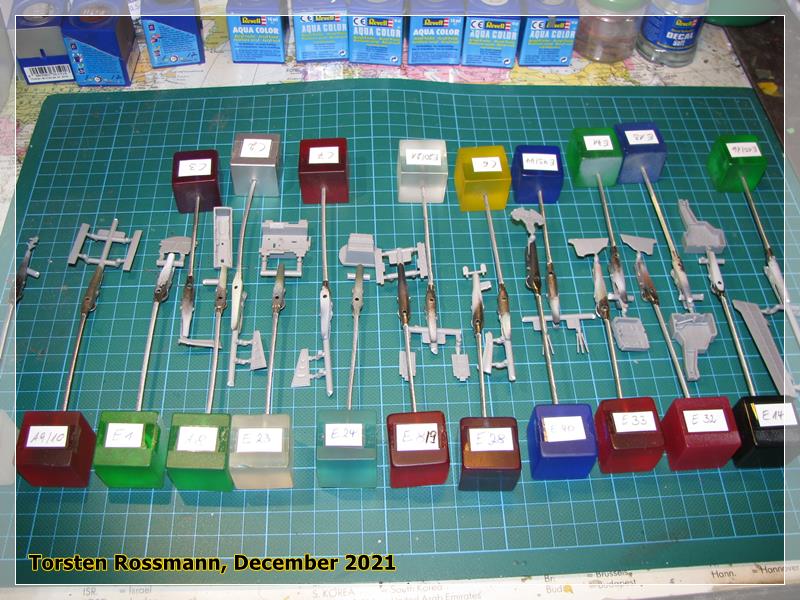
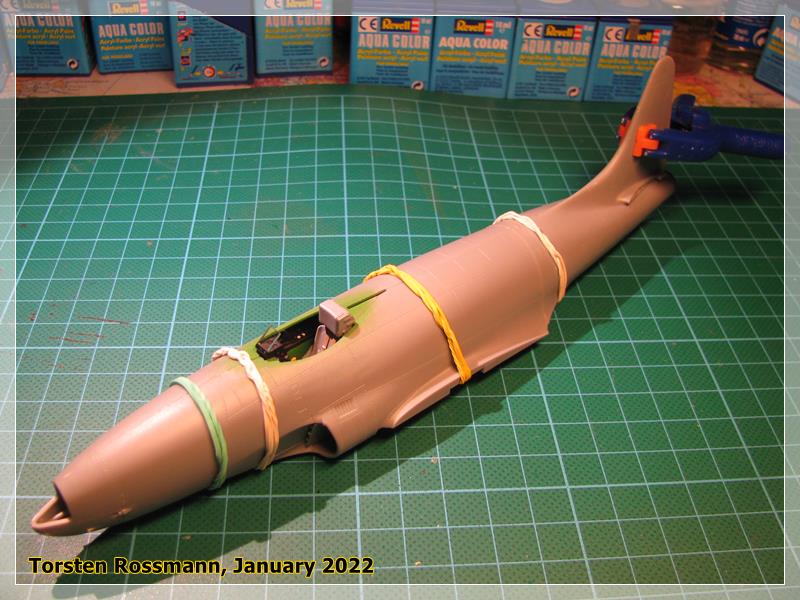
Less than 1 hour to go before 2022 here in Germany, so I’ll post my last photo for this year, which is also the starting photo for my next build. Now that my Feldumschlaggerät FUG is finally very close to the finish line, I have started to do some preparations and sub assemblies for the F-80. So here’s my proof of work for the last 2 days. Lots of clamps at work. Hope to paint them with Interior Green tomorrow … 
… wishing everyone here a happy New Year 2022 with lots of great builds. Let’s hope that the year will be better for all of us than the last and we can return back to a bit more normality.

Stay safe and may the modelling gods be with you!
Torsten 
4 Likes
Happy New Modelling Year Torsten. Looking forward to seeing what passes through your bench this year.
1 Like
Torsten,
You’ve had one heck of a great year modeling. Looking forward to your F80 build for sure.
joel
1 Like
Peter, Joel, thanks for your well wishes. Same back to you! Especially to you Joel with your annoying health issues and your wife’s new hip. Hope 2022 will become a good year for a good recovery!
I also wonder what will leave my work bench this year. I have a few plans (usually more than I can realize…). In 2021 I have finished 8 models, so 8-9 would be my goal for this year. My FUG is hopefully finished by next weekend.
Just came back from painting. Nothing worth showing yet, everything’s just Green. But I also cleaned my compressor and checked if it has some condensed water in the tank. Well, it was only a lot of air which came out of the drain valve. Quite happy with that after 9 months. Bought it last year, needed a new one.
Chris, I don’t know the Revell kit of the He 219 but I would love to see your build blog. But I don’t think my build of the Tamiya kit would be of some help for you. There are decades between the kits.
Torsten 
3 Likes
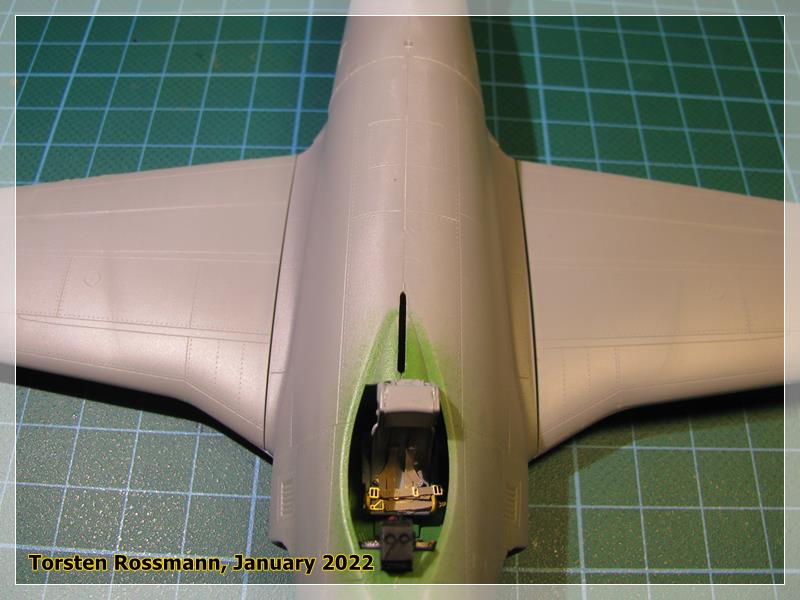
First small update on my F-80.
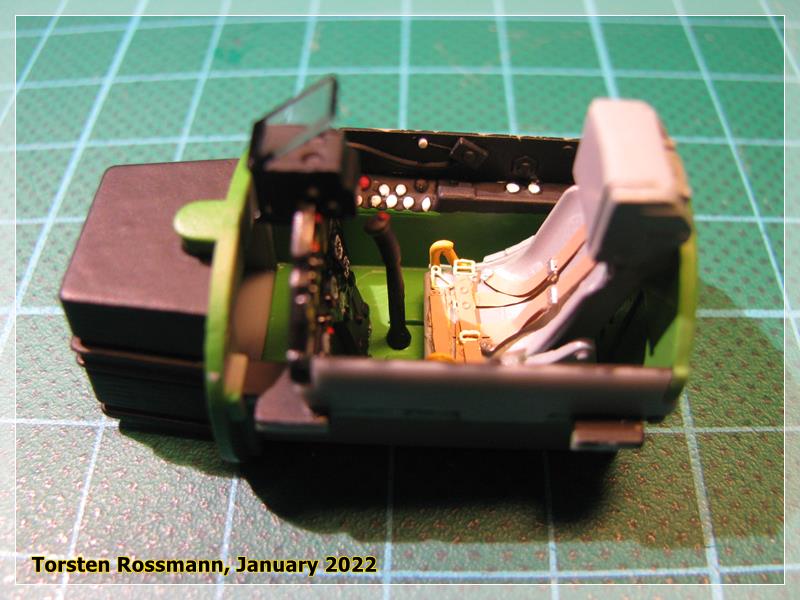
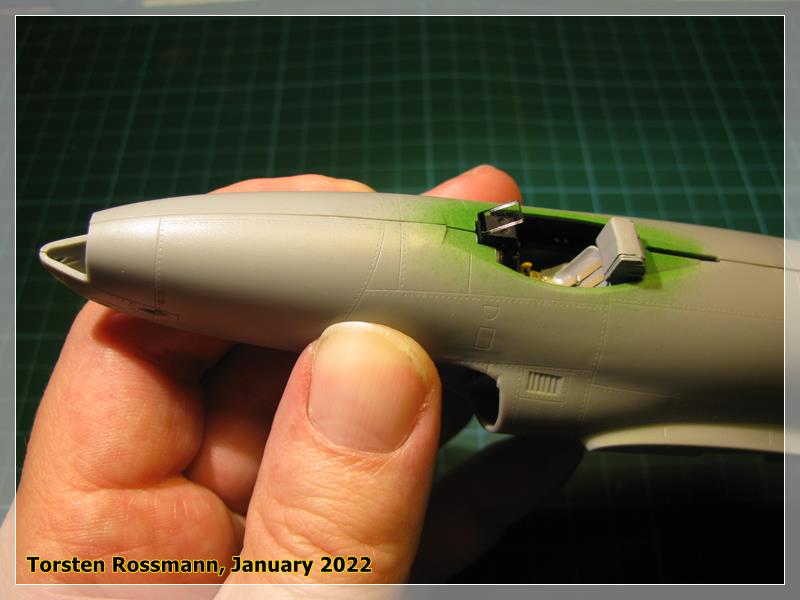
The cockpit is finished now but it looks quite rudimentary compared to my latest Eduard Spitfire builds. But for a closed canopy it should be okay. The IP has got 2 decals …
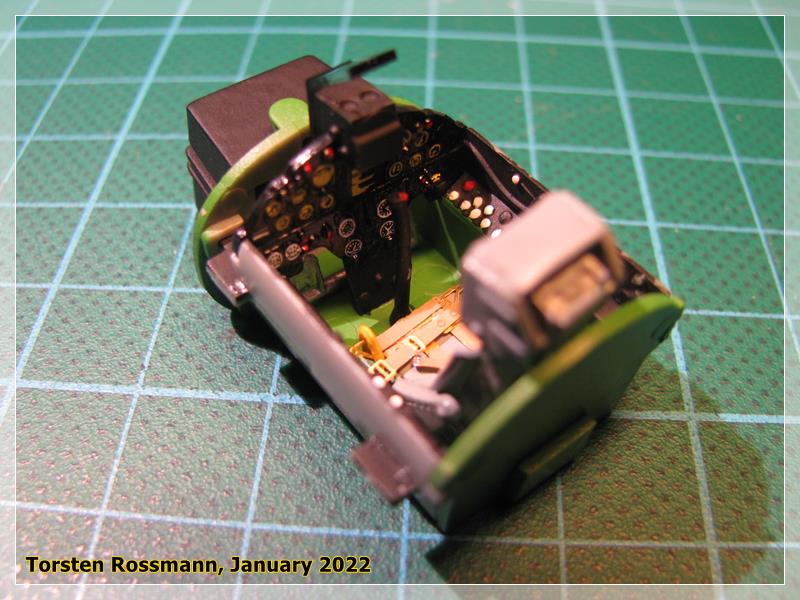
… further I drilled the muzzles of the 12,7 mm guns open …
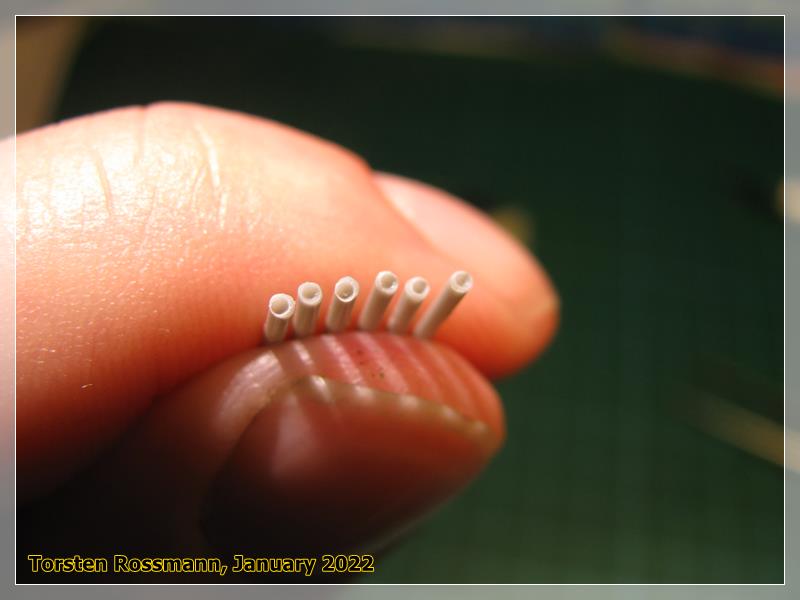
… not much it them will be seen later though …
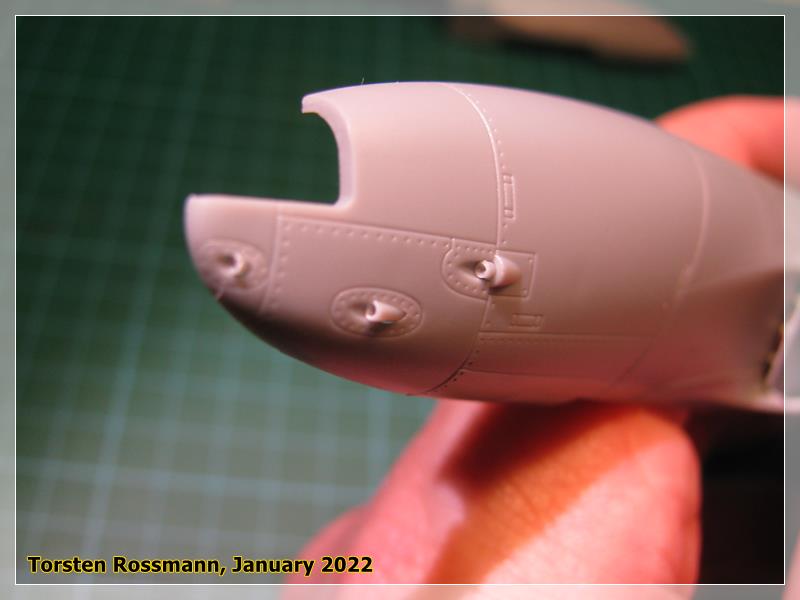
… each fuselage half consists of 2 parts, so I glued them together first, which is opposite to the intructions

… and some test fitting of cockpit and front landing gear compartment. Though I’ve cleaned the parts with detergent in warm water and a tooth brush there’s still some grease left …
 But the primer later will solve the problem …

Most of you sure have not followed my build of the Feldumschlaggerät FUG on Armorama. I have finished it just a few days ago. That brings my production in 2021 to 8 finished models. It would be nice, if I can reach that amount again this year …
More progress on the Shooting Star soon. Have a nice weekend!
Torsten
11 Likes
Some more work is done over the past days and we remember of what the Eduard Bunny reminded us on the Airacobra builds …
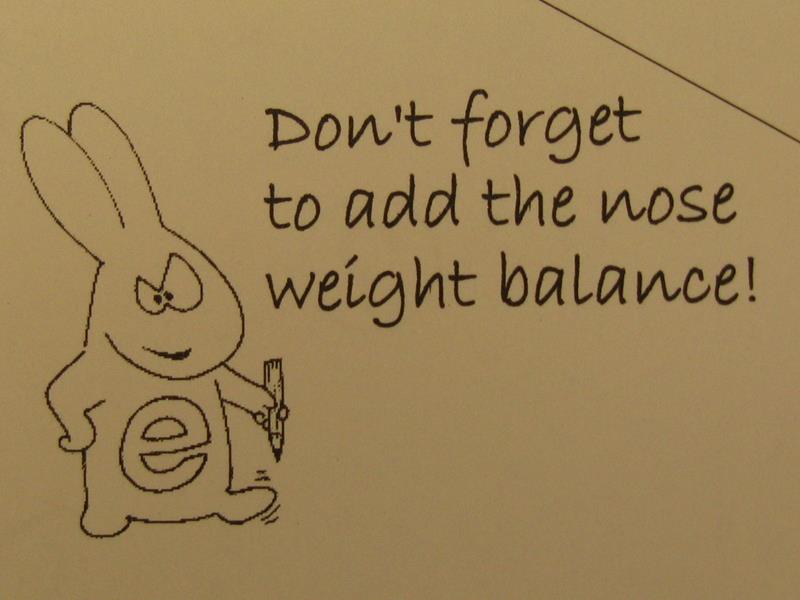
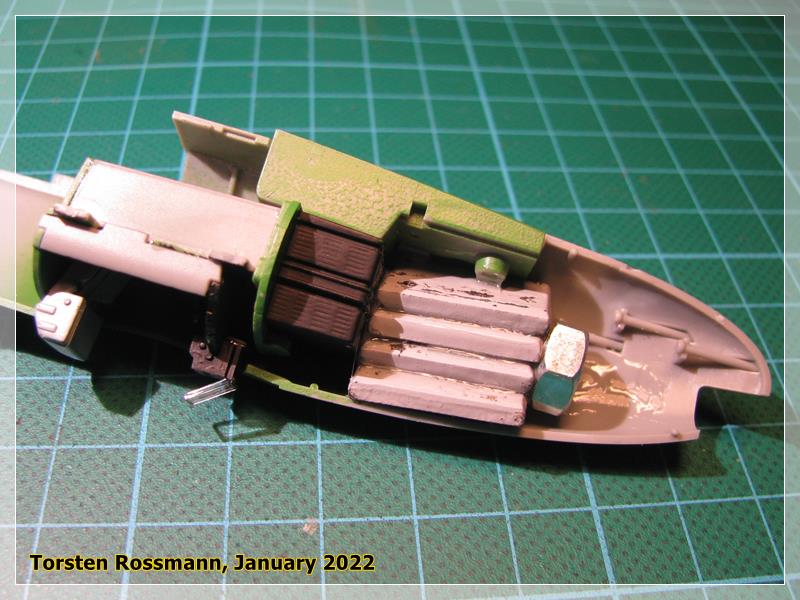
… check! Each plate has about 5 gram. That should do it …

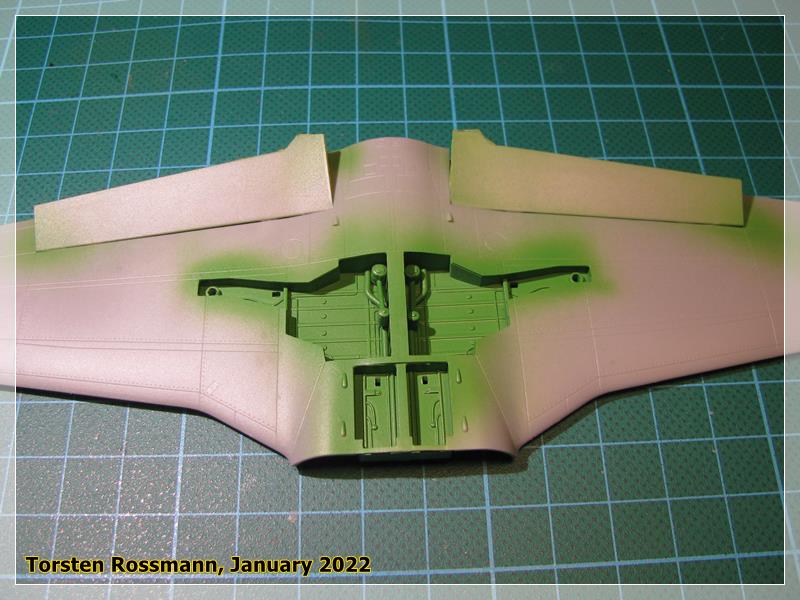
… while the White Glue dries I had a closer look at the wings. The landing flaps can be assembled in extended position. But first some masking …
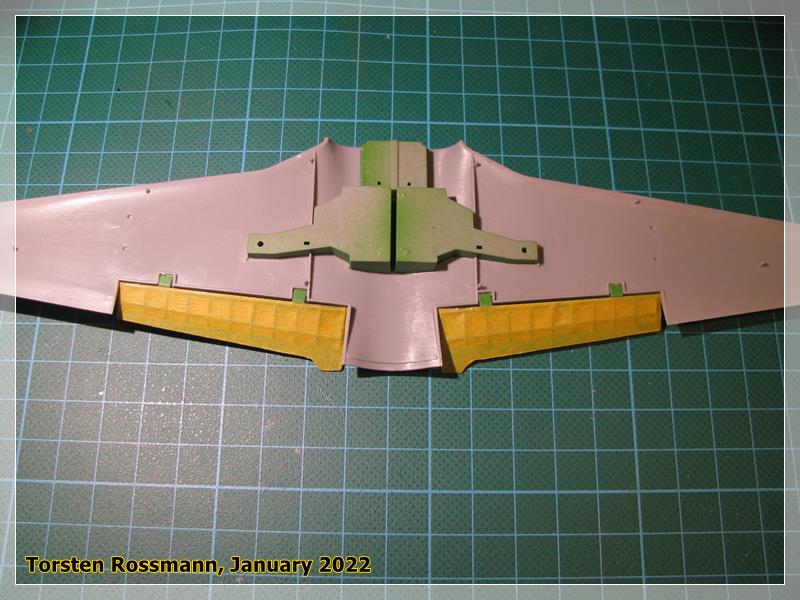
… here the underside …
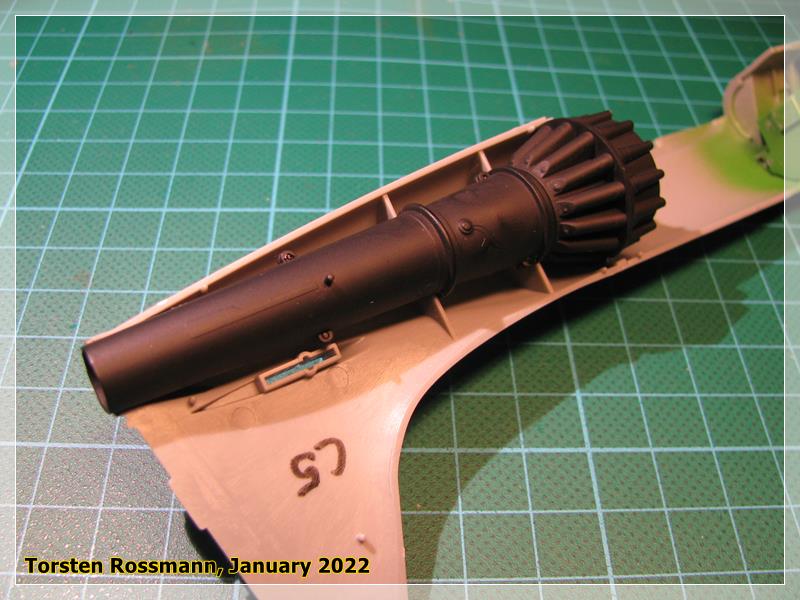
… the Allison Turbojet is also ready for installation …
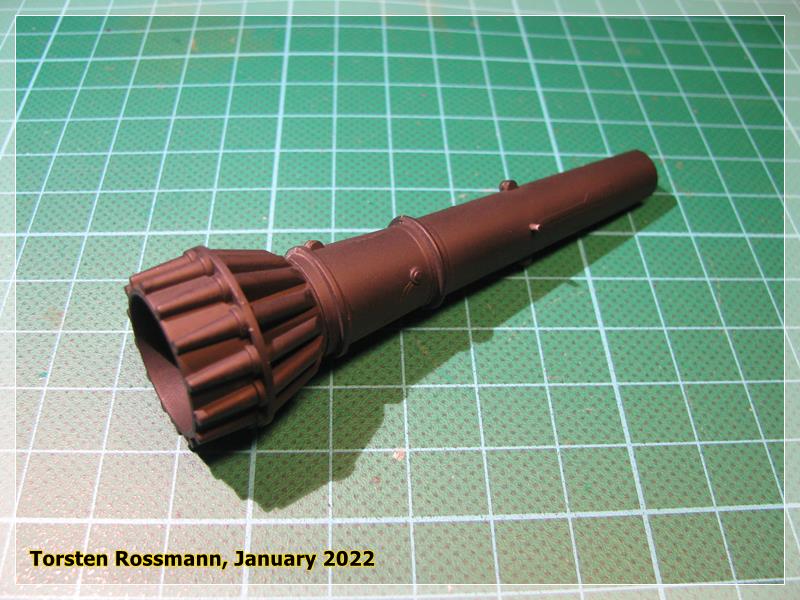
… not much of it will ever be seen again …

… and now the fuselage halves are glued together …
This is were I am at the moment. Tomorrow I’ll do some sanding. The overall fitting is excellent so far, compared to the FUG it’s another world. I know I deserved this …

Stay tuned and stay safe!
Torsten
10 Likes
Looks like a good fit of the two halves Torsten. Great work so far.
1 Like
Love that style of AC. Looking good Good SIr.
1 Like
Torsten,
Once again I’m stepping out of the shadows of the Darkside (AutoModeler) to sing your praises as to the level of craftsmanship you’ve already applied to one of my all time favorite early jets: The F80.
The kit is excellent, and your detail painting of the cockpit certainly brings even this early build stage to another level. When I built mine, the proper amount of nose weight always drives me crazy that I’ve used way to much (eventual damage to the front landing gear), or to little and she still seats on her butt. So I’d dry fit and tap as much of the kit together as I could in a effort to get the right amount of weight installed. From what you described it sounds more like you used your vast experience as a guide.
As for the Allison Turbo Jet, there’s not enough visible to bother painting the shell other then just the inside of the exhaust tube.
As always, I’ll be lurking in the shadows with each update posted.
BTW, we just had the coldest night for the last two years. Got down to 17F and with the wind chill factor -4F early this morning. tomorrow back into the balmy 30-40Fs
joel
1 Like
Thanks Peter, HG and Joel! I always put as much balance weight in the nose as possible and don’t care what the intruction plan says. Here it says “Ballast 8 gram” …  That will never to the job. Never had a problem with a damaged or broken landing gear. I remember when I built the Italeri F7F Tigercat several years ago I used so much fishing lead in the nose that only the fuselage had a weight of 80 grams … But it helped. The Tigercat didn’t fell on her butt and survived several transports to expos. She’s still in one piece in my shelf of pride … Here in the Shooting Star it’s balance weight from old car tyres.
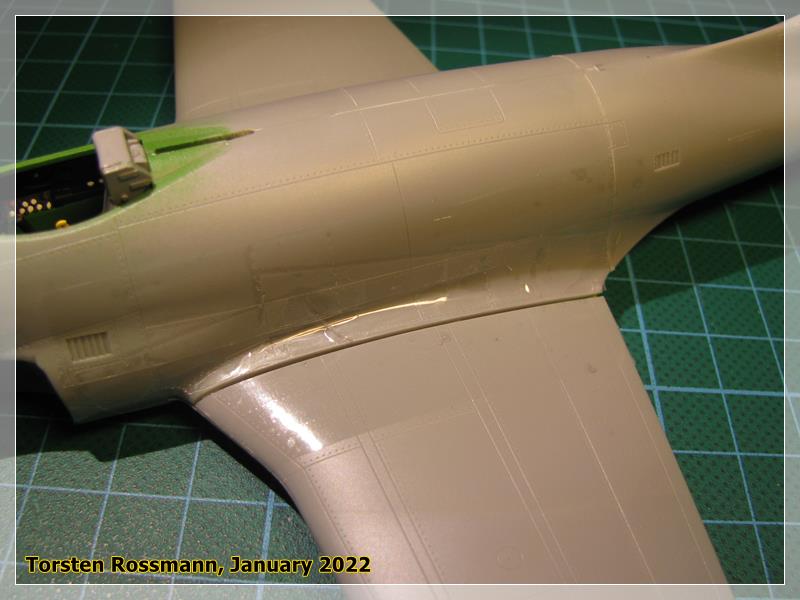
What did I say? Excellent fitting? Well, I said “so far” and I’m farer now. Big gaps like WW1 trenches show up here. I see what I can do here but I guess it will be again my “I make you do what I want” method …  The photos show just test fitting but this means some extra work. It was already successful on the P-39 and others …
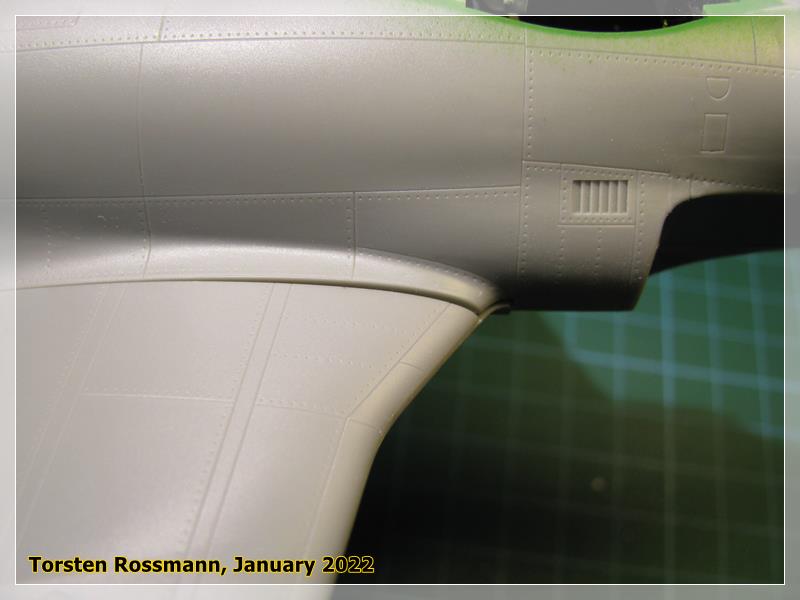
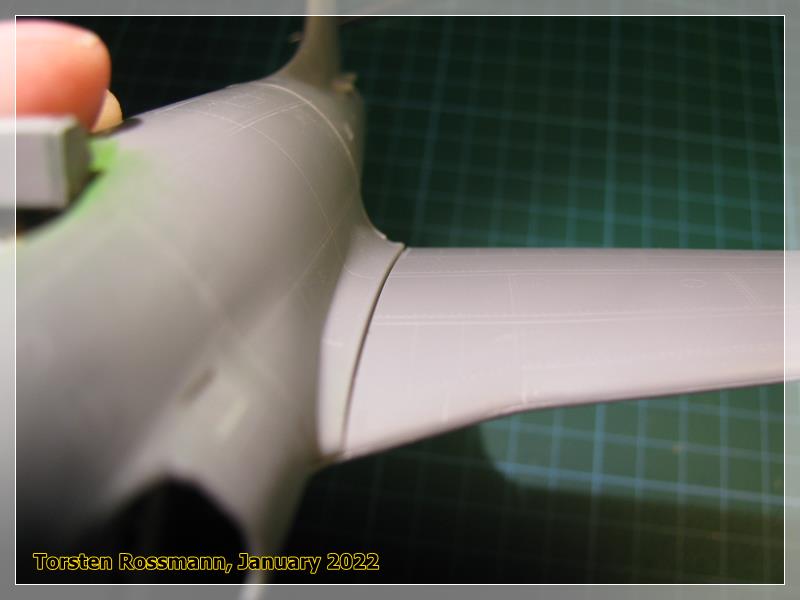
Next update follows in a few days when these parts are together - or not …

Torsten
7 Likes
Torsten,
I have complete confidence in you to make those wing roots look perfect. Sheet plastic would really work wonders in this case.
joel
1 Like
Or modify the part to lower it. Either way some filler may be needed, but you already know that, the comment is for new viewers. 
1 Like
Thanks for your confidence in me, Joel and HG. I have glued the parts together yesterday evening and added some clear tape to the gap for sanding. I’ll solve the problem like you can see in Post 6 in this thread. Flour and glue is the magic combination. I’ll let you know how successful I was …
1 Like
Sounds like my Mother-in-Law’s idea of baking…
3 Likes
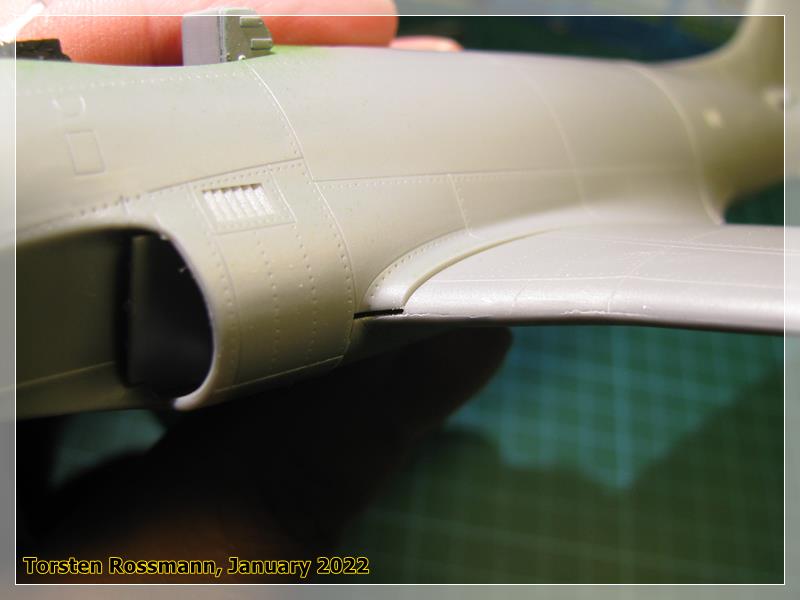
Not much work over the weekend. Got my 3rd Anti Covid Jab on Friday and had to let the inevitable side-effects pass first. But I think now I’m over it and can start sanding what you can see here.
Before I glued the parts together first I added clear tape to them. It’s easier to do that before the glue than after …
… then I filled the gaps with a mix of glue and flour. It’s sure a very old recipe but it still works well for me. The gap on starboard is smaller than on portside …
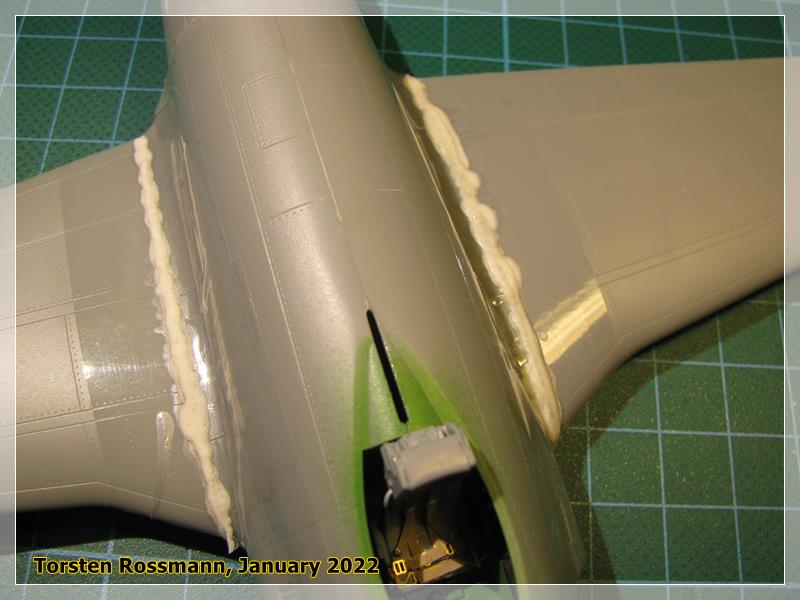
… and now follows sanding, sanding, sanding …
Torsten
8 Likes
Torsten,
Congrats on getting your 3rd jab. I got mine last month and it was the only one that I had any kind of reaction to which was just a sore arm for several days.
Are you using CCA glue in your home brew putty?
joel
2 Likes
Thanks for your well wishes, Joel. My first 2 jabs were Biontech and I had no problems at all. It seemed to me as if the vaccine just went through my body which showed no reaction. On Friday I’ve got Moderna and my body customs made a weekend long check which gave me some shivering in the night and a not so well feeling “do I become ill or do I stay healthy?” on Saturday but now the checks are done and the vaccine has passed customs …
No, I don’t use CA glue for my putty. Just ordinary Revell Contacta. That gives me more time to work with and I leave it to dry thoroughly over night anyway.
2 Likes