Bad news, folks! Monday evening my computer went to Valhalla to meet Odin. So no updates from my Mustangs the next time, I’m sorry. Have to get a new computer and will look for it after Easter Holidays. I hope to be online again in May and that my external HD with all the photos is still working. Until then I can only write here from my office computer.
Just a quick update. I have cleaned the cockpit parts with methylated spirit and painted them yesterday with Interior Green from Vallejo 71010. Everything is put on a hold now for the long weekend.
Well hell, Torsten that SUCKS! I know all too well the frustration of a dead PC. Good luck with the replacement and I look forward to your return online.
Torsten,
Sorry hear that your computer has finally bit the bullet. Good luck with your hunt for a new one. I’m sure that your external HD is fine as I’m assuming that it worked up until the very end.
Dear friends!
Since last weekend I’m online again and can now post progress of my Mustangs again, though at the moment there’s not much to see yet. Still painting and working on the cockpit parts. Hope to show some more soon than just 32 clamps in use …
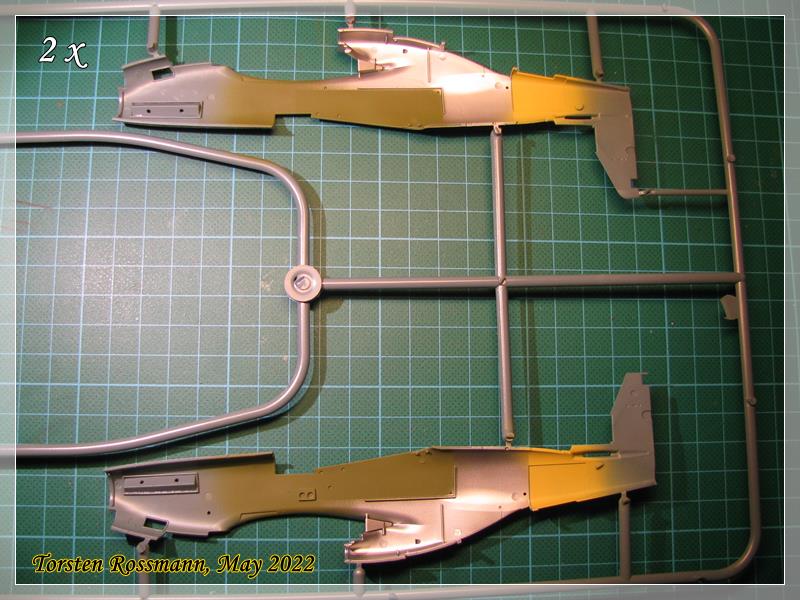
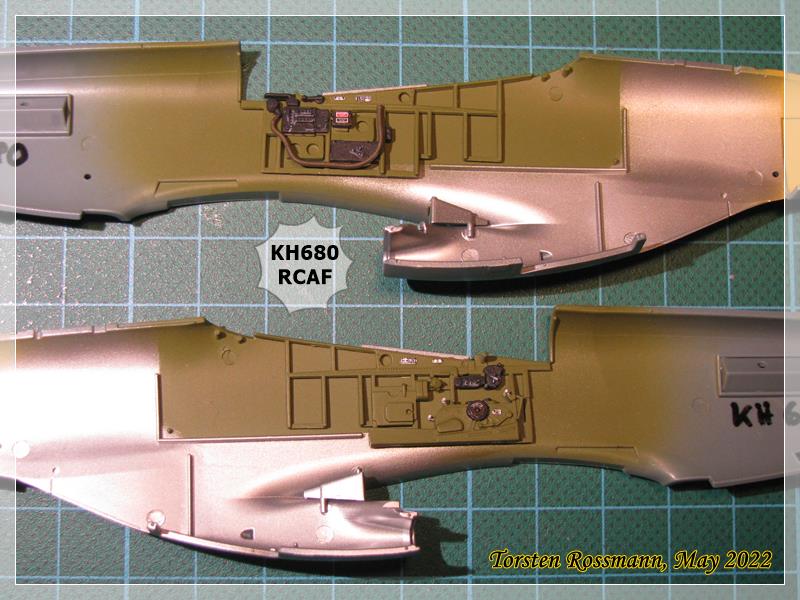
Finally some progress I can show. In the last days I’ve painted a lot like the inside of the fuselage halves of both Mustangs. Have used Interior Green (Vallejo 71010), Interior Yellow (Vallejo 71107) and Silver (Revell 90) …
Great to see the return of the “painted forest” and also good to hear your computer’s hard drive was salvageable! (Nothing worse than losing all those images!)
I’m also very happy that my external HD survived the crash and I have access to all photos. Not only from modelling but also from several years of holidays. Meanwhile I have another copy of these on CD.
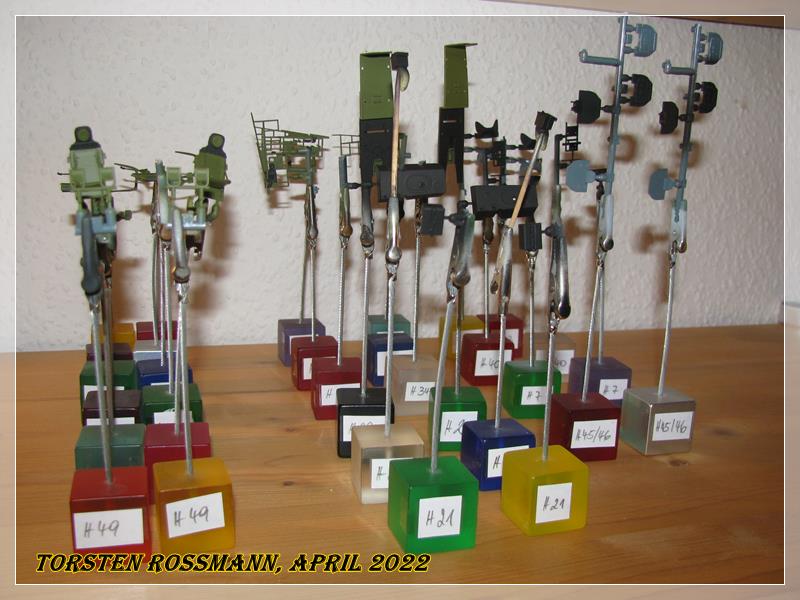
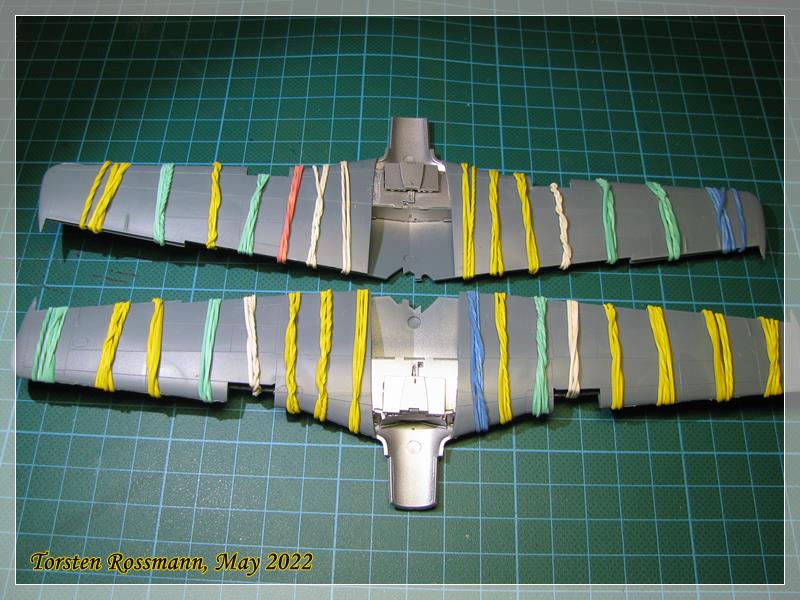
These clamps are a really useful accessory. Meanwhile I have 40 of them and they are often in use. None is still “unpainted” For a dual build it’s not unusual to have so many in use. I think, the most at one time in use for a single build were in 2019 during my K9FIN “Moukari” build, though I have not made a photo of them …
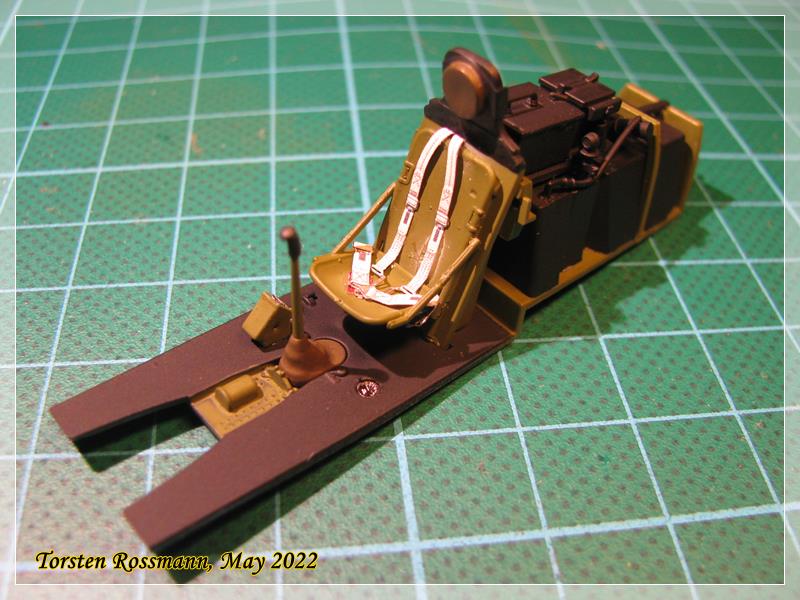
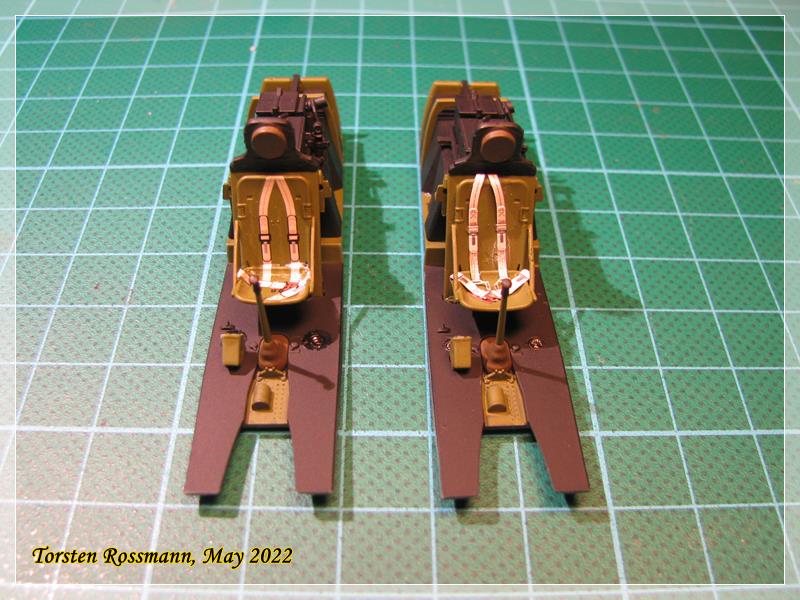
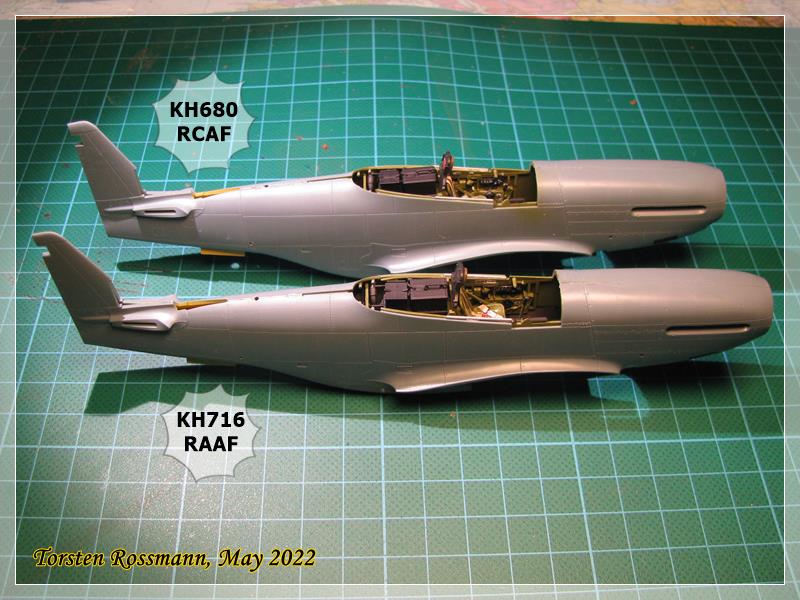
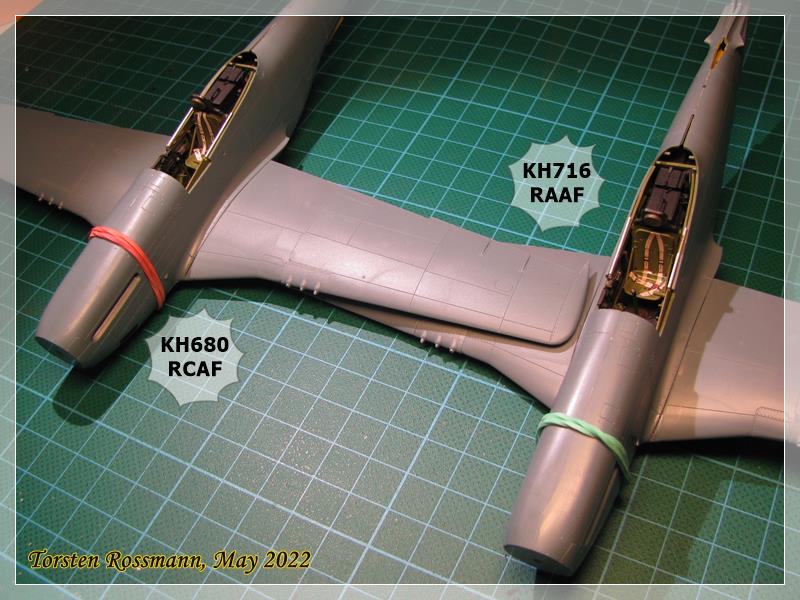
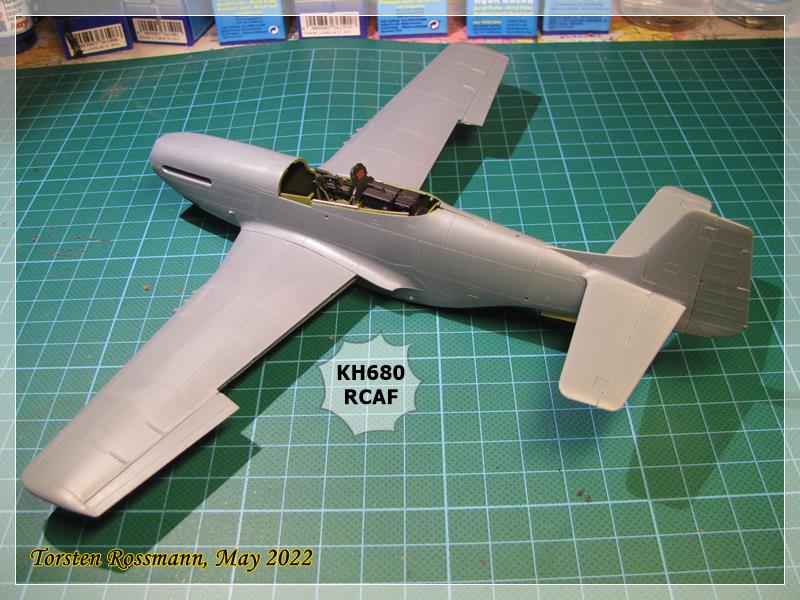
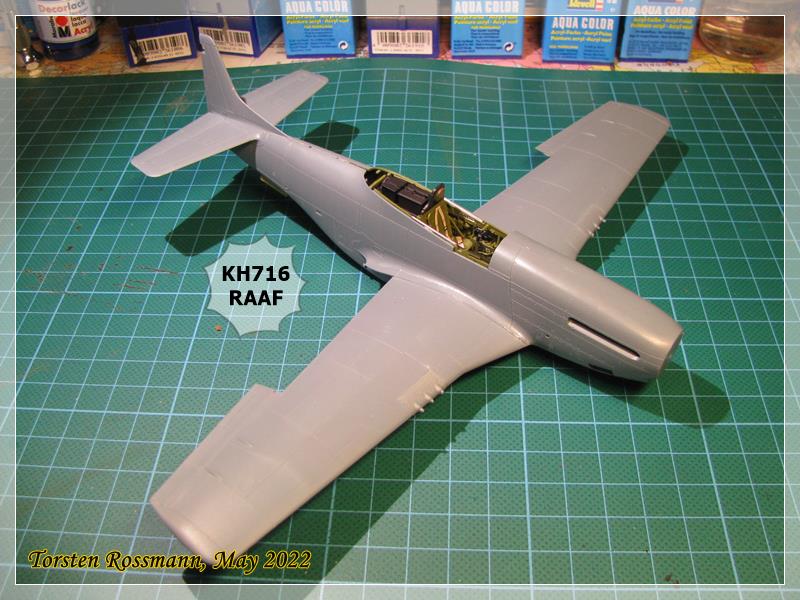
Back to the Mustangs. Here are both finished cockpits just before they join the fuselages. One with PE parts, the other with decals. I think I’ll open one canopy (with PE parts), while the other will be closed.
Torsten.
both cockpits look darn good to me. As Magnus said, for a closed canopy decals are the way to go. For my 1/24 scale race cars, 6 way seat harnesses usually cost me about $25 each, so I use Tamiya decals for those builds (their decals are the best looking by far).
I’m also super impressed at how clean and neat your work is. Even your cutting mat looks brand new. I’d be embarrassed to post a picture of mine for sure.
Magnus, you’re right, seatbelt decals are good enough for a closed canopy, if I have them on hand. For one of my Spitfires recently I didn’t have them, so I used small masking tape stripes. They do the job also for me.
Joel, the secret why my cutting mat is still looking clean is, because I mostly use an old newspaper on it while I’m glueing the parts together or do some detail painting, which I change every now and then …
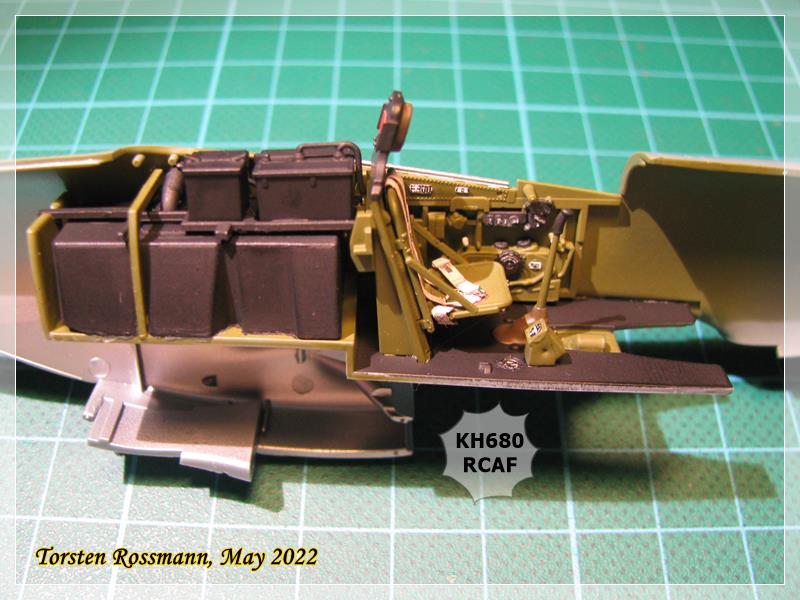
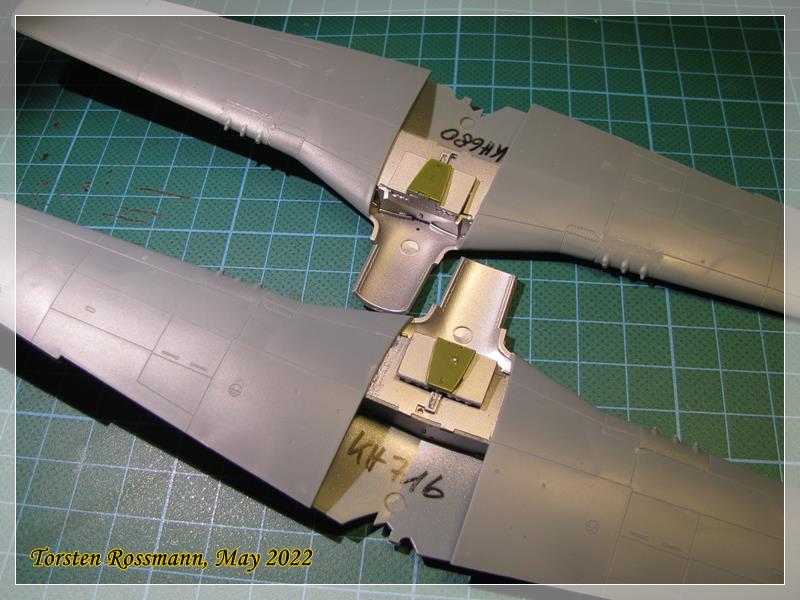
Another small update from the ponies today. First I added the cockpit parts to the fuselage sides, here KH680 with PE parts …
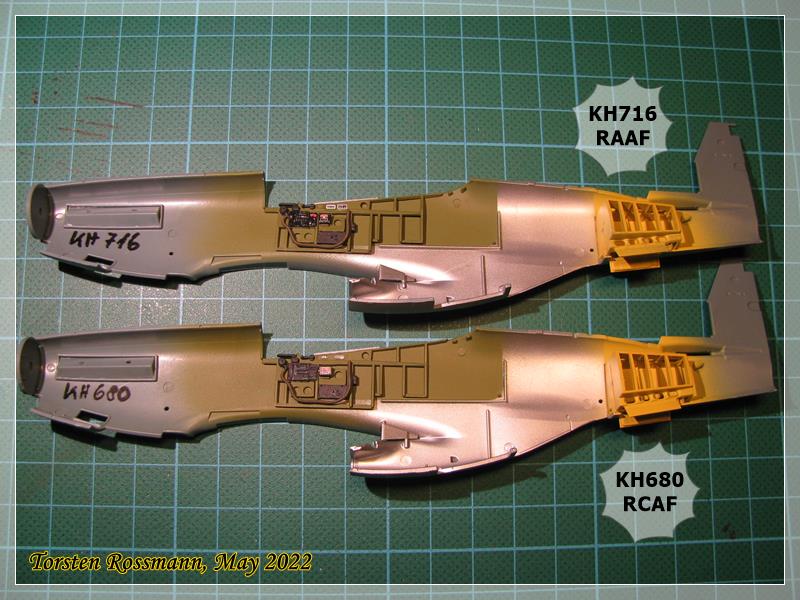
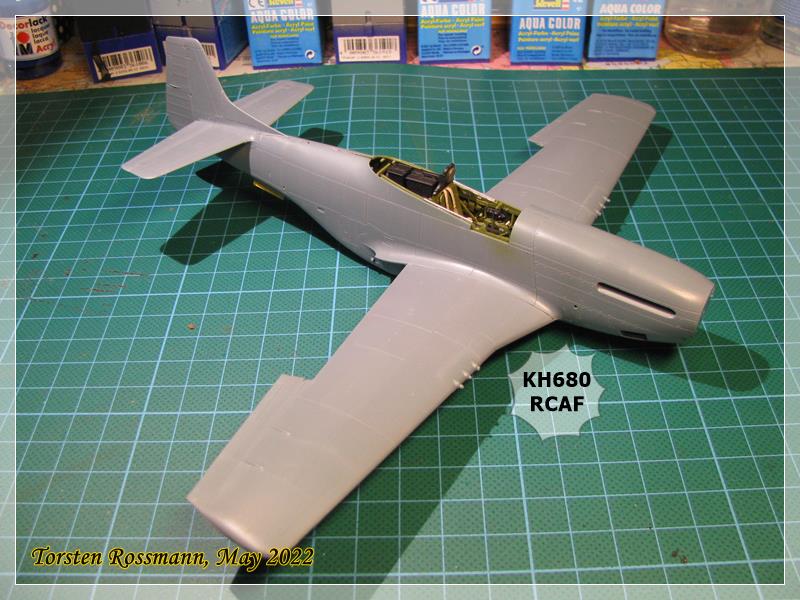
… yesterday eveneing I glued the fuselage parts together. I used ethylacetate again. Fitting is excellent so far, though I still have to sand the seams …
Torsten,
So you cover your cutting matt. I’ll have to keep that in mind when I eventually buy a new one. But covering it with newspaper I’d end up cutting right through it all the time.
The two fuselages glued up really look fantastic even when I enlarged the picture.
I have a slightly more luxurious trick: I buy a stack of ordinary A3 printer paper that I use to cover my work table. After a paint session I just throw the uppermost sheet away and then I have a fresh surface to work on. I also find that the white surface helps my vision.
@BlackWidow Clever using a marker to make sure that the parts aren’t mixed up between the builds, I’ll steal that one
Sorry for the long delay in posting progress pics, guys, but the last weeks have been a bit hectic. Last weekend we had our own model show and being the “table terminator” I had to make the plan for more than 130 tables. Everything went well and everyone had a great time.
And as it’s May again , we have the icehockey worldchampionship in Finland, so I spend a lot of time in front of the TV pushing Team Germany as good as I can. 5 victories in a row out of 6 matches isn’t bad, is it? Quarter Final is fixed!
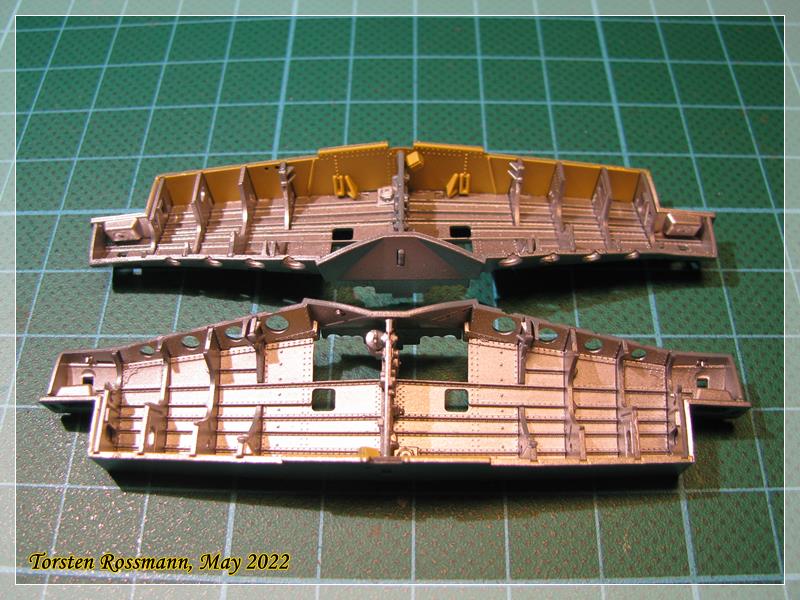
But every now and then I found some time for building. I have sanded the seams of the fuselages. It was more work than I thought. Next step was assembling the wheel bays. It’s 15 parts per wheel bay …
Another update from my ponies today and a proof of work for the last days …
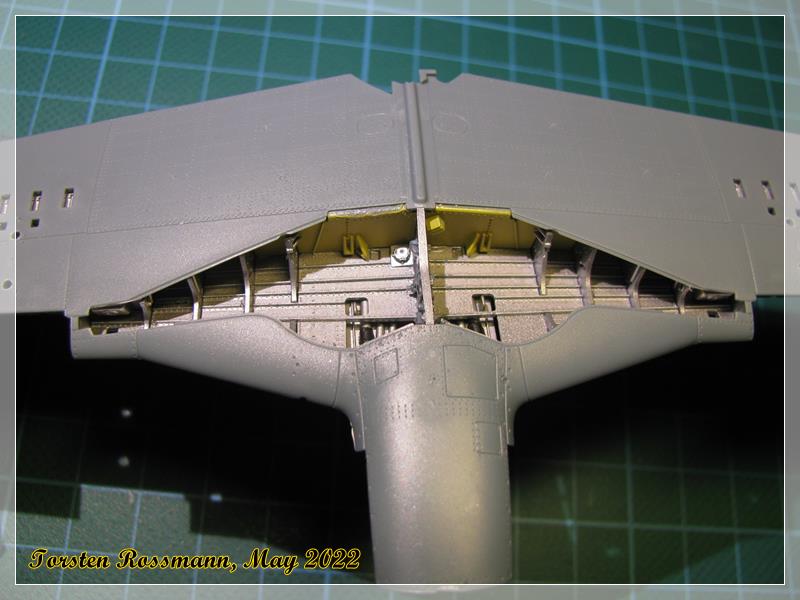
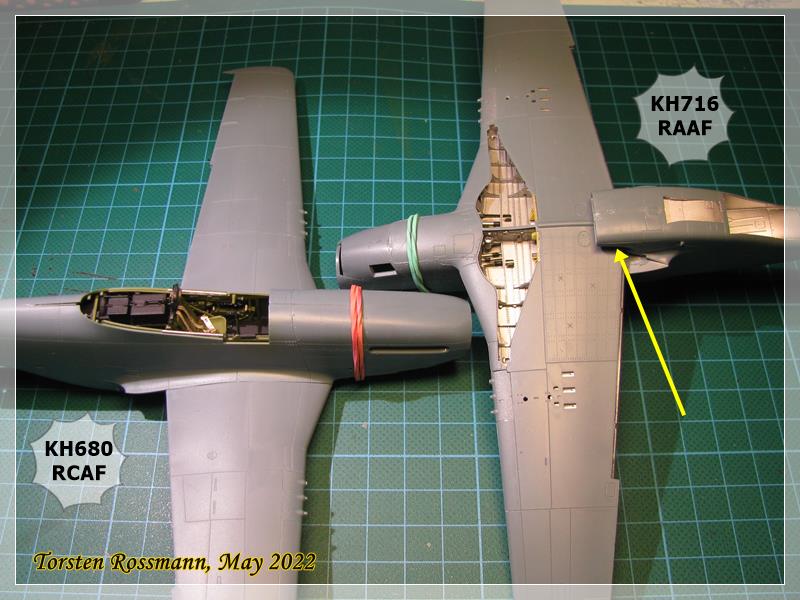
First I assembled the upper wing parts to the lower one, which was no easy task because the wheel bays are a bit too high. So I had to take away some material from the bays and the inner side of the upper wing parts to make them fit better. Not perfect but it was probably my mistake somewhere. The parts needed a bit of pressure for a while …
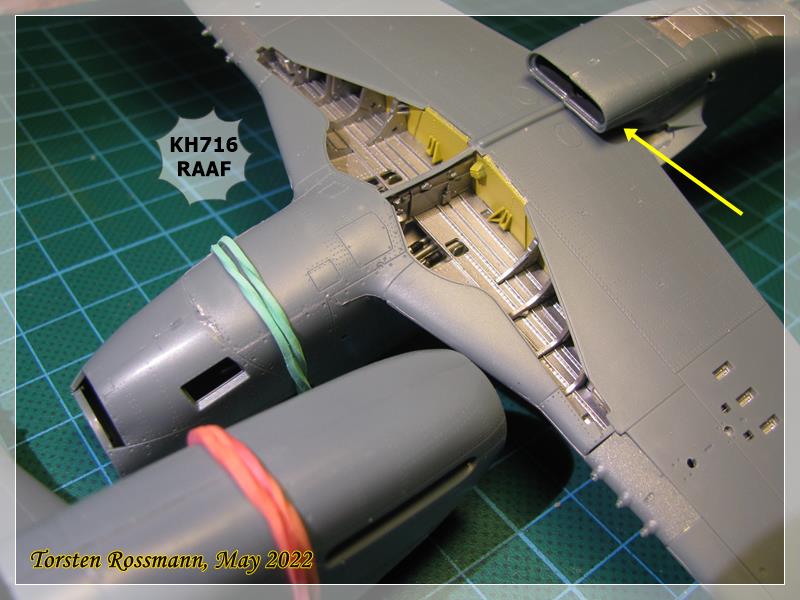
… I noticed small gaps between the wings and the fuselage. On KH680 it’s slightly better than on KH716. I filled a little bit of glue in the gaps and hope that will do the job. The gaps are too small to use the home made filler The fitting on the Spitfires earlier was a lot better …
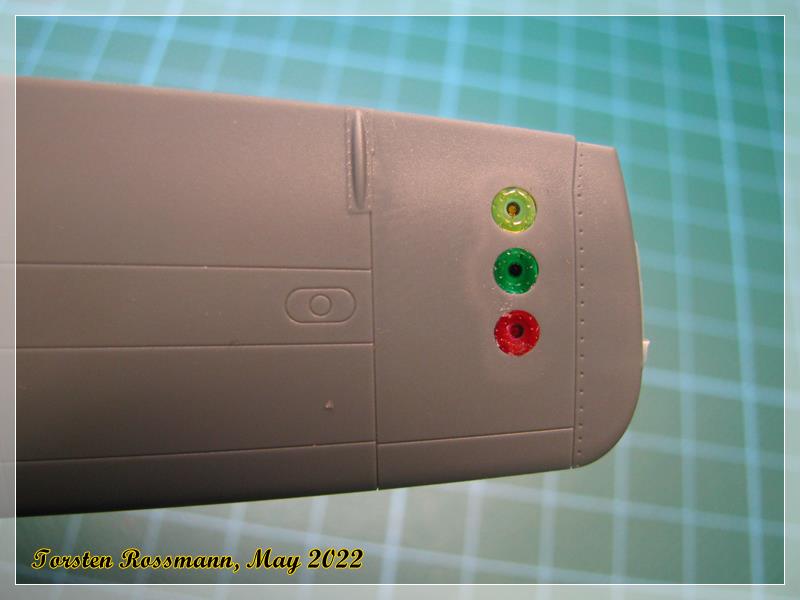
… here KH716 and you can see a difference to KH680 with the missing side rudder. As it will be painted in Blue I’ll add it when the build is nearly finished …
Next step will be the IP - many PE parts again … I’ll let you know.
Finally ice hockey: After a very good preliminary round with 5 victories in 7 matches Team Germany was kicked out in the quarter finals by Team Czech Republic with 1:4. To me it looked as if the guys were not really on the ice in the first period, the czech players used them as slalom posts and scored … Only in the last period our guys fought great but that came too late. Oh well, next chance next year …
Torsten,
Excellent job on both wheel wells. From the pictures both wings glued up quite well, but KH716 seams to have a slight step in the gluing up of the wing to the fuselage, or is it just the angle that the picture was taken?
As for your show, 130 tables sounds like a packed house. I’m betting that you had more then one table.