Torsten's bench works

Thanks for all your feedback, guys! Much appreciated! :slightly_smiling_face:

D, always great to know you at my side! :+1:

Dragos, you’re right, that would become many builds, if you just build the top aces. I have a book about all the Luftwaffe top aces with at least 100 confirmed kills. They are 104 … Many are known to me but also many I never heared of. In the same book it says, that the Luftwaffe had around 5.000 pilots with a minimum of 5 kills … Don’t know if that’s true, I haven’t counted them. Buddenhagen had 8 confirmed kills, the last on the day of his death.

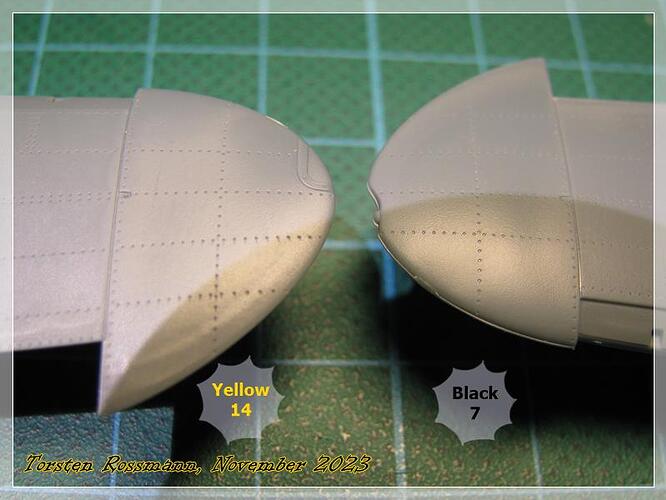
Peter, I found another little difference in the position lights …

I have cut away the pitot tube, which is moulded to the wing and drilled a hole for part I21 later, here on “Yellow 14”. That led to buying new mini drills which arrived today … :slightly_smiling_face:

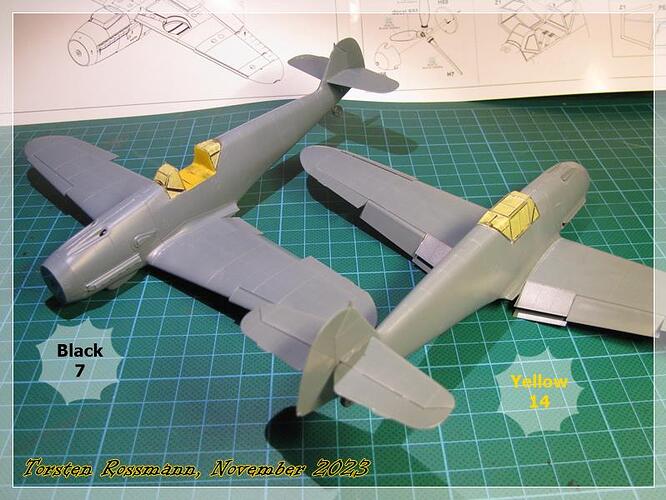
The fuselages are glued together and sanded …

Because the 109 was made of two half-shell parts I tried not to sand the panels away. On “Black 7” I was more successful, on “Yellow 14” less … :unamused:

Unfortunately part H52 was already broken on the sprue of both kits …

… this is the worse attempt of my rescue on “Yellow 14”. It looks much better on “Black 7” …

First test fitting came up with a bigger gap on the starboard side of “Black 7” …

… and nearly no gap on “Yellow 14” …

Okay, time for some extra work as so many times before … :grin:
Step 1

Step 2

Step 3

… Marseille’s “Yellow 14” was satisfied with a bit of extra glue and some polishing on both sides …

This is just an intermediate update, as I’m working on both builds right now. Hope to show you more in a few days. Until then …

Hai noroc!
Torsten
:beers:

7 Likes

Wow, Black 7 looks like an icebreaker ran across the wing root connection…

1 Like

Wait, what was that tape technique you used to fill the wing root gaps? I know you said you’ve shown it before, but I must have missed it.

1 Like

Great progressm Torsten, very nice work.

Indeed, a lot of builders make that mistake, myself included :tired_face: I found this image a while back showing the “clamshell” fuselage panels being assembled.

Cheers, D

6 Likes

Peter, you need an icebreaker … ? Help yourself … :grin: :rightwards_hand:


This is just a part (5 ships) of the Finnish Icebreaker Fleet laying at their Katajanokka Base in Helsinki, December 2017, just about 200 meters away from my hotel :hugs: Please note “Polaris” with special markings “Suomi Finland 100”.

That is ordinary clear tape like Tesa Film, Scotch or something else, Spitfire. It’s adhered on both sides of the gap and protects the details during sanding. The filler is a mix of Revell Contacta and flour. It’s an old trick that I’ve used many times already. Here on my FiAF “Mersu” a few years ago …

That’s a great photo, D! Thanks for showing! I also made this mistake a few times, The panel looks like a seam where the fuselage halves are glued together. So it has to go …

6 Likes

Yep. Careful sand and rescribe the top join. Easy fix for one with your skills :sunglasses:

1 Like

Friends! I have another suggestion regarding the top fuselage joint on 109:s. Try ever so slightly bevelling the edges on both fuselage halves, when gluing them together you will have the desired panel line without any of the effort!

:raising_hand_man:

Magnus

3 Likes

I would try Damian’s method first, Magnus. Sounds easier to me.

Time for another update of my “Friedrichs” :slightly_smiling_face:

“Black 7” has got the last PE parts for the water cooler and the oil cooler. Some fiddly work but now it’s done …

… and this is what will be seen later with a little luck …

… both builds looked this earlier this week …

… the PE fret for the F-2 holds 2 etch parts of the grilles for the sand filter which are not needed on any option of this Profi Pack, so they are most welcome for “Yellow 14” … :slightly_smiling_face:

… in the last few days I have masked the canopies and noticed the the masks for Part Z4 (the rear part) surprisingly don’t fit well. They are too big. So I cut them in quarters and made them fit. I always win … :stuck_out_tongue:

… and this is the status quo of the builds this evening. While “Black 7” gets an open canopy, on “Yellow 14” it will be closed. Finally I can start with primer and paint in the next days…

Hope to show you more soon. Have a great weekend!
Torsten
:vulcan_salute:

8 Likes

I’m impressed !

2 Likes

I added the PE grilles on my 1/72 builds just to notice that all cowlings on an F are so slim that nothing can be seen of it :slight_smile: . I reluctantly admit that 1/48 has its advantages every now and then :grin: !

:raising_hand_man:

Magnus

2 Likes

:smile:
Yes, 72 has many disadvantages for me (I can’t build what I don’t see … :wink:) but you are a master in that scale, no doubt.

2 Likes

What was Damian’s complaint about masking in his Chevy '59 El Camino build blog recently and my statement about that? :thinking:

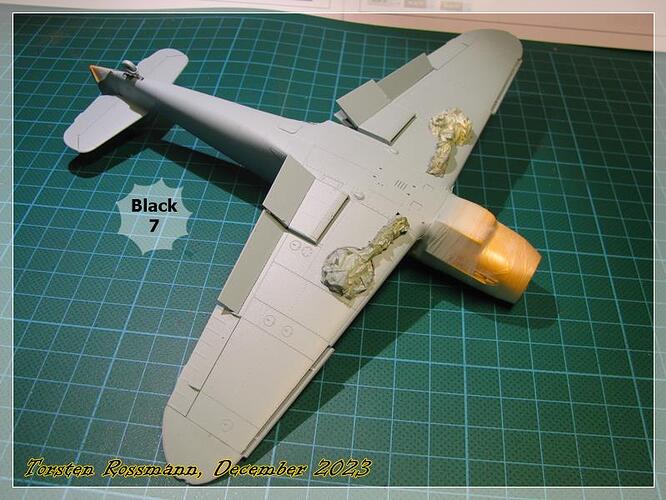
Now I had the same feeling on “Black 7”. Before primer I painted the black exhaust lines along the wing roots and masked them in the last 2 evenings, 2 hours per side … :crazy_face: But now it’s done and I can spray primer tomorrow after work … :slightly_smiling_face:

I’m sure they are not 100 % correct and I have to do some touch ups here in the end :unamused: We’ll see …

:beers:

9 Likes

Another small update from my Bayerische Flugzeugwerke :grin:

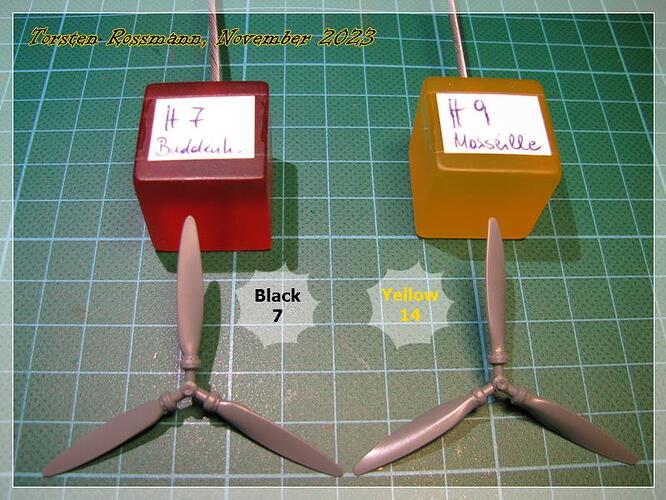
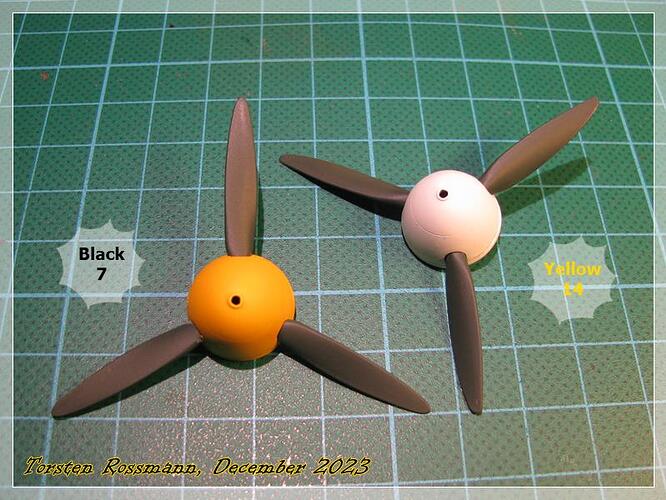
Do you see a difference in dimensions? I don’t … :thinking: In my book about the versions of the 109 it says, that the propeller of the F-4 was wider than the one of the F-2. So there are several props on Sprue H. Part H7 is for the F-2 and H9 is for the F-4. I don’t see any difference here. Maybe Eduard is cheating on us here :smile:

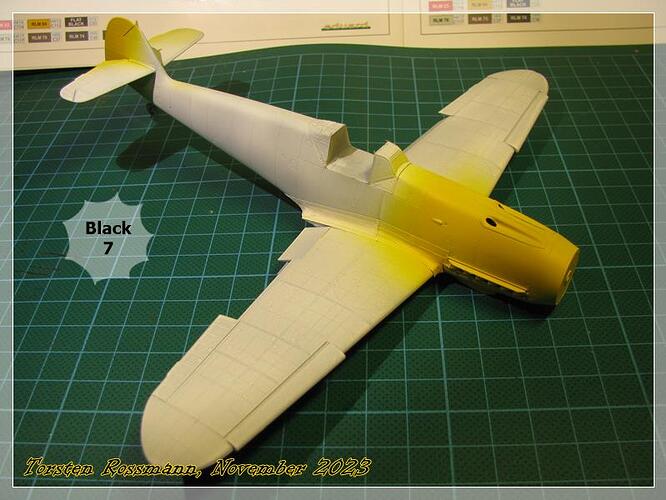
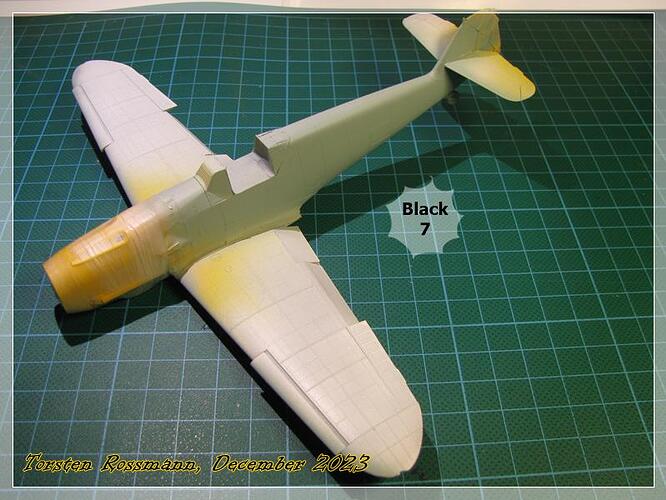
Anyway, primer is on and today I tested a new Yellow. It’s Vallejo 71078 RLM 04, which I ordered a few weeks ago at my trusted LHS in Leipzig. With a bit more Yellow “Black 7” would look like a DHL freight plane … :laughing:

“Yellow 14” has also got a bit Yellow on the underside. The white theater markings are already covered with Gold Tape and Parafilm M.

A white primer is essential for this colour. I guess it would be nearly impossible to brush paint it. As you see it’s not easy to get it opague. What I wrote on the inside of the spoon is still bleeding through …

Here for comparison Revell Aqua 310 what I used so far. Revell RAL 1028 Melon Yellow is more redish, while Vallejo RLM 04 is more greenish …

I will leave everything now to dry thoroughly and have another look at it tomorrow if there are any corrections needed. Next step after masking is spraying RLM 78 Blue on “Yellow 14”. Masking “Black 7” will take a while …

Torsten
:beers:

7 Likes

That is a nice vivid yellow Torsten.

I love how you call it your ‘LHS’ (LOCAL Hobby Store) as it is over 500 km from where you live… :rofl:

2 Likes

I can get Revell paints here in a toy store but nowhere near any Vallejo. I know Ralf Theis from Theis Airbrush Leipzig already for 15 years. He’s a member of the PMC Leipzig. I have attended their shows for many years until Covid came. Ralf sold me all my airbrush equipment, excluding the compressor and all my Vallejo paints (about 130 colours). Just a few weeks ago he called me back because I mailed him a question about my airbrush. We chatted about 30 minutes not only about airbrushing. If you look for an airbrush expert he’s the guy to ask. So support your Local Hobby Shop, even if it’s on the other side of the country :slightly_smiling_face: I guess you find these guys in every country.

2 Likes

Another week has passed and I came a bit further with my “Friedrichs”. First I gave both another layer of Yellow RLM 04 and then started to mask “Yellow 14”. Spraying RLM 78 Light Blue (Vallejo 71101) was a quick job … :slightly_smiling_face:

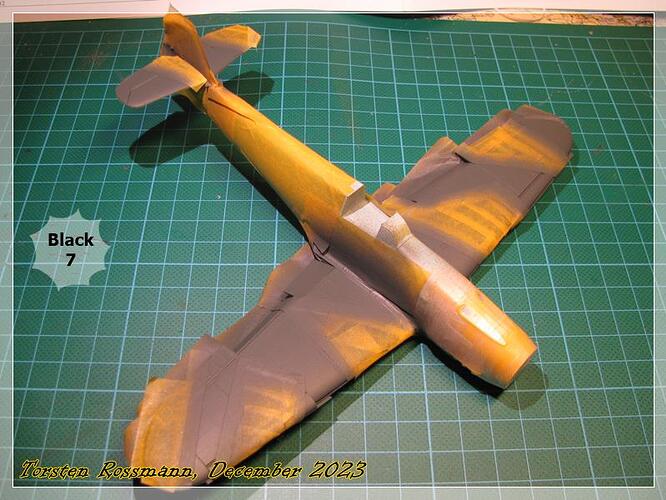
Masking the nose of “Black 7” with Tamiya Tape and Parafilm M went also easier than I thought. The yellow side rudder is also masked with Tamiya Tape. For spraying RLM 76 Light Blue I used Vallejo 71257. Here it’s not only the underside but also the sides of the fuselage …

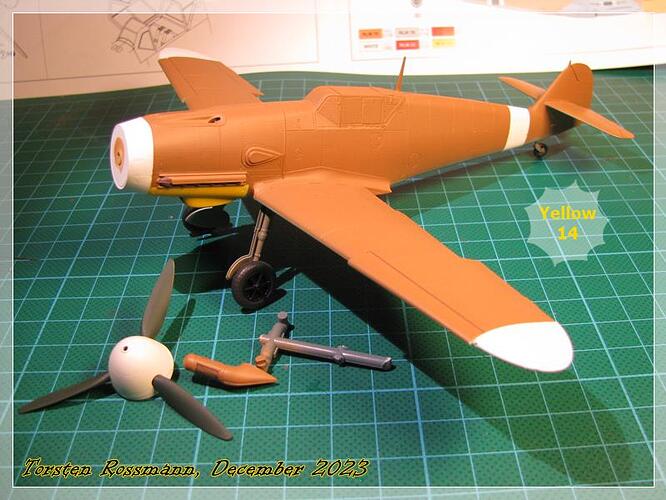
And fresh from the paint booth this afternoon comes “Yellow 14” with RLM 79 Sand Yellow :slightly_smiling_face: Masking the underside took 2 evenings. Photo is taken with flash …

Here the paints I used for Marseille’s 109 …

I’ll leave everthing now to dry over night and have another look tomorrow if RLM 78 came on a bit “cloudy” but for now it looks good to me.

Next step then is masking the underside of “Black 7” and painting RLM 75 on the wings.

Have a great week!
Torsten
:vulcan_salute:

10 Likes

Don’t have much time for building this week, but small steps are steps anyway.

After a minor correction of overspray with Light Blue RLM 78 on the fuselage I took away most masks from “Yellow 14” and am really happy with the result. At the moment I see no paint ran under a mask and no further overspray … :slightly_smiling_face:

Next step here is now finishing the landing gear and the prop.

“Black 7” is still “in the mask” but I hope to get some painting done this weekend. I’ll keep you updated.

Hai noroc!
Torsten
:beers:

8 Likes

A very striking colour there Torsten. A big contrast with the white.

1 Like

Thanks, Peter!

Yes, sometimes I wonder why aircraft (on both sides) had camo when they also had high viz colours for friend/foe recognition also painted … :thinking:

Another small update from my workbench. The props are ready for action … :slightly_smiling_face:

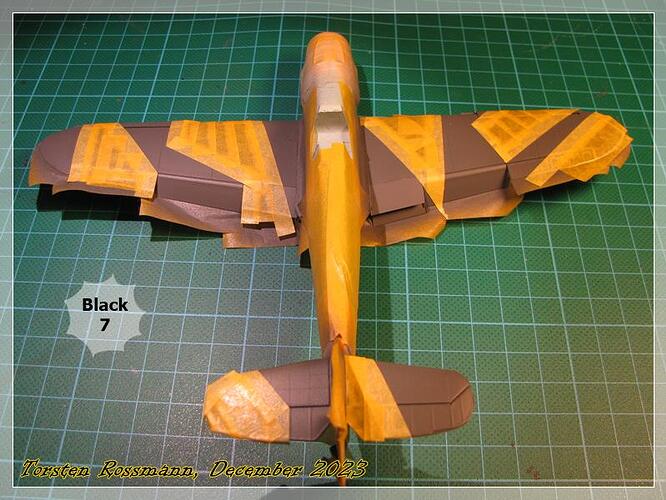
To avoid unwanted spray fog I nearly completely masked “Black 7” before spraying RLM 75, which comes from Vallejo 71259 …

… followed by another masking session …

… to spray RLM 74, which is Vallejo 71258 …

As you can see, I have left out the upper fuselage. I’ll do this in the next step.

While “Black 7” is still in the paint shop, “Yellow 14” stands on her wheels and is ready for some Bodenglänzer. Some minor touch ups to do though …

Hope to get something done this weekend beside the last club meeting 2023 on Saturday.

Torsten
:wave:

9 Likes

Very nice job. I plan to build the Hasegawa 109F Trop in 1/32 as a JG27 machine.

1 Like