Thanks Nito! I’m also happy with the result so far.
Concerning my next project, it’s already flying waiting circles over my workbench and you can wait for it … ![]()
Thanks Nito! I’m also happy with the result so far.
Concerning my next project, it’s already flying waiting circles over my workbench and you can wait for it … ![]()
Great work with those missiles, I always struggle with white missiles and their details..
Fantastic Torsten. Good to see the decals behaved.
Nice work so far Torsten, I look forward to seeing the finished model. Are you going to do some weathering on the model?
Dan
Thanks Daniele! No, no weathering as usual on my models. Time will do that … ![]()
![]() I also don’t like heavy weathering on my models. Even on the Macchi MC 202 that I just finished I went with a light hand. Best regards.
I also don’t like heavy weathering on my models. Even on the Macchi MC 202 that I just finished I went with a light hand. Best regards.
After a long time and more than 100 WIP photos I call this build finally done. ![]()
F-4E Phantom II
111. Sqn
Türk Hava Kuvvetleri (Turkish Air Force)
Eskisehir Air Base 1993
Kit: Hasegawa 1/48
As I mentioned before, the decals didn’t give me any problems, though they slept for 20 years in my stash. They worked well with warm water and Revell Decal Soft. The tiger head decals went on so easy, especially on the right side, I was really surprised and delighted! The only minor problem was the red band around the fuselage. The intruction does not make it totally clear where to place it but this looks about right. It’s a bit longer than needed, so I cut the rest.
The kit is from the 1990’s or even earlier and has its flaws. But I’m quite happy with the result now. There’s a new Phantom kit out from Meng and I will have a look at it, though I still have a few Hasegawa Phantoms in my stash. The final coating was again a 70/30 mix of Revell Clear Gloss and Clear Matt. It’s no small kit with a length of 40 cm and has a weight of 205 gramms now. My board has a depth of 40 cm, so it barely fits ![]() First flight to a model show will be in July to Leipzig.
First flight to a model show will be in July to Leipzig.
So thanks to everyone of you who joined me during this ride with comments and/or likes. Your feedback is always much appreciated. ![]()
The next kit is just around the corner and I will start it in the next days. Going back to the big piston engines and propellers … Hope to have you at my side again.
Happy modelling!
Torsten
![]()
Wonderful job Torsten. A great addition to your collection.
I’m looking forward to seeing your next ![]() build.
build.
Very nice Torsten ![]()
The decals came out great.
Thanks for sharing- Looking forward to your next build ![]()
Thanks Peter and Russell! I was really happy that the tiger heads went on so easily. And it’s the first turkish aircraft I’ve built. So “Hoş geldin Türkiye” to my Plastic Air Force!
And on we go to new projects. Another oldie climbs out of my stash and on my workbench. It’s the old Promodeller/Revell-Monogram Curtiss SB2C-4 Helldiver in 1/48 …
Let’s have a look in the box …
… on the underside of one elevator I found this mark. Thought the kit is older than 1997 … ![]()
There are some nice PE parts for the dive breaks included in the kit plus some more for cockpit and engine. The Eduard mask is always a usefull accessory …
The Revell instruction plan is from 1997, so still in b/w …
The kit offers 3 decal options for the USN and post-war the French Aéronavale and the Italian Marina Militare …
… and I decided to go with the USN bird, aboard the USS Essex in 1945 …
For painting Revell offers (of course) their dreadfull mixing orgies but as I have the Air War Set 71157 from Vallejo, I guess I have all needed paints and can avoid these unpleasant mixings. Will probably start the build this coming weekend with first wip photos following soon. I hope to some of you again at my side. ![]()
Happy modelling!
Torsten
![]()
Following along Torsten ![]()
Scalemates has this kit as being tooled in 1997 so a relatively new kit for Revell compared to some ![]()
Not sure about the accuracy of the copyright markings on the elevator compared to the actual aircraft though ![]()
Nice and clean work Torsten! ![]()
I usually track your model builds Torsten but this one I’ll be watching more intently, the Helldiver is another one of my favorite Pacific theater war birds, as usual I seem to be drawn to the less glamorous subjects that were decidedly less popular with their aircrews and their performance lacking. I built this (Monogram) model way back in the '70’s so this will be one that brings back some fond memories. Good luck with the kit!
Cajun ![]()
Thanks guys! I thought, this kit would also be something from the 1980’s or early 90’s. Well, I’ll see how I get it together … ![]() From the detailing it looks really nice.
From the detailing it looks really nice.
Thanks for watching, Terry! Haven’t done much research on the Helldiver yet and have not a lot of reference about the aircraft. But I heard, that it had a bad reputation from its crews. As usual I will build out of box. But I will do some more research on USN Helldivers. Some time ago I found some photos of Aéronavale Helldivers when I was searching for french Corsairs … ![]() The French used them still in 1954 in the Indochina War.
The French used them still in 1954 in the Indochina War.
![]()
![]()
Yes, the French Military in Indochine was awash with ex-WW2 USA manufactured equipment.
Nice choice. My interest is well peaked!
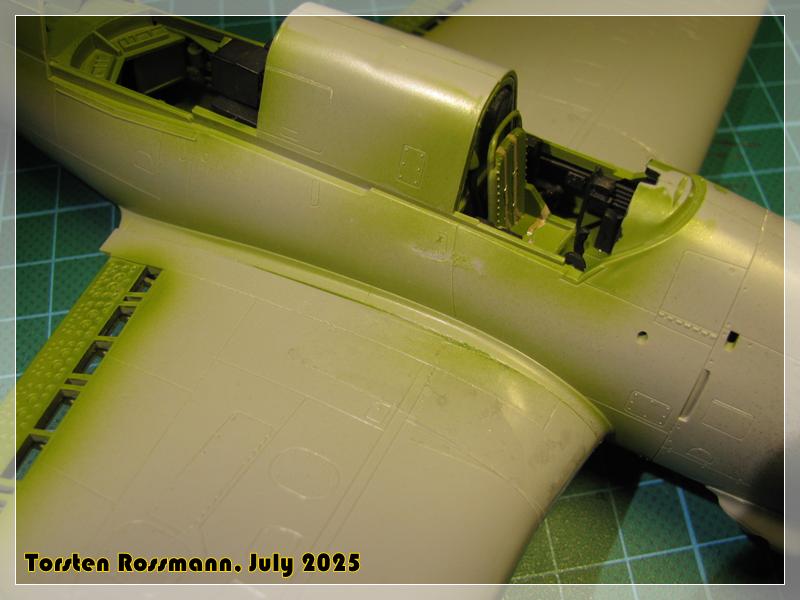
First update of the Helldiver. Made the photos yesterday but didn’t had the time to post earlier. So, the cockpit is nearly finished. 30°C inside (86°F) and 36°C outside (97°F) doesn’t make airbrushing easy these days here in the Southwest. But every day a bit gets to the finish line sooner or later … ![]() Interior Green (71137) is airbrushed, everything Black is brush painted.
Interior Green (71137) is airbrushed, everything Black is brush painted.
… the seatbelts are moulded to the pilots’ seat, so I painted them …
… the gunners office is not yet finished, his seat is still missing …
… therer are neither decals nor PE parts for the panel, so I tried a little dry brushing. Could have done better, I guess, but this is a macro shot and in the end there won’t be seen much of it …
There are a lot of nasty ejector pin marks all around the fuselage but I think they won’t be seen in the end. Fitting of the parts is good so far, I also did some test fitting of the 2 fuselage halves with all this stuff inside. The arresting hook might become a problem because most profiles show it outside and not inside. And of course it needs to be glued prior to close the fuselage … ![]()
Next update soon I hope …
![]()
Looking good Torsten… The instrument panel definitely looks the part… ![]()
Thanks Russ!
Slow progress this week because of the heat inside and outside, though it has cooled down slightly today.
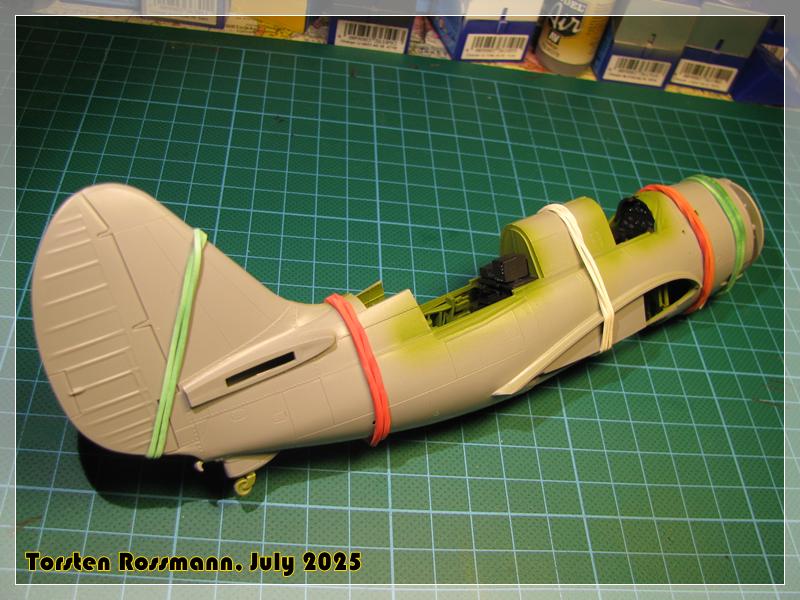
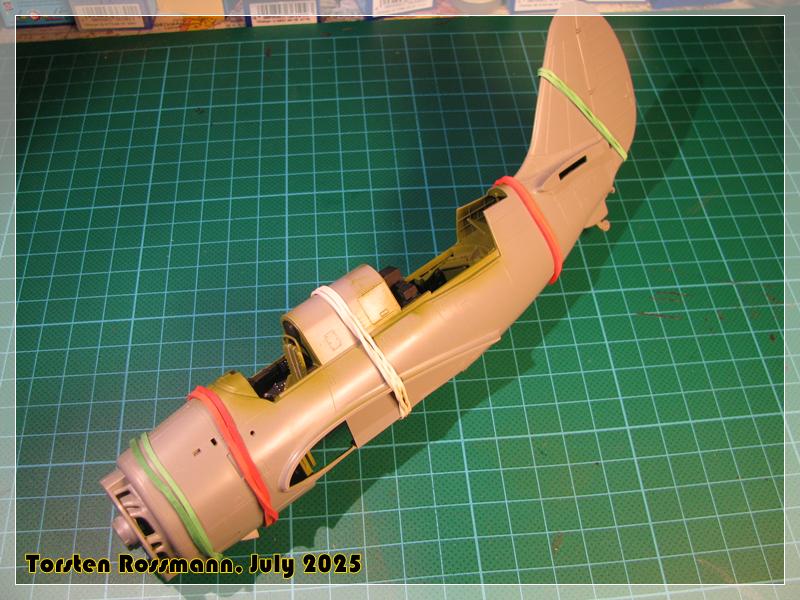
I have closed the fuselage yesterday. During test fitting I noticed that it would be easier than I expected. Nothing came in the way and it was a matter of minutes … ![]()
Let’s hope, sanding the seam will be as easy as that … ![]() I’ll start with that later today.
I’ll start with that later today.
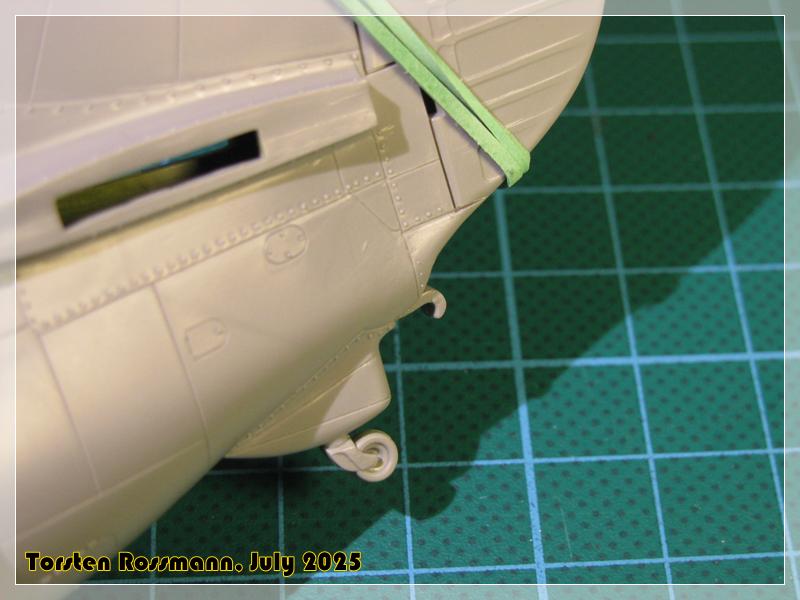
After looking at some photos of flying Helldivers and on deck I decided to build the hook retracted, as most photos show it like that. So it won’t be in the way during painting. Compare with the first photo of Post 1034! ![]()
Next step after sanding is the engine. The bomb bay will be build open but I can leave that step aside for a while. Makes painting also easier.
Have a nice Sunday, folks, and enjoy a cool
![]()
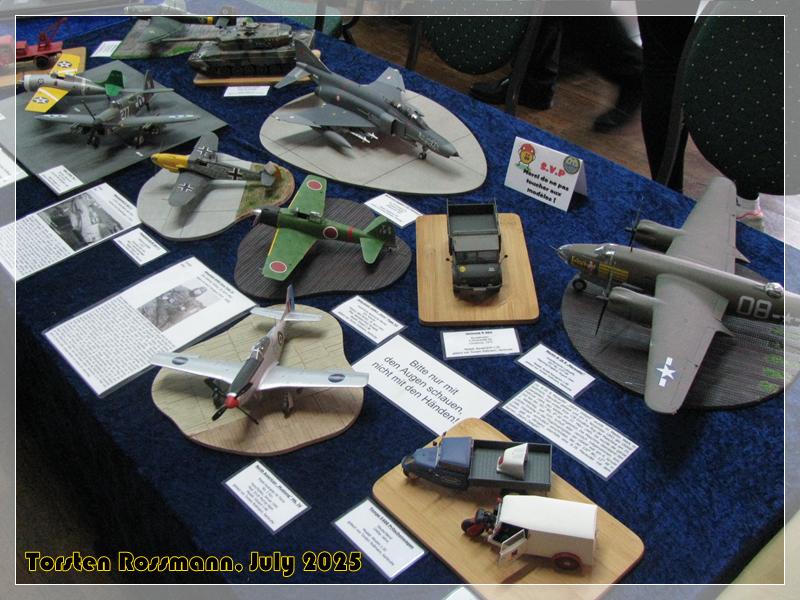
Not much done on the Helldiver in the last few days. Last weekend I had a wonderful time with some friends at the model show in Leipzig, the first since 6 years … ![]() My table was pretty packed because I had only one table instead of two, but I guess you recognize some models from this thread …
My table was pretty packed because I had only one table instead of two, but I guess you recognize some models from this thread …
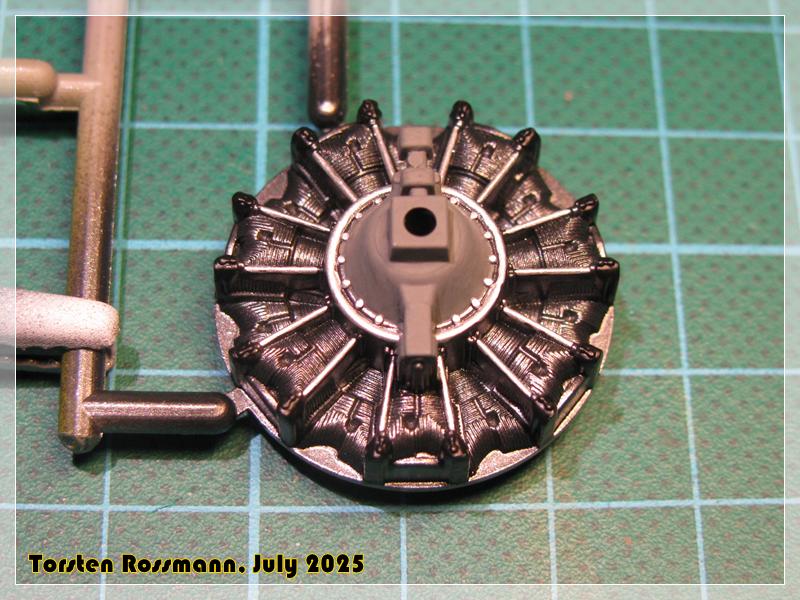
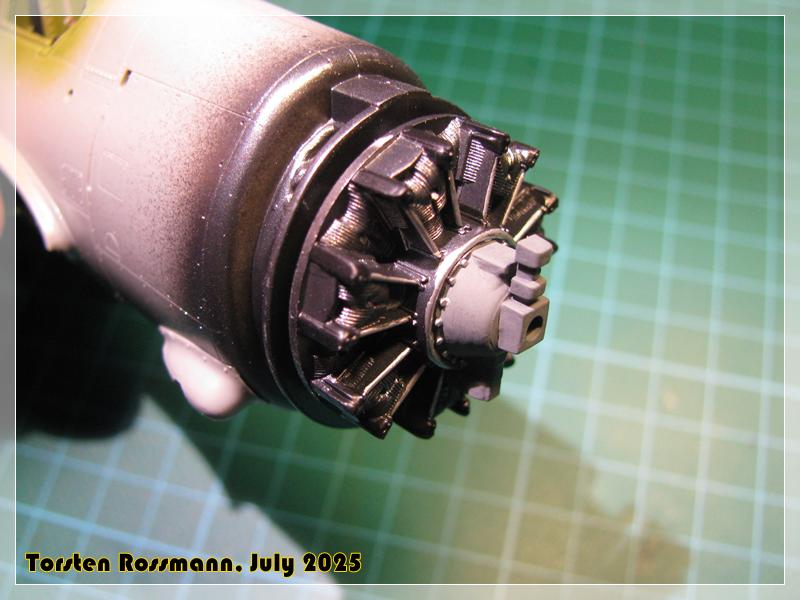
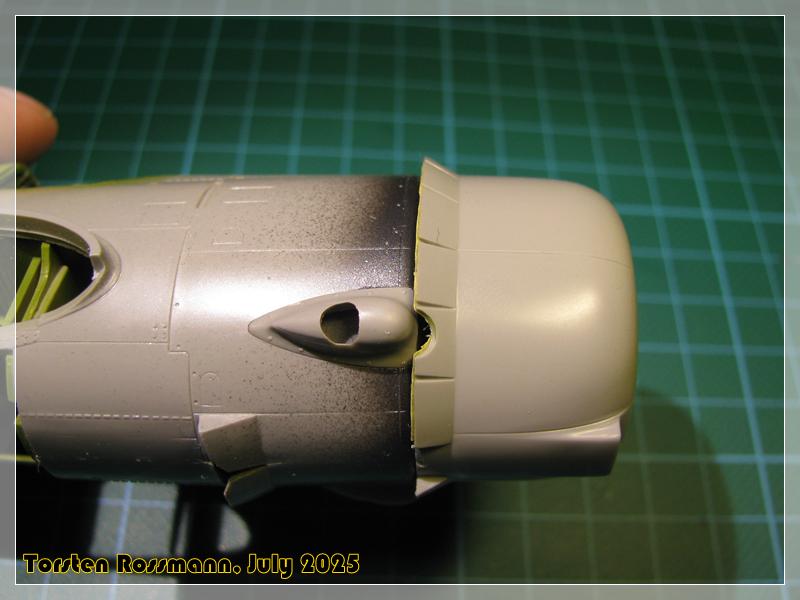
So I started with the engine. It’s a bit rudimentary, so I tried my best to make it look okay. Didn’t use the wires because in the end with the big propeller and hub there won’t be seen much …
Paint is mainly Vallejo 71073 Metallic Black
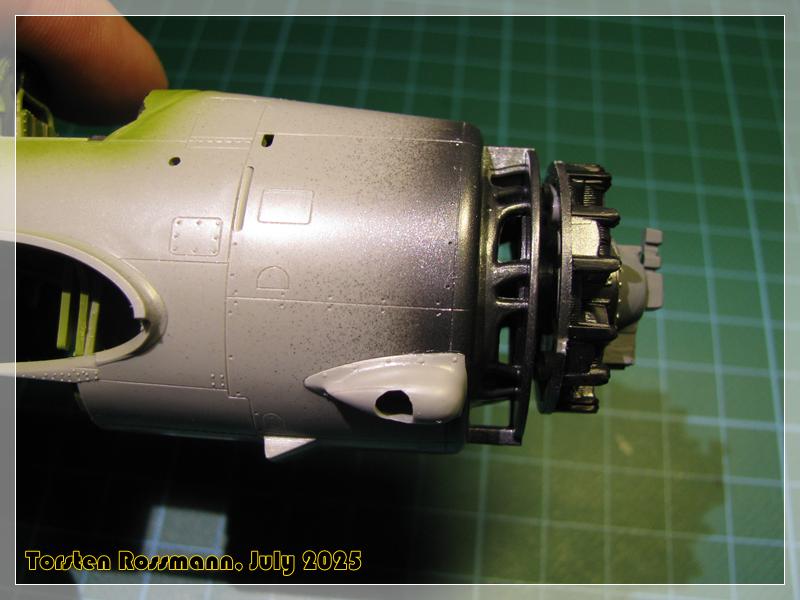
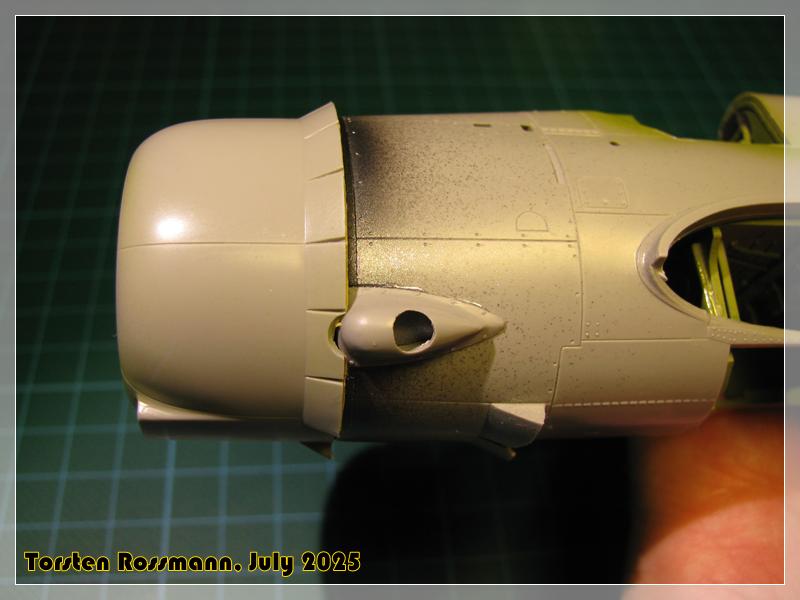
The cowling fits well over the exhaust cover on the portside …
… but not so well on the starboard side … ![]()
The wings will be the next step. But first I have to paint some more Interior Green. Stay tuned! ![]()
Btw, I have 2 more model shows in October but that’s it for this year. In 2026 I could have up to 9 shows if everything goes well … ![]()
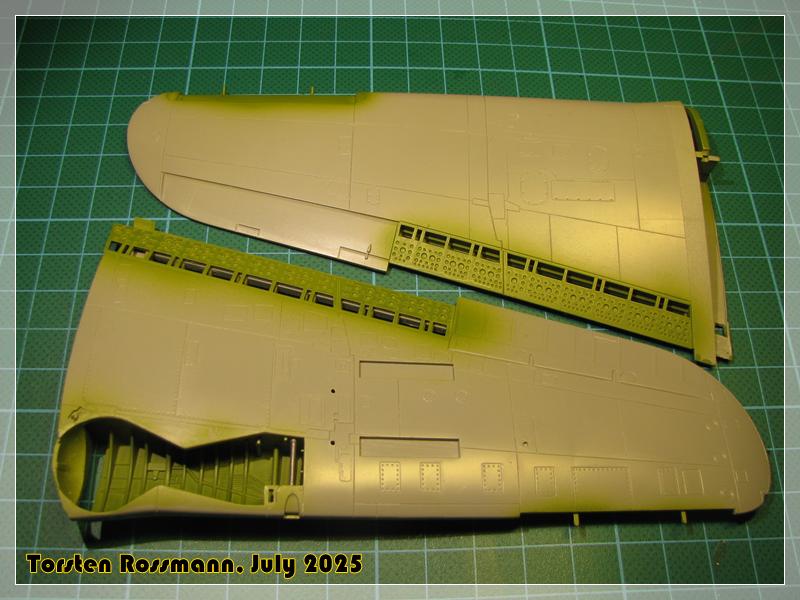
Working on the wings was more difficult than I thought. Fitting is not so well. Look at these gatings … ![]()
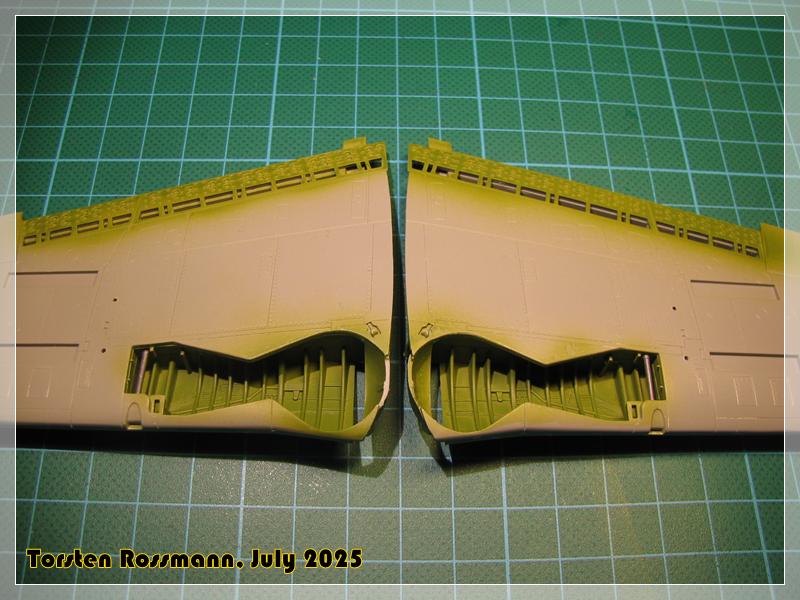
.. but I managed to get the wing parts off the sprue without much damage. Sanding the seams took a while but now it’s done …
The inside of the dive brakes will be painted Red and not Green of course … ![]()
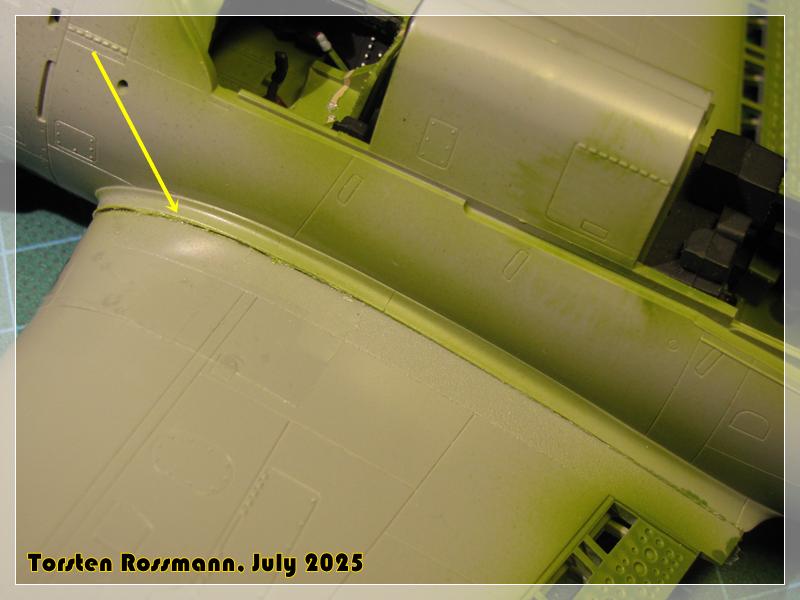
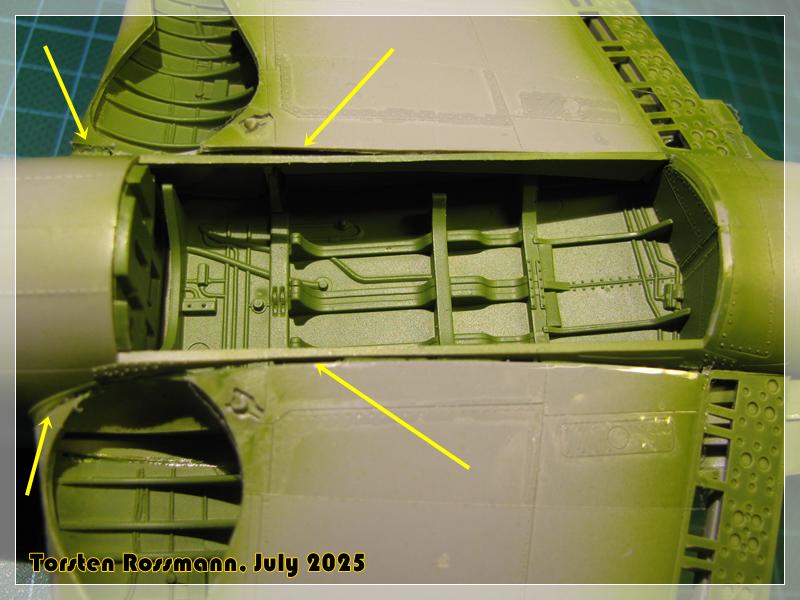
Attaching the wings to the fuselage needed quite a lot of test fitting first. While there’s only a small step on the upperside …
… there are big gaps on the underside which need some treatment … ![]()
Yesterday I prepared the parts with clear tape and mixed some putty … ![]()
I’ll let you know how the result of my sanding looks like. Quite happy that I don’t have to attach the bomb bay doors first. That would make sanding a lot more difficult …
Have a great weekend!
Torsten
![]()