Bingo … ![]()
2 Likes
Hi all, a bit of paint on now first use of my new tip and needle in my Badger 105😄


Hataka A215 IRR green was used,it does look a bit dark but it will lighten up in the weathering process etc.
Cheers
Jacko
7 Likes
Looks splendid!
3 Likes
Great build so far .
Warning be careful of walk arounds has we did upgrades to all of the trojans . I know that the Kit is the final build spec . if you look on Facebook modern Armour page you might see Ians Baracloughs complete with plumbing.
Was not my favourite vehicle to work on .
Great build keep it up. are you fitting a dozer blade or Mine plough?
Ossie
2 Likes
I have the FWMP to go on and I’ve got an old blade that will need a lot of work to fix:wink: I will try get photos of both on but if I can’t the plough will be 1st choice ![]()
1 Like
plough now has plumbing to the front r/h sides near lights . picture above 0083 shows connections
Ossie
2 Likes
Hi guys, a little bit of colour on now,looked ok to the eye but the camera shows some touch up will have to be done:roll_eyes:![]()


Thanks for looking
Jacko
9 Likes
Looking good Jacko. Its built up very well. I have noticed a few damaged resin areas, will you be trying a fix or leaving as is ? I know you said a few areas were pretty brittle as well ?
1 Like
Let’s see if I’ve got them all,lifting eye on rear deck.a bit of anti slip on the hull front,today the side on the o/s mud flap broke. If you have noticed any thing else please point them out. Everything will be fixed as best I can👍 ah a hole next to the grab handle😂
2 Likes
I wasnt being picky mate, sorry if it came across as such … I just wondered if the few bits I had seen were repairable ?
This is what I saw … the protective guard above the upper front right mounting eye & and the Bowman ABA stalk …

Other than that, I think once you have the stowage and external caggage added, its going to look the dogs
3 Likes
No bother mate that’s what it’s all about:+1:both are fixable just wanted to do some painting before touch up and the excavator:+1: hold on that on the front I hadn’t seen:flushed:![]() I thought you had spotted the hole by the grab handle
I thought you had spotted the hole by the grab handle
2 Likes
They all look easy fixes which is good … I suppose that’s the inherent problem with resin, you have to expect a few breaks along the way …You going to try and get a fascine on it ? Good old drinking straws might be a good size ?
2 Likes
Good idea on the straws that will be looked at👍before that however this will need sorted

Got it in a swap deal he certainly knew how to glue things together😂
Jacko
4 Likes
Should be able to hide some of the dodgy areas if its in the up travel position … will look nice once fitted.
1 Like
Hi guys,took a bit of a break from the resin and had a go at the blade.

Rework done now to get it together


It’s come out ok and its removable so if I can get the plough the same happy days ![]() (yep I know the bottom corner has come off
(yep I know the bottom corner has come off ![]()
![]() )
)
Cheers
Jacko
6 Likes
Nice repair job on the blade… Looks good fitted ![]()
2 Likes
Hi guys,
I’ve managed to make a start on the excavator,it’s going to be interesting to say the least.

Here are the carpet monster parts.

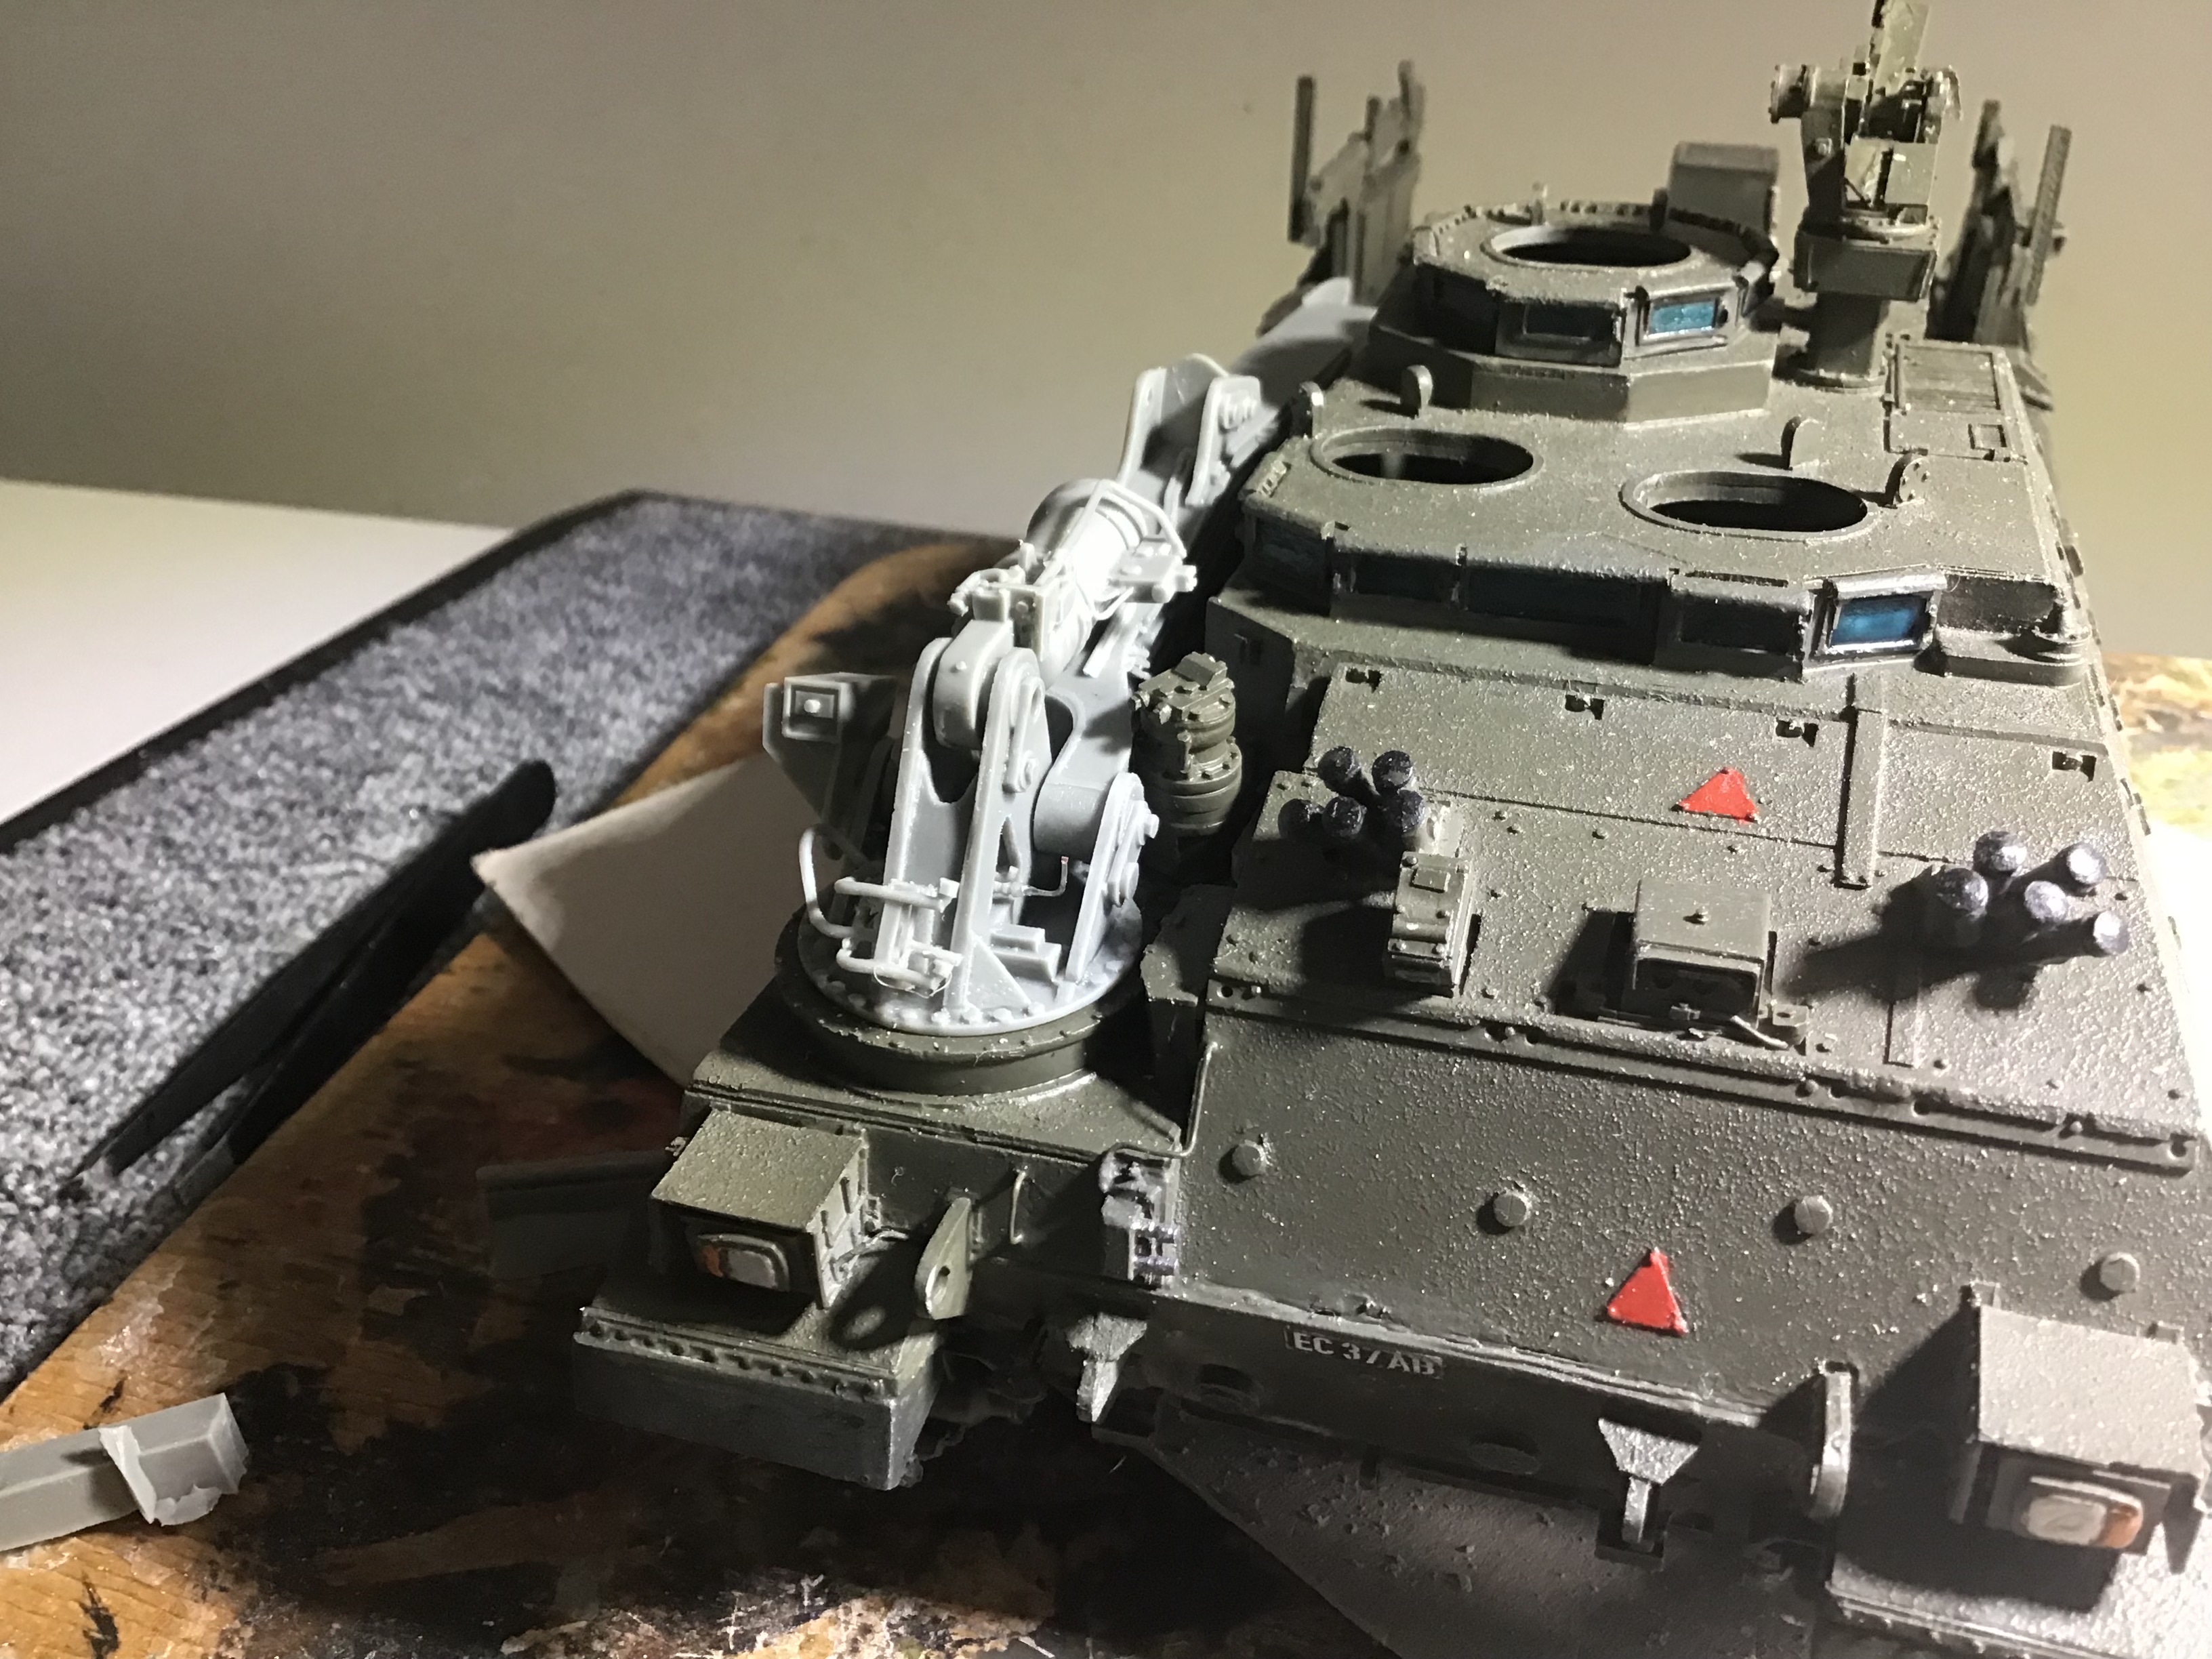
The top ram is not secure yet,but honestly some of those parts are so small I can hardly see them😂 it’s fun though isn’t it?
Cheers
Jacko
11 Likes
Those look like some seriously fragile parts mate … steady thy hand and go in with nerves of steel …
3 Likes
Woah! Looks like it’s gonna be worth the effort though, carpet monster or no.
That is cool…
2 Likes
You’re supposed to glue all those little stubs together into something tangible? I would be doing that work on a serving tray or in a baking dish just to catch everything I drop! Good luck and take a Xanax first!