Trucks around the yard

With the notch cut, I added the roofing material and skylights:

I like the notch, and you can still see the interior framing. I was convinced that it would be lost in shade, and I guess not -

Next, added some awnings to the big building:

These were a bit fussy to make, but not hard per se. I made up a wire frame and attached scale model sail cloth. Then airbrushed them with thinned Vallejo mint green and hand painted the “metal” parts. I did all of this because in real life it turns out, there was a clear view to the undetailed second floor interior, which annoyed me - this works and the awnings cast nice shadows

Thanks for having a look

Cheers

Nick :man_biking:

14 Likes

That is just crazy good … :+1:

3 Likes

Thanks John! Now, trying to sew it all up :grinning_face_with_smiling_eyes:

Nick

1 Like

I’ve started attaching the buildings and adding landscape - and we are off:

On one hand, this being the smallest building, it should go in easily. Which it did, but it is surrounded by a pretty wide variety of landscape parts - like a gate, fence, radial arm saw, tree and lots of other plants.

I think this tree is ok, but not great - for a long time it look a lot like a “vine tree” - just stretches of vegetation attached to a tree frame, which it was. Now, it looks a bit better, but more like a fruit tree than a shade tree :man_shrugging: but, that’s going to be just the way it goes :grinning_face_with_smiling_eyes:

As you can see, not really that much, but plenty to install :grinning_face_with_smiling_eyes:

I think the good news here is that this area is interesting when viewed on each side, which I don’t usually see happen on many of my projects - there’s usually a good side, and the other side! :grinning_face_with_smiling_eyes:

Added some saw dust and endcuts under the saw - I know, the sawdust doesn’t match -hey! they were cutting something else first! :grinning_face_with_smiling_eyes:

This shows an interesting photography problem which is that despite the building being set back from the base, unless you are taking straight-on photos or making big crops, the base is evident. This is fine, but for finals I will figure out how to find a background to lay this (or similar image of) over so that you can see the project and not the base -

Same problem above, so seems obvious enough this will need to be addressed for the final images. As I’m placing the cart about a mile before the horse in this observation, as there is a long way to go before final images. This went pretty well, but it was slow going. I don’t think I’ll need to make any more fences or gates, but have plenty of landscape etc to add, and two buildings to install.

Thanks for having a look

Cheers

Nick :man_biking:

11 Likes

Glad you included shots that included the base-edges, there was a growing suspicion all these images were actually just photos you’d taken on one of your bike rides :grin: I can’t think of a higher compliment. Oh and that tree – a few 1:35 lemons hanging off it maybe?

3 Likes

The edges of the base looks like kerb stones to my eyes, if that is indeed the case it might be sufficient to use a stretch of gravel or decrepit asphalt/tarmac road, either a model or 1:1 scale.

1 Like

other planet

1 Like

Hello guys,

@Uncle-Heavy and @Dioramartin, yes, the edges - always a challenge! and Robin, yes indeed! That’s the plan - making up some relatively forgiving details around the perimeter. I’ll cut them off in what hopefully looks like a convincing angle and drop over whatever landscape seems to look about right. Funny thing here is the challenge of getting the backdrop to either be clear enough to match the scale and crispness of the photo - this applies to fore- middle- and background images - which can turn out to be quite challenging to get right -

OK, today was sunny, so out I went with the woodshed installed:

The sun sure helps! Because, for a minute, I thought about using indoor pictures:

And while not a bad photo, in fact, in this case you can see the figure more clearly, but the lack of pop is obvious too -

Speaking of obvious:

Yes, the sun lets you know when you got it right and wrong - so something will be added around the base of these weeds - I’m sure they could have looked worse, but these do not look very good.

It looks like next week’s task will be to install the big office building -

Thanks for having a look

Cheers

Nick :man_biking:

14 Likes

I’ll leave my groaning :grin: pile of superlatives at your door :wink: , meanwhile apropos your notes;

Indeed daylight can be the sternest critic, I’m about to be similarly “reviewed” today (if the wind drops) photographing the finished Lazarus. Although would you agree sometimes the sun can actually be kinder than electric light? Whether it’s solely because of natural shadows, and/or something else, I’m not too sure.

That second shot (9_end) is freaky – two vanishing points, but it works although I felt myself leaning to the right looking at it :face_with_peeking_eye:

IMHO those weeds just need: a quarter-inch additional layer of soil/pruning some stems to shorter lengths and maybe some mild de-clumping/random washes of yellow ochre and/or slightly stronger greens.

5 Likes

double ditto.

All I have to say is, apart from your comments Nick about the grass, and it only looks a bit to uniform which a quick snip here and there will sort out, every single one of those images above it is as good and realistic as a real life view. Enough said.

4 Likes

@Dioramartin and @Johnnych01, thanks guys - yes, the weeds - they have been addressed by adding some odds and ends at the base so they don’t look so obviously “plugged in” :grinning_face:

And then added the final building to the base:

I’ve been strategically locating figures so that when I take final pictures, I can actually fit some vehicles in!

The bench above was a bit sparse, so added some clutter

As there is plenty going on in the shop, I don’t want to block the views

I like this long side - it worked out better than hoped

Notice the two guys on the right

Who are these two?

Who knows? maybe looking for a job? maybe just passing by? we don’t need a Rambo situation where they drive a truck through the front window! I hope the shop owner keeps his cool! :grinning_face:

In include the last photo because you can still see into the shop - no idea how I’ll capture this on the final pics - I don’t think much of the storefront hardware store will be visible - oh well -

Cheers

Nick

9 Likes

Its just stunning.

2 Likes

Which way are they heading, north or south?

1 Like

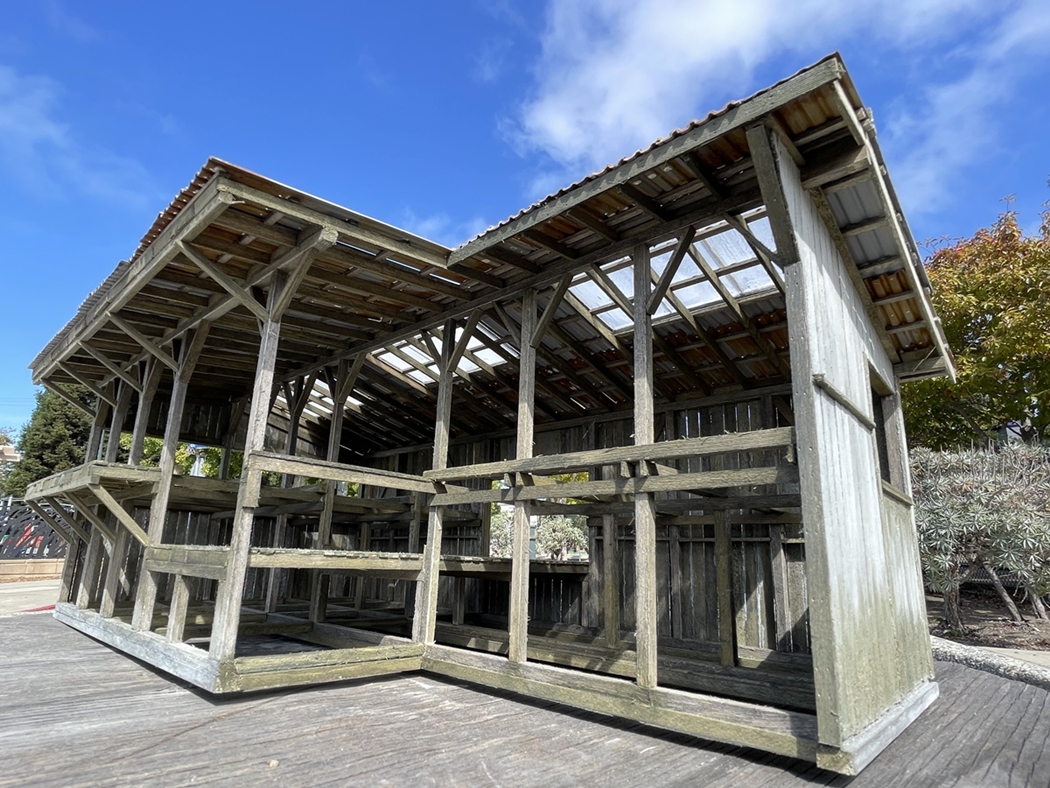
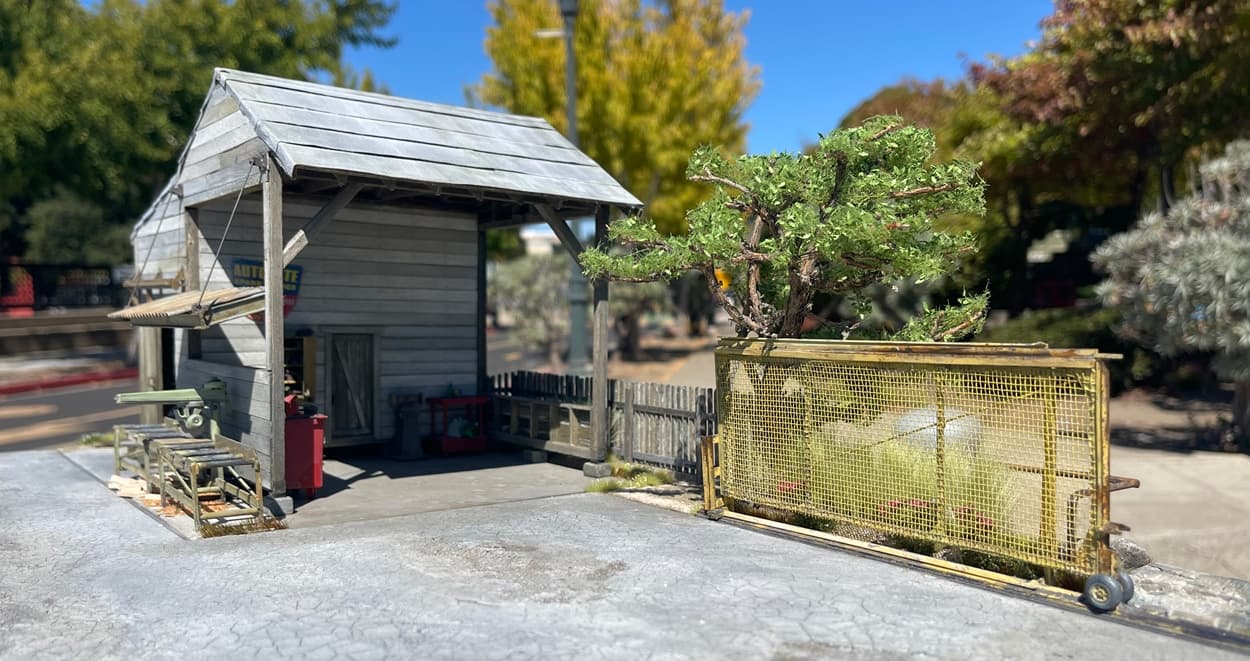
A guy was able to call this project done early last week, but we had overcast skies and some rain, so I waited, and yesterday was pretty clear and good for taking some final photos. So, yesterday, amped on coffee, I spent a long time dealing with photos, and this is how it all worked out, please have a look:

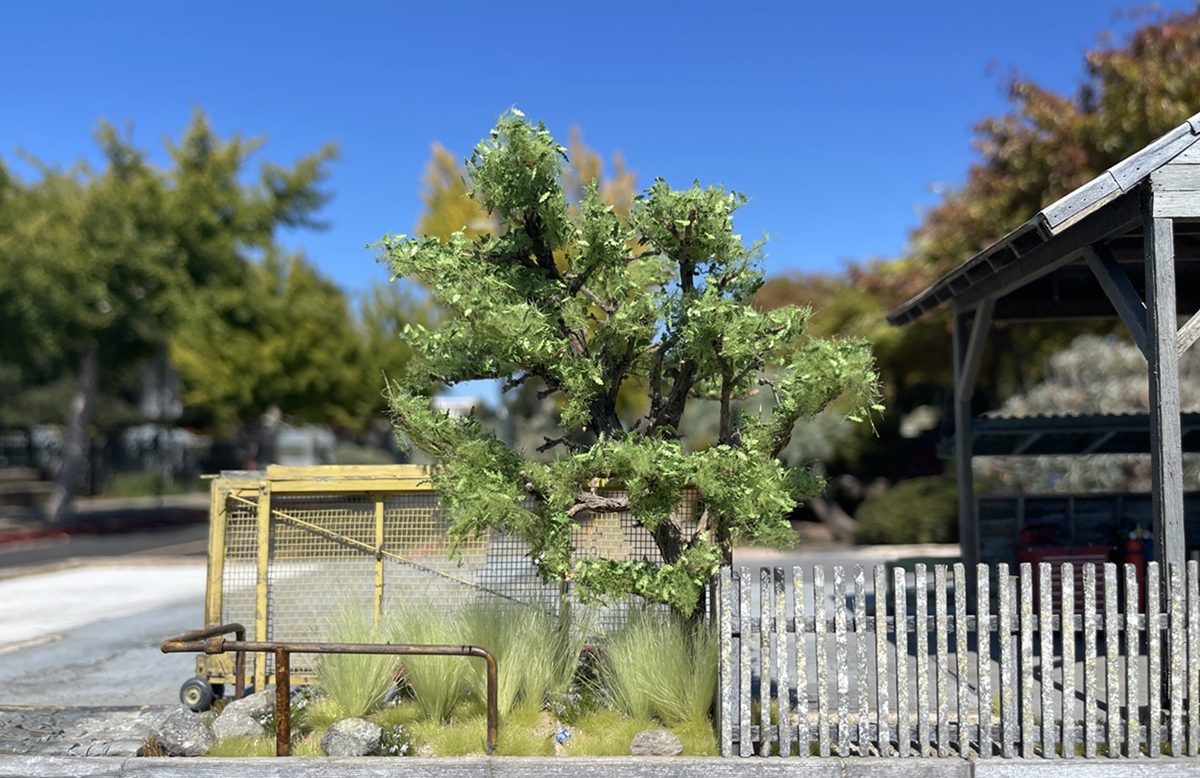
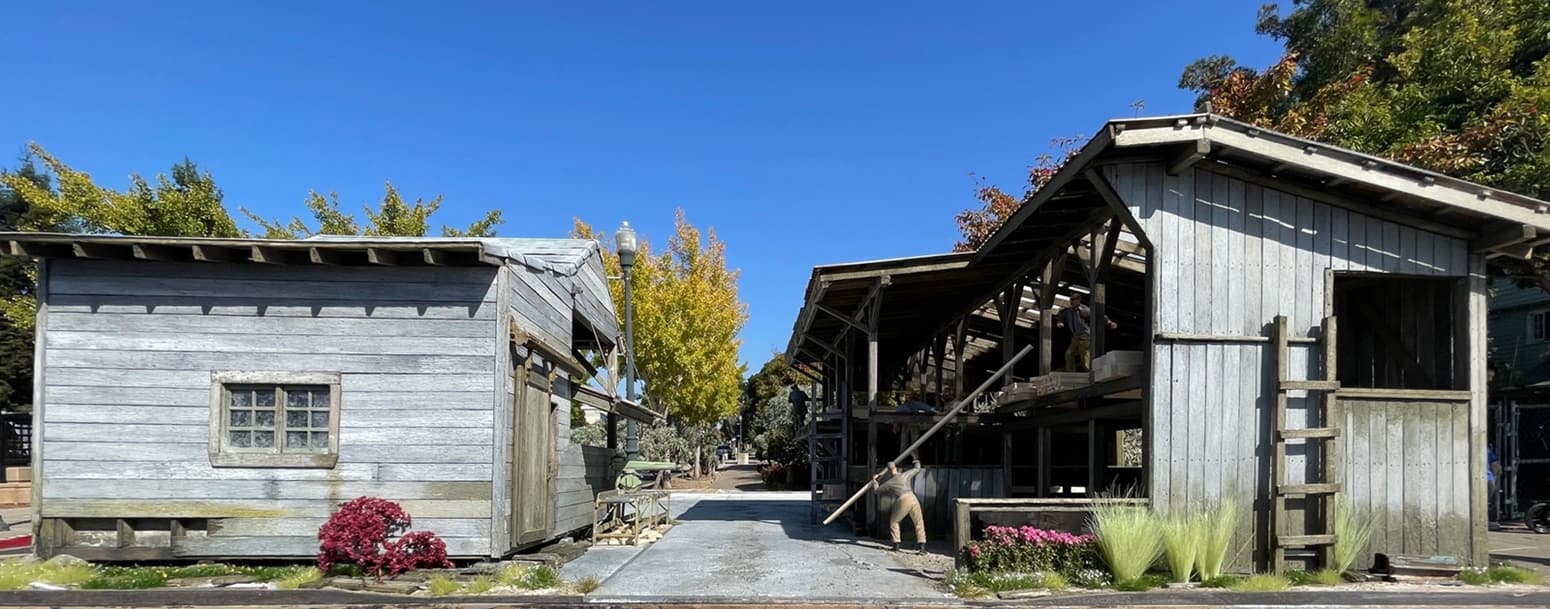
I think worth the wait. It’s funny how after years of taking outdoor pictures of models, and dealing with ridiculously dense and out of scale backgrounds, it finally occurred to me to use the parking lot across the street - it’s screened from view by landscaping, but once past that, it’s flat and relatively unobstructed, so good for taking pictures of models.

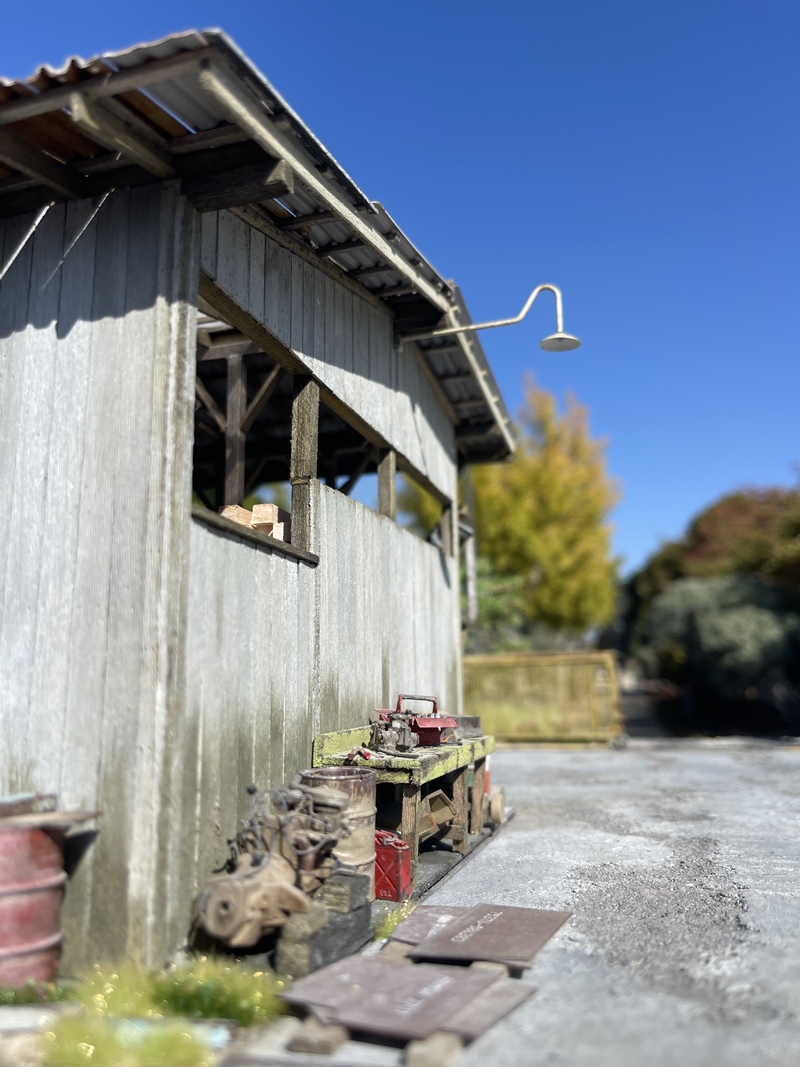
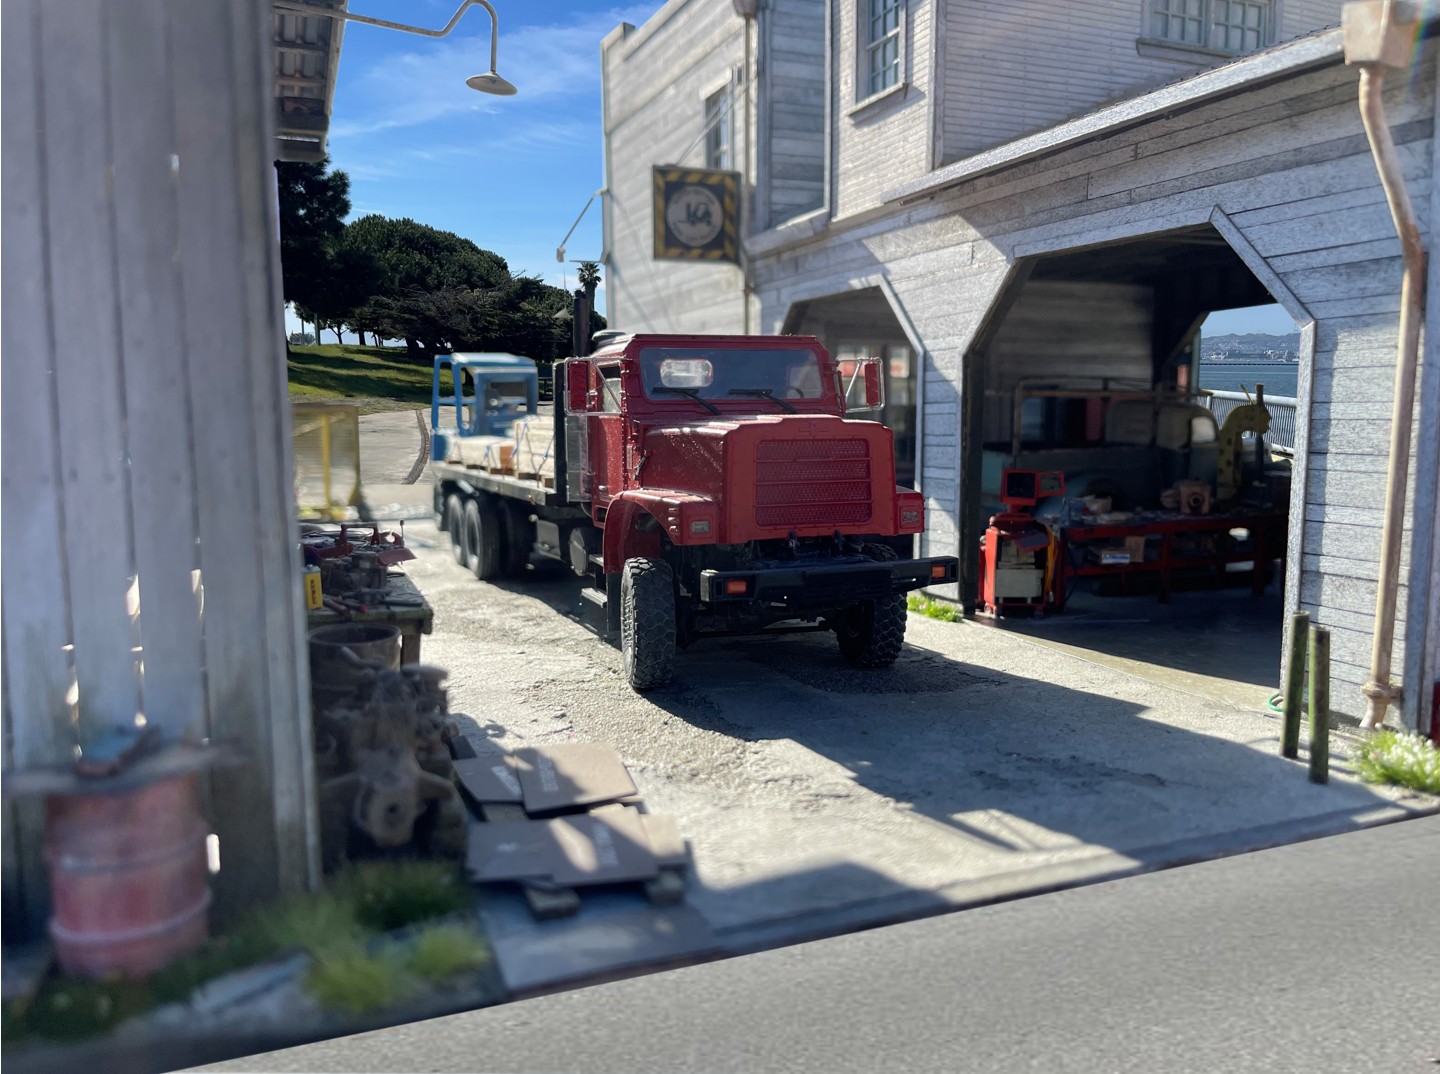
Each photo is cut out, meaning, you go through and crop out what you don’t want to see (like out of scale or context background stuff) and then superimpose the cut out photo over more desirable background pictures. Nothing about the original picture color, brightness etc is changed. While a bit slow going, well, if a project takes months to build, taking some time to take and set up photos is well worth the effort, and I’ve come to enjoy doing it.

To quote the great Marty DeBergi, “enough of my yappin” and on to some more photos:

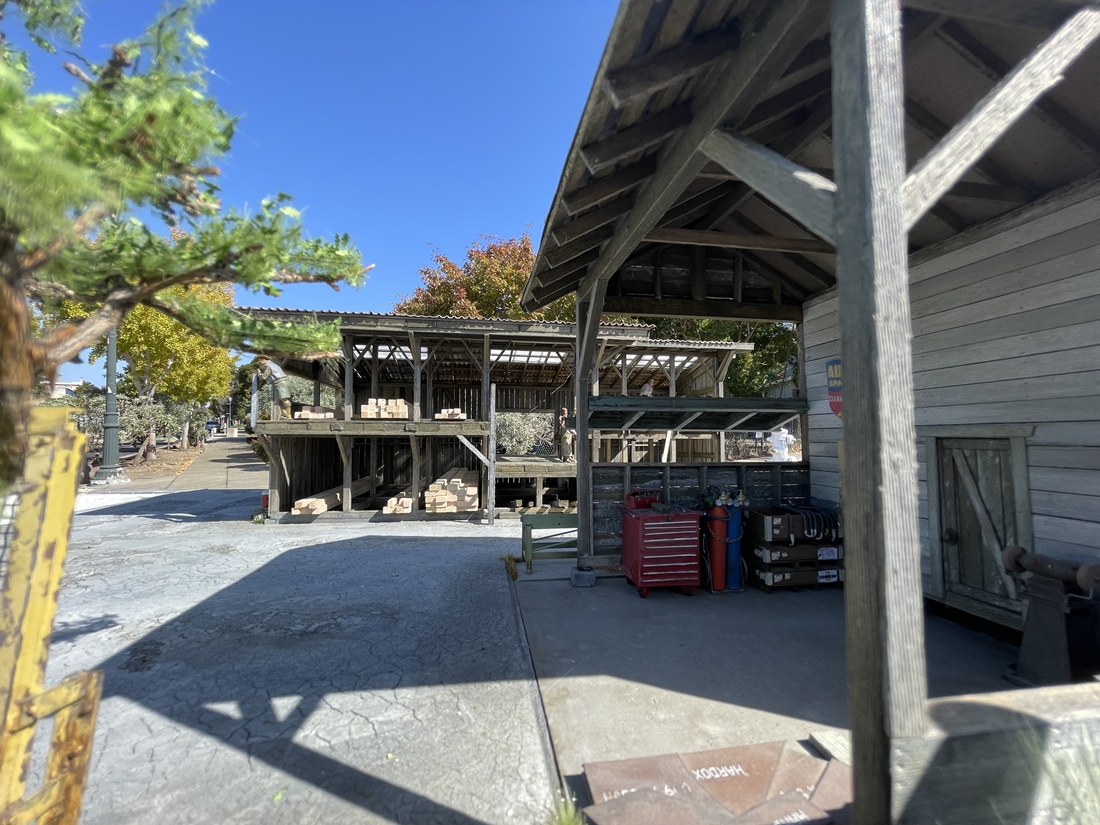
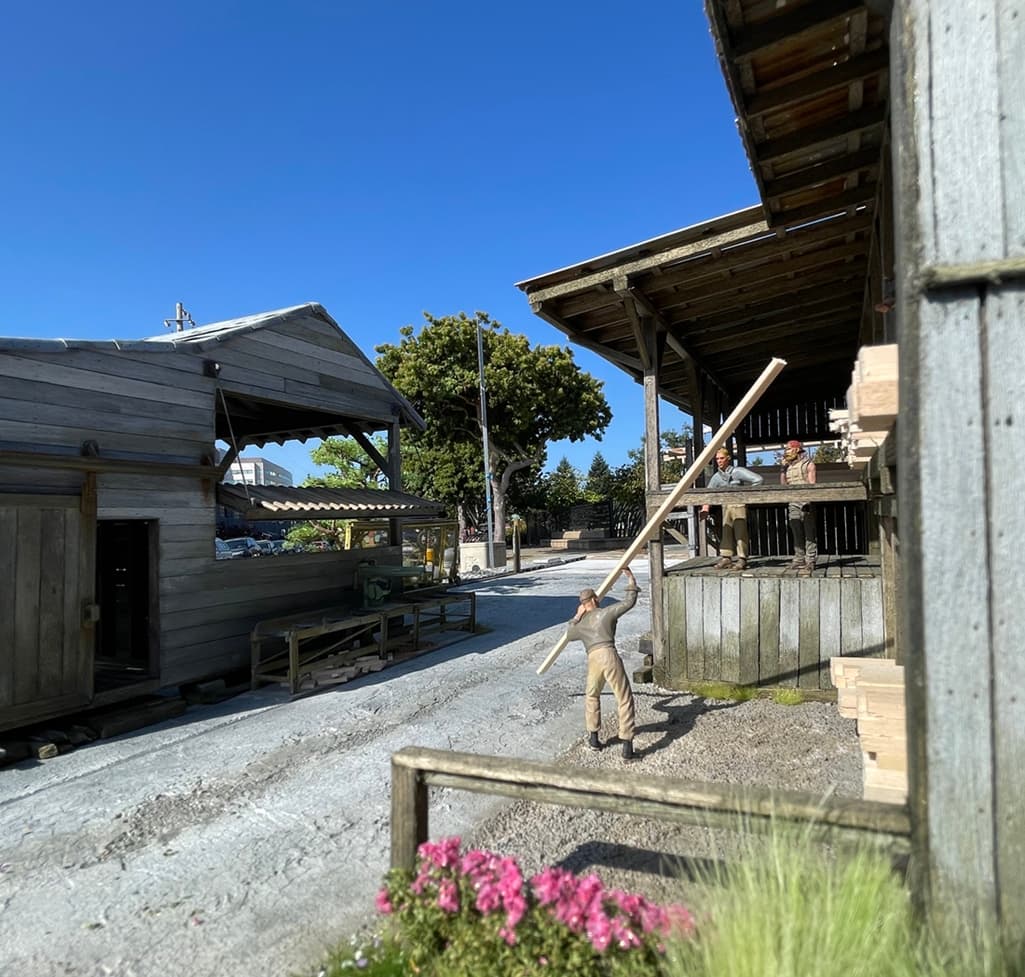
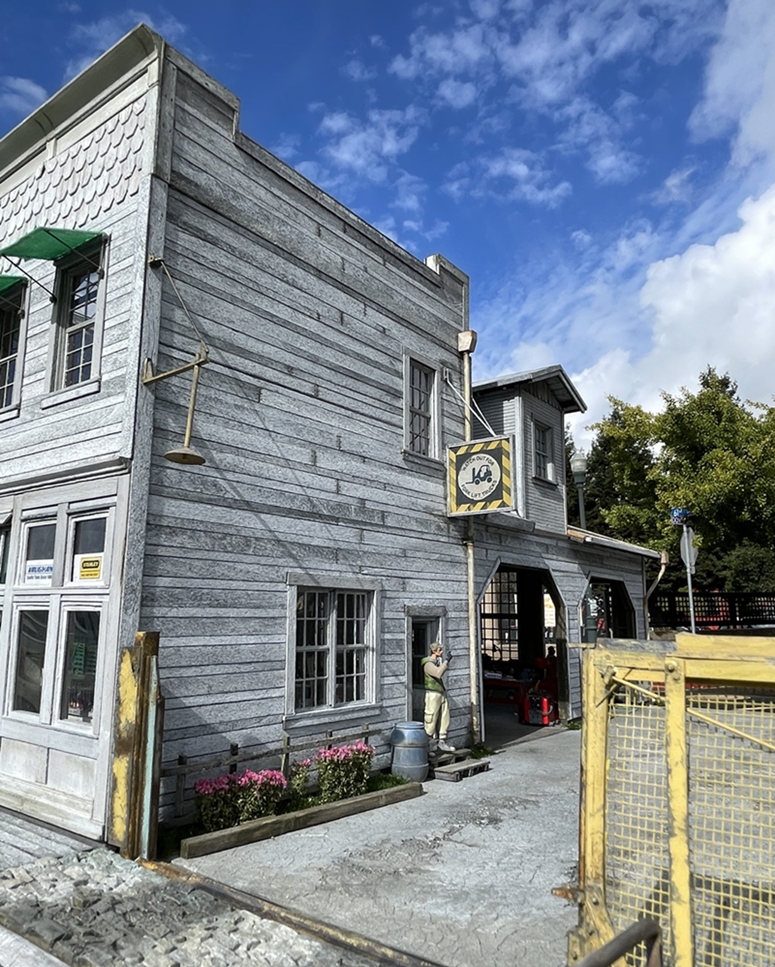
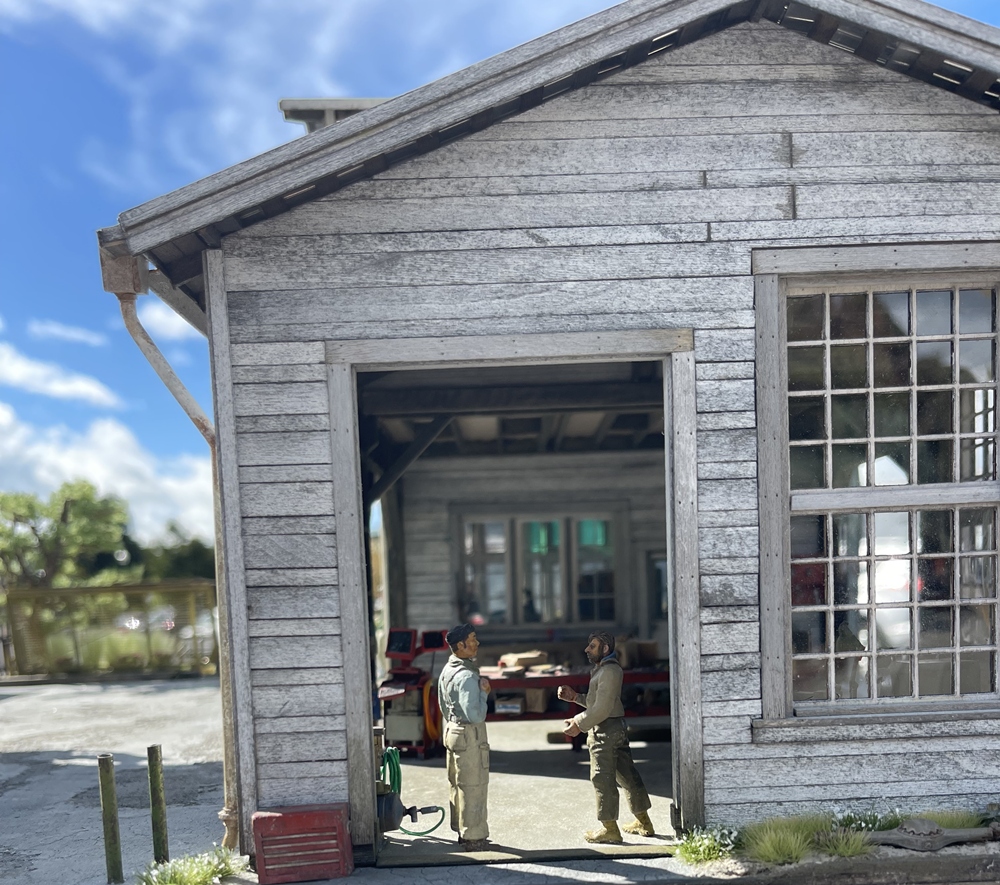
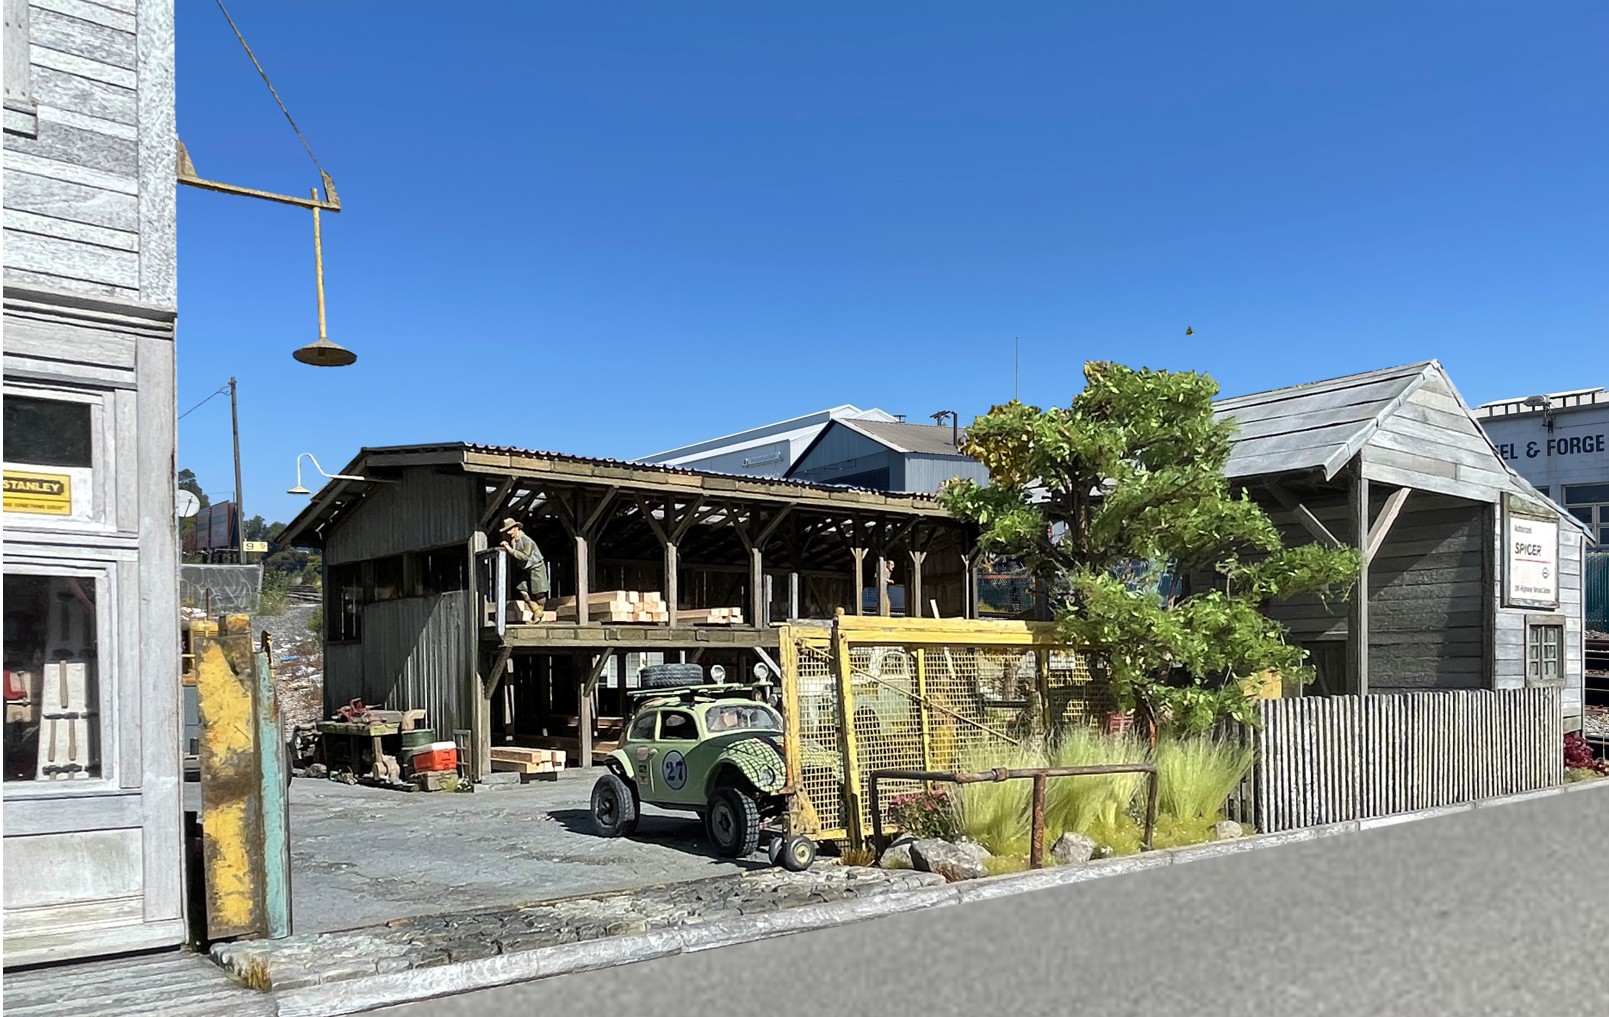
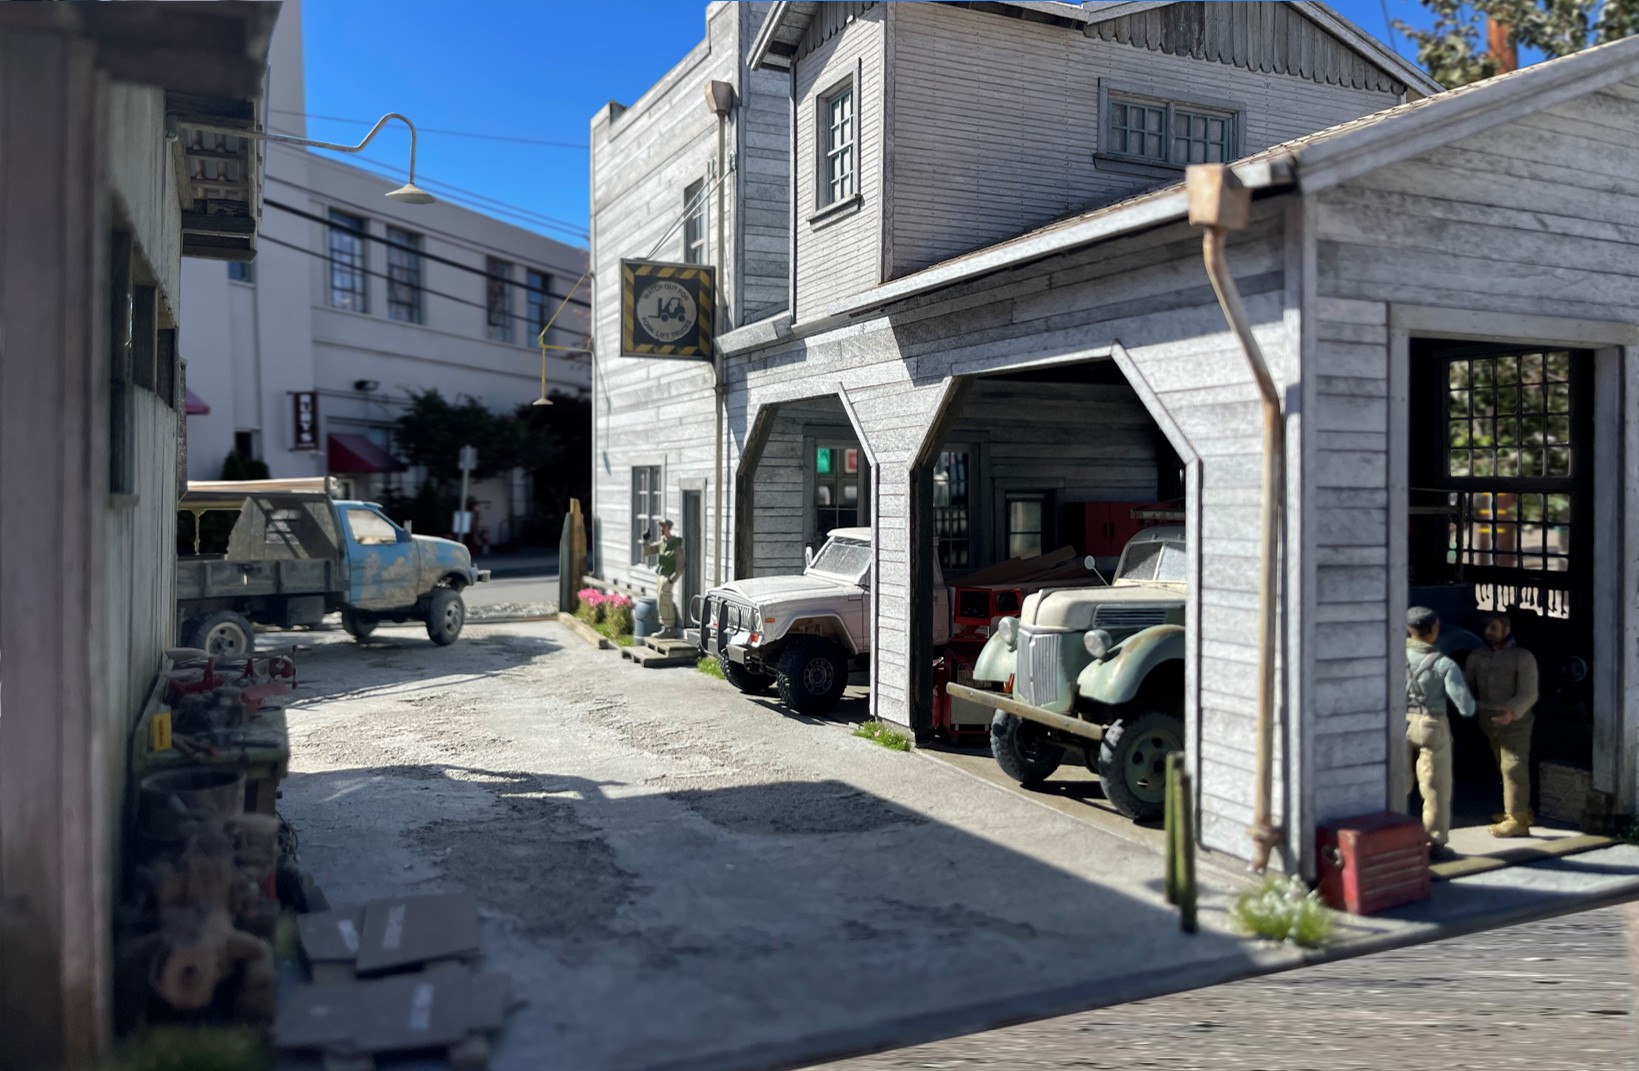
It seems there’s a guy with a tricked out Baja bug at every lumber yard, so there’s one here too

What a treat! all this 4x4 action right on Main Street! :grinning_face_with_smiling_eyes:

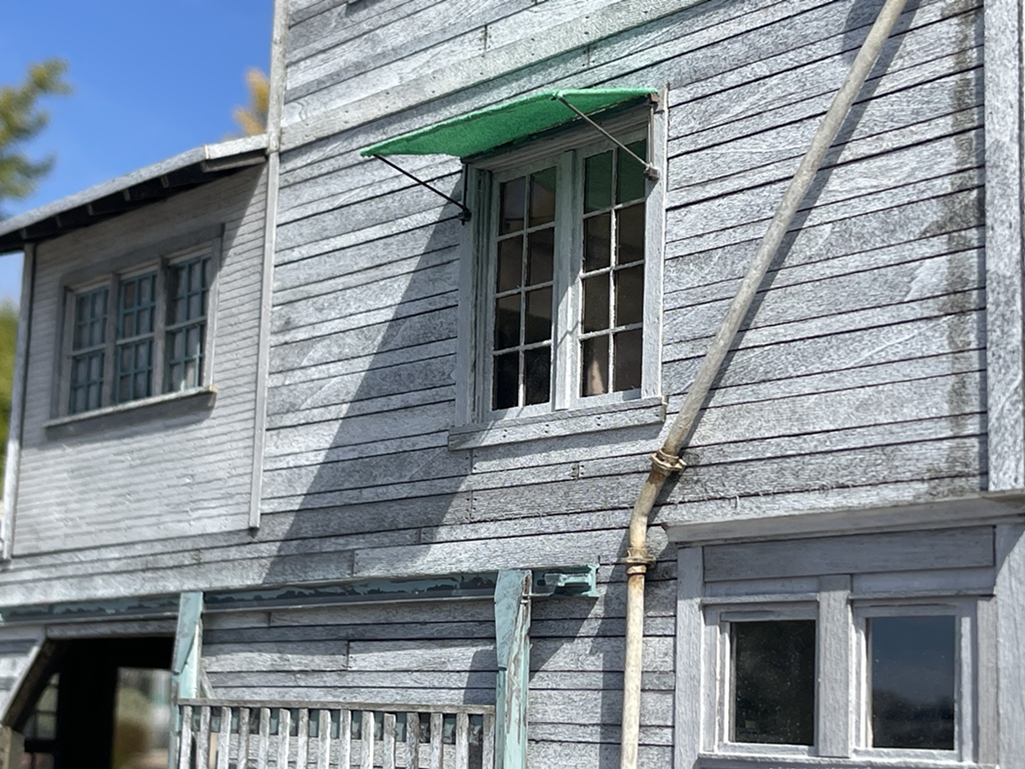
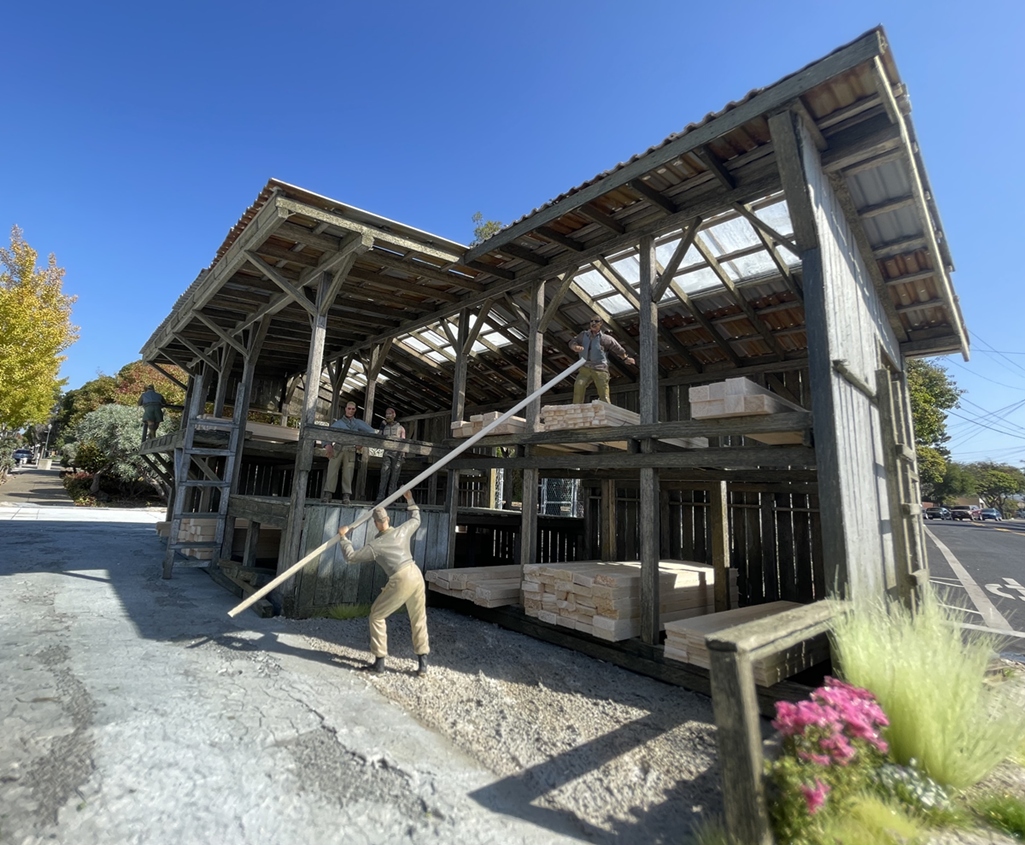
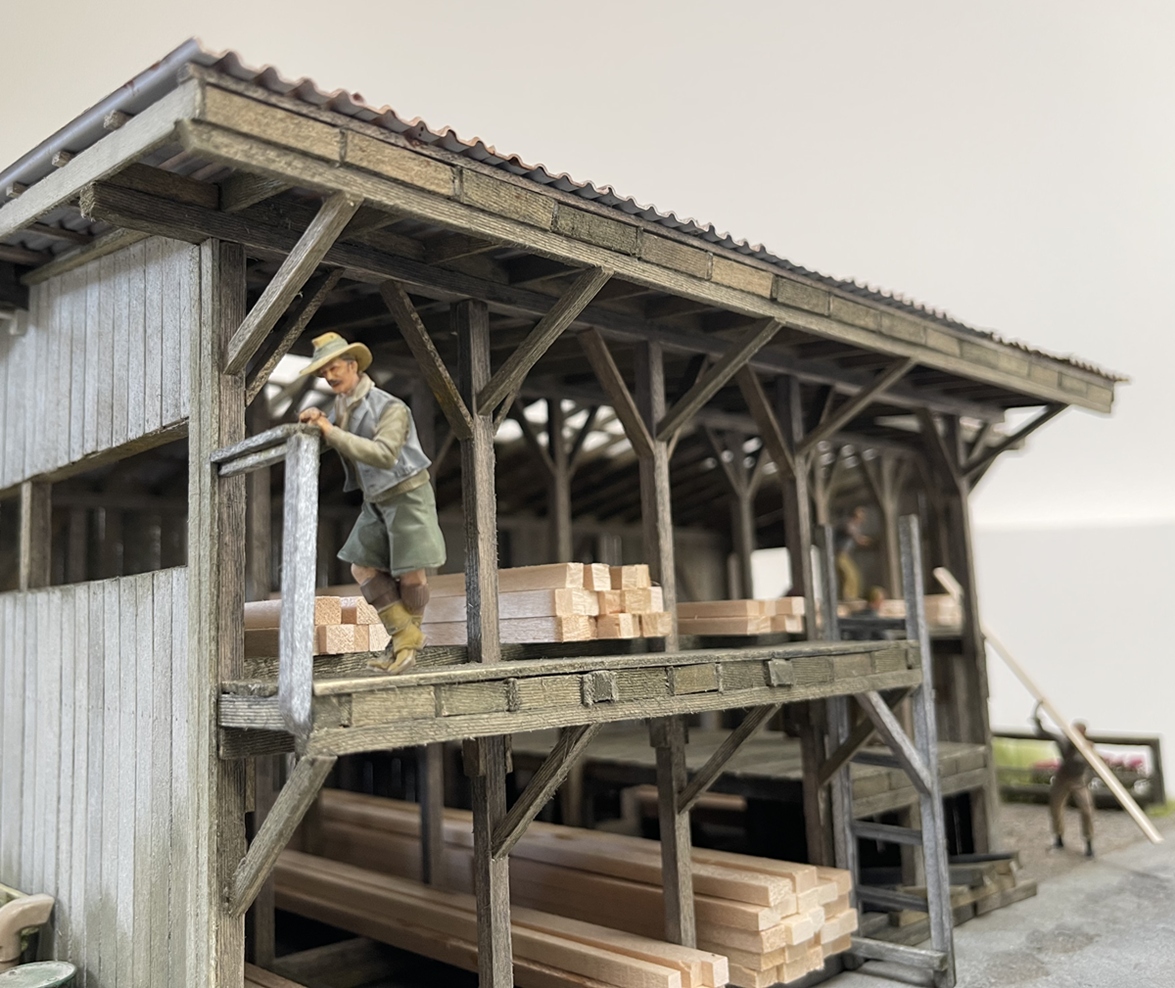
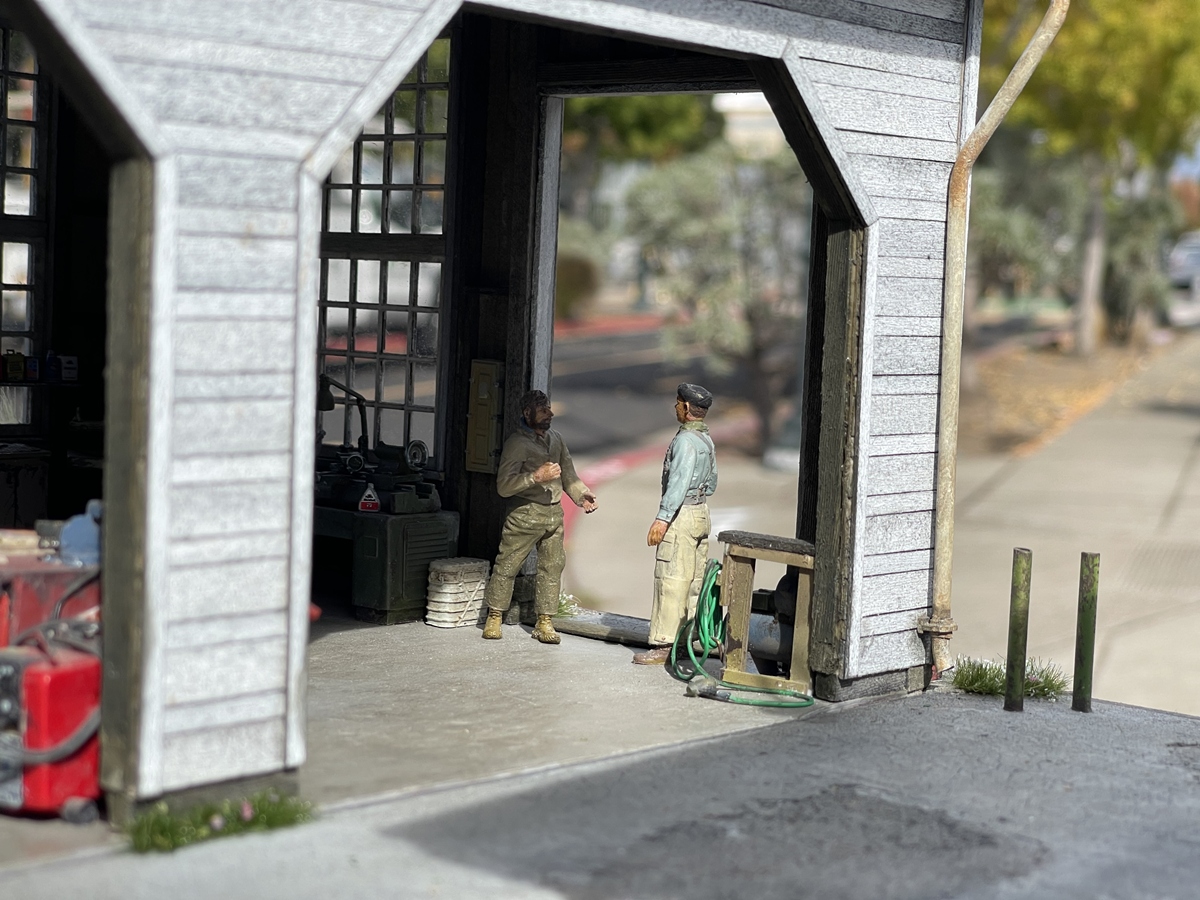
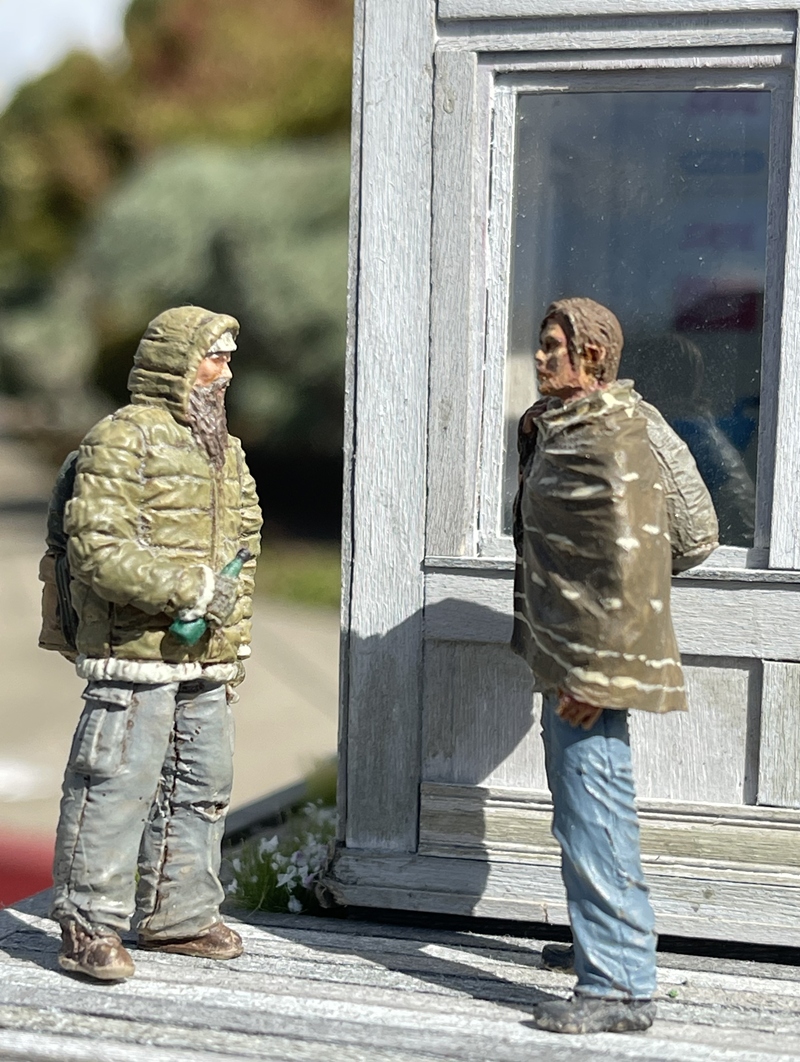
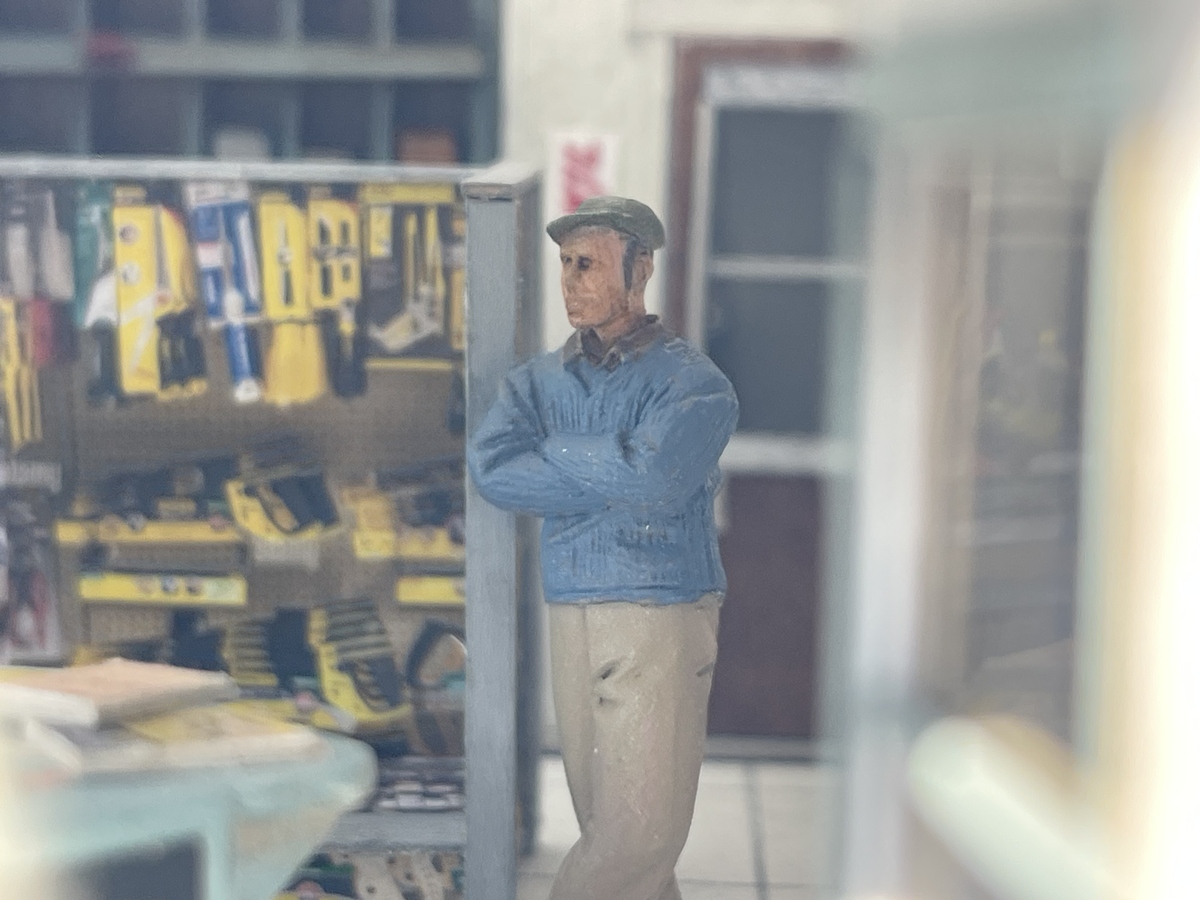
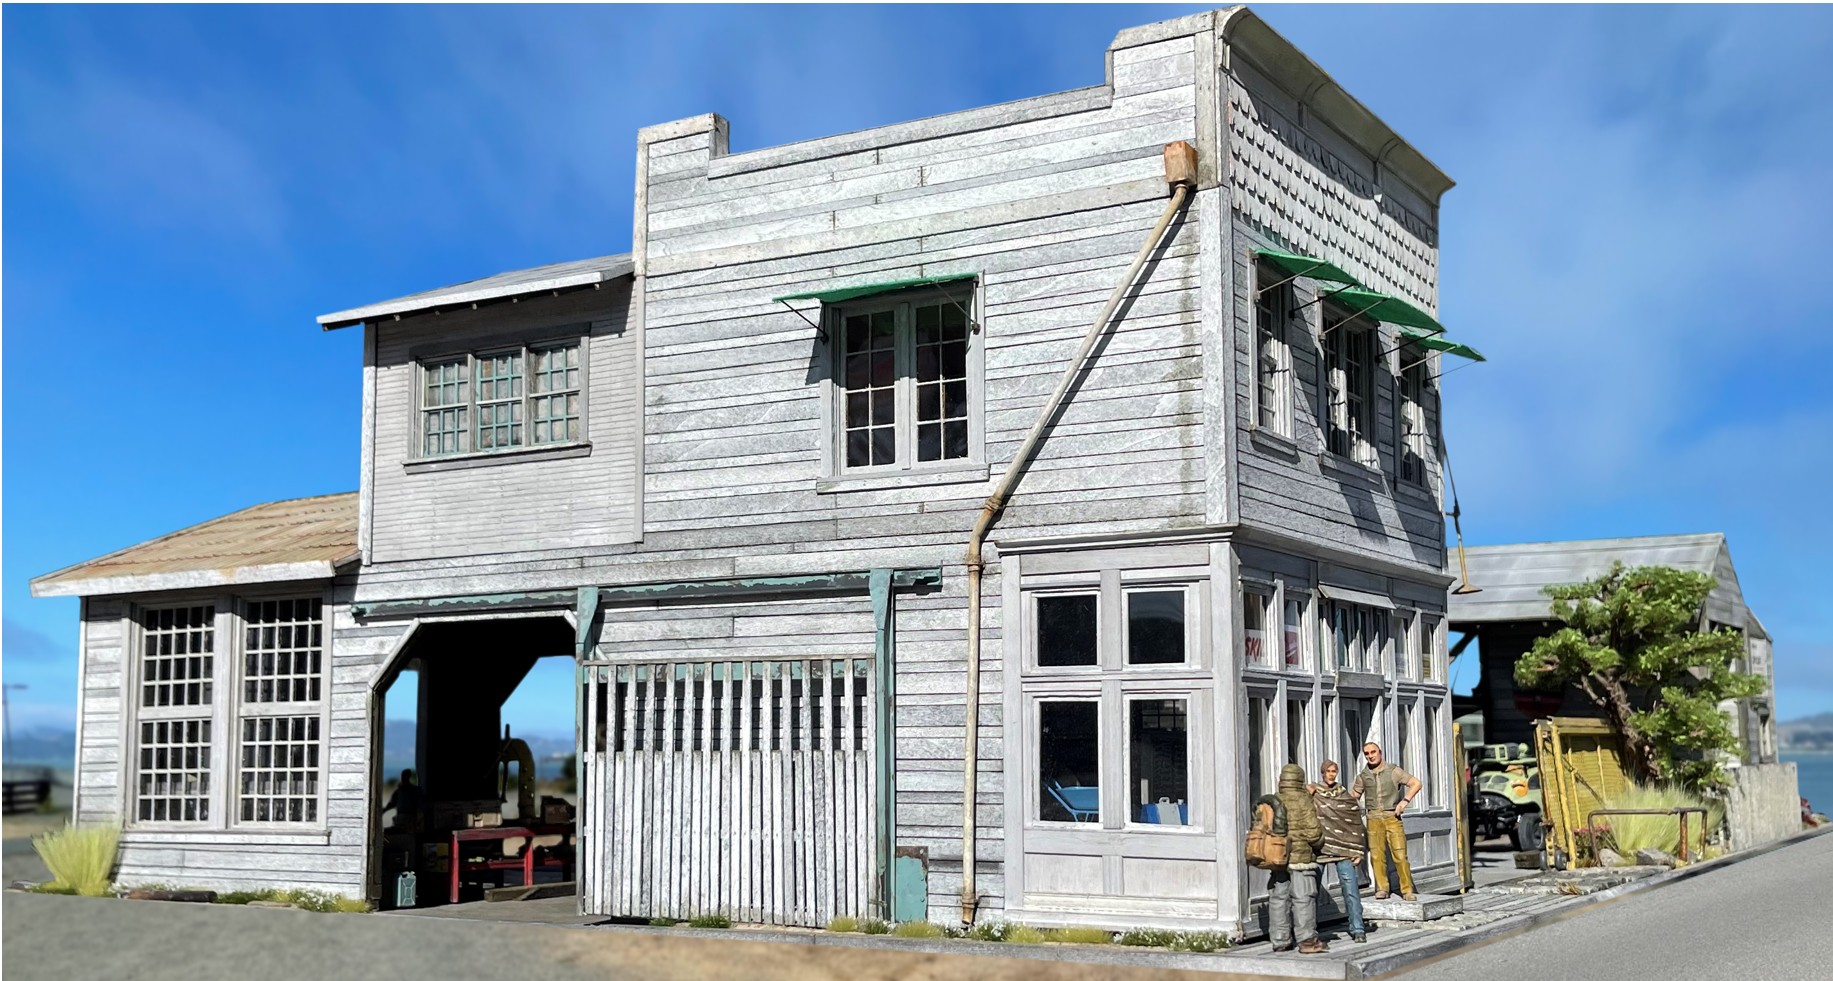
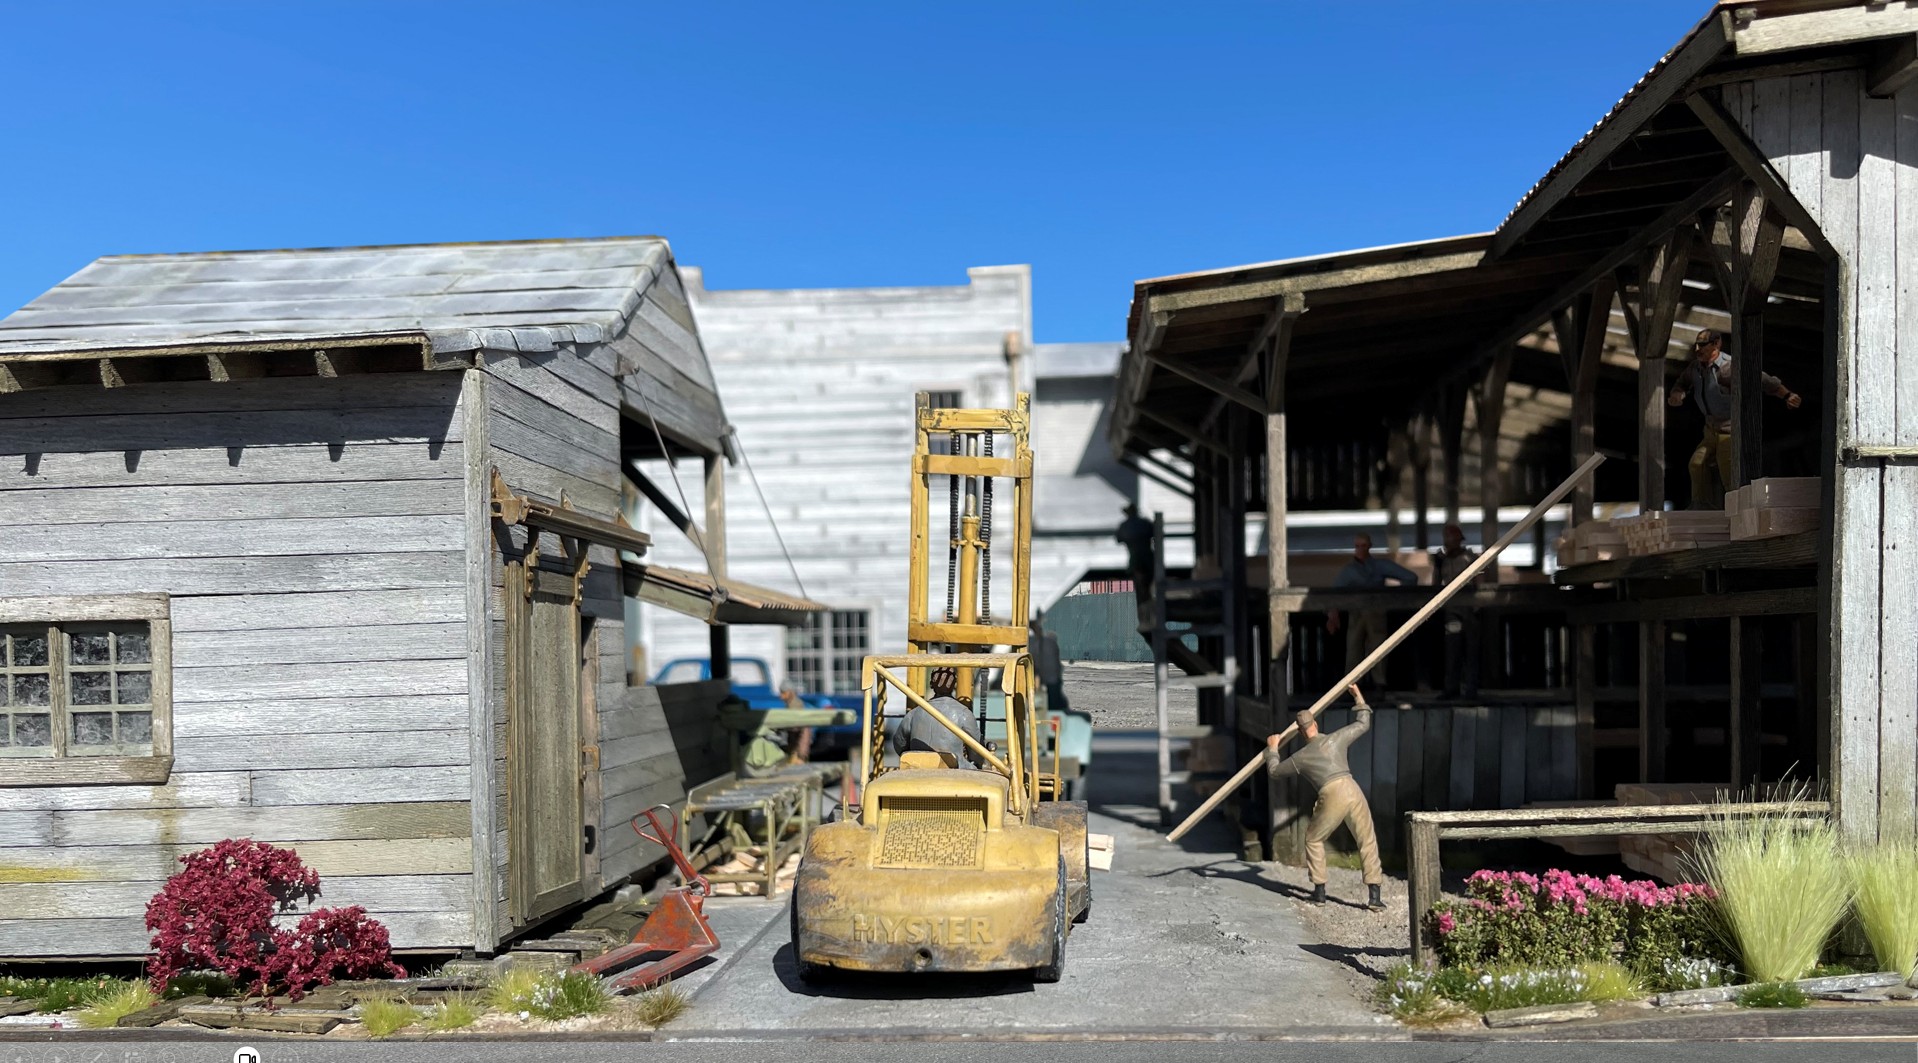
I left a note for Jerry @JRutman on his current build noting how he manages to get color and texture on his figures with no shine - me and these two are envious of that!

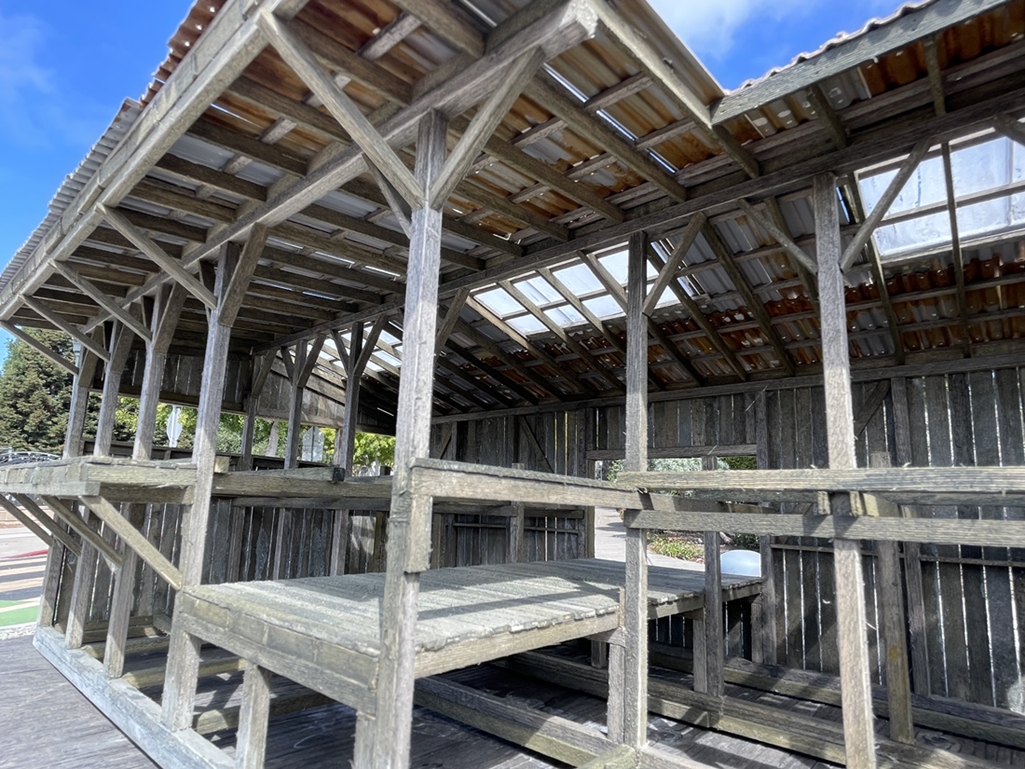
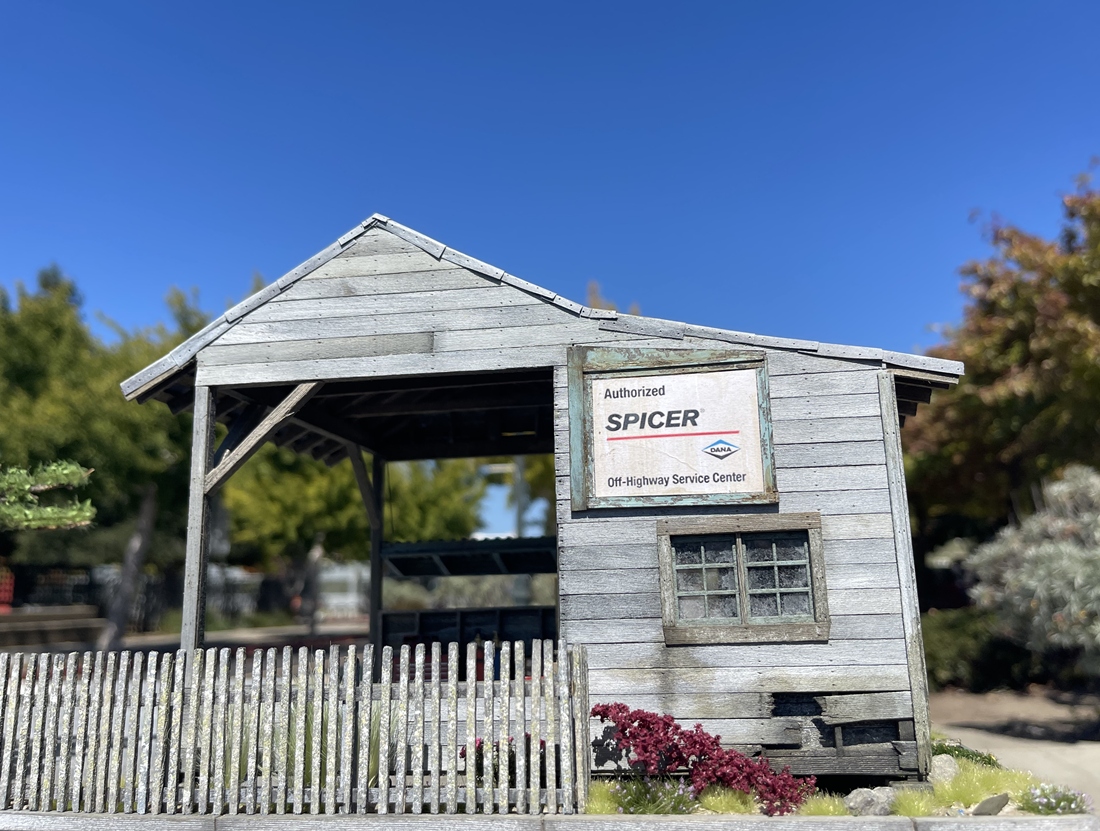
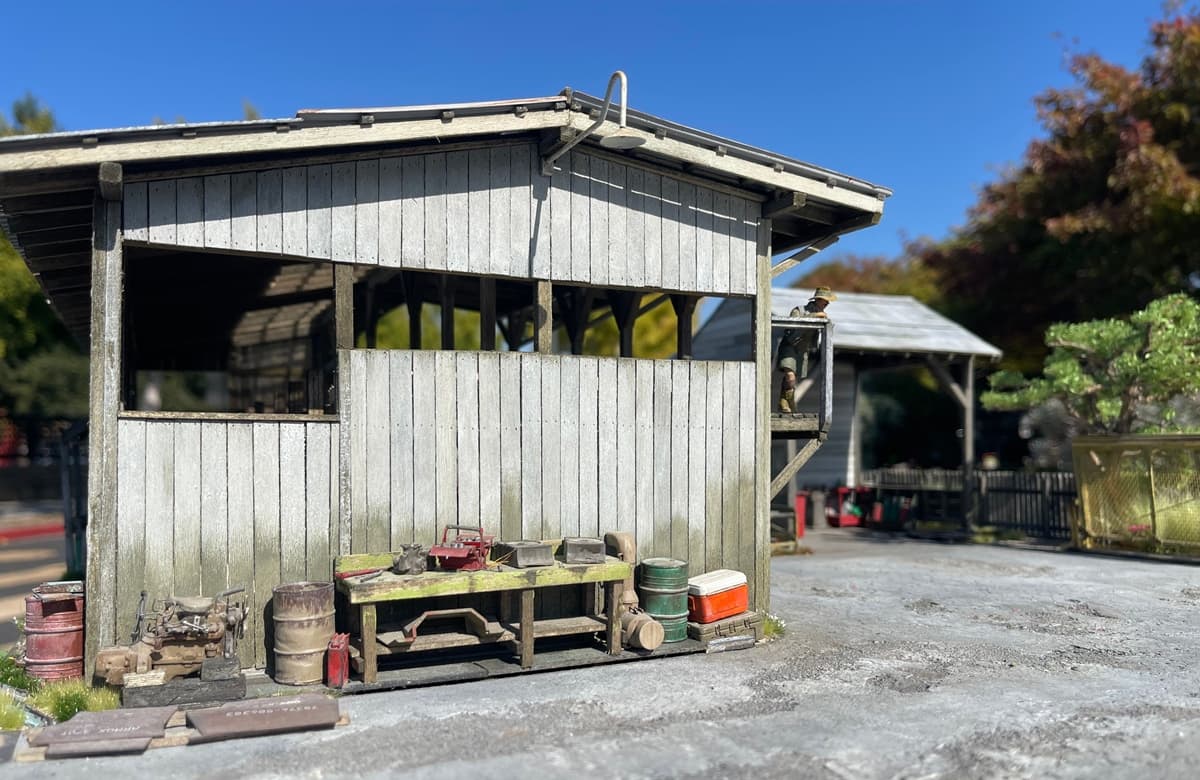
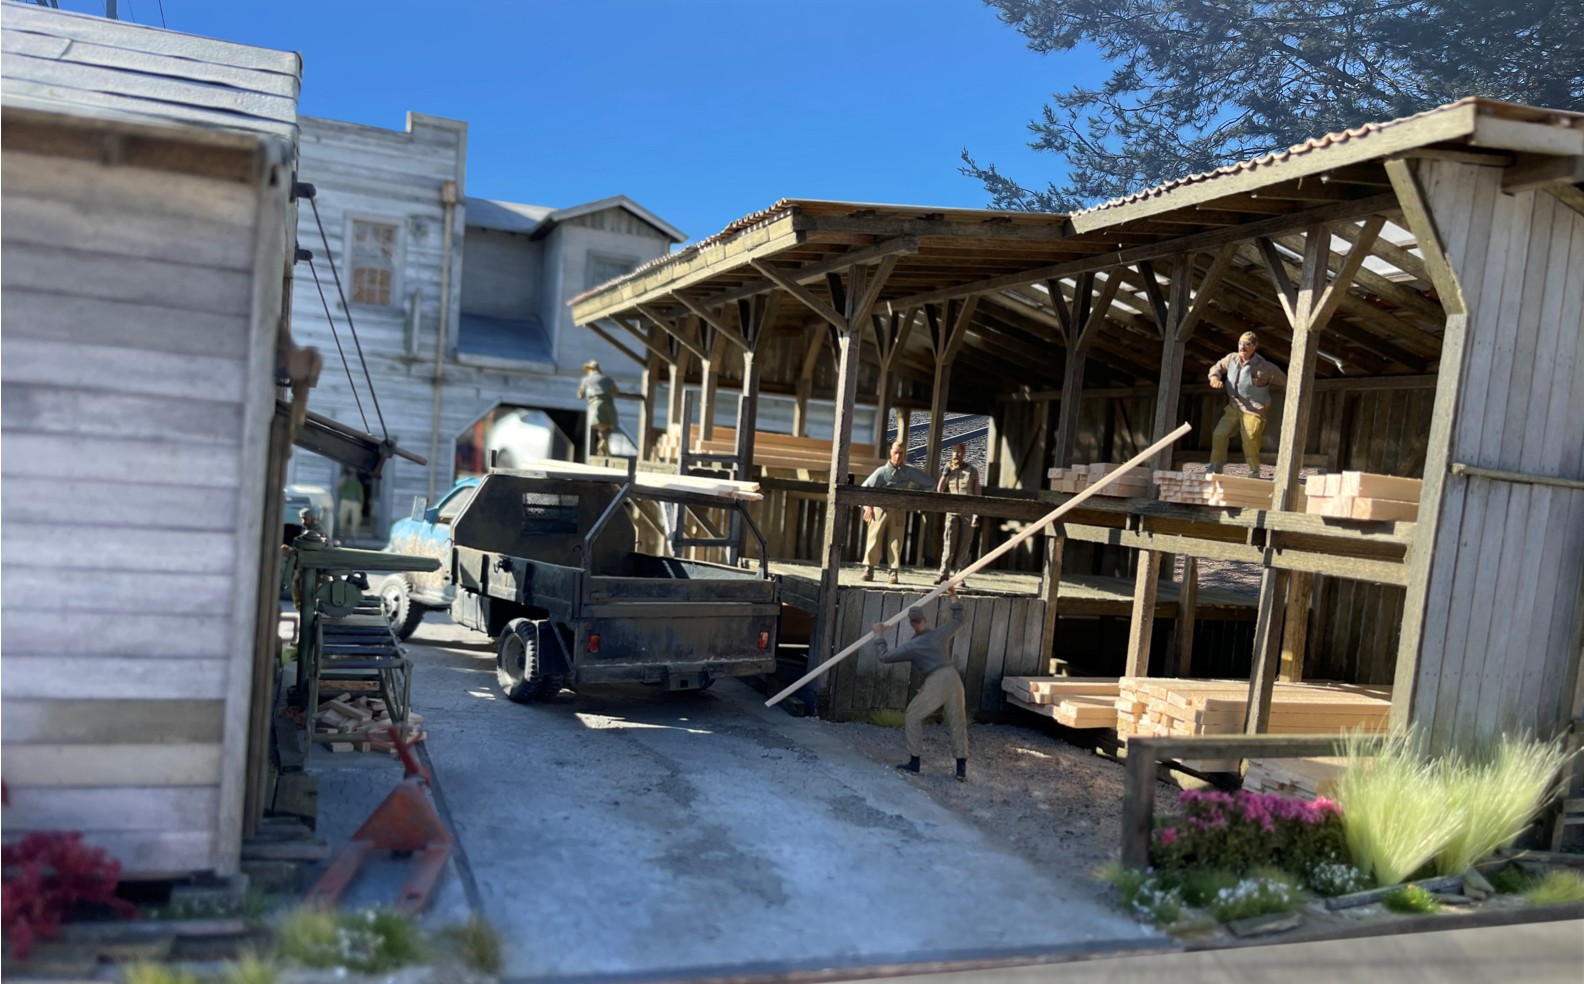
The background for this pic is a lumber yard about a mile from me, but unhappily, the pictures are south facing - so this is what we get, glare etc - there you go. But, the foreman, on the upper deck has very little if any shine, so that’s good!

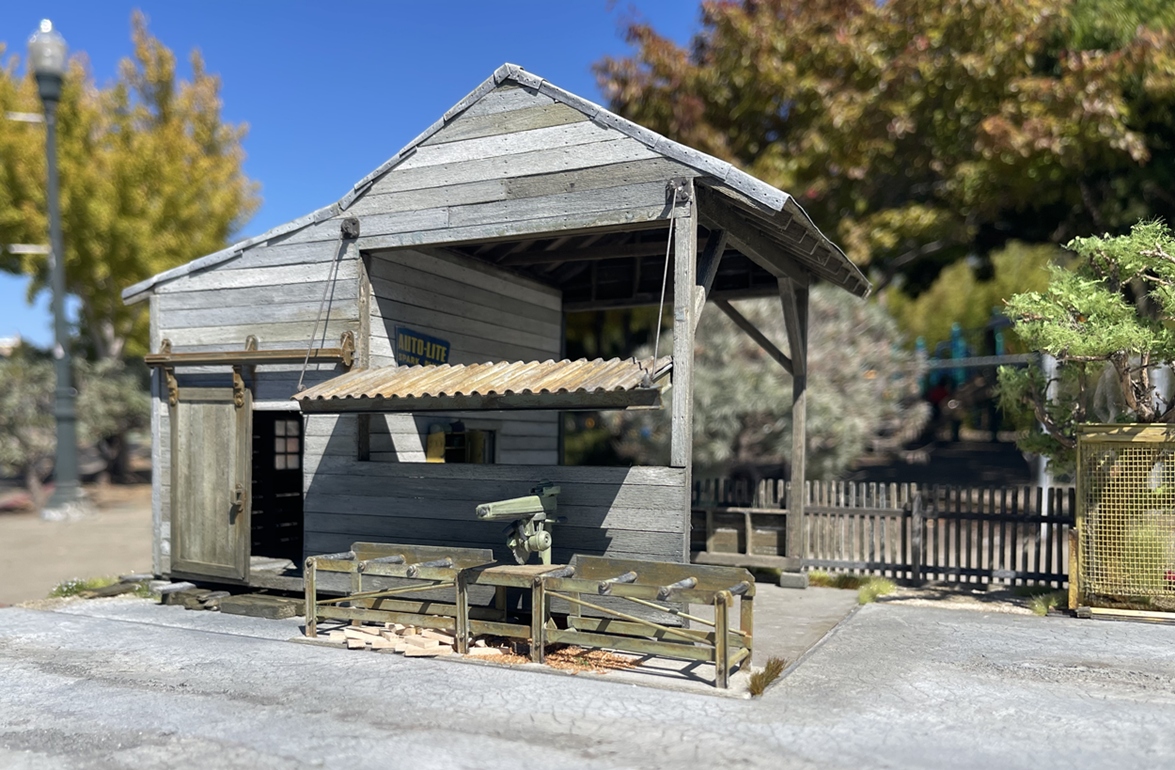
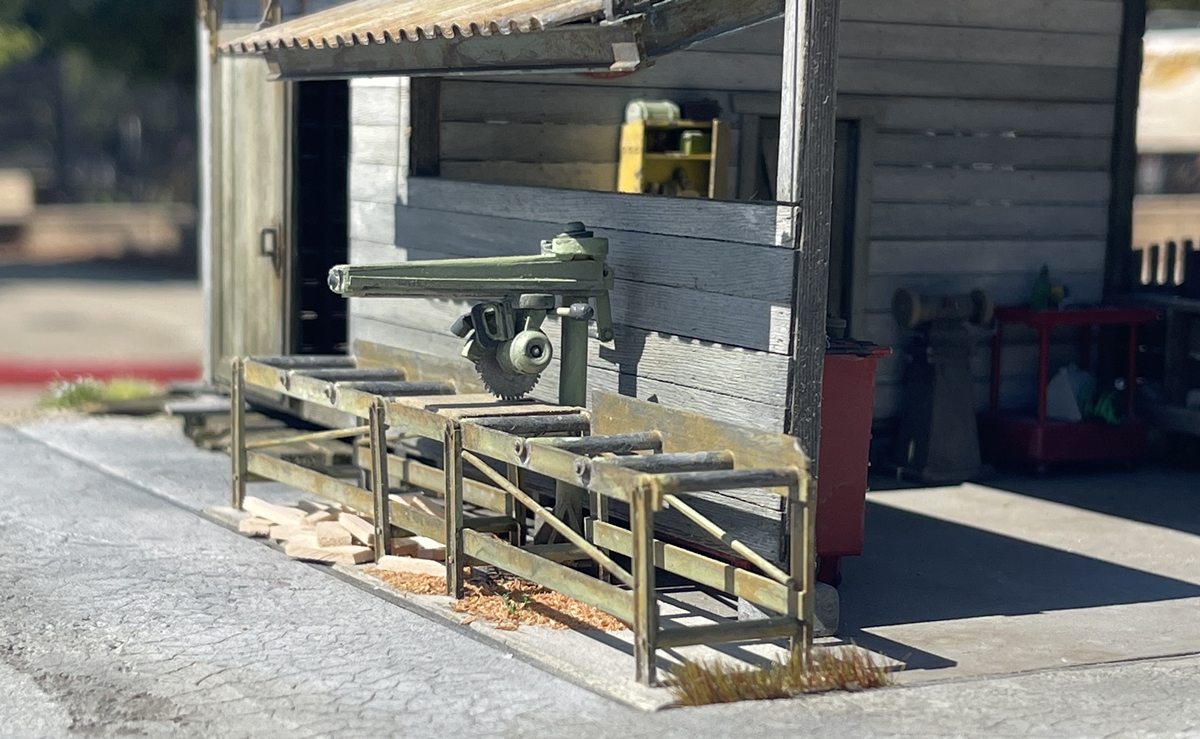
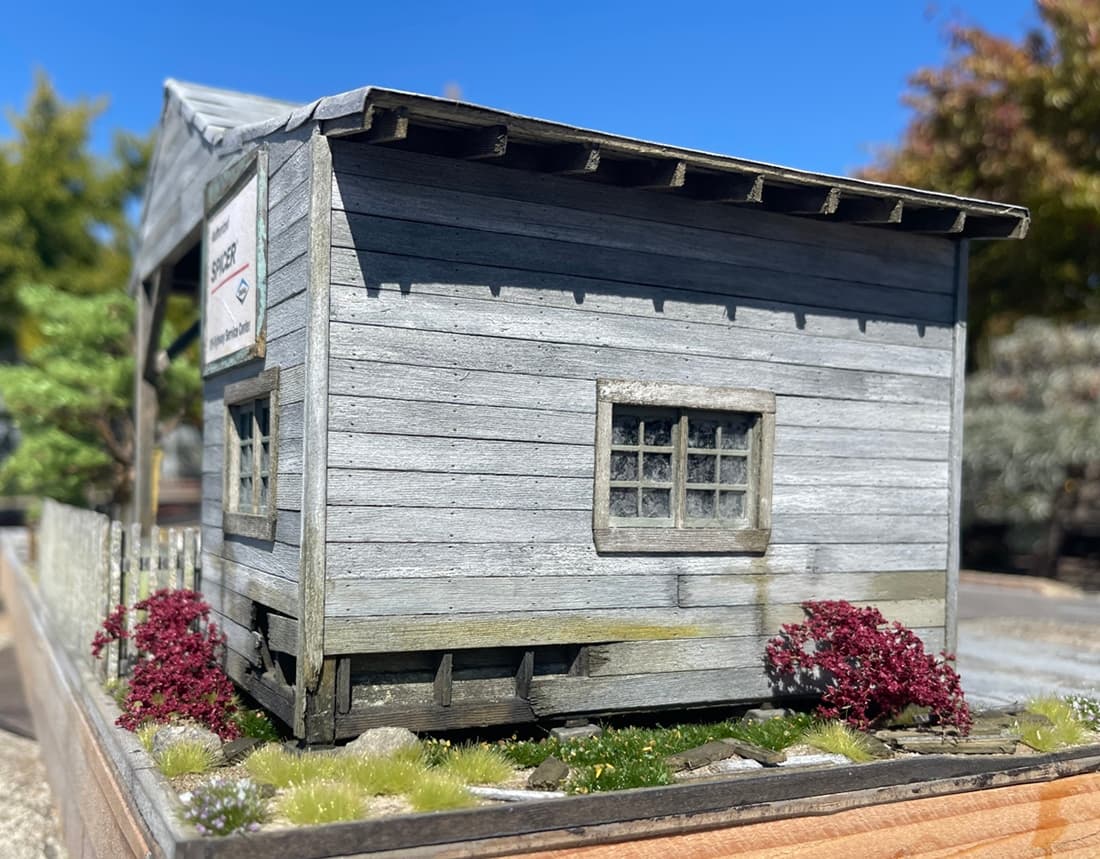
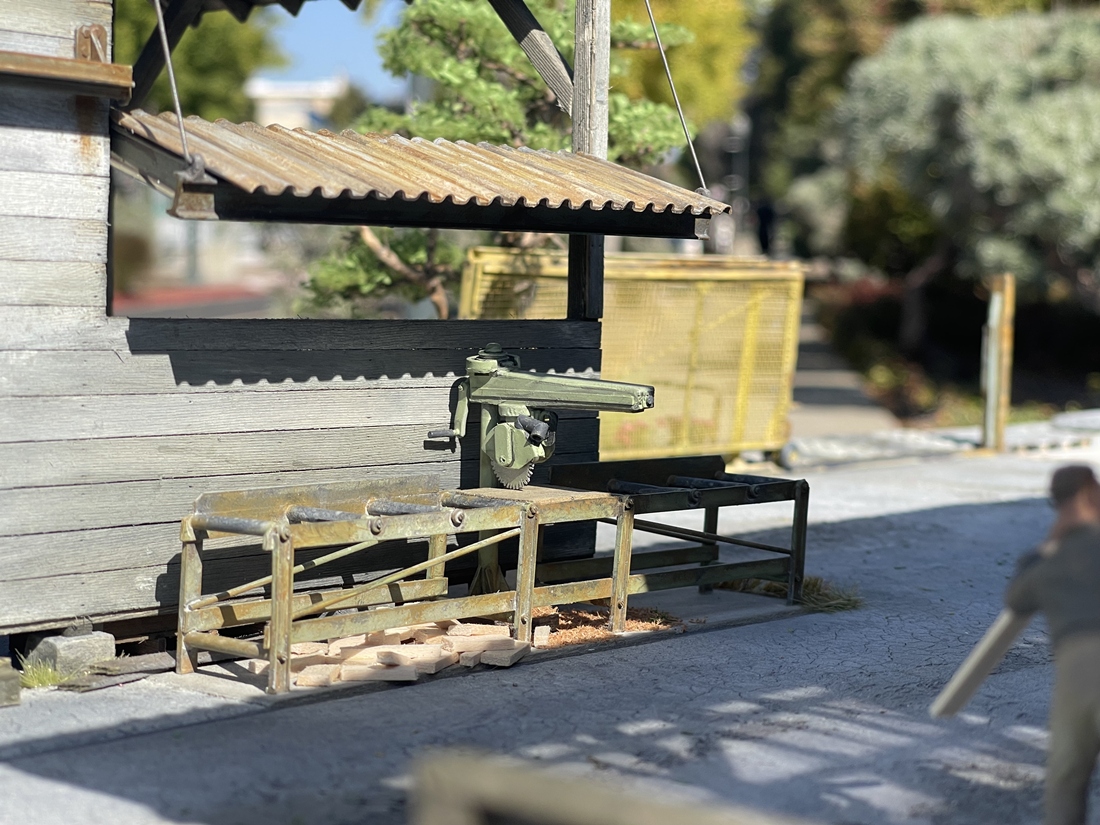
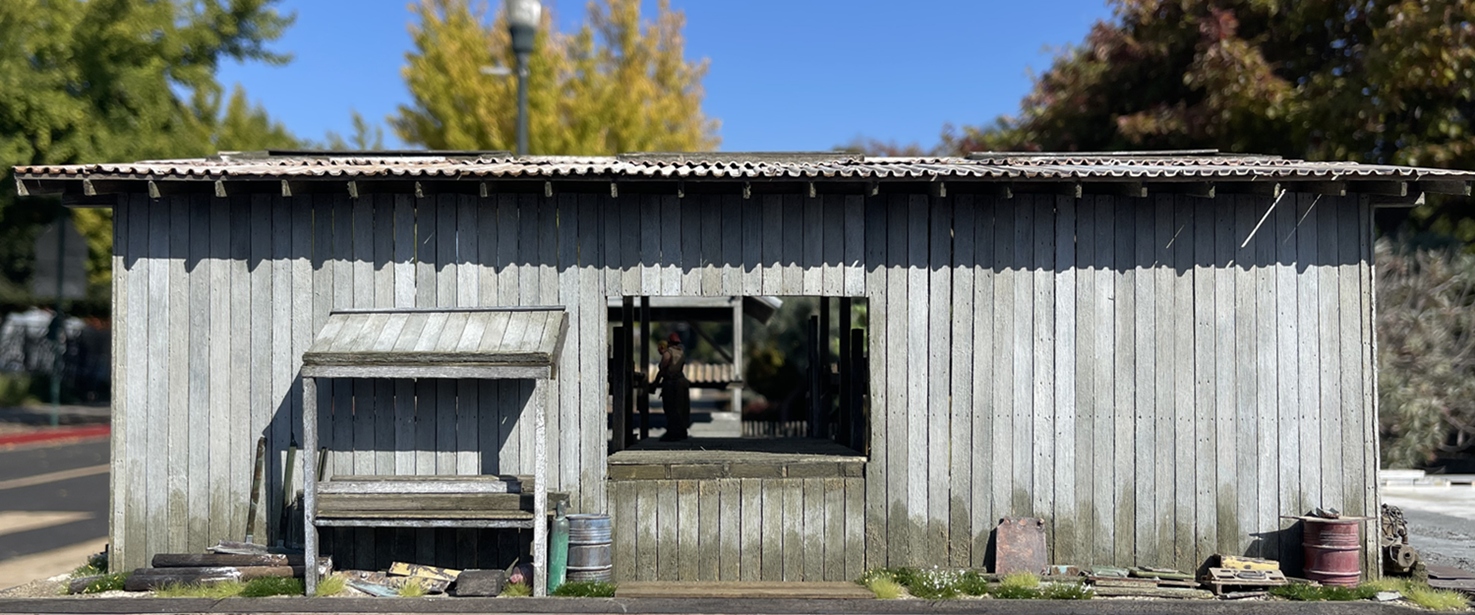
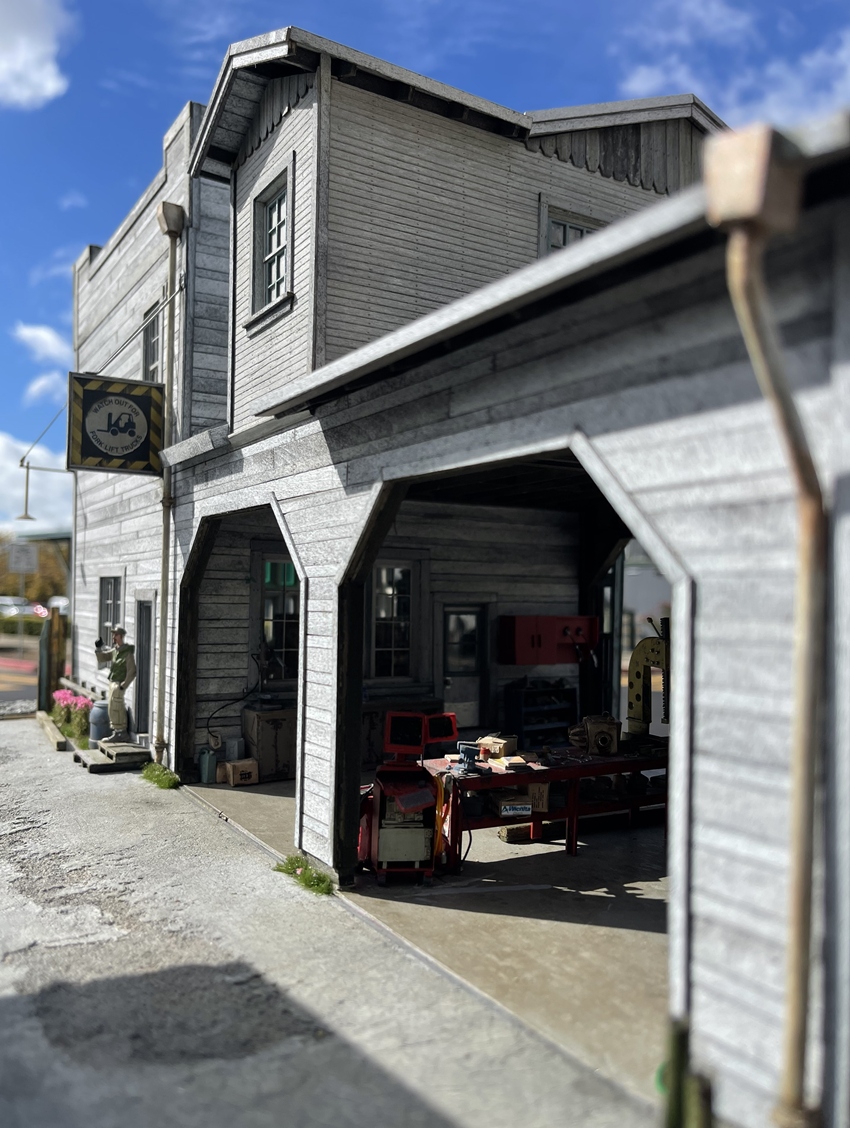
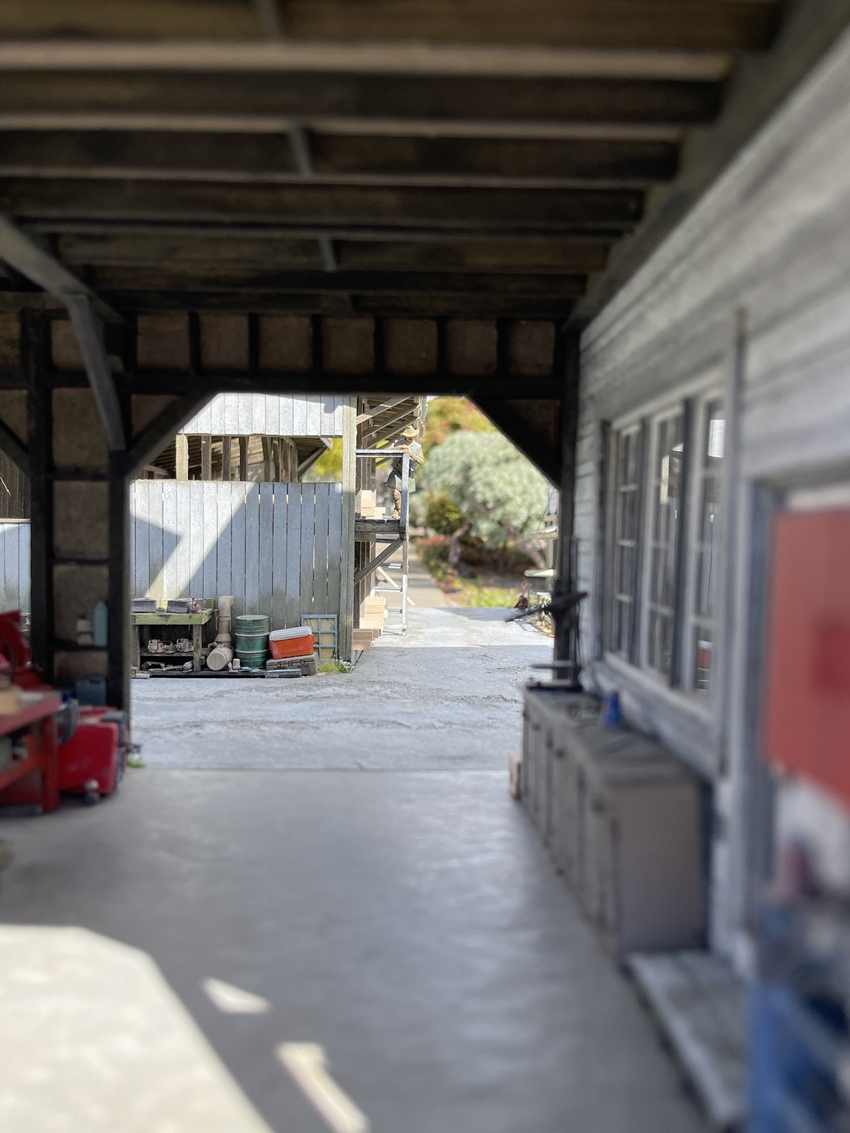
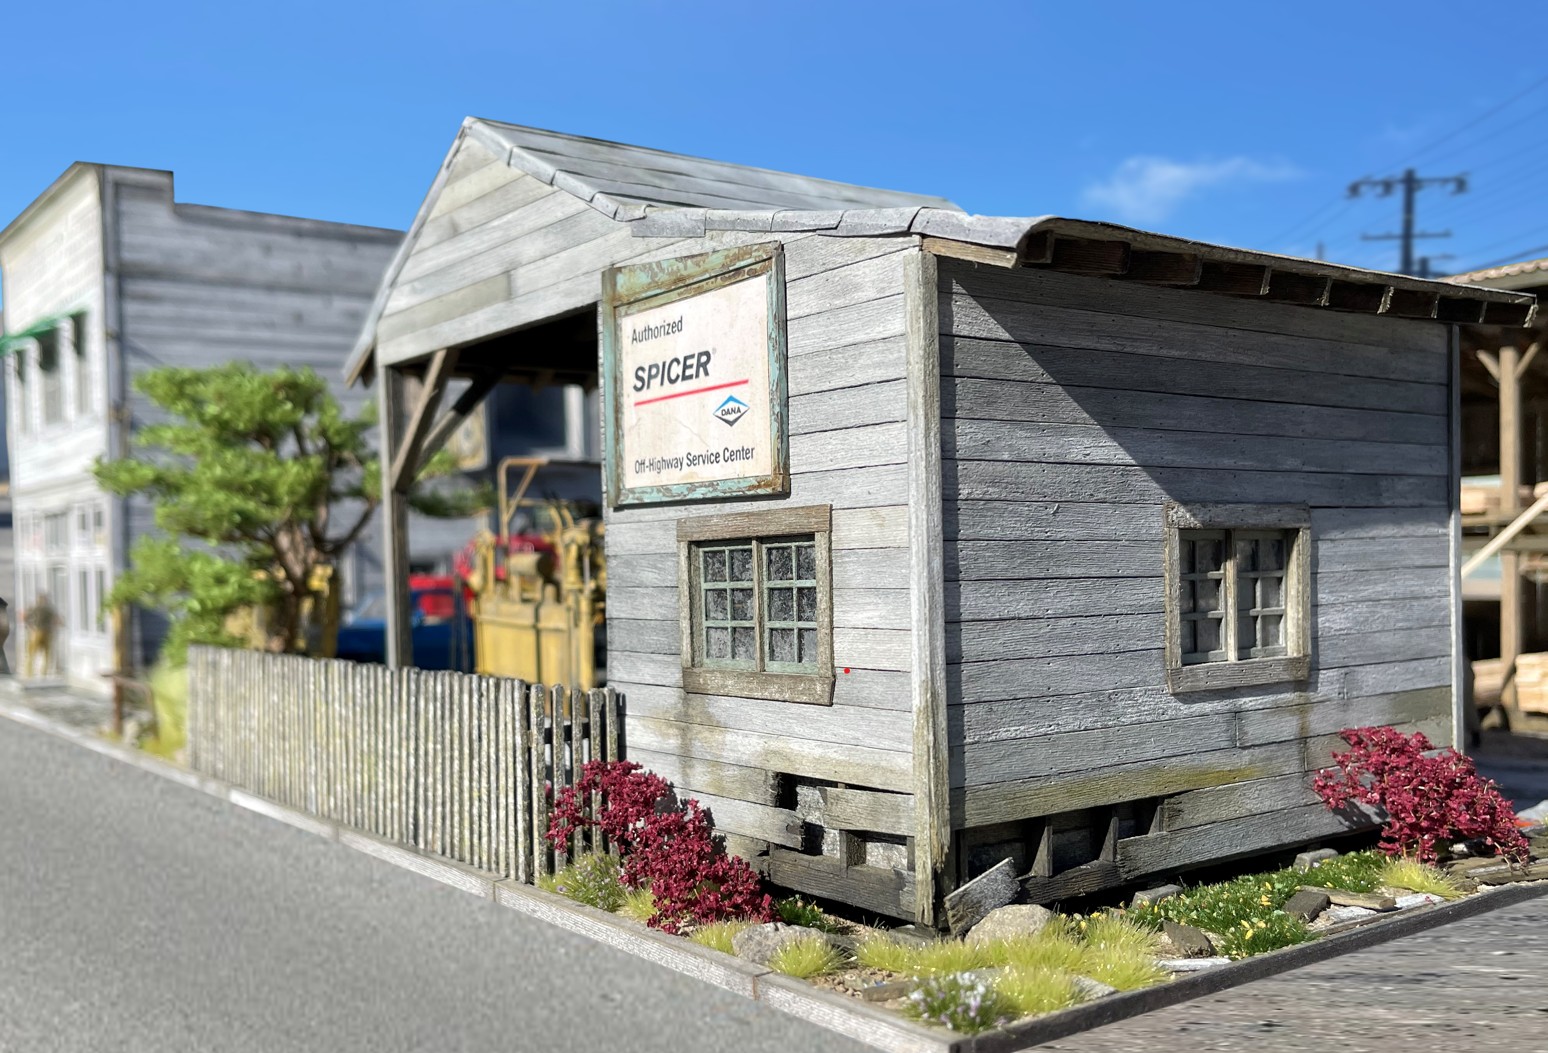
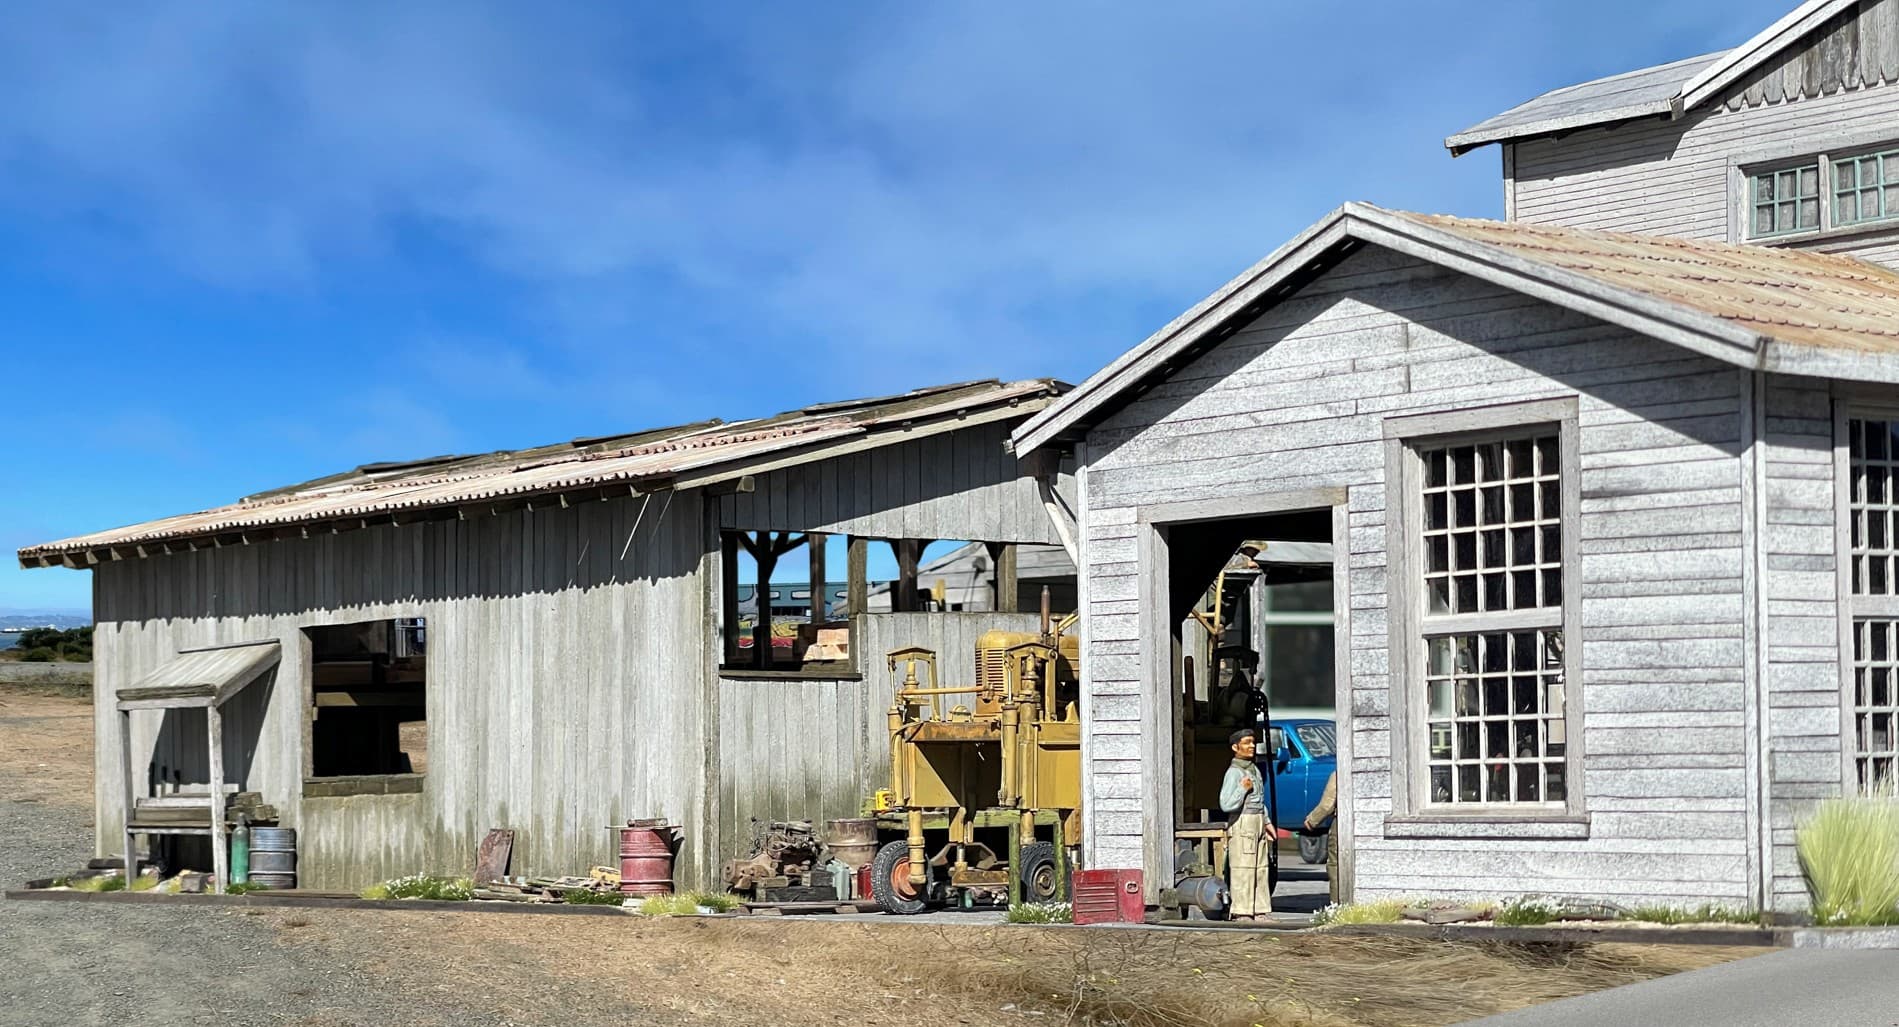
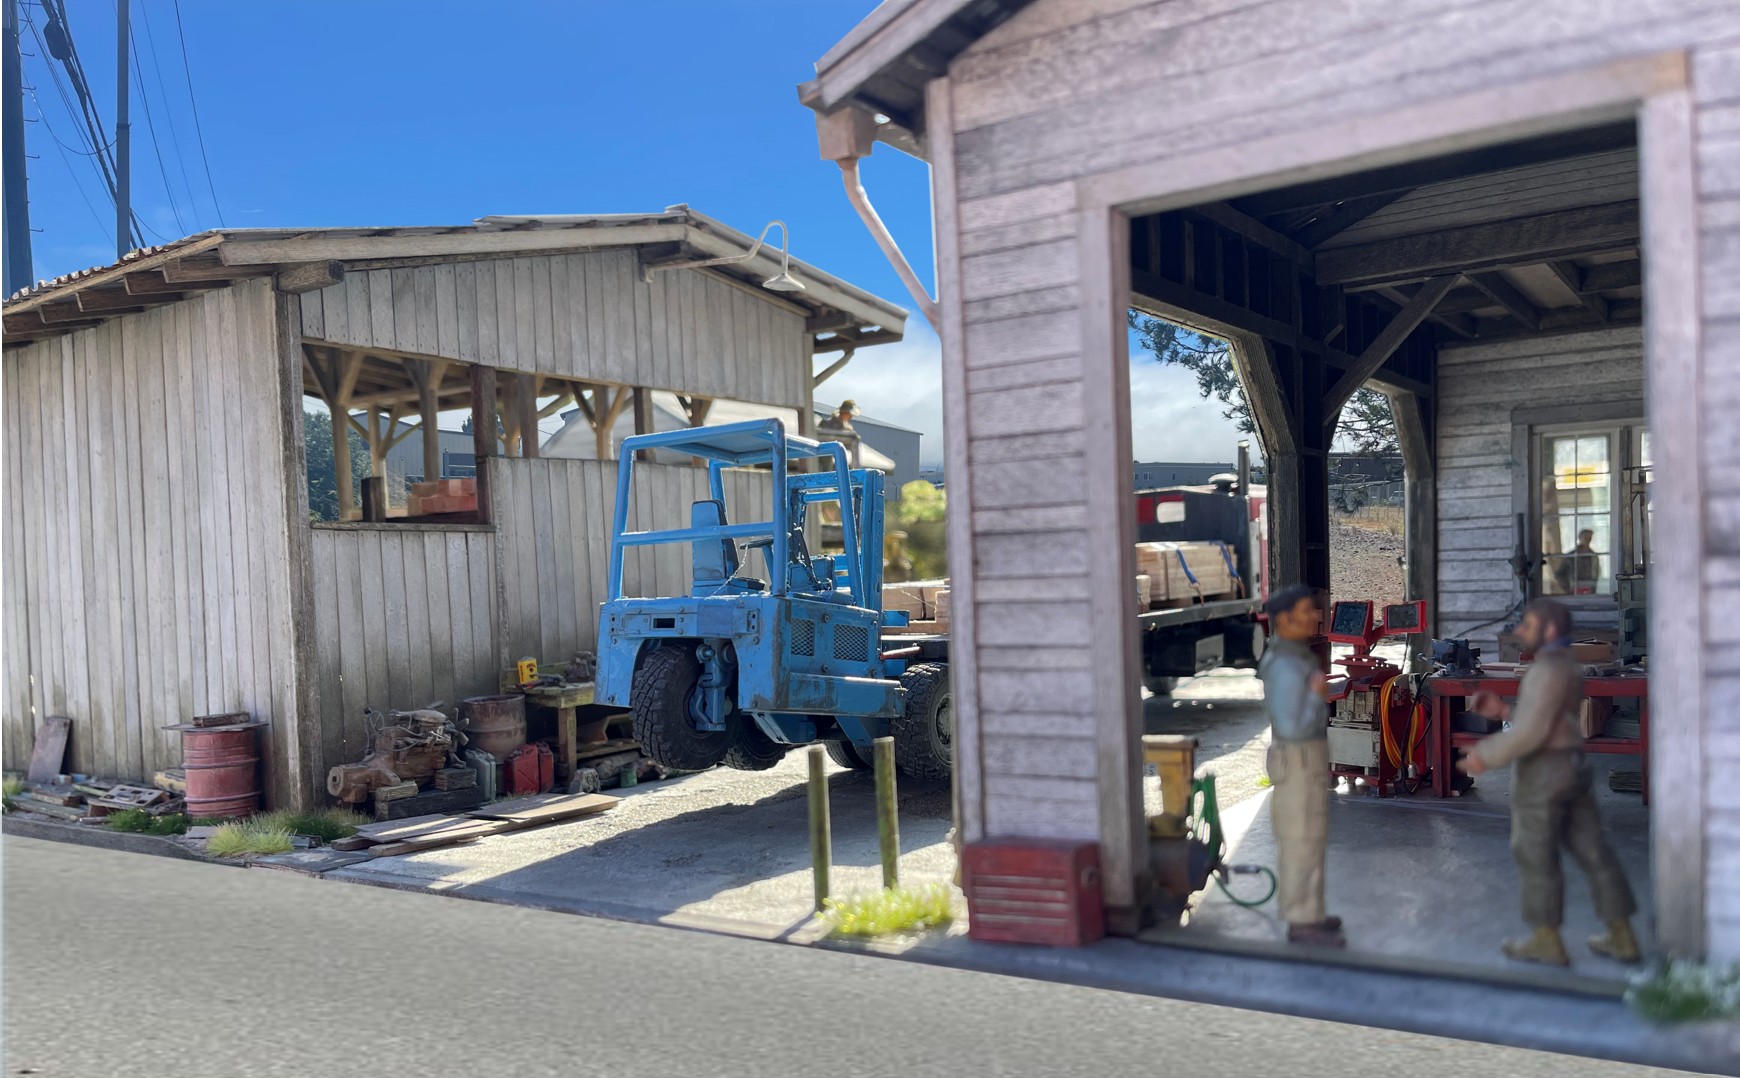
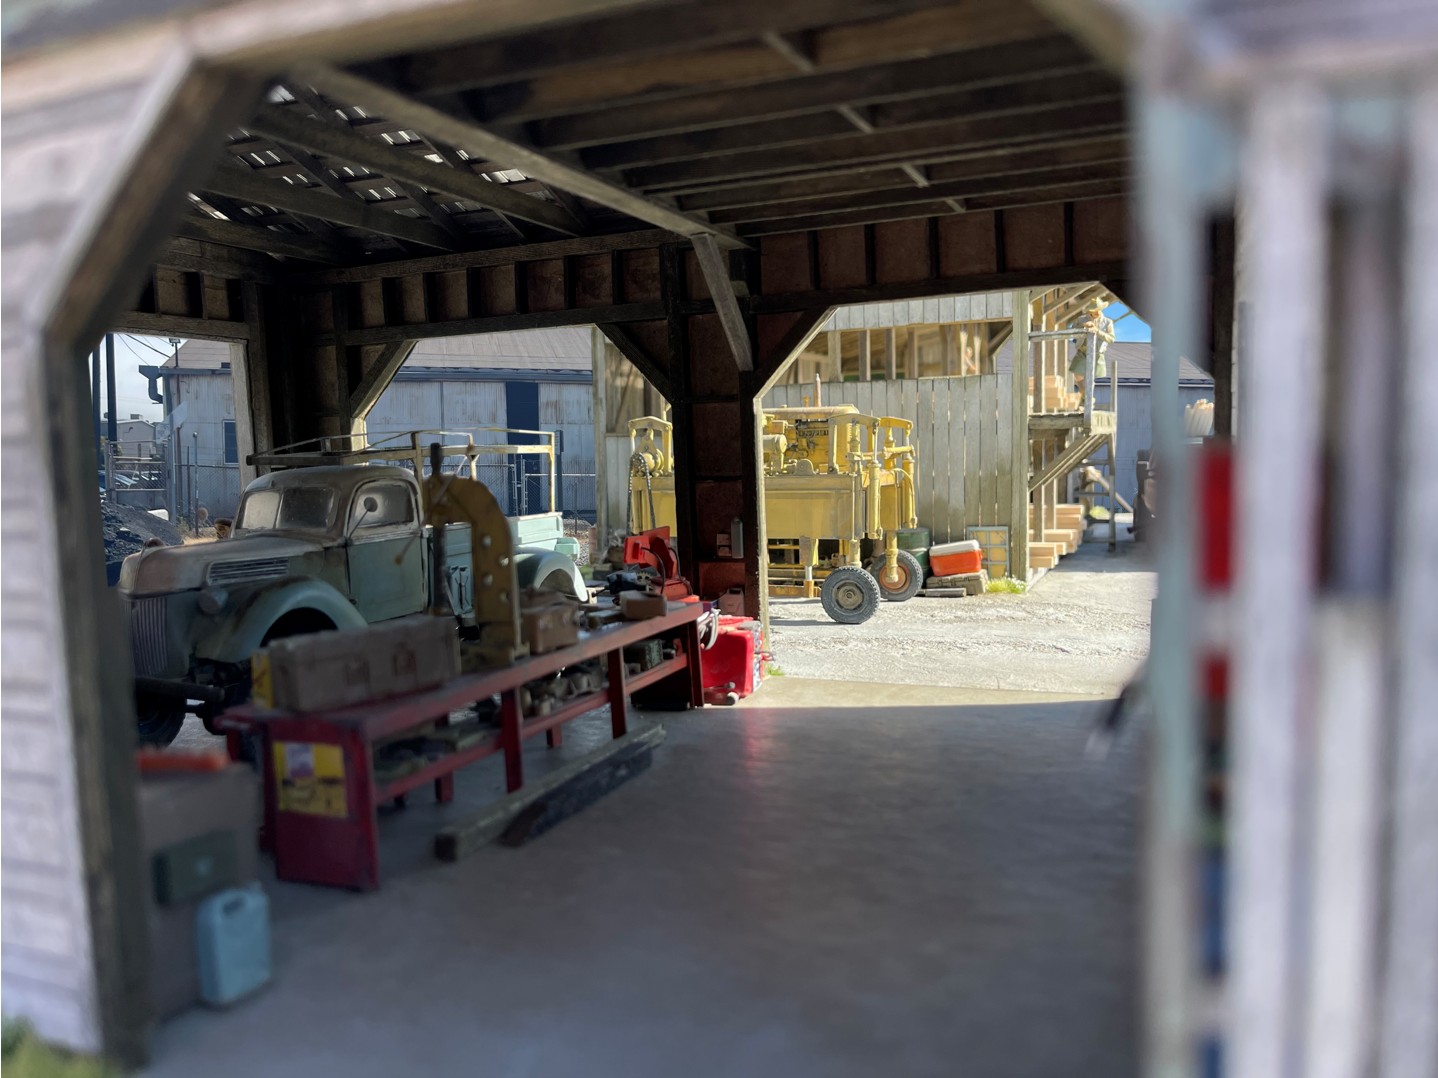
Thinking about a comment Tim @Dioramartin made about building dios and thinking about photos. During this build I seriously wondered about the value of making highly detailed interiors, which once done will be hard if not impossible to see - a bit like making a MiniArt T-55 with interiors - I build them compulsively, and yet, once buttoned up, never to be seen again! So, we have a stocked hardware store and workshop, but they are not easy to see - at all!

I realized this during the build and took a variety of steps to make them more visible, with moderate success. In the end, like making a T-55 interior, I did it; I just like making them, visible or not!

And here we are - time to call this done, and to move on to something else -

Thanks for having a look

Cheers

Nick :man_biking:

16 Likes

EXCELLENT result!

1 Like

Man, what an amazing diorama! Bravo

1 Like

It’s nothing short of spectacular…. And in between this getting completed…. We had end of the line !!! That was some real jaw dropping work :clinking_beer_mugs::bottle_with_popping_cork:

2 Likes

It is amazing. Love the way with the changing vehicles you get a sense of the activity in the yard. Great work Nick.

2 Likes

Brilliant man just brilliant. You are in a class all by itself.

Speechless,

J

2 Likes

What JR & others have said, ultra-crazy brilliant…all of ‘em & I could just stroll through photo 26 right now to see what else is out in the yard. Yeah interiors – in the end it’s about WEKIT (we know it’s there)

There’s one last aspect we’ve talked about before – what’ll happen now to all the components & base? :thinking:

3 Likes