I would cut the mask around the bolts and either add more tape to mask the bolt or retouch afterwards.
2 Likes
Hi John.
Yes you asked for awards for this one. I gave you a few options
I’ll see what I can come up with for 8 Wheelers.
3 Likes
Thanks Peter, and yes, it all comes back to me now … The third one was the one people liked… Anyway, I liked it so that’s that lol… And thanks in advance for the 8 wheelers ![]()
![]()
1 Like
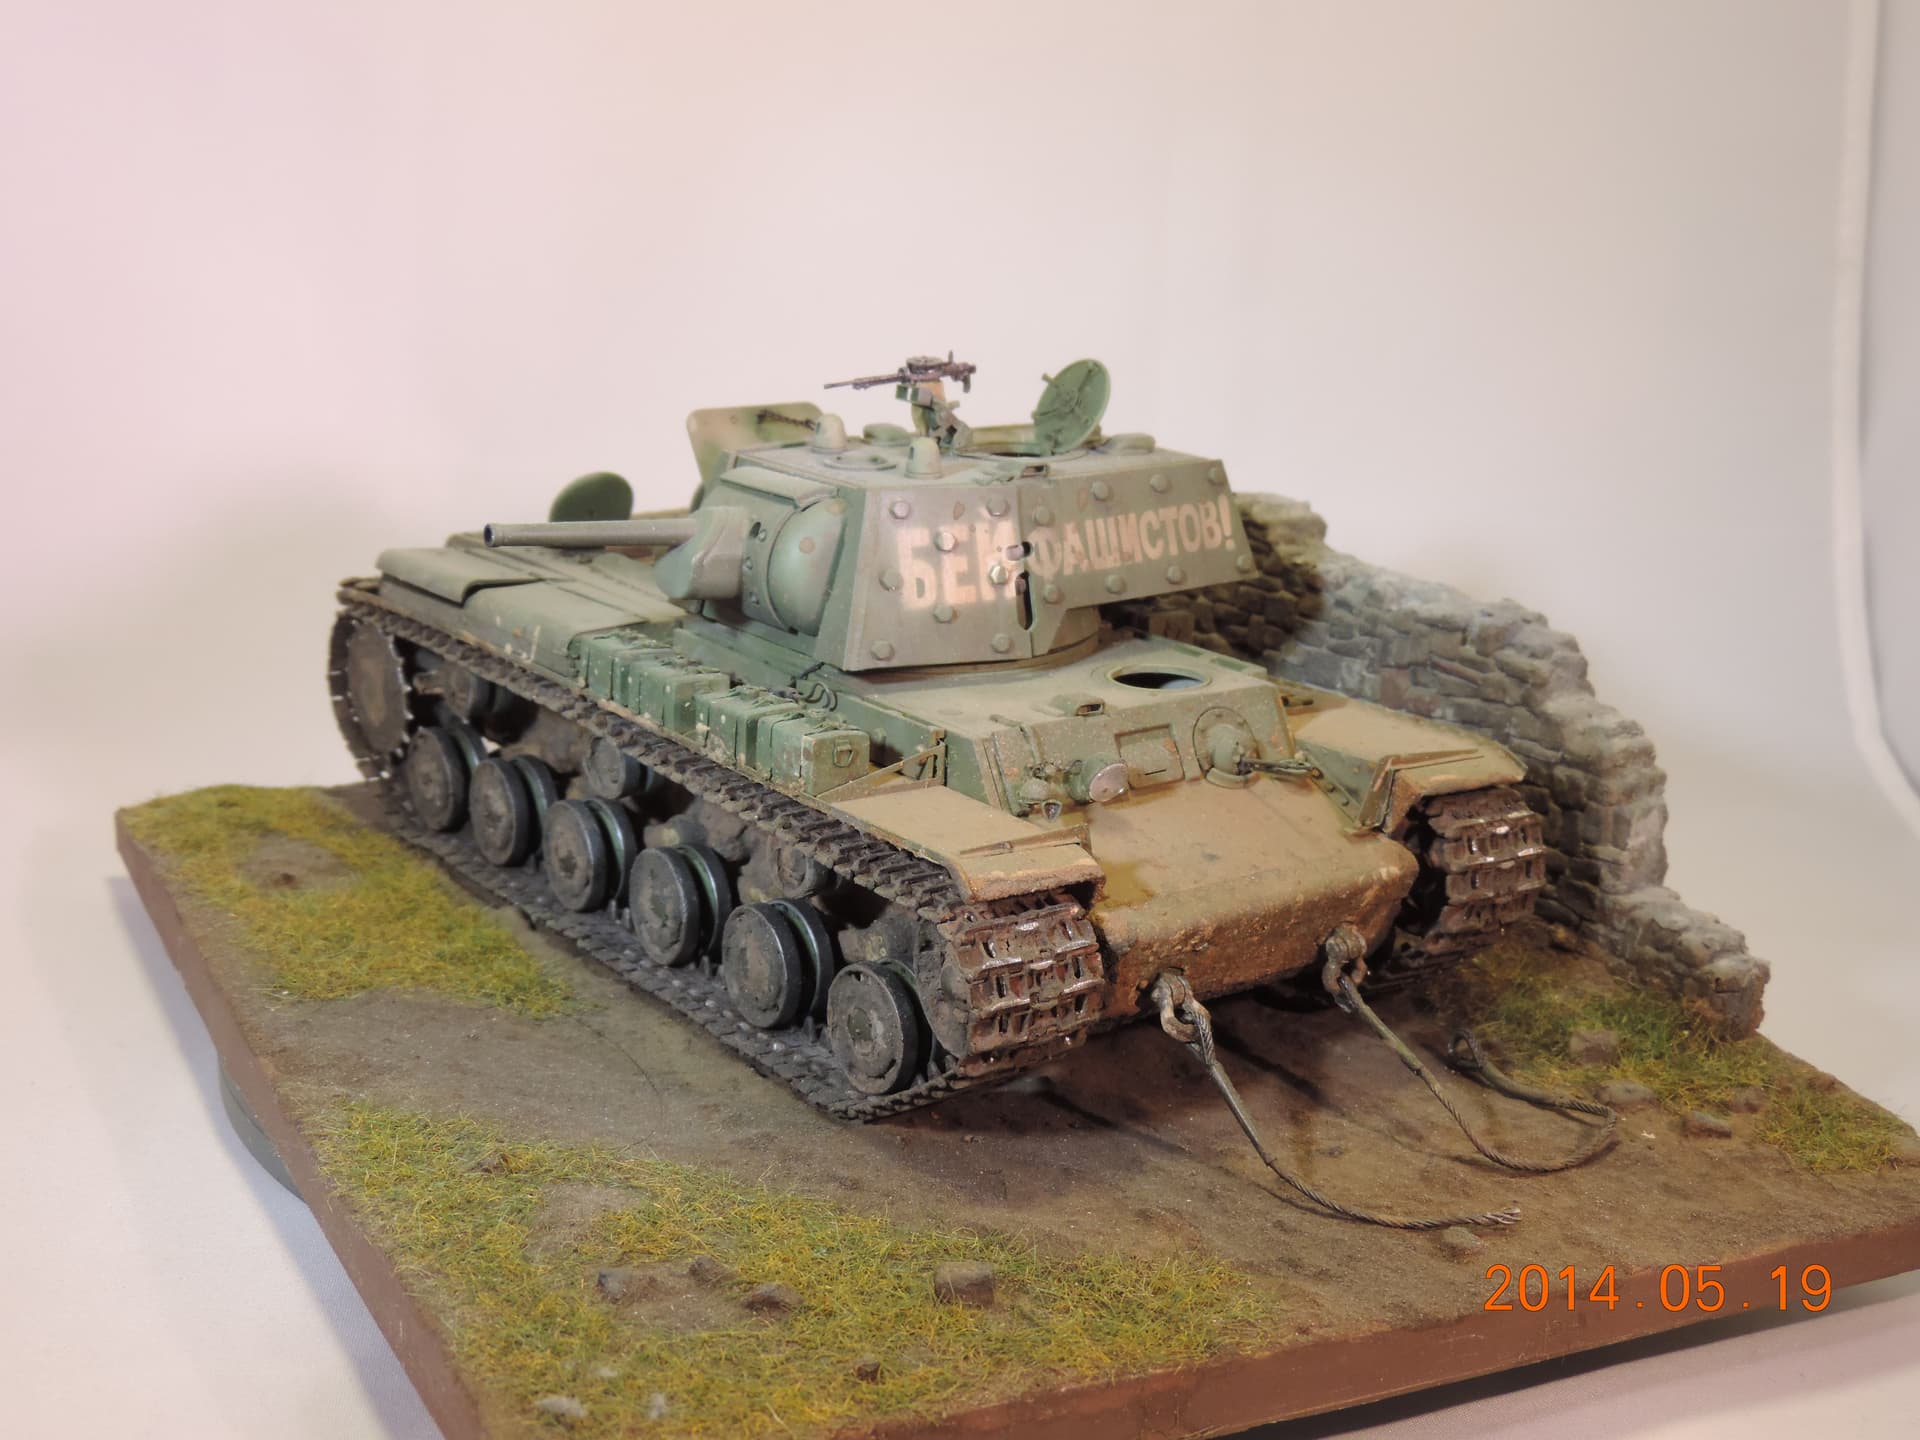
Here she is masked. The bolts and the gaps in the spaced armor were a bit of a PITA, think I’ll have to touch up around the bolt heads once I spray the base coat

Looks like I’ll also need to smooth out the masks as well, photos revealed some ripples and bumbs
6 Likes
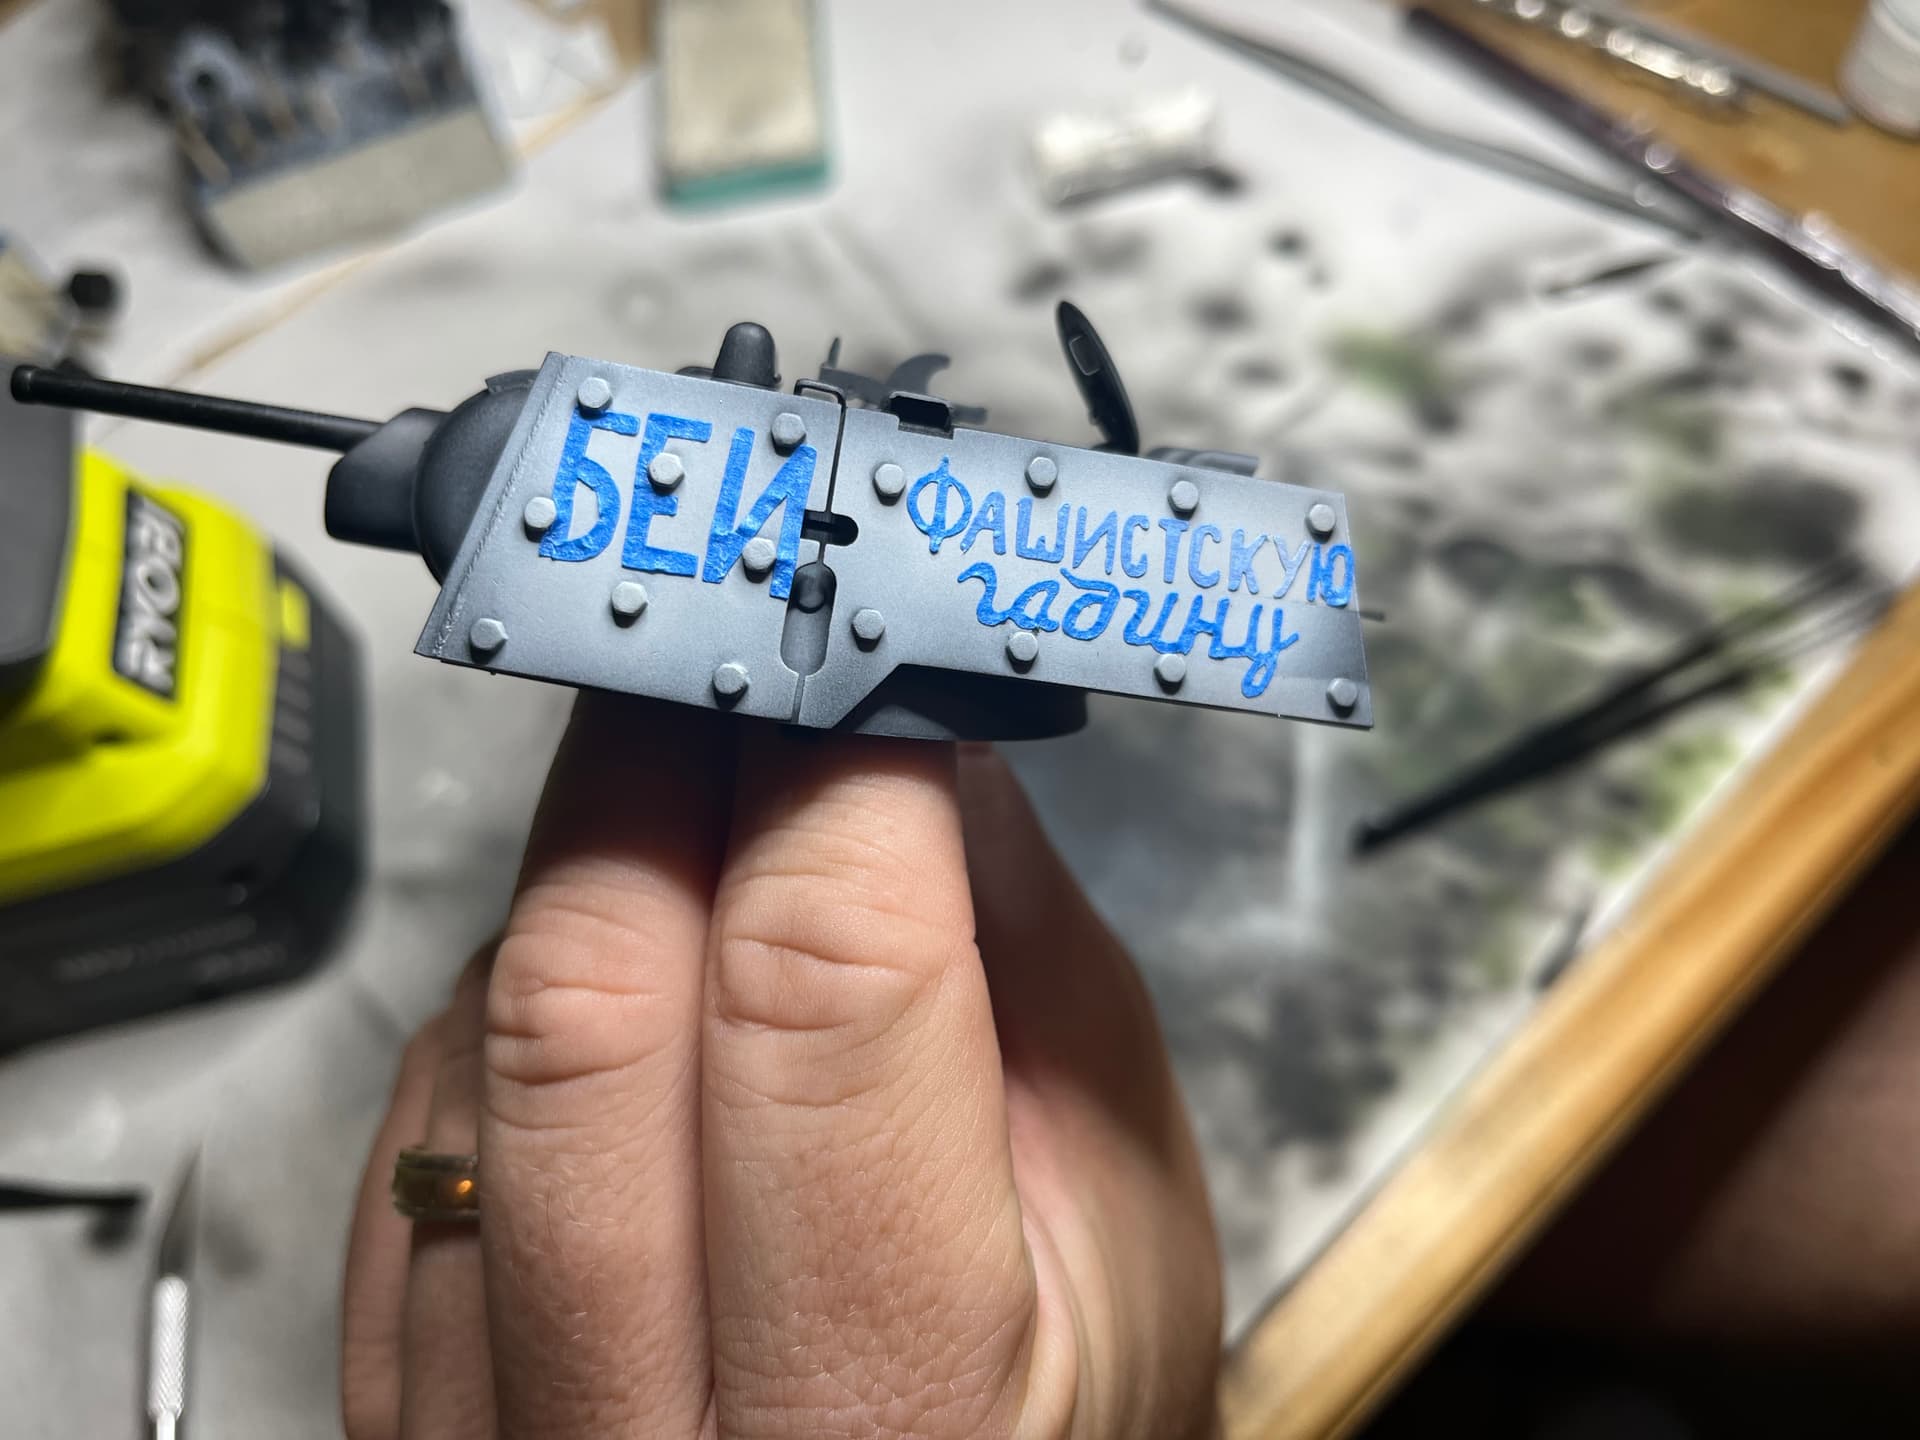
Mead, on the right side view in your pic above, shouldnt the decals be the other way as per the box art ? with the 3 large letters at the front and the 2 words on the rear section ?
Ok guys so we are about 6 months into this build and there have been some great builds and also a ship which was great to see, with Igor @Igor_Bobanovic completing 2 builds !! Hopefully we can get a few more done as they are a few that are nearly there and would be great to have a few aircraft and the Alaska finished…
Builds completed to date are;
JohnnyCh01
@Canmedic - Don
@TacFireGuru - Michael
@Igor_Bobanovic - Igor x 2
@Cookie - Gaz
@McRunty - Rory.
keep them coming guys ![]()
![]()
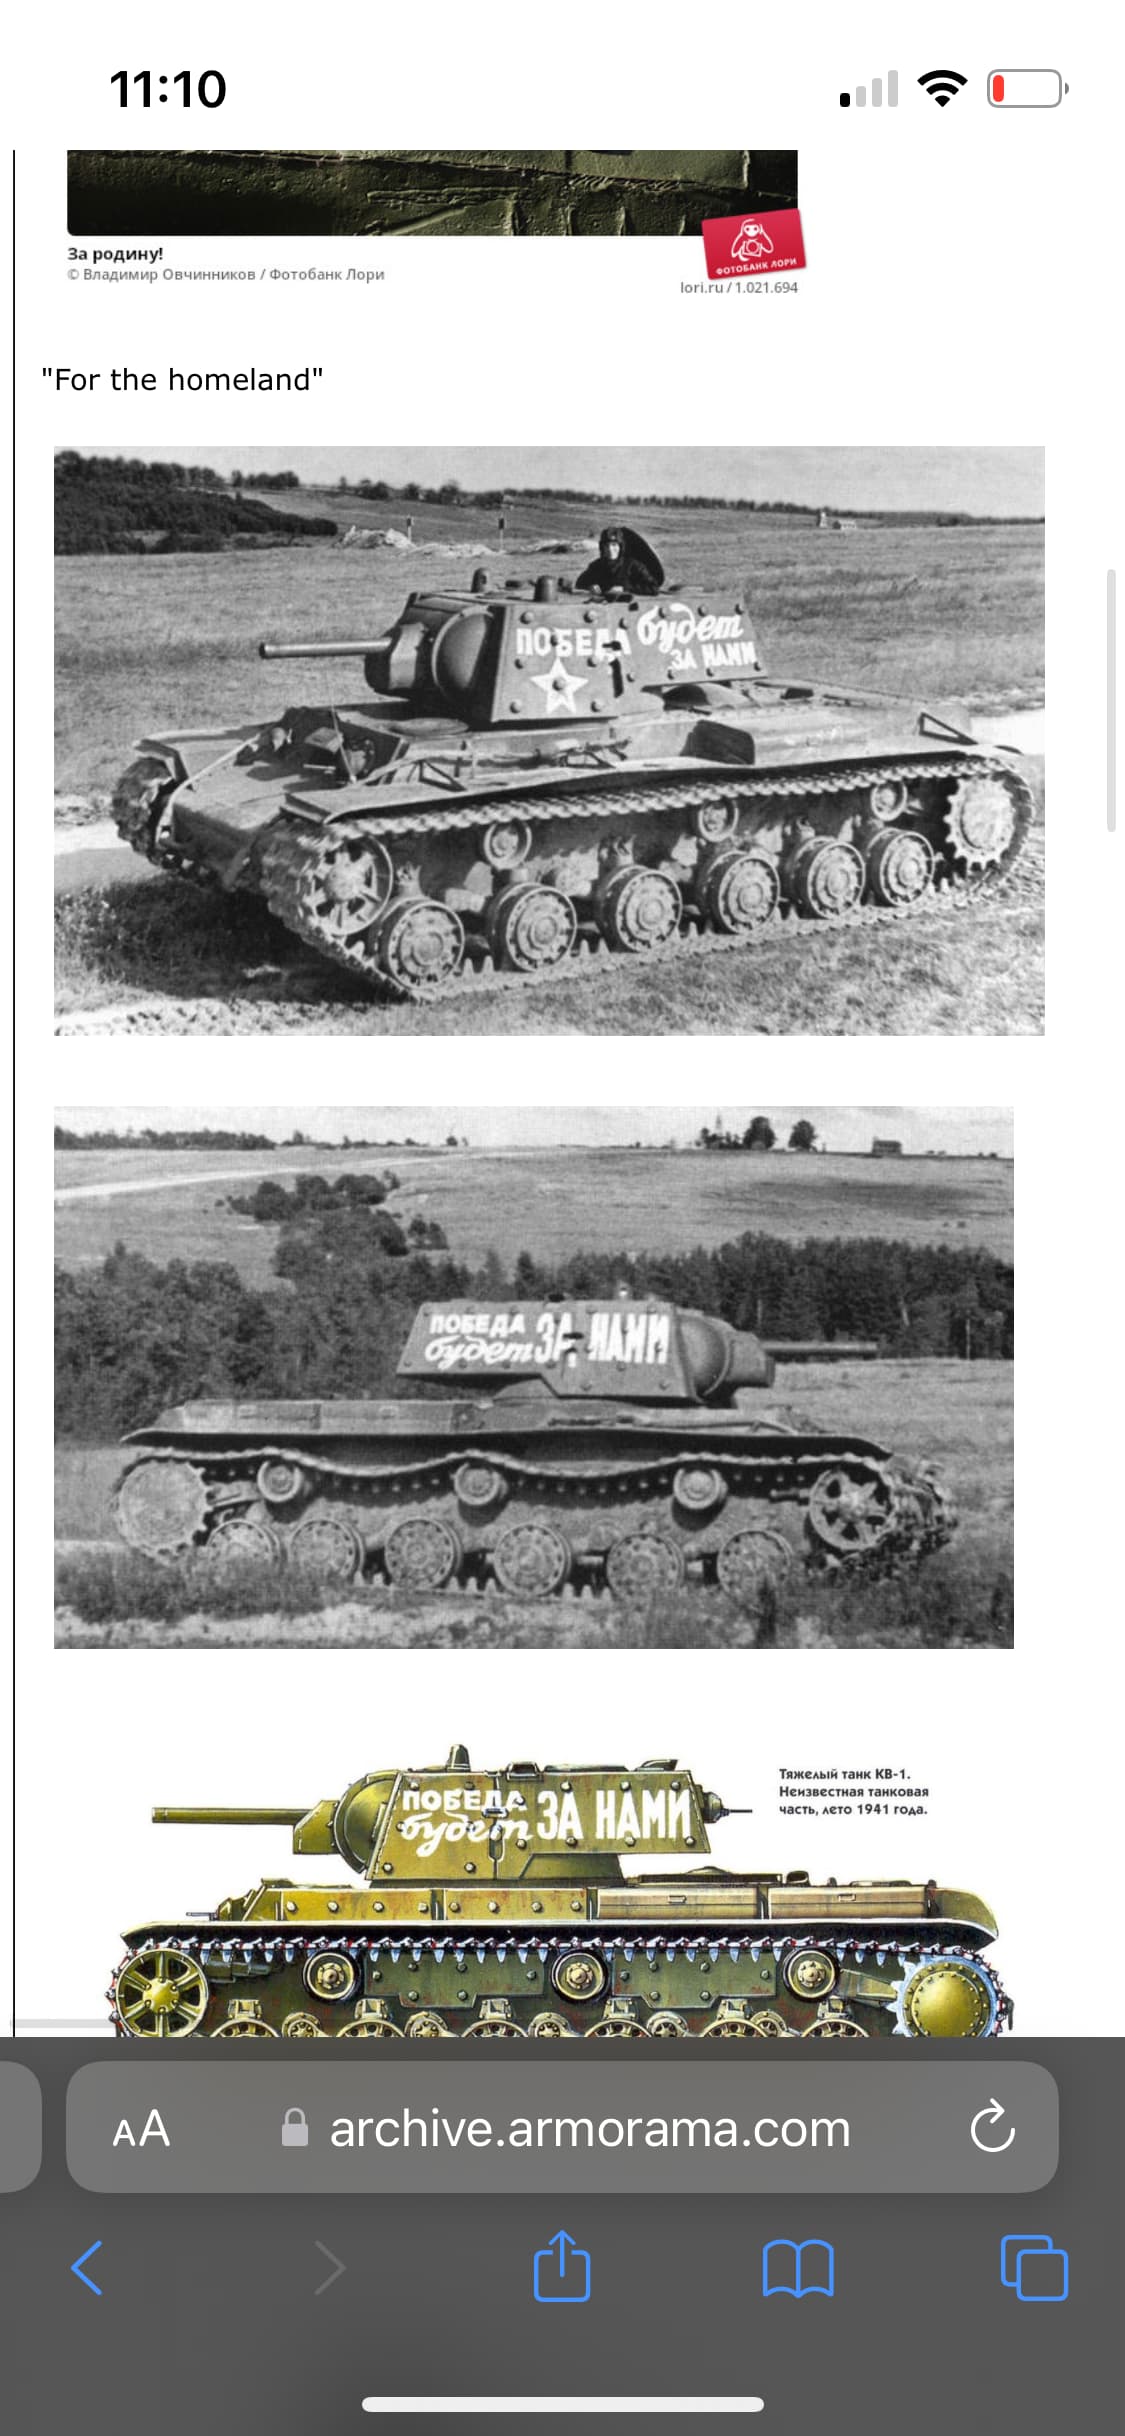
Rooikat has been primed and first colour down, but the brown is too dark. Hopefully I’ll get a lighter coat down tomorrow.
1 Like
There is some confusion there on my part. On the box art you are right. The slogan is the other way. However, in the instructions, it shows it the way I have it.
I have only been able to find a reference photo of the left side.
Given that it’s a slogan. Something along the lines of “ crush the fascist viper”, I assume it would be the same order on both sides
I would go with the box art way — when you look at the proportions and the area the words have to fit into, it makes sense that they would go on the rear section. Its the only sensible way as the 2 large gaps on the front / rear join line will never allow the long words to sit correctly ?
I’m up for that! Making the small letters fit the way I had them was a royal PITA. I have no issue with reversing them, or only having the slogan on the left side and completely removing it from the right
1 Like
I would do it- put the 2 words on the rear section and the large 3 letters in the front. Are the first large 3 letters along the lines of BYE or BYY ?
Literal translation is Bey?
Something along those lines. I think it may need a Russian speaker to get a proper translation.
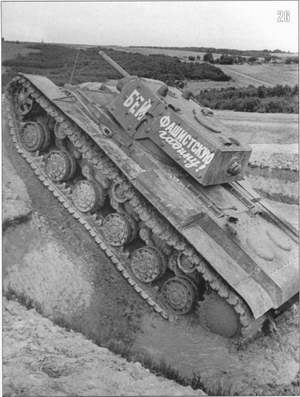
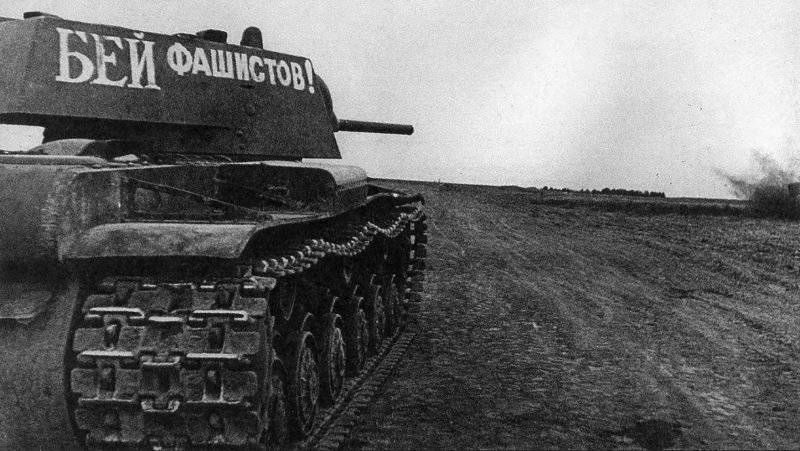
Would be nice to find an image of a Kv-1 both sides of the same turret. On this example they seem to not care that the letters don’t fit and just apply them over the gap.
2 Likes
I would still go with the 2 words on the rear section
I’m super torn. I think it would look better and matches the box art and photos on trumpeters website, but, I am not sure the phrase makes sense of the two sections are reversed, and it wouldn’t match the kit instructions
Hmm! Found one with both sides, they clearly change font size and style to better fit the bolt pattern on each size! Easy enough to do with the Ciricut
This should also allow me some artistic license to change sizes to strategically miss the bolt heads!
1 Like
Maybe the best person to ask will be @fromSalekhard … he may know more about WW2 Soviet wording on tanks …
1 Like
The Russian language is less sensitive to word order in a sentence. That is why I have problems with English: I forgot what I was taught at school.
On the skinshot, the same inscription on both sides is read correctly. I did not immediately understand what your problem is.
I made such a tank a long time ago and I don’t remember the details. Mine had the inscription on one side.
Here are the big pictures: Screened KV-1 gallery
Stencils can be made without bolts, and then painted on them with a brush.
2 Likes
Hi Mead,
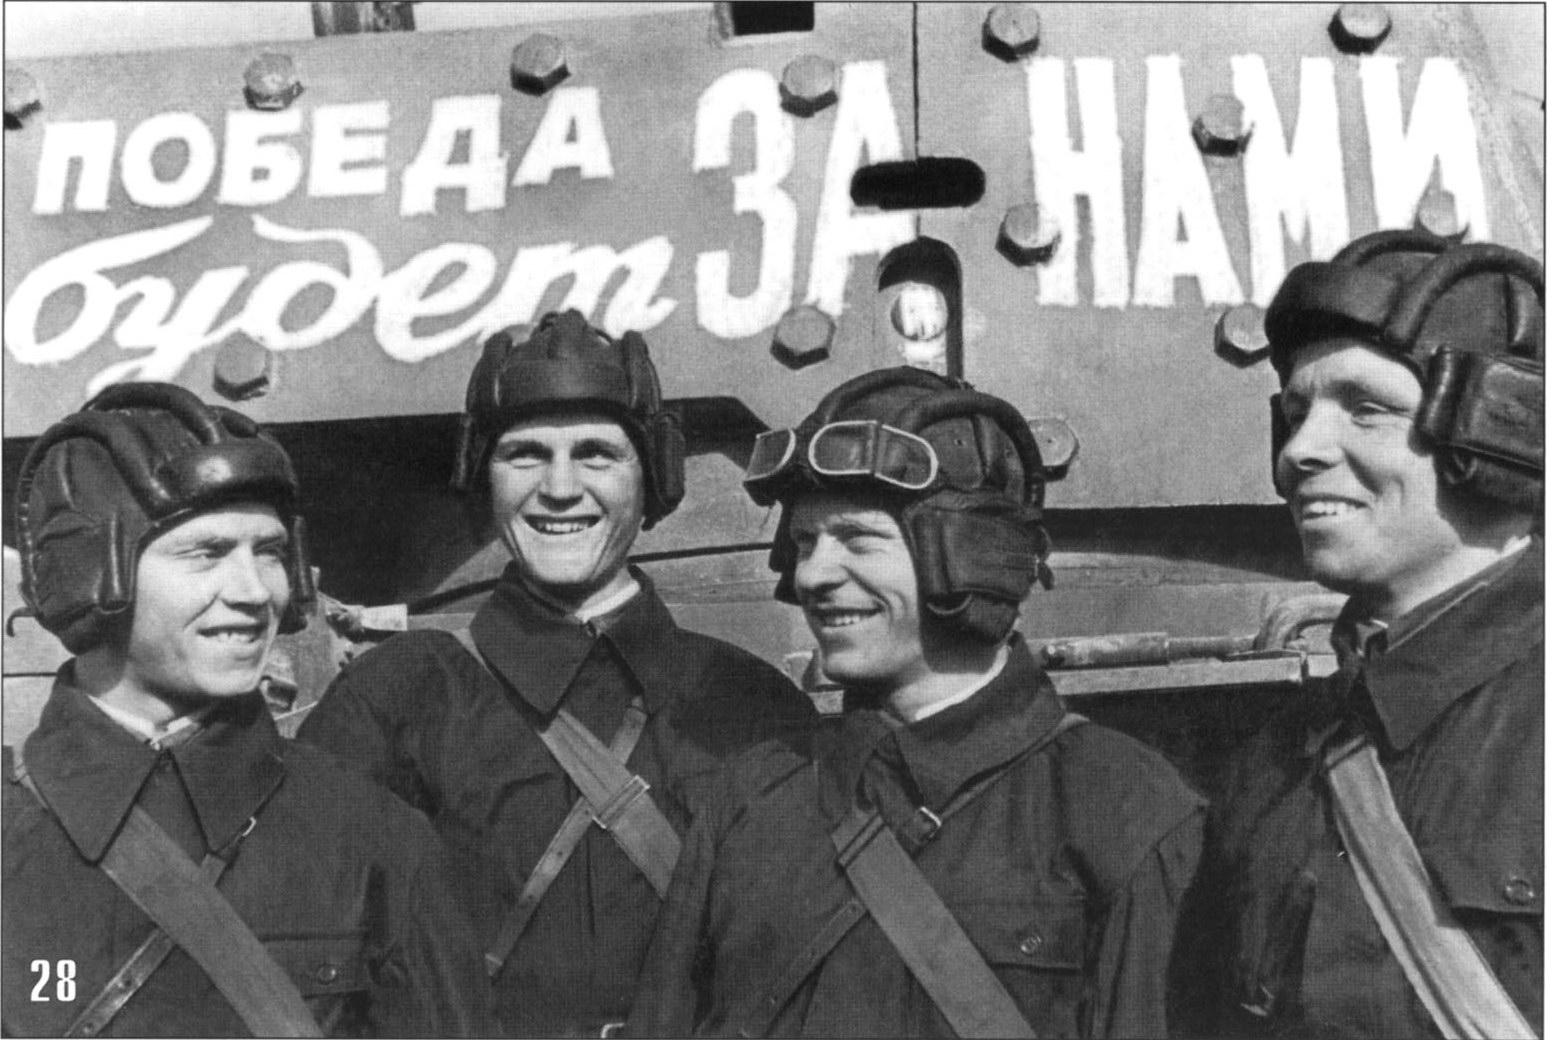
Take a look at these pictures. Not exactly the same text, but…

Not a KV-1 but…
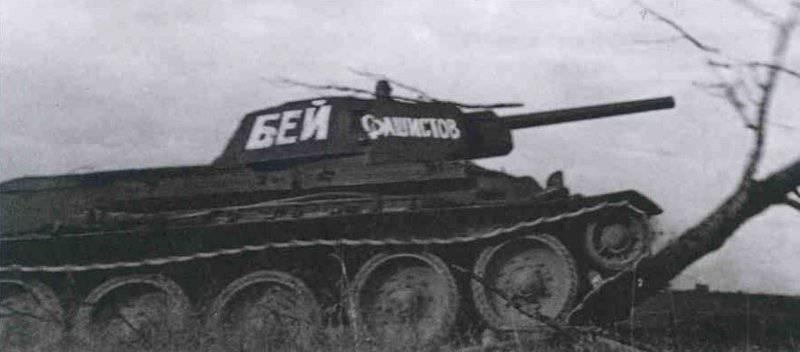
And pay attention to that kind of accent on the “inverted N”.
Source: https://en.topwar.ru/27669-kamuflyazh-tankov-rkka-zapadnoe-napravlenie.html
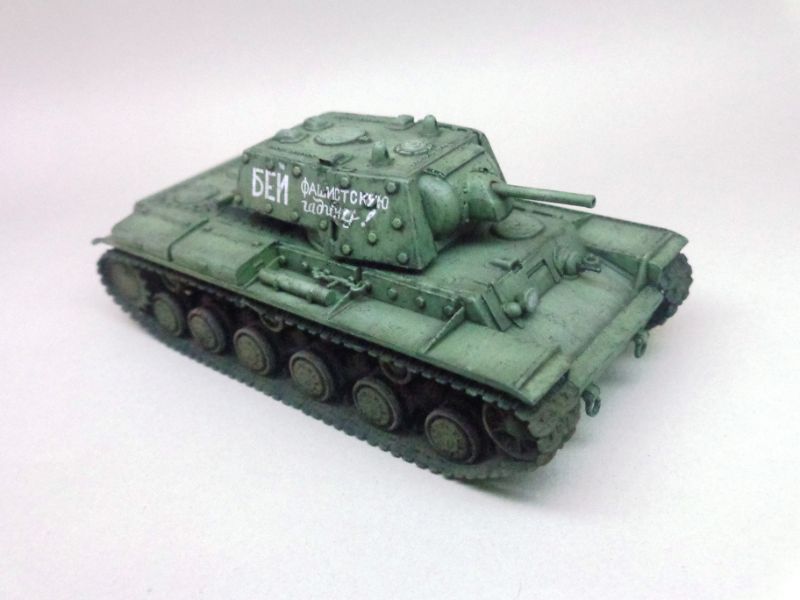
This was my choice when I built this model but in 1/72 scale.
3 Likes