Trumpeter's 9P140 BM-27 Uragan - Build Log

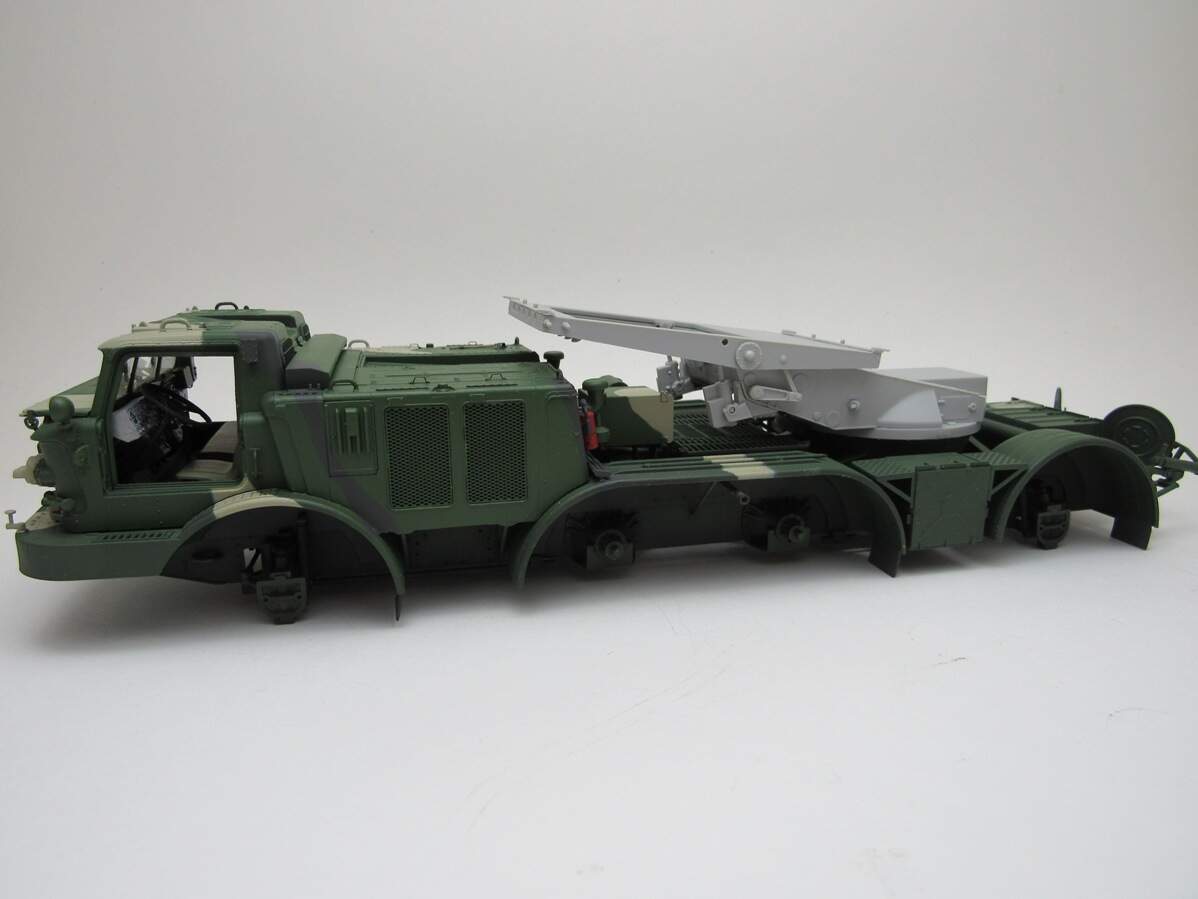
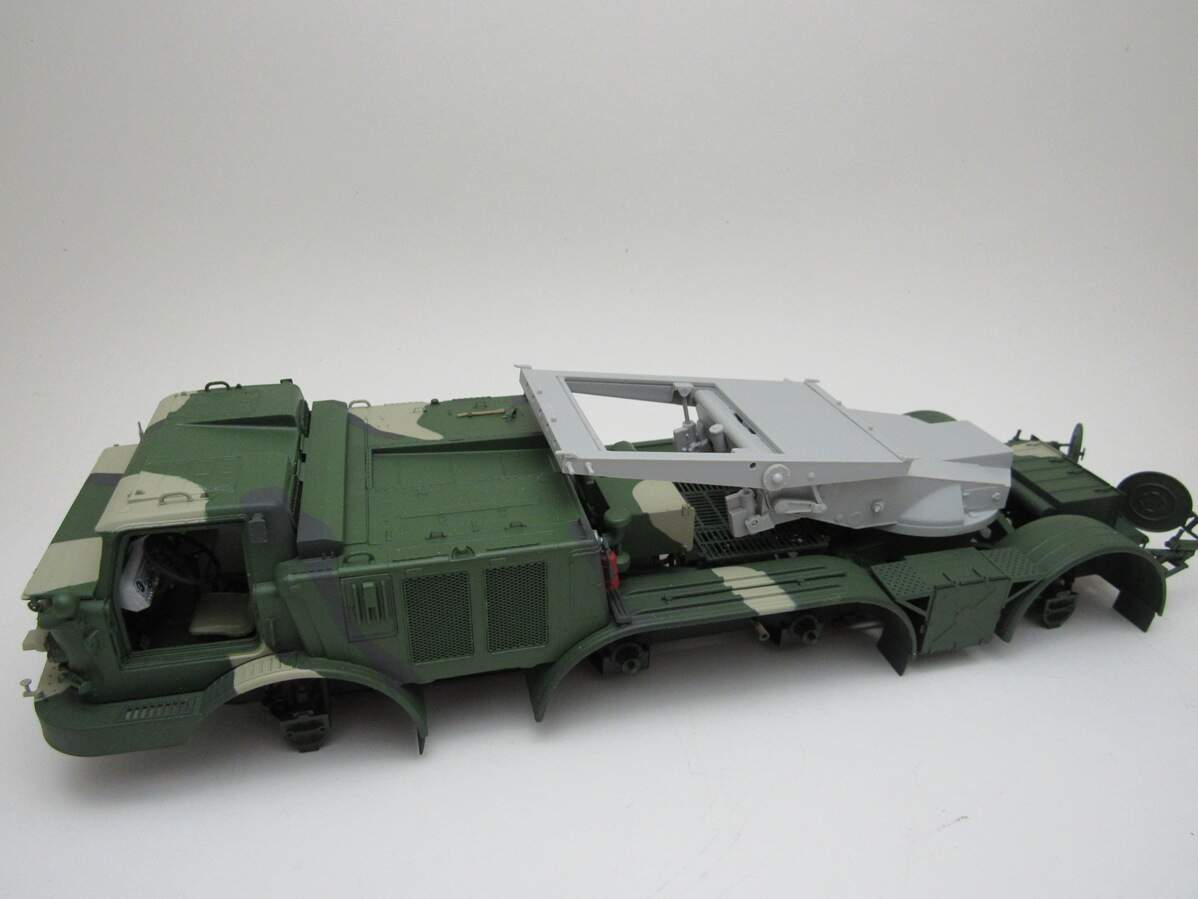
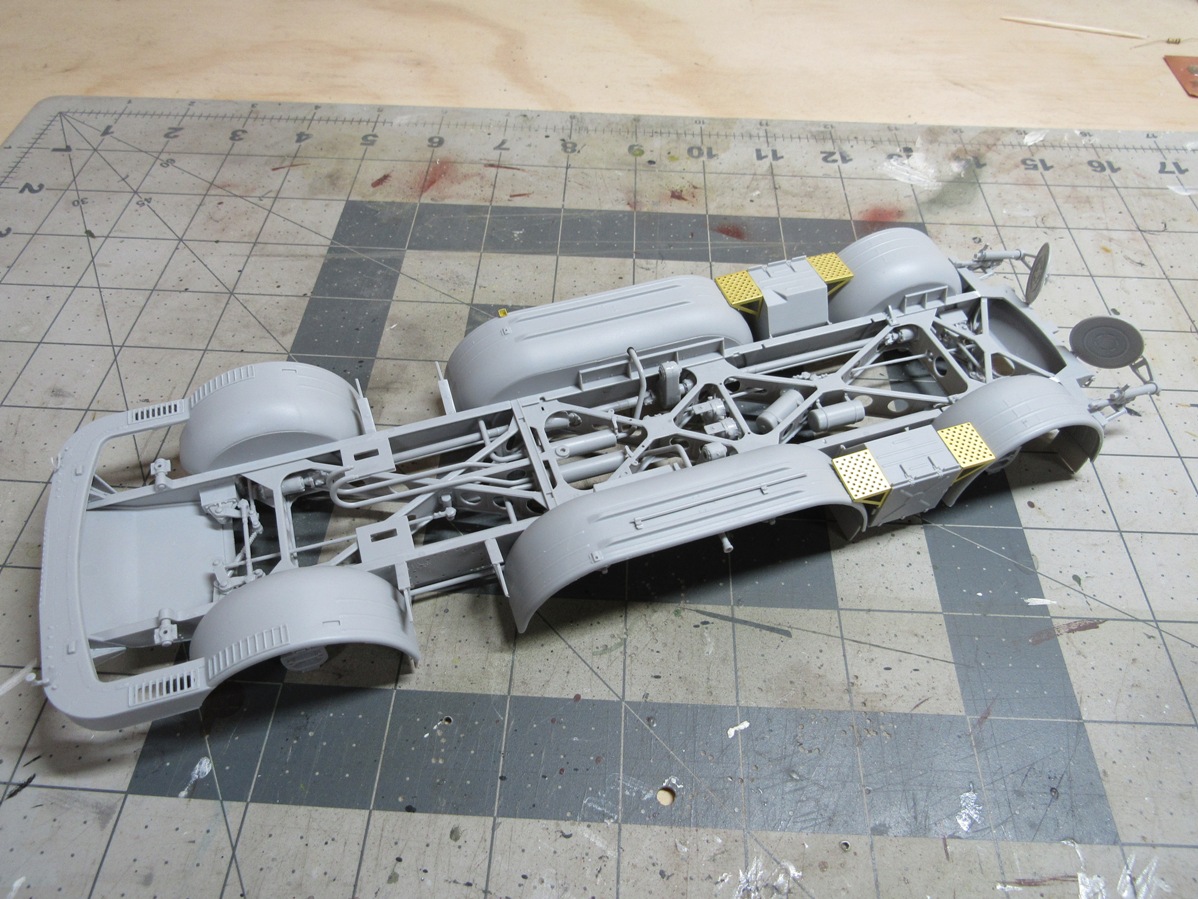
New forum, new build log. I’ve been building Trumpeter’s 1/35 9P140 BM-27 Uragan. Got sidetracked with two campaigns and home renovations, but now the bench is clear and the work on the house is slowing down, so time to pick this back up.

I didn’t fully document the early parts of the build, but I gotta say I like the kit. The chassis is definitely something different, and everything went together well. Maybe one day I’ll do the Frog-7 too.

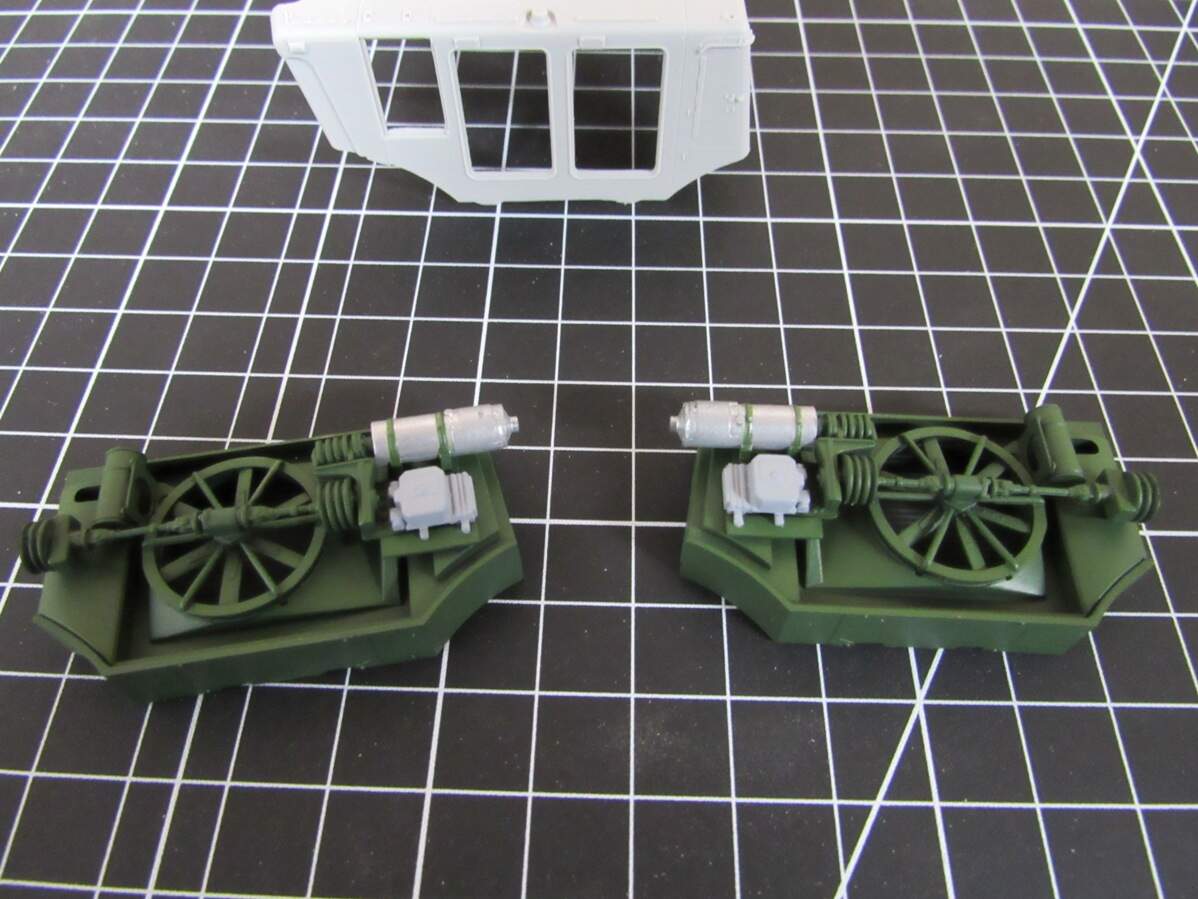
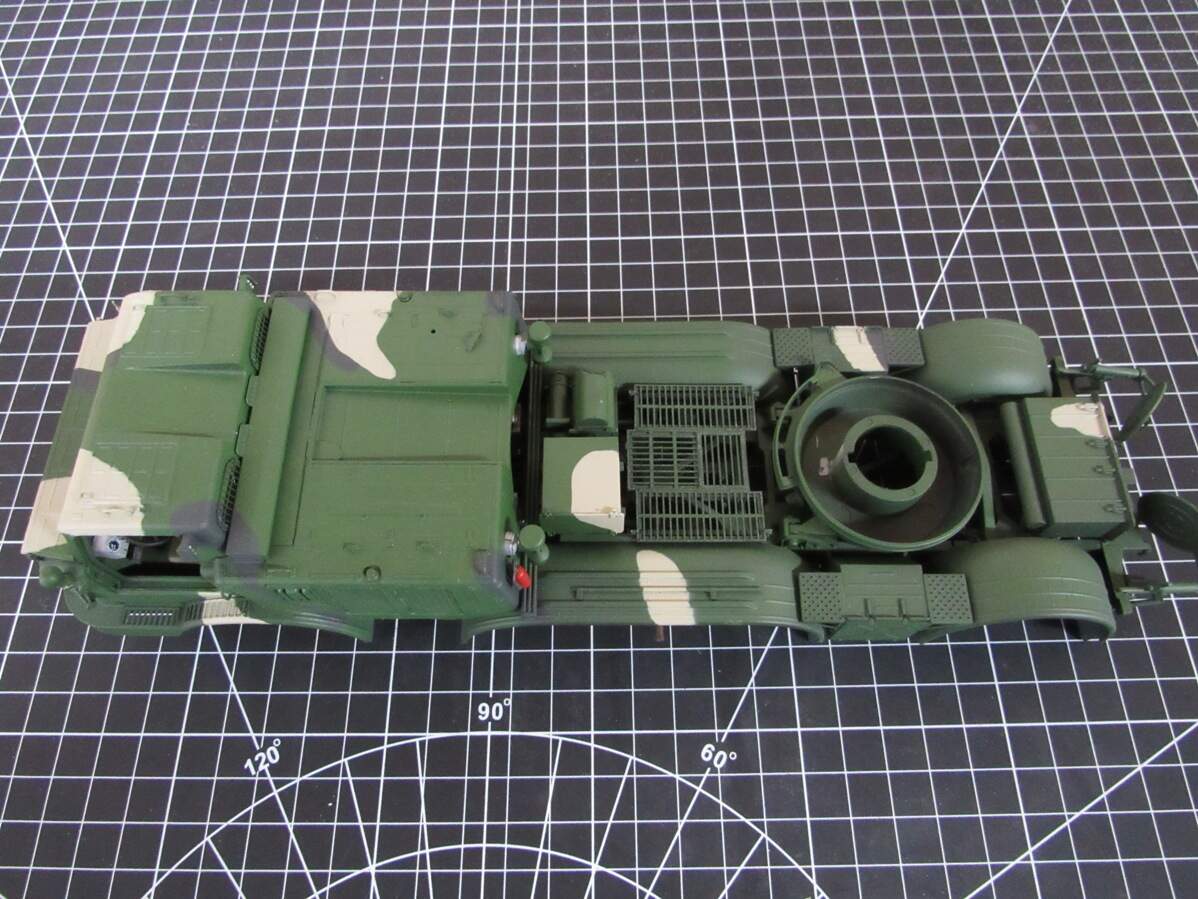
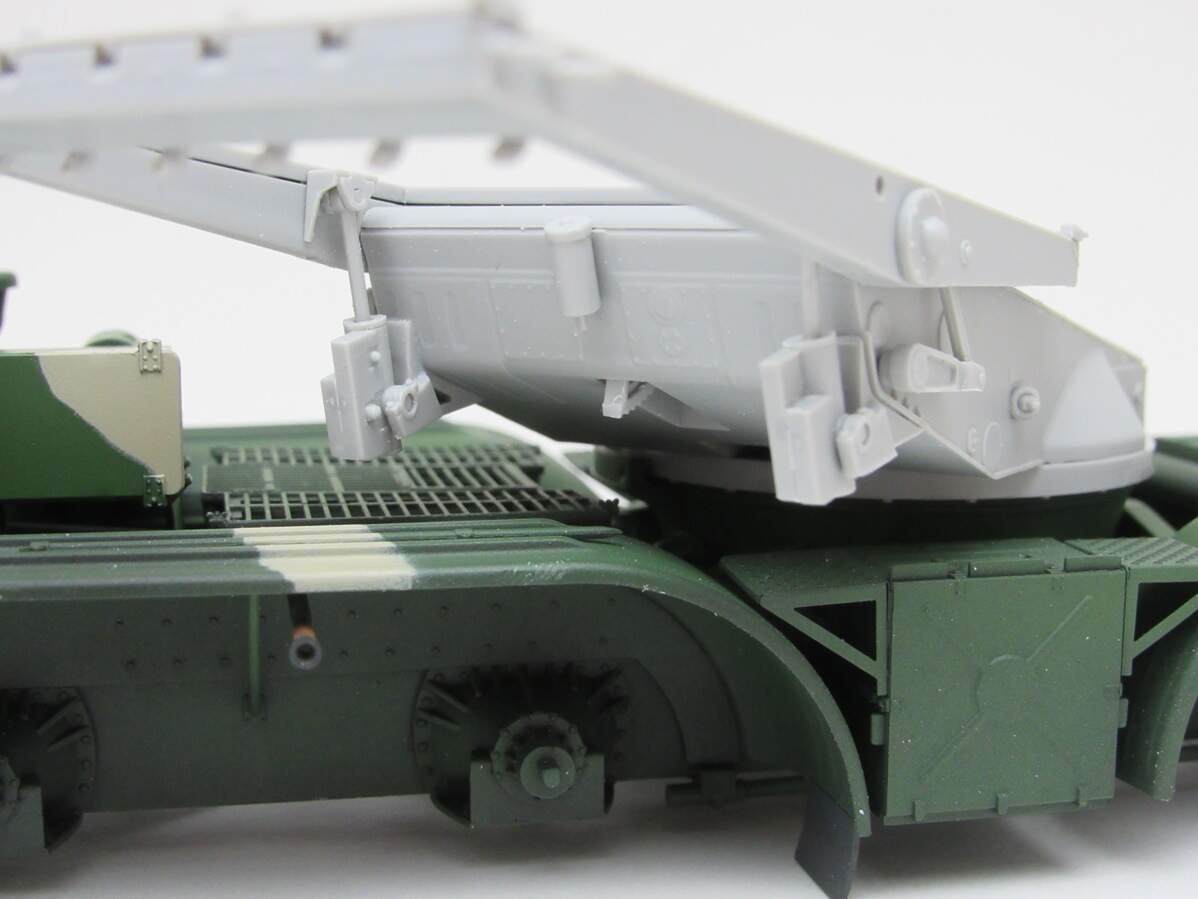
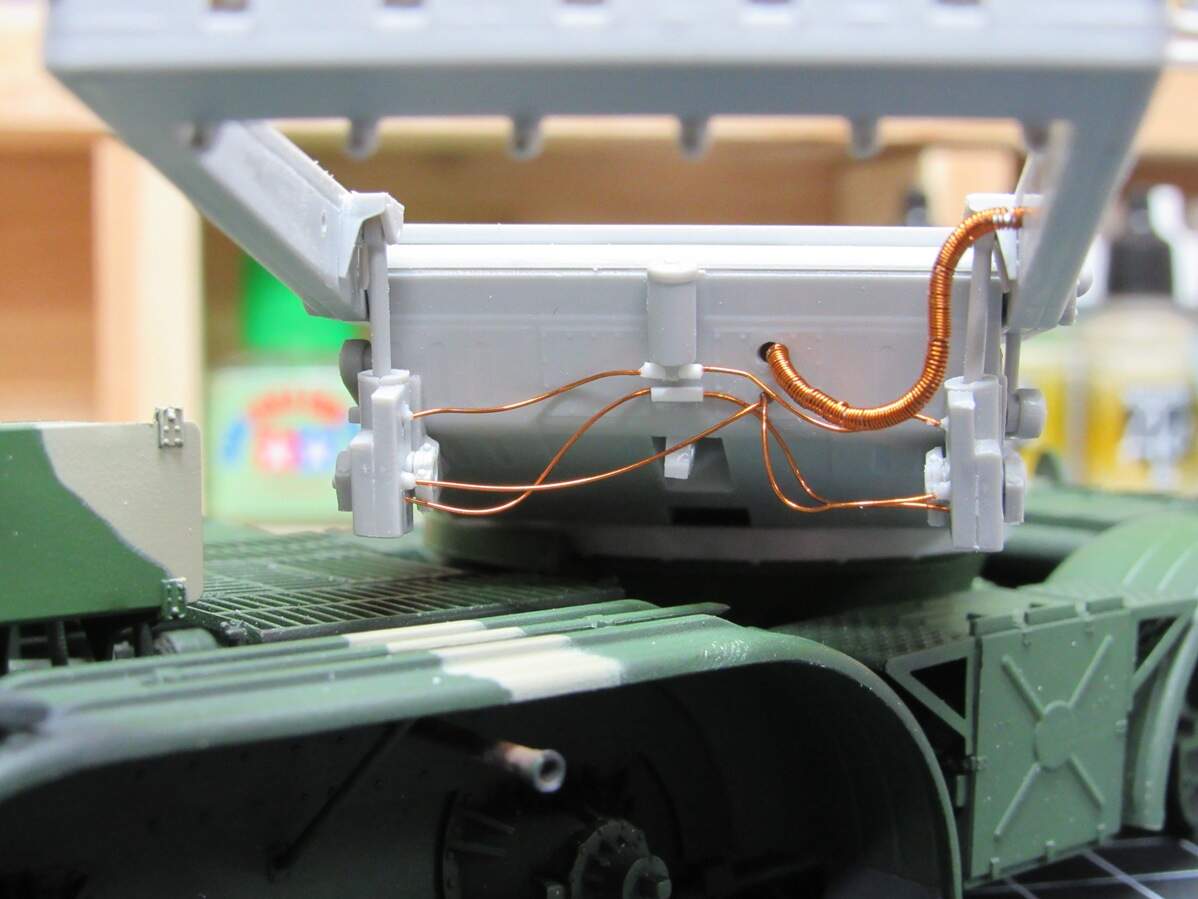
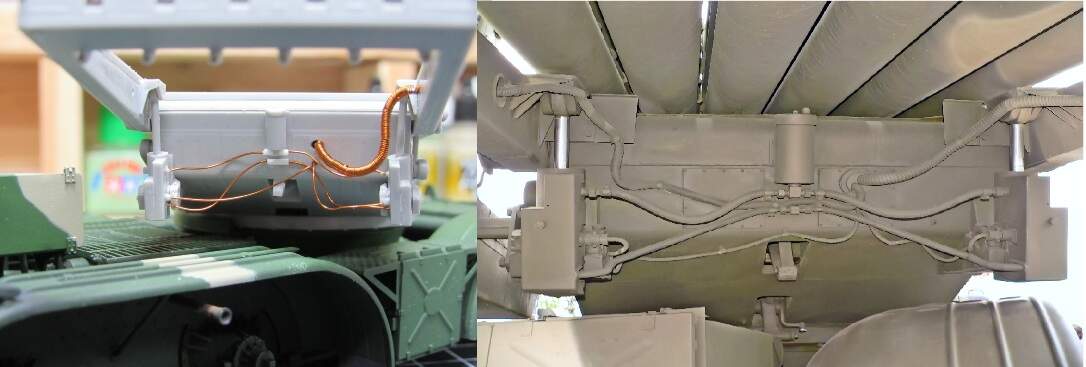
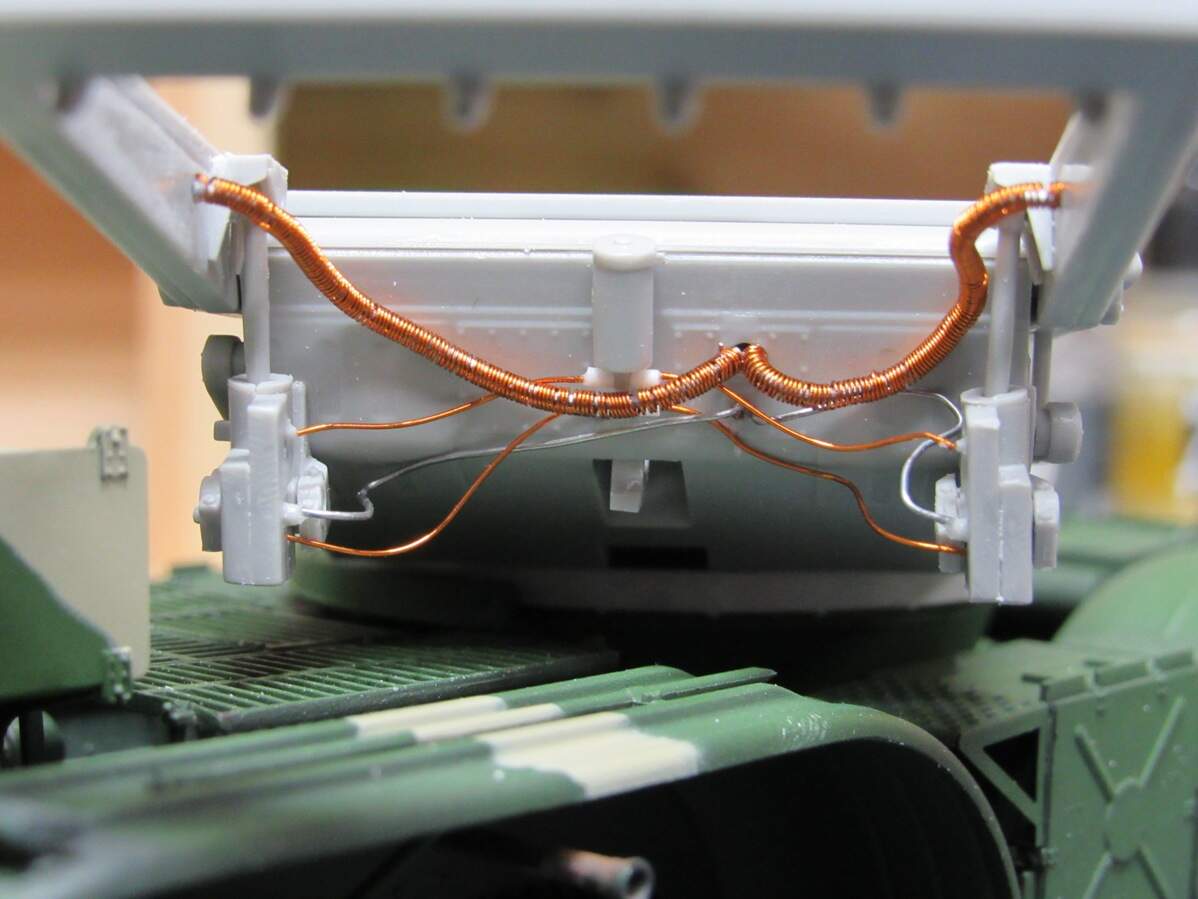
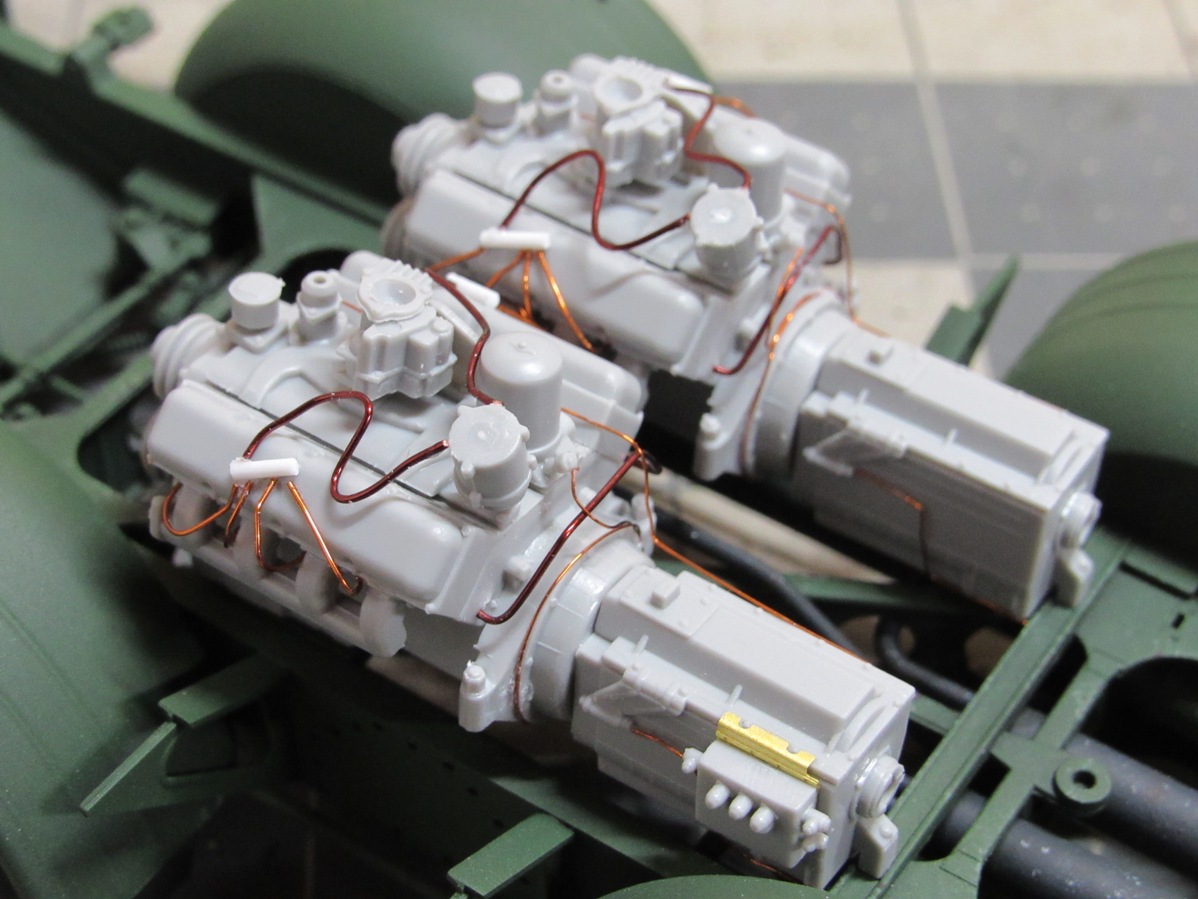
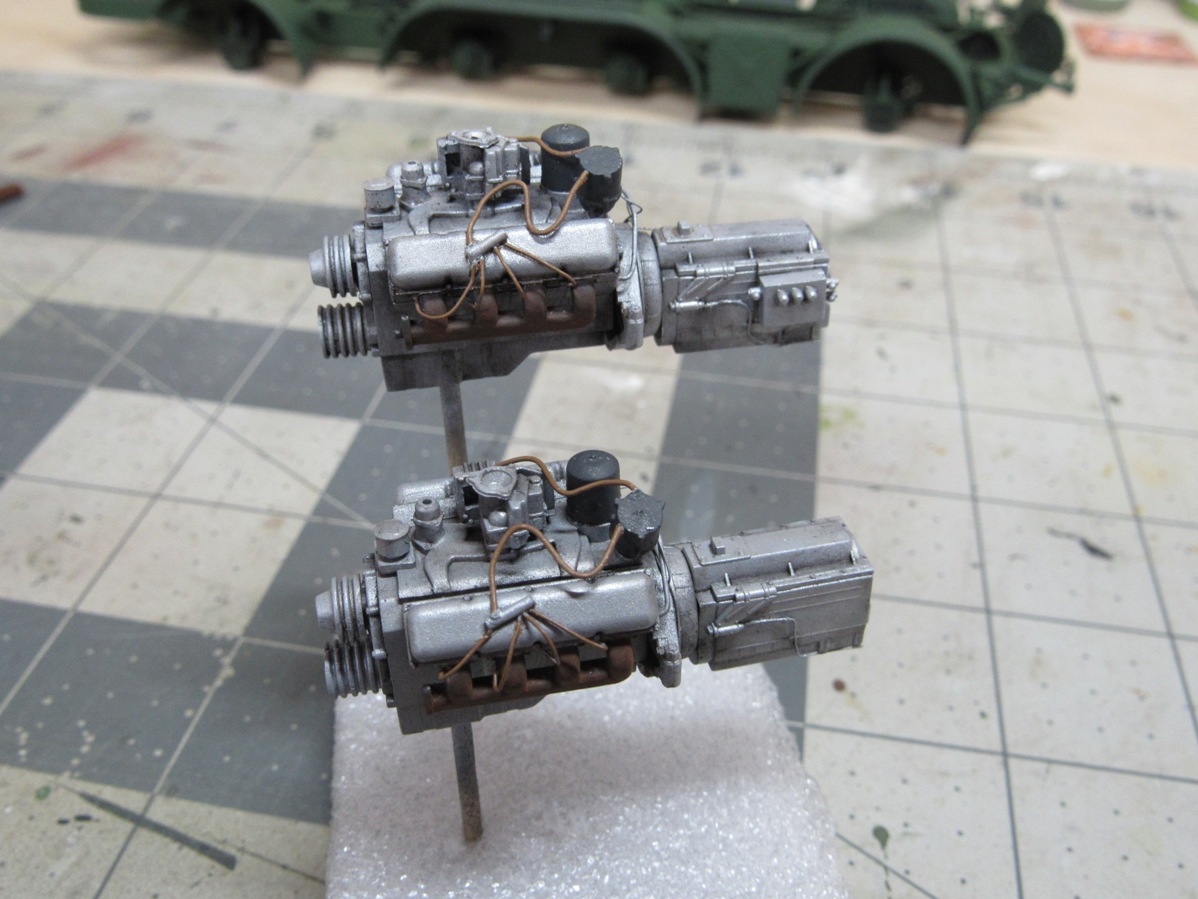
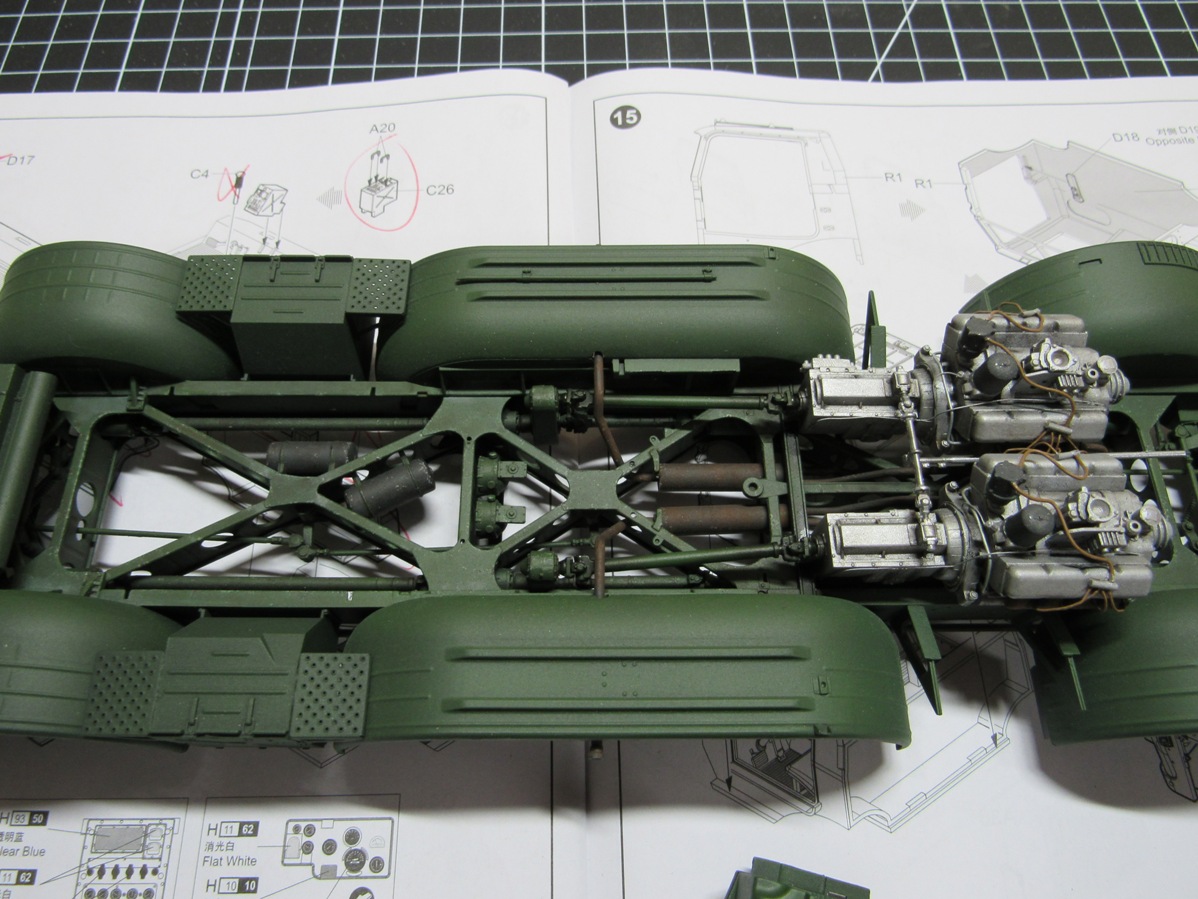
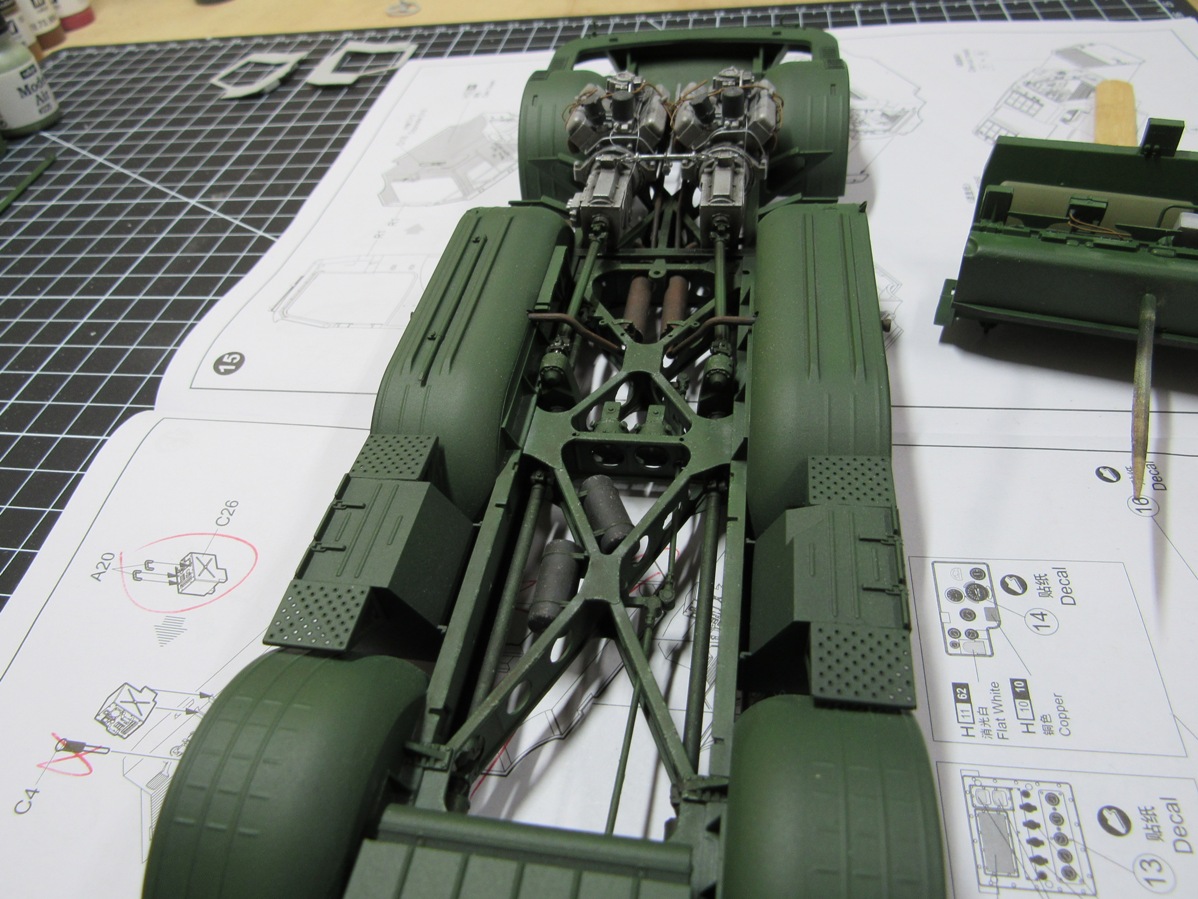
There’s been a lot of painting between build steps as there is a good amount of the chassis visible when complete, so a lot of piecemeal painting & weathering. With the chassis mostly done I got started on the engines, decided to add some wiring. References are hard to come by, but from what I can see it looks like a complete rat’s nest in there, so I only added what I could make sense of.

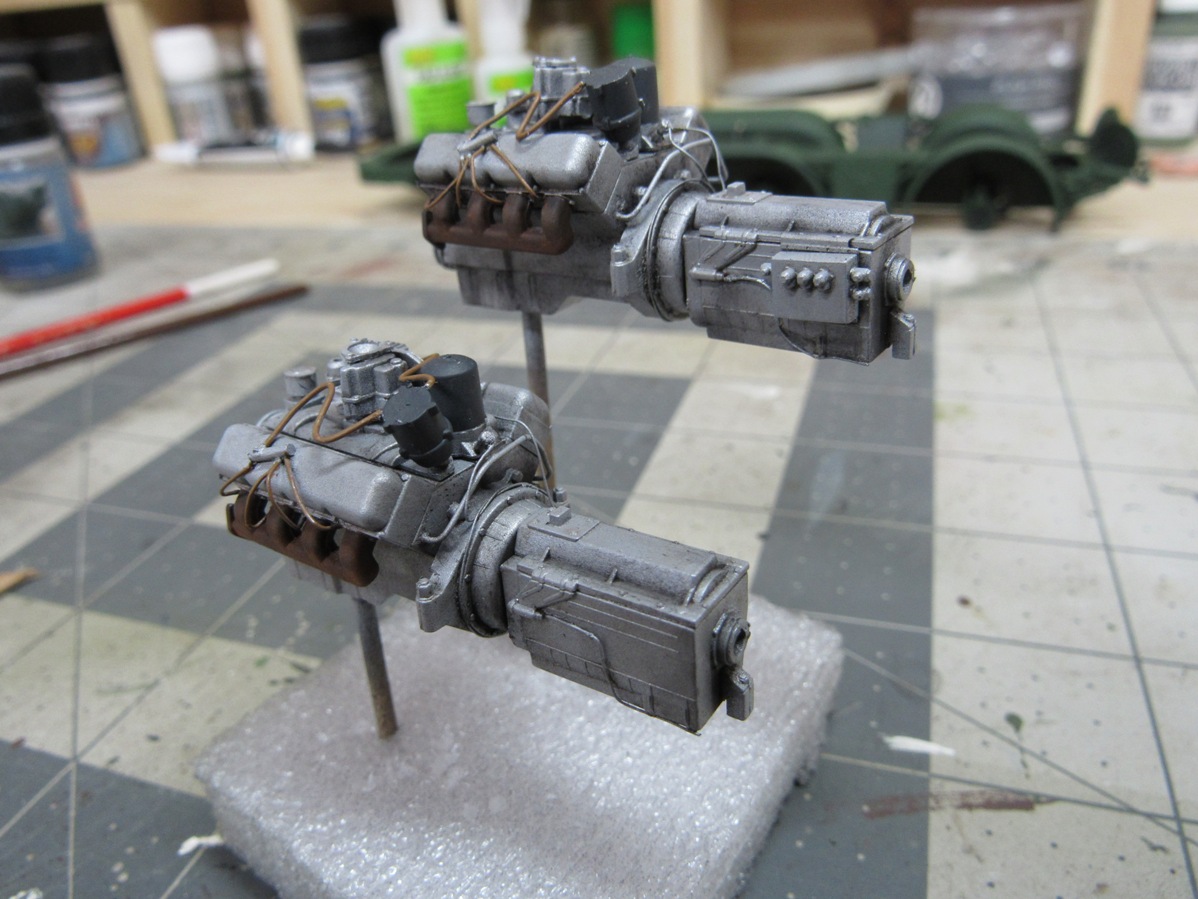
Then I painted them and dirtied 'em up

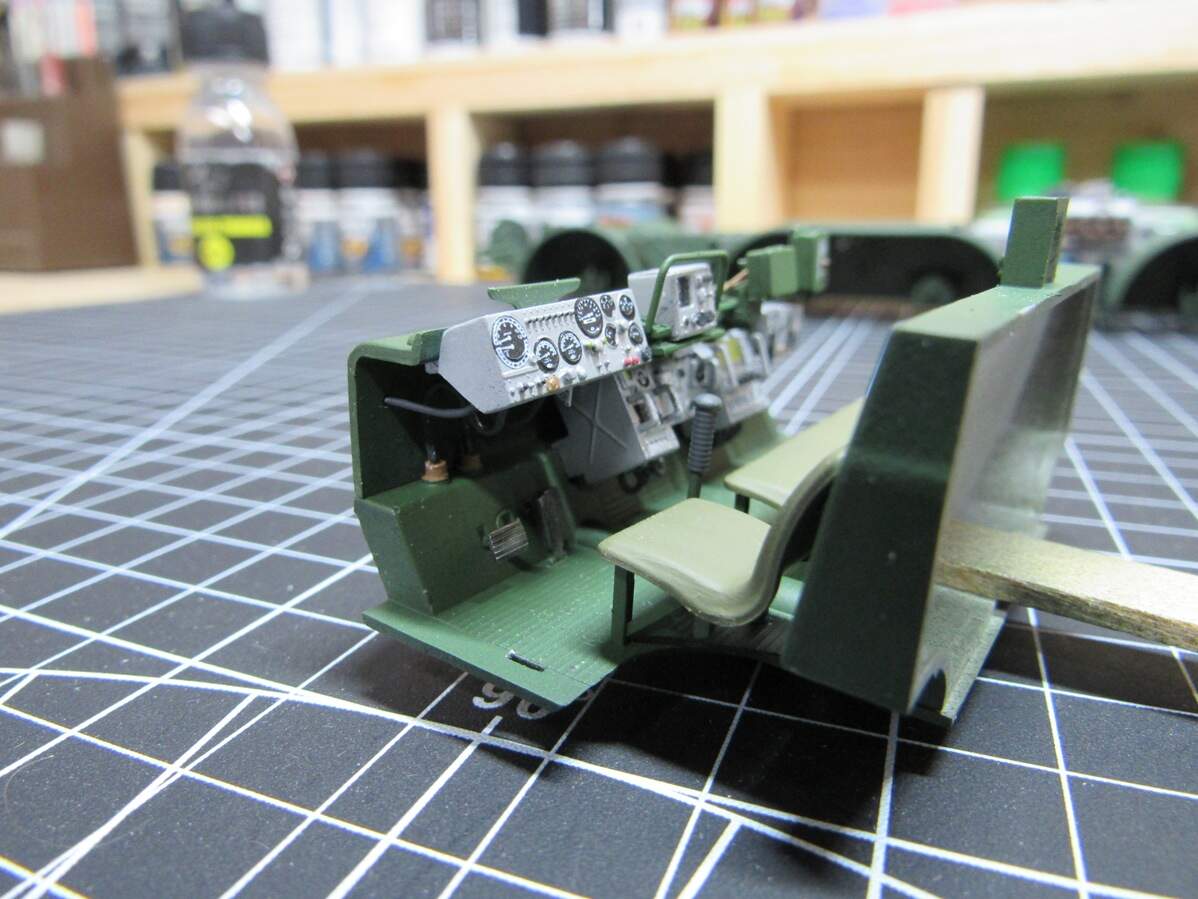
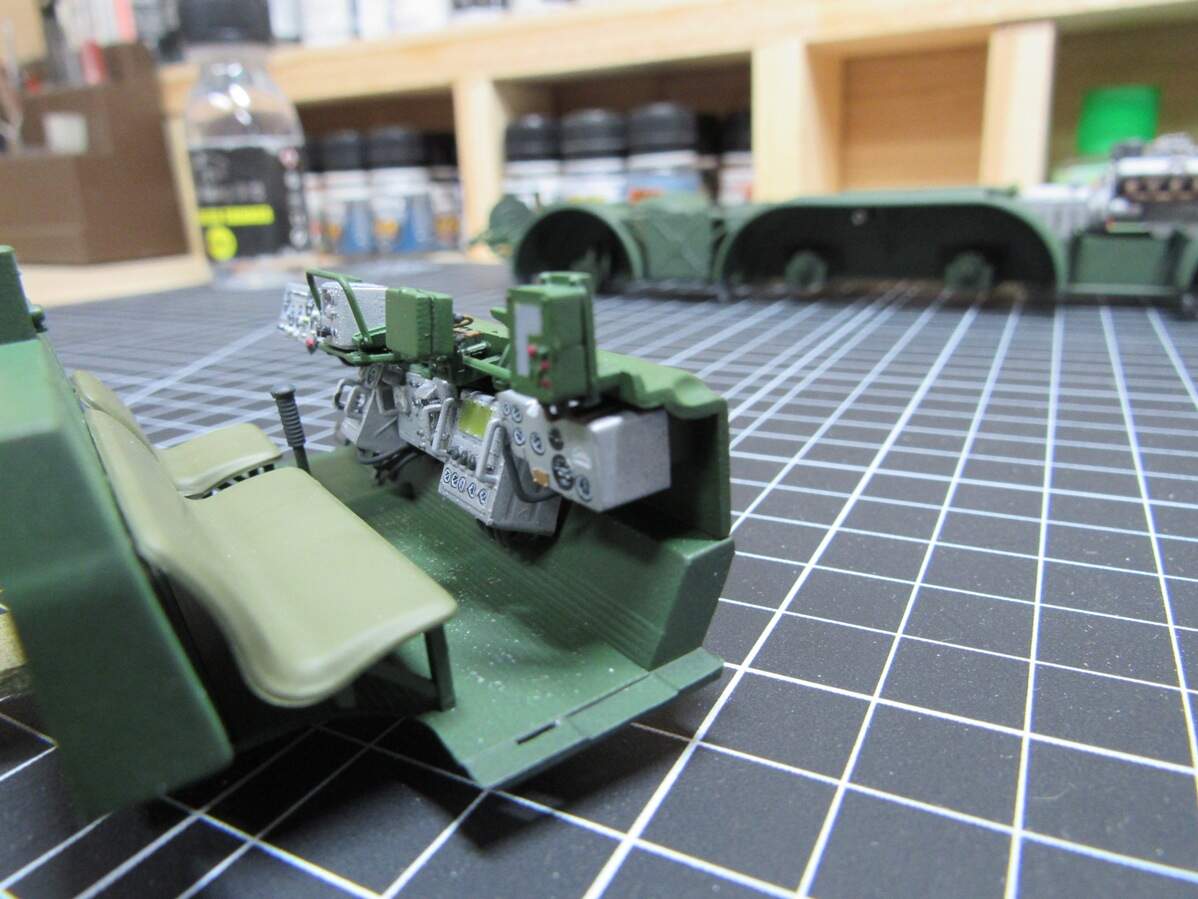
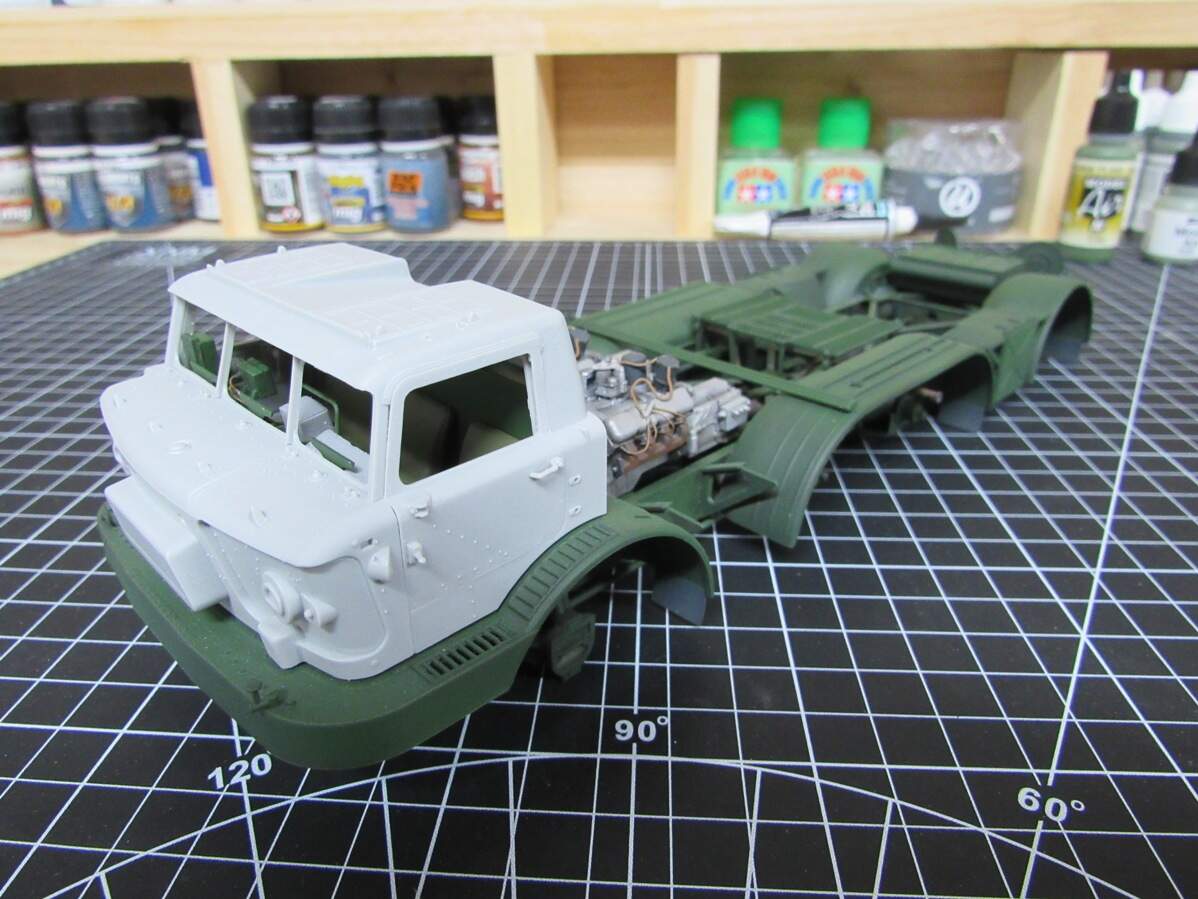
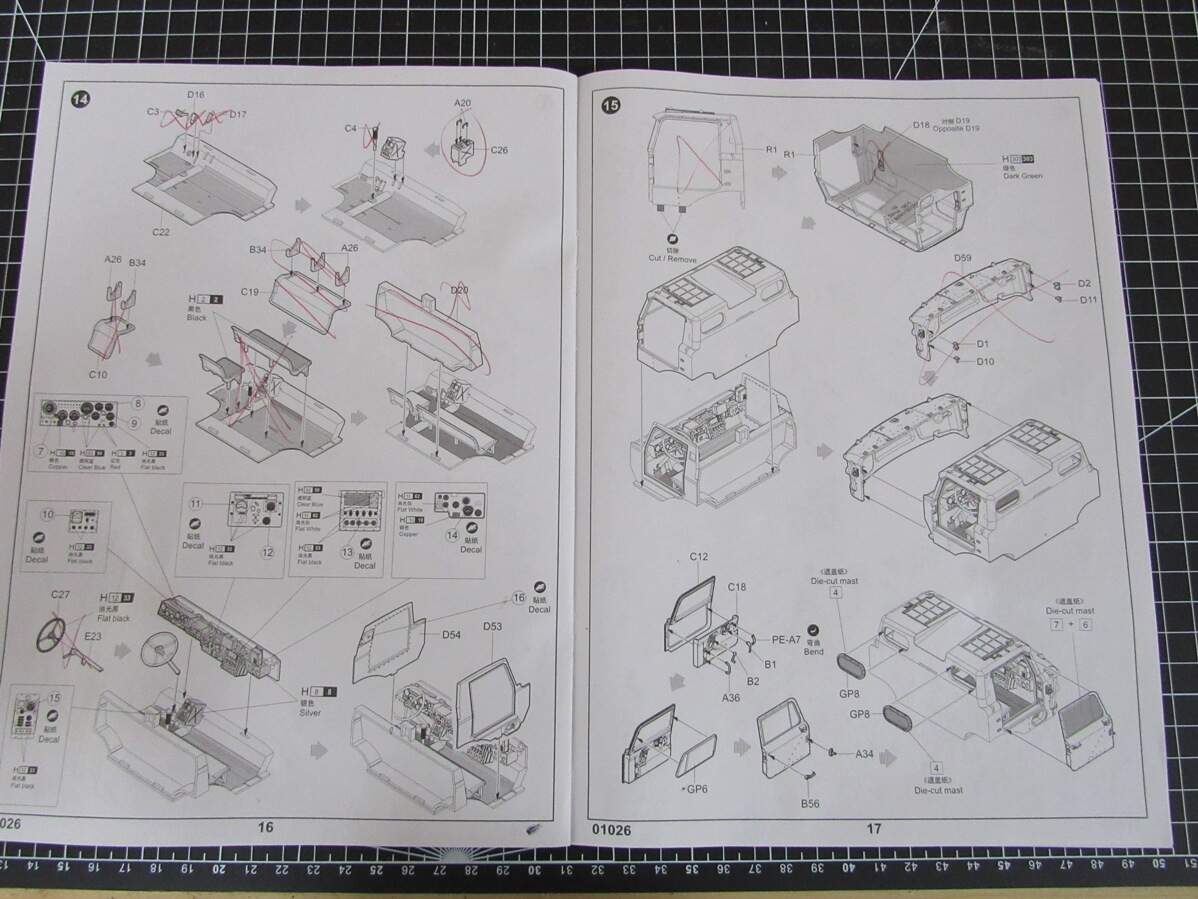
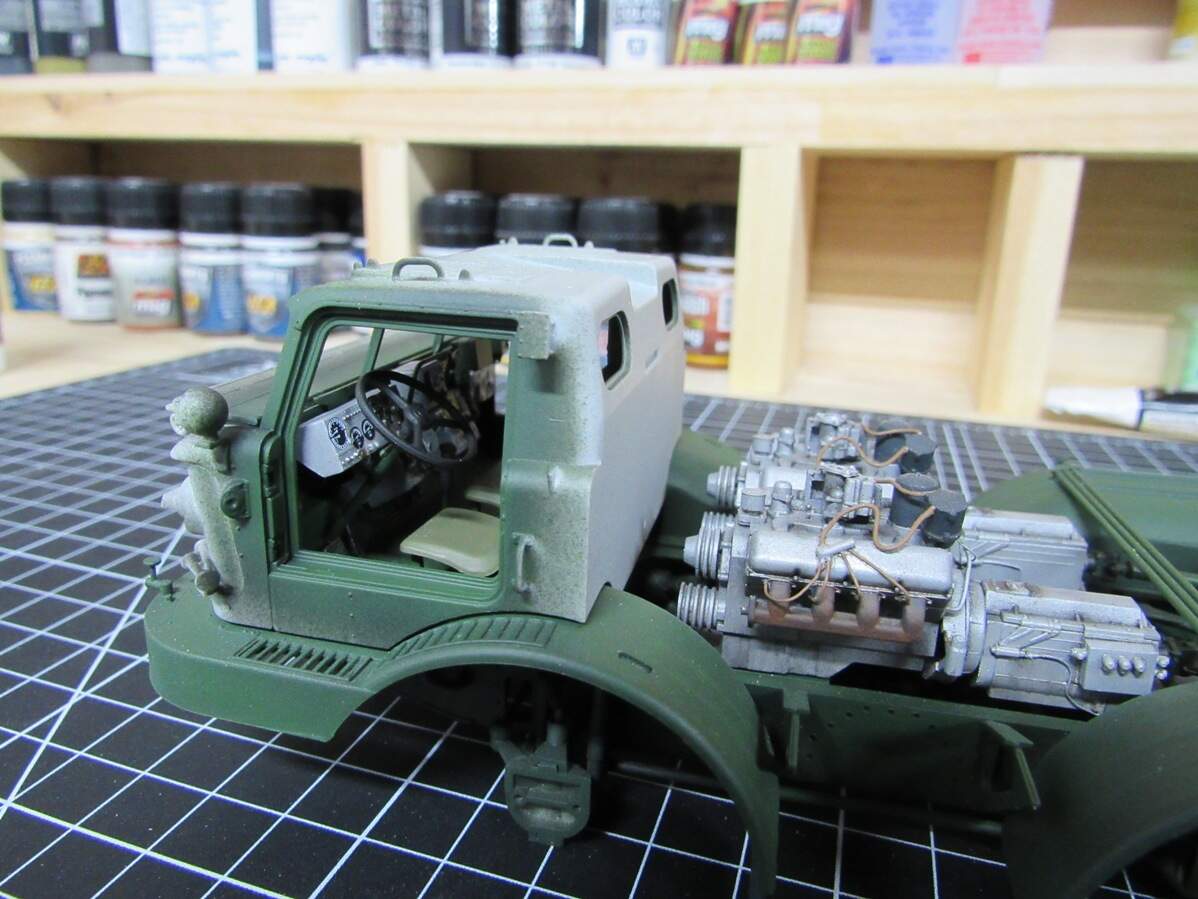
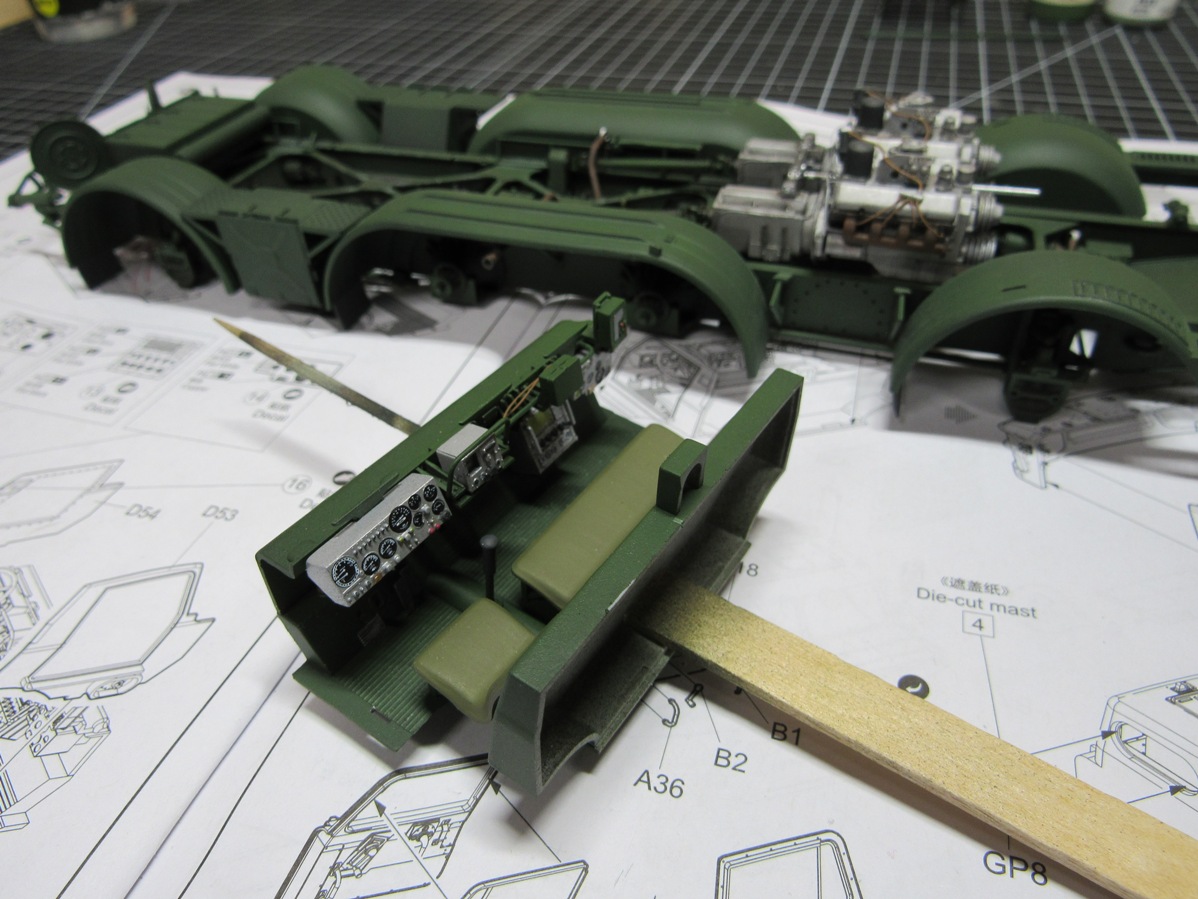
With the engines done, the instructions have me moving on to the cab. Lots of instrument panels in there. Like the engines, I want some more detail, so I’ll be adding some wiring. I also didn’t fully follow the painting call outs in the instructions, instead I used picture references I found online.

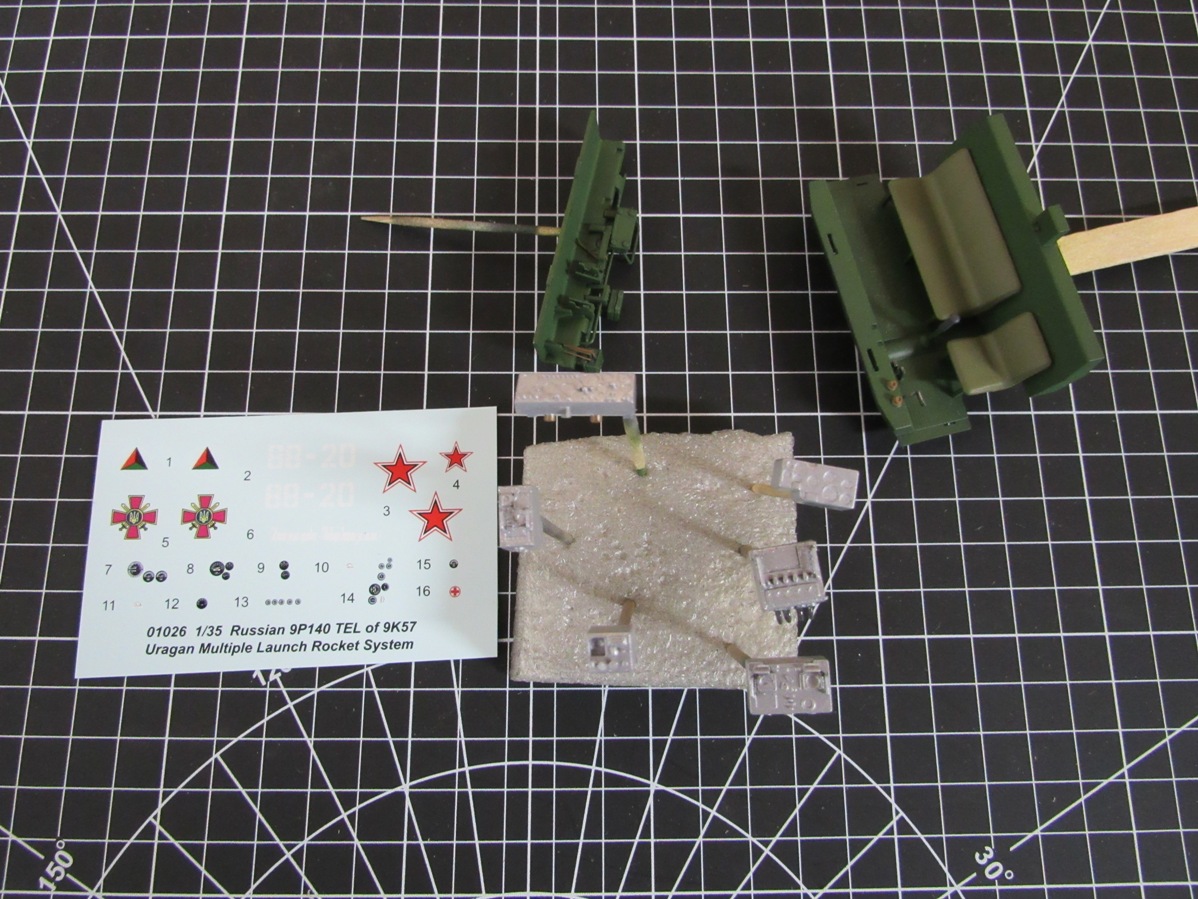
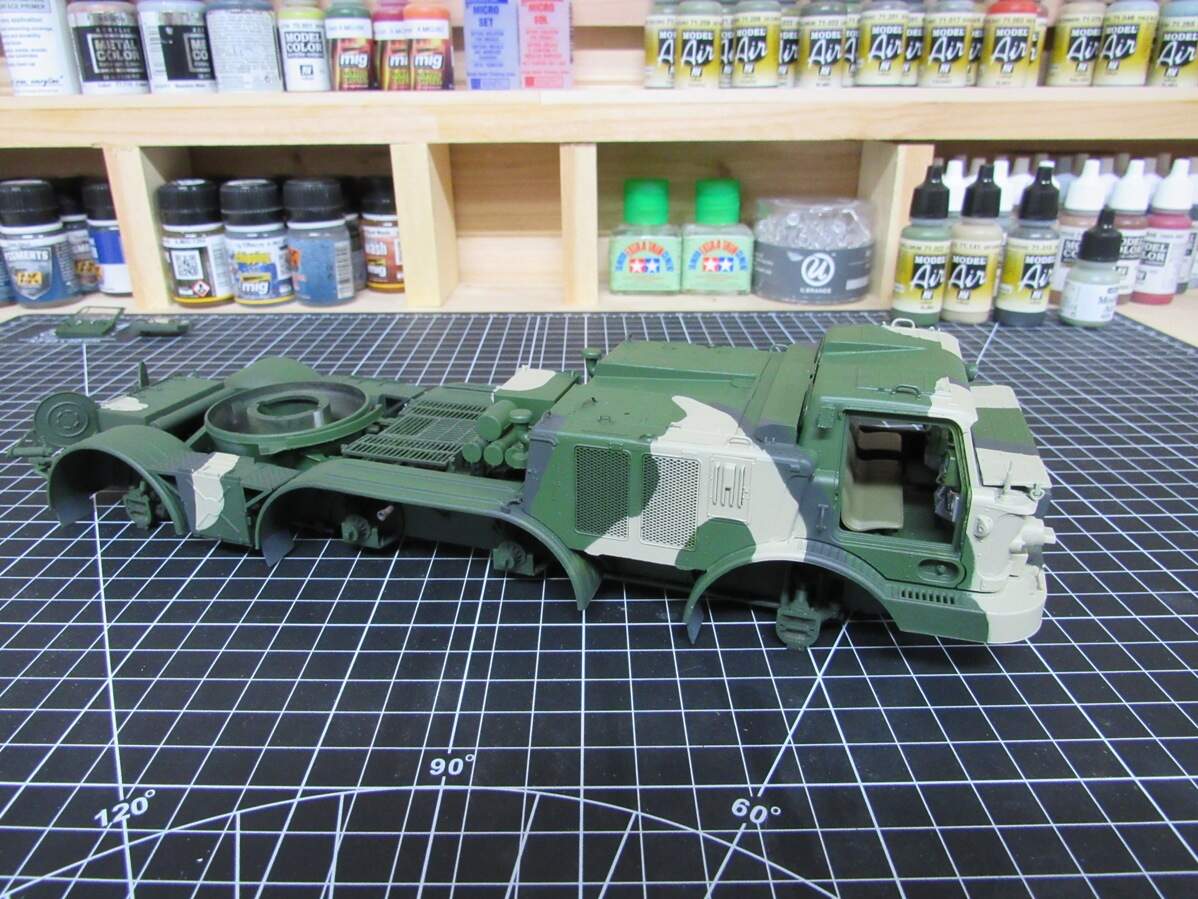
I didn’t get the decals perfect. They come in clusters, which can be hard to fit when there’s surface detail in the way. Took them two coats of MicroSol to get them settled down.

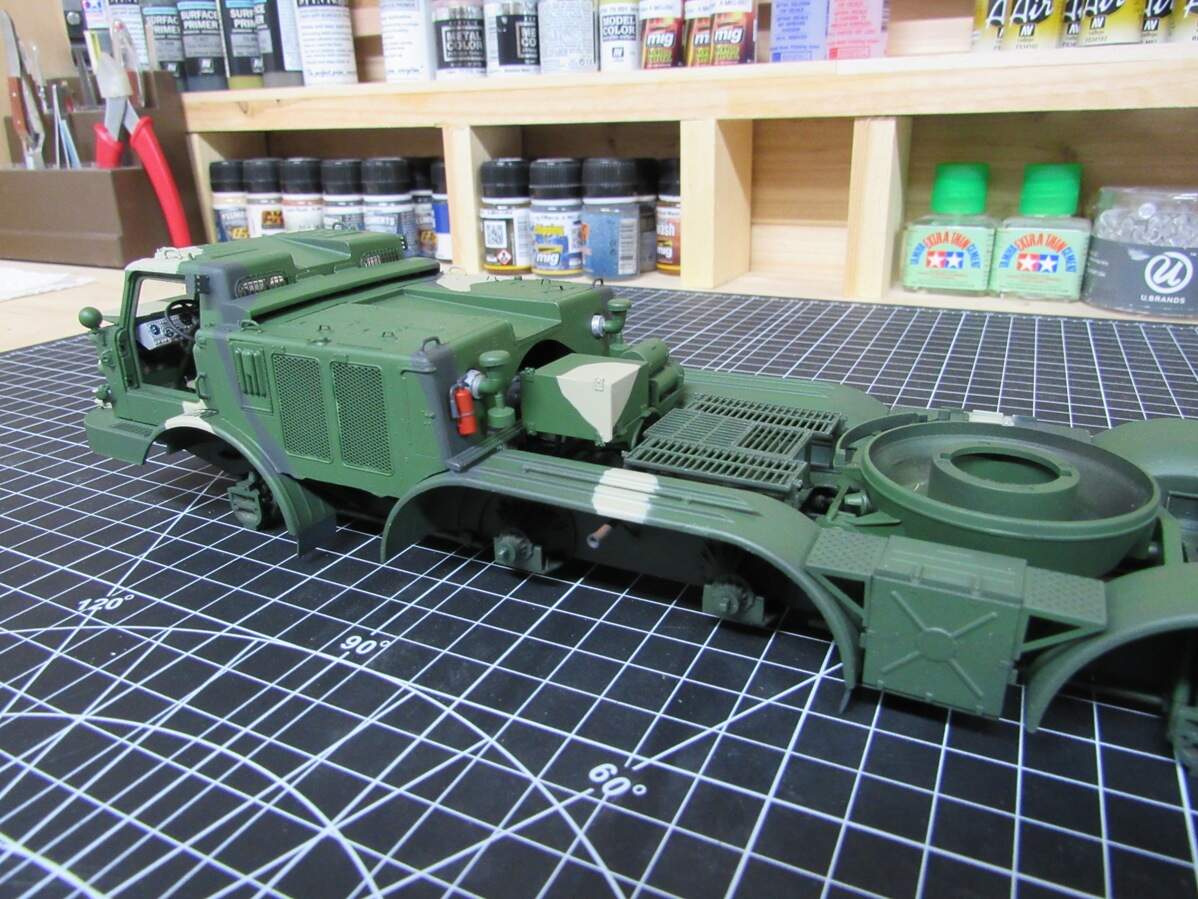
In the meantime I’ve been weathering the chassis, oils, chipping, pigments, etc…

And that’s where I’m at so far. Current plan is to keep plugging away at the cab, in the end I want to pose it with the doors open.

6 Likes

Finished up the dashboard and wiring tonight,

Now on to finishing the rest of the cab

James, that’s some detail you’ve put in there; I was thinking about this monster in due course as I love these Soviet era monsters, but I’m not sure I could find the resources of patience(!)

Keep at it - a hell of a job bit I’m sure it’ll be worth it.

Nice interior!

Thanks guys. Kit hasn’t tried my patience yet, it may be big, but at least there are no tracks to do.

Alright, got a little bit more done before the beers kick in. Finished the bulk of the cab assembly and dry fit it in place,

For anyone who may build this kit, I didn’t fully follow the instructions for the cab assembly. I believe my method is easier.

The instructions would have you piecemeal the entire cab together. I dry fit D53 & D54 seen in the lower right on page 16, then slid the major cab part over it (R-1), and glued D53 & D54 to R-1. Once it dried I pulled it off and attached the hood assembly. So now the cab is in two major pieces which makes for much easier painting. Dry fitting it all to the chassis, it’s close… It’s rocking a bit, either off at the front fender, or off at the wheel wells. A little trimming here and there and I think I can get it to work.

1 Like

Looking good James; good colour too.

Thanks Brian. The green is Vallejo’s Model Air Light Green, built up over black primer. I’m planning on the 3 tone camo for this one, following one of the kit provided schemes of green, black and a light sand/grey color. Got some paints coming in the mail, hope they’re a close enough match.

Some more progress,

Built and painted the cooling assemblies for the engines. For the most part they’ll be hidden so I’m not going too crazy with them, won’t bother with any wiring. Saving the weathering for when I get the whole engine cover assembled and painted.

Also finished up the cab interior. Dry fitted in place right now,

That’s it for now. I’ll keep moving along on the engine cover, getting that built and base painted. Paints should be coming in later this week, so next update will probably have some camo in it.

Progress continues. Camera was down for a while with a broken SD card. While I was waiting for a replacement I got the cab and engine cover in place and painted. Camo is done, save for the missile tubes. It was a lot of piecemeal painting, which really slows down a build.

Currently I’m rounding up the last of the little details, getting them painted and attached, then doing some touch up painting on the camo, and then I’ll finally get started on the missile tubes.

Keep it going James - 'just love this piece of no-nonsense Soviet kit.

Brian

Chipping away at it. Doing the odds and ends towards the end of a build tends to be my least favorite part. Lots of multi-step painting on small parts which means 75% of the time is cleaning the airbrush, or waiting for paint to dry. Just got some headlight covers done, and the windshield wipers installed though.

I think tomorrow I’ll be able to start on the missile tube assembly. I plan on adding some wiring to that which will really up the detail.

Looks good so far. I think the pictures are too light though.
Can’t wait to see it with the rockets launcher on.

Olivier

Thanks Olivier. Photography is one of those things I need to work on, it’s an entire skill in itself.
Put today’s progress in the lightbox though. Completed the base of the mount. Following the instructions and with some careful gluing you’re left with a mount that can elevate. I’ll be modeling mine in the transport position.

In this area here I’ll be adding some hydraulic lines and other cabling. Think it’s 5 or 6 cables to do. Once that’s done it’ll be on to the missile tubes, and then even more cabling.

1 Like

Shelved the distractions for tonight and got some cabling done. Looks mainly like hydraulic lines.
One more hose to go

And here it is side by side with a reference image I found,

That coiled copper line will need to be bent up and tucked away more. And the smaller lower lines could sit closer to the launcher body, but I’m happy with it so far.

That’s some nice additions. And you can be happy with them. :grin:

Olivier

Thanks Olivier. I wasn’t fully happy though, decided to replace two of the lines with some solder I found that was about the same thickness of the copper wire I had in there. Much more malleable than the copper. Also finished the other hose, and tucked the first one up a bit.

Next step: Missile tubes

1 Like

Missile tubes assembled and ready to be stacked together. Went in thinking the PE supports would be a pain, but it was very enjoyable. I did skip the winding strap PE that the instructions would have you do, I think the molded plastic looks good enough for me to skip all that work

Got a little happy with the glue in some spots, but I’ll clean that up. Most won’t be seen anyway.

Now we’re talking! Looking good James.

Thanks Brian. In the home stretch now, well at least for the build. Got them stacked and started fitting some detail parts since my last post. Tomorrow’s my last day of work for the year, so things should be picking up.