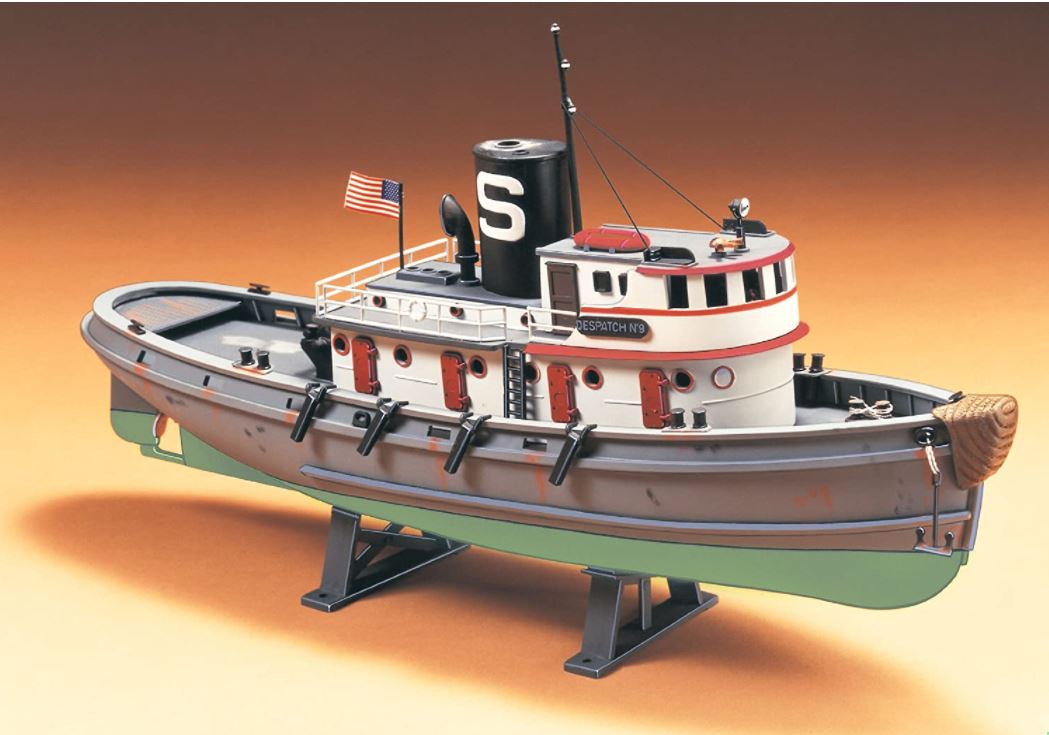
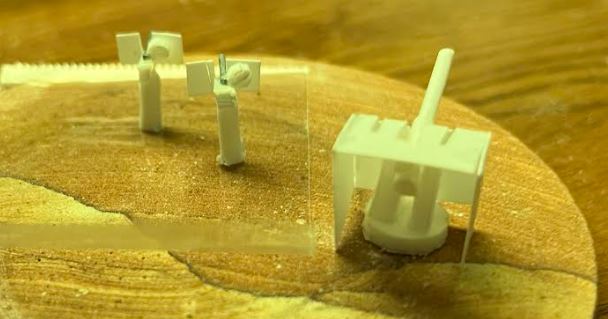
Lower deckhouse and bridge wings assembled.

Deckhouse is assembled. Cutting just by eye, ruler and straight edge it was hard to get a precise fit but it will do with a bit of trimming and filling.
I’ve settled on HMS Frisky (W11). It was one of the earliest commissioned and survived the war with a long and busy career. “W11” is the easiest hull number to out on. Finally, there are few photos, which gives a bit of freedom with detailing
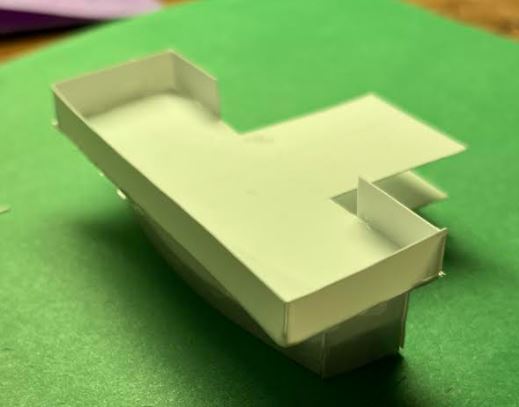
The forward scuppers sealed and a transverse bulkhead added. When the balsa upper deck is glued on the forward end will be watertight up to a hatchway around the deckhouse.
The next decision will be whether to leave a hatchway under the engine room skylight or to seal the afterdeck completely. Charging and battery replacement would be through the big forward hatch, the entire deck would be attached with caulk and removable for more serious maintenance.
A bit of surgery to transform the Lindberg tow winch into more of an Assurance anchor windlass.
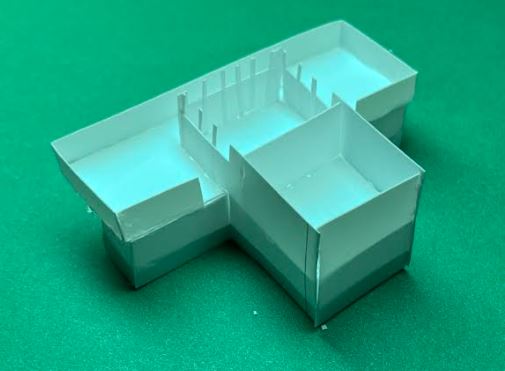
Foredeck epoxied on, shaped and faired with filler, the access hatch fabricated and deckhouse attached and the rear of the deck opening covered with a thin styrene sheet to keep it simple for now but allow installing a hatch there later if needed. Now the basic structure is complete.
Next step is making and attaching all the detail bits.
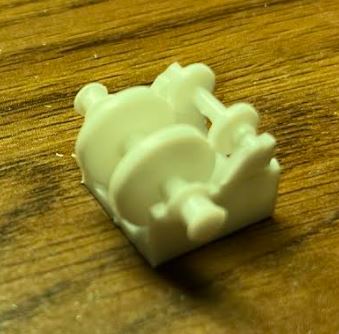
Two side-fenders transformed into Oerlikons and other bits become a 12pdr LA/HA.
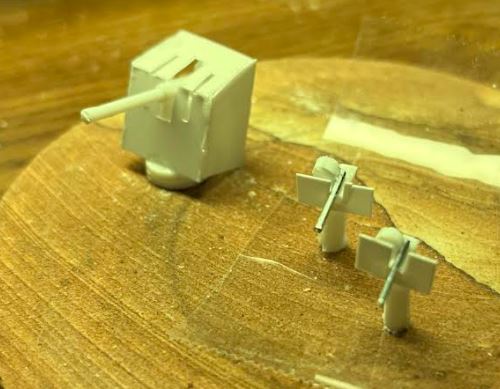
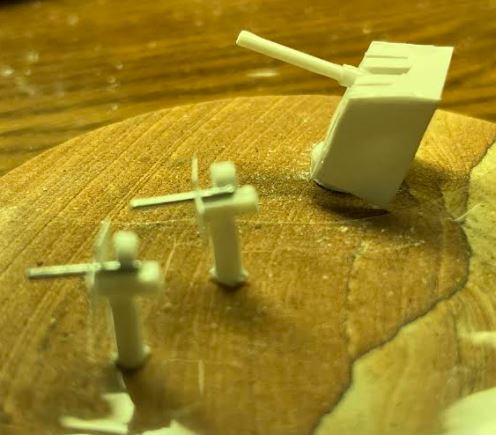
I had no 144 scale dimensions, so I took measurements of the 12 pdr on my 1:96 scale trawler and cut those by 1/3 to get the 144 scale dimensions.
Then I looked up the barrel lengths of the two weapons and used that to calculate the overall length of the 144 scale 20mm. Then I printed an online drawing of the weapon and used the length to calculate the other dimensions.
A bit rough, especially with tiny pieces cut by eye and ruler, (loud laughing from all the 1:700 modellers) but they look like they will serve.
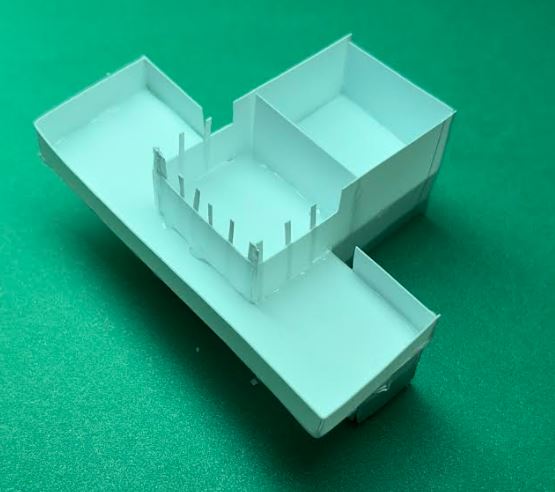
Front end of the access hatchway roughed out and the breakwater installed. Matching the front deckhouse wall, it will keep water from the foredeck away from this hatchway. It is a feature adopted from the larger 44 scale Model Slipway kit design. The rest of the hatchway will be formed later and an interior coaming to fit it will be attached to the underside of the access hatch to fit it.
Blanks for the boats with outline cutouts cut from a copy of the plans to guide their shaping.
They are on the the coffee table; I do much of the work sitting on the sofa watching TV with my Significant Other. She’s happier that way than if I hid for hours shut away in a workshop. Though I suppose that along with simple tools, poor eyes and jittery hands this does contribute a bit to the slightly ramshackle results. 
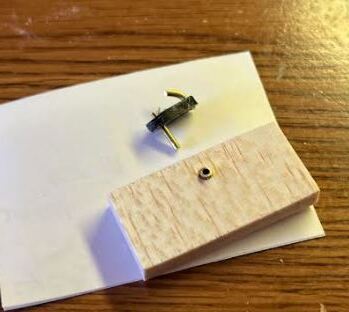
While American tugs traditionally fastened the tow line to a bit or a special towing winch, in Europe a towing hook was usual, swiveling near the center of gravity.
I’ve fabricated the hook from a servo arm and bits of leftover propeller shaft. A brass bushing sized to match is set into the tow hook base. When the glue dries a rub ring will be added.
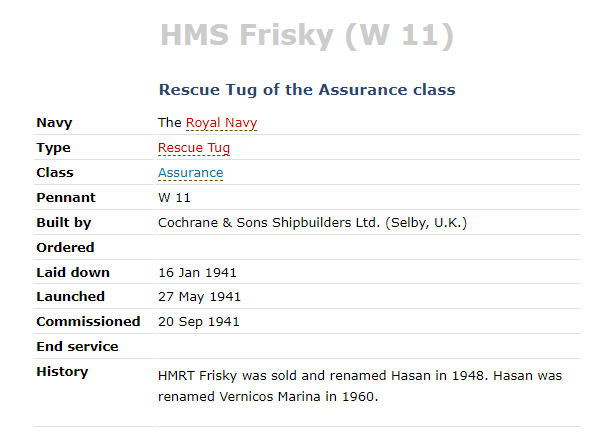
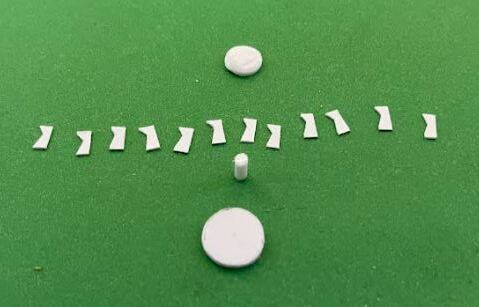
Tiny bits ready for assembly into the captstan.
Danie,
You must be a patient person, your model is really shaping up nicely.
Mark 
For days I’ve been prowling everywhere looking for balls/hemispheres the right size for the cowl vents. Today I hit pay dirt; a coworker had a box of dead dry erase markers whose caps had the right size!
She’s starting to take shape very nicely Danie. Excellent scrounging skills! Between those and the highlighter you could christen her HMS Staples (or whatever your equivalent local office supply place is).
Whenever I get stumped or frustrated with one part I work on a different part. Eventually either a solution appears for the first part or just the gumption to do it the hard way.