Twin-engine bombers

After an afternoon of loving, touching, and squeezing the top half of the wing to the bottom half of the wing, it’s together. I just have it dry-fit to the fuselage for now, but I don’t really want to pop it out. It took some effort to get them to pop together but now they are together, I’d really like to leave them. But the fuselage is going to need some sanding and rescribing and that’s probably easier to do with the wing off…


And the interior bits of the cockpit are complete. Just waiting for the glue holding the clear parts to dry completely. They fit pretty well together before I had the clear parts on so that should go well hopefully.

I’m ordering some masks from Hannant’s. Hopefully they will be here in time for me to complete on time.

3 Likes

got the canopy masks i ordered the other day on the mitchell’s canopies. glad i decided to use them instead of masking myself although the turret mask was not completely right and i had to fill in the missing masks. i added some thin plastic strip to the right side where the stabilizer mounts to fix the droop to that side. it will need some clean up once it dries and then attach the wings and start painting.


4 Likes

Hi everybody,

I’m coming in late on this one, though it hasn’t been without a bit of thought. My first thought was the Monogram He-111, test fitting found that the great deal I got had parts from two different kits. So, I thought ICM’s Do-17Z, and all was well till I biffed the cockpit decal. I did order the Eduard set, but that comes with its own set of issues.

Finally, I decided upon Tamiya’s Mosquito Mark IV. I’ve always loved this plane, perhaps from seeing the movies back in the 70’s!

Given the short time frame, I dove right in! I’ll be doing updates as I go along!

I started per the instructions with the wings. and painted the interior as instructed. Forgive me, I know not RAF aircraft or their paint jobs.

I painted the colors per the instructions and kept on moving!

Next up will be the interior so stay tuned!

Stay safe and have fun!

5 Likes

Great choice! Colours look good to me.

I got the engines mounted and cowlings on today. Probably should’ve thought my scratched mountings a bit through more as I had to a bit of jiggling to get the engines centred. And fitted the upper and lower intakes. Again, the positions were a little vague and needed some checking and gradual adjustments to centre. Think they’re looking ok though.


8 Likes

Progress on the F-15E continues to move very slowly, mostly for lack of paint, which is on order.

My plan is to paint and build the cockpit, get that installed, build up the front of the plane, seal it off, then tackle the intakes. Once I get the intakes right, I am hopeful the rest of the model will progress quickly. This is all unexplored territory for me.

5 Likes

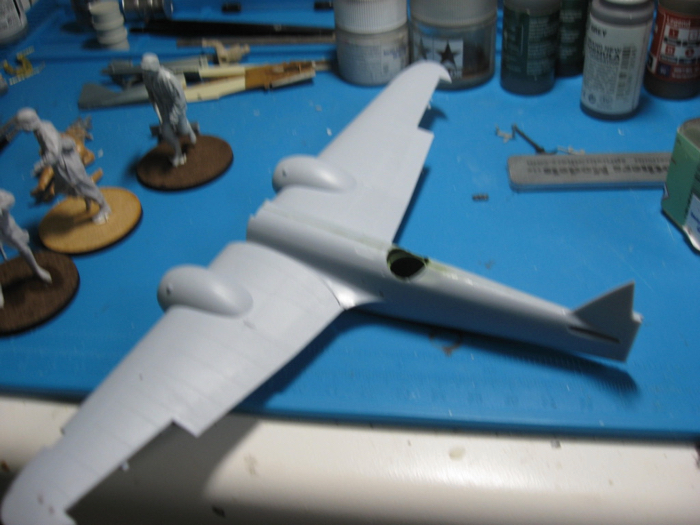
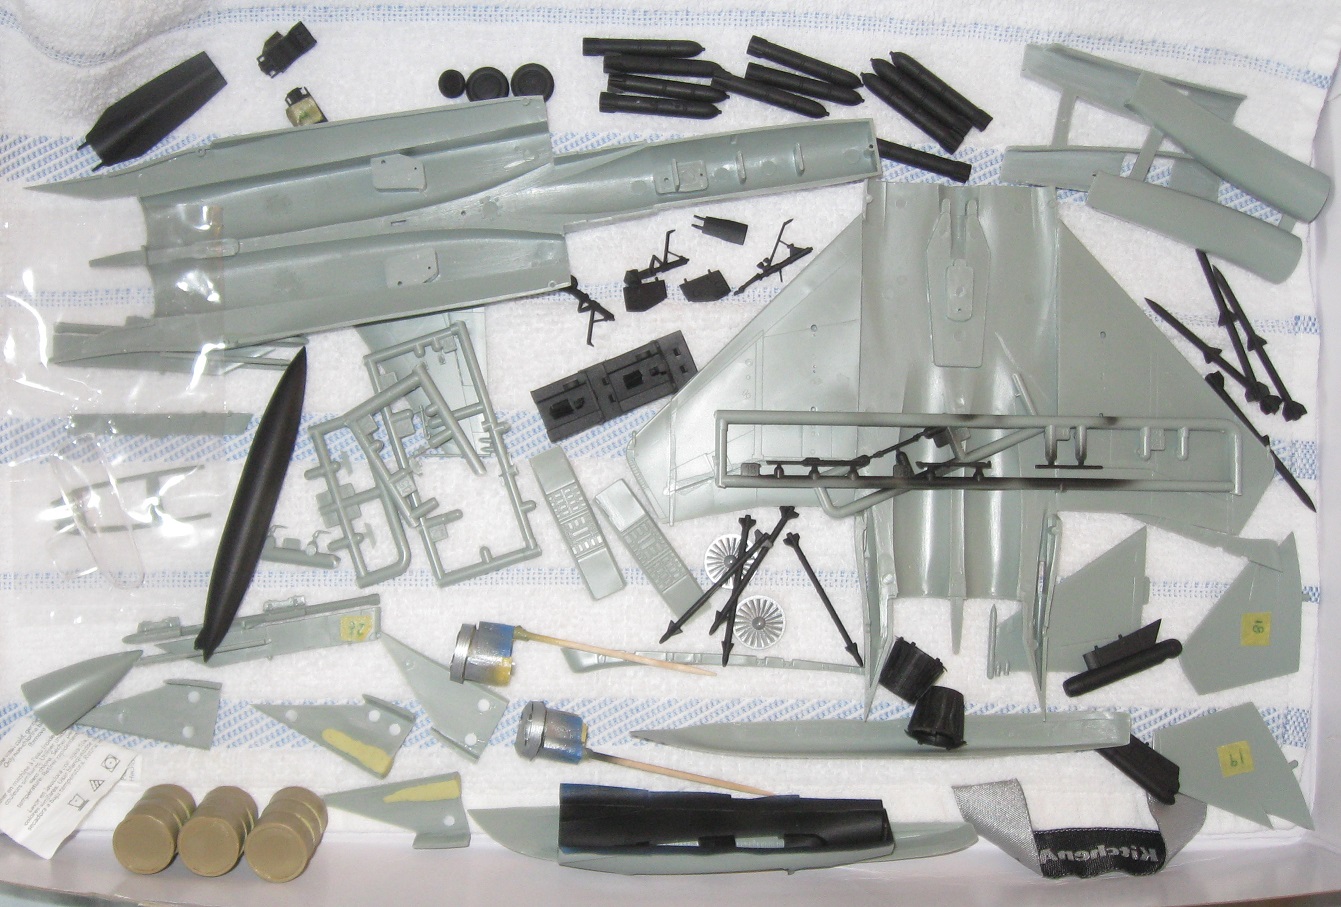
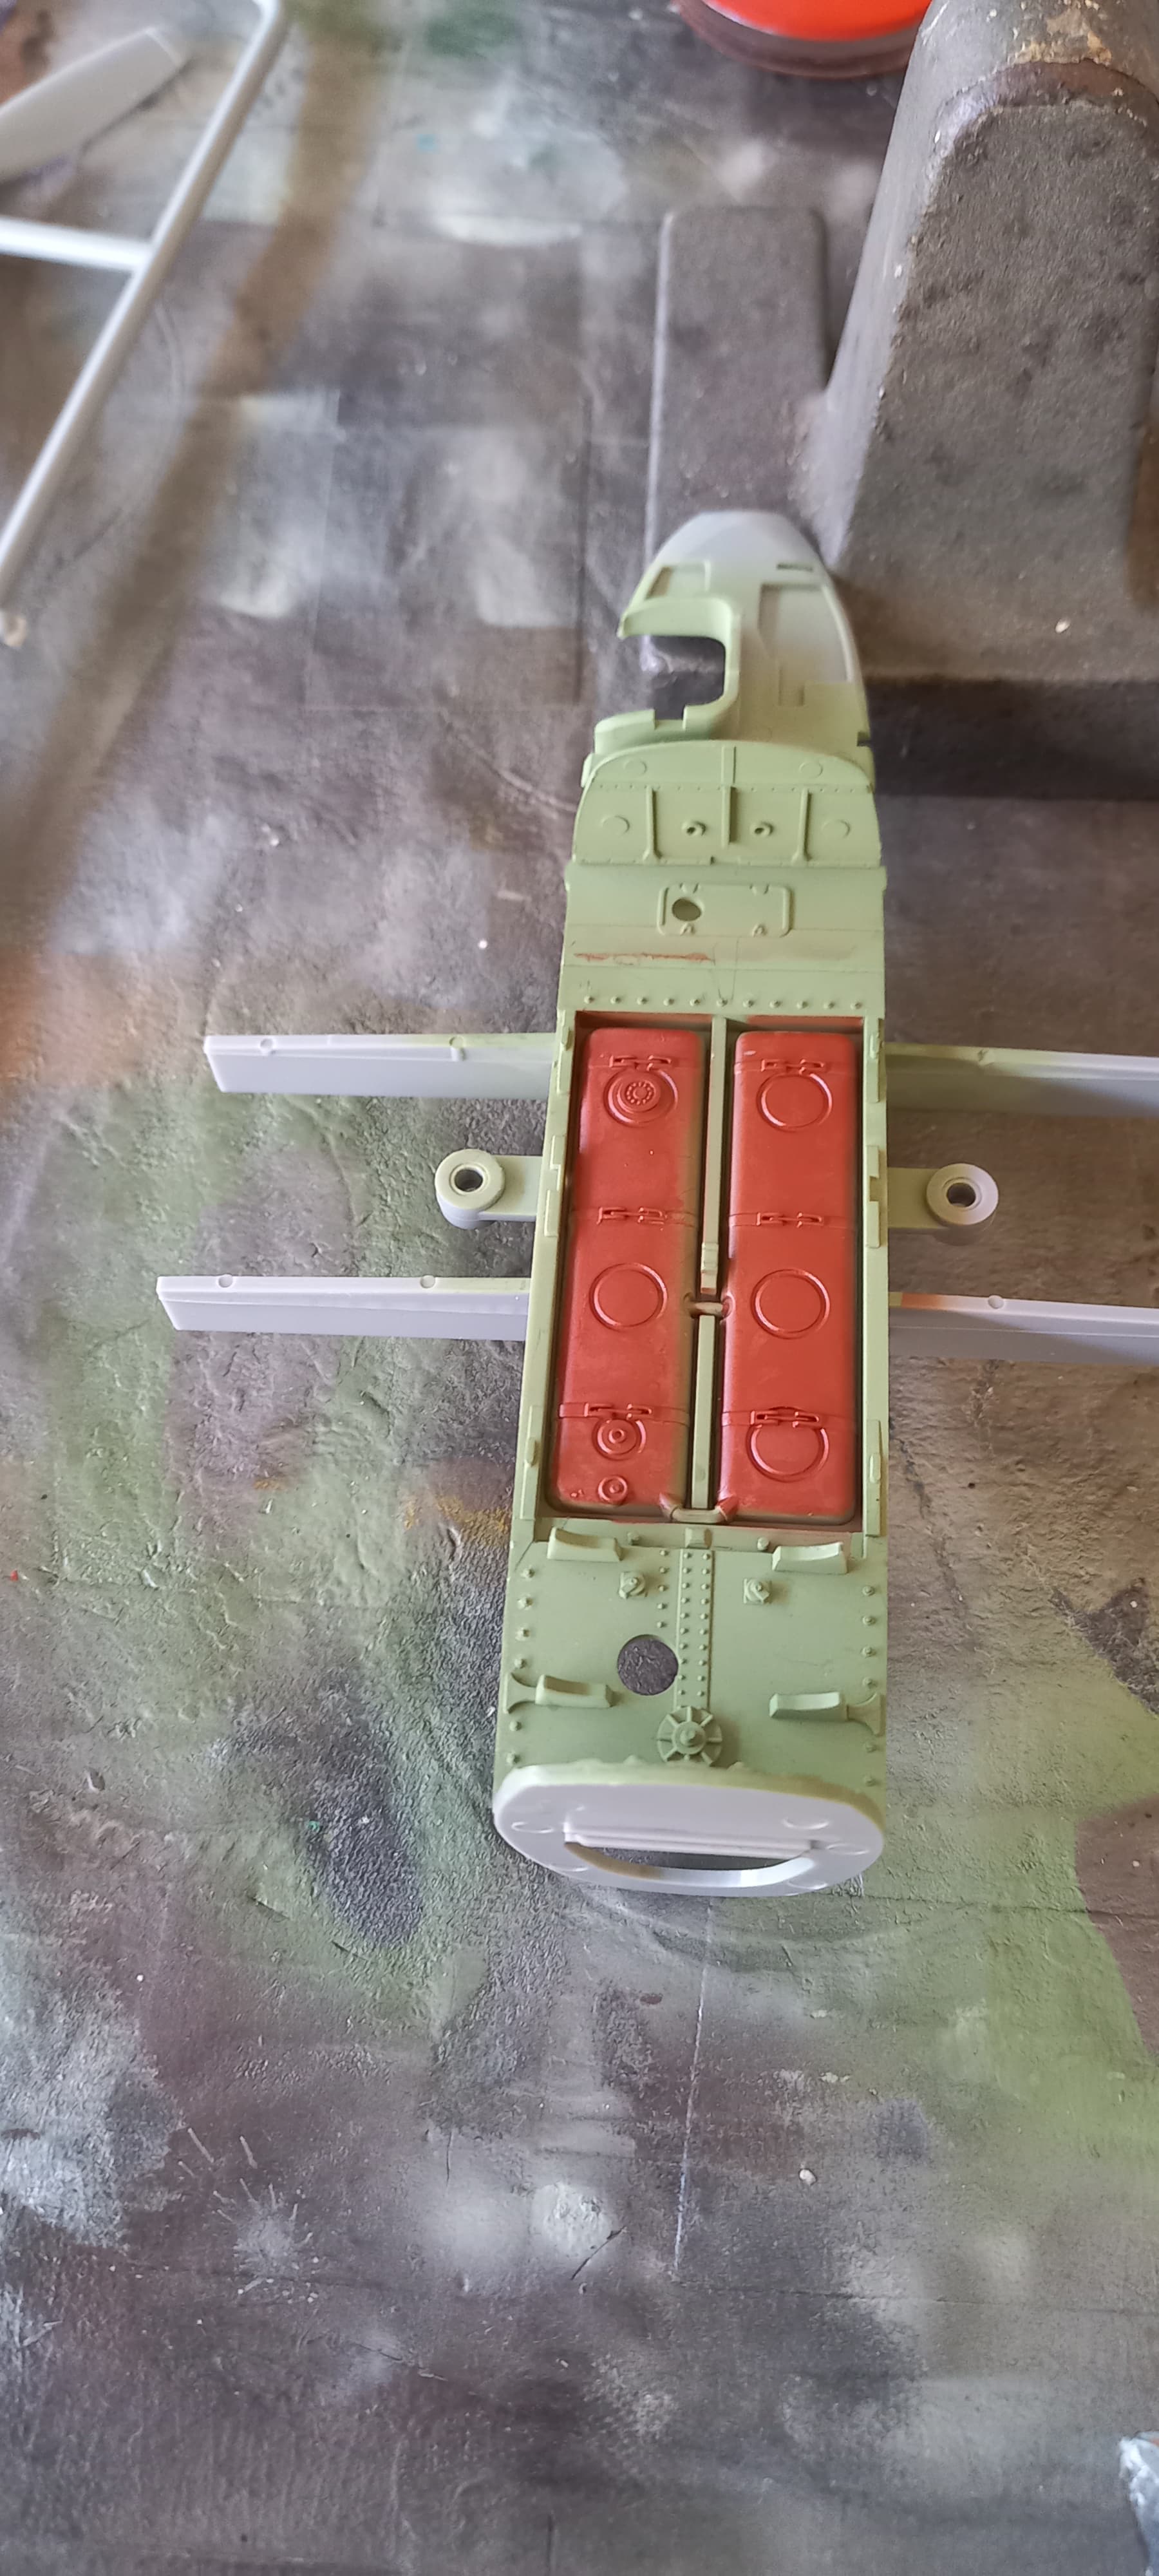
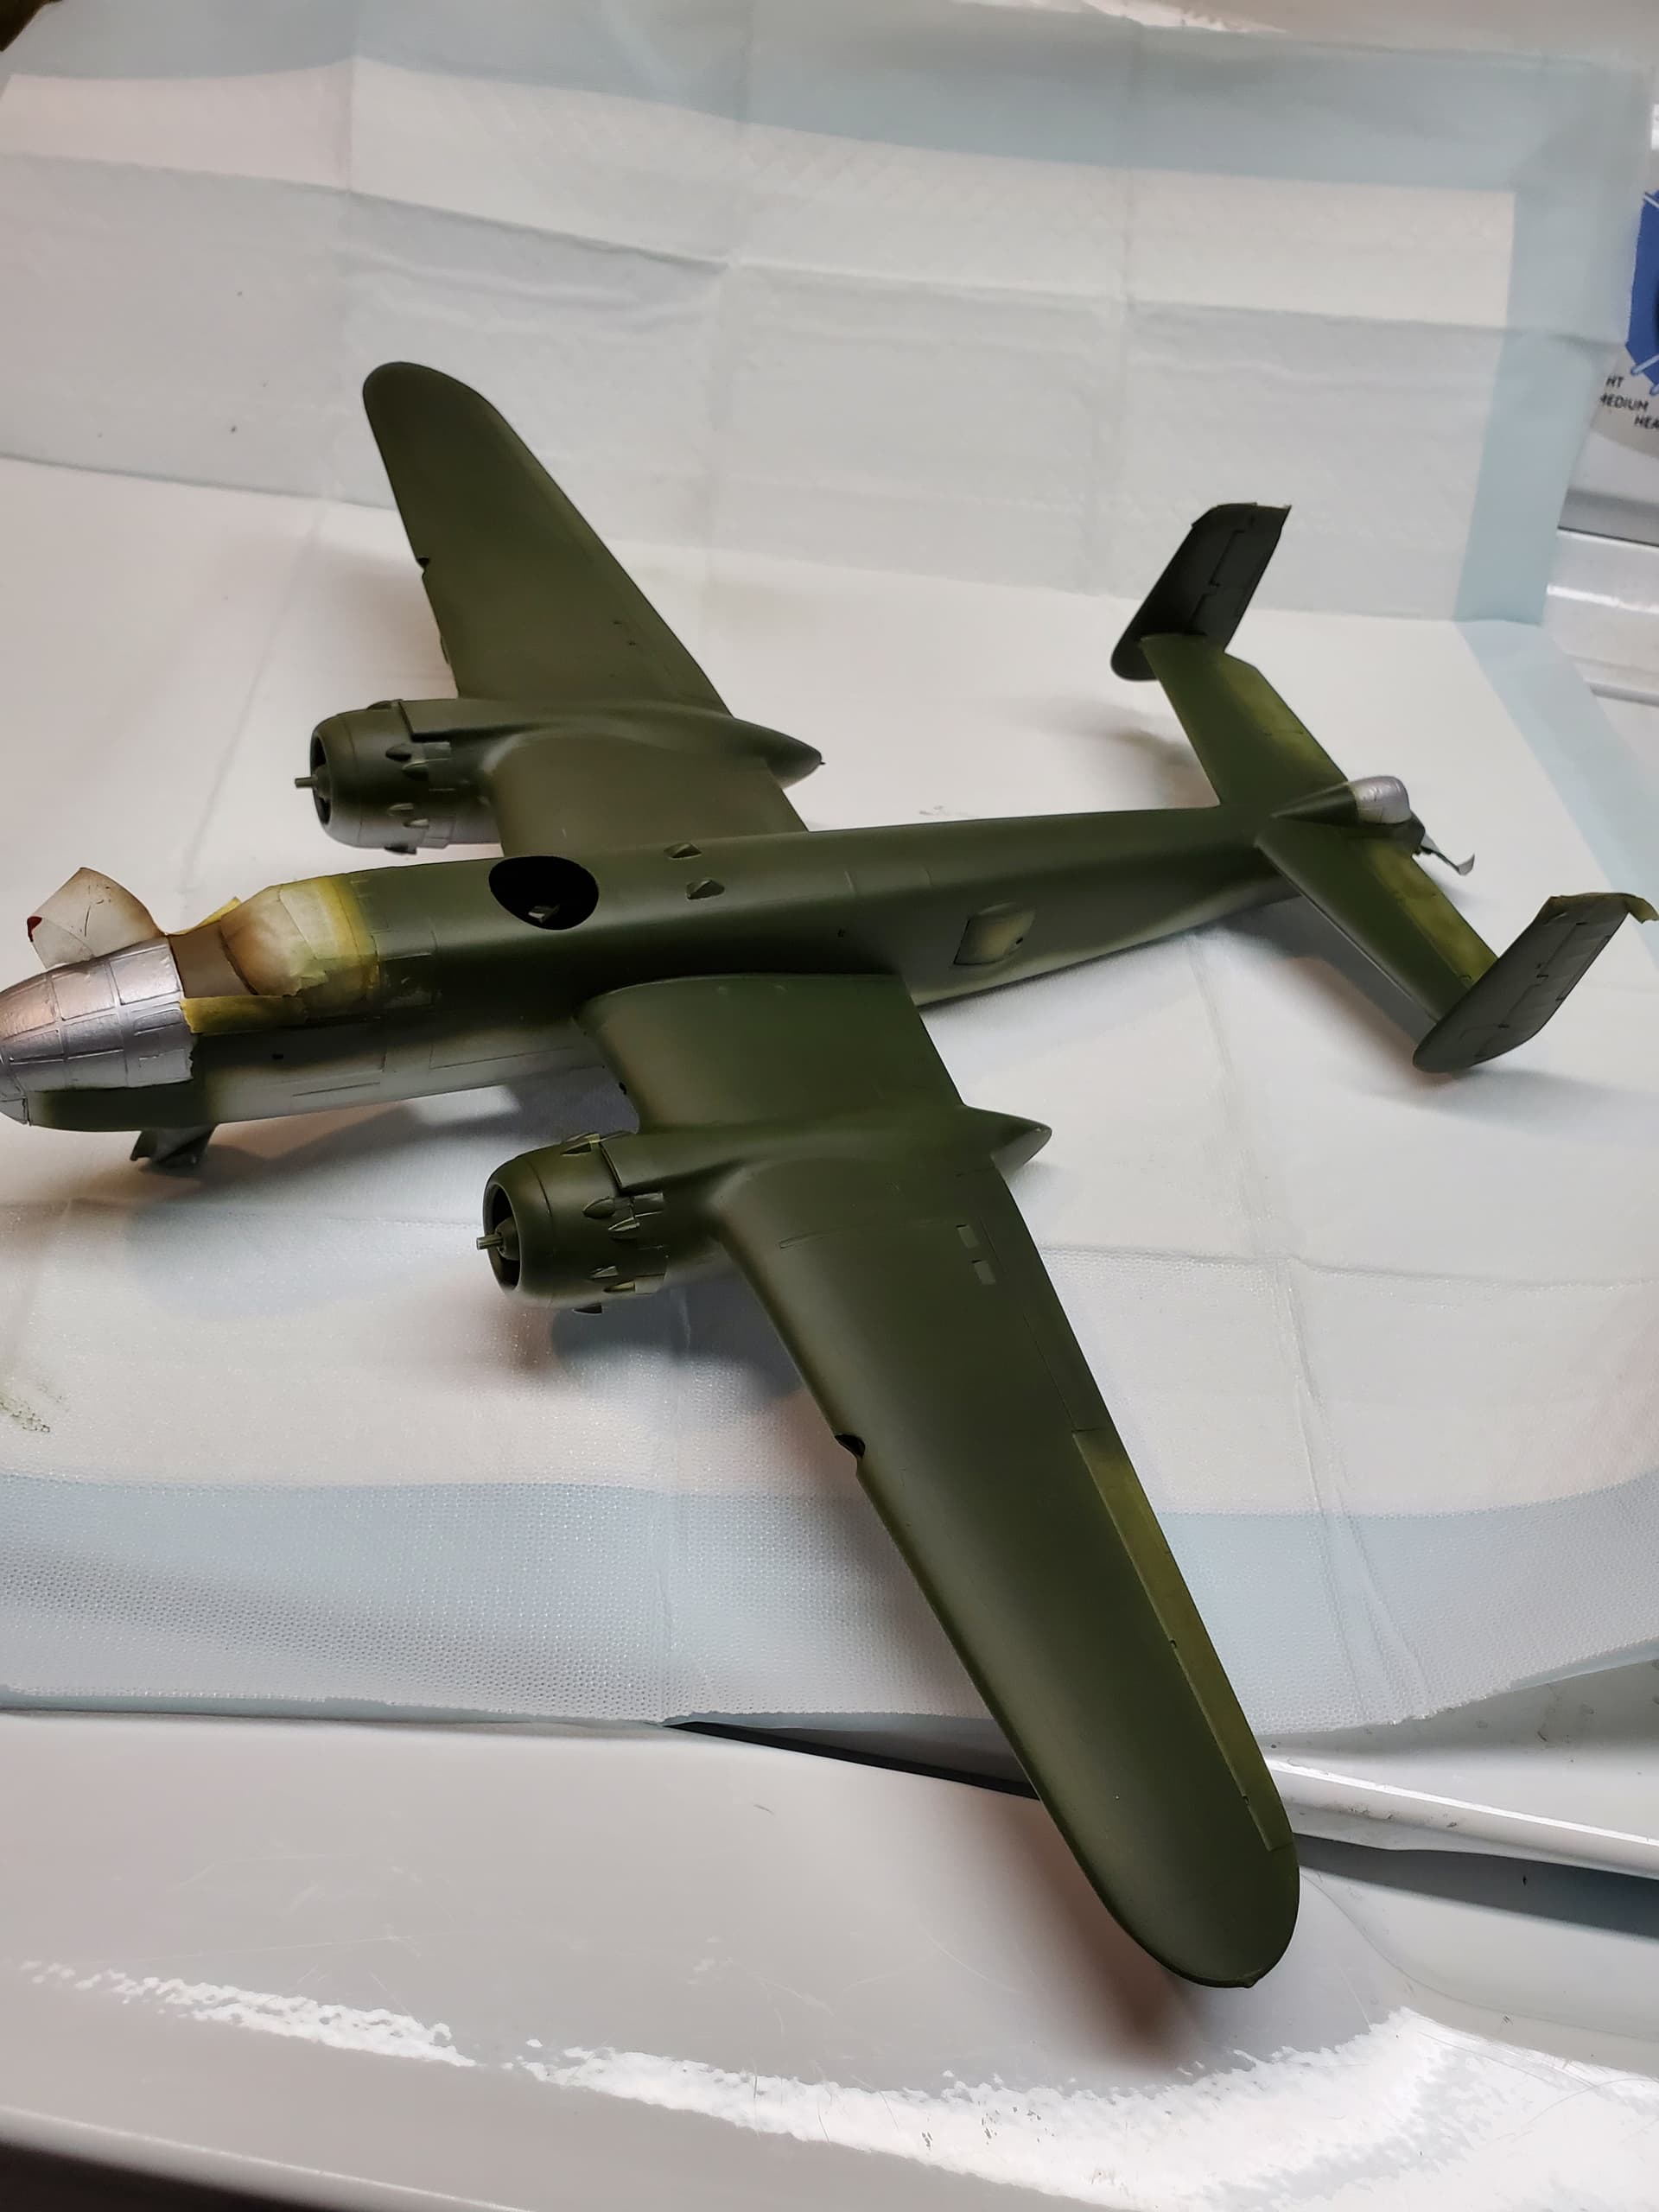
With less that four weeks left, I decided to completely reverse my previous plan and build up the entire F-15E accept the cockpit. That meant tackling the intakes and engine ducts.

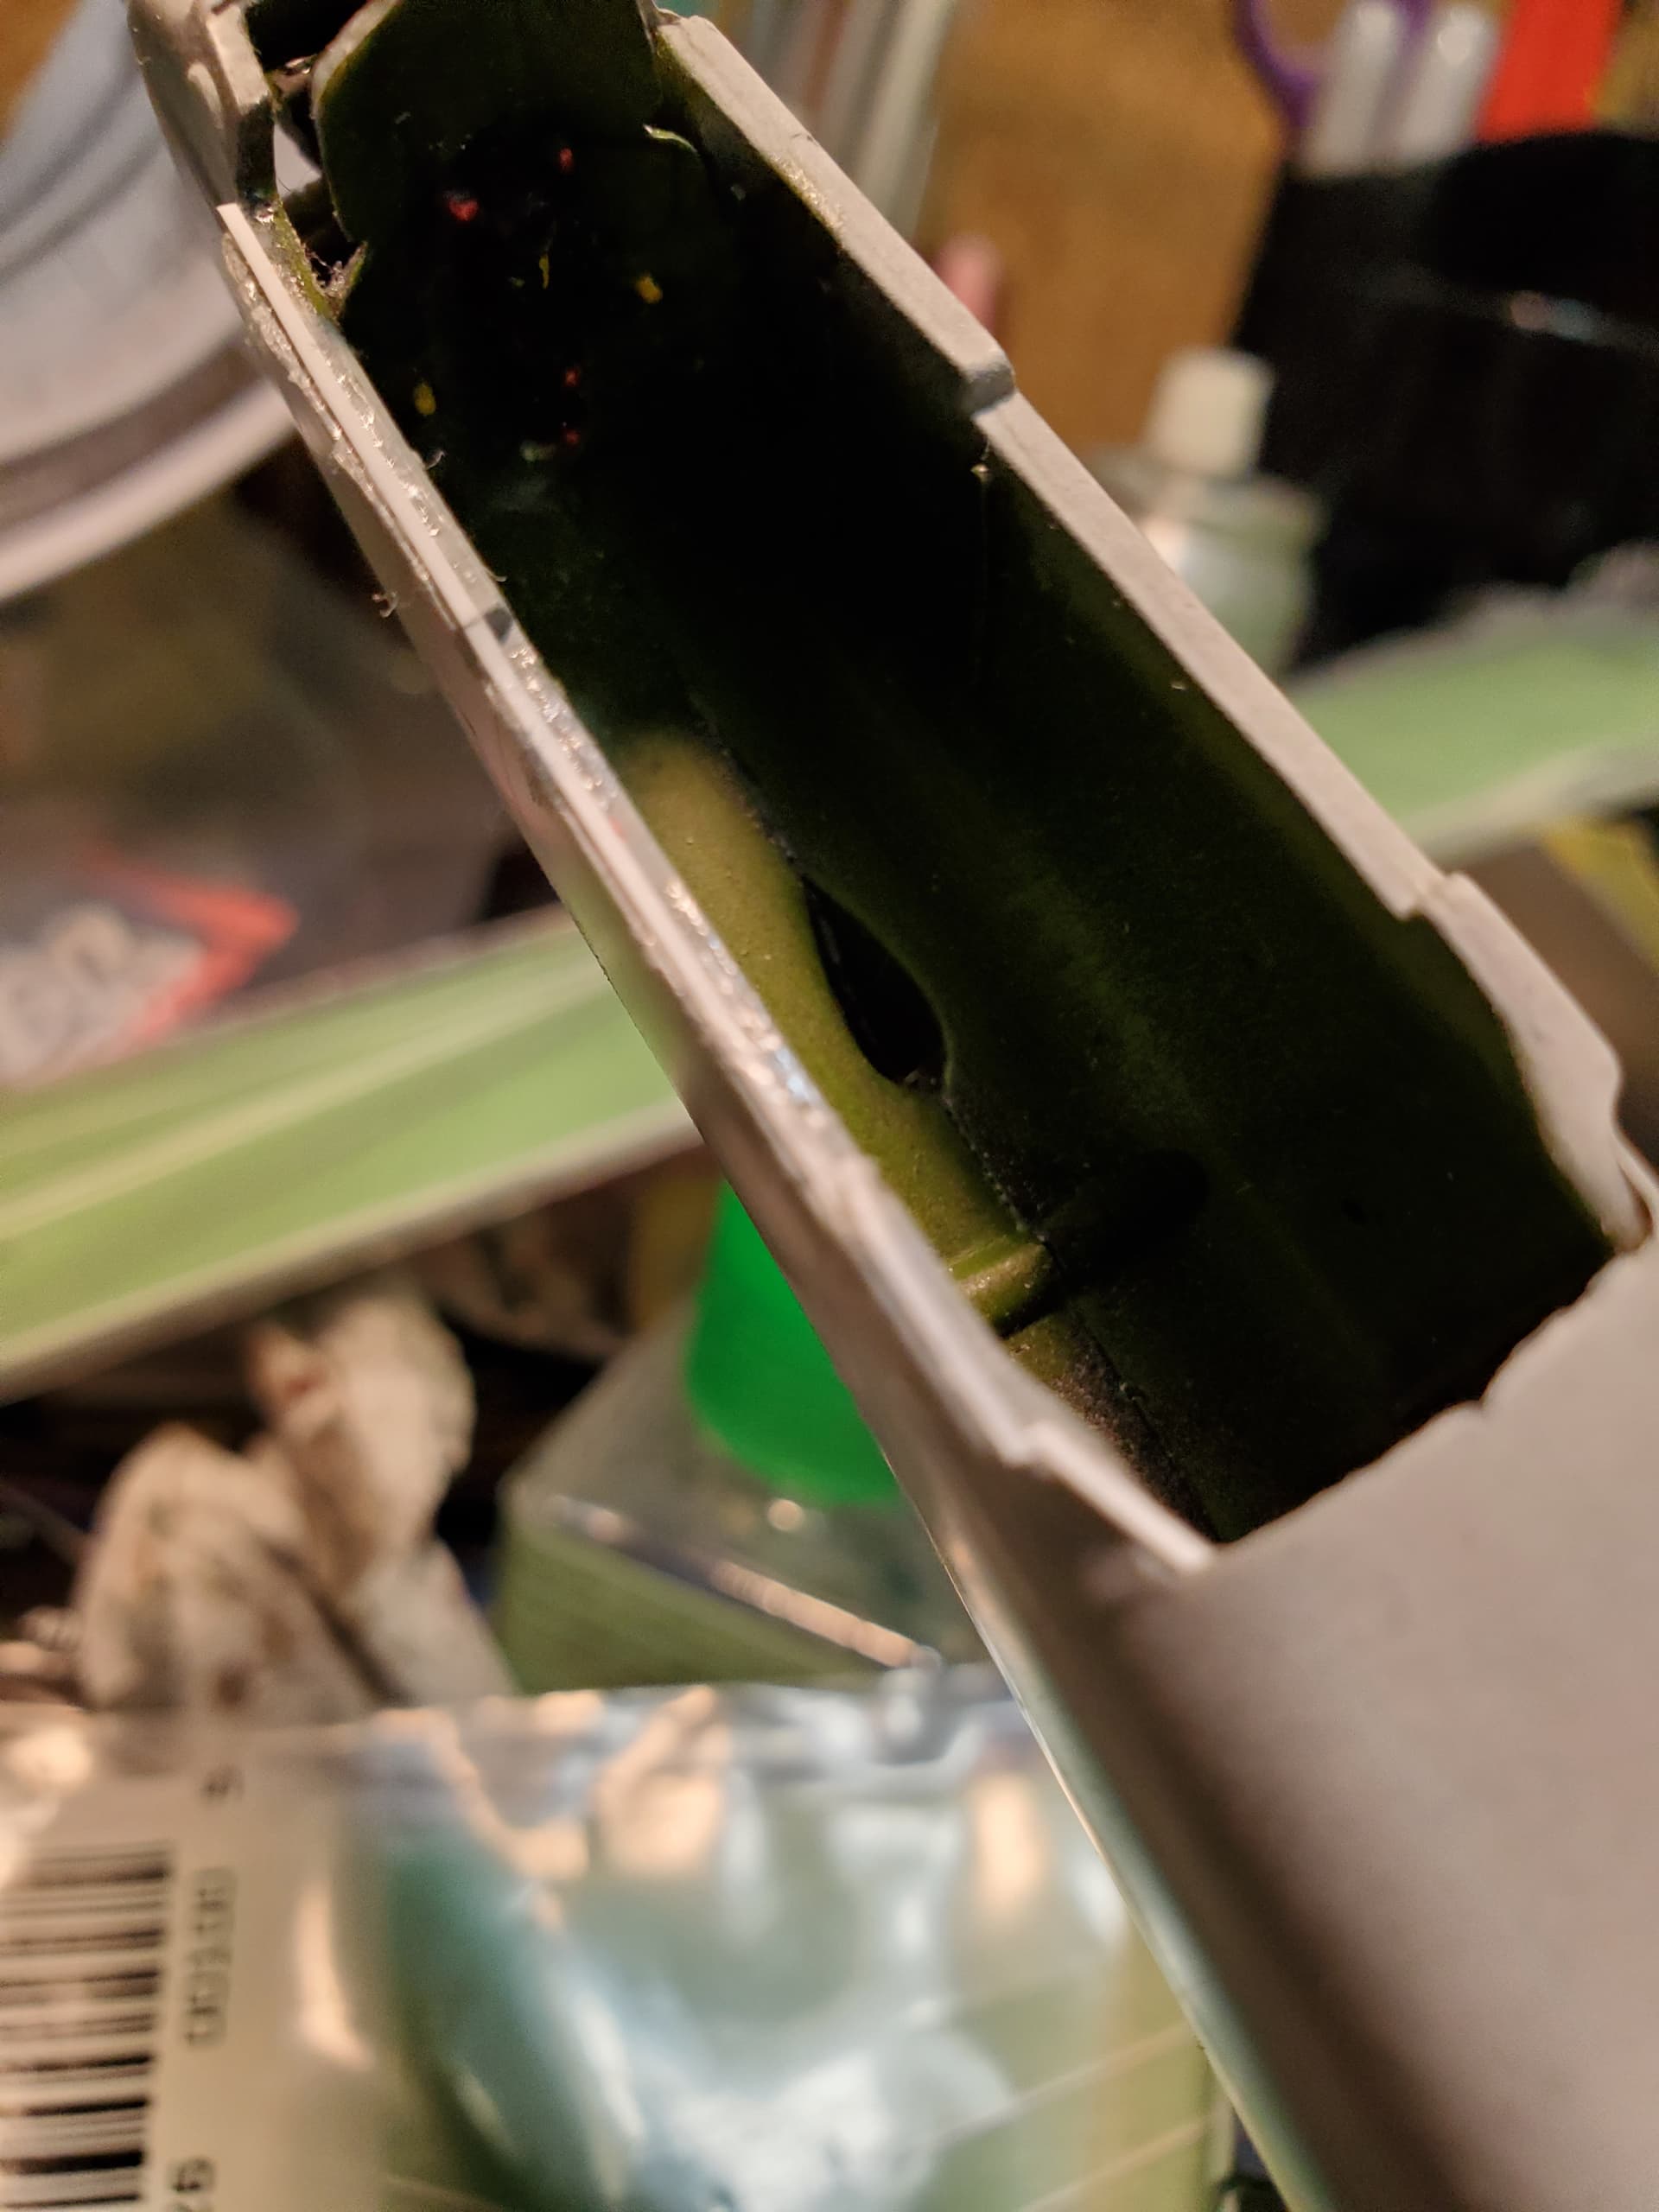
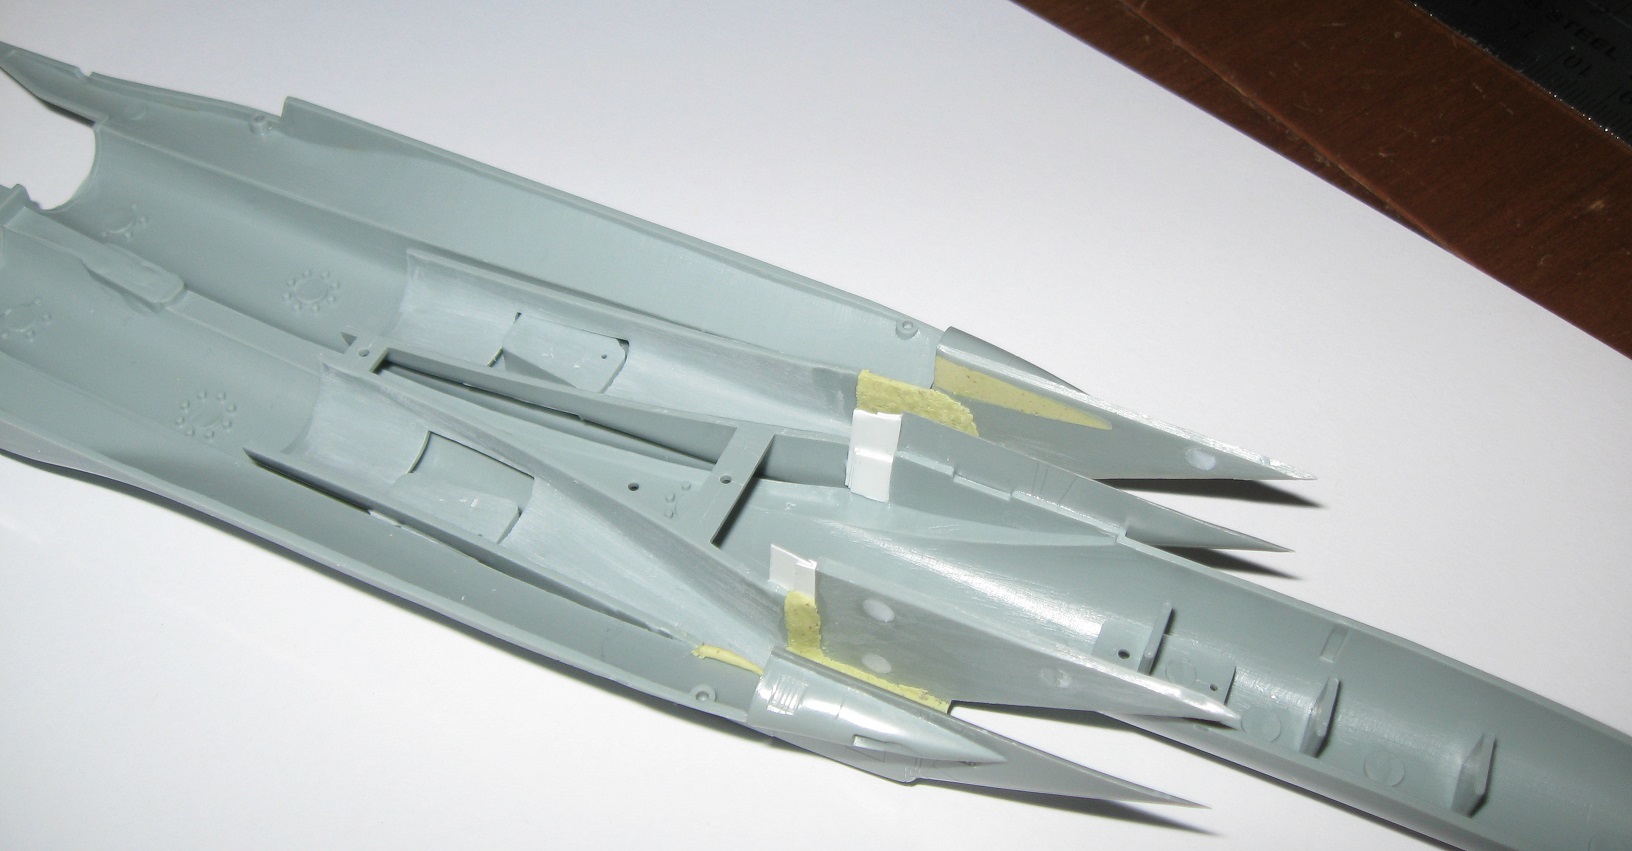
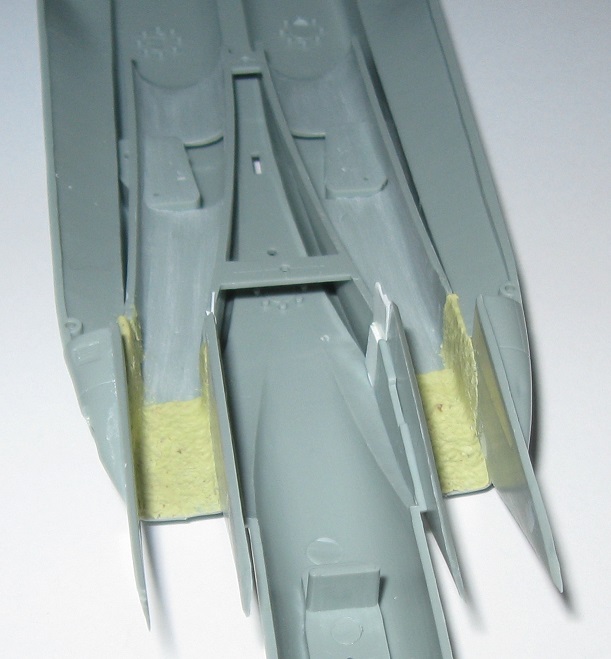
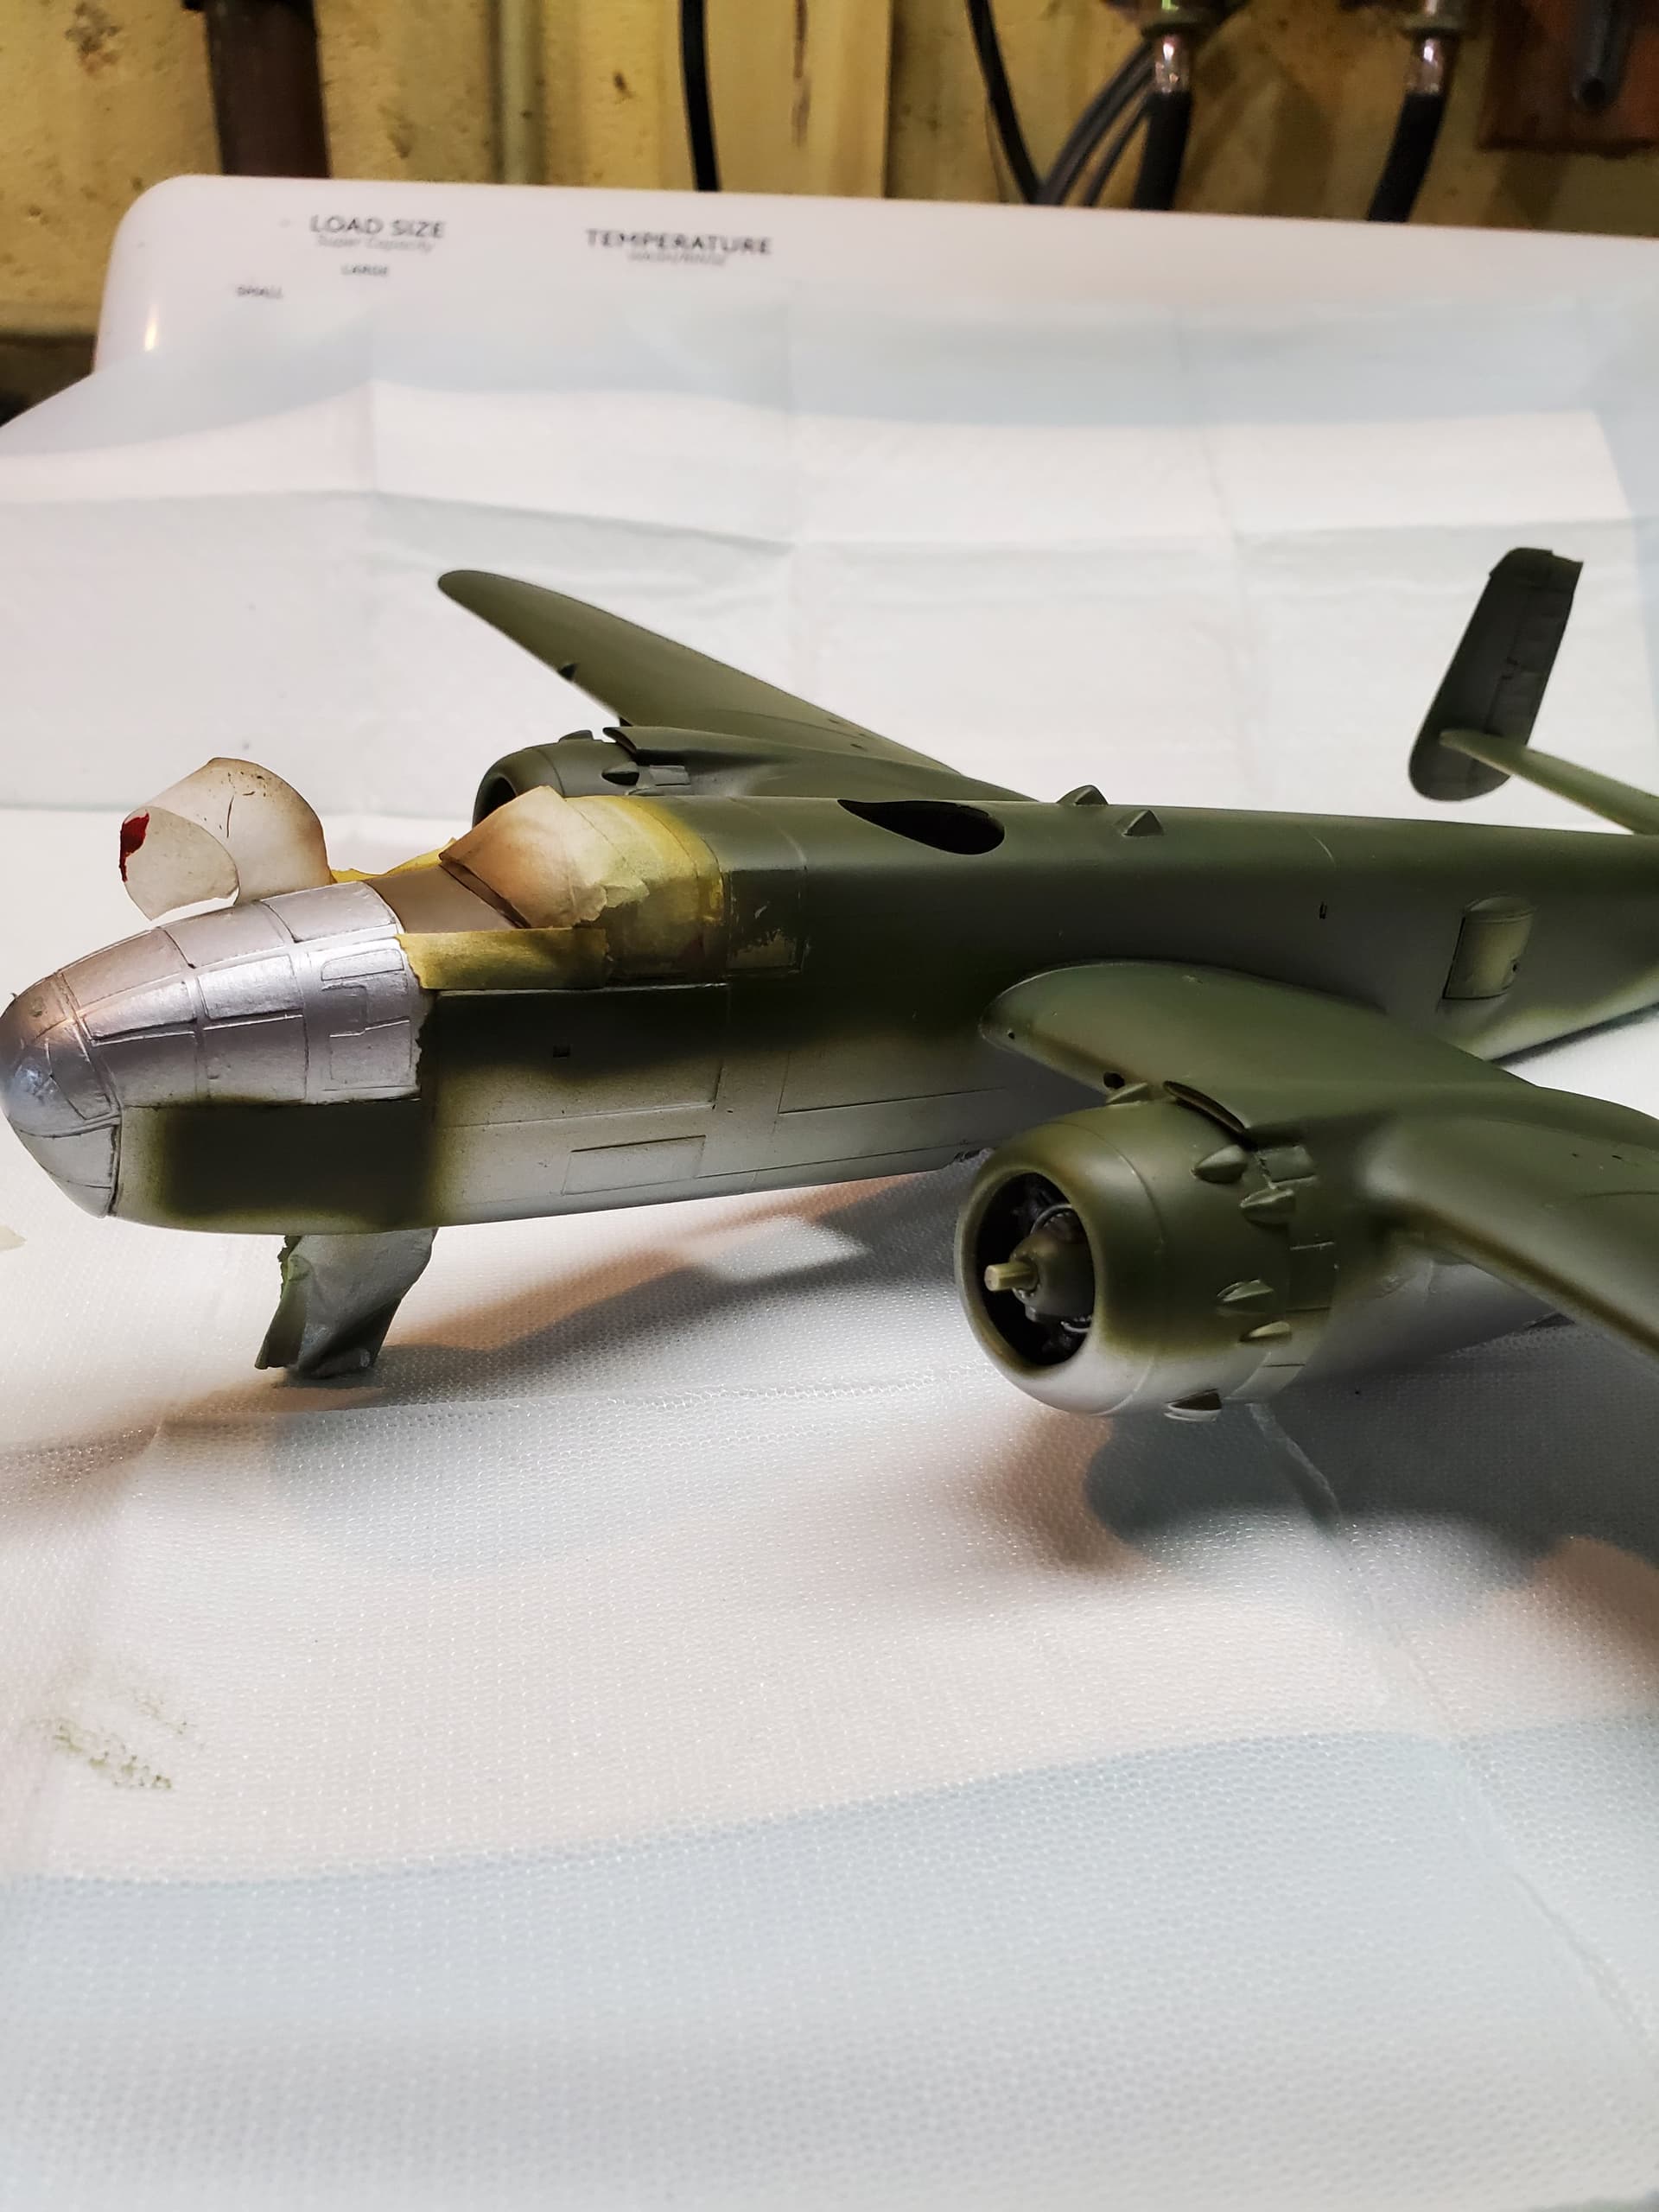
Externally, the intake wall halves did not blend smoothly with each other, nor did they blend with the lower fuselage, requiring a bunch of sanding and shaping on the exterior of the aircraft. With the intake halves in place, the lower engine duct piece was added, leaving a 2mm gap between the intake halves and duct. Also, the bottom and sides of the duct were not flush with anything. Therefore, I built a dam connecting each inner intake with the duct, then filled the gaps with Milliput. Milliput was also added to the bottom of the intakes to thinken them up because sanding left them dangerously thin. In addition, the Milliput acts a ramp to the duct.

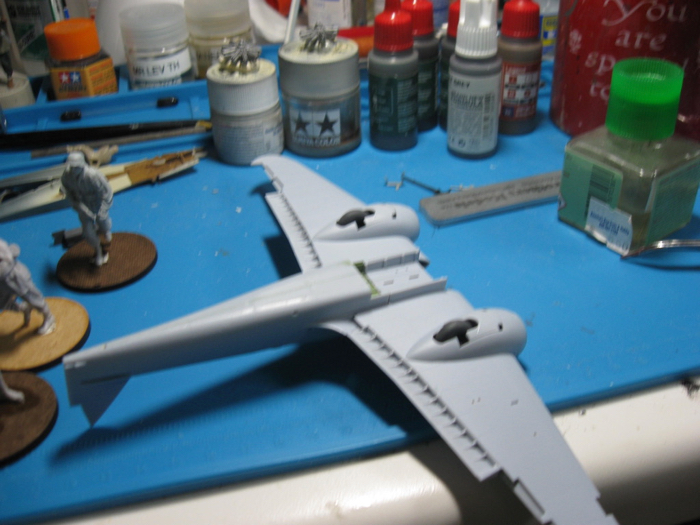
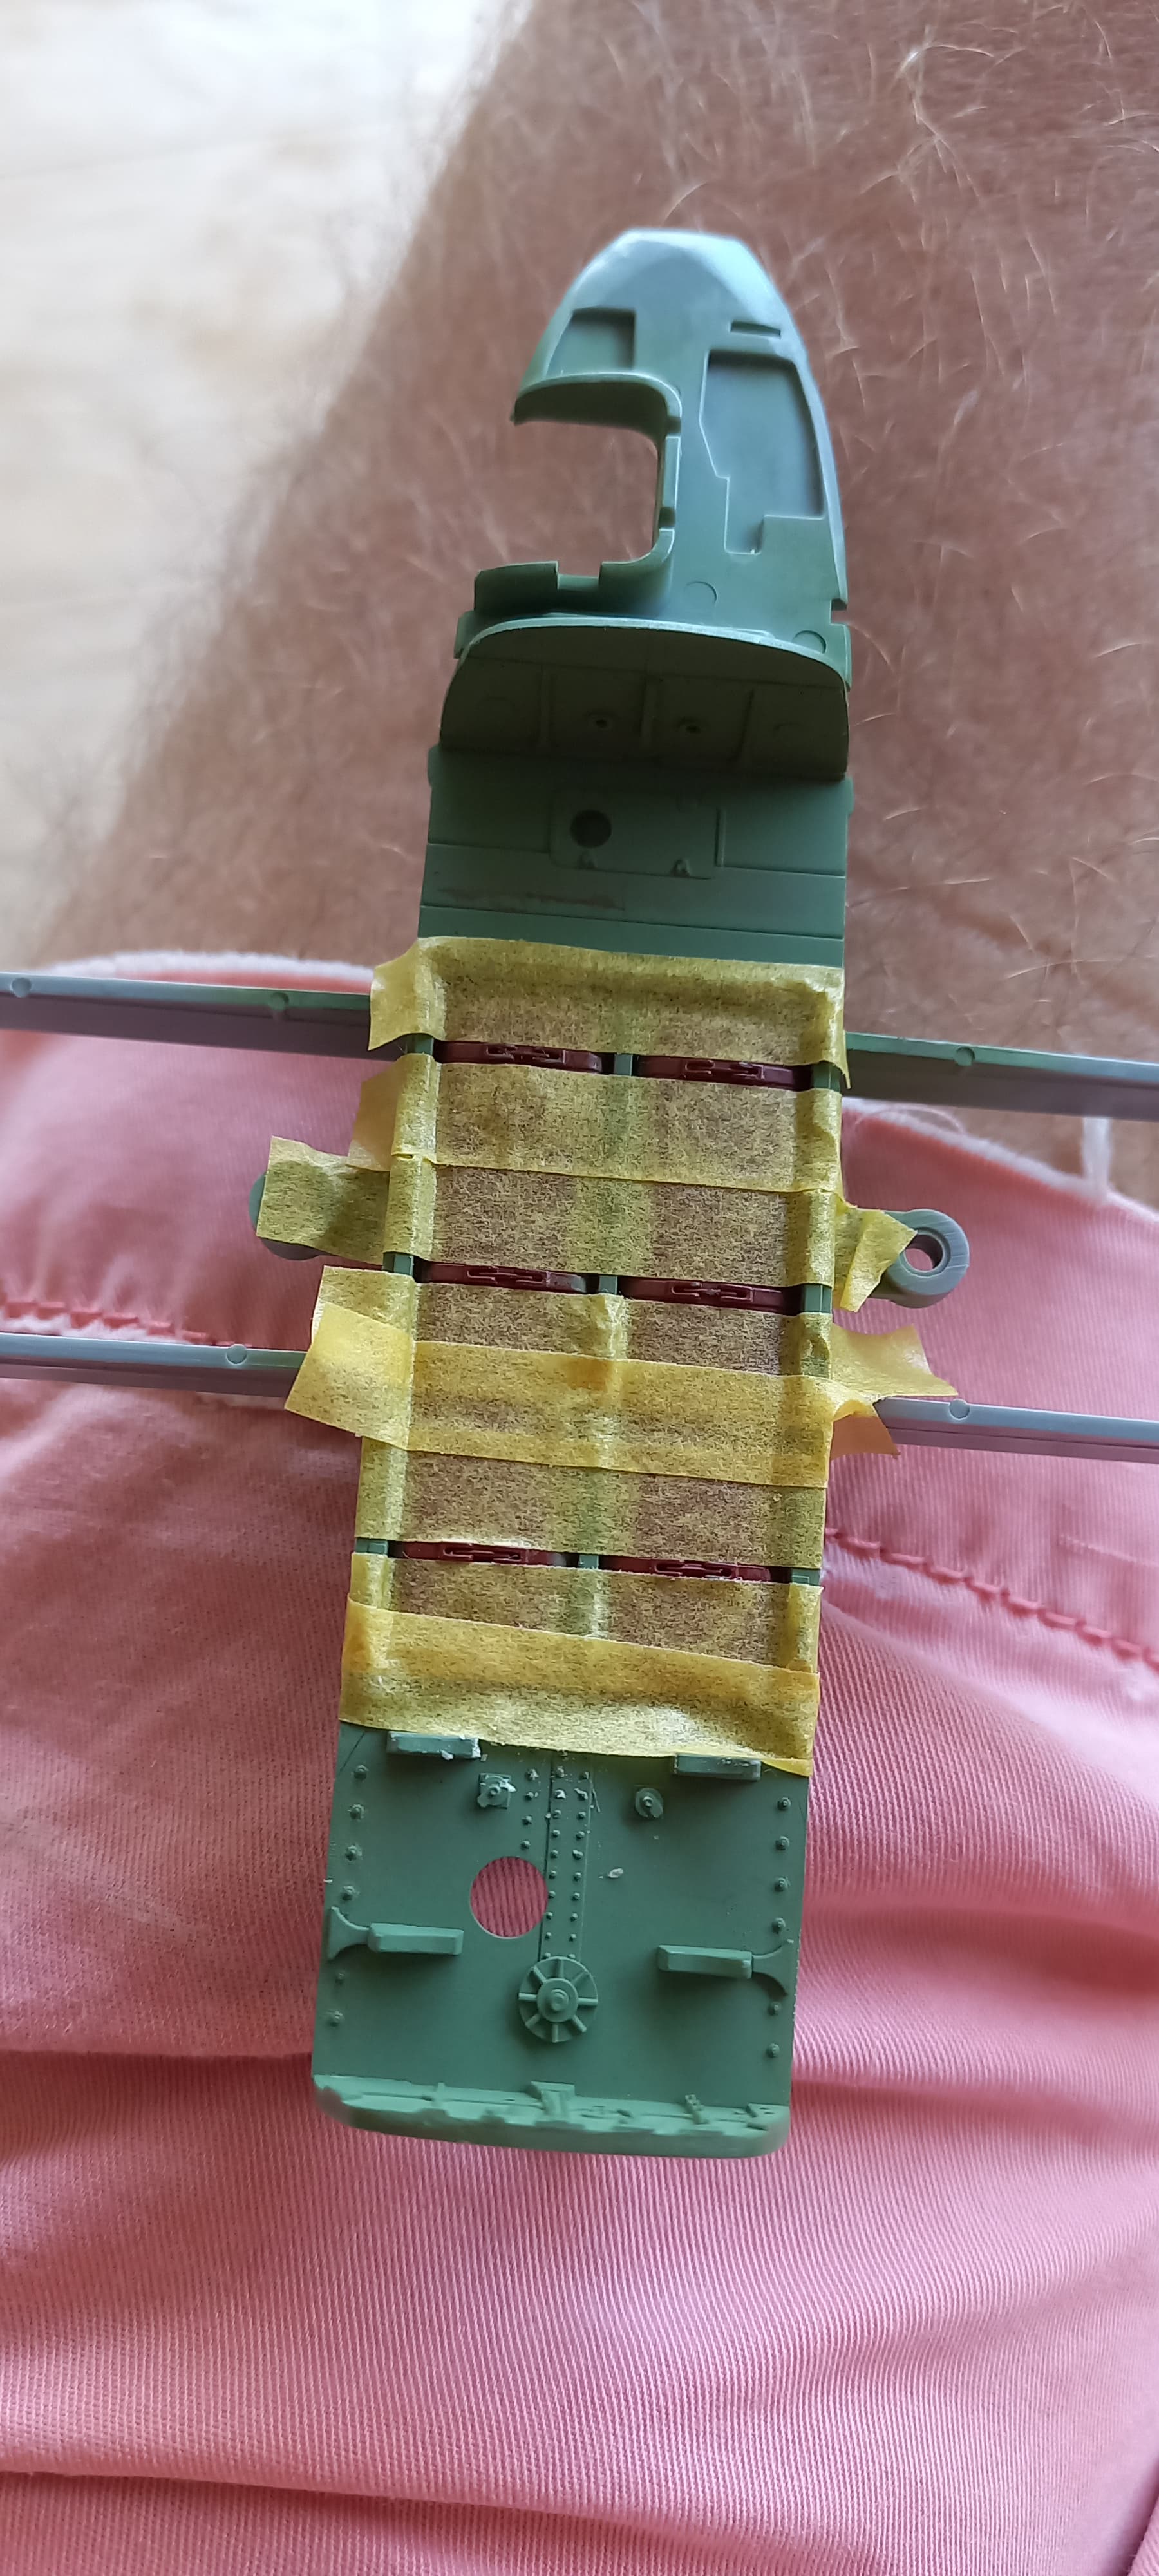
This picture better shows the Milliput in the bottoms of the intakes. It also shows how the Milliput now acts as a ramp from the intake walls to the duct pieces.

Here you can see the dams that connect the intakes to the ducts, and the Milliput filling inside each dam. The wing roots were also filled with Milliput and sanded down.

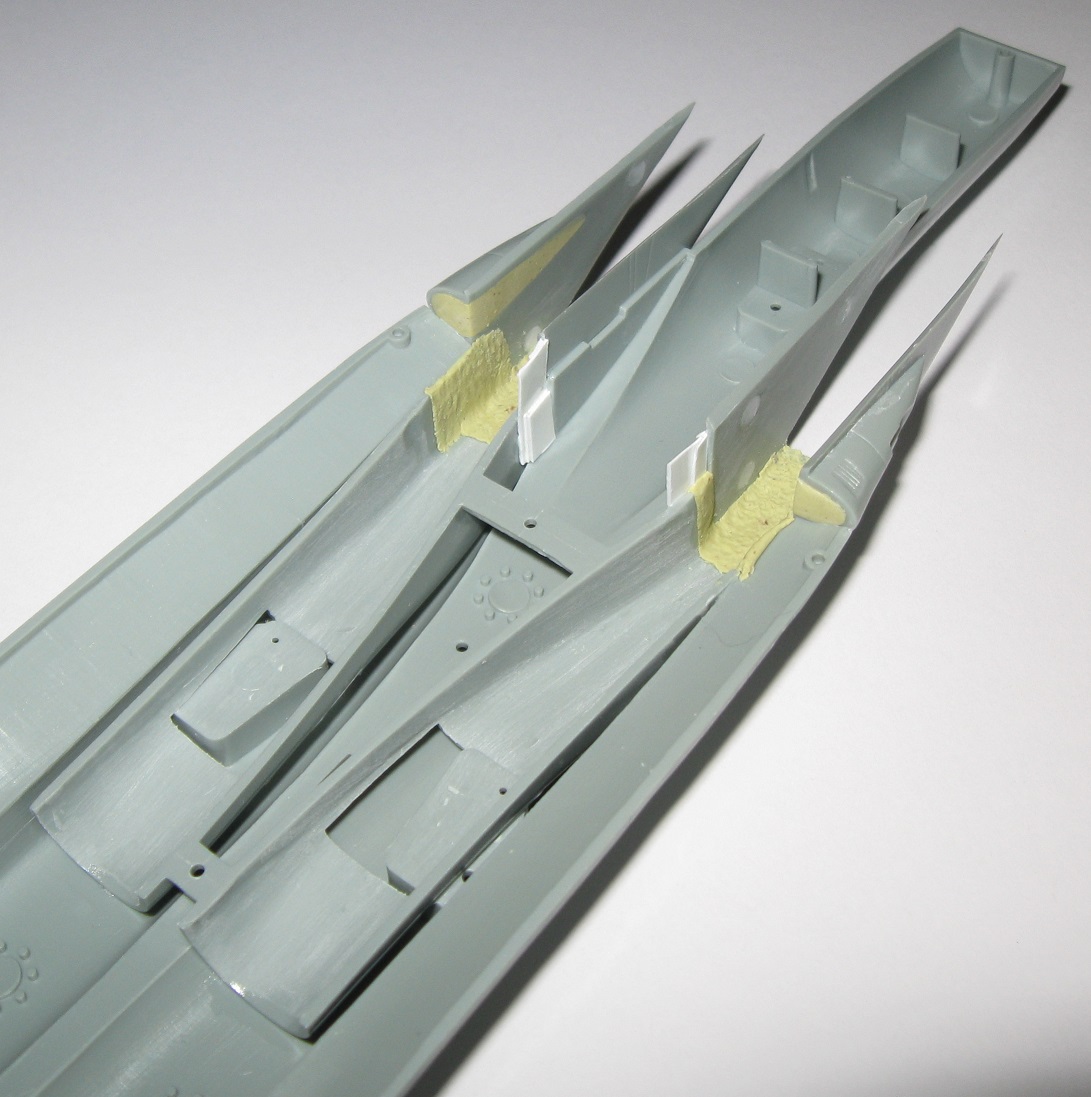
The previous pictures also show the gigantic holes where both rear wheel wells intrude into the ducts. There is no way the duct work in the real plane works like this. To make things appear more realistic, the giant gaps around each rear wheel well were filled in and a ramp added to each duct, taking the air flow over each wheel well. In addition, Milliput was carefully added so that it fit perfectly around the top half of the engine ducts.

Eagle 2023_0607 05

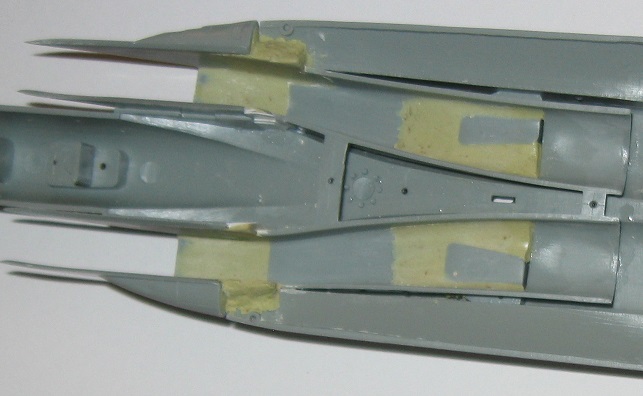
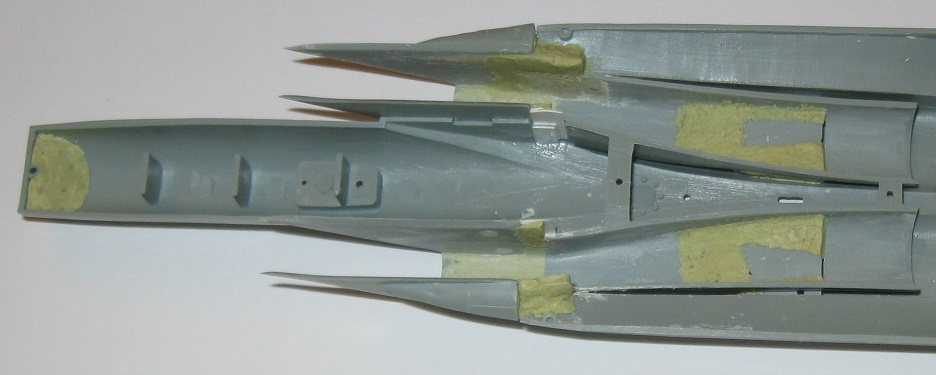
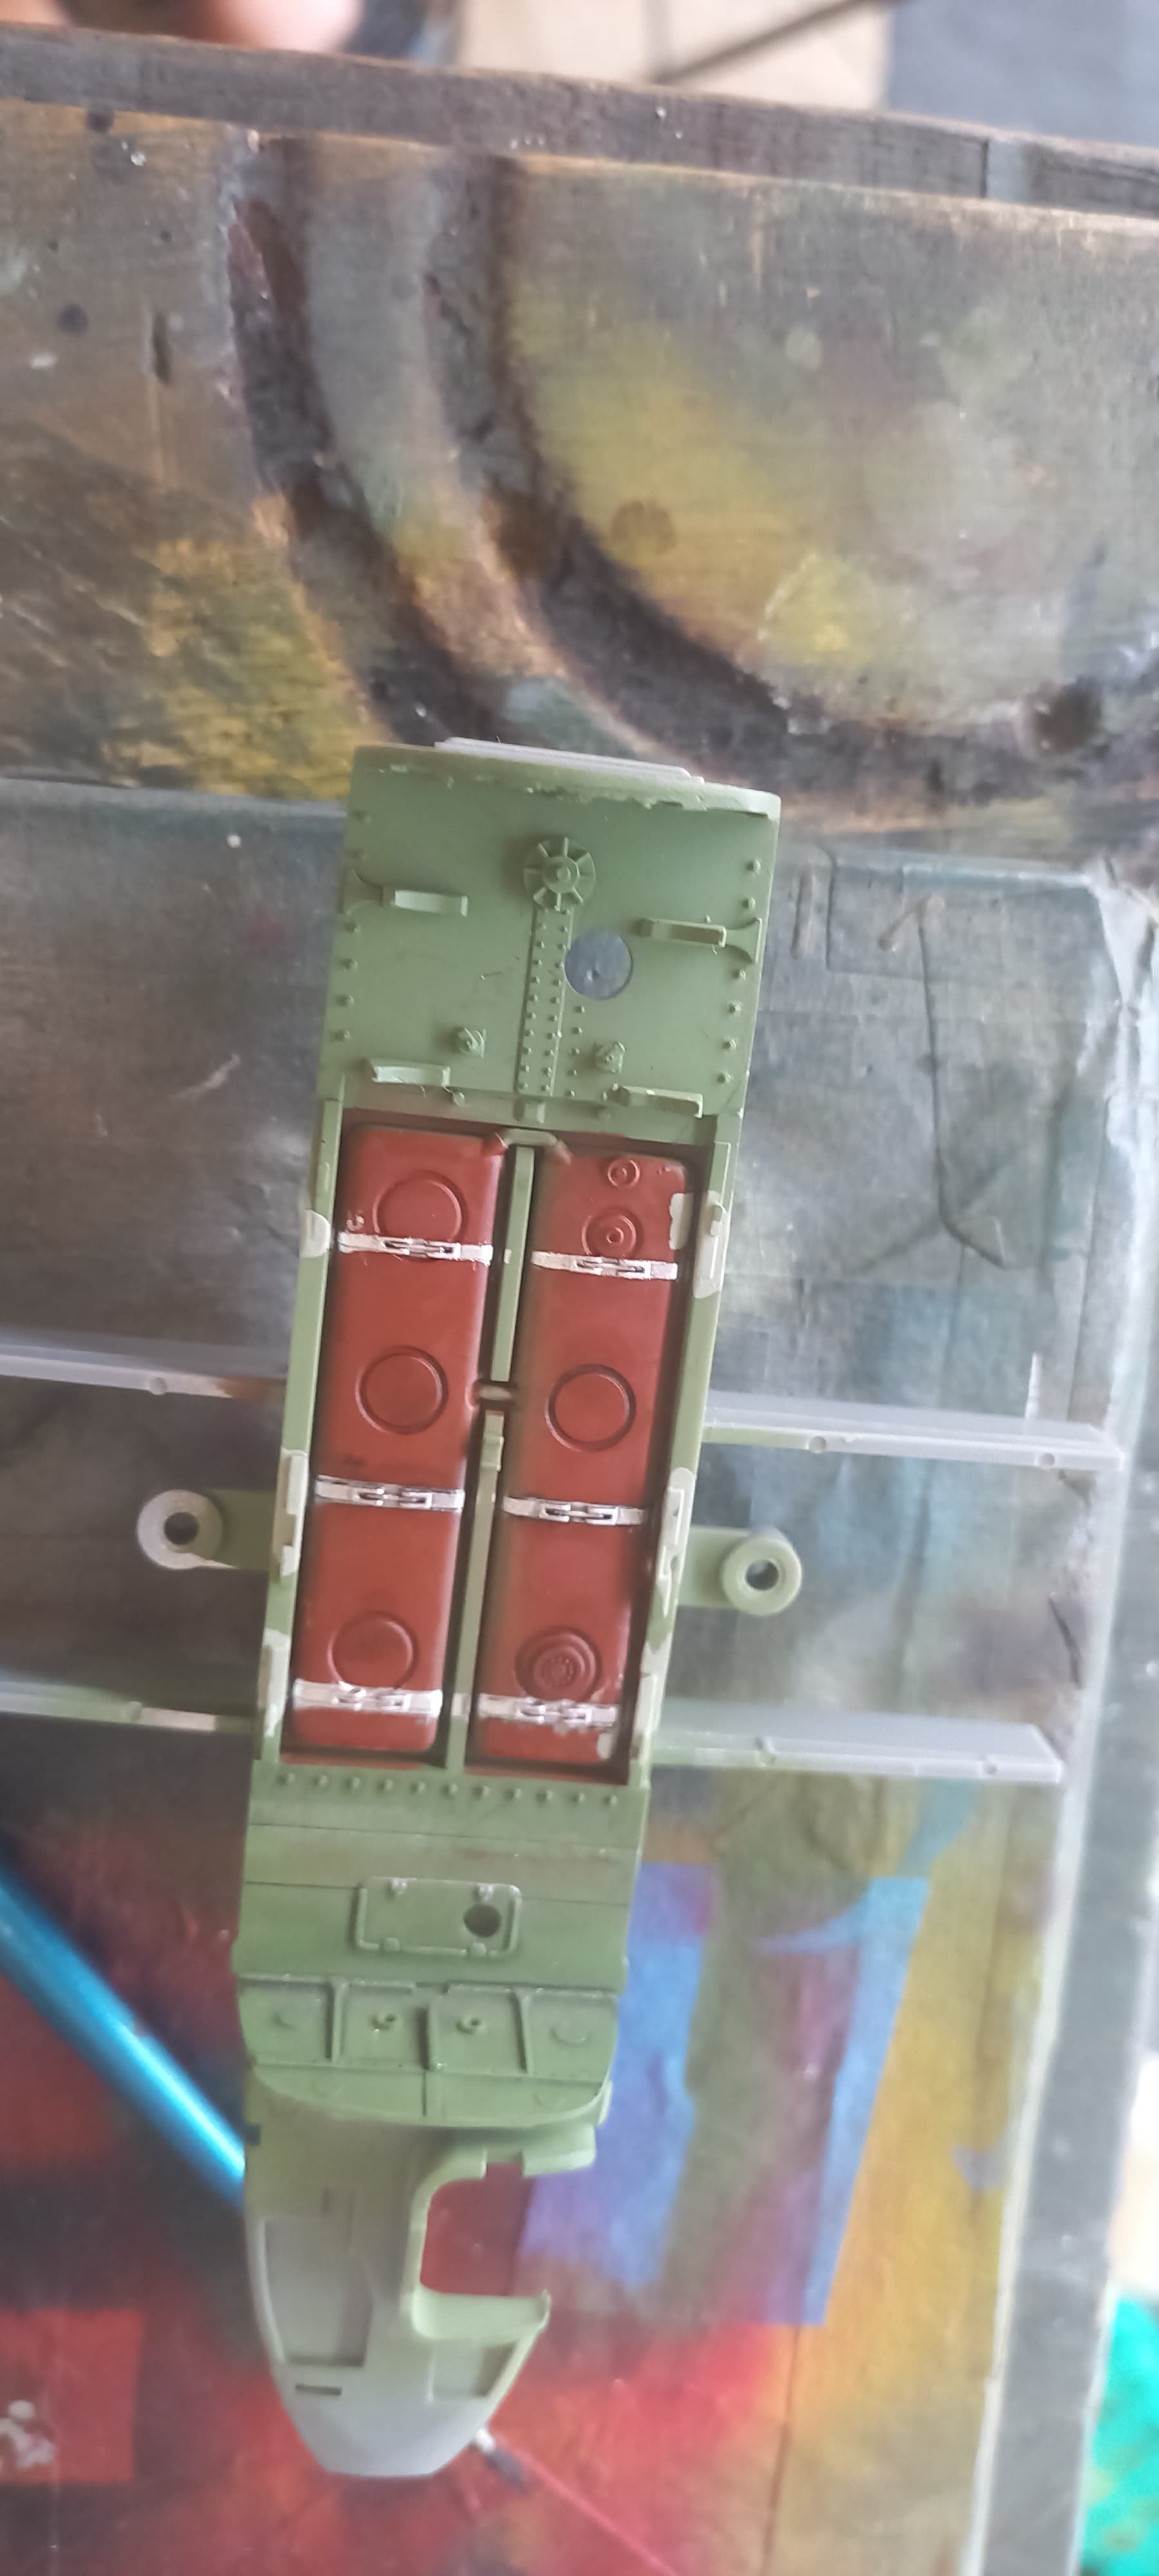
With all that done, everything was sanded out so that air can now flow through a smooth channel to each engine. The upper duct piece was also sanded for this purpose. The cliff behind each rear wheel well does not matter. Now, anyone looking into the intakes will see continuous, smooth channels to each compressor fan. While fictitious, it looks real. :slightly_smiling_face: This exercise cost 8 hours of work.

In hindsight, I was very wrong about this model. It is hard, not easy. It is an exercise in filling and sanding, not an exercise in painting.

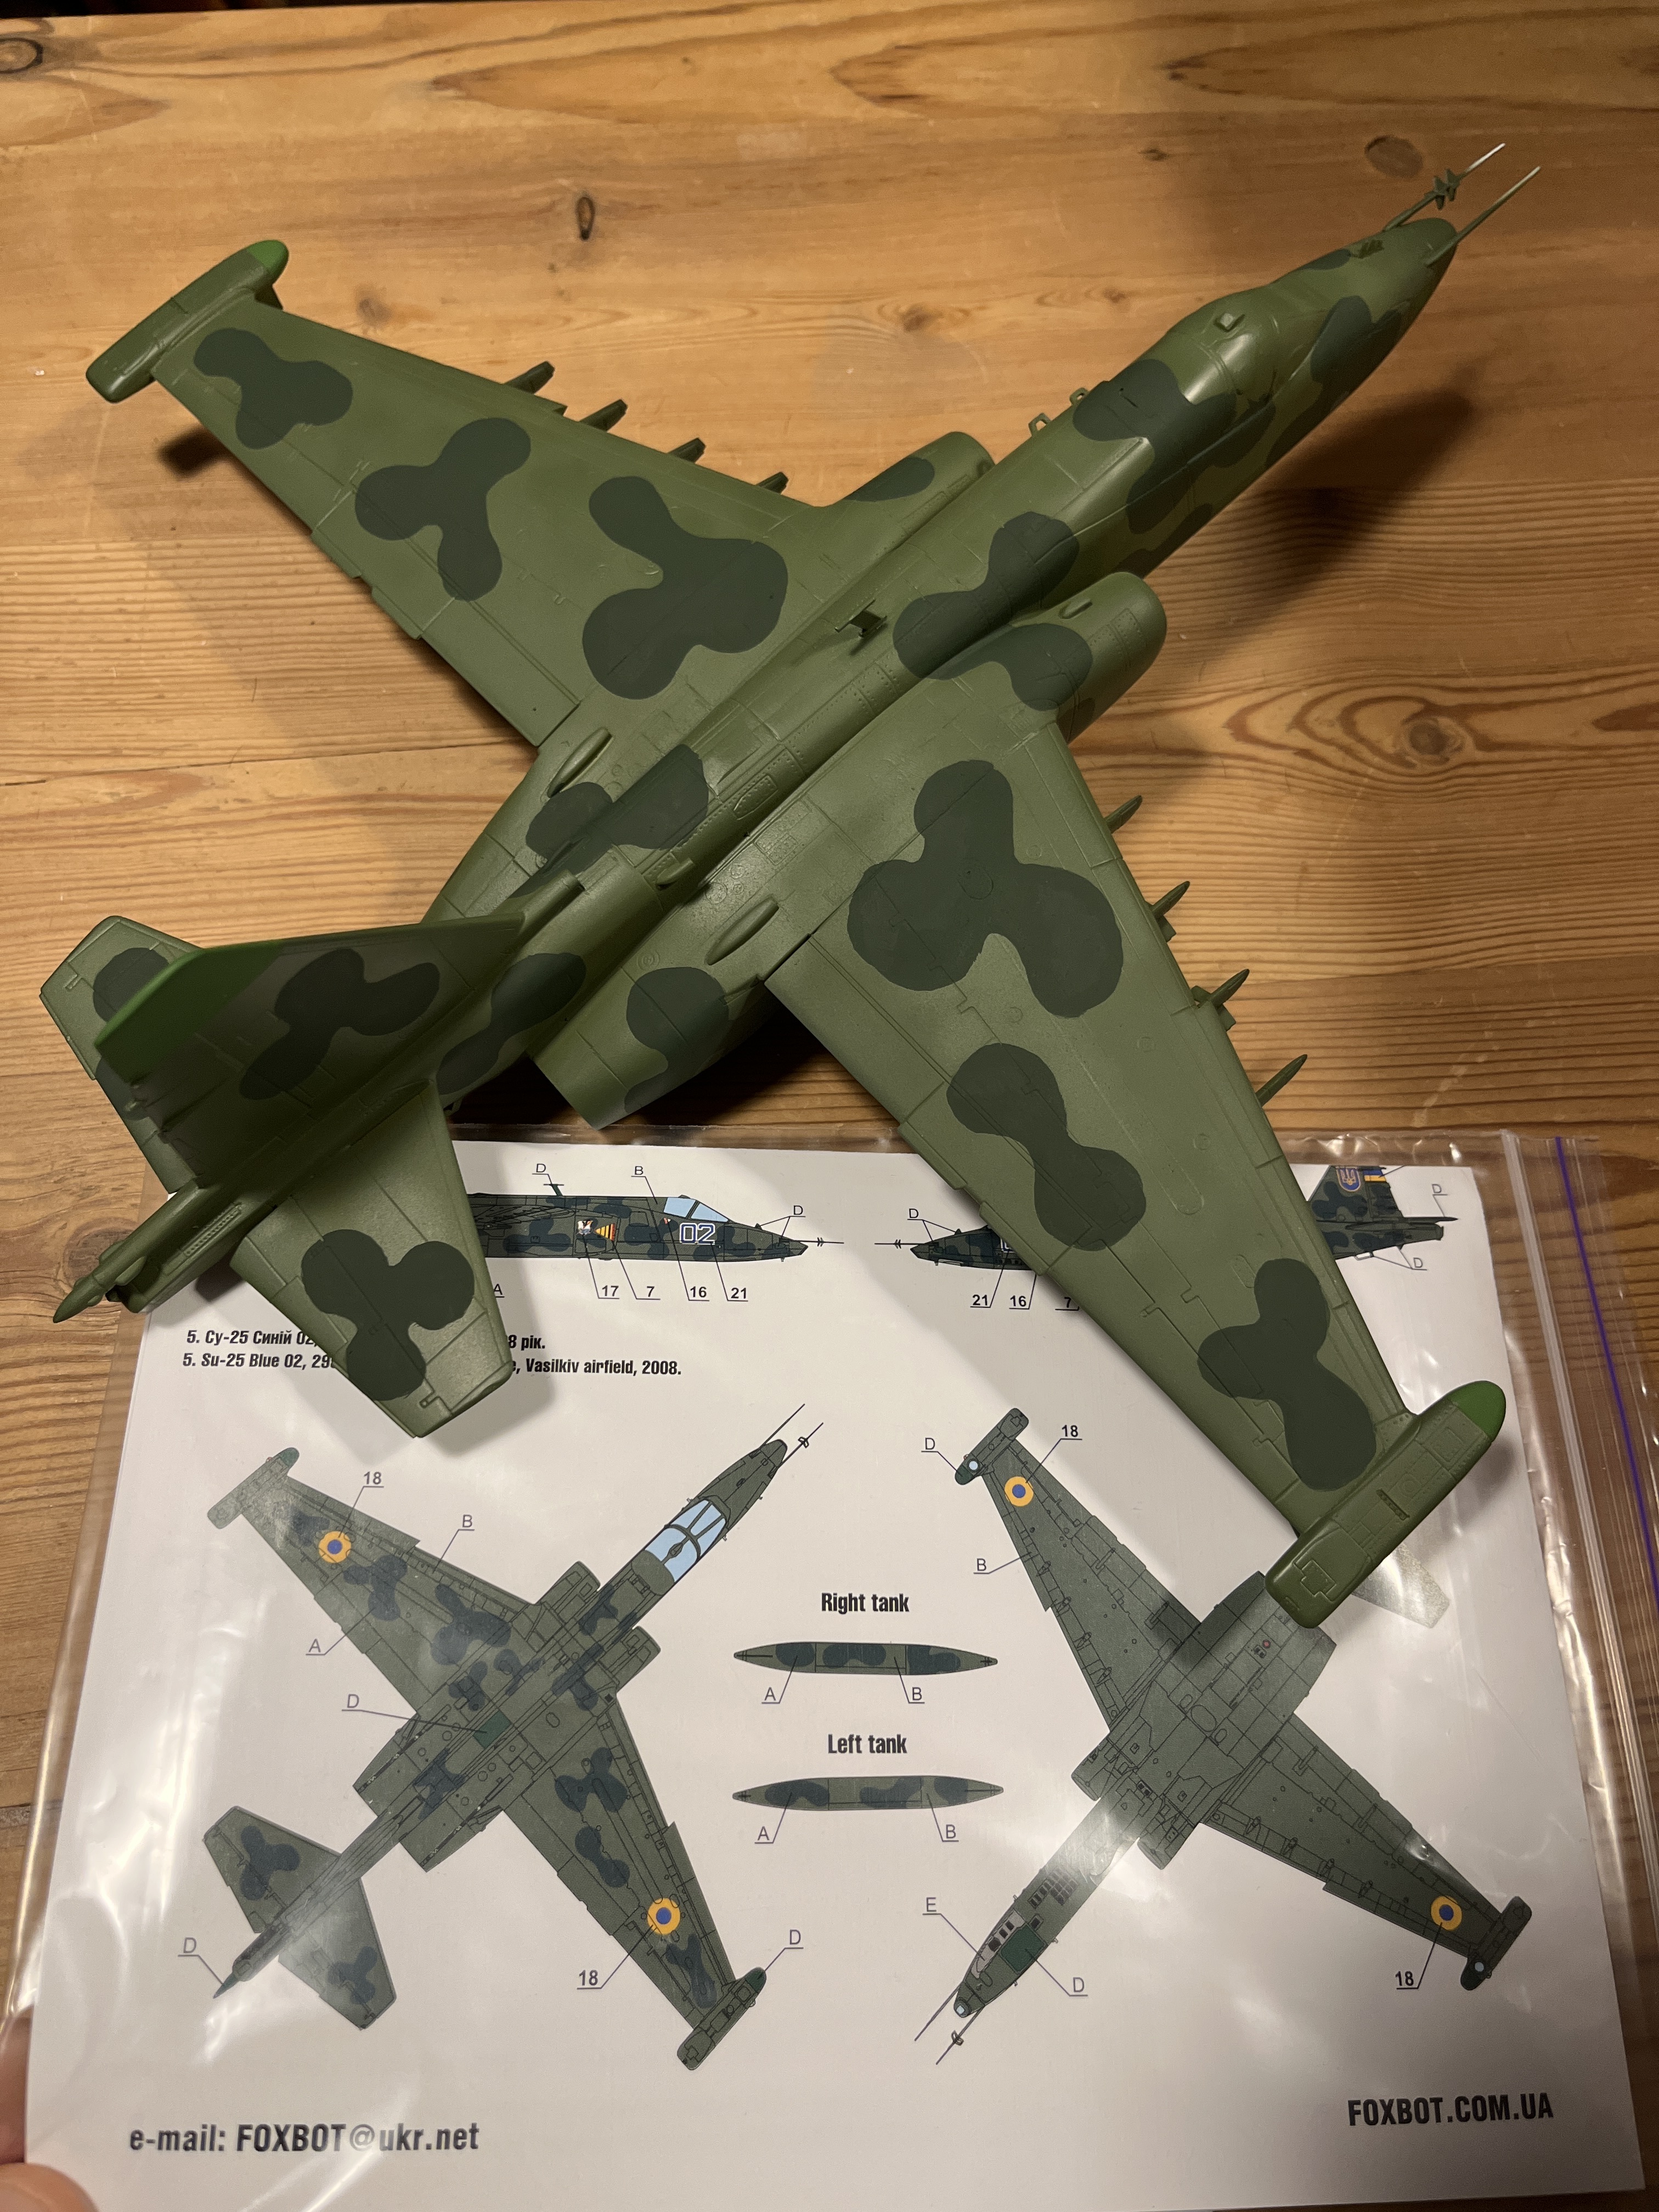
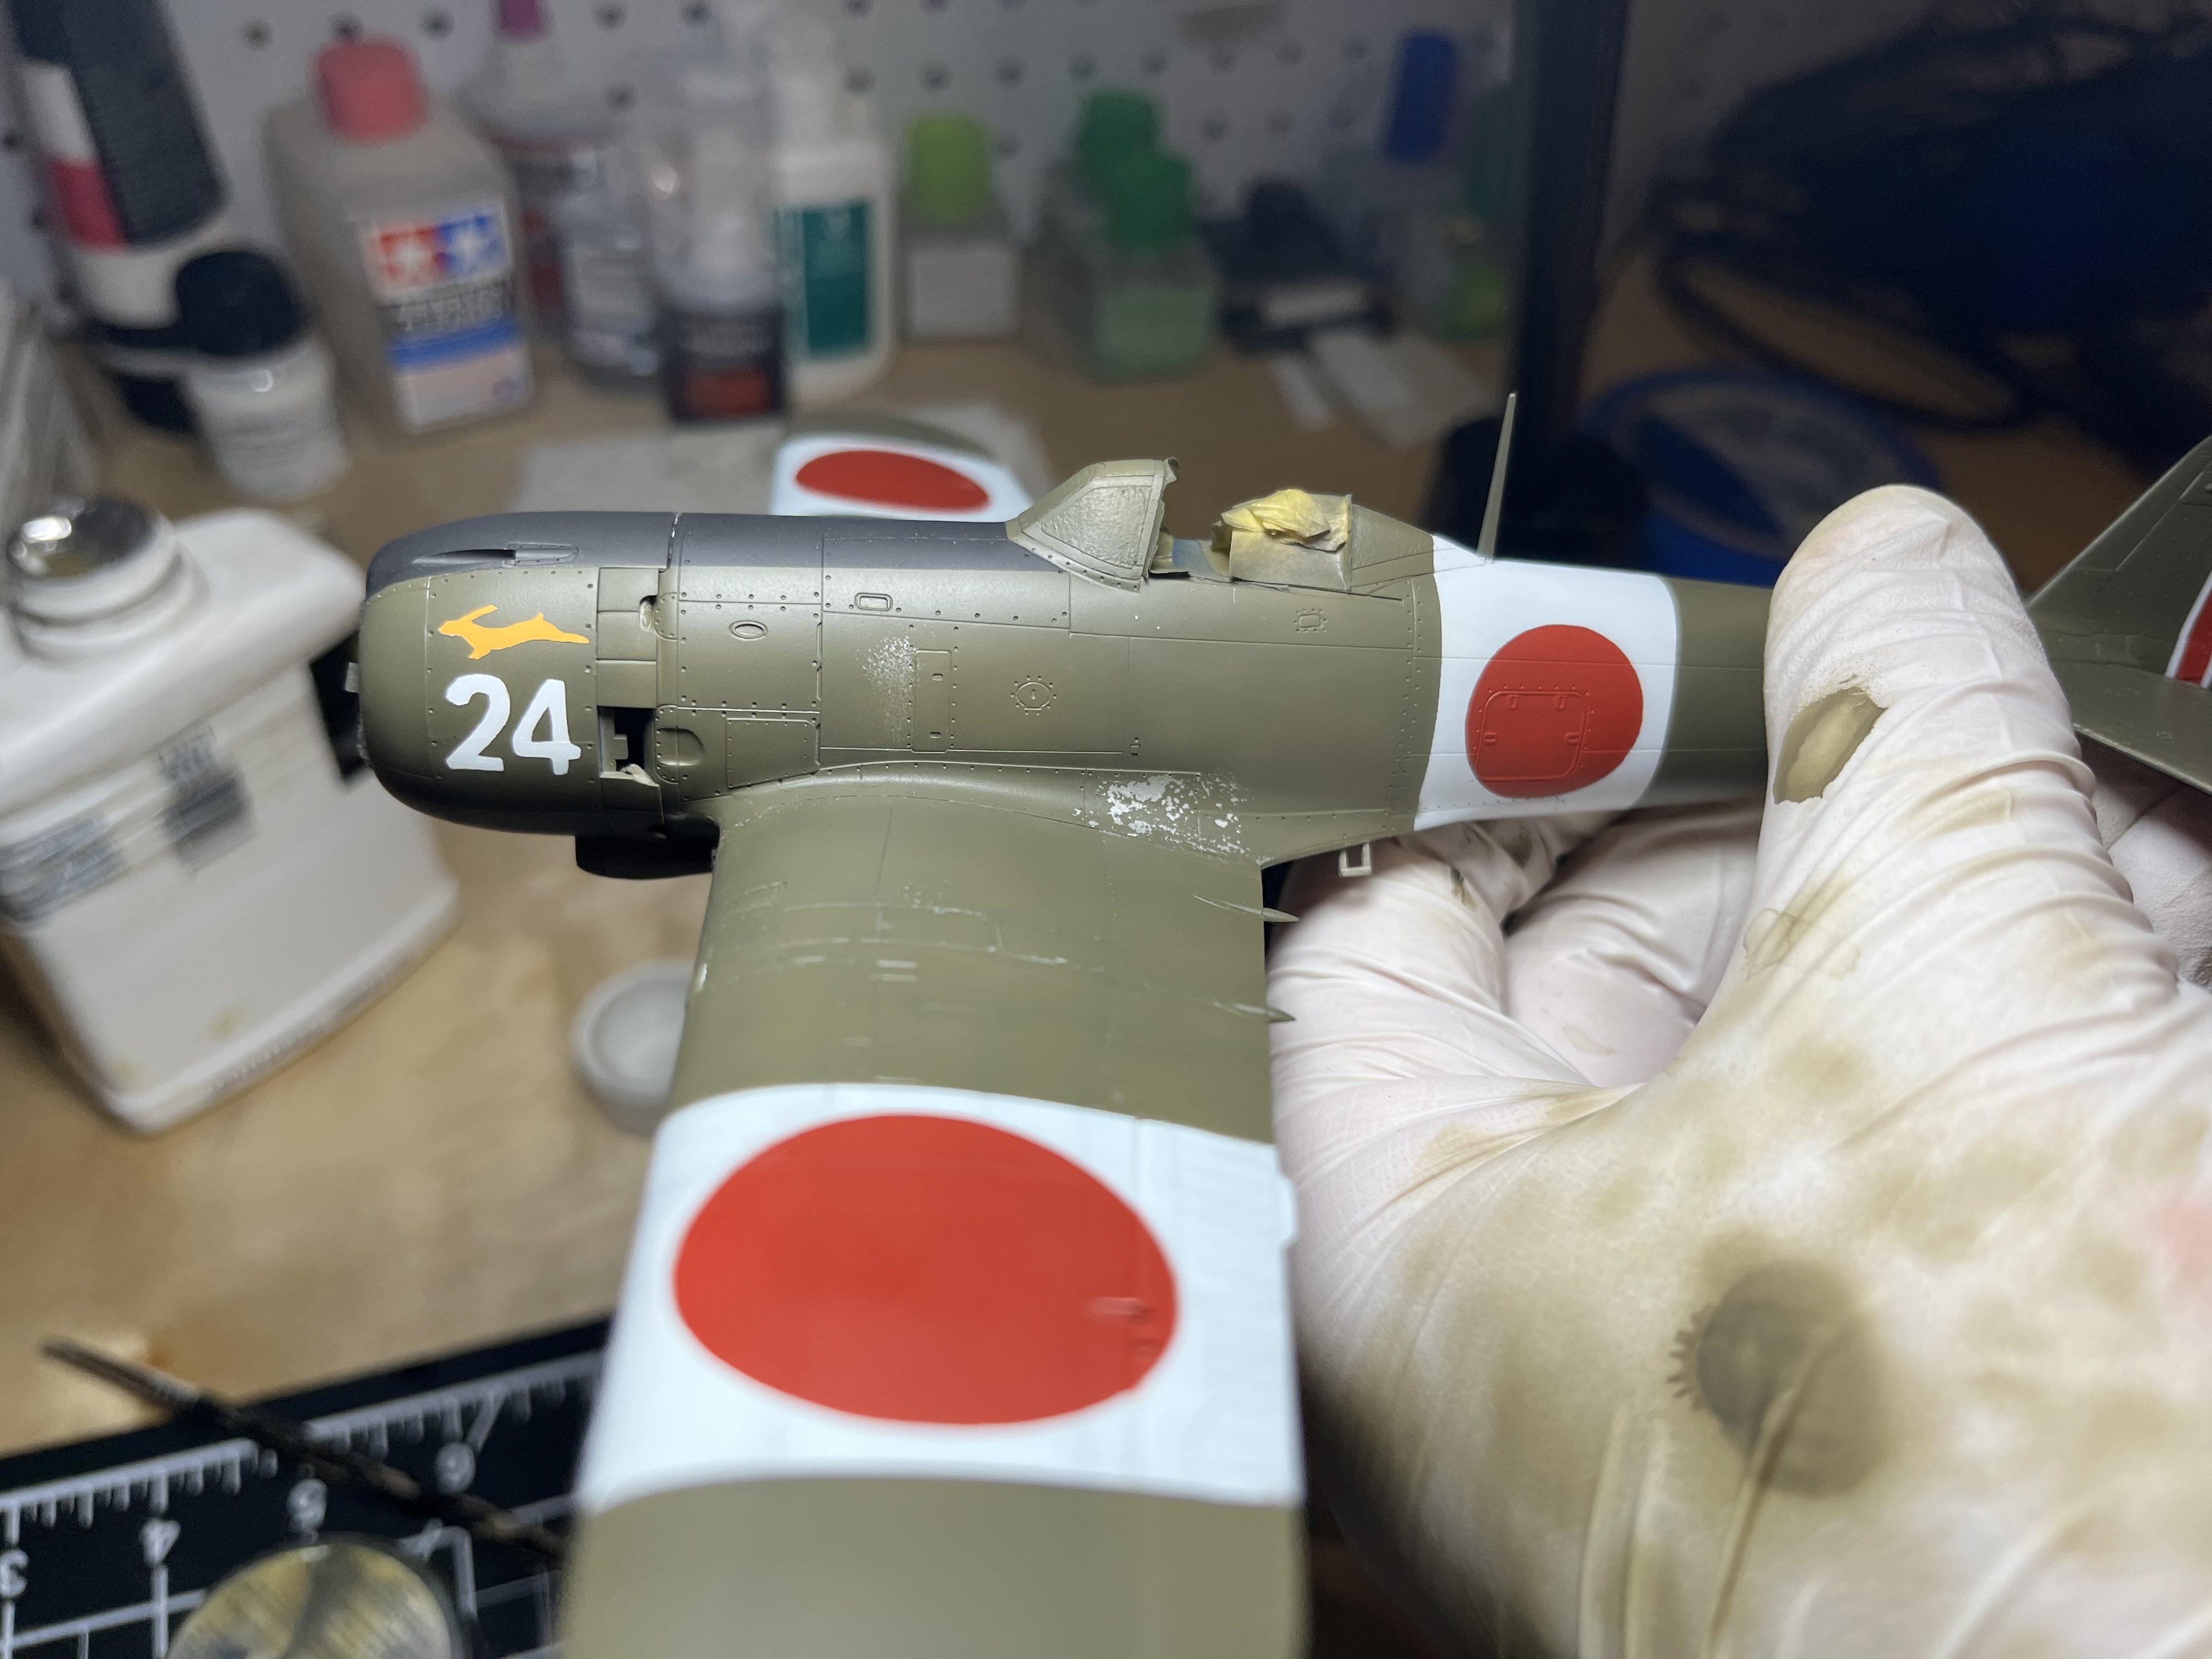
The paint arrived today so now I find out if all that effort was in vain. :upside_down_face:

23 days until Bellus… No. Wait.

6 Likes

Camouflage on. Love the camouflage the Ukrainians gave these early refurbished SU-25s. My plan is to display it next to a grey pixeled SU-25 at some point. Anyway, maybe finish this one first. :wink::slightly_smiling_face:

More to follow :slightly_smiling_face:

9 Likes

Hi Everyone,

Just a quick update. Doing the interior lots of masking and a few moments of painting. If there was one complaint about this kit it would be the number of ejector pin marks. Ai yo! Armed with a number 10 blade and sand paper, problem solved! Went to work on the underside first, odd red, yet looks the part.

more to follow, be safe and have fun!

7 Likes

Ok i am trying the hairspray technique on my mitchell. How long do i wait before I can spray and how long after i spray my color coat do i have to do the chipping? What is the best method to remove the paint? I am using lifecolor dark green ua531 mixed with vallejo model air british green 71.324.

Really looks like a lot of progress, but it was simple stuff’


True Details ACES II seat grafted onto the kit’s seat rails.


Quinta Studios cockpit set really brings the office to life. :wave:

3 Likes

You can spray the hair spray after the primer cures. I leave the hair spray about an hour.

On this Hayate I just chipped I was still able to chip after about 24 hours


Though the sooner you chip the easier. Put some water on the areas you want to chip, then brush the water area with a stiff bristle brush. Don’t push to hard or you’ll take larger chips than you want

3 Likes

Thanks mead. i also looked it up on youtube too. they didn’t say you can wait up to 24 hr so that is helpful information.
Joe

So i finally got around to airbrushing the base coat on my mitchell. After much exprimenting i came to the choice of lifecolor dark green with a few drops of gunze ija green thinned with lifecolor thinner. Did i mention how much i hate lifecolor paints? The suck!!! almost imeadeatly it gave me problems with fading spray, clogging and watery overthinned running paint even though i thinned it properly and added plenty of retarder. i struggled through one wing adjusting paint amount and pressure and said screw it. i dumped it and started over replacing the lifecolor with Vallejo british dk green. much better performance but not the exact shade i wanted. really i don’t like airbrushing acrylics, except gunze. M preferred paint is MM enamel or hytaka lacquer for military. Anyway about 40 min later i proceeded with the chipping. first time i used the hairspray method, i liked it, some before and after photos-
Before


And after


I was enjoying myself too much and got a little carried away i think. i want to go back and cover up some of the chipping plus i need to decant some of the silver and blend in the soft demarcation line some, i got a little too much of the green overspray. i used my grex instead of my neo and it is not as fine at spraying soft lines. I also need to spray the control surfaces but not sure what color to use. got to get back on it, running out of time.

Joe

5 Likes

Looks great!!

Word of caution you may need to slight sand if you repaint over the chipping, as it may show through. Bonus though is that may just looks like a real life touch up

1 Like

whish i had read your post before i went to touch up. you were right, i couldn’t cover the chipping easily. i was having trouble with my airbrush in keeping a consistent spray going it would slowly clog and i would have to open it up to blast out the clog. don’t know why i periodically have this problem i thin to the same consistency and i loaded up on the retarder. keep adding thinner and it still happens.
i got the painting and weathering done though i am not that happy with the results. with all the messing around with the AB and dumping the paint and starting over i ended up not being able to match the original shade. then i had the same flow issue with the decanted tamiya silver which caused the brush to miss fire a couple of times while blending the separation line. i think i need to go back with the green to touch up. it was kind of a frustrating session.
This is what i ended up with


and i added a couple of switch boxes and a photo etched ammo belt to the bombardier compartment

decals next. which with all this weathering being done i can’t put bright clean national insignias on. can someone suggest a technique how to fade/lighten the blue background of the star?

Joe

5 Likes

A bit more progress on my SU-25. Getting close to the finish Line now. Next is a gloss coat to seal in all the decals and then a light weathering.

More to follow soon :slightly_smiling_face:

7 Likes

Sanding…priming…sanding…priming…

…modern art…

…miracle…

…11 days until Bellus…

(Really should have saved that joke for a Space Ark build.)

4 Likes

nice, but where does that turret go?

Woops!

That is the turret of a Tamiya Panzer II Ausf. C that really needs finishing. The decals did not lay down nicely so I wet them with solvent at the start of each day. Meanwhile, time is running out on the F-15E so that project has priority and the box sits on my work desk. The Panzer II turret ended up in the F-15E box so I would remember to monitor decal progress each day.

Finally into the paint shop. Mr. Finisher 1500 on Hasegawa’s 1/72 F-117. If I get really busy and extra lucky, I can finish in time. :crossed_fingers:


Whish me luck, or an extension. :wave:

7 Likes