Type 87 Reconnaissance Combat Vehicle - scratchprint

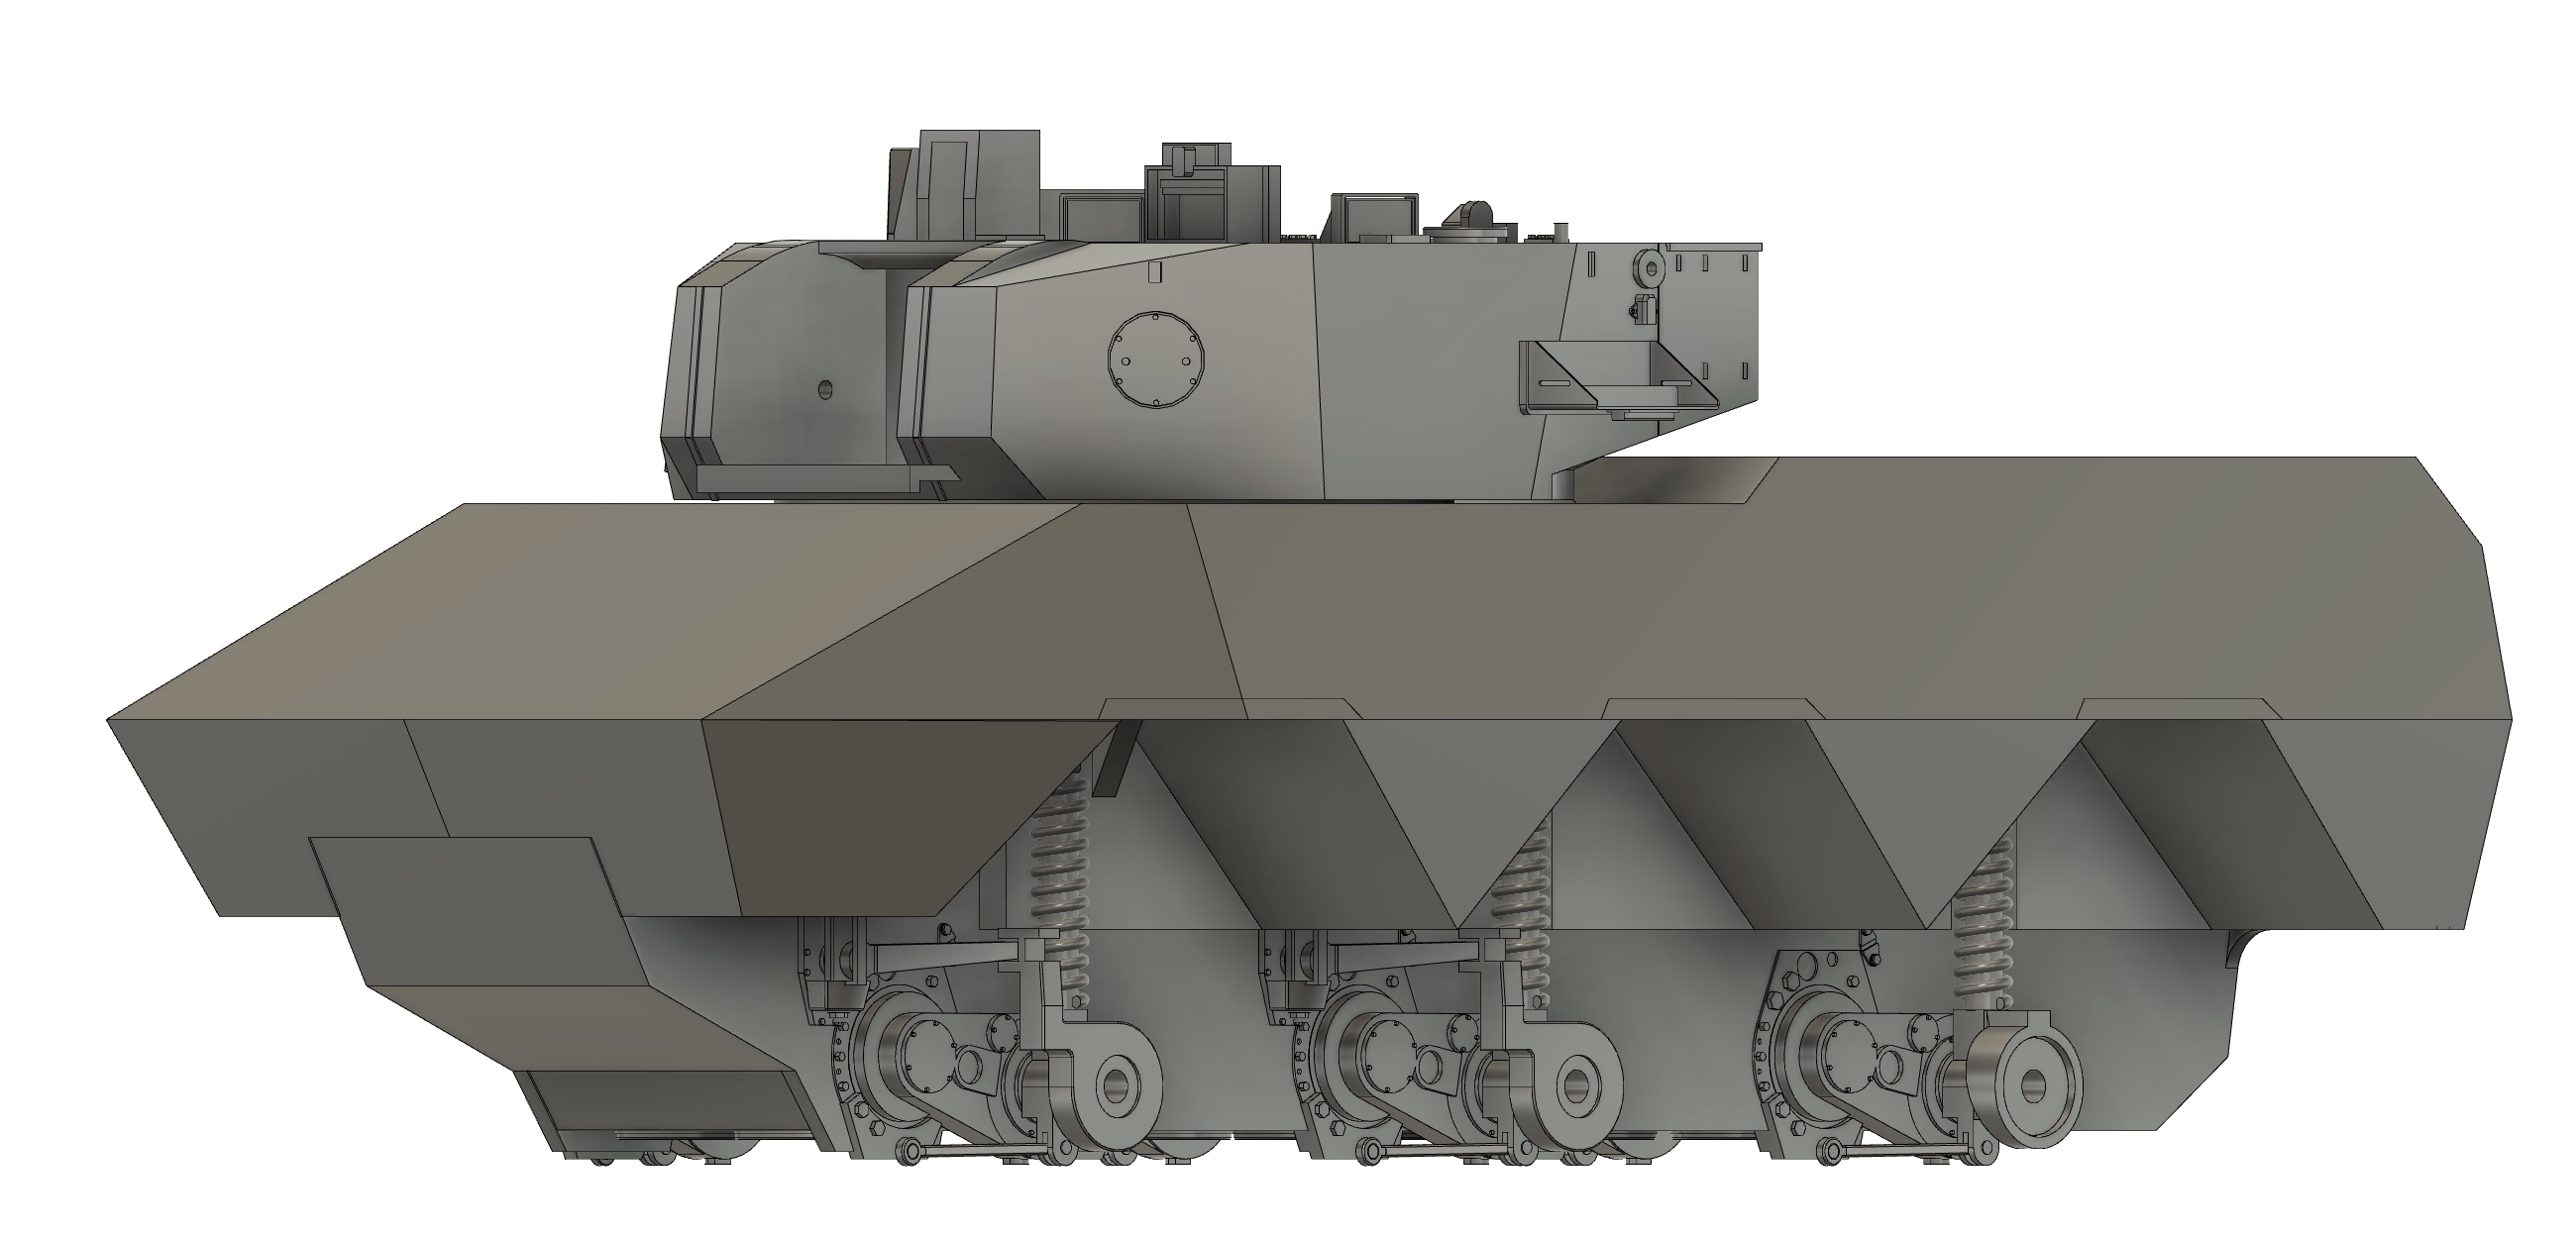
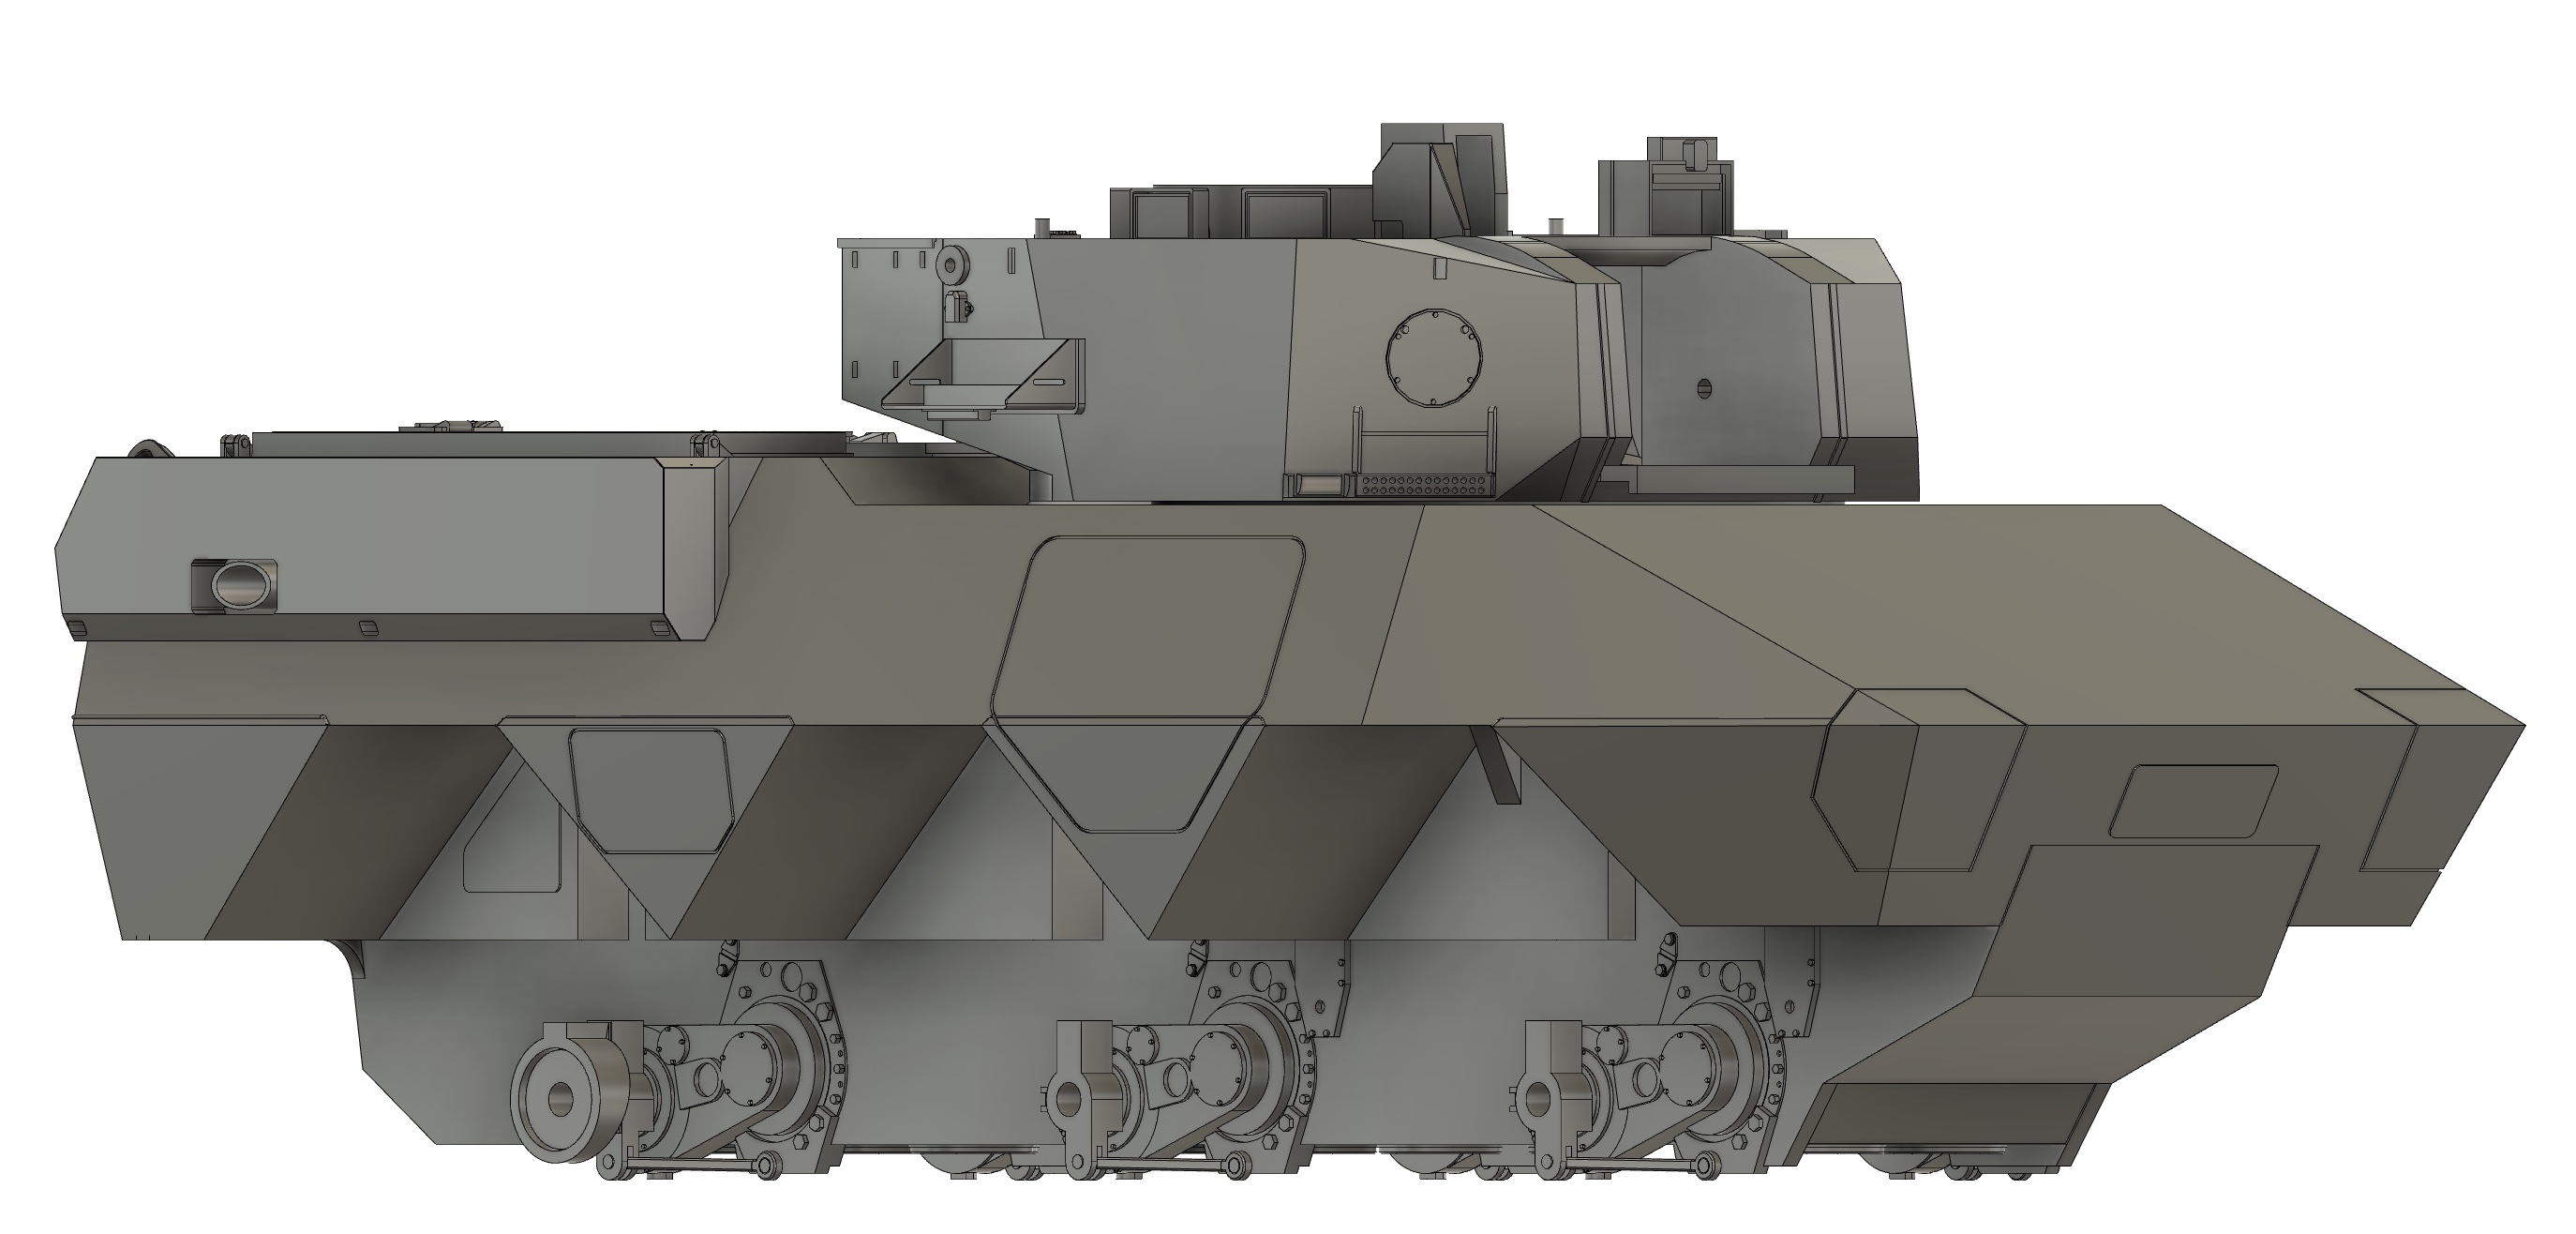
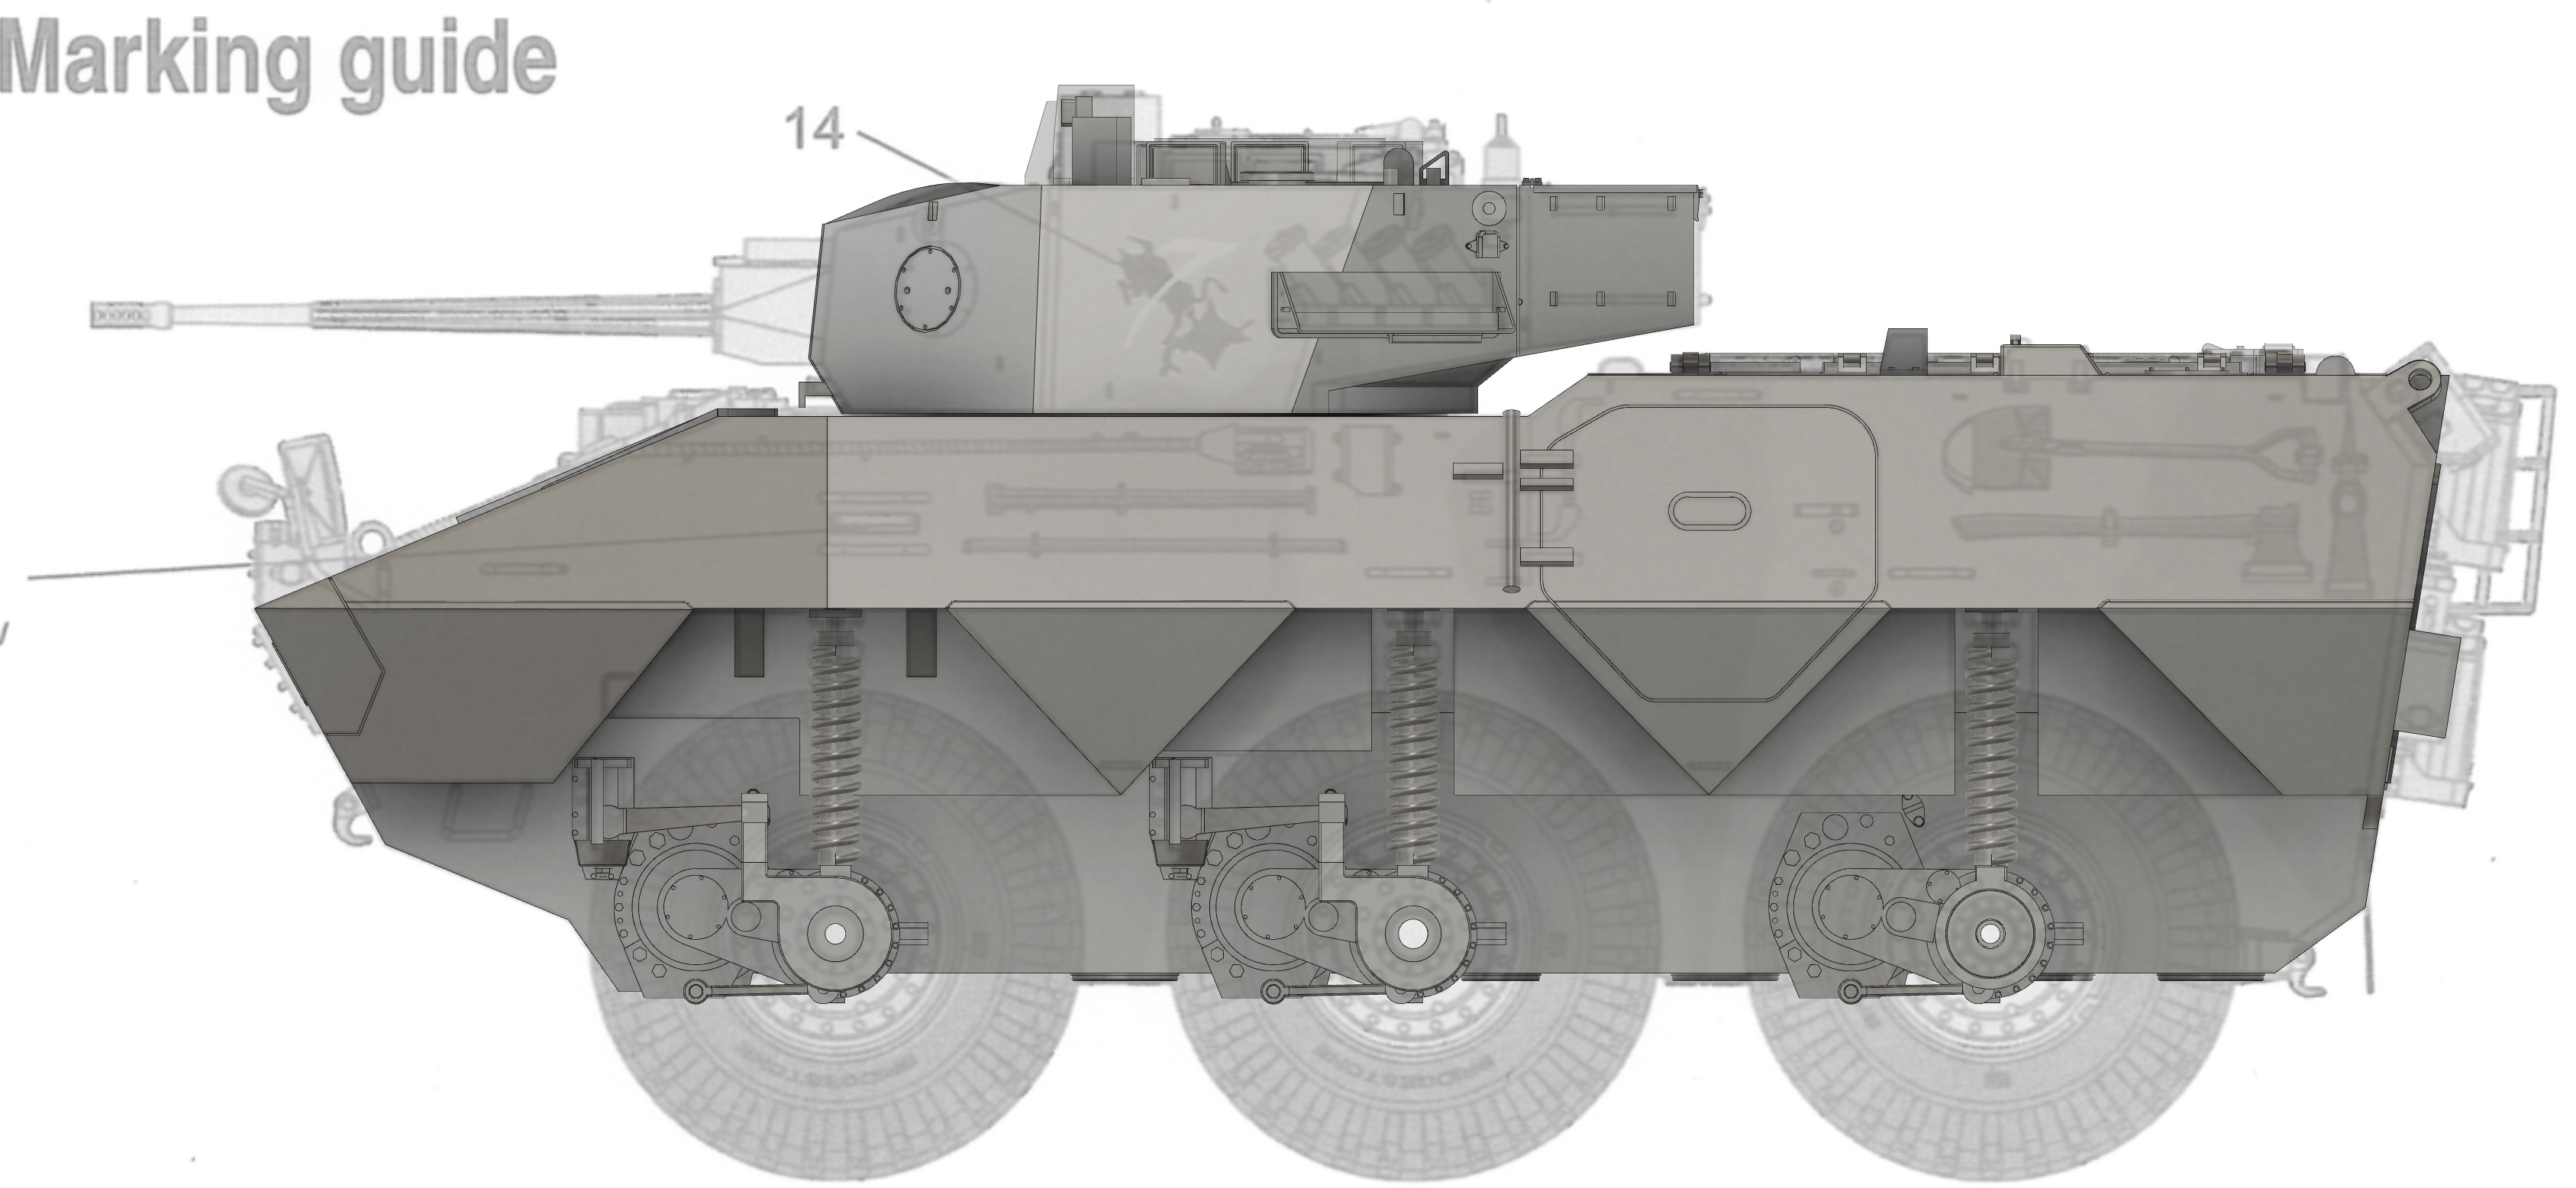
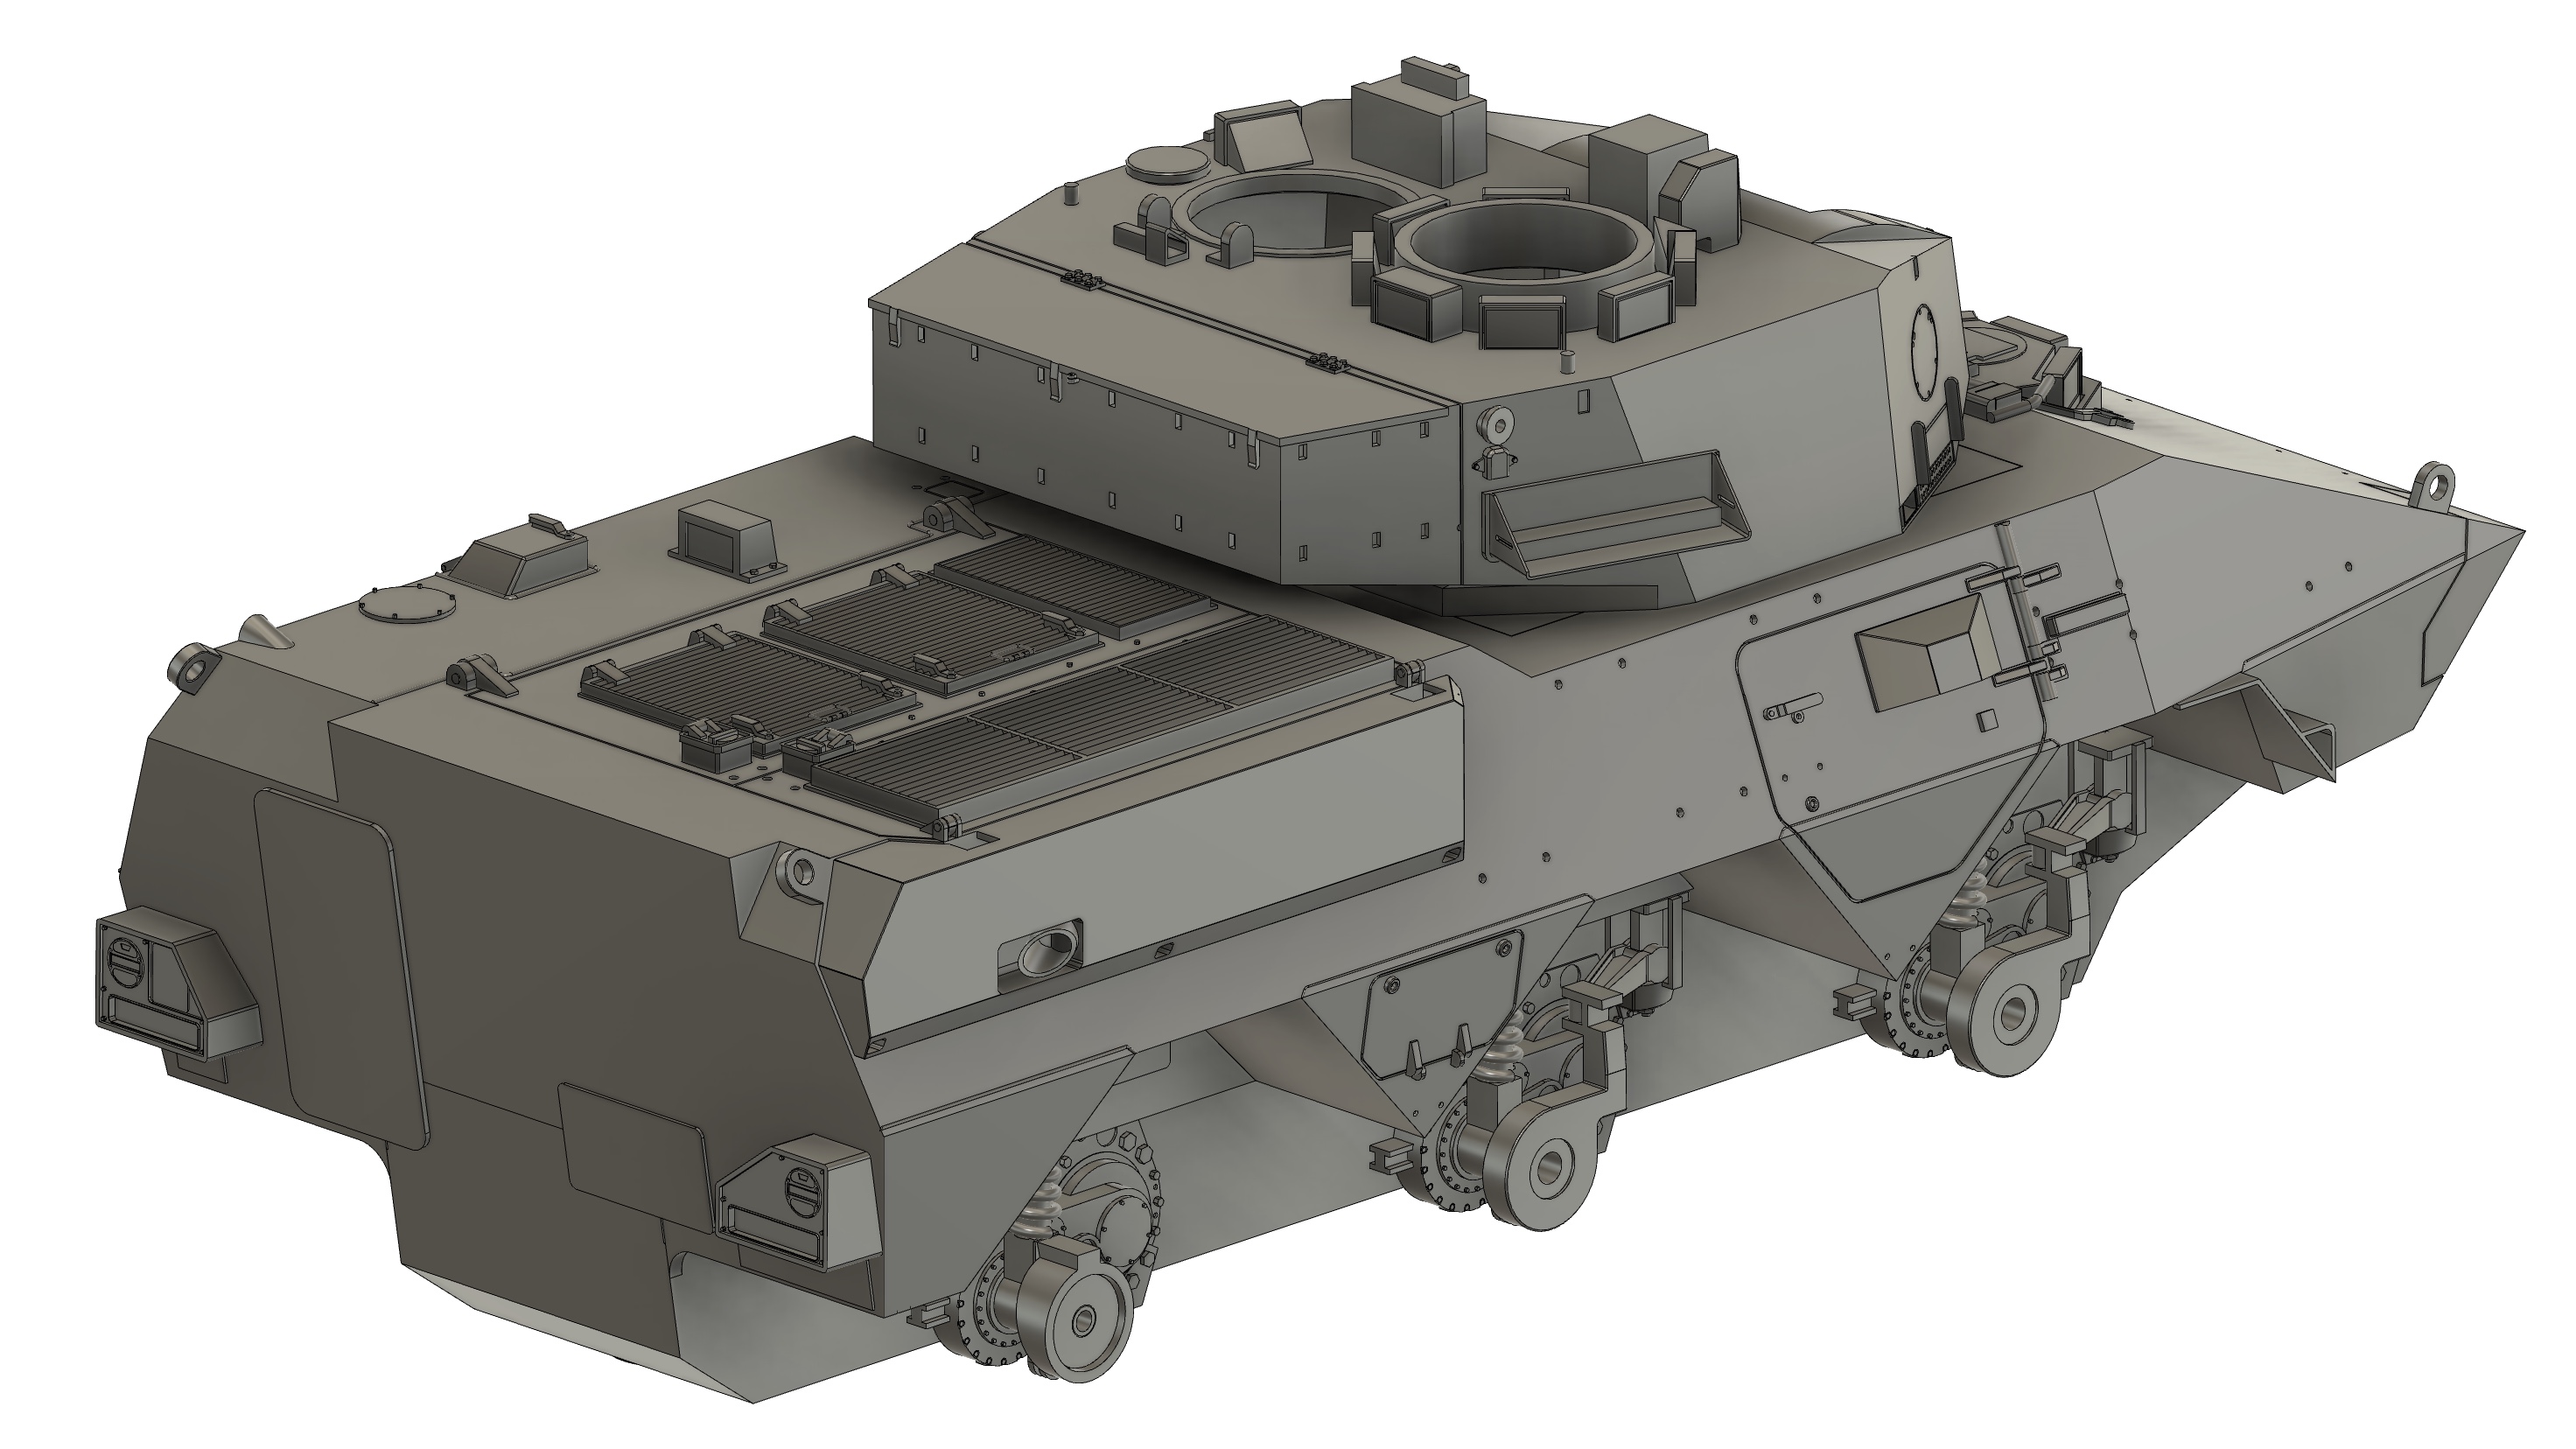
While I wait for some bits & pieces for my conversion of the Tamiya 1/16 M1A2 into an Australian SEP v3, I thought I’d do a quick palette cleanser in the form of the Japanese Ground Self Defense Force Type 87 Reconnaissance Combat Vehicle.


Using the Trumpeter/Pitroad 1/35 kit as a point of departure, I’ve drawn up the vehicle in Fusion360.

Here’s a test print of the turret.


Thanks for looking in.

14 Likes

That’s pretty darn nice. :+1:

2 Likes

Before starting the hull in earnest, I drew up & printed a section of the roof with the turret race interface.

Smooth but not loose traverse.

From above.

Thanks for looking in.

1 Like

Suspension skateboard is in progress. Very close to going on the printer.

Thanks for looking in.

4 Likes

After some more work & refinements, the skateboard is done.

8,503 x .03mm layers…see you in >37 hours!

Thanks for looking in.

2 Likes

The printer lied. Print duration was 45.5 hours!

Initial impressions are favourable!

Merry Christmas or equivalent to all. Thanks for looking in.

3 Likes

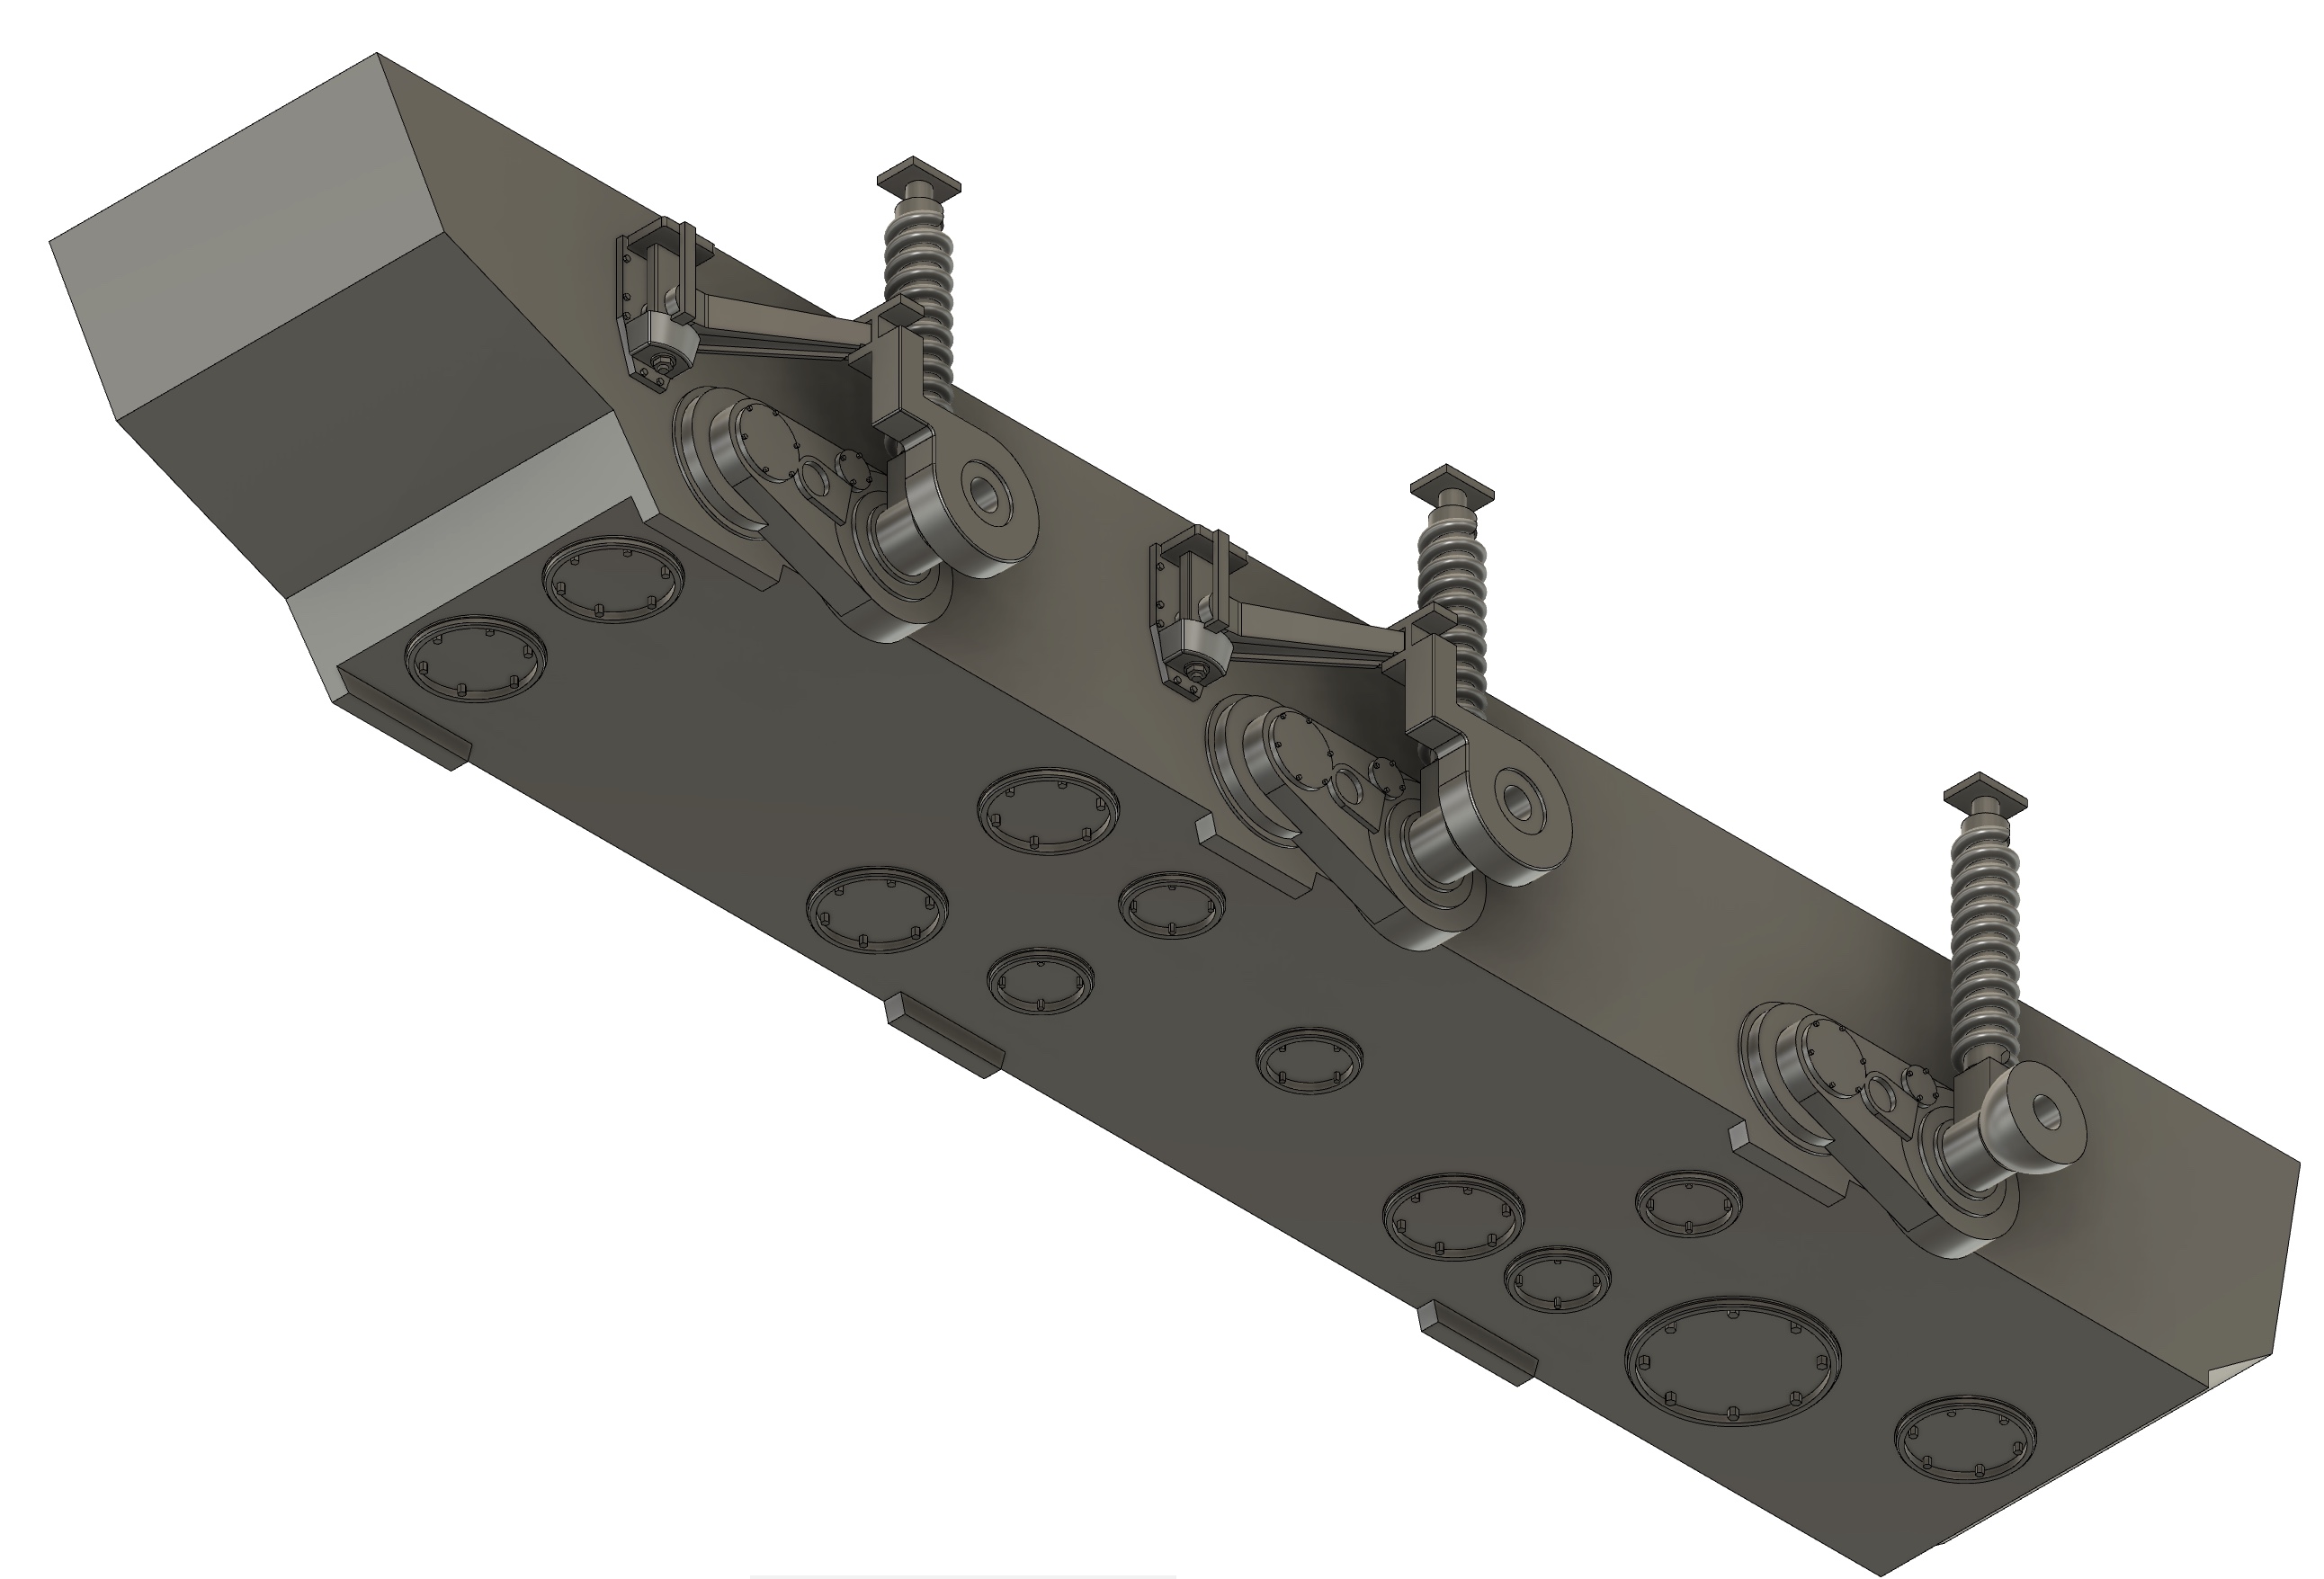
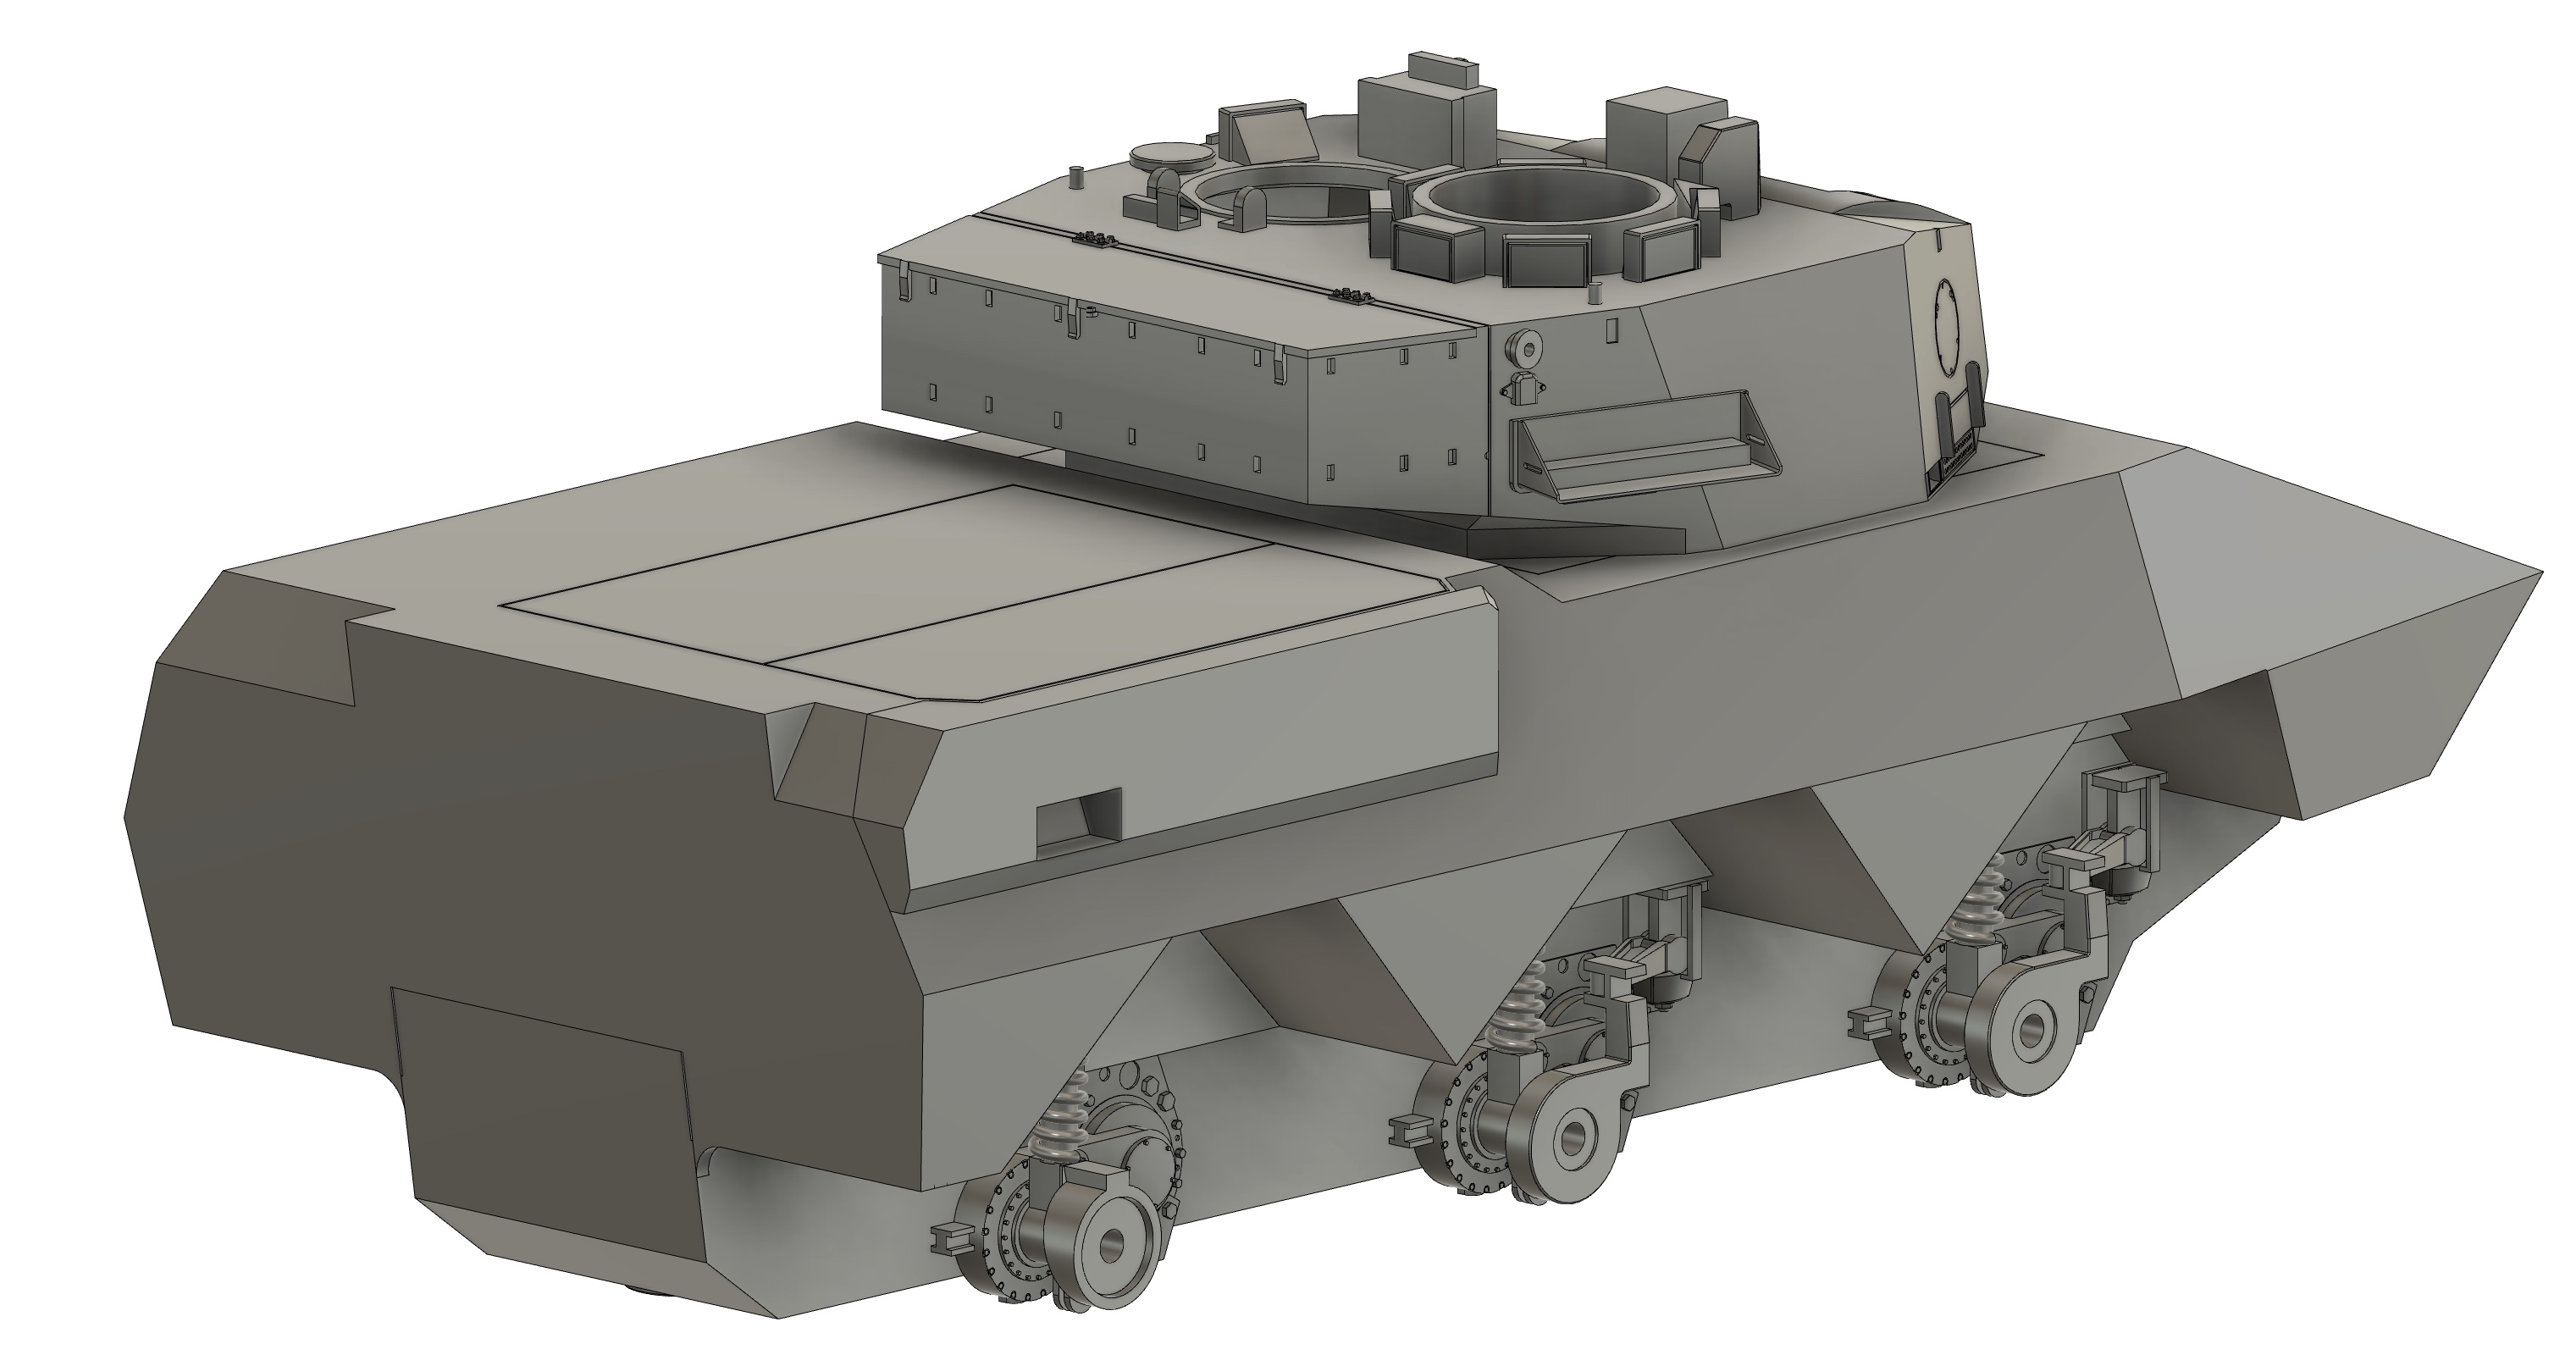
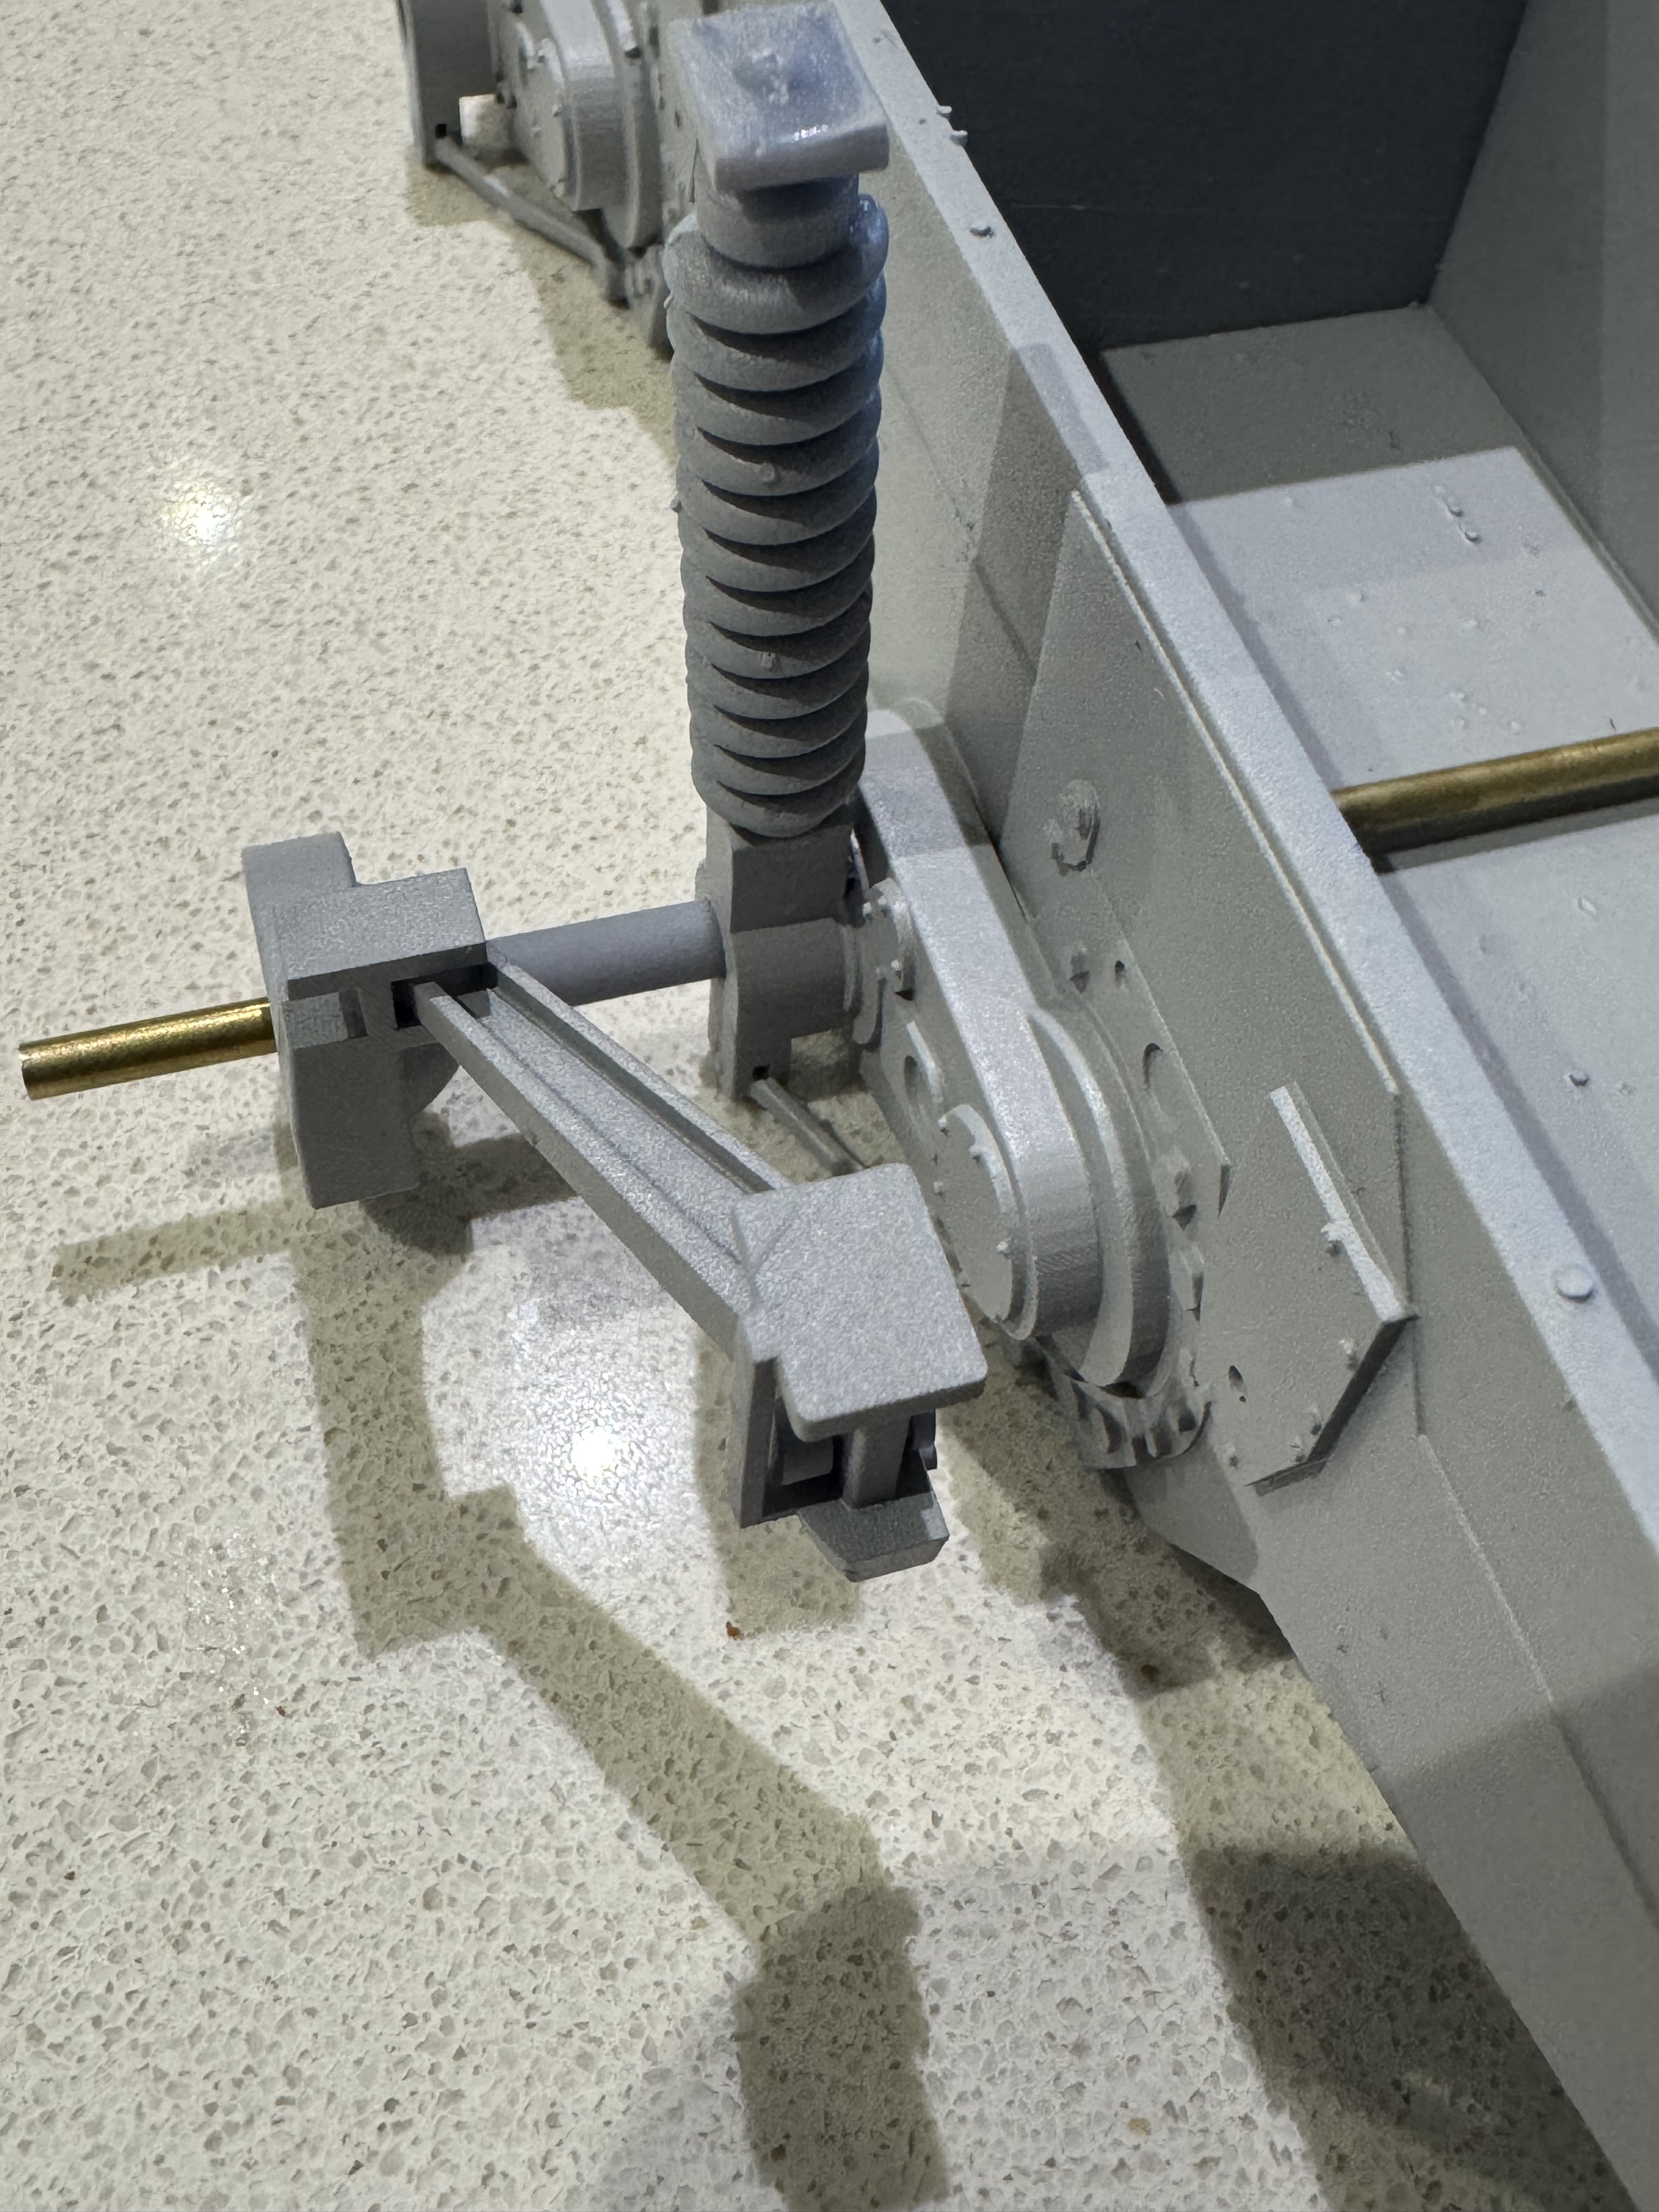
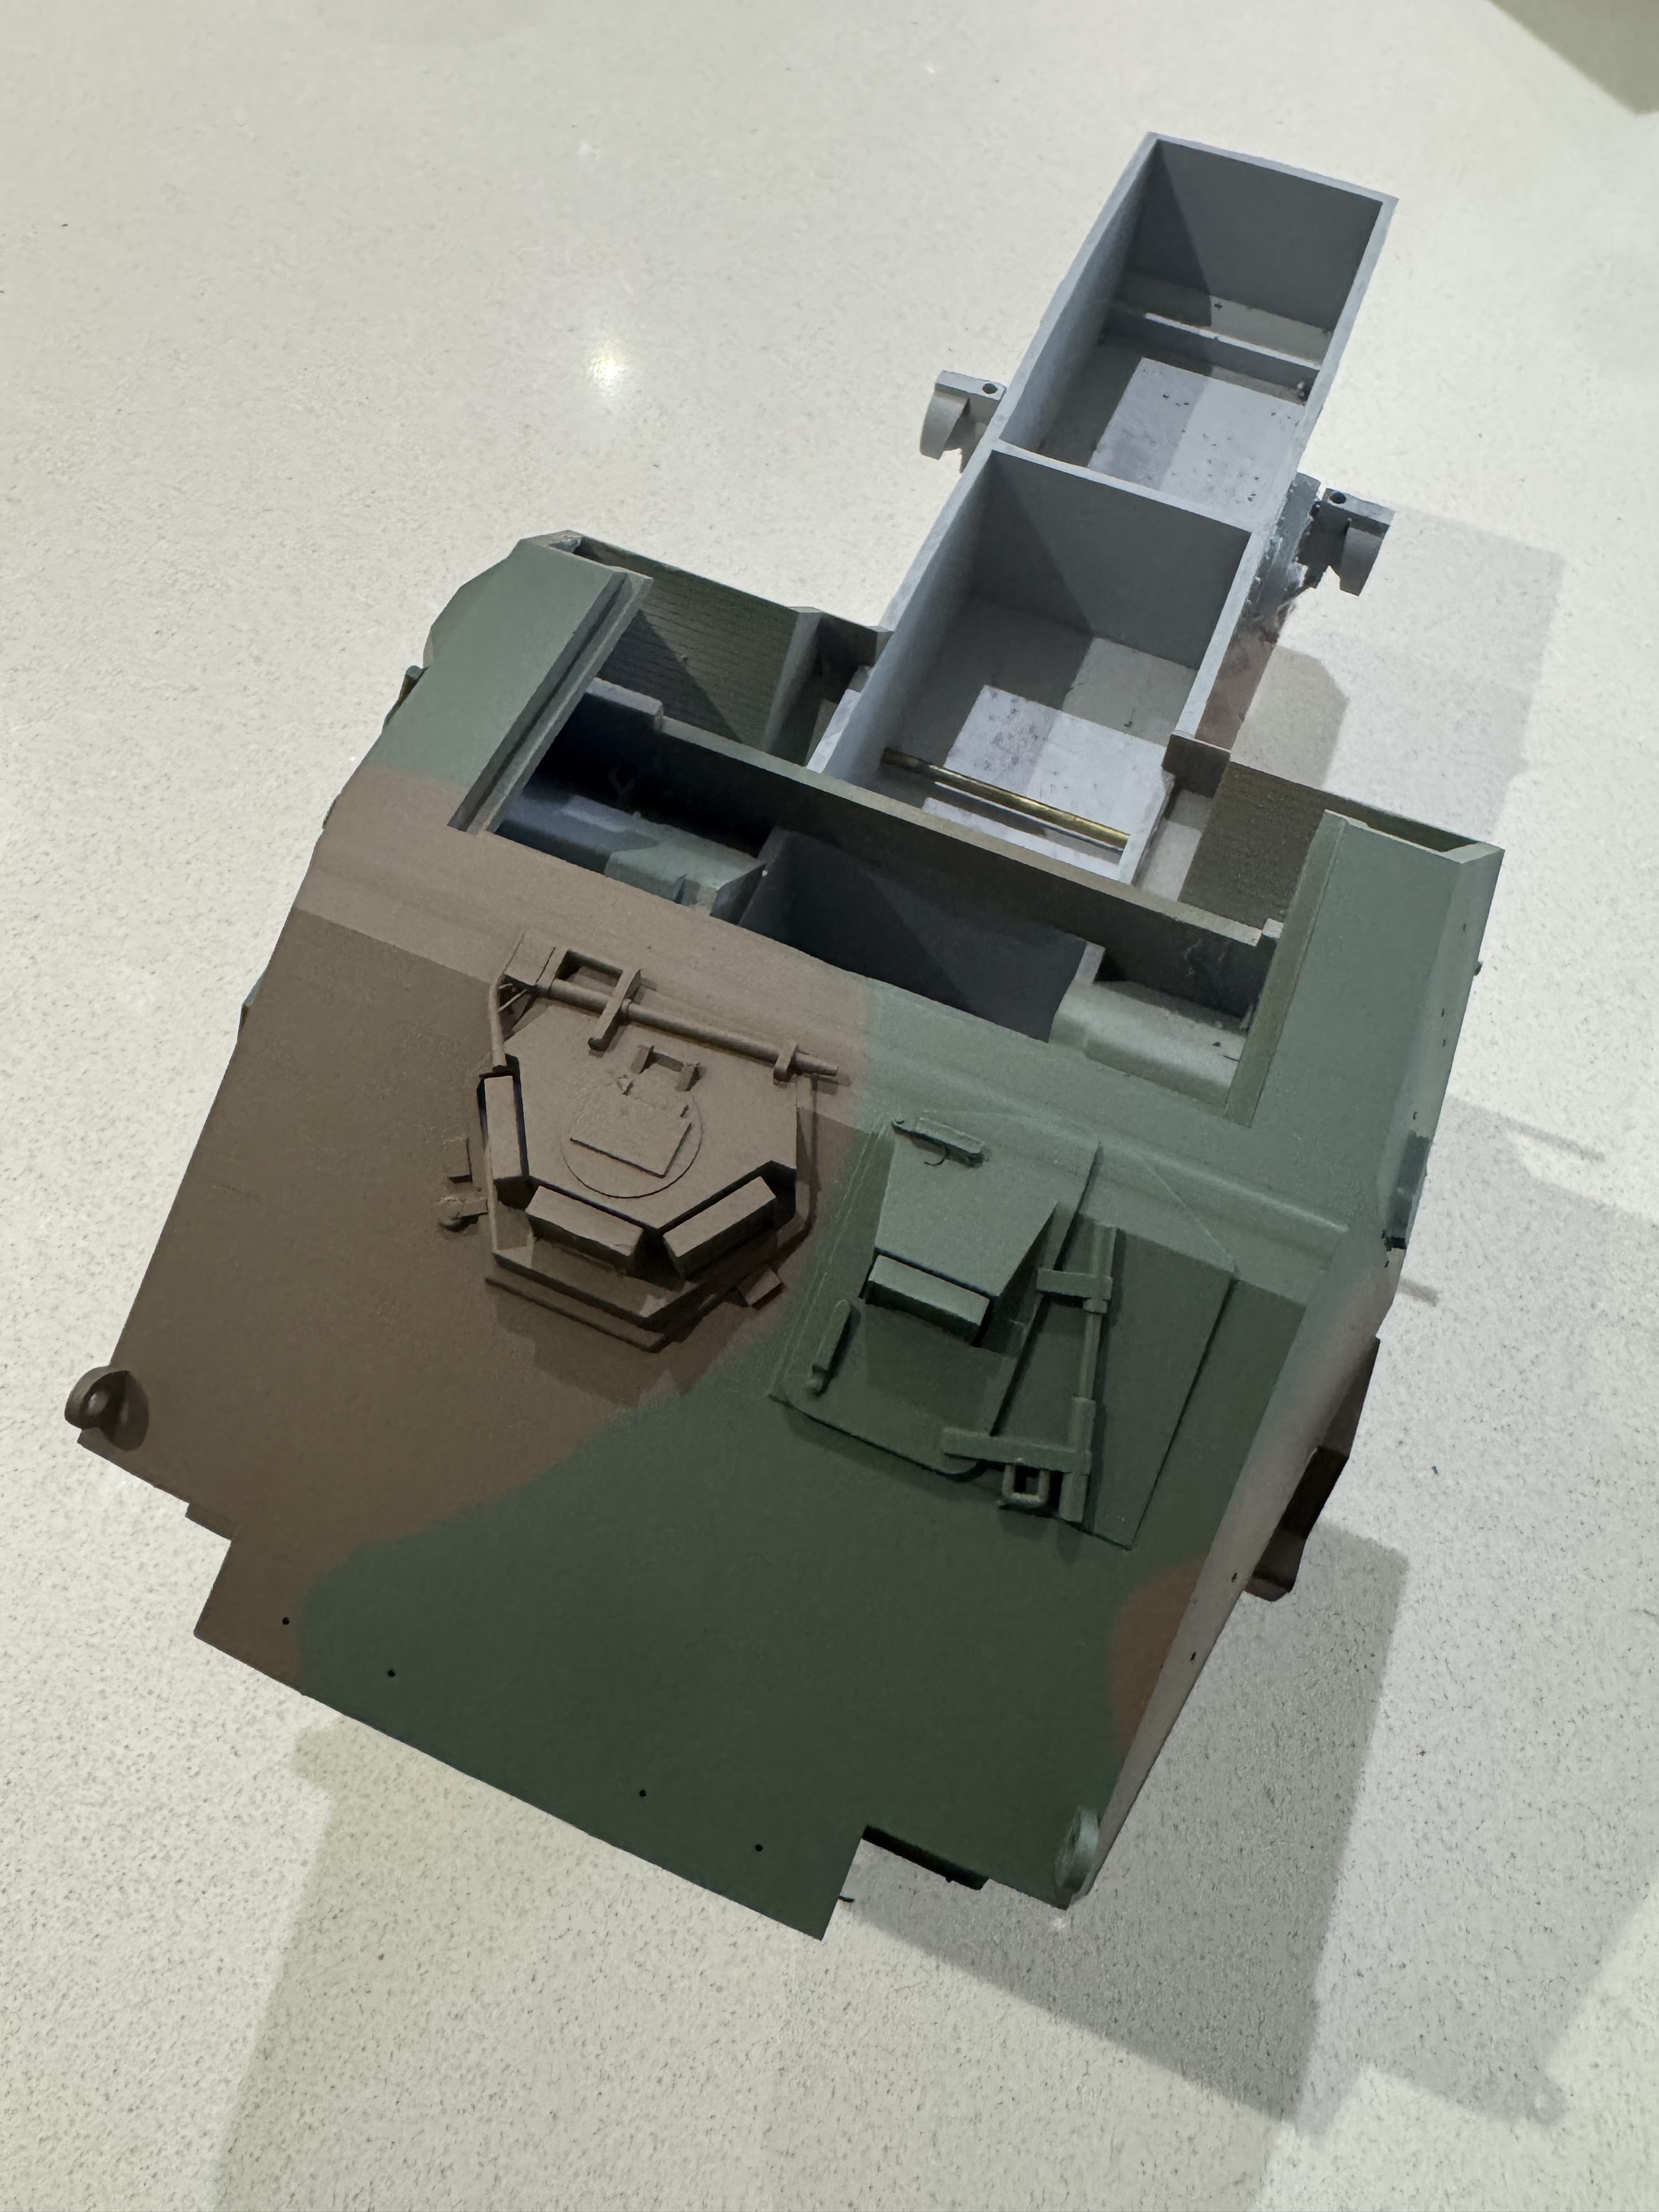
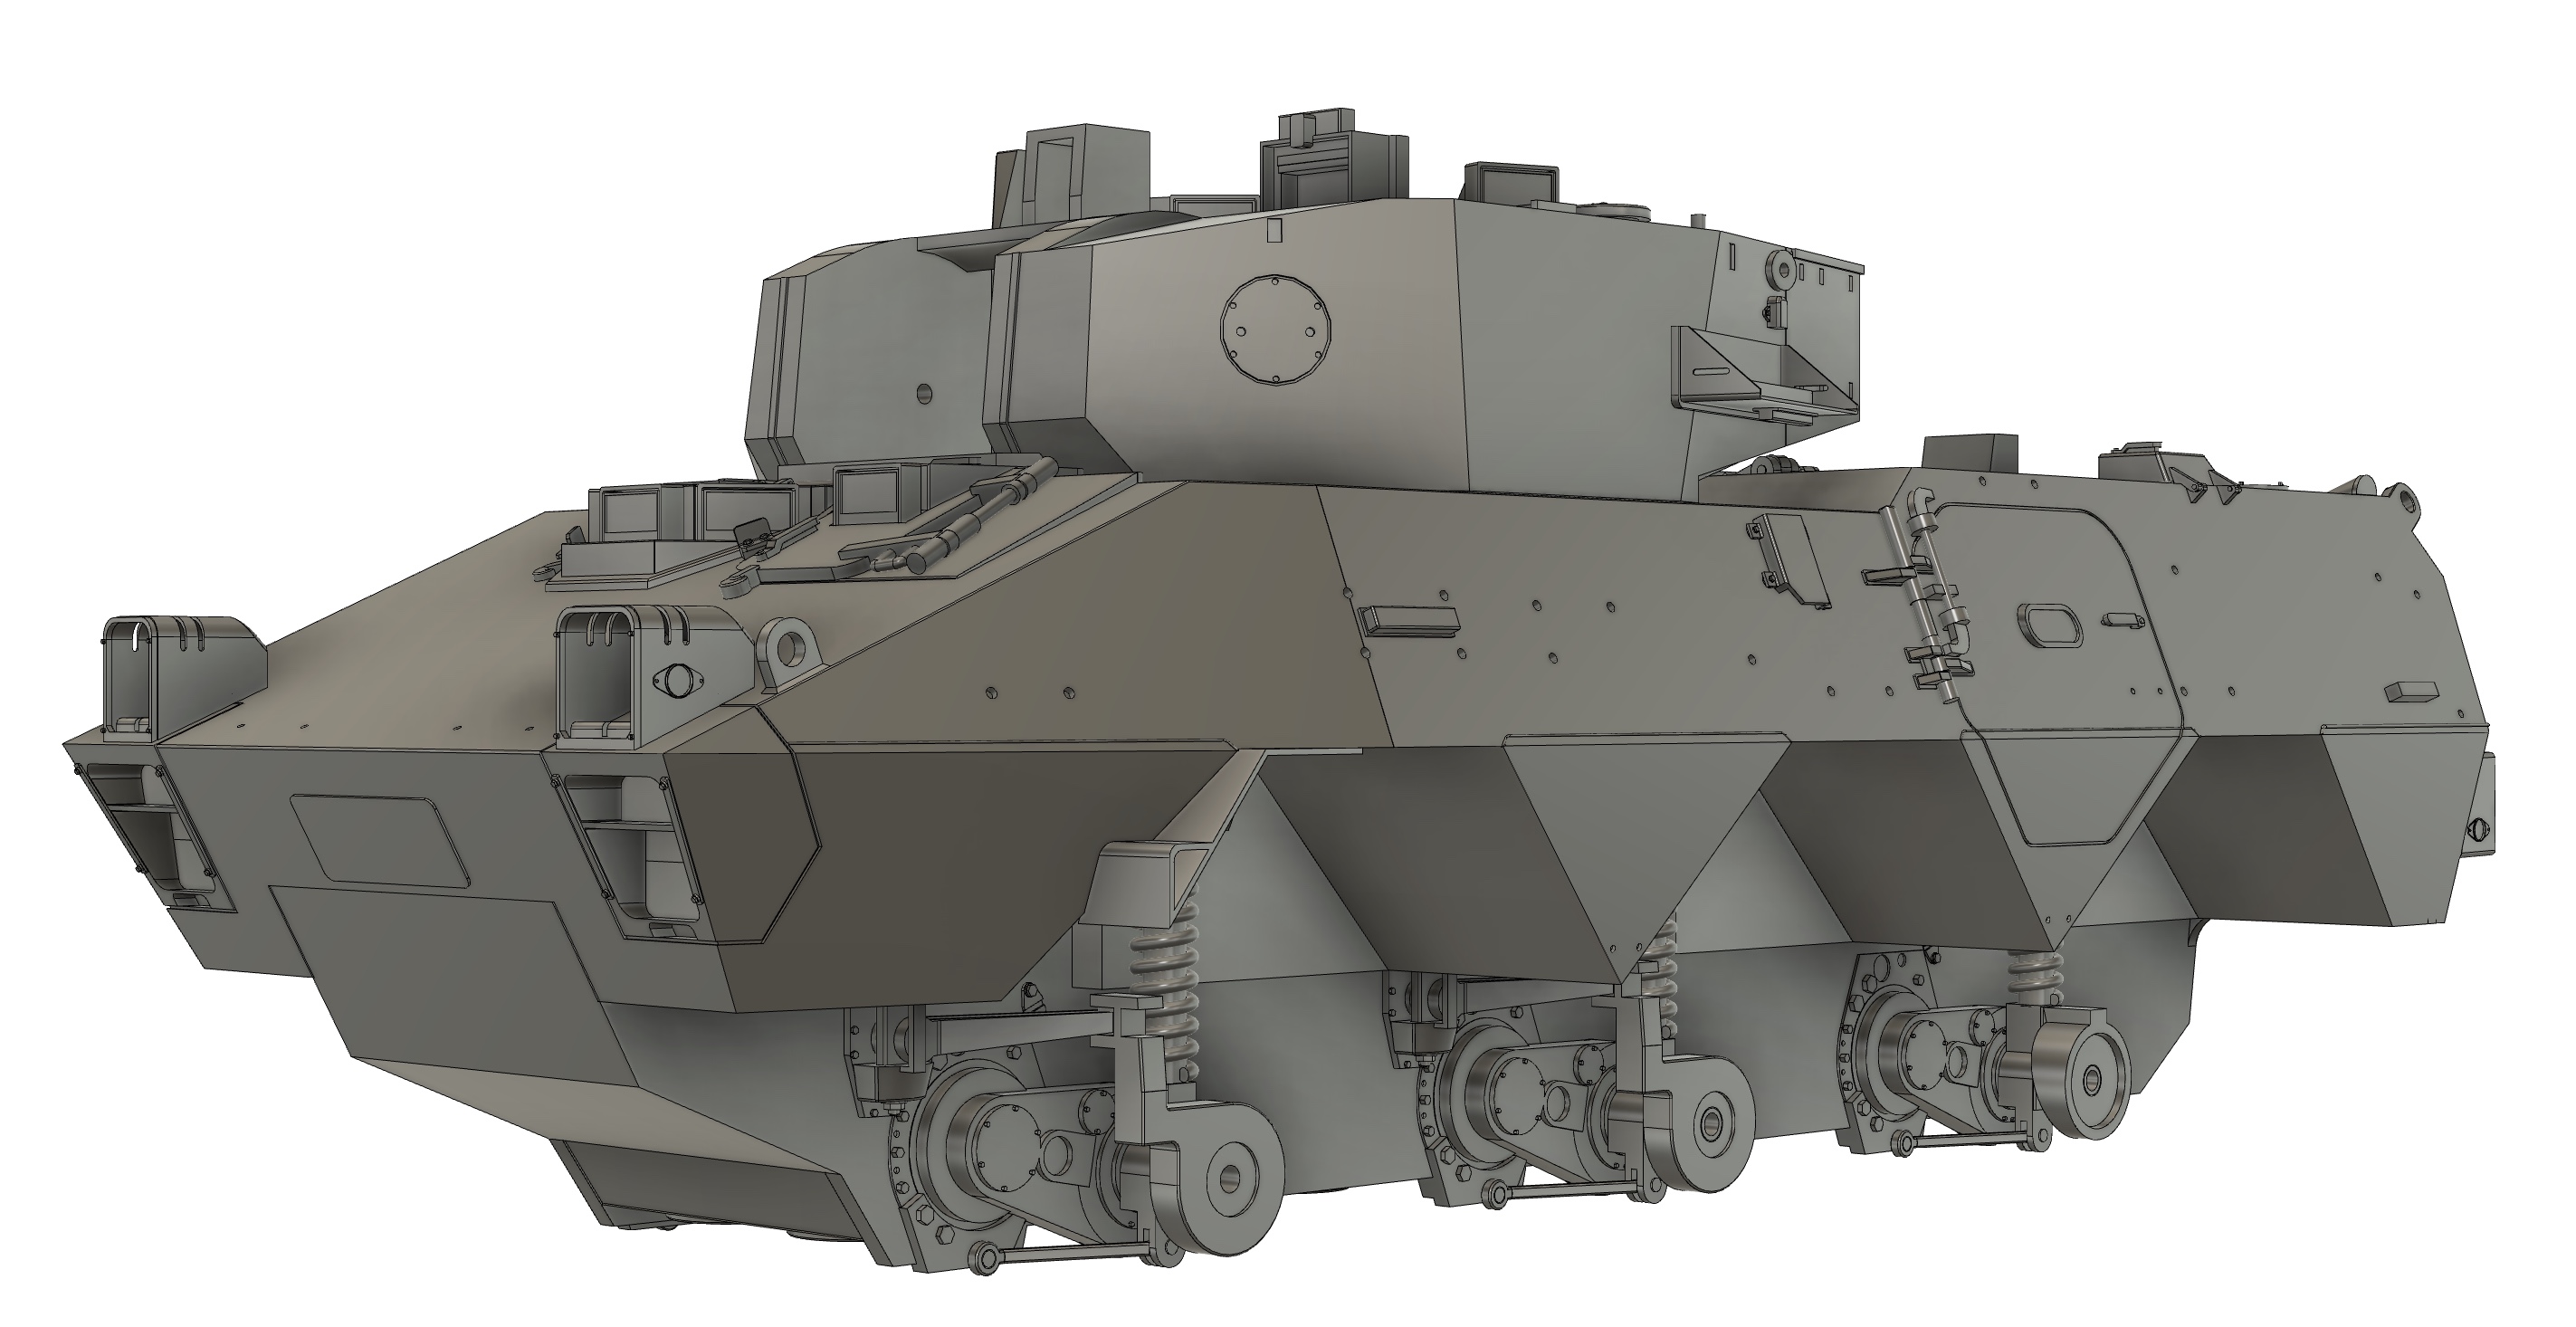
The decision to separate the suspension skateboard from the lower hull introduces an interface fit risk to be managed.

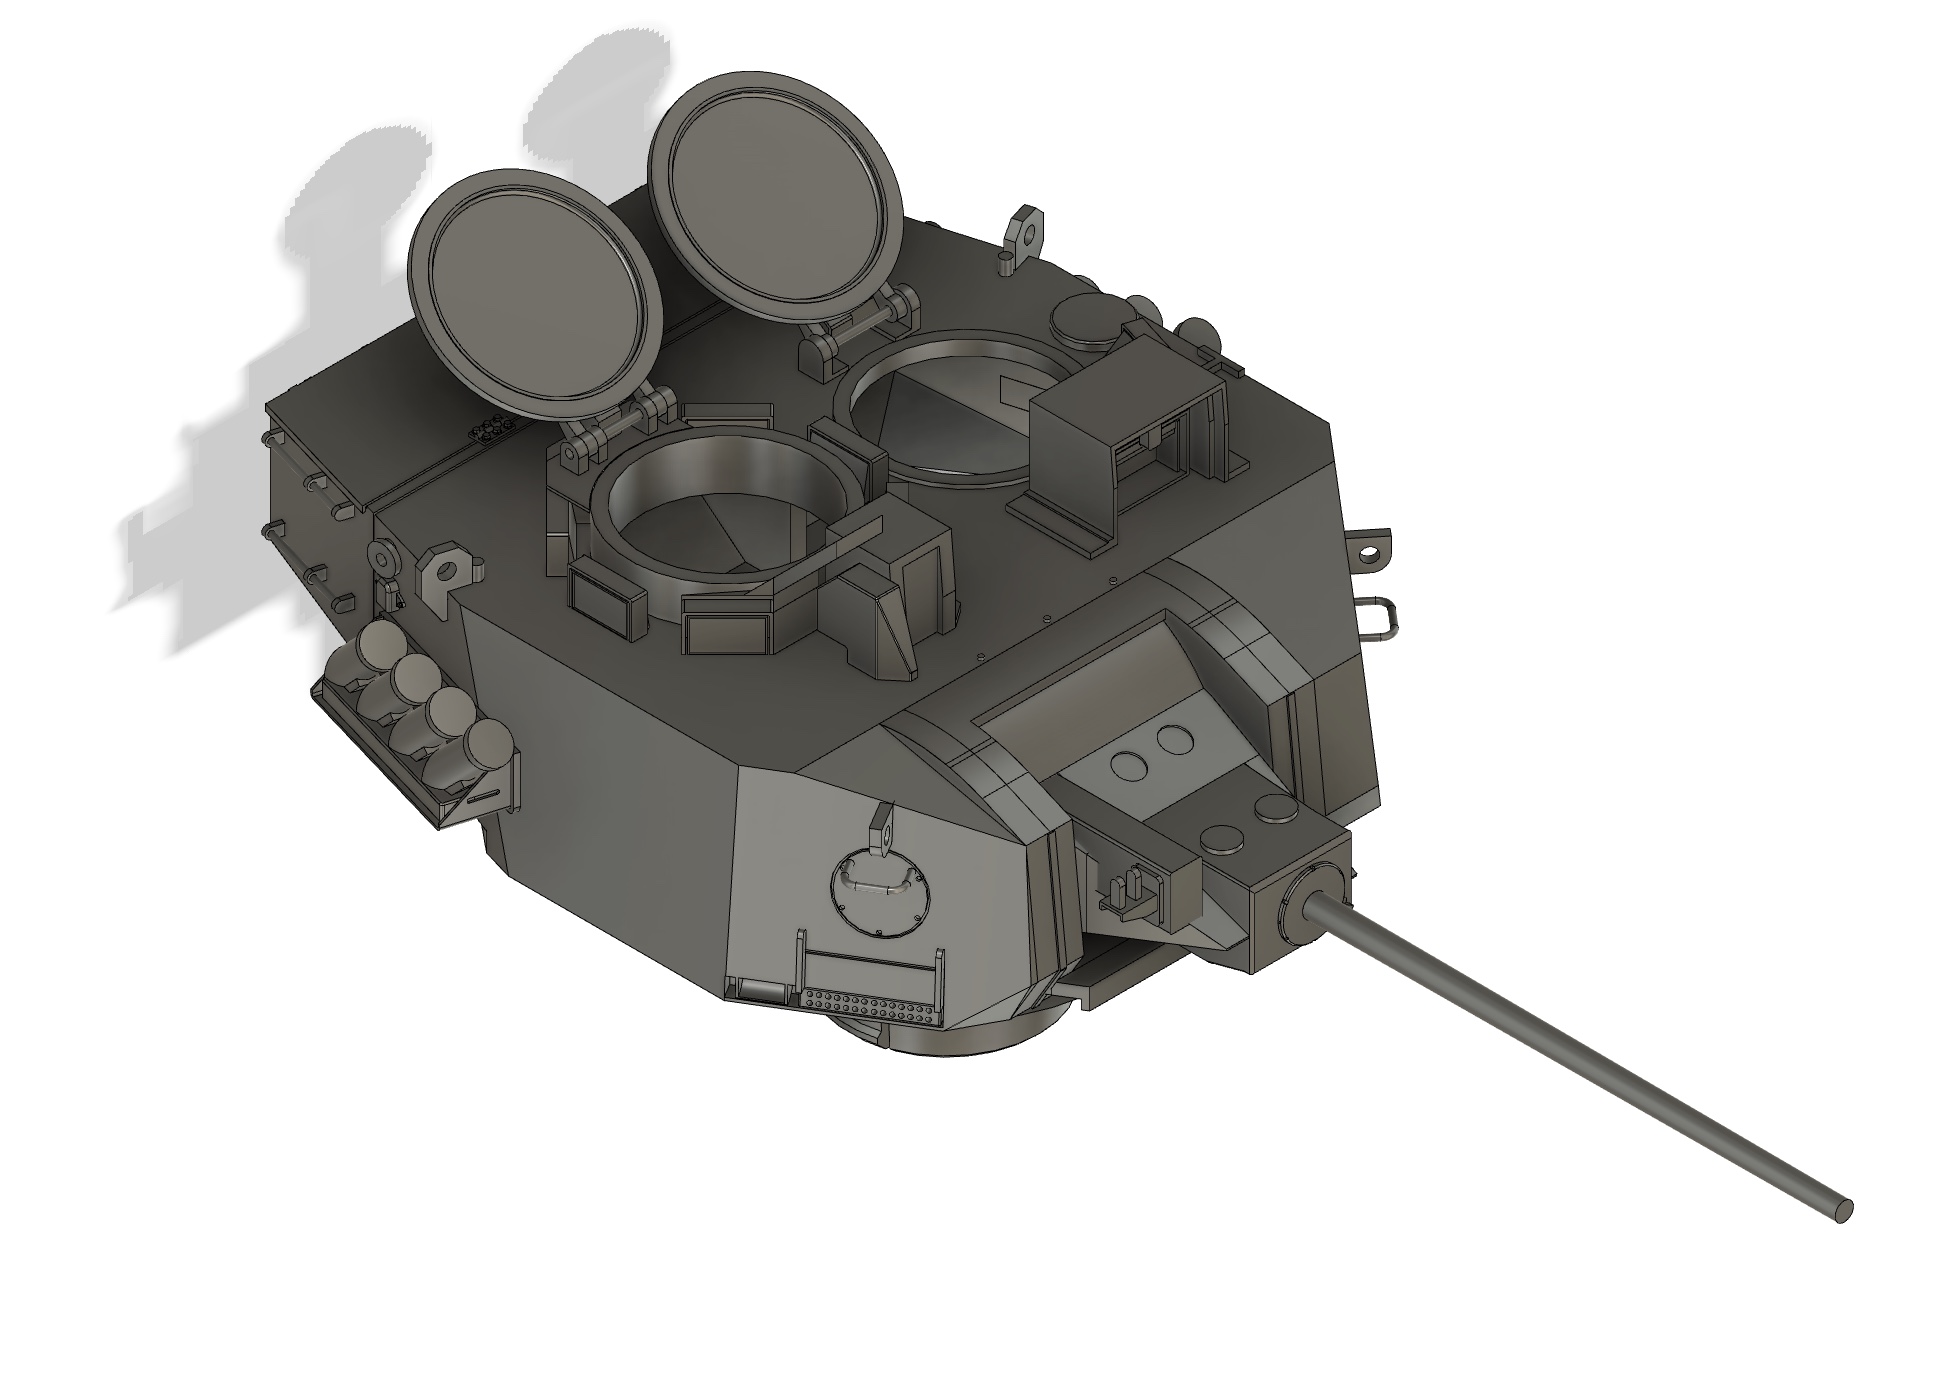
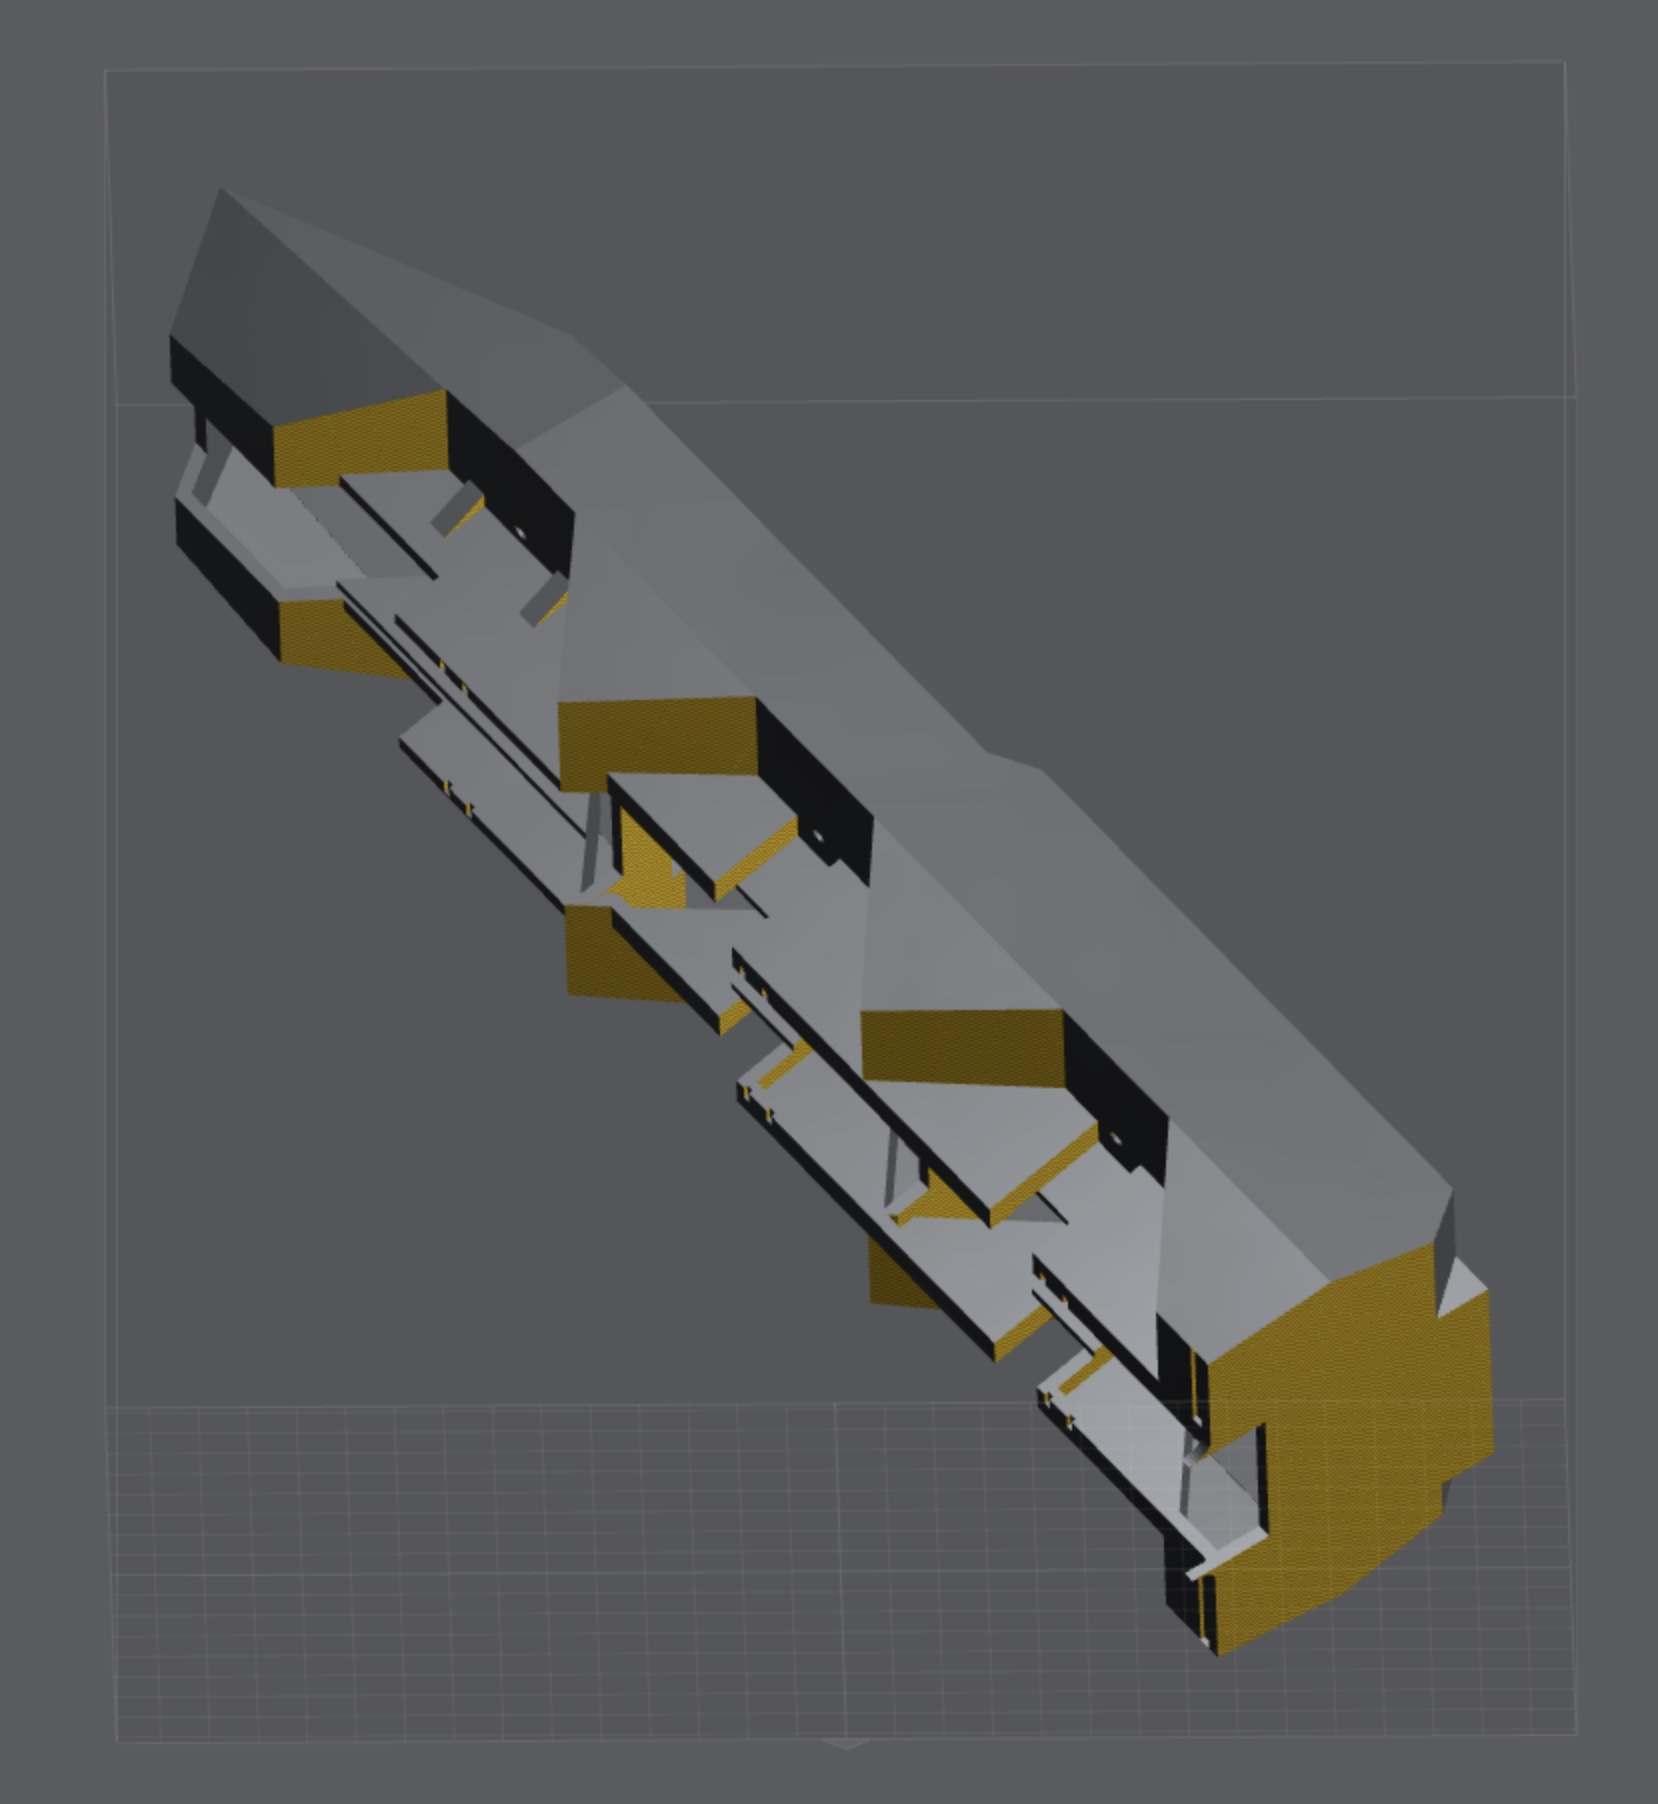
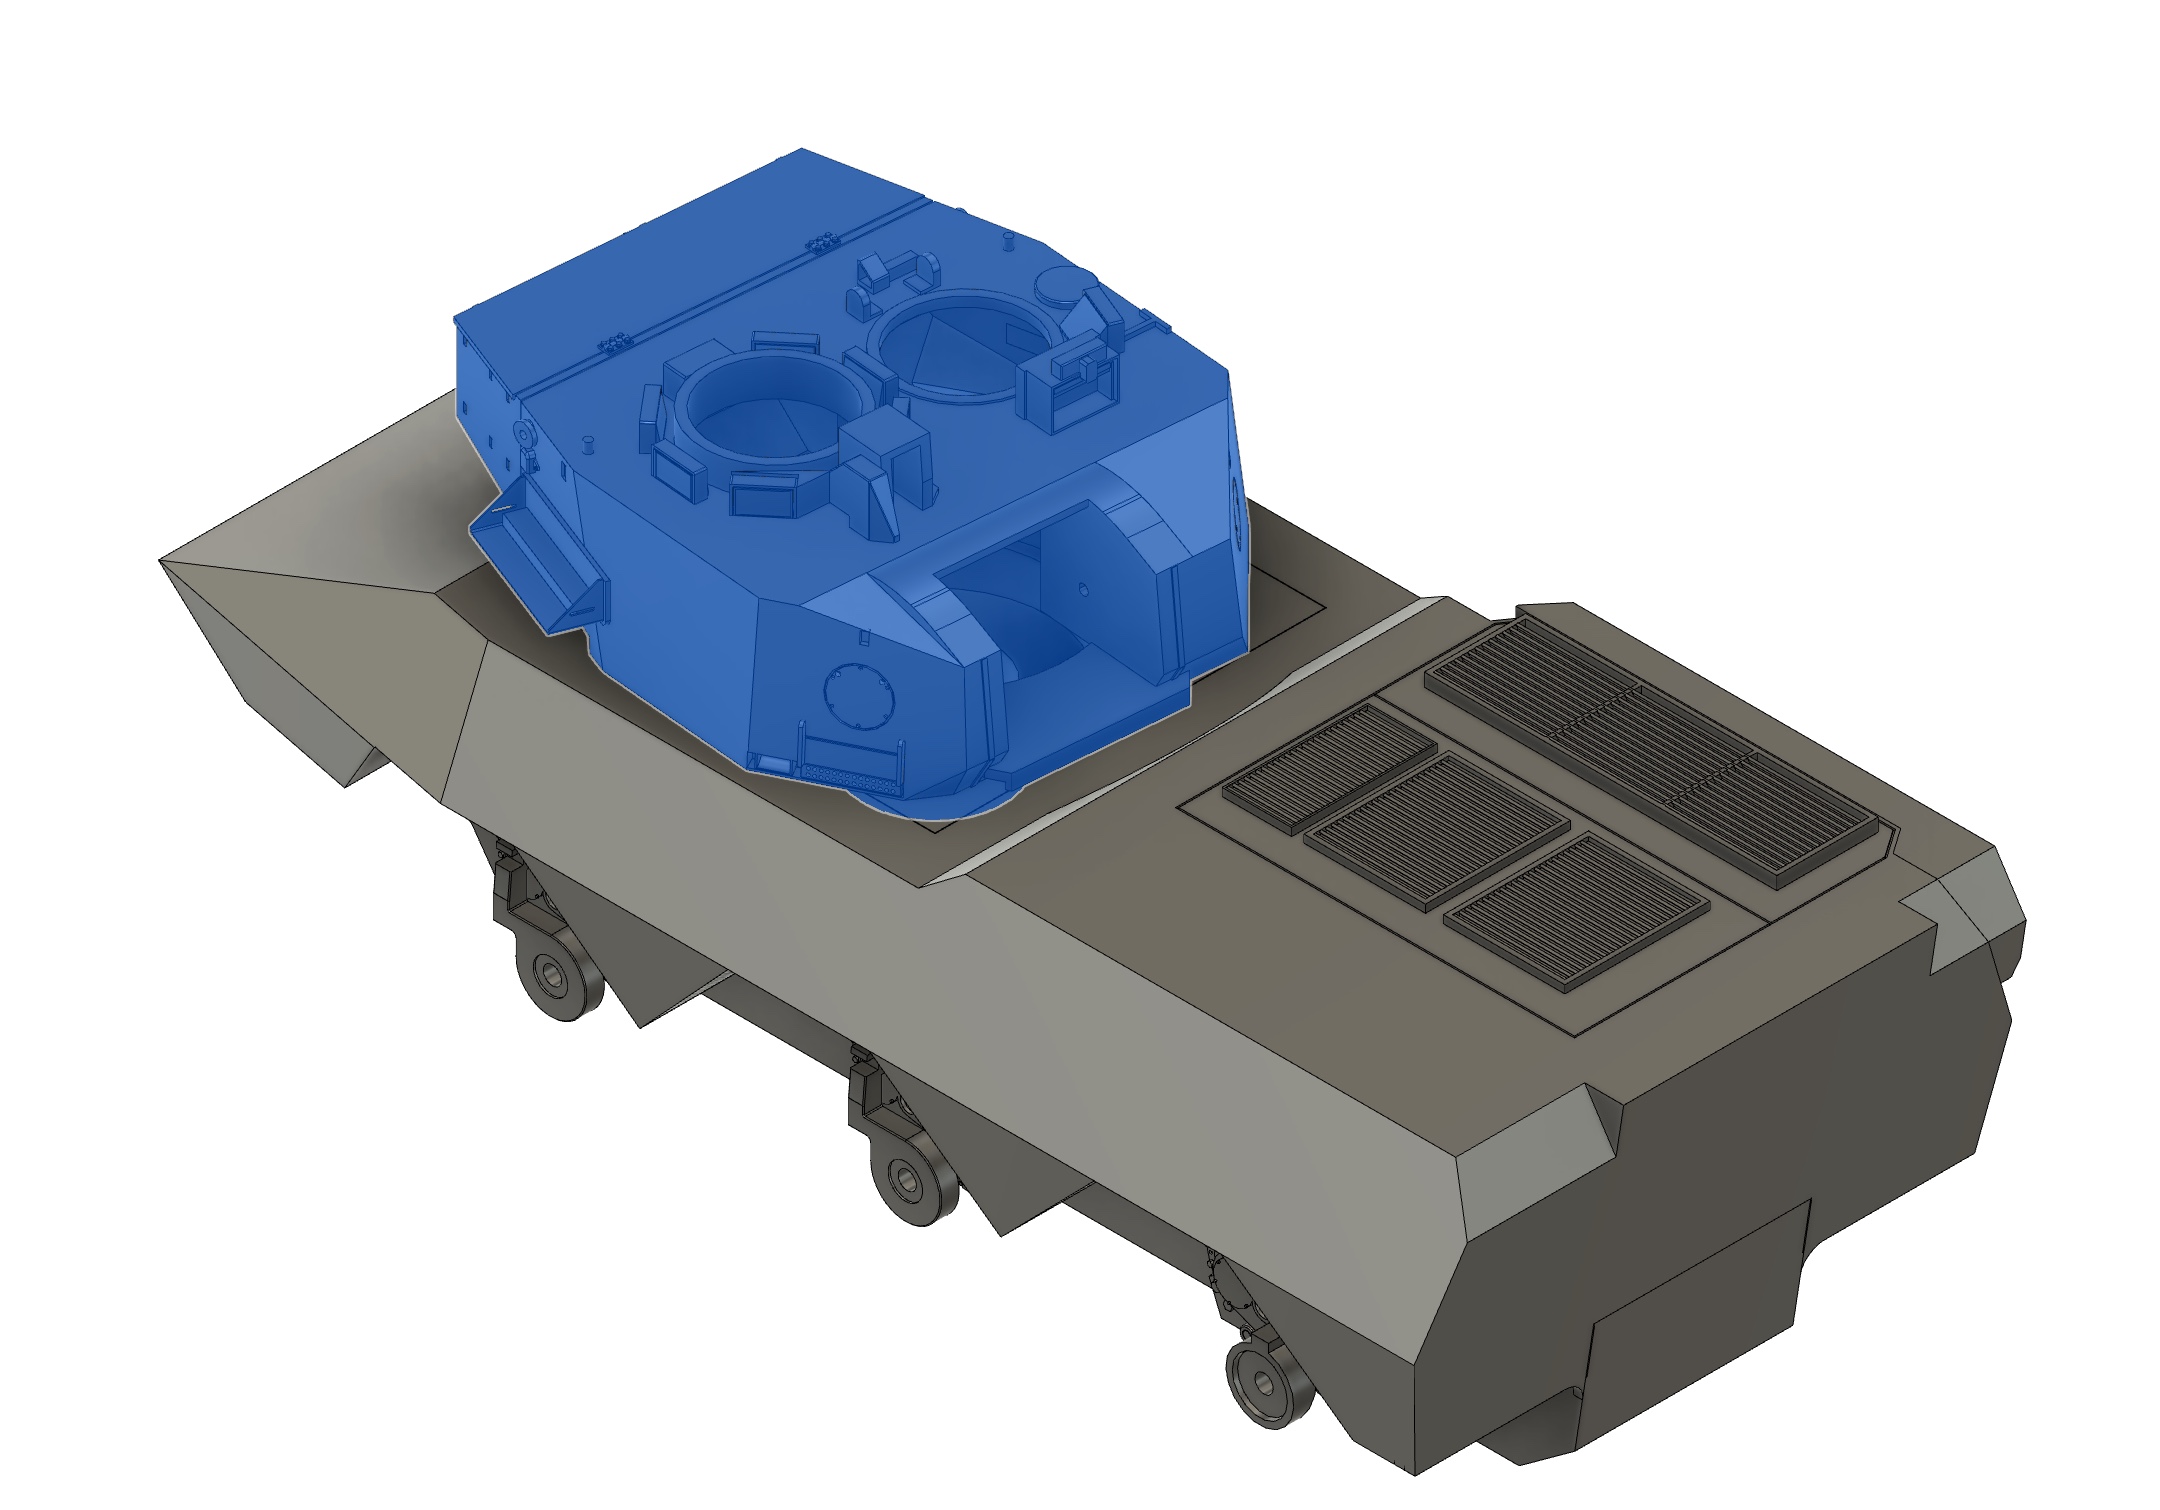
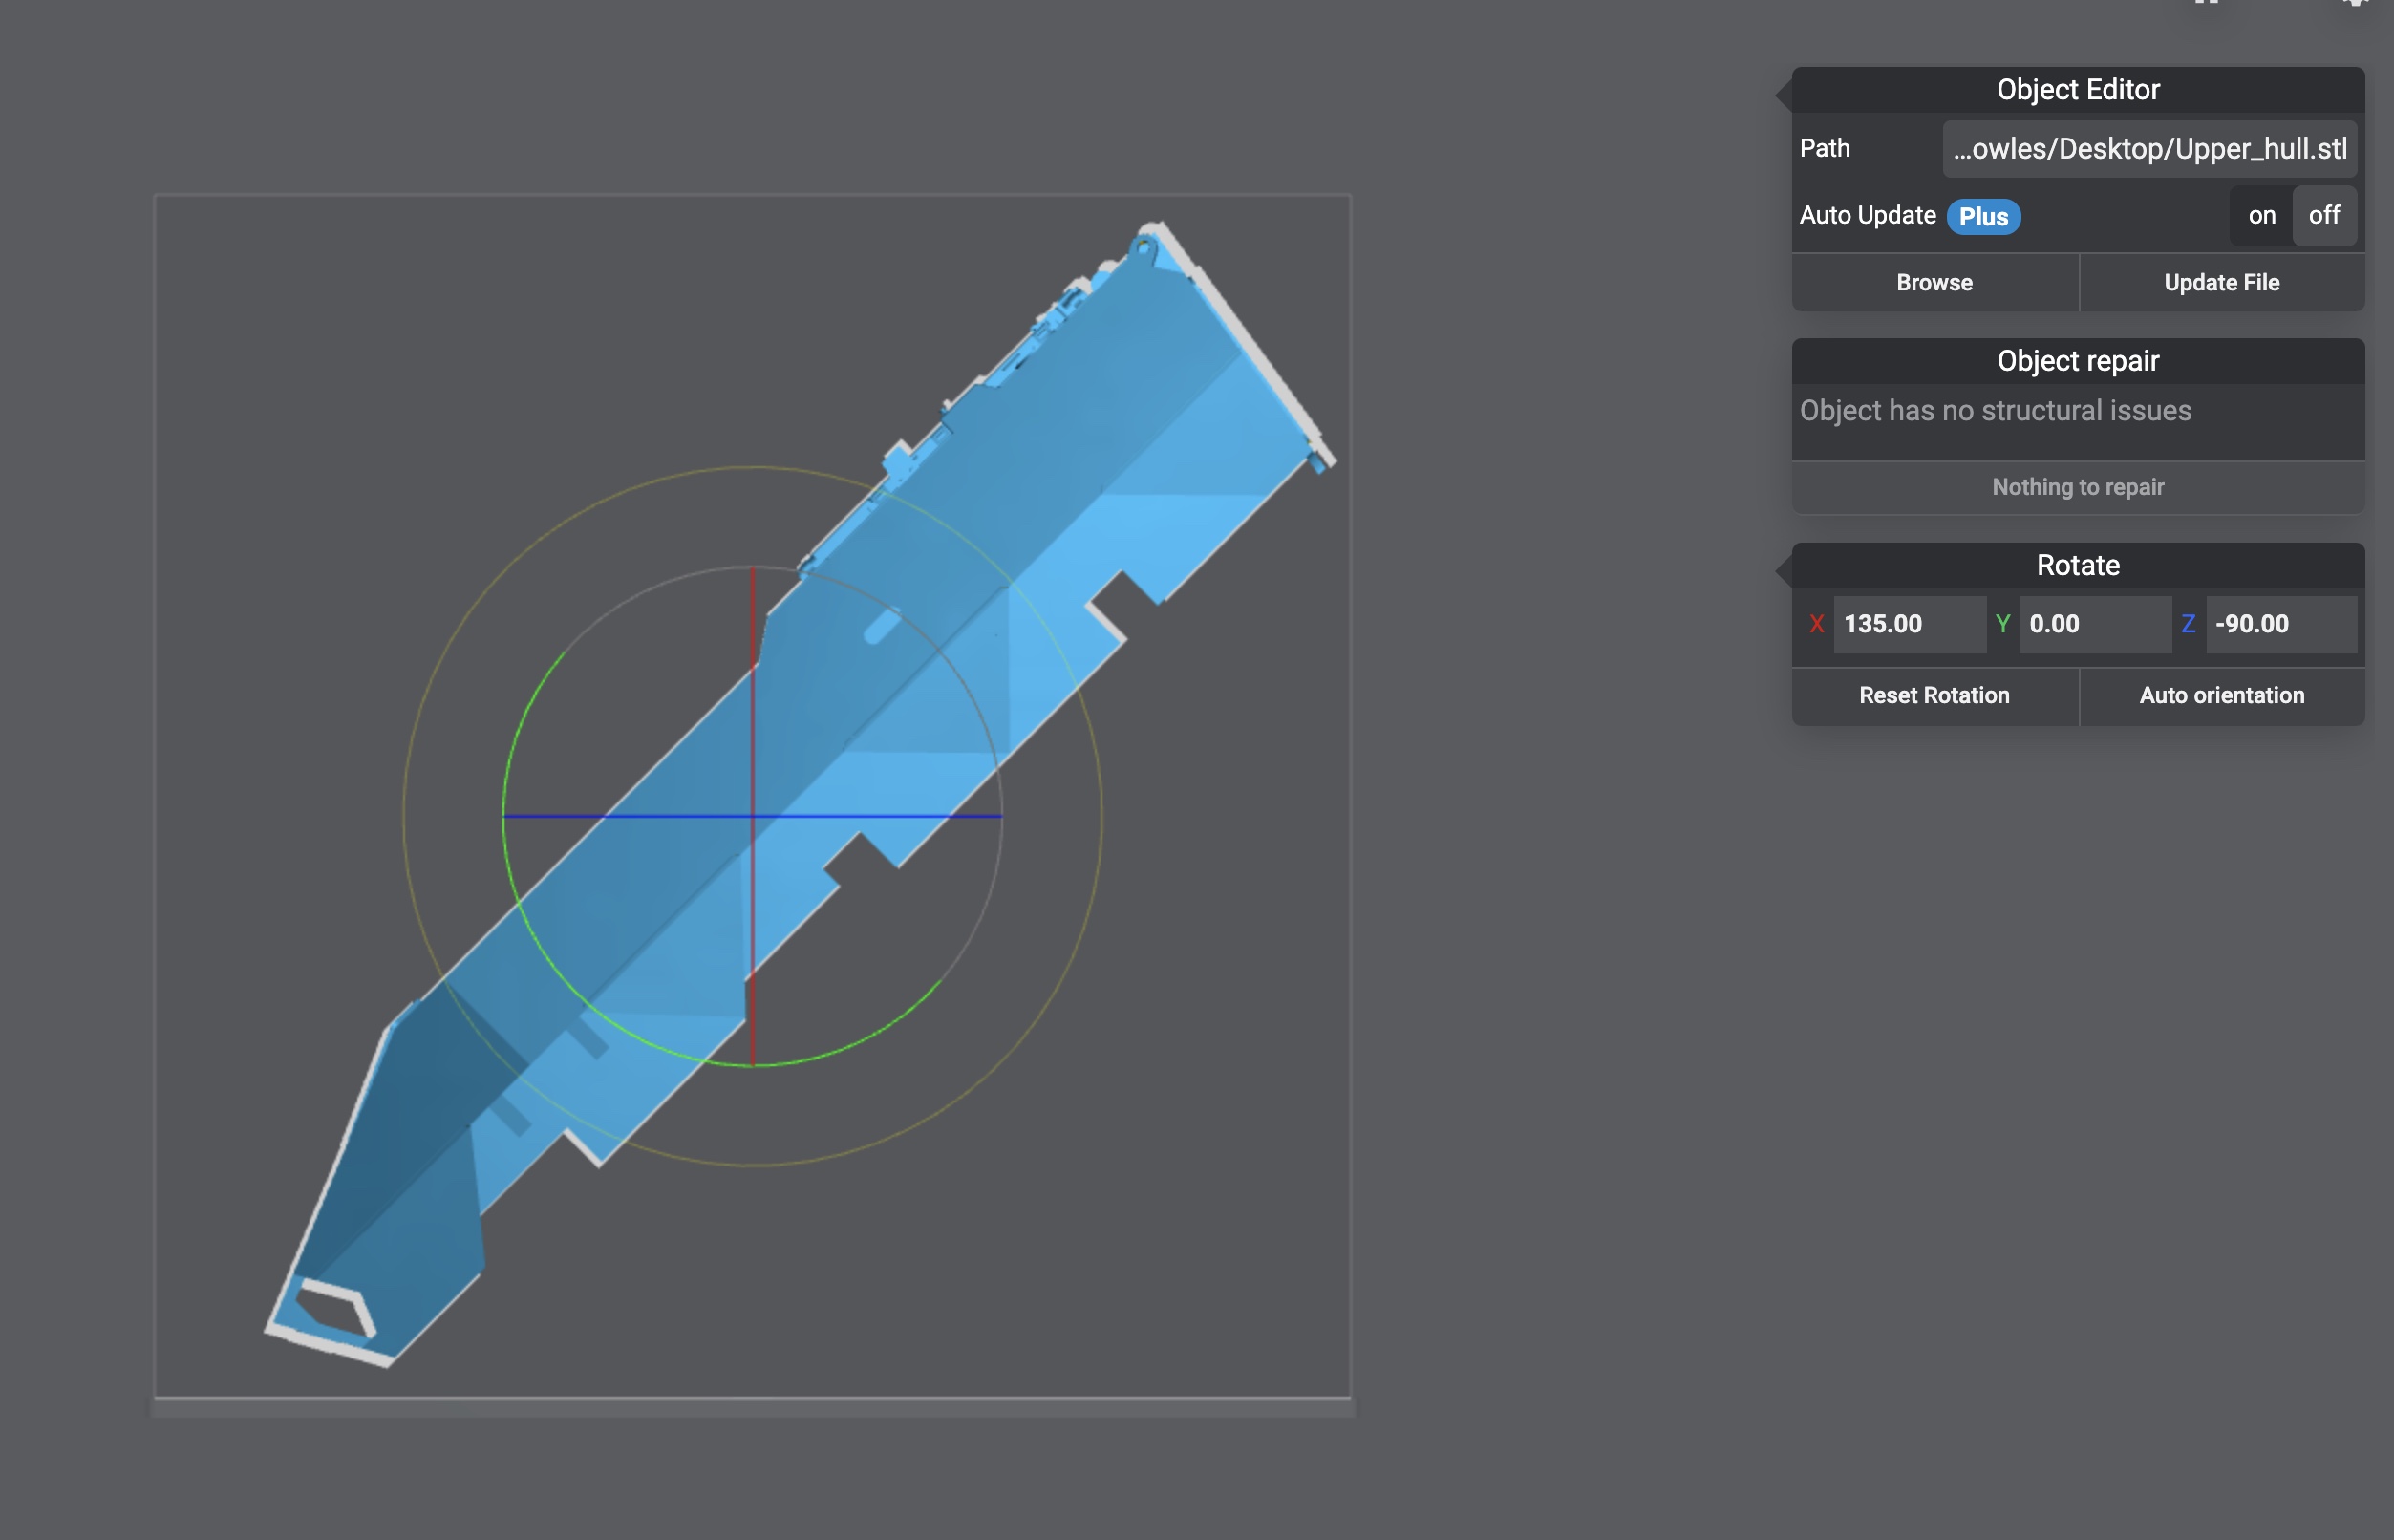
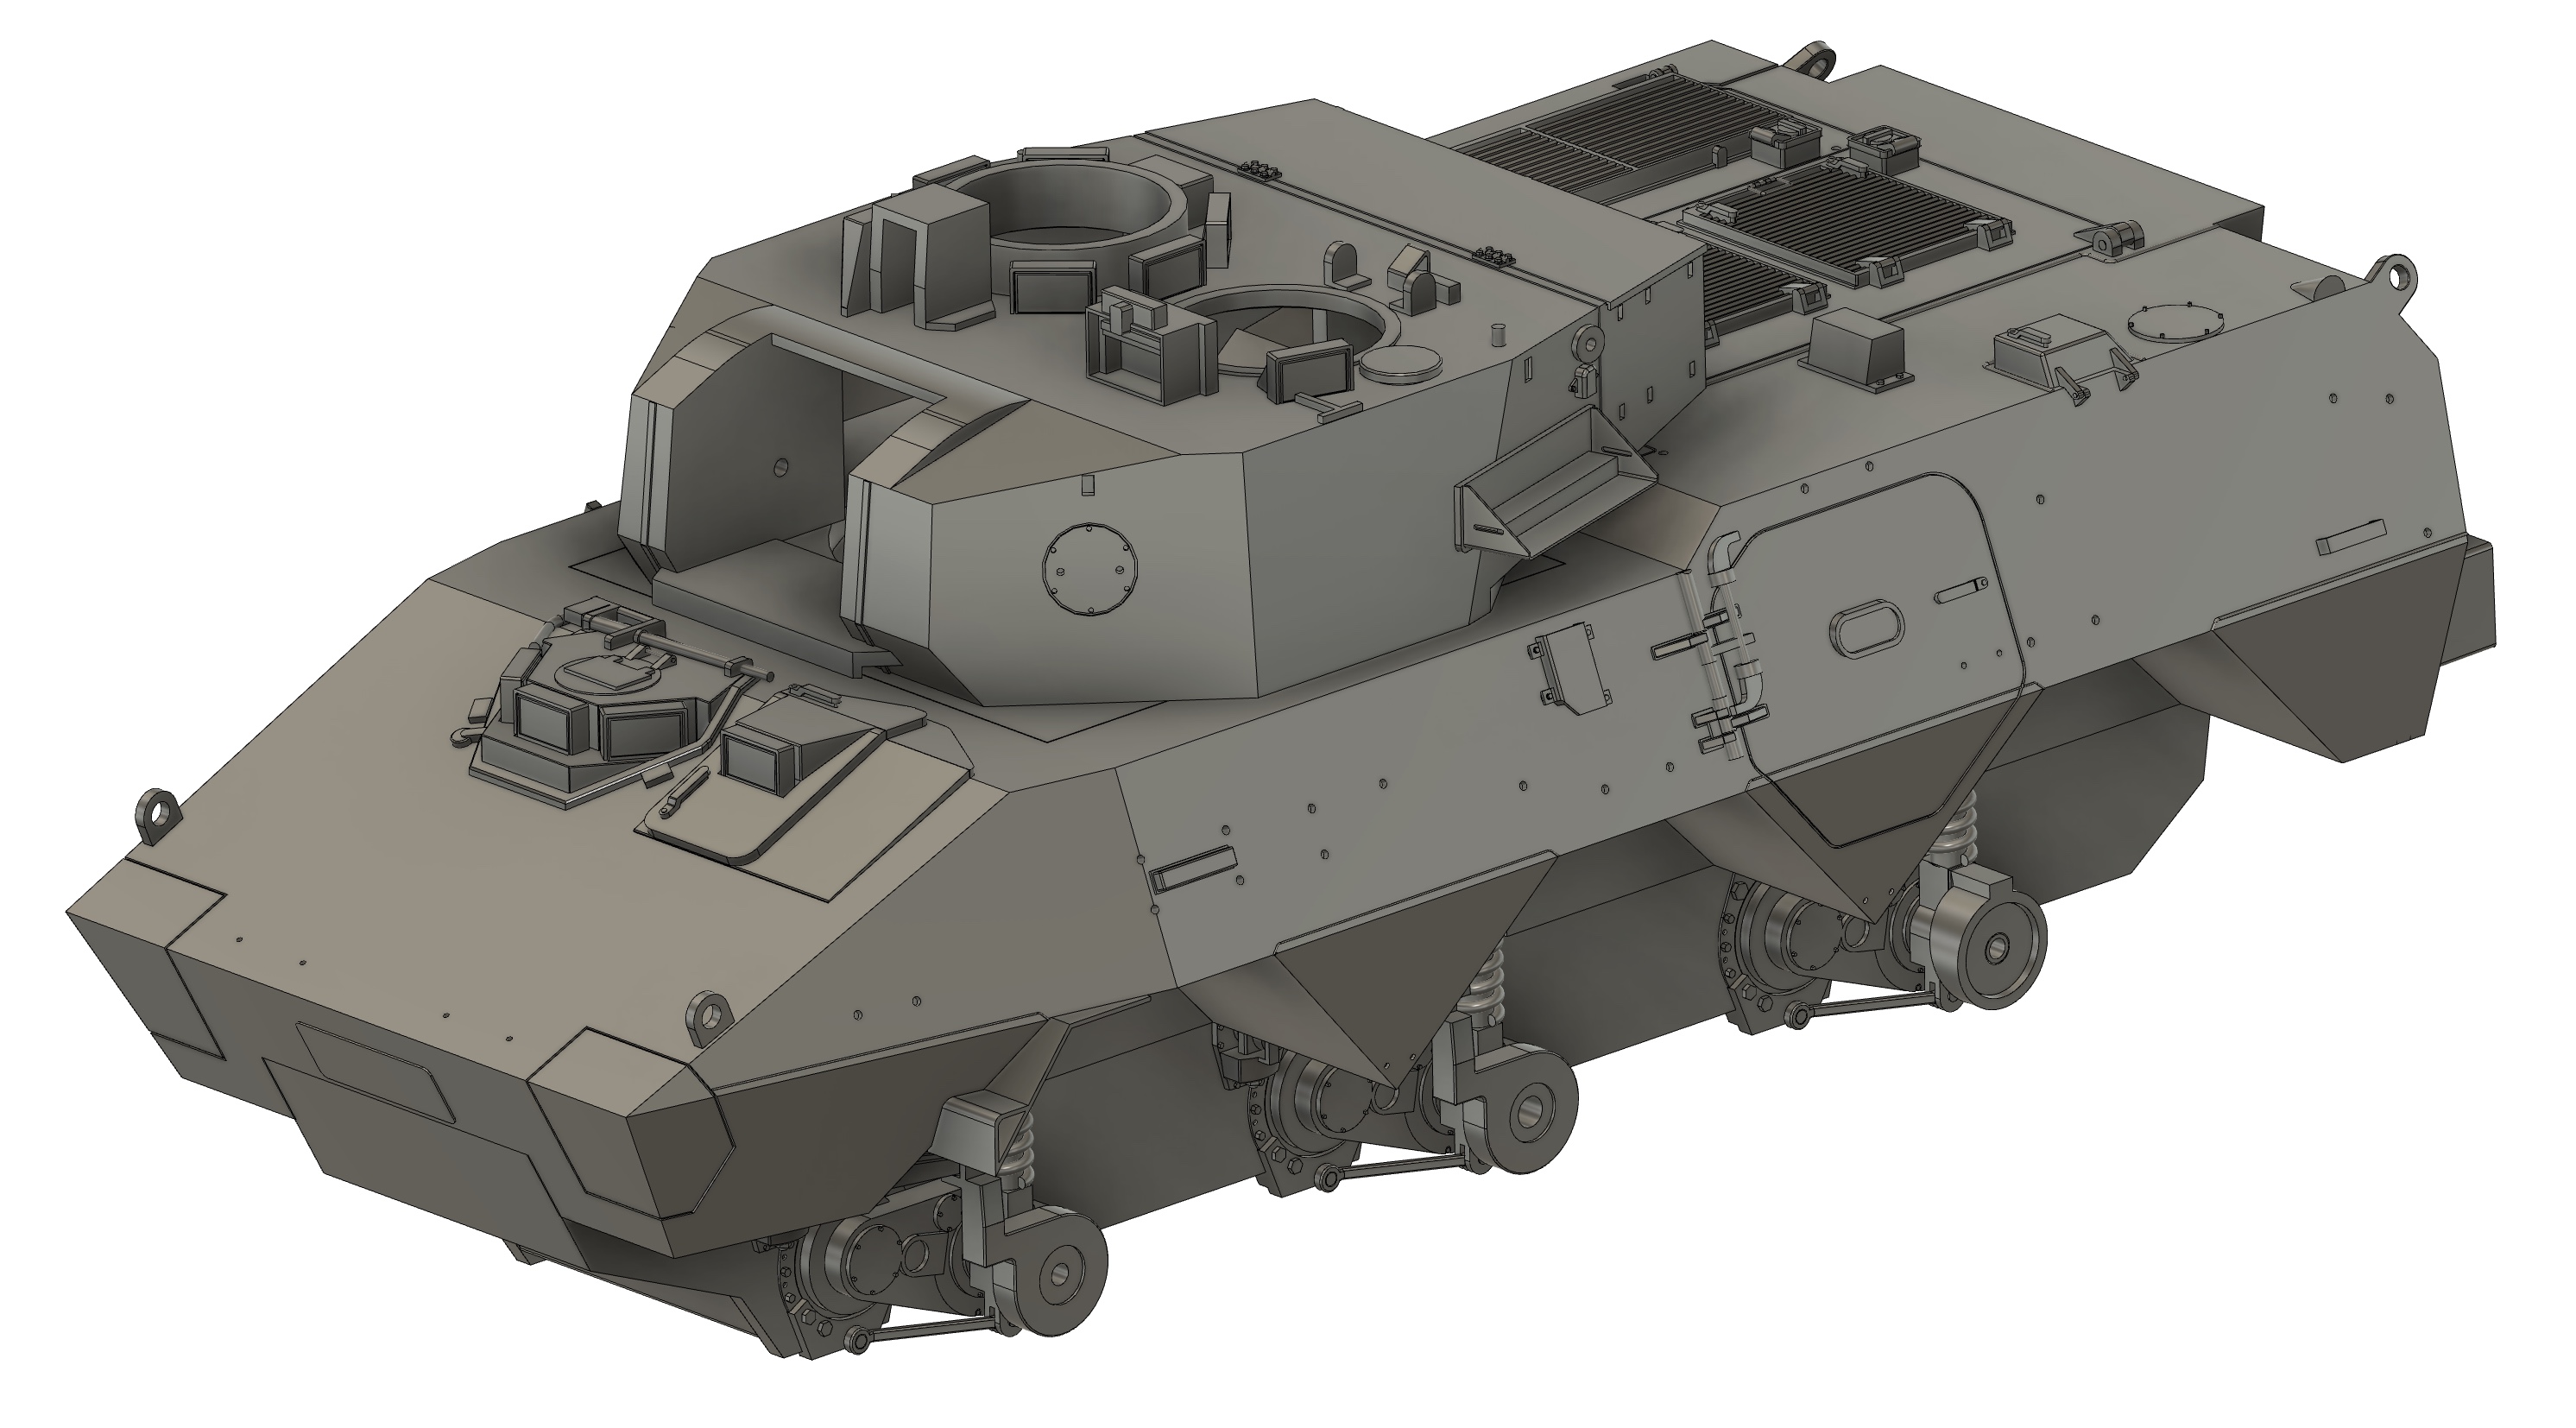
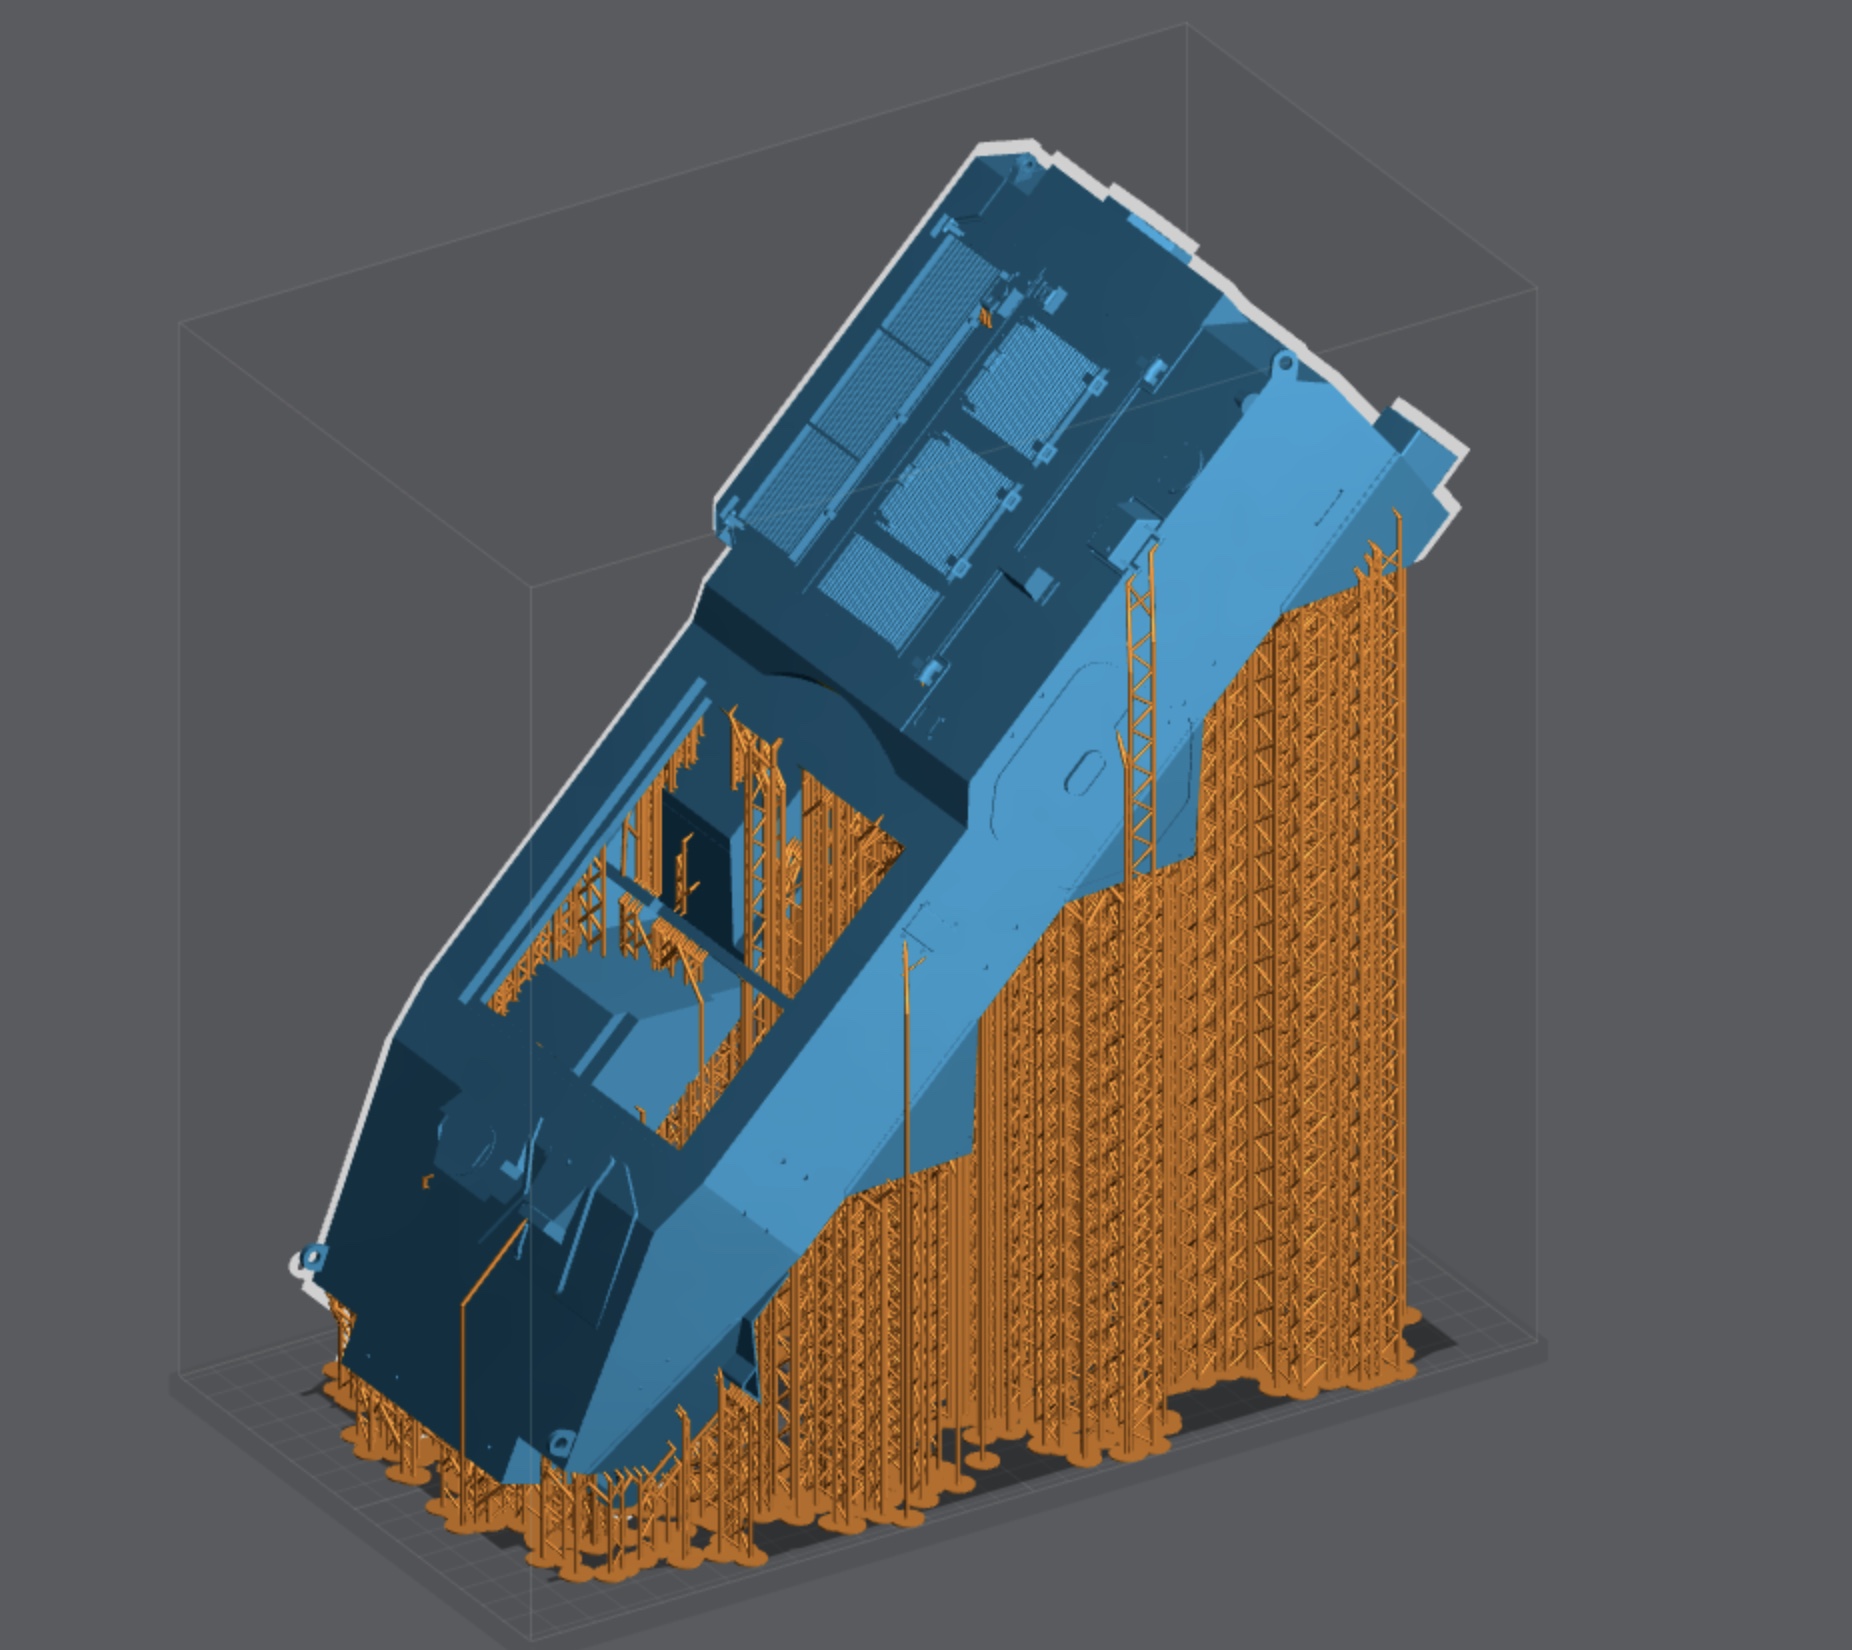
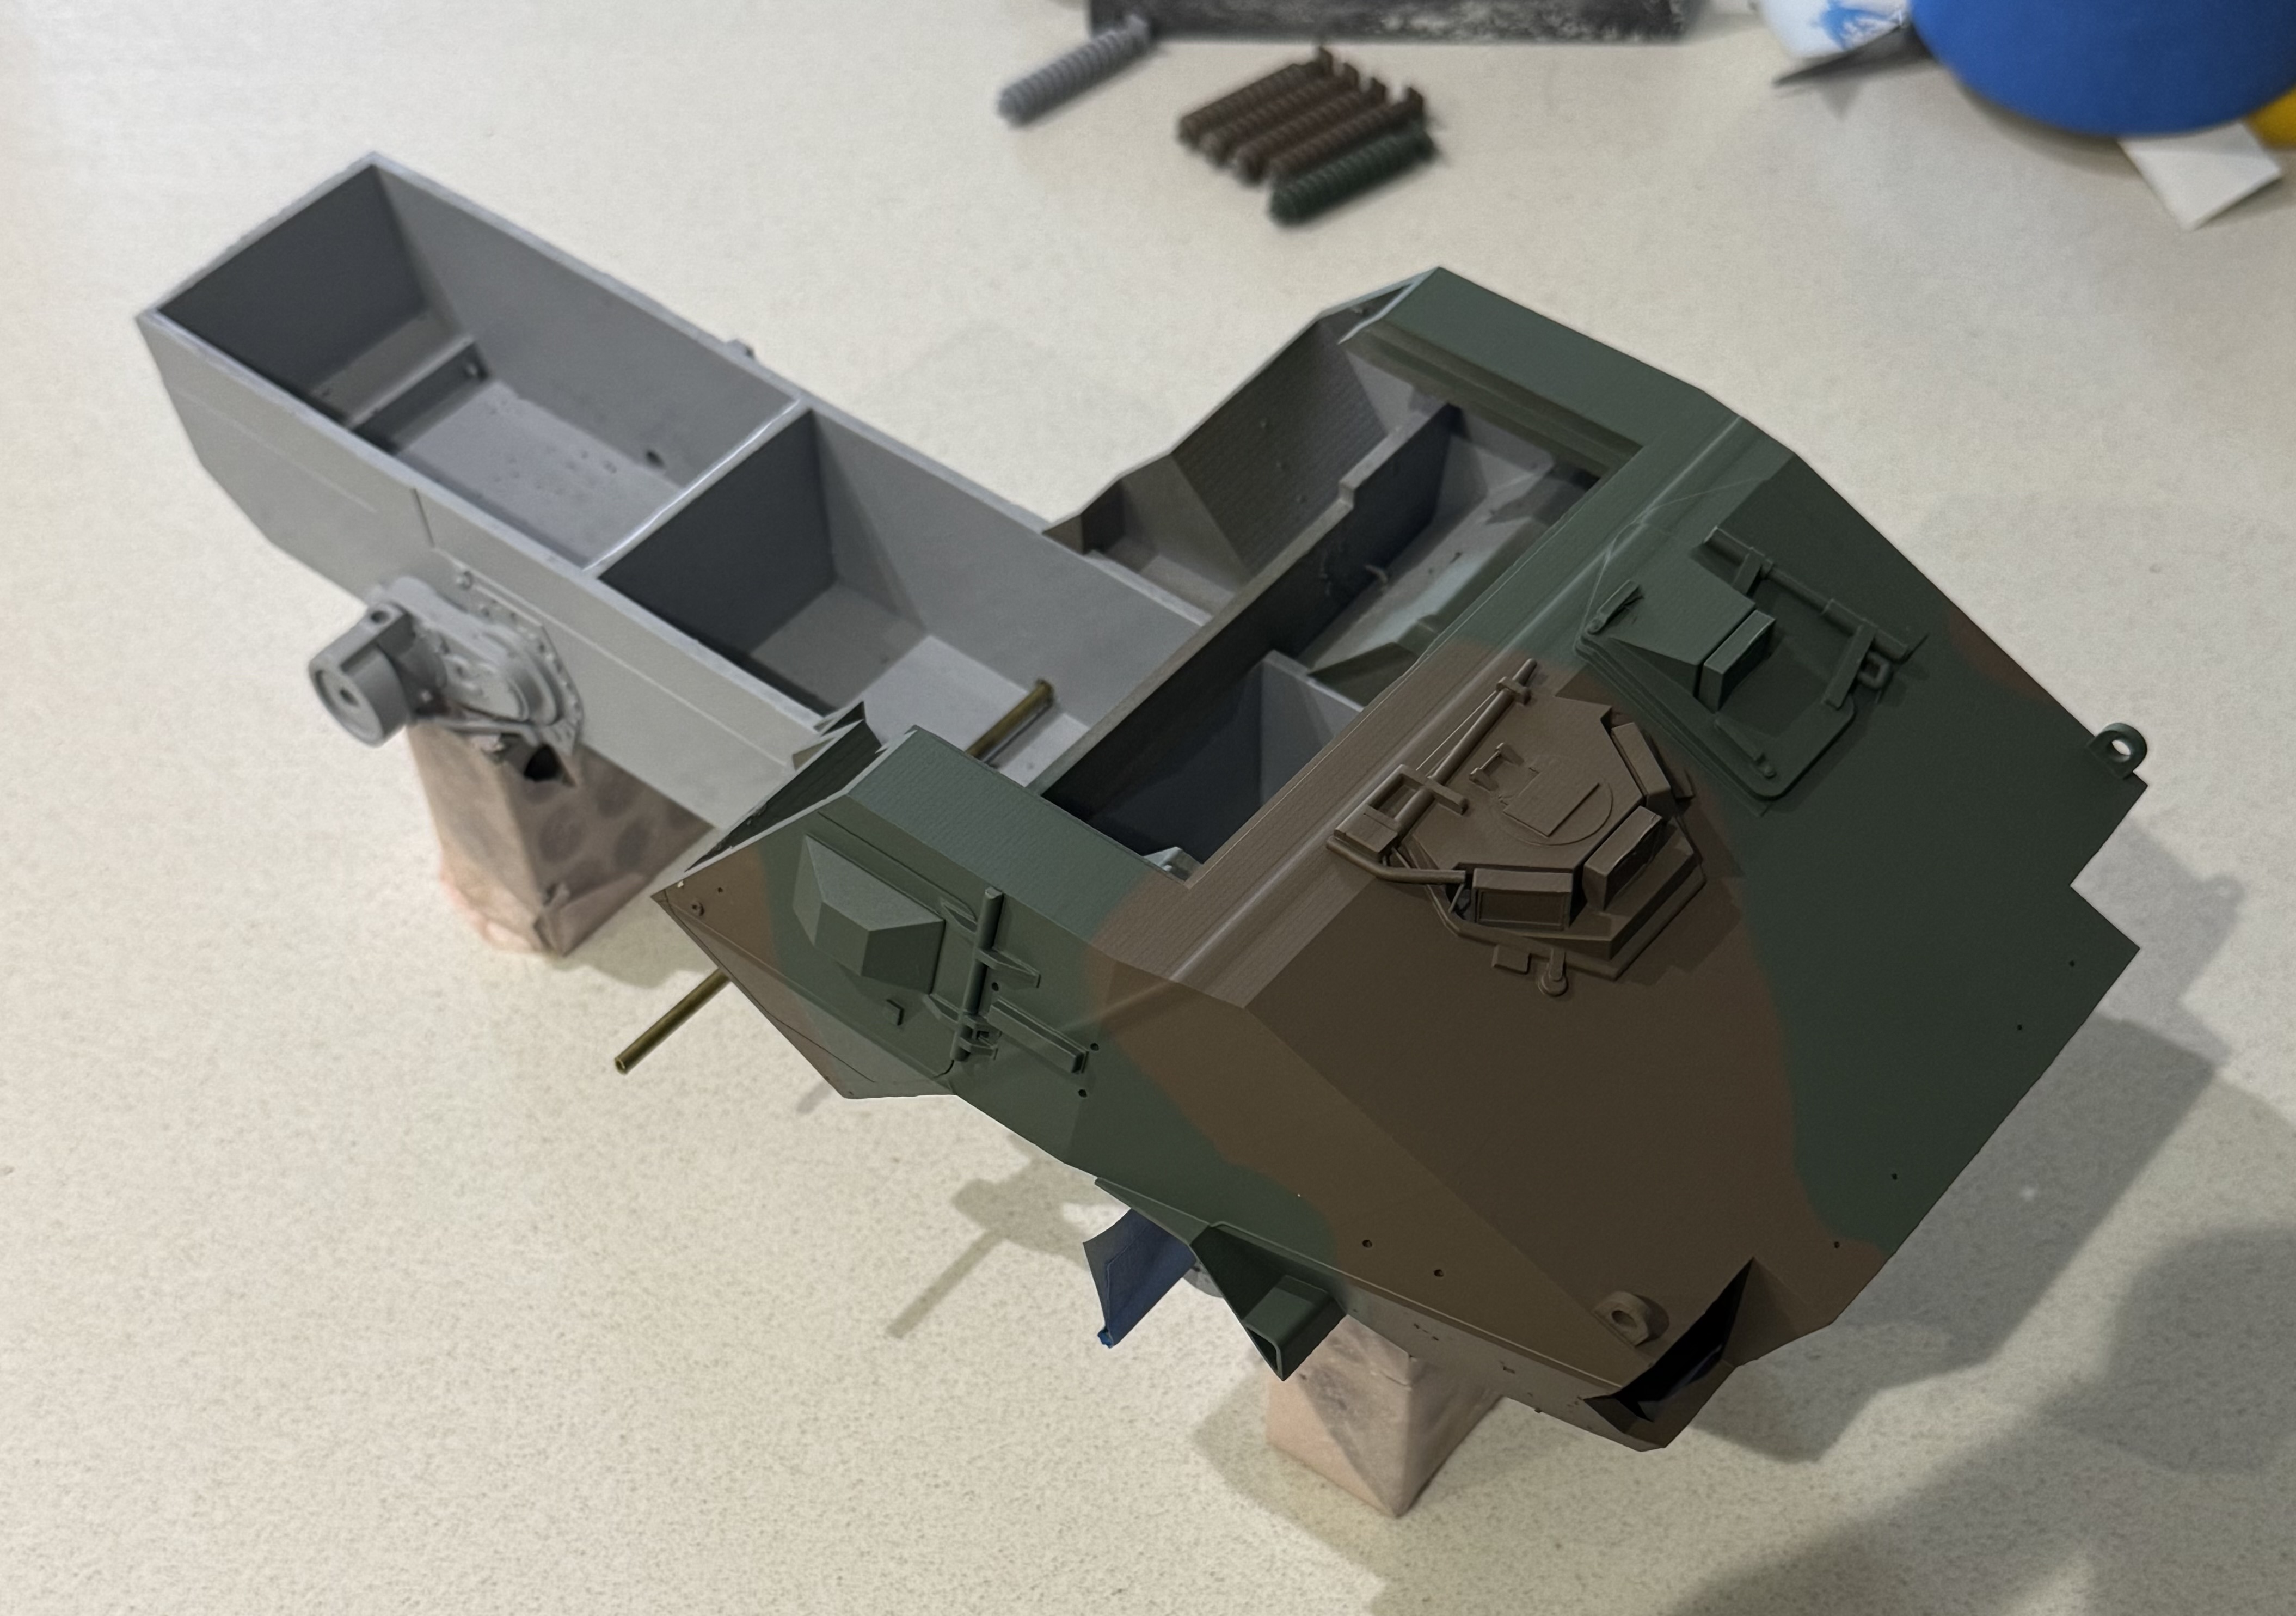
Here’s an early sectional view that’s checking turret traverse, upper hull to suspension skateboard, & turret retention clearances. My default tolerance is .305mm.

An overall view to check the “look”:

Last check before detailing the upper hull is dumping a rough of the hull into the slicer.

As expected, this one is too long to print vertically. Red is bad!

Will definitely be able to fit without having to chop it up or orient it at undesirable angles.

Time to get to work!

Thanks for looking in.

3 Likes

Have you given any thought on selling the stl’s or putting them up somewhere? I know a couple guys who might like to build this in 1/16.

3 Likes

I don’t, normally. My CAD level of detail etc. is to whatever I’m happy with. Wouldn’t feel right to sell them, but there’s a lot of time invested, so giving them away doesn’t sit right, either. Will figure something out, no doubt.

2 Likes

Whatever you decide, please post it here so I can let them know.

And even putting them up on Cults3D for $10 is not a bad price.

2 Likes

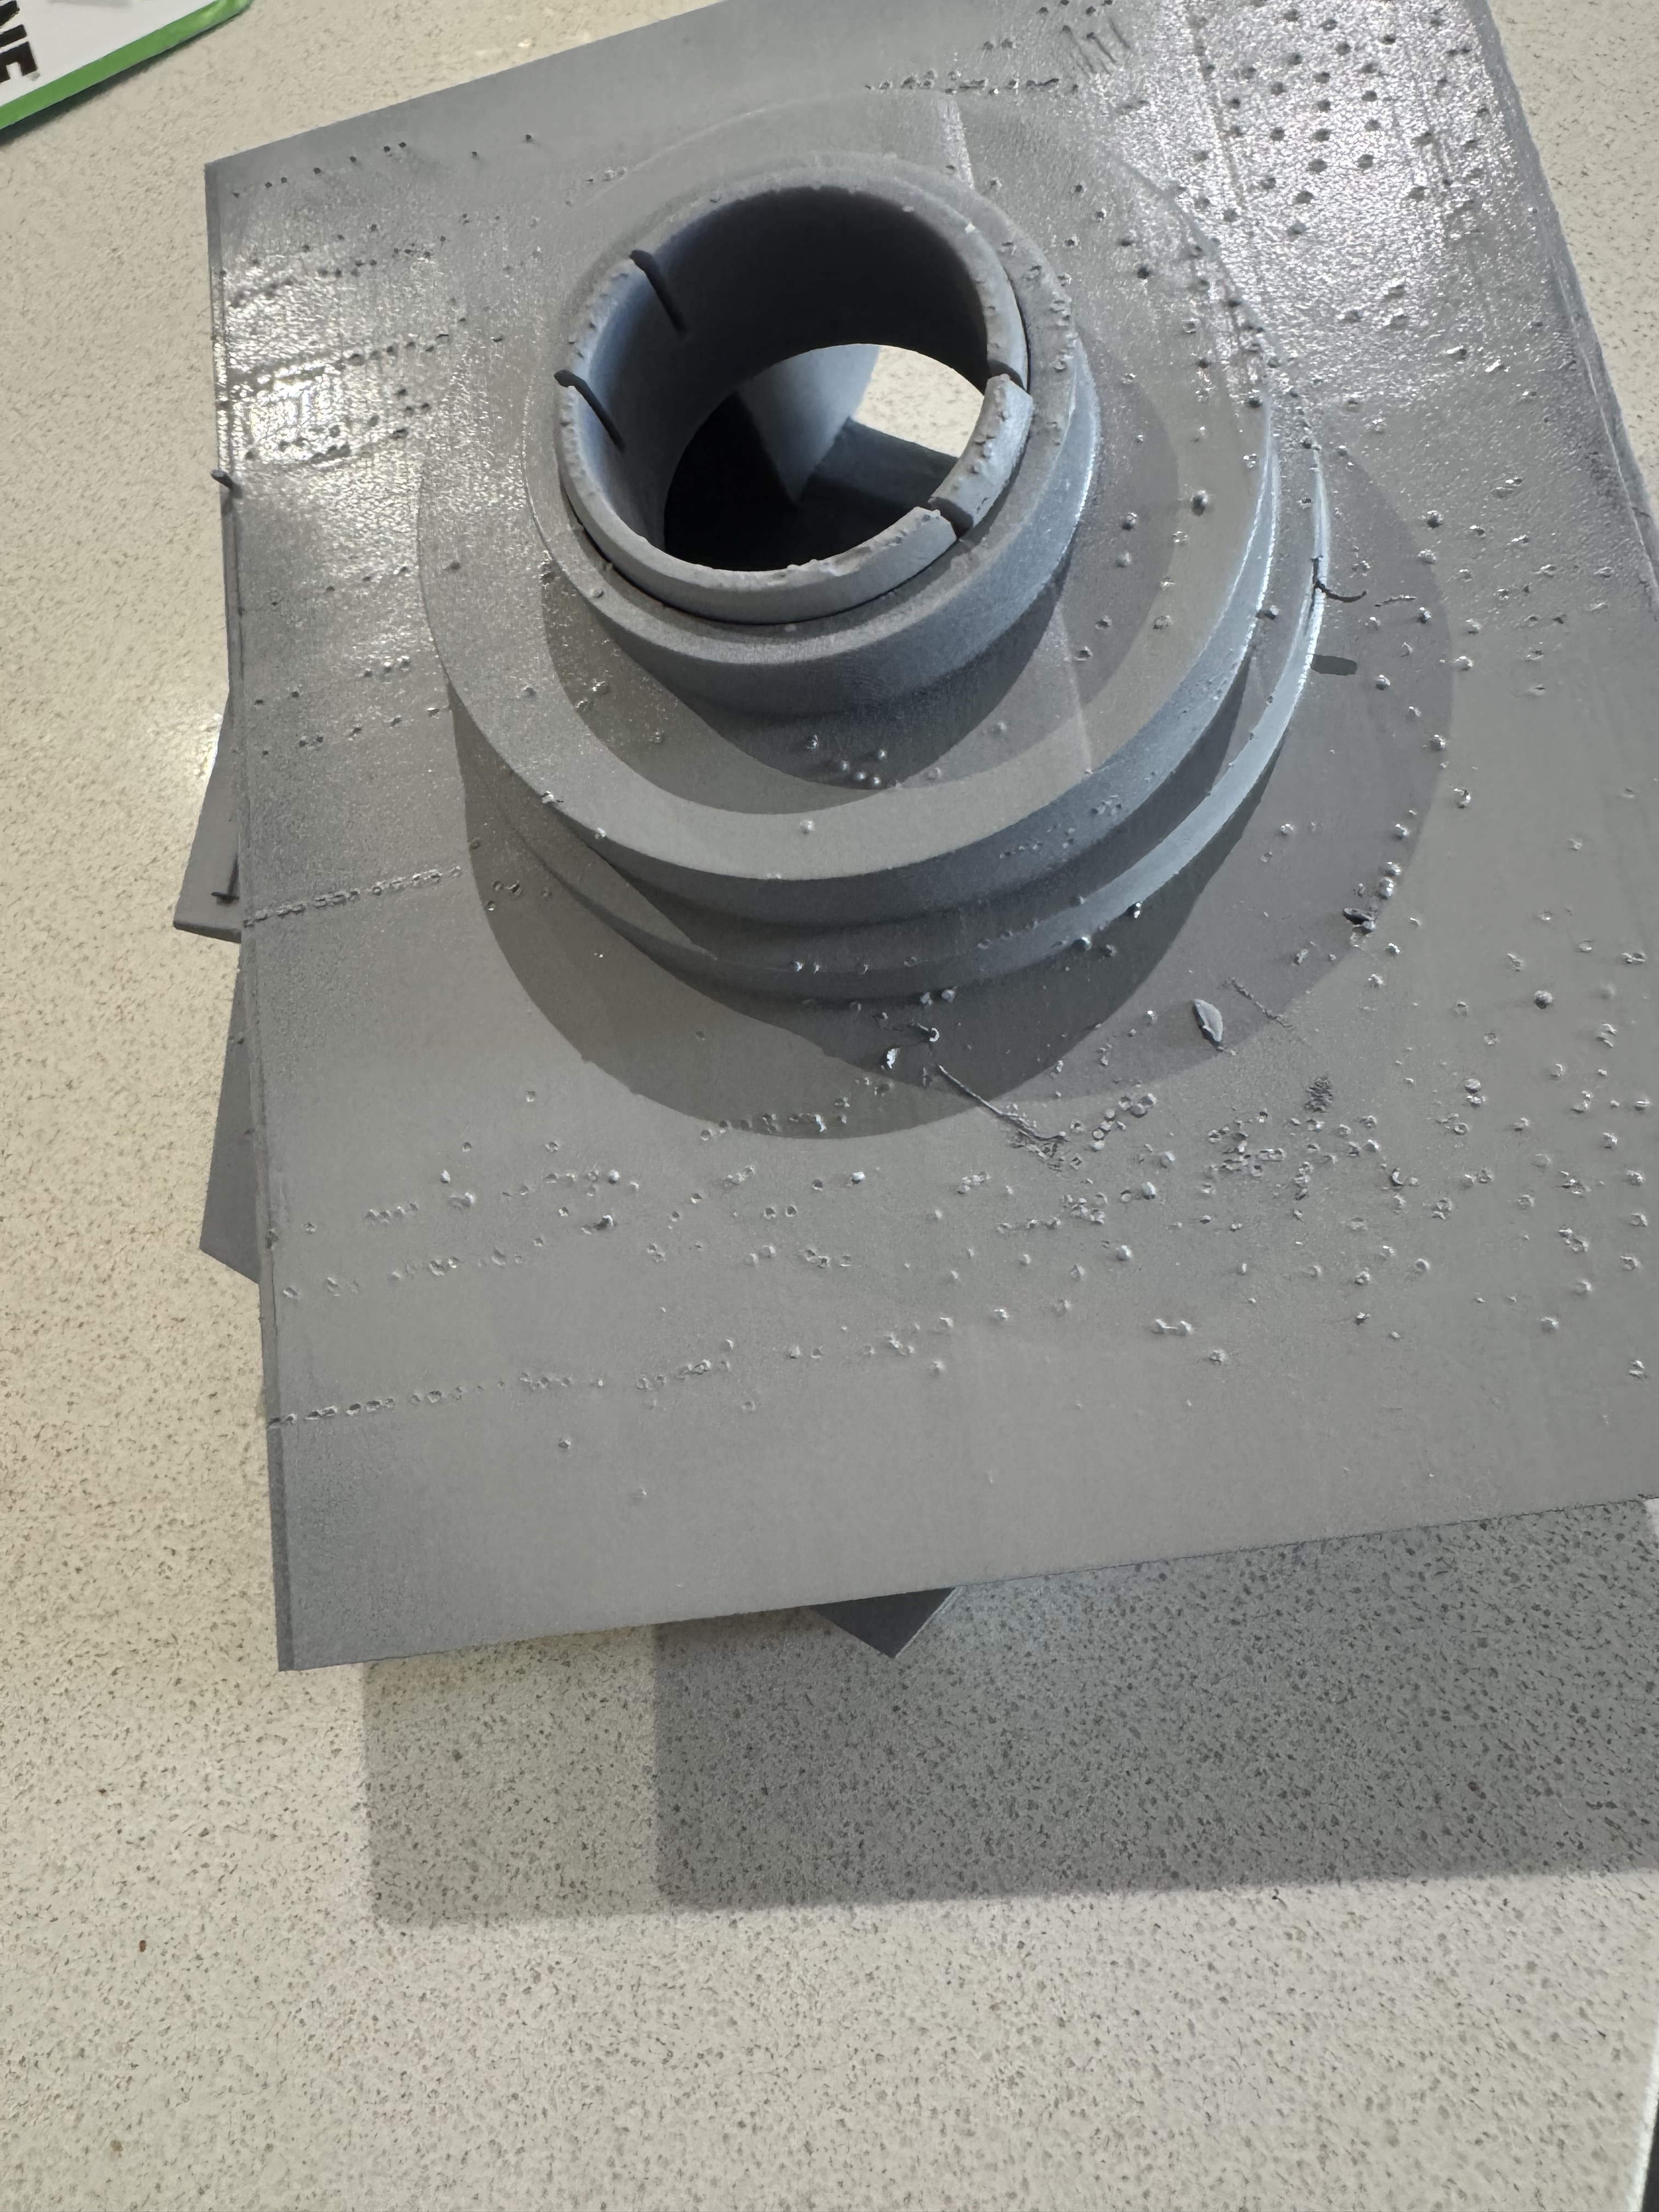
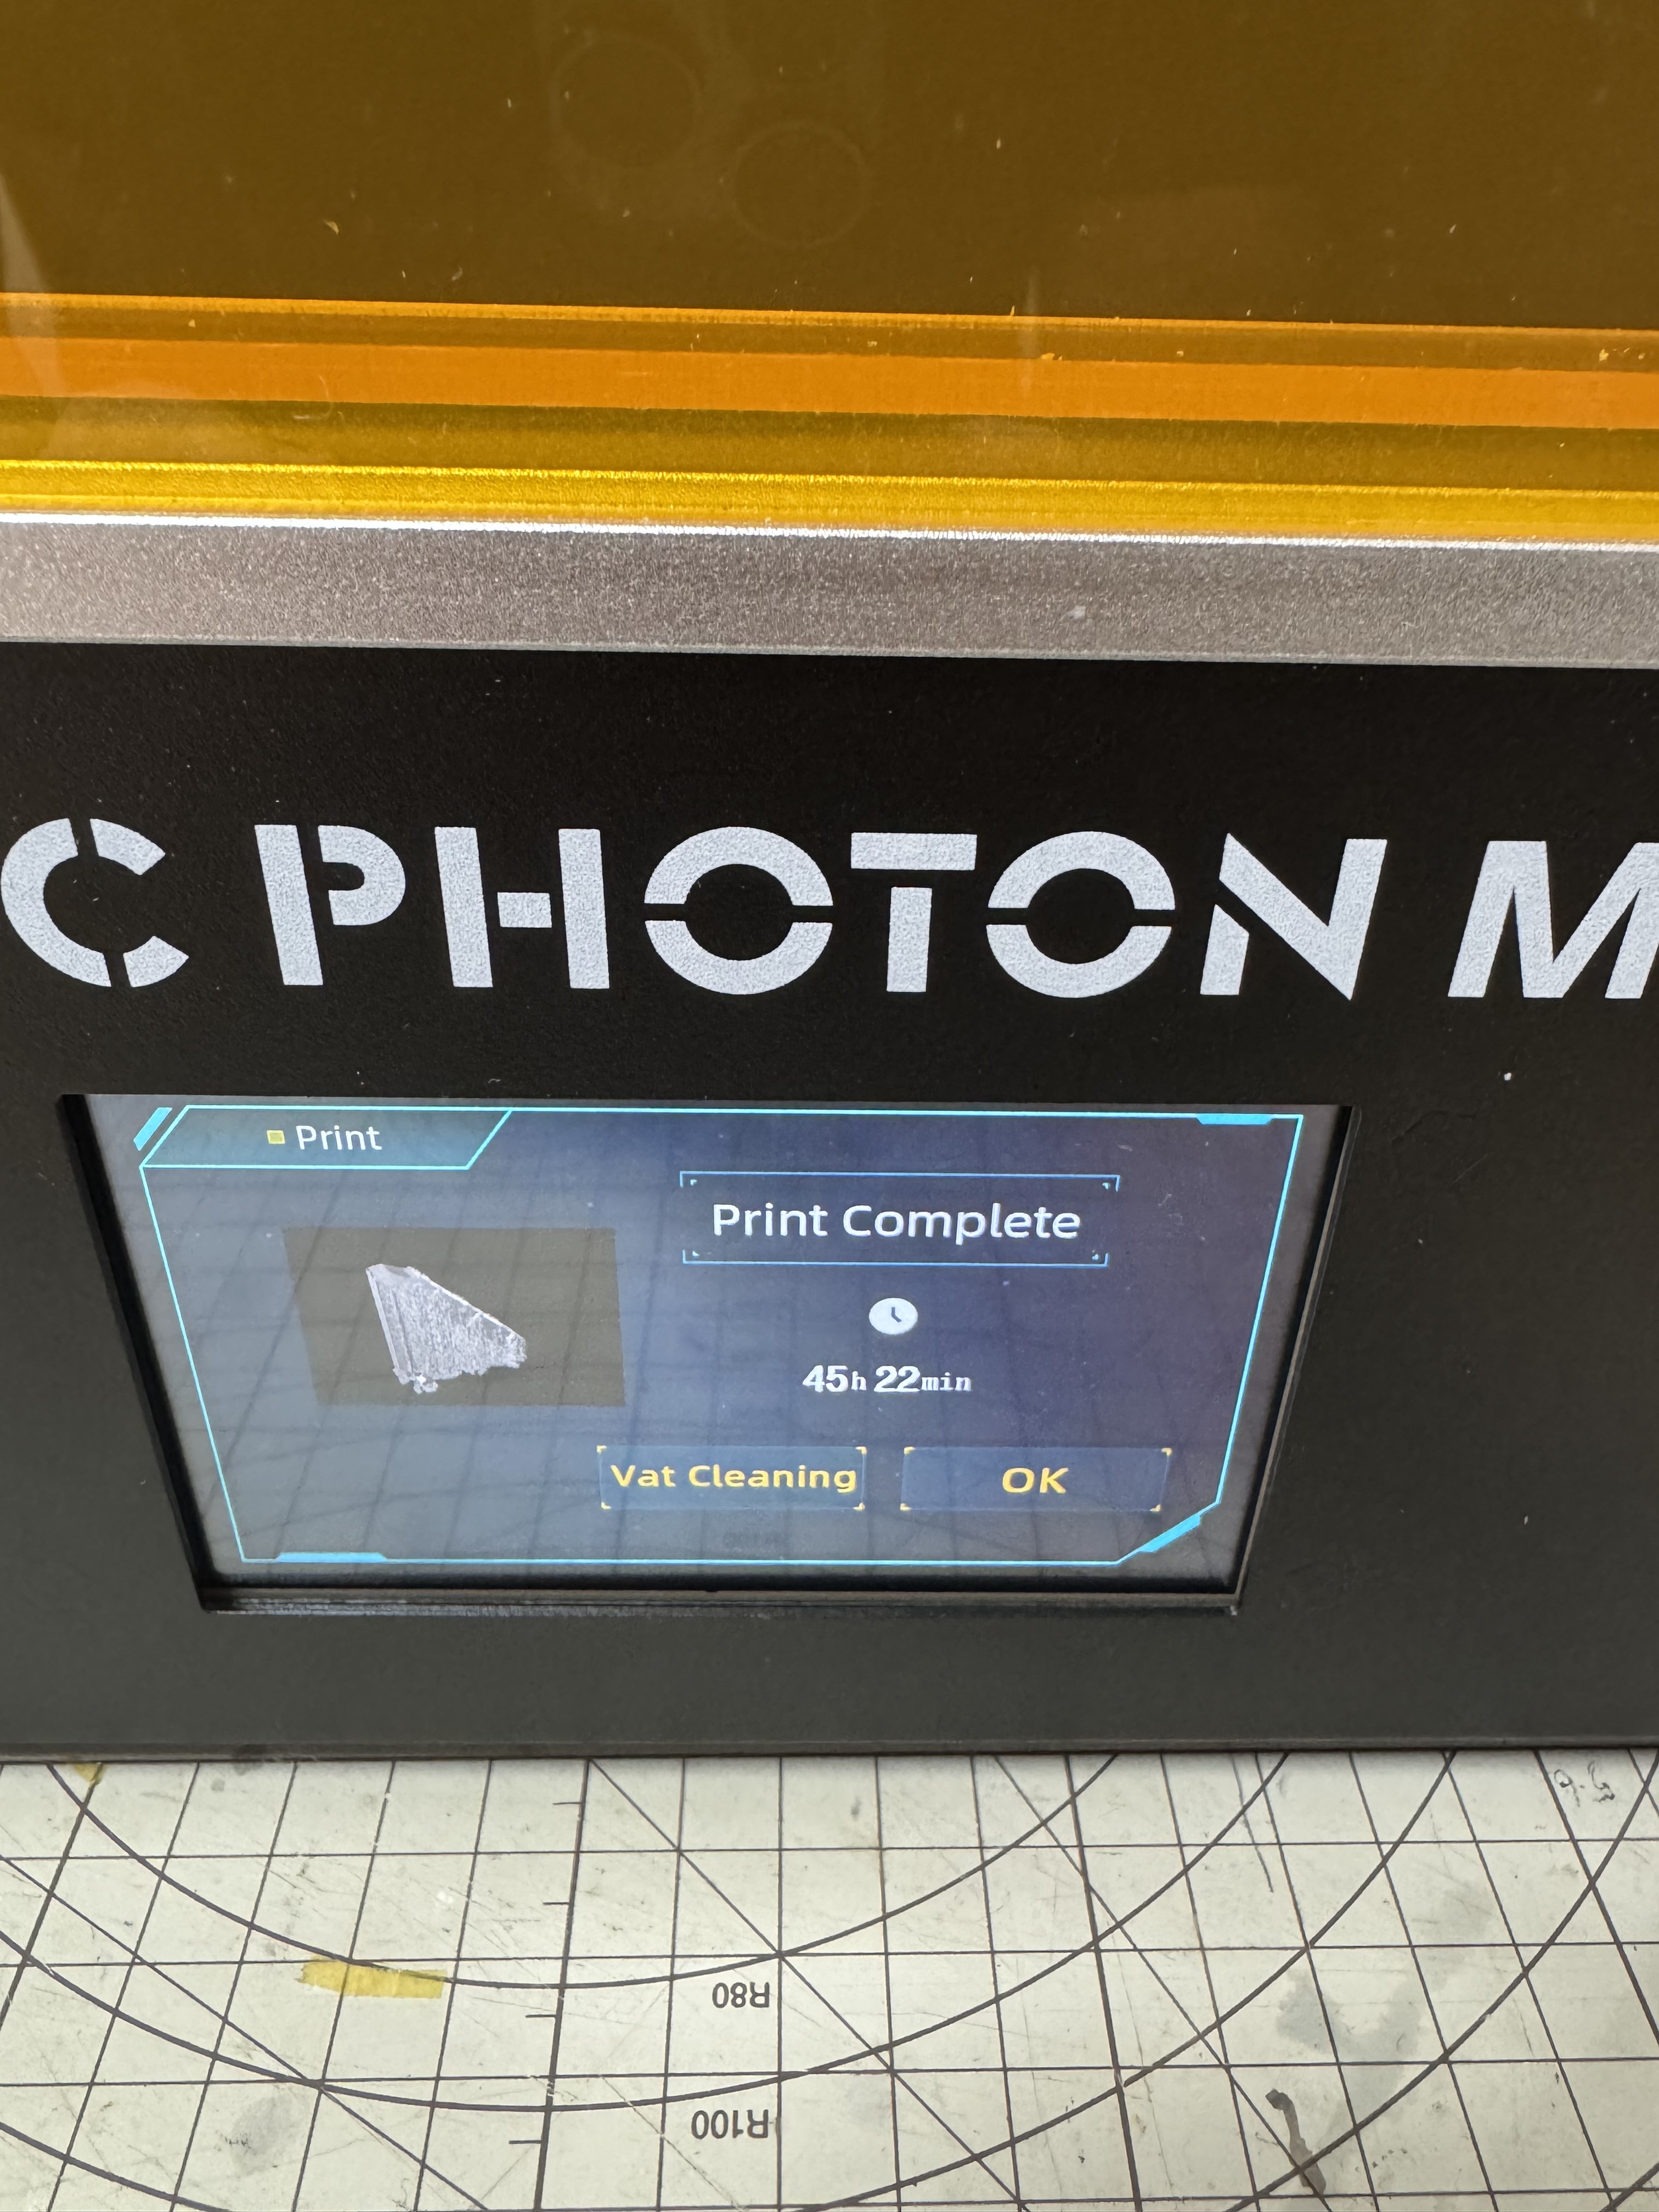
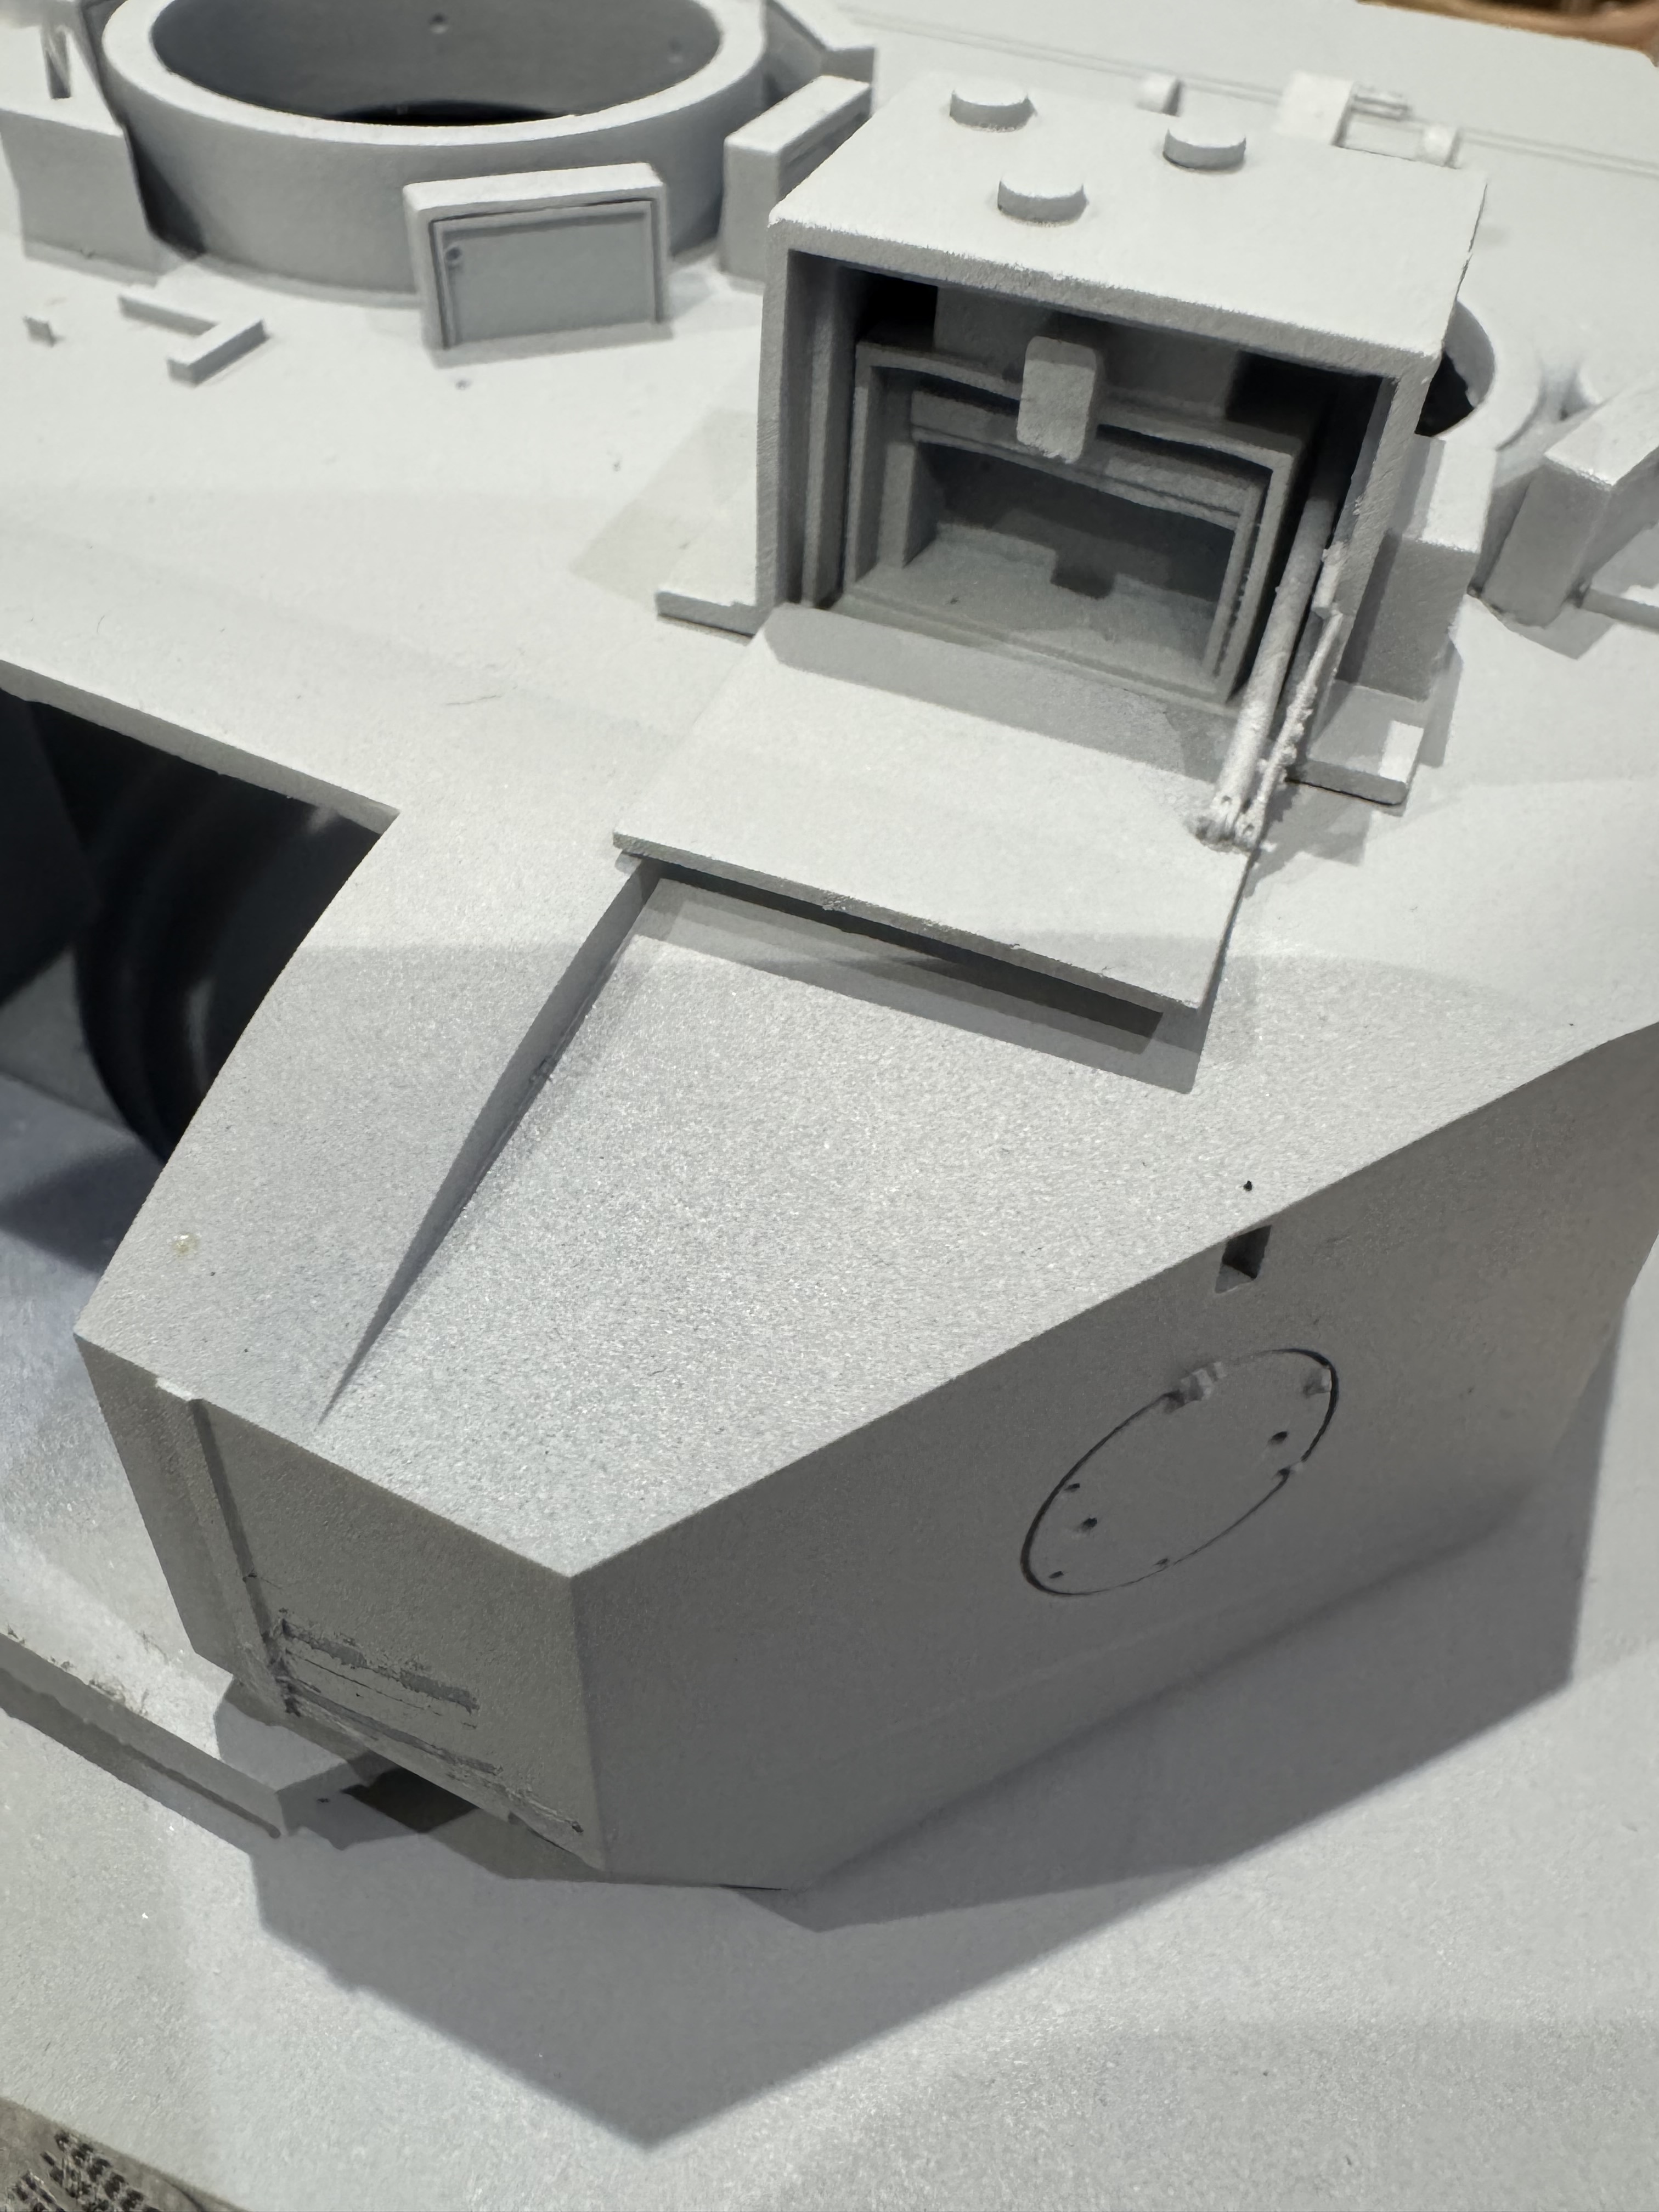
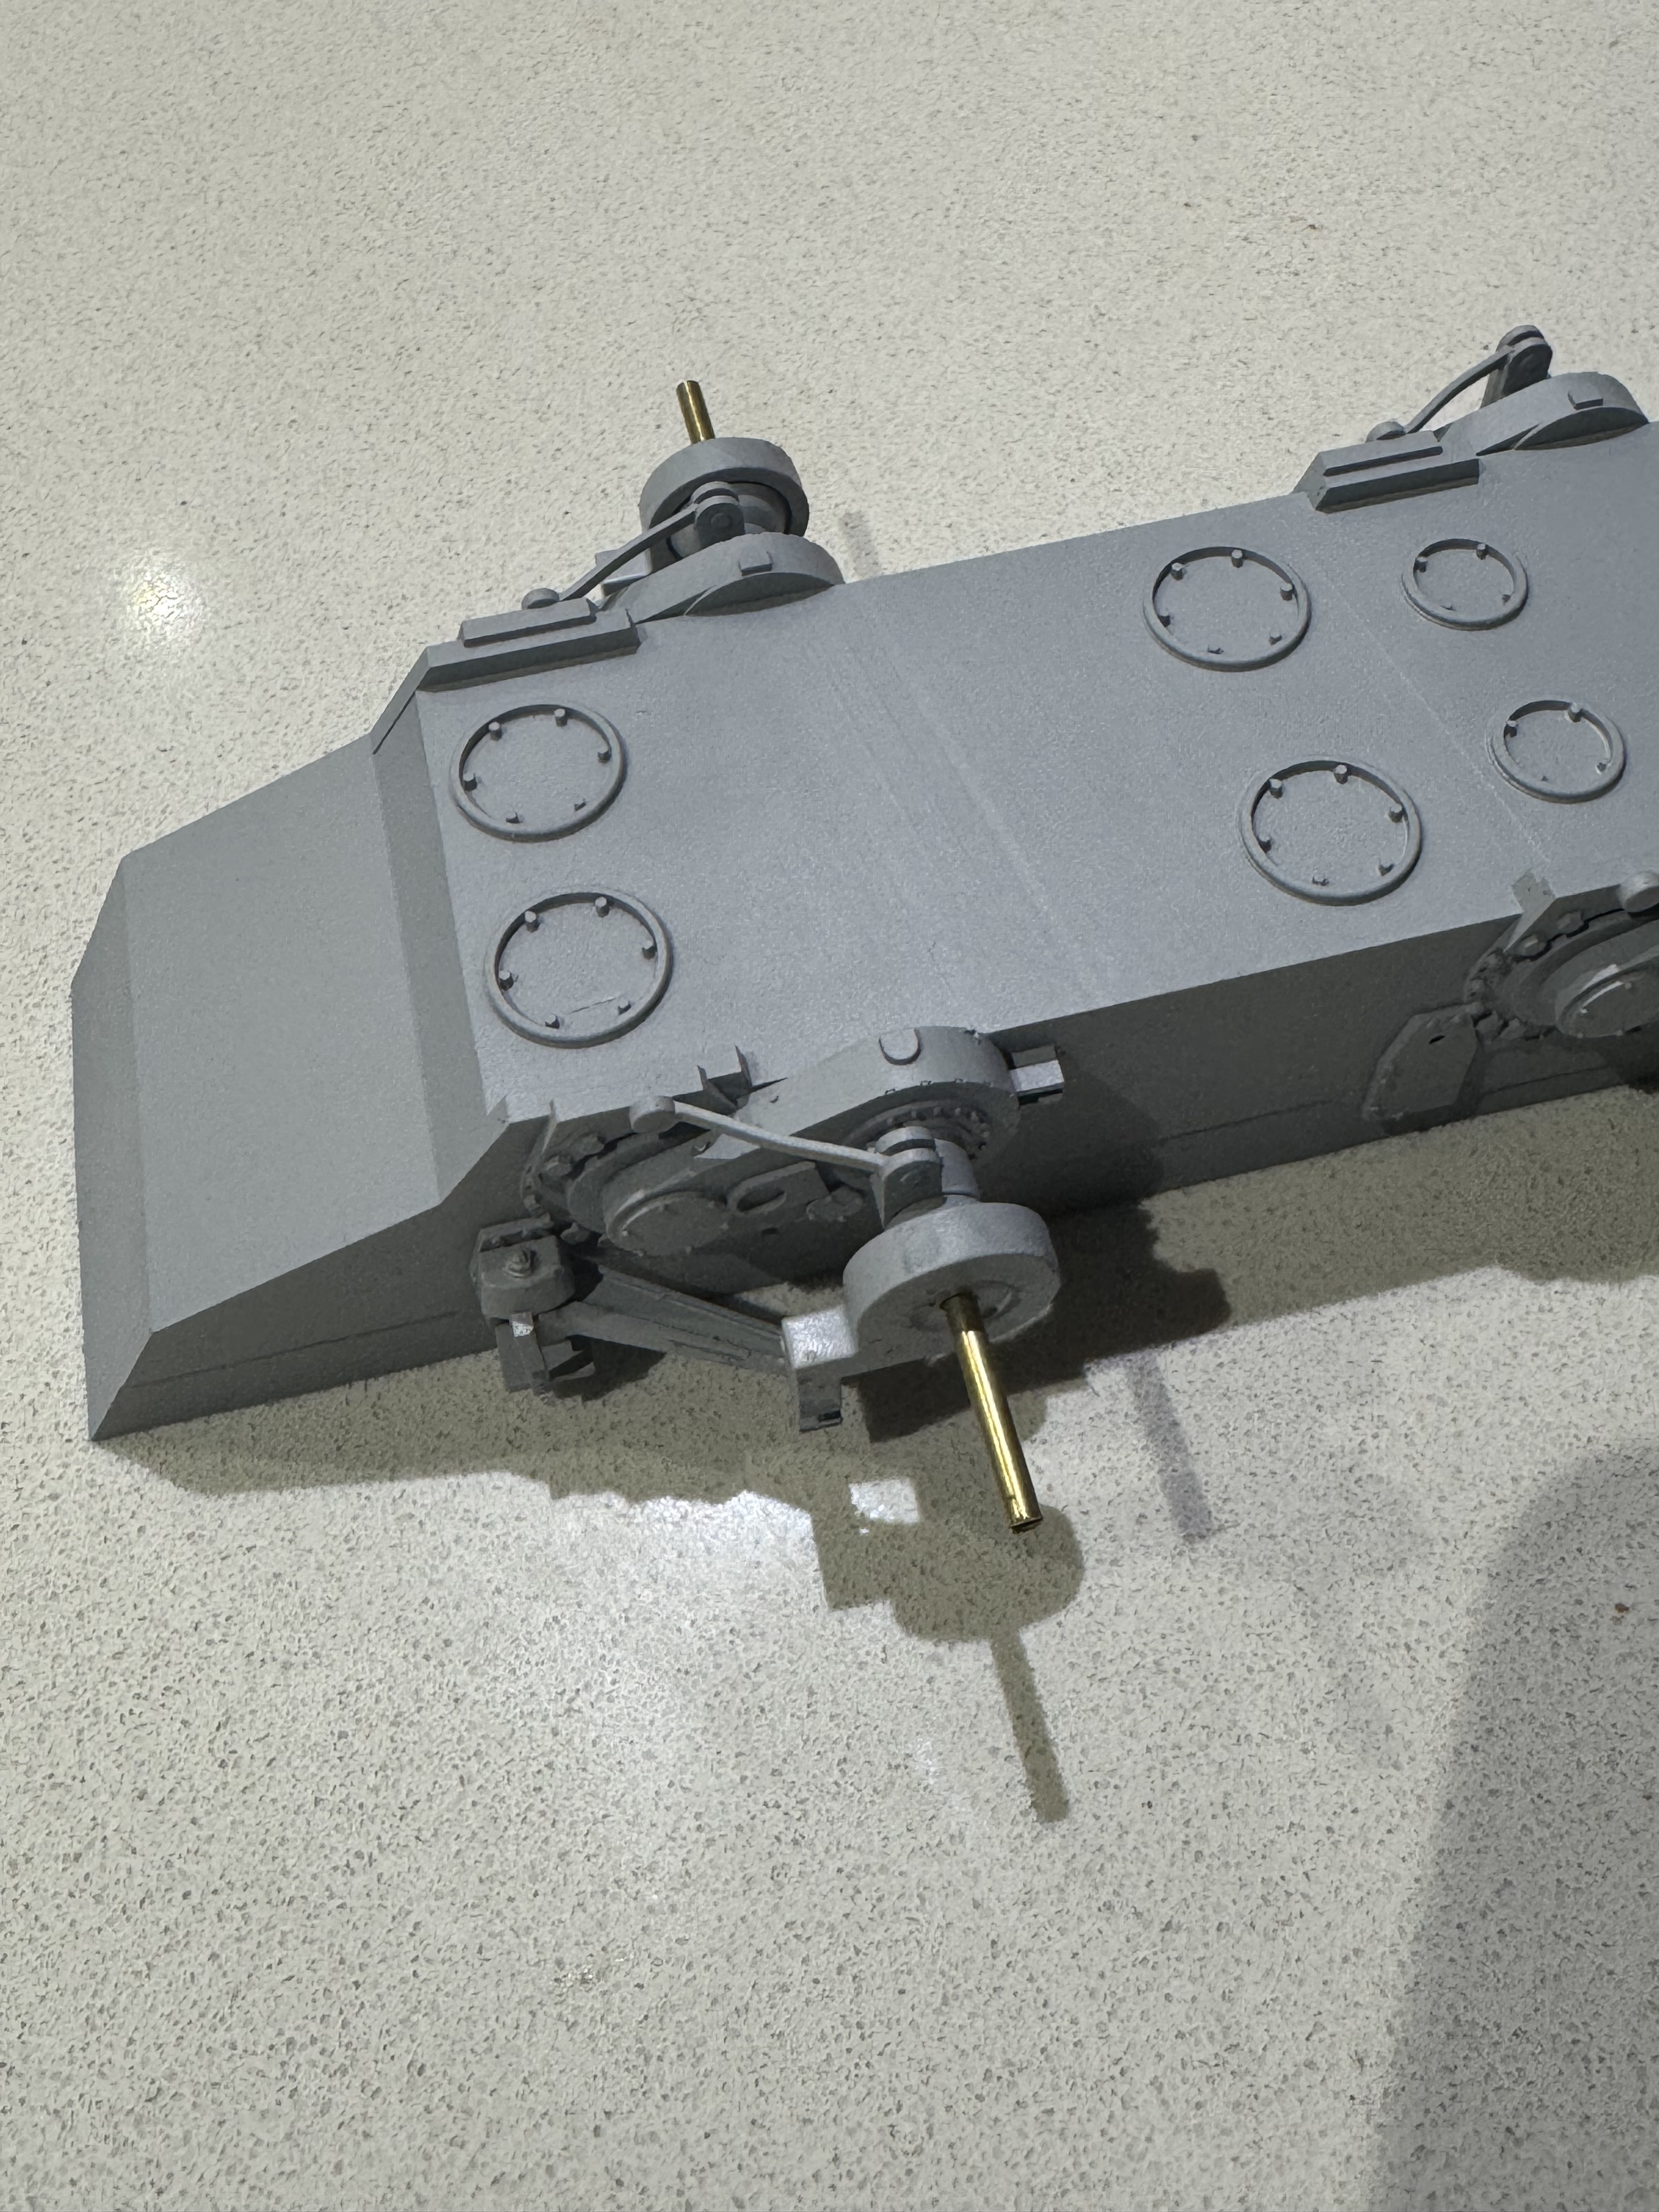
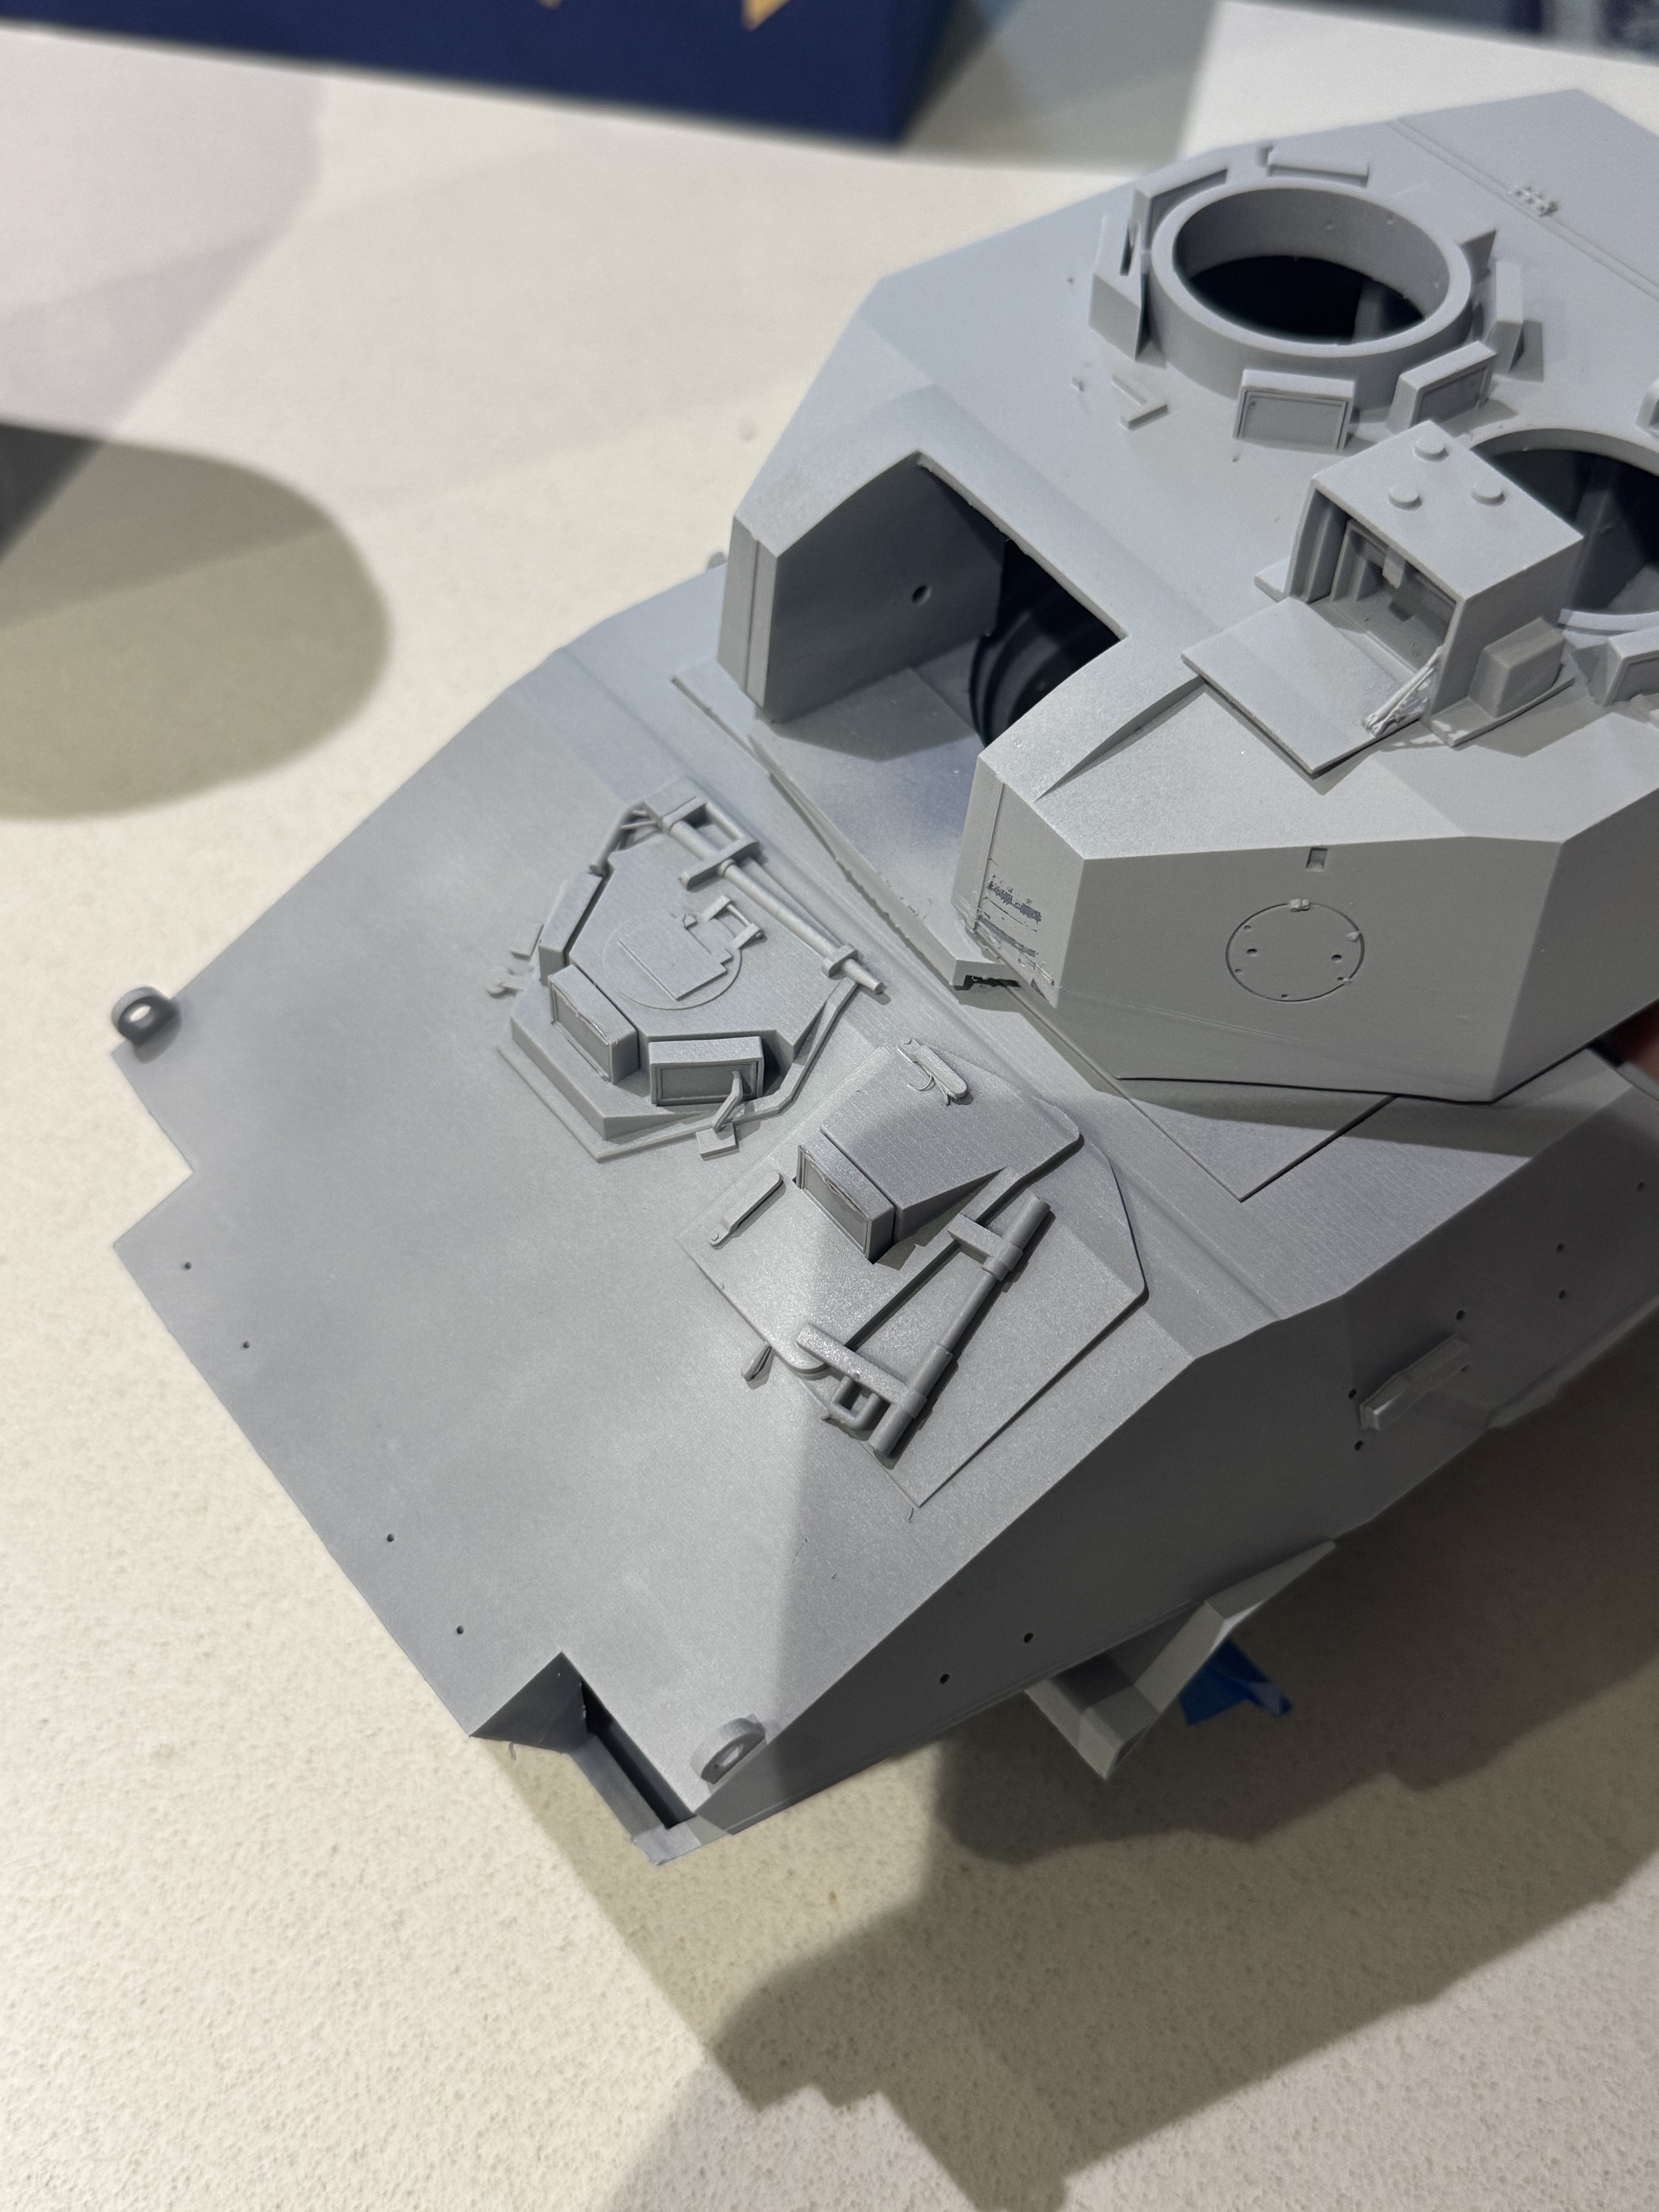
Part of the suspension skateboard print was the gunner’s sight housing & cover. As a smaller part, this is a test print, with the outboard cover actuator needing beefing up.

Work on the upper hull continues, focusing on the engine deck & exhaust housing.

Thanks for looking in.

2 Likes

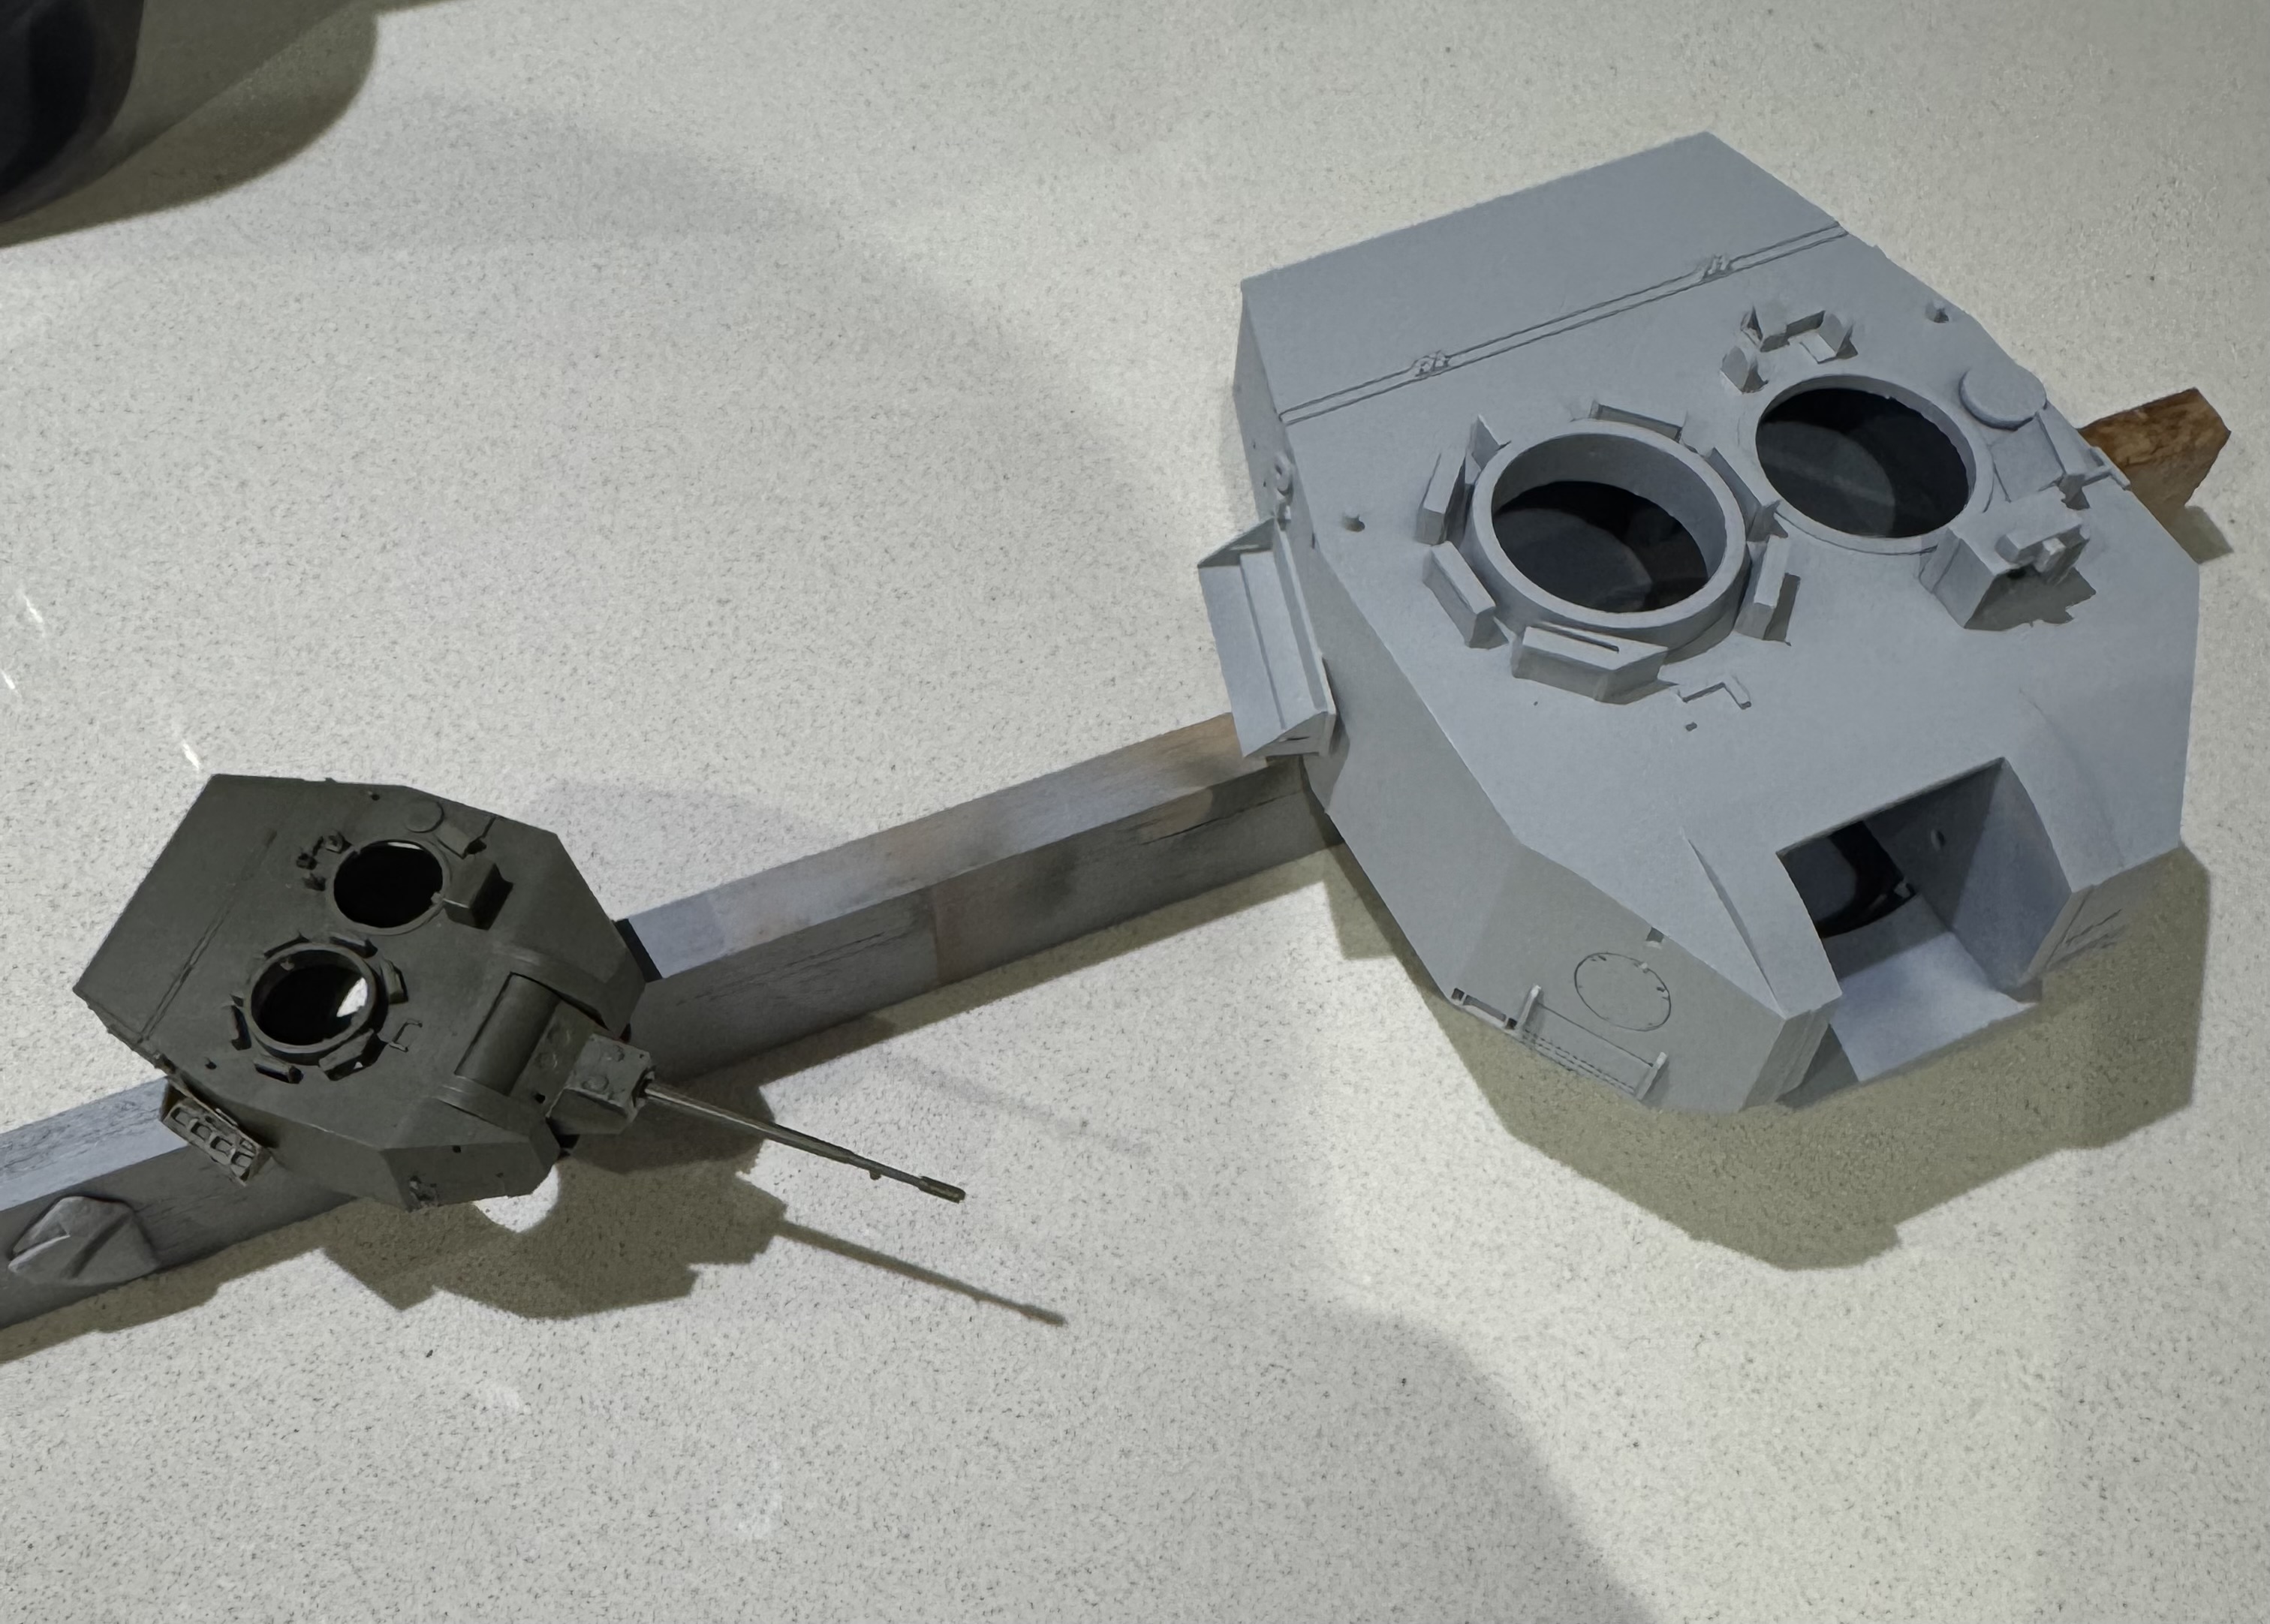
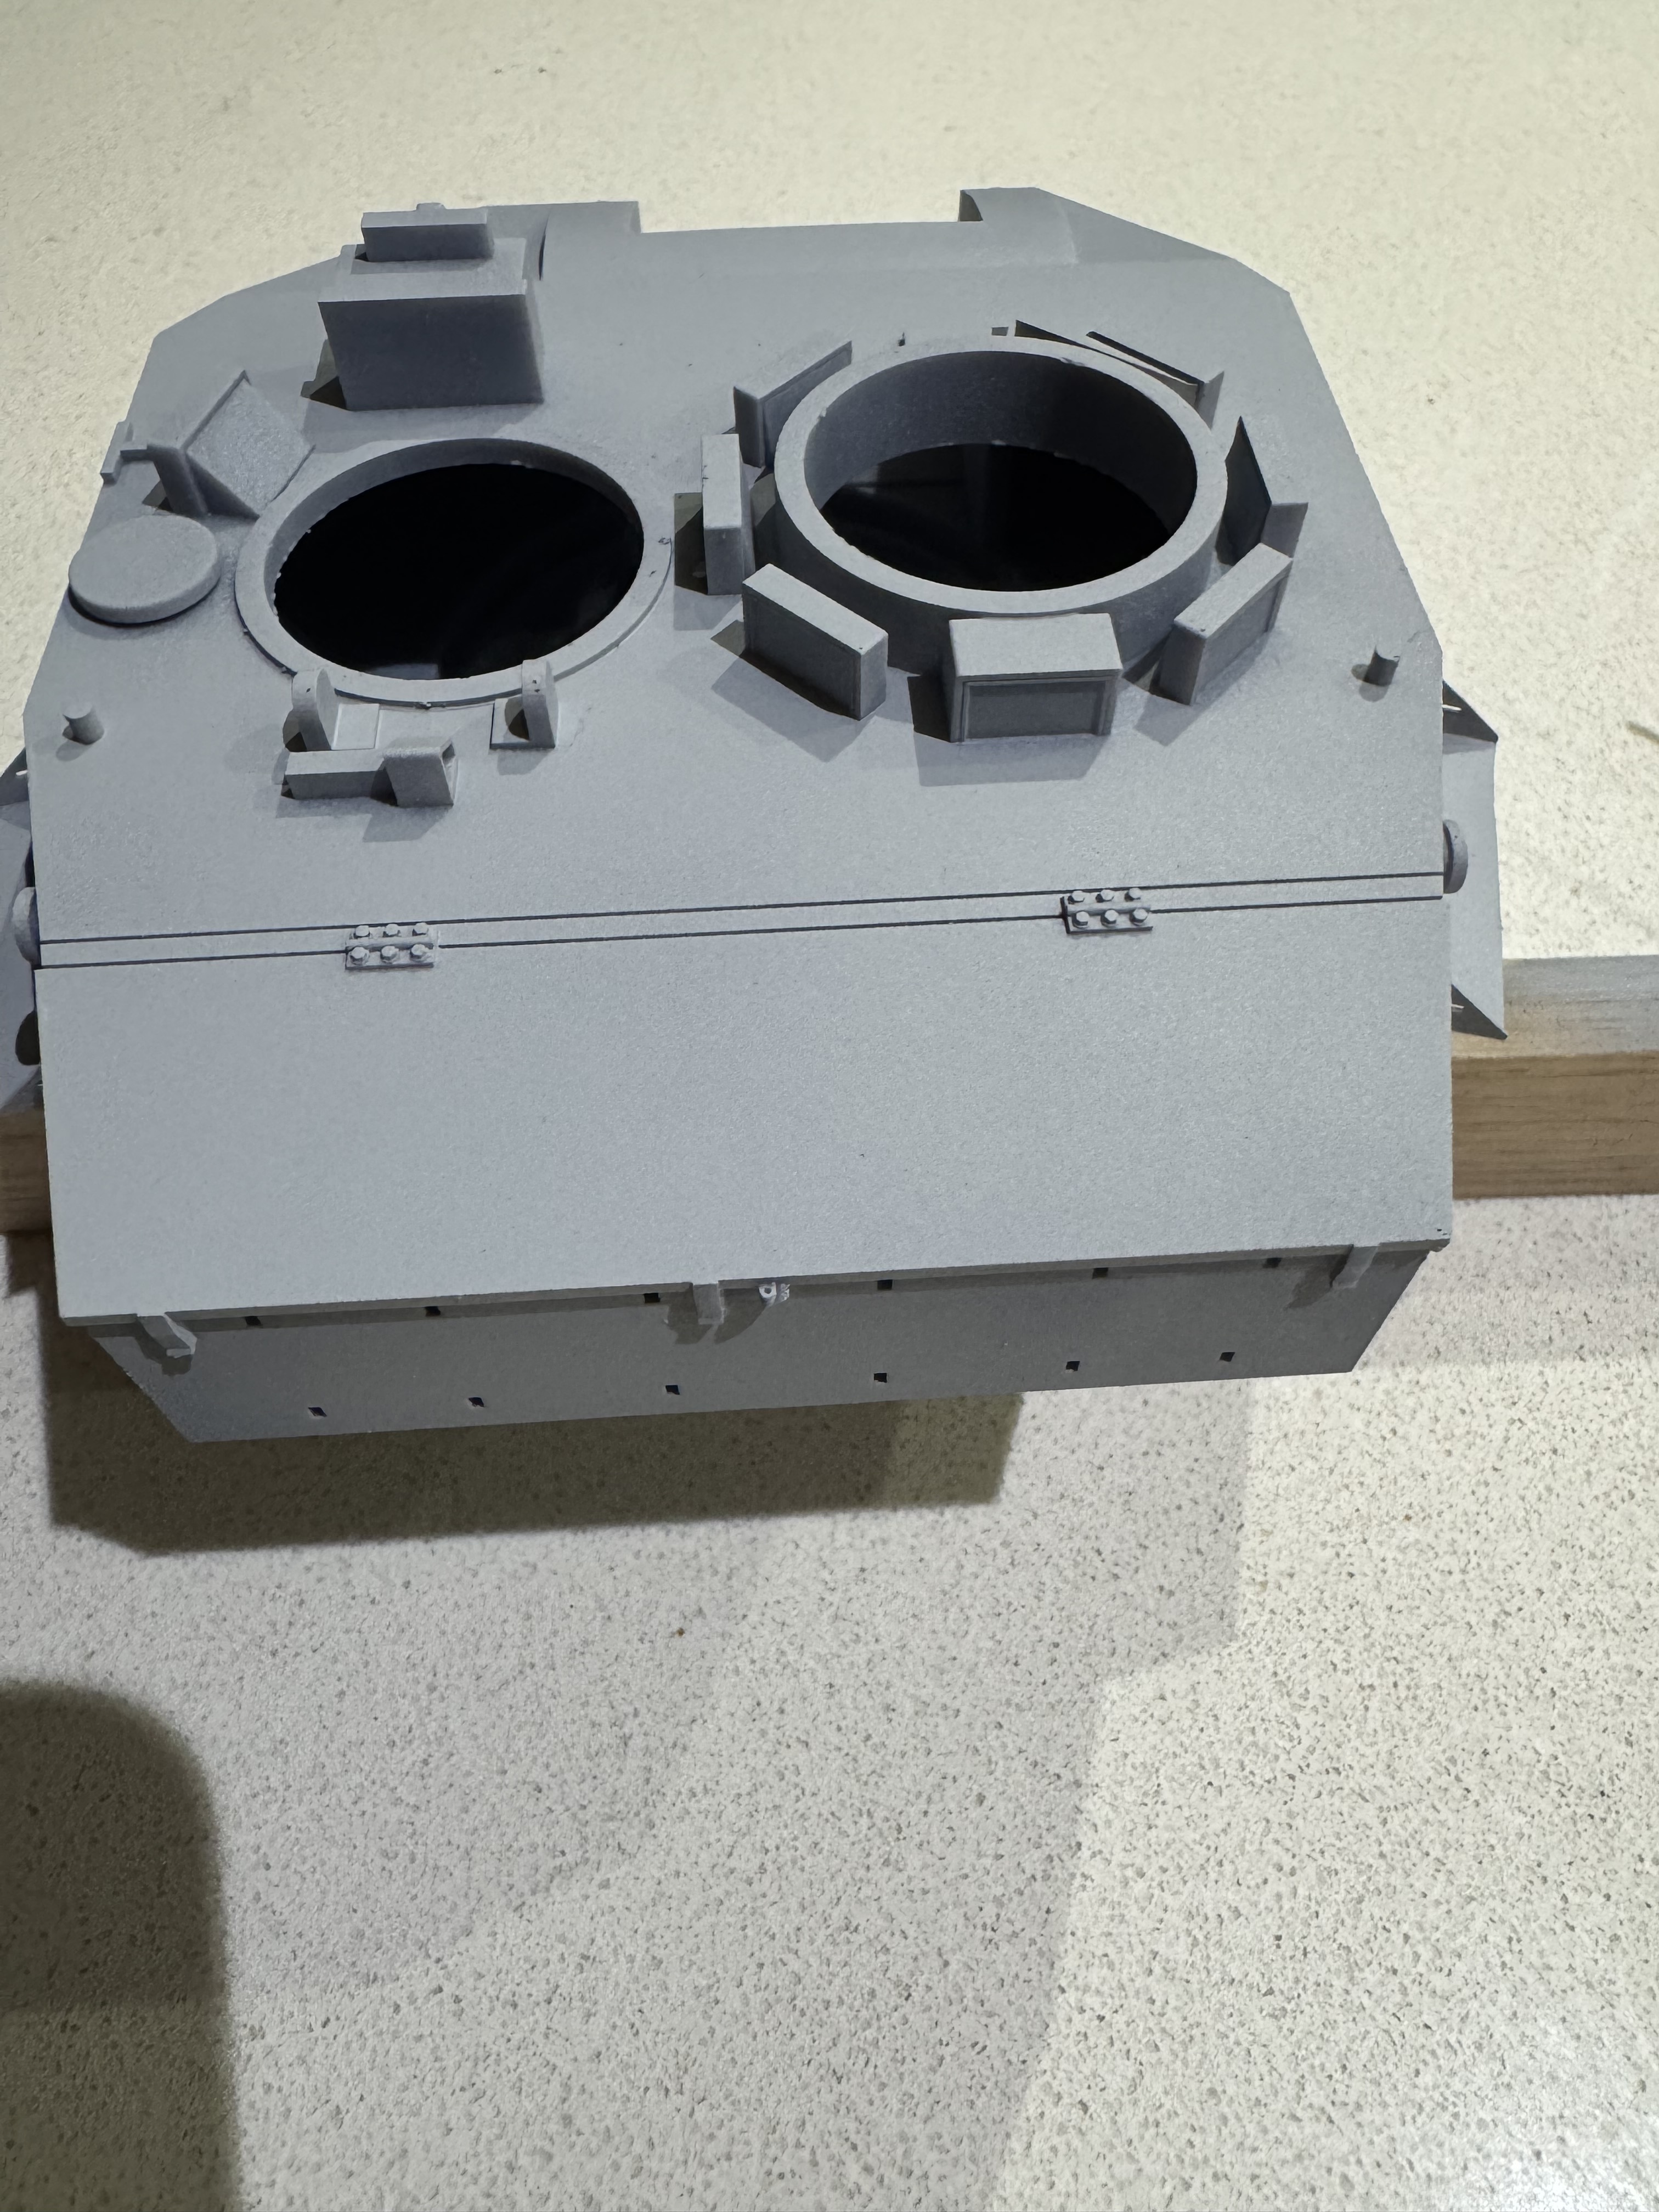
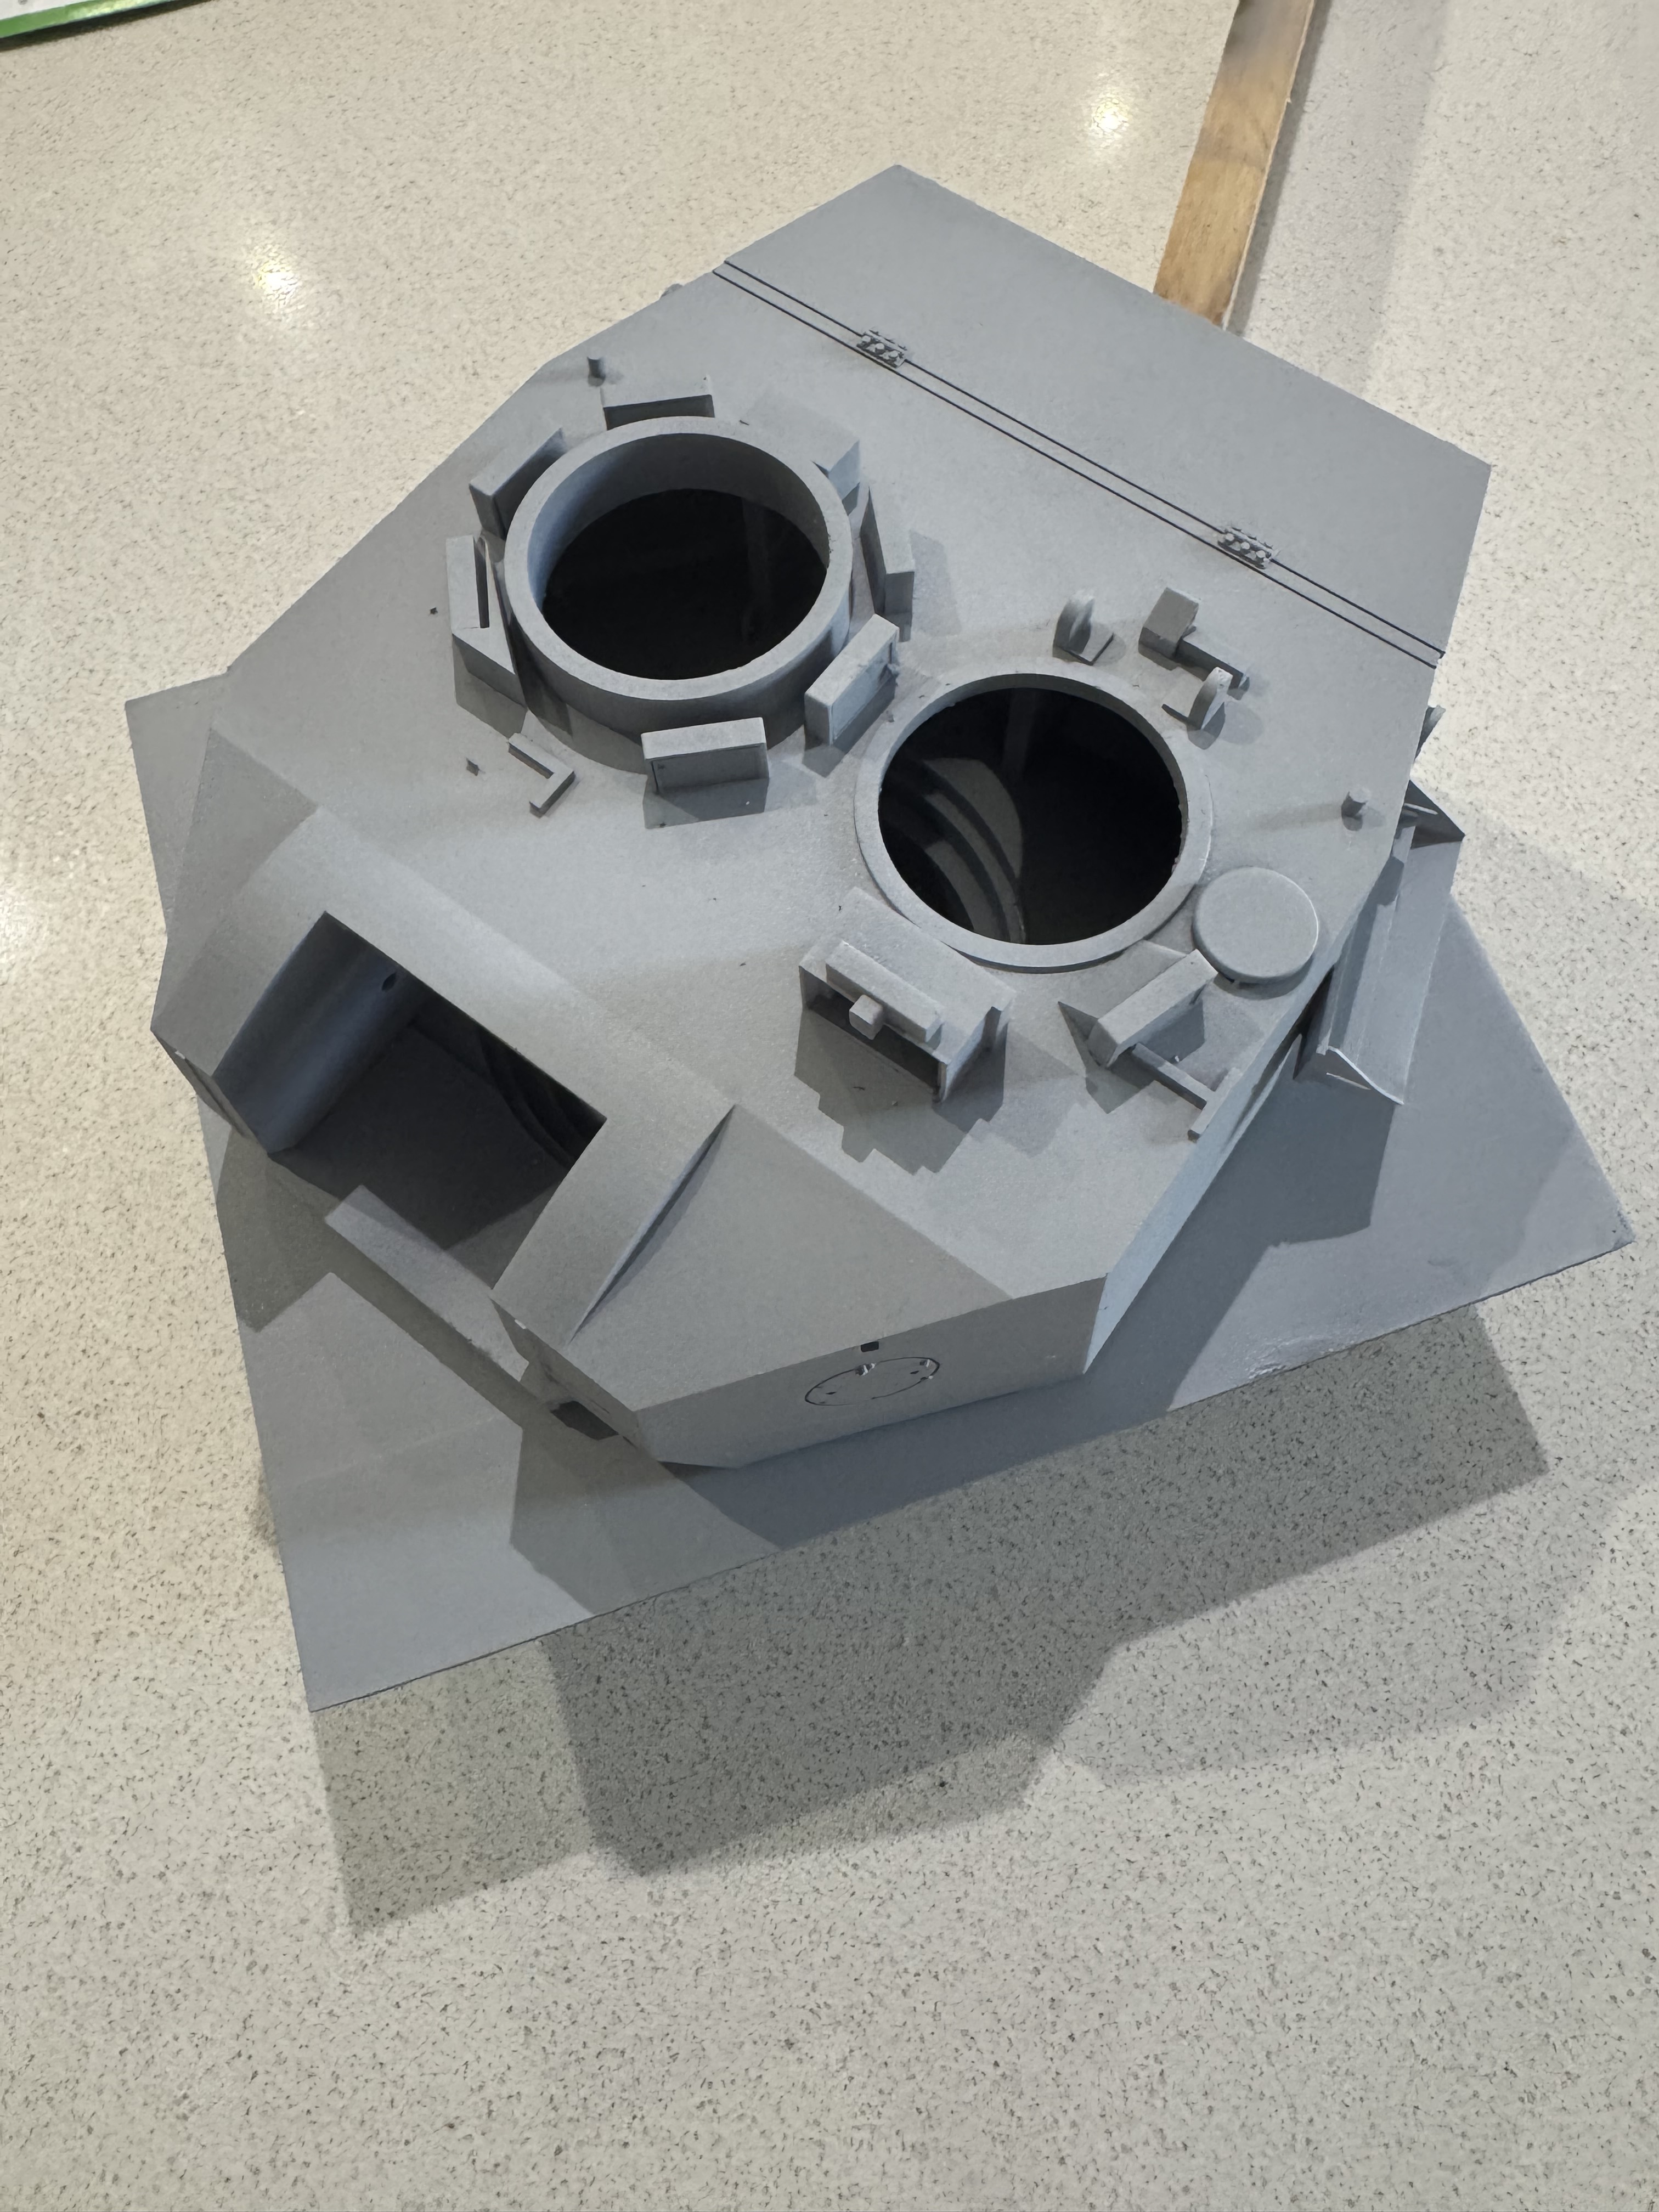
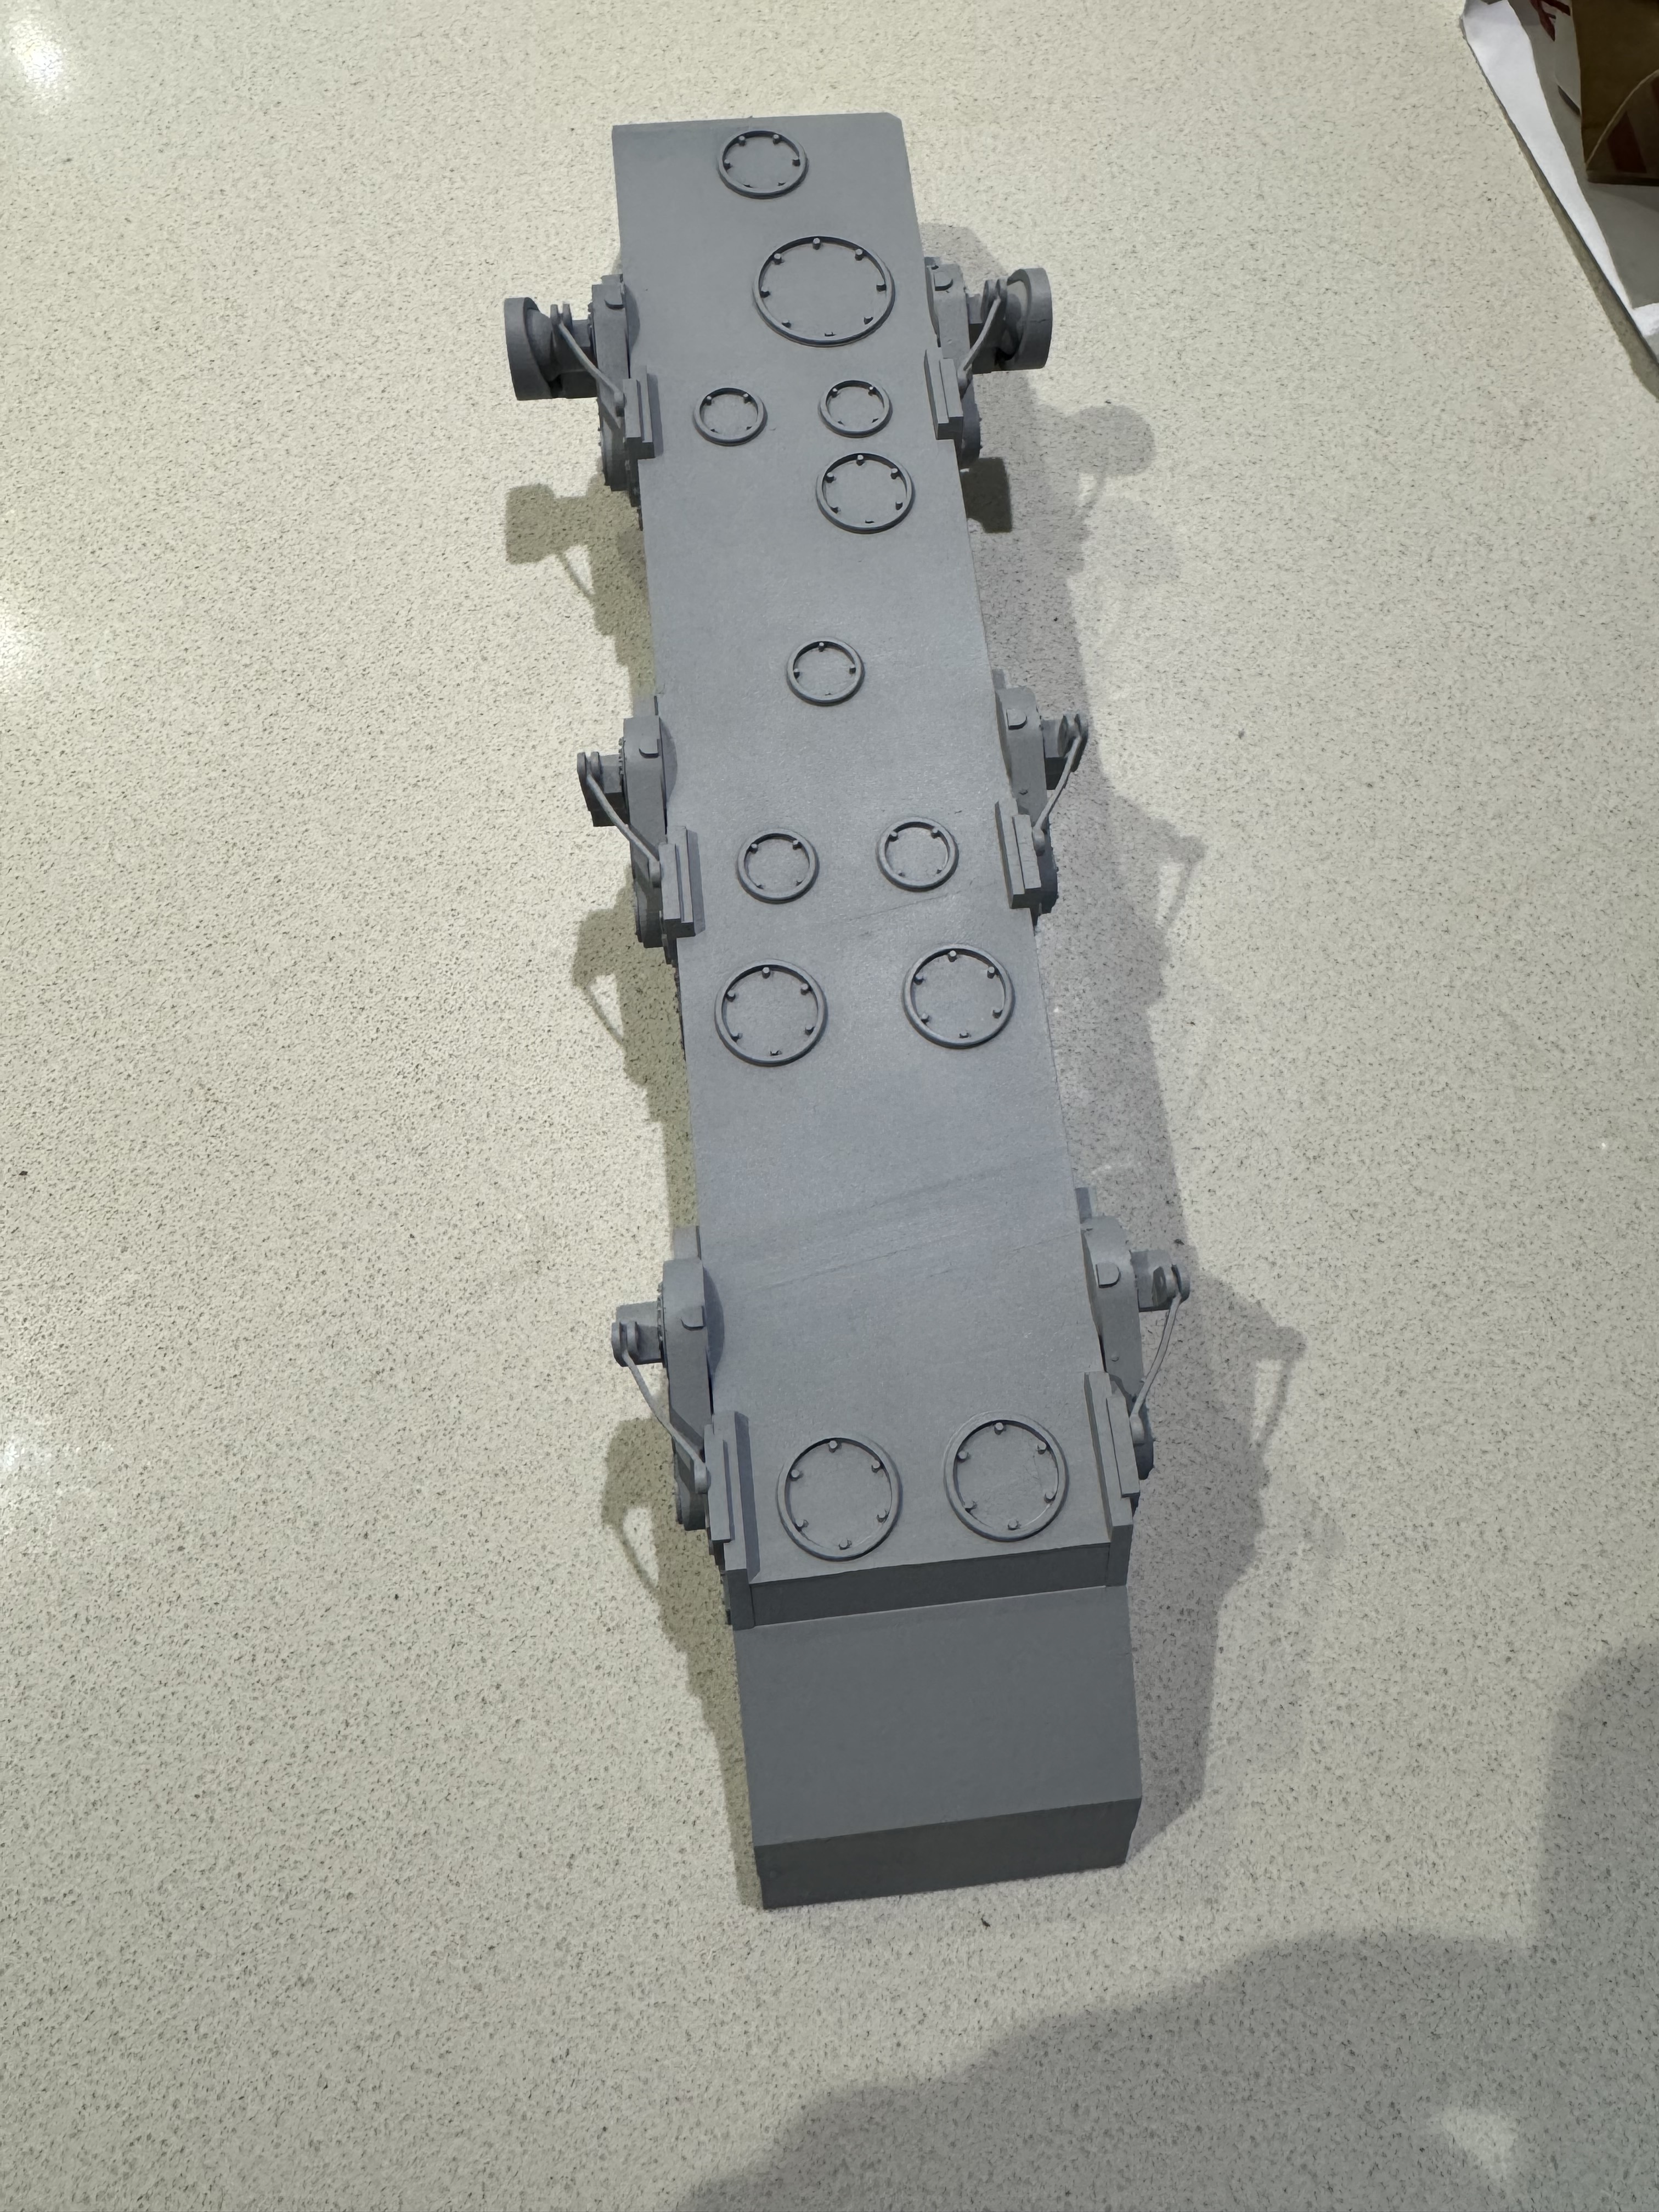
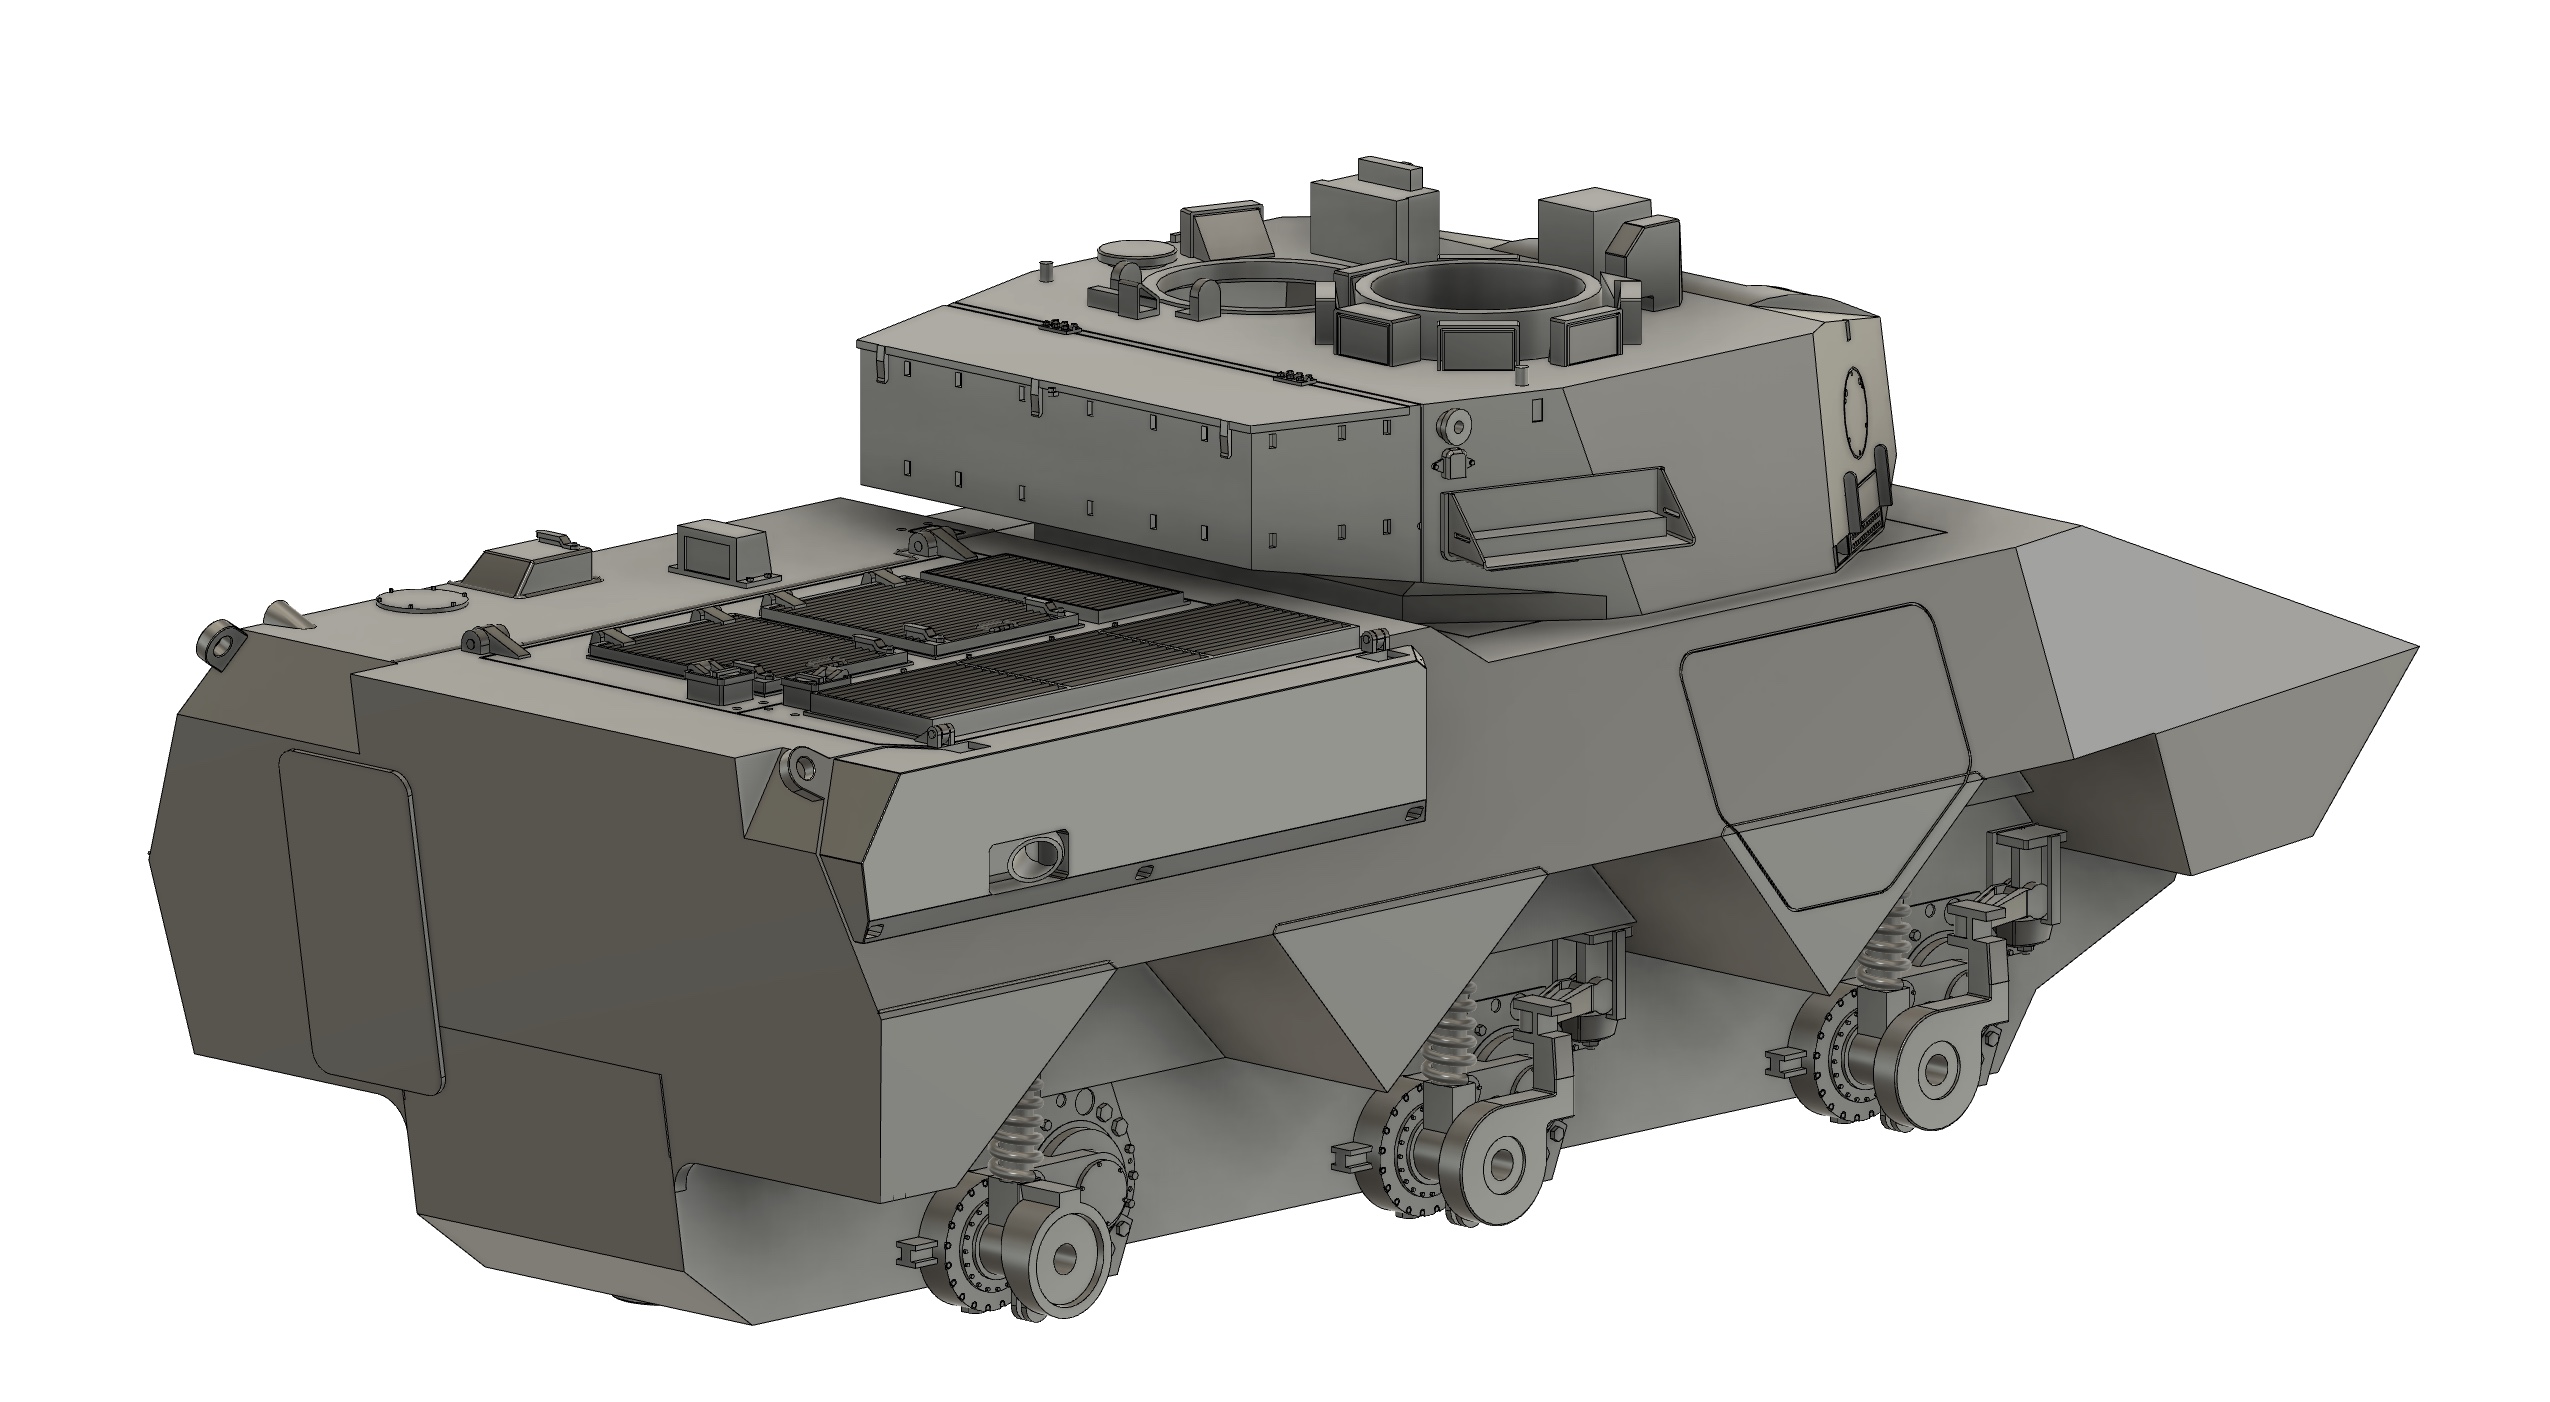
Some more progress on the upper hull, specifically the engine deck. Not a lot of references out there, so leaned very heavily on the Pit Road/Trumpeter kit.

A little earlier, did a turret rotation clearance check. Nil issues.

Thanks for looking in.

3 Likes

More work in the physical world to validate the design, in this case the suspension fit.

The initial design lacked positive location for itself and the 3mm brass tube axle.

At that point a sleeve was added with a tolerance to fit the already-printed suspension skateboard.


Test fitting revealed too snug a fit, requiring a greater tolerance. Ideally that print will address all the concerns & be the final iteration.

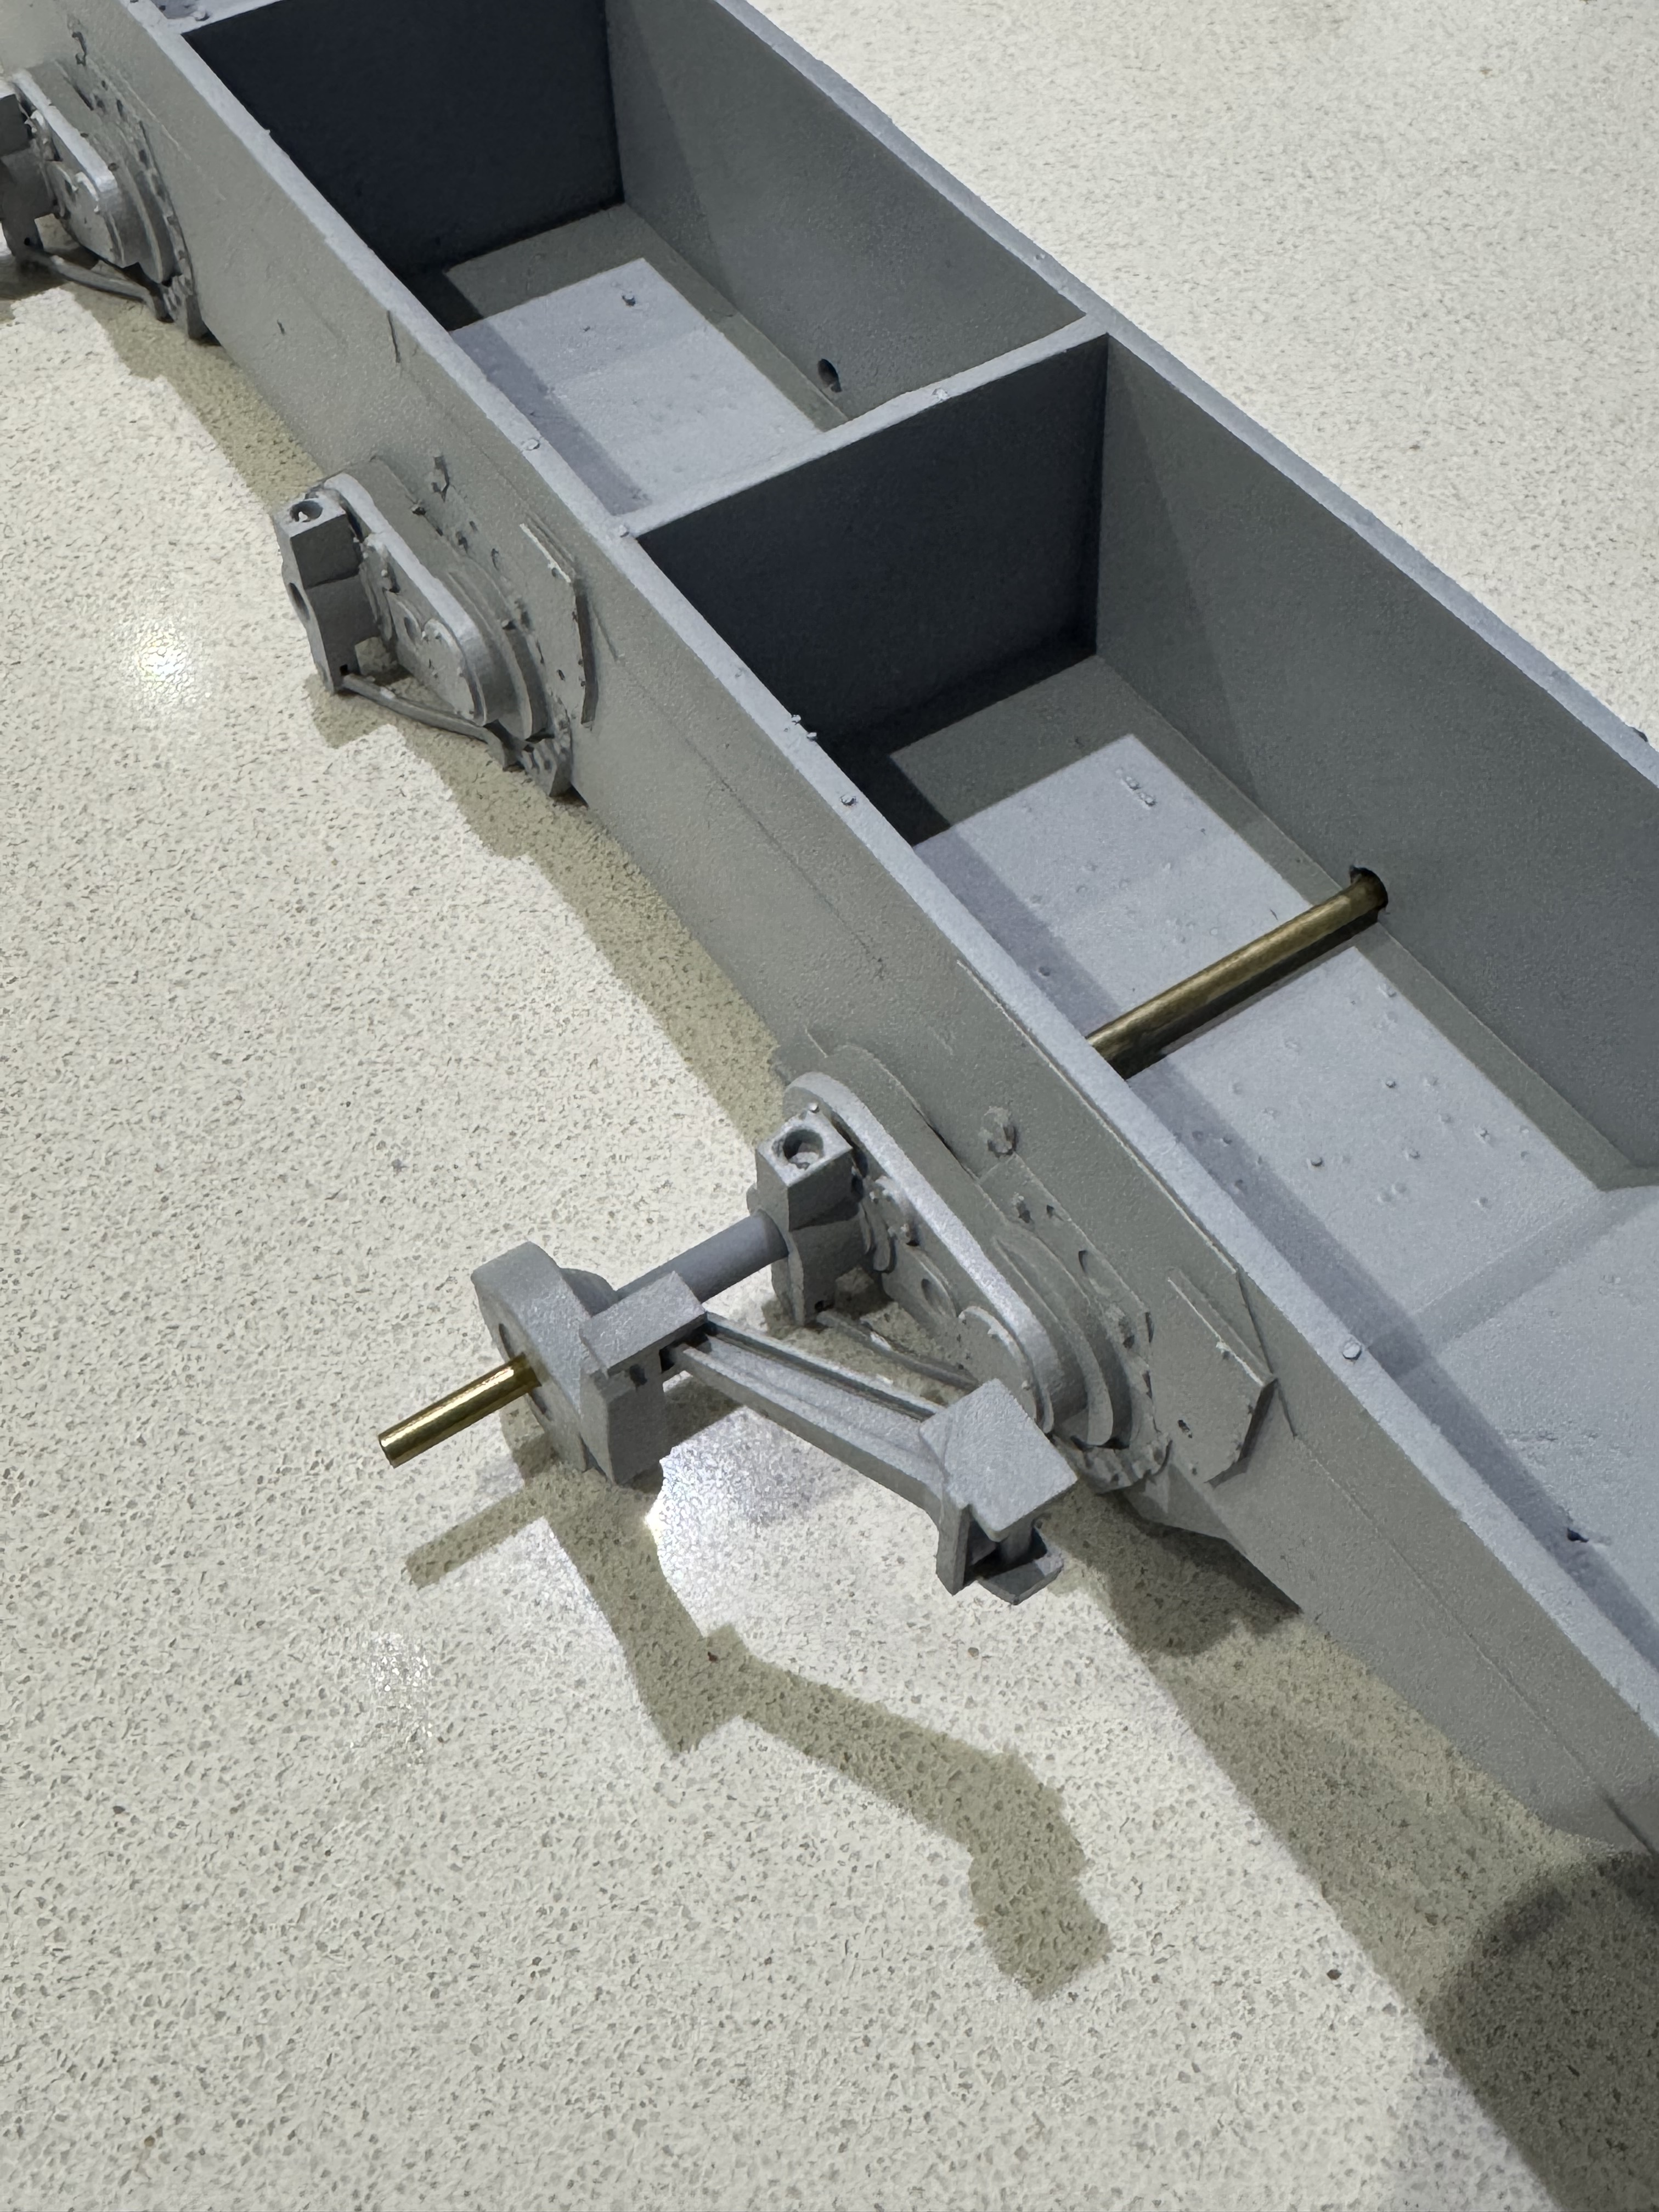
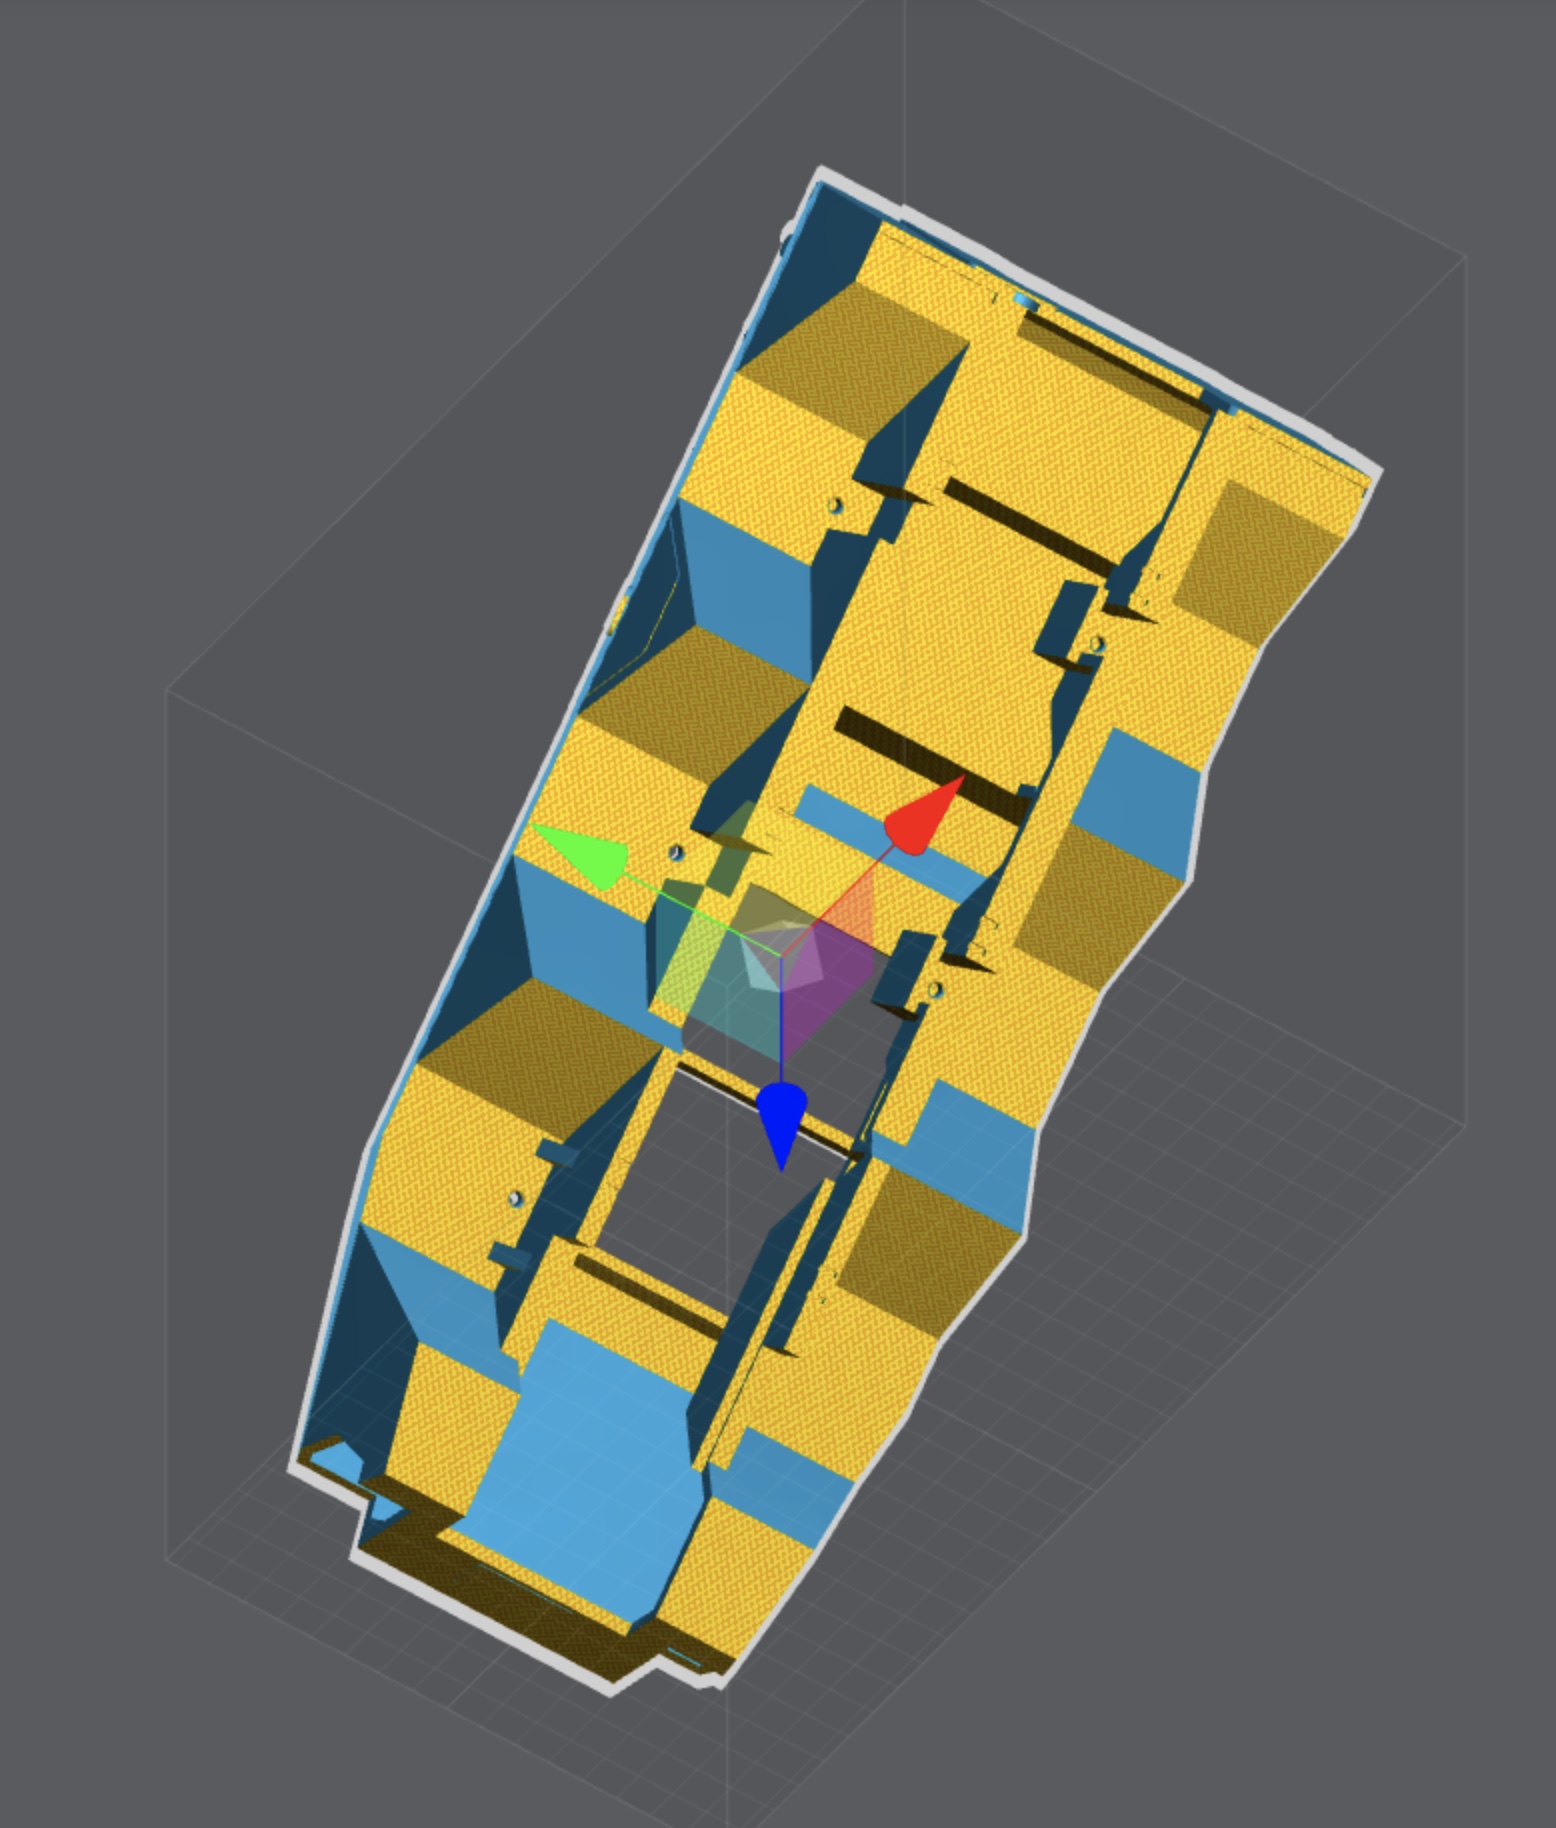
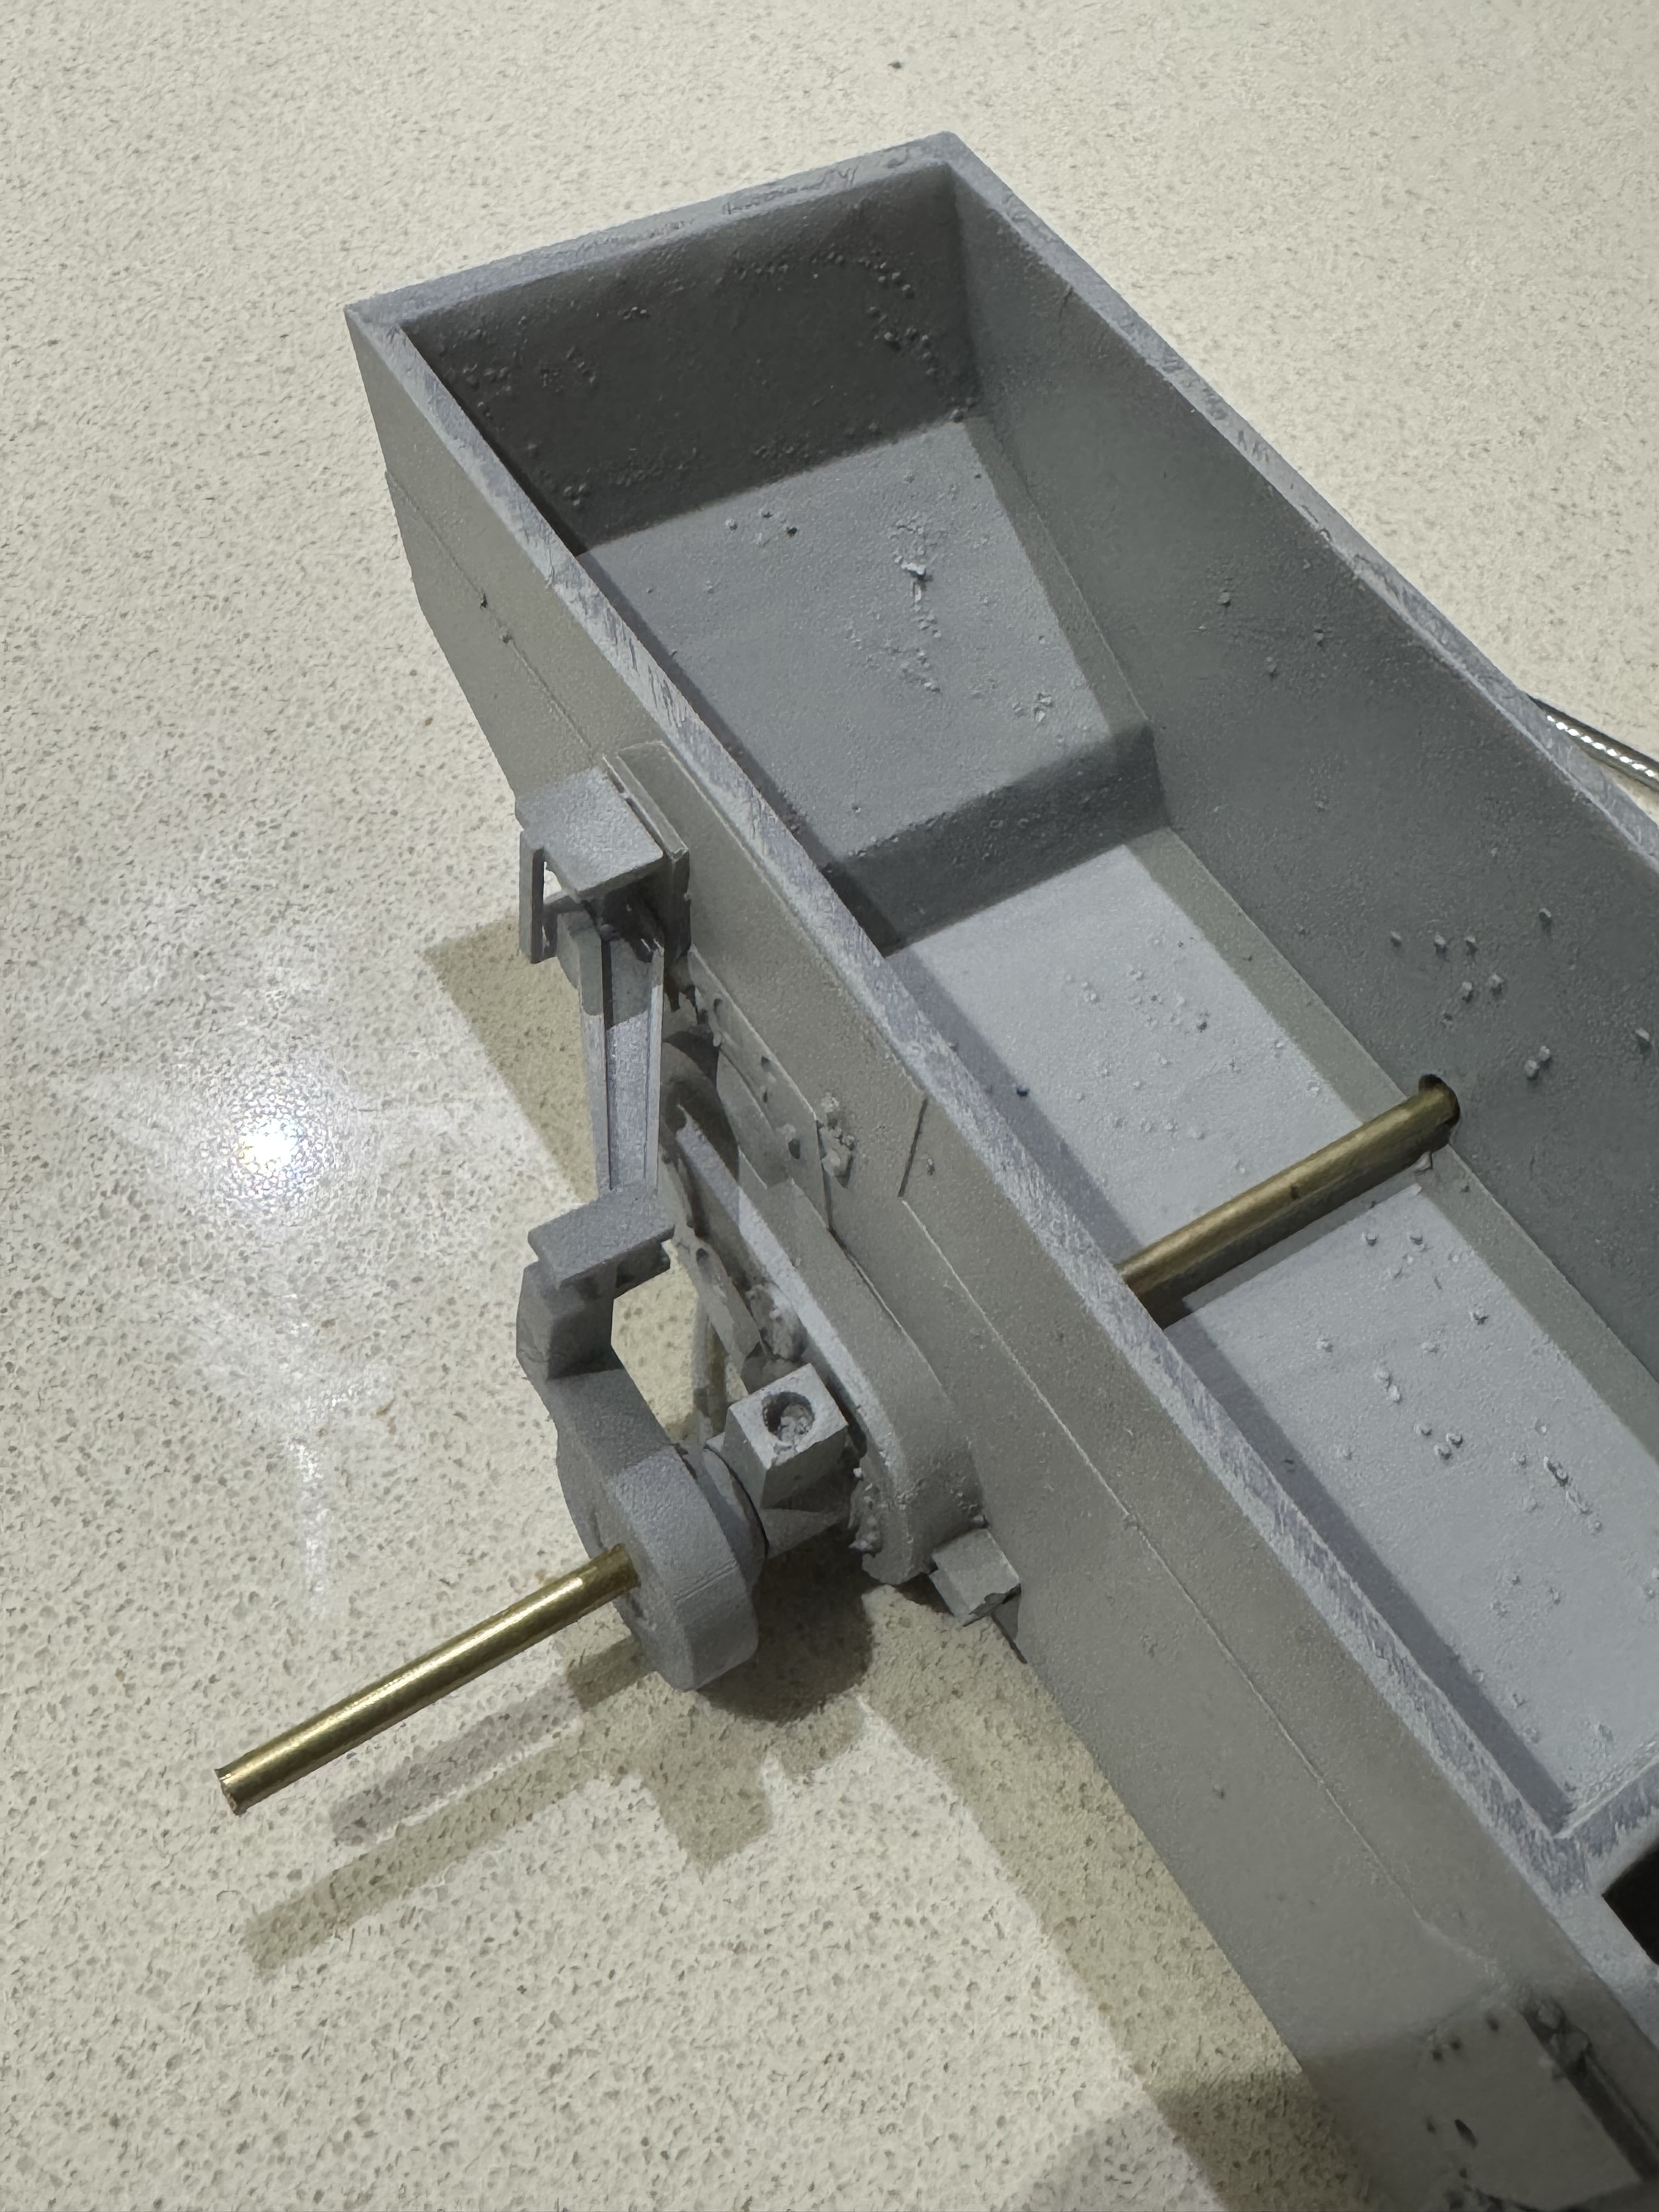
The skateboard itself turned out well. Some more cleanup & prep is required, but keep in mind that this is the underside of the vehicle. Also, the sides will be obscured by six large wheels & the overhang of the upper hull.

As always, thanks for looking in.

1 Like

Upper hull design progress is a little behind, but on track.


Thanks for looking in.

3 Likes

Planning the print for the upper hull - looks like it’ll be 9,500 layer print well over 50 hours.


On the home stretch for detailing the upper hull.

Version three of the steering arms fit very nicely.


The overall profile matches the Pit Road/Trumpeter kit quite well.

Thanks for looking in.

4 Likes

Two days + of printing! Is that common?

2 Likes

Not for most resin prints I do! The vehicle is about 14” long in 1:16 scale, plus I’m printing in very thin layers.

2 Likes

Grinding out the upper hull, perilously close to being able to get it on the printer.


Detailed print planning is largely concluded.

Thanks for looking in.

4 Likes

Due a really basic error orienting the upper hull model in relation to the printer’s build plate, I canned the print at the 46% mark.

At least I now have a paint mule & an opportunity to test fit. The “crease” in print is visible behind the driver’s & assistant driver’s hatch covers.

Used Tamiya rattle cans to mock up a paint scheme.


In the meantime, the print of the tweaked hull is underway, now 9,801 layers and a 1.16Gb file!

The front light cluster designs are underway, as are the wheel assemblies.


Thanks for looking in.

3 Likes

How many hours of printing?

2 Likes