Looks lovely Thomas. You have done a cracking job with it so far. It is certainly a very big chunk of metal for sure. 
Lovely work👍
Following with great interest
Ivan
@Johnny and Jacko: Thank you for your commendation, nice to have you both on board
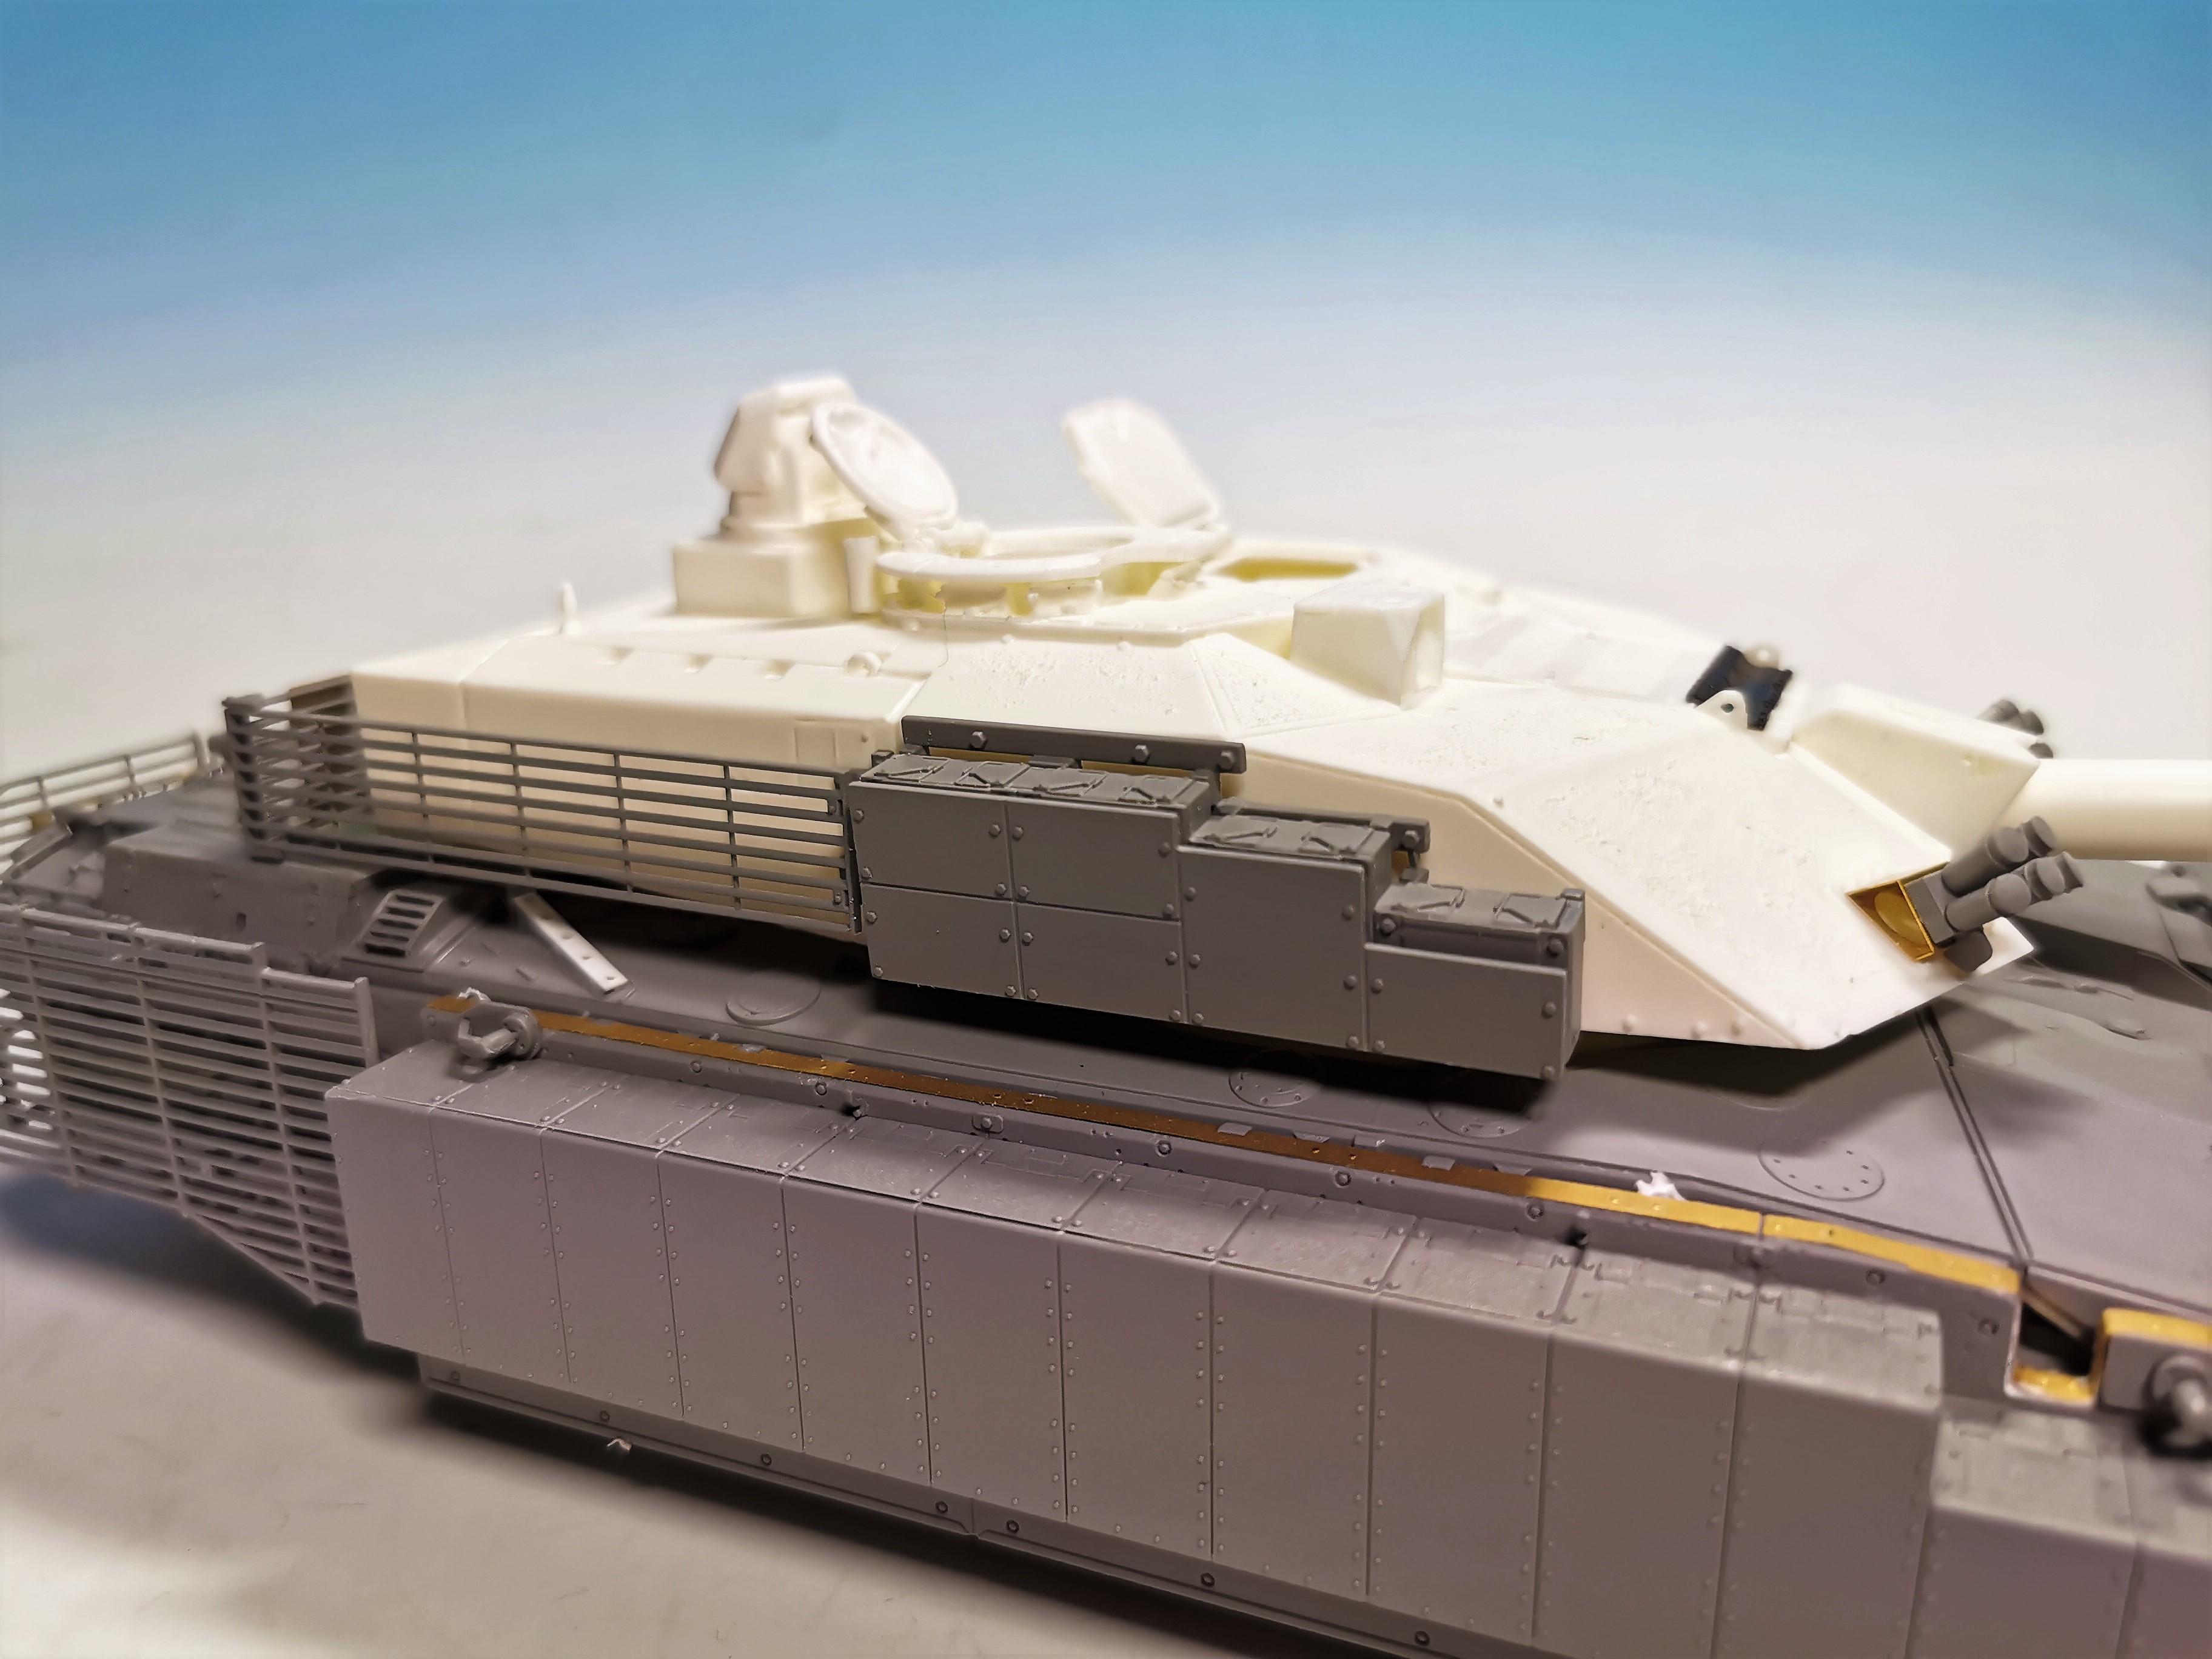
I was able to finish the resin turret which marks the Churchill 3. I added the reactive and bar armor too. Therefore I had to modify the reactive blocks at one side as both sides had different dimensions in the kit and did looked strange without a change. The holders for the bar armor were also modified as the Challenger 3 have an even turret rear unlike the angled turret rear of the Challenger 2 Megatron.
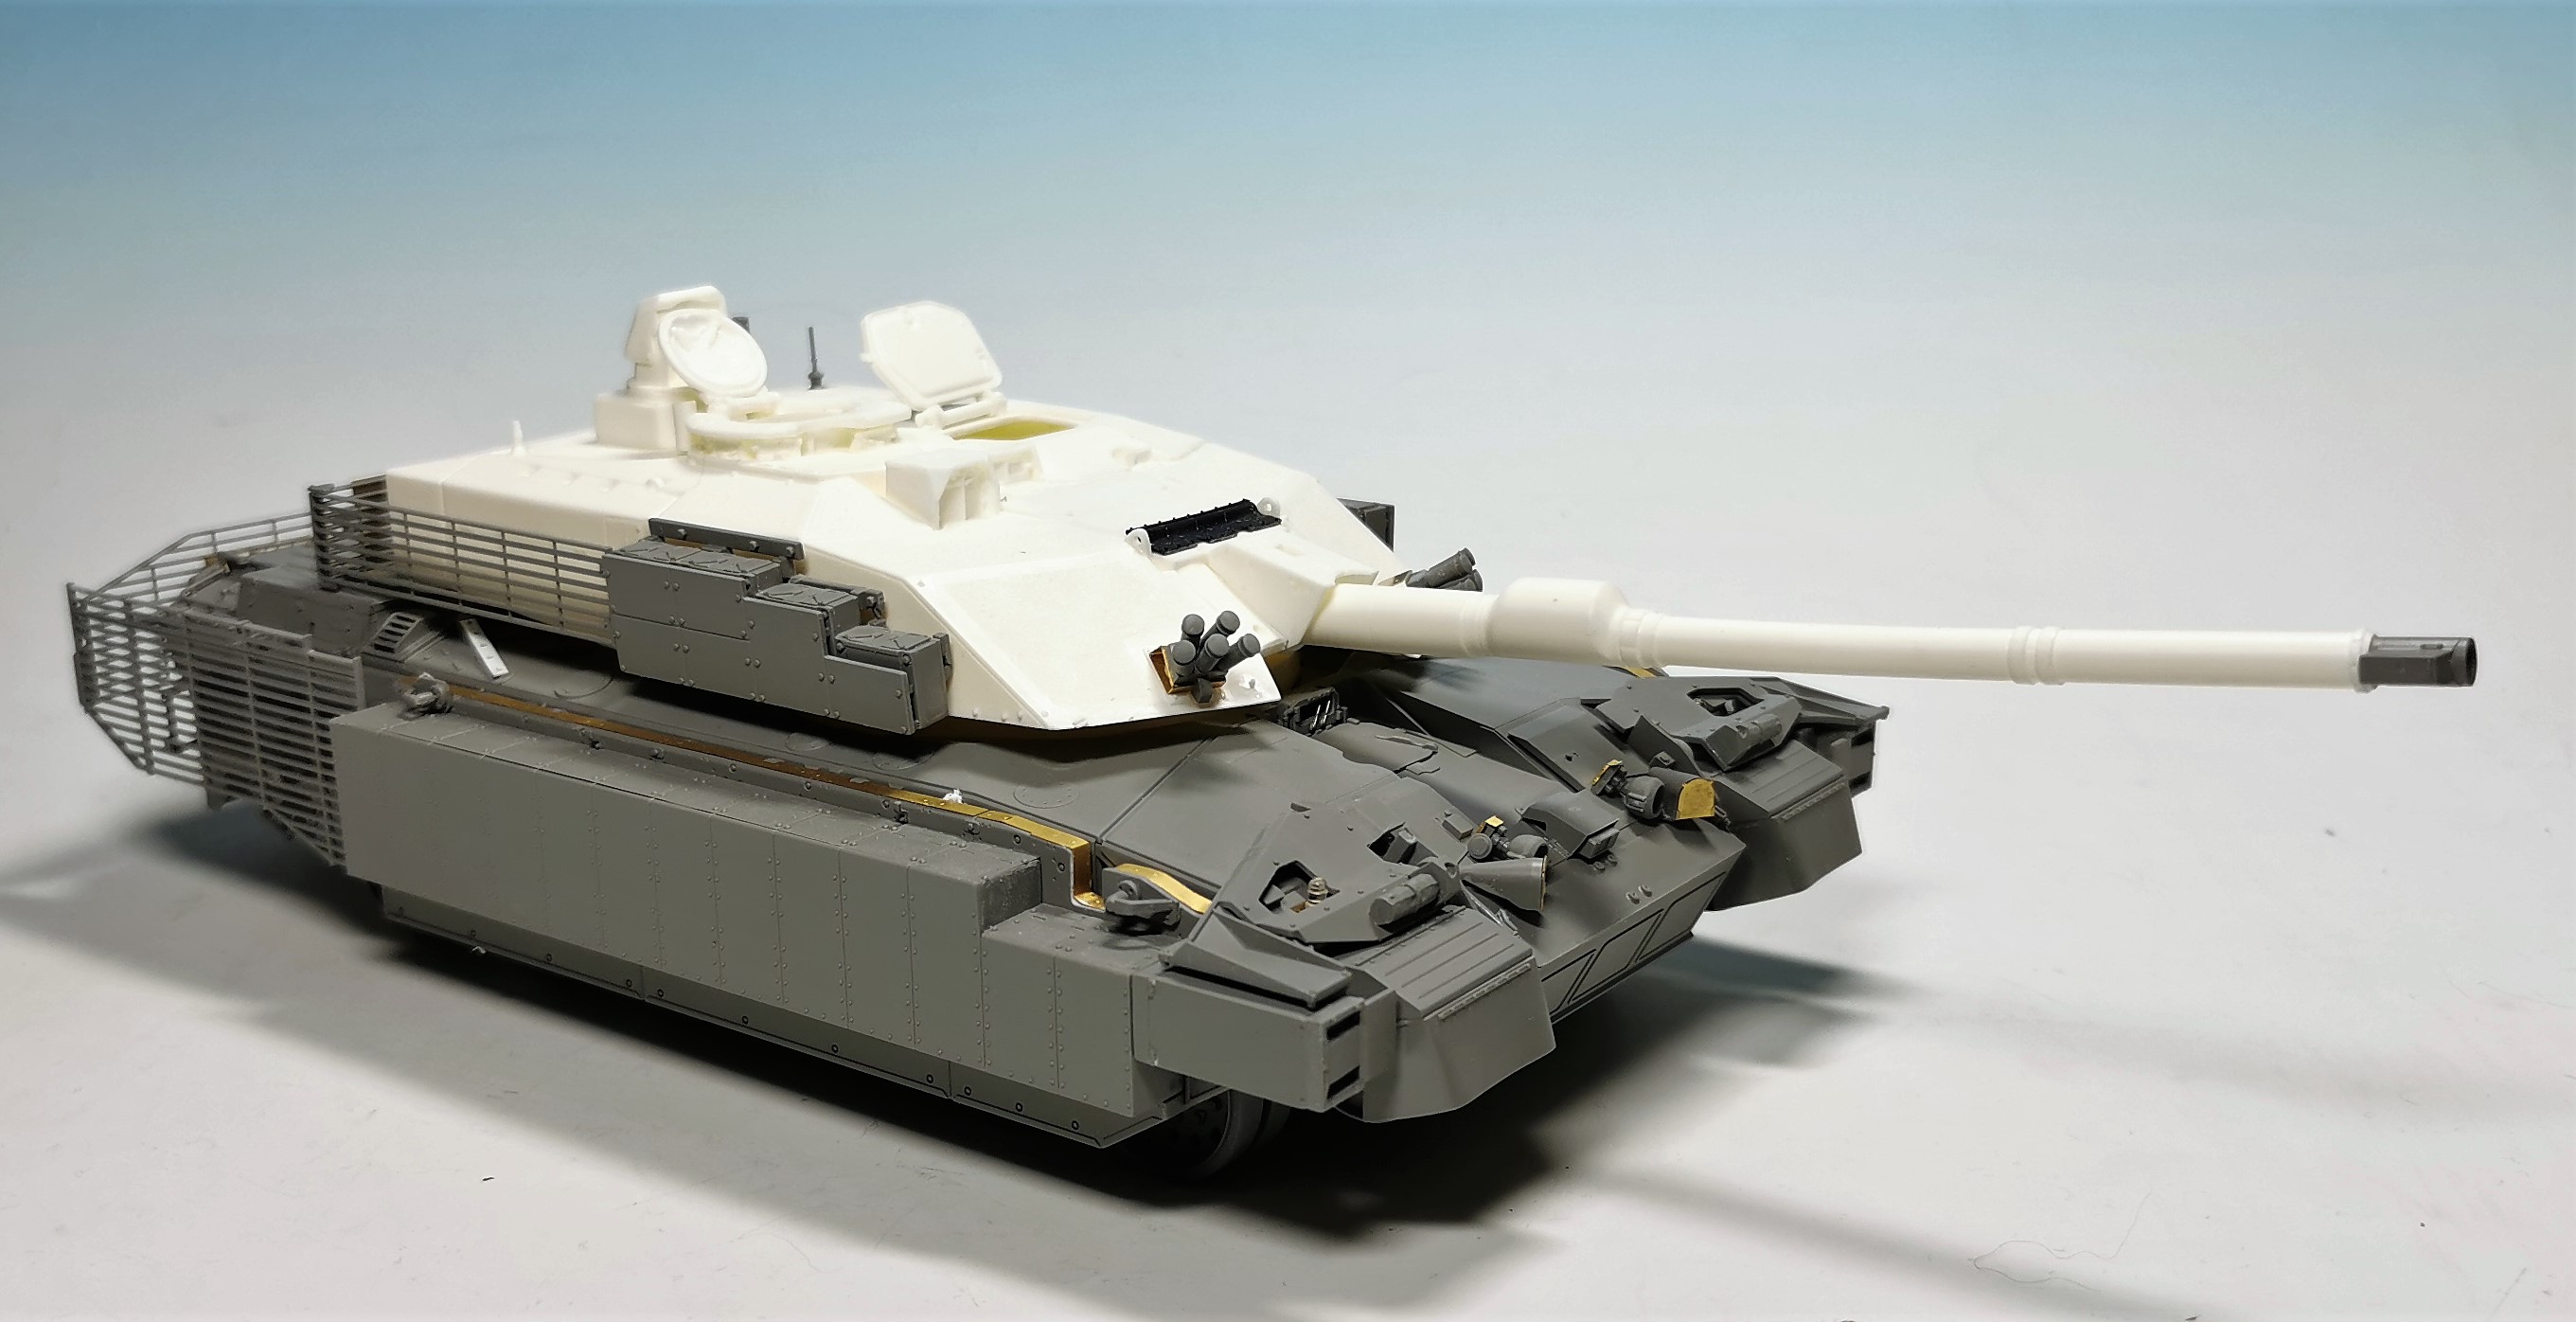

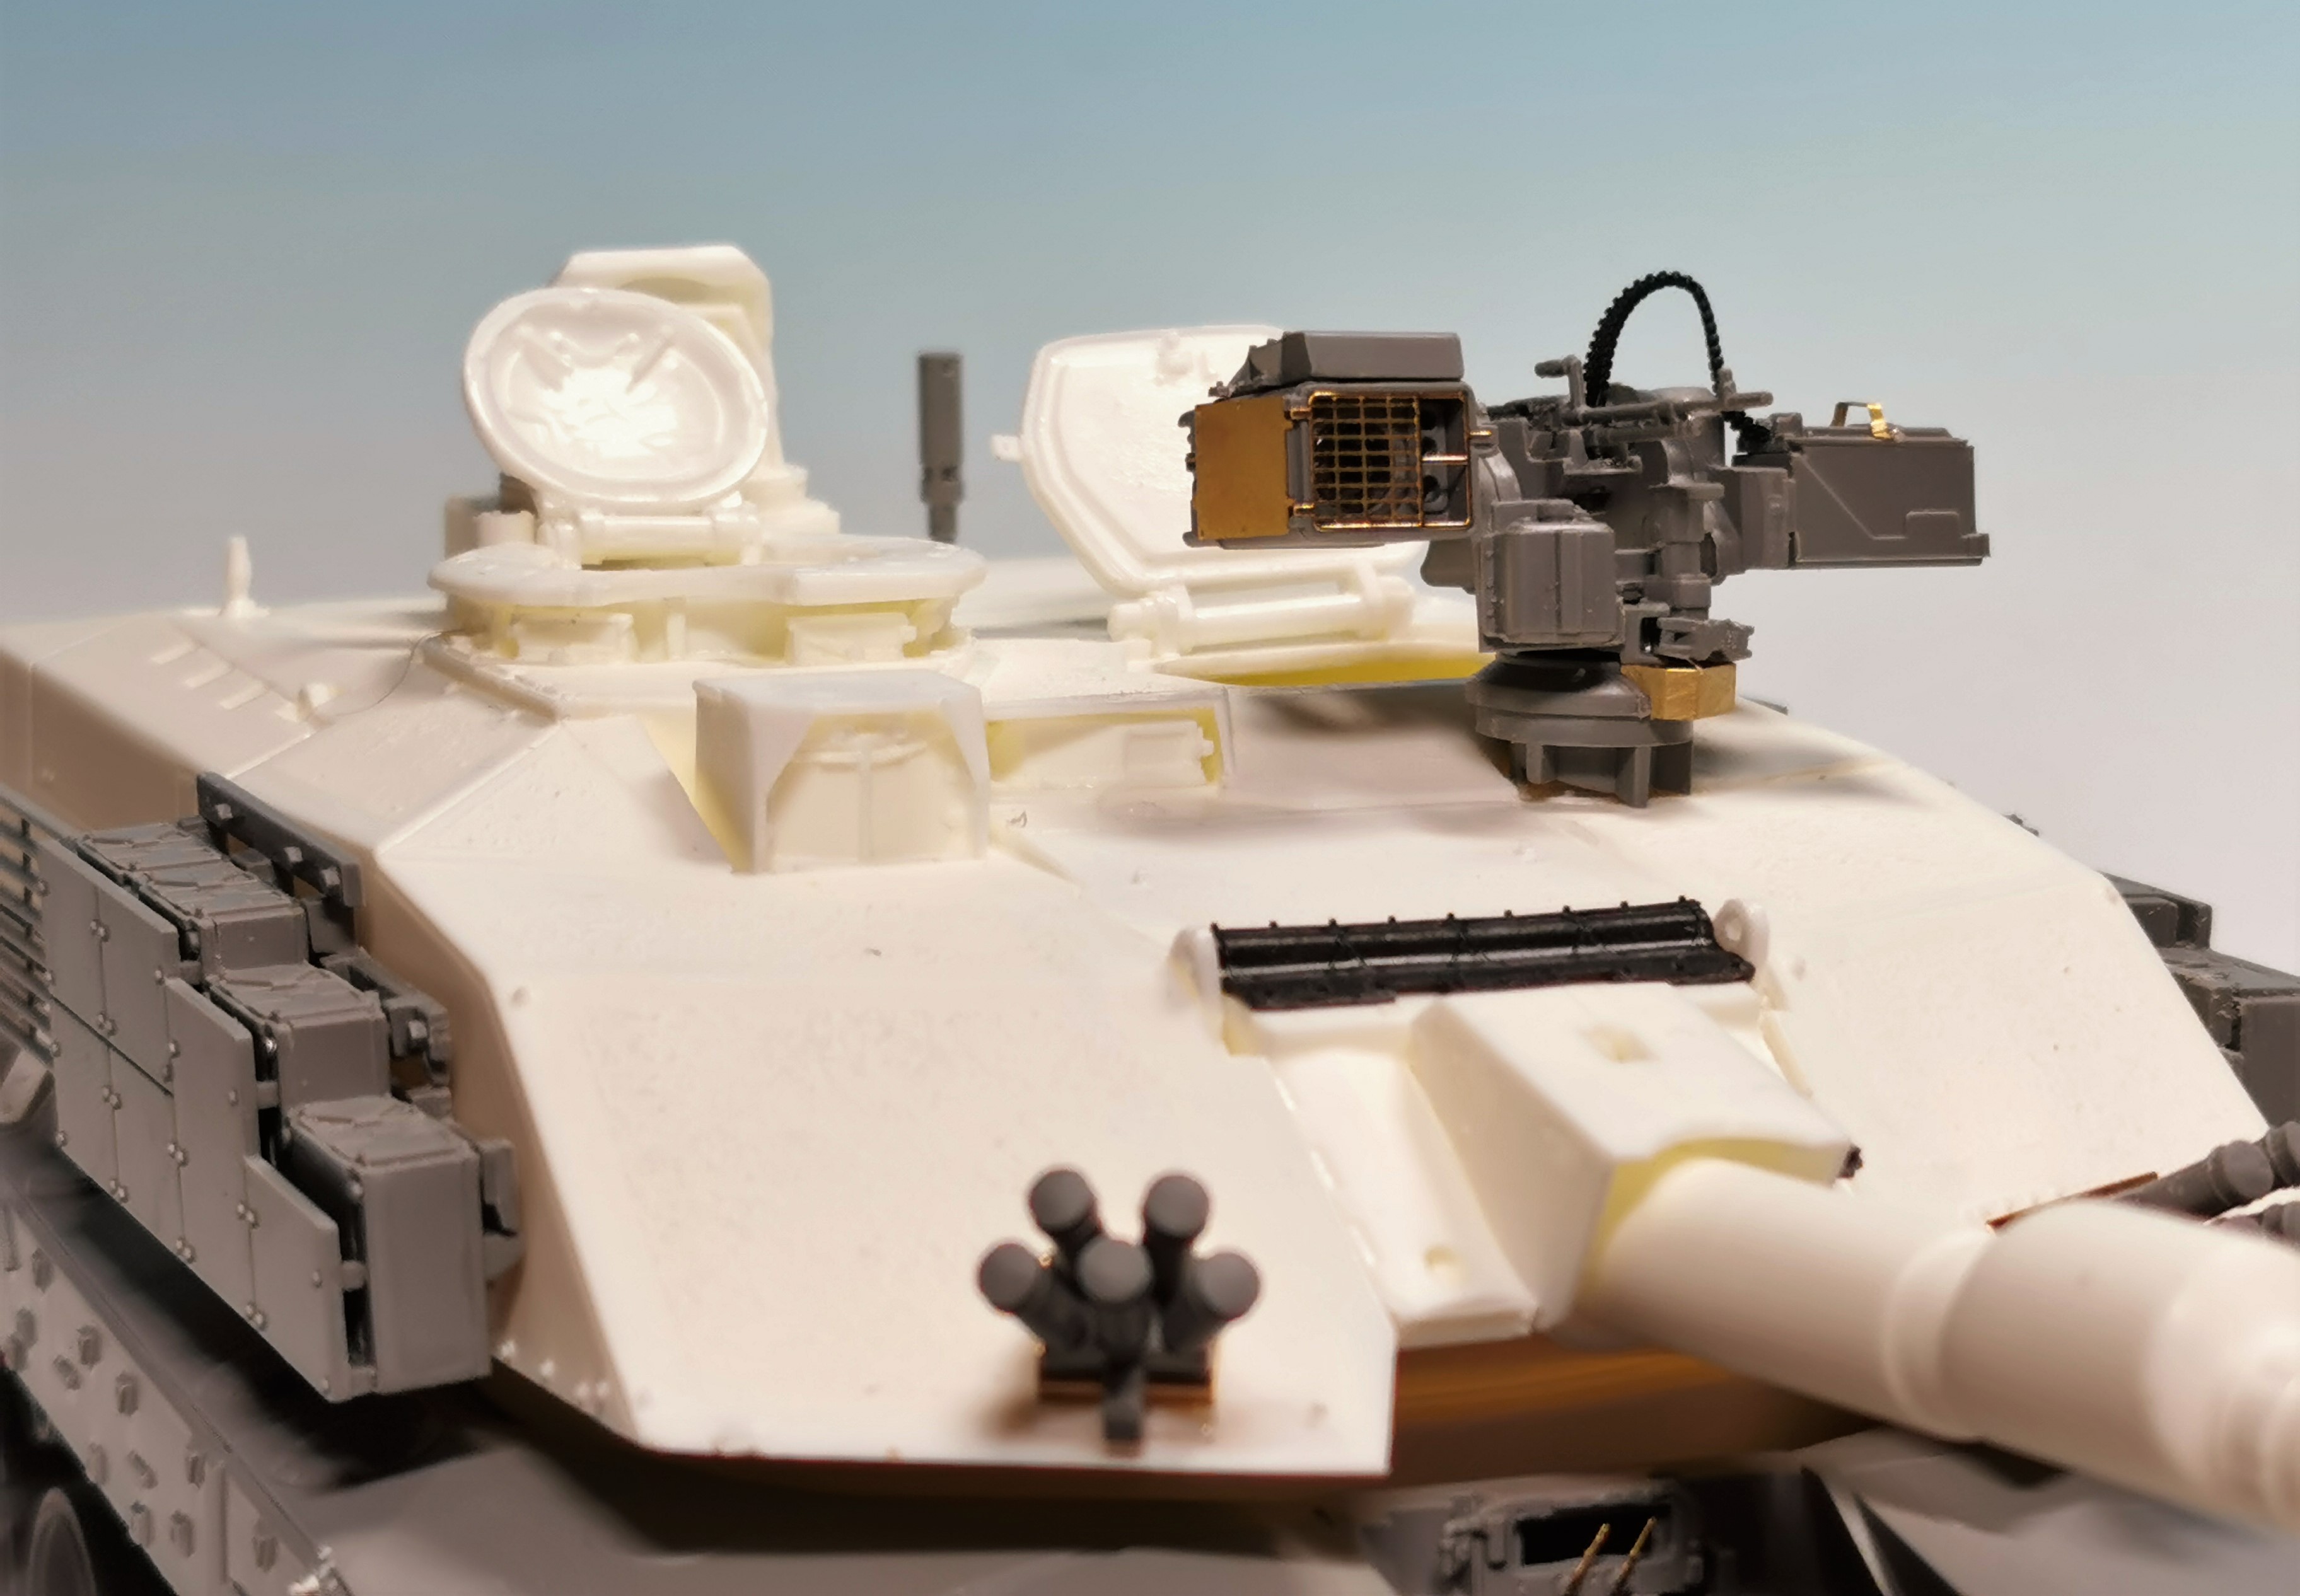
Next will be the remote weapon station. I am still not sure if I should add this or not. Many modern tanks have one and maybe the Challenger 3 in an hot conflict, too?!
Off for a beer now 
6 Likes
Looks very impressive do far Thomas. A couple of things though.
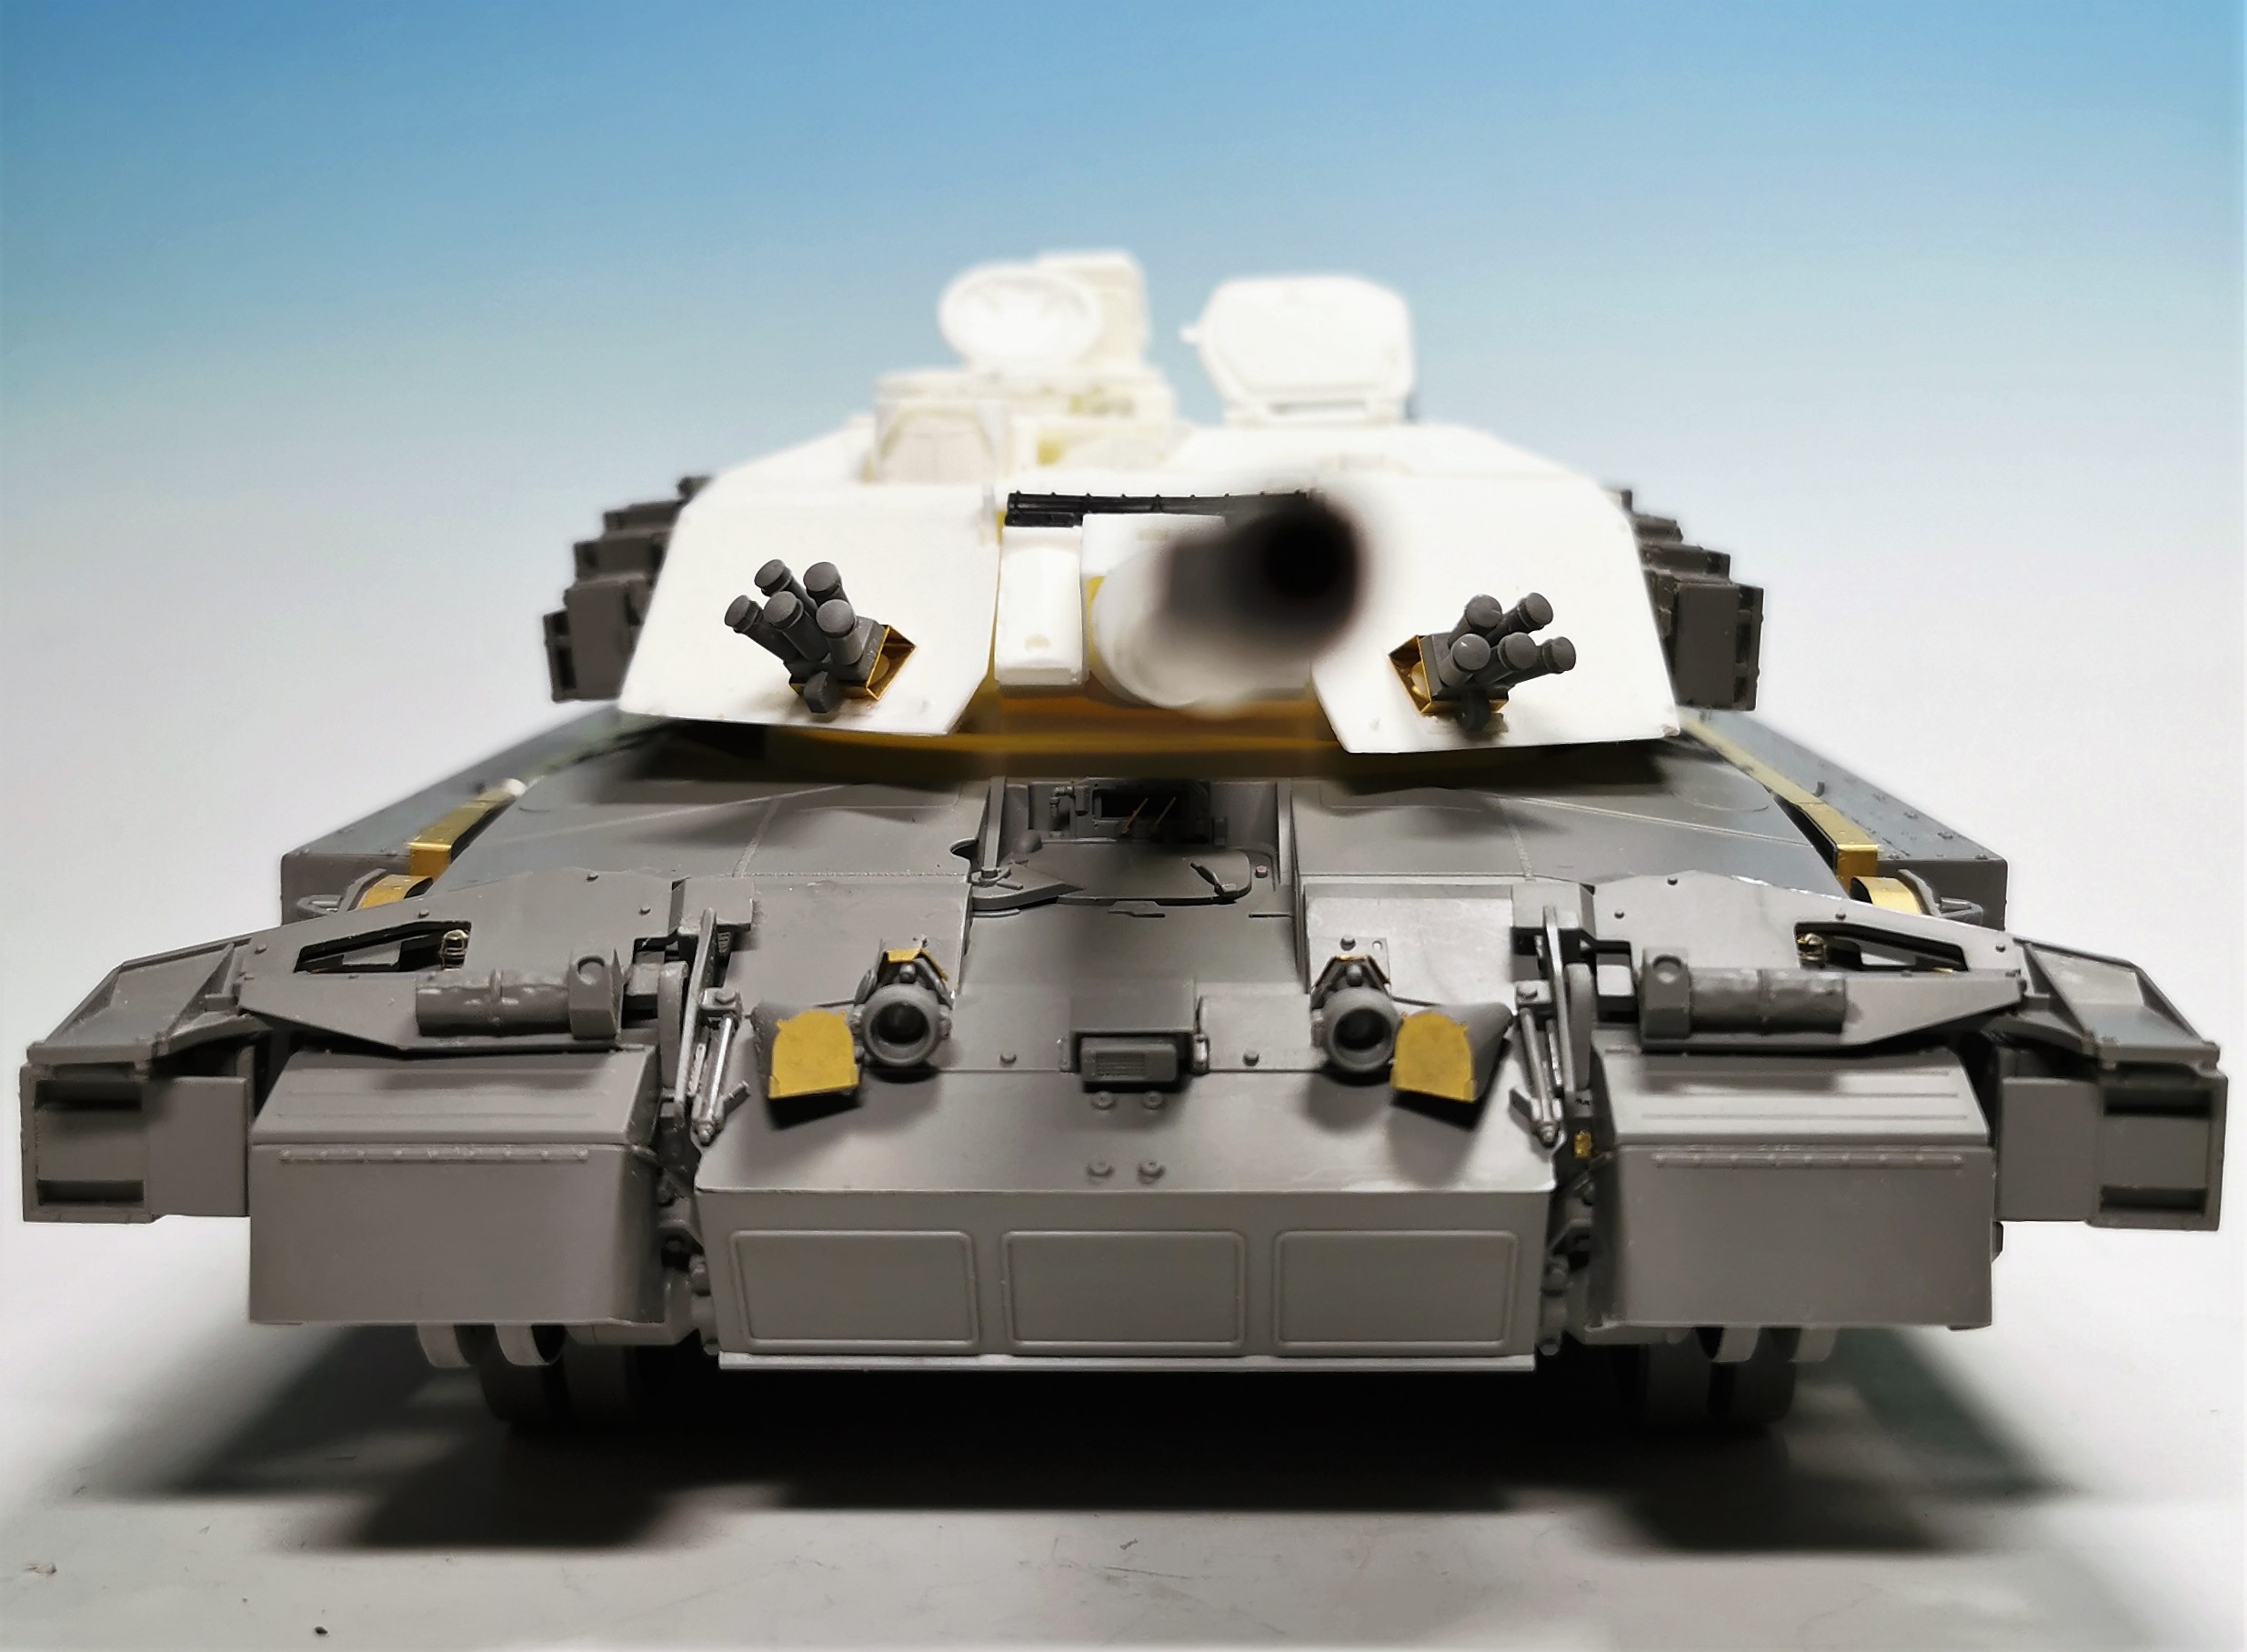
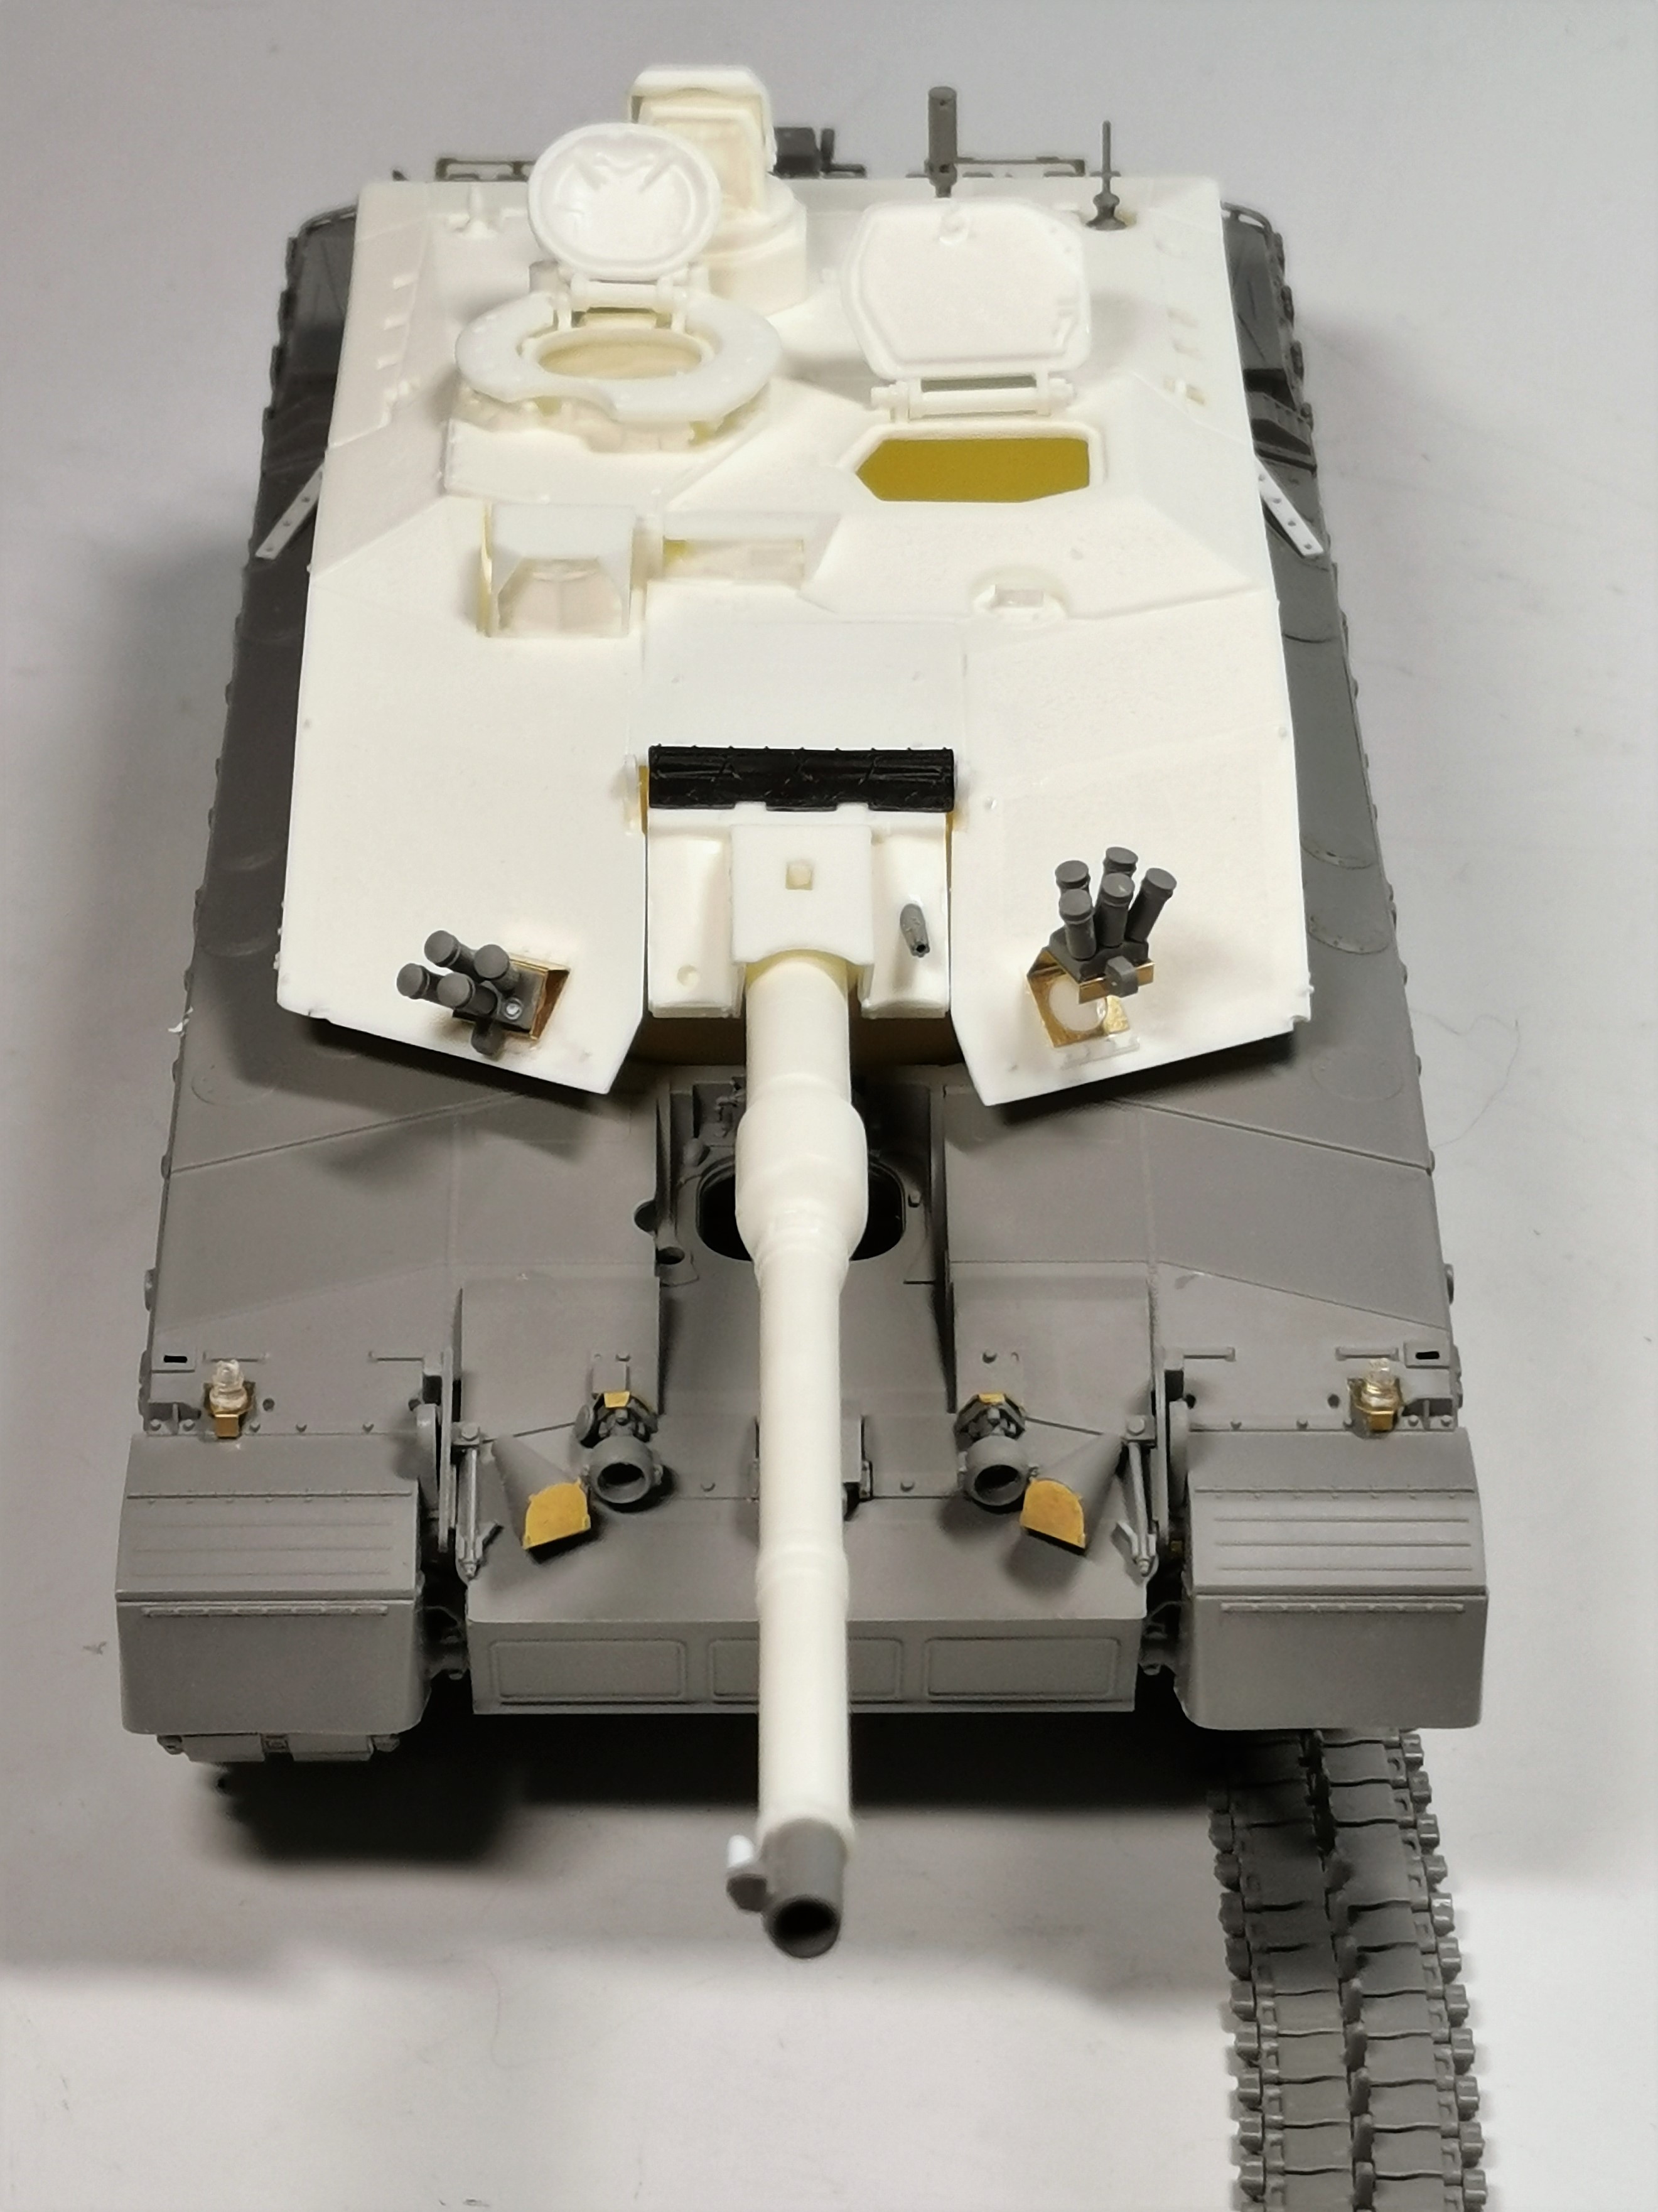
Is the barrel secured and glued ? I only ask as it may be the angle the picture was taken, but the barrel looks off slight centre to the left compared to the hull and turret which all look square to me ?
Also, is that the muzzle from the conversion ? The images I’ve seen so far don’t have any cover over MRS or whatever it’s called now. ?
@John: you are right, the barrel is still slightly bended upward and to the left. It was already coming within the box this way. I tried to straighten it up within boiling water but I wasn´t completely successful. Unfortunaltely I have already glued in the barrel. Maybe I will try carefully again with a blow-dryer? Another option would be to replace it with a turned barrel. Therefore I would need to drill out the old barrel from the gun shield.
The muzzle isn´t from the conversion set; it just wasn´t inside the box. Therefore I did used the kit´s one. Do you mean the small device left of the muzzle with MRS? I think I know it as the Kollimator. I´m not completely sure about it. The images I saw of Challenger 3 looking indeed a bit different. I should modifiy this, too.
Thanks for your input 

Some more progress today  I don´t know if there is a remote weapon station also planned for the Challenger 3, too or not. Therefore I just glued together the one within the Rye Field kit do see how it would look. Not sure if I will use it later or not. What do you think?
Then there was the moment which is the most boring one during tank modelling for me - assembly 8 billions of multi part single link tracks  . But Ryefield provided four jigs which can be glued together into a big one. With this one it went fairly easy and fast
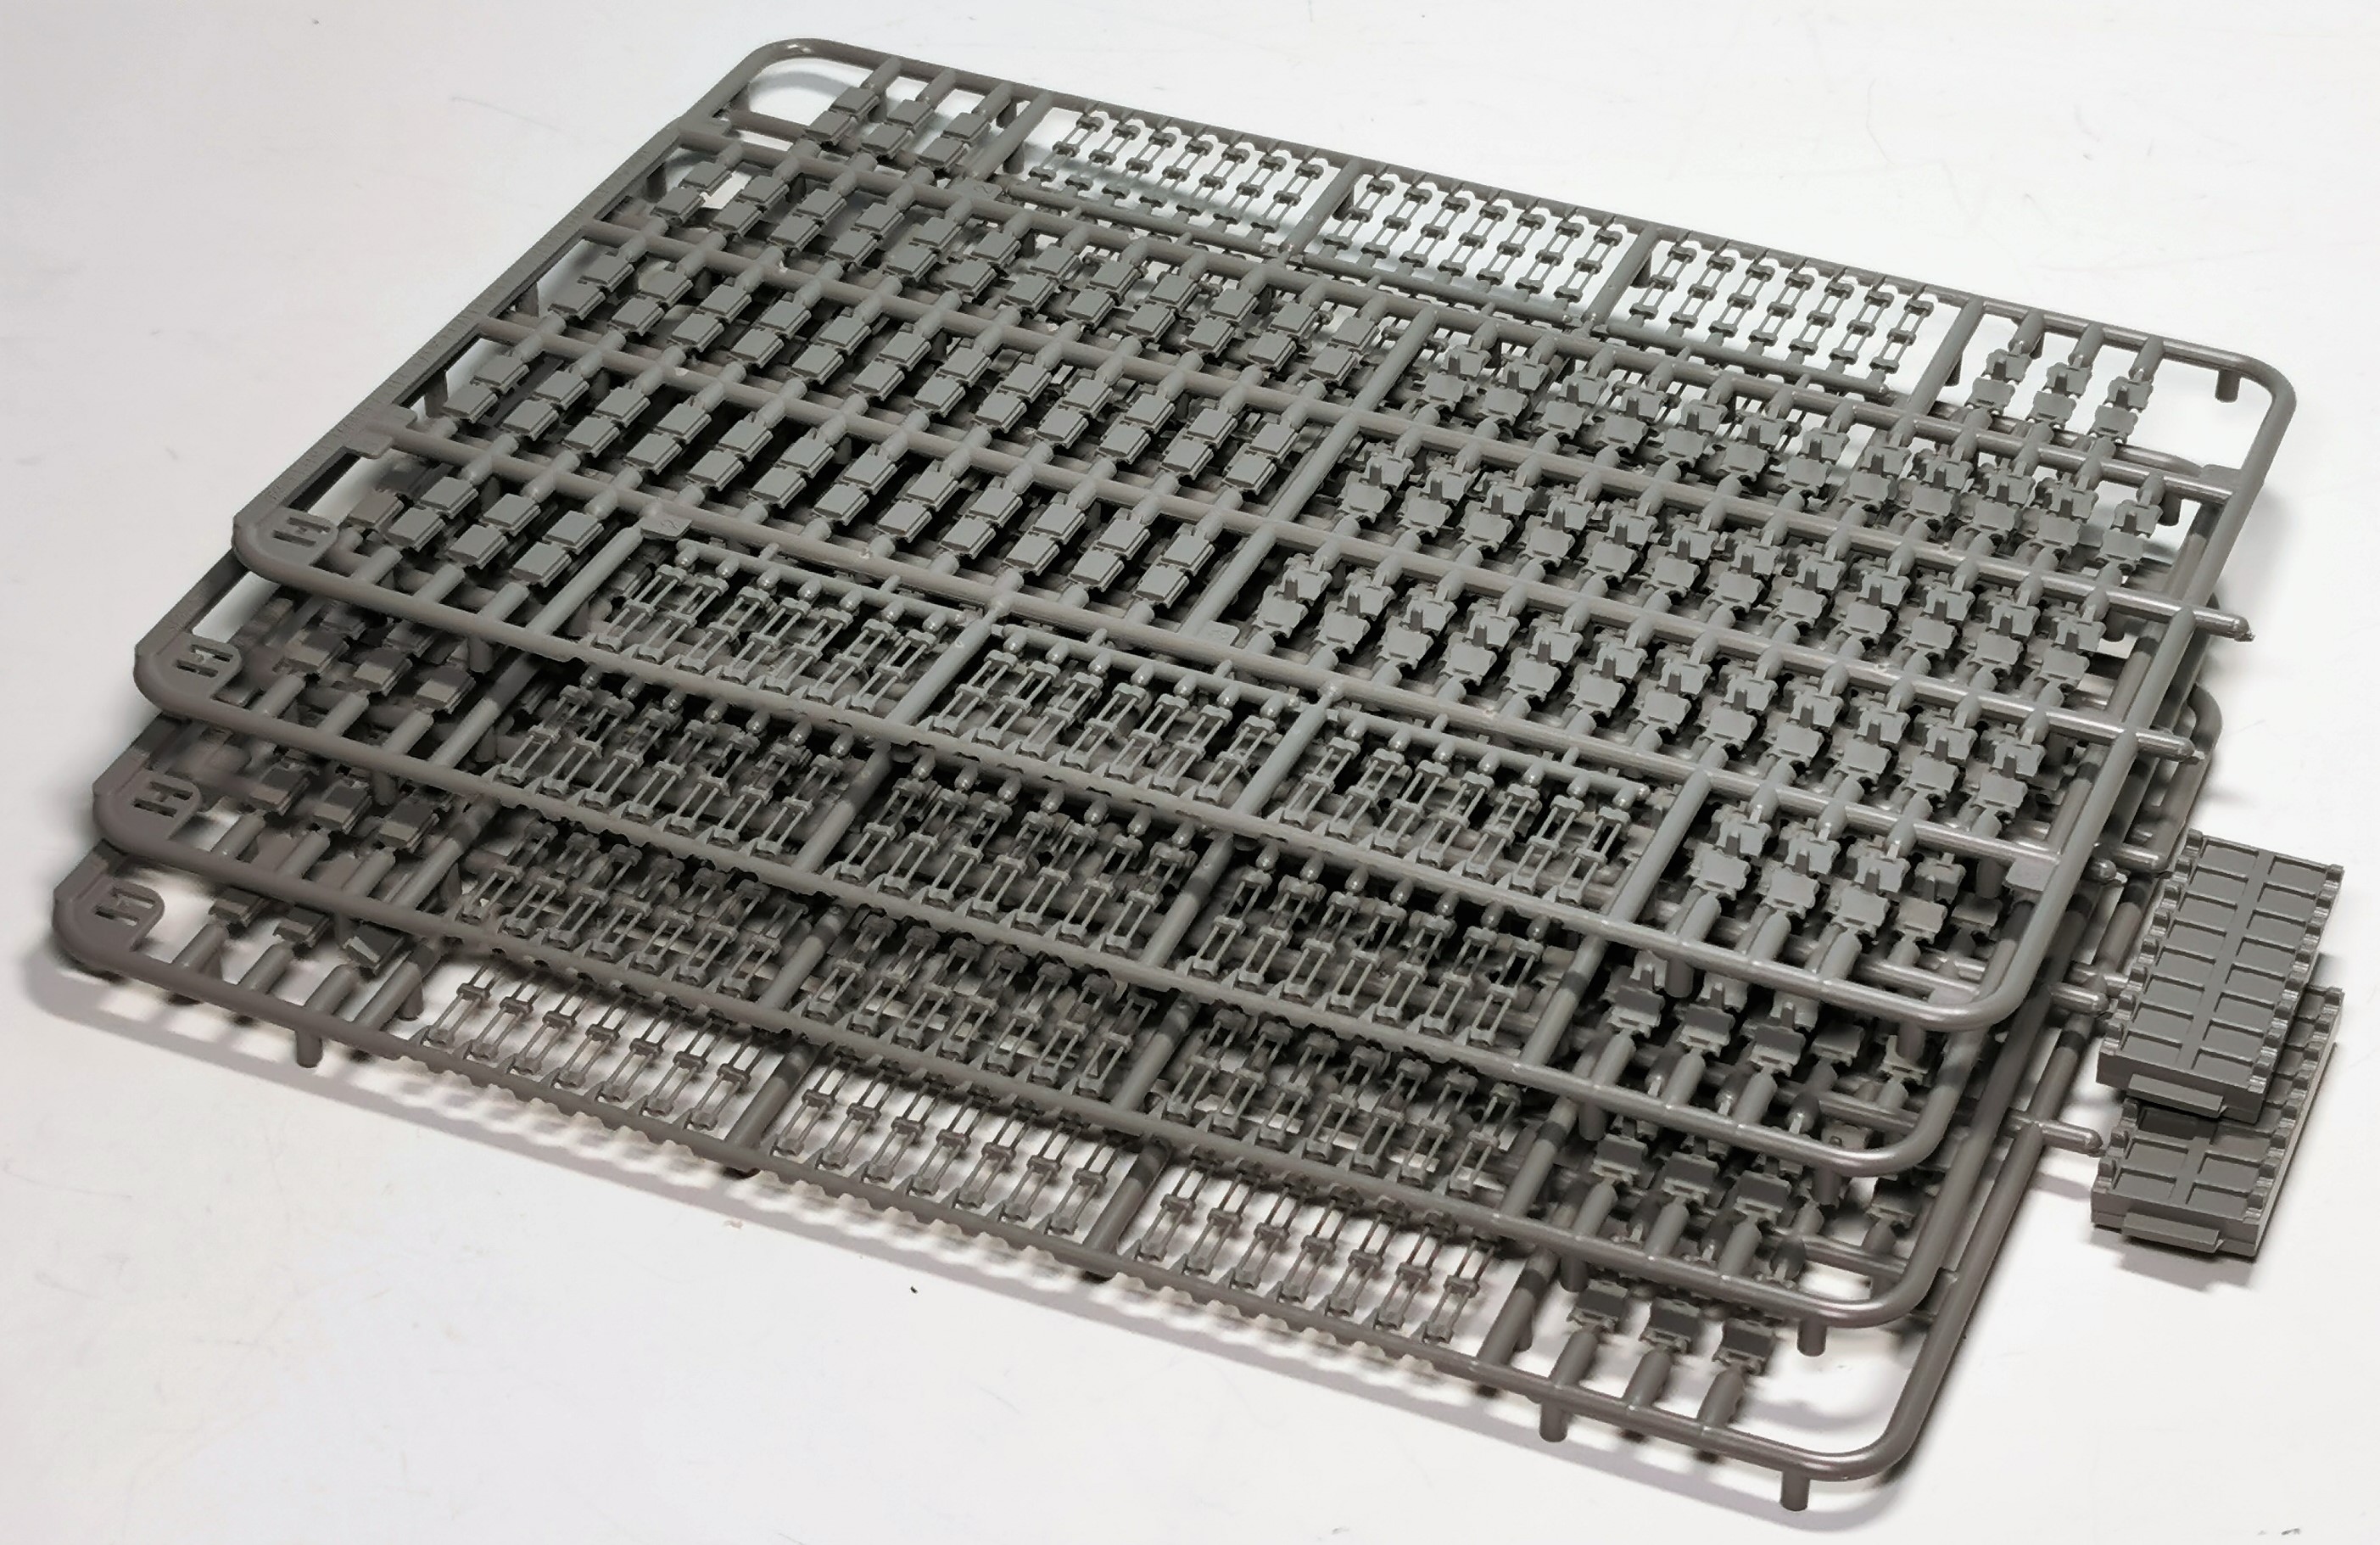
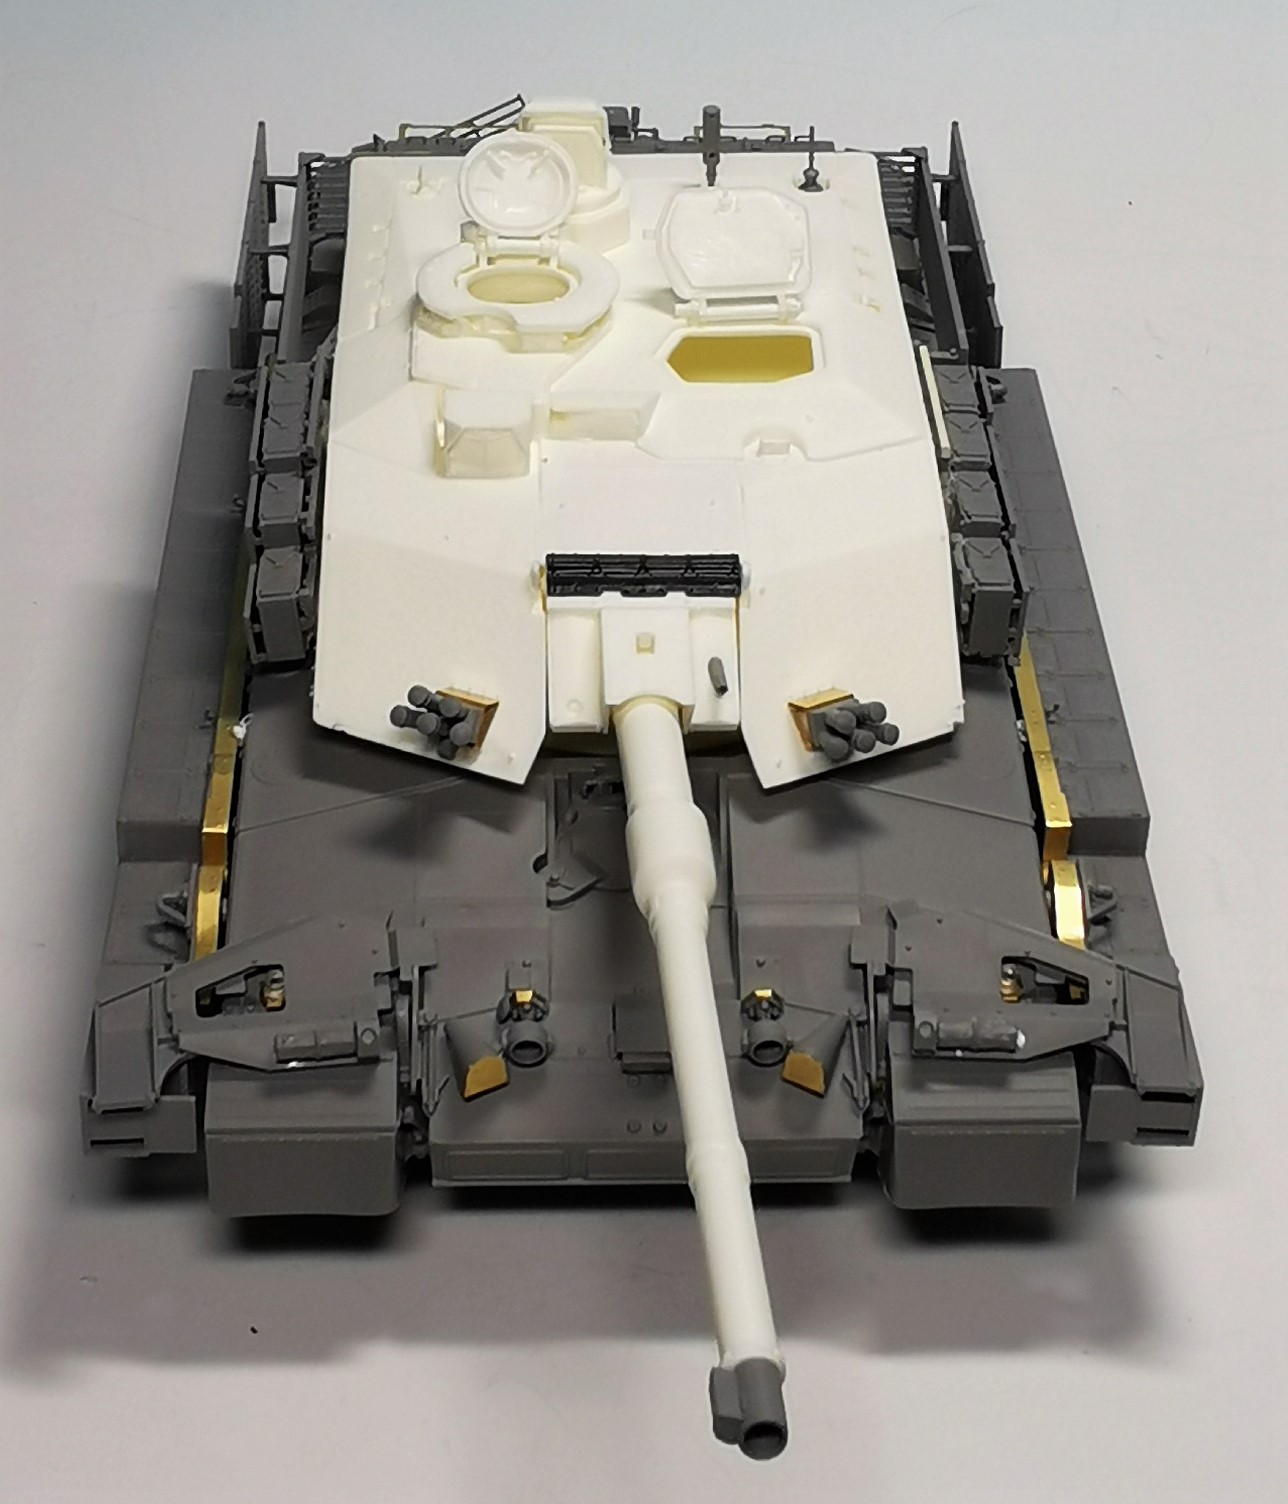
But I still did not made a complete track for each side as you anyway will not see the upper part because of the track guards and the reactive armor blocks. This is how it looks now
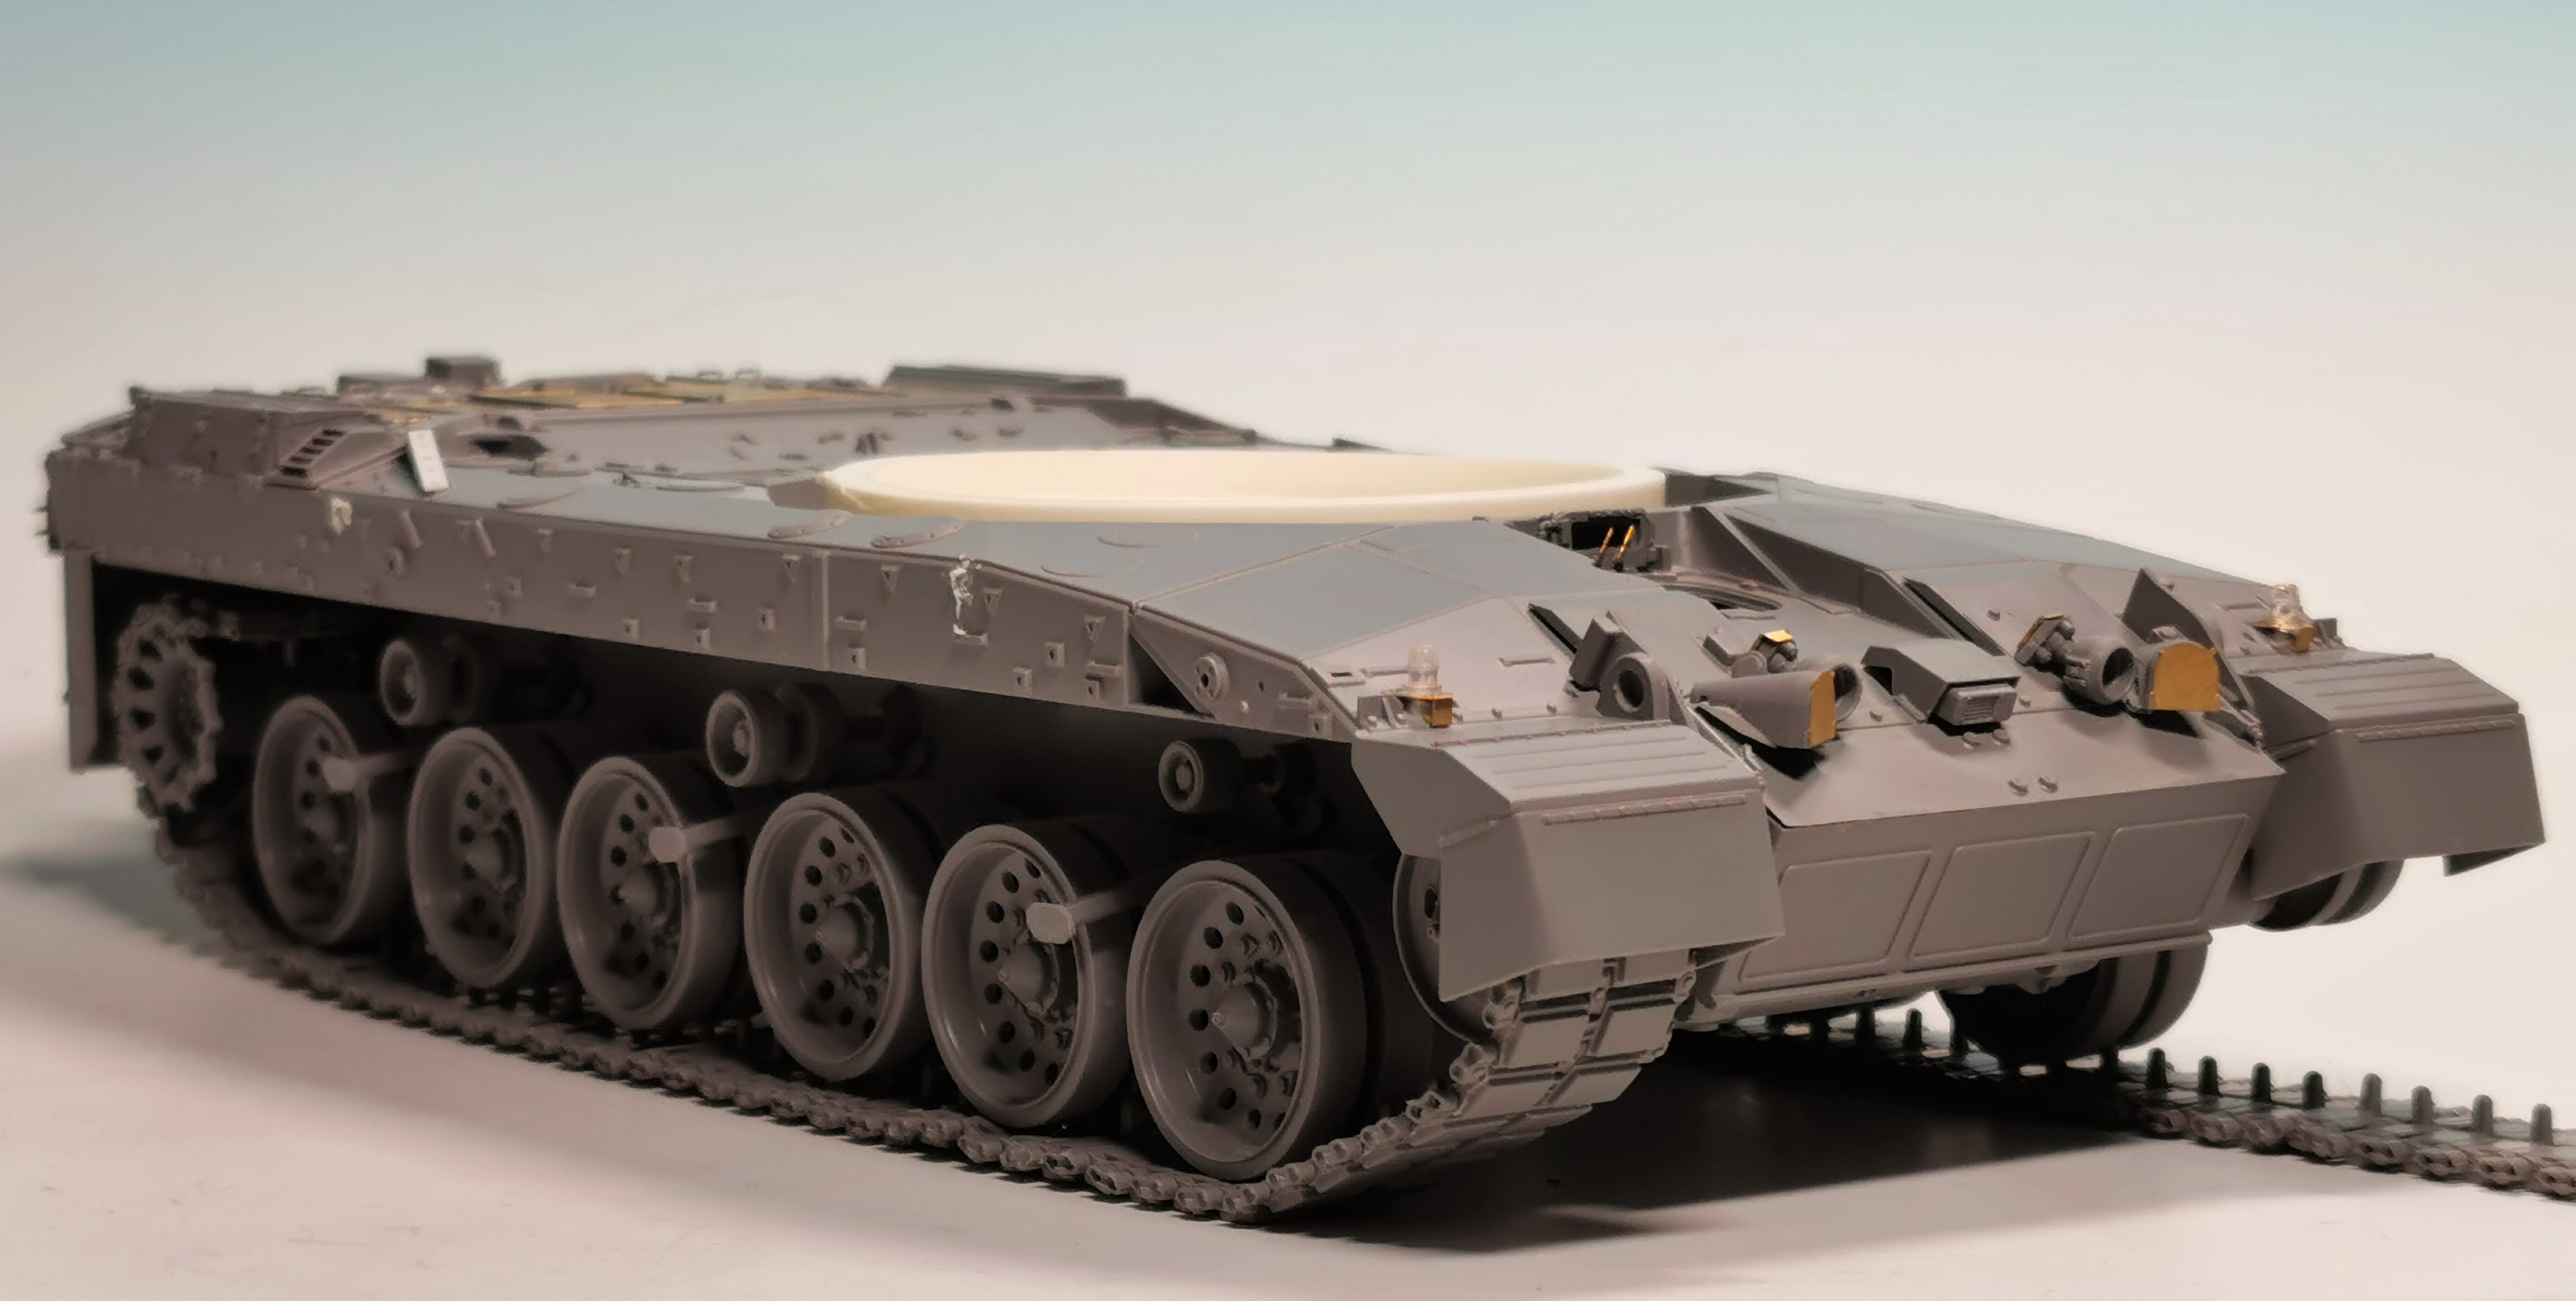
Exept for the towing cables and fixing the gun barrel and the Kollimator I call the construction phase finished. After fixing the small bugs I will start to prime and paint the monster and its crew.
Cheers
7 Likes
Looks great! The TES looks great on the Chally 3 as well as the RWS.
I wasnt a big fan of the Chally 3 at first but I really like how this is shaping up!
That’s a shame about the barrel Thomas. I hope you think of a way to straighten it. I don’t think the Chally 3 has a cover on the MRS, (or its new name) it just appears uncovered… Not sure if it will stay like that on the production versions.
The RWS looks very very good on the turret… Makes it even more menacing.
That’s a good plan with the top run on the tracks… . If they are hidden from view… Why bother
1 Like
Really liking how this is shaping up Thomas- I think you have made the right additions. Looking forward to seeing some paint on it!
Lucky me - I was able to fix the bended barrel with a hair-dryer. Now it looks 99% even
The Kollimator was also changed according to pictures of the real vehicle which have this device installed 
6 Likes
Now as the painting phase will start I have some questions to the educated audience:
-
Would the TES add-on armor be painted in the same olive-black camouflage as the tank itself or would these blocks, its attachment bars and the bar armor be painted in solid plain green?
-
Could you give me some advice at which would be the best color for the olive green? I tried Alclad NATO green and AK NATO green but both seems to be much too dark

Thank you for your input gentlemen
And now a 100%. Really pleased you were able to sort the barrel out Thomas and the MRS mirror assembly looks as per the pics now. Very good job ![]()
![]()
TES armour would be tricky as it will also depend on the theatre the wagon is going into.
I imagine for the publicity pictures and demo wagons they will either have a few available and perhaps one in NATO green only and perhaps a NATO cam version and they will match the paint to that particular wagon so its all green and black. Not sure if that will work in reality as the cam painting isnt always uniform for each vehicle so the blocks may just end up green ?. If its a desert scheme they will probably be over sprayed before deployment to match up. I think on this one, you have a bit of artistic licence to do any of the 3 possibilities and no one can say you are wrong.
I am sure you can get away with nato green as you have done a vehicle that doesn’t exist yet 
Your choice😉
1 Like
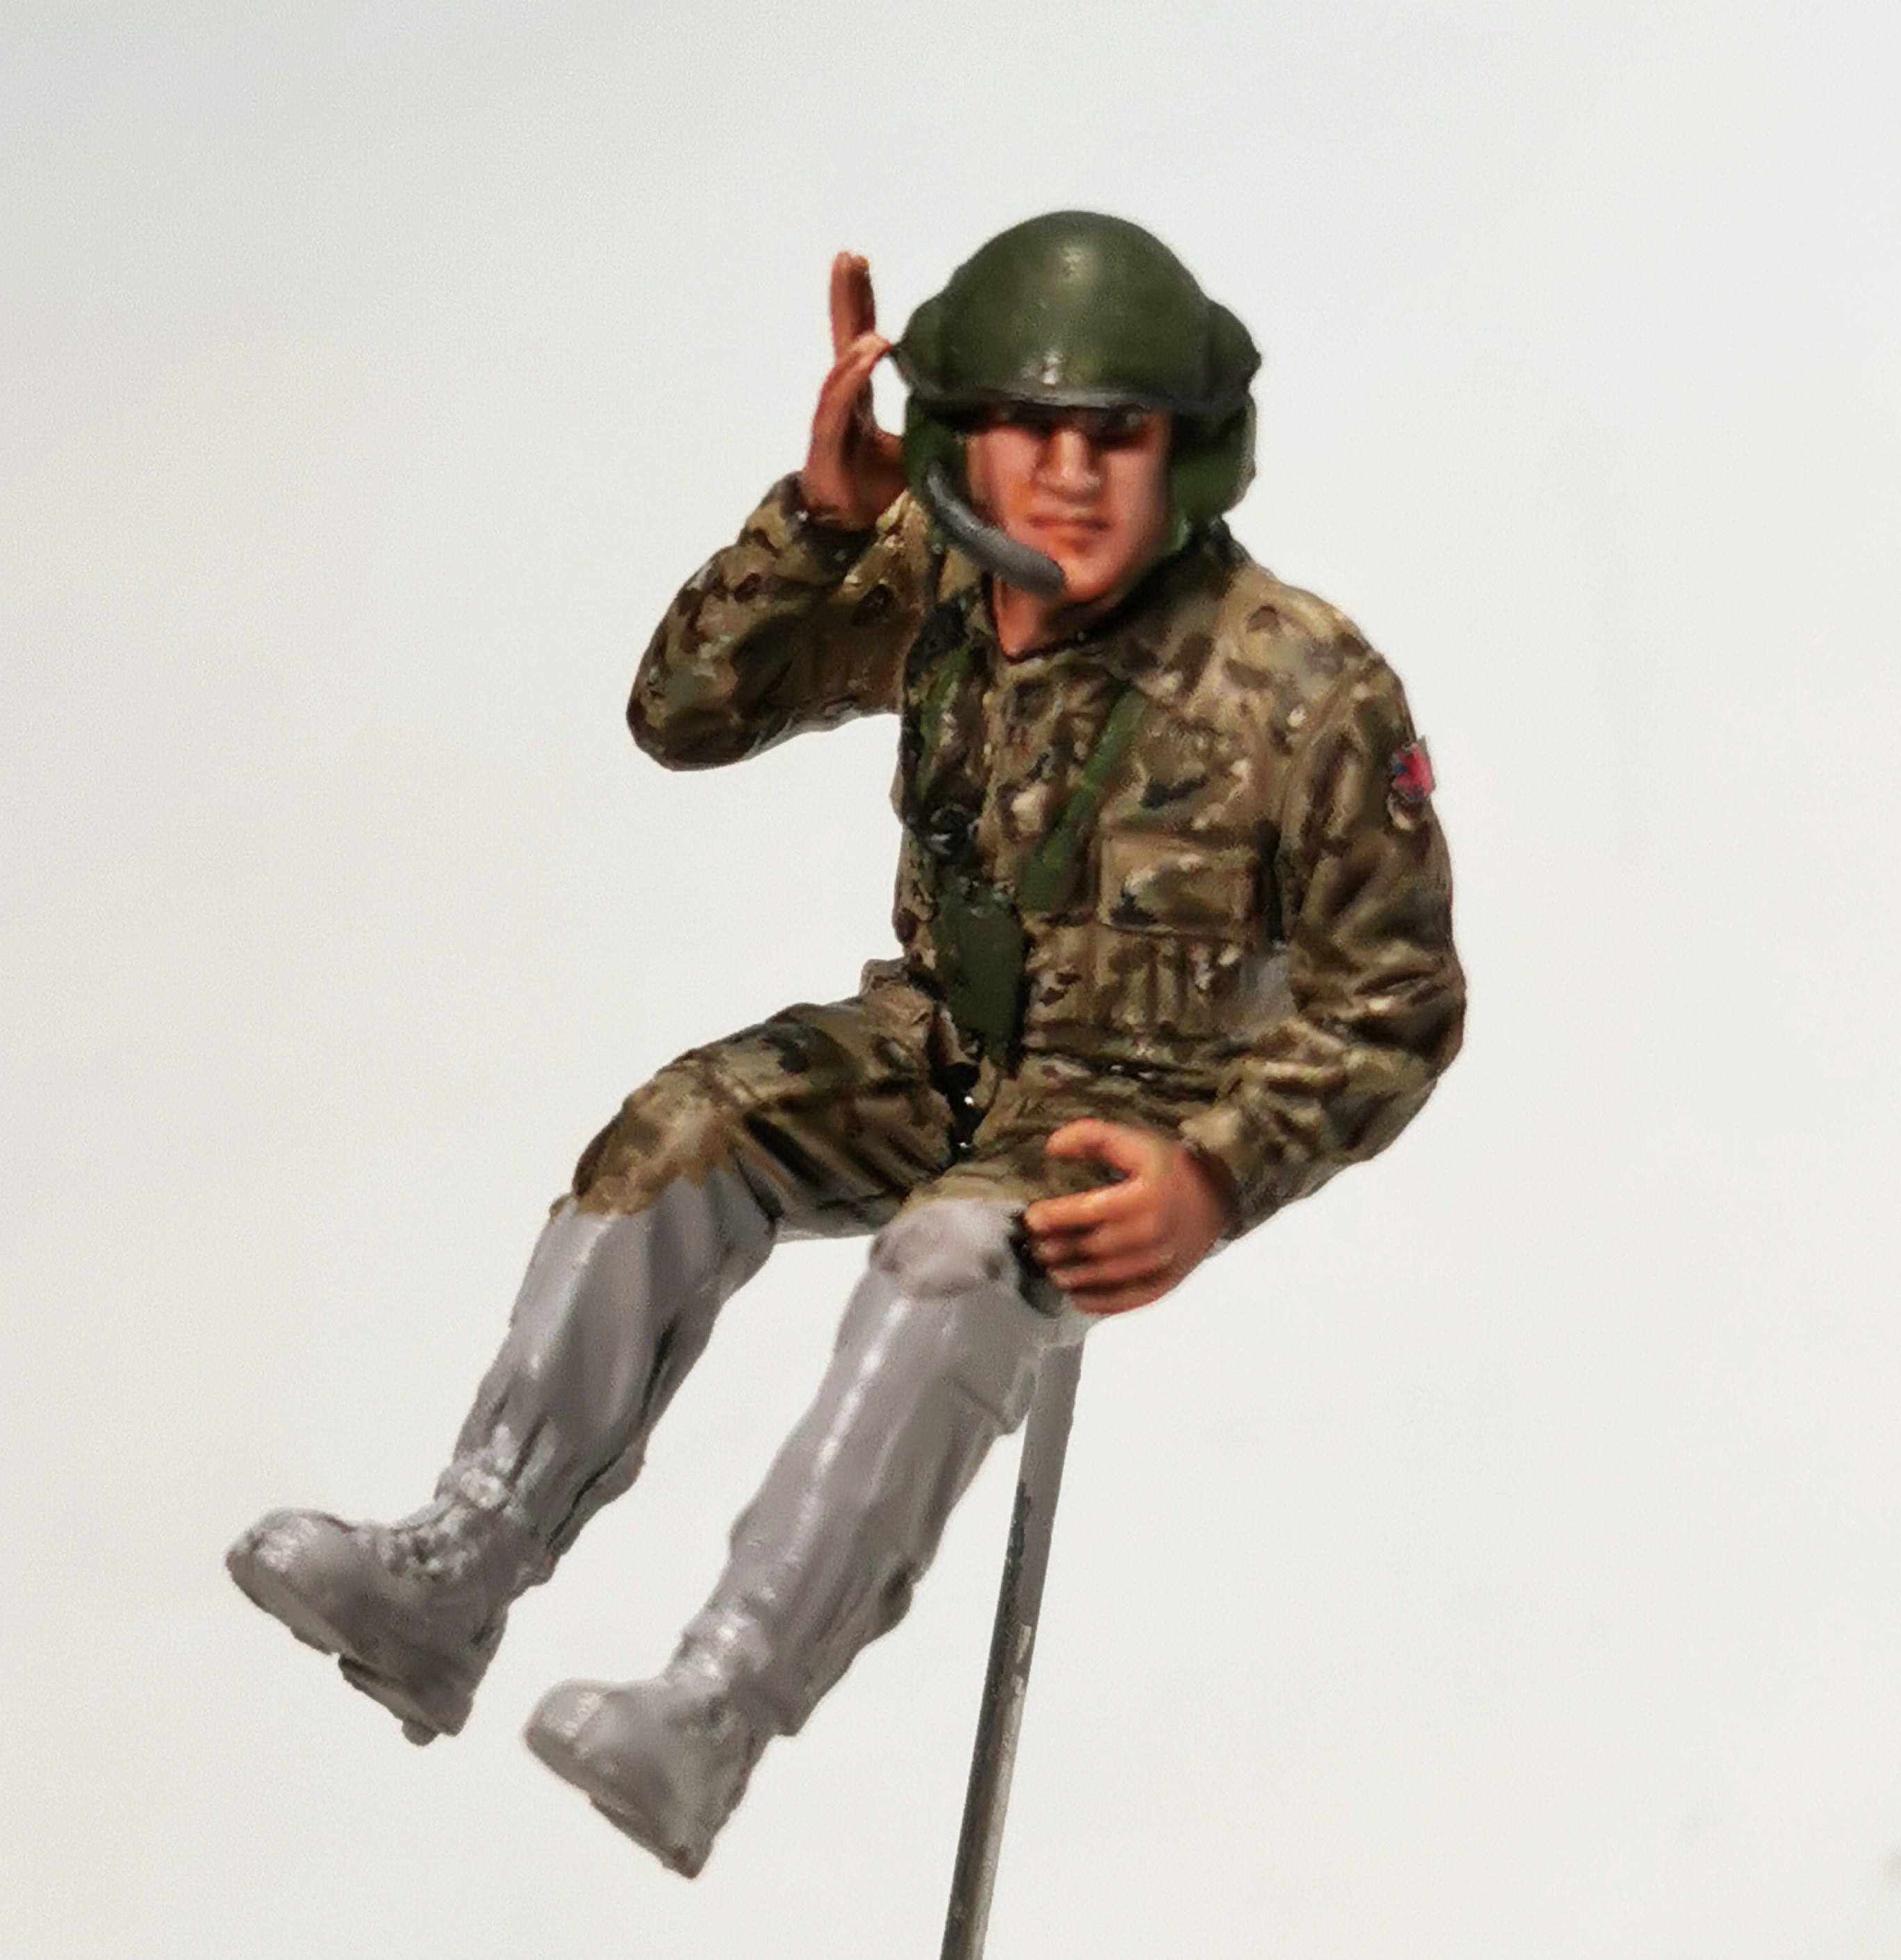
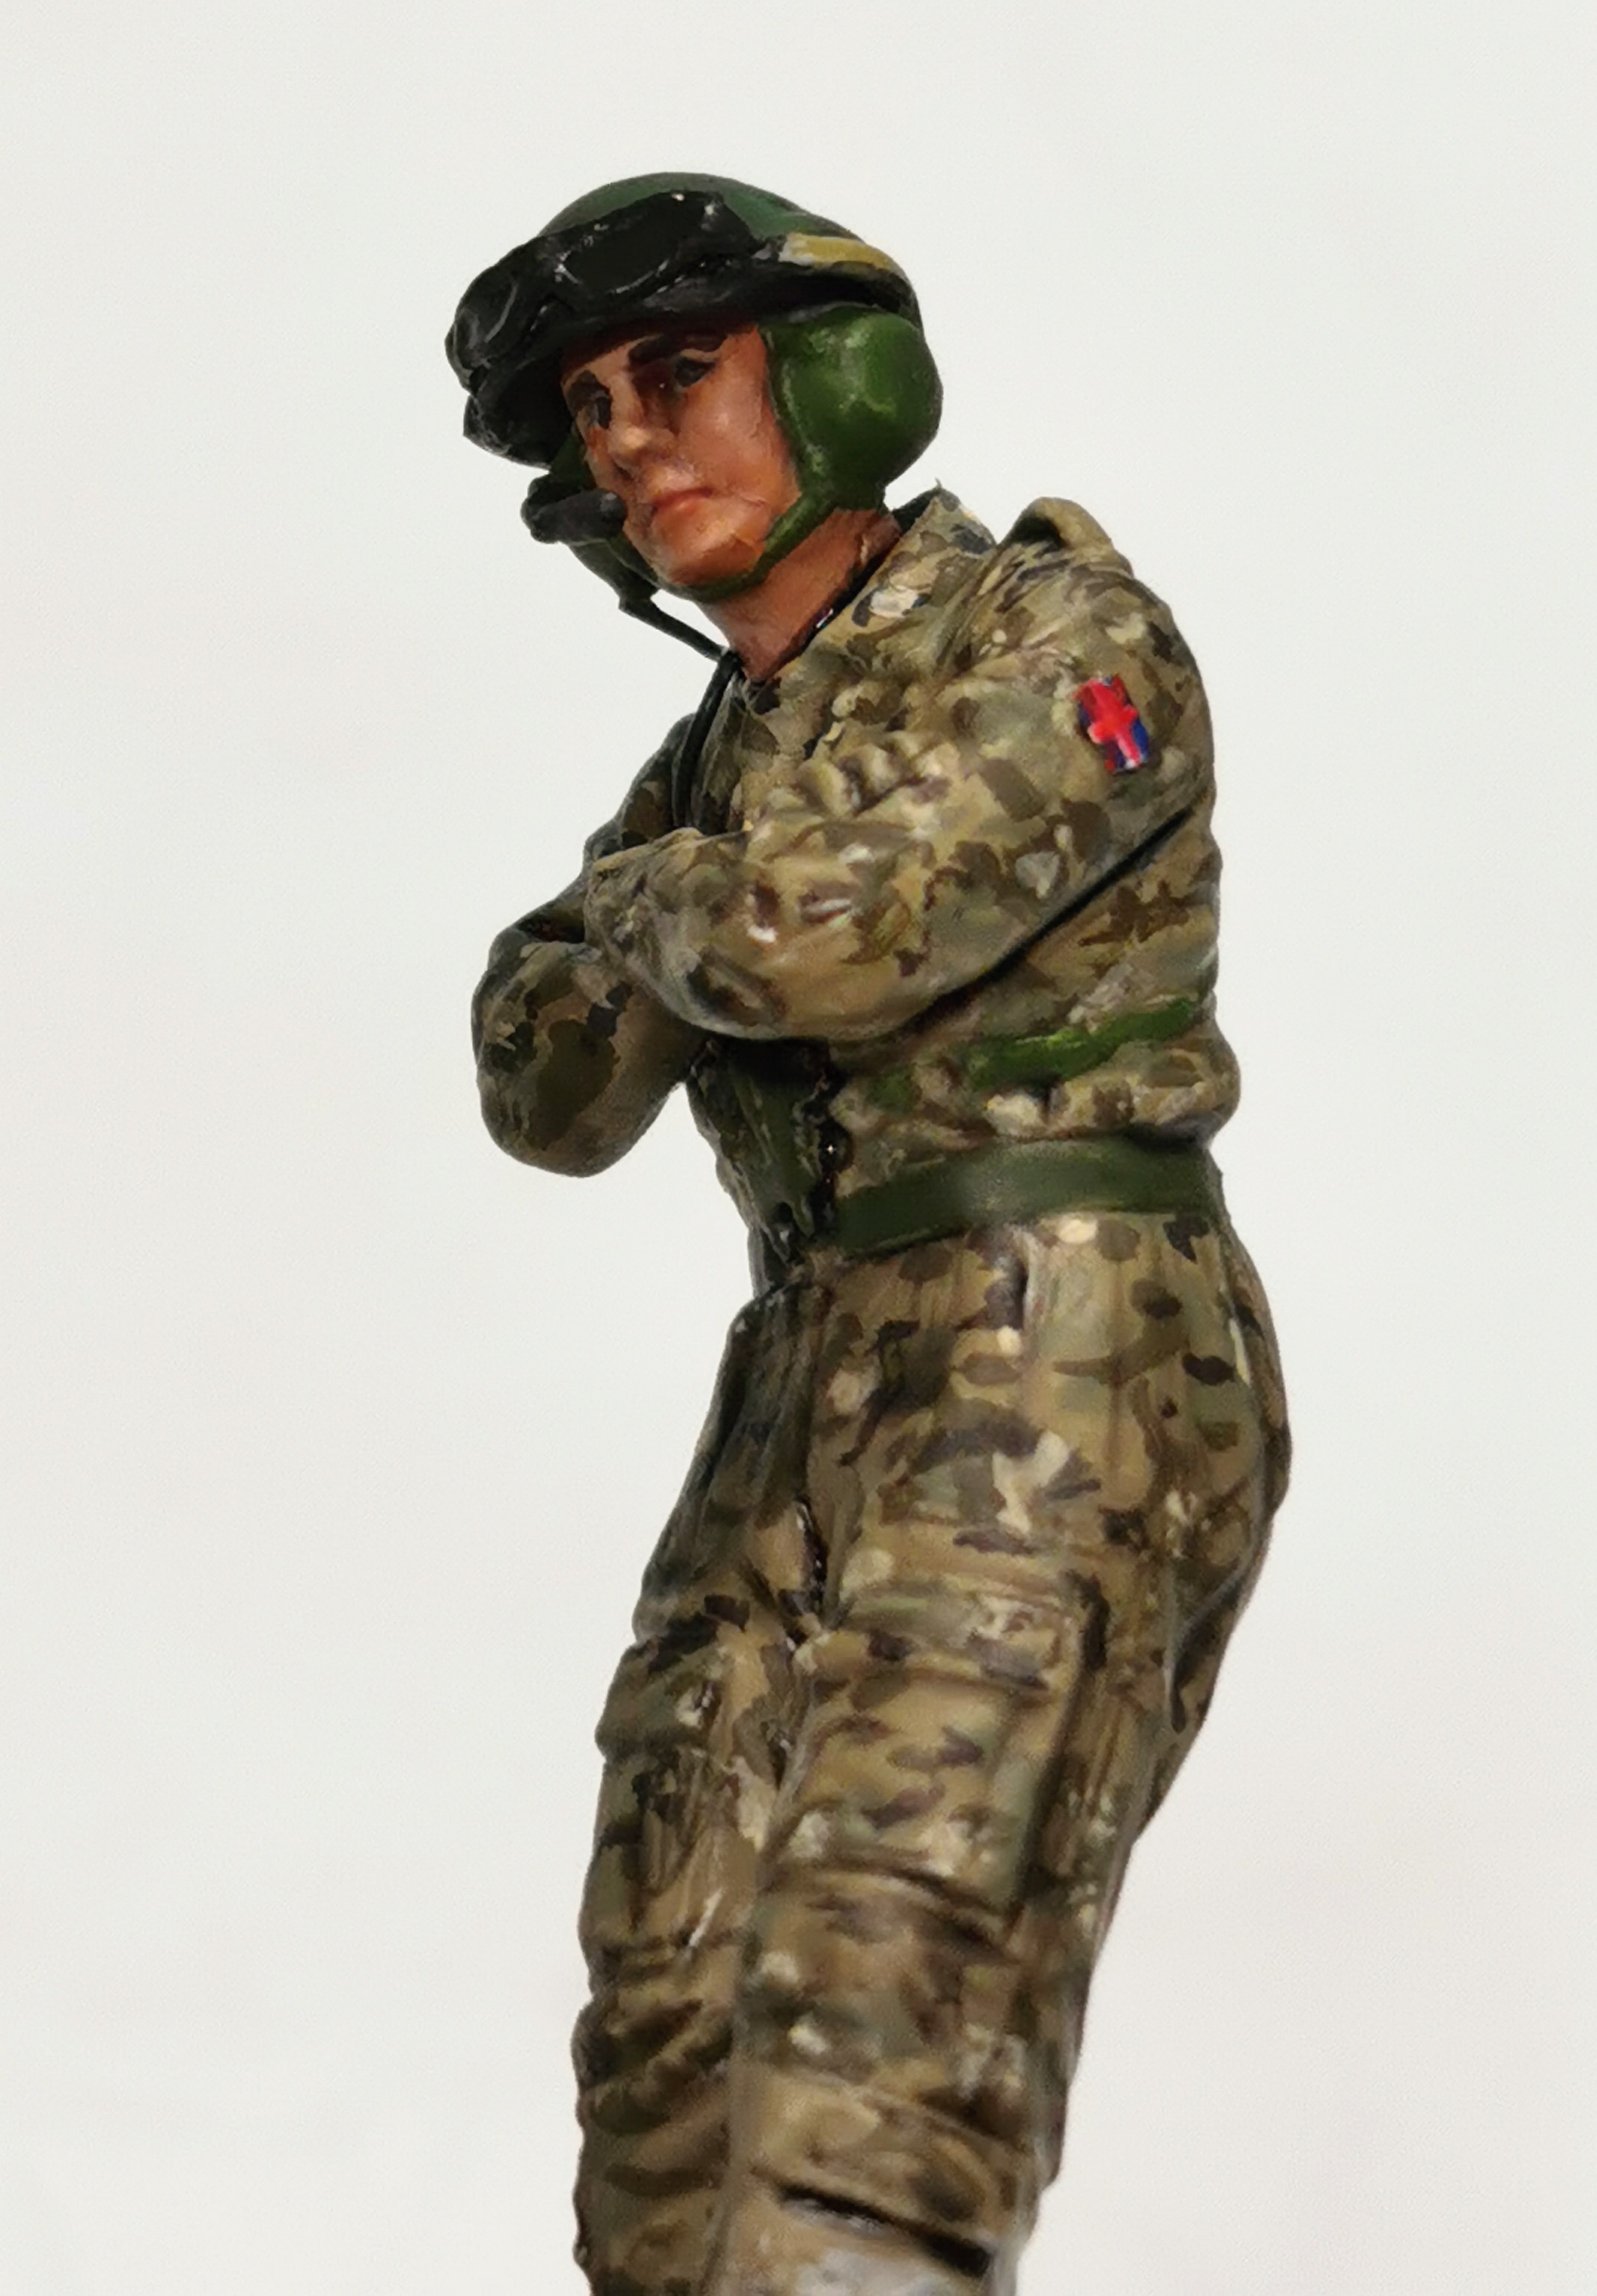
Gentlemen I did finished the crew. Here I would like to say thank you to Johnnych01 for its help with all the pictures of his MTP uniform - thank you John and enjoy a virtual beer from me
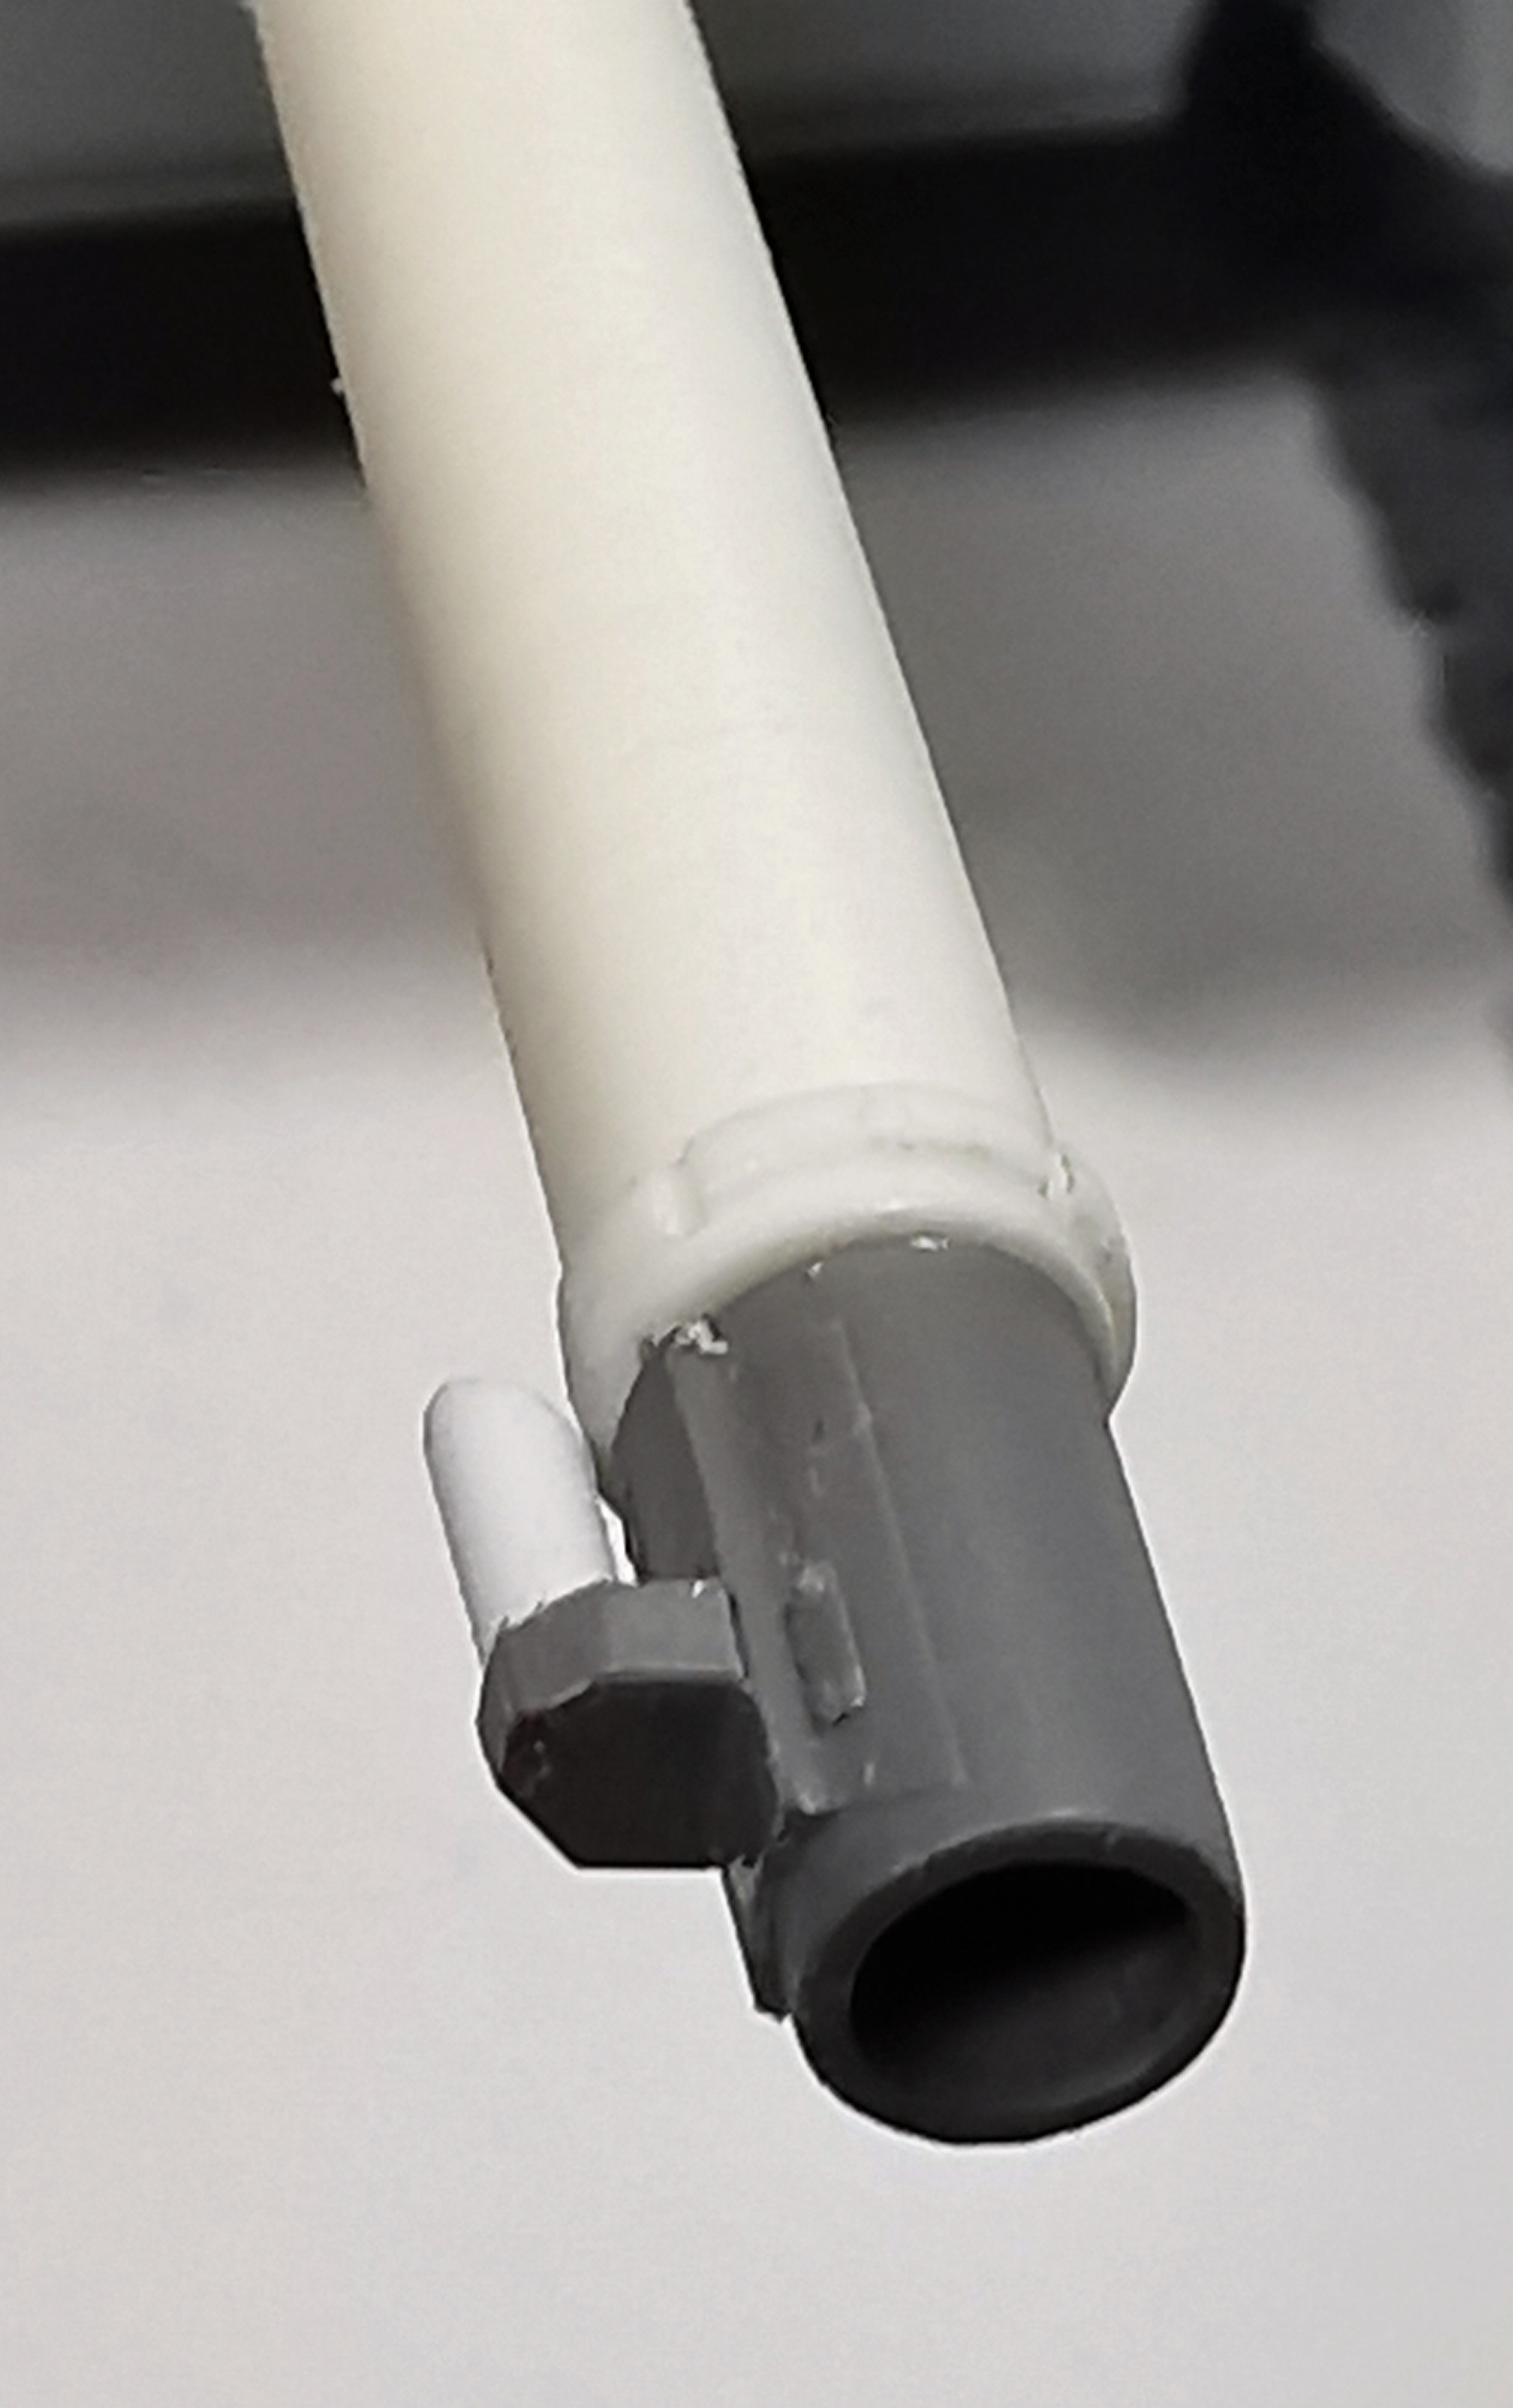
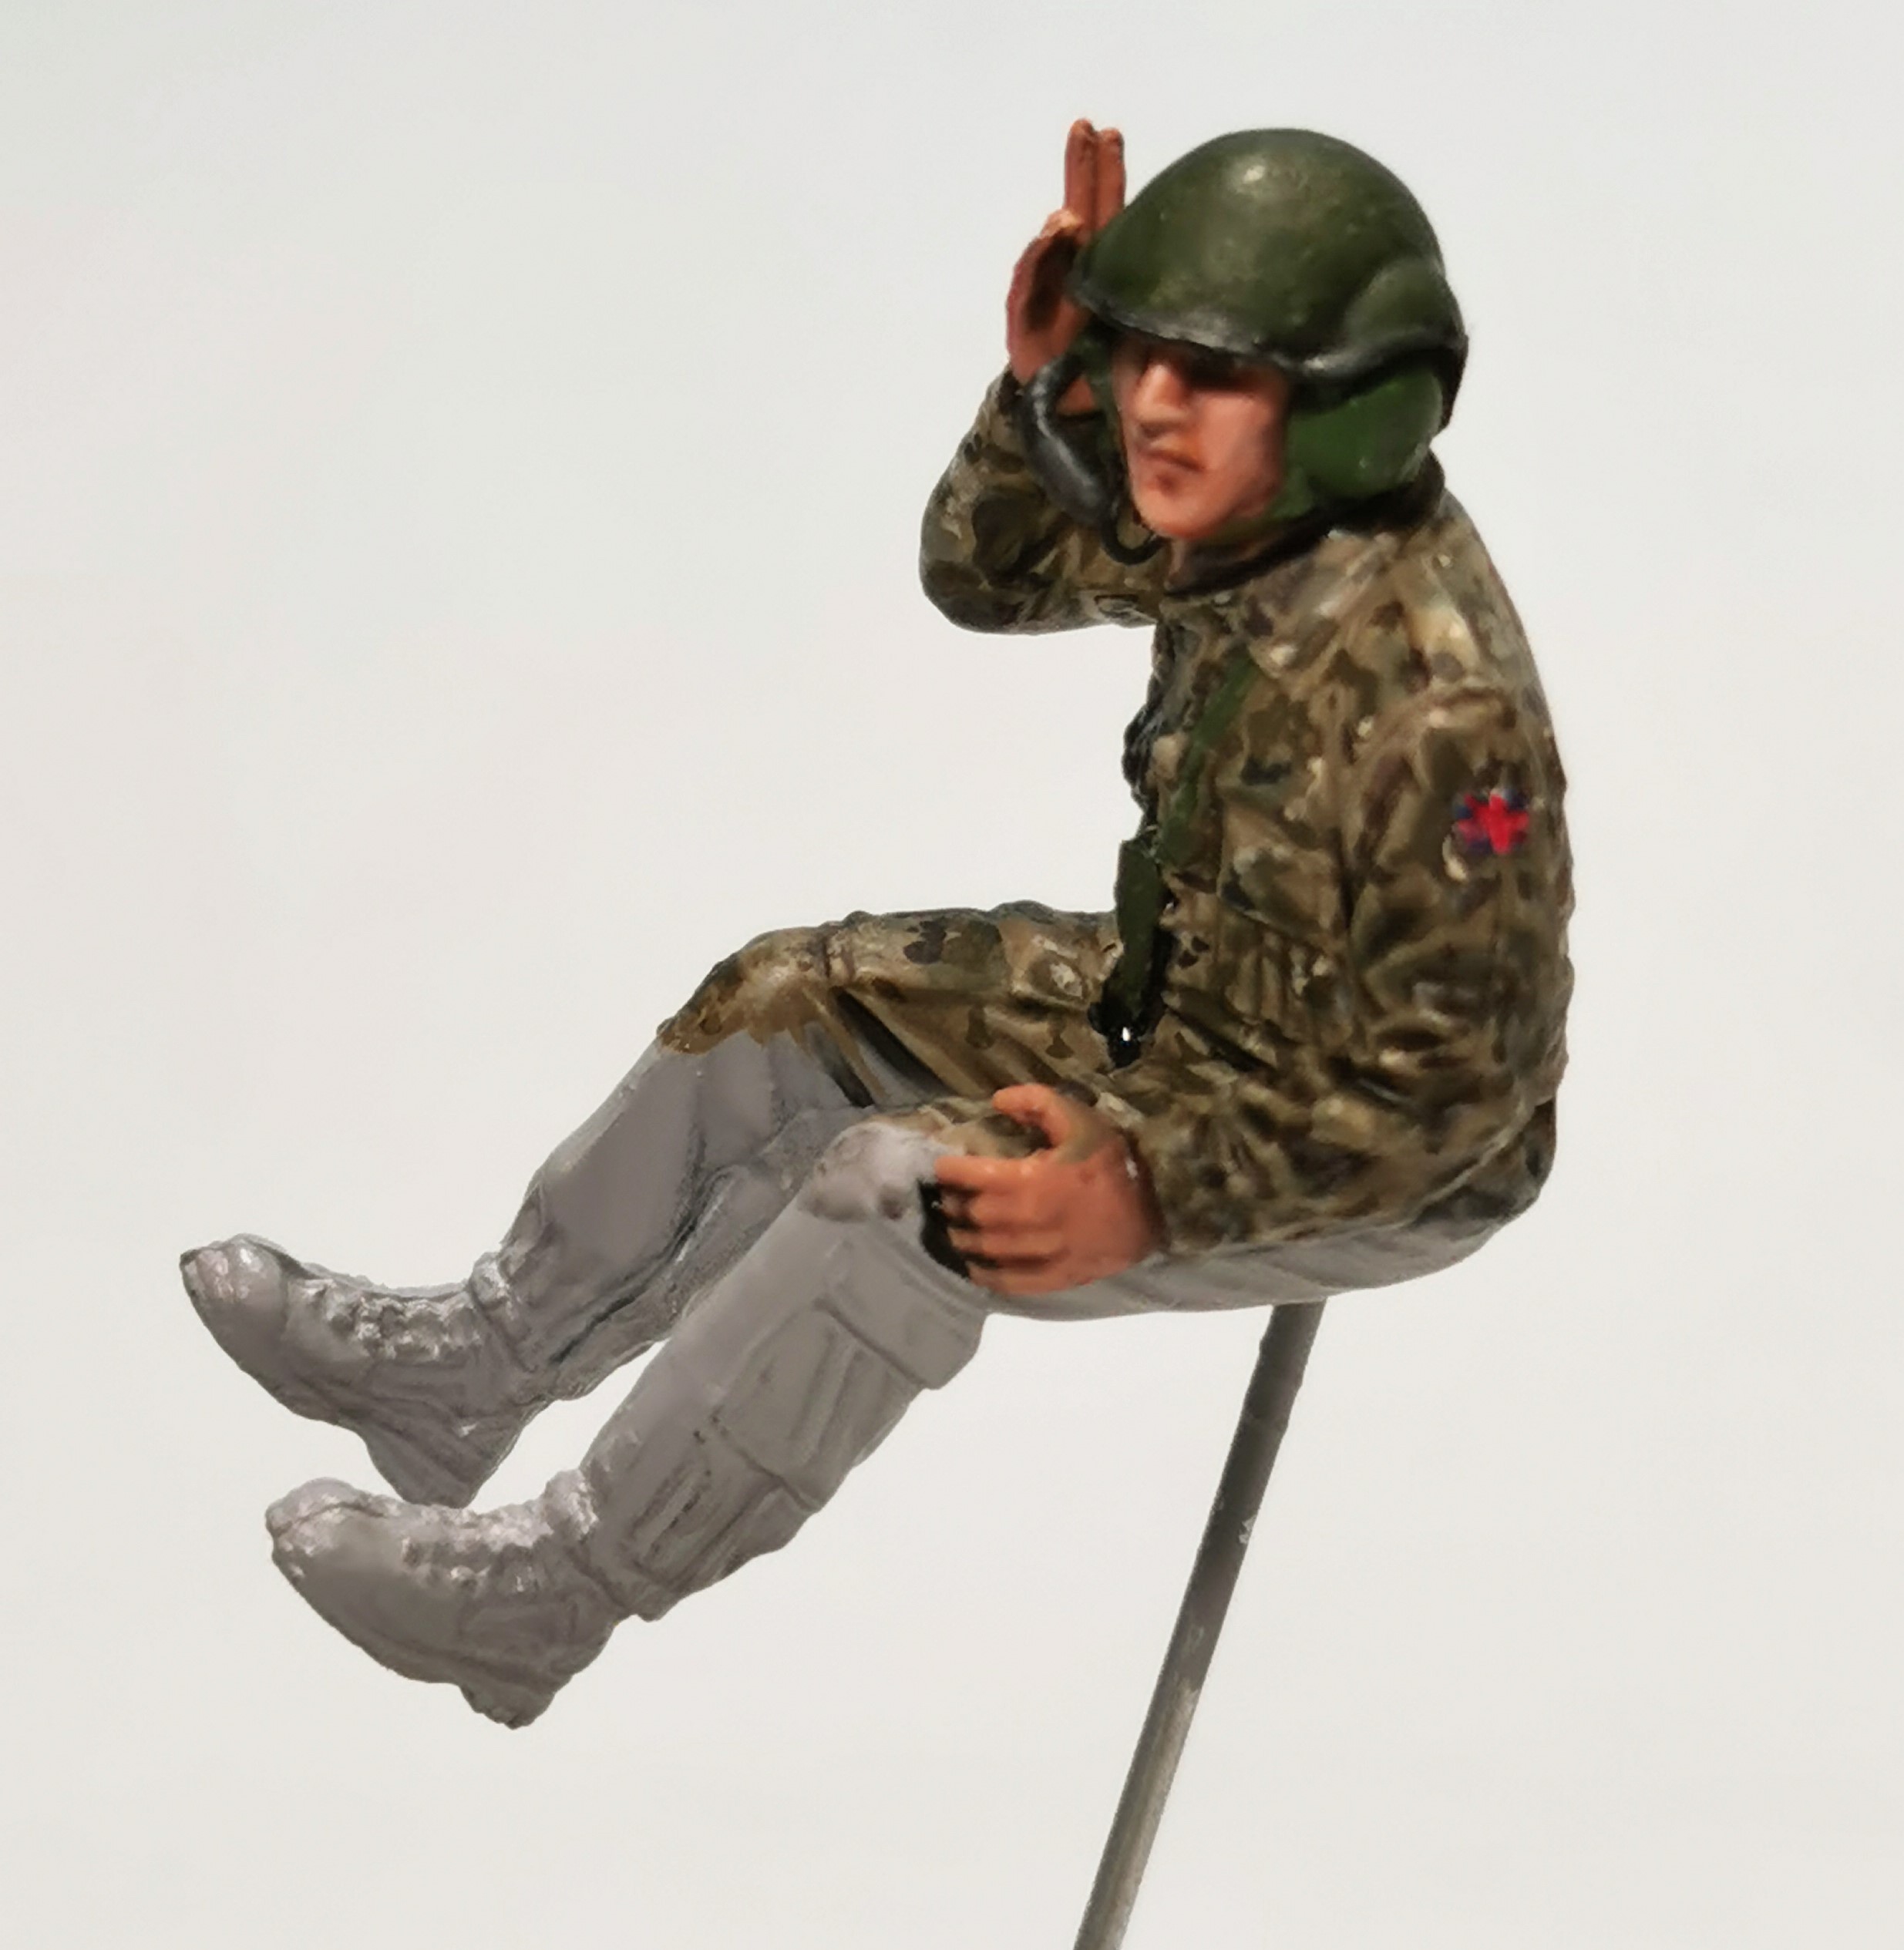
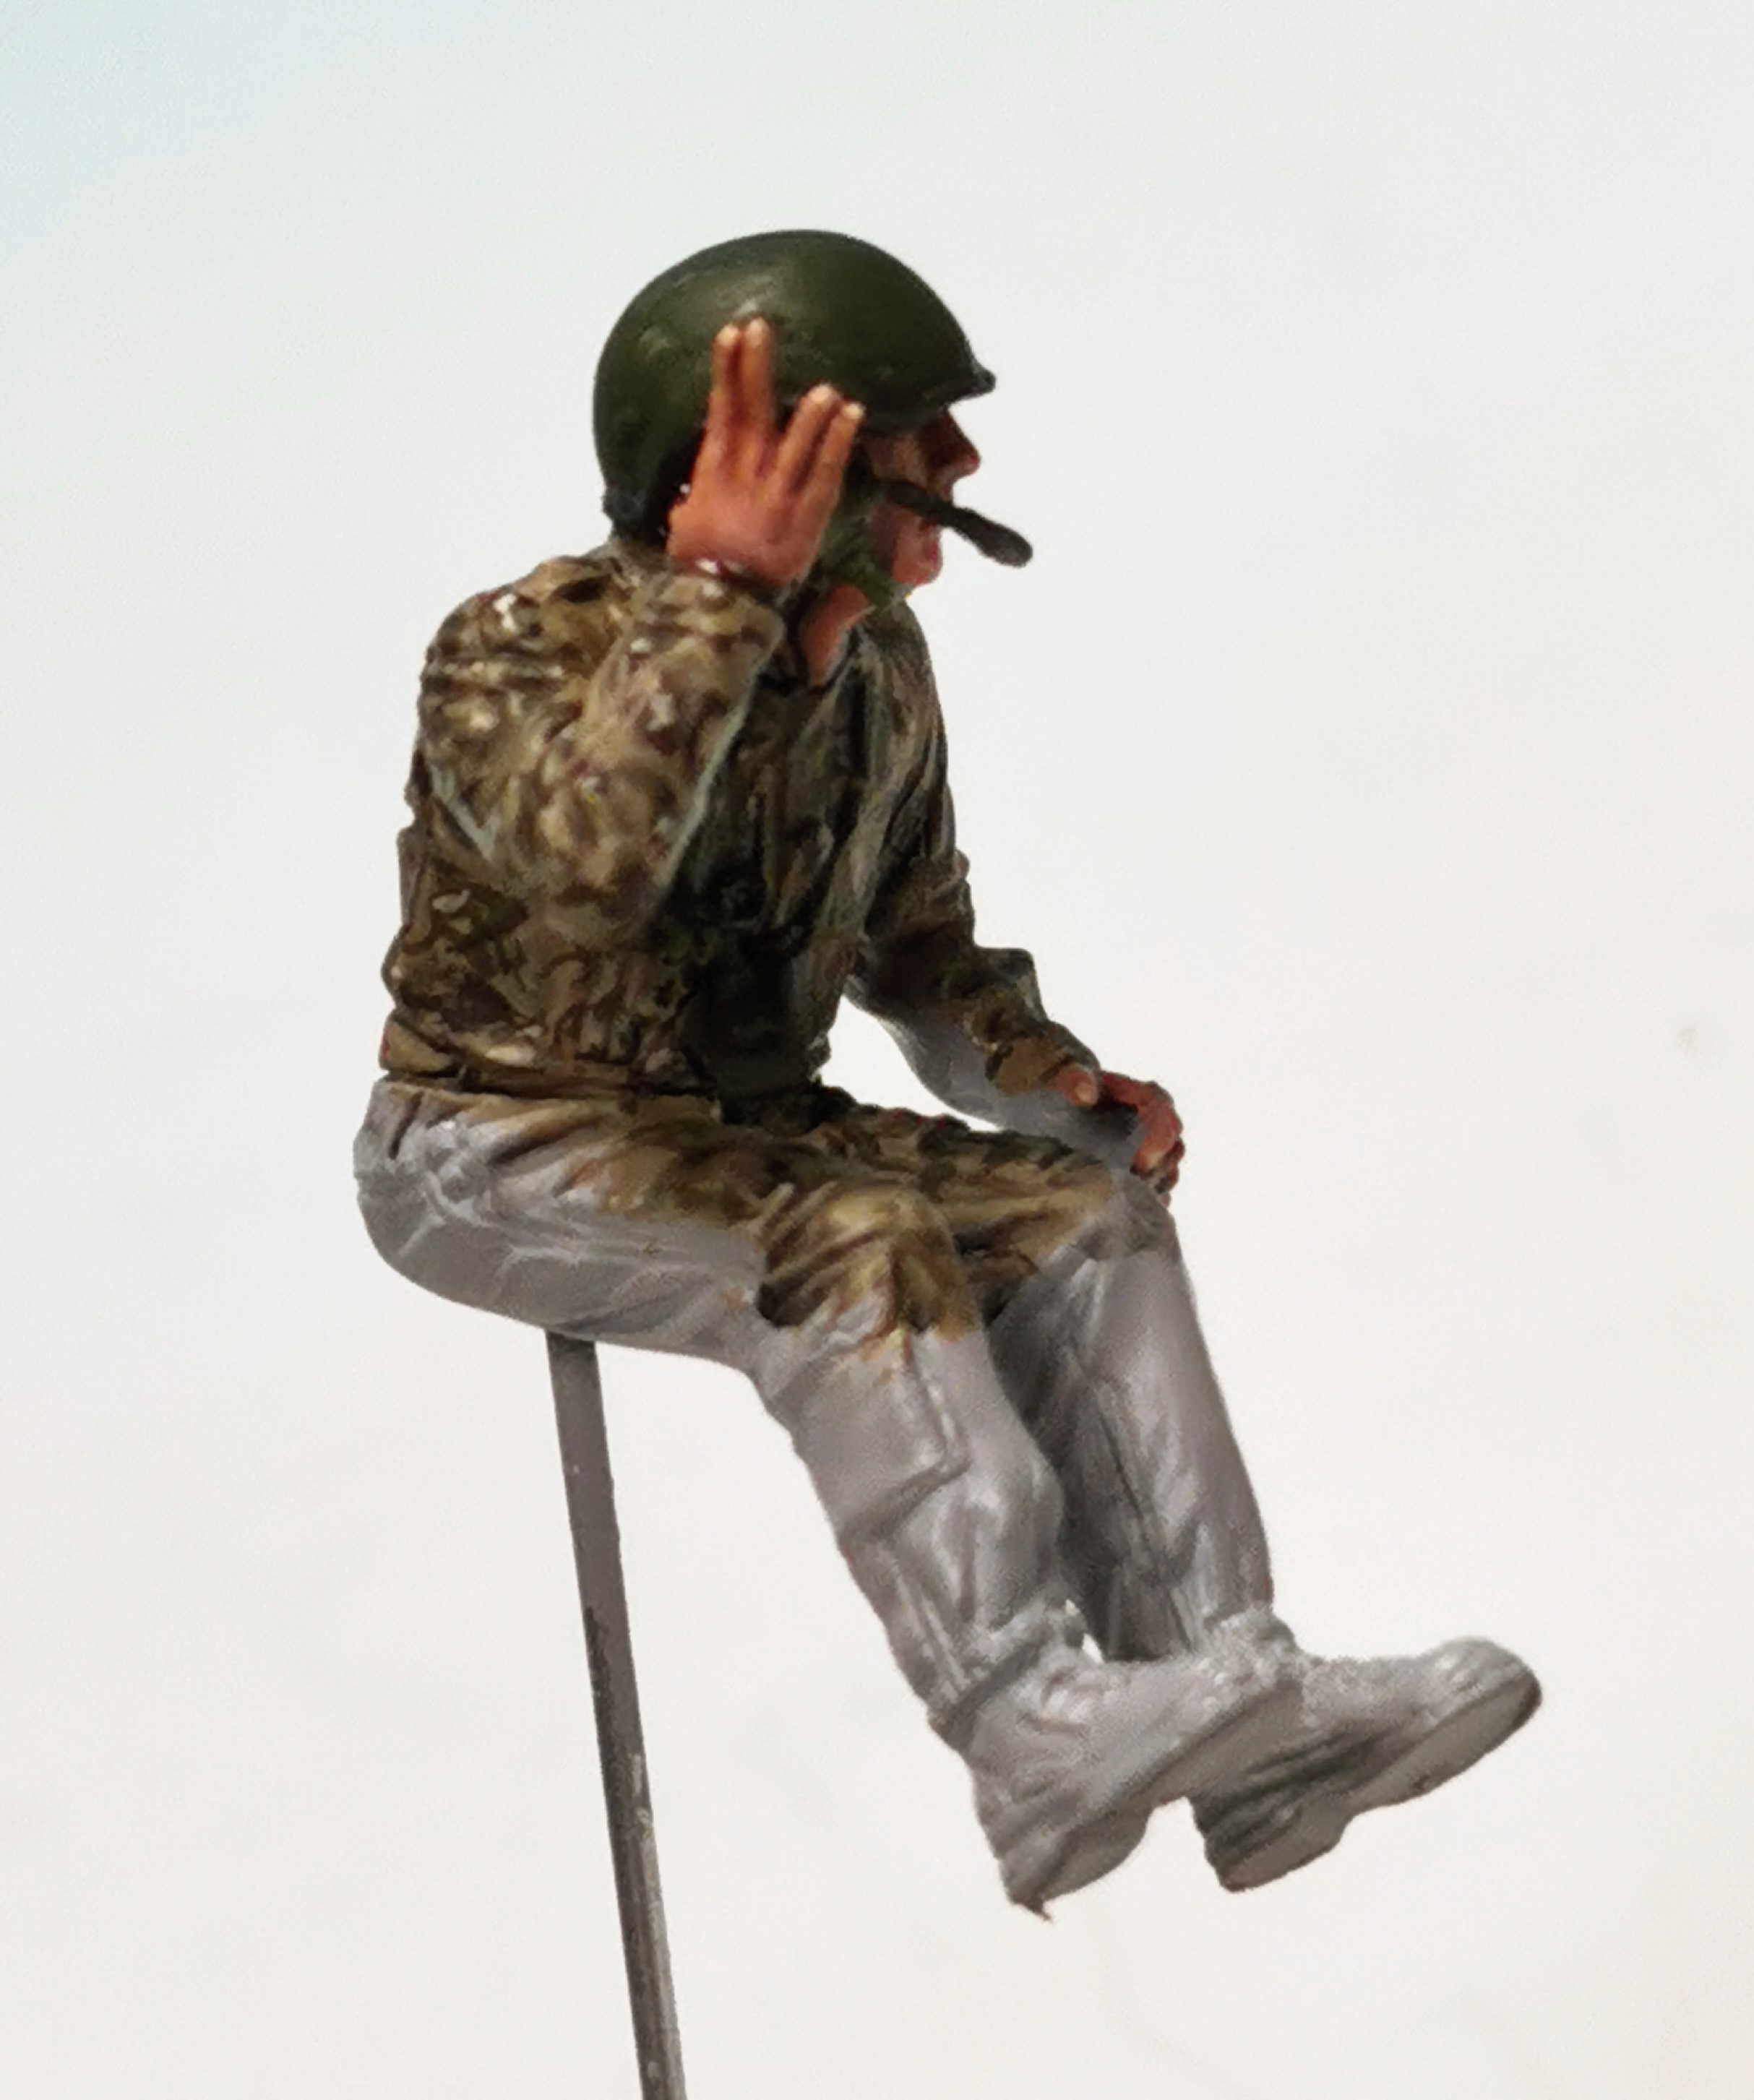
The uniforms were painted all with vallejo colors. After priming with Mr. Primer I painted the base color with 70821 German camouflage beige, then areas about 25% with 318 Panzer Aces US Army Tank crew, After this some smaller blotches with 70887 brown violet. Then smaller dots and stripes with 70822 German black brown. Finally even smaller dots and stripes with 72034 bonewhite. Quite some work but I think the results really paid off. The small national shoulder badges were made with thin masking paper, painted with blue, white and red oil colors, sealed with matt laquer and glued on with superglue. The wiring of the communication system were made out of PLUSMODEL 0,3 mm lead wire.
Notice that the final black glaze is still wet on some areas, thats why there are some glossy spots. These will be fully matte when the glaze color is fully dried.
This is the driver, private Harris. Only its head and maybe some part of its upper torso will be visible, thats why I just painted the upper part.
The loader, corporal collins. Also here will be just the upper part visible as he is leaning inside the loaders hatch.

And finally the commander, Lieutenant Stewart.
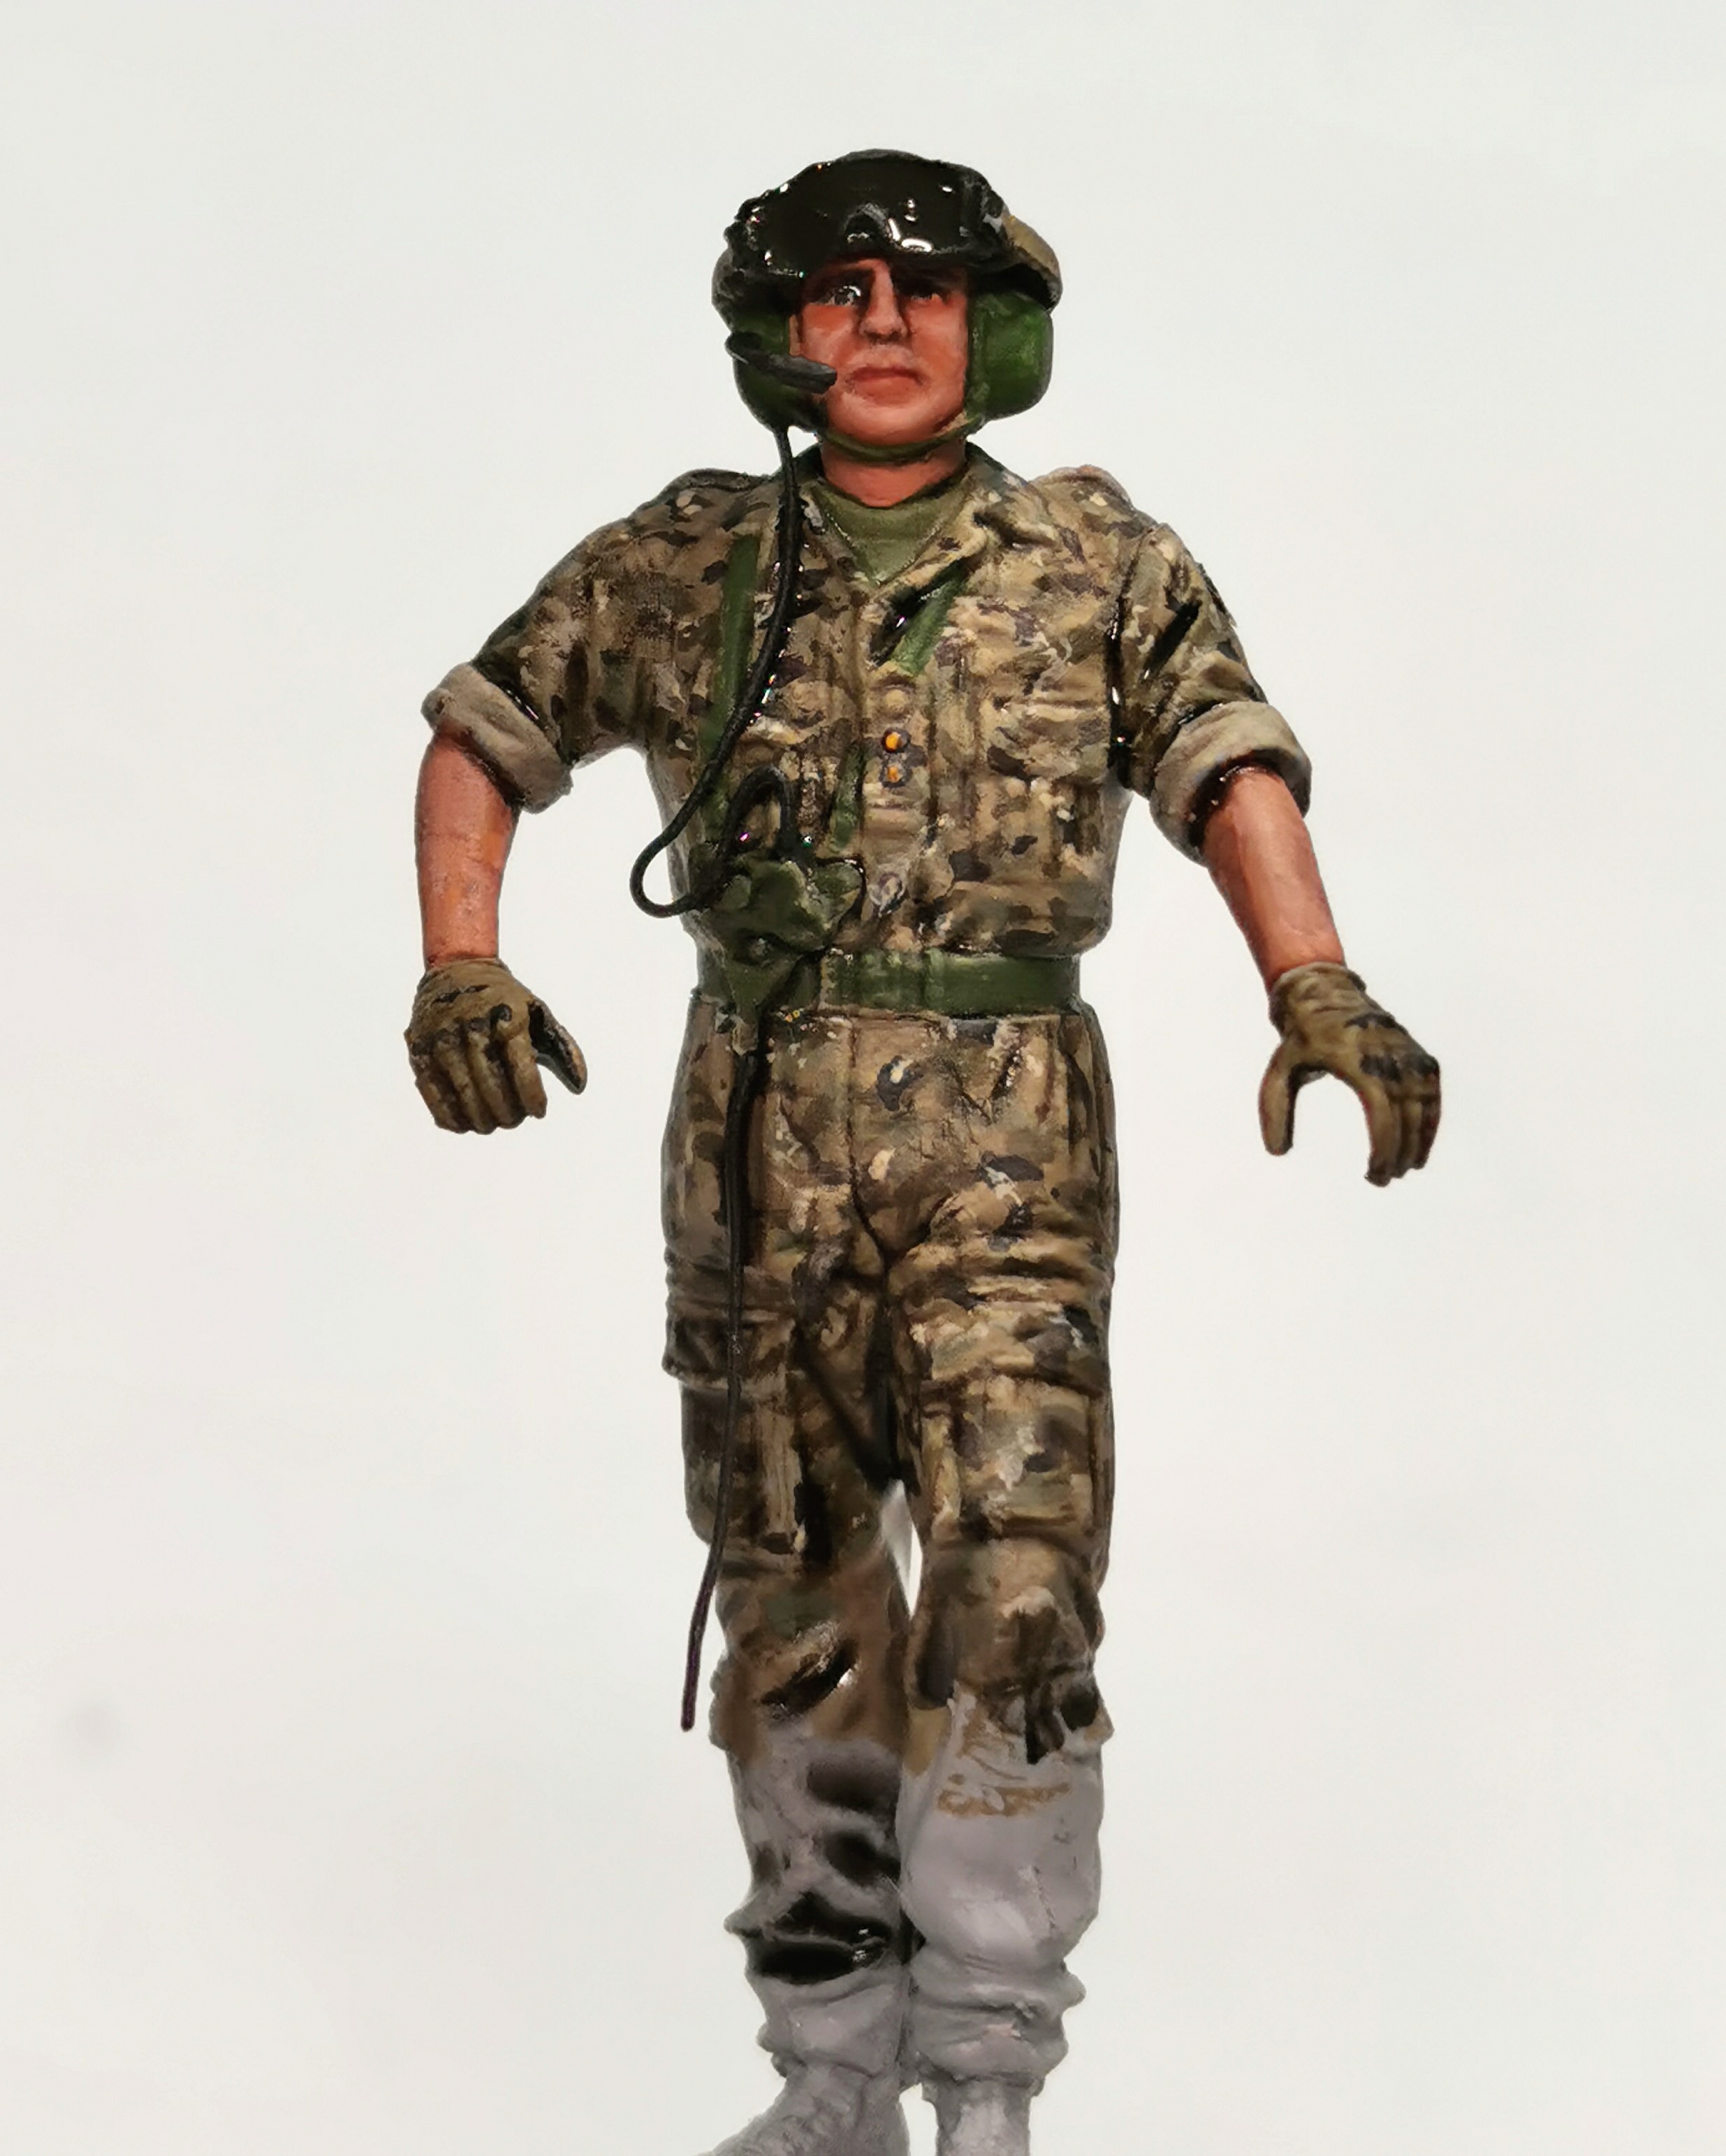

This was my first effort to represent modern british MTP camouflage but I am quite satisfied so far; for me they are good enough. I am no figure painter so be gentle with my limited skills here 
Now its time to paint the beast
Cheers
Thomas
6 Likes
Outstanding paint job👌
Thomas, from one non figure painter to another. You have done a really great job with those crewmen. It looks very good and gives a lovely rendition of MTP. Well done. Only thing I would say (and don’t overly worry about it) , like I think I mentioned before, I’m not sure if the MTP tank overalls have the Union flag on the left sleeve. Also, if you ever do it again, the actual flag is really really small on the upper sleeve. Probably about a 1/4 or less of the size youve done, but nonetheless, the figures do look really great do you should be proud of them
Thank you Jacko and Johnny, I am glad you like it
@John: I´ve seen somewhere a small union jack on a uniform in the net and was thinking this will be a nice add-on to do. Yes I also feel it is too big but as the figures are comparatively small I believe the size difference will not be overly recognizable to the undiscerning audience 
Best Regards
Thomas
Was not able to resist to fix the crew onto the still just primed ride how everything will look. Discovered that the right smoke mortar was flipped up during priming, have to fix that. And, of course, the drivers microphone gone off during its tight insertion into his compartment. Have to fix this again, too 
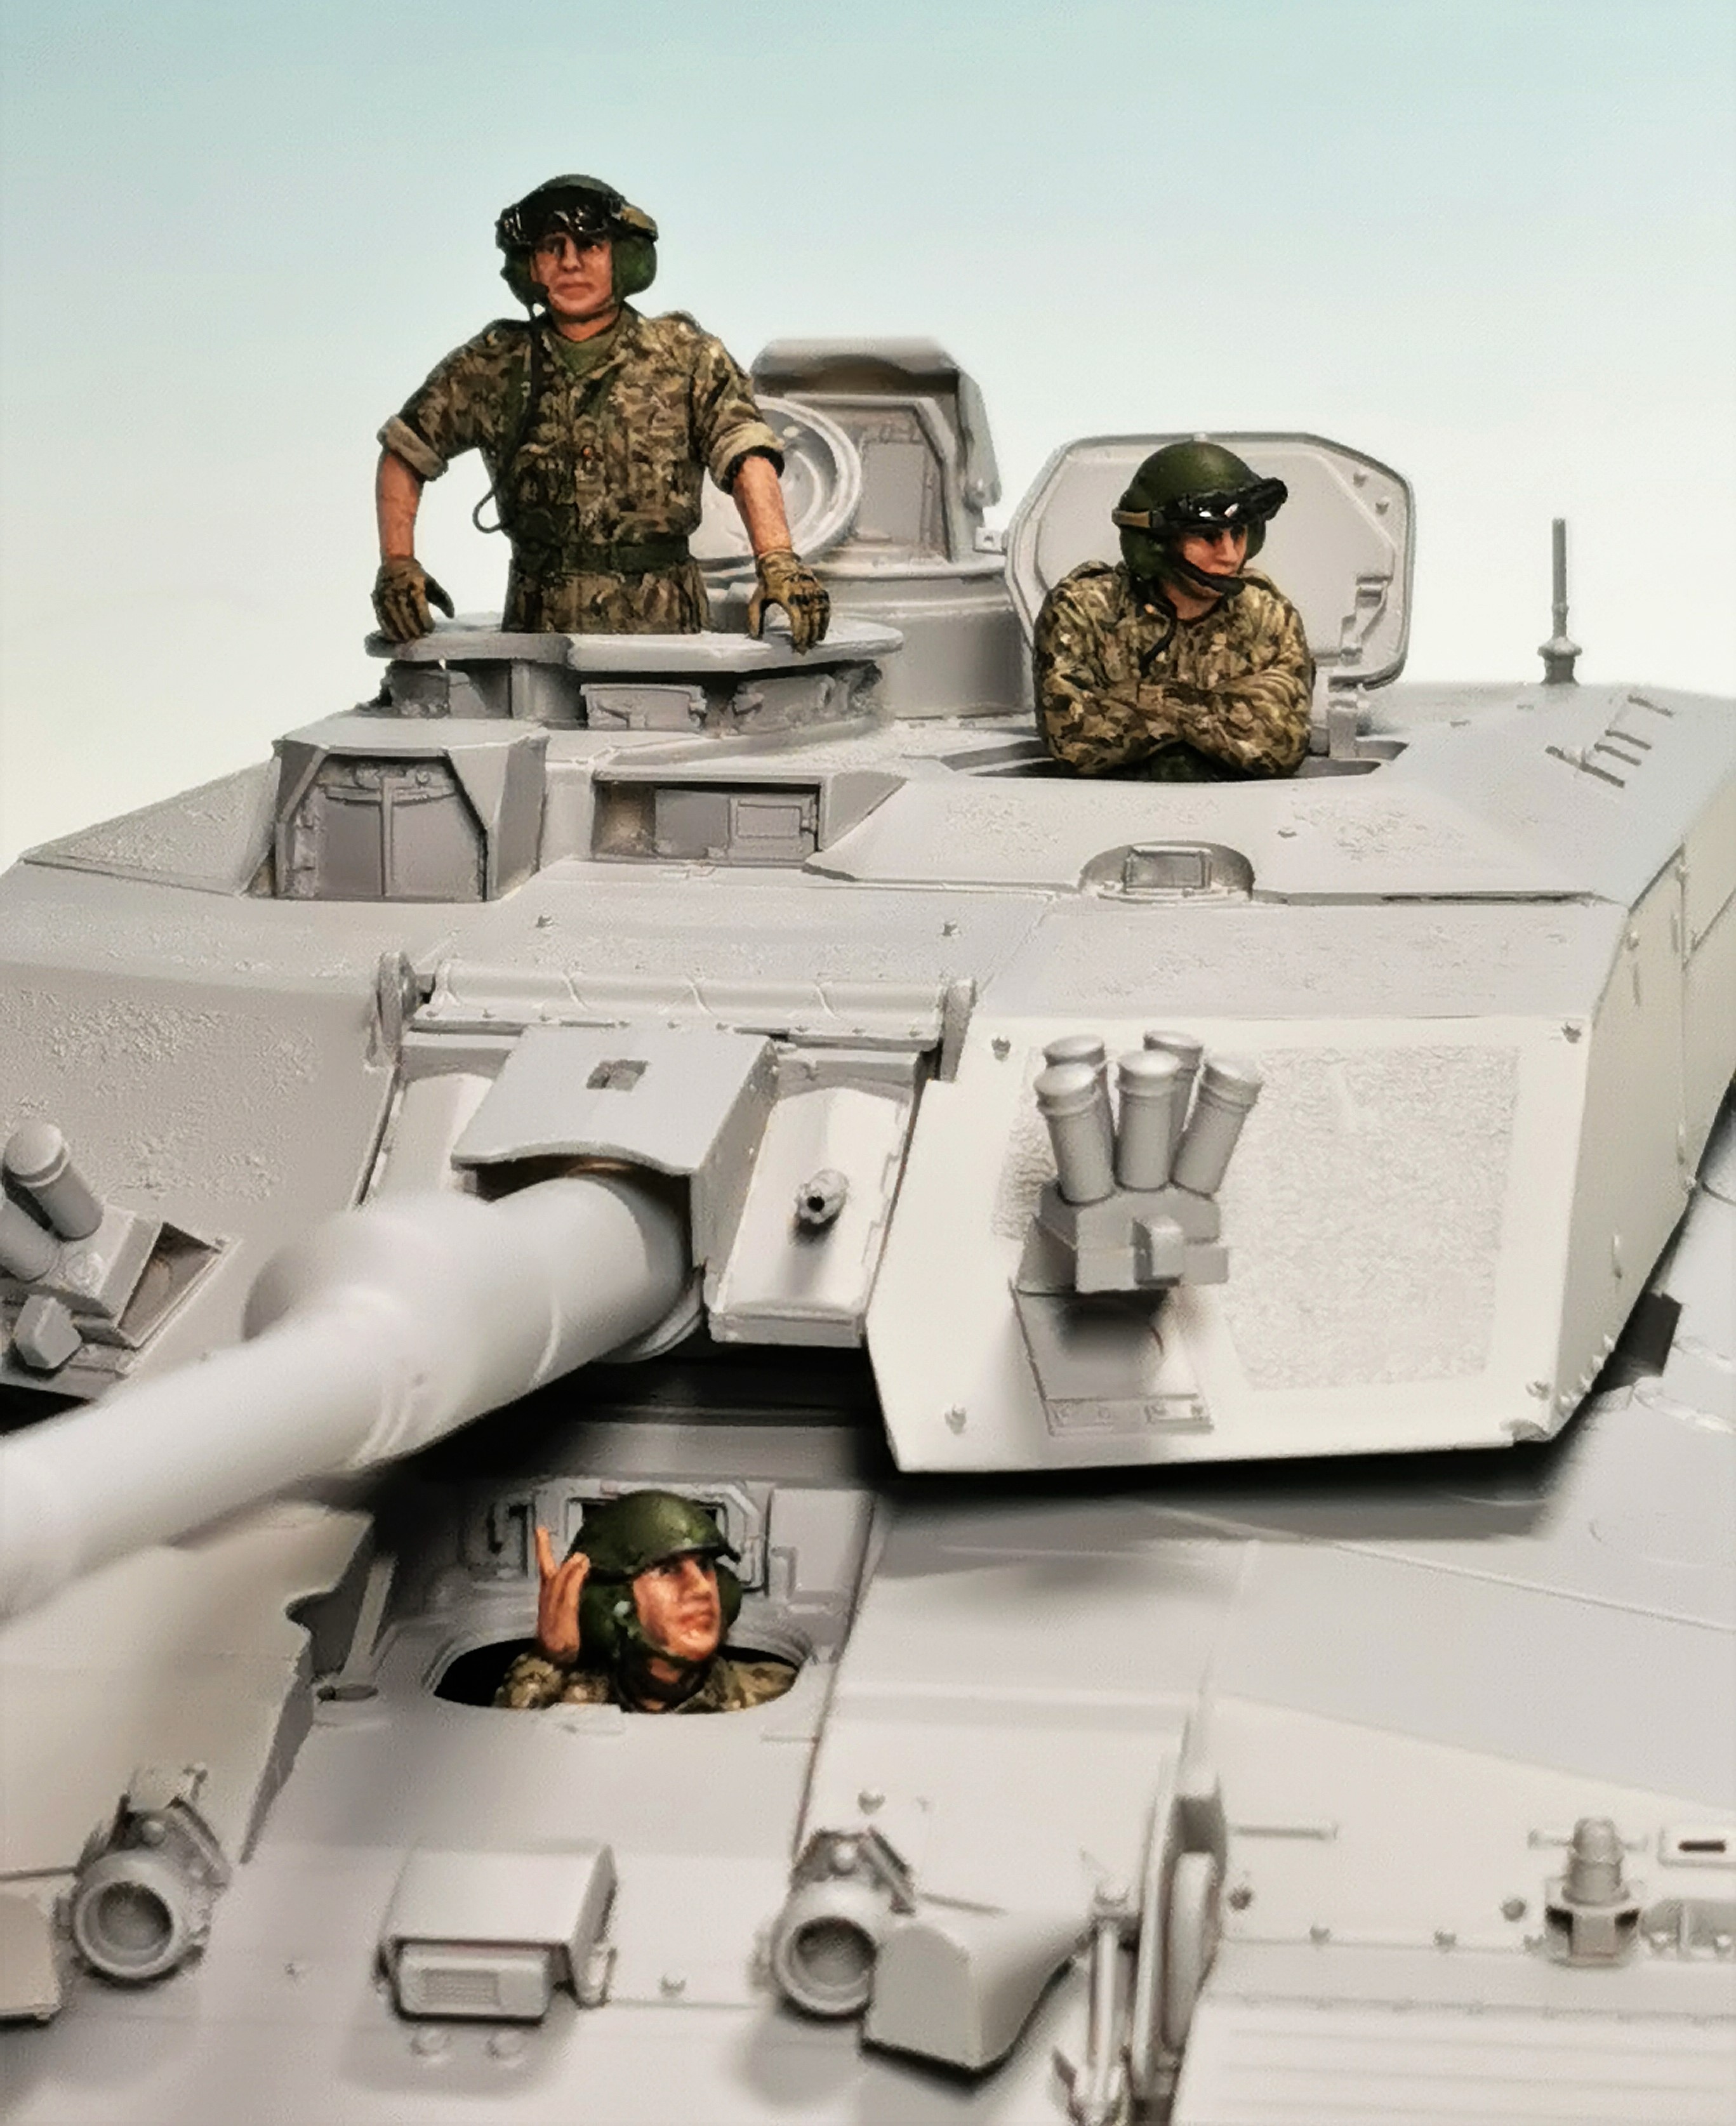
Off for a beer now 
5 Likes
They look great set in the turret …you deserve that beer
You should be very happy with these figures- they capture the pattern nicely and will really look the part on the finished tank.