USAREUR M48A2 - c.1962

I am, sadly, one of those modellers who gets all too easily distracted with other themes and projects and tend to veer off in all sorts of direction. My recent Dutch MBT-70 a case in point; although it fits in well enough with my Cold War focus, it is, of course, technically a What-If. None the worse for that you might think, but it has done nothing to reduce the stash of the more prosaic kits languishing therein.

With that in mind, I thought I’d tackle a Cold War 1960s workhorse in the guise of the M48A2. This is the Revell kit, which I had acquired some time ago; I believe it is now out of production so probably quite rare. The only other kits of the A2 that I’m aware of are the venerable Monogram version, and the more recent I Love kit one. I wanted to tackle the Revell one to see if the over-emphasised casting finish on the upper surfaces will interfere with the overall presentation of the model. To that end, I do not intend to attempt to sand it down or otherwise remove it, but just to see how it all flows.

Just to clarify re the MBT-70; it is actually built, however, it will have to be parked for a while as I’m about to undertake a bout of medical treatment; of course, that may also impact on this M48 project, but we’ll see!

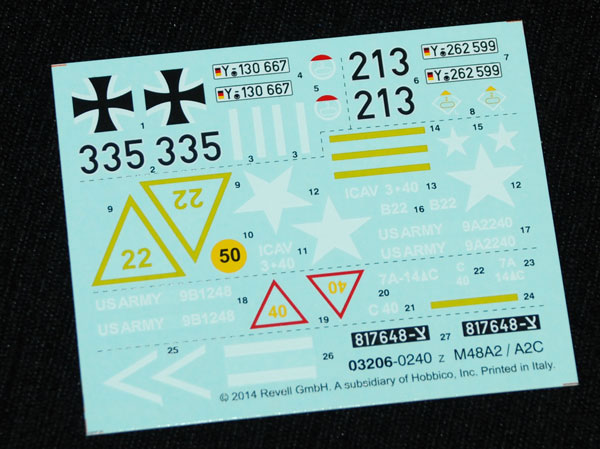
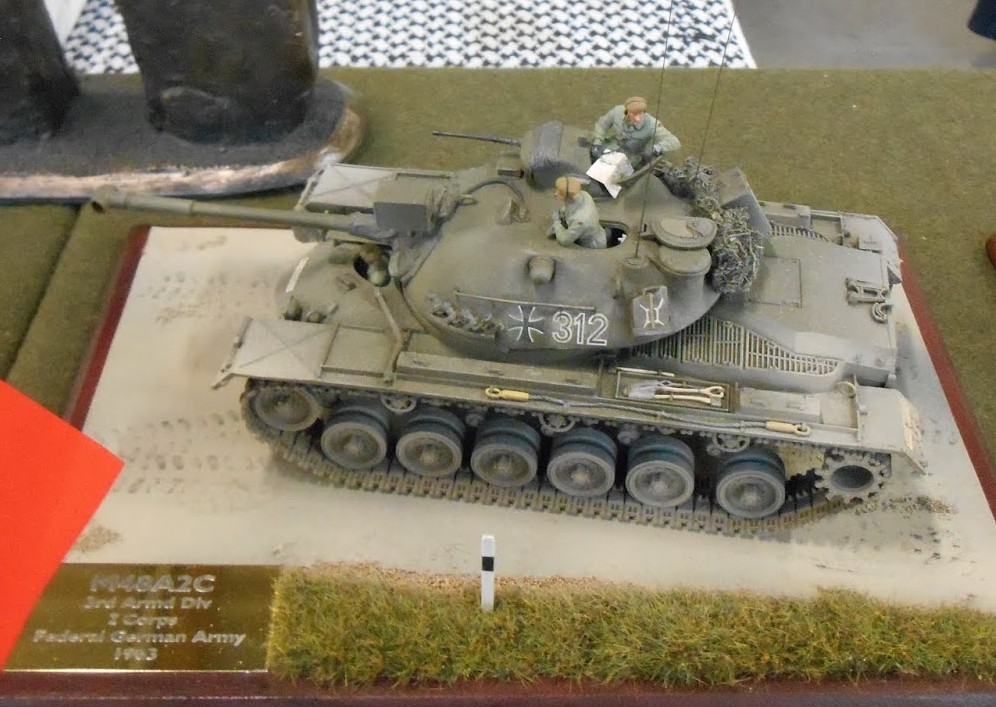
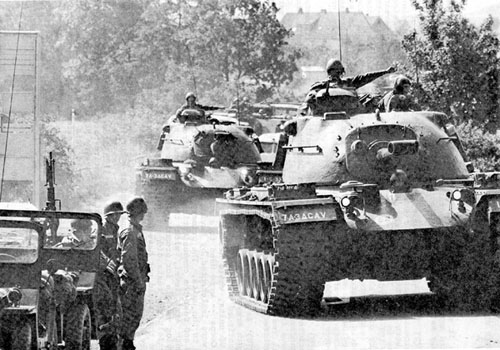
Those who know the kit already will be aware that it can be built up as a Bundeswehr version, and in such a finish will add to any such collection; however, I was keen to portray a US vehicle and the kit’s alternate markings will effect that perfectly, depicting an M48A2 stationed in what was then West Germany in 1962. I was inspired by this particular picture and sought to replicate at least the positioning of the crew and the AFV in transit as on exercise:

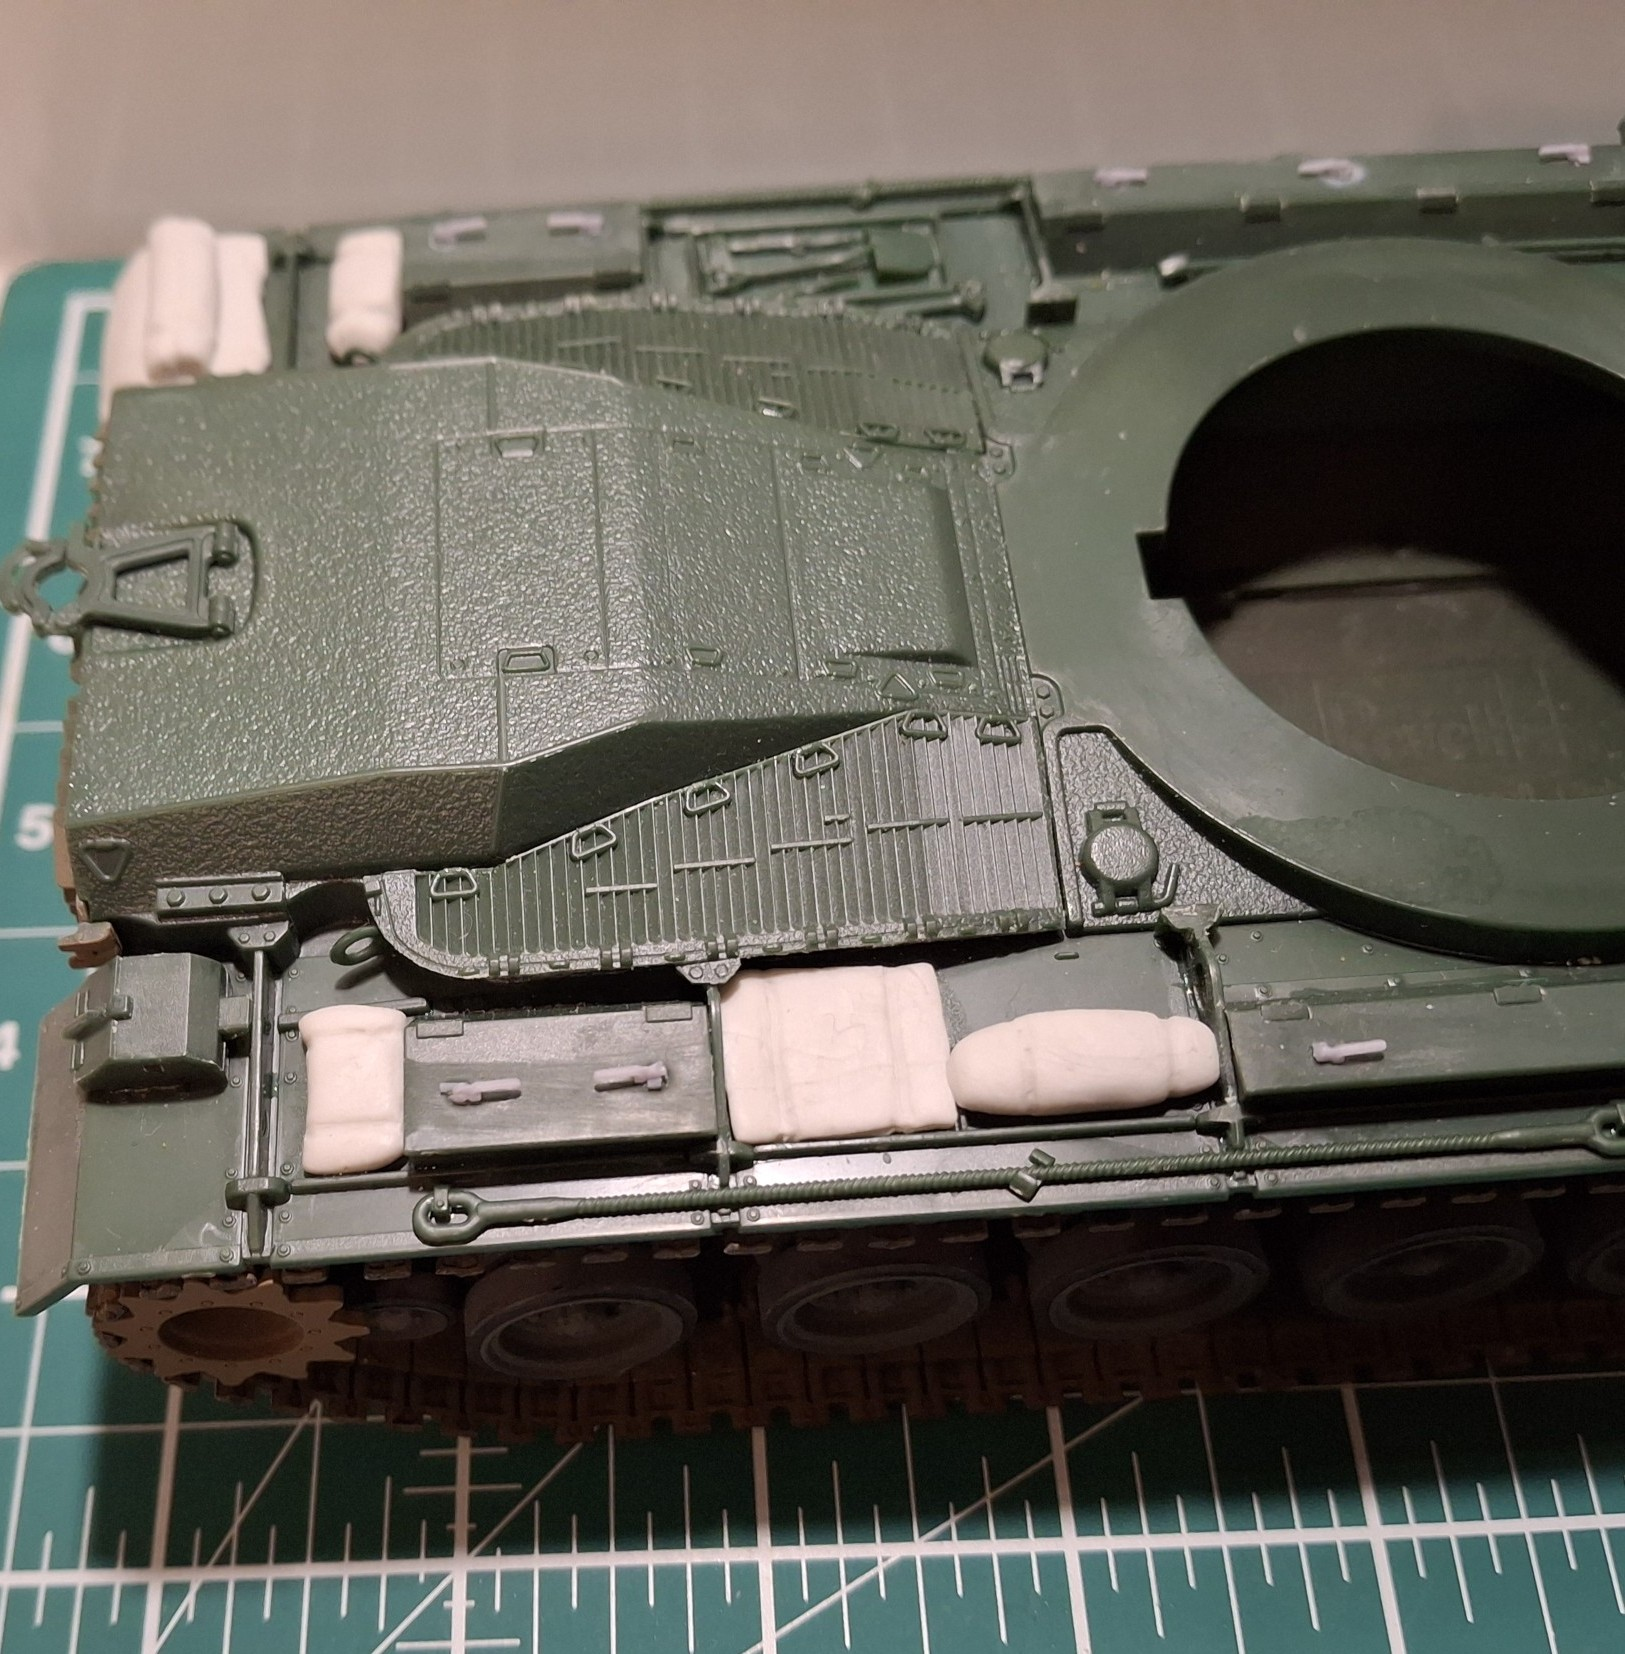
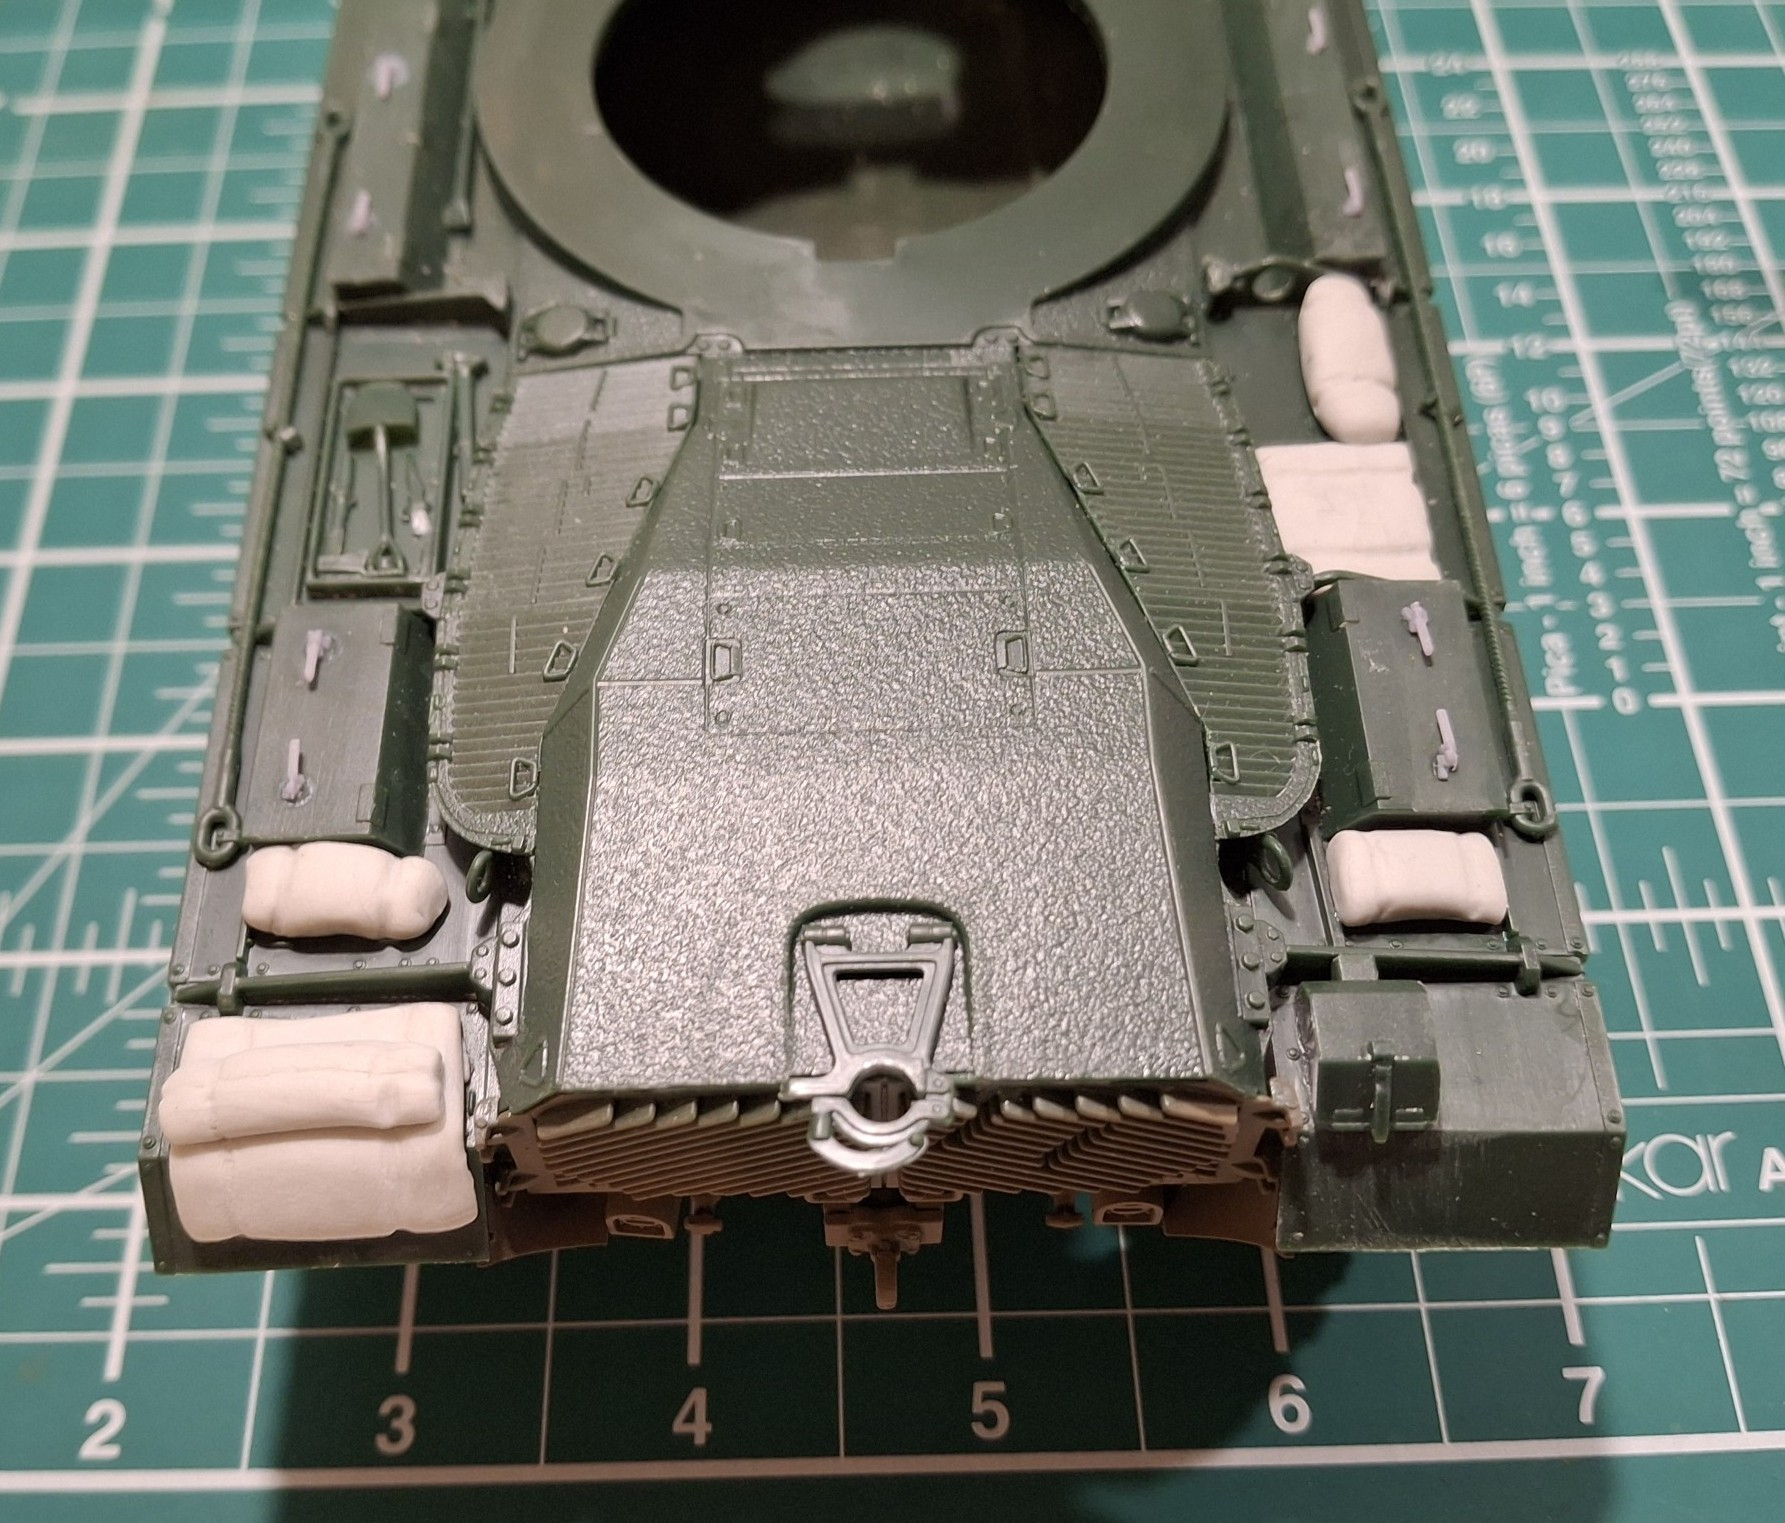
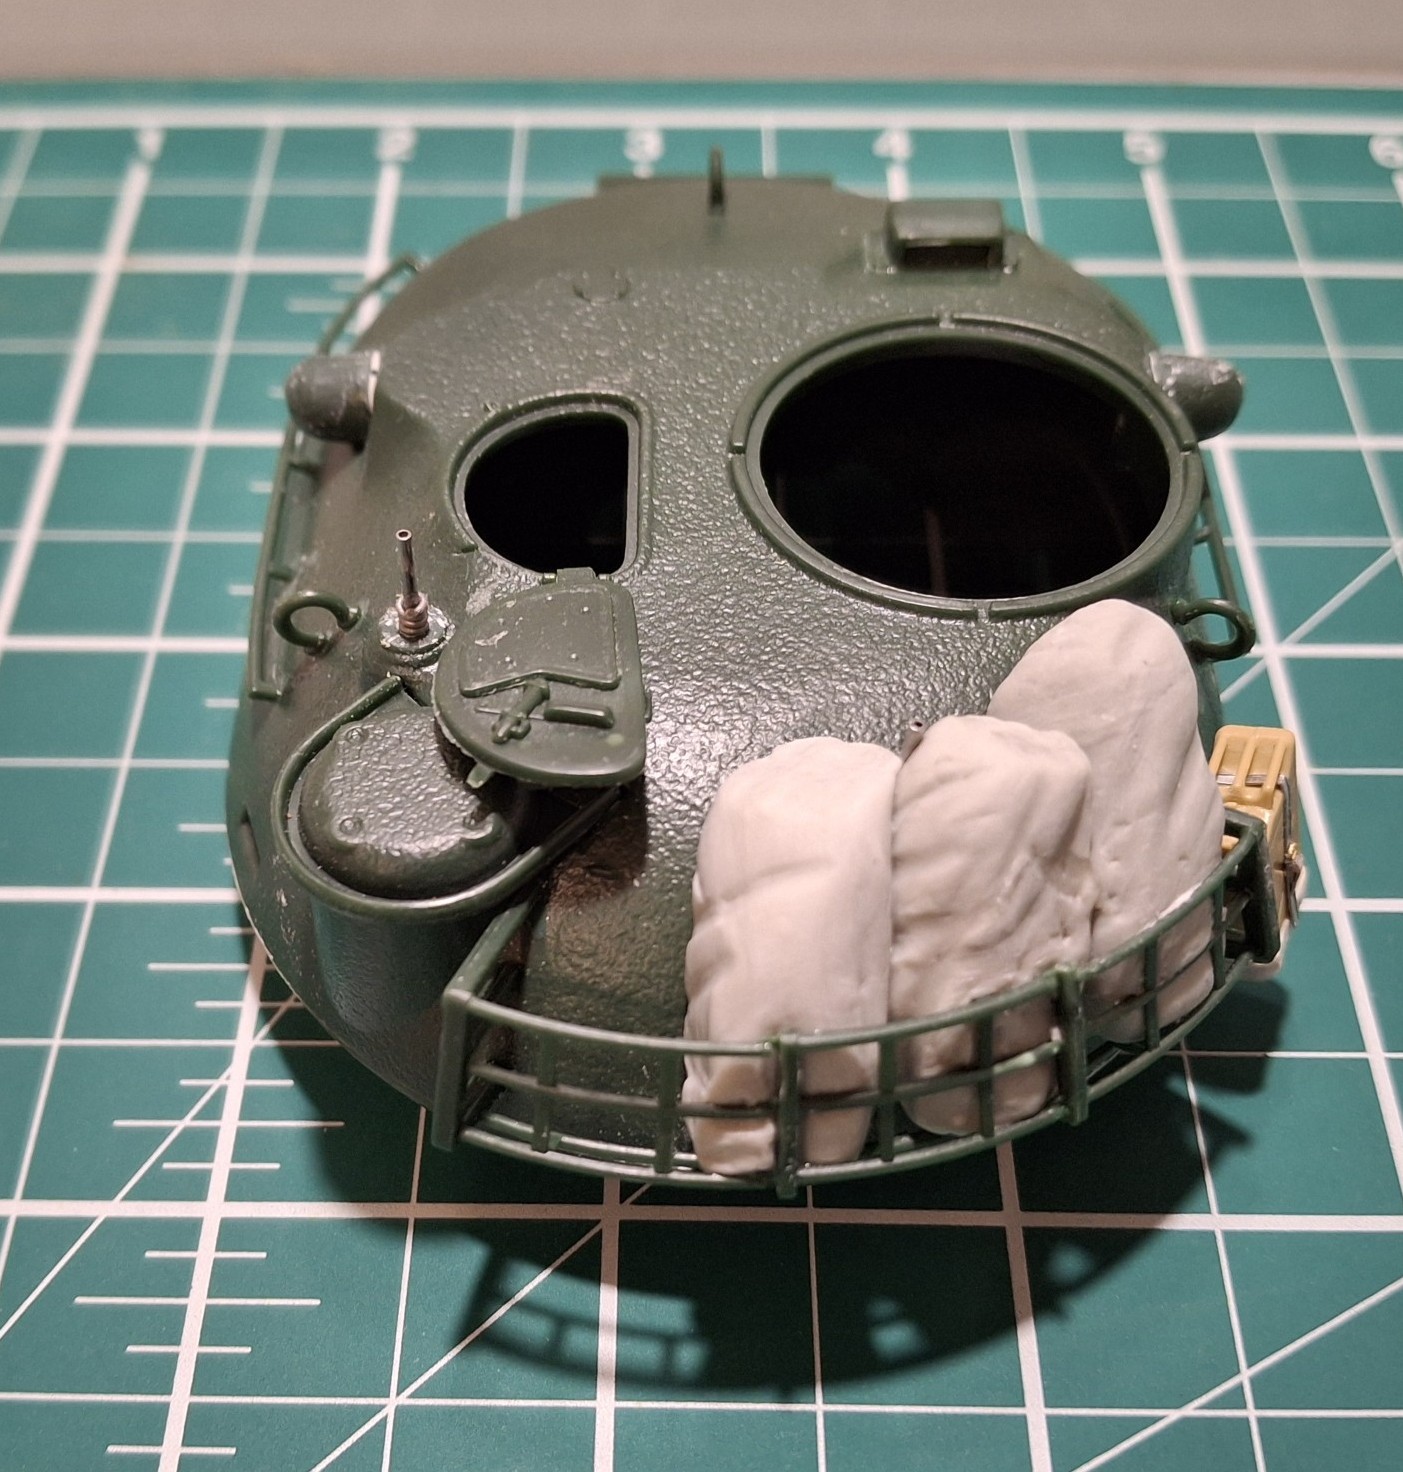
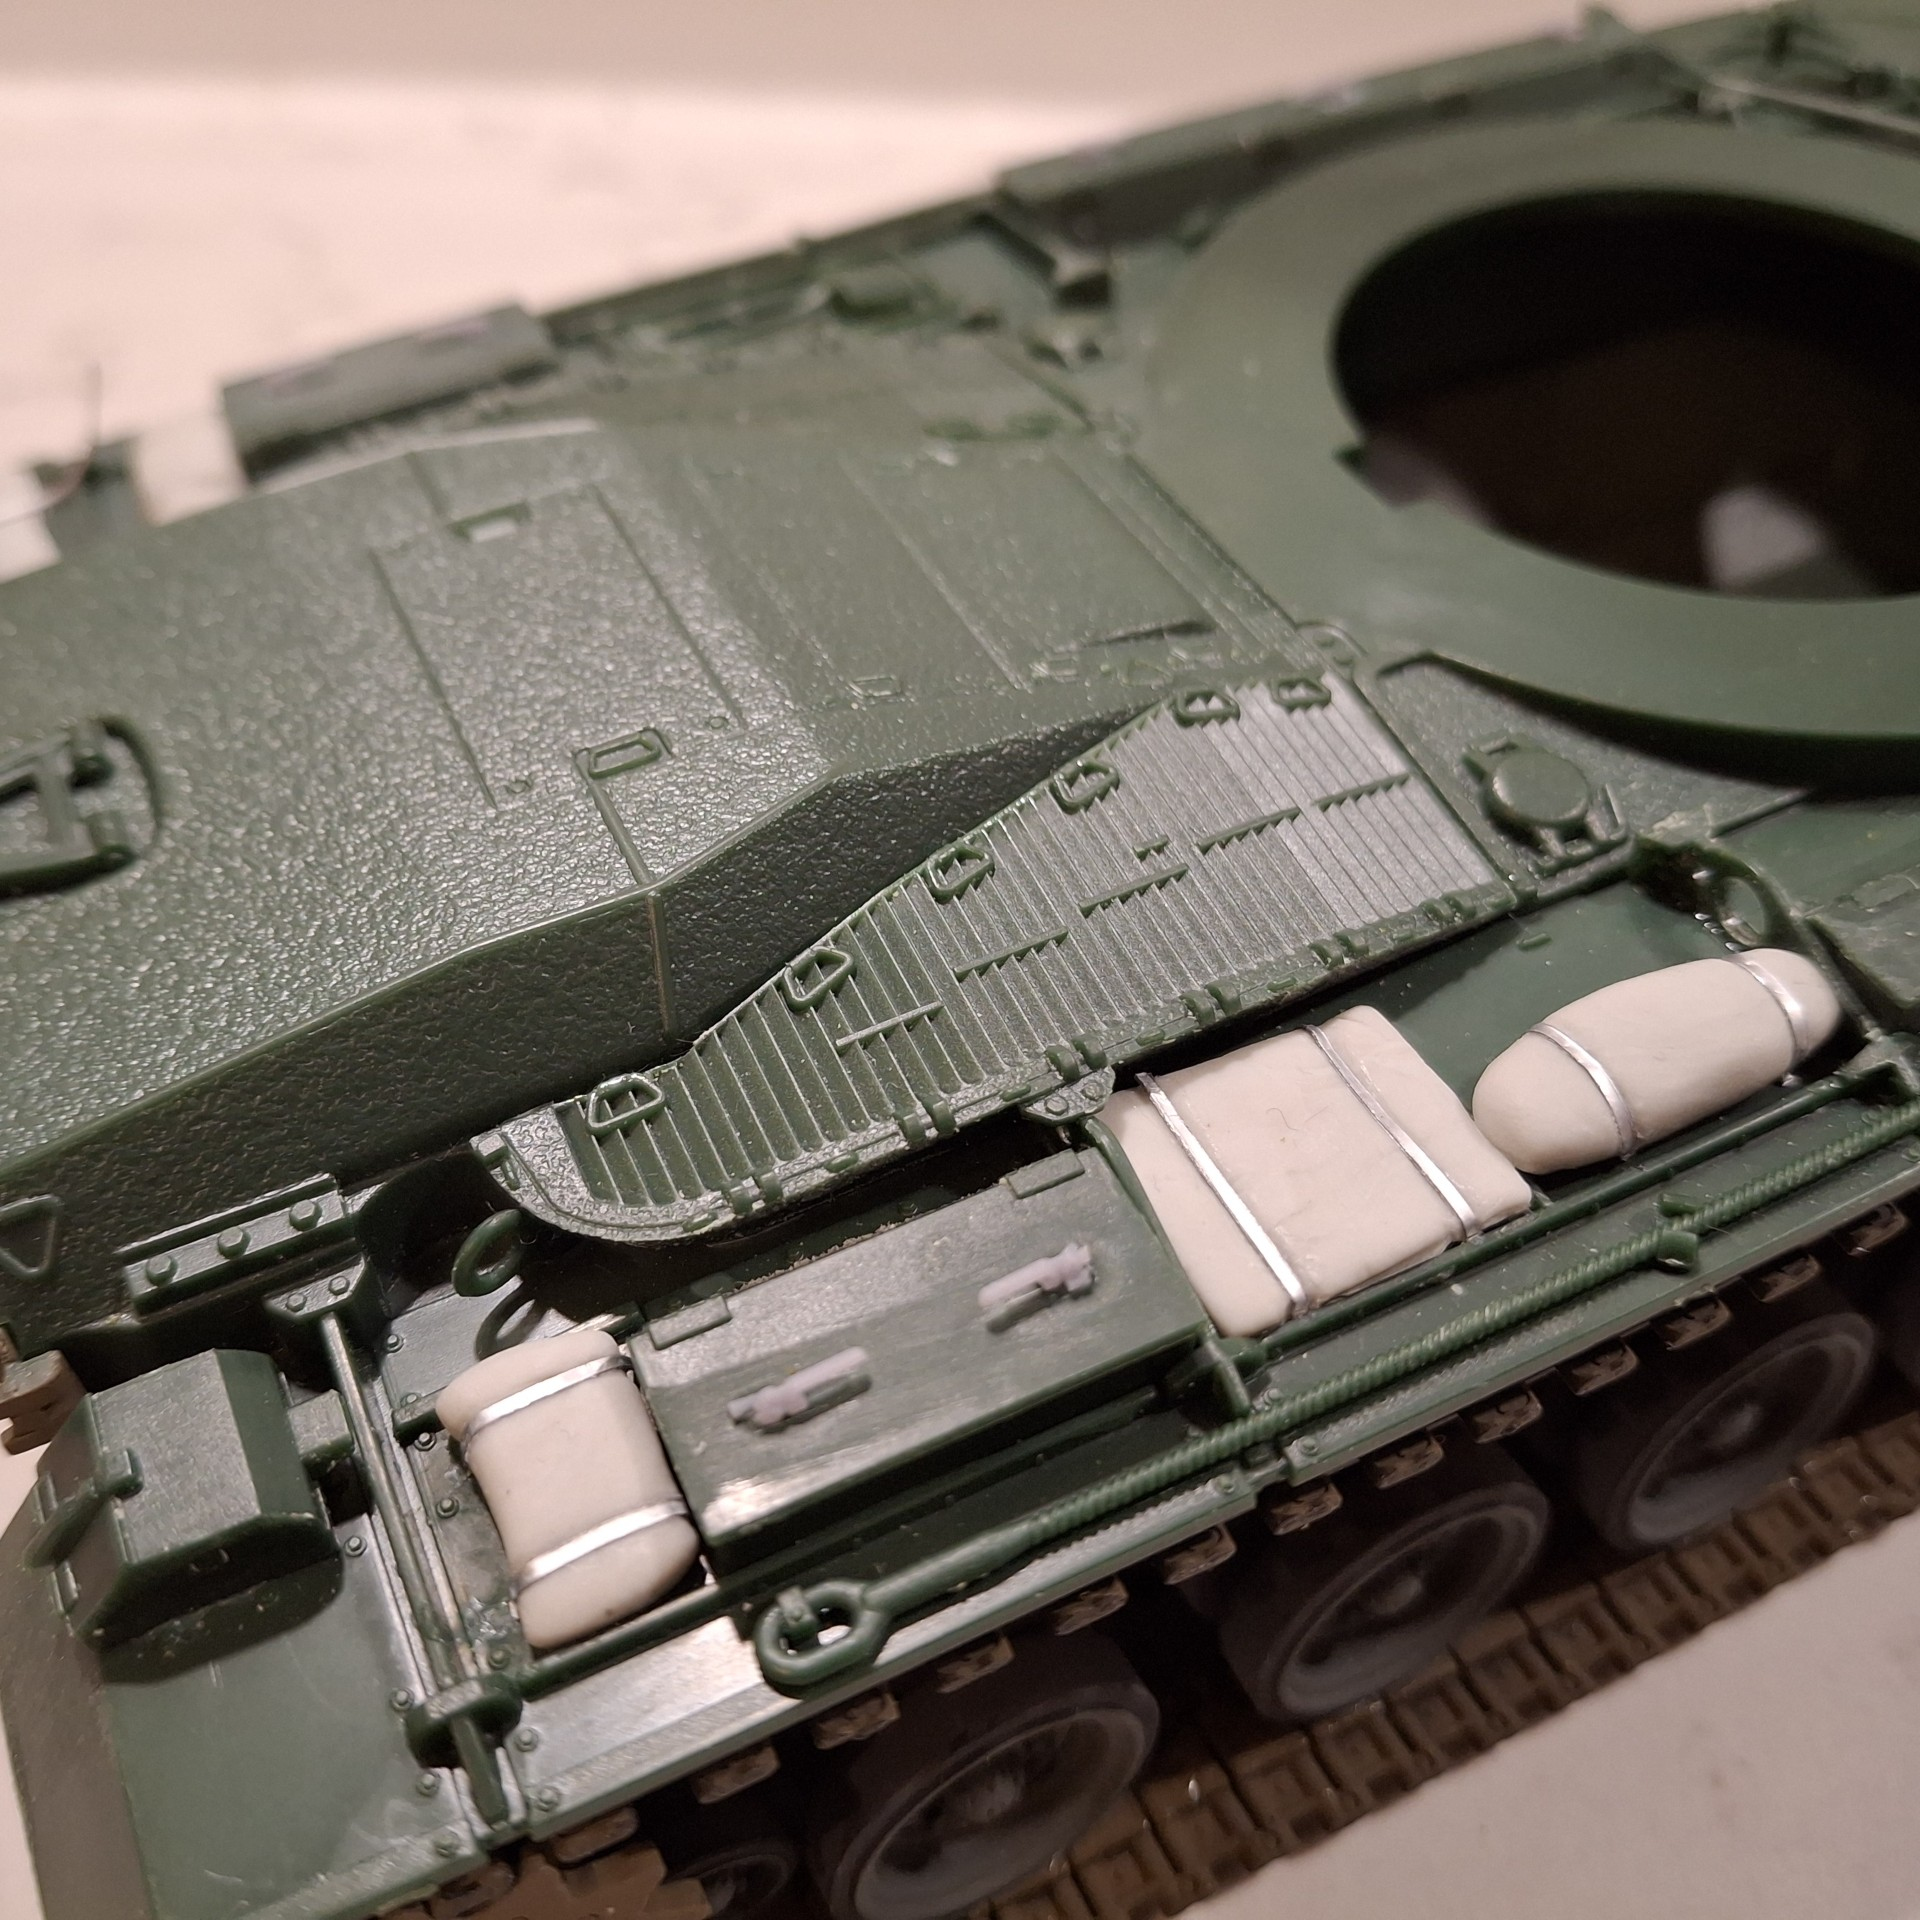
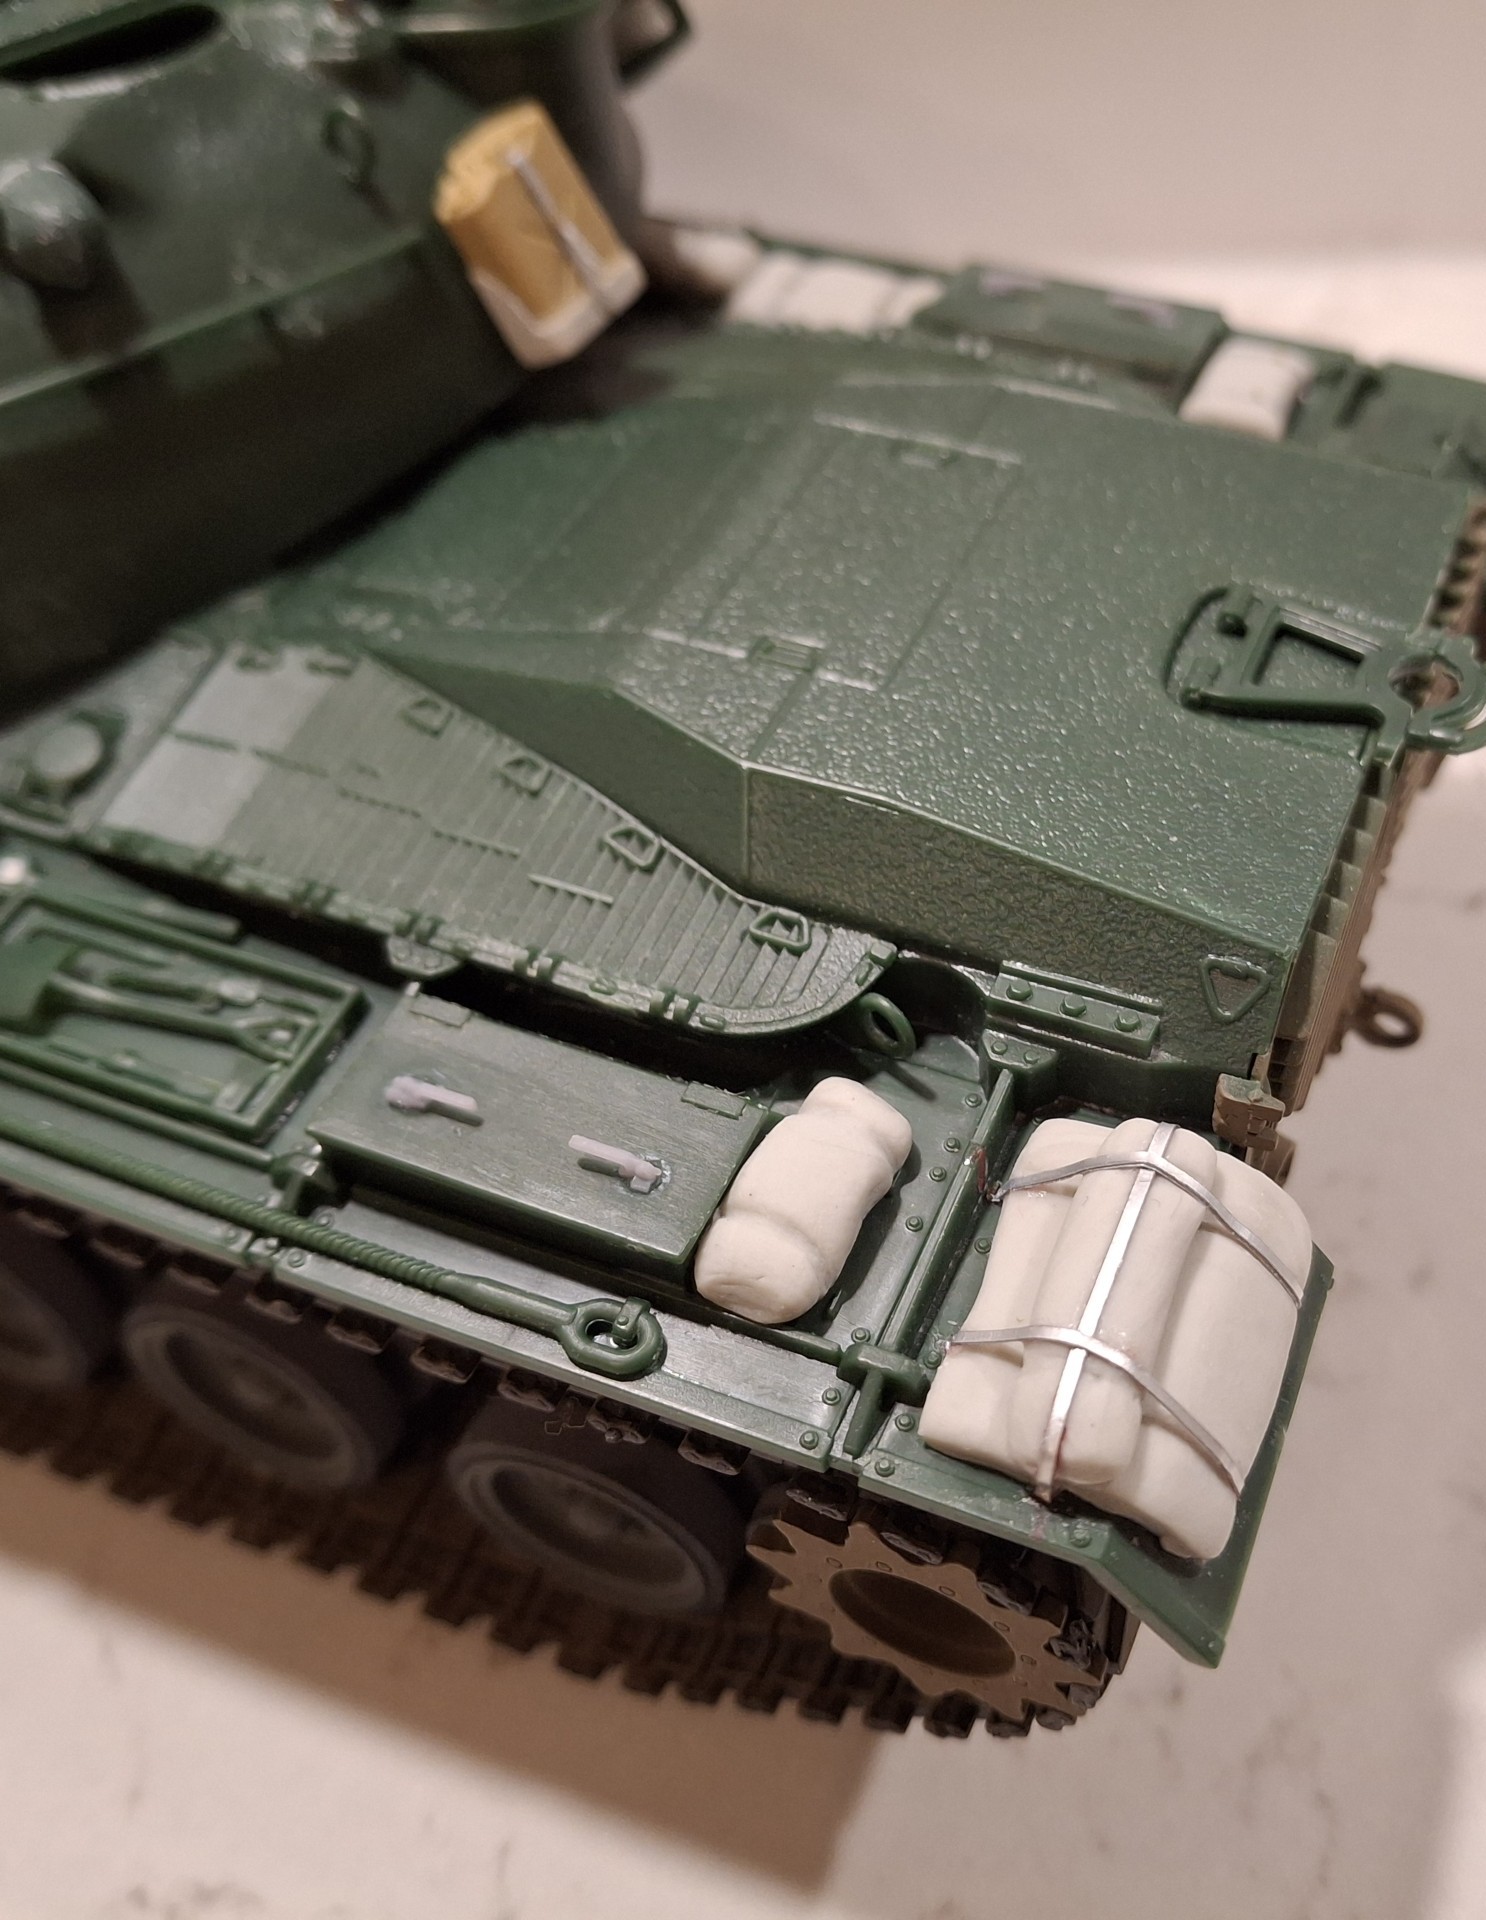
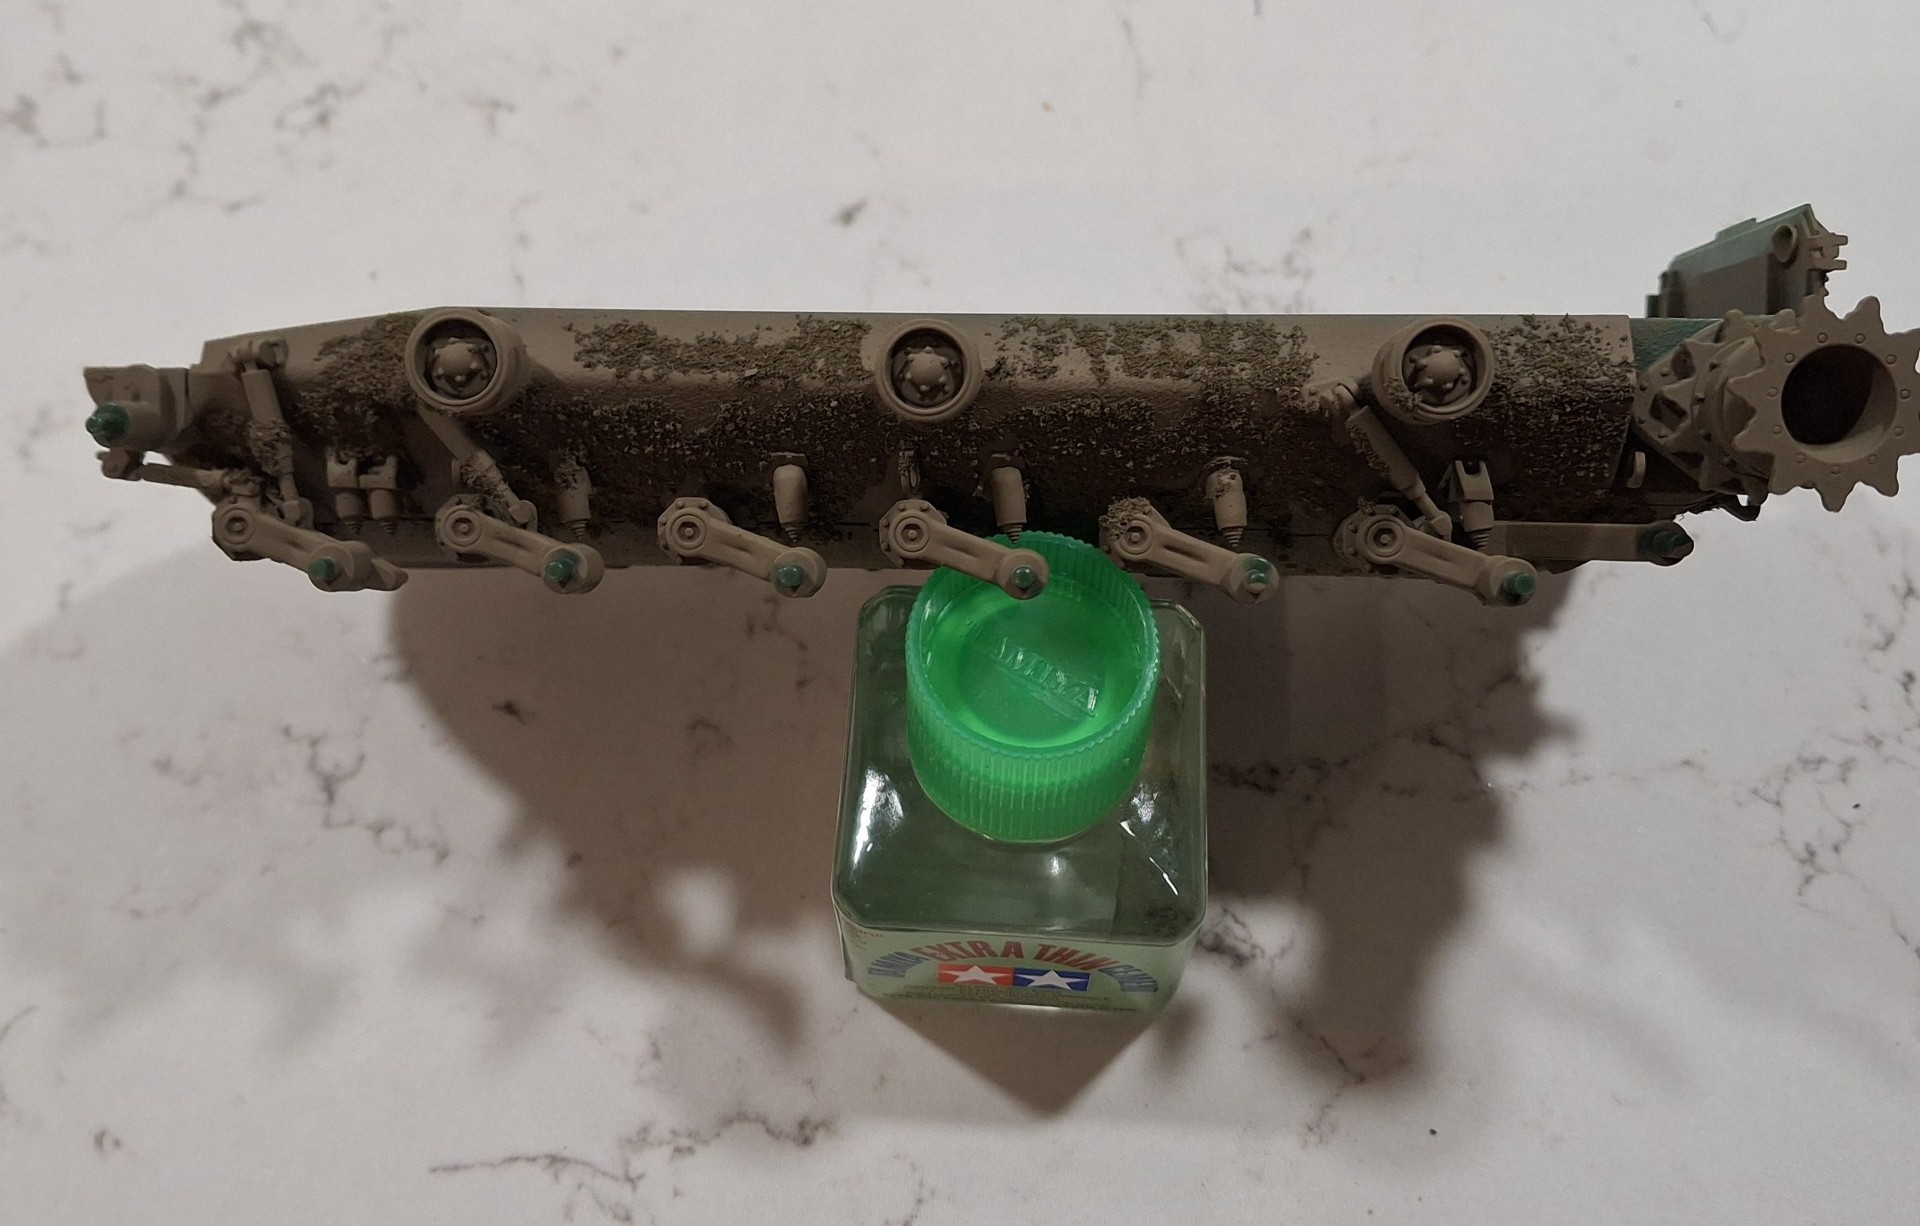
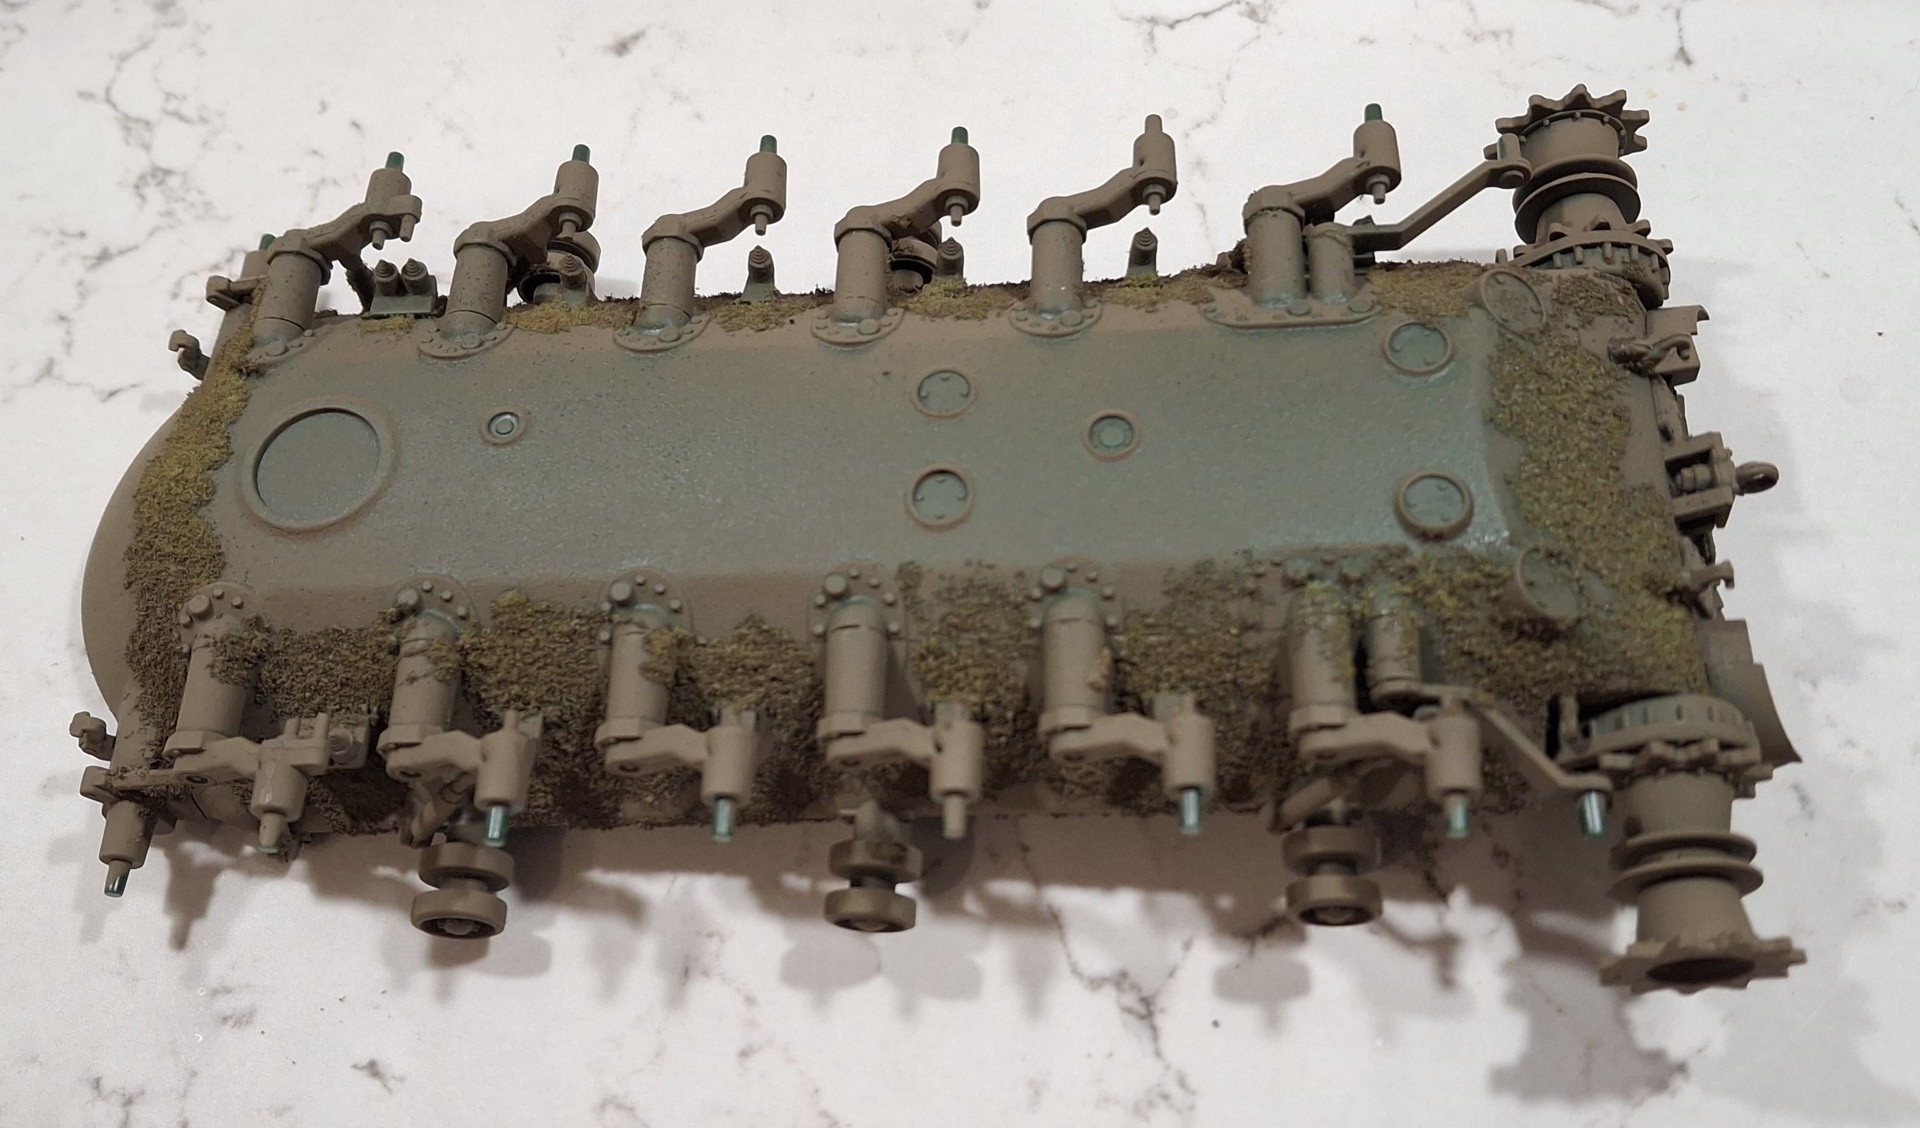
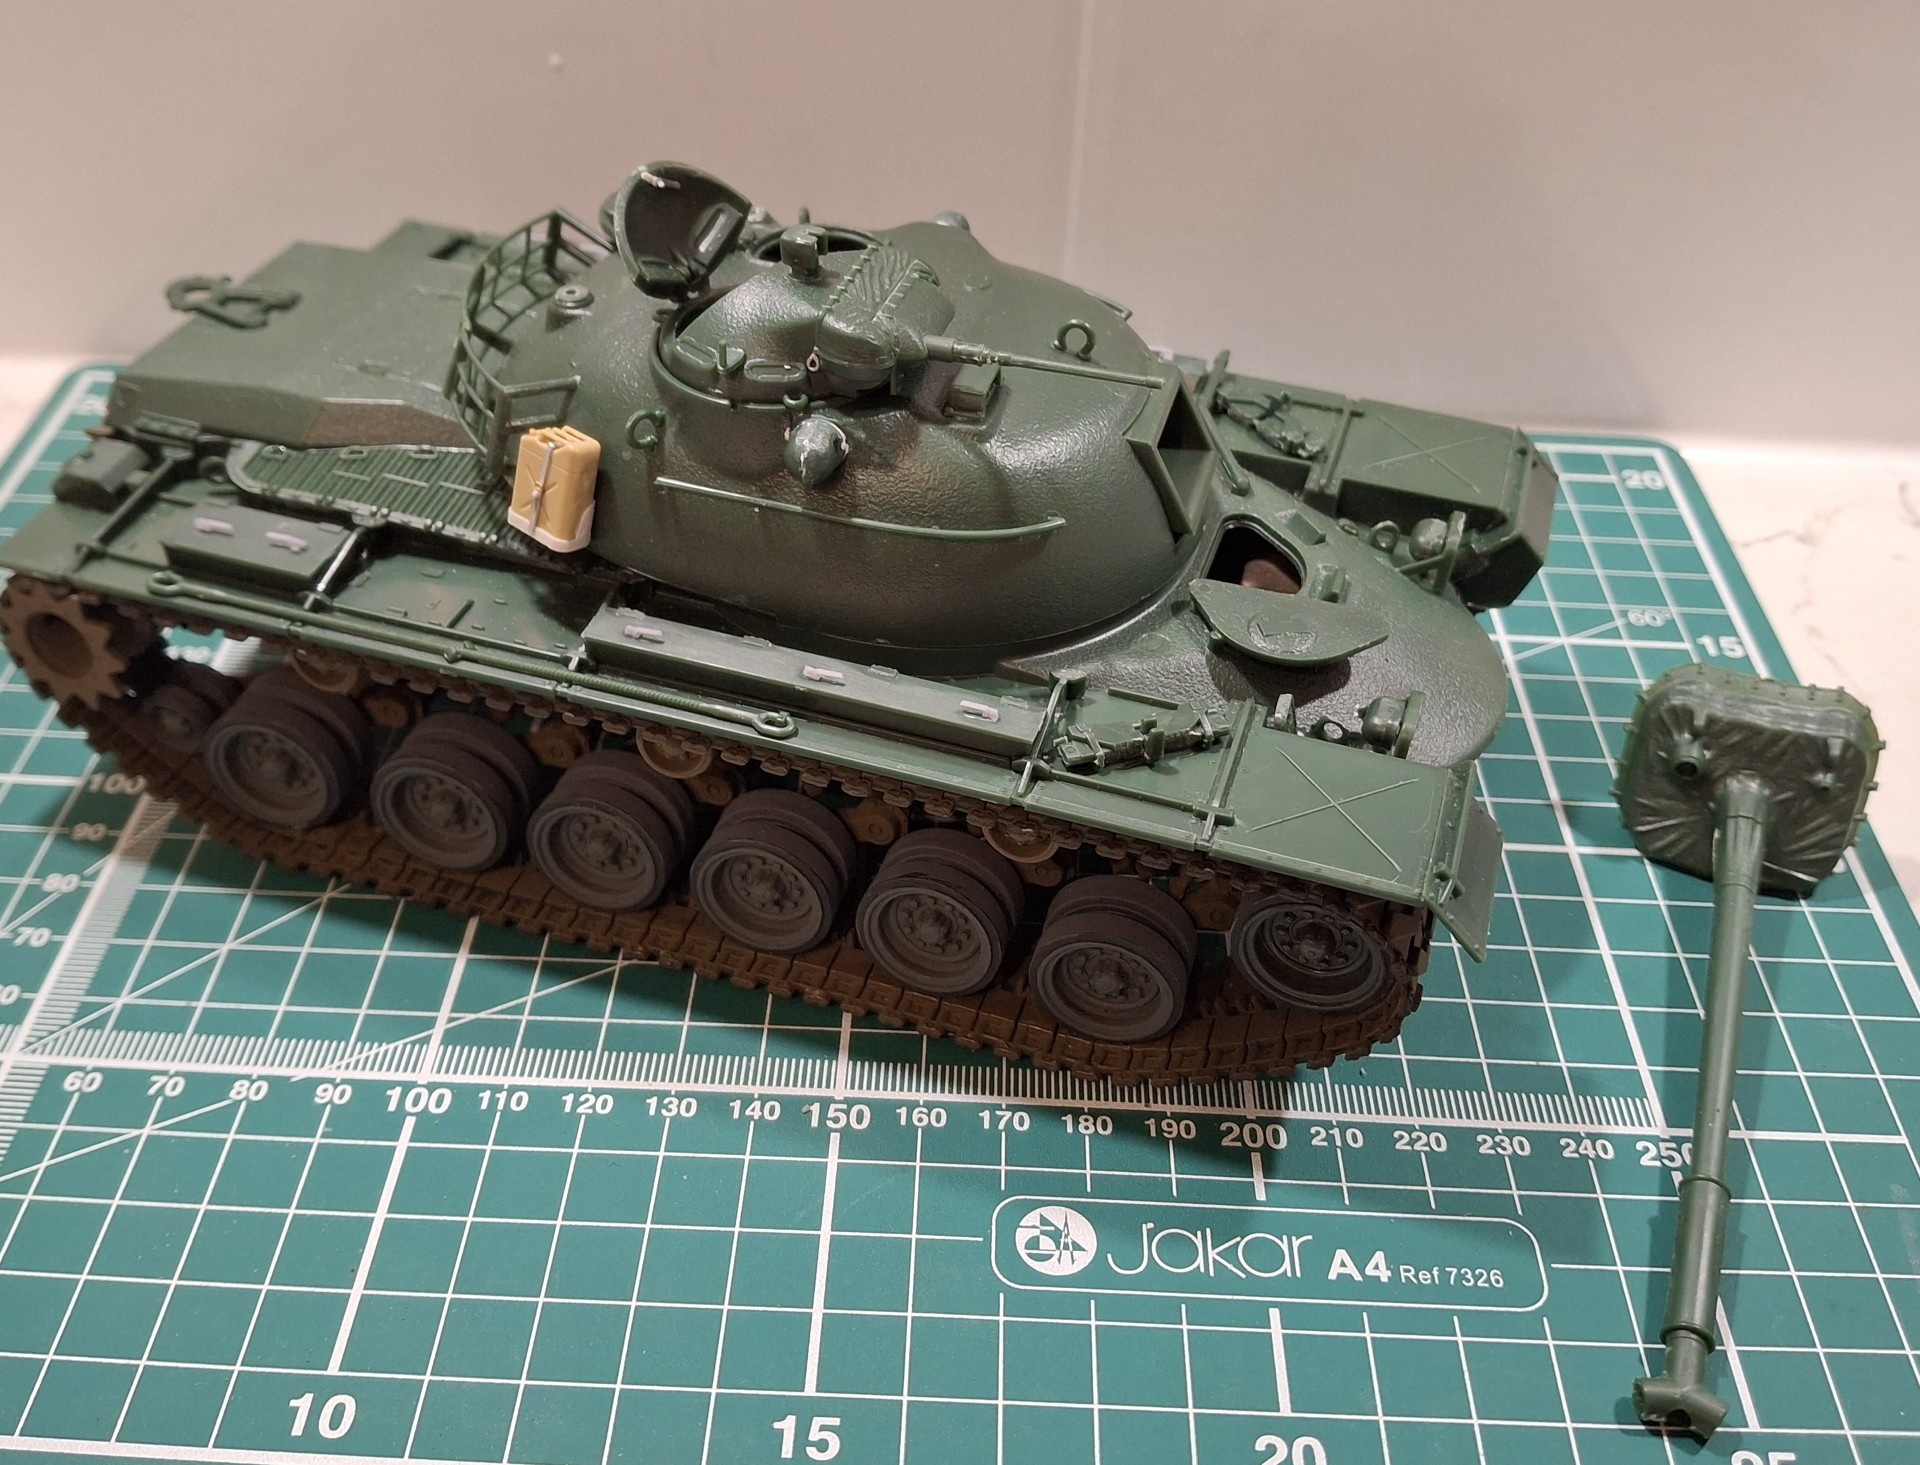
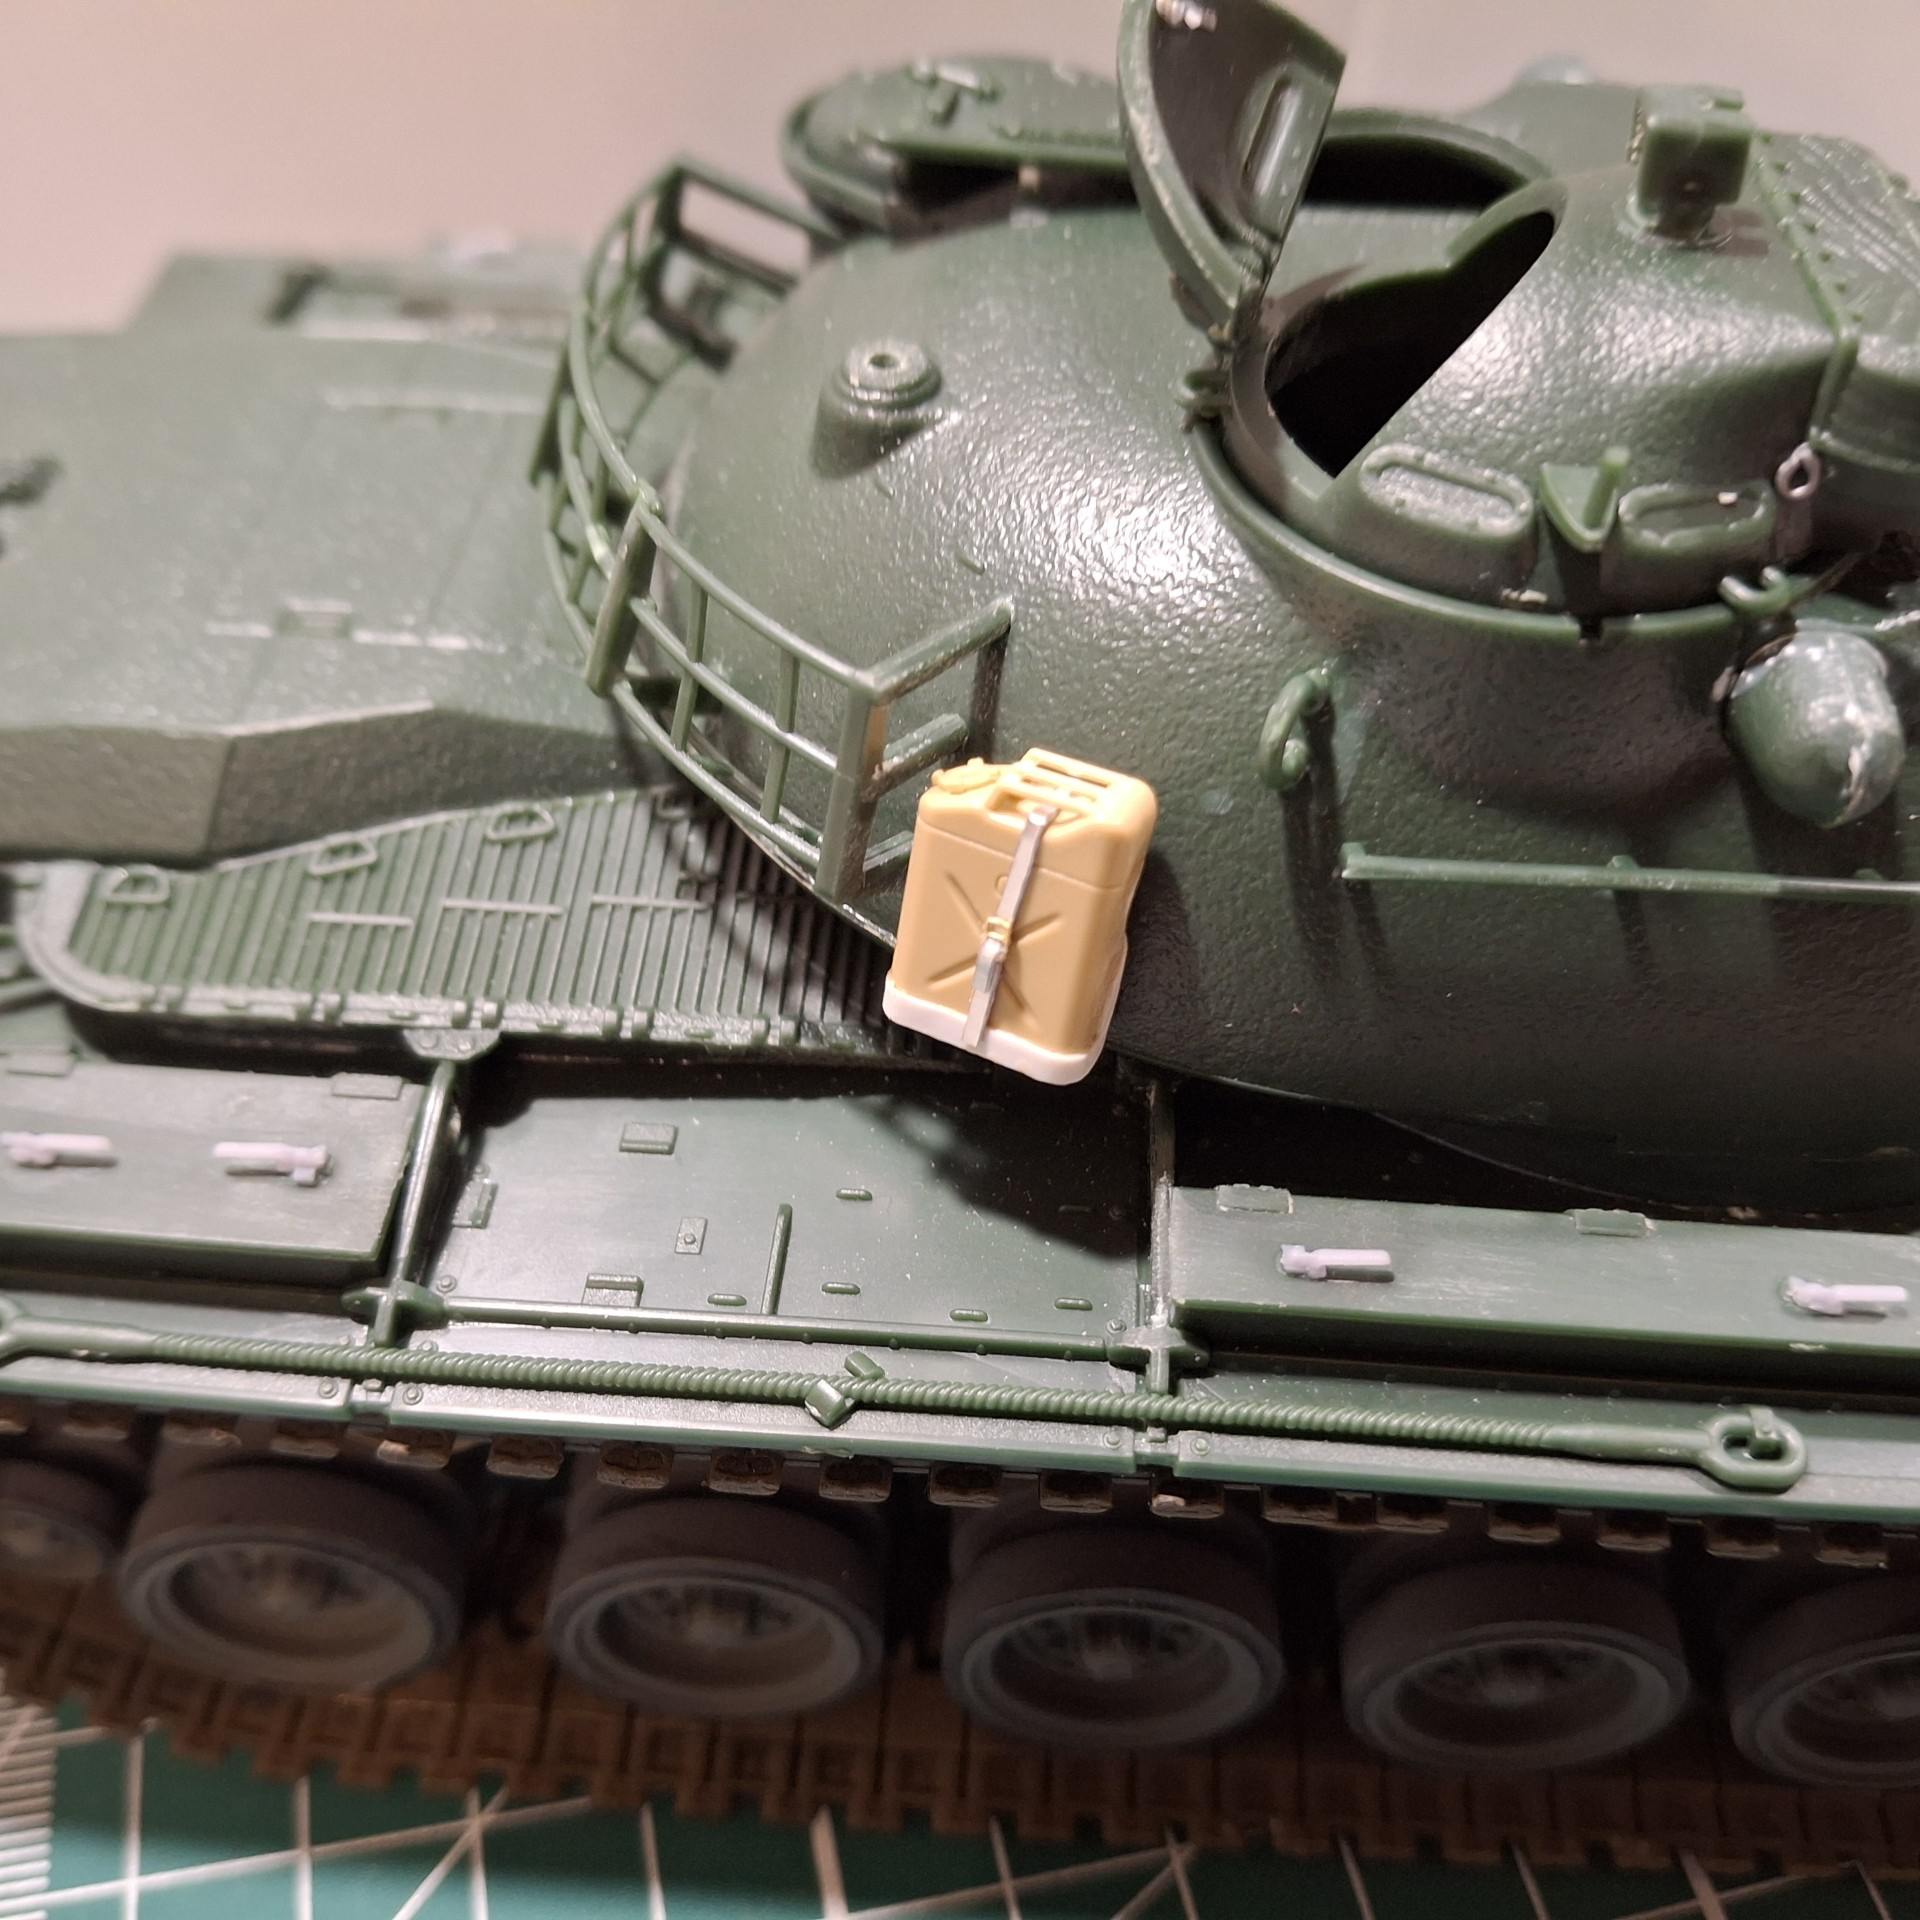
The build was straightforward and I more or less followed the instructions. I did however, add a fair amount of model railway flock to the hull sides and chassis to represent the accumulation of mud:

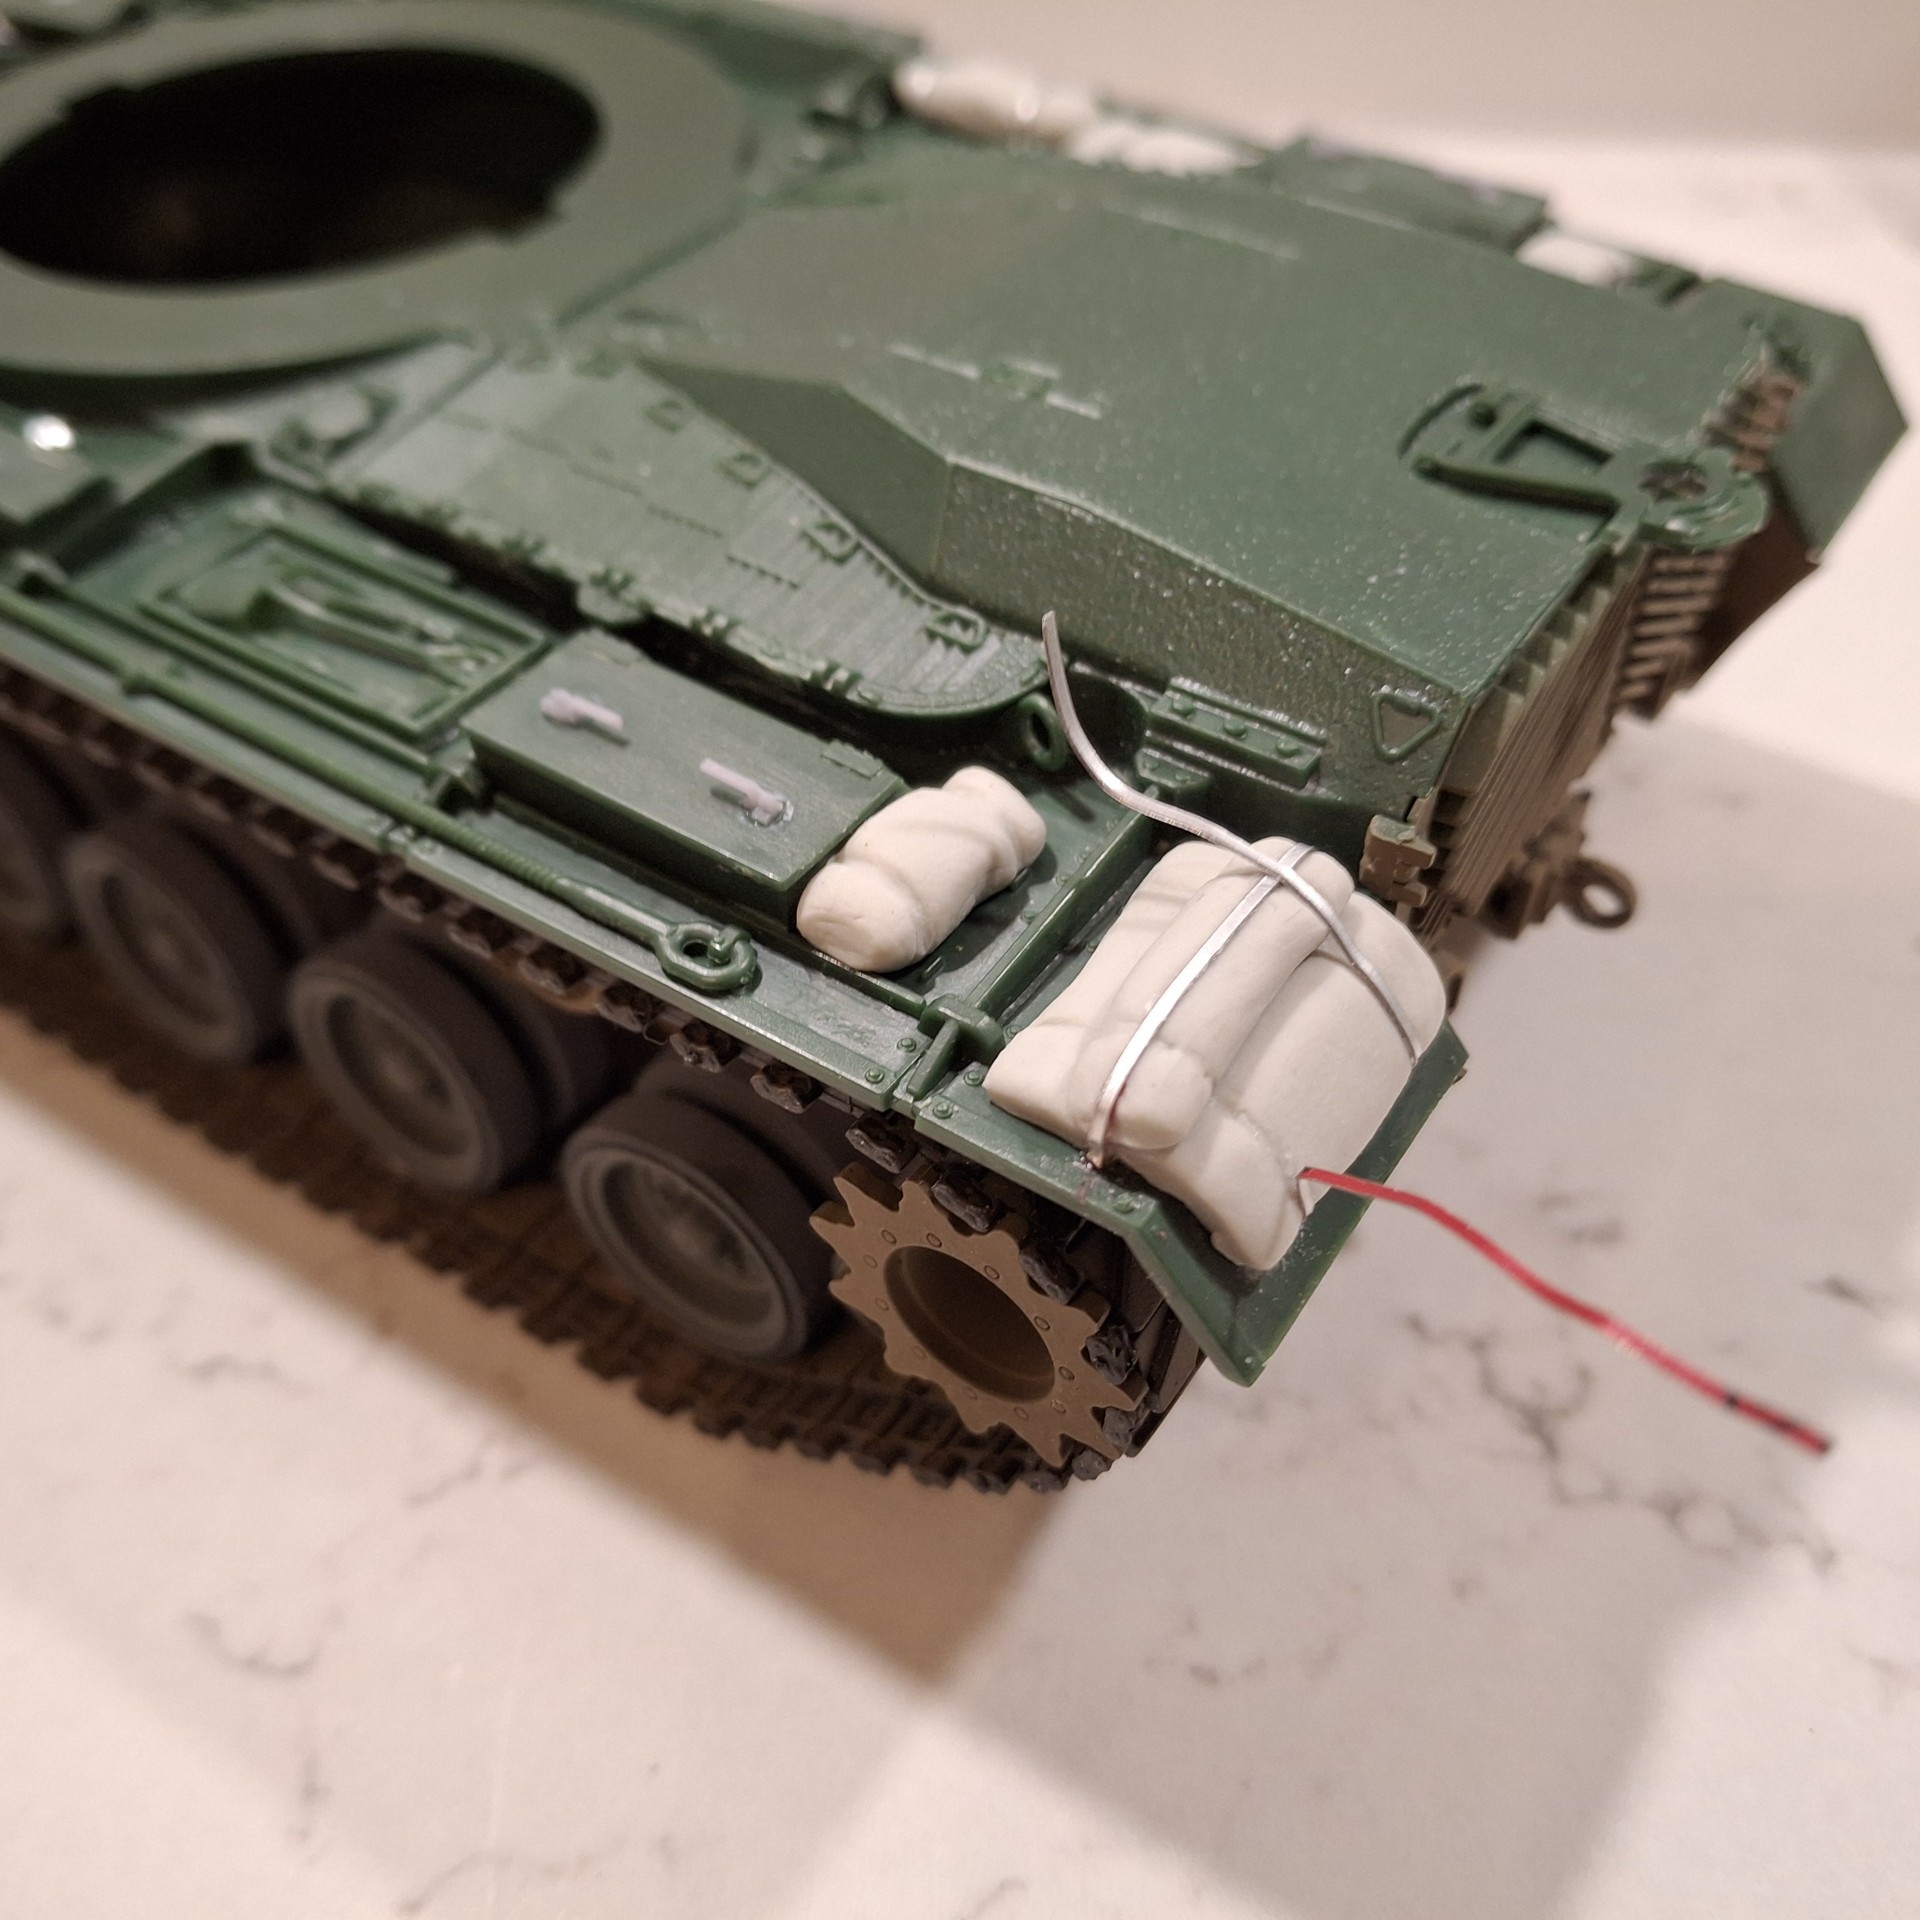
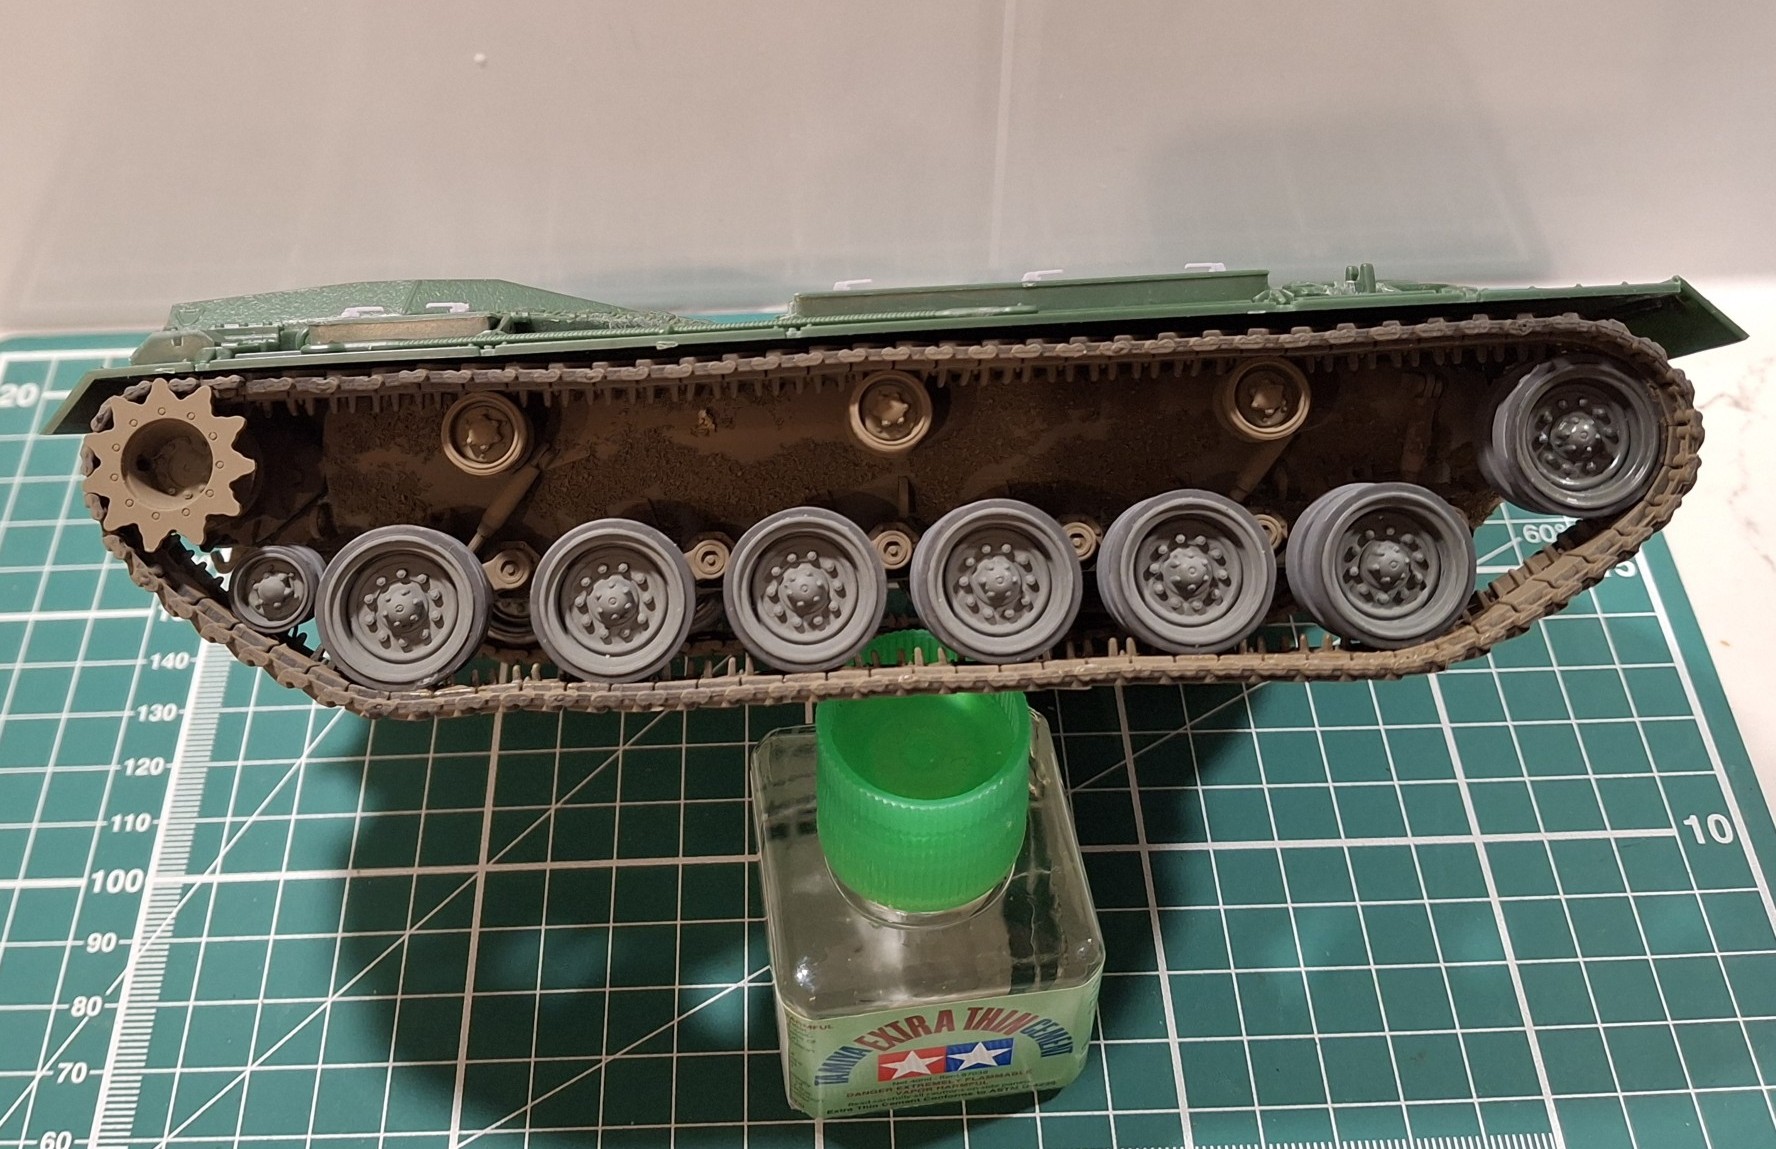
I decided to use the kit rubber-band type tracks as they seemed quite reasonably represented. I noted that they sported a sink mark around every 5 track shoes; on the AFV Club track kits there is one on every link(!)

Tracks fitted:

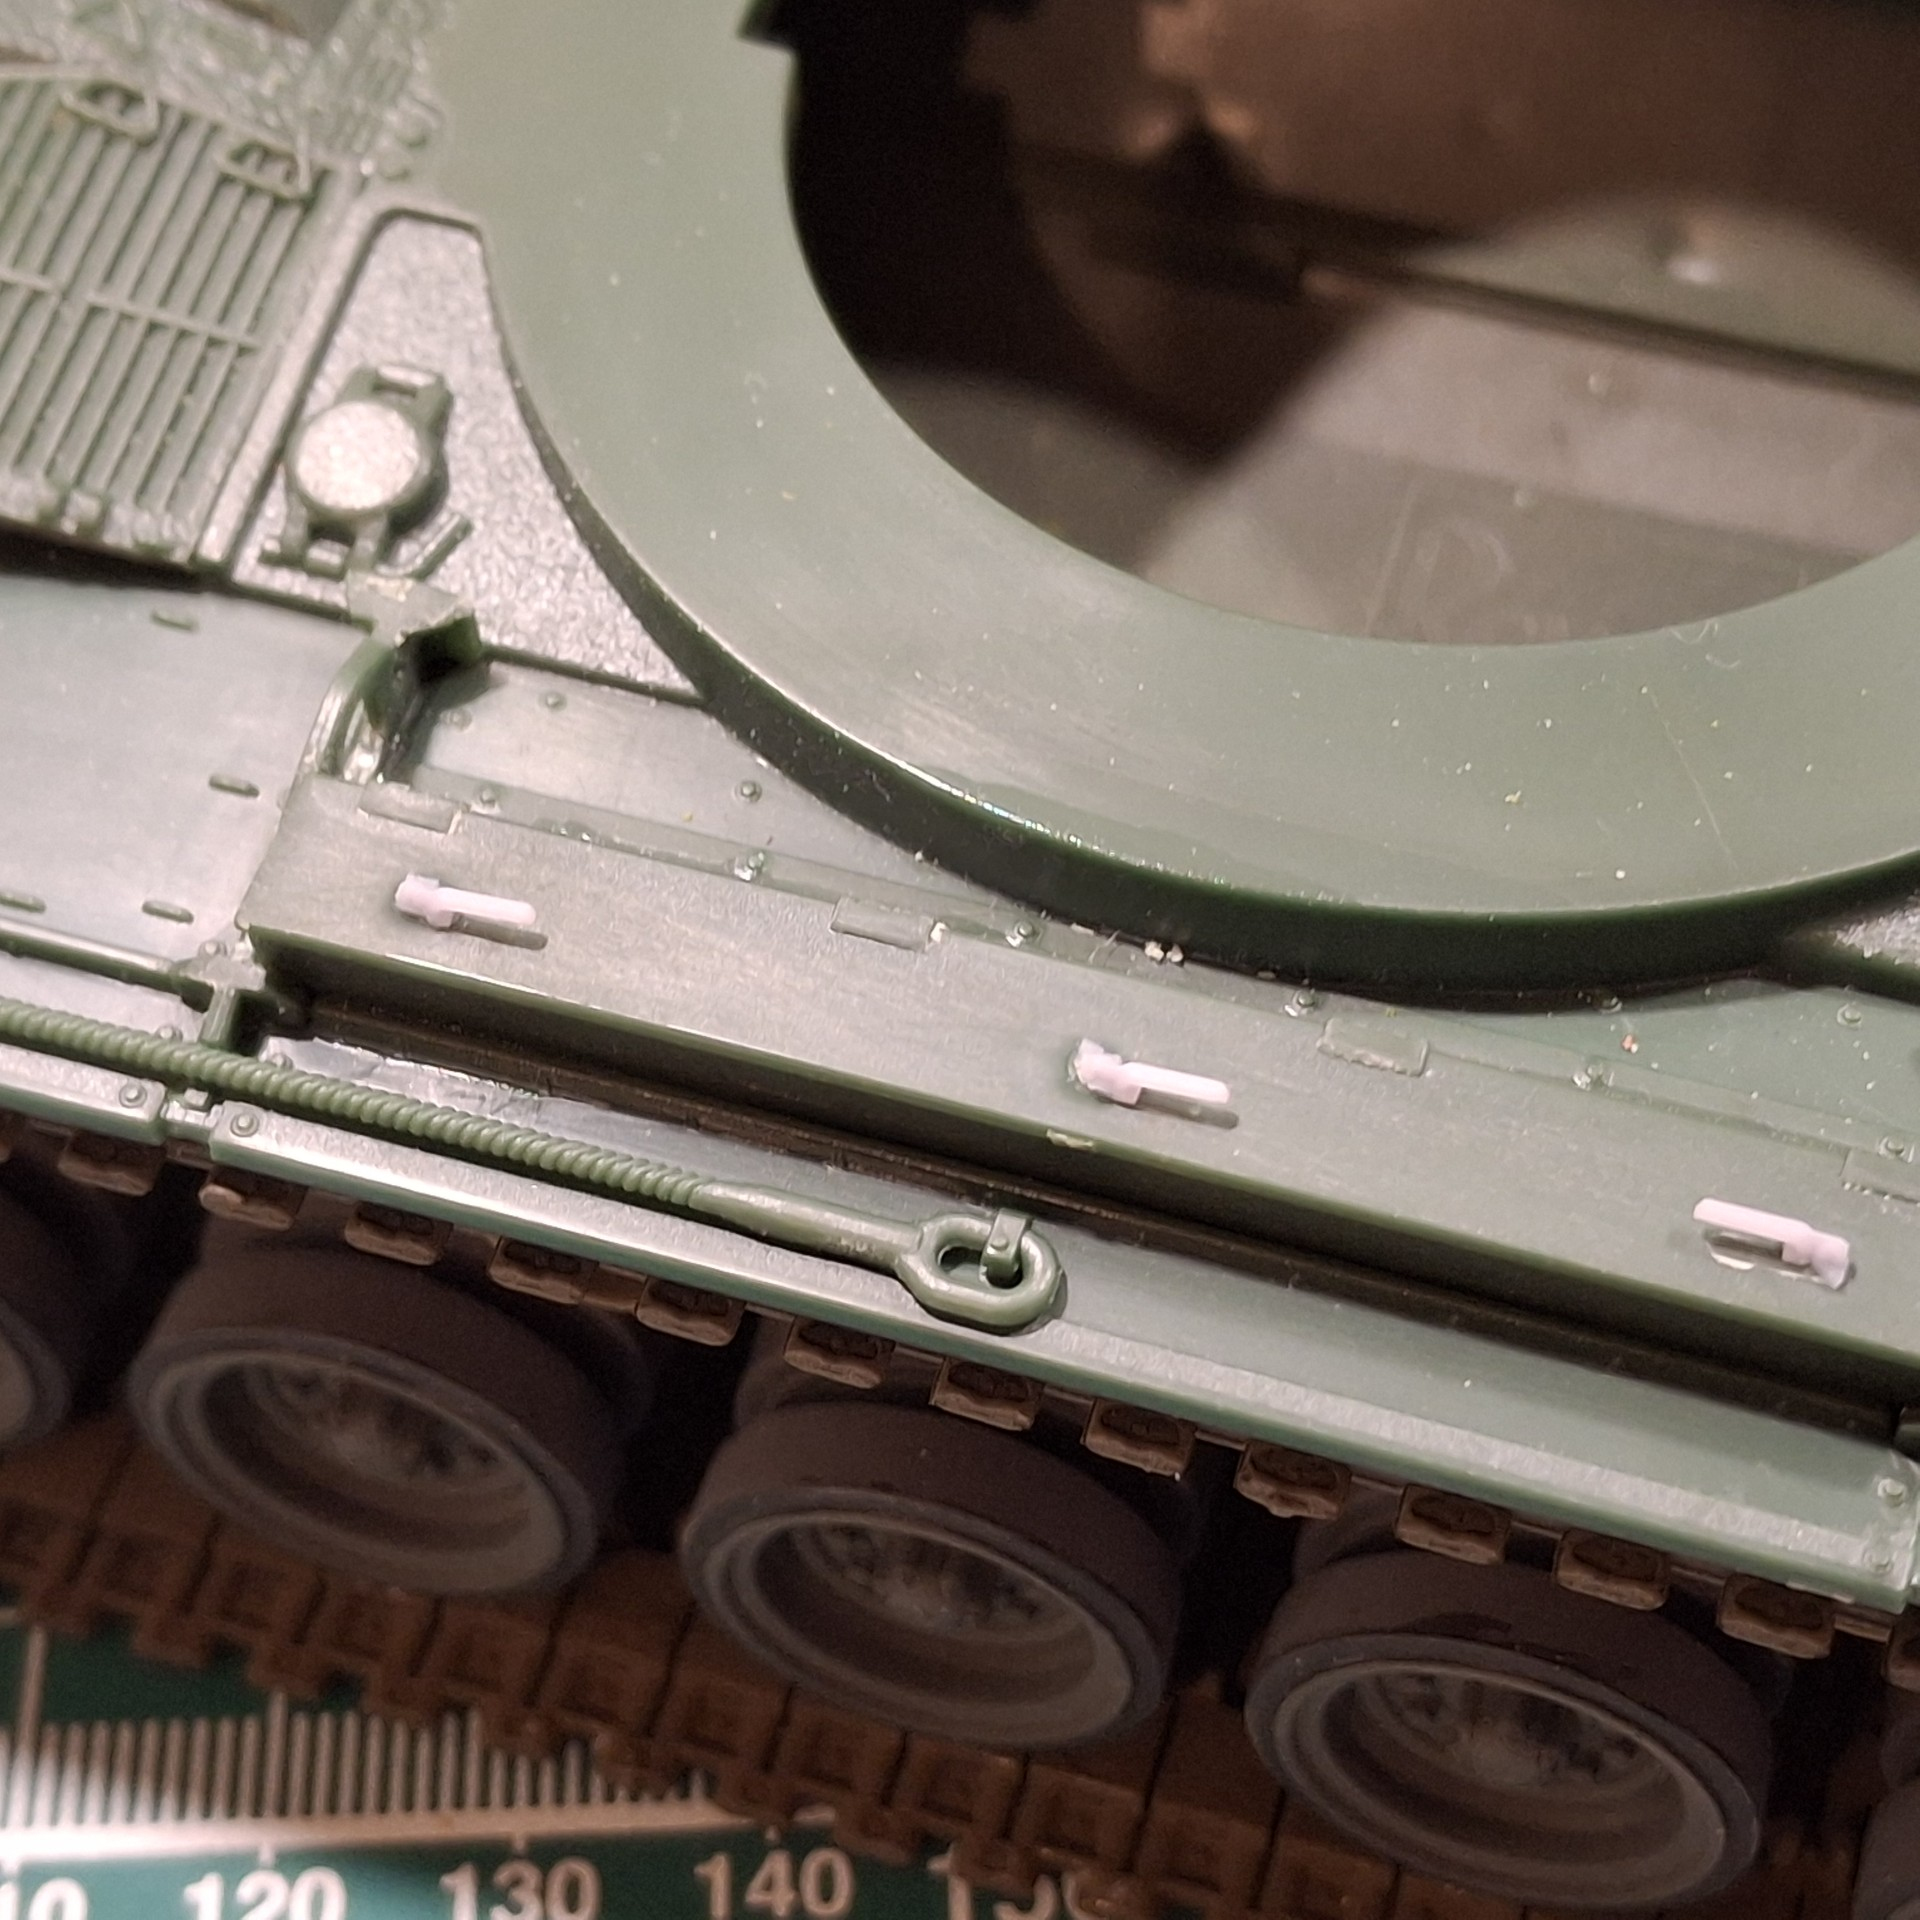
I also utilised replacement handles on the stowage bins and these came from FC Modeltrend – the kit versions being moulded solid. As with an awful lot of 3D printed stuff, I find removing the items from the runners a fraught business, and I damaged several; however, they do look better than the moulded on versions I feel, even though I was a little heavy-handed with glue:

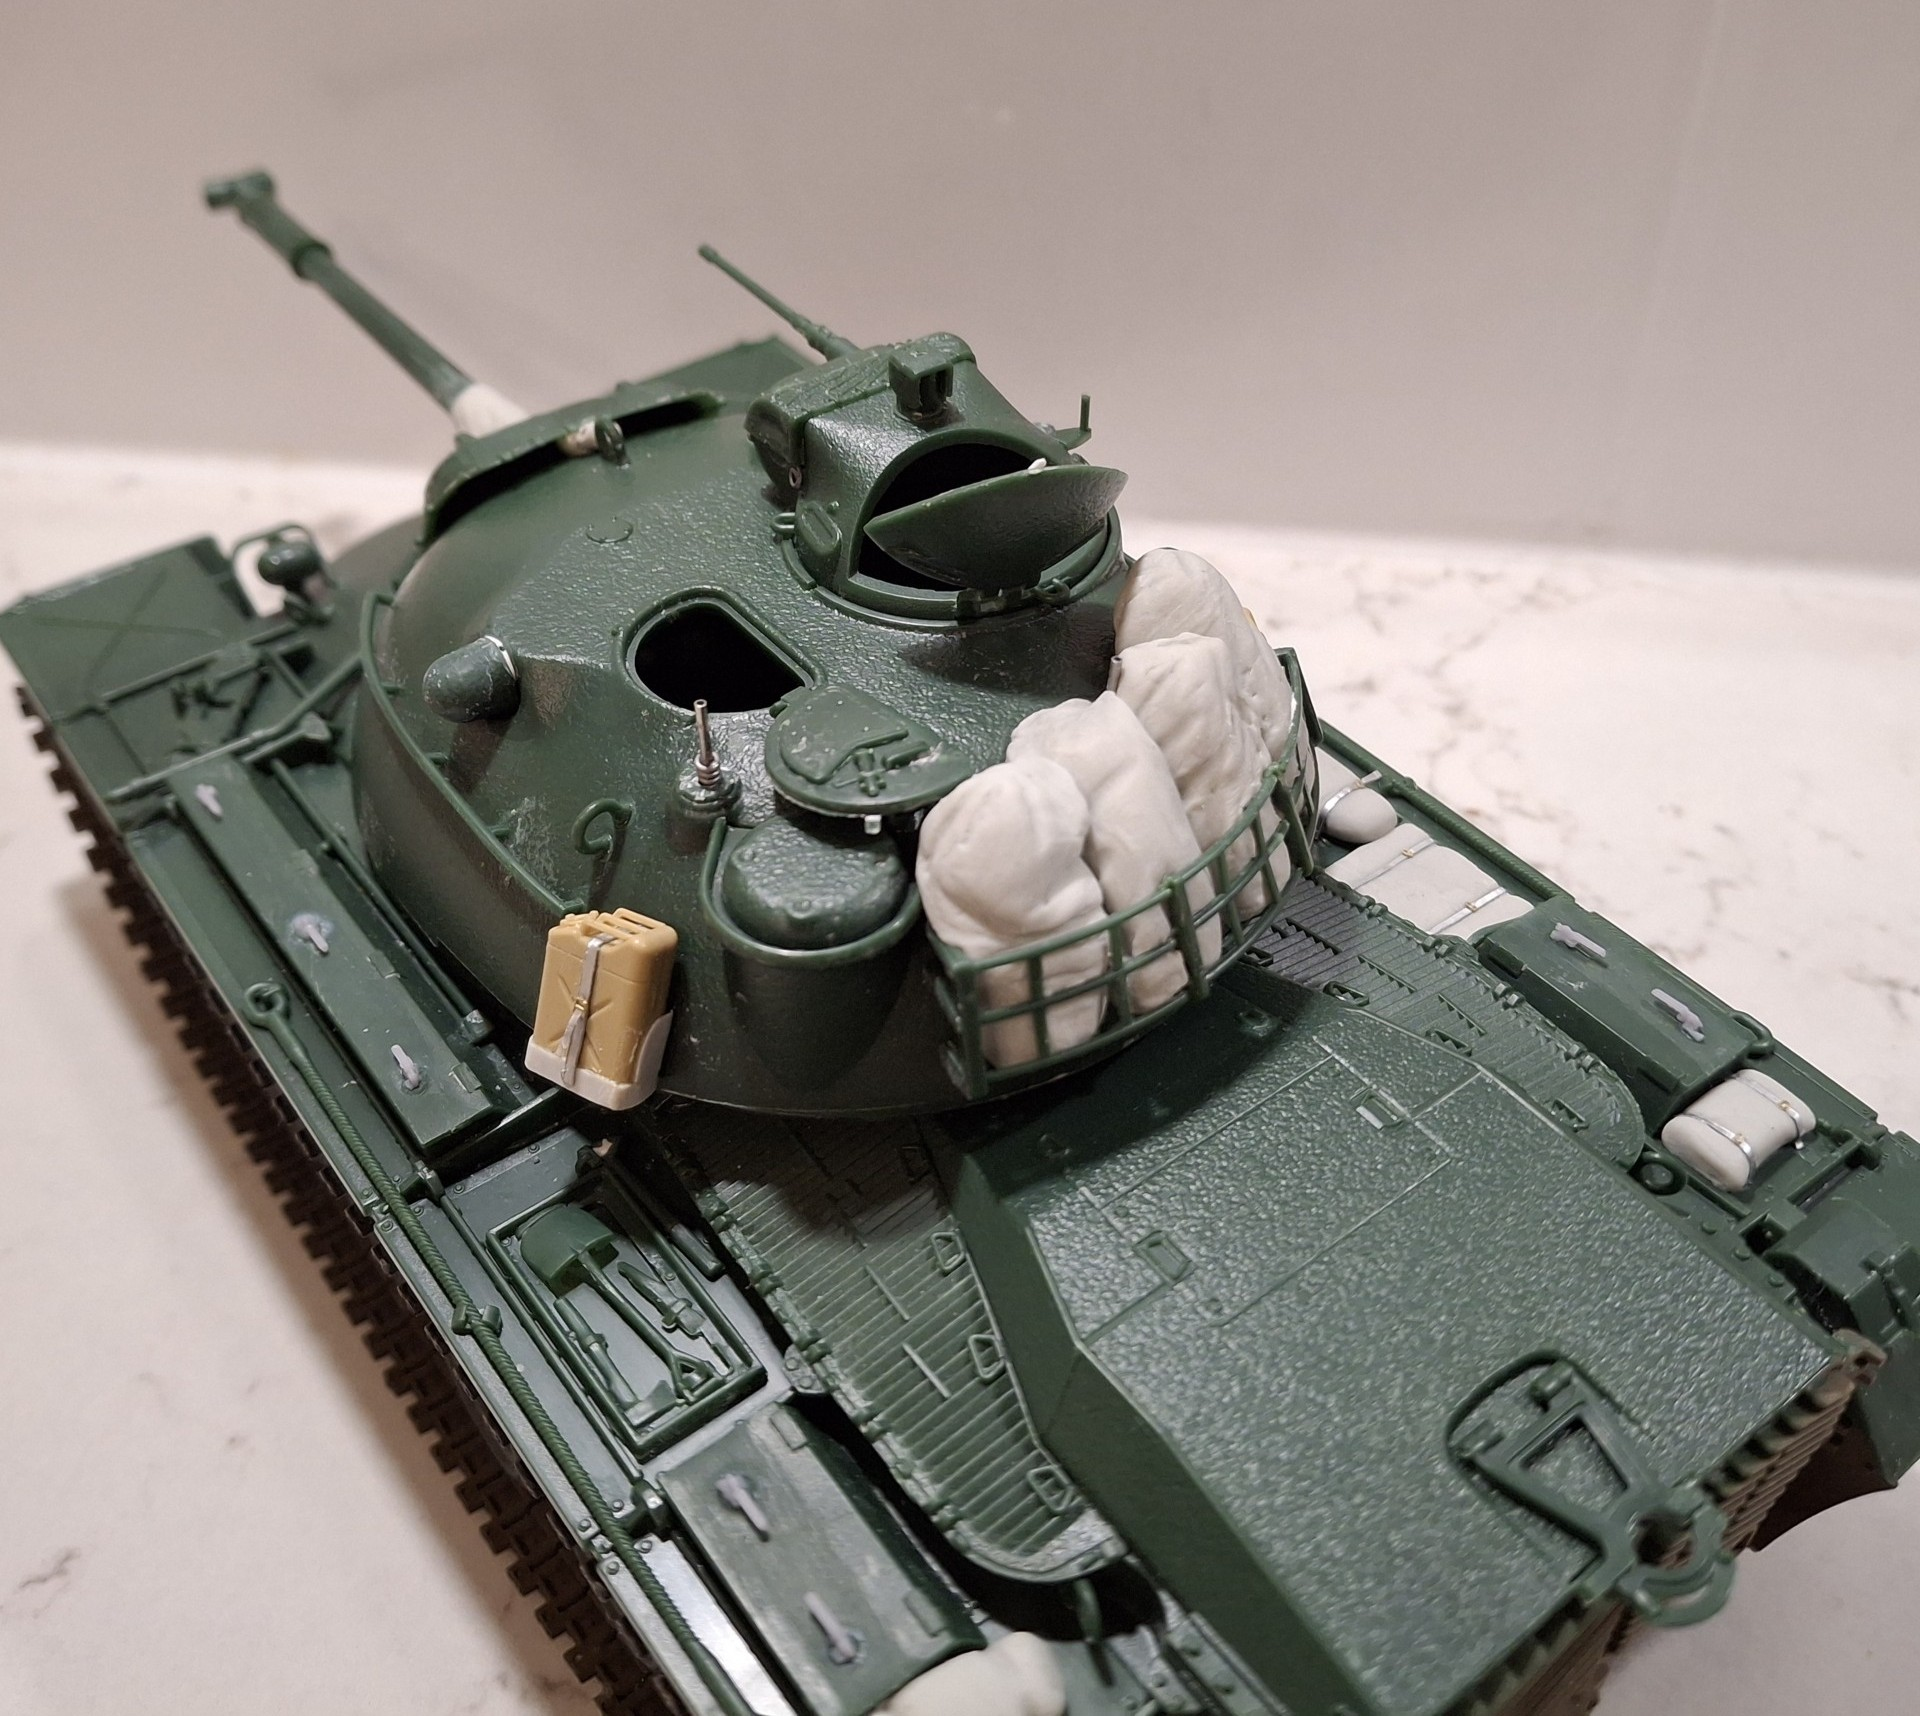
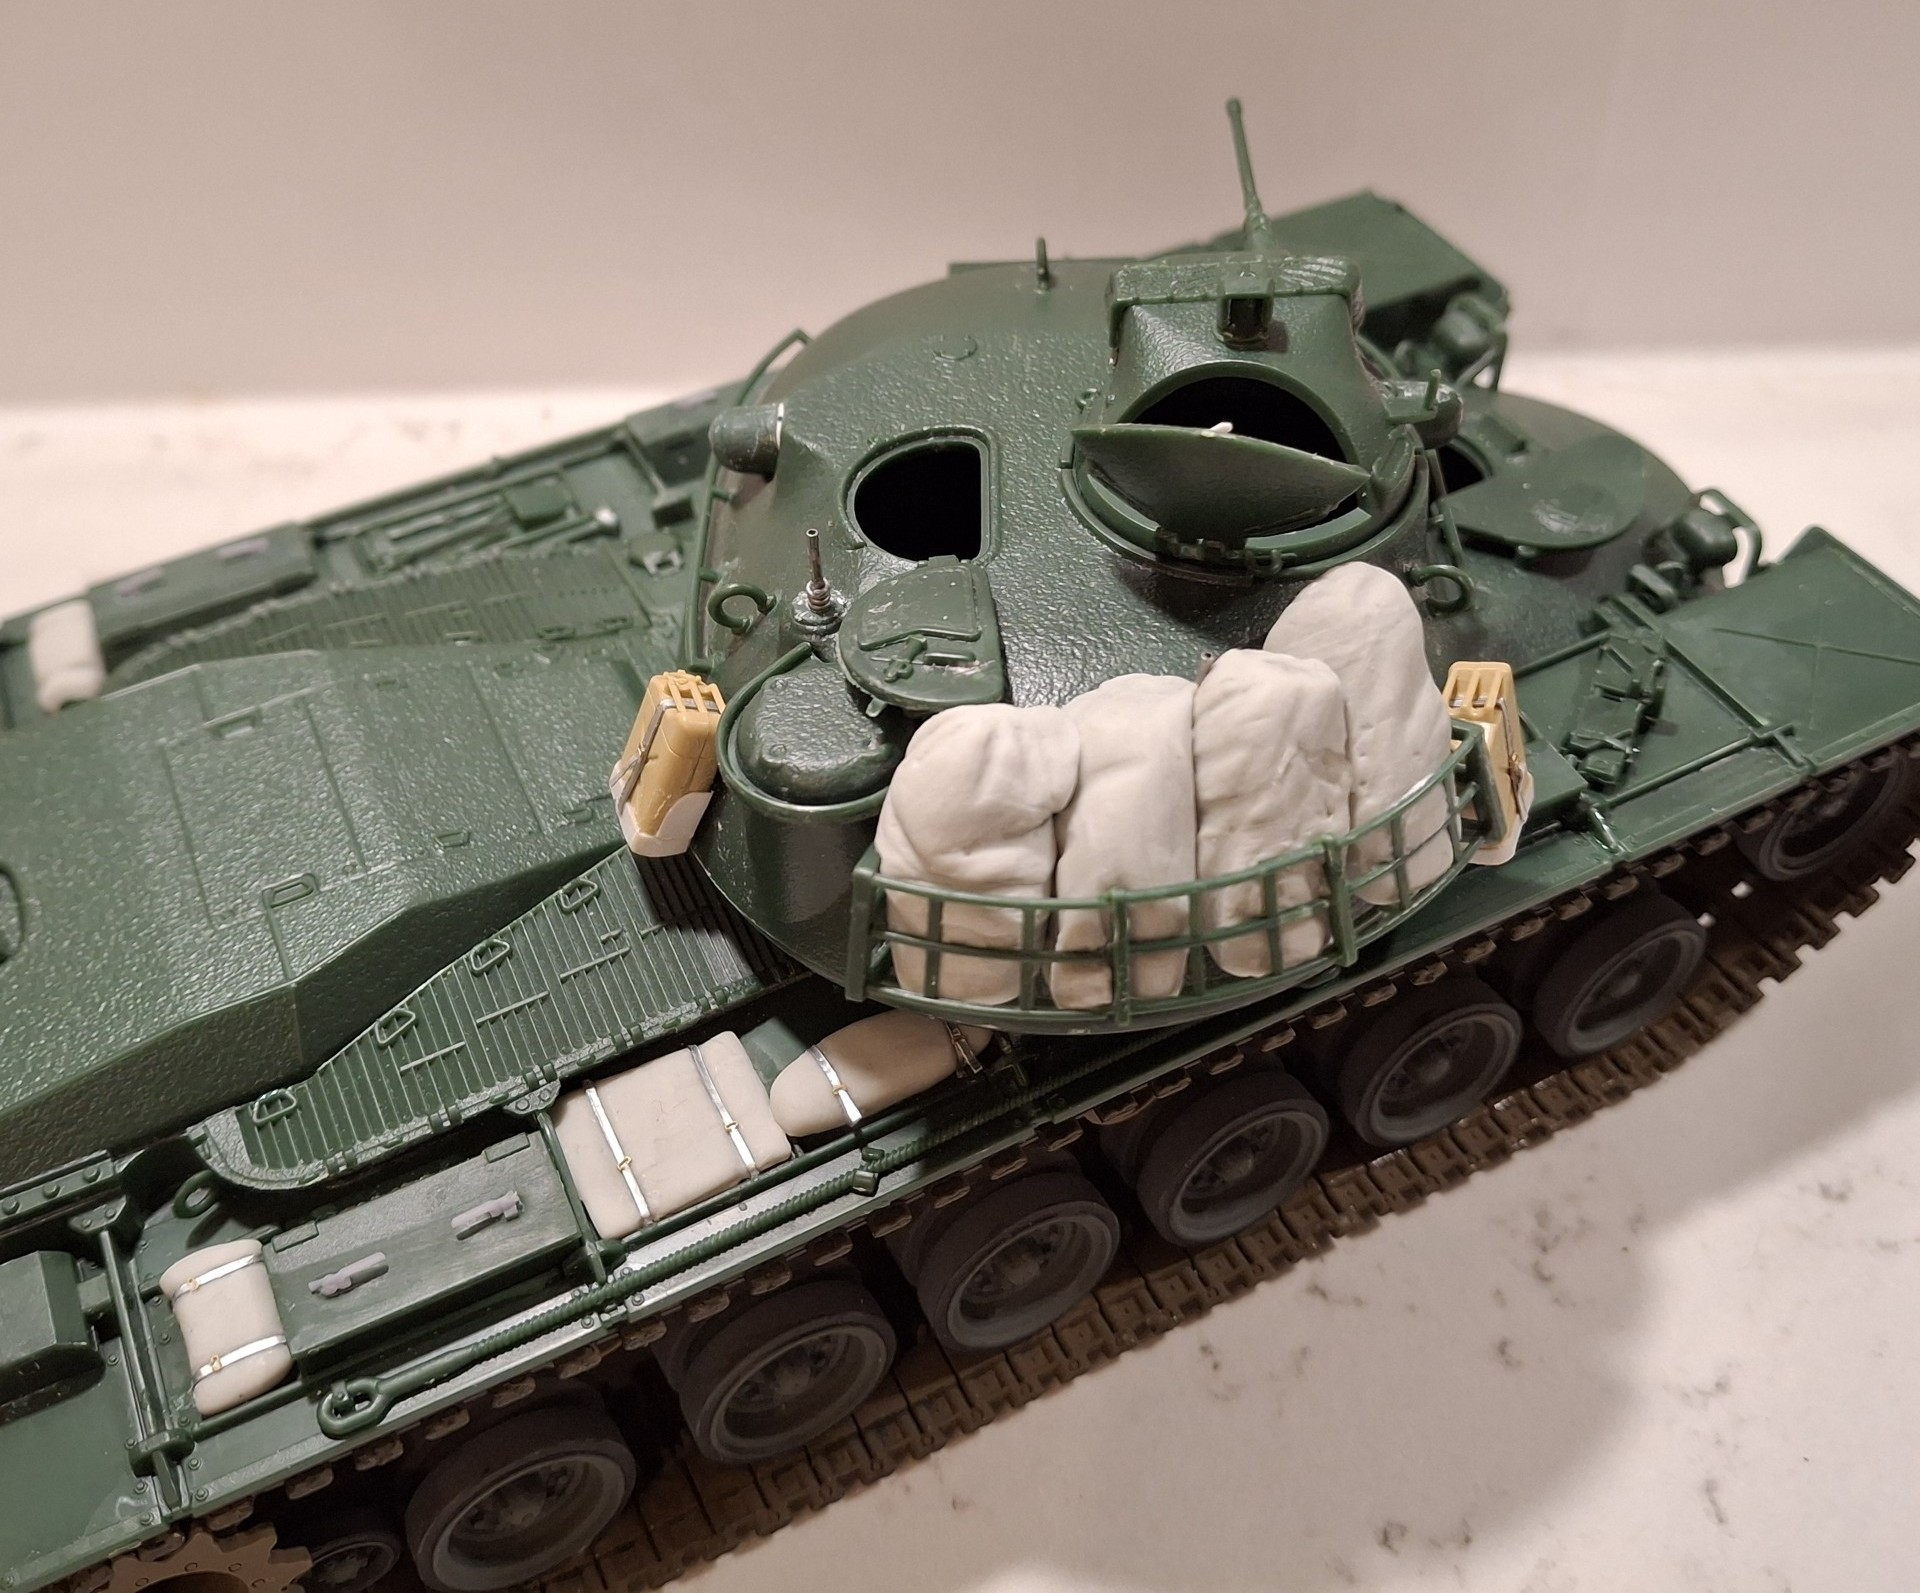
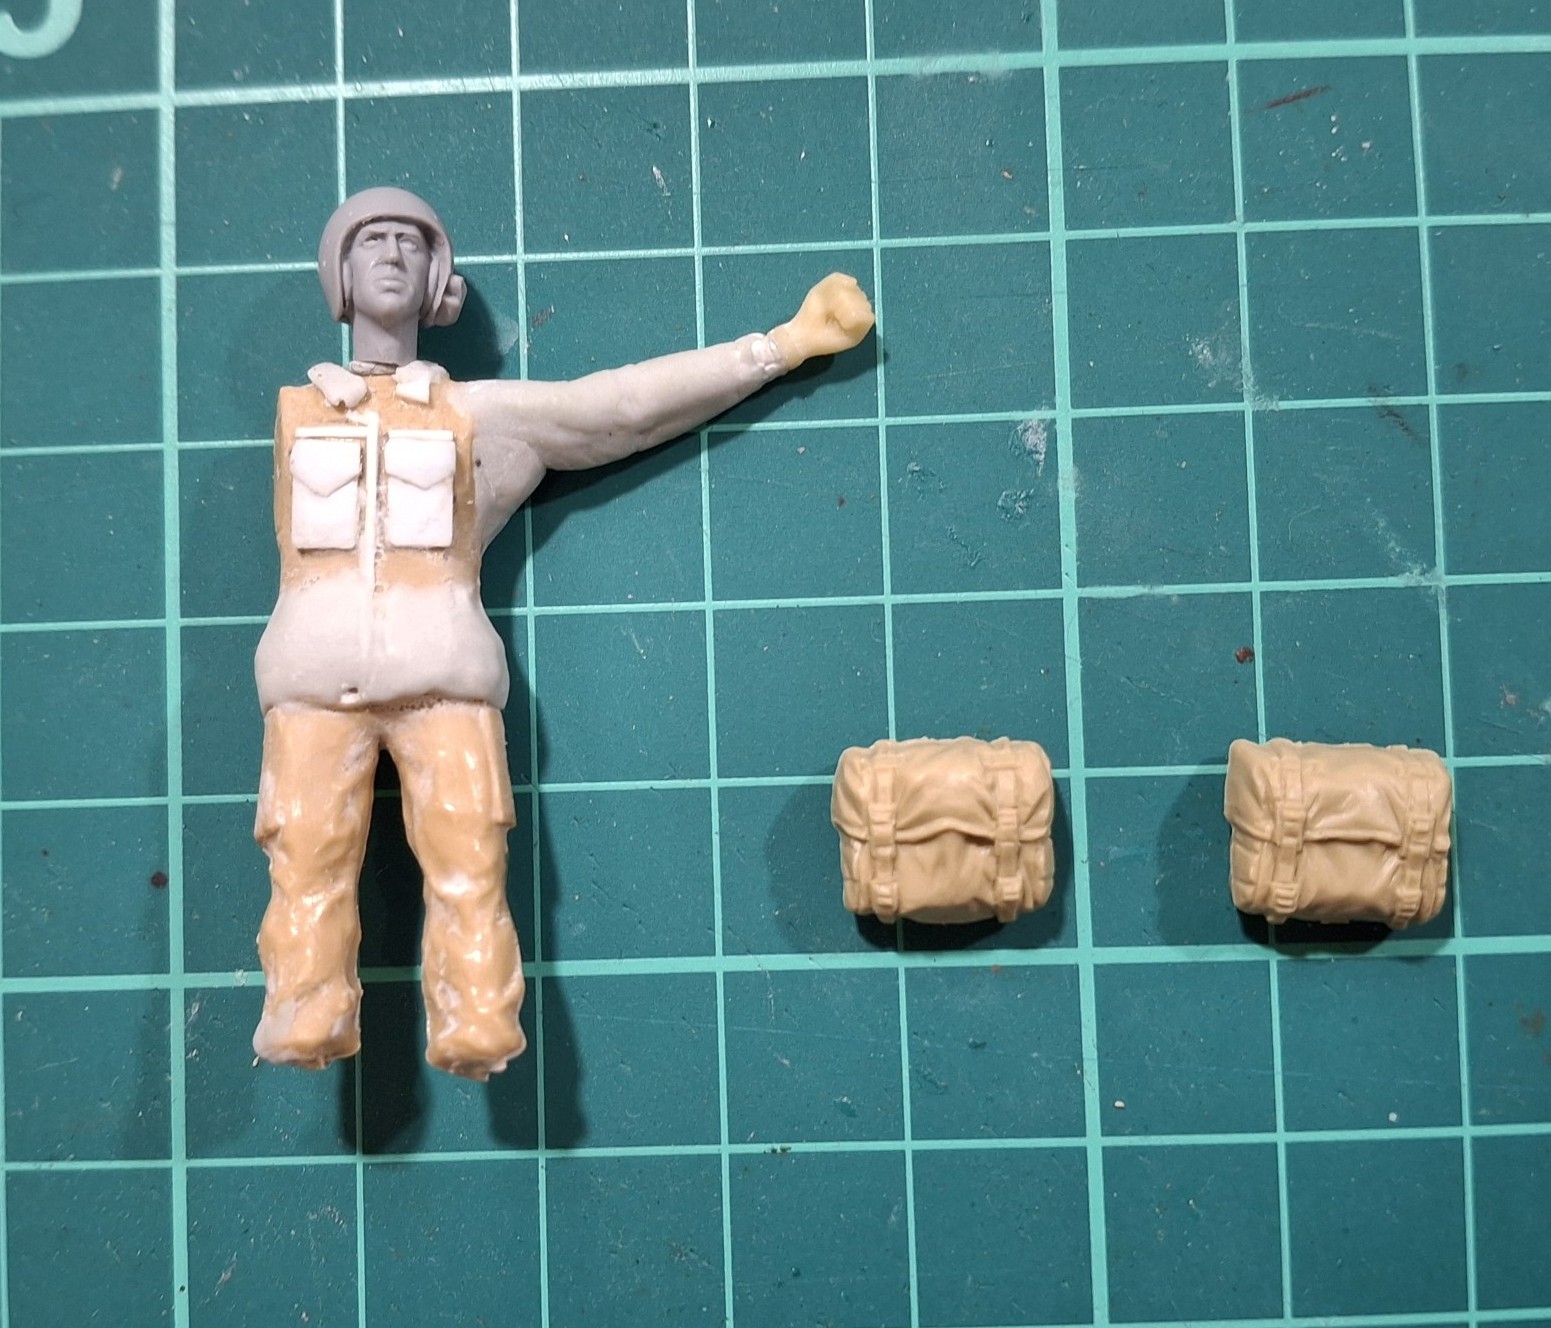
I like to populate my models so identified some suitable figures from the ancient Tamiya US Accessories set; there are sufficient figures to replicate the Driver, Commander and Loader/Operator, although all will require a makeover to ensure a representation of the timeframe, in this case, say, the early/mid 60s:

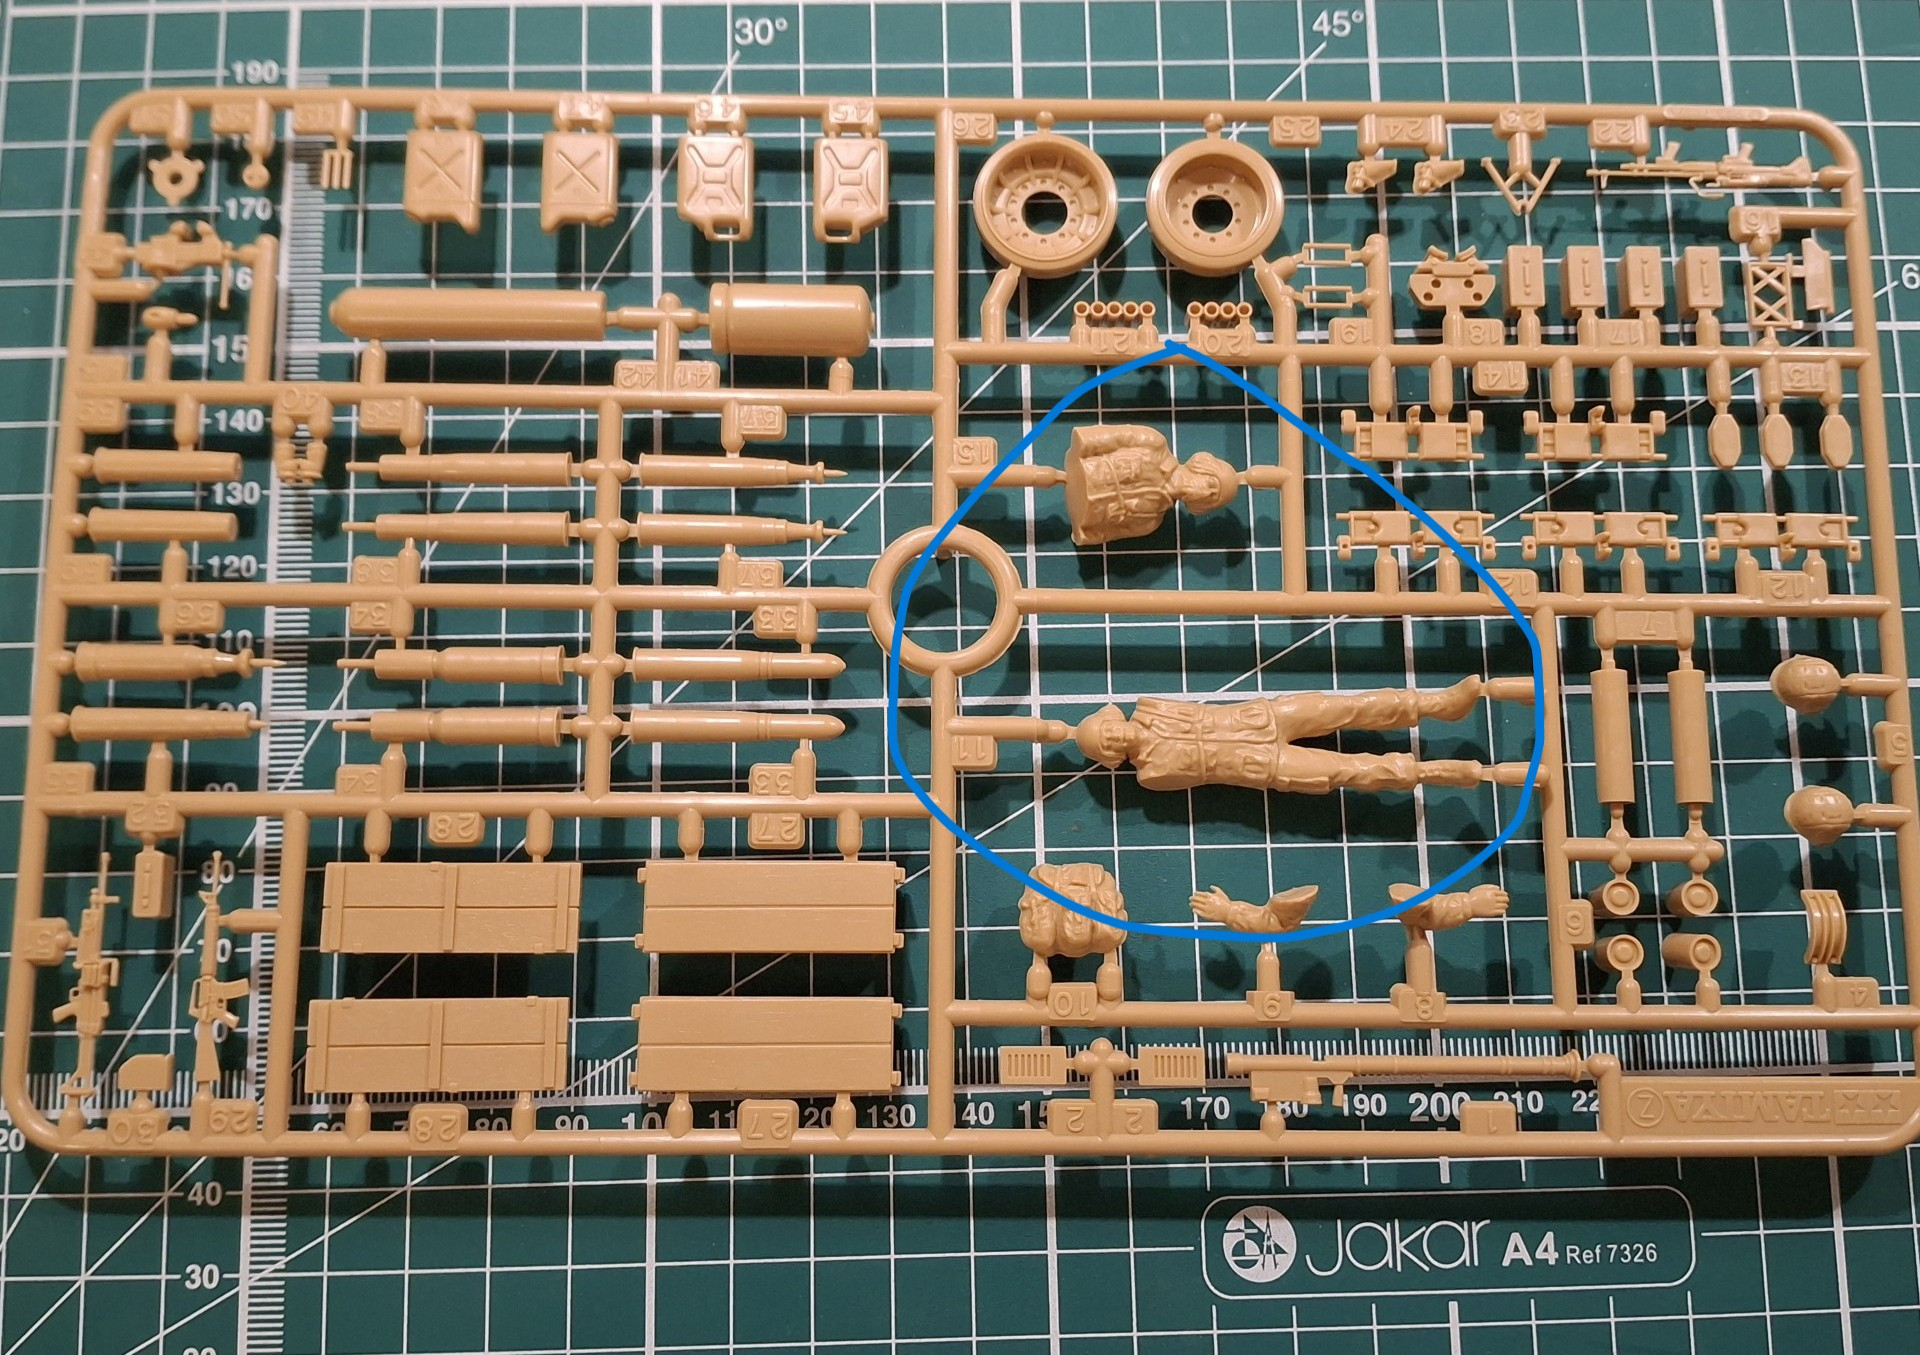
Cold War modellers will recognise the effort required to achieve anything like half-decent figures for this period; no manufacturer, apart from say, Valkyrie, have appreciated the gap in the market, (although in fairness, Miniart provide several iterations of Soviet crews) so, I set-to with extensive sanding, plastic card modifications, flattened lead wire, lead foil, all aided as usual with the simply sublime Hornet Heads US Tank Crew:

The Commander figure required an outstretched arm with a clenched fist (to indicate a change of direction to following tanks) and I decided I’d make an armature for this; a simple enough process with a wire drilled into the torso, then fleshed out (pun intended) using Magic Sculp.

The figure in its early stage:

Driver shown too, who will not require much attention at all as he can barely be seen.

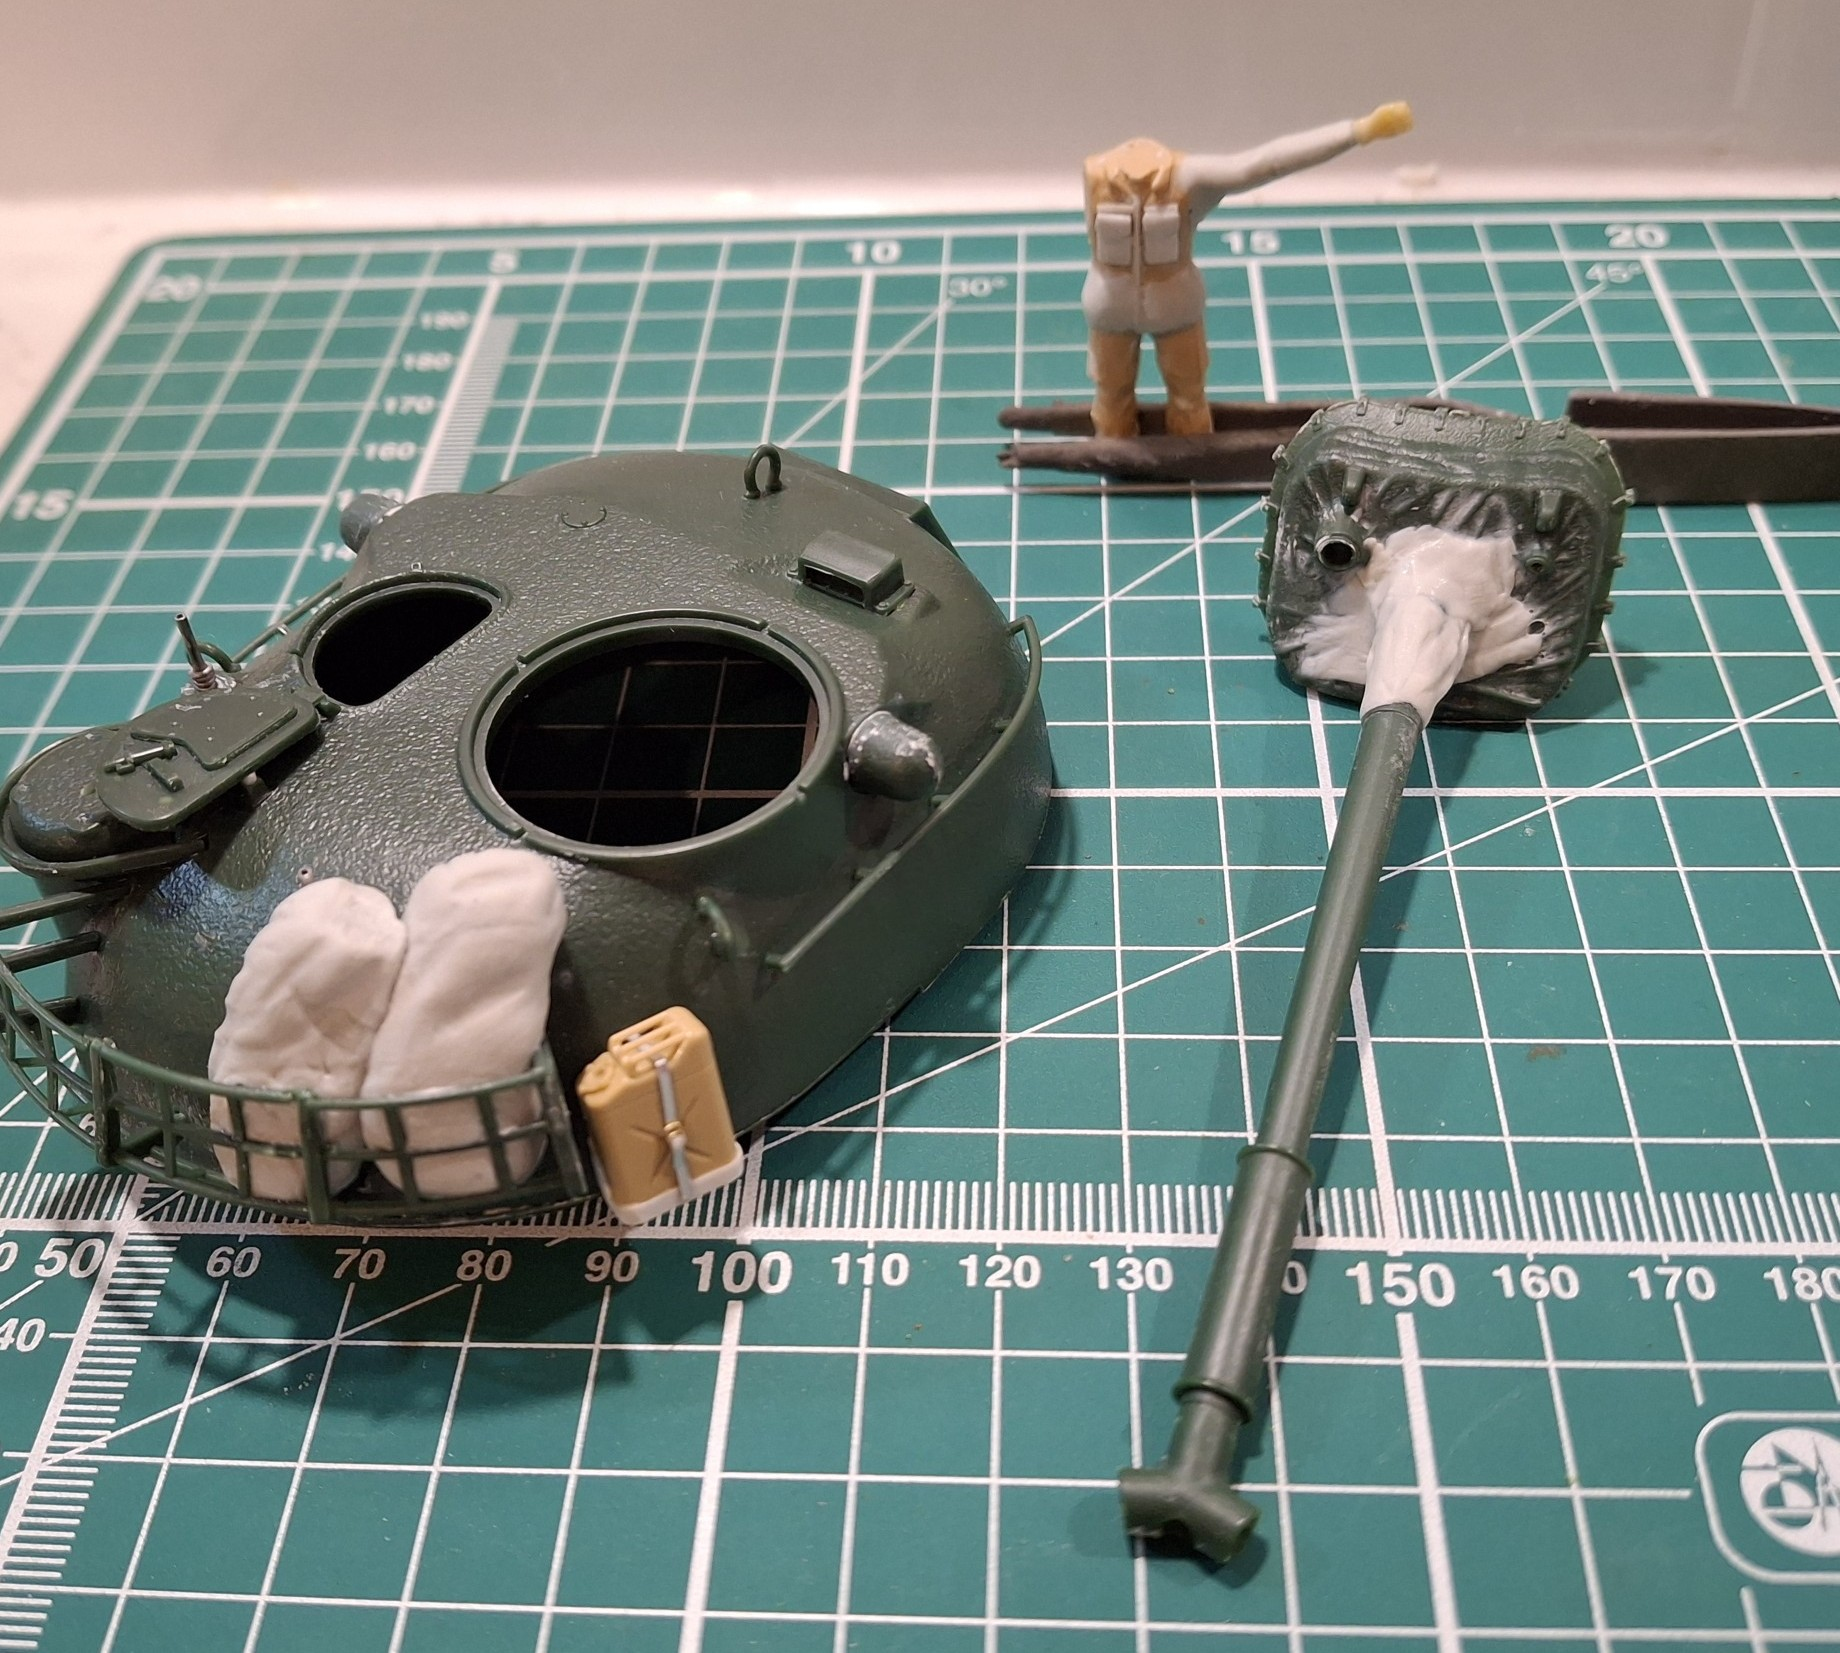
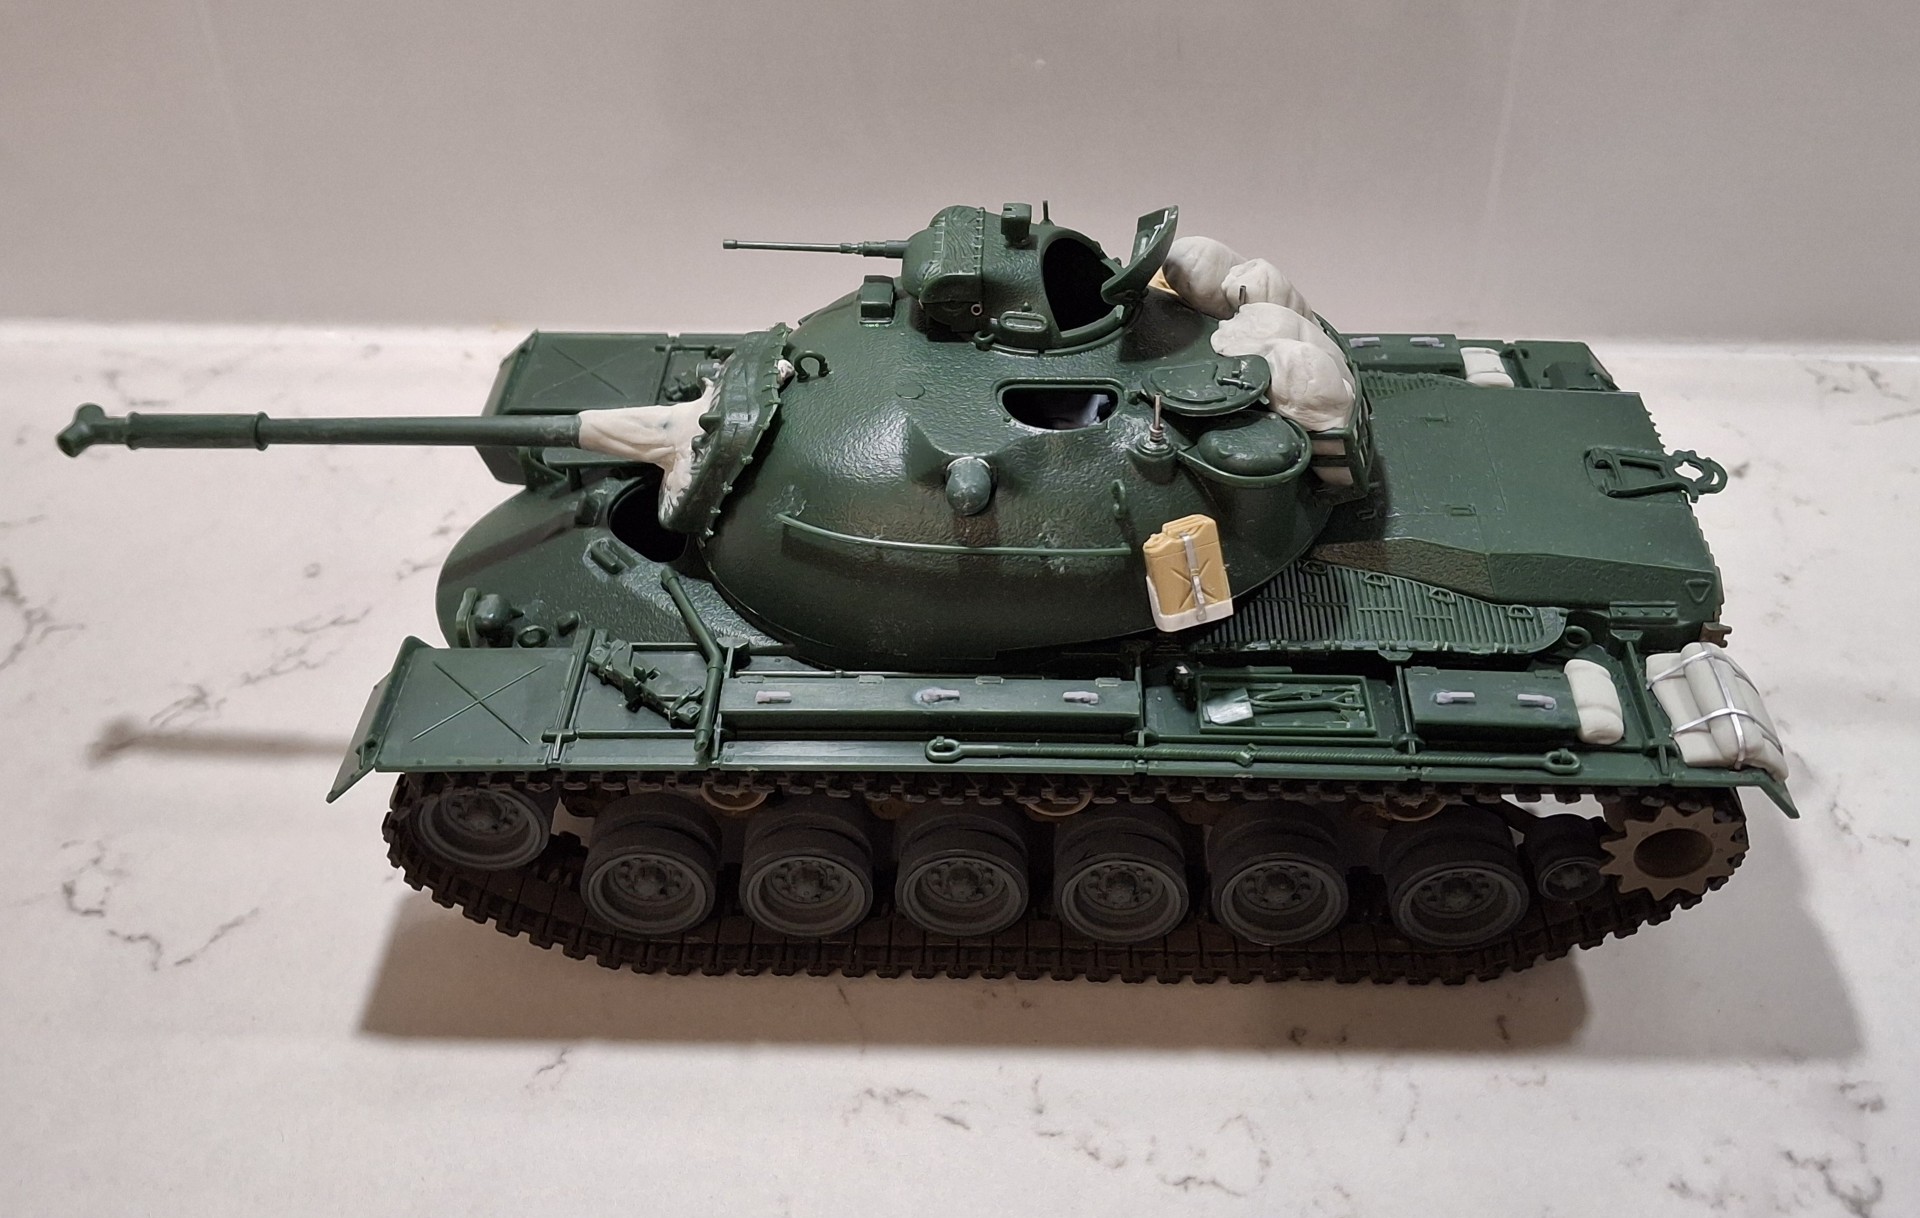
The model so far; I need to add contours to the mantlet cover and sleeve on the barrel using Magic Sculp:

The real thing shows what needs to be achieved:

The kit’s jerricans weren’t really good enough so I’ve used one from another Tamiya accessory set, with a mount for it from card, a strap from lead foil, and a buckle from an Aber etched set:

Infuriatingly, I’ve only the one so have ordered another accessory set.

20 Likes

Looking good so far. I am really interested how the Colgd War figures will come out.

Also of note, Dragon has a pretty good M48A2 as well. It is marketed as the Magach 1 & 2 kit but builds into a standard M48A2 that the IDF got from Germany.

4 Likes

Thanks Gino; I was unaware of the Dragon effort. That said, I went down the Revell route purely because of the markings:

which apparently gives me a vehicle from “14th Armoured Cavalry Regiment, 1st Squadron, Fulda, 1962” according to their instructions.

There doesn’t seem to be much love given to this workhorse of the 60s - or at least on the display tables - apart from the Middle East useage of course - but NATO’s Central Region - not much at all; plenty of interest in the A1 in Berlin, but even the Tankograd booklets don’t seem to provide much.

4 Likes

Great start Brian, love the figure conversions you do! Can’t wait to see it all painted up!

2 Likes

Very interesting Brian.Im enjoying seeing what you create with this one.

Chair pulled up!!.

Richard

1 Like

Bugger! I thought I might escape your eagle eye Richard; I’d better up my game methinks. No slacking on this one!

1 Like

I admit I haven’t brought my A2 efforts to a show for some time now, but I built a couple in BW markings! I also did an A1…

2 Likes

Well, that’s good to hear Tom! I cobbled together the ancient Monogram A2 into a Bundeswehr version around 30 or so years ago using a few components from the Lo Model M48/M60 conversion set, and filched the tracks from the Tamiya M48; crew came from Dragon’s LAH at Kursk set - always my go-to for Bw crew:

But high time I thought for it to be displayed in its country of origin finish; we’ll see how it goes - crew - as usual on my models - being crucial(!)

13 Likes

That’s what I like about your builds, besides being great builds, you usually include crews, just the thing I always do as well :+1:

3 Likes

Thanks Bert; I just always think it needs a figure or two, just to show the respective sizes yet also, if I’m not too preachy here(!) to remind the viewer that people lived, worked, and even died in these things. That said, I fully understand why some modellers deem that figures are difficult, and they have my sympathy. It’s taken me years to get a working methodology, not helped by the fact that Cold War modellers generally, have to convert; which is where I came in. I need to tackle the Magic Sculpting right now as I keep putting it off!

Thanks for the support.

3 Likes

Nooo Brian.You keep making your stuff your way fella.Always interested in what you create.I really must get my act together and get some Cold war stuff done but so many other distractions and off on a tangent wayyyyy to much.

Richsrd

2 Likes

As Kennedy said, “We choose to do these things, not because they are easy, but because they are hard!”…

1 Like

God, you can just imagine how that would go down today!

2 Likes

So, not that much to show for this evening’s work, but I find sculpting of any sort quite taxing; an arm added to a figure plus some work on the jacket skirts, some extra contouring to the mantlet cover, and an attempt at 2 out of 4 kitbags required for the stowage rack. Straps etc still to be added to the latter:

16 Likes

A great start (and more) on this one Brian. This should be an interesting one indeed, a true Cold War warrior!

I’m sure I can recall seeing that Monogram version of your’s at a Salisbury club meeting many years ago, and being impressed with it then!

I’m also watching this one keenly.

1 Like

Gonna follow this one for sure! The Cold War USAREUR and a M48, two favored subjects! :saluting_face::+1:t3:

1 Like

Right, another evening - or rather part of it - spent wrestling with Magic Sculp: ever wondered what those apparently surplus lash-down points are on the rear hull? Well, they’re certainly for something according to these images from the TM:

So, using these images as a guide I’ve come up with these extras - straps and buckles to be added once dry (post overnight):

Plus a little bit of extra texturing on the gun mantlet cover.

Now, it may well be that crews did not abide by such strictures as the Technical Manual, but it’s nice to make the tank look busy I think, so if that was the case - ie crews stashing stuff elsewhere - then suspend a little bit of belief!

Needless to say, as I’ve always maintained that life is, in fact, a conspiracy against one, I ran out of Magic Sculp and only managed one extra kit-bag for the stowage rack; I never seem to be able to estimate the amount correctly when I’m kneading the constituent compounds together; anyway, not really a problem but I’ll deal with that tomorrow.

8 Likes

The somewhat tedious chore of adding strapping to the various equipment bundles:

Buckles will be added once all are done.

11 Likes

Managed to finish installing the final kitbag, and also installed the second jerrican:

The vehicle now looks as though it’s going somewhere with a bit more purpose; for some reason this shot below took me back to the Roco Minitanks version:

Strapping still continues but nearly there:

Of course, there’s still the buckles to add - some just discernible here:

I was considering adding the crew’s butt-packs from the M1956 equipment to the stowage rack rails as well; the Tamiya accessories kit comes with some and with 2 x sets have sufficient, however, they look a little on the large size to me, and I’m sure Tamiya are probably portraying the later ALICE-type. which may be larger. This means I may have to make my own so I’m chewing this over:

13 Likes

Excellent job Brian

1 Like