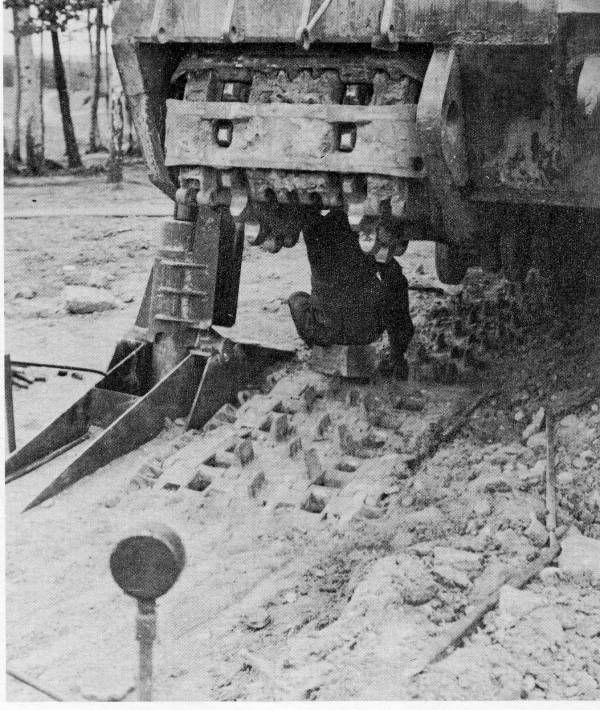
Yes, I can’t decide, but am thinking that all models of this are based on the same single vehicle, the Maus no. 2, which was the only completed version with the armed turret. It was only used for trials, but armoured plates had already been cut for another half dozen tanks, and rolled for a number of others, so they were serious about series production. It just made me think that for use in combat it would probably be fitted out with the usual spare links, tools, cables, etc. The jack was not the normal jack however, and there are photos of links being replaced.
The side skirts were not demountable, so it all had to be done from underneath. Love the thought of getting under this thing with it jacked up on muddy earth…
Anyway, I was thinking of making it an operational version with all the attachments. The one thing I think to avoid is anything that increases the width or length, since it was already at the maximum. There’s not a lot of spare room on the deck.
Excellent… two massive jacks… It is true that I can’t see those stowing easily on the tank itself. And yet would you risk it getting stuck for want of a track link if your support convoy cannot reach you? Can you fit a link by driving until the busted one is at the accessible end?
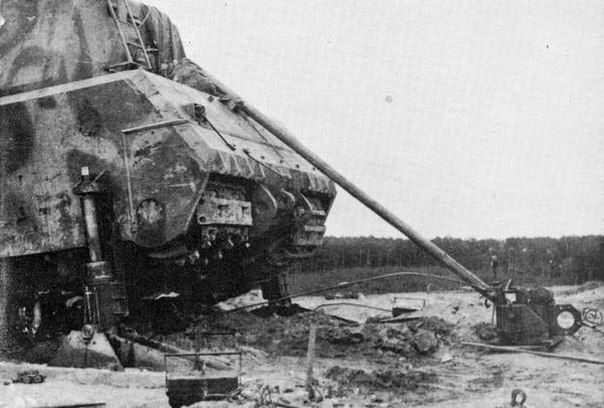
That’s another point I was going to make - those jacks are too big to stow inside, and they aren’t in evidence being stowed externally. A support vehicle like a Famo would be necessary for the equipment! I’m pretty sure there was another pic from the same series published with a deep hole dug under the track, and the worker’s head just visible underneath - certainly not a place I would like to be with 180+ tons directly above!
Thanks, I think that was the encouragement I needed not to make any more work for myself. Plus Biggles’ comment about needing a support vehicle. I was wondering how they even were meant to get in and out of it without help.
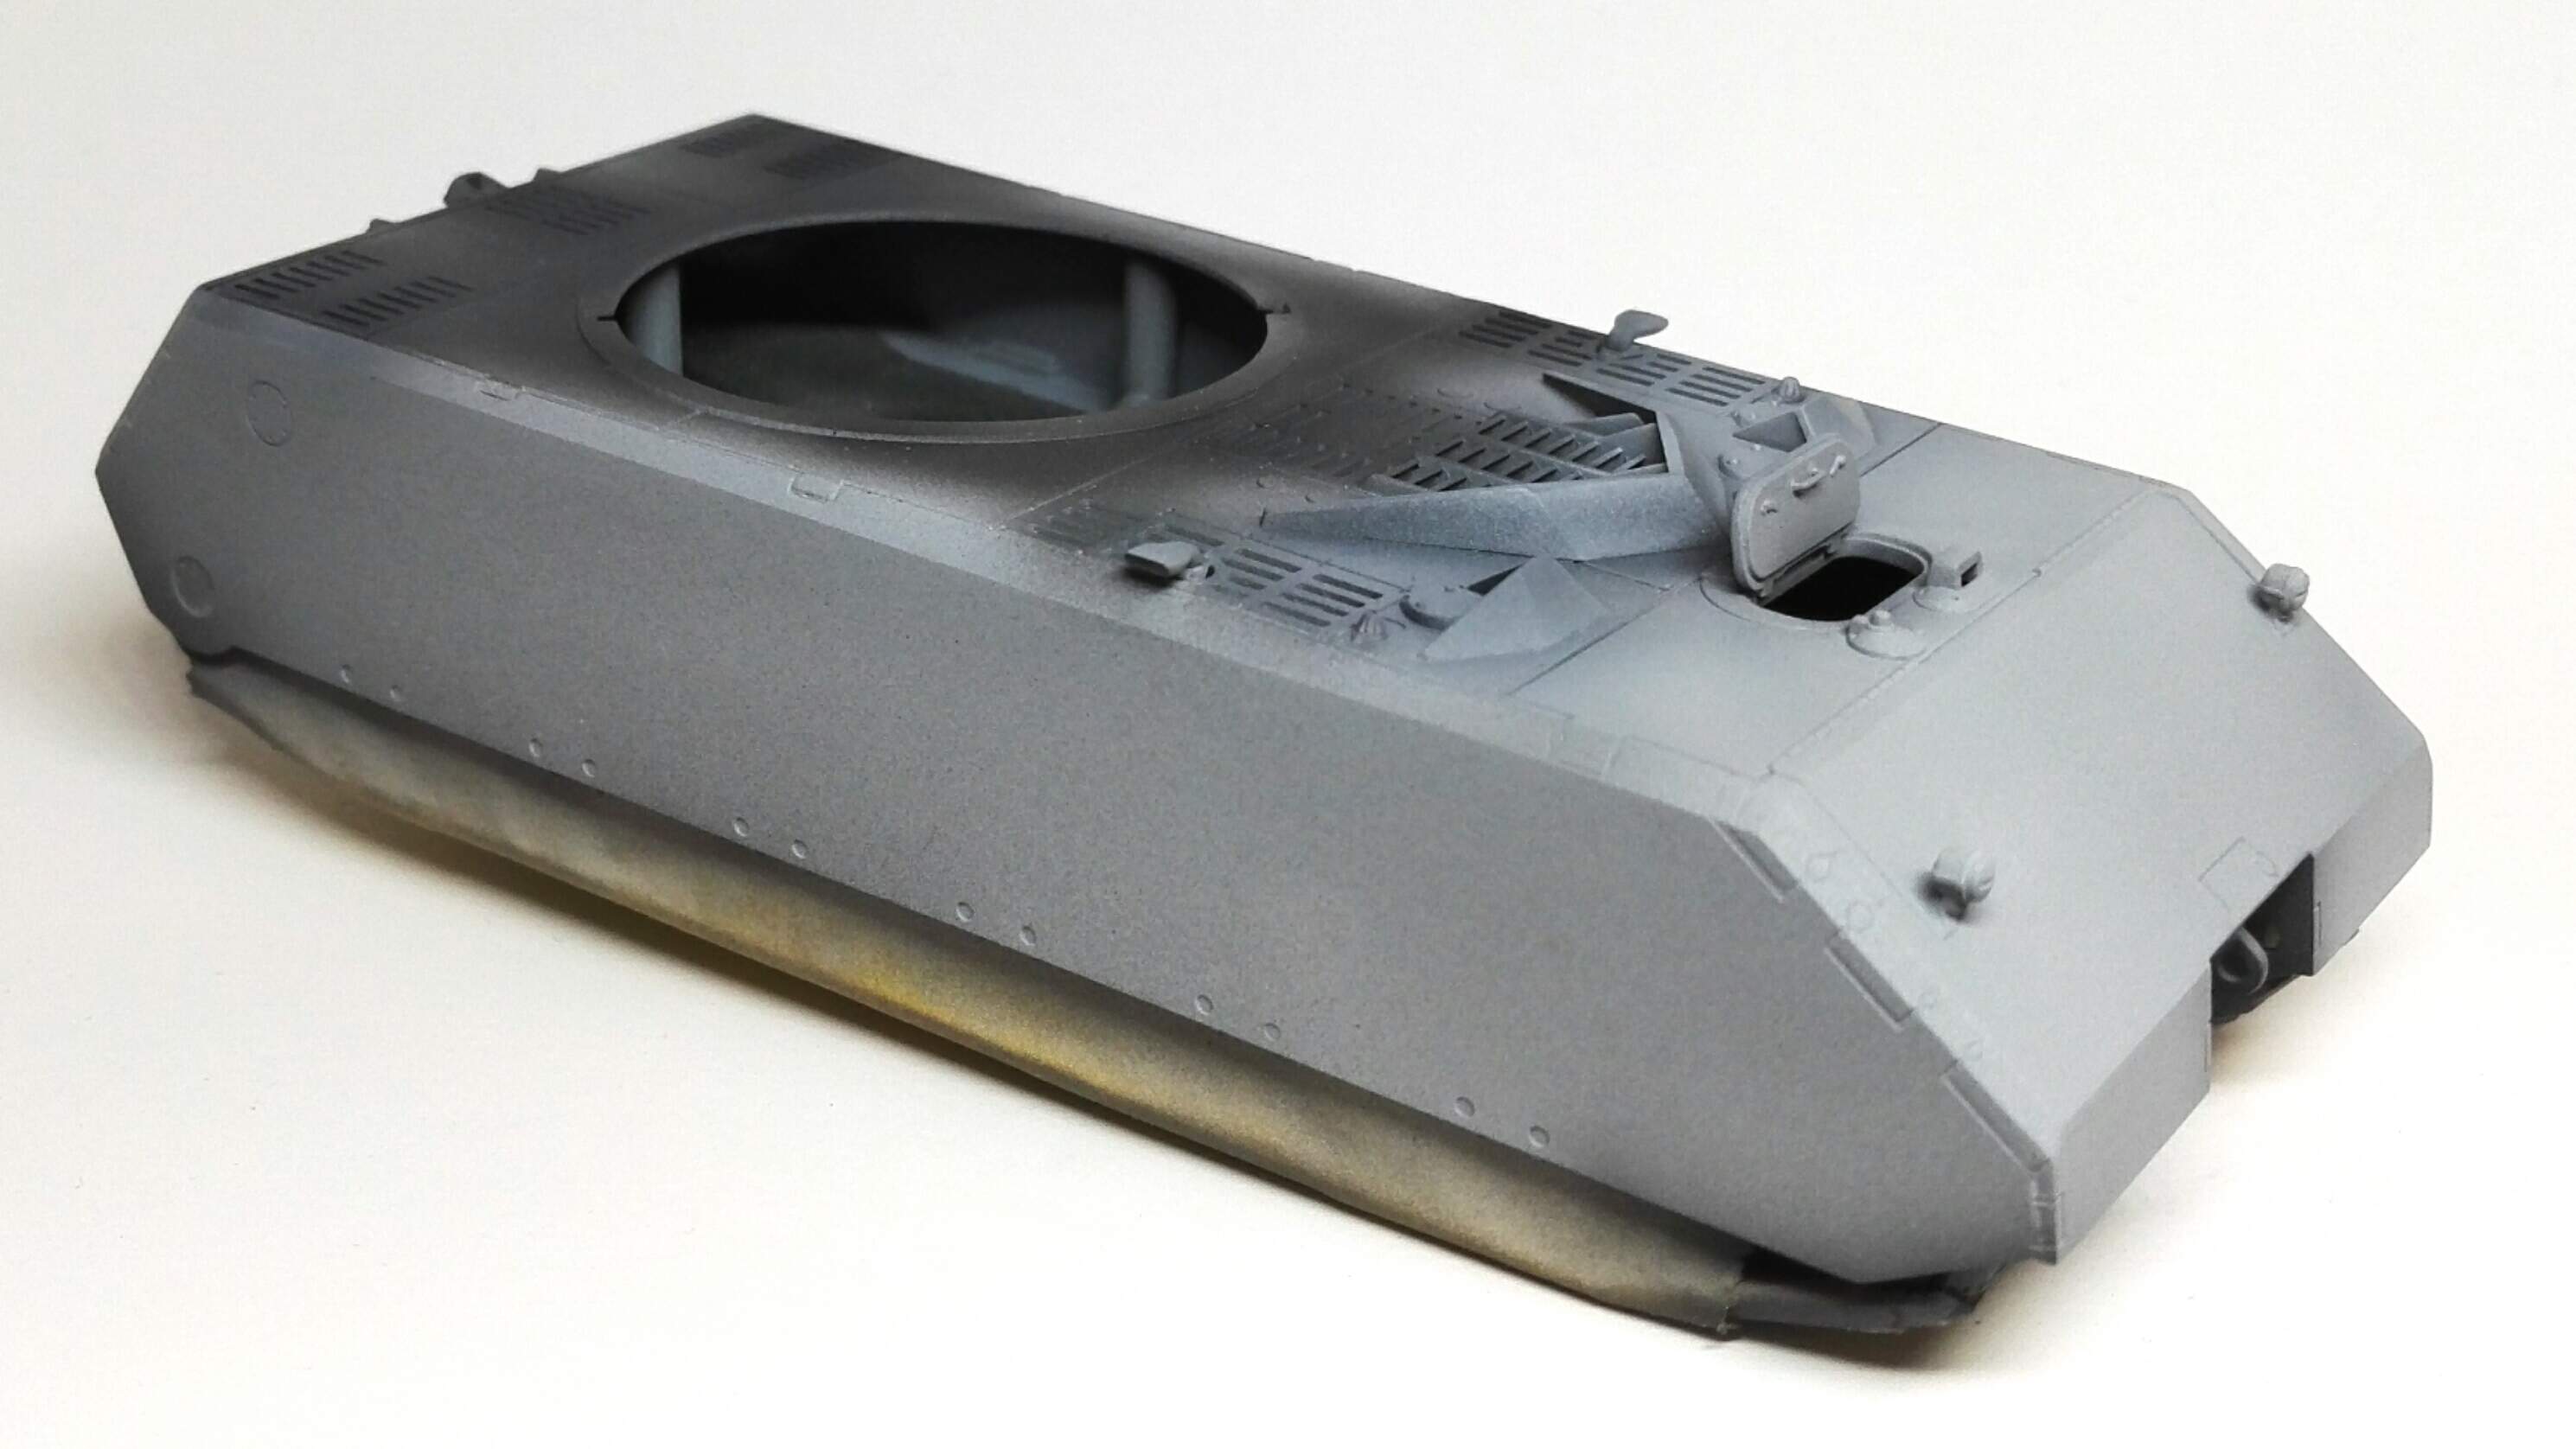
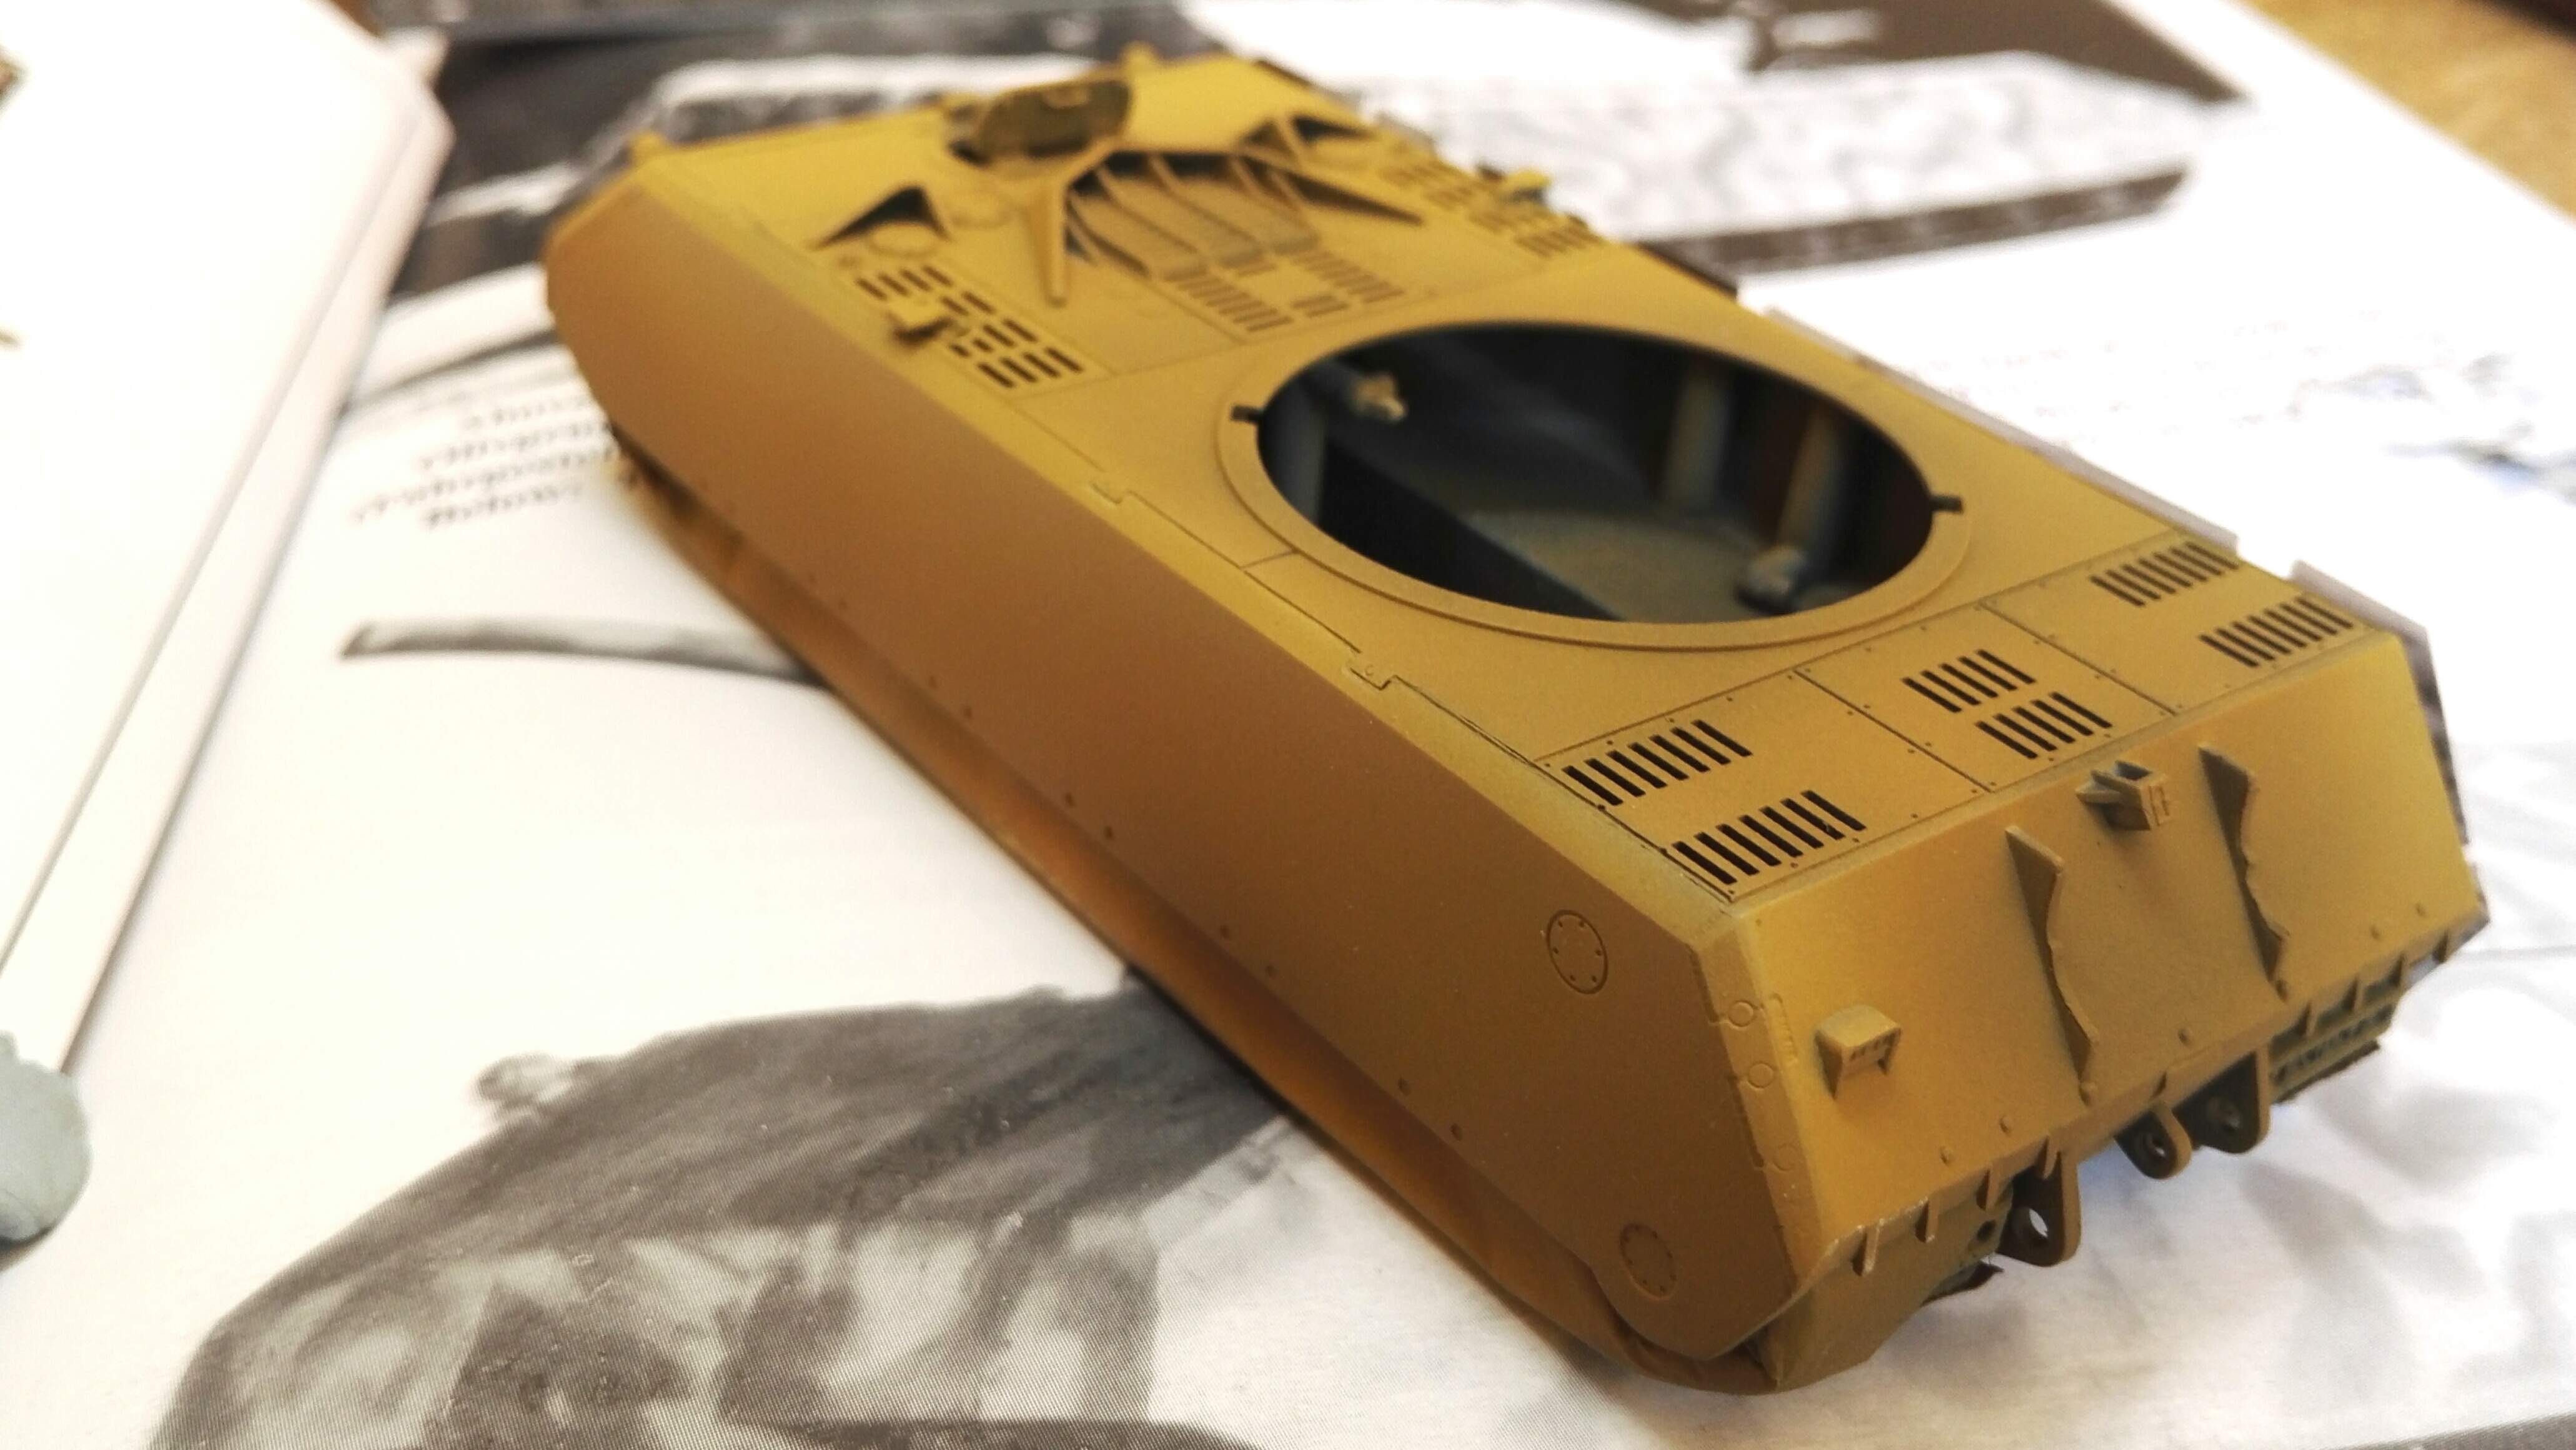
Recently I’ve primed everything in black, but thought I’d try grey and black this time. Can’t decide on plain dark yellow or camouflage in the end, see how it goes once the dunkelgelb is on, I guess.
On the side armour, it needed to be 180mm thick on the upper section, but 100mm thick on the lower section over the wheels and track. To make it as strong as possible it was decided it should be made from a single piece of steel rolled to 180mm,with the lower section milled out to 100mm. Krupp owned the one single milling machine in Germany capable of removing that much steel.
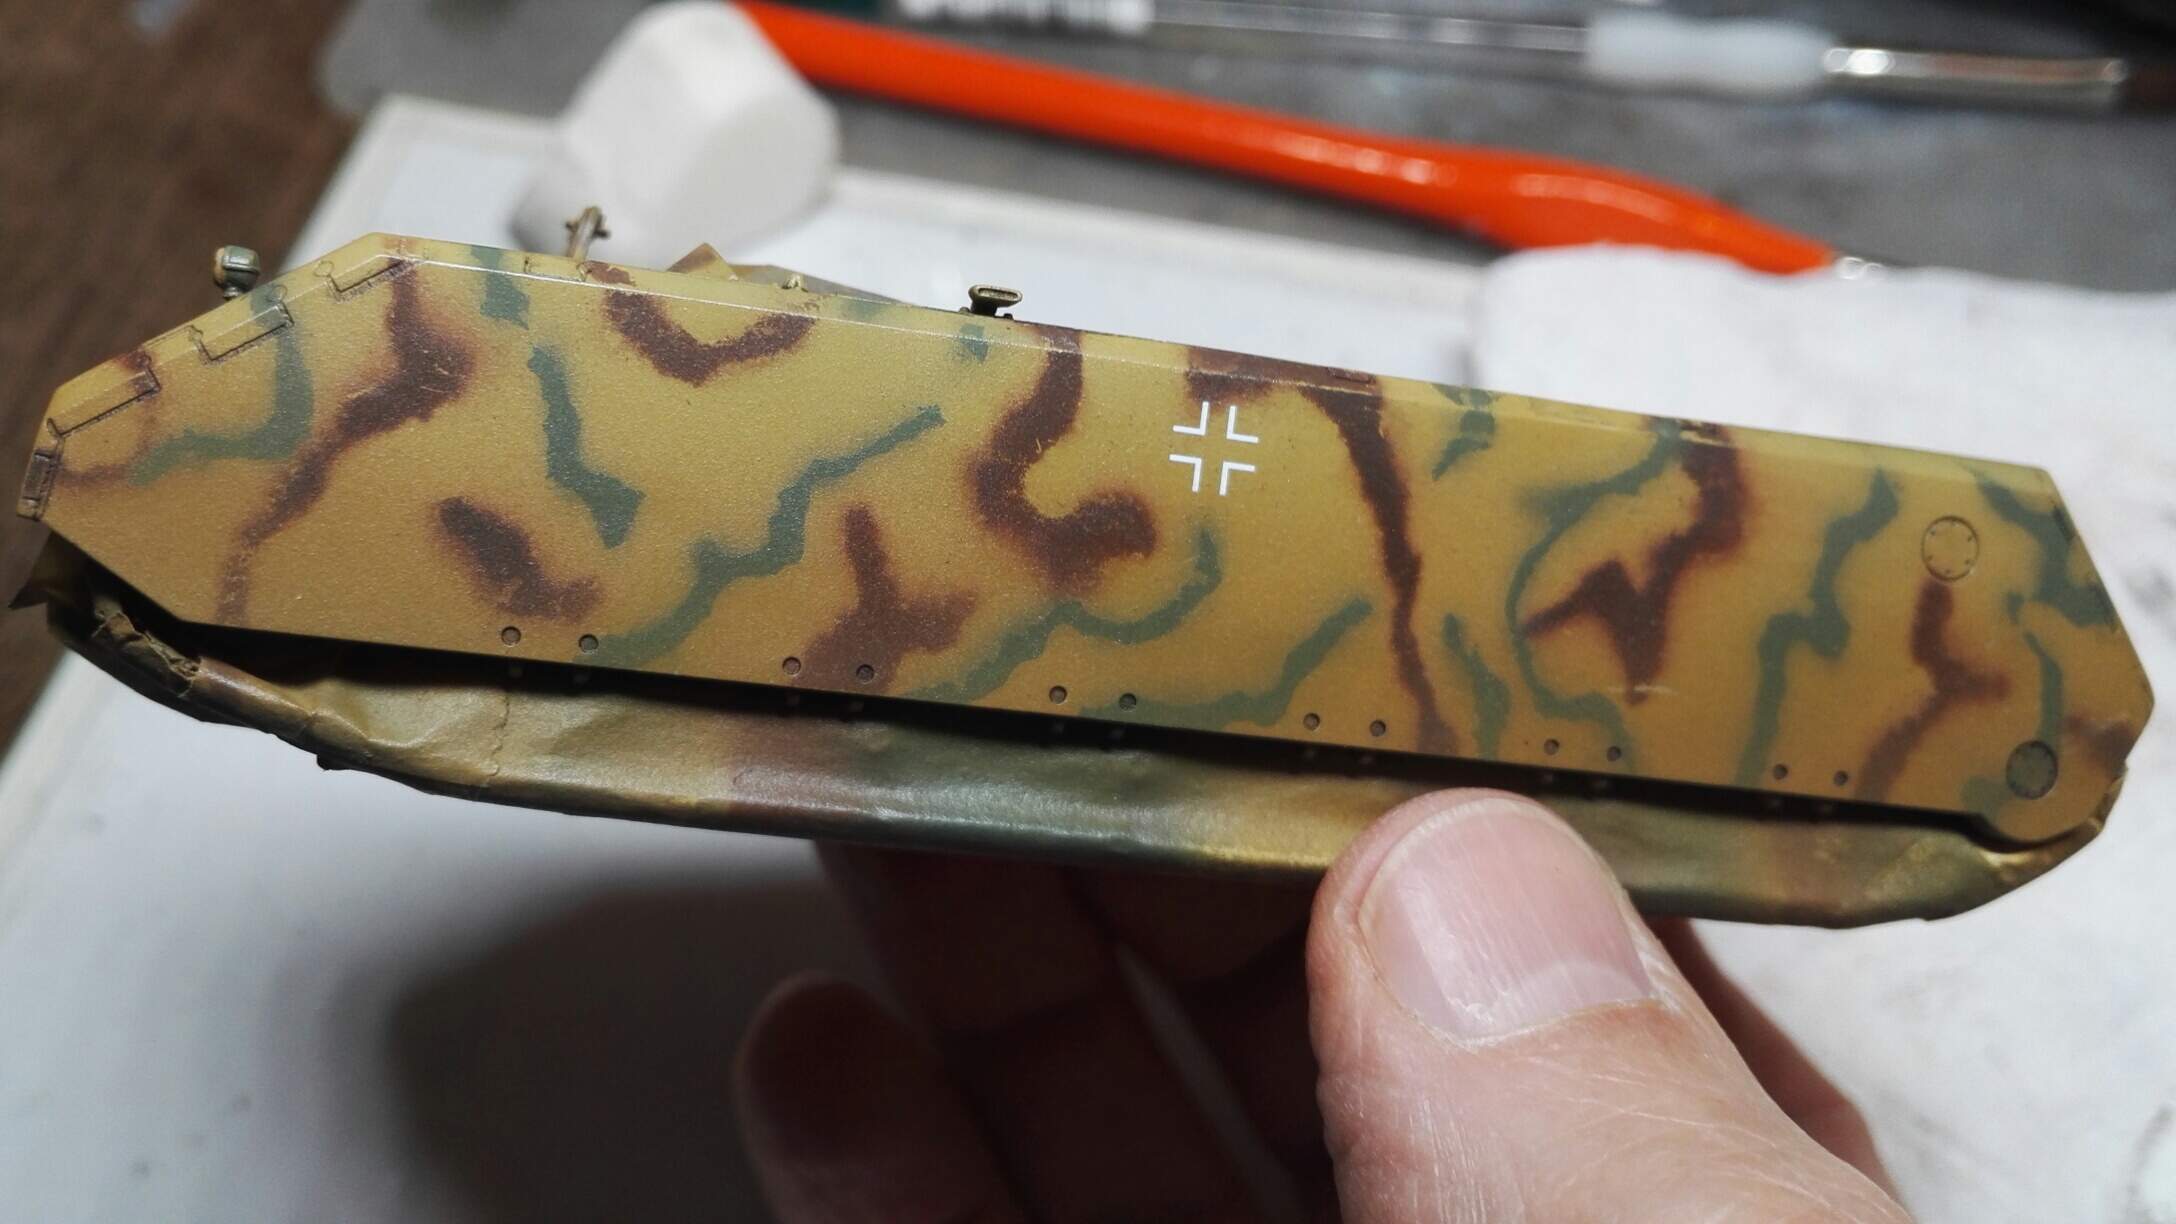
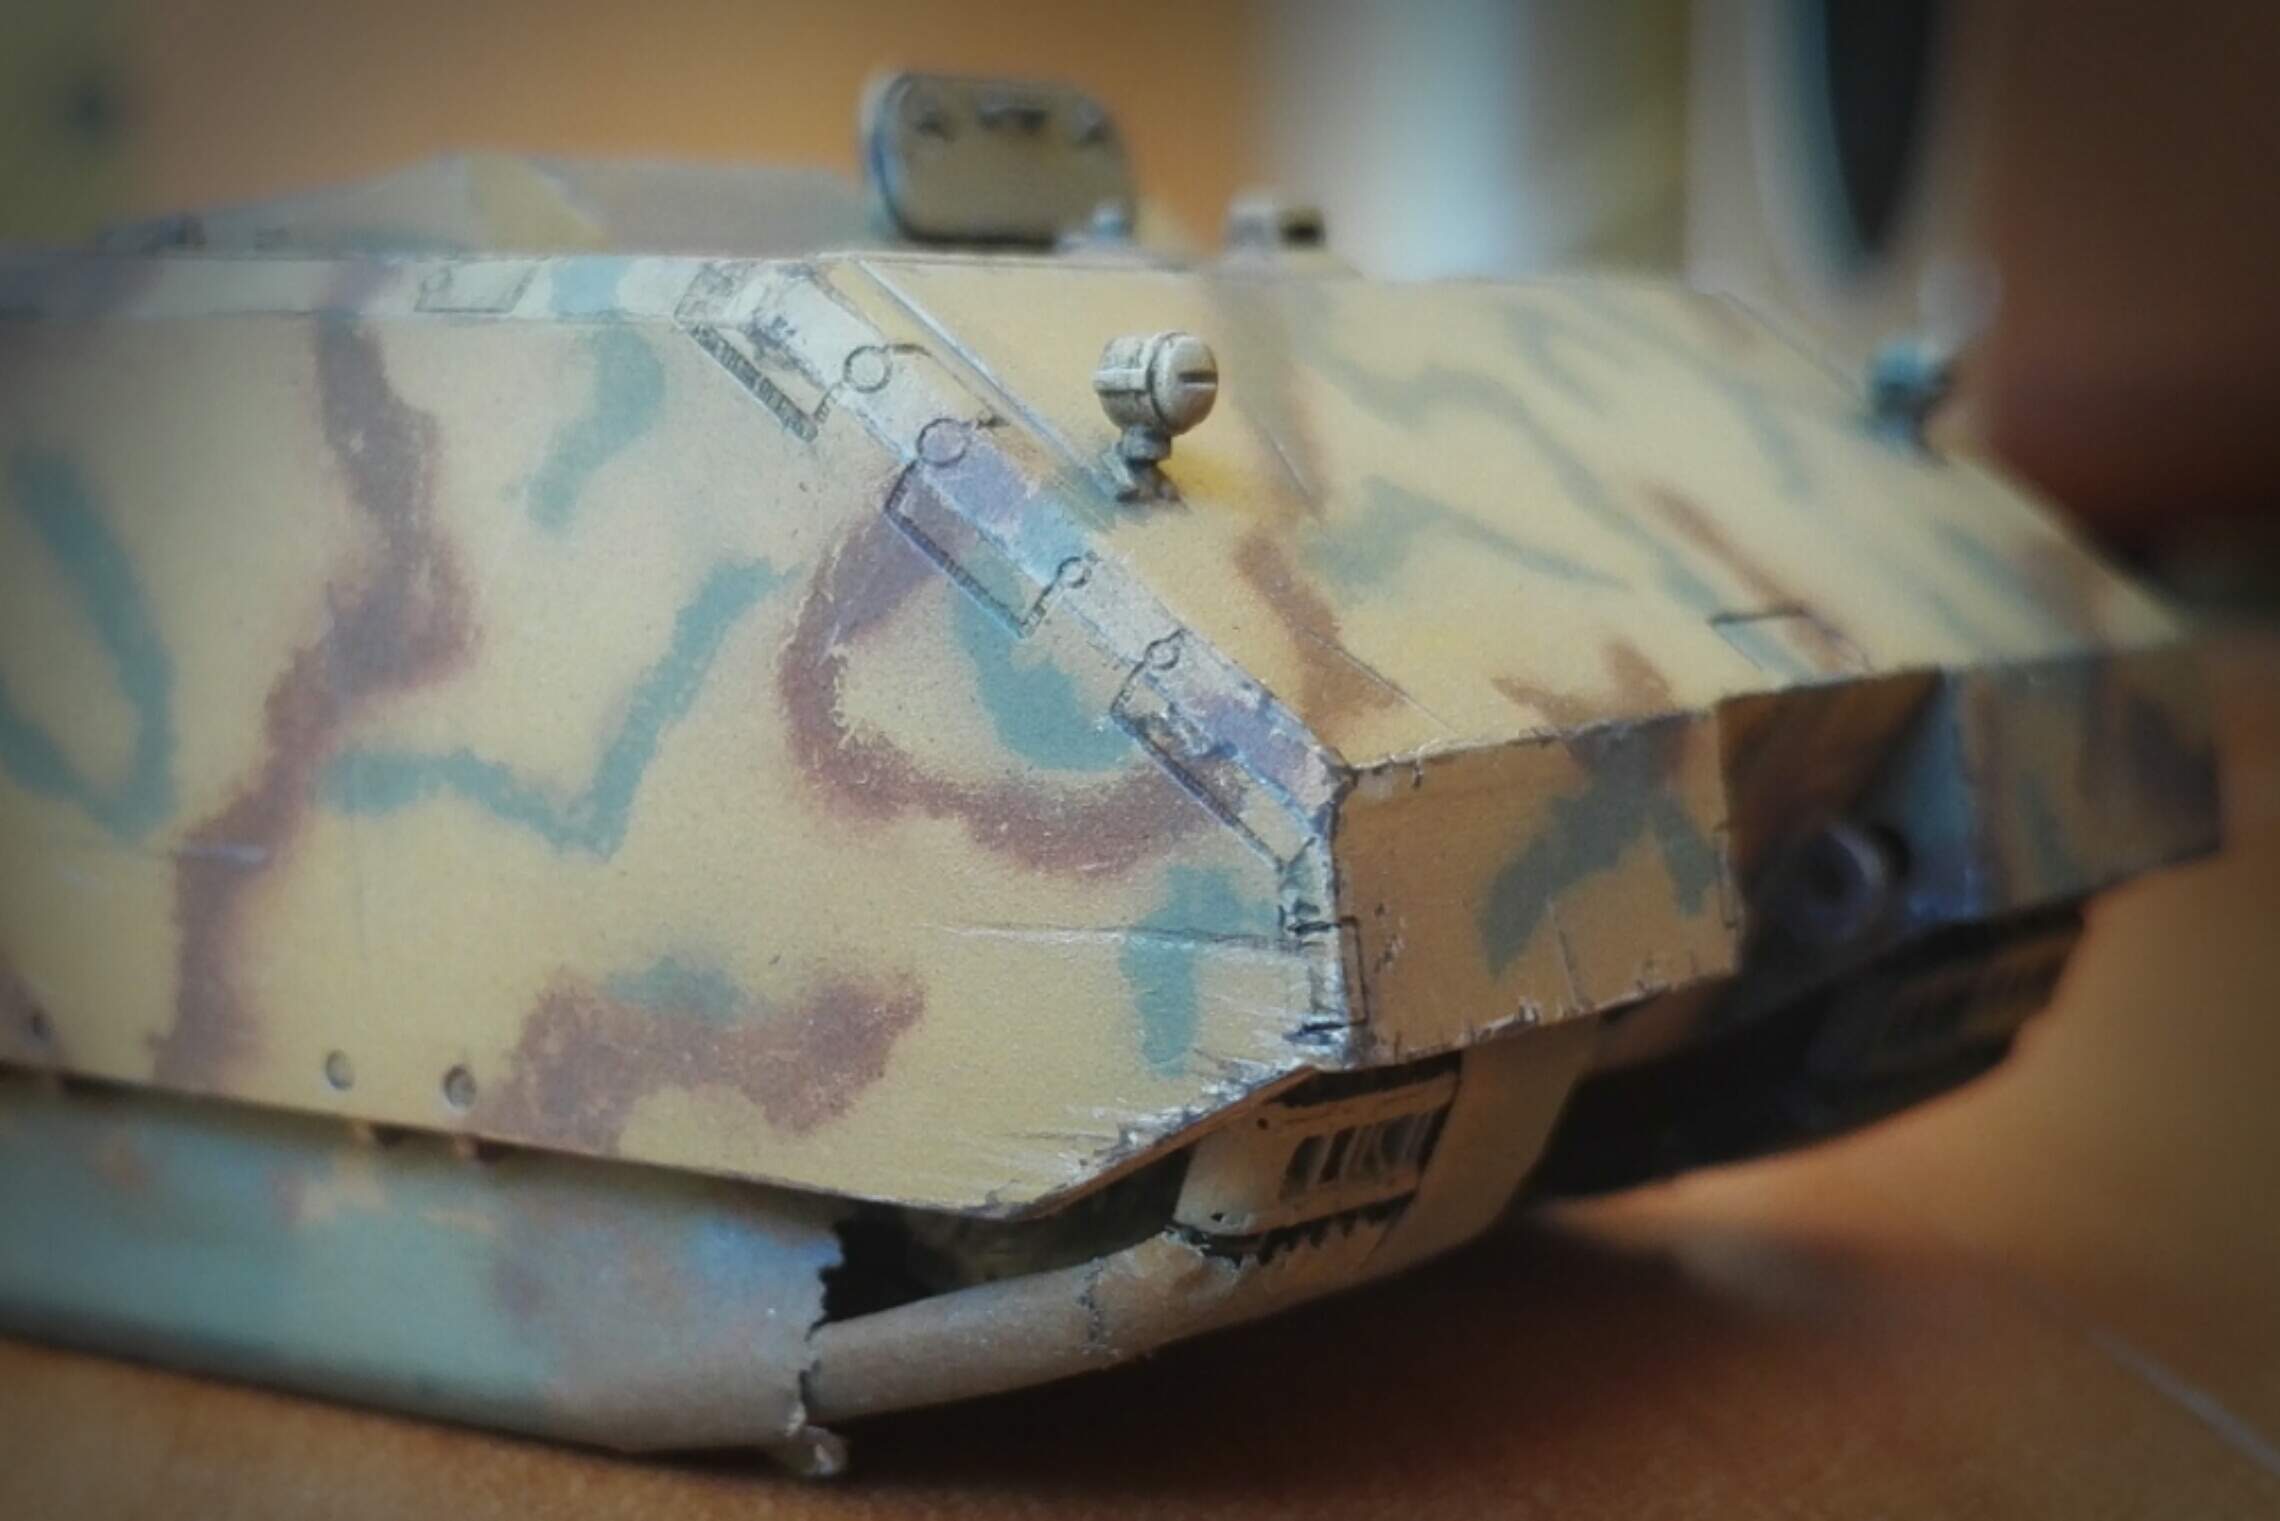
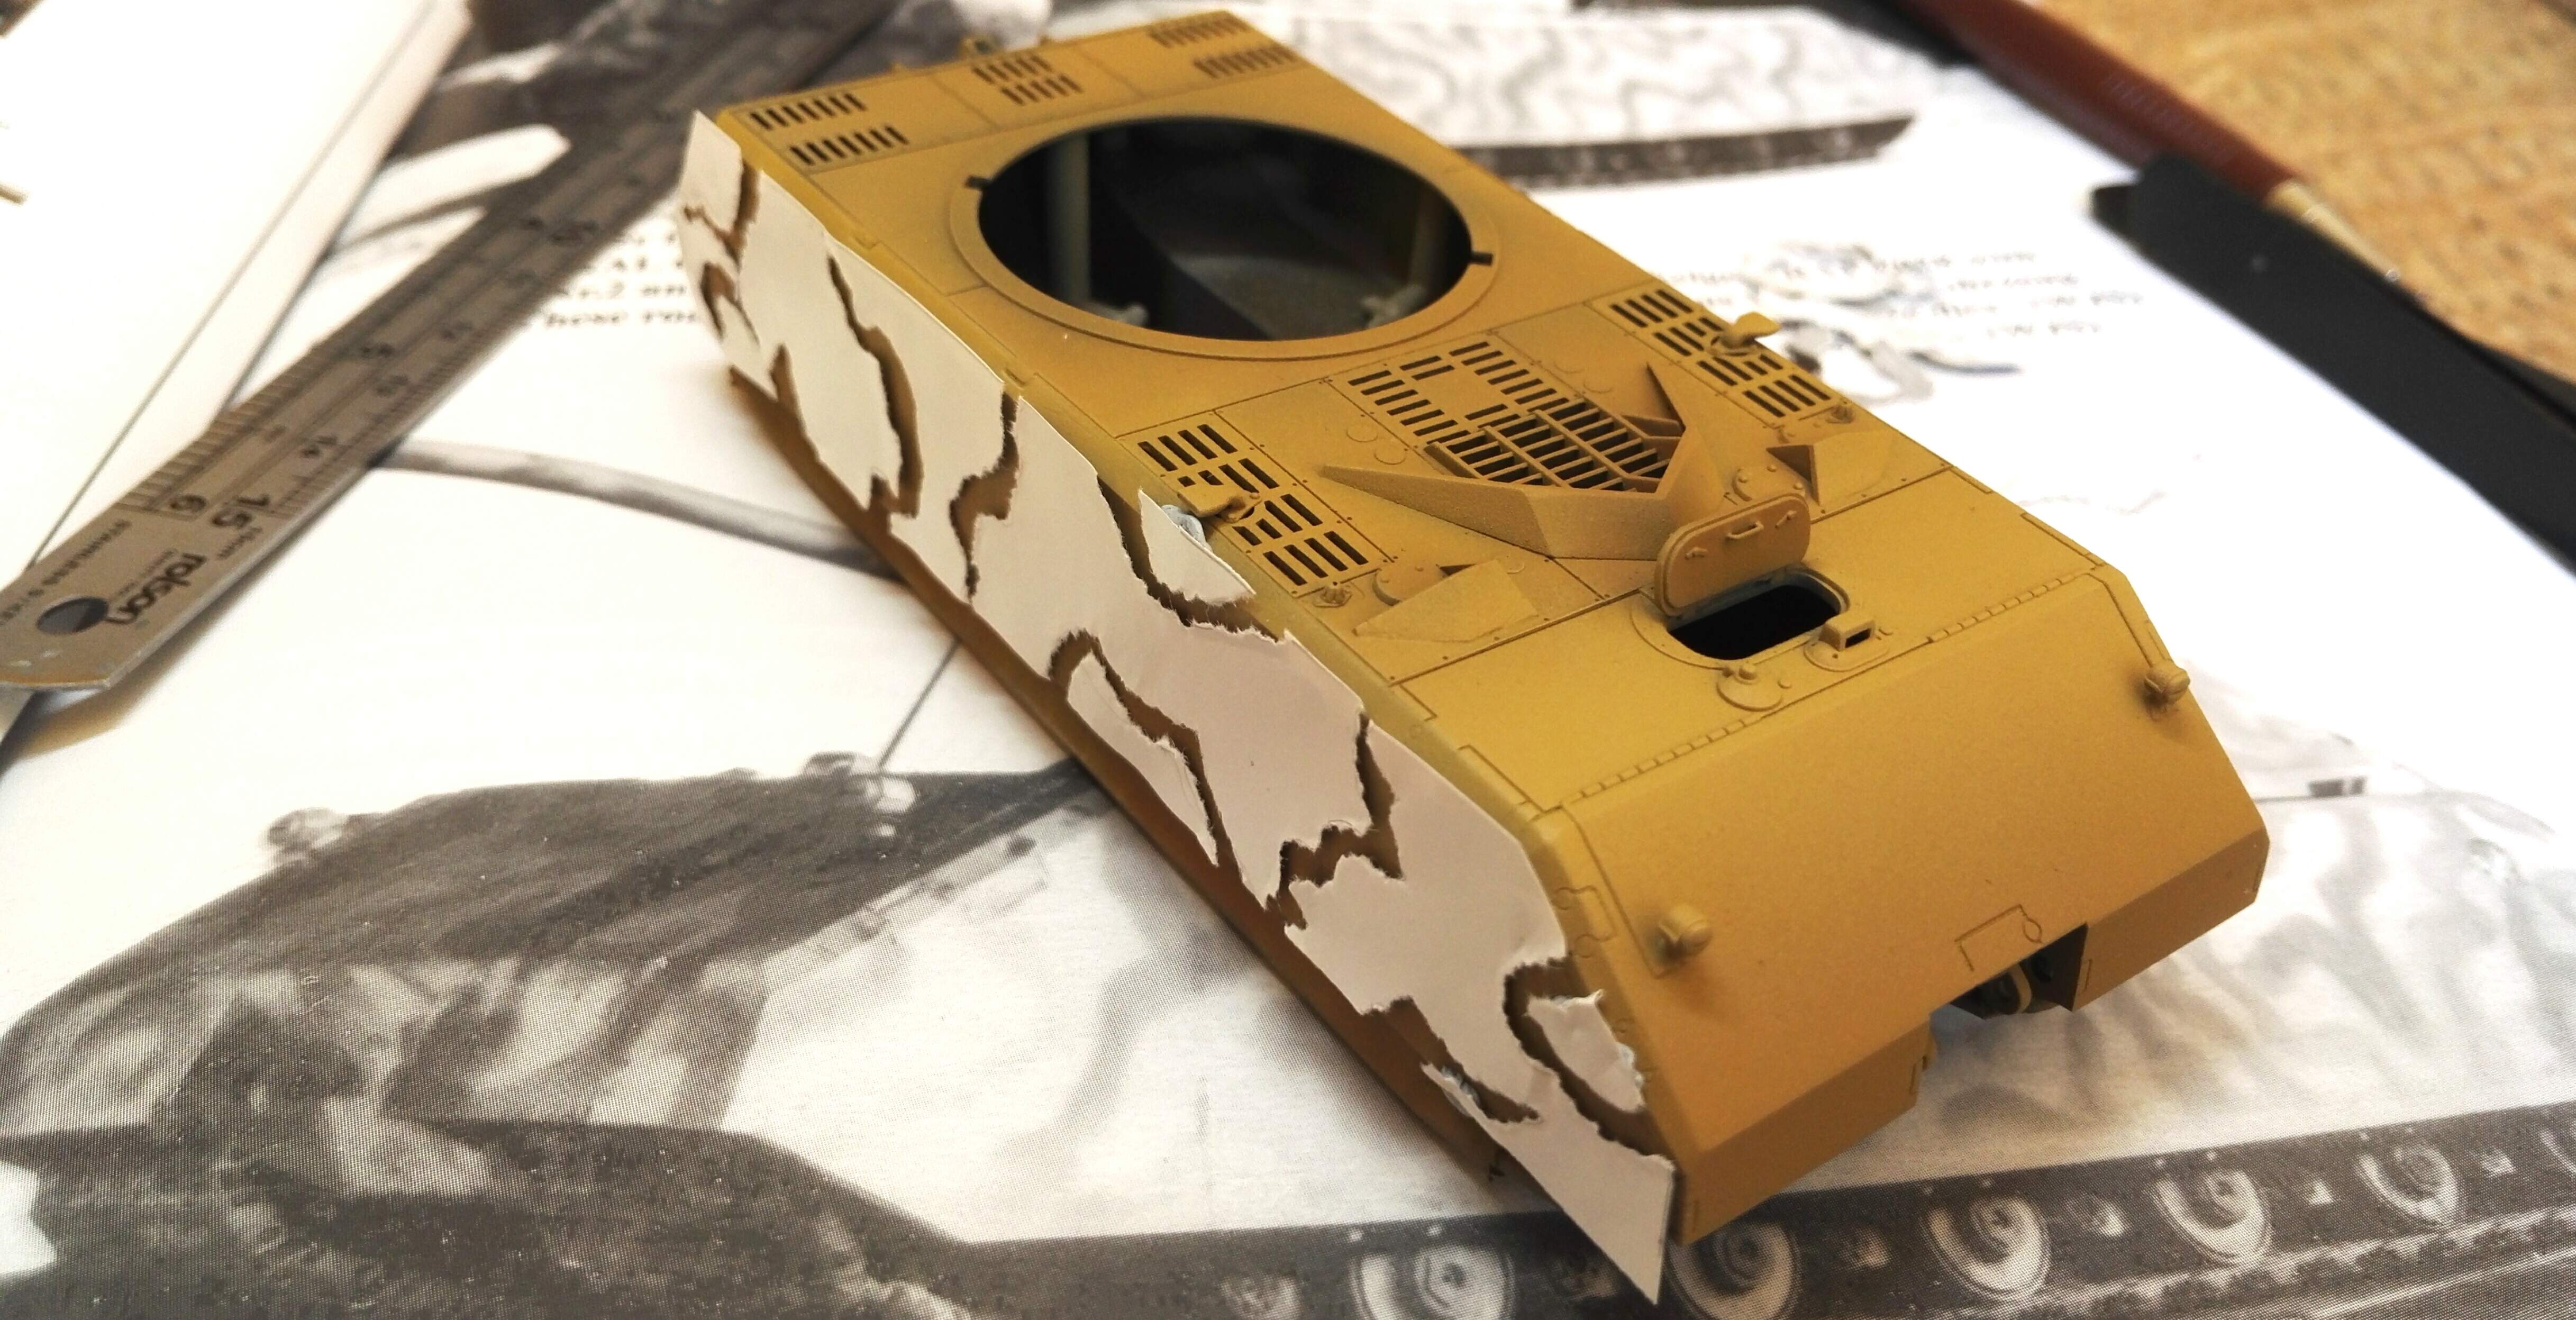
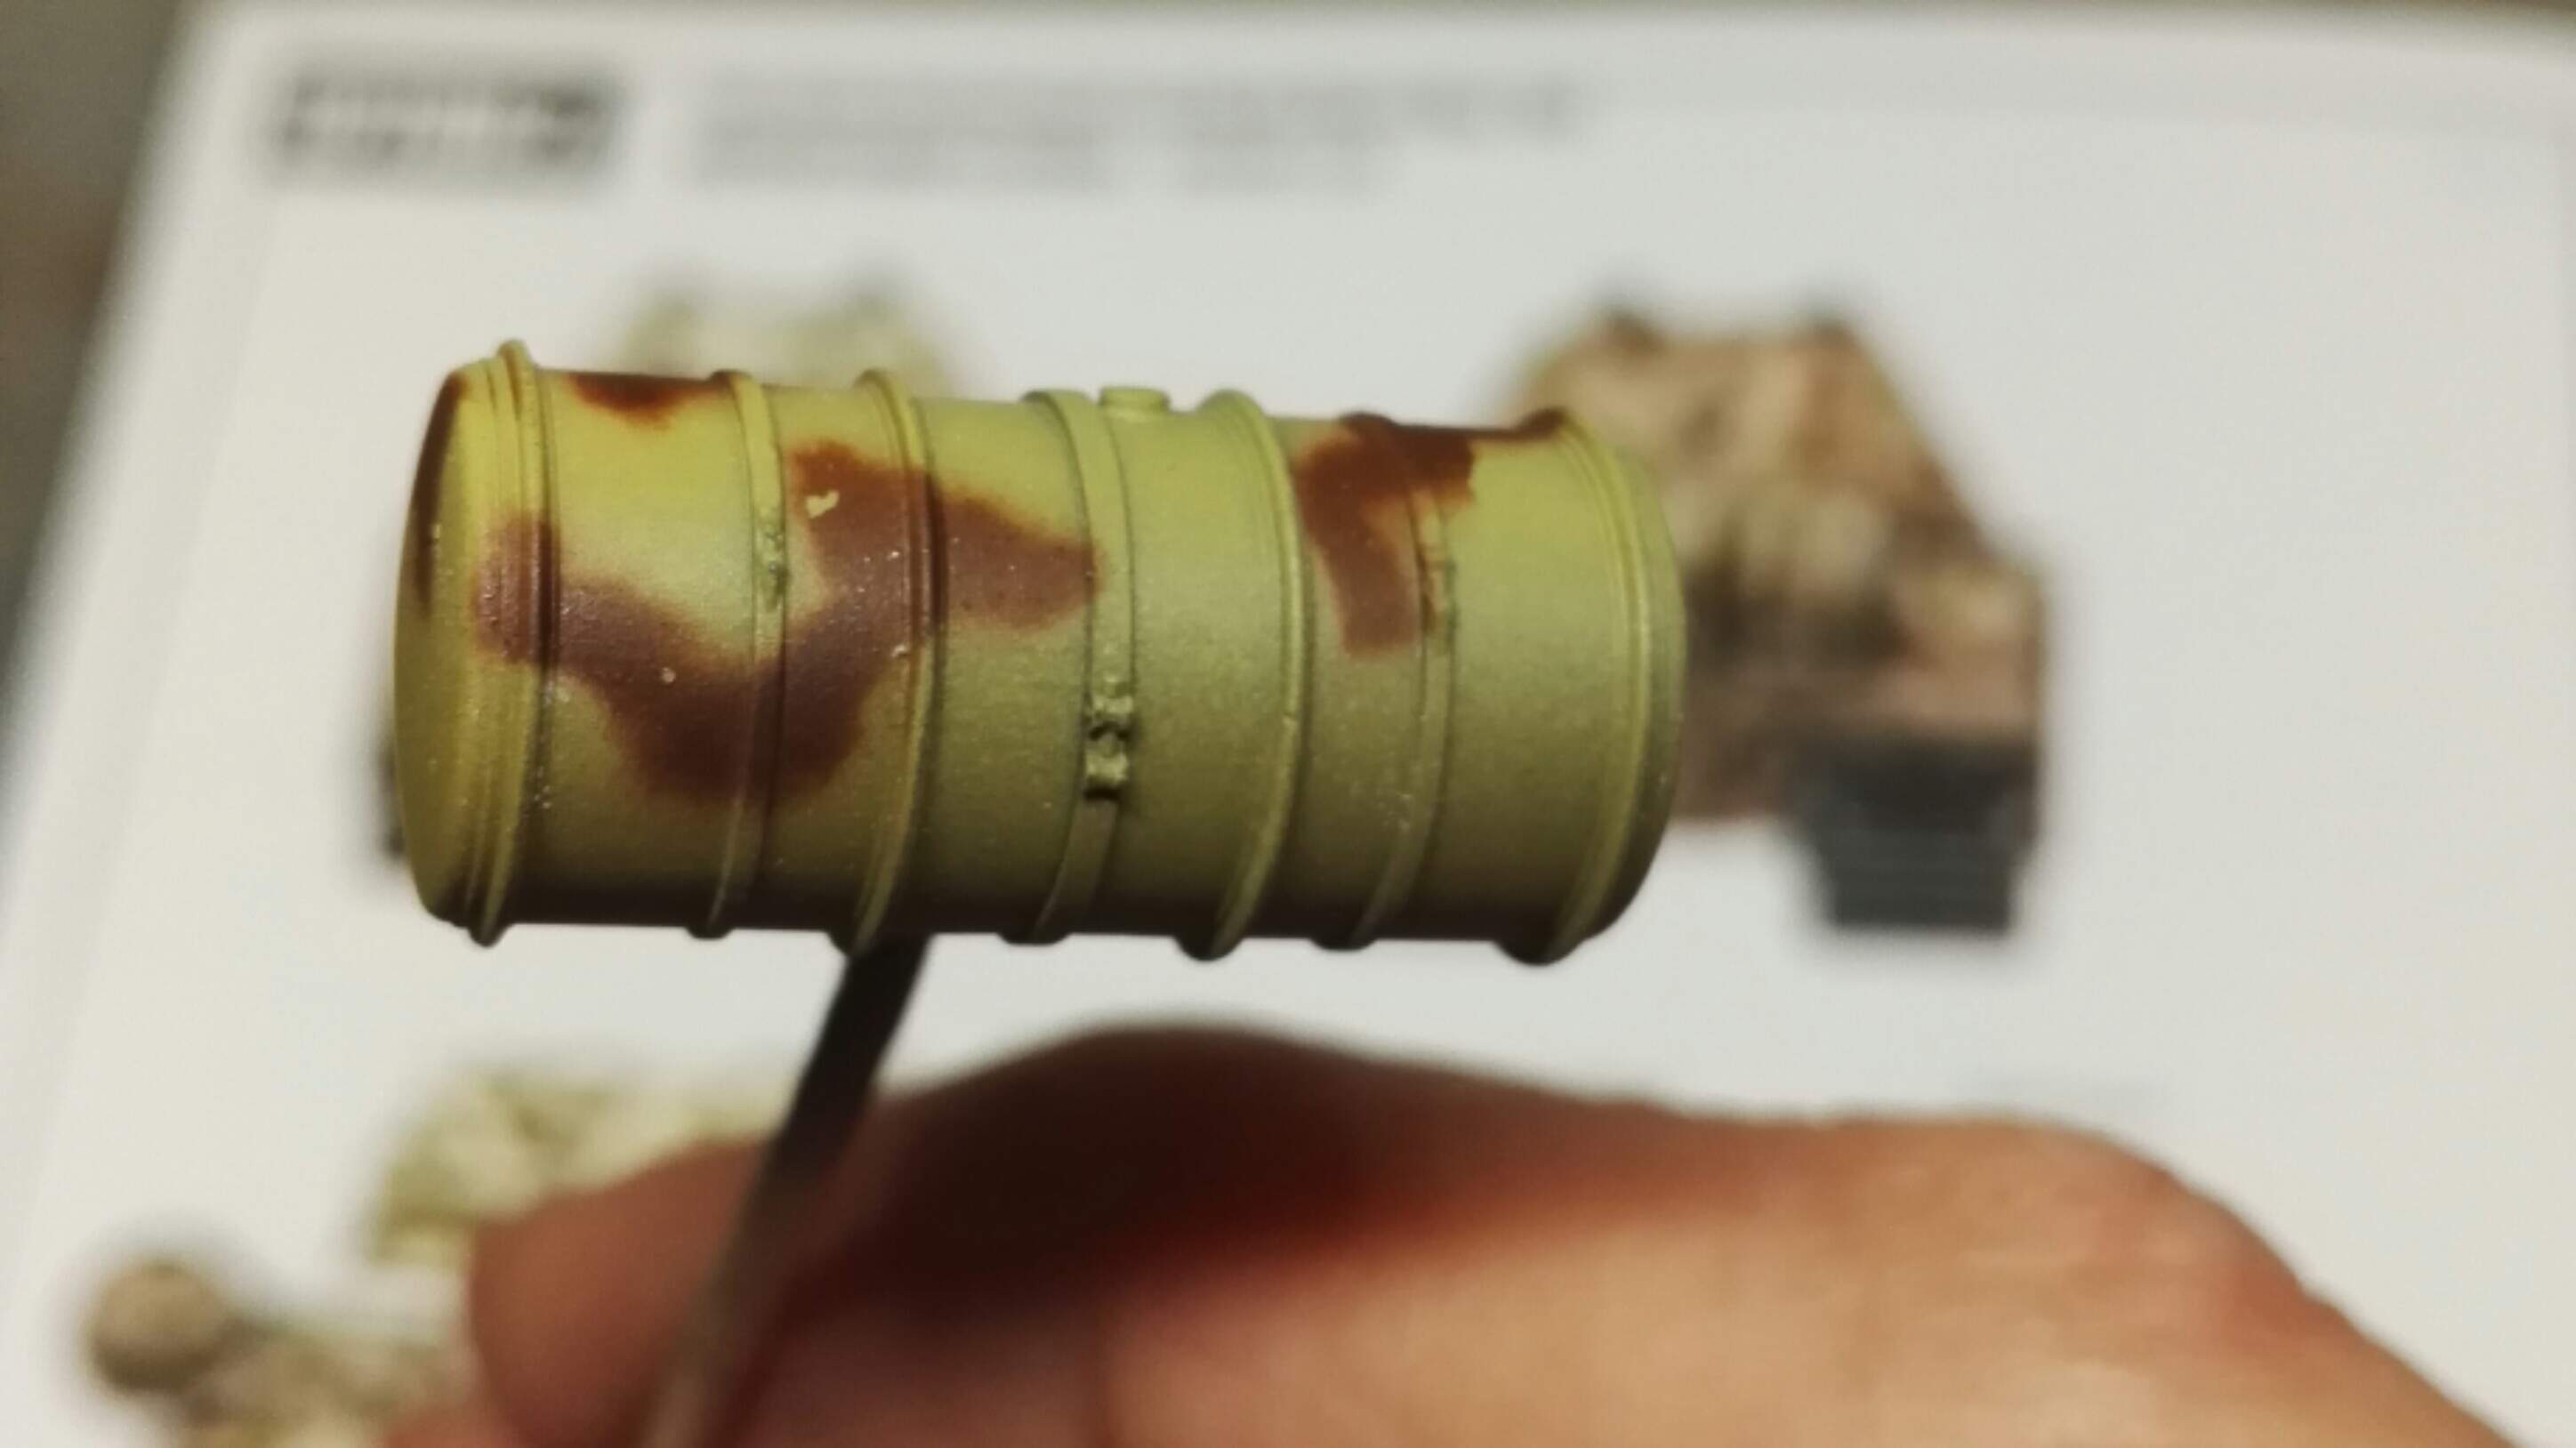
Few photos of the base colour(s) using the AK modulation set, then the start of the possibly overly complicated way that I’m going to try masking the camo. This is just for the redbrown, will repeat the process for the green.
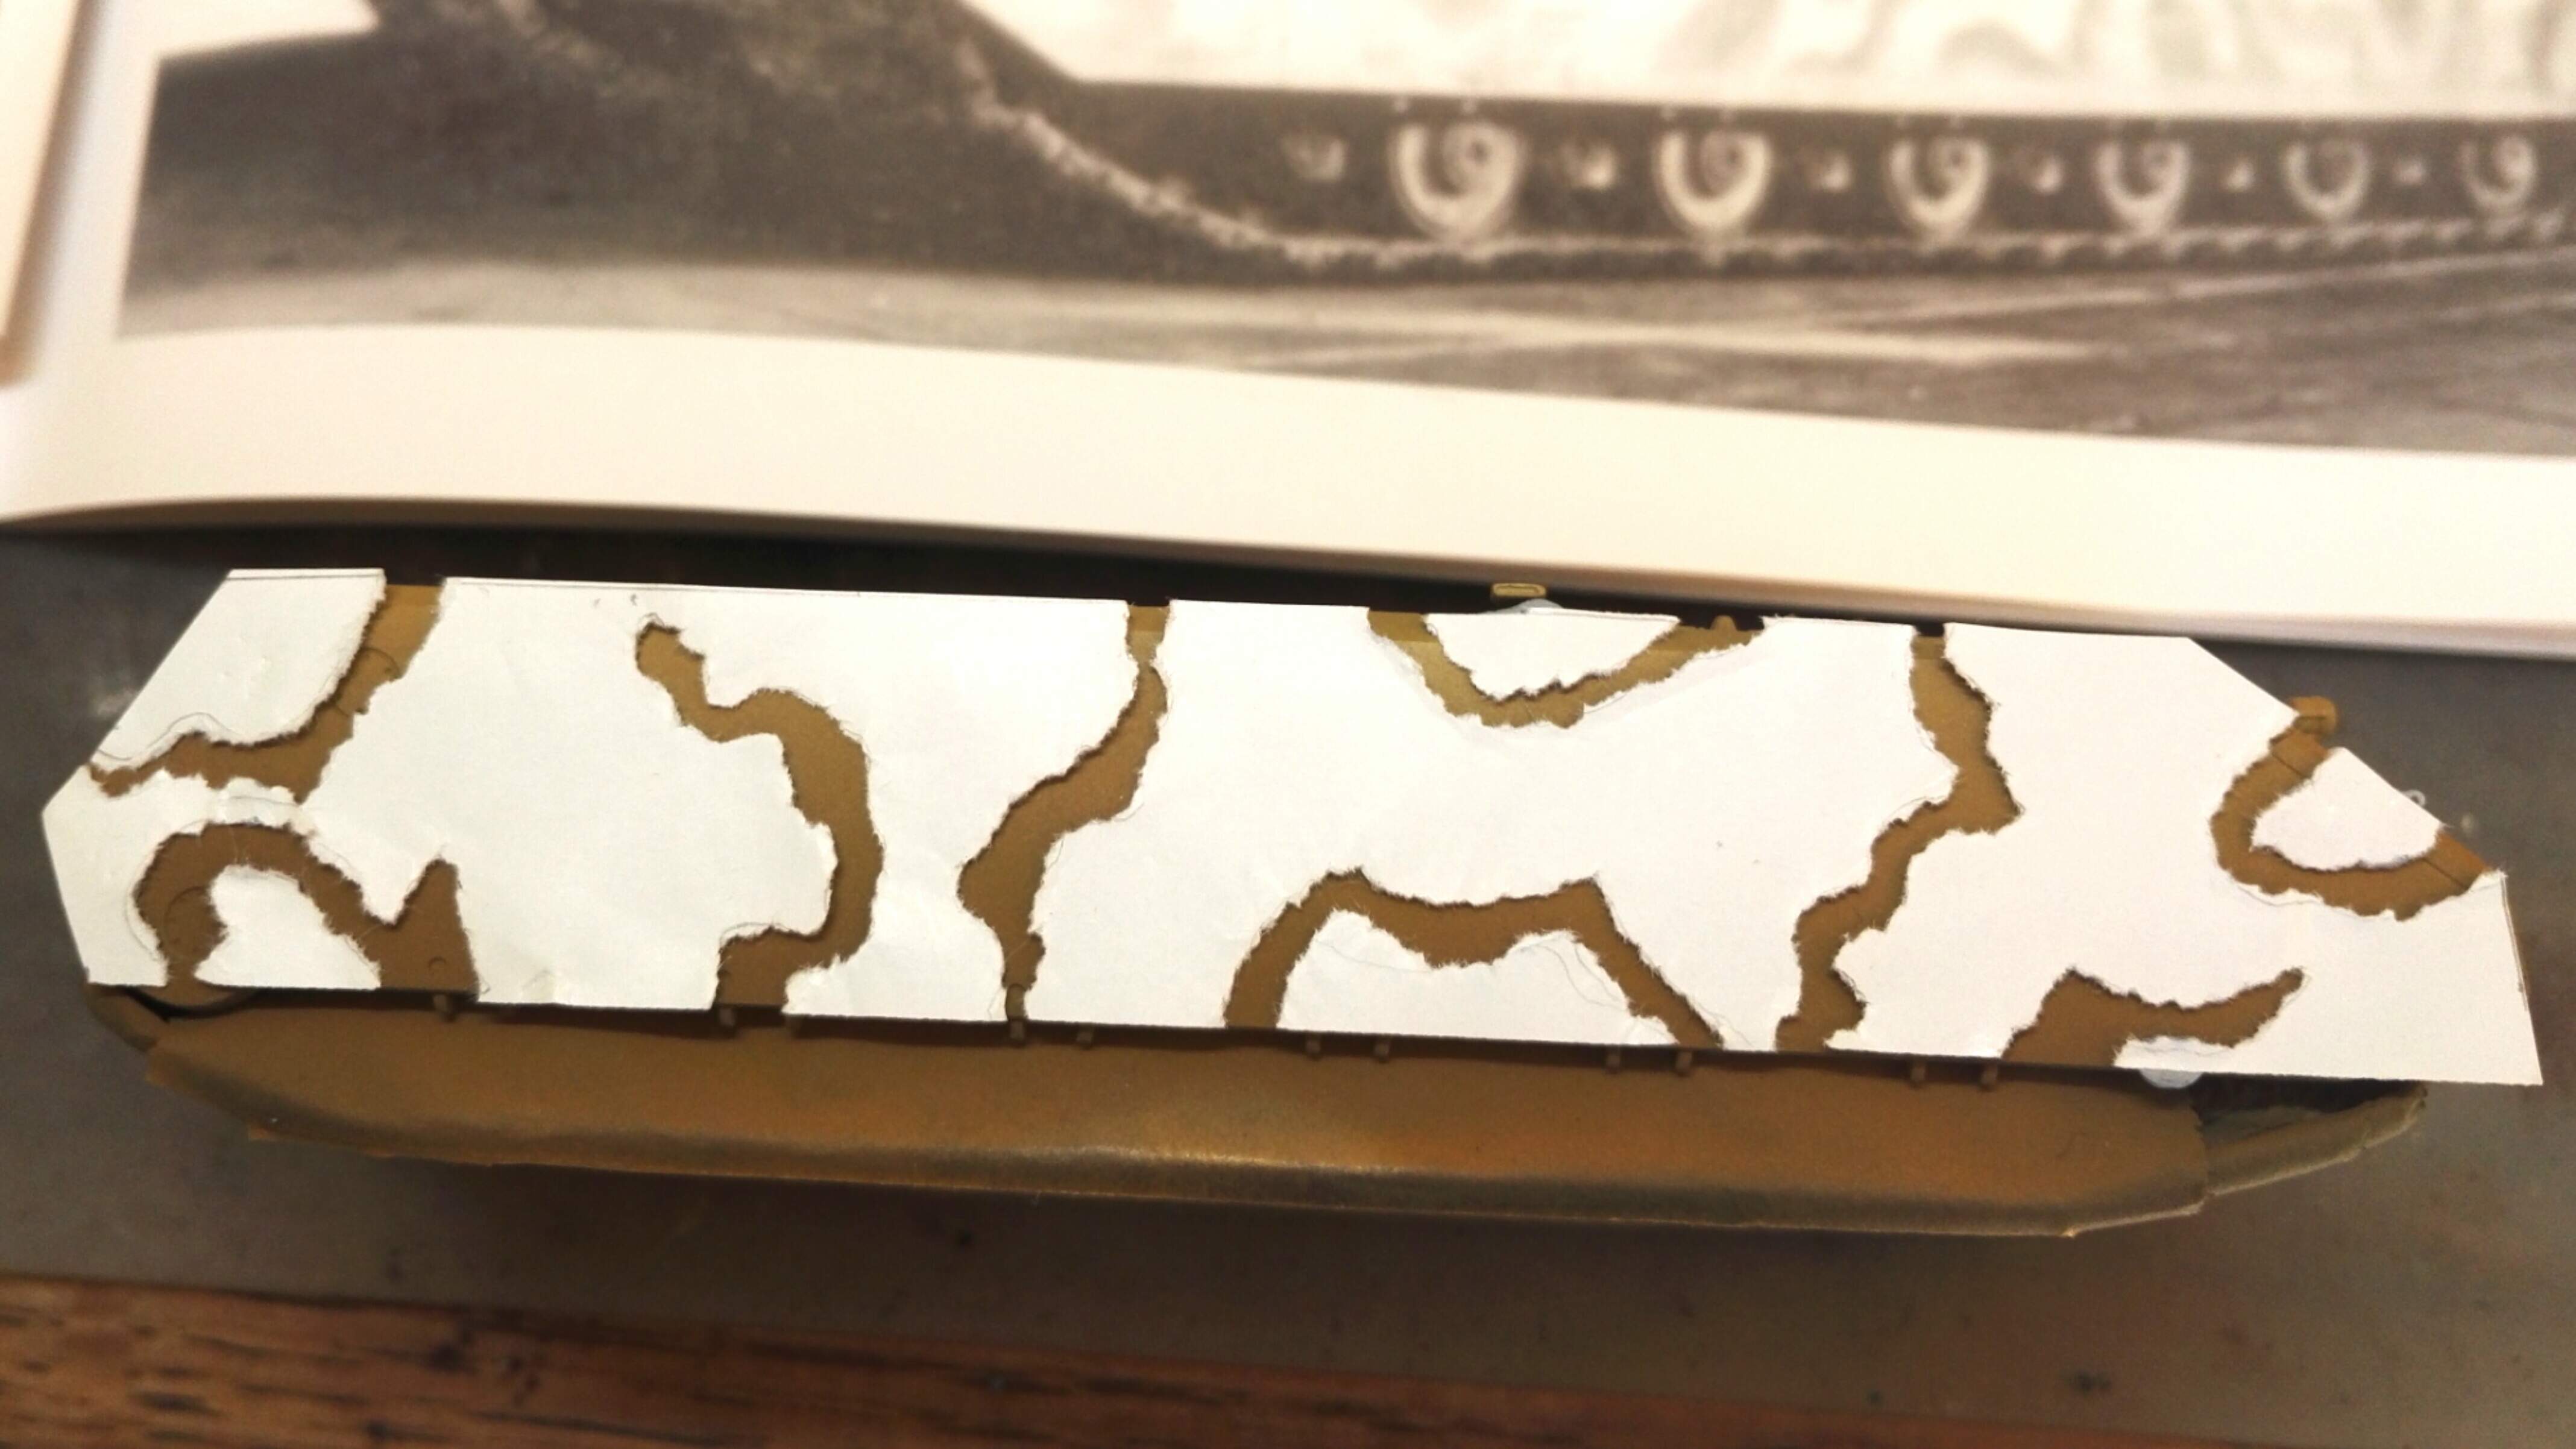
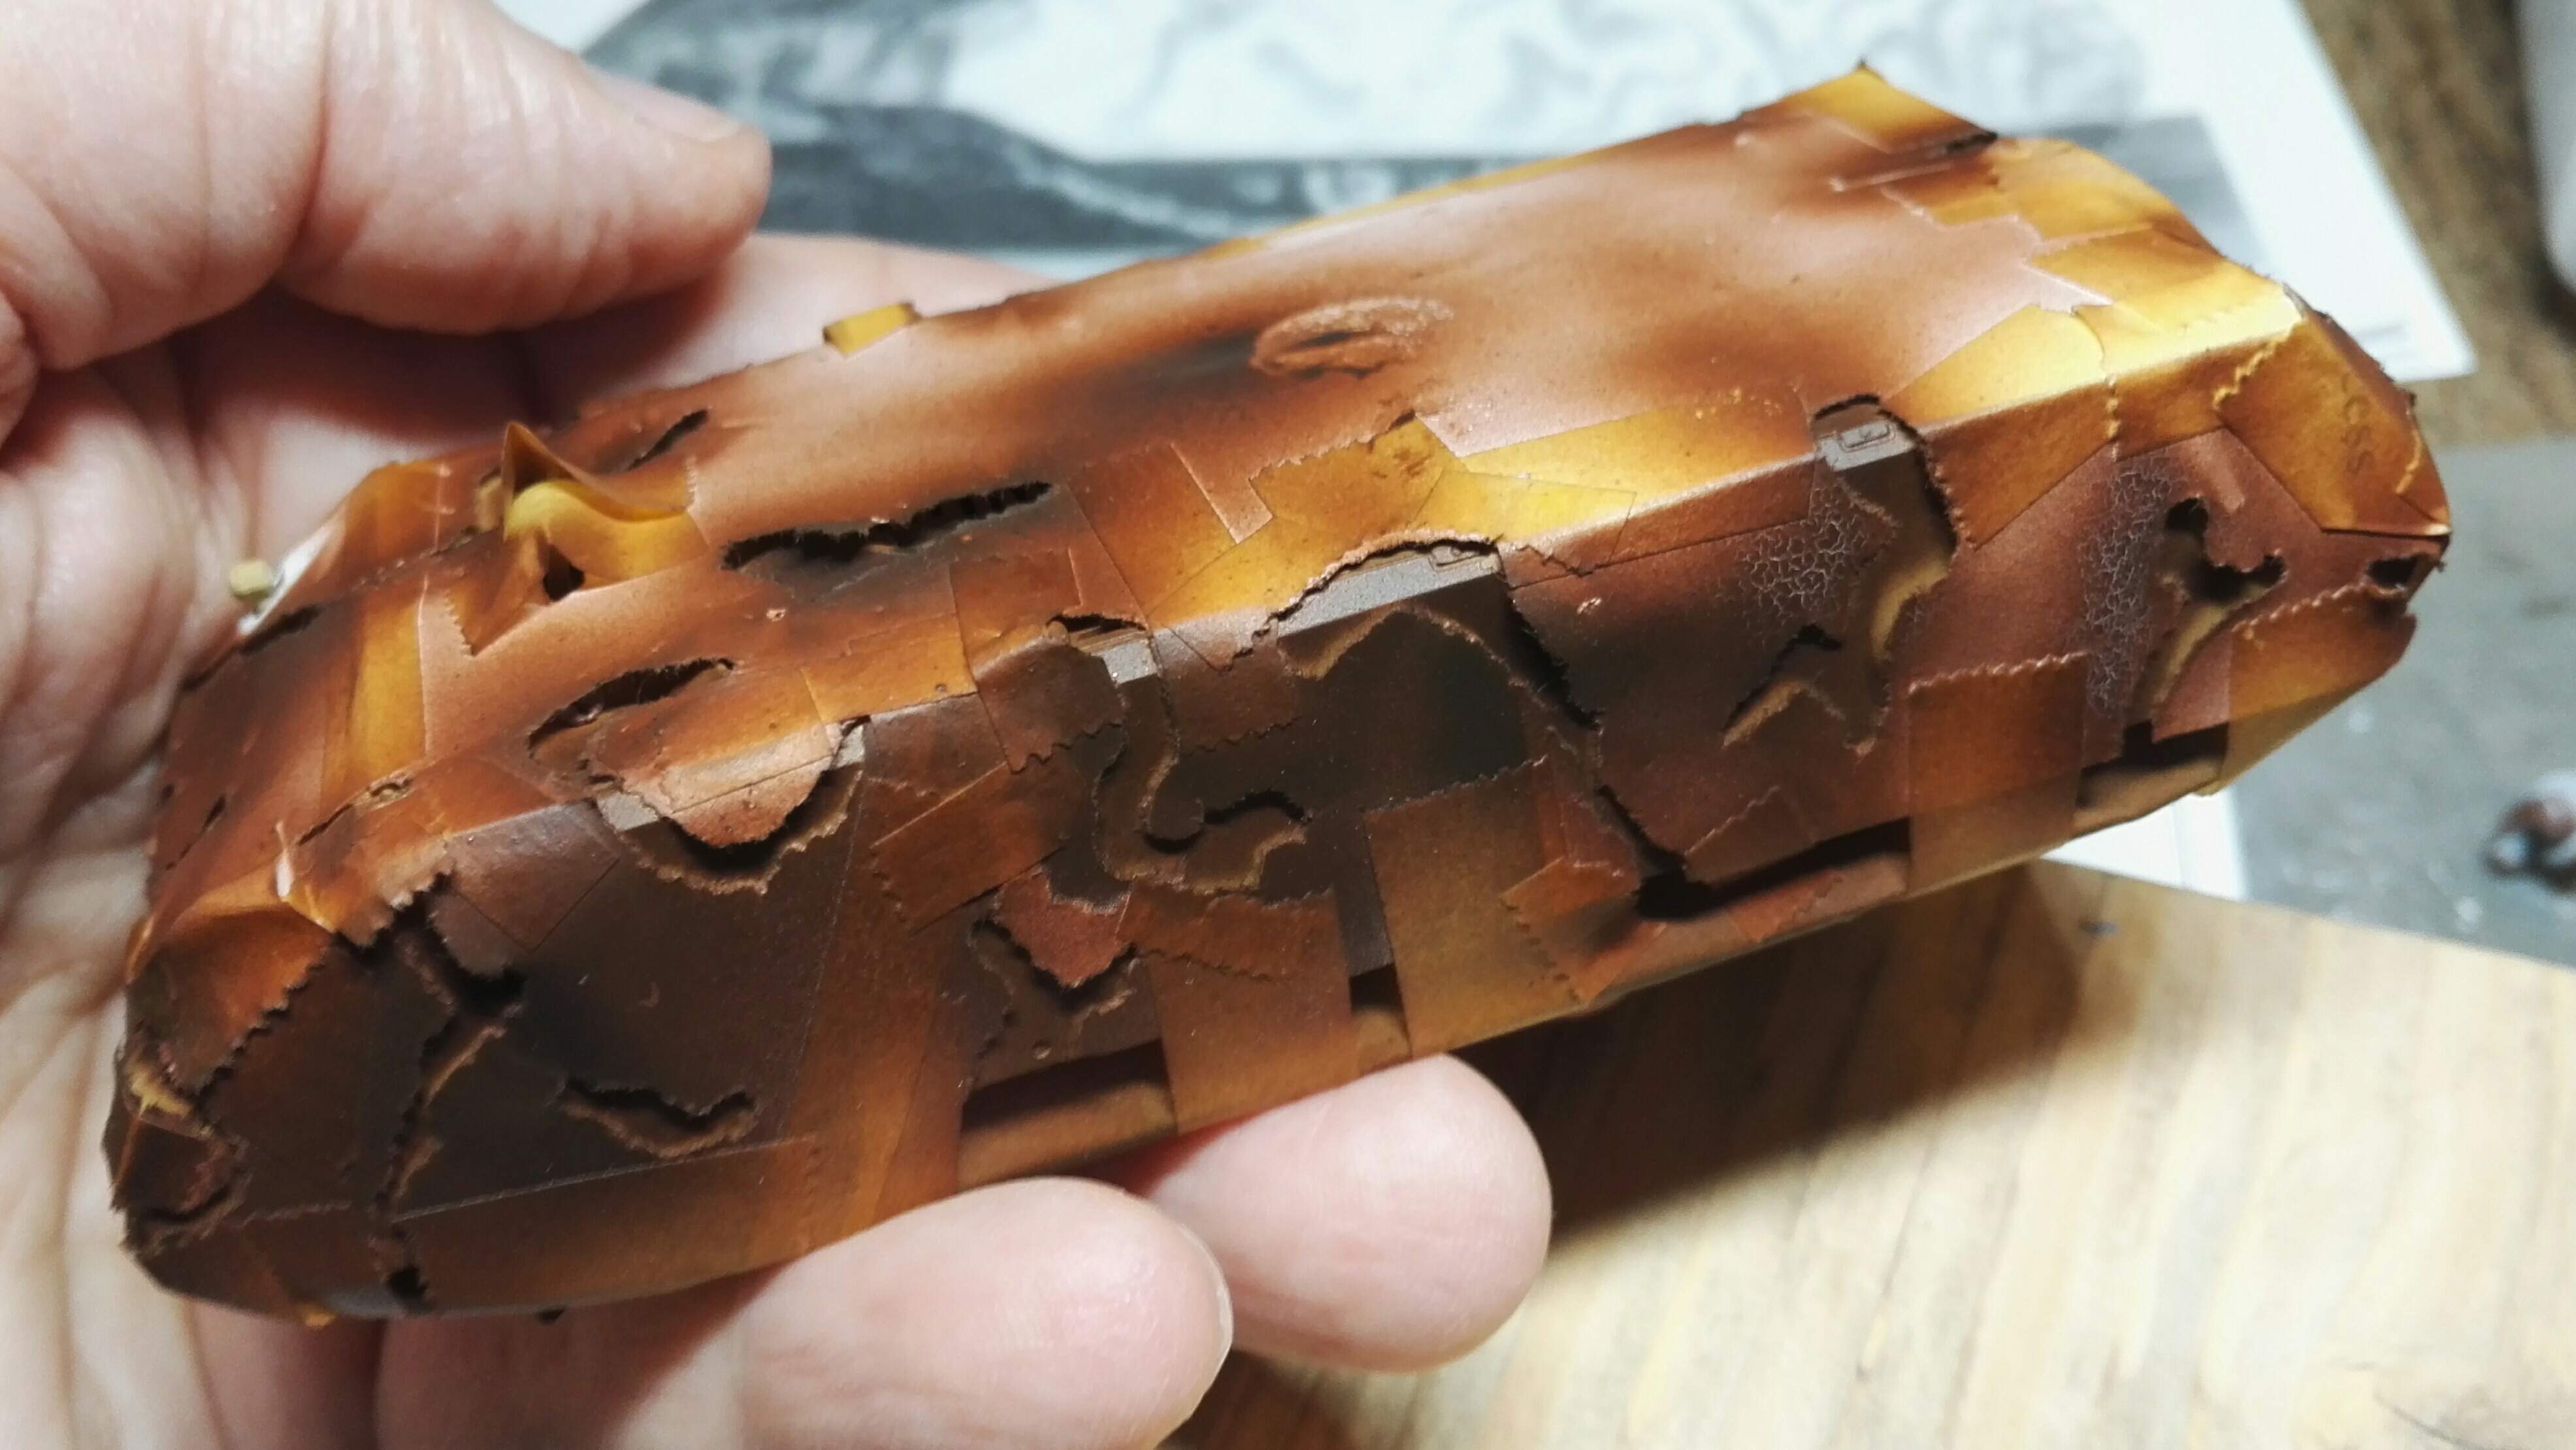
Paper masking worked mostly OK from the point of view of giving a controlled shape, with a small amount of soft edge. Main disadvantage was the time it took. I ended up only doing it for the brown, and only took a photo of the fuel tank completed at that stage for some reason.
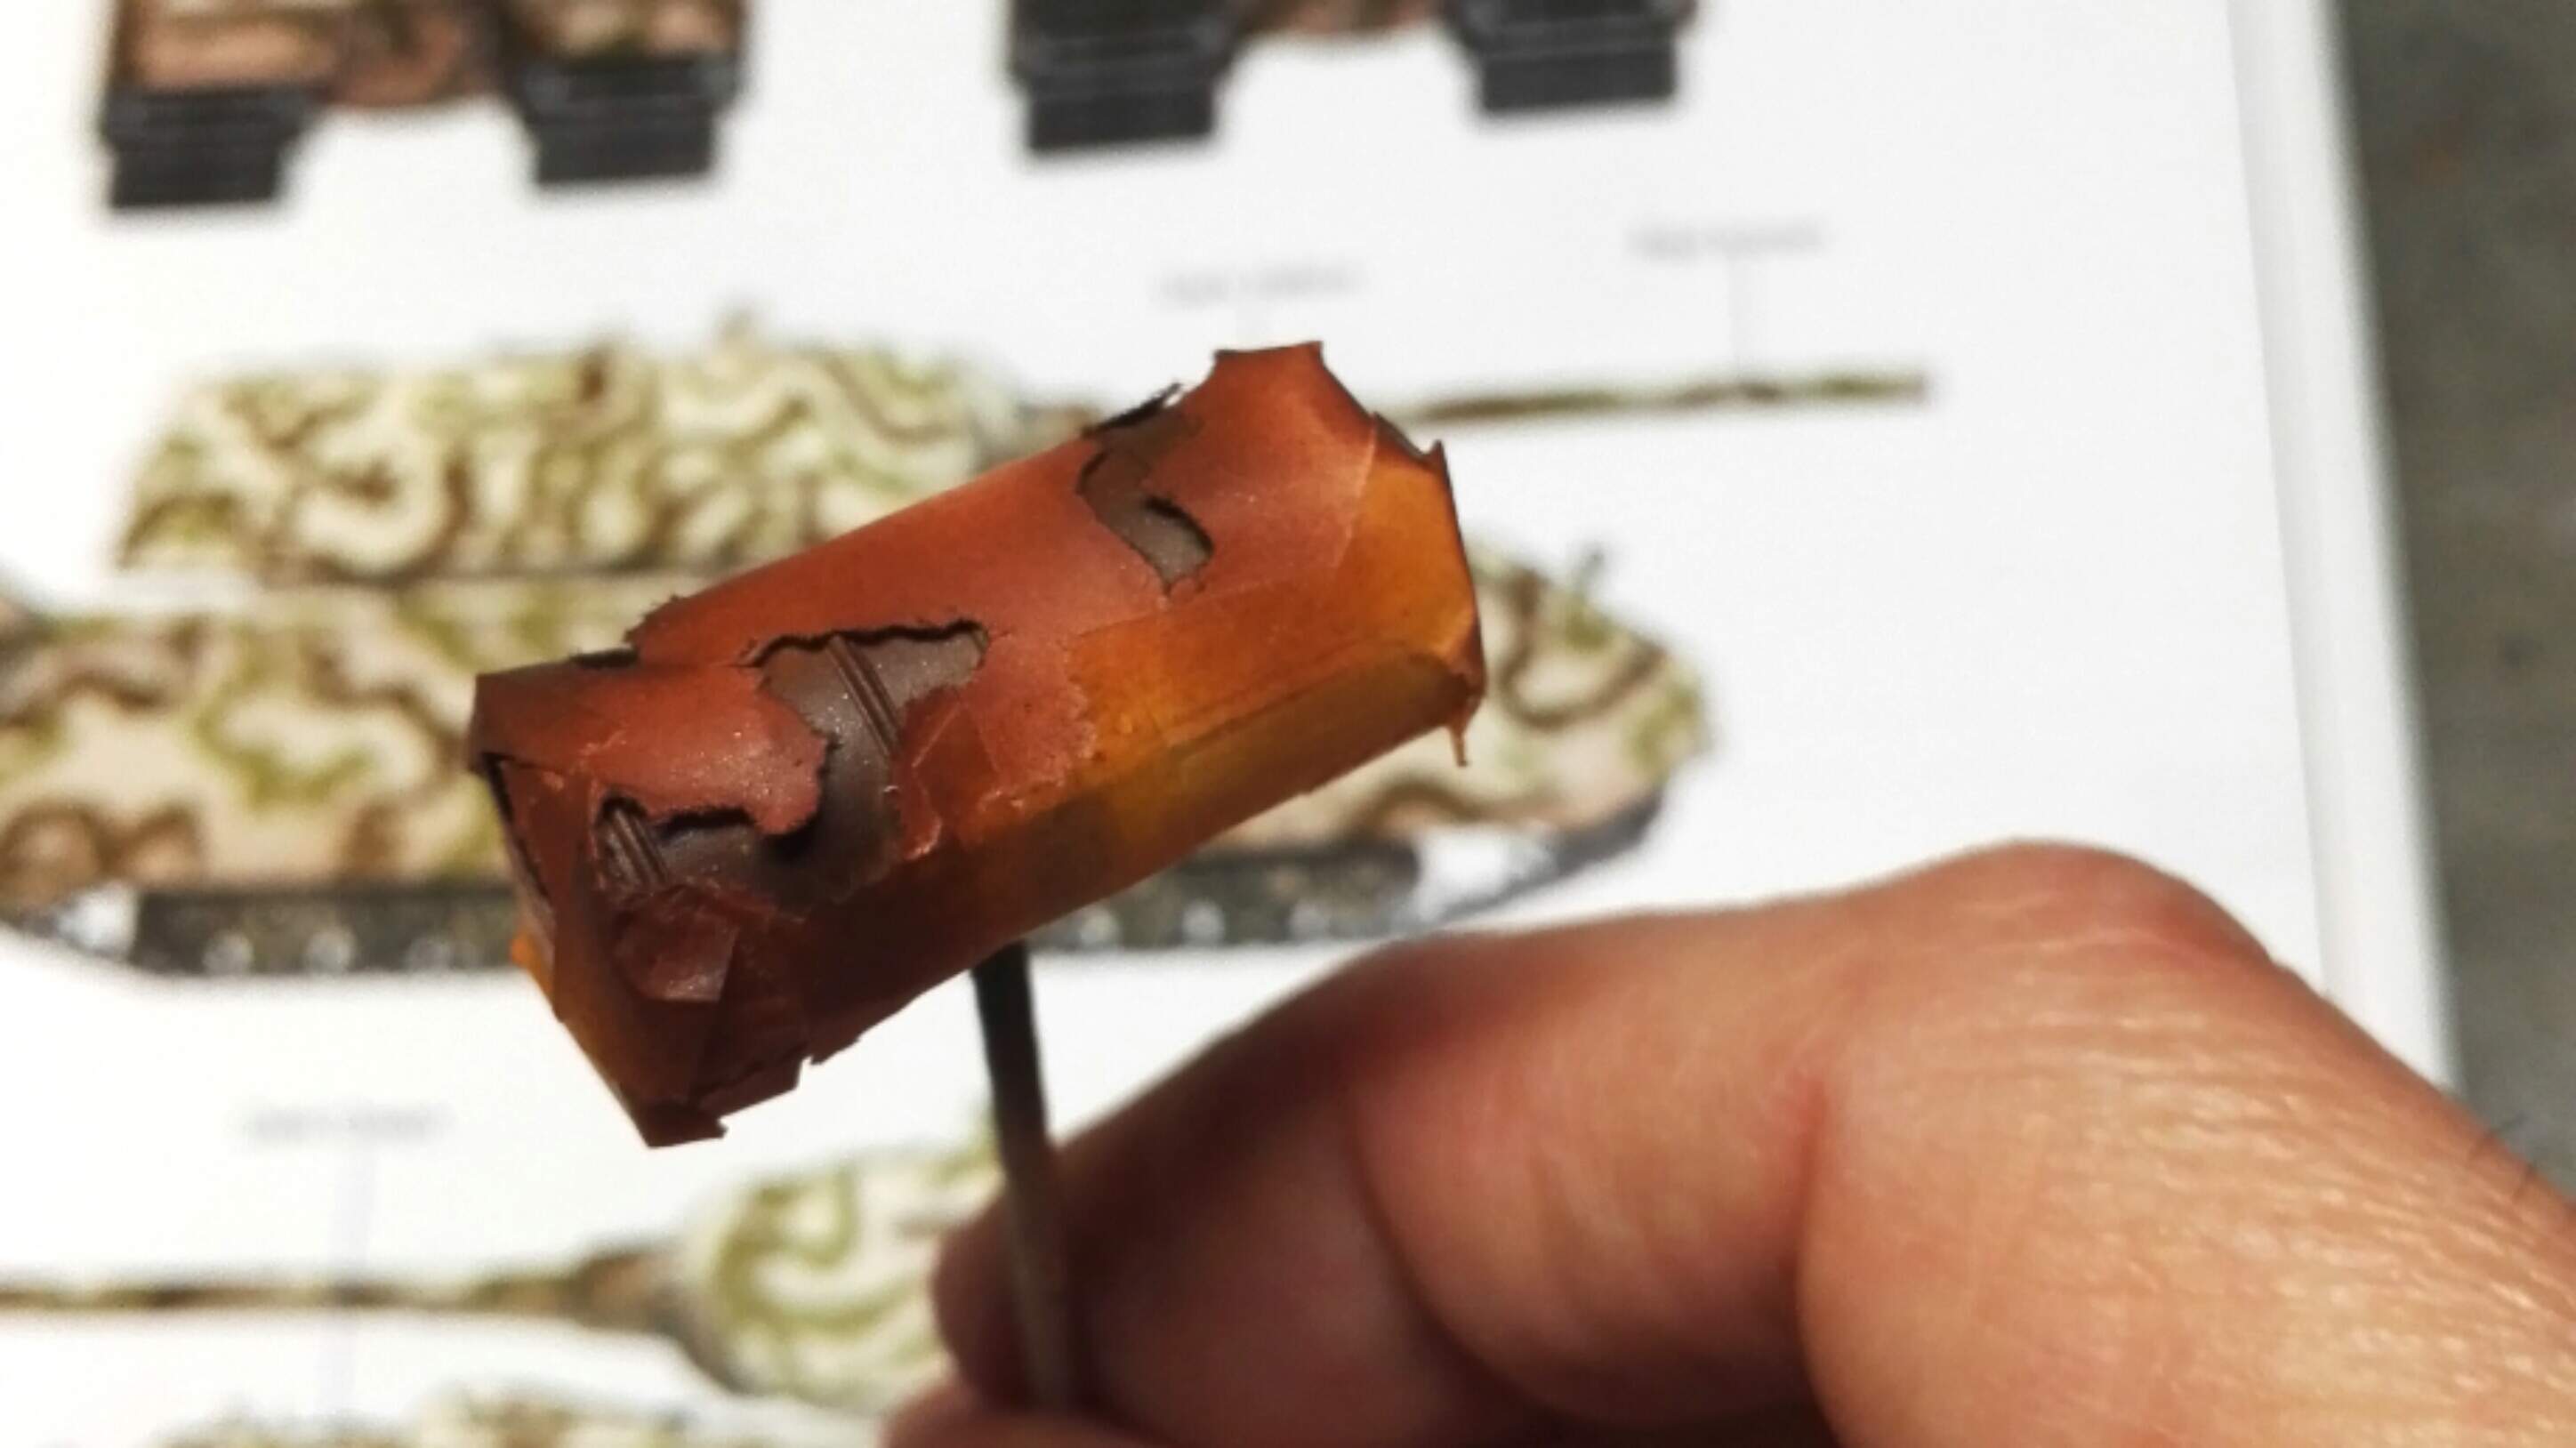
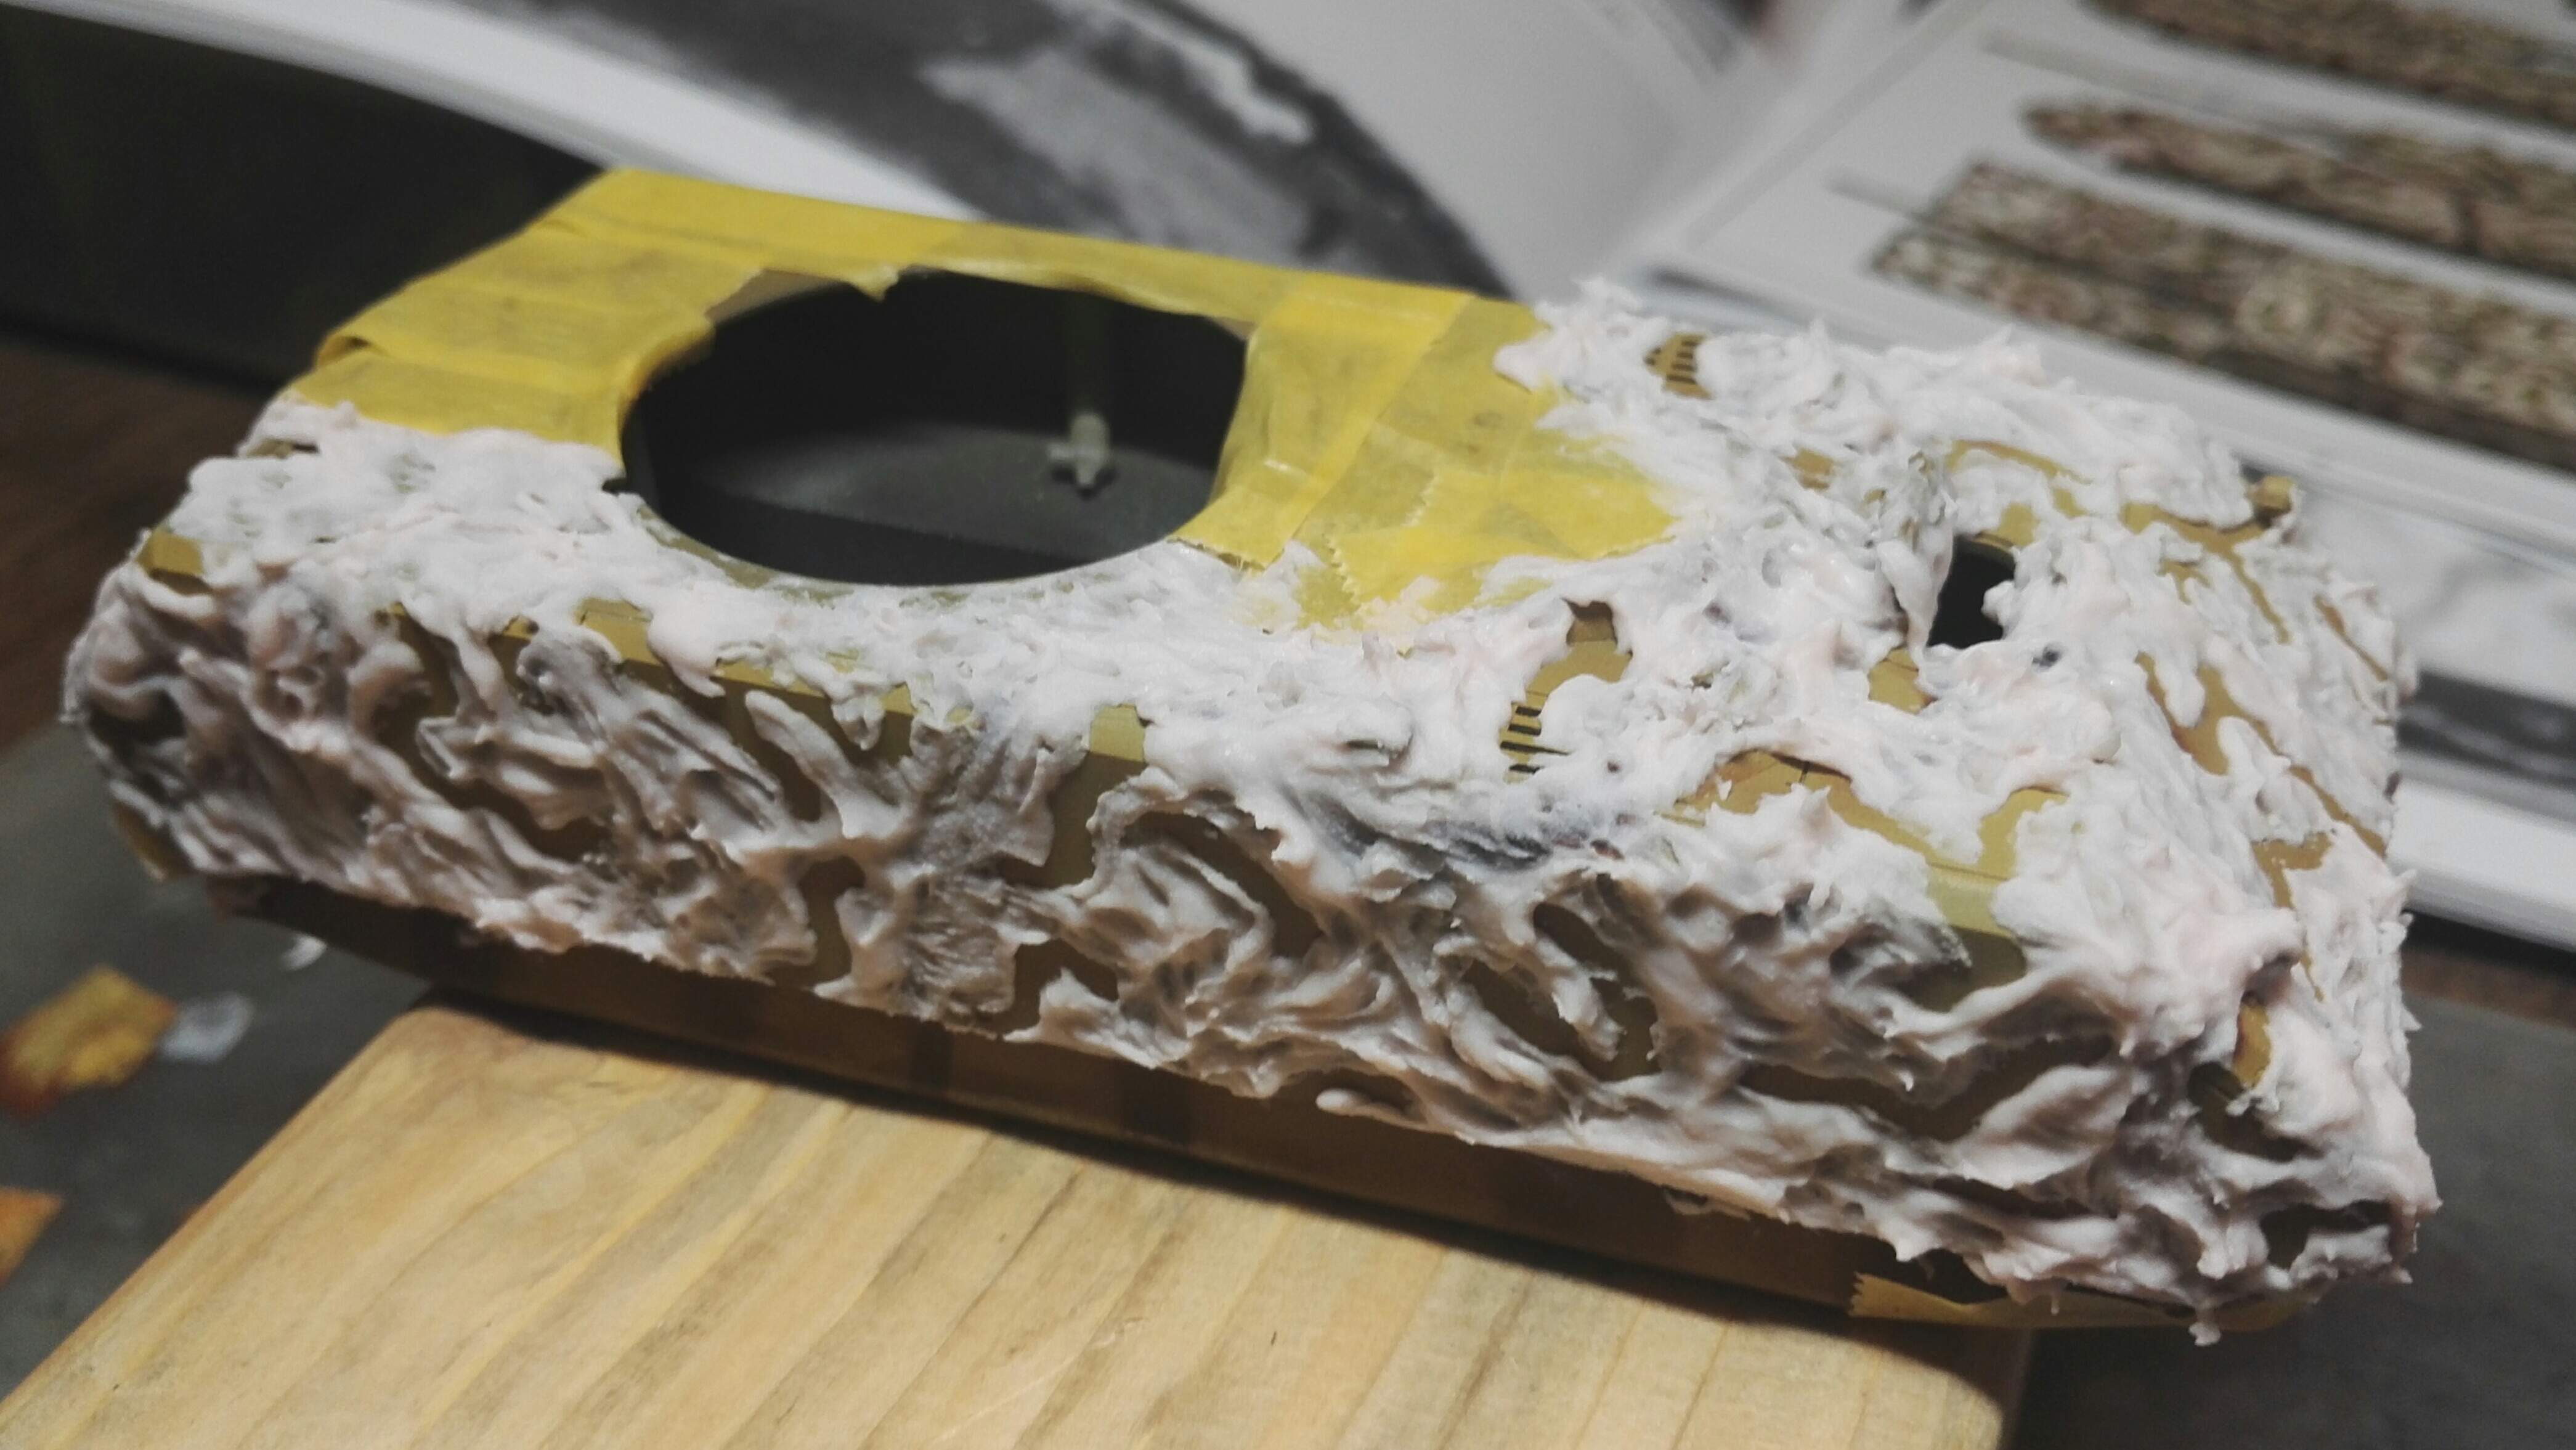
For the green I reverted to toothpaste masking, which is much quicker, but doesn’t give a soft edge. Used Corsodyl for the first section, not that good as it’s opaque and abrasive. I had under coated with chipping fluid so I could abrade the camo, but when washing the toothpaste off, a lot of the brown paint came off with it
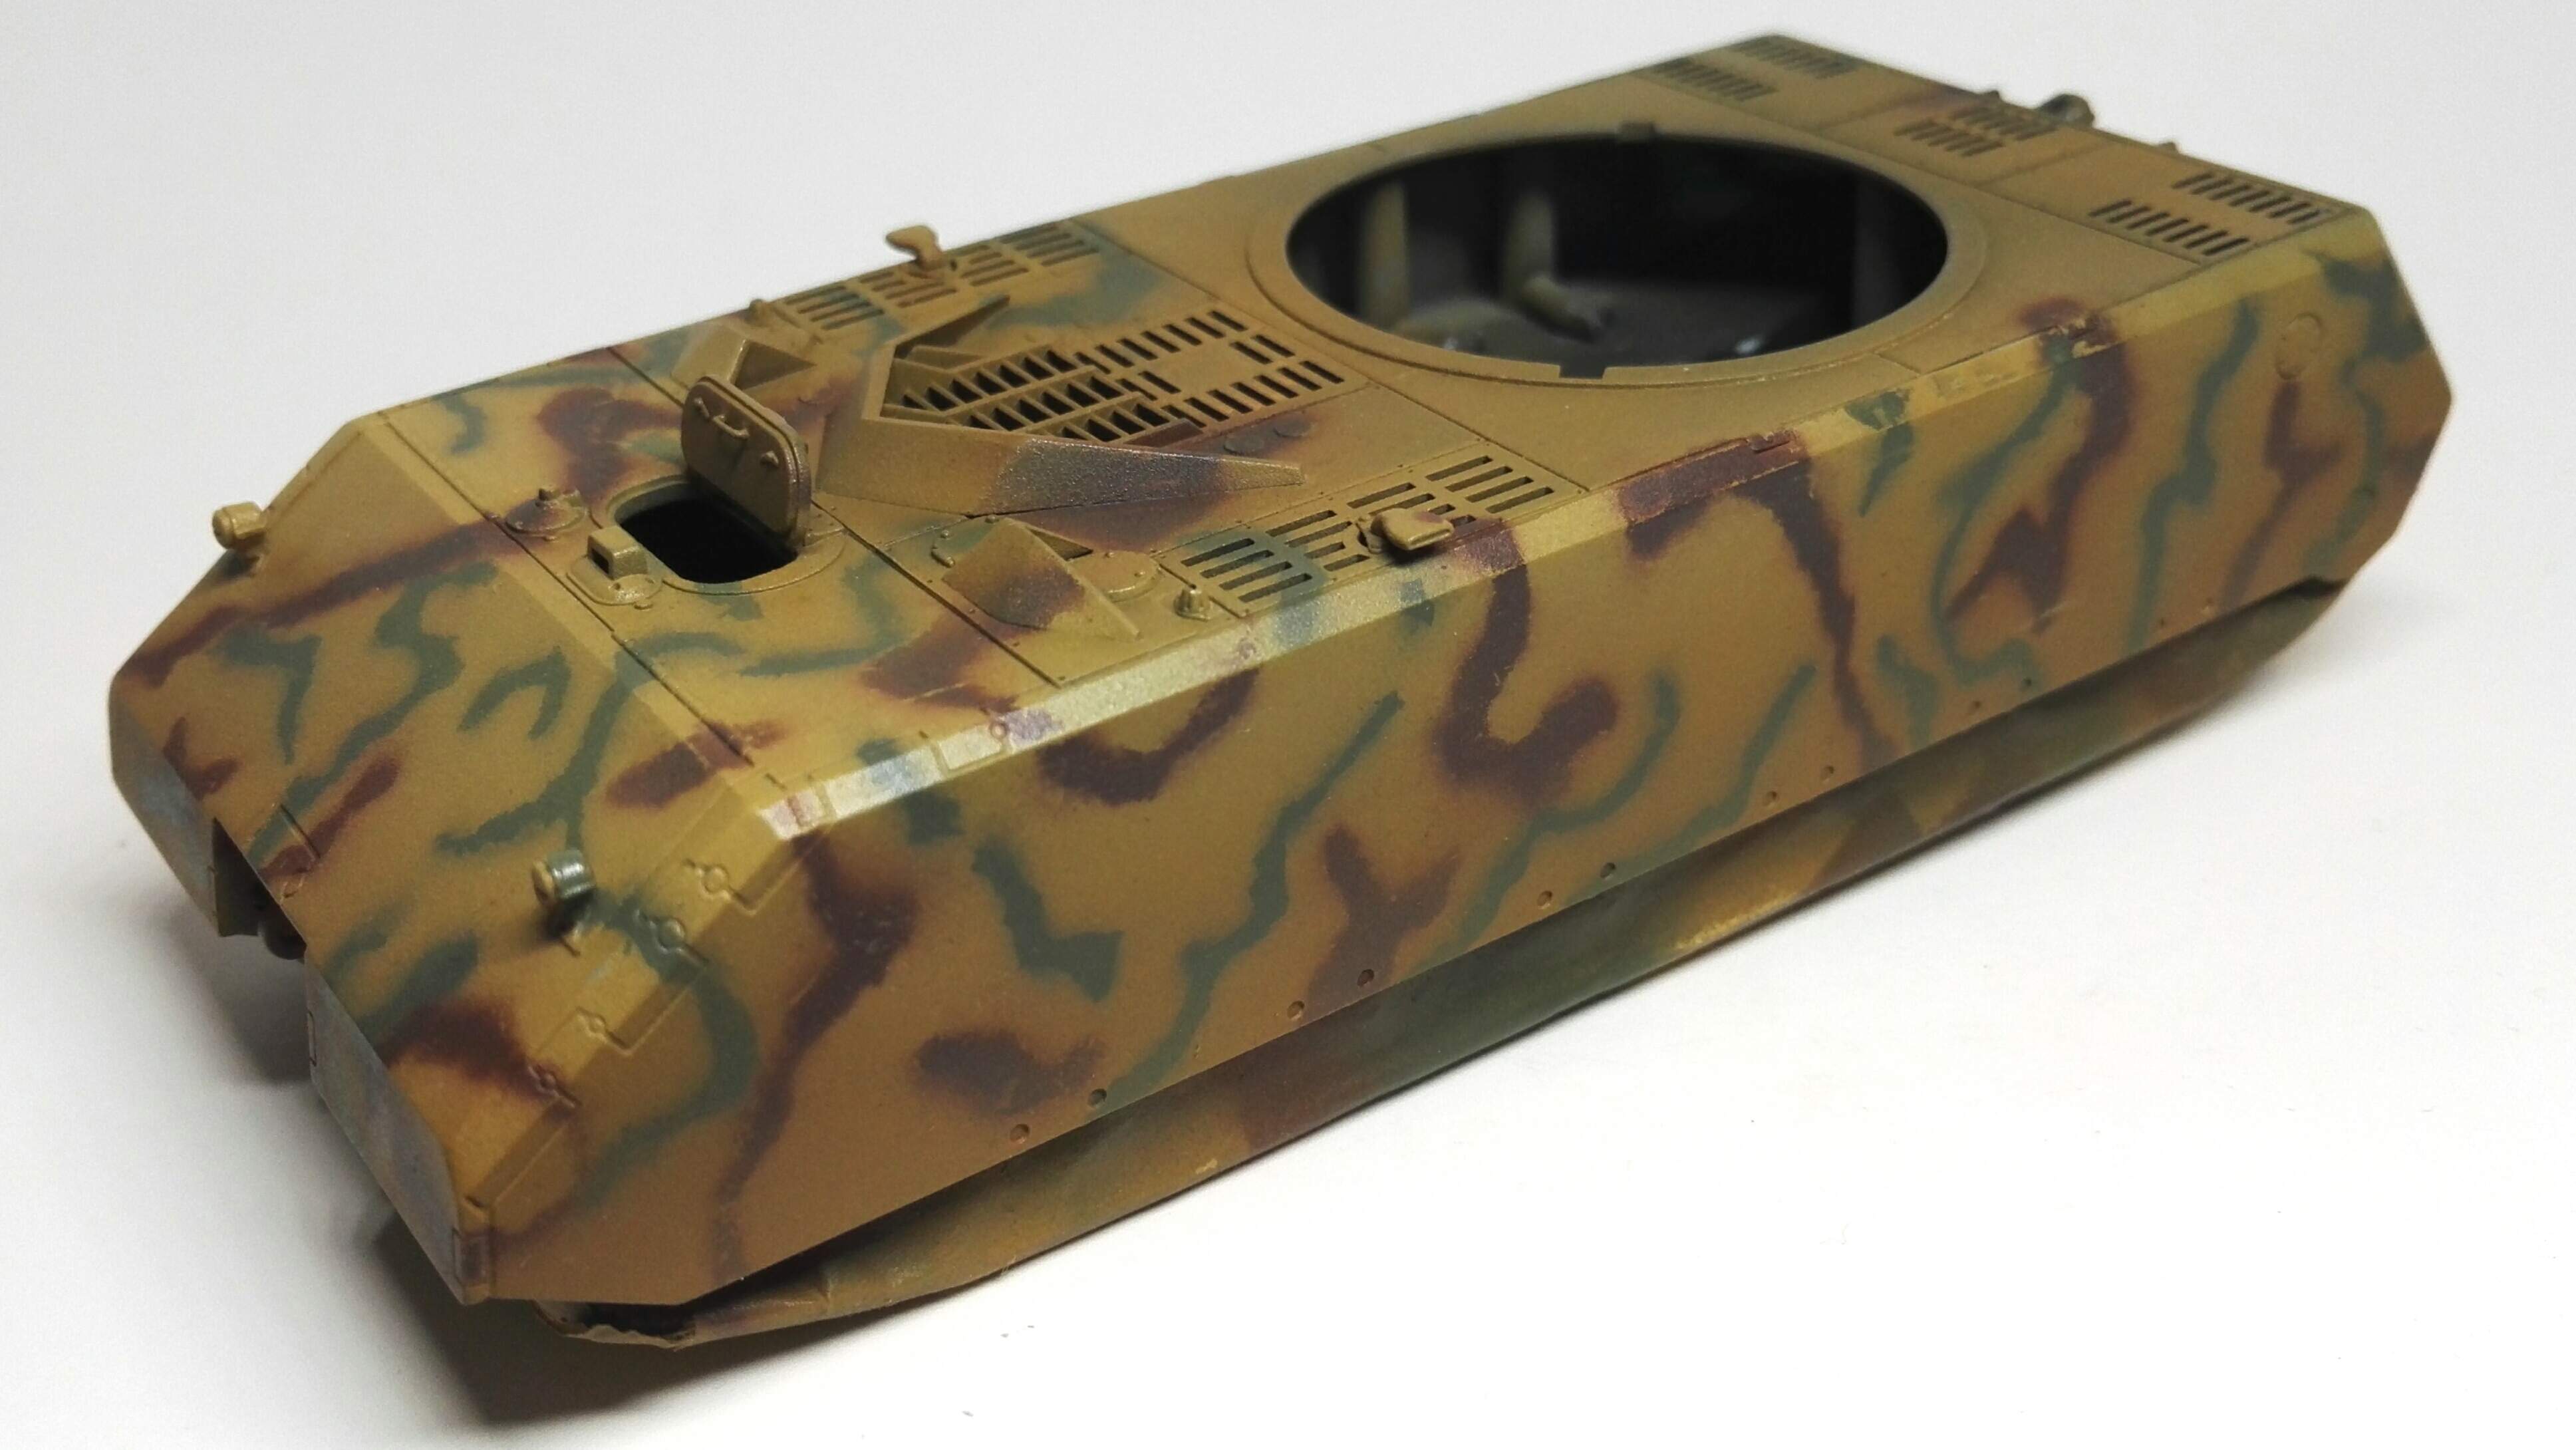
With the mask all washed off, strong smell of mint, and very stark looking, so no photos of that ugly stage. These camo paints were Model Air, but went with Tamiya to gently touch up the brown camo, and soften the edges of the green. The whole thing was then misted over with thinned colours from the AK dunkelgelb mod set. So after many visits to the airbrush station, I’m mostly happy with it.
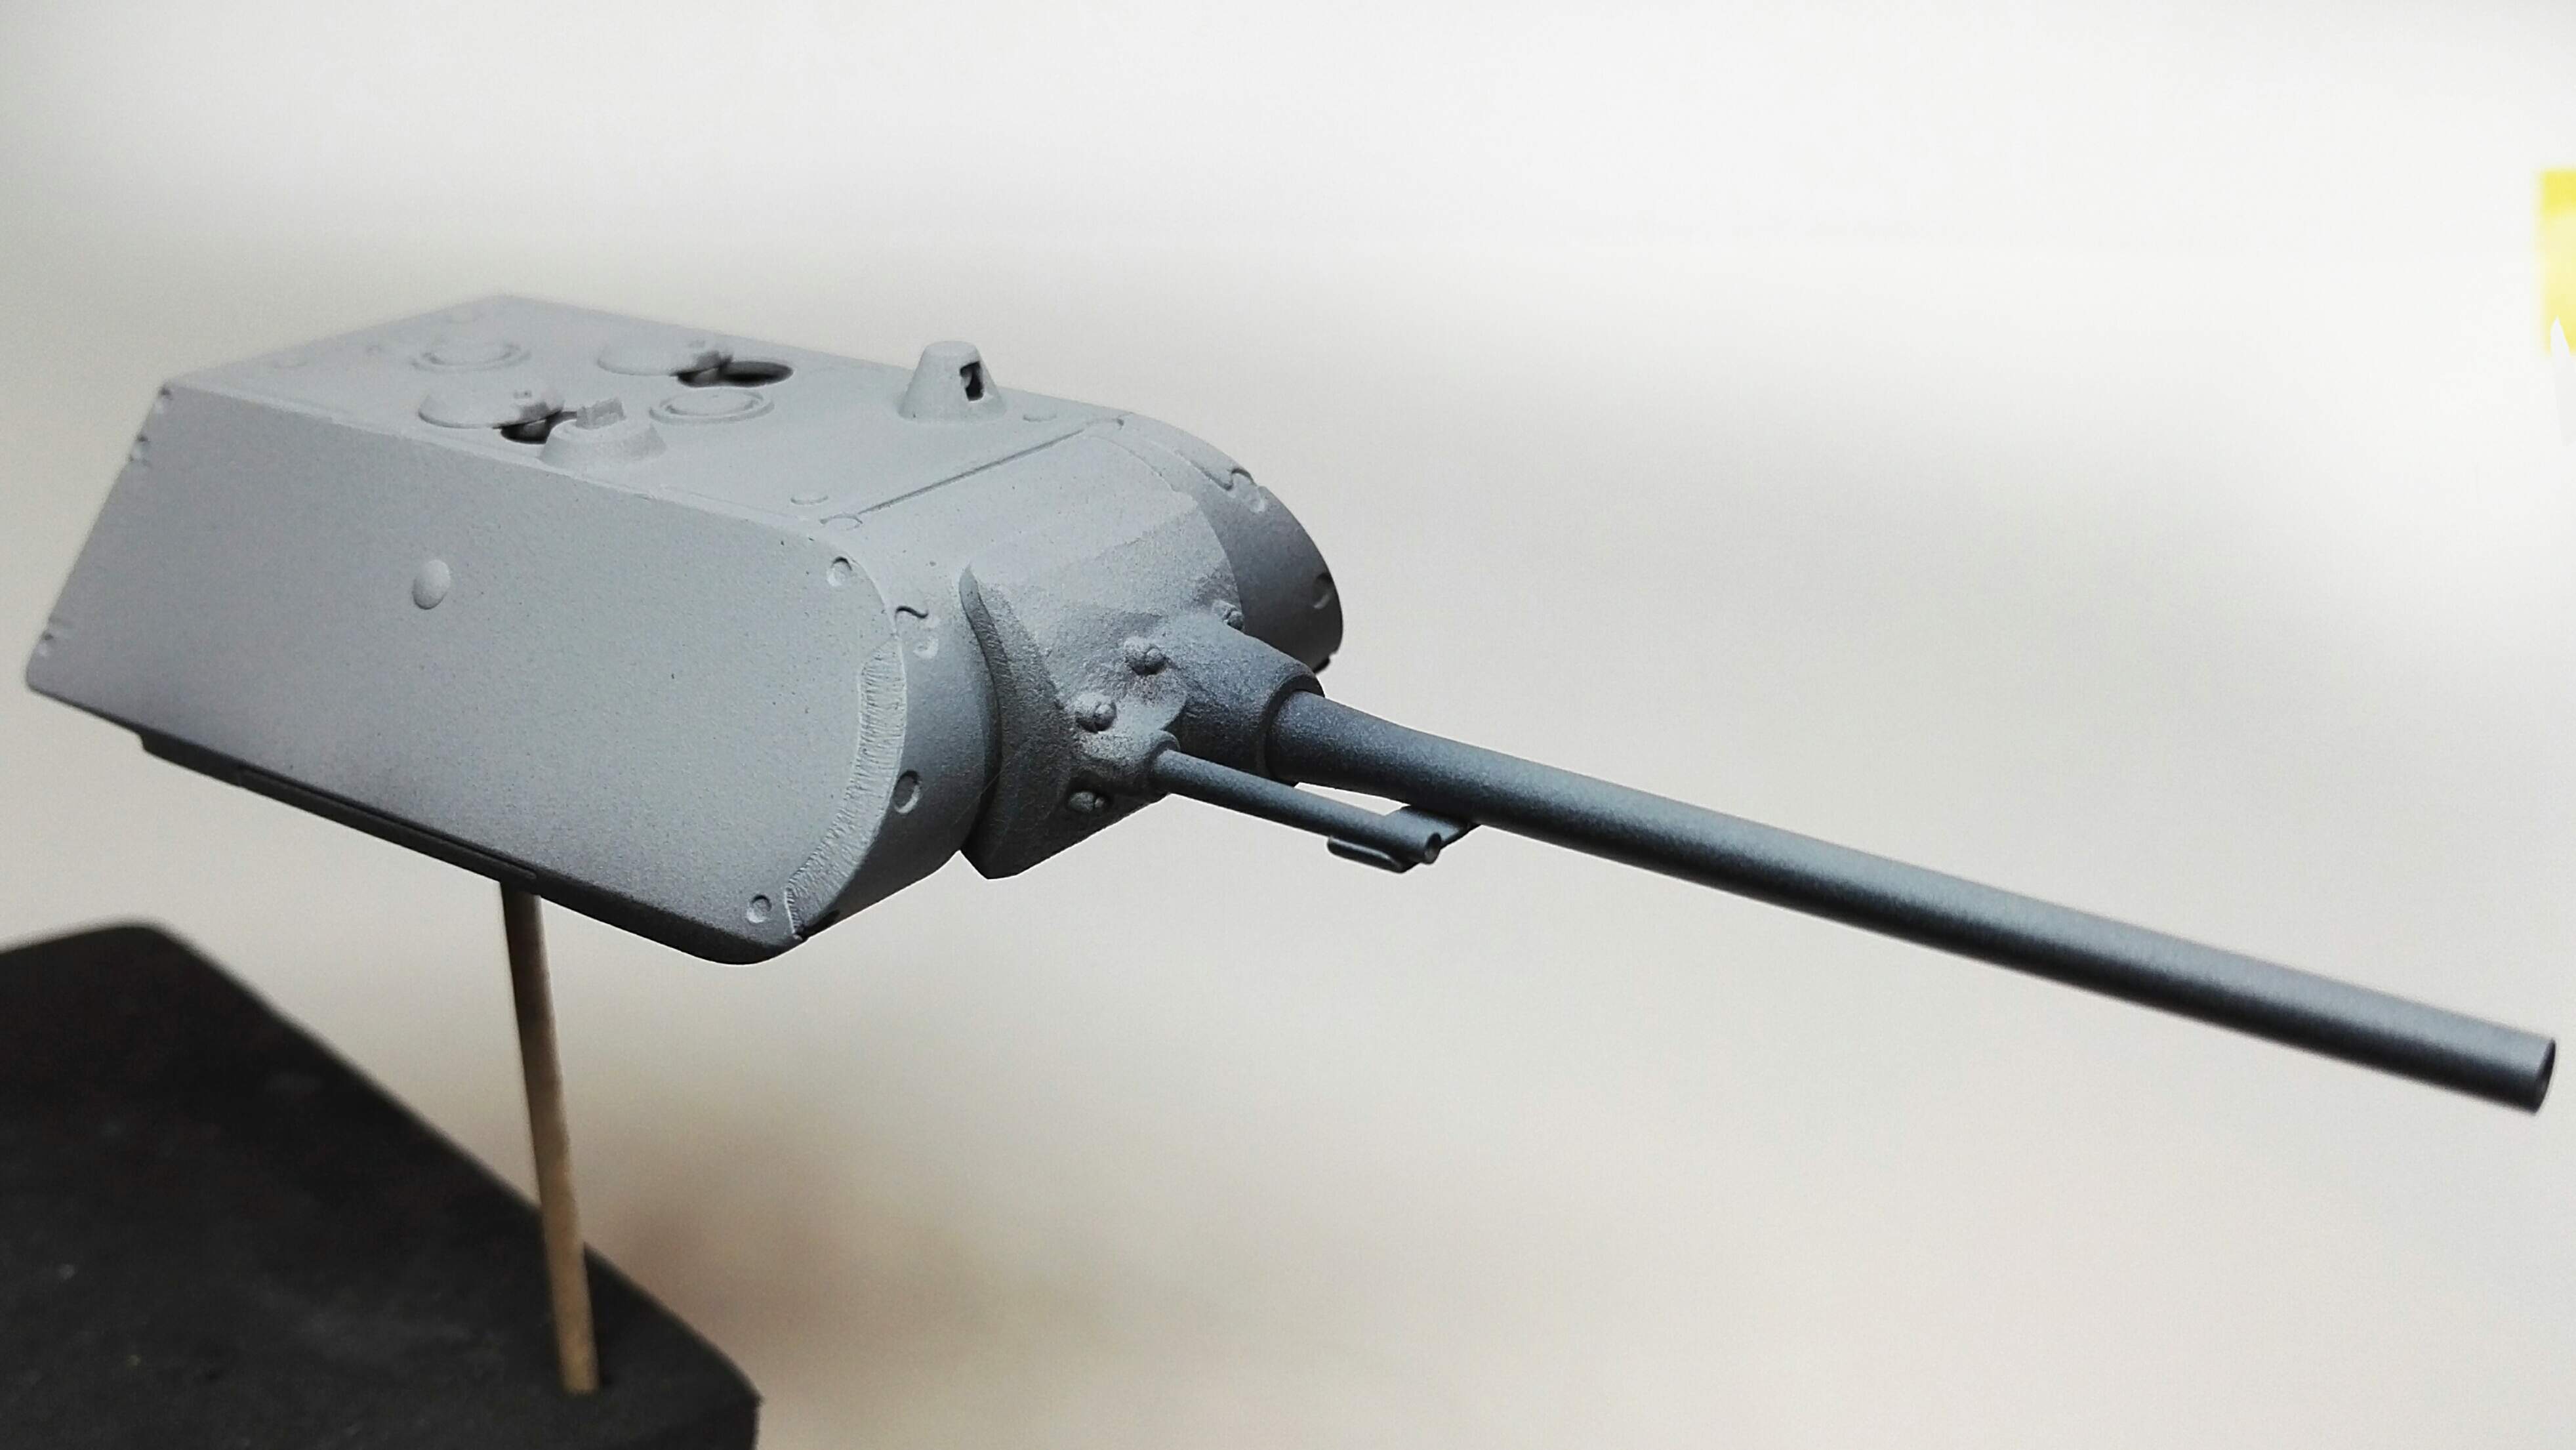
This tank seems to offer all kinds of possibilities in terms of finish, but this is one of the schemes in the kit instructions, based on the real scheme used on the number 2 chassis with the number 1 turret.
Trying to decide whether to put any decals on. The ones supplied with the kit are not shown as being used in the instructions. None of them are real schemes for this tank of course. The decals also look pretty thick, which is similar to what I found with the Vespid decals in the Comet kit.
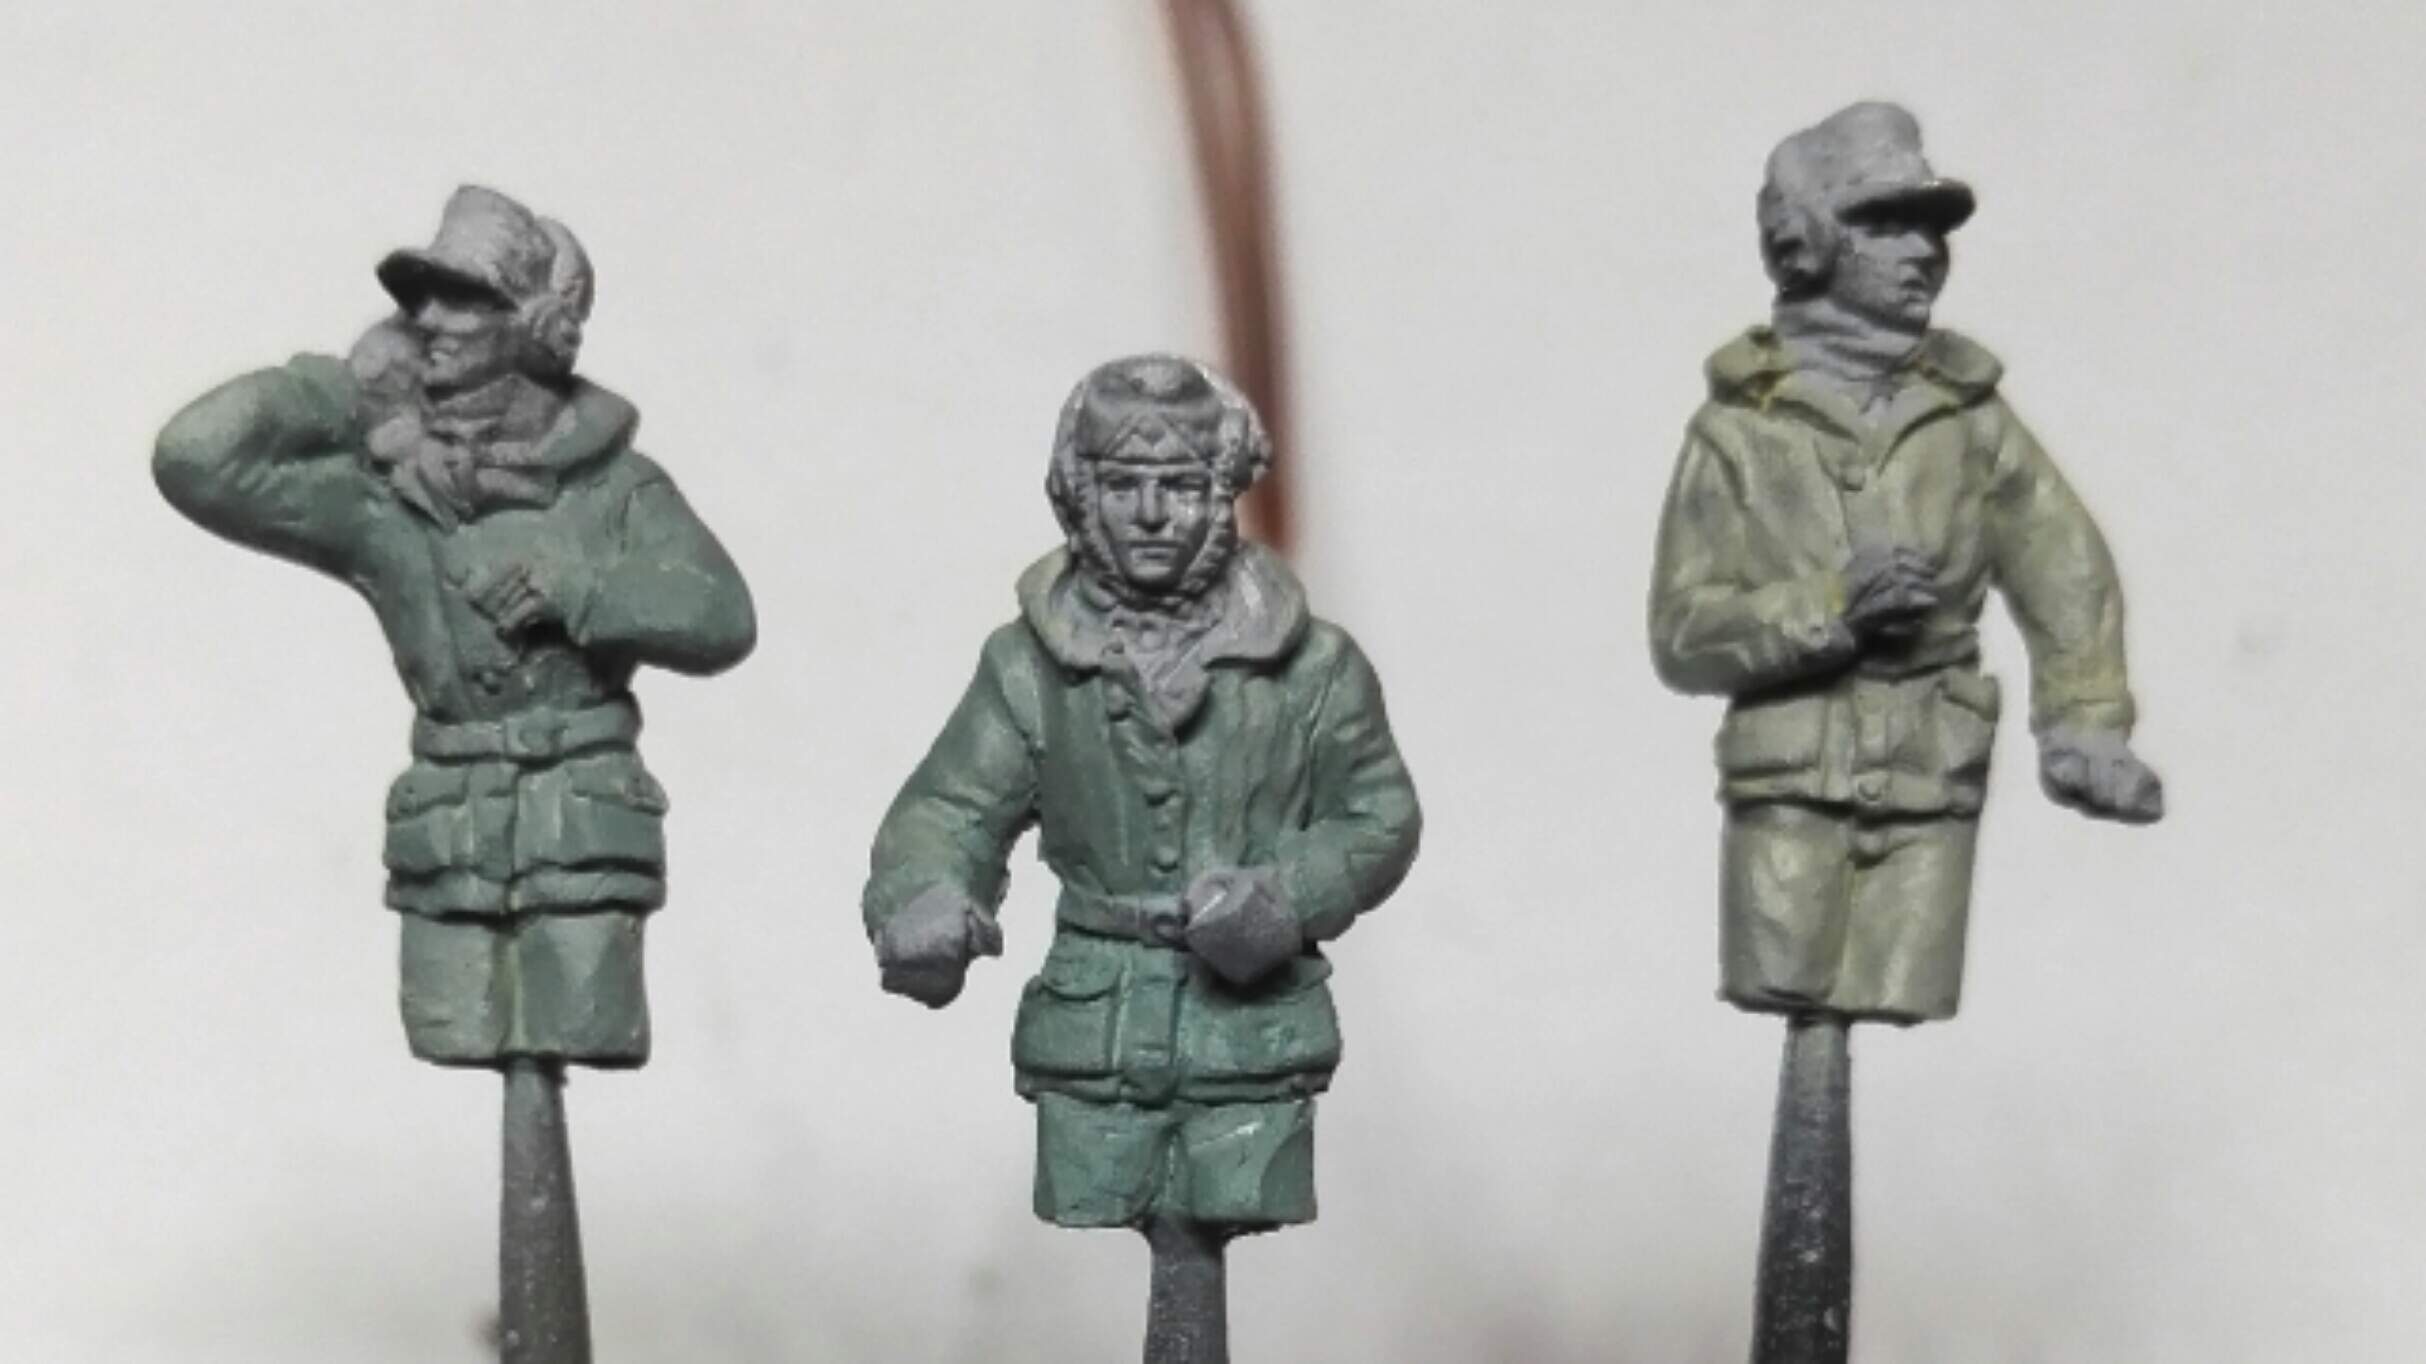
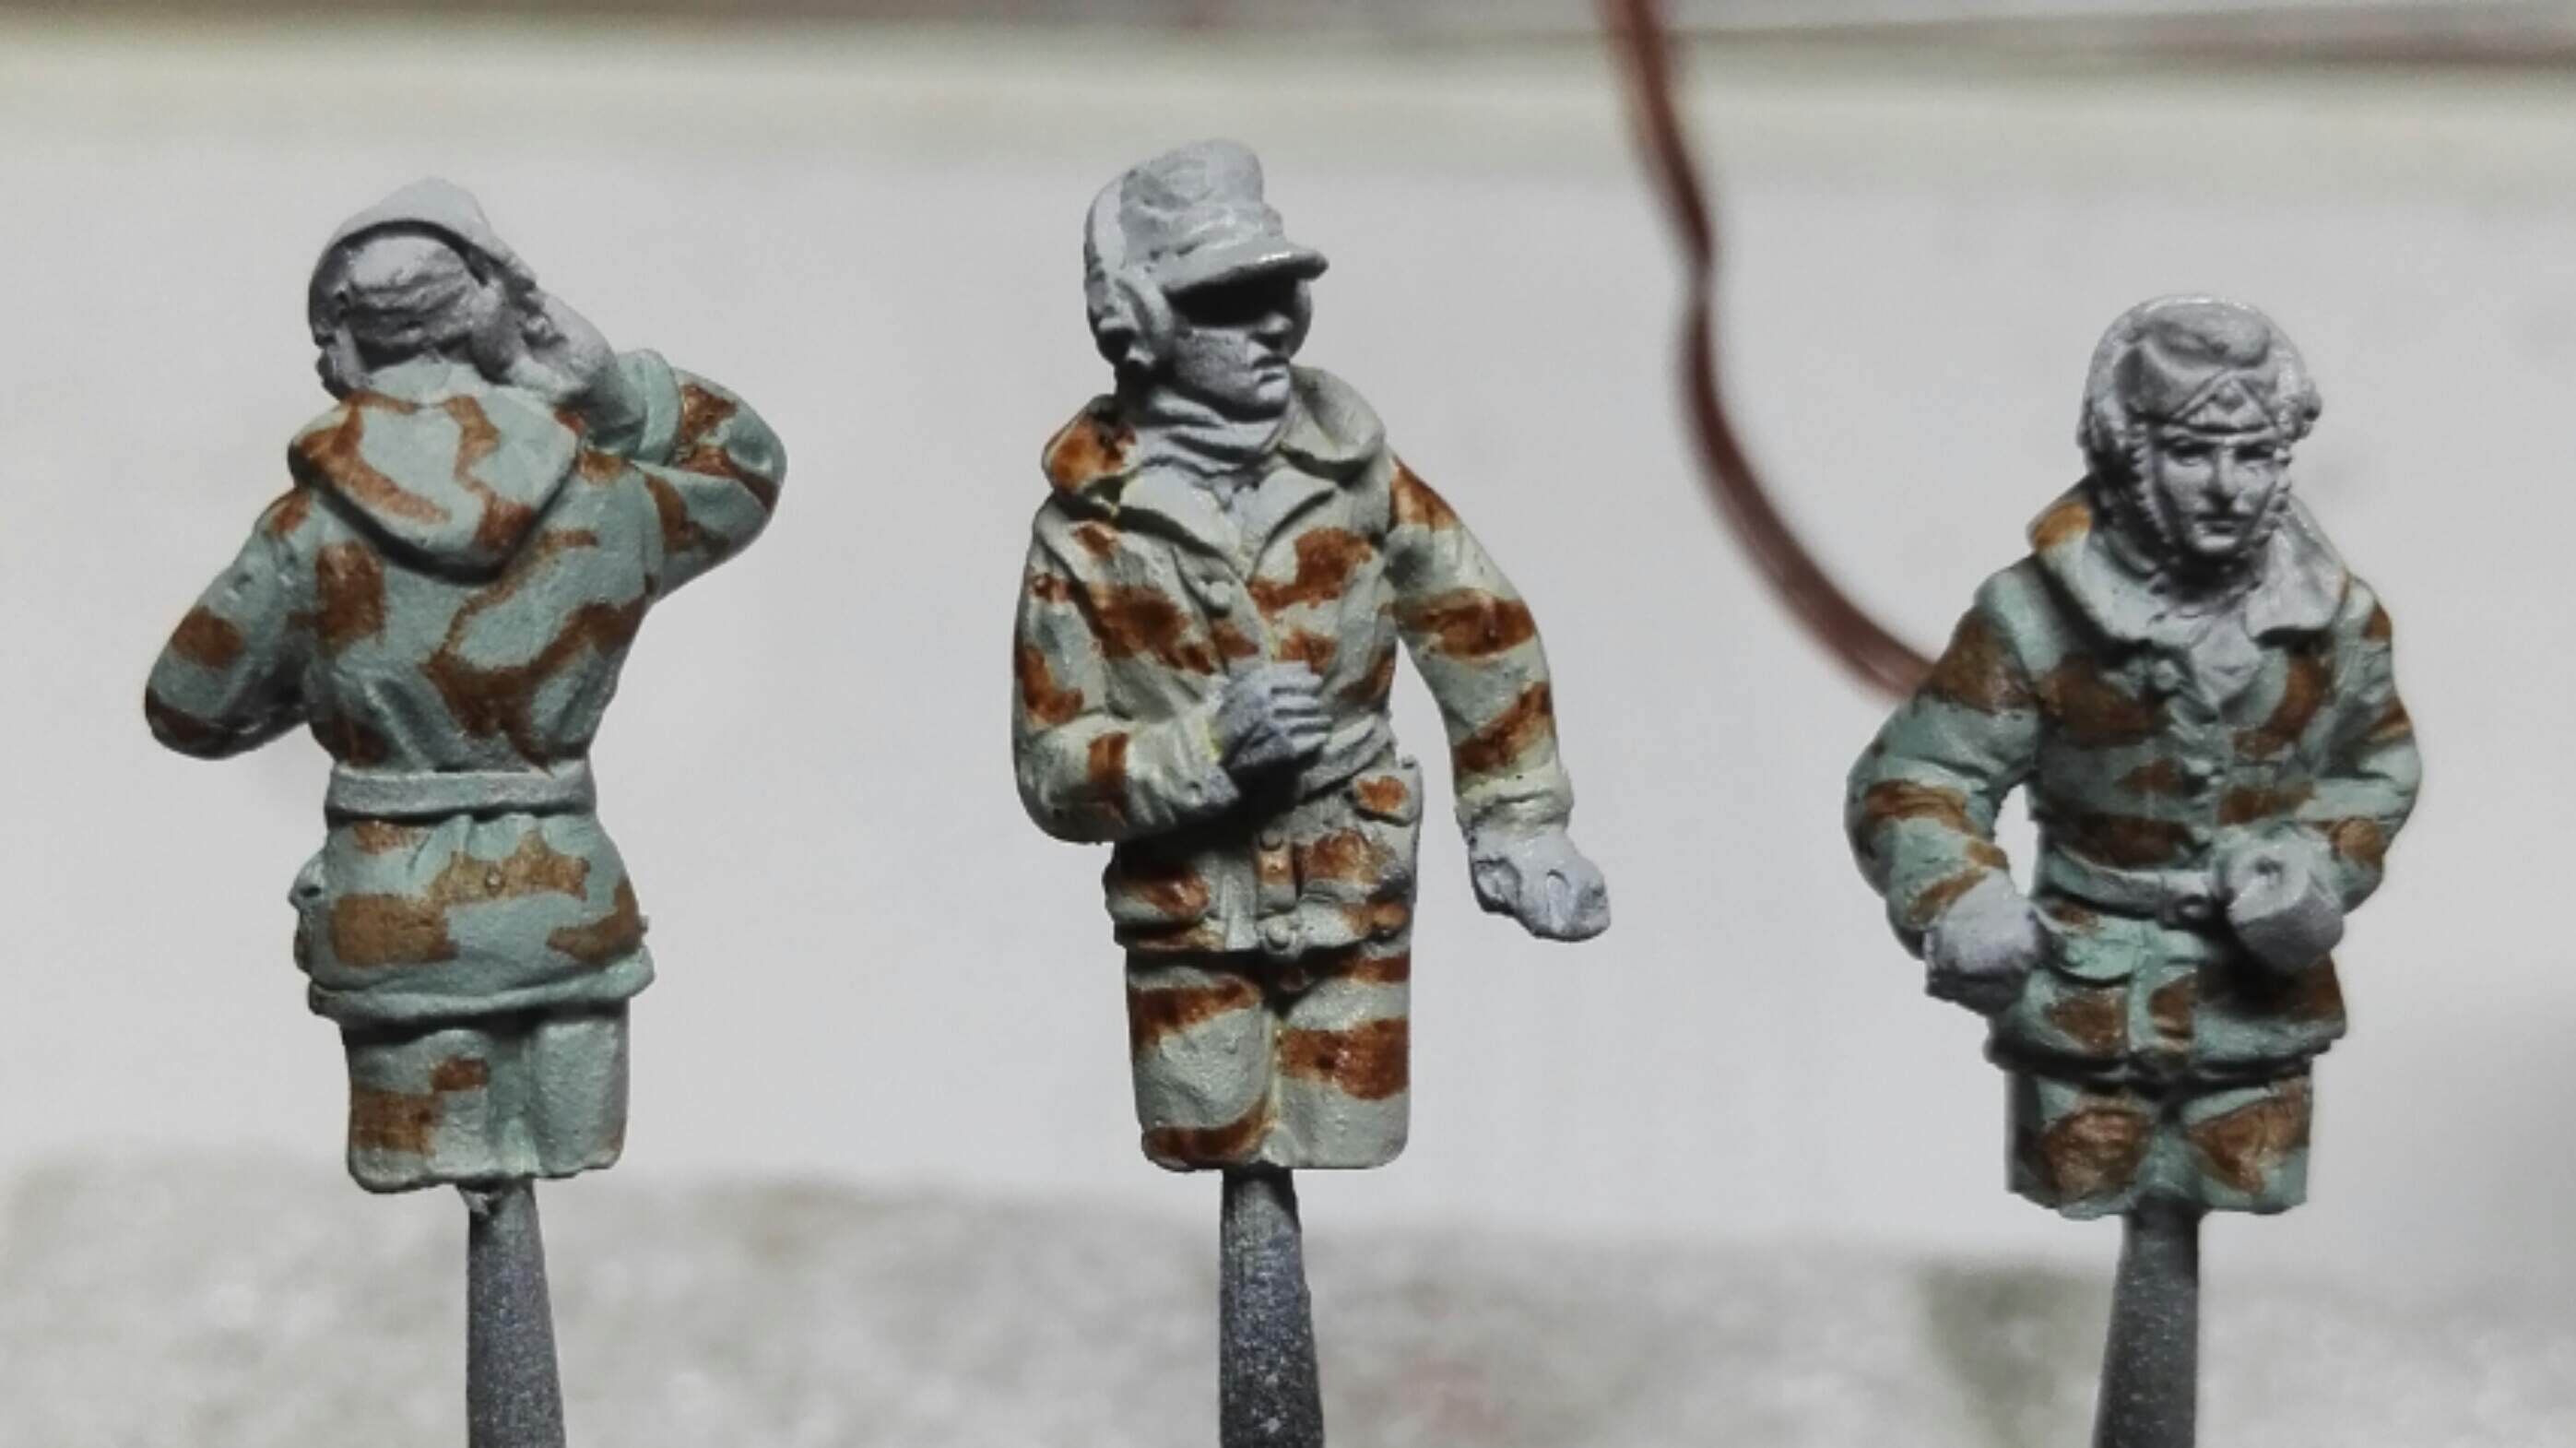
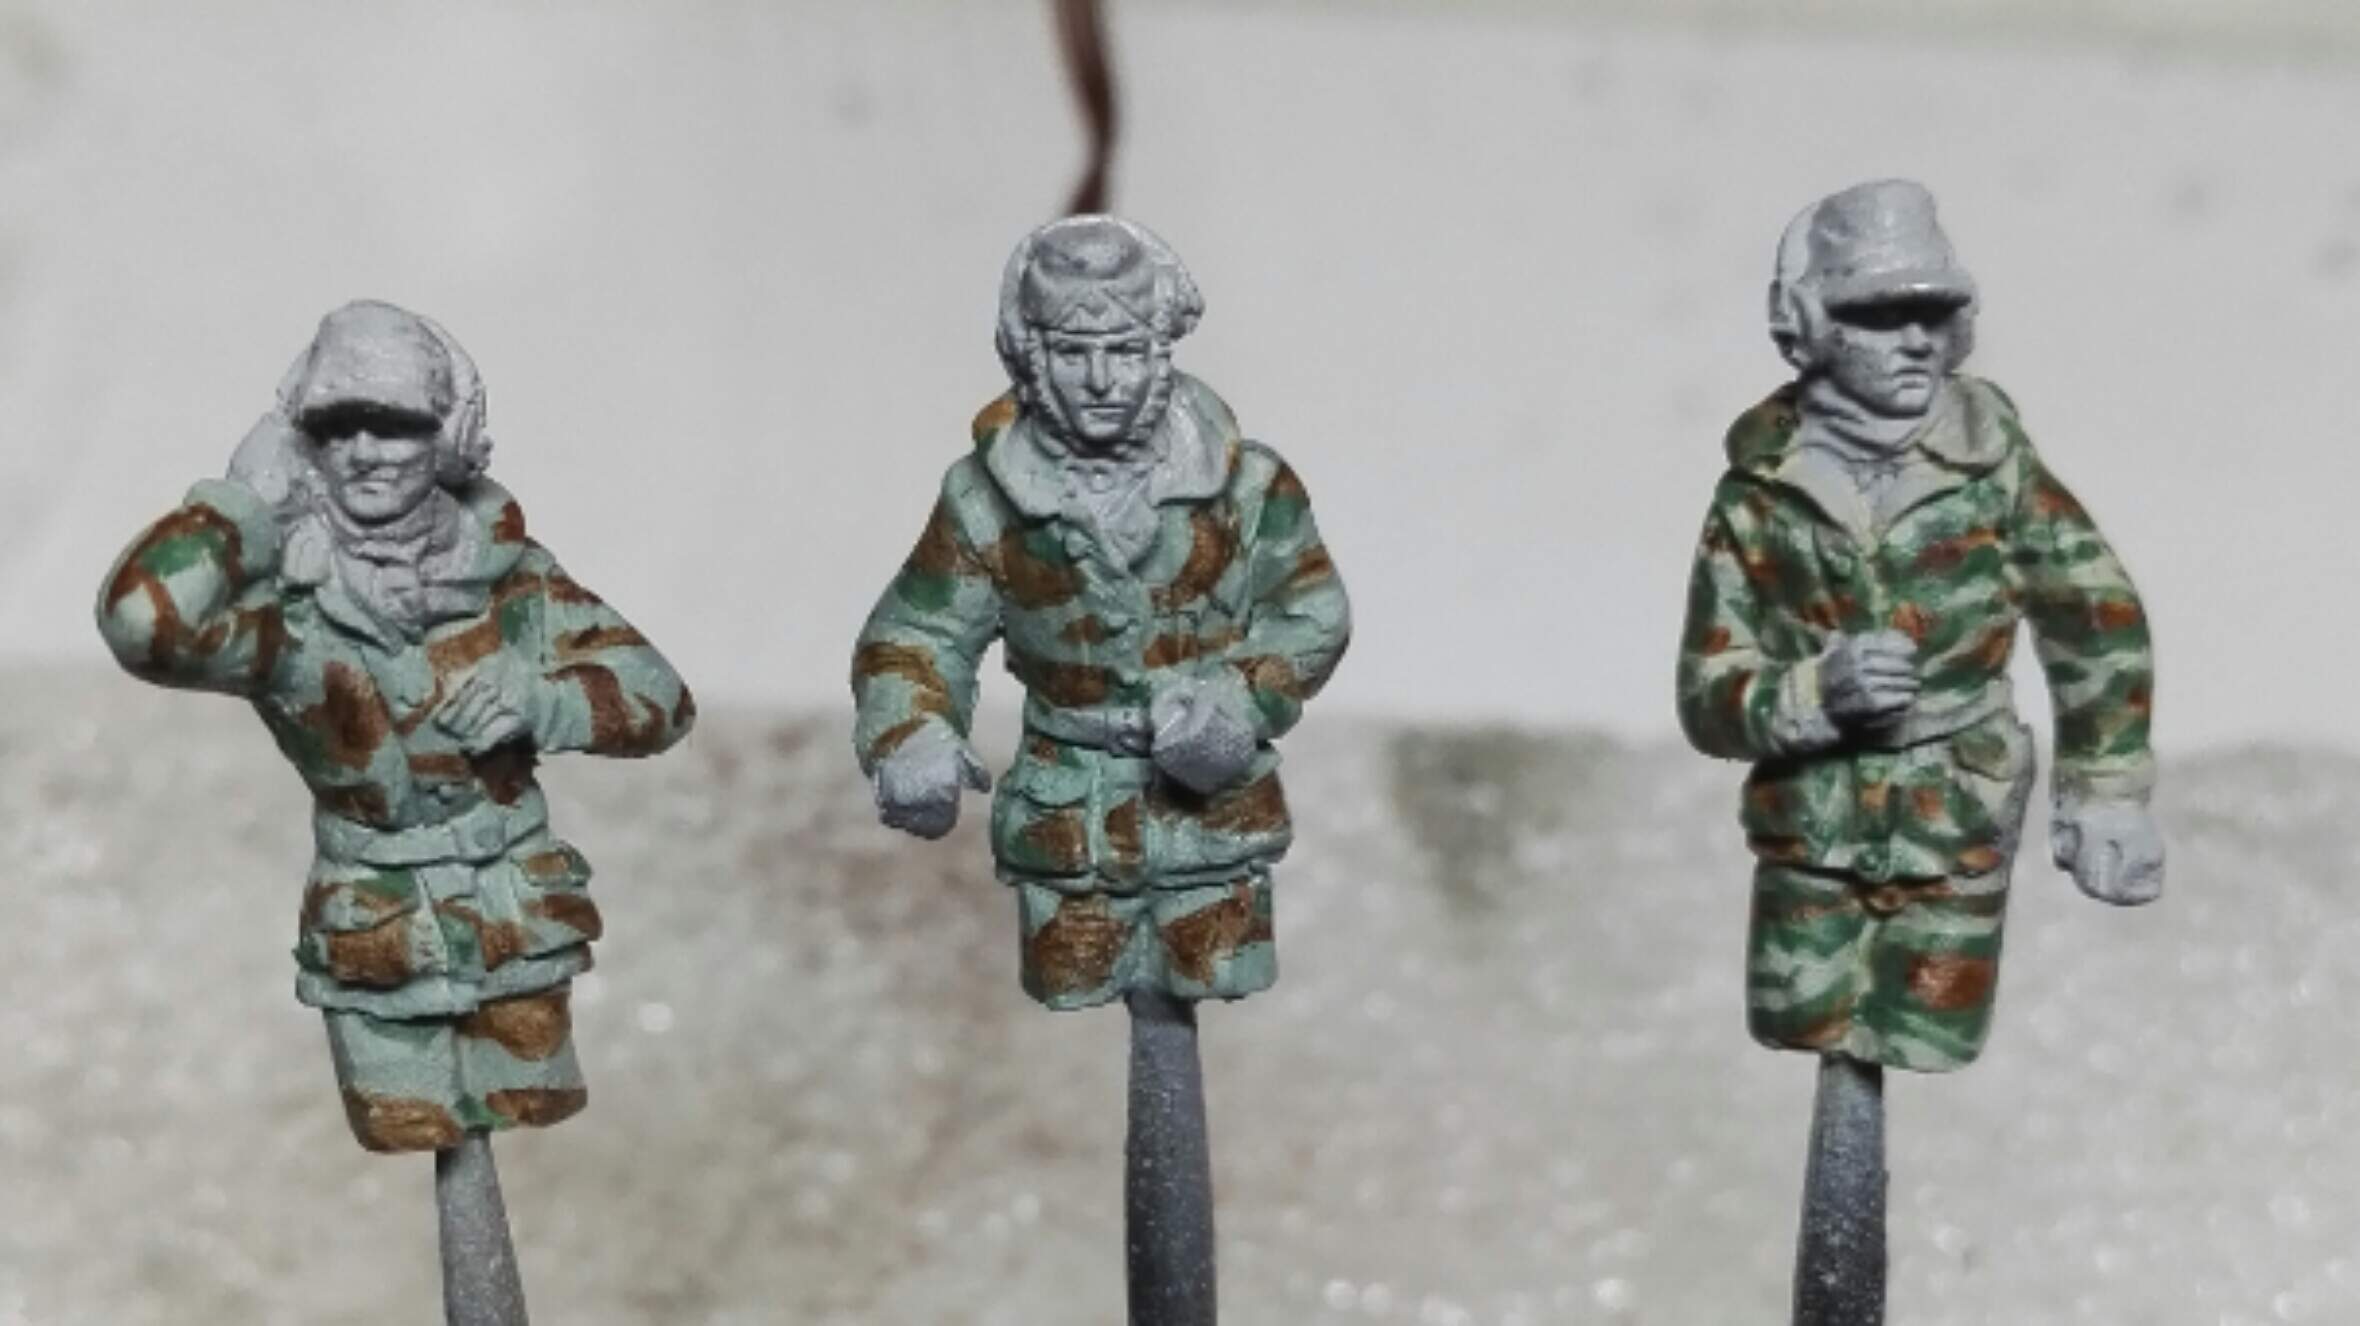
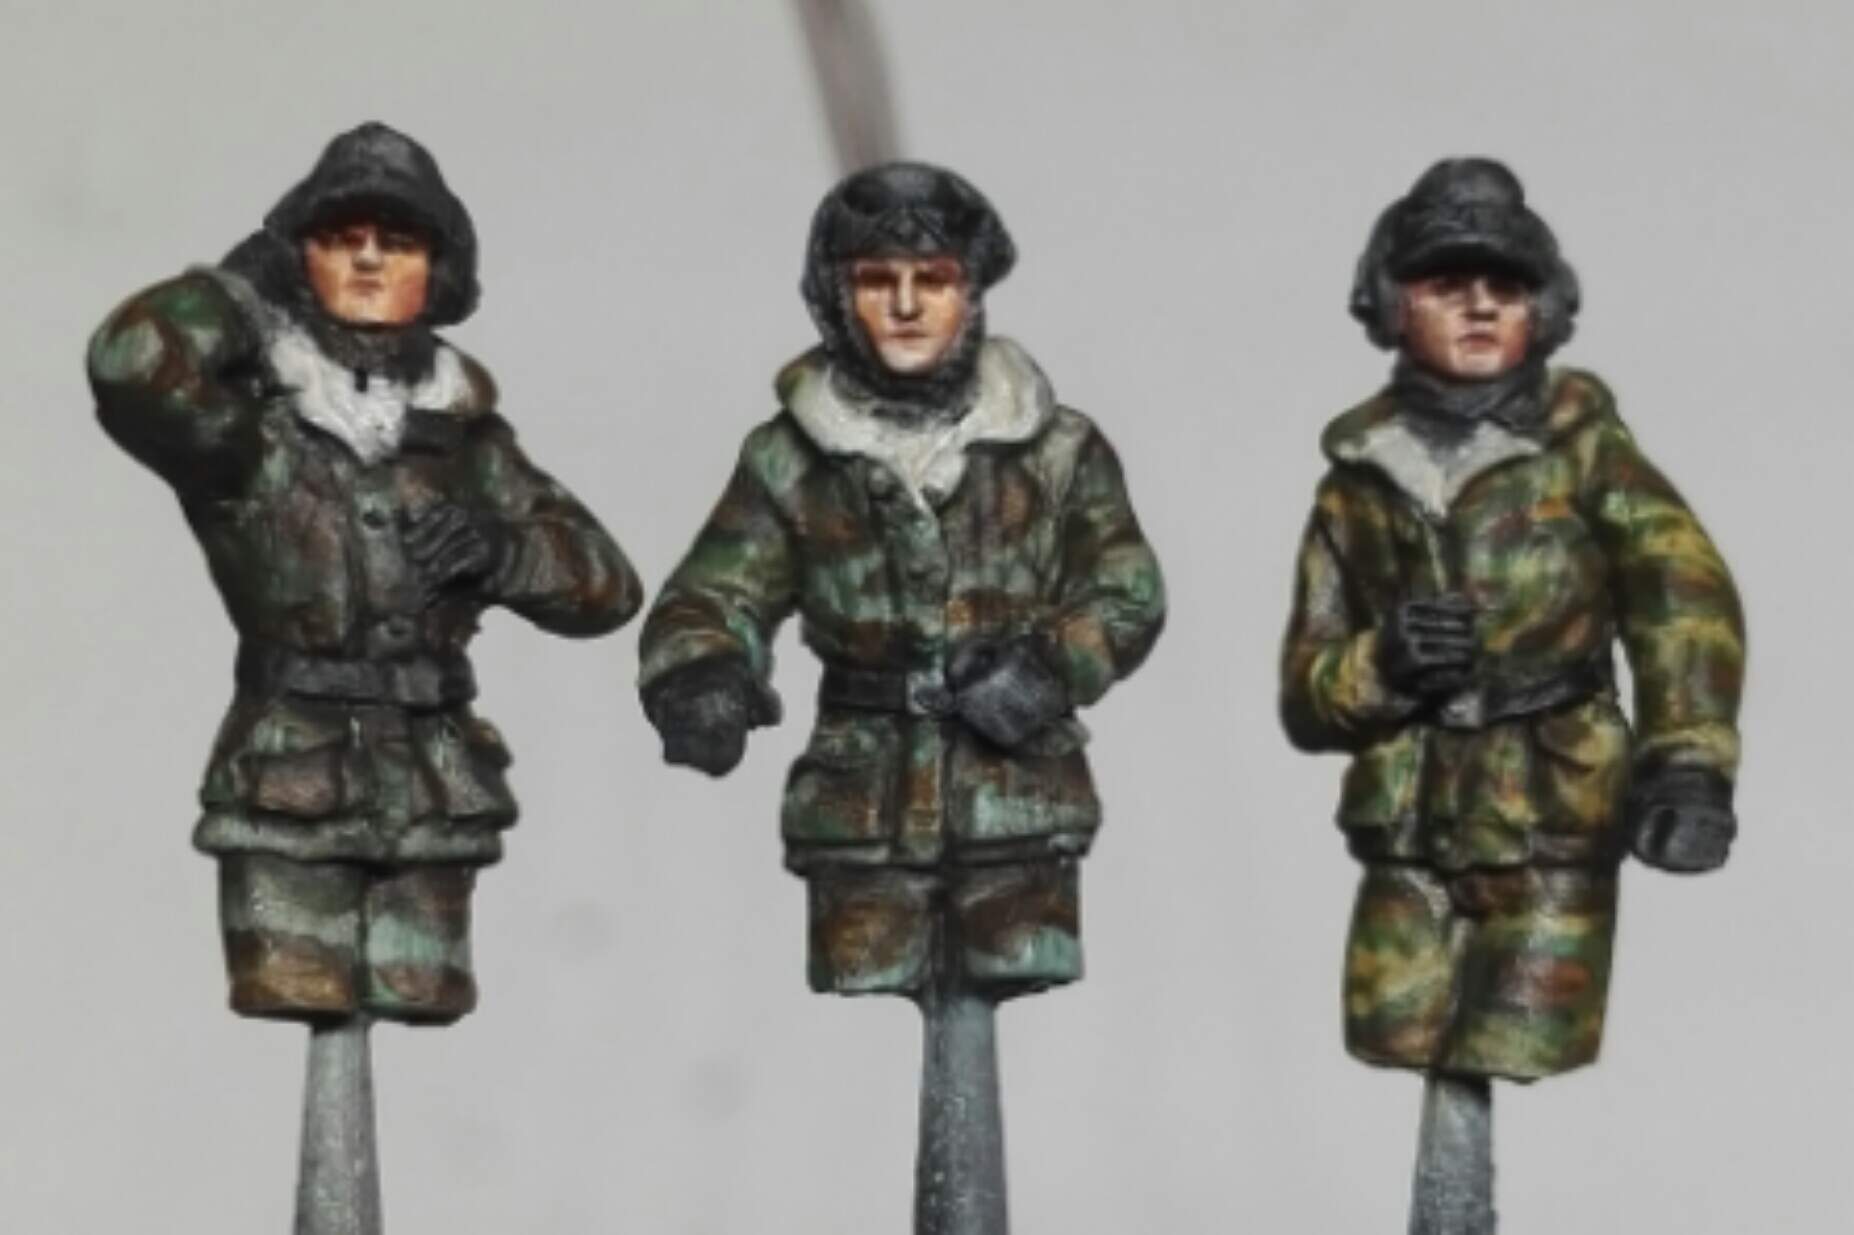
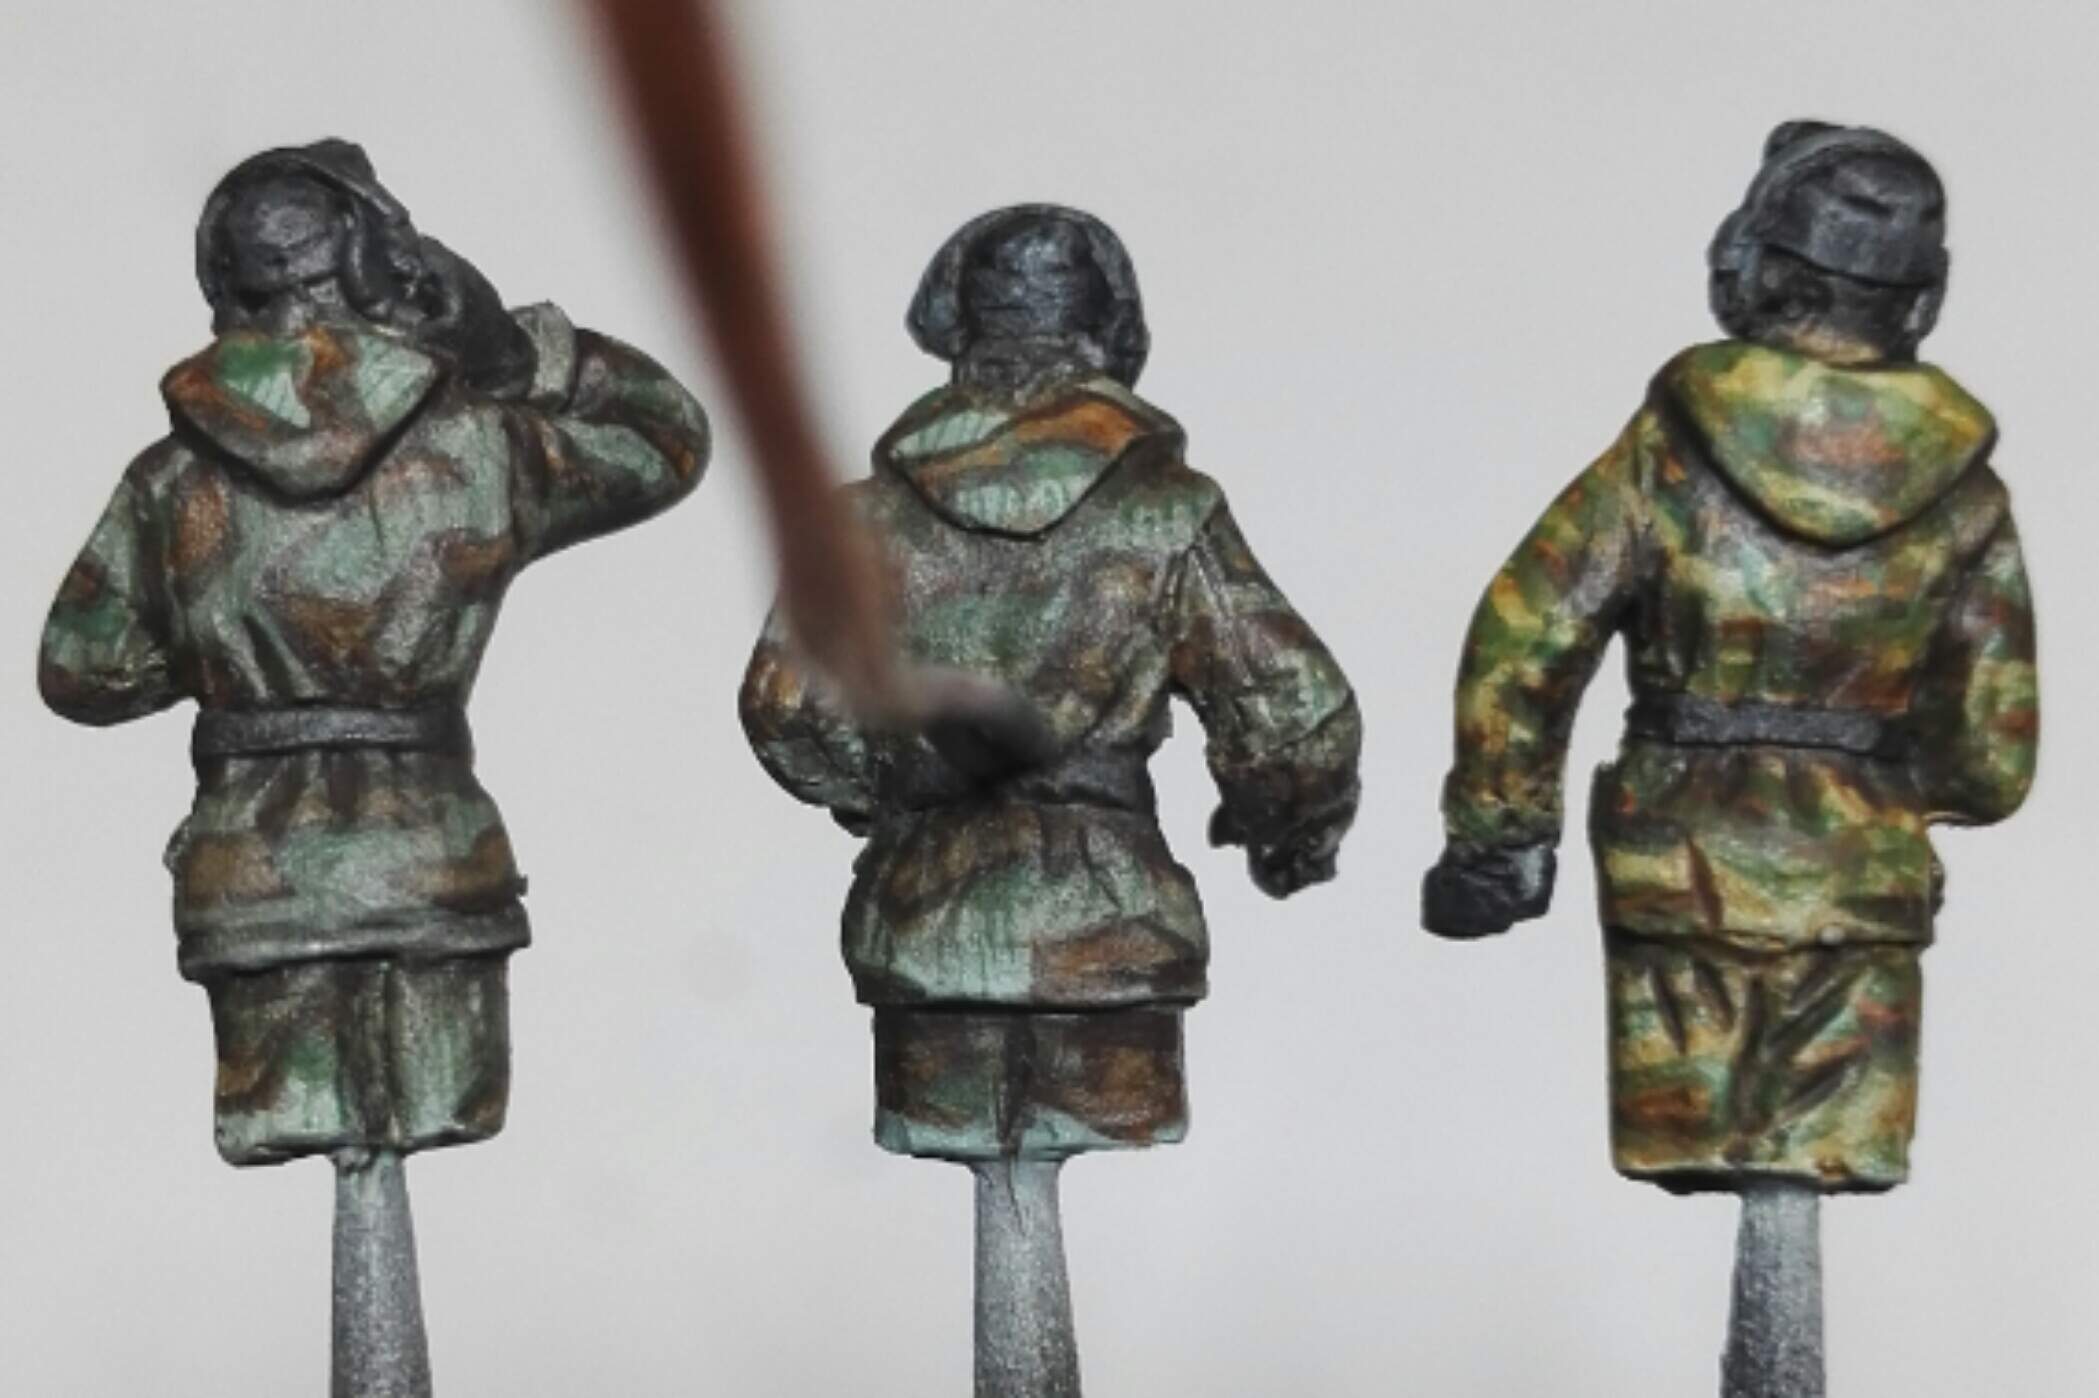
The decision about whether to put any decals on has gone on hold while I make a start on the crew. Winter reversible suits, two with splittermuster camo, the other with sumpfmuster… I think that one needs to go a bit more yellowy, hopefully some oil paints will fix that. First coats:
All looking great Matt … All the cam schemes look very good. Ref the decals, if you wanted I have the ones I did for my E100 Flak 40 and King Tiger I am not going to use. You are more than welcome to them if you want to try them ?
Thanks for the offer, are they numbers or just crosses? - though now you mention it I have some E-100 and KT decals somewhere. As usual it will be a question of where…
Went for minimal decals, just two crosses from an Archer dry transfer sheet, applied on a coat of Fimo size for leaf metal to make sure it transferred.
Good plan with the minimal markings. That looks just right.
And with the size of that thing, I think if you were the best crew and driver in the world that wagon is going to take a beating… It would just attract things to hit it like a magnet lol…
Nicely done Matt
 two massive jacks… It is true that I can’t see those stowing easily on the tank itself. And yet would you risk it getting stuck for want of a track link if your support convoy cannot reach you? Can you fit a link by driving until the busted one is at the accessible end?


 These camo paints were Model Air, but went with Tamiya to gently touch up the brown camo, and soften the edges of the green. The whole thing was then misted over with thinned colours from the AK dunkelgelb mod set. So after many visits to the airbrush station, I’m mostly happy with it.