I hope the resin flaps will fit as they are meant for the Fujimi kit…shoudn’t be too big a problem, I think.
See you here and good luck for your interesting builds!
Cheers
Peter
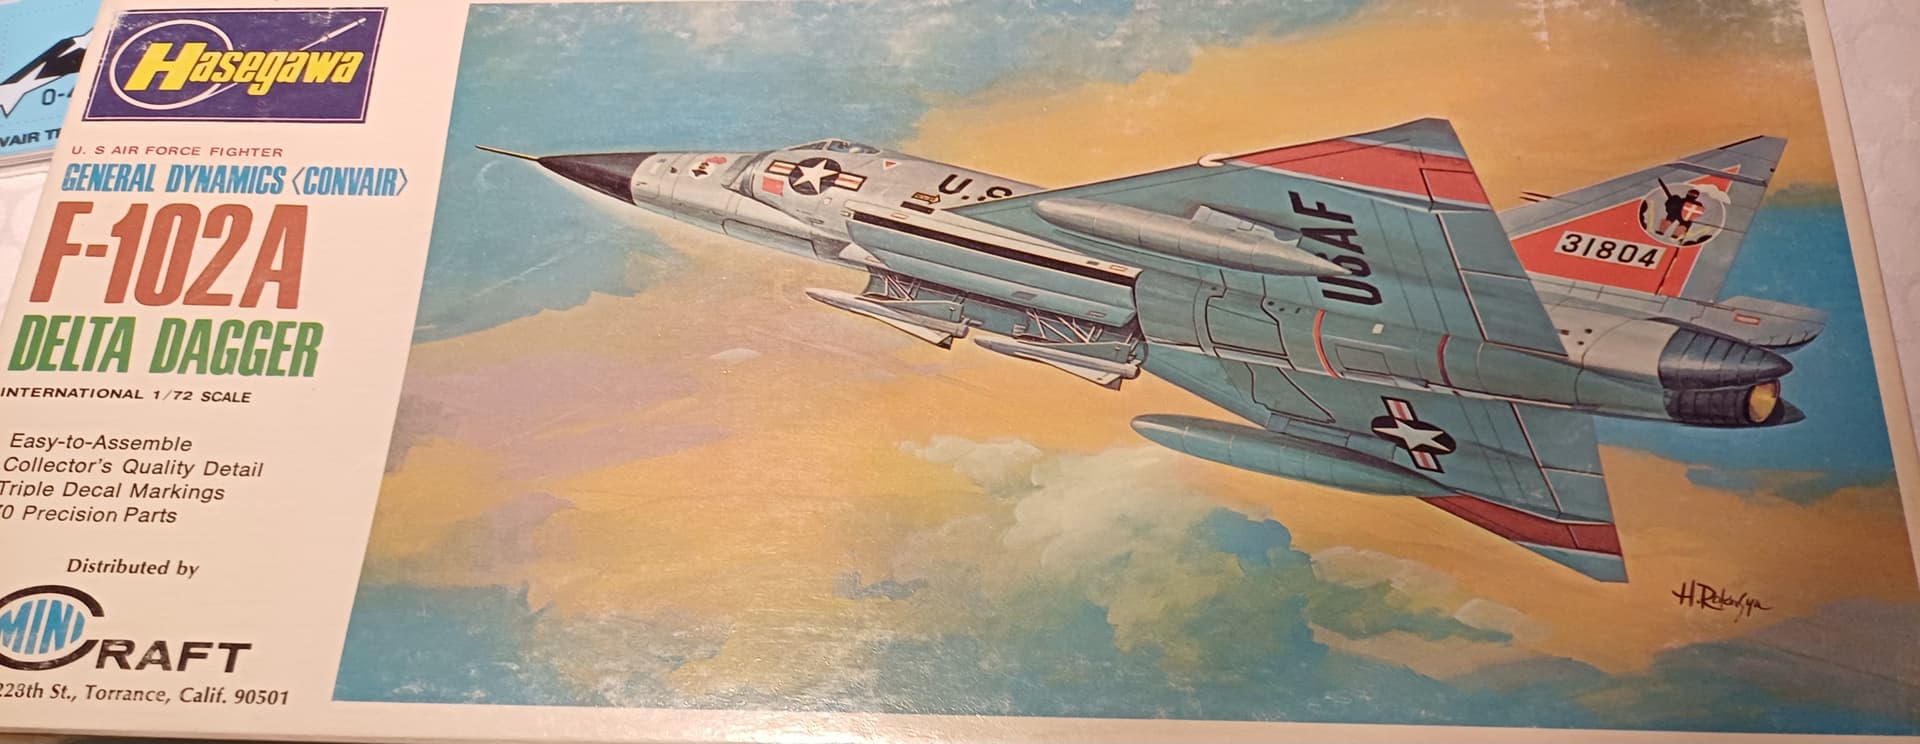
As I started a Delta Dagger F102A yesterday, I wonder if that would qualify for this campaign? It does say these were used in “South East Asia as the main combat aircaft” at the time this kit was released (1969).
And from key-military.com:
“Following the attacks on US warships in the Gulf of Tonkin in August 1964, President Lyndon B. Johnson ordered the F-102 to be brought in. The type would have permanent bases in Bangkok, Tan Son Nhut and Da Nang, Vietnam, and the 509th had the distinction of being the first full squadron to deploy to Vietnam. A few days later, the 405th Tactical Fighter Wing (TFW), the 509th’s parent, sent its two Martin B-57 squadrons to South-east Asia.”
Absolutely a USAF VN combat aircraft in the early stages of the campaign along with F100s, F101 VOO DOOs, F105 and a few F104s, they look cool in the typical jungle camo of the period.
Not much time left, but I found this Heller Hellcat with French Indochina markings in my stash and this is a great chance complete it. I had barely started it like 30 years ago. Pretty simple kit, so I hope it’s a pretty straight forward build.
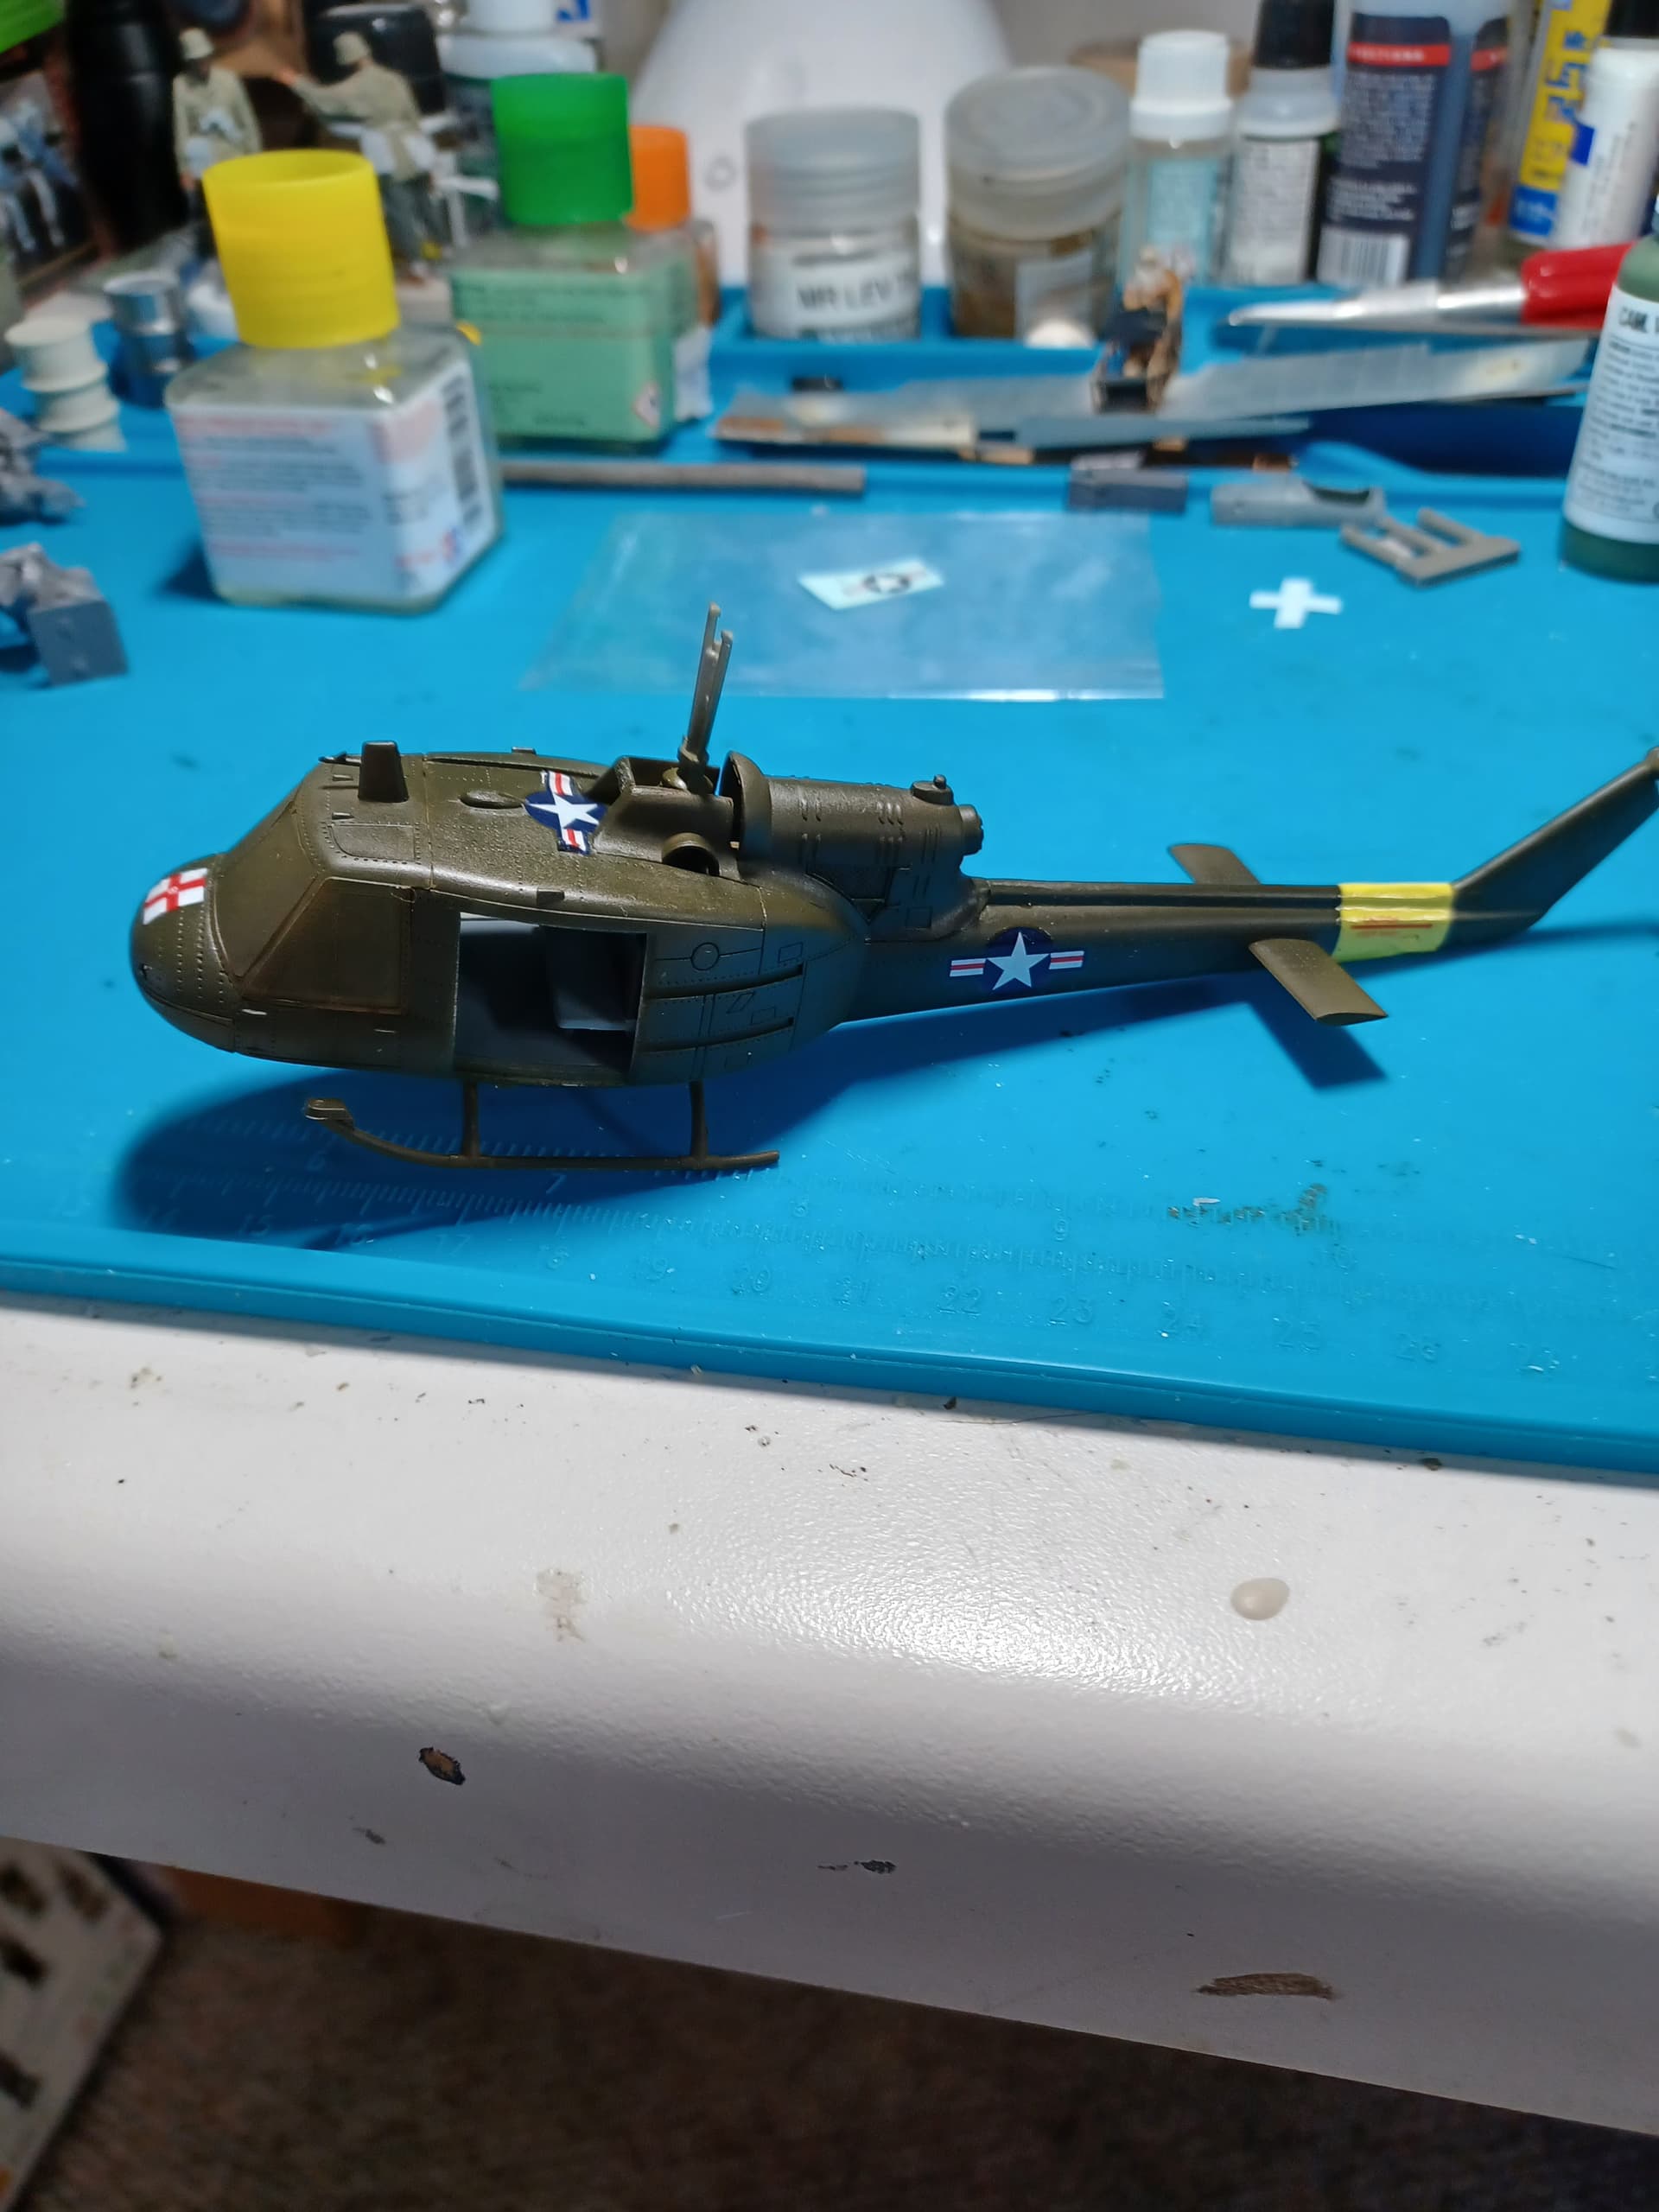
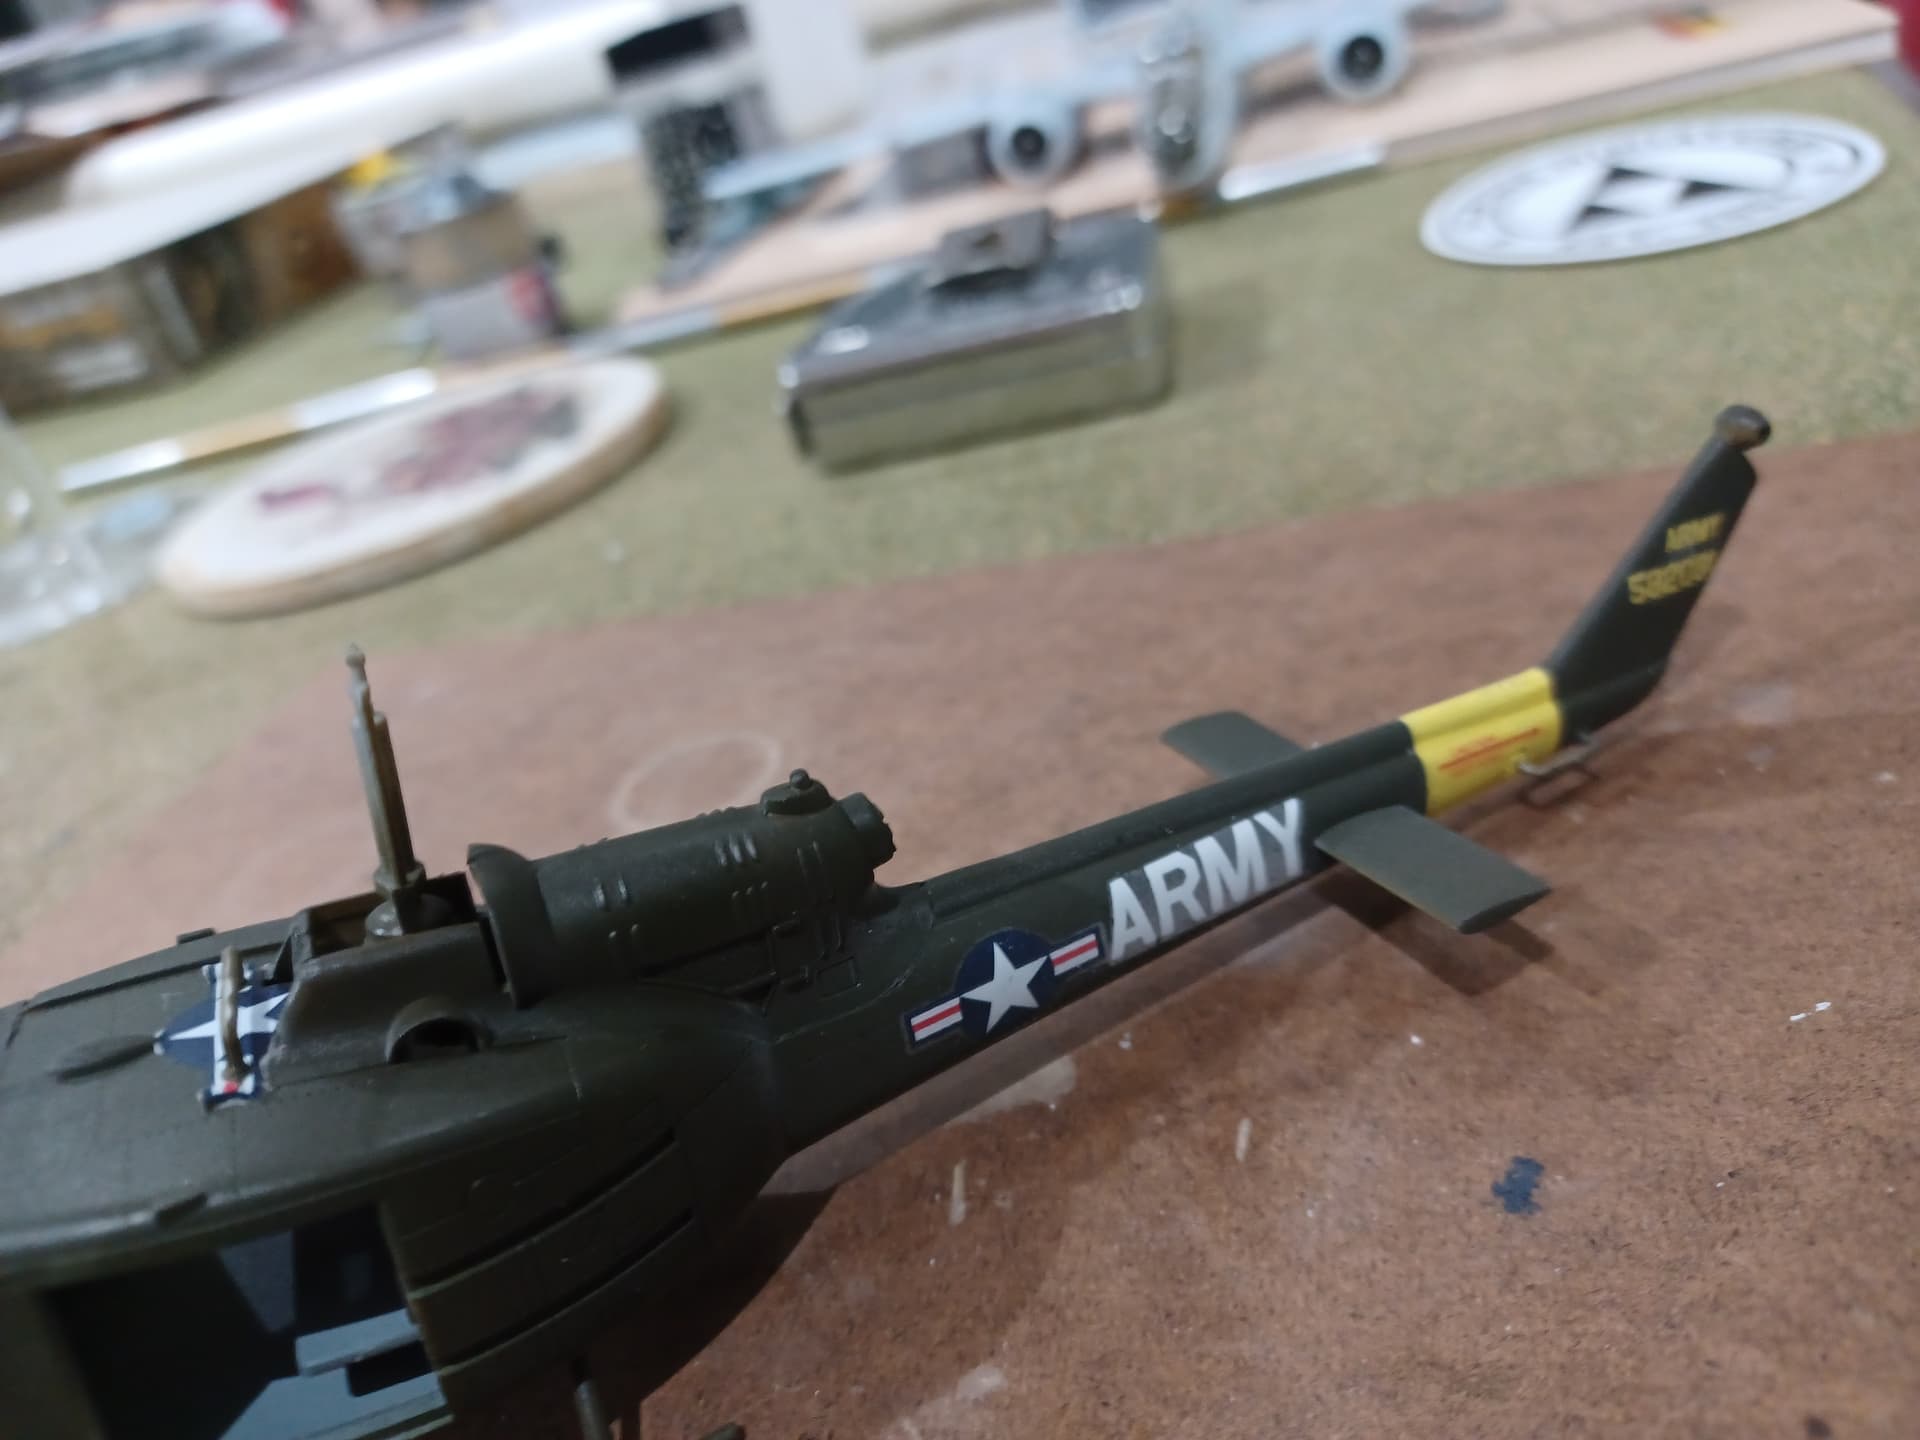
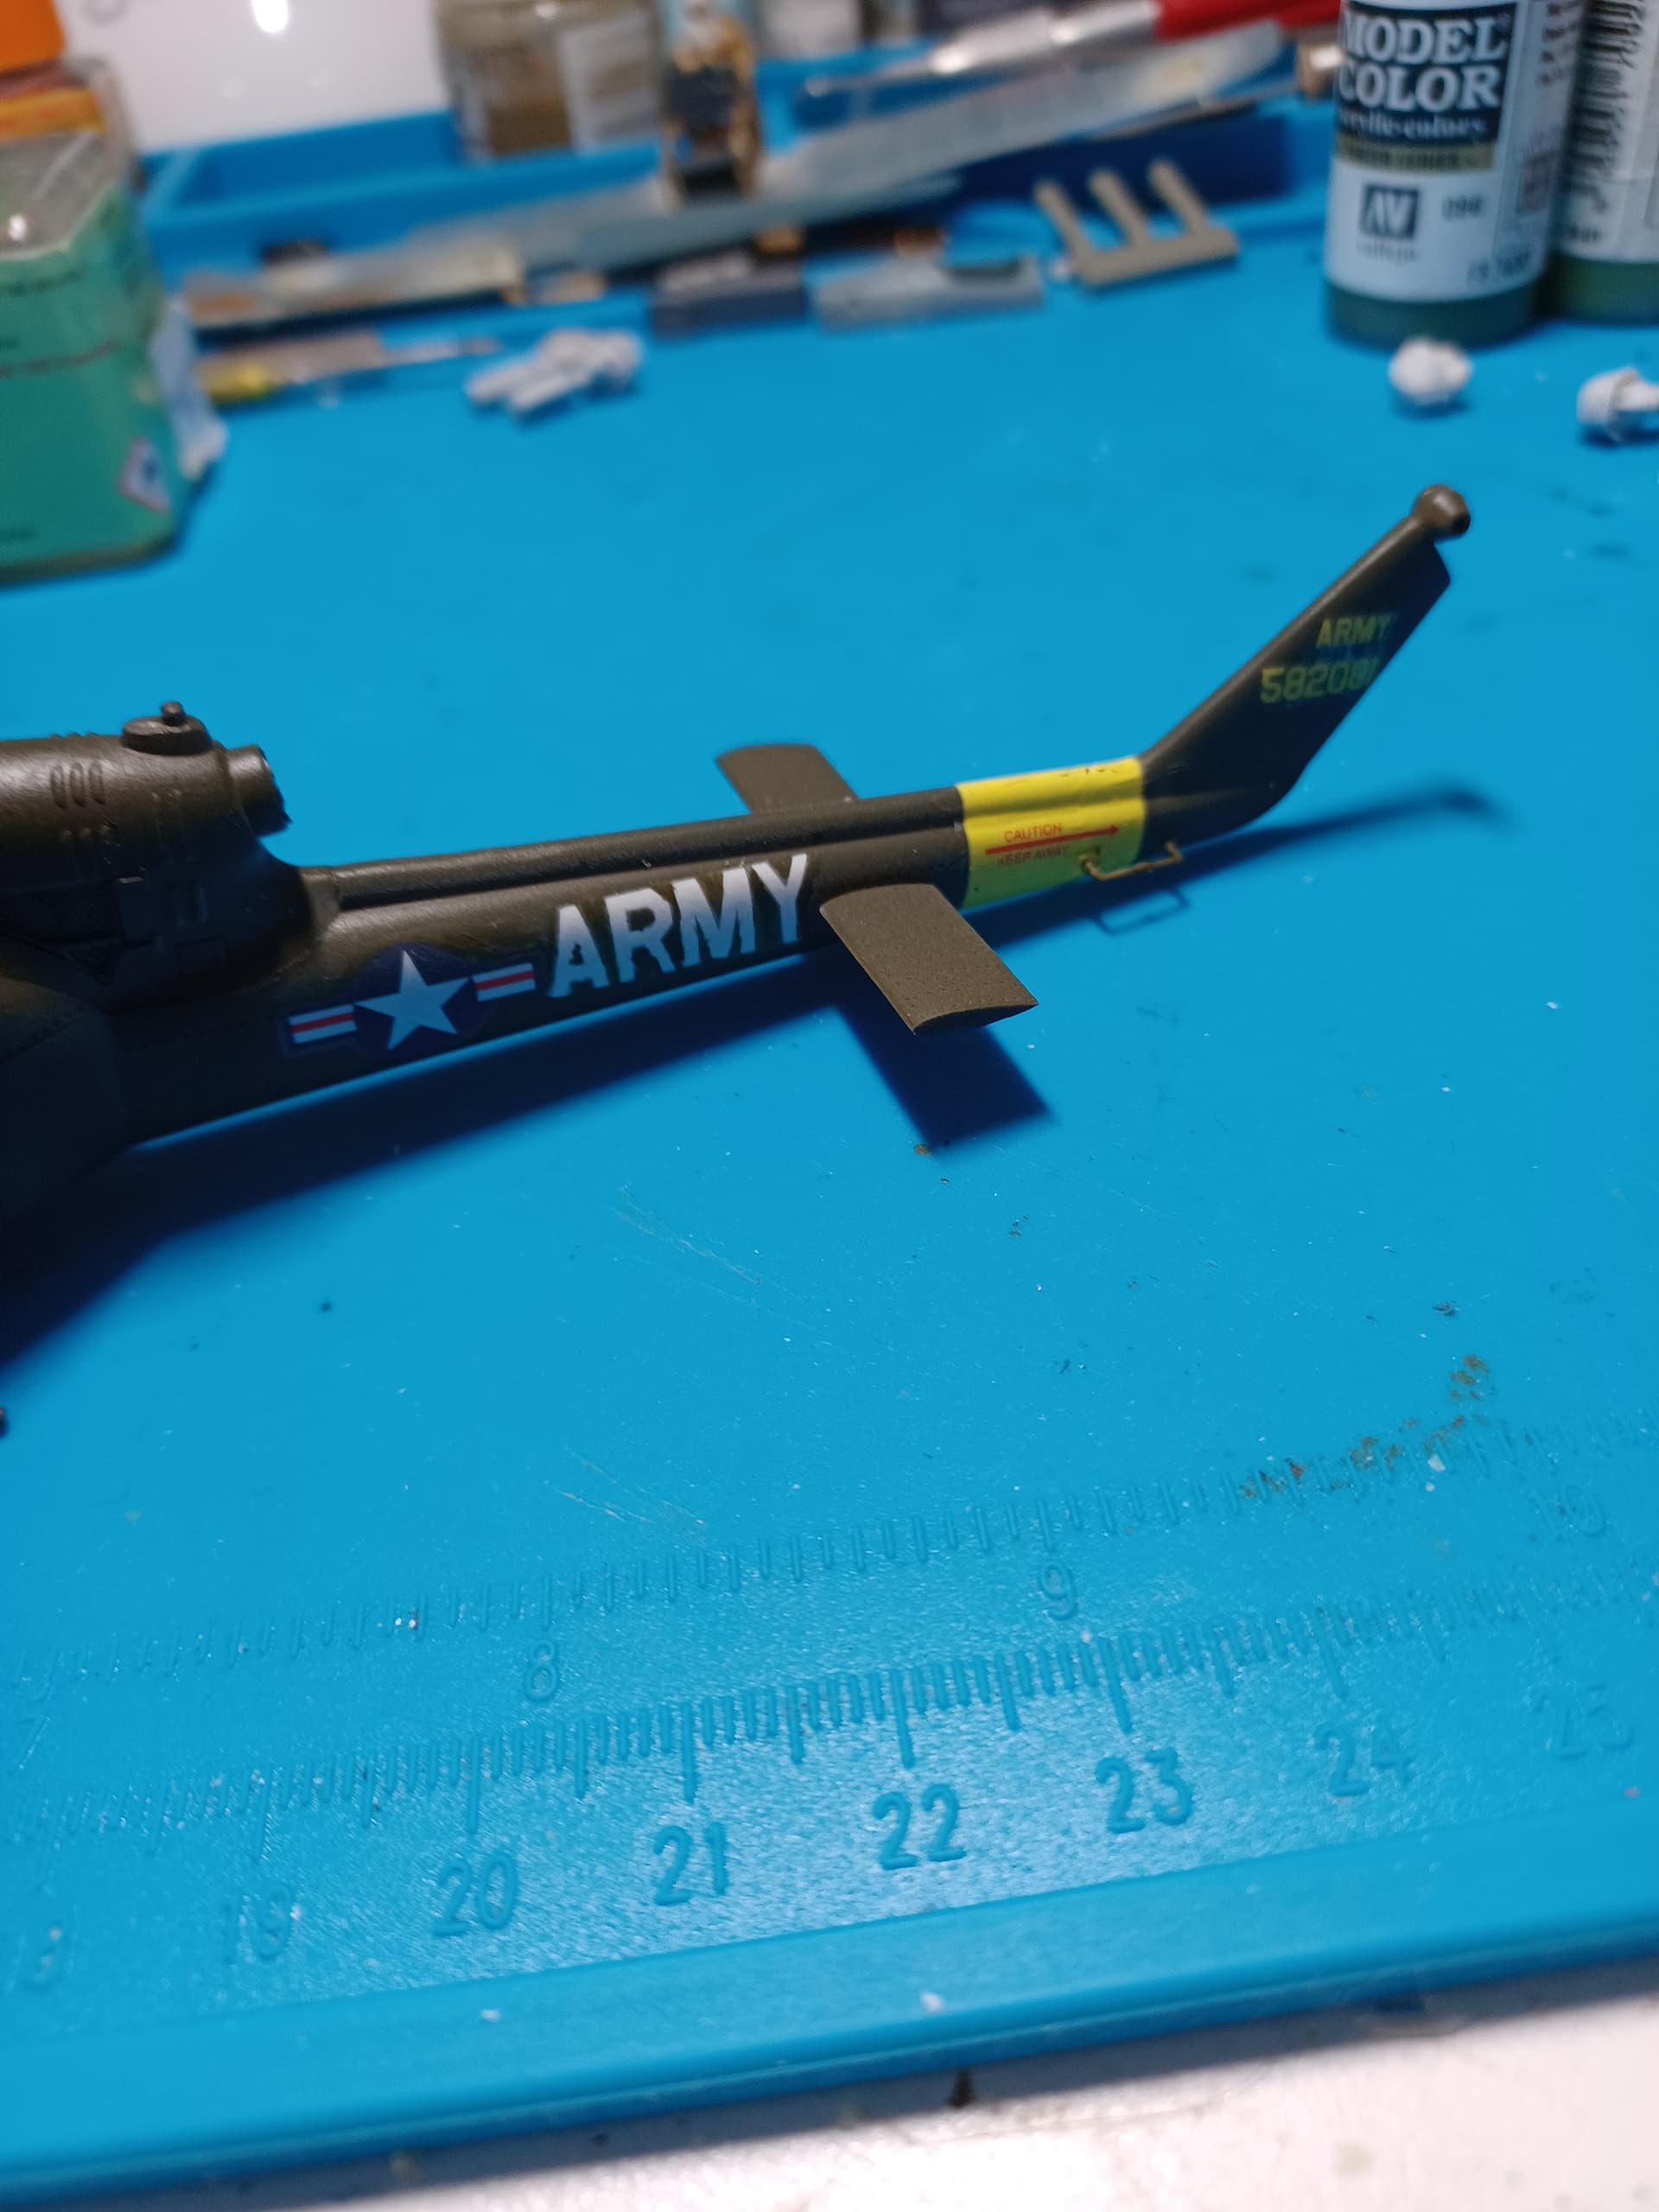
After getting the decals down I had mixed feelings. They were so thin and fragile, but on the upside, I thought, they were absolutely clear. The decal film is invisible! So I sealed them in with another coat of clear. Then I put on dullcoat and arghhhhhh. The star insignia is good - you can see a little silvering on the one on top of the huey, but that’s where it pops up against the protrusion - I think I can fix that. But the background of the ARMY decal is totally visible now. Interestingly the background of the serial number on the tail is still completely clear.
Two thoughts, the silvering is caused by the decal film not laying flat on the surface. A decal softener could have helped the issue. Not sure with other coats if that is possible now.
A interaction between the clear and dull coat. Not sure how to overcome that.
If starting over with new decals, trim film and gloss/future where the decals go to get a flat/flatter surface. Use a decal softener to get them to lay flat. Gloss and then dull coat with time between each step to allow out gassing.
I’m thinking it is likely an interaction between the clear and dull coats. There was a smooth surface (gloss coat) and I pressed out the decals on the surface (this was awkward because it is roundish, but nonetheless) and this didn’t happen on the rest of the decals. And I brushed a layer of softener (mark fit strong) on afterwards. There was no indication that any silvering would be going on. Very frustrating.
I think i’ll try painting around with the original base coat and then putting a filter over the whole thing. I don’t really want to order an aftermarket decal set just to replace the two army decals…
OK, having looked at it now under light with magnification, I think it is that I didn’t do a good job of pressing out the decals. On one side, it’s just the bottom half of the ARMY decal that has this characteristic, but on the bad side, it’s the whole thing. There is a little bit of silvering around the national insignia on the bad side. Oh well. I’ll see what I can salvage by painting over it …
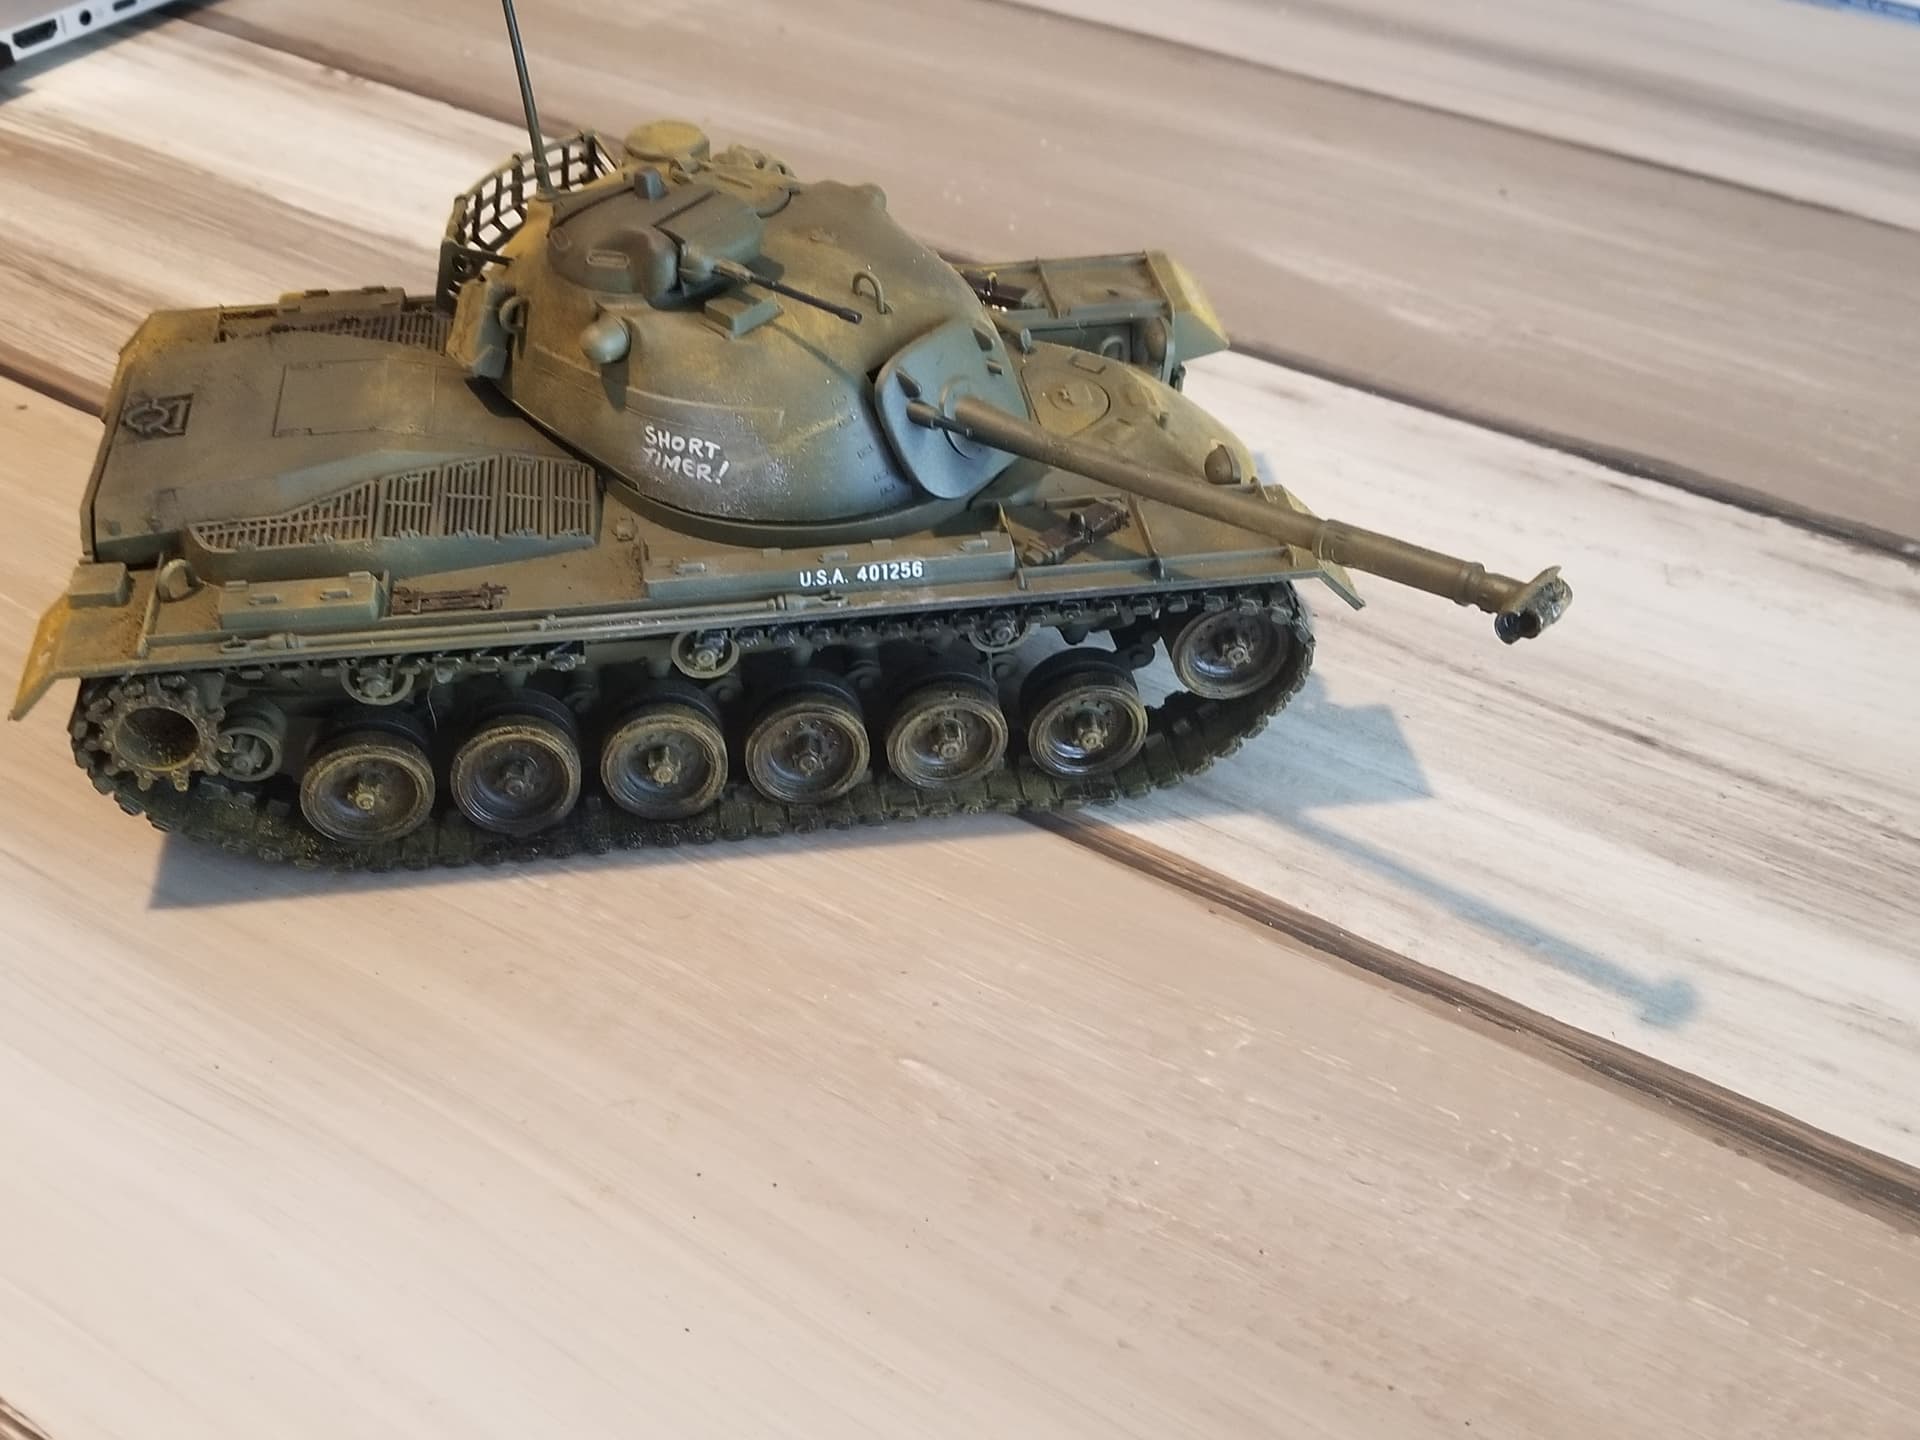
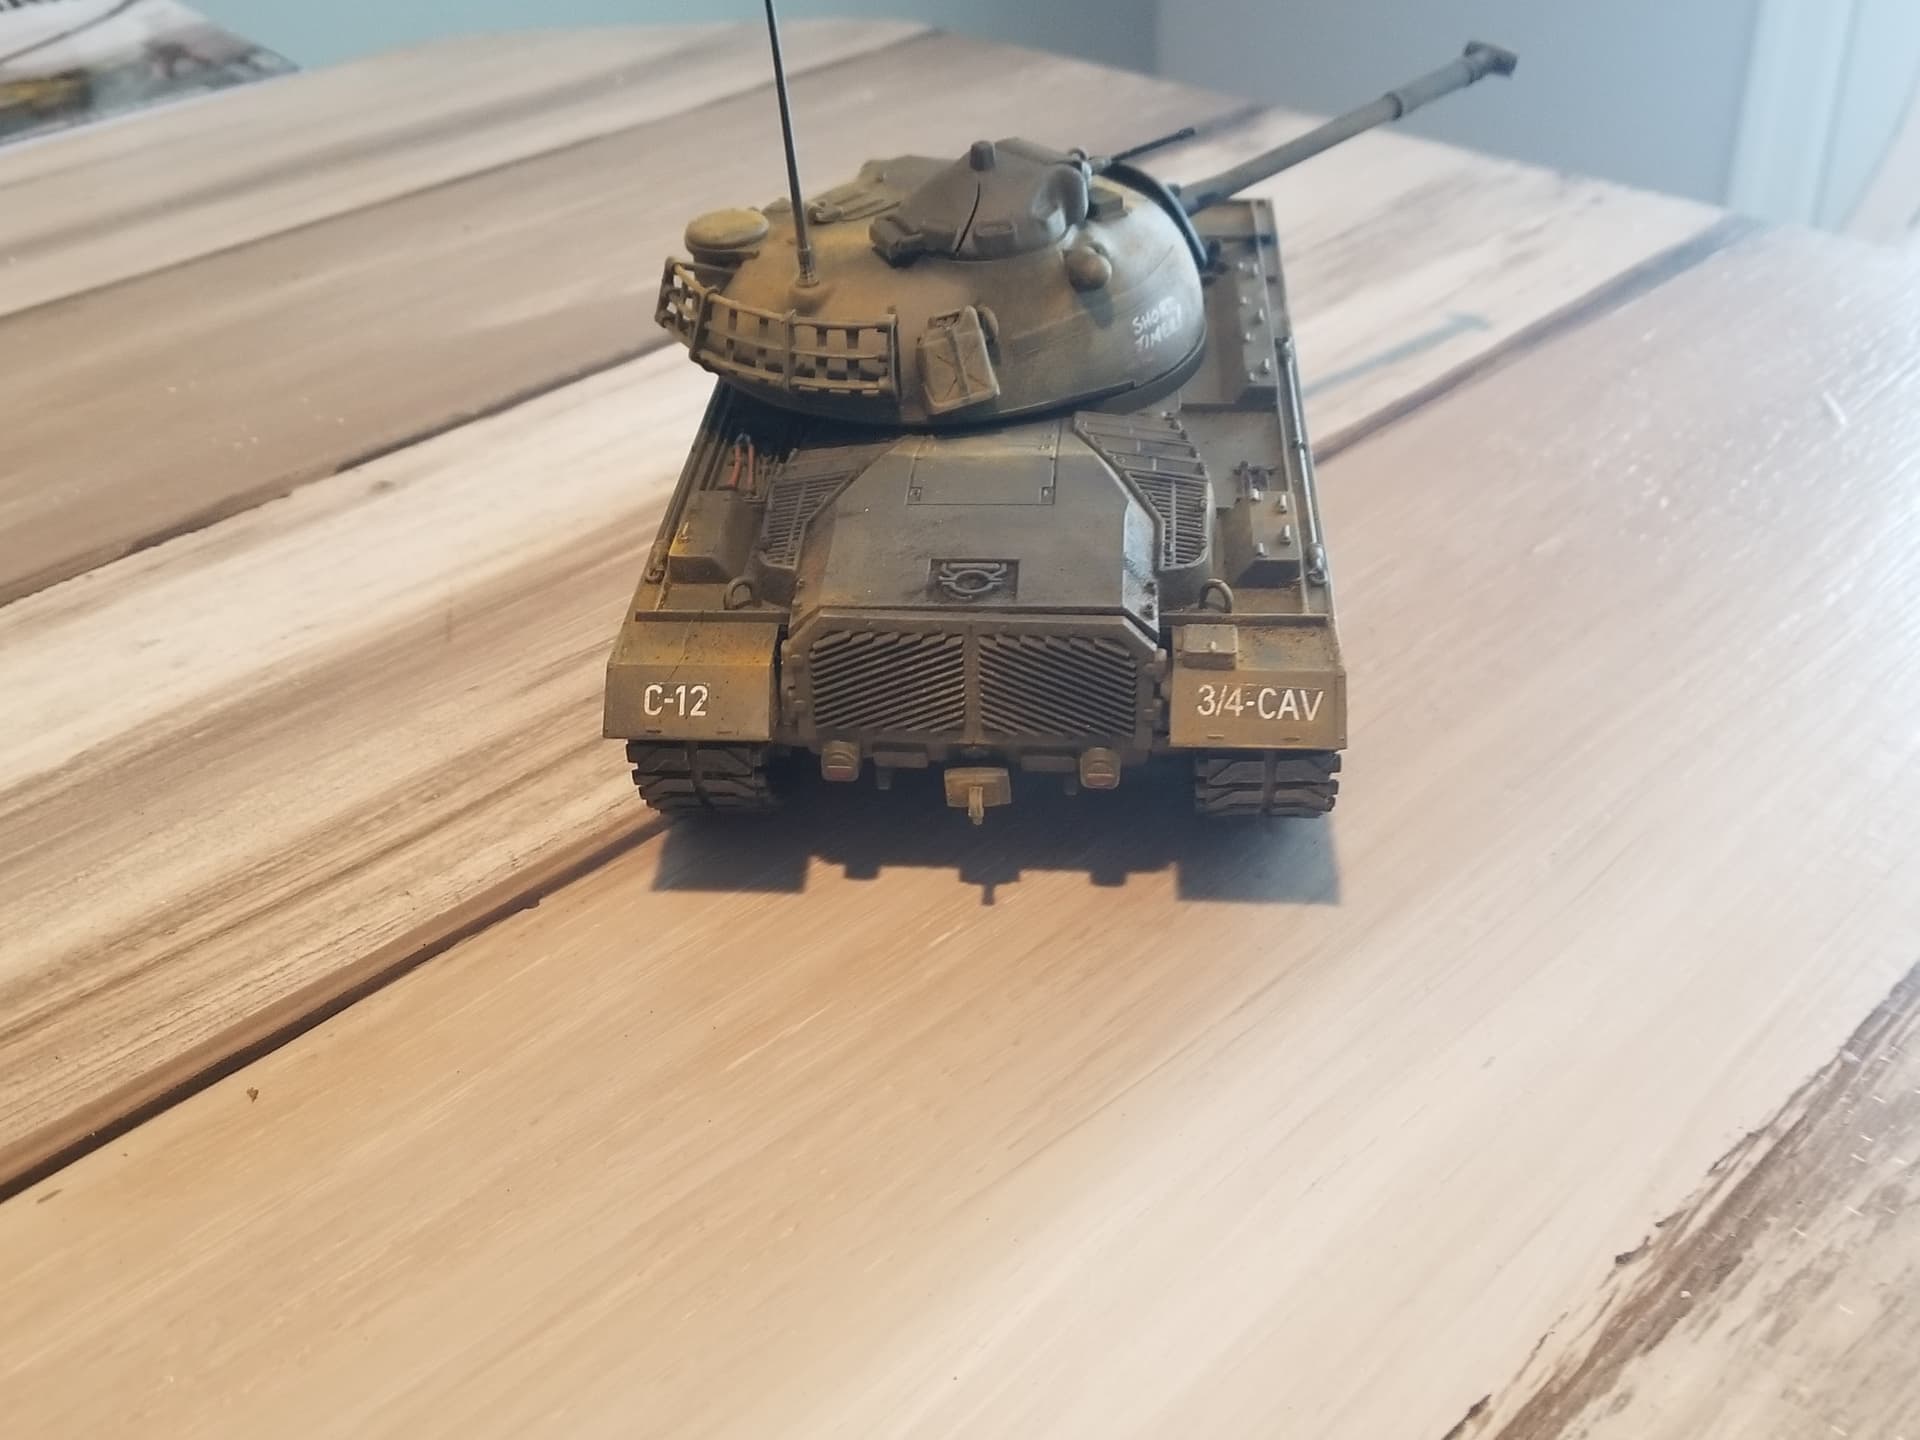
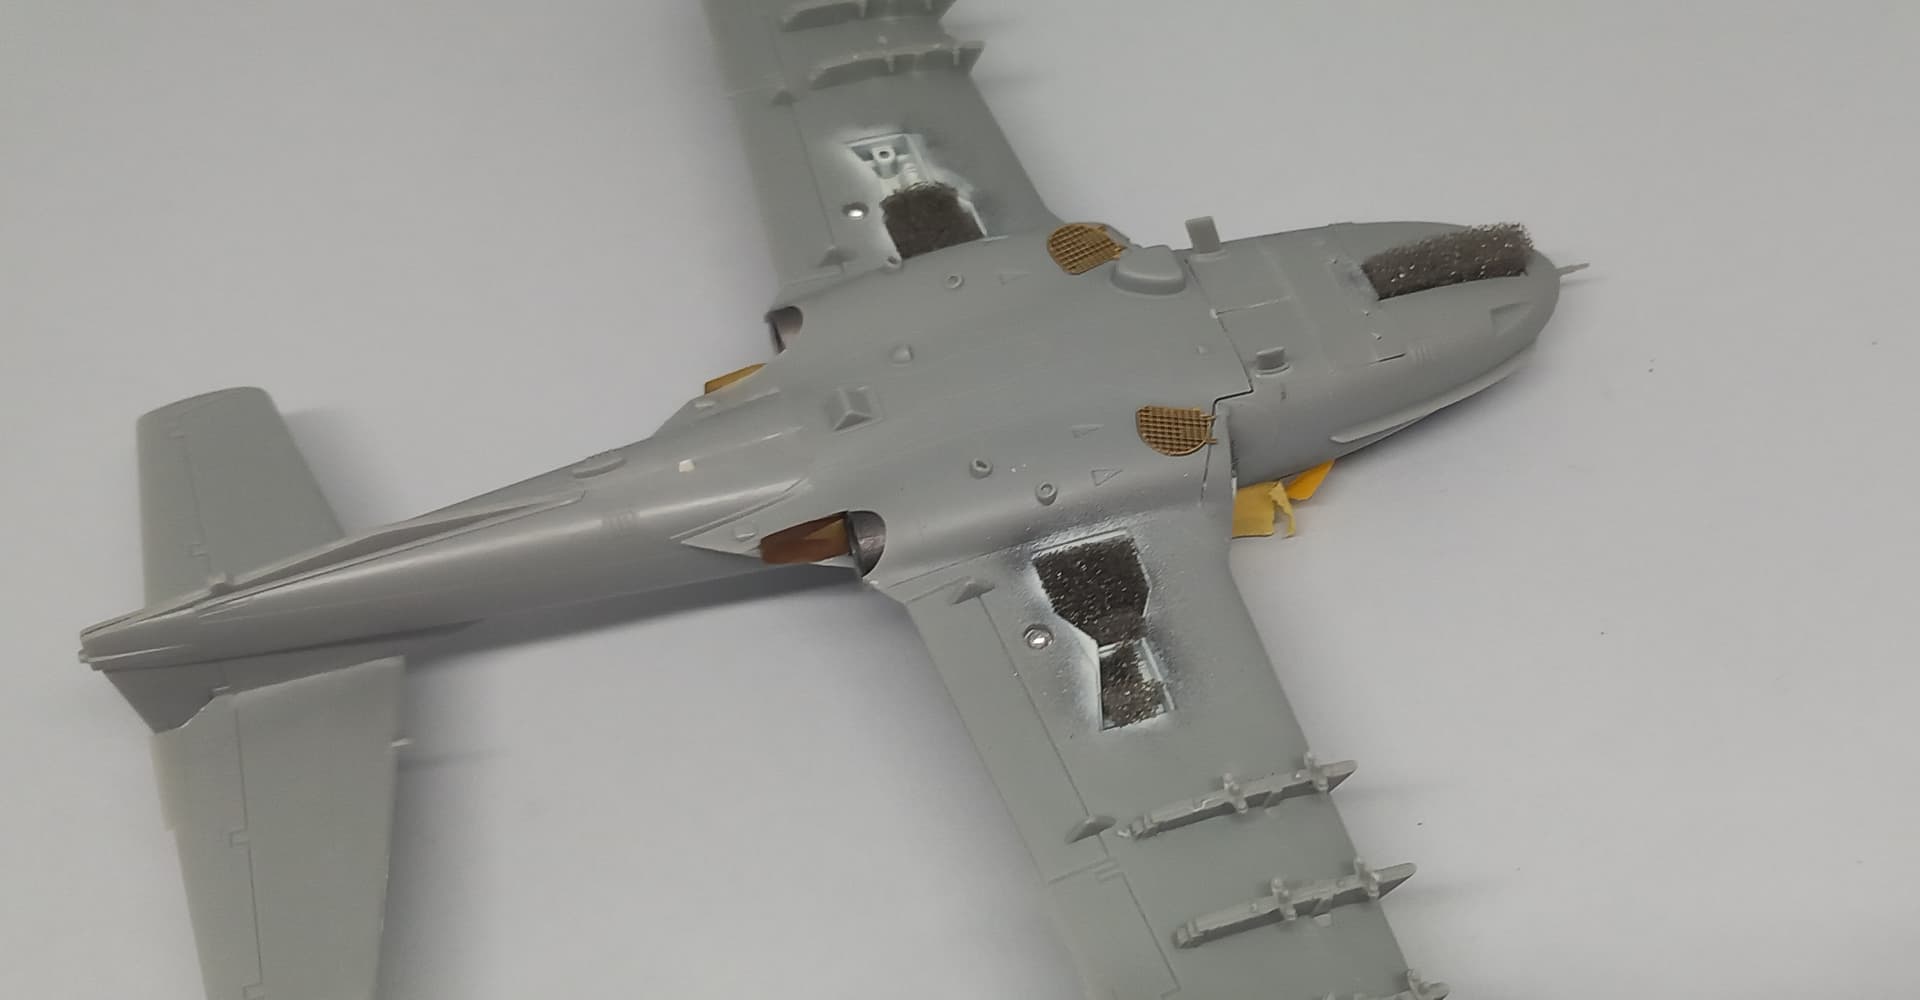
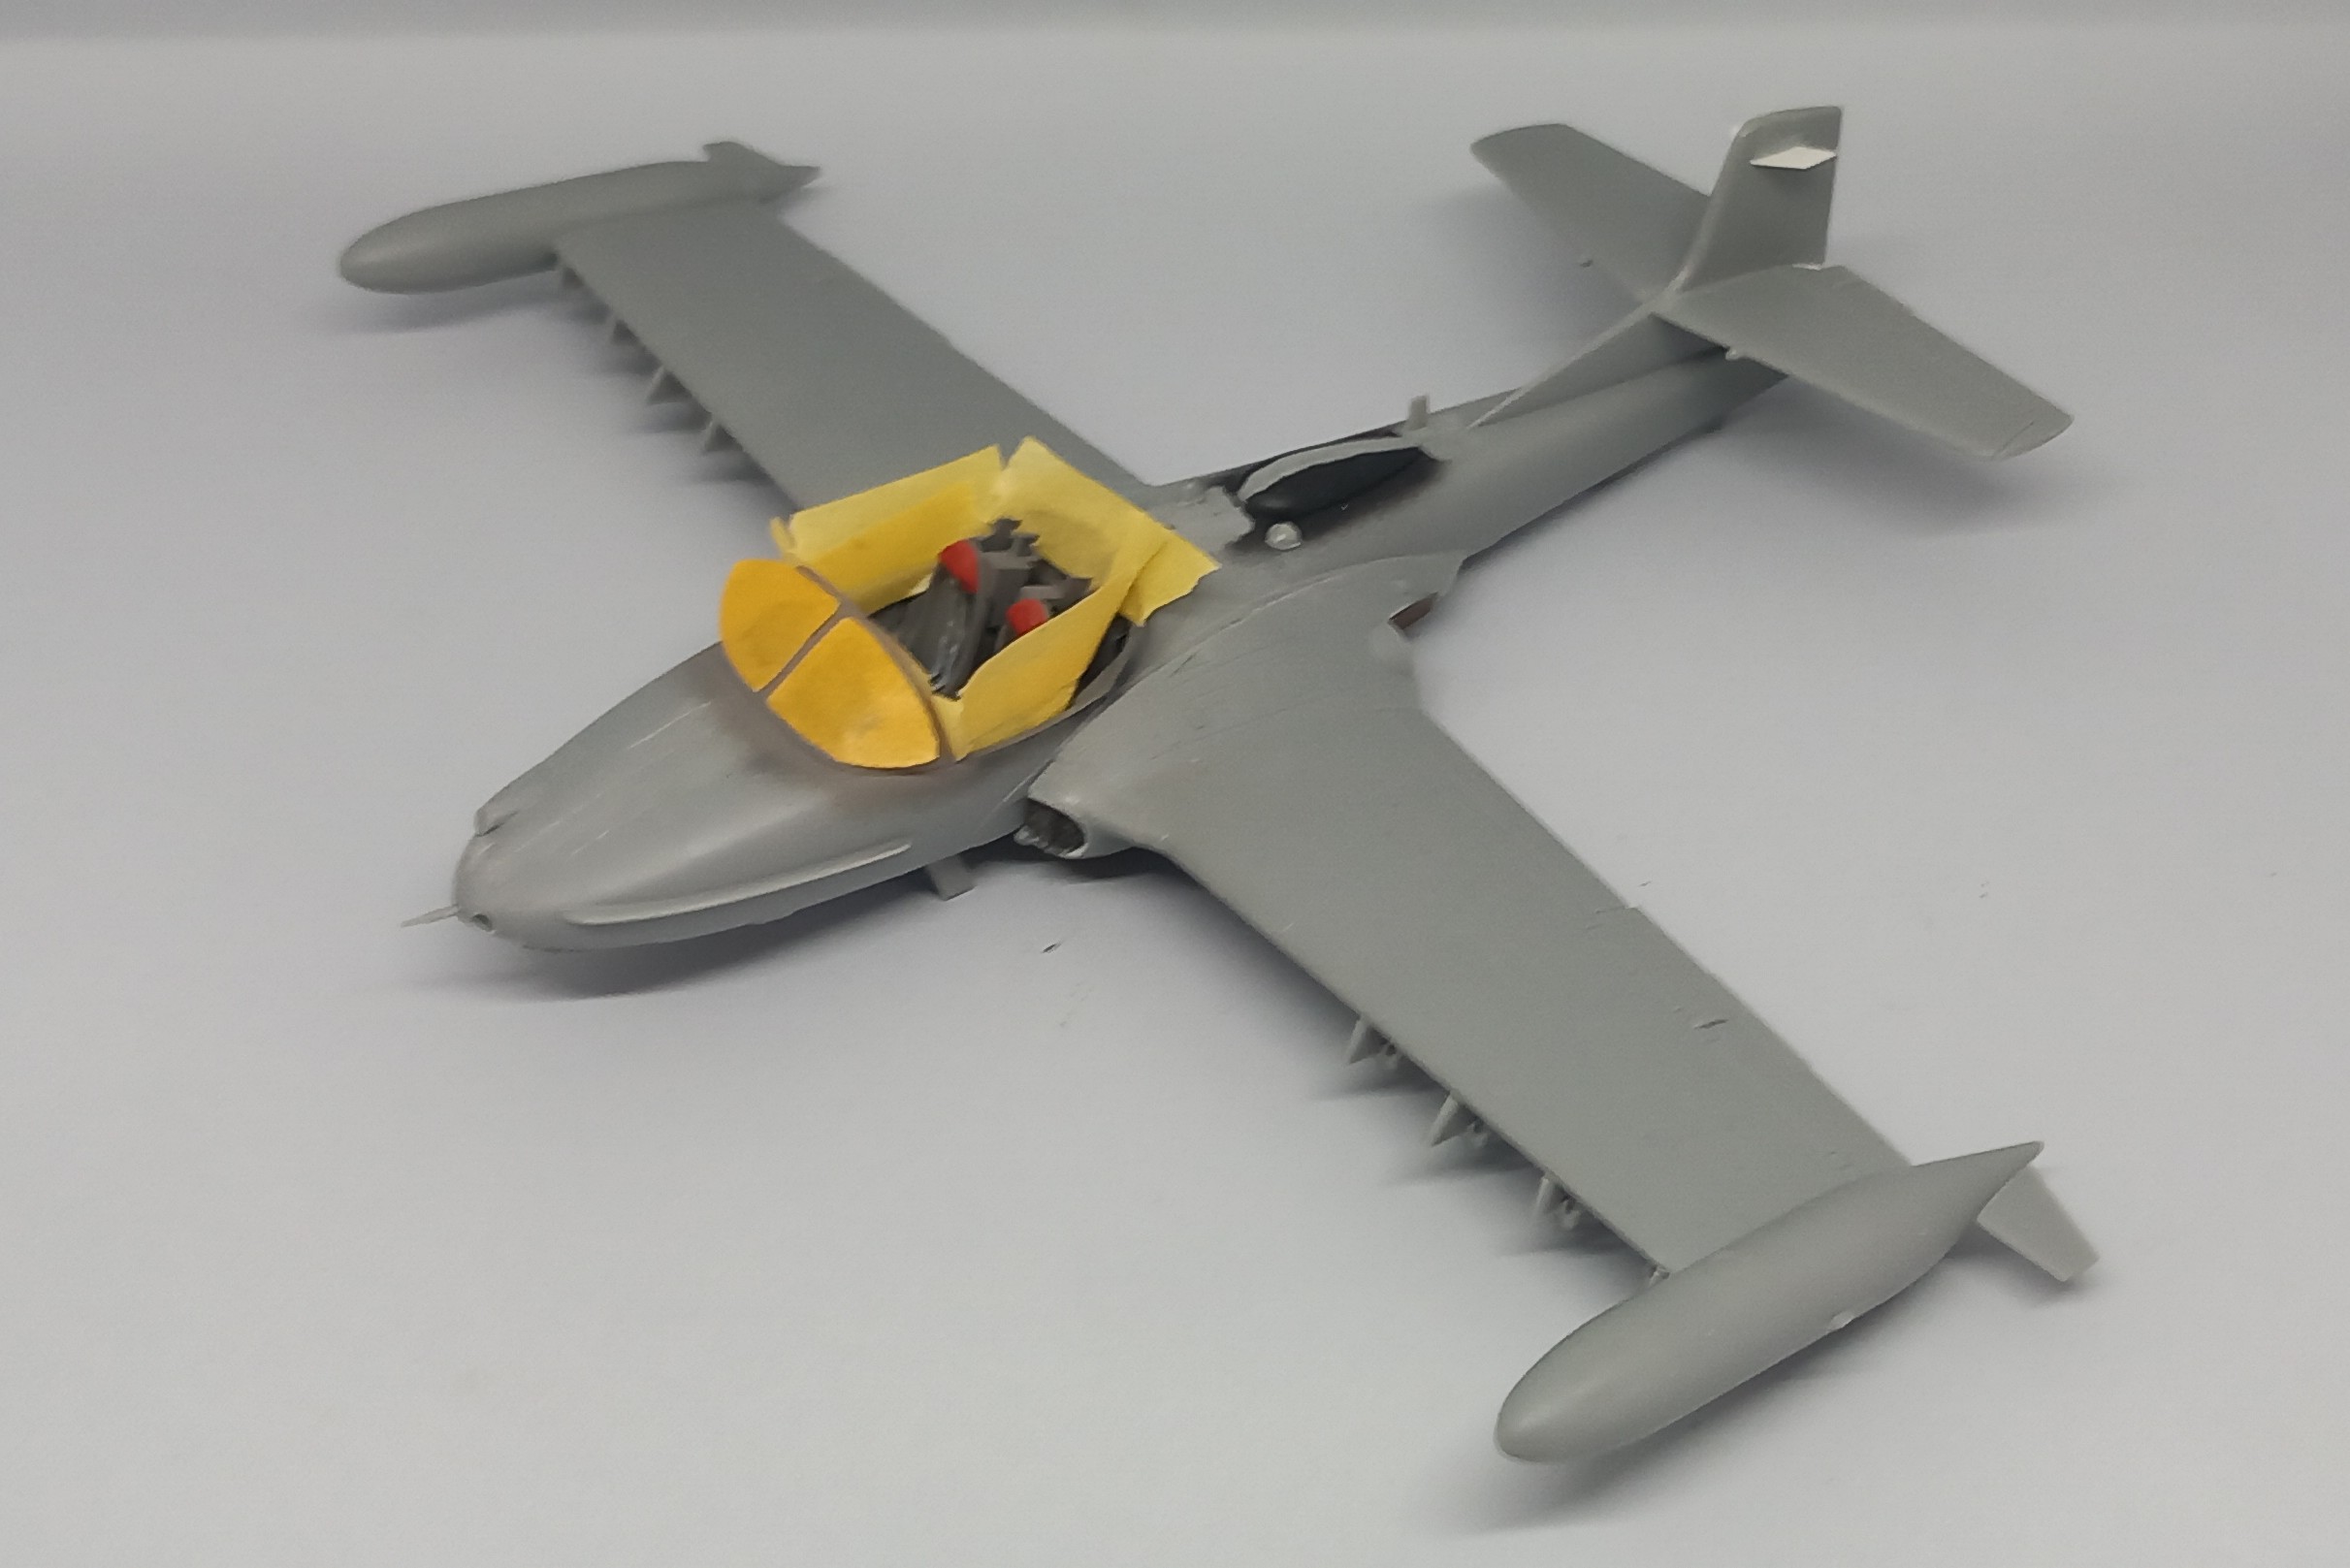
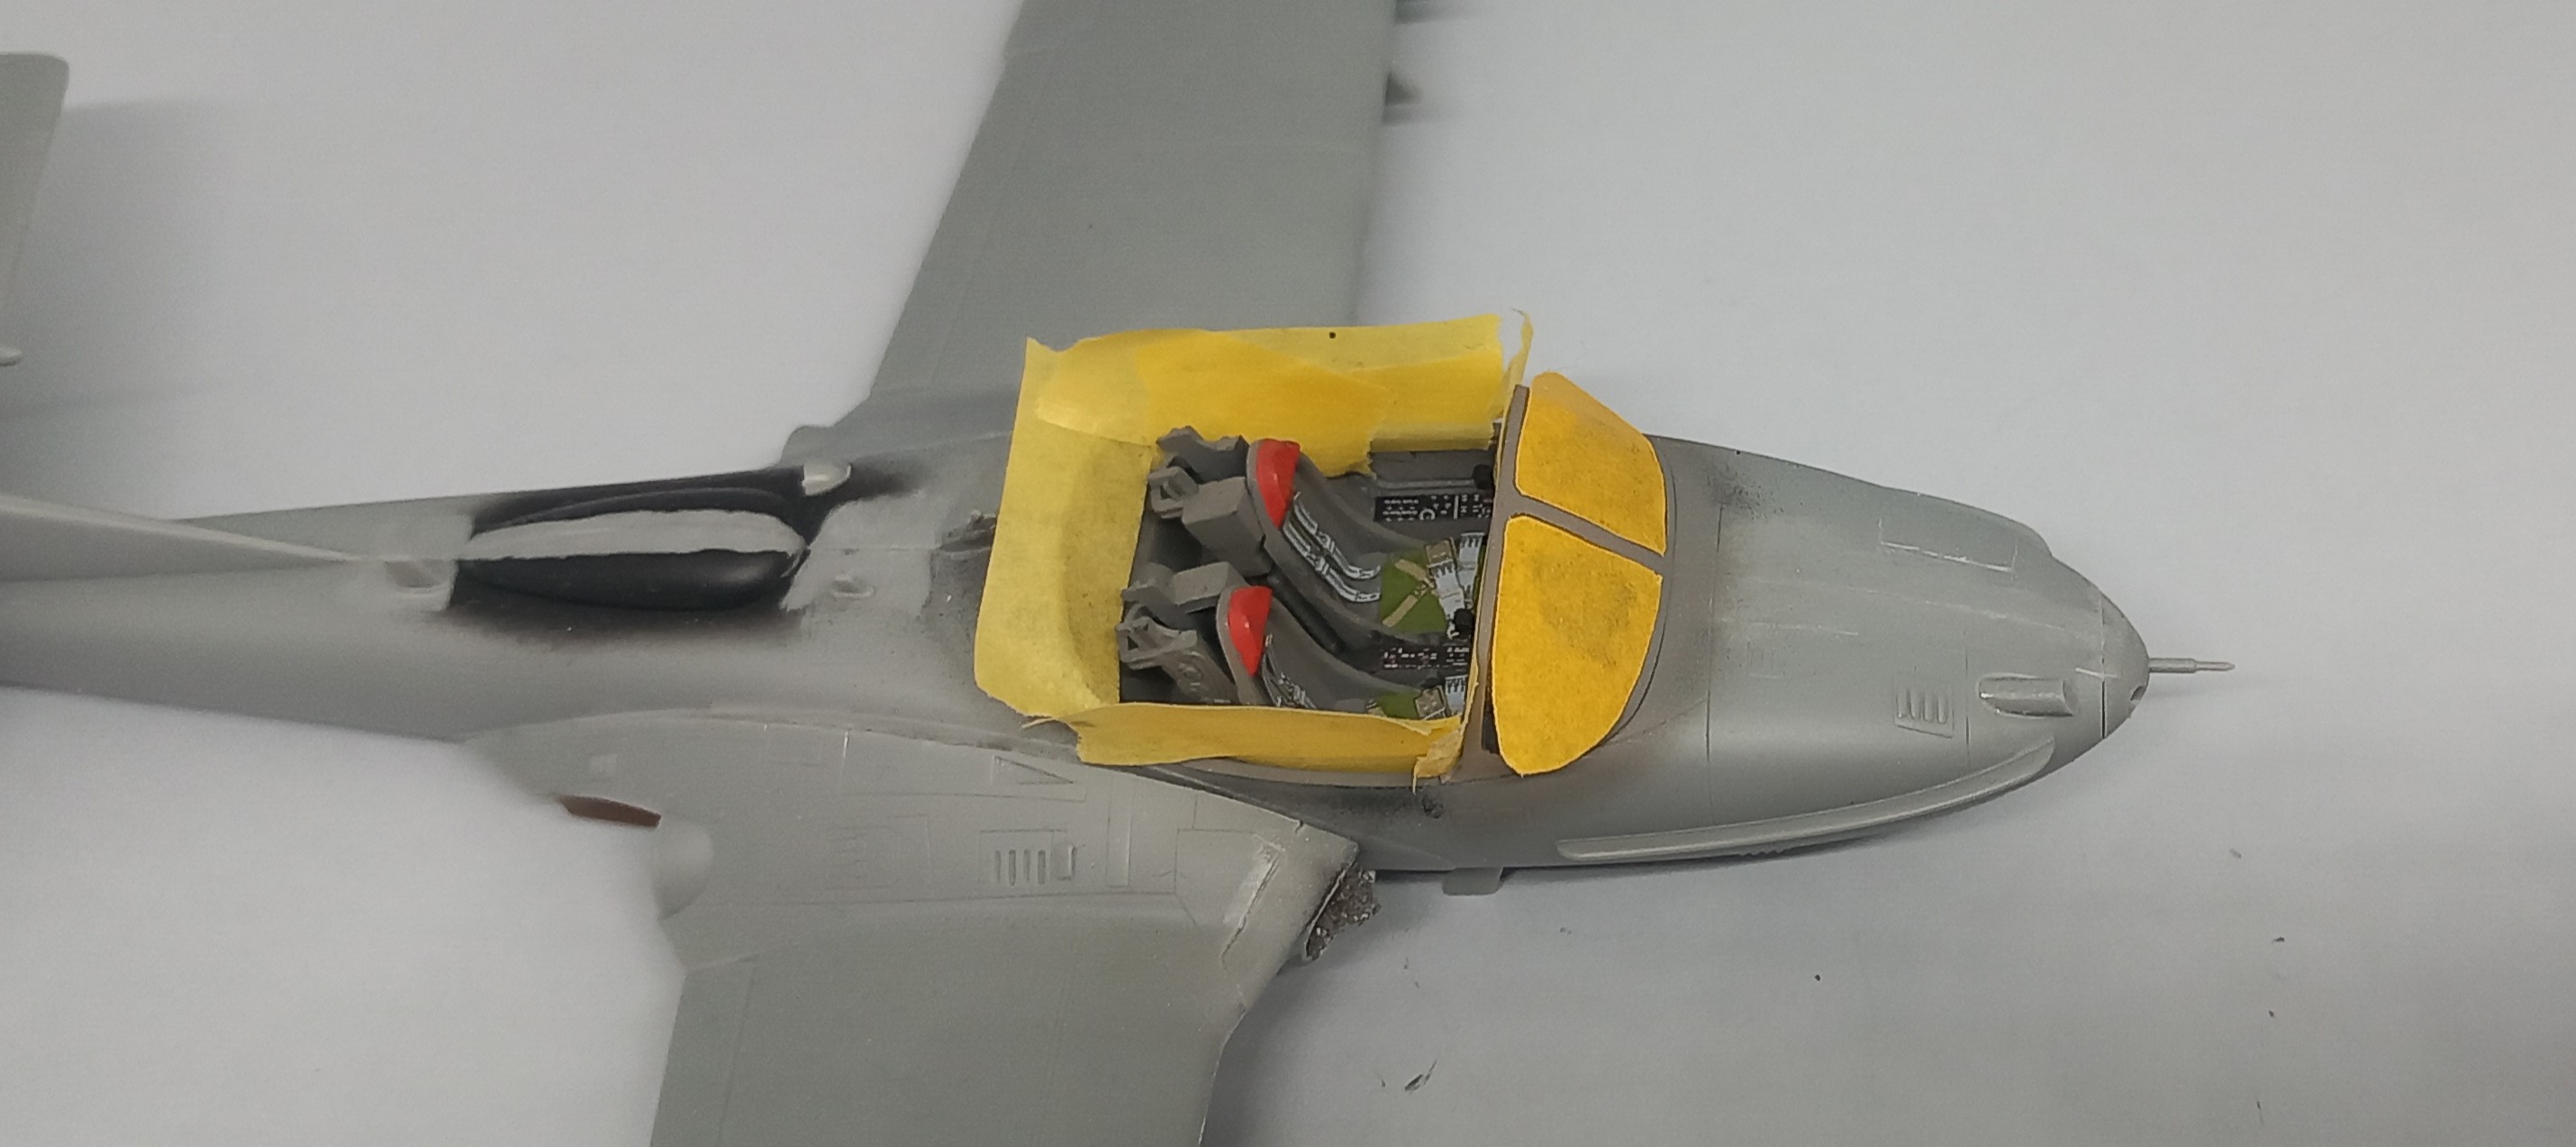
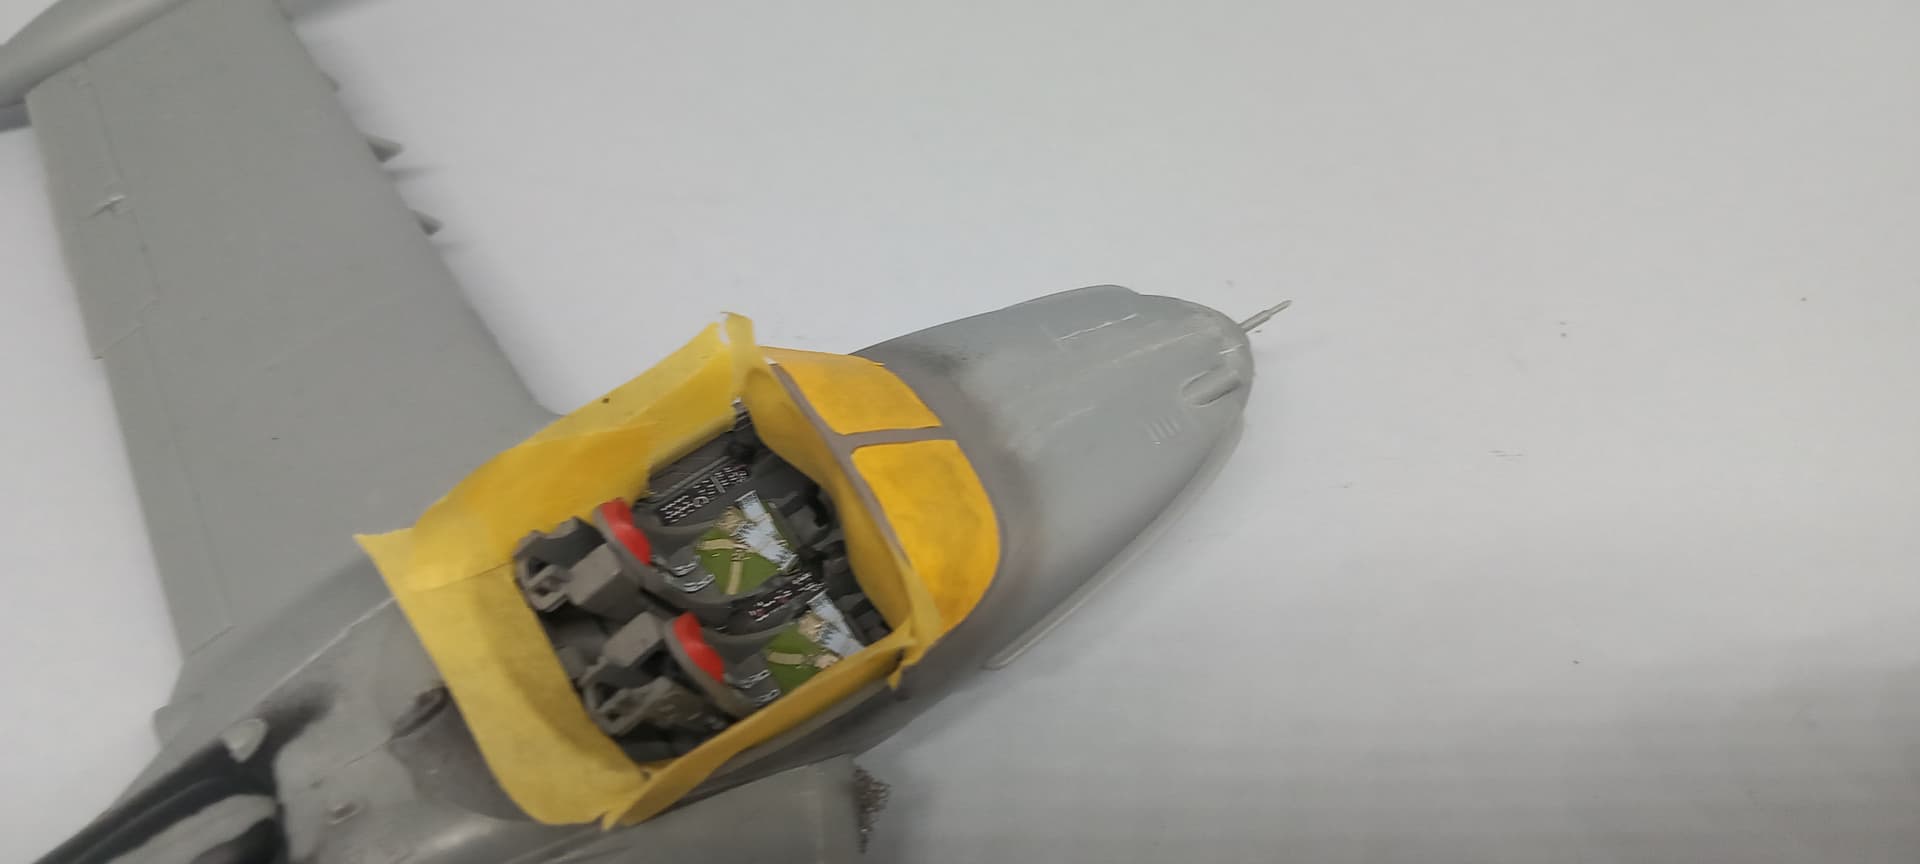
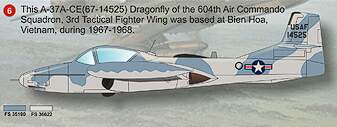
I opted for a test camo used by the 604th Air Commando Squadron at Bien Hoa in 1968 - 67. I found a sheet of decals at Print Scale with this camouflage.
Loadout: 2xSUU-11, 2xSUU-30/B and 4 external tanks
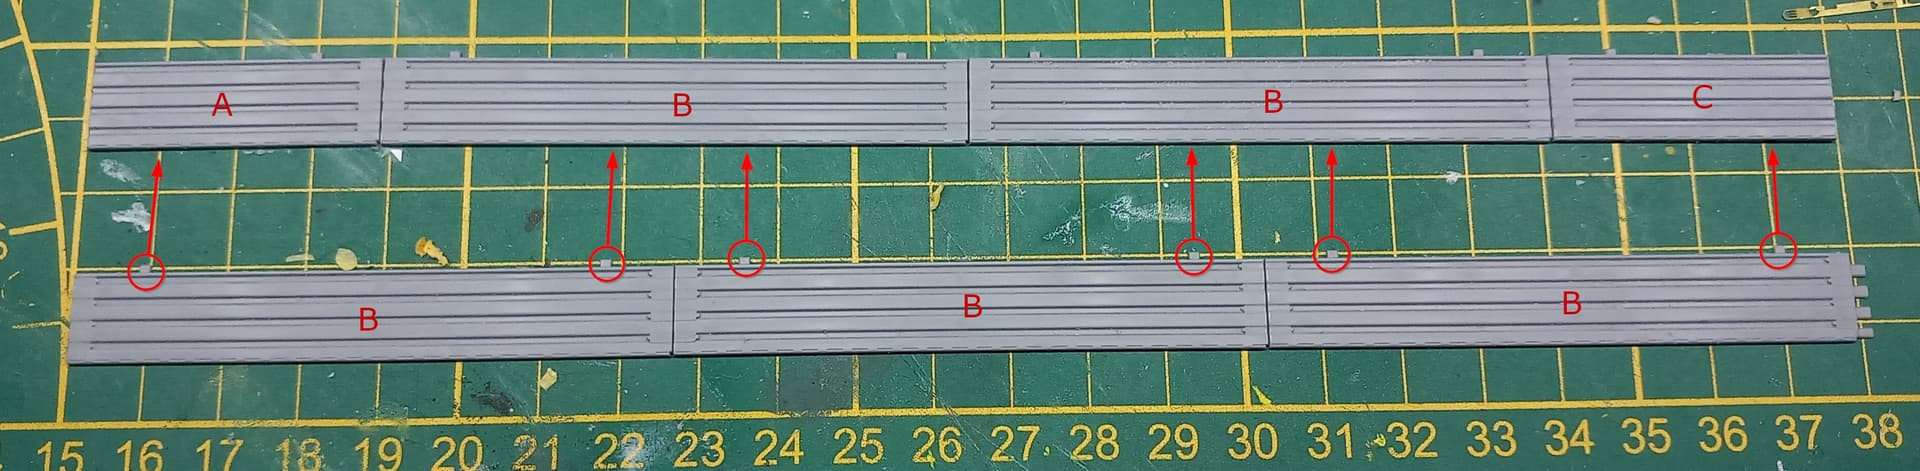
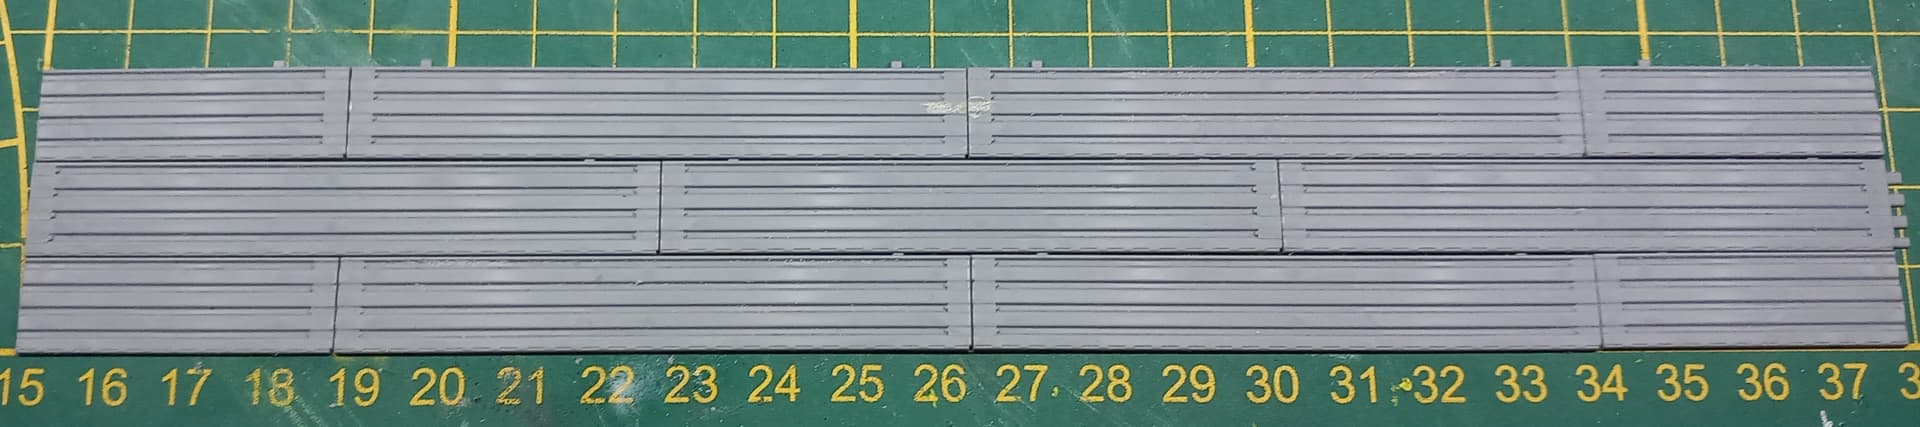
At the same time I’m working on a diorama. To do this I’ve planned several reskits addons (SUU-11A/B, MJ1 Jammer driver and airmens an MJ1 Jammer lift truck) and an M8A1 US Landing Mat from ICM.
Let’s talk about the construction of the landing mat. It’s very simple, we have 3 types of tiles, the structure is modular so the more landing mat kits you have, the bigger your scene.
Love the camo scheme, first saw this on a Sky Warrior and it looked ultra cool, had no idea the USAF was trying this color combo on their planes. Can’t wait to see how your diorama turns out