
Erik,
Could you please explain the process for achieving the weathered green on the house? Particularly this area (snagged one of your photos)… 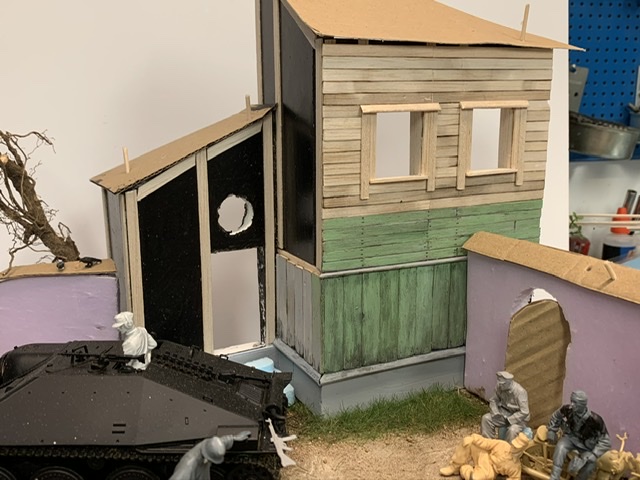
Thanks,
C.
Oh man, I was afraid someone should ask me that 
Actually when I am sitting at the work bench I mostly improve, it have happens more than once that a few days later I hardly remember how I did…
Well if I remember correctly I did like this:
(Sorry, you will now notice my poor English vocabulary)
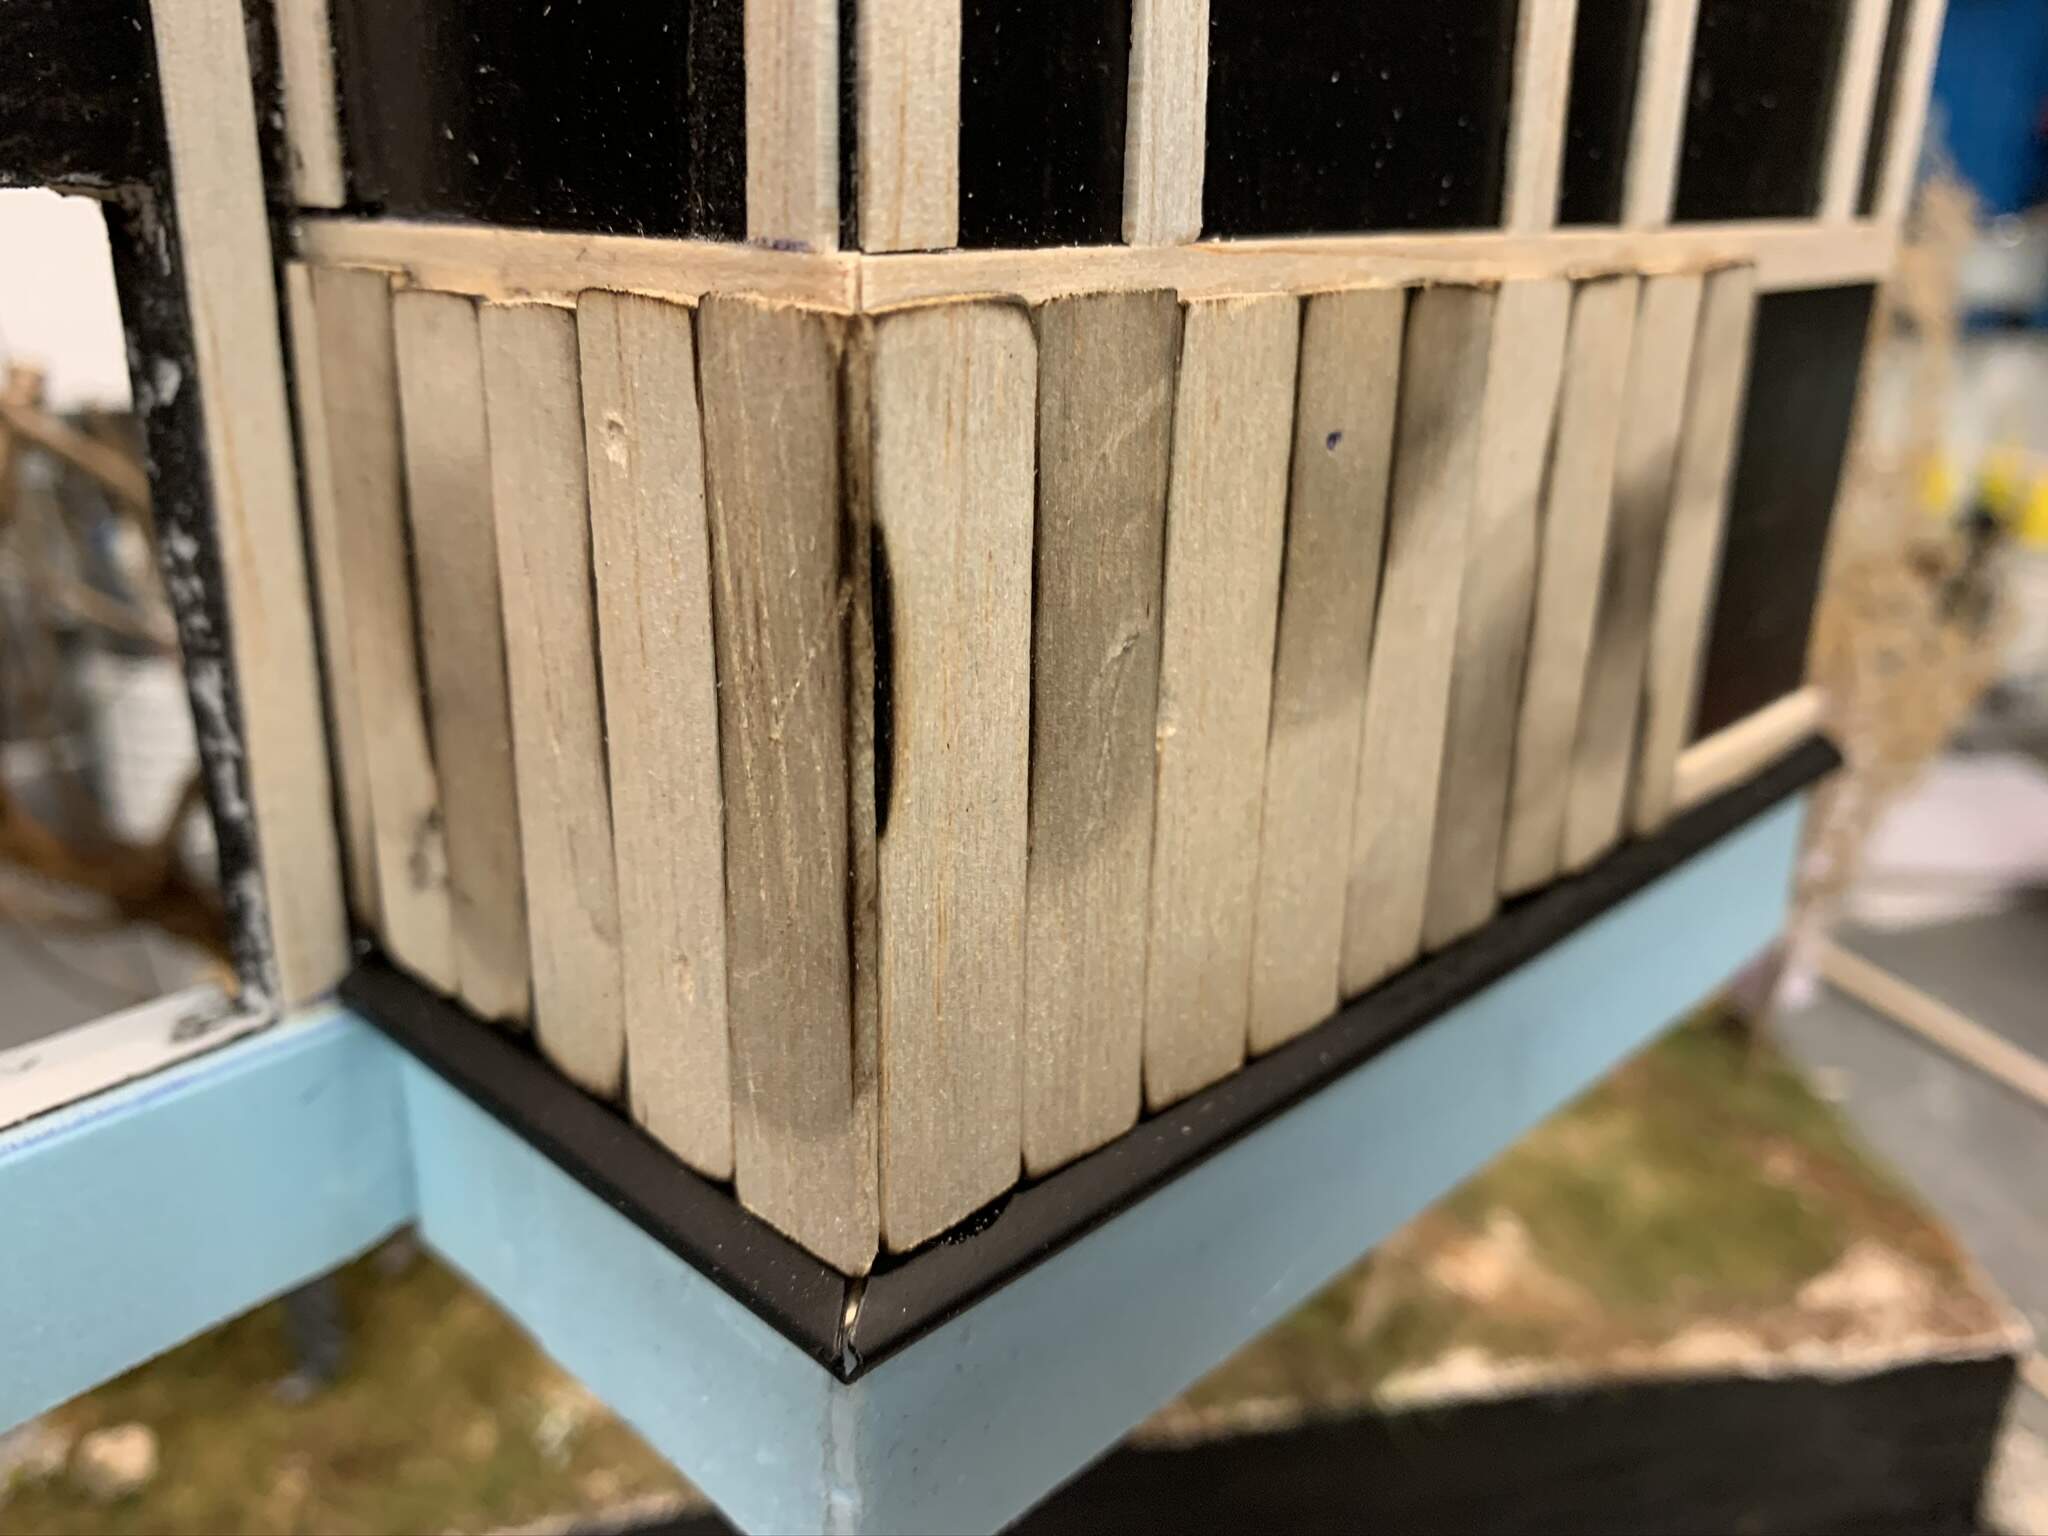
I primed the balsa wood in different tones of grey. As you see here:
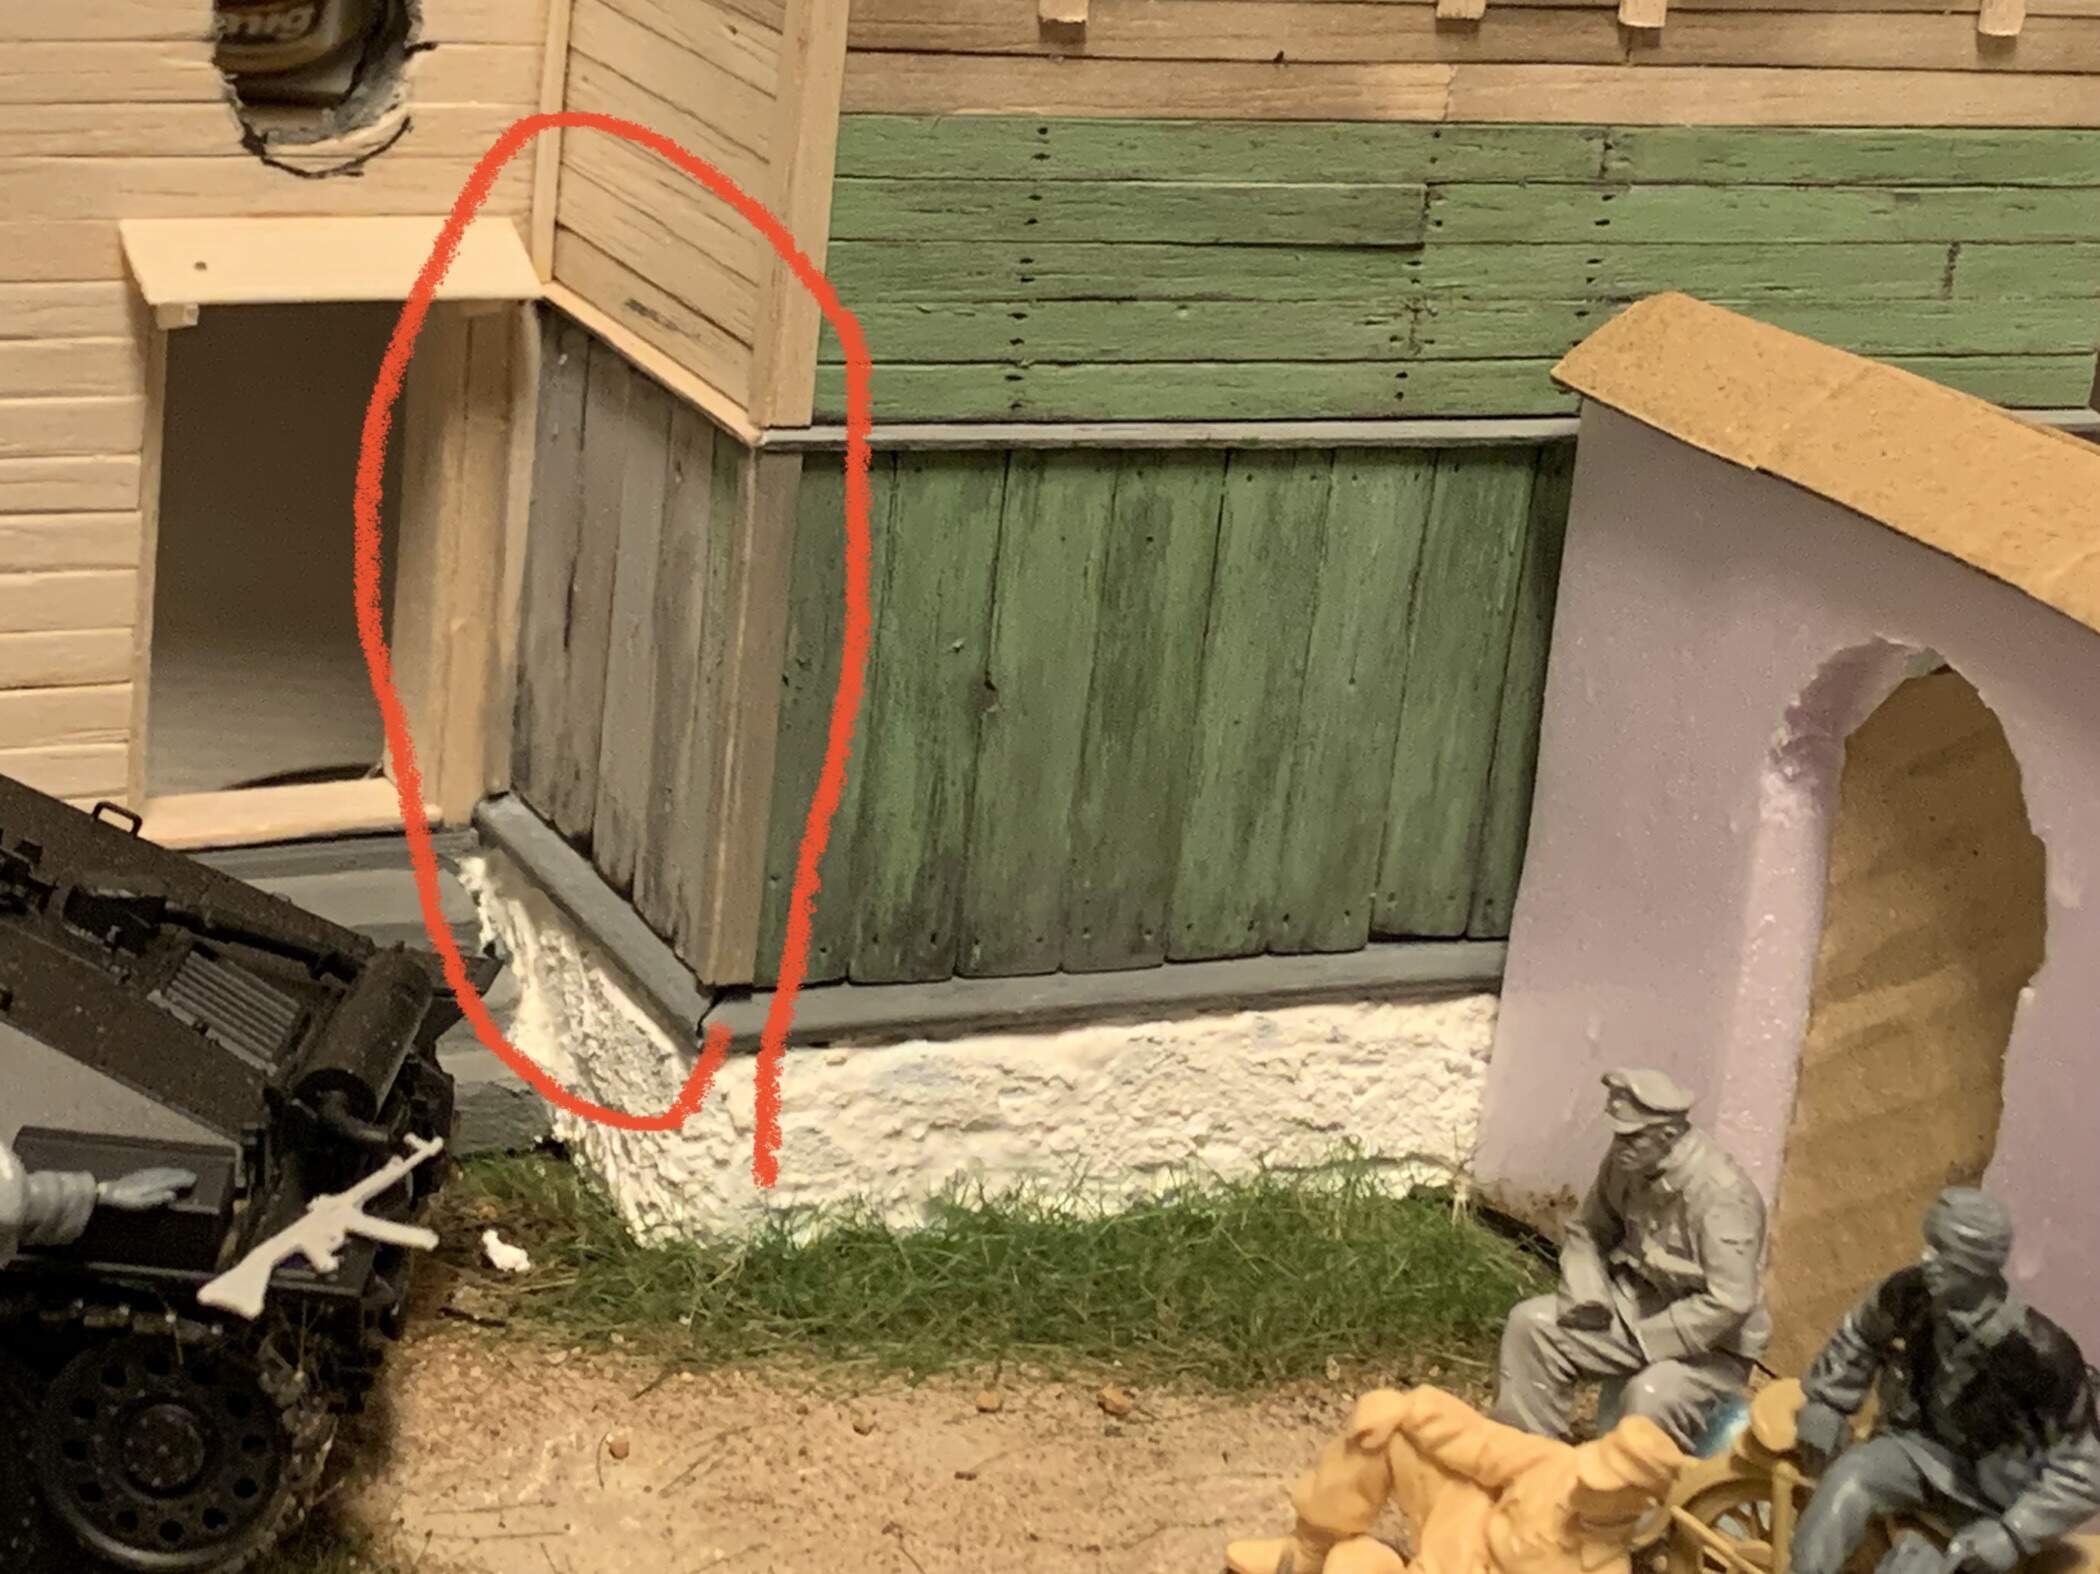
Then I painted in thin layers, the light green color, then I put a little darker tone of green in some places. I think I also used a very thin black/dark grey wash as well, but not all over, just in some places.
Maybe that’s visible here:
Then I am a big fan of pencils, especially white, black and the brown ones:

Together with the pencils I must have added some grey again with a small brush in small areas.
This picture with higher resolution show it better I hope?

It will be interesting because I have to finish the weathering and then I must get the same “look” as last time…hmm this is bad, never stop a painting process:)
/Erik
Oh, I also took a lighter and “burned” the wood to get smothered edges, that also gave the wood some darker areas.
Thanks. You sound like me in that the process sort of happens as you are working at it rather than a preplanned method. Anyway, the woodwork and finish is great. You’ve really captured the ‘faded green paint’ look. I’m going to have to give it a shot.
Cheers,
C.
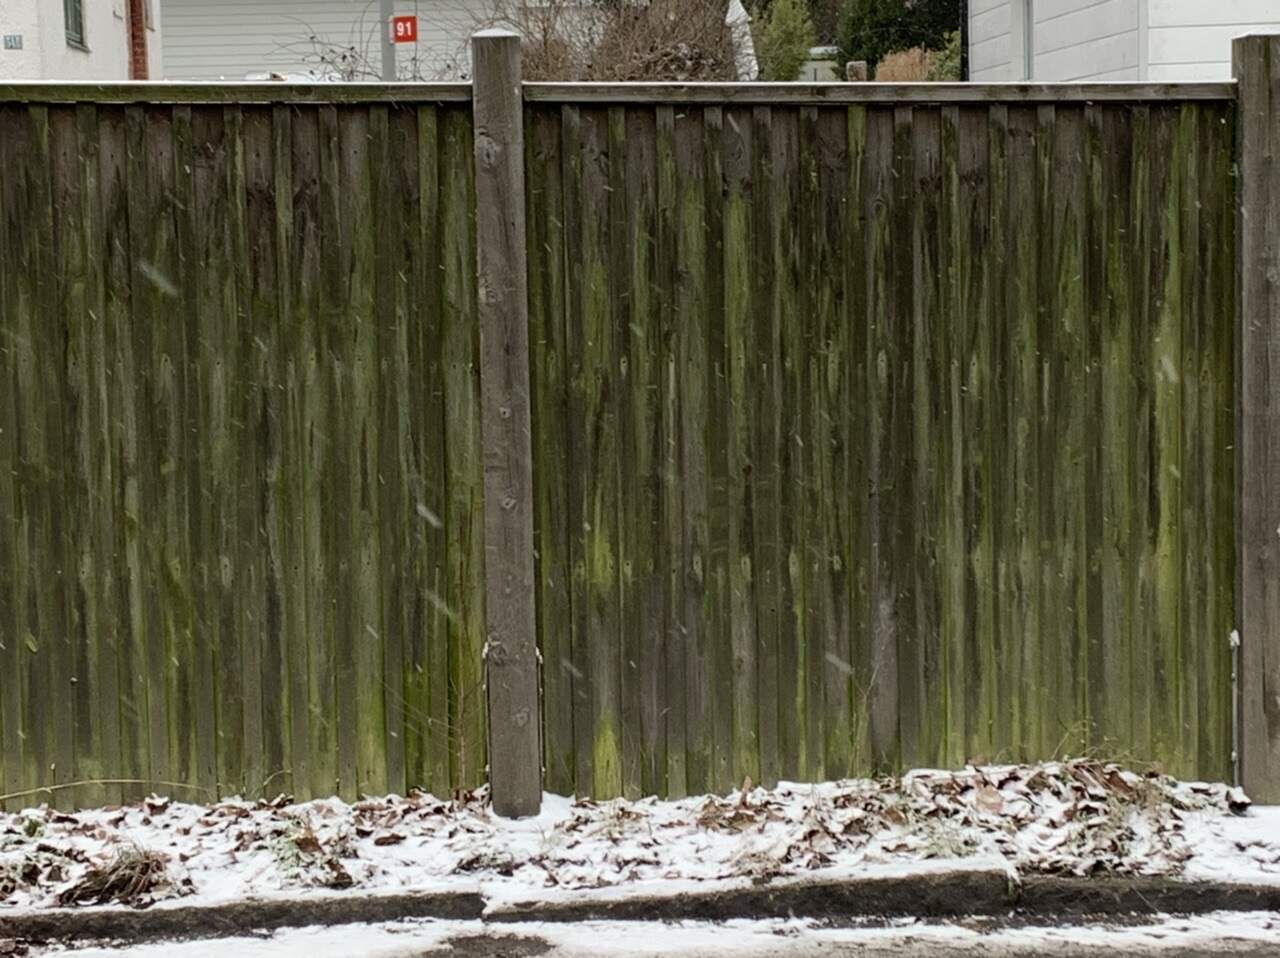
Wood that has been exposed to the weather and the paint has worn thin usually has this undertone of black or very dark brown (some kind of mold??).
Using black under the top coat catches this black undertone

Your scratch builds are great  As I recently returned to 1:35 scale dioramas having stopped in the early 80’s (…), I am wondering about the options for military models and figures currently. I have always used Tamiya, but there are clearly several other options that may be good. What brands do you mostly use for your figures?
@PaulG Thanks!
Well, I am not an expert in figures. But in my stock I have: (approximately)
30 kits made by Dragon, MB. In these kits there use to be a handful of figures. (Plastic)
100 kits that includes 1 or 2 figures, made by all of the most common brands. (Resin)
I don’t have any figures made by Tamiya at all, I think that the quality is to poor. There is no reason to by Tamiya, kits from Dragon ain’t that expensive.
Back in the days, Tamiya was great of course, but that was before the resin figures available.
The figures made of resin are another dimension comparing even to example Dragon.
But the price is of course higher.
If you haven’t built and painted models and figures for a long time I would start with figure kit from Dragon and MB, on the other hand Tamiya is the best choice if you want to build vehicles/tanks.
Quite cheap and easy to build.
After a while when you feel that your work is improving, then you buy some resin figures and see if you notice any difference in working with them.
Don’t do like I did, I bought a lot of figures and models in the beginning, now a couple of years later and my skills are better, I have a lot of models/figures I never will use. (A lot of wasted money)
Sorry for my poor English, I hope you understand what I mean!
PS Recently I bought about 30 kits with 1-2 figures made by US company WARRIORS. I am very pleased with those figures.
A lot of the figures in this diorama is made by WARRIORS.
I bought them from here:
https://lots-of-models.com/collections/warriors
/Erik
Thanks Erik, that’s very helpful 
I am going to check out some of those options.
Nicely done man !!
Very realistic with a well placed cast of characters .
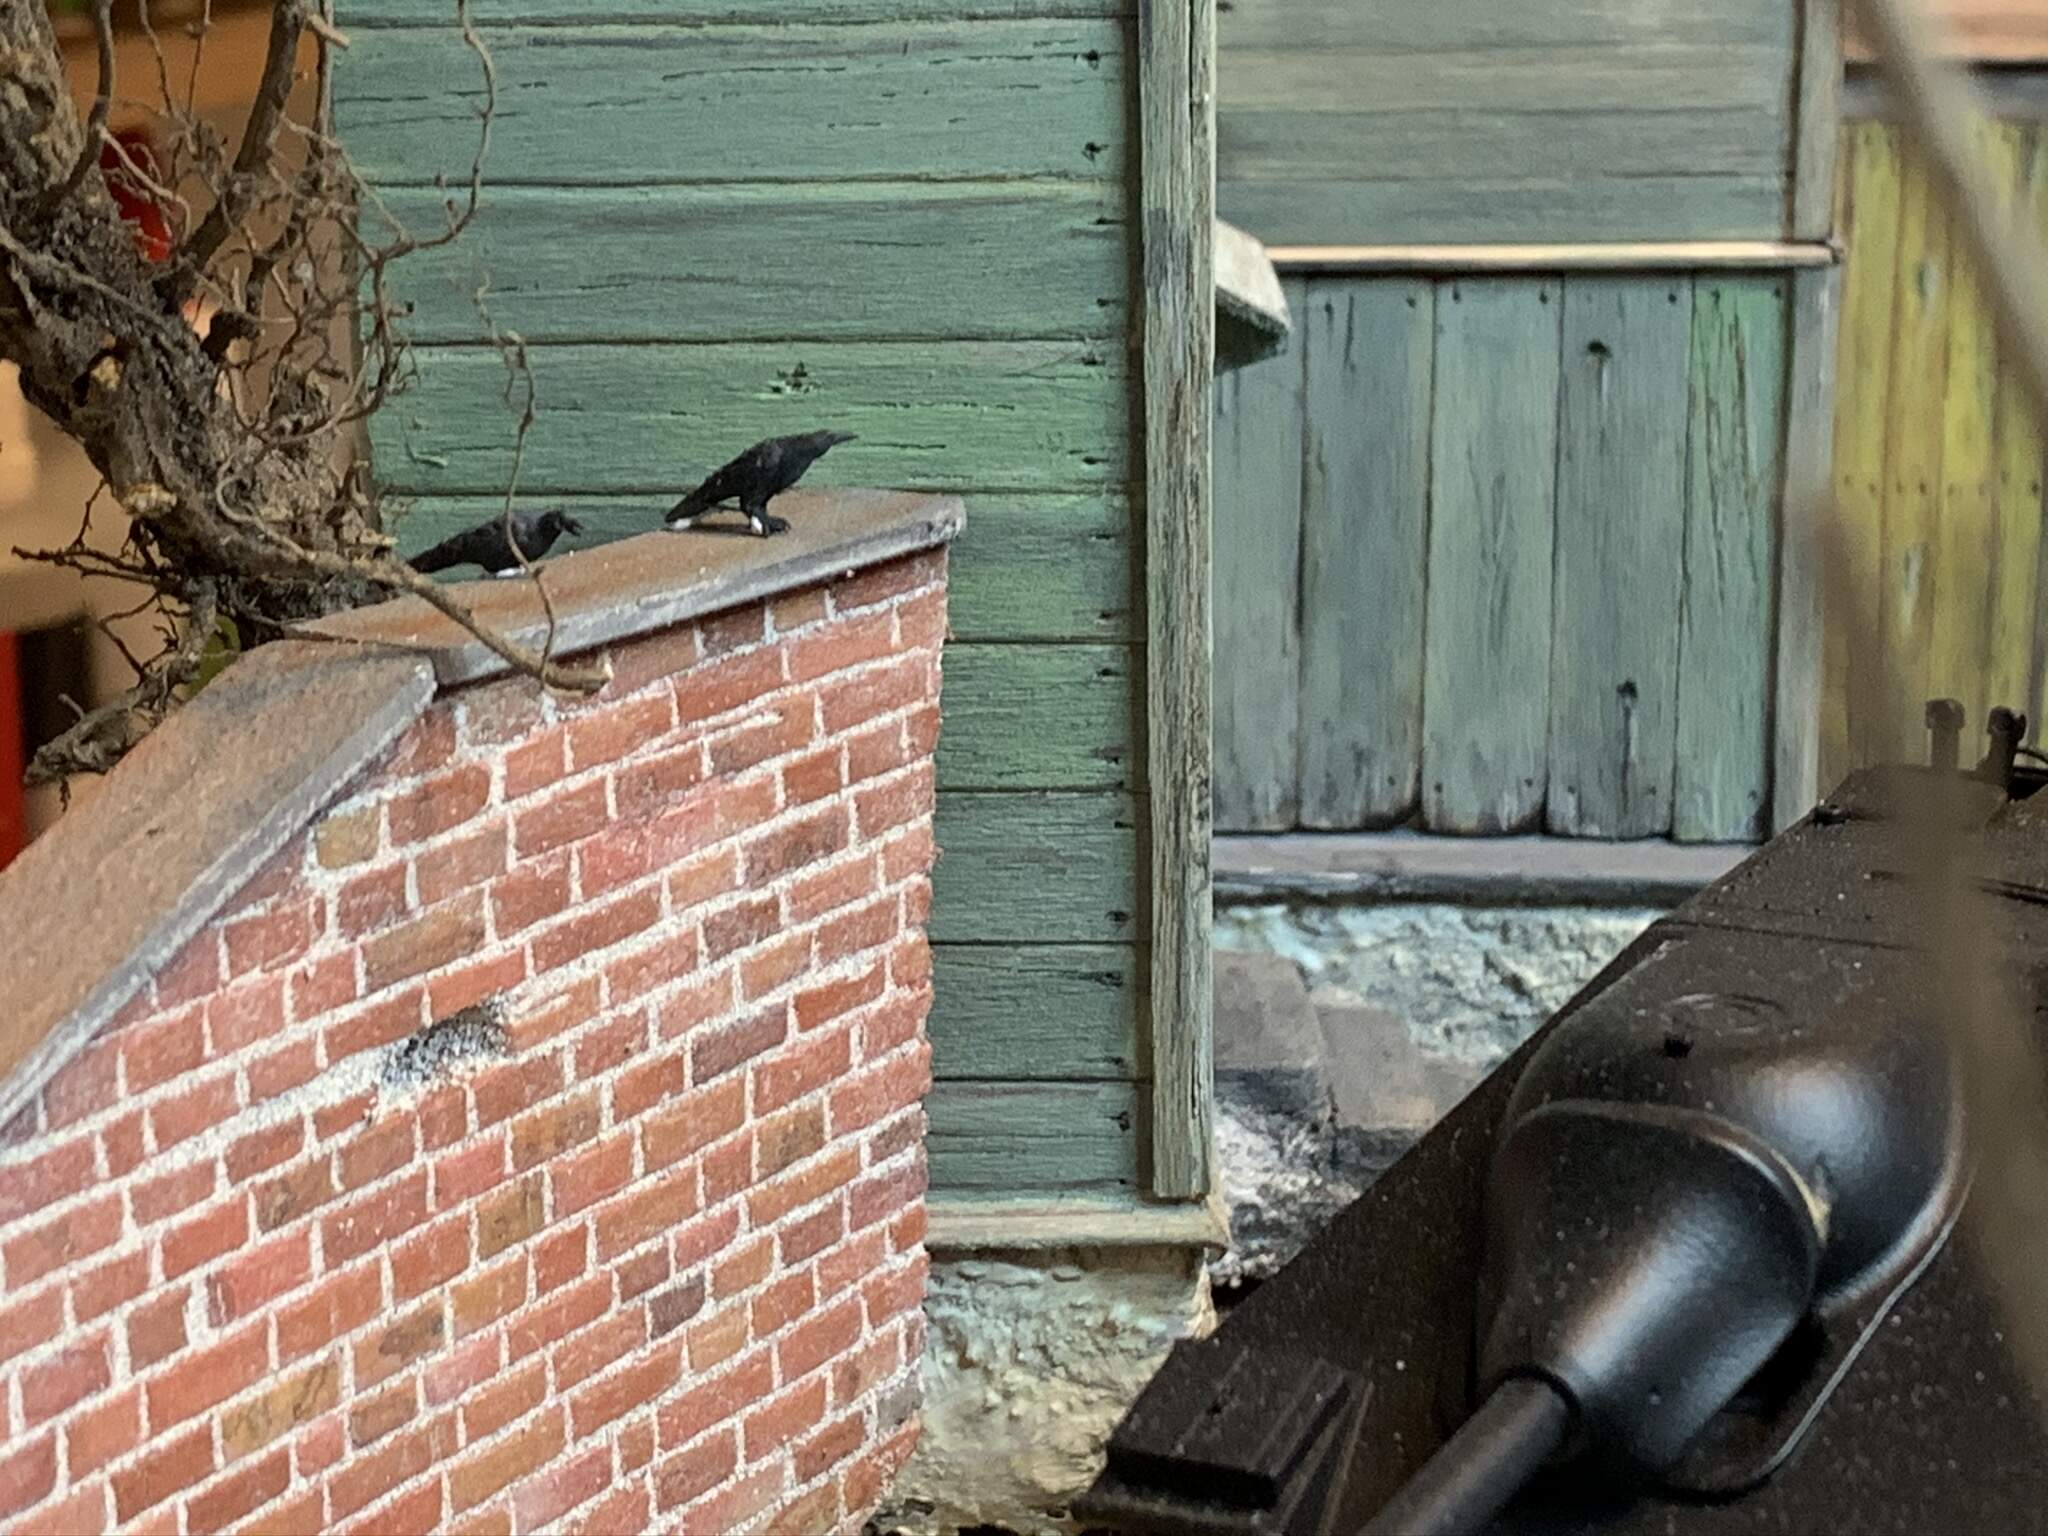
Quality work everywhere, where would we be without balsa? I really like that brick wall too 
Thanks guys! Yeah balsa and styrofoam is gifts from above:)
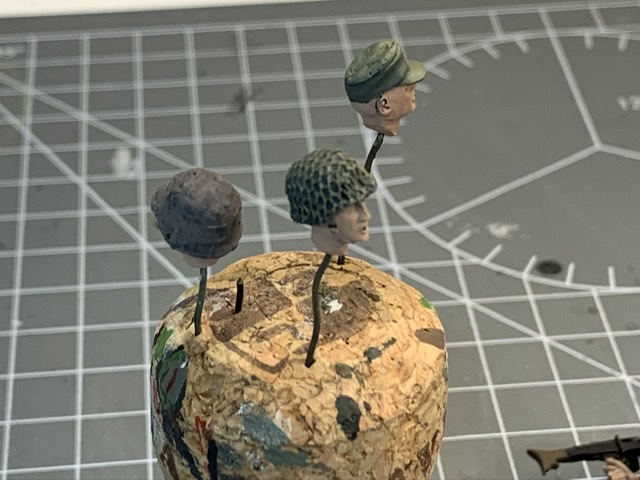
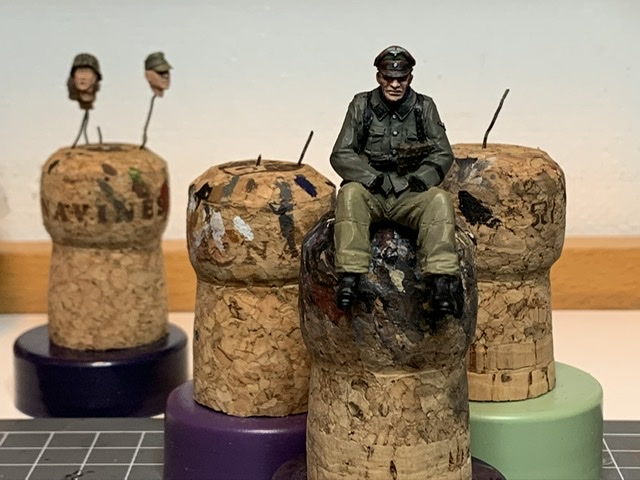
I almost forgot that I have started painting some of the figures. Nothings special but it’s a good thing to show pictures during the hole process.
Here you see that I take away the Wehrmacht collars:
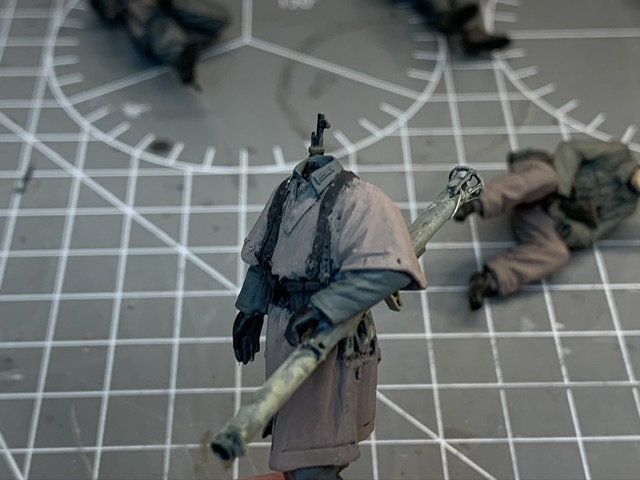
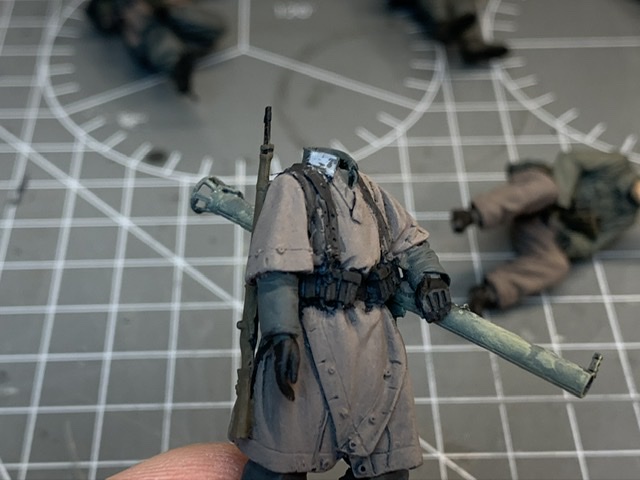
Here I have started to paint the figures. All of them painted with a brush.
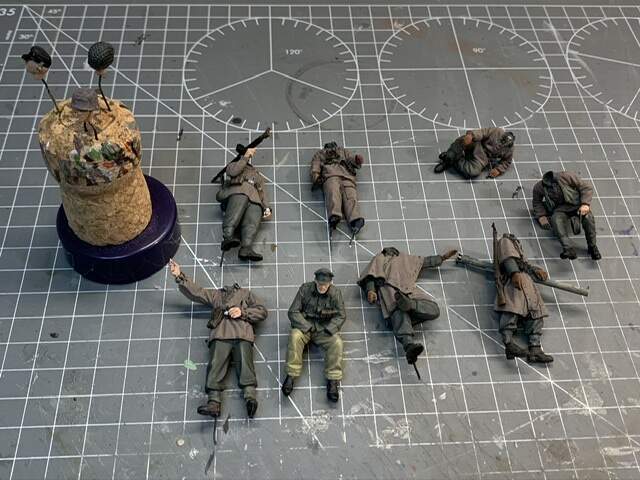

To be continued…
Hi,
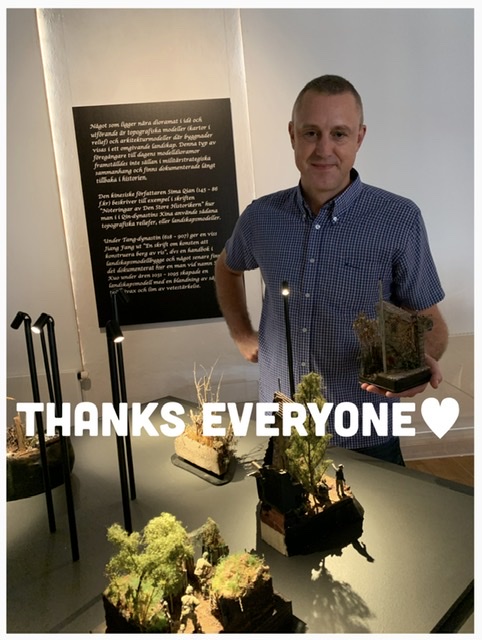
I have decided to give it a try to finish this project within 7 weeks. Last weekend in October the Swedish model show C4-open take place in Malmö. This show is also the competition for the Swedish championship this year.
I will be there!
First I thought to finish both “Checking out” and “The Spaghetti Massacre”, but, no. It’s better to finish and bring a diorama that has many figures, a tank, a scratch build building, trees, a fens, a wall etc etc and also quite large.
So wish me luck…… I am not sure to succeed, but I will definitely give it a try.
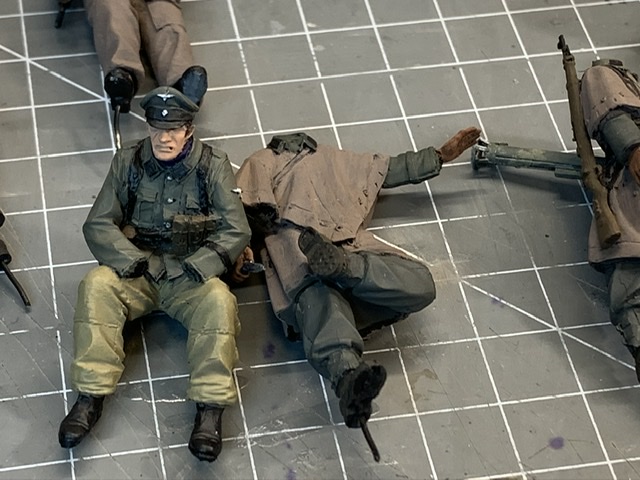
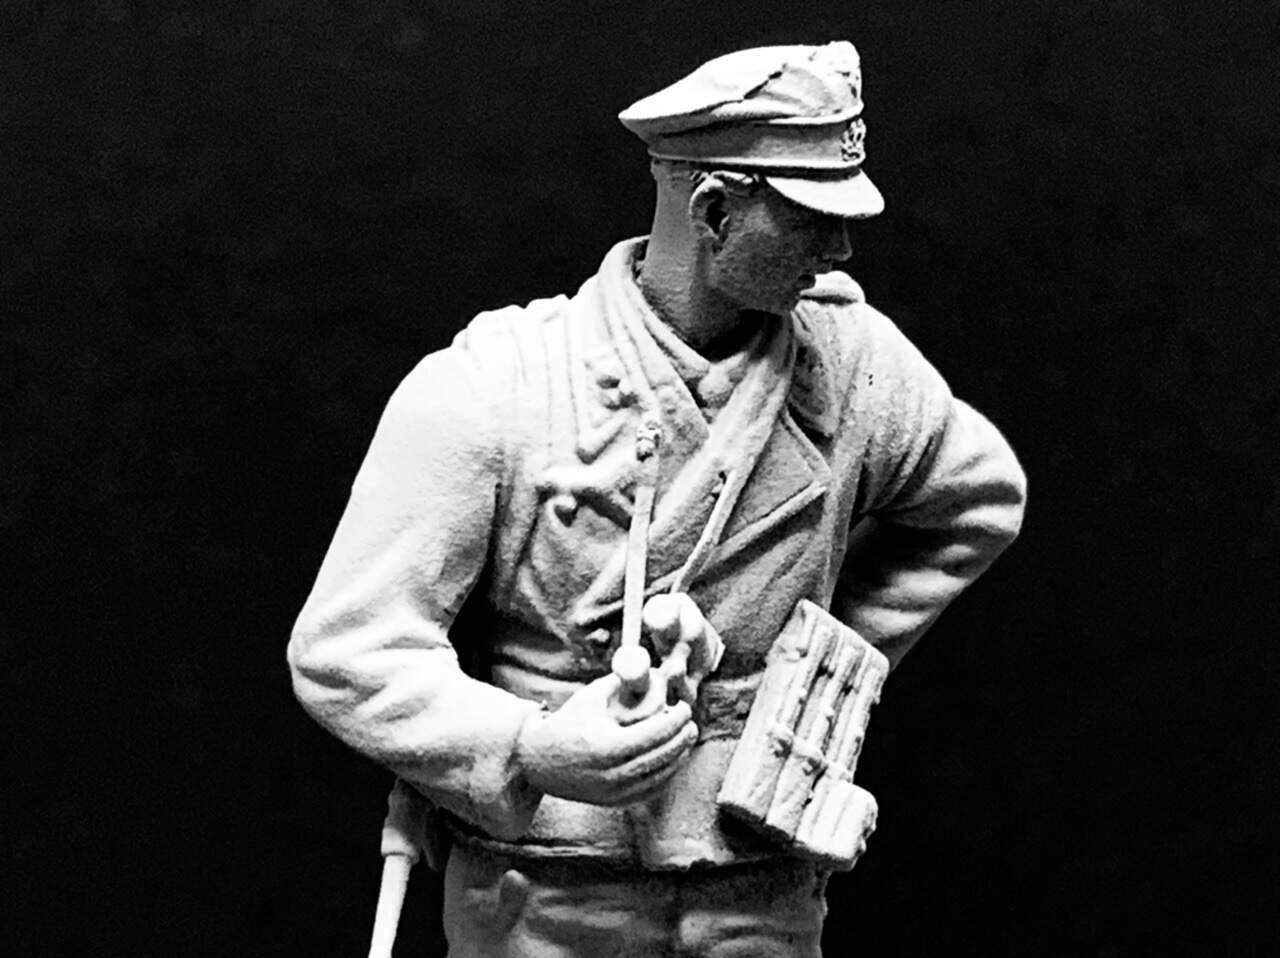
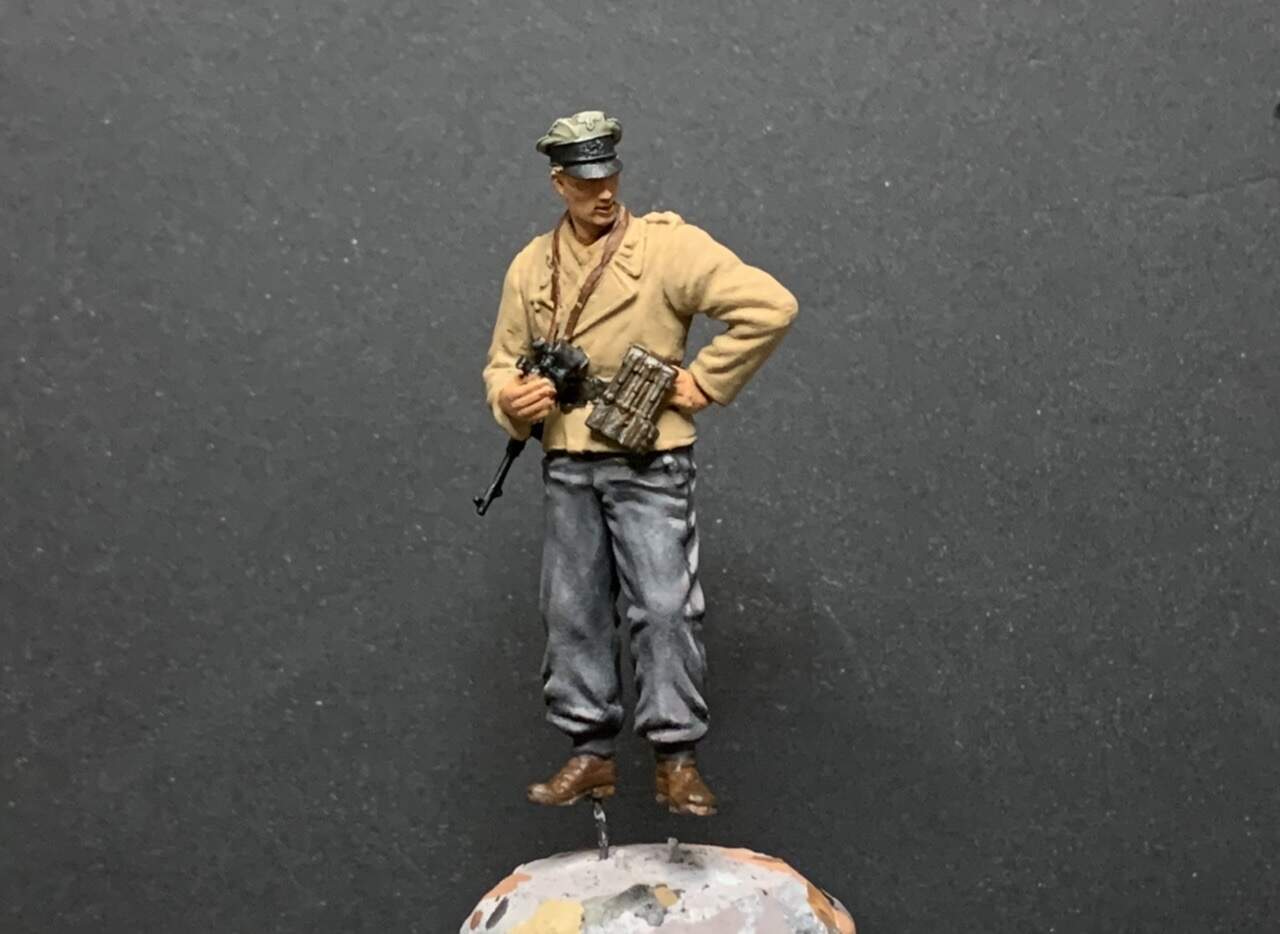
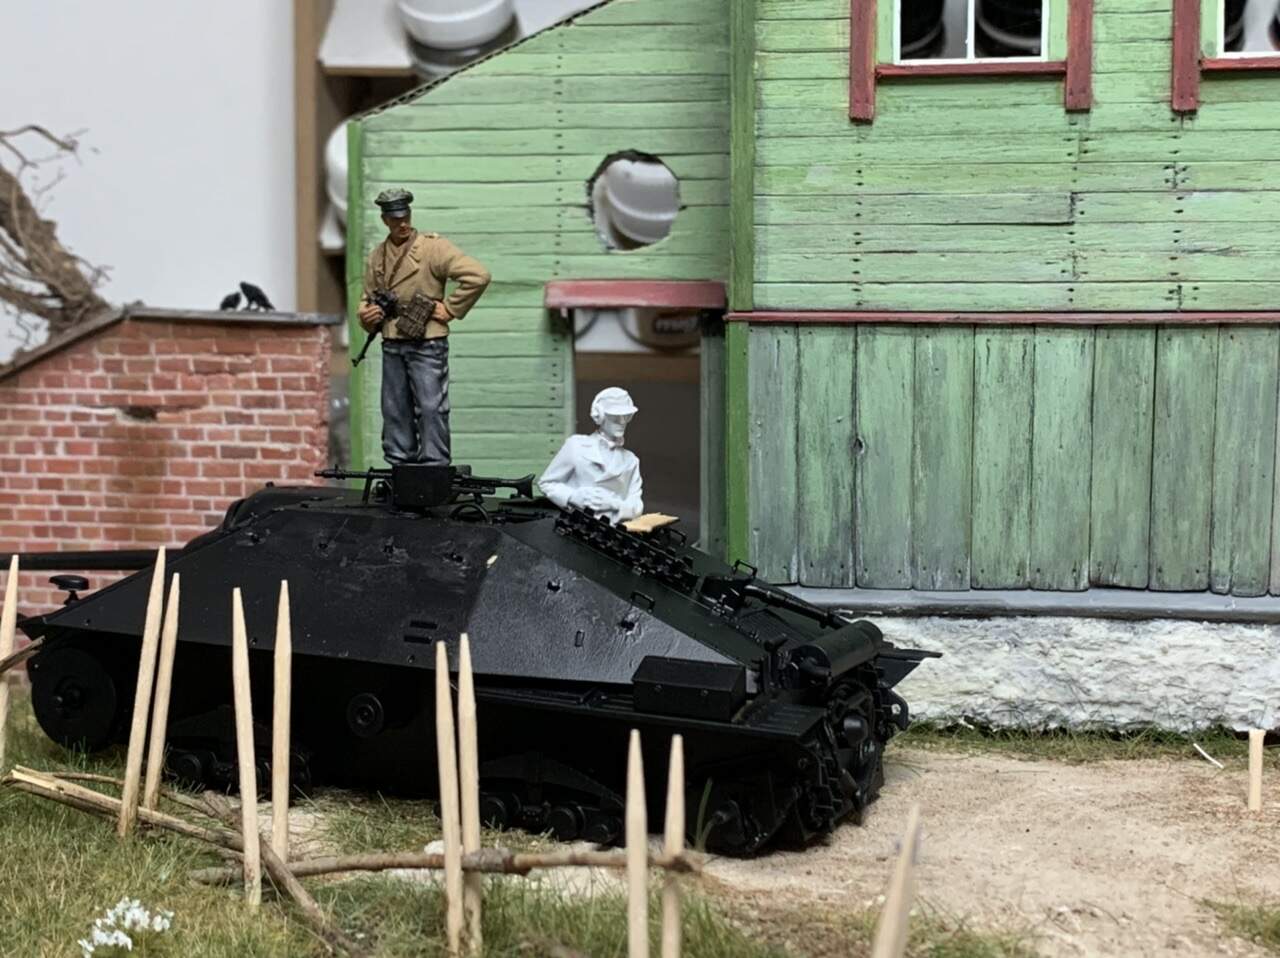
The first thing I did was to add another figure……crazy yes. I wanted a panzer officer standing on the Hetzer. I looked in my stock and found this one: (to the left)
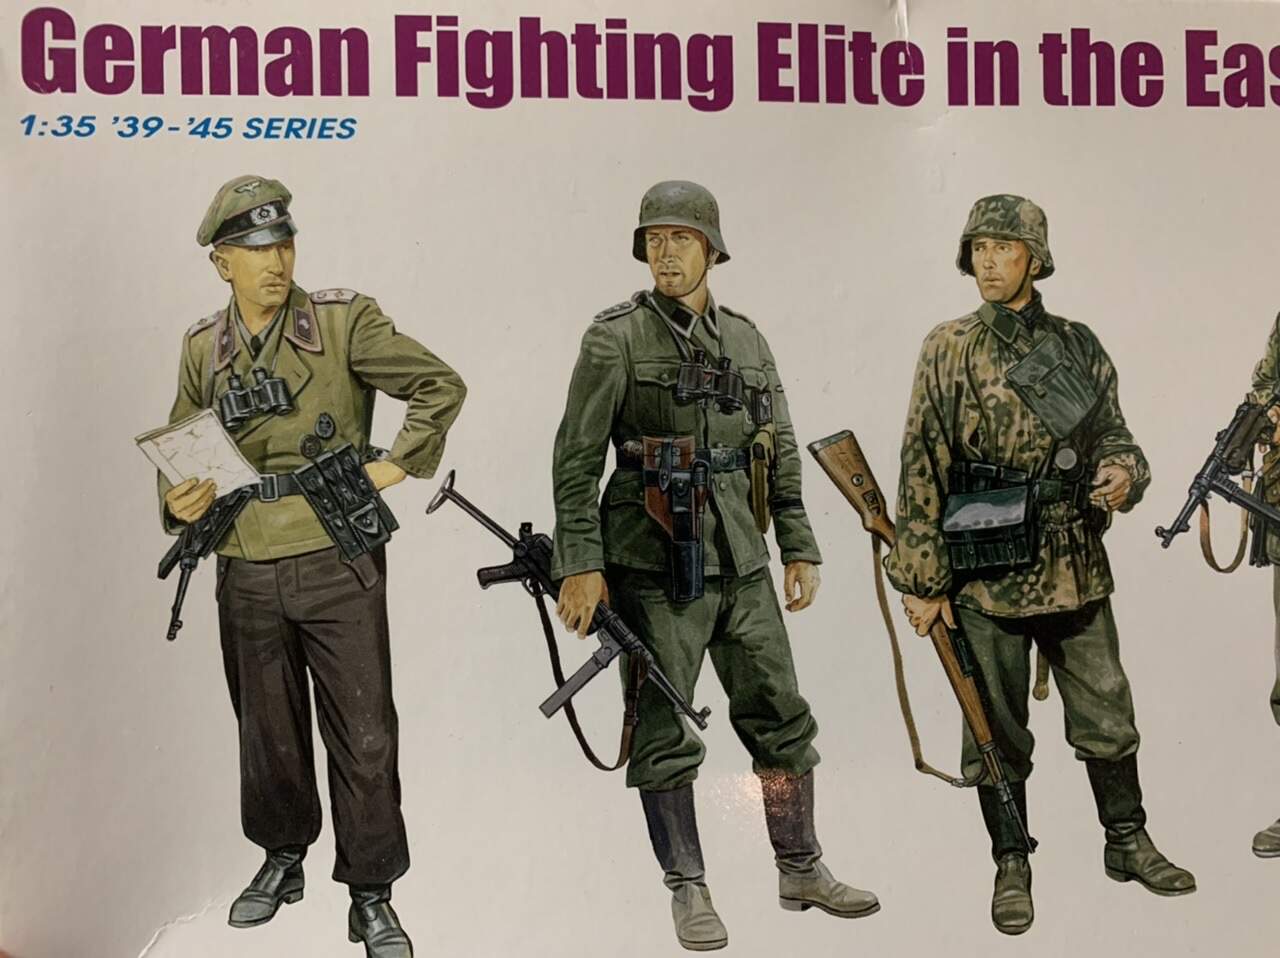
After I put him together and added a new head, not sure what brand, I put a binocular in his hand instead of a map. I think that’s better choice.
Unfortunately I missed that he had a molded strap for the binocular on the body.
Oh no… what to do? I wanted to keep the binocular in his hand. So I decided to use the molded strap and just make it longer.

I used aluminum and super glue. It ended up quite ok I think.
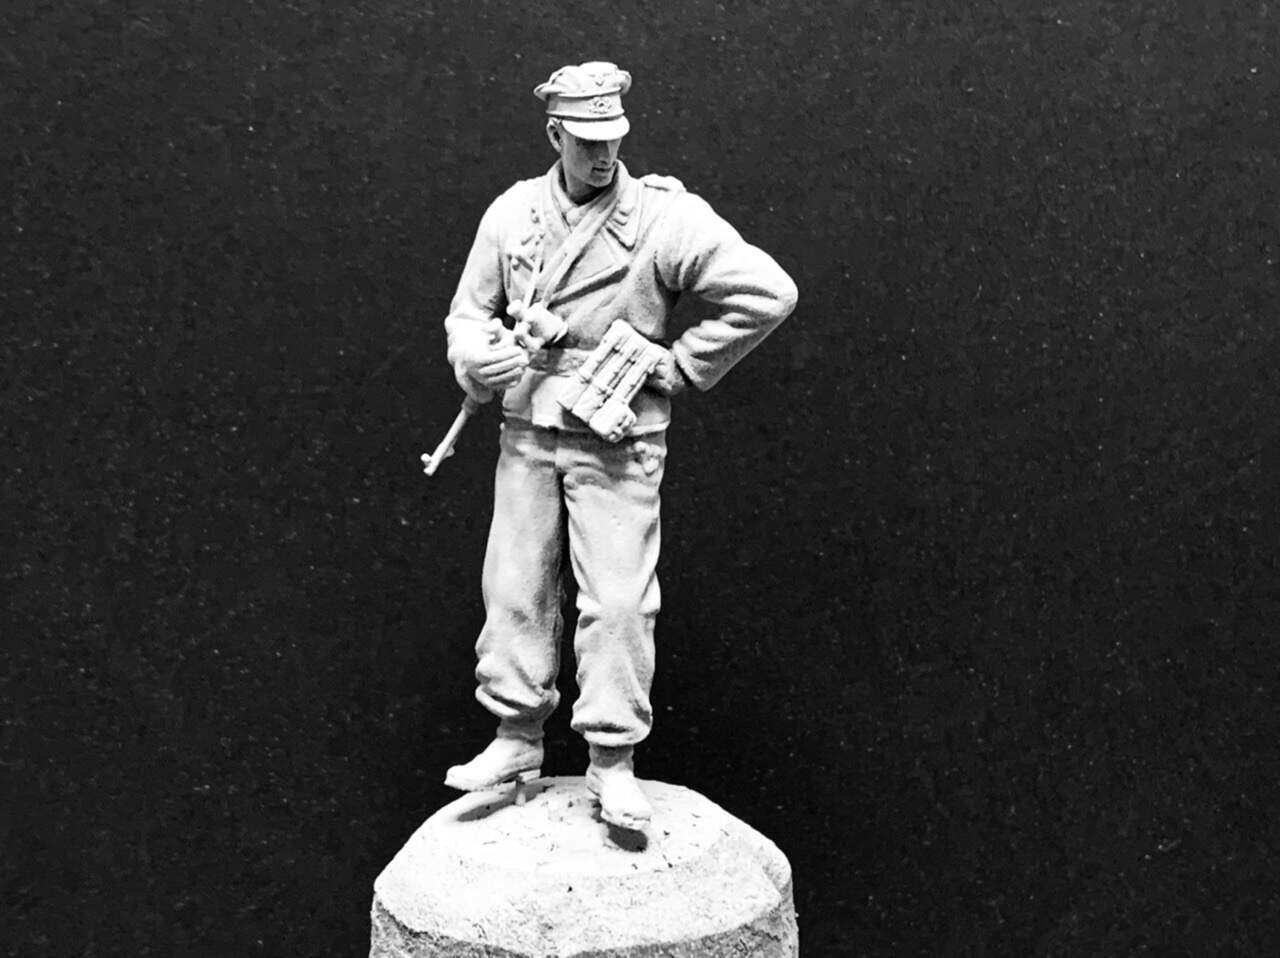
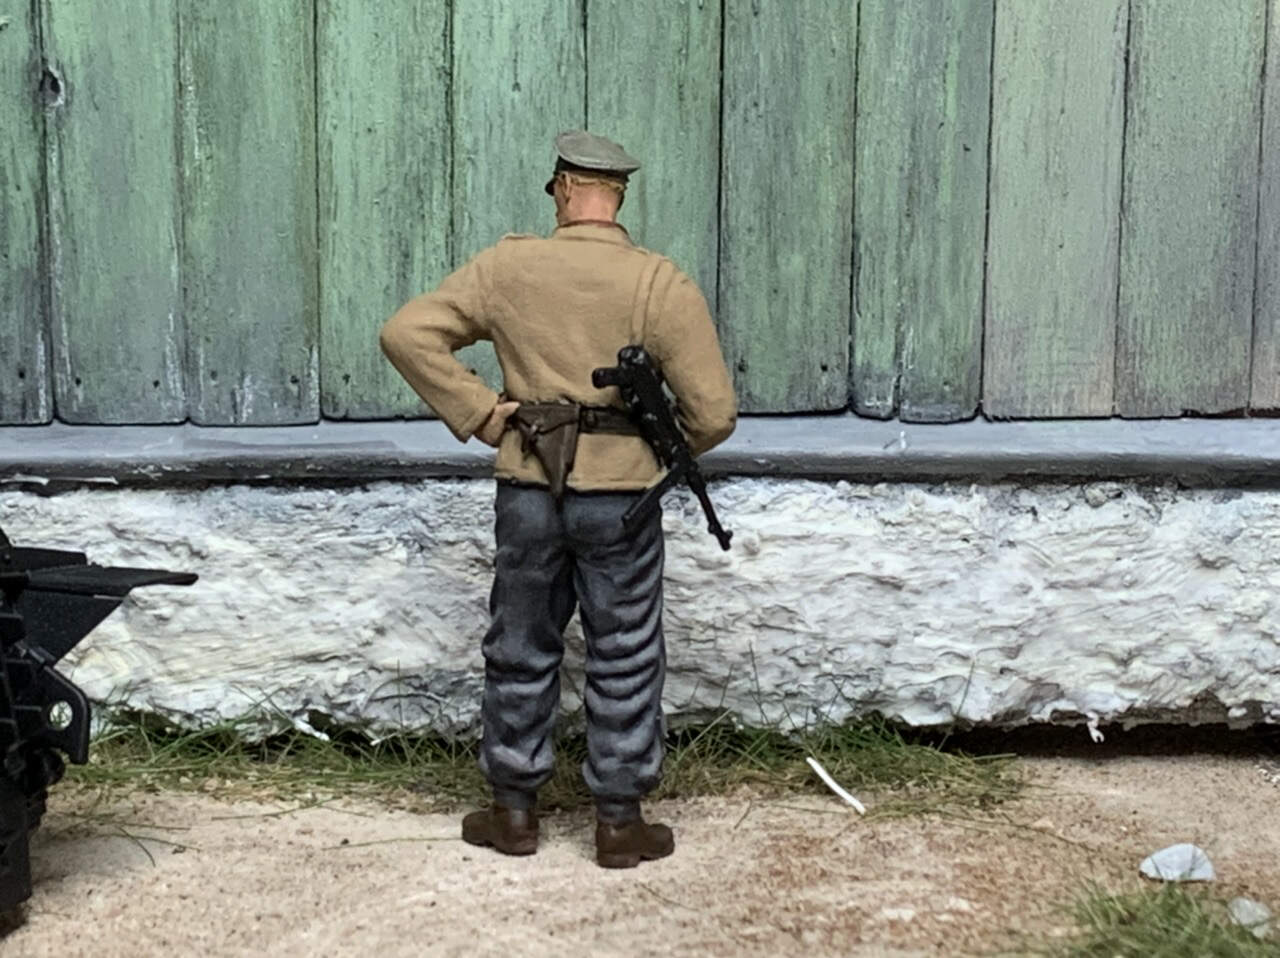
Tonight I painted the basic colors on the figure. I used my airbrush to paint the trousers. Highlights sprayed from the top and shadow from below.
Not a master result…. but good enough right now.
I will make the DOT camouflage on his jacket.
Some pictures:
Cheers

Erik, you have so many Dio’s on the go I had completely forgotten about this one. Great idea to focus on this for the Malmö show 
Great save with the bino straps and just lengthening them so they connect to the binos.
Will be fun watching you bring this up levels each time you work on it… the shading on the trousers looks great btw
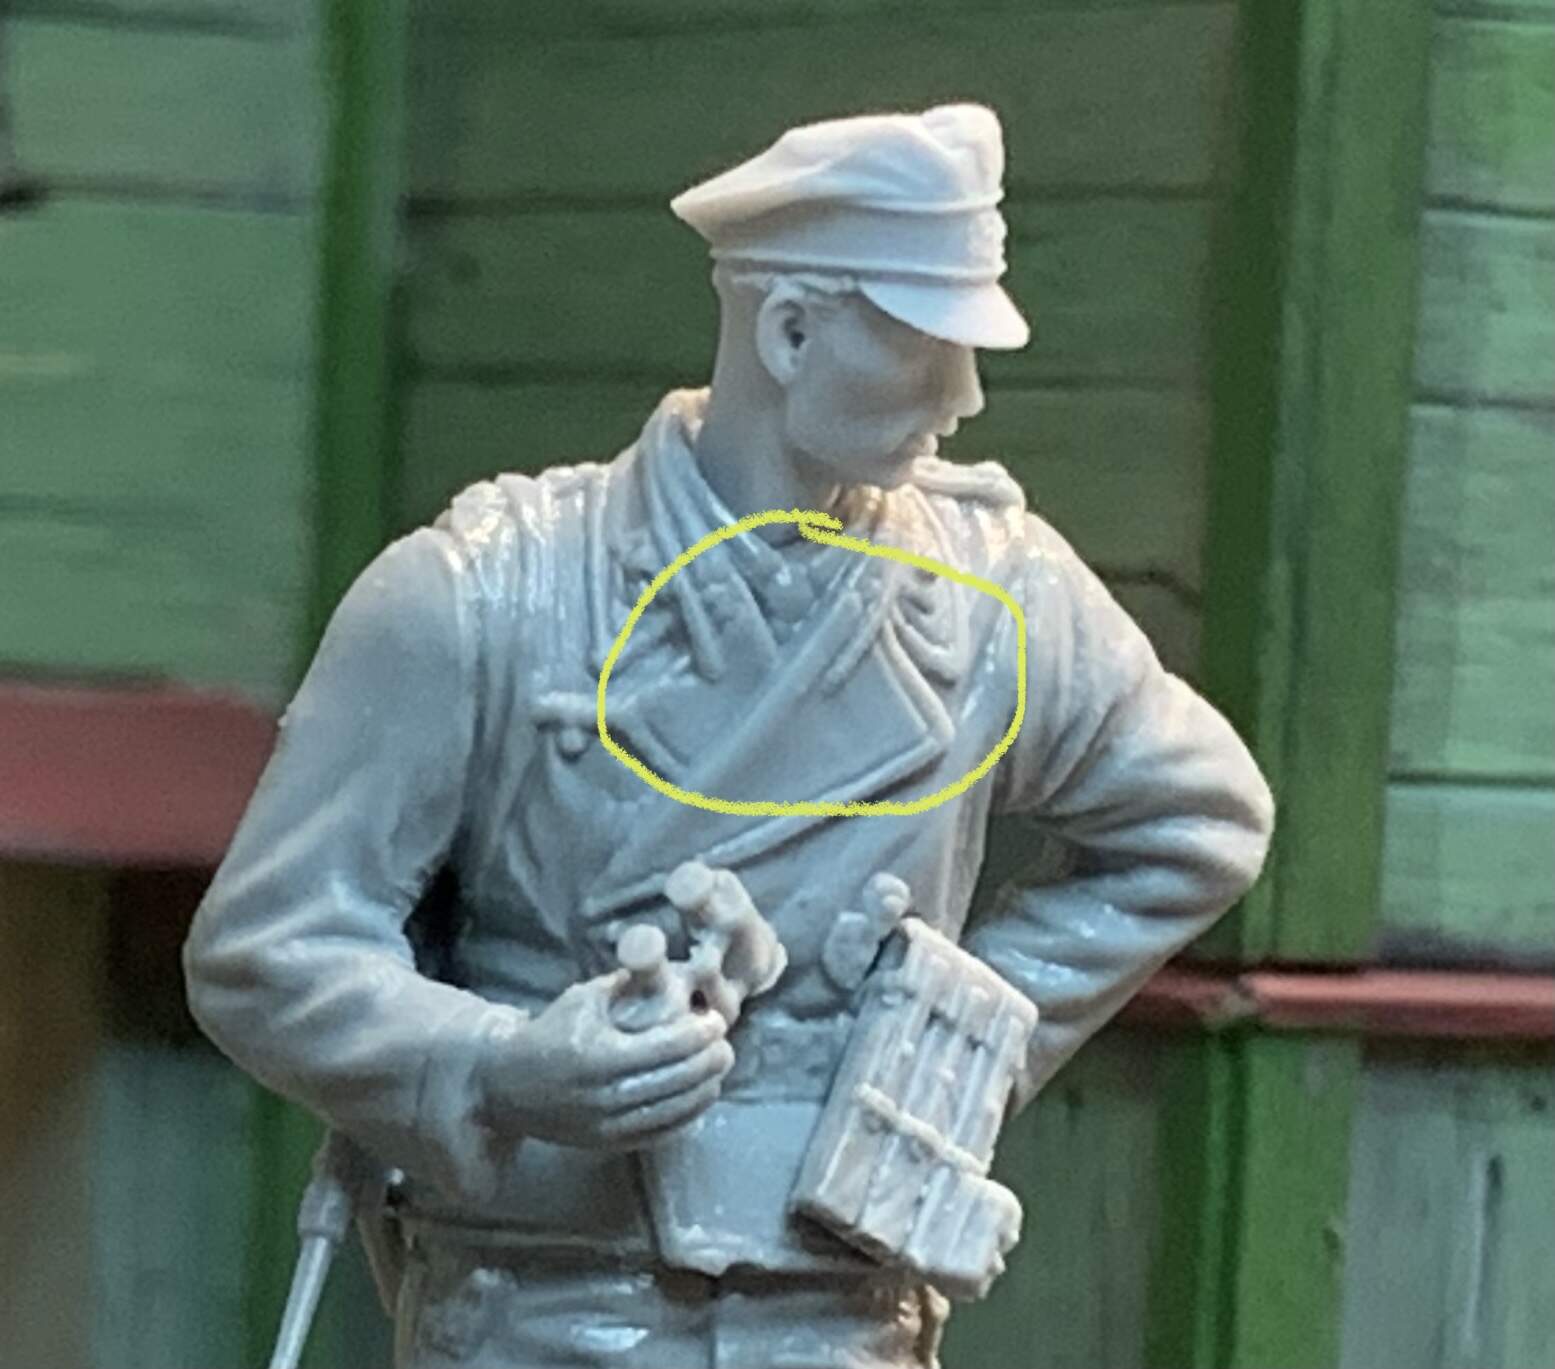
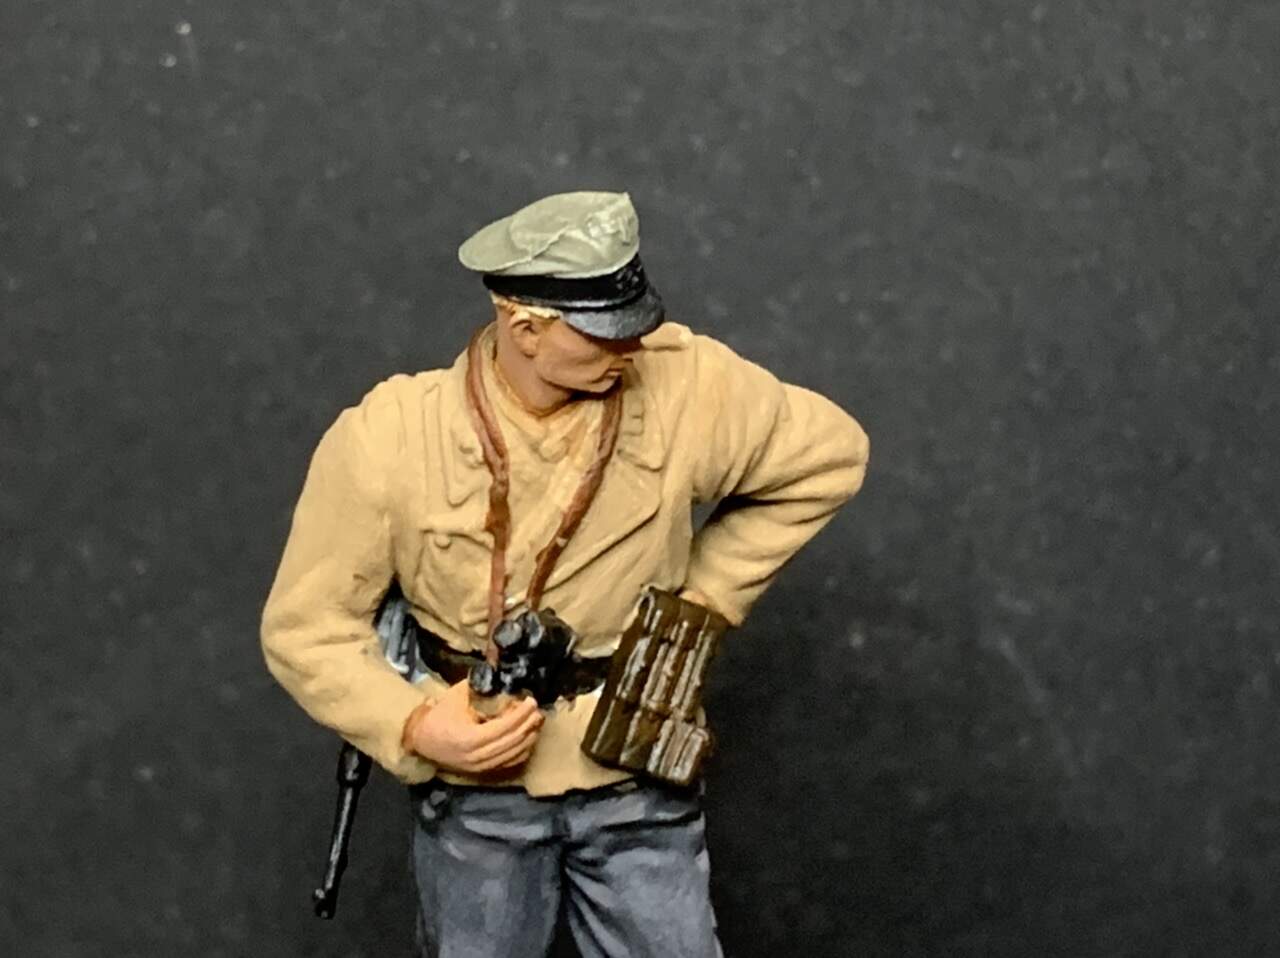
Erik, excellent work all round but I fear the ammo pouch (for the MP38/40) on this figure is fixed on the wrong way; that is, if it were fitted like this for real the figure would not be able to sit down or bend. See the Dragon box art for the correct angle. 'Hope you don’t mind this small observation.
Great scene again! Each of your dio’s are like scenes from films, not a picture but a scene from a film… are you by any chance related to Ingmar Bergman? 
Love the house and fantastic the way you repaired the binoculair strap!
Just a question: will this officer be looking at Fritz or at the group discussing their position? I can understand him being interested in wether Fritz will be able to get rid of that smelly dogpoo if they were both members of the Henzel crew… but Fritz isn’t dressed like a crew member… So I have the feeling the officer should be doing the last?
Thanks for the notice. I will change the position. As you know I am thankful for all tips.
It was a little tricky to place it the correct way, therefore I thought okey his hand has temporarily moved the pouch….
But I want to minimize all details that could cause questions. Therefore I will change the position.
Thanks 
 especially when it is an elite soldier who is in that situation…