Weathering, when does it end?

Dear fellow Modelers of all Stripes:

Being an admittedly intermediate AFV modeler, but one who is a voracious quick study, a question popped into my mind whilst working on yet another heavy German armor build: when should/must I stop weathering? Being one of those persons who when discovering a new avocation goes way overboard and capitalizes a brand new operation into one overstocked with every single paint, accessory, model kit, primers, weathering and washes, oils, filters (even making my own now) Shaders, you name it, I discovered that I had a mania that would now cause me to operate like the government: if I have something I better use it, to Hell with the mission or what the build might call for (apologies here to Michael Roof for my parataxis affliction, I’m sure his fertile mind will spot it). I’m sick and twisted over this. When is enough enough? I pore through tutorials almost each day on some painting or weathering issue, but it necessarily comes with buying a new product. Bought a set of Windsor and Newton oils, but then discovered the MiG Oil brushes.
To me, after going through prepping the piece, I’ll prime it, sometimes rattle can if it’s Mr. color or Tamiya Fine, or Mr Surfacer from an airbrush, then I’ll lay my base (I might preshade), I’ll add any necessary camo, I then choose to detail paint all accessories and pioneer tools. Thanks to EurekaXXL, I make my own cables and handles, or I even scratch build parts.
But, after laying clear or varnish, I’ll start weathering usually with chipping if I laid chipped fluid down before finishing paint, or I’LLP use VMS’s new Chip n Nick acrylic chipping paint. I used it over the weekend but I found that while it does what it says, it’s excess creates a sort of wash which is Hell to remove. So you have to move forward in little bits. Then I find myself driven to use every damn thing I have on my shelves which are buckling now under the weight of materials. (I won’t even get into the paint debate (acrylics v lacquer v enamels). I had finished chipping, but hit a crossroads: wether to use Tamiya panel liners or the new Mr Color Weathering oil Weathering paints.? I went with the new Mr Color despite the lack of information on it. You really have to plan how and when to use it. So I used it. Now, understand that I also have layers of filter, chipping, various “stain” products, the works. I find myself actually have a serious desire to do an oil pin wash. Am I insane? When is enough enough, or am I coming at this wrong? While I have a couple knowledgeable mentors, they generally counsel moderation. Since most of you are well versed in this subject, and I’m not limiting it to AFV, isn’t there a better way? I myself know that each build seems to have a voice that calls for this or that, but I’ve never whispered a build which asked me for the works. So, what the h*ll is wrong with me? Is this conspicuous consumption of industry substances, or something worse? Help me.
Dan
1 Like

I find it very helpful to decide what I am going to do with my weathering before starting. Have a plan and choose the technique I want to use.

Ask yourself, what do you want to show with the weathering you want to do? wear and tear? Dust? Mud? Damage? What kind of terrain is the vehicle on? Has it been used for a long time? Usually these help to decide and not over do it.

4 Likes

Subjective of course - I have always felt that it is better to err on the side of subtlety. Too little is better than too much . ( except for money … )

2 Likes

Weathering is very much a personal choice. For the most part the majority of my builds are relatively clean. No missing or beat up fenders, little or no mud, no chipping. Streaking, some rust and dust and that’s pretty much it. Lately, however, I have been applying more mud and dirt to get the look of a more operational vehicle but not one that has been abused or seen hard action. I avoid chipping as I have not been able to master it to my satisfaction but more importantly I feel it is generally overdone and frequently out of scale. Looking at photos of operational vehicles in Ukraine and Gaza one can safely say there is no such thing as too much weathering. That said, like painting, if the associated weathering is not pleasing to the eye it will distract from the build. The painting/weathering process is the artistic element of our craft and allows us to personalize our work.

4 Likes

Good idea: think ahead, not on the fly. Trying to work as you isn’t much of a plan but I thought it might just lead me to the result it dictated, thx
Dan

"[quote=“gtdeath13, post:2, topic:39079, full:true”]
I find it very helpful to decide what I am going to do with my weathering before starting. Have a plan and choose the technique I want to use.

Ask yourself, what do you want to show with the weathering you want to do? wear and tear? Dust? Mud? Damage? What kind of terrain is the vehicle on? Has it been used for a long time? Usually these help to decide and not over do it.
[/quote]

What he said.

Consider each build a project. Decide if it is to stand alone on the shelf or on a base or part of a diorama. The amount of weathering is based on the final product. If I had massive amounts of mud caked on the vehicles that just sat alone on the shelf, It would indicate a story that wasn’t being told. Stand alone vehicles should just have the normal light weathering most armored vehicles have. Bases and dioramas are the framework of the visual story you are telling. The weathering should complement the story.

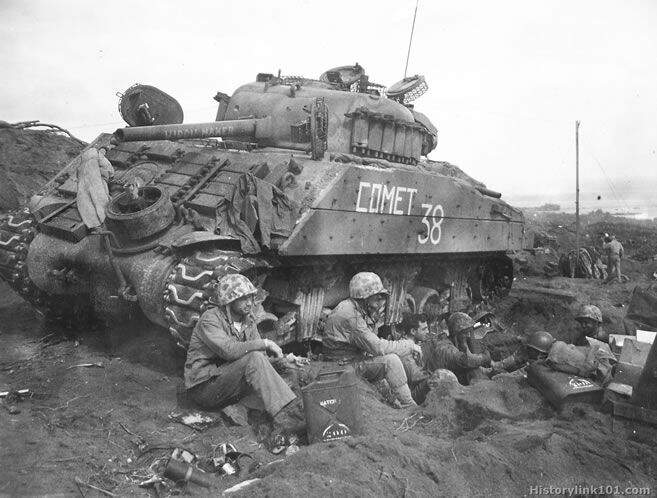
Here is a story for a diorama that would require extensive weathering.
https://www.bing.com/videos/search?q=found+ww2+tanks+in+mud&view=detail&mid=835E721479B433EAEA45835E721479B433EAEA45&FORM=VIRE

Here is a story for a diorama or base that requires medium weathering.
image

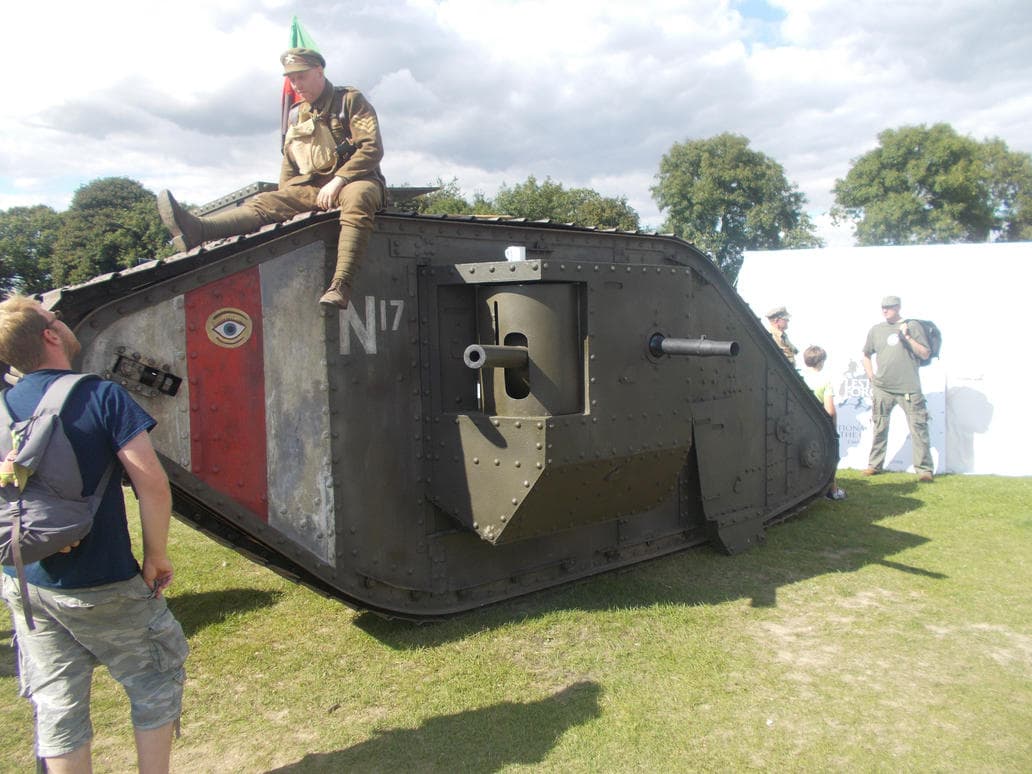
A diorama about a days outing to the museum may only need the lightest of weathering.

2 Likes

I’m primarily a figure builder who dabbles in armor. Nonetheless, I spent the entirety of my Regular U.S. Army life as a mech infantryman, so once upon a time I was well acquainted with heavy vehicles. I had firsthand experience with M-2A3 Bradleys, M-1A2 Abrams, M-113’s and M-109’s. I also had the pleasure of rummaging through an Iraqi armored brigade motor pool full of T-62’s, T-72’s, BMP-1’s, Crusaders, Scimitars, MTLB’s and M-113’s. The Iraqi tracks were in varying condition from operational to scrap and battle damaged (presumable from the Iran/Iraq war because it wasn’t from us).

There seems to me to be an everlasting challenge between the art of the hobby and pure realism and realism tends to be far more mundane than modelers think. I’ll admit that for some reason heavily weathered vehicles are visually appealing on a purely artistic level. But I will also say that the fairly recent trend to portray totally battered tracks turns me off. I see too many armor models that look more like abandoned range targets than an operational vehicle. I blame this on the proliferation of specialized materials, such as you mentioned, and influential modelers who are good at marketing products to obtain those effects.

I agree with those who say you should decide up front what you are portraying. As most modelers like showing a vehicle in use and in the field, use photographs as your reference. There are no shortage of WWII photos. Armor gets used and abused, but I believe you should avoid chipping and rust unless you are portraying some sort of rebel militia who managed to get an old rust bucket running. The paint that is used on armor is tough. It doesn’t just fleck off from hitting a tree branch. We rammed our Bradleys through cinderblock buildings in Iraq without a scratch to the CARC paint. I obviously don’t have personal experience doing the same with WWII vehicles. But if the opposite was true with the old paint you would see photos of armor in WWII with large, gleaming sections of exposed metal (or massive rust patches from exposure). But you really do not see this. Those tracks were used hard and for all the hedgerows, farmhouses and stone walls they busted through you’d imagine seeing photos of tanks almost devoid of paint on the sides, barrel and portions of the turret. In my experience, minor chips and rust spots do occur on particularly exposed items like handles, but at 1/35 scale those would be miniscule.

The heaviest damage occurs on external items that are not armored like the tank chassis. This would be sponson boxes, lightweight fenders and mud flaps. Once damaged, those things rarely get replaced in the field because they don’t affect the tank’s performance. For example, our Bradleys rarely had a complete set of functioning rear sponson boxes. They were easily dented and torn off. The dented ones DID have massive paint chipping and exposed metal. The reinforced rubber mud flaps regularly got chewed up and torn off. The only place I ever consistently saw rust were on our track shoes and road wheels.

Two things that do dent, chip and rust easily are the old 5 gallon metal gas and water cans.

Even the Iraqi tanks that suffered from decades of minimal maintenance and long term exposure were not extensively chipped and rusted. From what I’ve seen, chipping on the actual tank chassis is the result of a specific action, usually the impact of incoming fire. Even then, those impacts are unpredictable. I saw an M-113 with scores of 12.7mm impacts and while the rounds scarred the armor (even as thin as M-113 armor is, regular 12.7mm doesn’t go through it) and made impact craters exposing the metal, there weren’t large chunks of paint thrown loose. The same goes for the characteristic halo impact of an RPG. The main charge might expose metal, but most of the impact looks like small charred holes.

Like I said, I dabble in armor modeling with figures being my passion. It is my belief, however, that environmental factors should play the greatest role in weathering a vehicle. You decide that beforehand. Is your Tiger on the Eastern or Western front, and where in those theaters? What time of year is it? Look for photos and do your best to discern how abused those tracks were, knowing that no two tanks were the same. There are some amazing effects out there for modeling environmental conditions and many of the guys on here can speak to utilizing those much better than I can. There are plenty of tutorials and books out there as well.

I say you stop when you feel that your vehicle accurately reflects the conditions you envisioned. I believe it is easier to overdo the weathering once started, so instead err on the side of understating your weathering effects.

6 Likes

And after I write all that…

1 Like

Wow, Apache26, what a wonderful piece. Very thoughtful and just what I was looking for. Thanks for your contribution and your service.
Semper Fi
Dan

1 Like

Well said, tragically, I do “think about” what the build calls for, what conditions or weather it was exposed to, and the like. But with so many new weathering products, there’s a temptation to do too much—except for rust, which, unless one is doing a knocked out tank, generally should be conservative because most tanks didn’t have a long shelf life in combat.

May I suggest to try a different approach? Do not let the products decide what you want to do with the weathering but decide what techniques you want to do for your weathering, then choose the proper product. For example, on a sand painted vehicle you do not need rainmarks or streaks. Ignore those products. You also might not need to add a filter on a single color paintjob, depending on how much you have highlighted some areas or if you applied shades with high/low contrast between them. Do not force yourself to use stuff that will not benefit you towards the end result.

Get accustomed with the products you have and how to best use them for a specific technique but do not force the technique onto your model.

Most products are time saving replacements of basic modelling products we have been using for years. Filters, panel liners, washes etc are more user friendly stuff than oils for example. Pigments are better than pastels. There are still lots of people that use oils and pastels and achieve great results because they know how to use them in order to achieve a specific effect.

We have more tools to do the job, but the tasks for accomplishing the end result are the same. Just my 0.02$

3 Likes

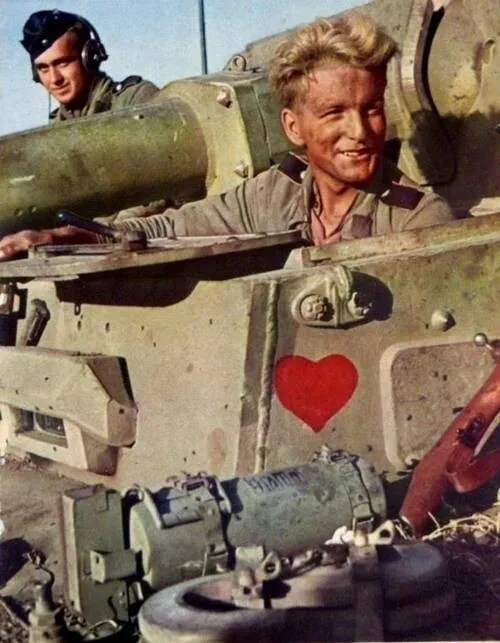
I just going to give my personal thoughts on this. I’ve been modeling (1/35th Armor) for several decades (crazy how that just sounded), entired countless model shows (both IPMS & AMPS). I have done very well from winning Best Military Vehicle and Best Of Show. My preference on how much to weather a vehicle (especially a tank) is making the vehicle look like it has seen a lot of combat. Again, my personal opinion is that when I see a tank at a model show with either no weathering or very little just doesn’t look right. I understand that “to each their own” and the builder builds to how he/she deems it to look. If you look at recent conficts, the first and second Chechnya Wars, Ukraine and the Israeli/Hamas war. These tanks are just brutally abused and show extensive weathering as well as battle damage and it’s how I try and replicate my models. Wether it’s WW2 or modern tanks. My philosophy is this, the more damage and weathering l can apply the better l like it. Like someone said earlier, have a plan how you want your model to look before you start. There is so many reference photos available at your disposal that the possibilities are endless. Bottom line is how you want your model to look. If you’re happy with the results, then that is all that matters.

4 Likes

Thanks for sharing. Coming from one with your credentials I’ll be well served by your sage advice. Interestingly enough, my builds tend to show ranks that indeed have taken a beating, but I do tend to be sparse on rust. The only real exception are exhaust pipes , around battle damage and in places where crew member egress and ingress. I like to refer to my models as trash pandas. Nothin like broken things hanging off etc, but they definitely look like they’ve been in fights and through harsh terrain and weather. It’s odd that I kind of fell into a philosophy like that. Thank you
Dan

1 Like

Dan,
I can fully understand your enthusiasm, entering the world of armor modeling, to buy the entire Ammo by Mig catalog and feel ready to kick a$$ and take names. It’s a natural approach to want to have every tool at your disposal for a perfect project. But you can’t use every Ammo product on every build, you’d just turn out brown blobs. It’s tough just starting out in this hobby - you see so many masterpieces on this site and you expect to do the same, except what isn’t illustrated is that the guys producing the models with “The Look” have been building, painting, and weathering models for 20, 30, 40 or more years. Some every day. No matter how many Ammo products you have, don’t expect to get “The Look” on your first model, or your tenth. It takes talent, experience, and patience. You have to have a good eye and a good hand. Every product and tool in the world won’t help you if you don’t have a gift for it.
Now let’s first presume you’ve built an excellent model. Everybody rushes to paint and weather nowadays because it’s all the rage and ignore the basics of the build. It doesn’t matter how beautiful your weathering is if you have open seams, mold lines, crooked tracks, or fingerprints. Concentrate on building a good model first.
Ammo By Mig certainly makes excellent products, and his books and videos along with his products will certainly get you where you need to be. I have some Ammo products and they work very well. I usually use Winsor & Newton oils with Turpenoid. Weathering has many steps and is all about restraint and subtlety, rather than a barrage approach. You want to finesse everything to get “The Look”. As to how much to weather, @Apache26 just said it perfectly. I’m retired Army Mech Infantry and have extensive experience with real tracked vehicles, also. While you are weathering, when you get to the point where it looks like it needs one more coat, STOP. That’s usually when you’re done. The following is my sequence for finishing and weathering. It’s not Gospel or Scripture, you don’t have to do everything if you don’t feel like it. It’s just my checklist to make sure I don’t forget anything, and I achieve “The Look”. You can substitute Ammo enamel products for any of the oil steps. I’ve been modeling for 55 years and it’s gotten me in the running for AMPS Best in Show, so I stick with it. If you want to see more examples of models with “The Look”, go to the AMPS website and check out the photos of the show winners. Better yet, make the pilgrimage to an AMPS International show.

  1. Base paint
  2. Acrylic clear gloss
  3. Decals
  4. Acrylic clear gloss
  5. Acrylic or lacquer clear flat
  6. Oil washes
  7. Oil filters
  8. Oil dot staining
  9. Oil pin washes
  10. Oil drybrushing
  11. Chipping and scuffing
  12. Pigments
  13. Mount to base so nobody touches the pigments.

How to actually do each of these steps is each a whole thread in itself. But I hope that this gives you some guidance and clarity and you feel less overwhelmed. We’re here to help!

5 Likes

Depending on the base layout this step might should be a few steps or at least one step higher to avoid you the modeler from touching the pigments when attaching the model to the base.

I think also lost in the sausage making is that some steps are best done along the way and not at the end. For instance, depending on the weathering direction, adding products to hull before attaching running gear gives you a better out come. You can blend in towards the end to give a uniform look that can be difficult to achieve when the running gear is attached.

2 Likes

“Weathering, when does it end?”

The rule of thumb I use, and answer to this question is: “if you think you need a bit more weathering, you have already done too much. It is time to stop.”

5 Likes

Excellent information has been shared!

The process Matt listed is an outstanding Strategic outline for weathering and finishing an AFV model. Basically, same process here with a minor tweak.

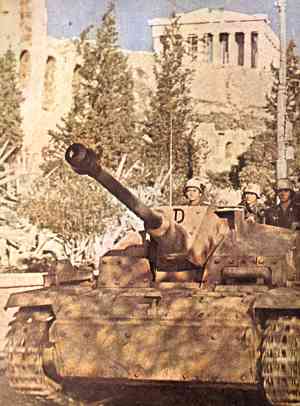
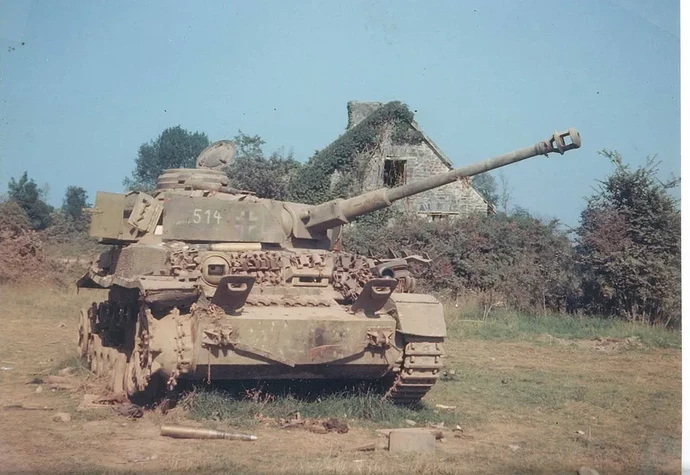
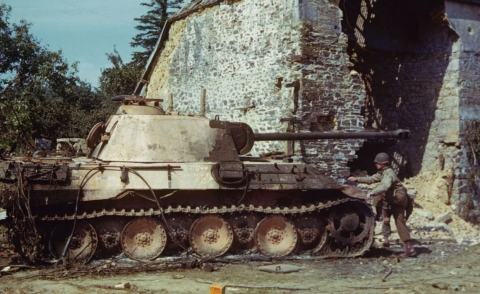
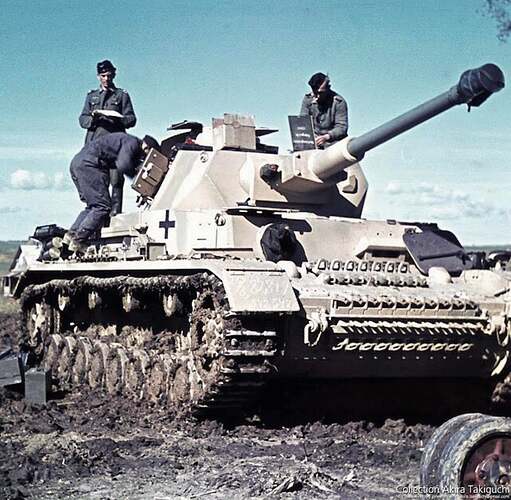
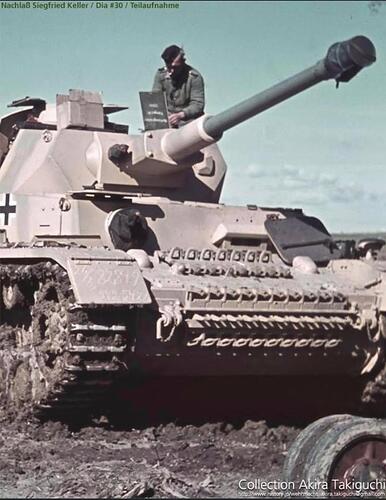
Chipping is probably one of the most discussed topics in weathering. It can look interesting but if realism is on the checklist, chipping is a pretty minor item. Posted for weathering discussion purposes only.

Stug_III_in_Athen

140-Panther-THN

FWIW - I’ve been using VMS Chip n Nick for a couple of years, here’s my experience. It’s an excellent product overall.

Tactical thoughts…

The excess creates a wash only when the paint is heavily applied then removed. To avoid that issue, apply very sparing with a high quality 00 or 000 small pointed brush, just barely touching with the tip or edge of the brush. This greatly helps. With some experience, it’ll get to the point one can frequently apply the desired chip or scrape with the small paint brush without needing to tidy by removing paint. Needing to remove less paint helps avoid the wash issue. Working in small areas also helps.

If too much is applied, immediately take a water moistened clean paint brush and “dry brush” over the VMS painted area to remove excess. The VMS paint dries quickly so this needs done as soon as excess is noticed. Sometimes a second attempt is needed.

My favorite use of this product when a tiny bit of hobby paint "chips’ off of PE on the model. VMS makes for an excellent “touch up” with little hassle and easy removal of excess with clean damp brush for touch up.

HTH

2 Likes

Thank you for your kind words. Again, it was just my opinion of the way I view and perceive military vehicle’s (tanks) to look. Good luck and don’t be afraid to venture out and give something new a try. It may or may not work for you. Happy modeling my friend.

Gentlemen
I’m sure by accident and over-cautiousness, I still haven’t even glued the upper hull and casement on my Jagdtiger yet, although the project is near complete. First there was fear I’d glue it and remember I left something out like a periscope, then I figured I’d keep it off until I did all the work on the lower hull because I have PE fenders here and there and figured the weathering would be easier, which it was. I painted all the wheels and weathered them separately along the way, including the tools and cables which I, close to attaching.
So, for me as a relative novice to intermediate modeler, my process was one of caution more than strategy. But, this isn’t set in my mind. There will be a need to marry up the total weathering which I’ve been trying to do along the way, blowing some dust product over it all should work. I hope.
Dan

1 Like

Sound principle. I think it’s more of a matter of questioning than a conclusion, but I had the same problem when I used to build or improve my own custom pistols and rifles. When is the customization done? Idk, but good advice. Thanks
Dan

1 Like