What did you do in your modeling workshop today?

Hi gents, glad the hoods and hinges pass the eye test - :sweat: :smiley:

I was going to post these on the build log, but here we are:

You can see what’s going on with the hood. The body work is .040" styrene, and each side is just under 2 3/4" long, so at this scale is fairly heavy.

The piano hinge is made of parts from The Model Car Garage, which provides you with each side of the hinge. The kit comes with some unusually flexible wire for the pin, which I replaced with .015" phosphor bronze rod, which is rigid and strong.

These hinges are very similar to those you see in many 1/35 PE kits, but they are not made of brass - I don’t know what the material is, but it is harder/stronger than brass. I mention this because the parts are universal, so you need to cut the “teeth/comb”? part to match the outside diameter of the rod you will use for the pin. I wound up cutting the teeth one-by-one with my knife to try to match the pin diameter.

Back to the PE material - it is HARD! and a pain to drill through. As you can see above, I went through the process of punching/drilling #78 drill bit diameter holes in the opposing sides of the hinge parts. This was a very slow process, as the material is not east to punch/drill through, and I didn’t want to get too aggressive and make the hole diameter bigger than the rivet head :sweat: :man_facepalming:

The rivets are metal, with .8 mm heads, so they are small. I frequently use small rivets for structural purposes, particularly on parts that move and when using CA glue, as parts can snap off/break the CA bond. Along the way I figured out that the rivet themselves needs to be securely held in place (sorry for such an obvious observation!) or they can pretty easily and annoyingly, pop out. CA alone doesn’t always work to keep them in place. So, as you can see above, I used small diameter alu tube to make little nuts, which are slid over the rivet ends and glued in place. The result is a pretty secure fit.

As you can see in the picture above, the rivets are spaced fairly evenly along the length of both sides of the hinges. The rivets are nickel plated (rather than brass) to match the hinge color, because I will likely leave it in unfinished metal, as I think paint might essentially glue the hinge together.

Cheers
Nick

13 Likes

Nick that’s awesome!
I really like seeing the in depth :heart_eyes:


It Italeri Panther land, today installed exhausts, with hangers and anti-crimp bolts. Special thank to @SSGToms Matt, for pointing out specifics about the anti-crimps.

Tool Time, Heavy Hobby Style

I’ve vowed no Italeri Panther parts should be used in my Italeri Panther build if I have a replacement available.

Not using Italeri Panther parts on the Italeri Panther build has been medically proven to reduce blood pressure, cholesterol and improve sex appeal.

What previously took two weeks building old school now takes minutes.

The parts do still need a little bit of touch up, especially the Zimmerit because your know the Heavy-Hobby parts are accurate and this an Italeri Panther…that isn’t.

Something just feels so right about slapping state of the art 3D printed parts on this old Italeri Panther-pig :pig2:

:grinning: :smile: :flushed:

Mock up

8 Likes

Shall we call this pre-shading and mottling? :paintbrush::thinking:

After scribing some random fractures, I splashed-around some Vallejo Dark Grey Wash (76.517).

Here it is after a wipe-down with Isopropyl alcohol. :bubbles:

—mike …:flying_saucer:

13 Likes

I’m going to spray the base color on the pair of Takom Blitz Stugs I am working on in just a few, but first I wanted to show the two new kits I just got this week:

I’ve not read any reviews of either kit so I don’t know exactly how accuracy and fit are but I have dealt with Bronco before and as there are no other kits out there, it is what it is.

But, it puts me with about 25 vehicles left to find a kit for from ‘The Encyclopedia of German Tanks of WWII’ so now it is on me to live long enough to build them all.

The bridgelayer came today looking curb-stomped but contents were fine (My last few cartons from China have not been packed as well as usual – using the Tofu-Dregs cardboard?). The kits themselves look like standard issue Bronco and should build up well enough for me.

9 Likes

This is the way we are heading, you know those umbrellas boys in Normandy

19 Likes

The past few days I’ve been working on finishing a Panther Ausf. G from Takom that’s sat on the shelf for a few months. I’m nearing the end, just have a few more details to paint and the wheels and tracks to wrap up.


12 Likes


This is going to take some work.

12 Likes

Missile madness continues

The front platform refused to cooperate :point_up_2:

12 Likes

Inter/early-war German vehicle camos are very interesting! I would love to see a Panzer I with the gray/brown camouflage.

2 Likes

Cleaned up this little tiny Gautama Buddha. It was corroded and turning green. First it was soaked in white vinegar over night then scrubbed with a brass brush.

The first picture is after the vinegar scrub treatment then rinsed clean with 70% isopropyl and dried.


I purchased the gilding paint after determining that it would be too difficult to try and apply gold leaf, which I already have a supply of, to this tiny piece.

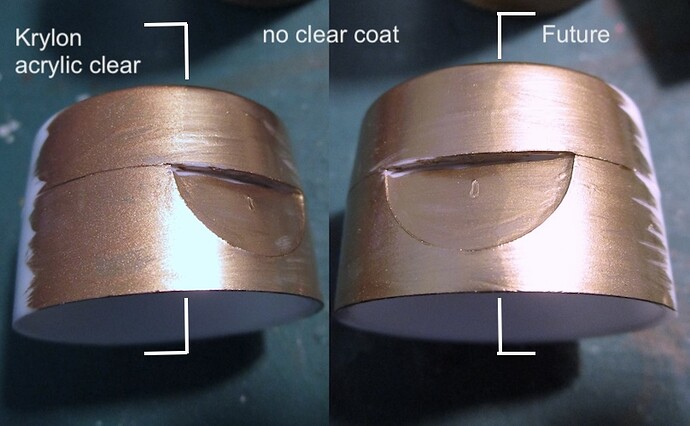
After the Gilding Gold dried, I wanted to clear coat. The product label suggests a spray acrylic clear. The following test shows the results.


Krylon covered well but produced a very grainy look. Future covered well and didn’t alter the finish much at all. Looks almost like the original finish without a clear coat.


Completed. The dark shading under the Mucalinda nǎga is a Tamiya bronze wash prior to clear coat.

9 Likes


The 3d decals are good, from them.

9 Likes

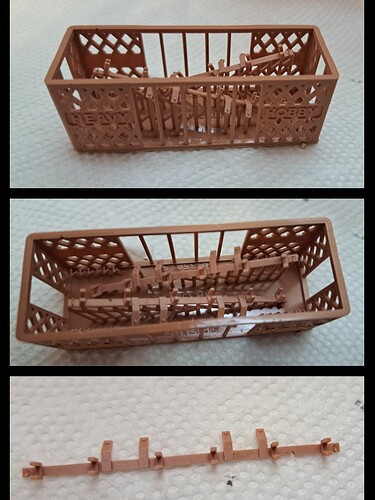
Glued/assembled a Motrak Models 3oz spray can rack together .

7 Likes

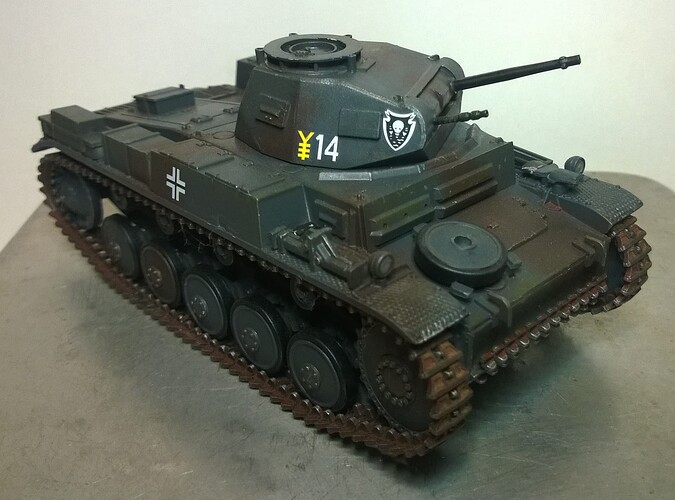
I don’t have a Pz I in that scheme, but will this suffice for the meantime?

It’s the old Tamiya kit, and the first kit I built a decade ago when I started building again, thanks to Hobby Lobby and 40% off coupons.

10 Likes

Very nice! I wonder why such a camo was decided on in the first place.

2 Likes

So on top of finally getting some progress made on the T-72M-1, I had a minor / brief set back, my air compressor that I’ve had for a really long time quit working, it just stopped , & was Really Hot to the touch. So I’m guessing it fried for som e reason, But then I’m not too surprised, considering that it sat in a garage for at least two year’s, not being used. subjected to freezing cold and then really hot temperatures. Thankfully I have a back up and was able to resume working on my projects. My brother is going to take a look at it to see if he can figure out what happened to it.

7 Likes

A bit of redneck engineering went on last night. Just under 4 hours left to the finish of the Rolex 24 at Daytona….

Missile holder things. One for decals later:

And one for painting. :roll_eyes:

7 Likes

Al, that is one outstanding looking hobby workshop! A+++

4 Likes

Al, the Pershing is looking great! What are the dimensions of the finished kit with the missile up? I’m thinking it’s not going to fit in my display cases - too tall for one case and too long for the other…

3 Likes

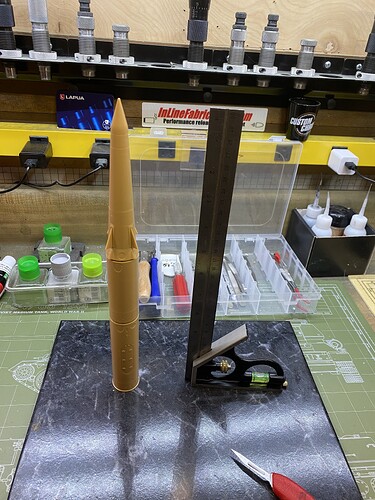
This thing huge Rick. The missile alone is a little over 12 inches tall and the azimuth ring that the missile sits on is almost 3 inches off the ground, so figure about 15 inches give or take for vertical clearance….

The trailer launcher is just a little under 14 inches long and the M1001 is about 10 inches long. The good news is the trailer is only 3 inches wide and the tractor is only slightly wider……

The Ft Sill Pershing pics you shared with me have been invaluable. Thanks again.

Hey, my dumb holder thing worked!

12 Likes

Got some work on my Bulgarian May 1943 production Nibelungen done:

Turret Schuerzen and its brackets- especially the rear ones- took a hell of a time to build.I used parts from my spares box and had to lengthen the rear brackets by 1.5 mm to make them work.Plus they took some surgery to look the part:

A Zvezda’s Pz.IV Ausf.H bracket came to the rescue, when I lost a cut part from Border’s rear bracket to the carpet monster:

Still have some bits to add- fenders, fender springs, the Nibelungen retention bar on the glacis track run, rear convoy light, both front Bosch lights and the protective ring at cupola base- but these will be straightforward additions, no modifications.

I need to change the base of the 20 t. jack too- I went for the plain one, that is typical for Nibelungen and VOMAG tanks, but pictures I found later on do show Nibelungen tanks were using Krupp’s reinforced base in said period.

Last but not least- I came across a picture of a Bulgarian Maybach in Craig Ellis excellent “Pz.Kpfw.IV at the Front”/ Update 1.
It shows an Ausf.G with cupola hatch opened backwards- Nibelungen used 40 such cupolas (lended by VOMAG) in their May 1943 production.

Thus the Maybach in the picture is either the Fgst I model( #84280) or one of the 2 May 1943 VOMAG’s tanks delivered to Bulgaria(Fgst.84907 or Fgst.84911):
Update 1 CE cutout
Picture for discussion purposes only

Cheers,
Angel

15 Likes