Build the Border Models Crusader Mk. III
Easy does it, ready for the spraybooth
9 Likes
Returned to working on the Italeri Panther previously mentioned above in this thread.
Worked on adding three round details to the rear engine deck today. Part of the kit was lost long ago so Improvised parts were sourced.


13 Likes
Ahh, so much nice PE! looks great!
Cheers
Nick
2 Likes
Today’s task focused on making fuel tanks - how hard can that be??? ![]()
Well, let me tell you, making two gave me a run for my money!
Happy model building
Cheers
Nick
14 Likes
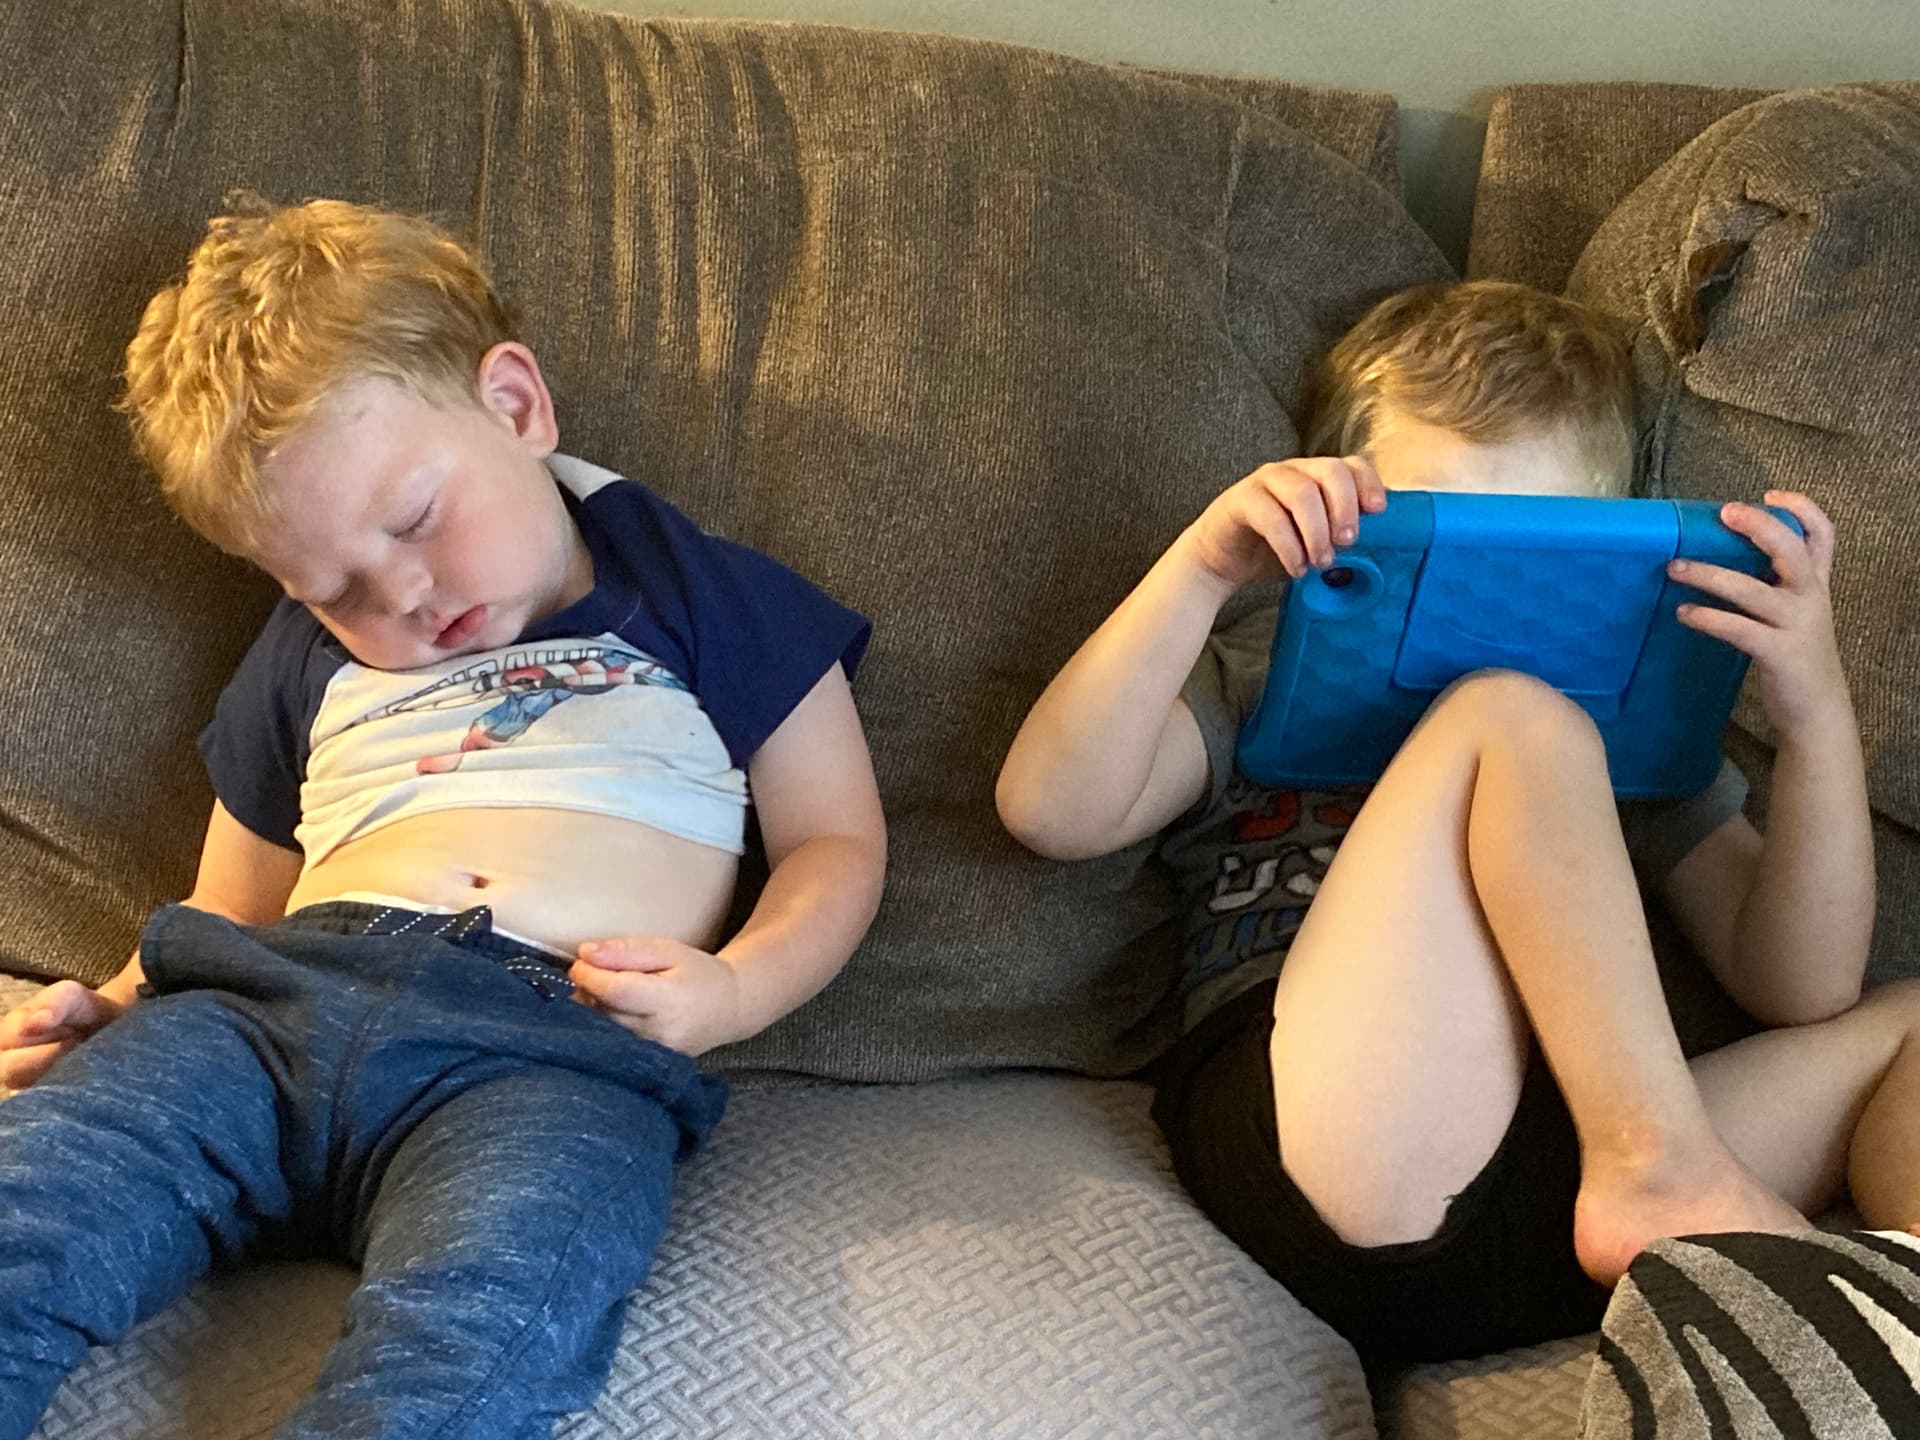
I’m retired, so I usually get benchtime every day. But Tuesdays and Thursdays from 8 - 5 my benchtime is forfeited to watch my Grandsons, 2 and 4, by myself. It’s a great challenge because although they think like enlisted men, they don’t follow orders like enlisted men! But yesterday I won. I finally wore the little bastards out -
22 Likes
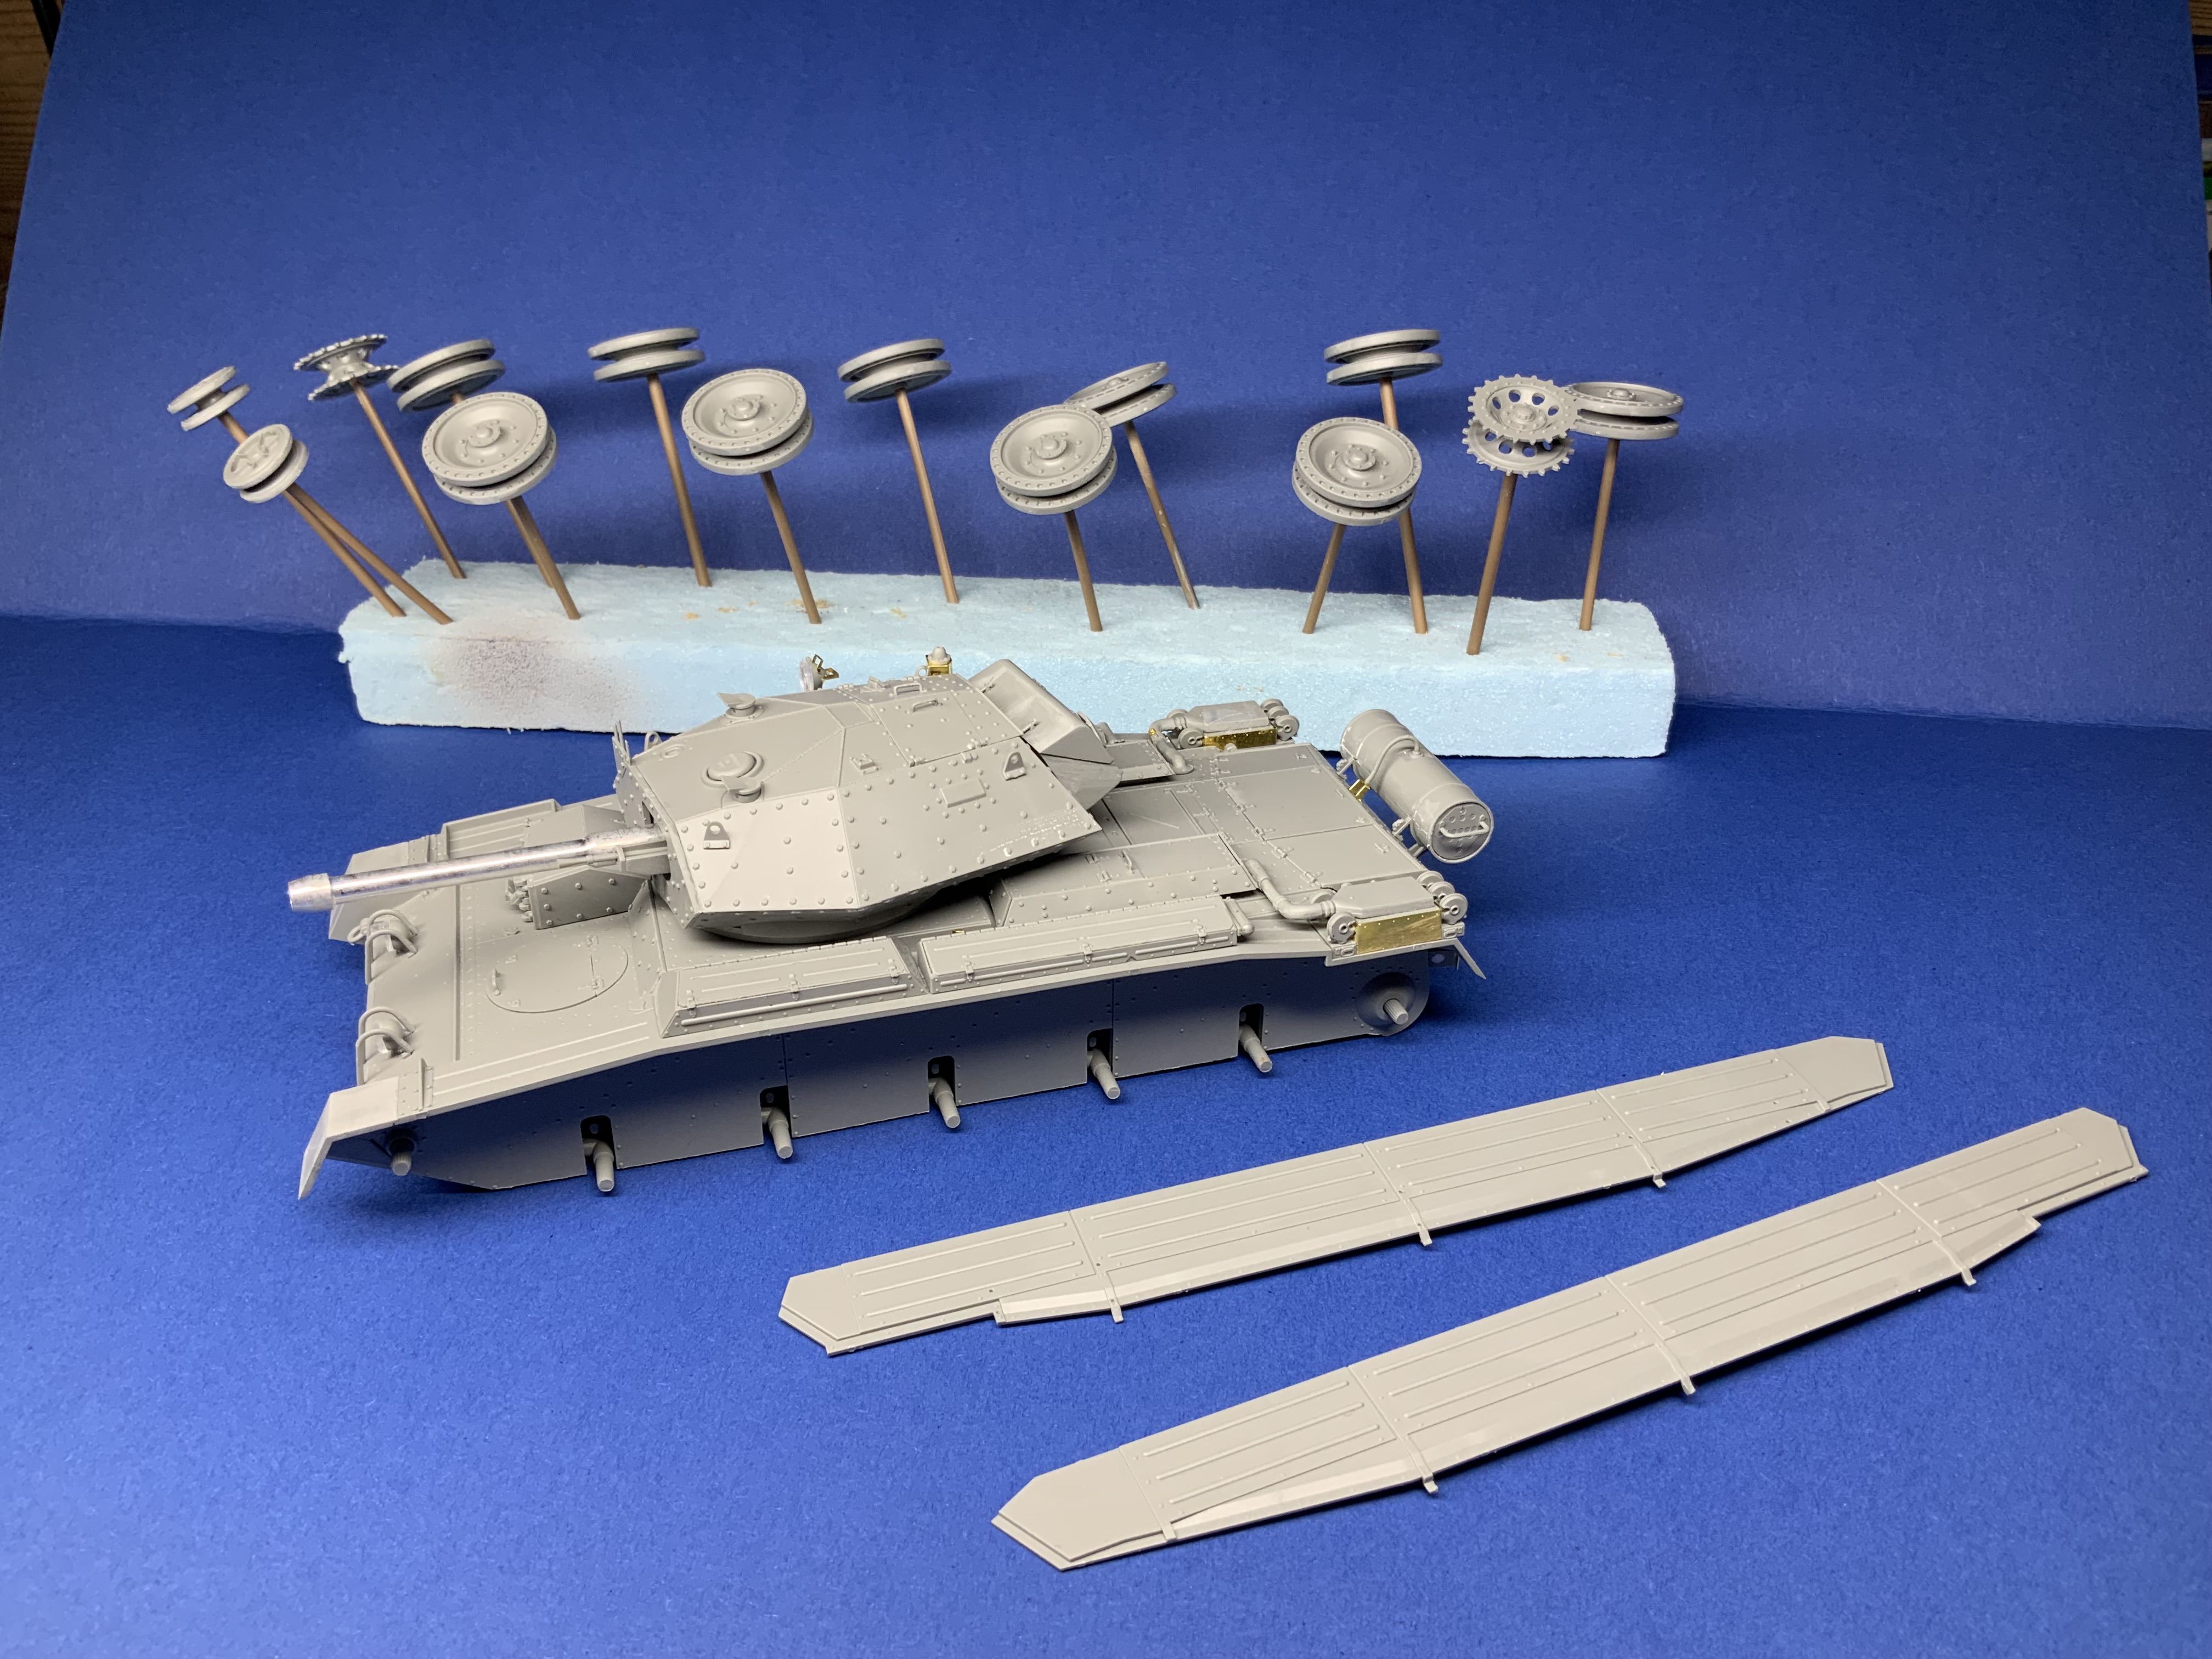
My M 48 slowly comes together. This is the work of the last few days. The hull is nearly completed while the turret is still on the sprues. All wheels are in the paint shop at the moment. It’s quite an easy build compared to my latest aircraft builds. But many parts have some really thick sprue bushes. Not so nice.

13 Likes
15 Likes
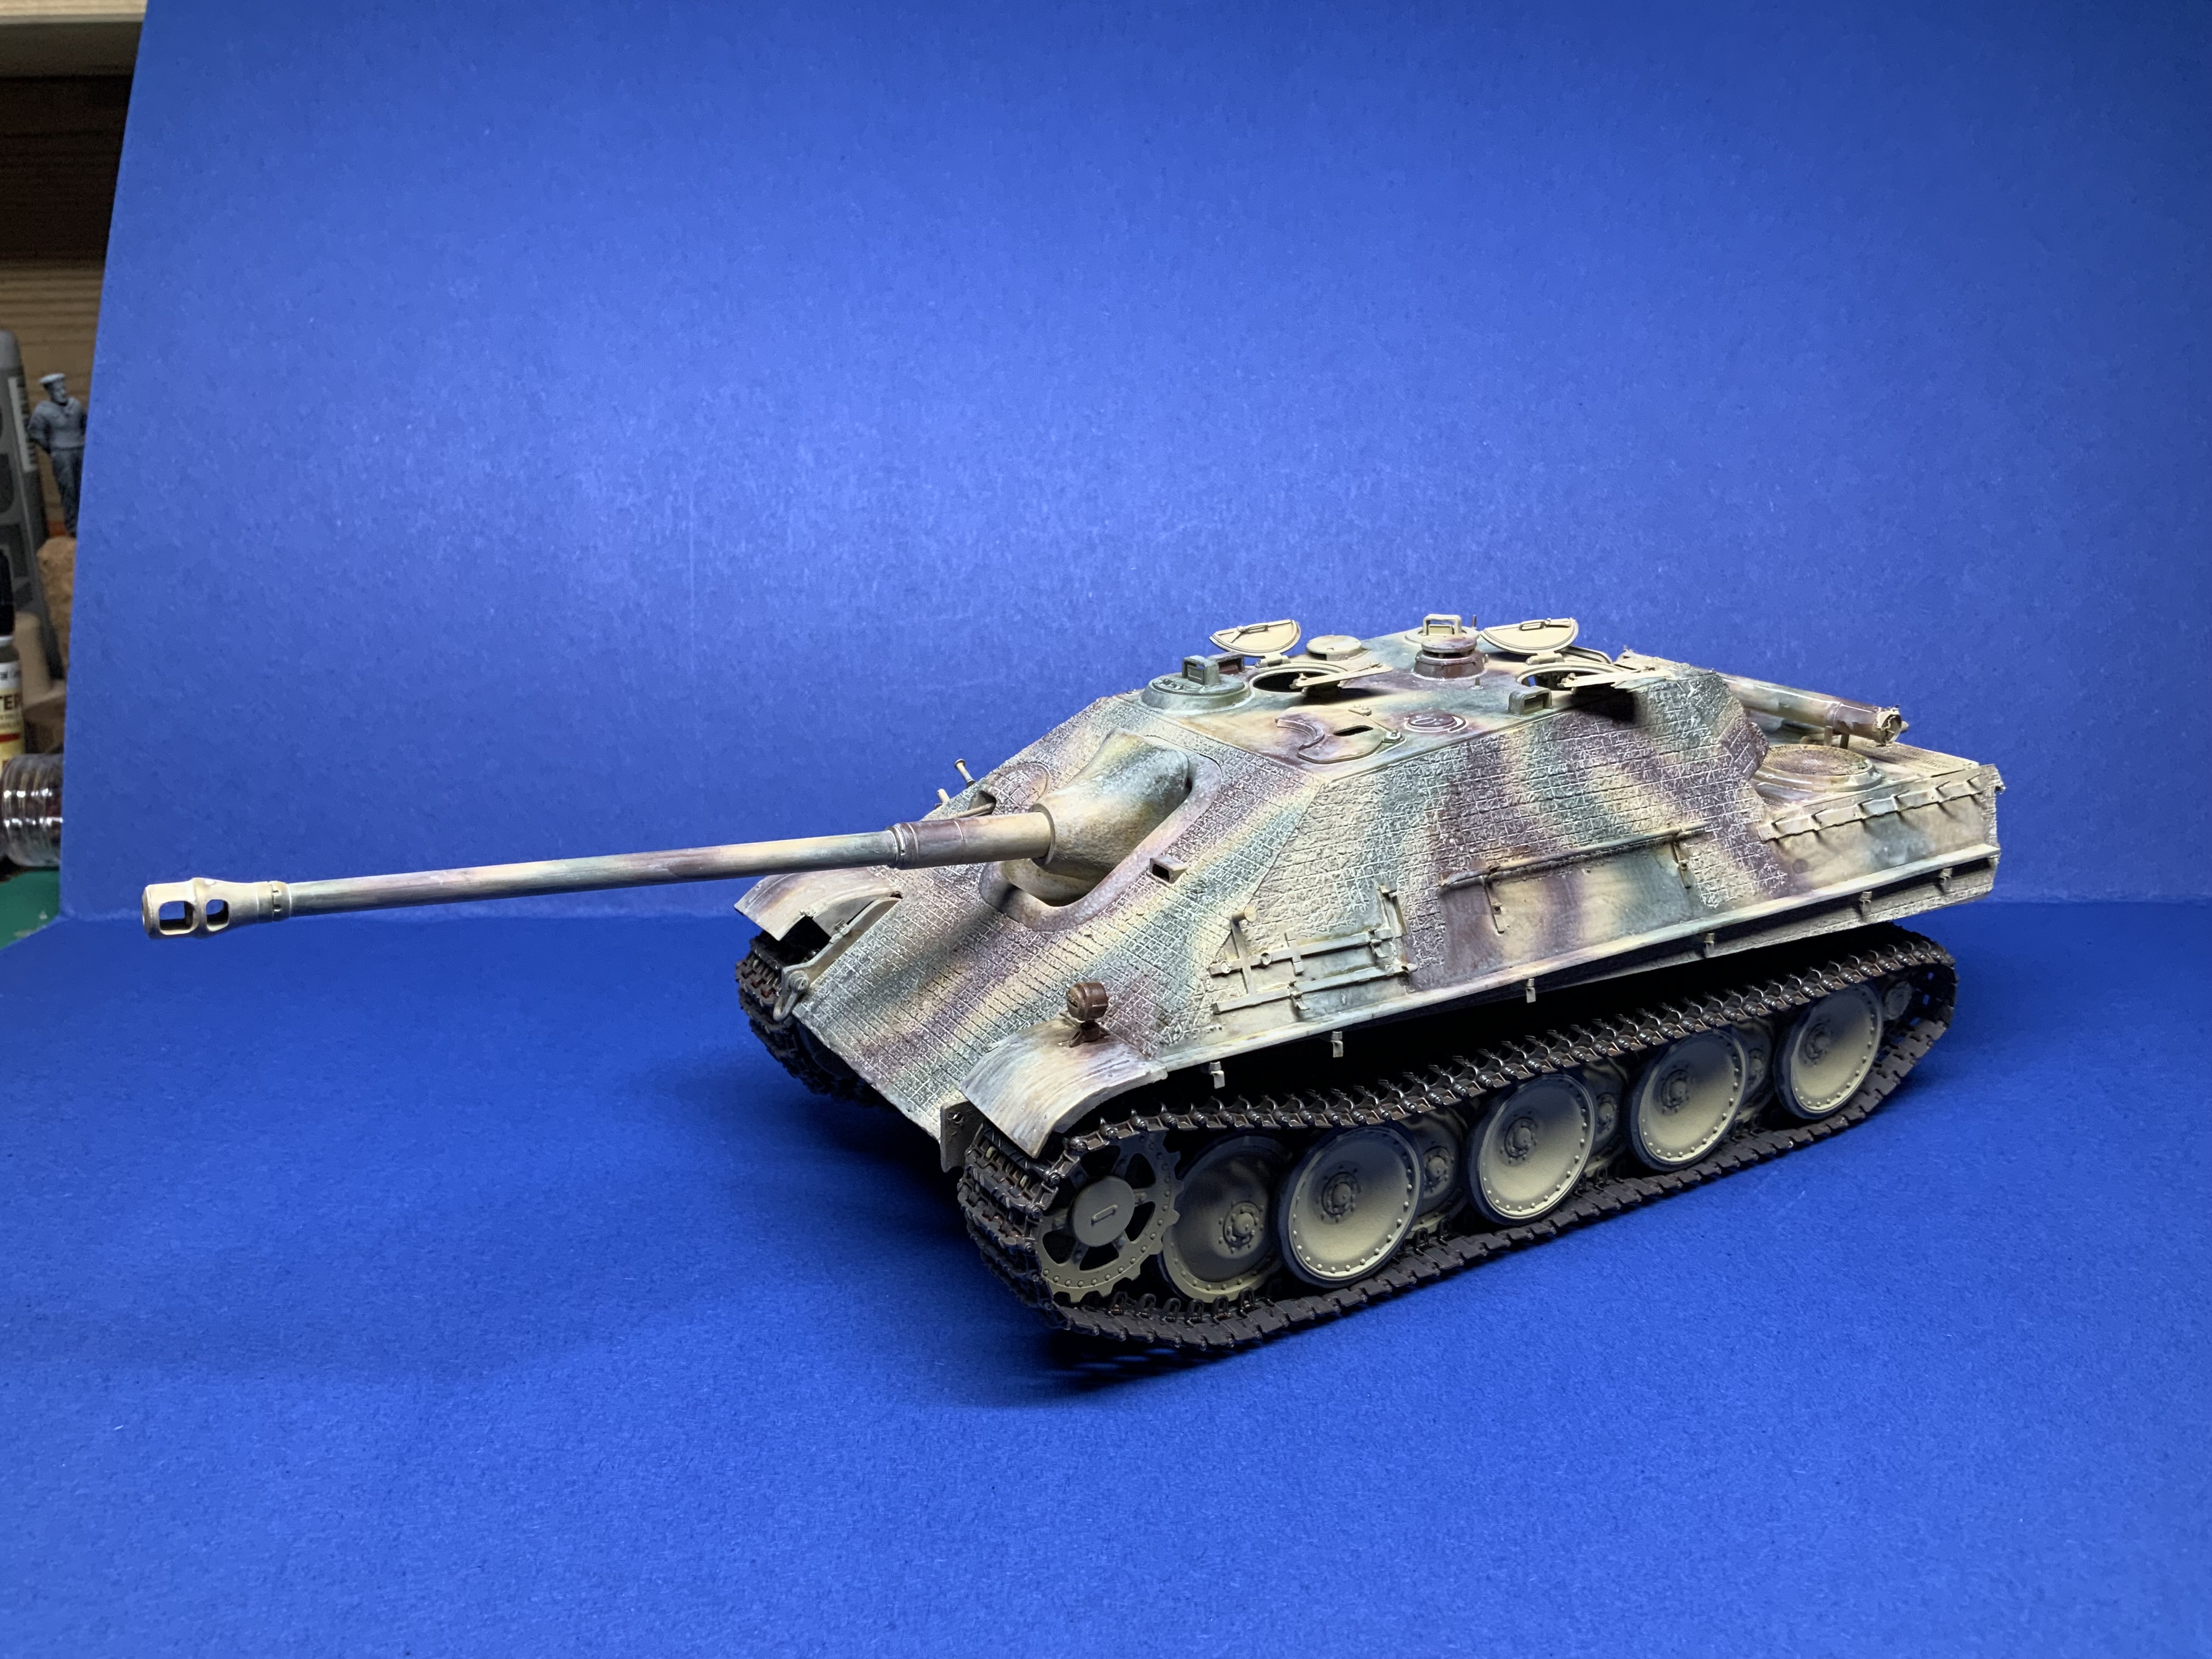
And he’s already on the blue chroma-key background ready to be shot on film for a CGI-enhanced Jagdpanther movie!
2 Likes

Something quick, out of the box build.
one of the children, looked over my collection and decided this will do for Xmas, just under 6 hours to this, including meal and odd jobs ready for painting.
16 Likes
To not see the fall out on my workbench which destract from the subject ![]()
![]()
![]()
2 Likes
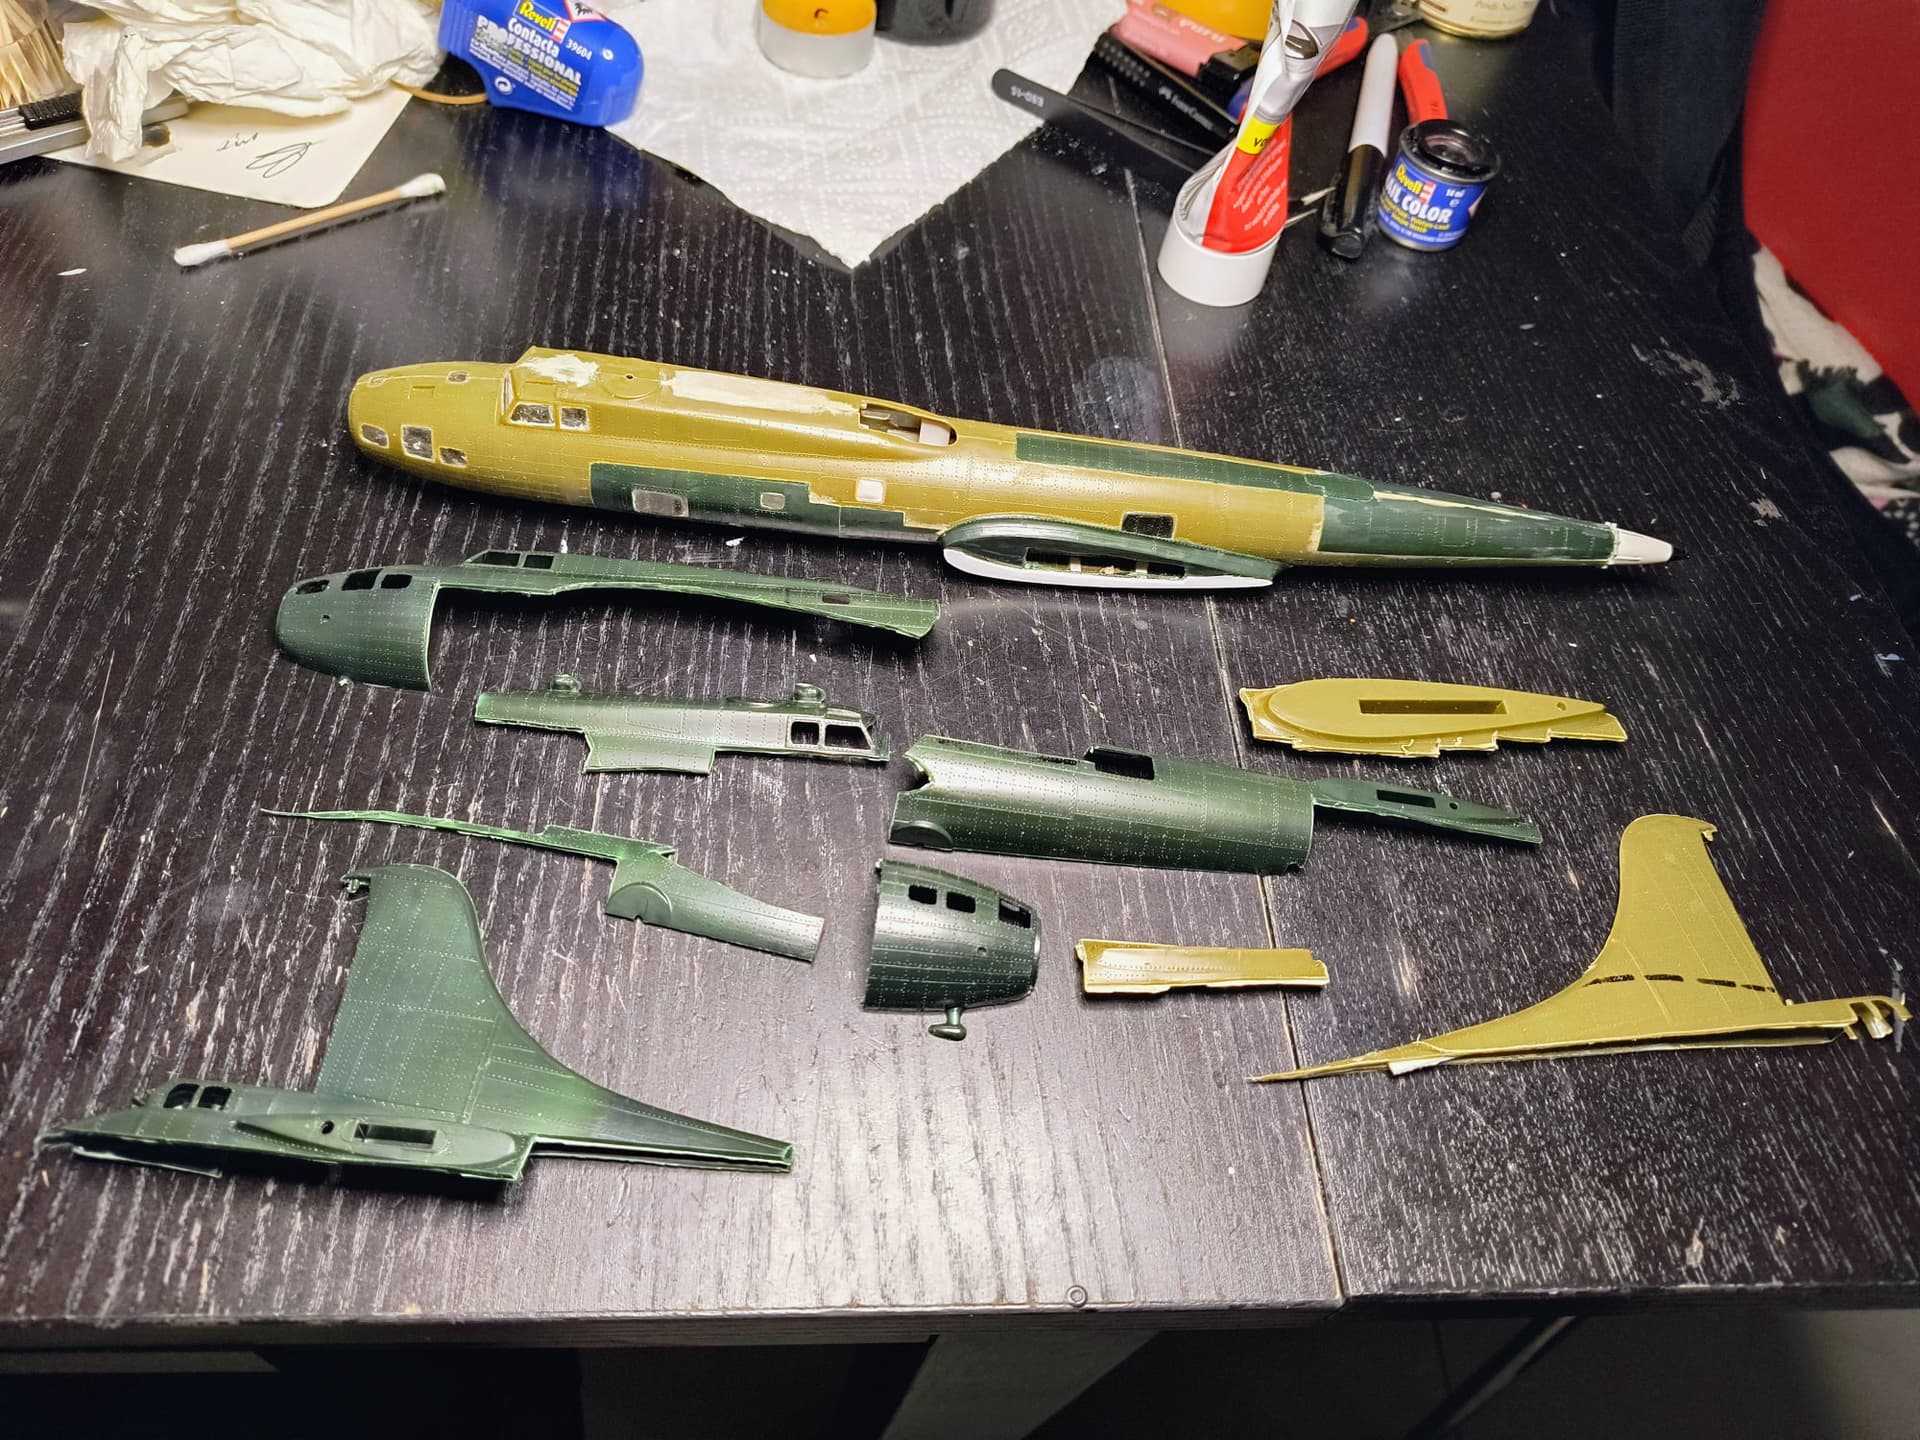
I finished the main bodywork on my B17 conversion . Used two kits to change the construction , wings gonna move backwards with canards at the front, and then a rear end centre prop system and front wheel instead of the tailsitter .
11 days of cutting and sanding until this.

14 Likes
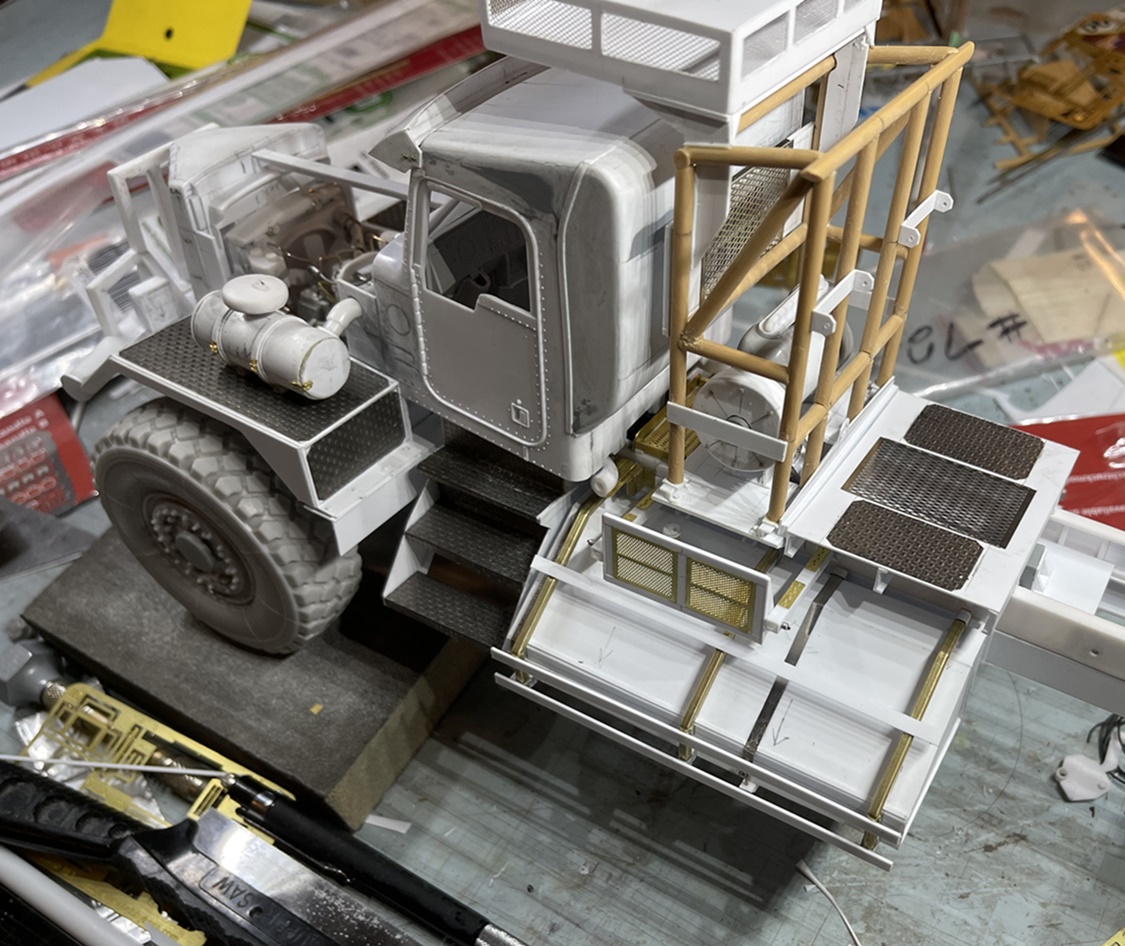
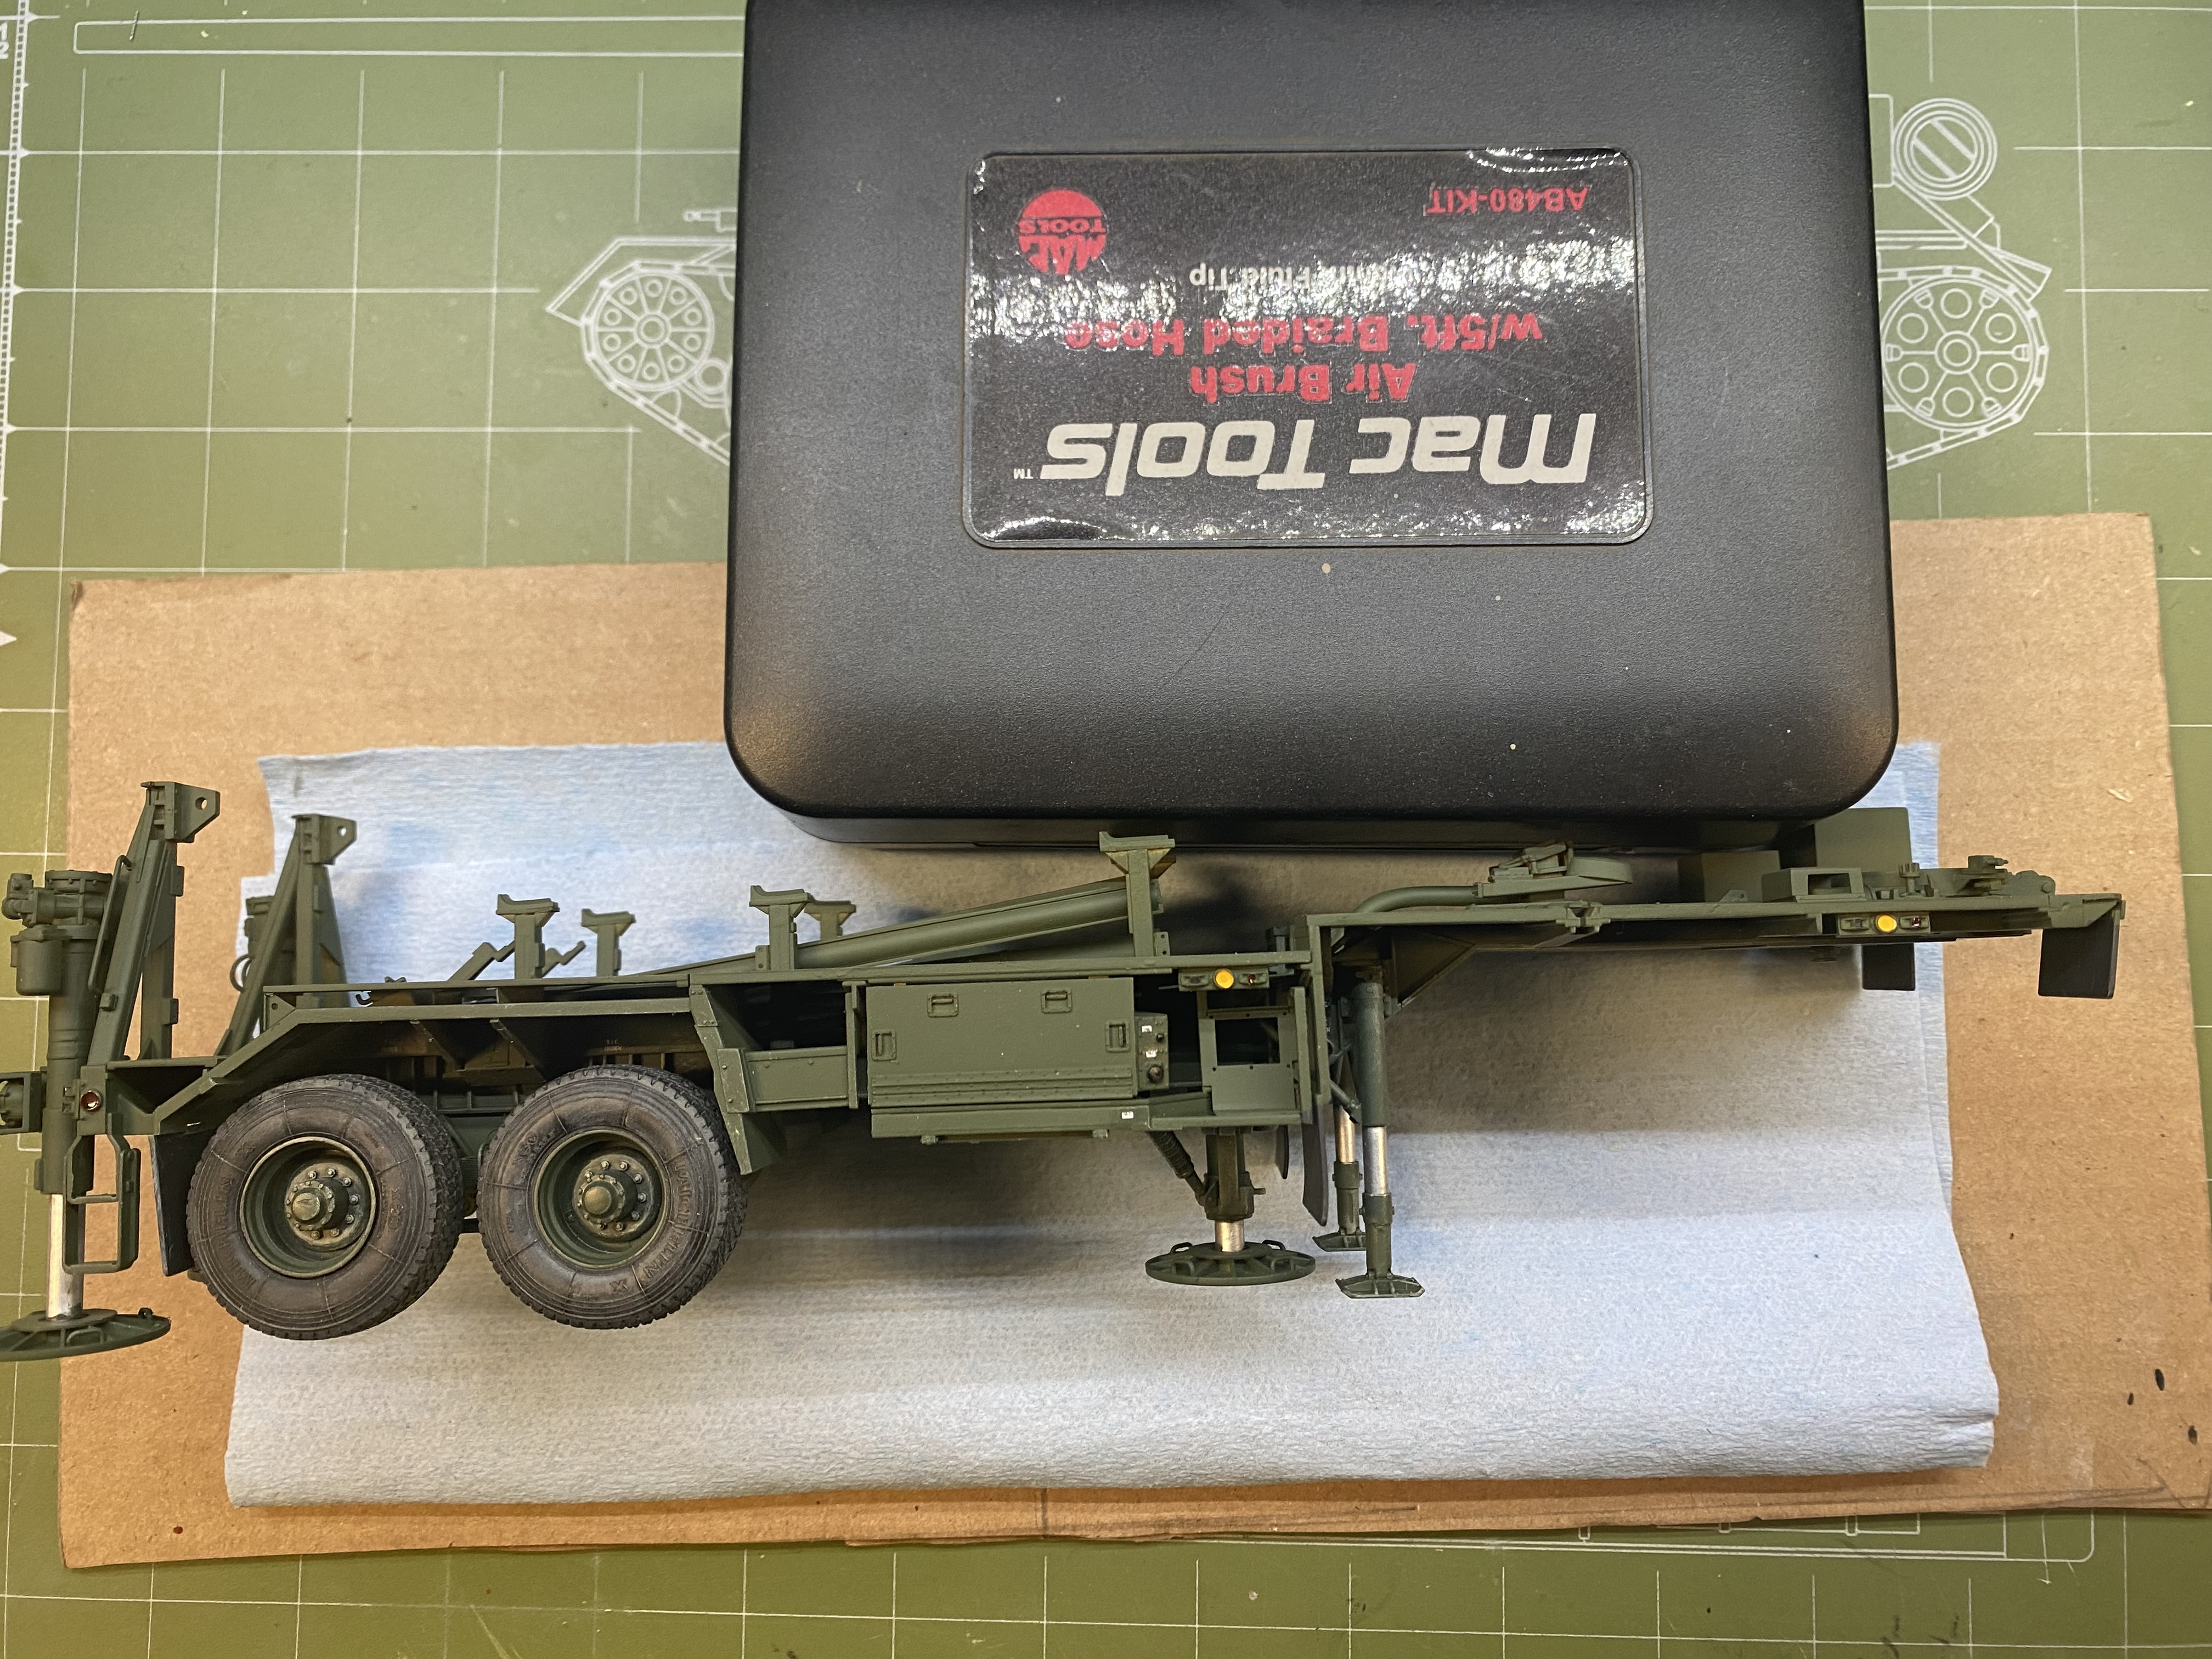
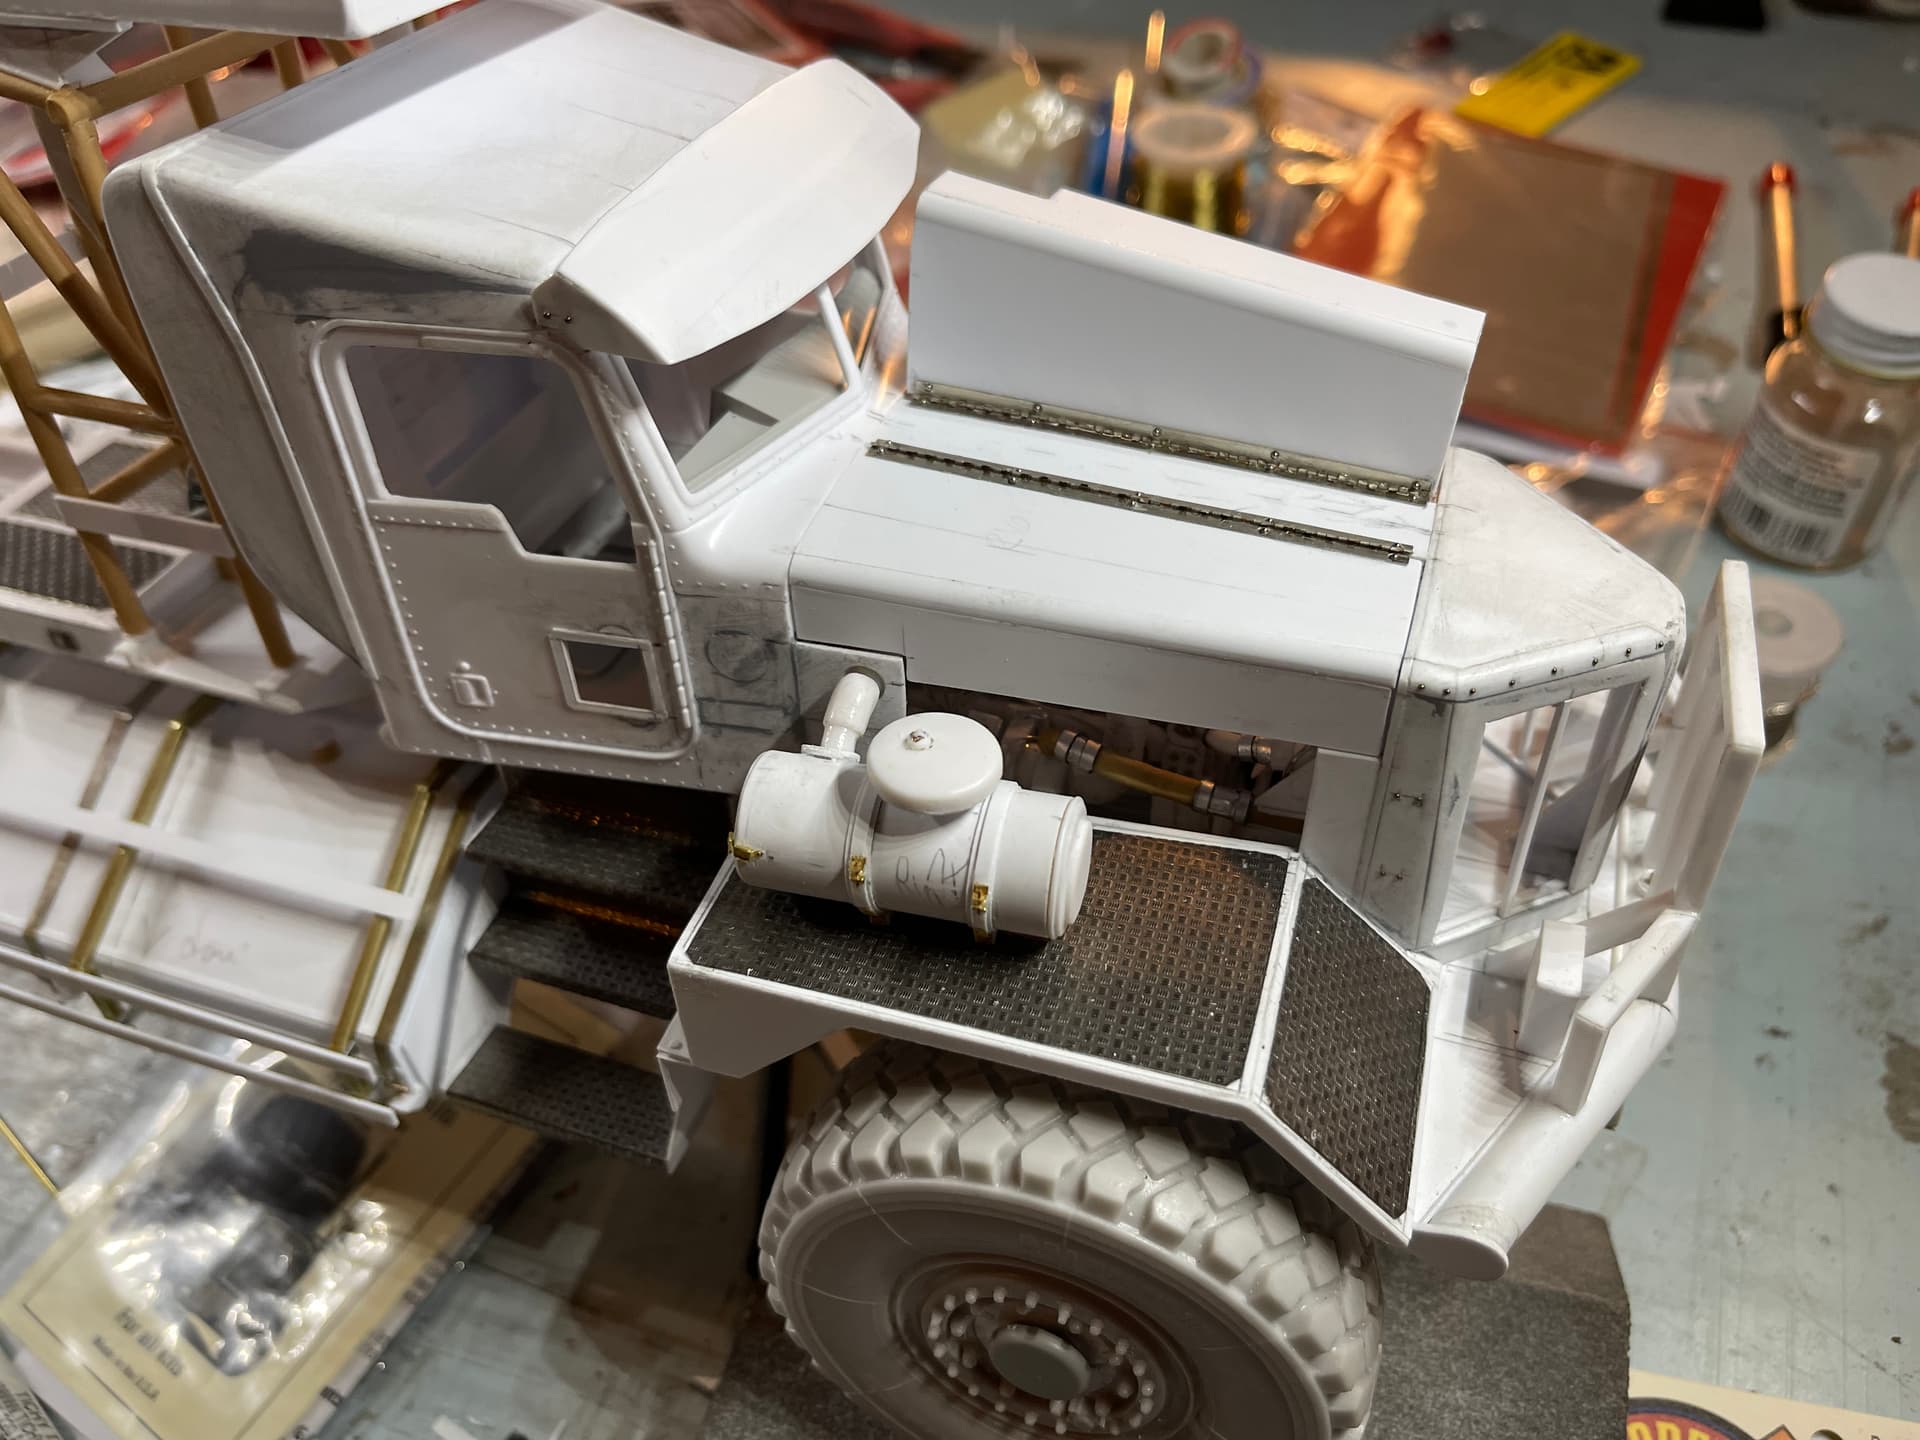
Well guys, I’ve kept after the big truck. Today’s project, the hood. I owe @ayovtshev, Angel, a special tip-o-the hobby knife for this solution, as a few weeks back I saw some remarkable work he did, which happens to apply directly to this:
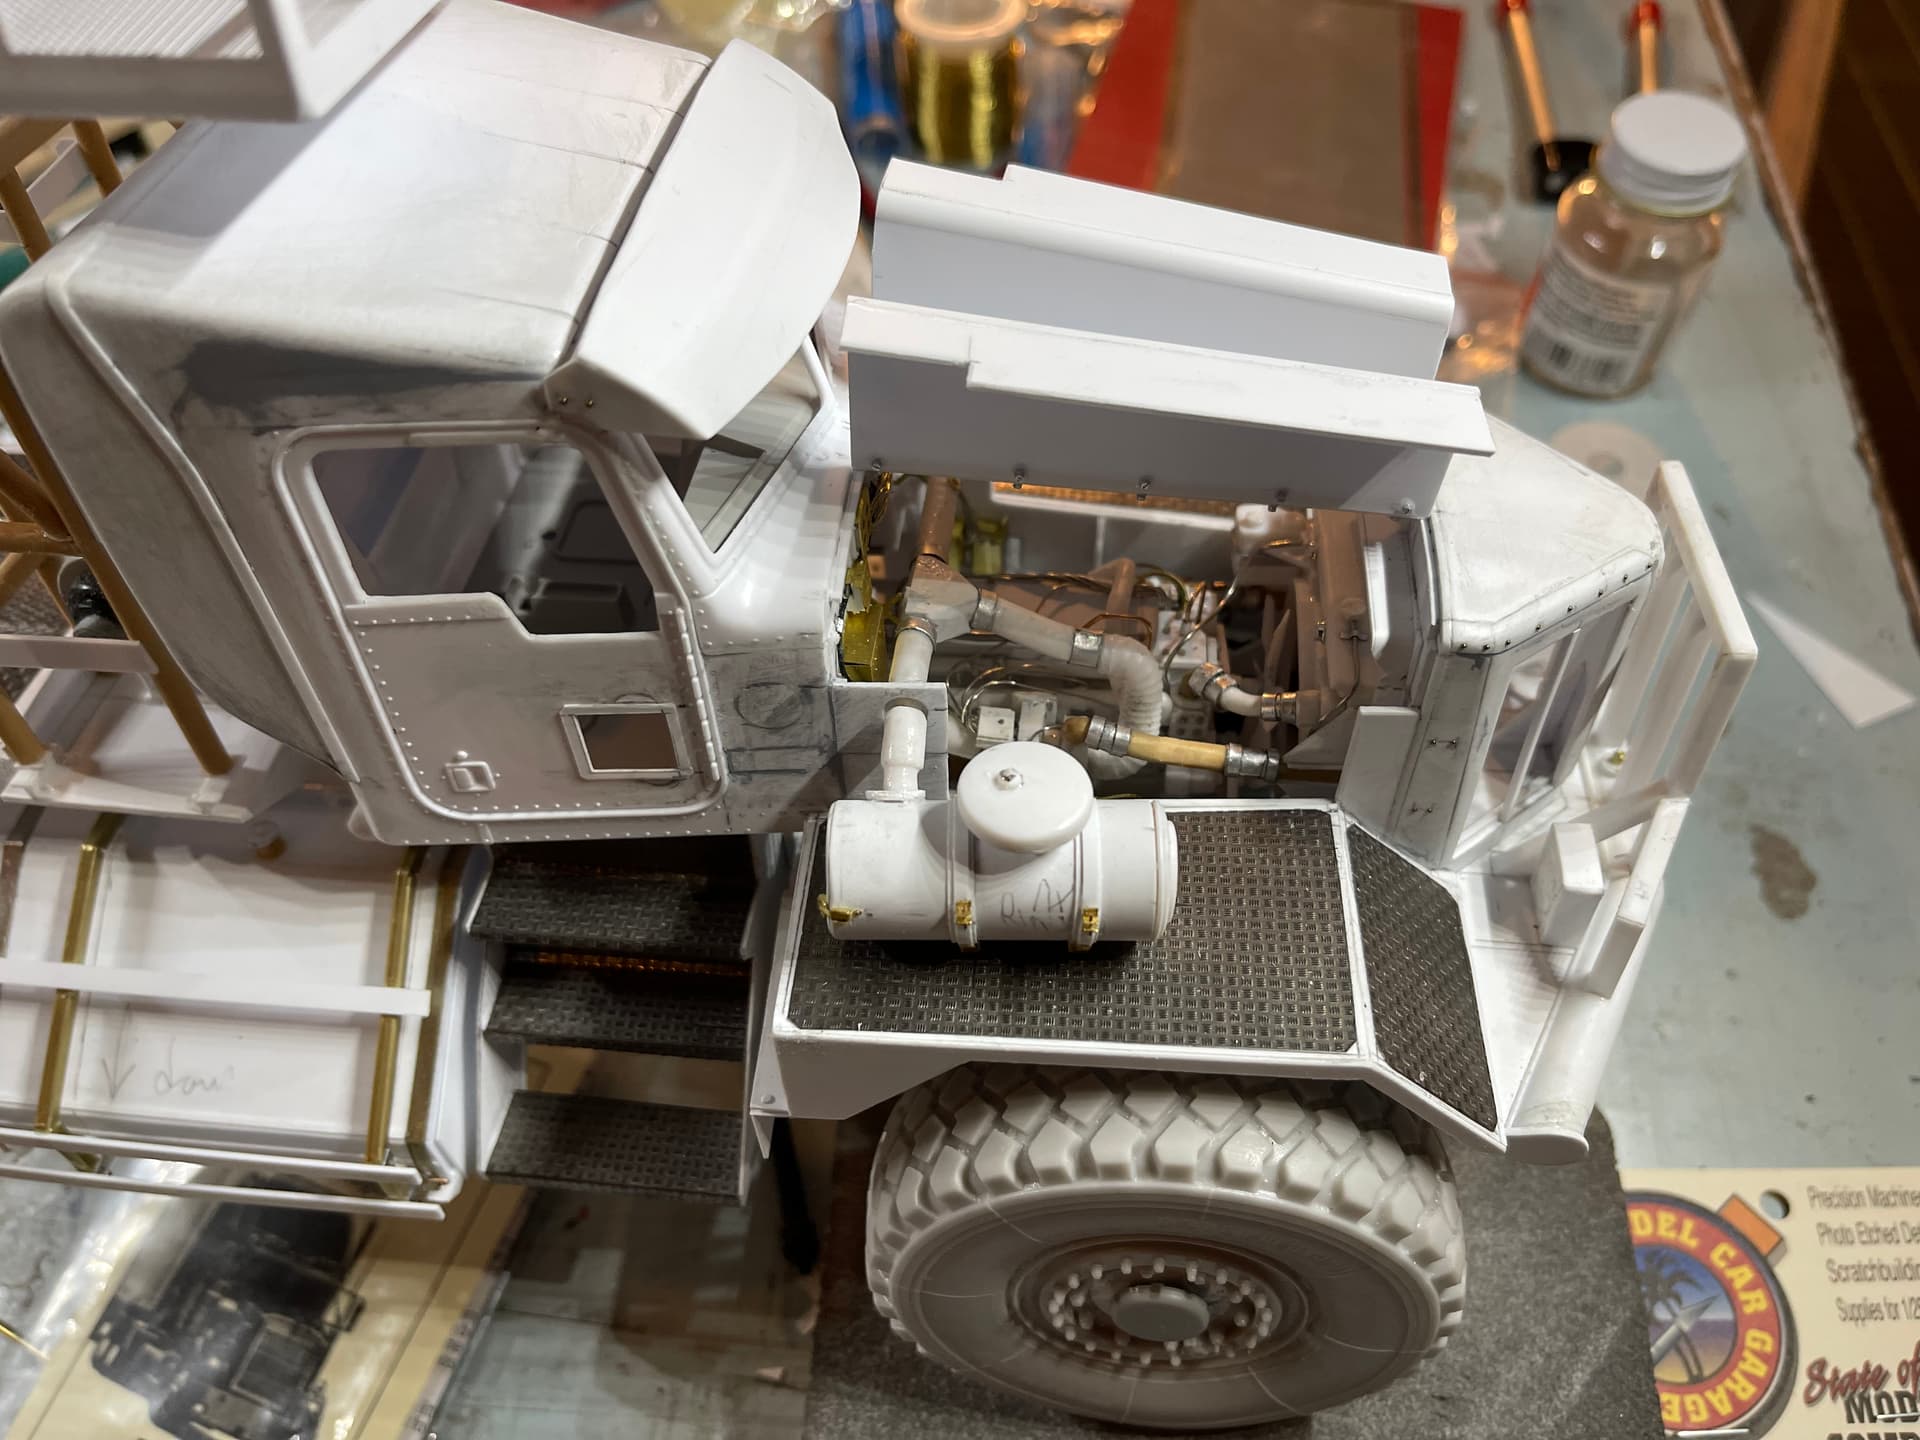
Right, so the task was two-fold ![]()
![]() First, preparing the body work, then the remarkably tedious task of making the hinge and installing it. As the hood panels are heavy, well, CA alone wouldn’t likely hold this together for so long, so I added, rivets, ten per side, drilled through the hinge, hood, and glued in place, with metal sleaves functioning as nuts glued on the underside. Much to my surprise, it works.
First, preparing the body work, then the remarkably tedious task of making the hinge and installing it. As the hood panels are heavy, well, CA alone wouldn’t likely hold this together for so long, so I added, rivets, ten per side, drilled through the hinge, hood, and glued in place, with metal sleaves functioning as nuts glued on the underside. Much to my surprise, it works.
Happy model building,
Cheers
Nick
18 Likes
You’re crazy! ![]()
![]()
Be sure to keep us updated on the progress of the project. It is very interesting.
3 Likes
Amazing details!
4 Likes
1/35 scale rivets on working piano hinges. That’s just stark raving around-the-bend fit you for a straight jacket insanity. Glad it worked Nick.
5 Likes
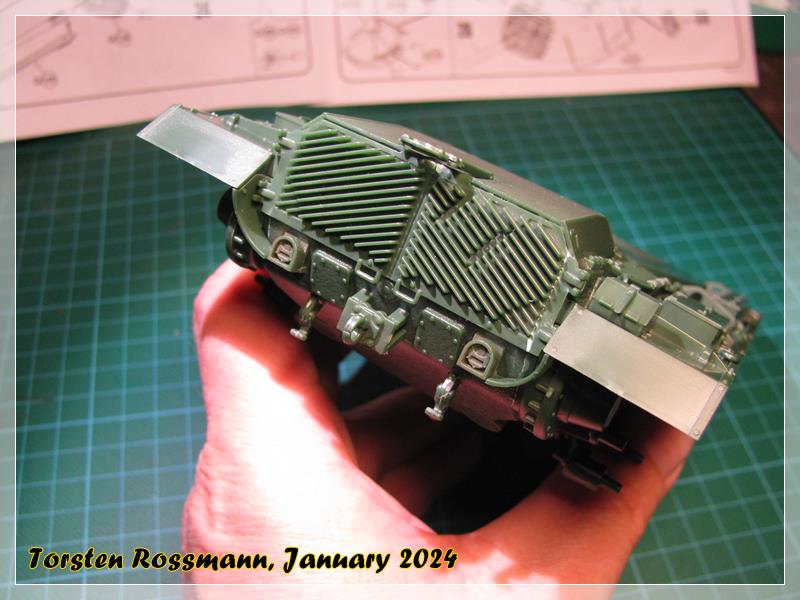
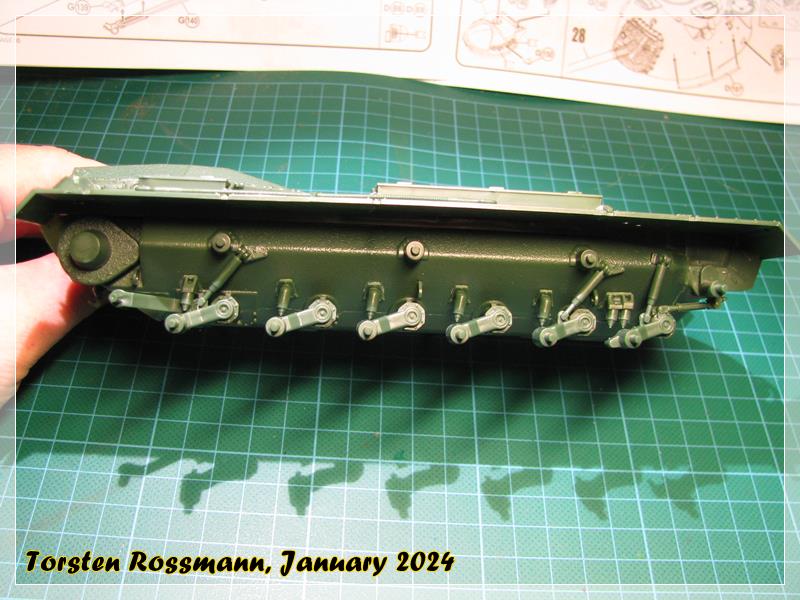
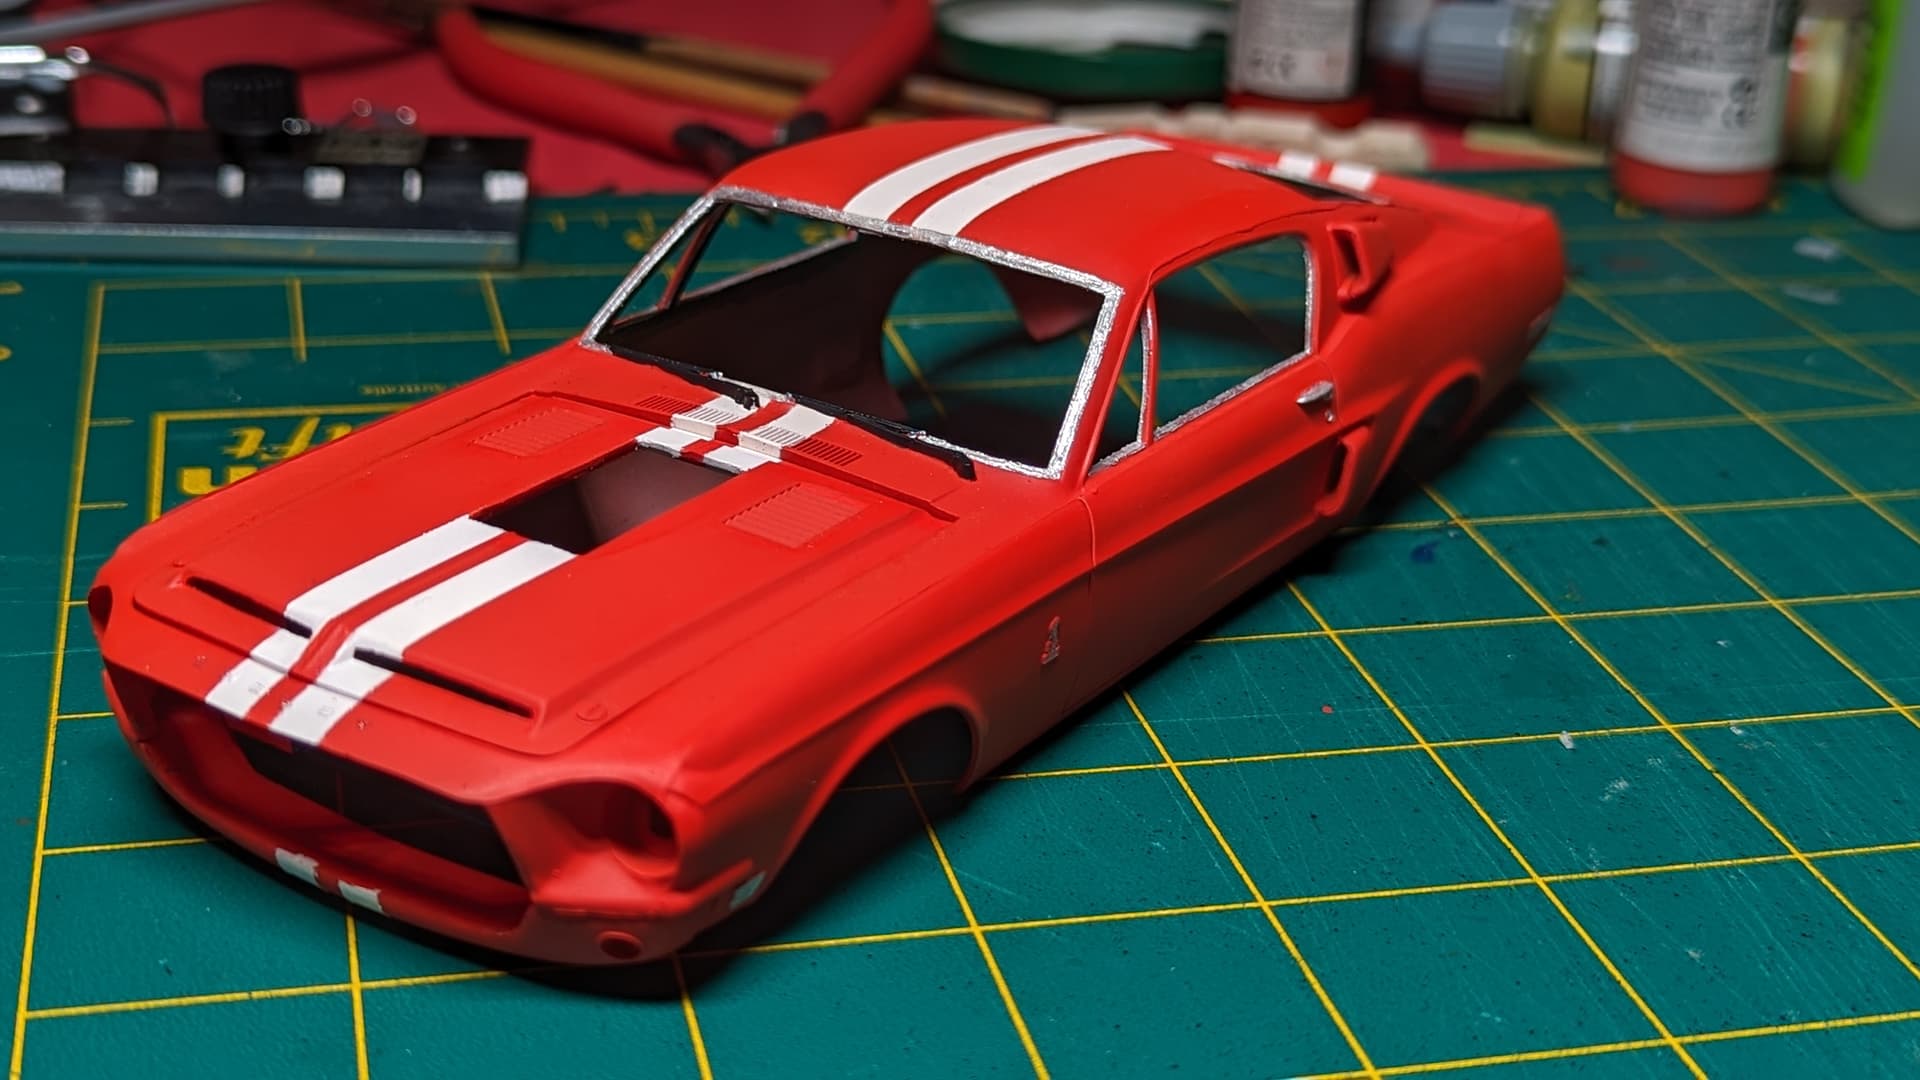
I continued to teach myself airbrush basics.
Tried some masking,
Found that my only silver colour is closer to kindergarten glue than paint. So not happy with it, but it will stay as a learning experience.
Model itself is a terrible kit so no redo, just forging ahead until it’s done. Pure learning experience.
13 Likes
Nick that is outstanding work!
Wayne’s World or Wade’s World all I can says is…

5 Likes